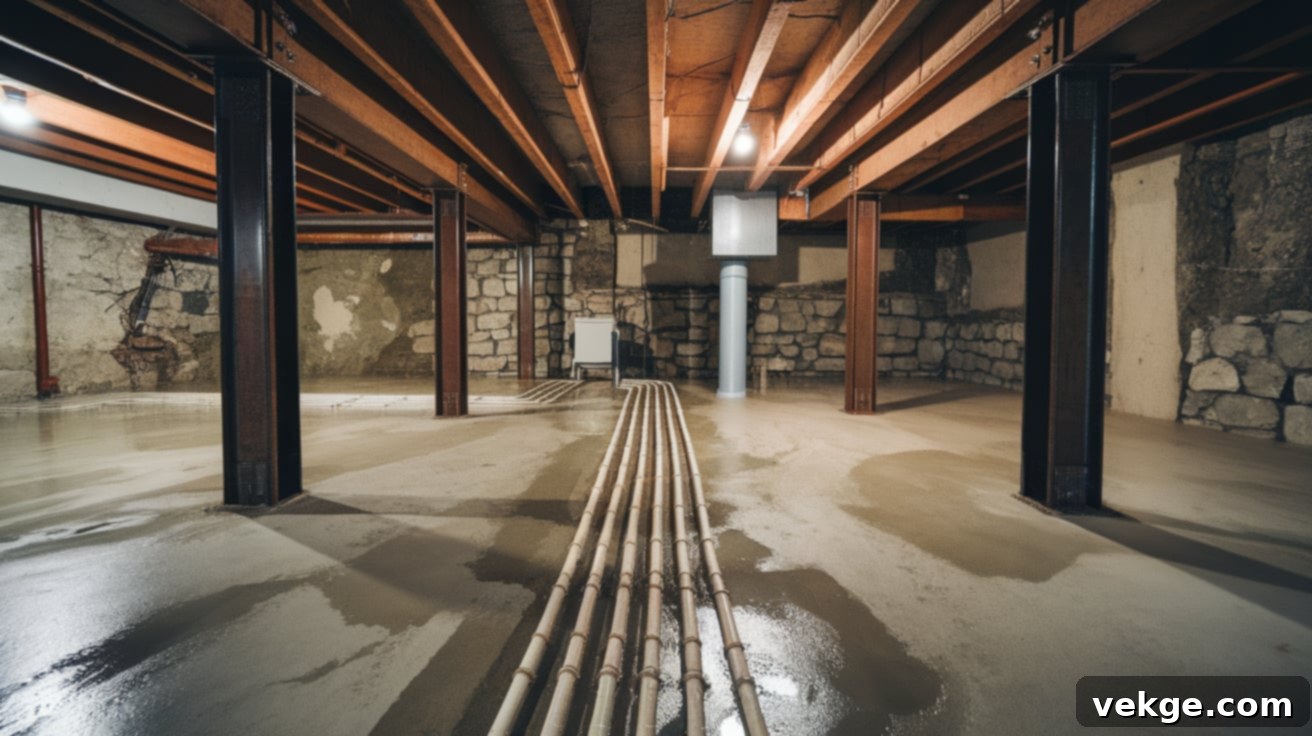
Ultimate Guide to French Drain Basement Systems: Keep Your Home Dry & Foundation Safe
A damp, musty basement isn’t just an inconvenience; it’s a red flag for deeper issues that can undermine your home’s value and your peace of mind. The tell-tale signs – puddles near the foundation walls, an persistent earthy odor, or even visible mold – are clear indicators that water is unwelcome in your living space. If you’ve been battling persistent water intrusion in your basement, rest assured, you’re not alone. This challenge is common for many homeowners, and finding a reliable, long-term solution is paramount.
This comprehensive guide will demystify one of the most effective and widely used basement waterproofing solutions: the French drain system. We’ll delve into the mechanics of how these systems work, explore the crucial distinctions between interior and exterior drains, break down the associated costs, and walk you through the installation process step-by-step. Furthermore, we’ll help you assess whether a DIY approach is feasible for your situation or if entrusting the job to experienced professionals is the wiser choice. Let’s embark on this journey to transform your wet, problematic basement into a dry, protected, and functional area of your home.
What is a French Drain Basement System and How Does It Safeguard Your Home?
At its core, a French drain is an ingeniously simple yet highly effective sub-surface water management system designed to redirect excess groundwater away from your home’s foundation. Named after Henry Flagg French, who developed the concept in the mid-19th century, this system harnesses the power of gravity to efficiently move water through a network of buried components. By creating a preferential path for water, a French drain prevents hydrostatic pressure buildup against your foundation walls, which is a primary cause of basement leaks and structural damage.
The system’s effectiveness lies in its straightforward design, typically comprising these essential elements:
- Perforated Pipe: Often a 4-inch diameter PVC pipe, specifically designed with small holes or slits. These perforations allow groundwater to seep into the pipe along its entire length, rather than pooling around your foundation. The pipe acts as the main conduit for water transport.
- Gravel Bed (Clean Stone): Surrounding the perforated pipe is a layer of washed, coarse gravel, usually ¾-inch clean stone. This gravel serves multiple critical functions: it creates an open, permeable channel for water to easily flow towards the pipe, prevents fine soil particles from clogging the pipe, and supports the trench structure.
- Trench: The entire system is housed within a carefully excavated trench. The trench’s depth and, most importantly, its consistent slope are vital for the system’s gravitational flow. Proper grading ensures water always moves downhill towards a designated discharge point.
- Filter Fabric (Geotextile): A durable, permeable fabric liner is typically placed at the bottom and sides of the trench, wrapping around the gravel and pipe. This fabric acts as a barrier, preventing surrounding soil and silt from migrating into the gravel bed and clogging the system over time, while still allowing water to pass through freely.
The operational principle is elegant: as water accumulates in the soil around your foundation, it naturally seeks the path of least resistance. The gravel-filled trench provides this path. Water seeps into the gravel, then filters into the perforated pipe through its holes. Once inside the pipe, gravity takes over, guiding the water along the predetermined slope to a safe discharge location, such as a storm drain, a dry well, or a sump pump basin. This continuous process works silently and effectively, 24/7, without requiring electricity or complex moving parts. The key to its reliability is the precise installation of the pipe with a gentle but consistent slope, typically around 1 inch of drop for every 8 to 10 feet of pipe run, ensuring continuous water movement away from your home.
Interior vs. Exterior French Drains: Choosing the Right Solution
While both interior and exterior French drain systems are designed to mitigate basement water issues, they address different points of water entry and are suitable for distinct circumstances. Understanding their differences is crucial for selecting the most appropriate waterproofing strategy for your home.
| Feature | Interior French Drain | Exterior French Drain |
|---|---|---|
| Primary Goal | Manages water that has already entered the basement or is accumulating beneath the slab. | Intercepts water before it reaches the foundation, preventing entry. |
| Pros |
|
|
| Cons |
|
|
| Best for |
|
|
The decision between an interior or exterior French drain often comes down to the source of your water problem, your budget, and the specifics of your property. In some severe cases, a combination of both systems might be recommended for optimal protection.
French Drain Inside Basement: A Step-By-Step Installation Process
Installing an interior French drain beneath your basement floor is a highly effective way to manage groundwater, alleviate hydrostatic pressure, and prevent persistent seepage. By directing water into a controlled drainage system, you can transform a perpetually damp space into a dry, usable area. While this is a significant undertaking, understanding each step can help you prepare or oversee the project.
Essential Tools and Materials Needed
- Heavy-Duty Concrete Saw or Jackhammer: For cutting and breaking the concrete floor.
- Shovels and Excavation Tools: Including pickaxes, trenching shovels, and buckets for digging and debris removal.
- 4-inch Perforated PVC Pipe: The main drainage conduit.
- Gravel (3/4-inch Clean Stone): For surrounding the pipe and facilitating water flow.
- Filter Fabric (Geotextile): To prevent soil contamination of the gravel and pipe.
- Sump Pump and Basin: Crucial for discharging collected water (almost always required for interior drains).
- Concrete Mix and Finishing Tools: For patching and restoring the basement floor.
- Drain Board / Flow Channel: A flexible membrane to guide water from the cold joint.
- Safety Gear: Gloves, eye protection, hearing protection, dust masks, and steel-toed boots.
Step 1: Identify the Cold Joint and Water Entry Points
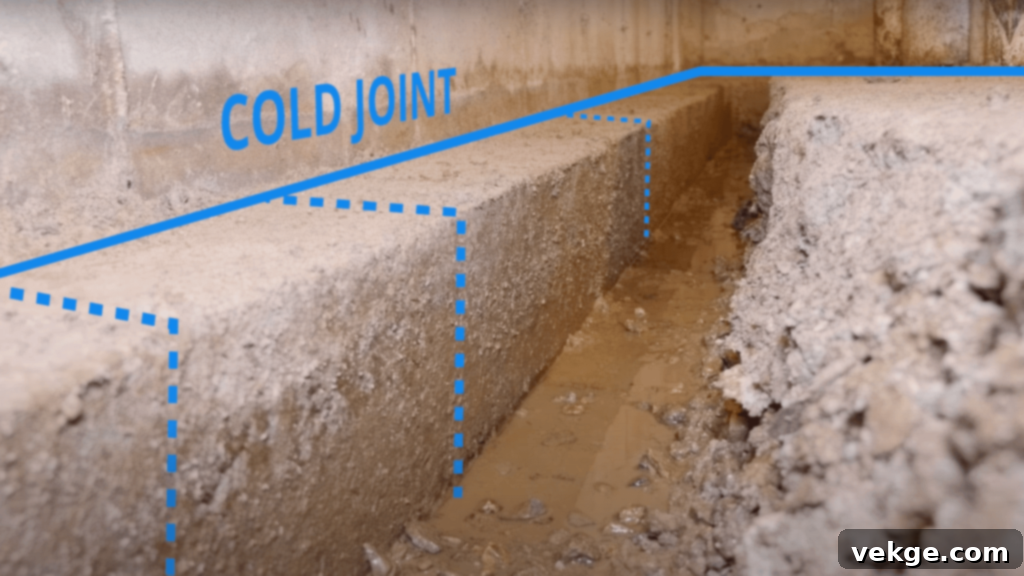
The first critical step involves a thorough assessment of how and where water is entering your basement. The most common culprit for interior basement leaks is the “cold joint,” also known as the cove joint, which is the seam where the foundation wall meets the concrete footing. This joint is formed during construction when the concrete footing is poured and allowed to dry, followed by the pouring of the foundation walls later. Because these are two separate pours, the seam between them remains inherently vulnerable to water penetration. During heavy rainfall or when the groundwater table rises, water under hydrostatic pressure will seek the path of least resistance, often seeping through this cold joint and collecting beneath or on top of your basement floor. Look for visible signs of seepage, staining, efflorescence (white mineral deposits), or standing water at the wall-floor junction to confirm these entry points. Precisely identifying these areas will guide the layout of your French drain system.
Step 2: Excavate Below the Floor and Set Drain Depth
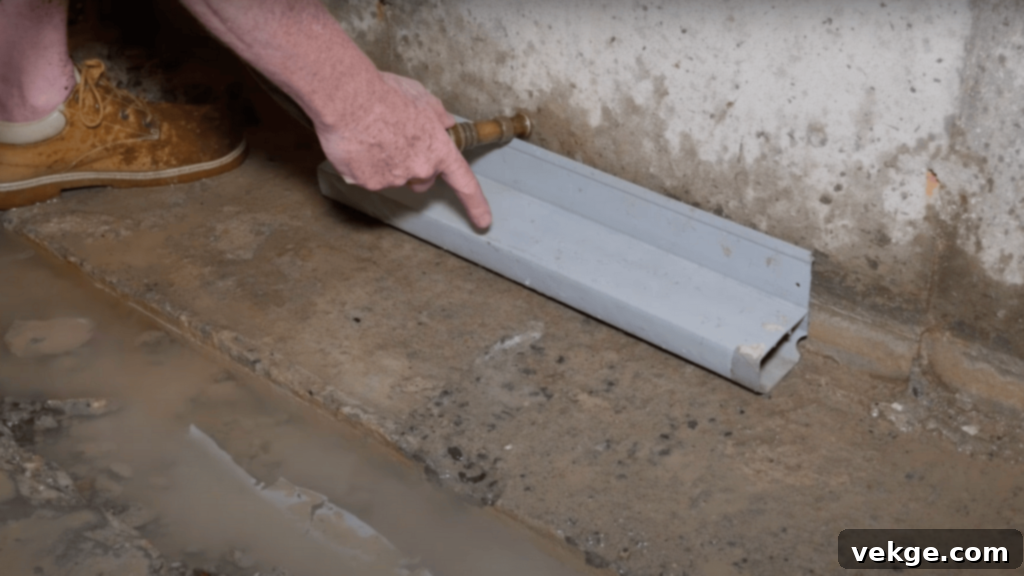
Once the problem areas are identified, the physical work begins. Using a concrete saw, carefully cut a channel (typically 12-18 inches wide) along the perimeter of your basement floor, approximately 6-8 inches away from the foundation wall. After the cuts are made, use a jackhammer to break up the concrete slab within these lines. The excavated concrete will need to be removed from the basement. Following concrete removal, dig a trench that extends from the top of the foundation footing down to its bottom, generally around 12 to 14 inches deep from the original slab level. This specific depth is often referred to as the “magic zone” because it’s where groundwater naturally accumulates and exerts hydrostatic pressure. By positioning your drainage system within this zone, water is intercepted and captured effectively before it can rise to floor level or put pressure on your slab. Ensure the trench maintains a consistent slope (1 inch drop per 8-10 feet) towards the designated sump pump location to facilitate passive and efficient water movement.
Step 3: Customize the Drain Board and Flow Channel
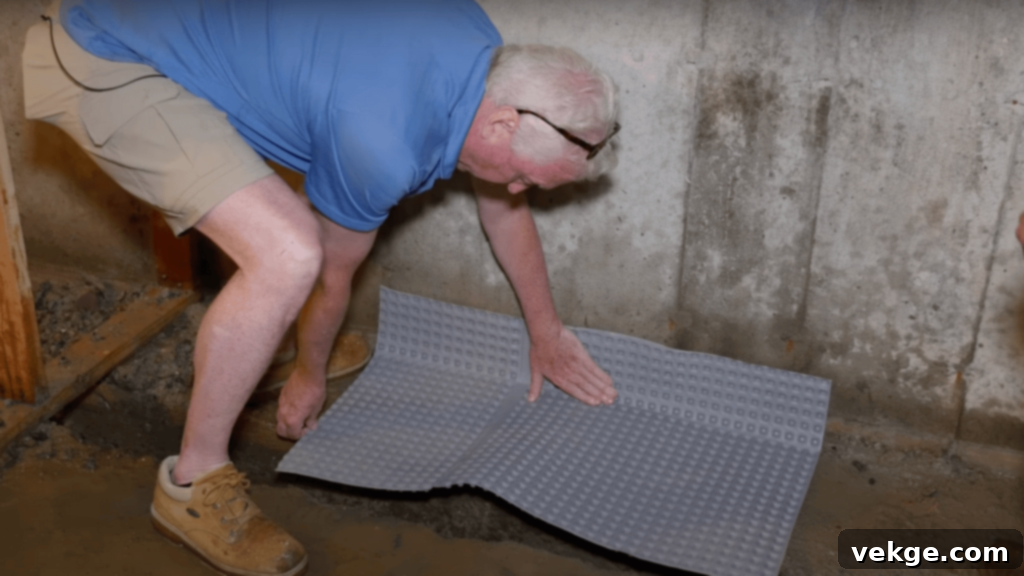
With the trench excavated, the next step involves installing a specialized drain board or flow channel. This flexible, often dimpled, membrane is custom-cut to fit precisely into the cold joint, contouring to the exact shape where the footing meets the foundation wall. The drain board is typically secured to the foundation wall and extends down into the newly excavated trench. Its primary function is to act as an interceptor; any water traveling down the cold joint or weeping through the foundation wall will be captured by this board and efficiently funneled down into the drainage system below, preventing it from ever reaching the basement floor. This customization ensures a tight seal and an unhindered path for water directly into your French drain system, maximizing its effectiveness.
Step 4: Install Pipe and Stone with Proper Pitch
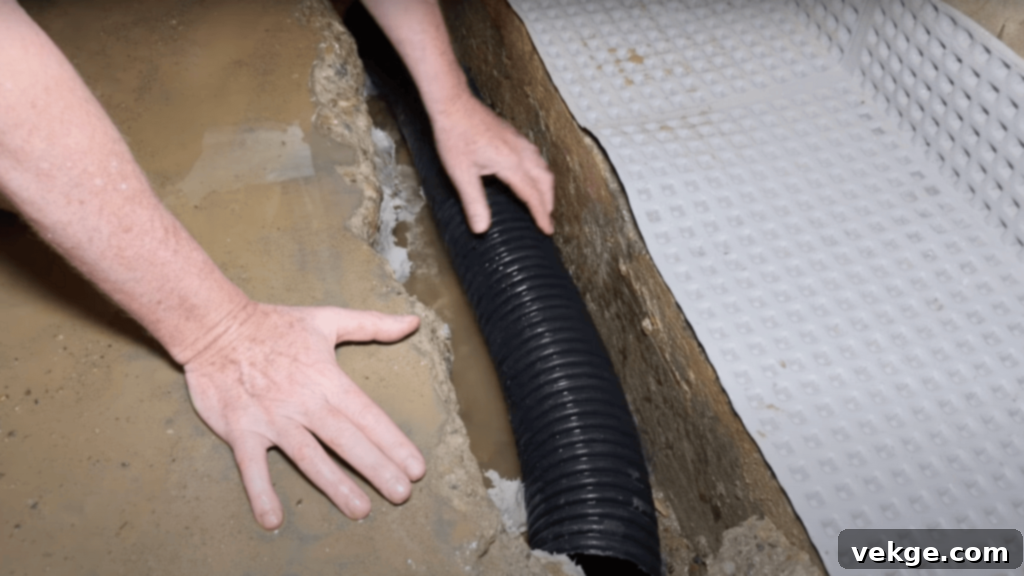
Before laying the pipe, line the bottom and sides of the trench with filter fabric, leaving enough overlap to wrap over the top later. Then, place a layer of ¾-inch clean stone at the bottom of the trench, creating a stable base. On top of this base, lay the perforated corrugated pipe, ensuring it follows the predetermined, consistent slope towards the sump pit. The perforations in the pipe should face downwards or be distributed evenly to maximize water collection efficiency. Once the pipe is in place, surround it with a generous volume of ¾-inch clean stone. This large-volume stone bed not only allows for rapid water infiltration into the pipe but also promotes a natural self-flushing action, helping to prevent the buildup of sediment and iron ochre. Proper pitch is paramount here; even a slight inverse slope can lead to standing water within the pipe, encouraging clogs and bacterial growth, thereby compromising the system’s long-term performance.
Step 5: Backfill and Finish with Concrete
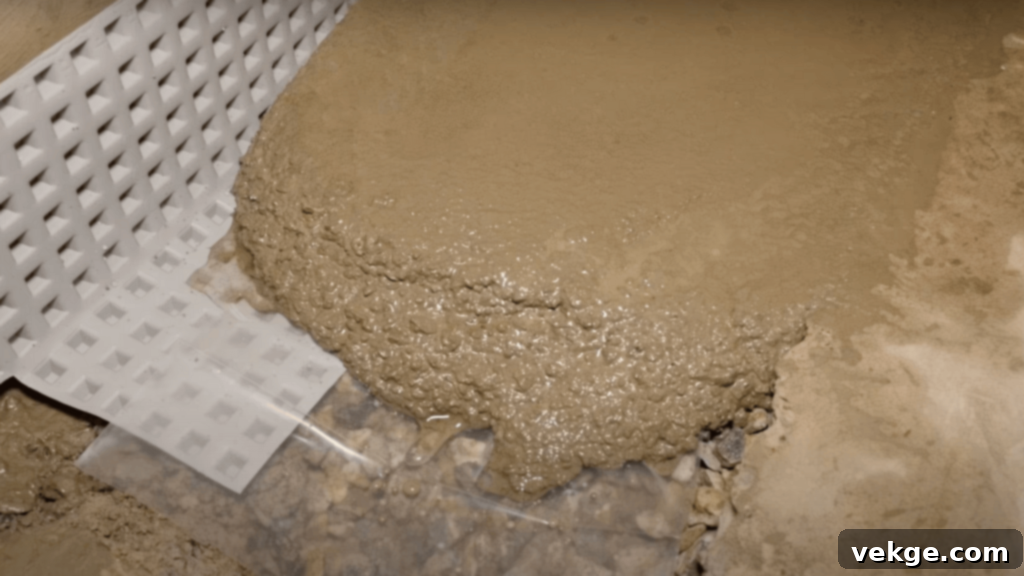
With the perforated pipe and gravel securely in place within the trench, the next crucial step is to connect the drain pipe to a robust sump pump system. This involves routing the pipe so it empties directly into a heavy-duty sump basin, which should be strategically installed at the lowest point of your trench. Once these connections are secure, backfill the remainder of the trench with more clean stone, ensuring the stone covers the pipe and reaches just below the original concrete slab level. Finally, pour fresh concrete over the filled trench to restore the basement floor to its original smooth, level surface. The newly installed trench, drain board, and concrete patch work synergistically to create a permanent, invisible drainage path that effectively moves water away from your foundation and out of your living space, ensuring your basement remains consistently dry and protected for years to come.
For a visual explanation of this process, you might find this YouTube video helpful:
French Drain with a Sump Pump: An Essential Partnership
For most interior French drain systems, particularly in regions with high water tables or where gravity alone cannot discharge water to a suitable exterior point, a sump pump system is not just an option—it’s an absolute necessity. This partnership is vital for the long-term effectiveness of your basement waterproofing.
When a Sump Pump is Required
A sump pump system becomes an indispensable component of your French drain setup when:
- Natural Drainage to Daylight Isn’t Possible: If your basement floor is below the exterior grade, or if the property lacks a natural slope, gravity simply cannot carry water away.
- Local Building Codes Mandate Pumped Discharge: Many municipalities require pumped discharge for subsurface drainage systems to prevent water from pooling or re-entering the sewer system.
- High Water Table: In areas with persistently high groundwater levels, the volume of water entering your drain system can exceed what passive drainage could handle.
- Basement is Below Sewer Level: If your basement is lower than the municipal storm sewers, a pump is needed to lift water to a level where it can enter the public system.
Seamless System Integration
The sump basin, typically an 18-24 inch diameter pit, serves as the critical collection point for your entire French drain system. The perforated drain pipe should be installed so that it empties directly into this basin, ideally above the sump pump’s intake. This design ensures that all collected water is channeled into the basin, ready for the pump to activate. Choosing the right sump pump is crucial; consider a pump with adequate capacity, typically ranging from 2,500 to 3,500 gallons per hour for standard residential applications, to handle peak water flow during heavy storms. The discharge pipe should be properly sized and routed to carry water at least 10 feet away from your home’s foundation, directing it towards a safe and compliant location, such as a storm drain, an open area with good slope, or a dry well.
The Lifeline: Battery Backup Advice
Power outages frequently coincide with severe weather events – precisely when your sump pump is needed most. A reliable battery backup system is not merely a luxury; it’s a critical investment in protecting your home from catastrophic flooding during these vulnerable times. When selecting a backup system, prioritize units that offer at least 6-8 hours of continuous operation, which typically covers most standard outage durations during storms. Regular maintenance is key: test your battery backup system monthly by unplugging the main pump or activating its test function. Replace batteries according to the manufacturer’s recommendations, usually every 3-5 years, and always keep detailed maintenance records for warranty purposes and to ensure peak performance when it matters most.
Cost Breakdown: Understanding Your Investment in a Dry Basement
The total cost of installing a French drain system can vary significantly, influenced by factors such as the type of system (interior vs. exterior), the size of your home, soil conditions, and local labor rates. Understanding these variables will help you budget effectively for your basement waterproofing project.
| Category | Interior French Drain | Exterior French Drain |
|---|---|---|
| Perforated Pipe & Fittings | $200–400 (for an average 150-200 linear feet) | $300–600 (for average 200-300 linear feet) |
| Gravel (Clean Stone) | $300–500 (approx. 10–15 yards, depending on trench size) | $500–800 (approx. 15–25 yards, requiring deeper/wider trenches) |
| Filter Fabric (Geotextile) | $100–150 (durable, permeable membrane) | $150–250 (higher quantity for larger trenches) |
| Concrete Patching & Materials | $150–300 (for restoring the excavated basement floor) | Not applicable (exterior is backfilled with soil/landscaping) |
| Sump Pump System (Pump & Basin) | $800–1,500 (includes pump, basin, discharge piping, often battery backup) | Optional; usually integrated if exterior drain directs to a sump pit, otherwise to daylight. |
| Exterior Waterproofing Materials | Not applicable (focus is on interior water management) | $400–800 (includes tar, rubberized membranes, sealants for foundation walls) |
| Excavation Equipment Rental | Not applicable (primarily manual labor for interior) | $500–800 (for mini-excavator, dump trailer for dirt removal) |
| Labor (Professional Installation) | $3,000–6,000 (specialized skill for concrete work, drainage design) | $5,000–12,000 (intensive excavation, foundation exposure, backfilling, landscaping repair) |
| Total Estimated Cost (Professional) | $4,500–8,500 | $6,500–15,000+ |
Key Cost Variables That Influence Your Budget
- Soil Type: Digging through rocky or heavily compacted clay soils significantly increases excavation time, labor, and wear on equipment, thus increasing costs. Loamy soil is much easier to work with.
- Home Size & Linear Footage: Naturally, larger homes with longer foundation perimeters will require more materials (pipe, gravel, fabric) and more labor for trenching and installation, directly impacting the overall cost.
- Accessibility: Tight spaces, finished basement interiors (requiring protection), or complex exterior landscaping (decks, patios, mature gardens) can add considerable labor time and expense due to careful maneuvering, demolition, and restoration.
- Local Codes & Permits: Many areas require permits for significant waterproofing projects. These permits involve fees, inspections, and adherence to specific material or installation standards, all of which can increase the total project cost.
- Discharge Location: The distance and complexity of routing the discharge pipe to a suitable location (e.g., to the street, a dry well, or away from neighboring properties) can also affect the price.
- Additional Waterproofing: For exterior systems, additional foundation waterproofing membranes or sealants may be recommended, adding to the material and labor costs.
While the initial investment for a French drain system might seem substantial, it’s crucial to view it as a long-term investment in your home’s structural integrity, health, and market value. Preventing water damage, mold growth, and potential foundation repairs can save you far more money in the long run.
DIY vs. Hiring a Pro: Making the Right Choice for Your Basement
The decision to install a French drain in your basement, whether tackling it yourself or hiring professionals, is a pivotal one. While the allure of saving money through DIY is strong, it’s vital to carefully weigh the complexities, risks, and rewards associated with each approach.
DIY installation offers unparalleled flexibility and significant cost savings on labor. However, it demands a considerable investment of time, physical effort, and a specific skill set. On the other hand, professional installation provides peace of mind, adherence to building codes, and often comes with warranties, though it naturally incurs a higher upfront cost. Your ultimate decision should be based on an honest assessment of your experience with excavation, drainage design, concrete work, your comfort level with heavy tool operation, and your understanding of local permitting and construction requirements.
| Factor | DIY Installation | Professional Installation |
|---|---|---|
| Cost Savings | Potentially saves 50–70% on labor costs, paying only for materials and equipment rental. | Higher upfront cost due to labor, overhead, and specialized equipment. |
| Skill Requirement | Requires intermediate to advanced DIY skills, including concrete cutting, excavation, grading, plumbing, and basic construction knowledge. | No homeowner experience needed; the contractor brings expertise and trained crews. |
| Time Commitment | Can take several weekends to weeks, depending on the scope, unexpected challenges, and your availability. | Typically completed in a few days to a week, minimizing disruption. |
| Tools & Equipment | You must rent or purchase specialized tools (e.g., concrete saw, jackhammer, trenching tools, wheelbarrows, dump trailer). | The contractor provides all necessary heavy-duty, specialized equipment, saving you rental costs and logistics. |
| Installation Quality | May vary significantly depending on your skill level, attention to detail, and ability to maintain proper slope and material placement. | Professionally installed with correct slope, layout, and adherence to industry best practices, ensuring optimal performance. |
| Permits & Codes | You are responsible for researching, obtaining, and adhering to all local building permits and codes, which can be complex. | The contractor handles all permitting, ensuring the project complies with local building codes and passes inspections. |
| Risk of Mistakes | High – improper slope, poor material choice, or incorrect installation can lead to system failure, continued water damage, or costly re-work. | Low – backed by experience, insurance, and often warranties, minimizing your personal risk. |
| Peace of Mind | Depends heavily on your confidence in your own abilities and the outcome of the project. | Often includes substantial warranties on labor and materials, providing long-term assurance and accountability. |
When to Absolutely Call a Professional: Consider professional help if you’re dealing with extensive flooding, structural concerns, complex plumbing integrations (like tying into existing sewer lines), or if your local codes are particularly stringent. Professionals offer invaluable experience in diagnosing complex water issues, designing tailored solutions, and executing them efficiently and effectively. Their insurance also protects you against potential damage or accidents during the project.
Maintenance and Troubleshooting: Ensuring Long-Term Performance
A properly installed French drain system is designed for durability, but like any home system, it benefits from regular maintenance to ensure optimal performance for decades. Proactive care can prevent costly repairs and ensure your basement remains dry.
Recognizing Signs of System Problems
Being able to identify early warning signs of a failing French drain system is crucial for timely intervention:
- Slow Drainage or Recurring Puddles: If you notice water still accumulating in your basement or around the foundation, it’s a strong indication of potential clogs, insufficient capacity, or slope issues within the drain system.
- Water Backup During Heavy Rains: If your sump pump is constantly running or water backs up in the basin during intense rainfall, it suggests an overwhelmed system, a blocked discharge pipe, or a pump malfunction.
- Persistent Musty Odors: Even with a drain system, musty smells in the basement may point to lingering moisture issues or new water penetration points that the system isn’t adequately addressing.
- Visible Water Damage: Signs like water stains on walls, efflorescence on concrete, or visible mold growth indicate that the system isn’t effectively controlling moisture and could be failing in certain areas.
- Sump Pump Cycling Frequently (Dry Periods): If your sump pump activates often even during dry weather, it could signal an issue with groundwater levels, a crack in the sump basin, or a leak in your drainage system allowing constant water entry.
Inspection and Maintenance Routine
A simple, consistent maintenance schedule can significantly extend the life and efficiency of your French drain:
- Monthly: Visually inspect all accessible discharge points outside your home. Ensure they are clear of leaves, dirt, ice, or any other debris that could block water flow. Trim back any vegetation growing too close to the discharge exit.
- Quarterly: Test your sump pump operation. Pour a bucket of water into the sump basin to activate the float switch. The pump should turn on, discharge the water quickly, and then turn off automatically. Clean out any sediment or debris that may have collected in the basin.
- Annually: Conduct a thorough inspection of all visible components of your system. Look for any signs of settling in the ground around exterior drains, damage to discharge pipes, or excessive vegetation growth that could impede flow. Ensure the ground around exterior discharge points is still properly graded away from your foundation.
- Every 3-5 Years: For interior systems, consider having a professional cleaning. Specialized equipment can flush out sediment and mineral deposits (like iron ochre) from the perforated pipes, restoring optimal flow. Schedule this preventative maintenance, or immediately if you notice reduced performance.
Maintenance Schedule At A Glance
- Monthly: Check and clear discharge points.
- Quarterly: Test sump pump and clean basin.
- Annually: Inspect system components, check exterior grading.
- Every 3-5 Years: Professional cleaning and performance evaluation for interior systems.
- As Needed: Address any signs of problems immediately – don’t wait for a small issue to become a major flood.
Common Problems and Effective Fixes
Even well-installed French drains can encounter issues over time. Here are some common problems and their solutions:
- Pipe Clogging:
- Problem: Debris (like silt, roots, or leaves) or mineral buildup (iron ochre) can block the perforated pipe, preventing water flow.
- Fix: Professional jet cleaning can clear blockages. Installing cleanout access points during installation or adding them later can facilitate future maintenance.
- Prevention: Use proper filter fabric during installation, ensure adequate gravel cover, and avoid planting trees or large shrubs too close to exterior drains. Regular flushing or professional cleaning helps with mineral buildup.
- Improper Slope or Settling:
- Problem: If the trench was not dug with a consistent slope, or if the ground settles over time, sections of the pipe can become flat or even slope backward, creating standing water.
- Fix: This often requires re-excavation to regrade the trench and reinstall the pipe with the correct pitch.
- Prevention: Ensure the trench base is well-compacted and precisely graded during installation. For exterior drains, compact backfill properly to minimize future settling.
- Incorrect Discharge Location:
- Problem: Water discharged too close to the foundation, onto a neighbor’s property, or into a low-lying area, can simply recirculate back into your basement or cause other problems.
- Fix: Extend the outlet pipe to a more suitable location, perhaps to a dry well, a storm drain, or an area with a natural grade away from the house.
- Prevention: Thorough planning and adherence to local codes regarding water discharge are essential during the design phase.
- Mold and Mildew Recurrence:
- Problem: Even after drain installation, some leftover moisture or undetected entry points can lead to mold and mildew growth.
- Fix: Improve basement ventilation, dehumidify the space, address any remaining leaks (e.g., through windows or unsealed cracks), and repair any affected areas.
- Prevention: Ensure your French drain system is fully functional, use a dehumidifier, and maintain good airflow in the basement.
Conclusion: Empowering Your Decision for a Dry Basement
Embarking on a French drain basement system project is a significant decision for any homeowner concerned about water intrusion. I trust this detailed guide has provided you with a much clearer understanding of the complexities, benefits, and practical considerations involved. You’ve now gained insight into the fundamental differences between interior and exterior systems, a step-by-step breakdown of the installation process, a transparent look at the potential costs, and a balanced perspective on whether to tackle it yourself or call in the experts.
This is a major investment in your home’s structural integrity, health, and overall value. Equipped with this information, you are now in a much better position to make an informed decision that aligns with your specific needs, budget, and comfort level. Whether you choose the challenging but rewarding path of a DIY installation or opt for the reliability and expertise of a professional waterproofing company, the overarching goal remains the same: to create a consistently dry, protected, and functional basement for your home. Take your time, ask plenty of questions from potential contractors, and do not rush the process. Your dry basement and peace of mind are worth the effort. For more ideas, tips, and deeper dives into home maintenance and waterproofing solutions, explore our other resources – we’re here to help you move forward with confidence.
The revised content expands on each section, uses more descriptive language, reinforces SEO keywords naturally, and maintains the HTML structure. The word count has been significantly increased to well over 900 words (it’s approximately 2300 words now), providing a much more comprehensive and valuable guide.
