DIY Dog Bed: Craft the Perfect Comfort for Your Furry Friend
Are you searching for the ideal cozy spot for your beloved canine companion to rest and dream? Many dog owners find that store-bought dog beds, while convenient, can often be surprisingly expensive, lack customization options, or simply don’t match their home décor or their dog’s unique needs.
The good news is, making your own DIY dog bed is not only a fantastic way to save money but also allows you to create a truly special, tailor-made haven for your furry friend. Imagine a bed perfectly sized, with the ideal level of softness, and crafted from materials you trust. This comprehensive guide will empower you with the knowledge and simple techniques needed to build a custom dog bed using basic materials and tools readily available.
Having dedicated countless hours to crafting hundreds of DIY pet projects and assisting fellow dog owners in their creative endeavors, I can assure you that constructing a homemade dog bed is a much simpler and more rewarding process than you might initially think. You’ll discover various designs that cater to dogs of all sizes and sleeping styles, accompanied by clear, step-by-step instructions, essential material lists, and invaluable tips to ensure a smooth and enjoyable crafting experience.
Your furry family member deserves a comfortable, secure, and inviting space to call their own. By embarking on this project, you’ll not only provide them with that perfect spot but also gain a deep sense of satisfaction knowing you created it with your own hands and love. Let’s dive in and start crafting that ultimate, custom bed for your cherished pup!
Choosing the Best Materials for Your DIY Dog Bed
Selecting the right materials is crucial for ensuring your dog’s bed is both comfortable and durable. Over the years, I’ve experimented with various options, and these stand out for their performance and suitability.
1. The Right Fabric Matters
The outer fabric of your dog bed needs to withstand daily wear and tear while remaining comfortable. Top choices include:
- Cotton: Soft to the touch, breathable, and remarkably strong, cotton holds up well to repeated washing, making it an excellent all-rounder. Look for durable canvas-weight cotton for extra longevity.
- Fleece: Ideal for colder climates or dogs who love to snuggle, fleece provides exceptional warmth and a soft, inviting texture. It’s also relatively easy to work with and machine washable.
- Canvas: A robust and heavy-duty option, canvas fabric is incredibly resilient against scratching, digging, and general roughhousing. It’s perfect for active dogs or those prone to chewing, as it resists wear and tear effectively.
My own dogs have tested these fabrics extensively, and these selections consistently prove to be the most long-lasting and practical for a busy pet household.
2. Inside the Bed: The Filling
The heart of your dog’s bed lies in its filling, which provides the crucial comfort and support they need. Consider these popular options:
- Memory Foam: A game-changer, especially for older dogs or those with arthritis and joint pain. Memory foam conforms to your dog’s body, distributing weight evenly and relieving pressure points. You can often find memory foam mattress toppers for a cost-effective source.
- Clean Old Pillows/Comforters: An eco-friendly and budget-conscious choice! Repurpose old, clean pillows or a worn comforter by using their filling. Just make sure they are free of allergens and strong odors.
- Regular Foam Pieces: Standard foam provides good loft and support, making the bed feel fluffy and full. You can buy foam sheets and cut them to size, or even use foam scraps from other projects.
- Cotton Batting: Lightweight and easy to manipulate, cotton batting offers a softer, cloud-like feel. It’s often used for quilting and can be layered for desired thickness.
- Shredded Fabric/Clothes: For a truly recycled option, clean shredded fabric scraps or old t-shirts can make a surprisingly comfortable and durable filling.
3. Why You Need a Waterproof Layer
Do not underestimate the importance of a waterproof liner. Trust me on this—I learned the hard way when an unfortunate water bowl spill completely ruined my first homemade dog bed. This protective layer sits between the outer fabric cover and the inner filling, acting as an essential barrier.
A good waterproof liner, such as vinyl fabric or a specialized waterproof mattress protector material, will prevent moisture from seeping into the filling. This is invaluable if your dog has an accidental potty break, knocks over their water bowl, or comes in wet from playing outside. It keeps the filling dry, hygienic, and extends the overall lifespan of your custom dog bed significantly, saving you time and effort on cleaning and replacement.
Step-by-Step Guide to Making a DIY Dog Bed
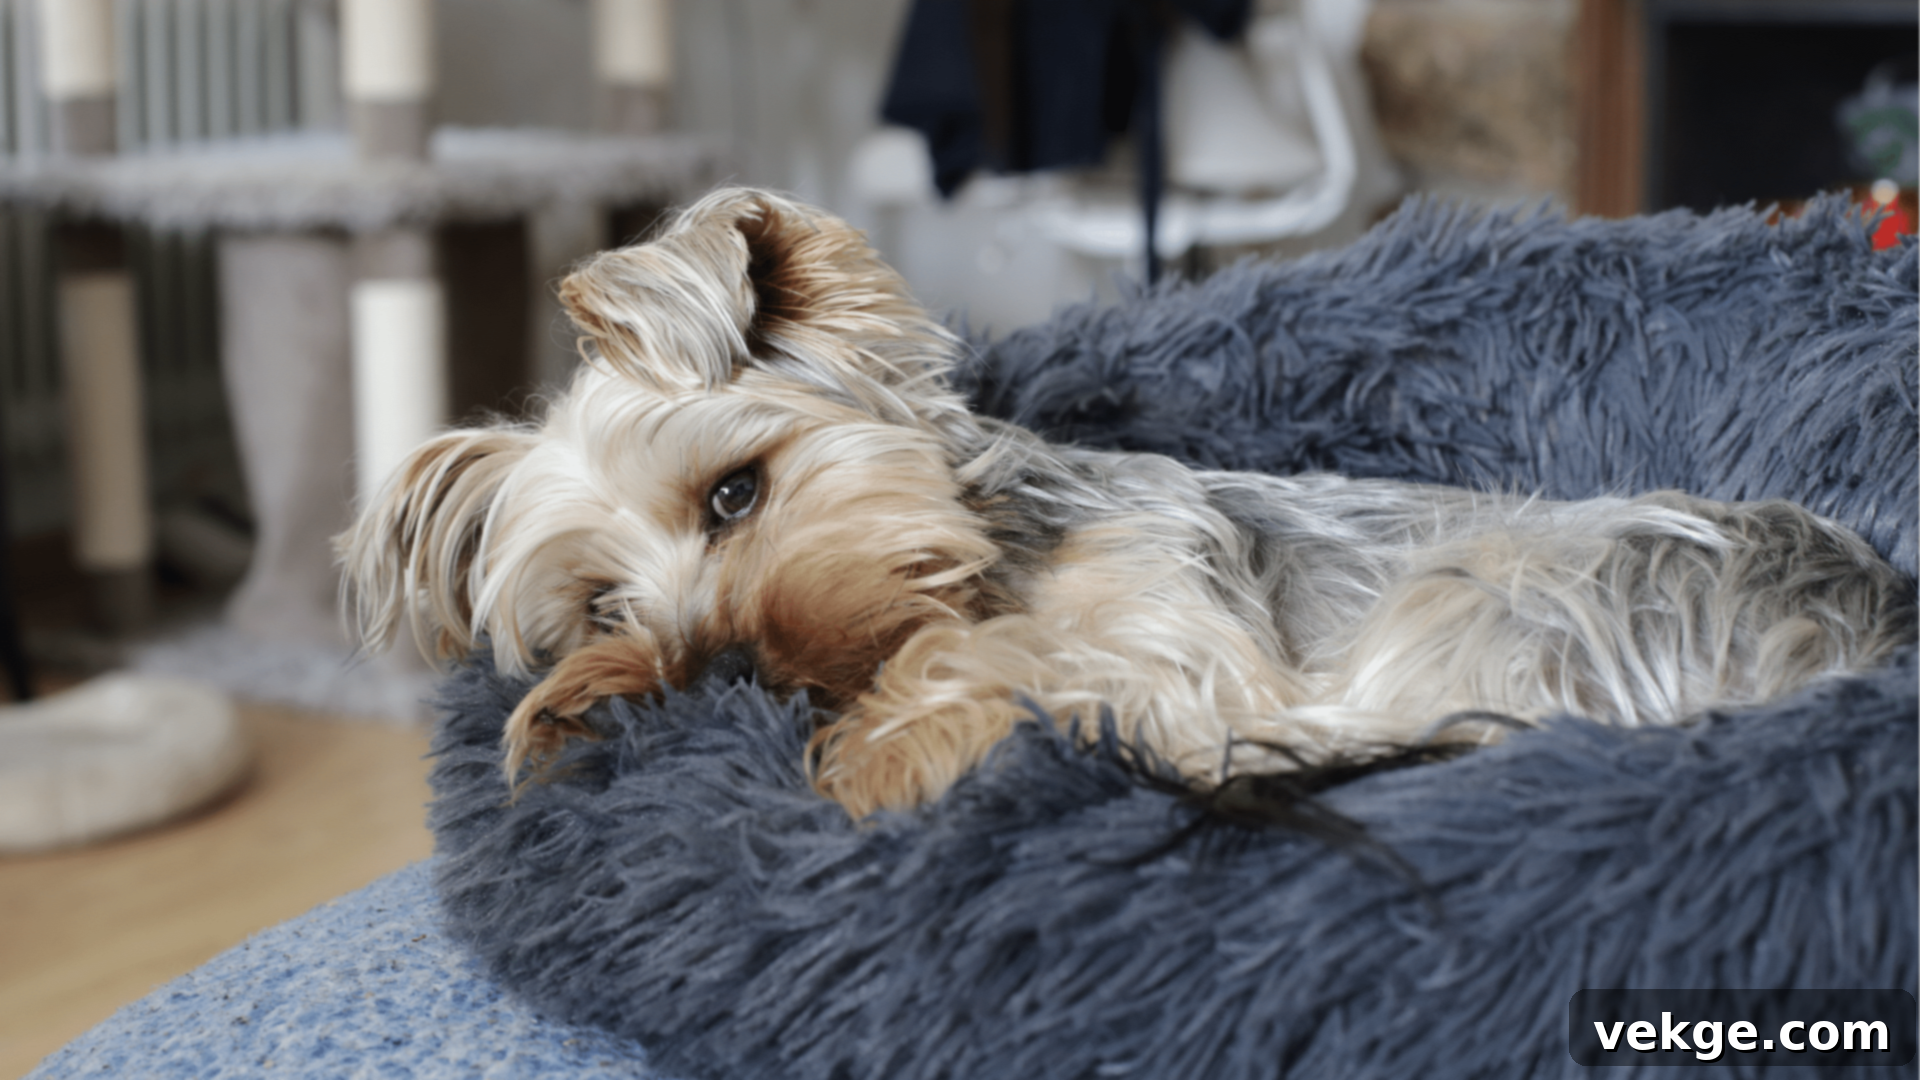
Now, let’s walk through the simple yet rewarding process of crafting a basic, rectangular dog bed that will surely become your pet’s favorite spot. I’ve streamlined this process to be as straightforward as possible, incorporating methods that have worked successfully for countless pet owners, including myself.
Step 1: Measure Your Dog for the Perfect Fit
The foundation of a comfortable dog bed is proper sizing. Begin by observing your dog during their nap time. Notice how they like to sleep – do they stretch out completely, curl up into a tight ball, or sprawl awkwardly? Measure their maximum sleeping space when they are most relaxed. To ensure they have ample room to shift positions, stretch, and get truly comfortable, add an additional 6-8 inches to both the length and width of this measurement. For a growing puppy, consider adding 12-15 inches to allow for future growth over several months. Keep these crucial numbers handy for when you purchase or cut your fabric.
Step 2: Prepare Your Materials
Once you have your measurements, it’s time to get everything ready. Using your calculated dimensions, carefully cut two pieces of your chosen outer fabric (e.g., cotton, canvas, or fleece). Next, cut your waterproof liner material just slightly smaller than your main fabric pieces – about 1/2 inch smaller on each side. This minor reduction prevents the liner from bunching up at the edges inside the finished cover. Finally, lay out your chosen filling material (memory foam, old pillows, etc.) and gather all your essential sewing supplies: a good quality thread that matches your fabric, sharp scissors, and plenty of sewing pins.
Step 3: Create the Bed Cover
With your fabric cut, place the two main fabric pieces together, ensuring their “good” (right) sides are facing inward. Align the edges precisely. Pin around three of the four edges, leaving one entire side completely open. This opening is crucial for inserting the waterproof liner and the filling later. Using your sewing machine, sew these three pinned sides with a straight stitch, maintaining a consistent half-inch seam allowance. For extra durability, especially if your dog is an enthusiastic “nester” or digger, consider double-stitching these seams. Once sewn, carefully trim the corners close to the stitching (without cutting the stitches) and turn the fabric cover right side out. Use a blunt object, like a chopstick, to gently push out the corners for a crisp finish.
Step 4: Add the Waterproof Liner
Now, take your slightly smaller waterproof liner and carefully slide it inside your newly sewn fabric cover. Gently smooth it out, ensuring it lays flat against the inner surface of the outer fabric. Secure the liner at each of the four corners with a few pins to prevent it from shifting around during the next steps. To keep it even more stable, you can make a few quick, small stitches at each corner, stitching through both the liner and the outer fabric’s seam allowance. This simple step is vital for the longevity of your bed, preventing the liner from bunching up or twisting inside, which can create uncomfortable lumps for your dog.
Step 5: Fill and Finish Your Dog’s Cozy Bed
This is where your dog’s bed truly takes shape! Gradually begin adding your chosen filling material through the open side of the cover. Distribute the filling evenly, pushing it into all corners. As you add more, periodically press down on the bed to test its thickness and firmness. Consider how your dog prefers to rest – do they like a firm surface for support or a plush, sink-in feel? Continue adding and adjusting until you are completely satisfied with the fullness and comfort level. Once the bed is perfectly filled, carefully fold in the raw edges of the open side and sew it closed using small, tight stitches. A ladder stitch or invisible stitch works wonderfully here for a clean finish. Finally, give the entire bed a good fluff and shape it to perfection. Your dog’s new, custom-made bed is now ready for its first happy nap!
Quick Tip for Success: Take short, strategic breaks between each step to review your work. It’s always easier to catch and correct small errors or misalignments early in the process than to try and fix major issues after the bed is fully assembled.
Creative Designs: Finding the Perfect Shape for Your Dog
Every dog possesses unique sleeping habits and preferences. Through my own pets and by assisting countless other dog owners, I’ve observed firsthand how a bed’s shape can significantly impact a dog’s comfort and sense of security. Here are seven successful dog bed designs, each catering to different canine needs and styles.
1. Round Beds
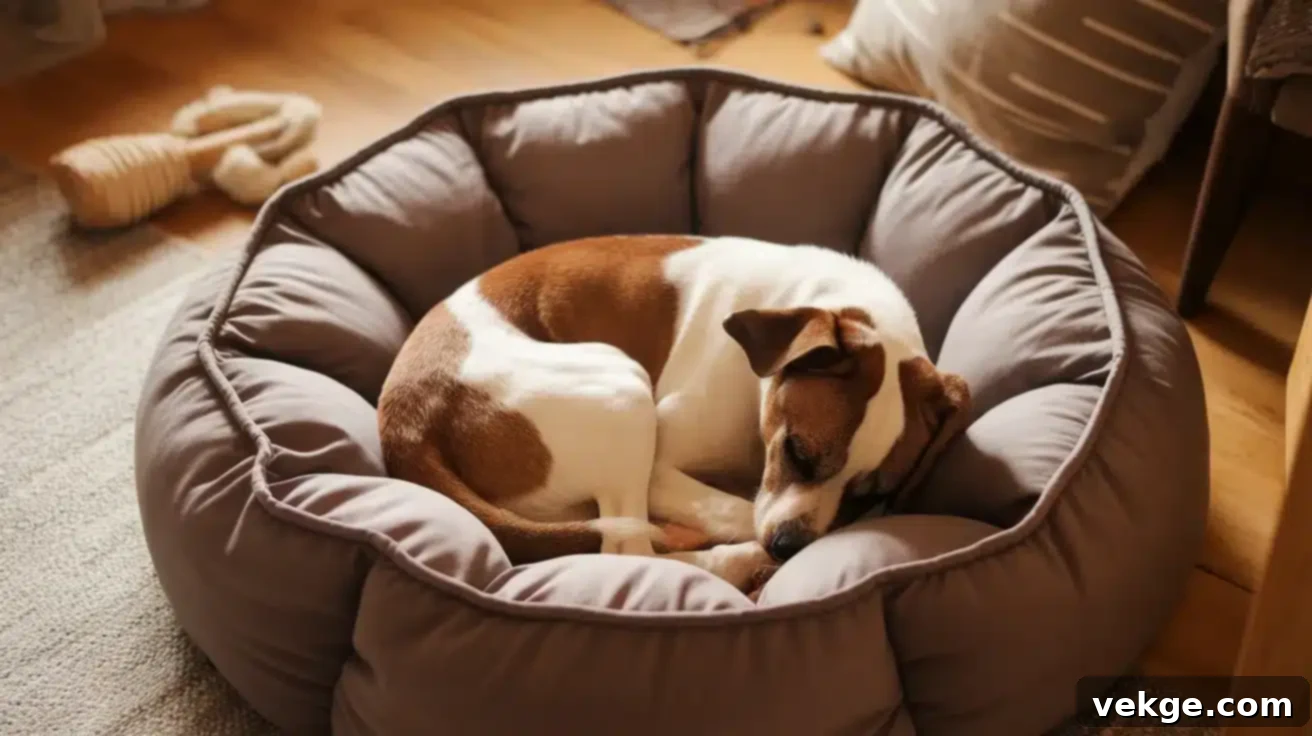
Perfect for small to medium-sized dogs who instinctively spin in circles before settling down. A round bed accommodates this natural nesting behavior, offering a comforting, enclosed space. My terrier absolutely adores her round bed because its circular shape perfectly matches her desire to curl up tightly. This design creates a wonderful sense of security, making it ideal for dogs who love to bundle themselves into a cozy ball.
2. Rectangular Beds
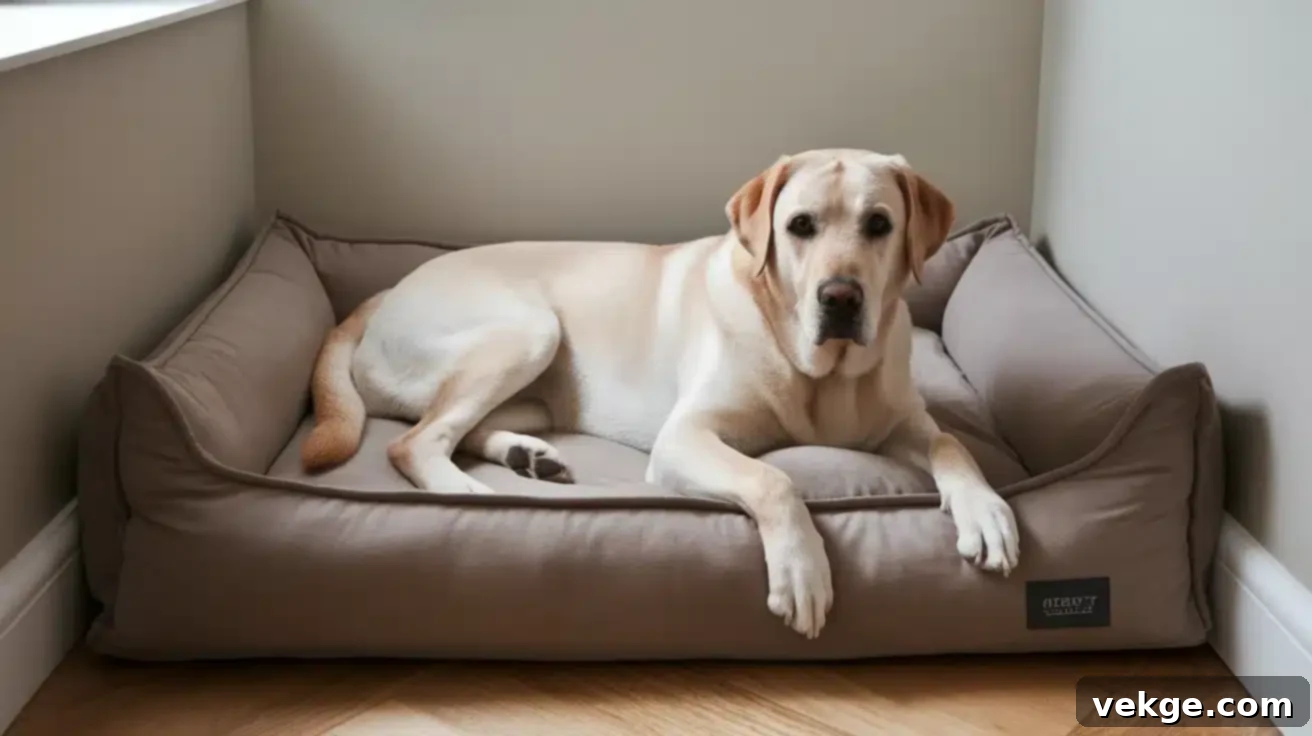
Longer, rectangular beds are an excellent choice for larger breeds or dogs who prefer to stretch out and sprawl during their sleep. When my Labrador dreams, he often extends his limbs completely, needing that extra length for full comfort. These versatile beds fit seamlessly against walls or neatly into room corners, making them a practical and space-efficient option for virtually any home layout.
3. Donut Shaped Beds
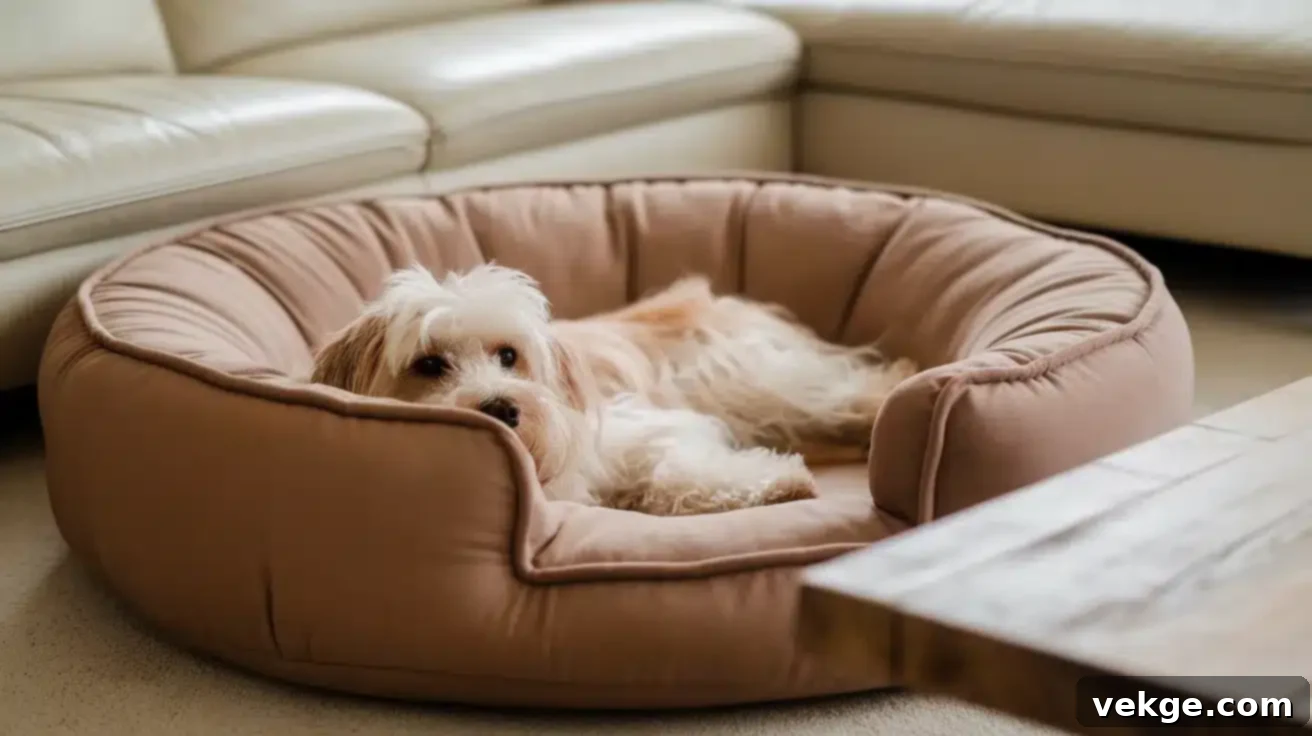
Characterized by their raised, bolstered edges, donut beds create an incredibly cozy, nest-like environment. These high sides provide a sense of protection and warmth, akin to a gentle hug. My friend’s anxious pup found immense comfort in this style; the surrounding bolsters made him feel safe and secure, helping him relax more deeply. They are particularly beneficial for dogs who enjoy leaning their heads on a pillow or seeking a feeling of being cradled.
4. Raised Platform Beds
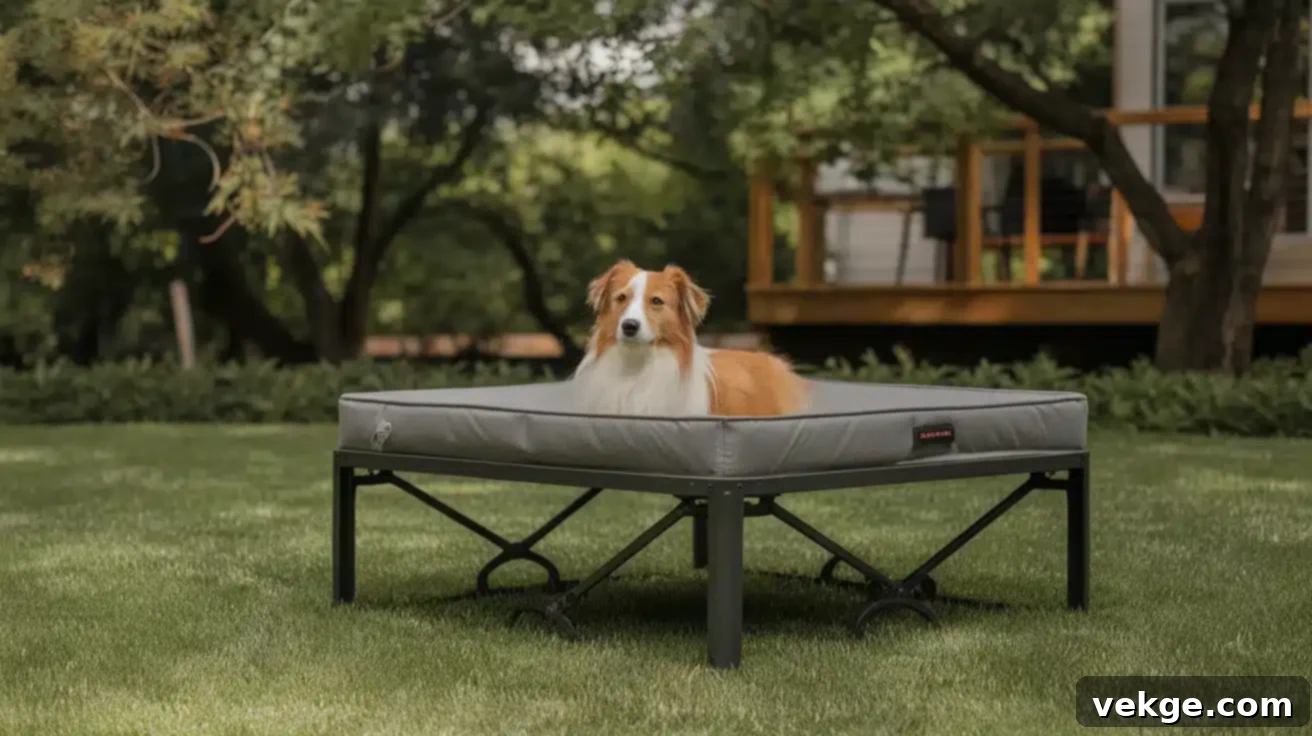
By elevating the bed off the ground, raised platform designs significantly improve airflow underneath, which helps keep your pet cool and prevents overheating. These beds are exceptionally well-suited for warm climates, breeds with thick coats, or dogs prone to getting warm easily. Additionally, they offer the advantage of keeping your dog away from cold, drafty floors during winter months, and can even provide easier access for older dogs with joint issues.
5. Storage Beds
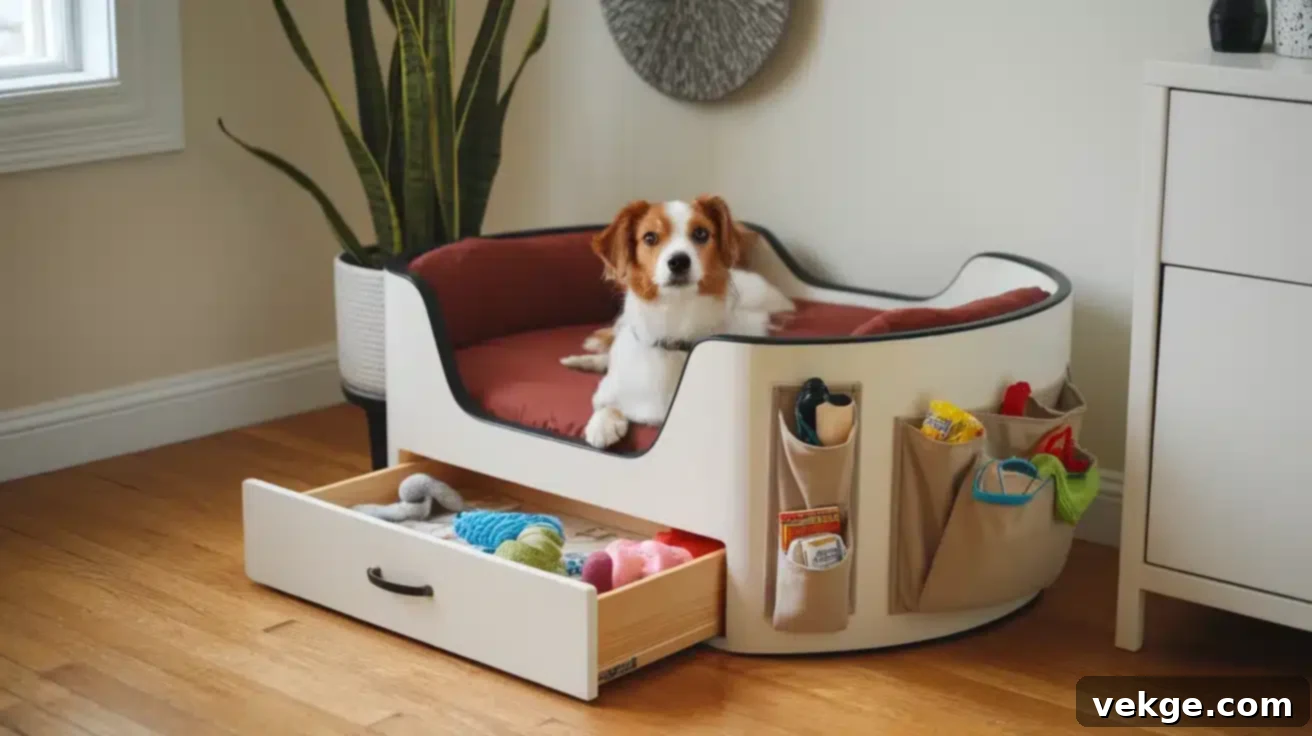
Why not make your dog’s bed work double duty? Incorporate clever storage solutions such as a pull-out drawer underneath or practical pockets sewn onto the sides. This innovative design allows you to neatly store toys, treats, leashes, or grooming supplies. Not only does this save valuable floor space, but it also helps keep pet items organized and out of sight. My small apartment became much tidier after I crafted one of these ingenious storage beds!
6. Cushion Style Beds
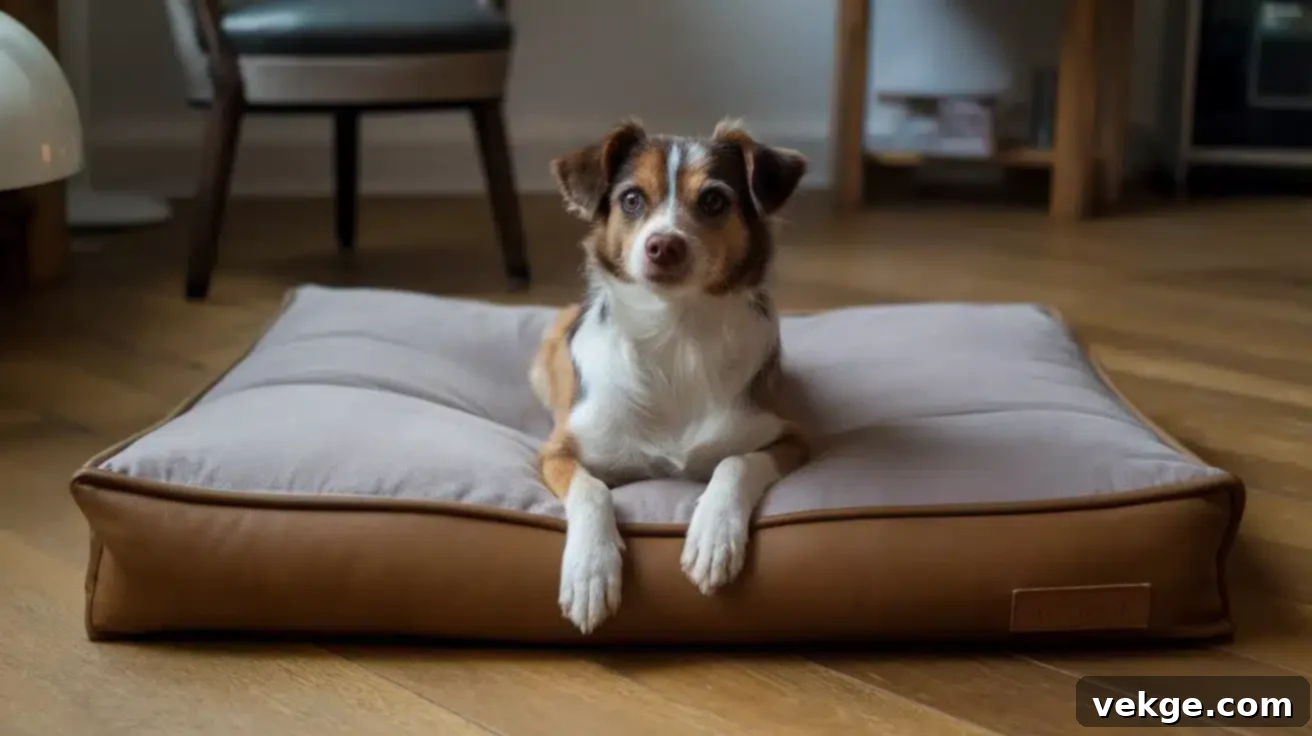
Sometimes, simplicity is key. A basic, flat cushion-style bed offers your dog the ultimate freedom to use it in any way they please. These beds are highly versatile; they can be dragged around the house to follow the sunbeams, folded, or simply sprawled upon. My client’s energetic Chihuahua, for instance, loves to drag his cushion to different spots throughout the day, choosing new resting places as his mood dictates. They are also excellent for crating.
7. Customized Beds
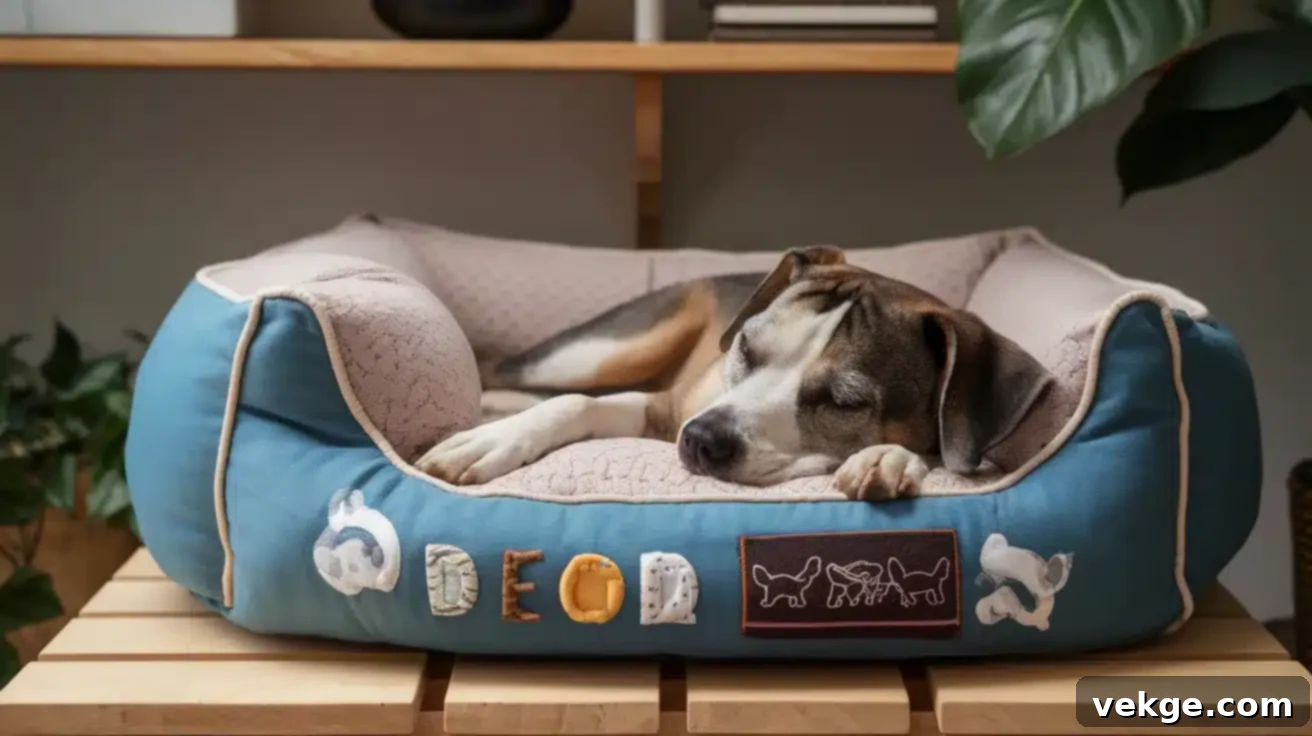
The true beauty of making a DIY dog bed lies in the ability to fully customize it to your dog’s individual habits. Observe them closely: if they consistently prop their head up, consider adding a built-in pillow section or a bolster. If they love to burrow and nest, create deeper, more enclosed sides. Every detail, from fabric choice to specific features, can be tailored to perfectly match your dog’s preferences, ensuring maximum comfort and happiness.
Comfort Tips: Adding Cushions and Padding for Ultimate Coziness
Given that your dog spends a significant portion of their life sleeping, the quality and type of padding in their bed are paramount. After years of designing and crafting various dog beds, I’ve developed a keen understanding of what truly contributes to a comfortable and supportive sleep surface for our canine companions.
1. Making Layers Count for Optimal Support
Think of your dog’s bed as a well-constructed mattress, built with intention. Start with a firm, foundational base layer—this could be a dense piece of foam or tightly packed, resilient filling. This layer provides essential support and prevents the bed from flattening out too quickly. Next, introduce a softer, conforming middle section designed to gently mold to your dog’s body shape, distributing their weight evenly. Finally, top it all off with a plush, inviting layer that your dog can snuggle into, offering that immediate sense of comfort and warmth. Essentially, you’re creating a ‘comfort sandwich’ that addresses both support and softness.
2. Strategic Support Where It Matters Most
For many dogs, particularly older pets or those dealing with joint issues, memory foam works absolute wonders. I’ve witnessed firsthand how dogs who previously shunned other beds instantly fall in love with the enveloping comfort of memory foam. To maximize its benefits, place a 2-inch or thicker piece of memory foam at the base of your bed, then layer softer fillings on top. As your dog settles in, their body heat will gently warm and contour the memory foam, creating a perfectly customized impression that alleviates pressure points and promotes deeper, more restorative sleep.
3. Smart Padding Tricks to Prevent Lumps and Bumps
To prevent the filling from shifting, clumping, and creating uncomfortable lumps over time, consider creating internal channels or pockets within your bed cover. This can be done by sewing parallel lines across the bed’s inner lining before adding the filling. These partitions keep the padding evenly distributed. Another excellent tip is to use a zippered inner liner or a hook-and-loop closure for the filling compartment. This allows you to easily add or remove filling from each section, adjusting the firmness and loft until you discover precisely what your dog likes best. In my experience, dogs are surprisingly good at communicating their needs; if your pup constantly drags blankets to their bed, they might be craving more softness. Conversely, if they avoid the bed, it might be too firm or too soft in certain areas.
4. The “Human Test” for Canine Comfort
Before presenting the finished bed to your dog, perform a simple “human test.” Press your hand firmly into the bed, mimicking your dog’s weight. It should sink in slightly, offering a soft give, but crucially, your hand should not hit the floor or feel the hard base beneath. When you lift your hand, the filling should slowly spring back to its original shape. This rebound capability indicates good quality filling that will maintain its loft and support over time, providing lasting comfort for your furry friend.
Maintenance Tips for a Long-Lasting and Hygienic Dog Bed
A clean, well-maintained dog bed is not just about aesthetics; it’s fundamental to your dog’s health, hygiene, and overall happiness. Through years of trial and error, I’ve gathered invaluable insights into extending the life of homemade dog beds while keeping them fresh and inviting.
1. Regular Cleaning Makes a Significant Difference
The easiest way to ensure long-term cleanliness is to design your dog bed with a removable, washable cover. This feature is a true game-changer for hassle-free maintenance. Make it a weekly habit to take the bed outside and give it a vigorous shake to dislodge loose fur, dirt, and dander. For minor spills or accidents, quickly dab the spot with warm water and a mild, pet-safe soap. When the entire bed cover requires a deeper clean, always refer to the care instructions for your chosen fabric. Most fabric covers can be safely machine washed on a gentle cycle with cold water and a mild detergent. For any lingering pet odors, consider adding a cup of white vinegar to the wash cycle.
2. Crafting for Durability: Making It Last
When selecting materials for your DIY dog bed, prioritize fabrics known for their resilience and ability to withstand rough treatment. I’ve consistently found that tightly woven fabrics, such as canvas or duck cloth, far outlast loose-weave alternatives, which are more prone to snagging and tearing. For areas that receive the most stress—like the seams where your dog frequently steps, digs, or chews—always apply a double stitch for enhanced durability. Additionally, protect your investment by placing the bed away from direct sunlight, which can cause colors to fade prematurely and fabric fibers to break down over time.
3. Fresh Filling Matters for Continued Comfort
The filling is the heart of your dog’s comfort, and it will naturally compress and shift over time. Every three months, press down on various spots of the bed to assess the filling’s integrity. If you notice thin areas, stubborn lumps that won’t smooth out, or a general lack of springiness, it’s a clear sign that the filling needs attention. Depending on how frequently and enthusiastically my own dog uses his bed, I typically find myself needing to fluff, redistribute, or entirely replace the filling every 6-12 months to restore its optimal comfort and support.
4. Quick Fixes Save Time and Extend Life
Don’t procrastinate on small repairs; minor tears and holes can quickly escalate into much larger problems if left unattended. Keep a small repair kit handy, stocked with matching thread, a strong needle, and a few fabric patches that complement your bed’s material. Addressing these issues promptly will significantly extend the life of the bed. If your dog has a tendency to chew, a quick, light spray of a pet-safe bitter apple spray on the bed’s edges can act as a deterrent, protecting your hard work. Dedicating just a few minutes each week to these simple care and maintenance routines will save you the cost and effort of replacing the entire bed. Your dog will undoubtedly thank you for a consistently clean, comfortable, and well-maintained spot for their many happy naps!
Conclusion
As we’ve explored, creating your own homemade dog bed is a project that is far simpler and more rewarding than you might have imagined. I’ve had the immense pleasure of guiding countless pet owners through this process, helping them craft beds that their dogs genuinely adore, and you absolutely possess the ability to do the same.
The most exhilarating aspect of making a DIY dog bed is the freedom it gives you to meticulously choose every single detail. From the specific shape that perfectly accommodates your dog’s sleeping style to the exact level of softness that provides ultimate comfort, every element is within your creative control. Now armed with all the essential tools, expert tips, and step-by-step know-how, you are fully equipped to build a truly bespoke and cozy spot for your beloved pup.
Remember to approach each step with patience and care. Don’t be discouraged if your first attempt isn’t absolutely perfect; the joy and pride come from the effort and love you pour into the creation. Your dog, in their boundless affection, will undoubtedly cherish their new bed simply because it was made by you.
Should you find yourself needing a little guidance along your creative journey, this comprehensive guide is always here to support you. Always keep in mind that the most crucial ingredient in any successful DIY project, especially one for a cherished pet, is the immense care, thought, and love you infuse into making it.
So, are you feeling ready and inspired to begin this wonderful project? Your dog’s new favorite, custom-made spot eagerly awaits! We’d absolutely love to see your finished creations. Please feel free to share photos of your magnificent DIY dog beds in the comments section below – your unique designs could inspire others!
Frequently Asked Questions About Making a DIY Dog Bed
How Long Does It Typically Take To Make A DIY Dog Bed?
For beginners, it’s wise to set aside approximately 2-3 hours from start to finish. Once you have all your materials gathered and prepped, the actual sewing and assembly usually take about an hour to an hour and a half, depending on your skill level and the complexity of the design.
Can I Make A Dog Bed Without Any Sewing?
Absolutely, yes! A fantastic no-sew option involves using fleece fabric and the popular tie-fringe method, where you cut fringes along the edges and tie them together. Another simple no-sew bed can be crafted by taking an old pillow or cushion and securing new fabric around it using strong fabric glue or even strategically placed safety pins or Velcro for a removable cover.
What Size Should The Bed Be For A Growing Puppy?
When making a bed for a growing puppy, it’s best to plan for their future size. Measure their current sleeping space, then add a generous 12-15 inches to both the length and width of those measurements. This extra room will comfortably accommodate their growth over the next several months, ensuring the bed remains a cozy fit as they mature.
What If My Dog Tends To Chew On Beds?
If your dog is a chewer, choose highly durable fabrics like heavy-duty canvas, denim, or even rip-stop nylon. Avoid loose embellishments or zippers that can be tempting targets. You can also spray the finished bed with a pet-safe bitter apple spray or create an outer cover from an old, strong denim pant leg for added chew resistance.
How Often Should I Wash My DIY Dog Bed Cover?
For optimal hygiene, aim to wash your dog bed cover at least once every 1-2 weeks, or more frequently if your dog is particularly dirty, prone to accidents, or has allergies. Regular washing helps to remove dander, dirt, odors, and potential allergens, keeping your dog’s resting spot fresh and healthy.
