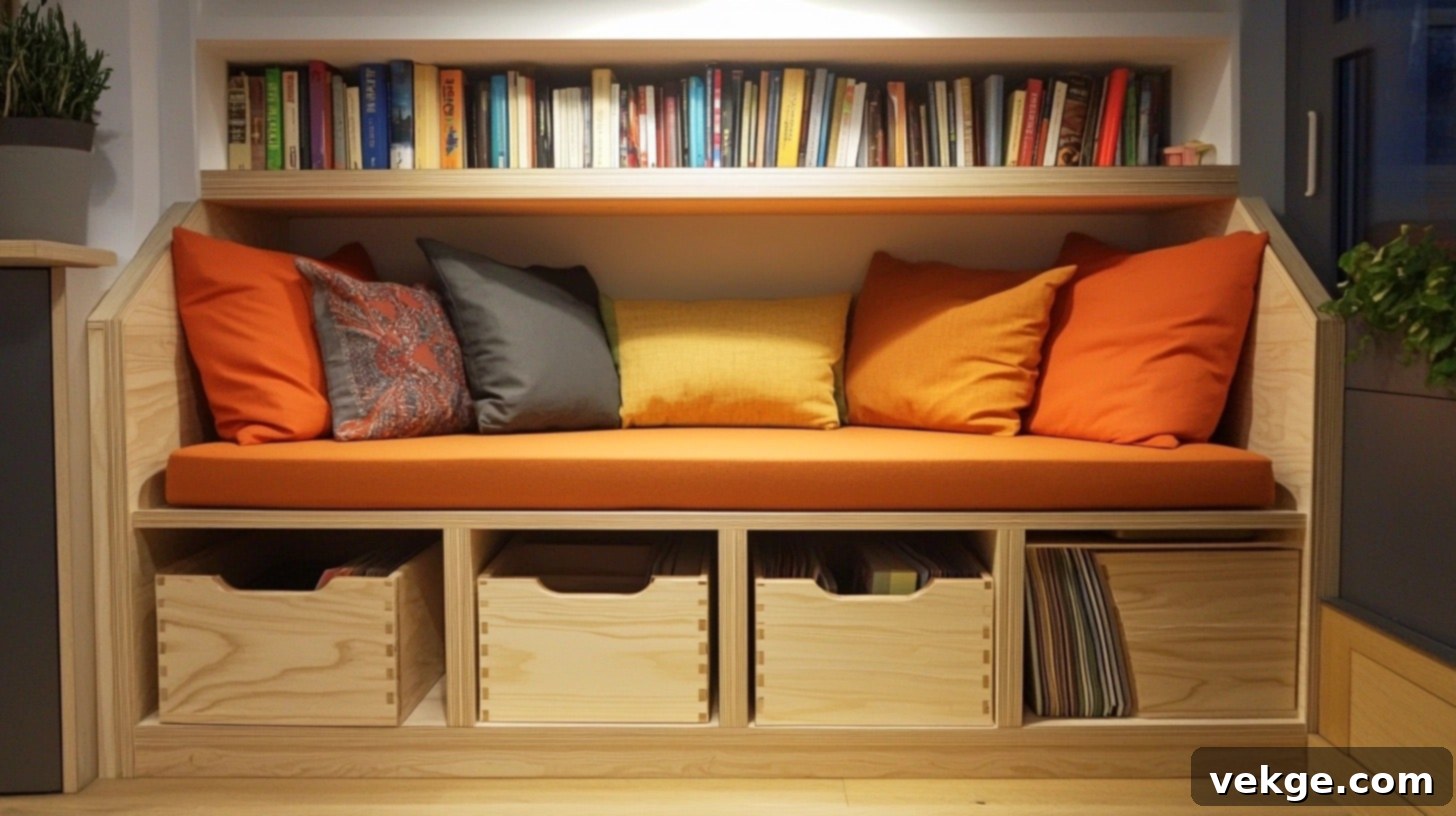
DIY Built-In Storage Bench: Maximize Your Home’s Space with Custom Seating & Storage
Are you looking to make the most of every inch in your home? A custom built-in storage bench offers a brilliant solution, combining comfortable seating with smart, hidden storage. It’s a versatile piece of furniture that can transform any underutilized area into a functional and stylish space.
This comprehensive guide will walk you through the entire process of building your own built-in bench. Unlike off-the-shelf options, a DIY approach allows you to create a piece that fits your specific dimensions, style preferences, and storage needs perfectly. Not only does building it yourself save money, but it also gives you the satisfaction of crafting a unique addition to your home with your own hands.
This detailed, step-by-step tutorial is ideal for homeowners who desire more storage, DIY enthusiasts eager for a rewarding woodworking project, or anyone looking to enhance their home’s functionality and aesthetic. With just basic woodworking skills and a set of standard tools, you can complete this project in as little as 1-2 days. Ready to embark on this exciting journey? Let’s create your perfect custom storage bench.
Planning Your Built-In Storage Bench: The Foundation of Success
A successful built-in storage bench project begins with meticulous planning and precise measurements. Taking the time to plan thoroughly will not only ensure a perfect fit but also simplify the construction process and help you avoid costly mistakes down the line. Here’s a detailed look at the key steps involved in planning your project.
Selecting the Perfect Location for Your Bench
Built-in benches are incredibly adaptable and can enhance almost any room. Consider these popular locations to determine where your bench will be most beneficial:
- Entryways and Mudrooms: Ideal for storing shoes, bags, and outerwear, providing a convenient spot to sit while putting on or taking off footwear.
- Under Windows: Transforms an empty space into a cozy window seat, perfect for reading or enjoying the view, with integrated storage beneath.
- Kitchen Nooks and Dining Areas: Creates a charming and efficient banquette-style seating, maximizing dining space, often with hidden storage for table linens or rarely used kitchen items.
- Hallways: Adds functional seating and storage along a wall, preventing clutter in high-traffic areas.
- Bedrooms: Functions as a stylish window seat or an end-of-bed bench, offering extra seating and discreet storage for blankets, pillows, or seasonal clothing.
Accurate Measurement: The Key to a Perfect Fit
Precision is paramount when measuring for a built-in piece. Take your time and double-check all dimensions to ensure your bench fits snugly and looks professionally installed.
- Width: Measure the exact distance from wall to wall where the bench will be placed. If it’s not spanning wall-to-wall, determine your desired length.
- Height: For comfortable seating, aim for a standard seat height of 18-20 inches, including any cushion. If you plan to use it with a dining table, verify this height allows for comfortable dining.
- Depth: A comfortable seat depth typically ranges from 16-20 inches. If the bench will be under a window, ensure the depth doesn’t obstruct the window frame or create an awkward gap.
- Floor Space: Use painter’s tape to mark out the exact footprint of your proposed bench on the floor. This visual aid helps you better understand its scale in the room.
- Obstacle Check: Carefully note the location of any electrical outlets, heating/cooling vents, light switches, or other architectural features that might interfere with your bench design. You’ll need to work around these or incorporate them into your plan.
Thoughtful Design Considerations
Beyond basic dimensions, consider these design elements to ensure your bench perfectly complements your home’s existing style and meets your functional needs.
- Aesthetic Style: Choose a style that harmonizes with your home’s decor—whether it’s modern, traditional, farmhouse, or minimalist. This influences your choice of materials, finishes, and trim.
- Storage Access Type: The way you access storage impacts both convenience and design:
- Single Lid Top: Best for larger, less frequently accessed items like blankets or seasonal decorations. Provides a seamless look.
- Front-Facing Doors: Offers easy access to items, similar to cabinets. Suitable for items you need regularly.
- Open Cubbies: Great for quick access to shoes, baskets, or decorative items. Can look tidy with well-organized bins.
- Drawers: Excellent for organizing smaller items and maintaining a clean look.
- Material Matching: If possible, select wood types and finishes that match or complement your existing trim, flooring, or cabinetry for a cohesive look.
- Paint and Finish: Choose a paint color that works well with your wall color, either blending in or providing a subtle contrast. Consider durable, washable paints, especially for high-traffic areas.
- Cushion and Fabric: If adding a cushion, select a fabric that is durable, easy to clean, and fits the overall aesthetic. Consider performance fabrics for areas prone to spills or heavy use.
Remember: investing time in good planning makes the entire building process smoother and helps you achieve a high-quality, long-lasting result. It’s the most crucial step in avoiding future regrets.
Essential Materials and Tools for Your Project
Before you begin construction, gather all the necessary materials and tools. Having everything ready will streamline your workflow and ensure you can tackle each step without interruption. Always prioritize quality materials for a durable and professional finish, and ensure your tools are in good working order.
| Materials | Tools |
|---|---|
| 3/4″ Plywood (for the main bench frame, top, and sides) | Measuring tape |
| 1×4 Boards (for trim and decorative elements) | Power drill and various drill bits (pilot holes, driving screws) |
| 2×4 Lumber (for the robust support frame and base) | Circular saw or table saw (for precise, straight cuts) |
| Heavy-duty Hinges (3-4 pieces, depending on lid length and weight) | Level (at least 2ft long for accuracy) |
| Wood Screws (#8 size, various lengths – 1 1/4″, 2″, 2 1/2″ recommended) | Electric sander (orbital or belt sander for efficiency) |
| L-brackets (for additional internal support and stability) | Hammer (for small adjustments or nail installation) |
| Wood Glue (high-quality, water-resistant for strong joints) | Pencil and straightedge |
| Primer and Paint (high-quality, durable furniture paint recommended) | Safety glasses (essential for eye protection) |
| Sandpaper (medium 120-grit, fine 220-grit for smooth finishes) | Work gloves (for hand protection) |
| Caulk (paintable, acrylic latex for sealing seams) | Dust mask (to protect against sawdust and paint fumes) |
| Wood filler (for filling nail holes and minor imperfections) | Stud finder (to locate wall studs for secure attachment) |
| Multi-tool (for precise cuts, especially baseboard and flooring) | Pry bar (for removing existing trim) |
Optional Items for Enhanced Finish and Comfort:
- Foam padding (for a comfortable seat cushion)
- Upholstery Fabric (to cover your foam cushion)
- Decorative Trim Pieces (molding, base cap for added detail)
- Handle or Pulls (for easy lid opening, if applicable)
- Soft-close Lid Supports (prevents slamming and adds safety)
- Edge banding (for finishing exposed plywood edges)
- Painter’s tape (for marking and protecting surfaces)
Investing in good quality materials and having the right tools will make your DIY experience more enjoyable and the final product more impressive and durable.
Step-by-Step Guide: How to Build a Custom Built-In Storage Bench
Follow these detailed steps carefully to construct a sturdy, beautiful, and functional built-in storage bench that seamlessly integrates into your home.
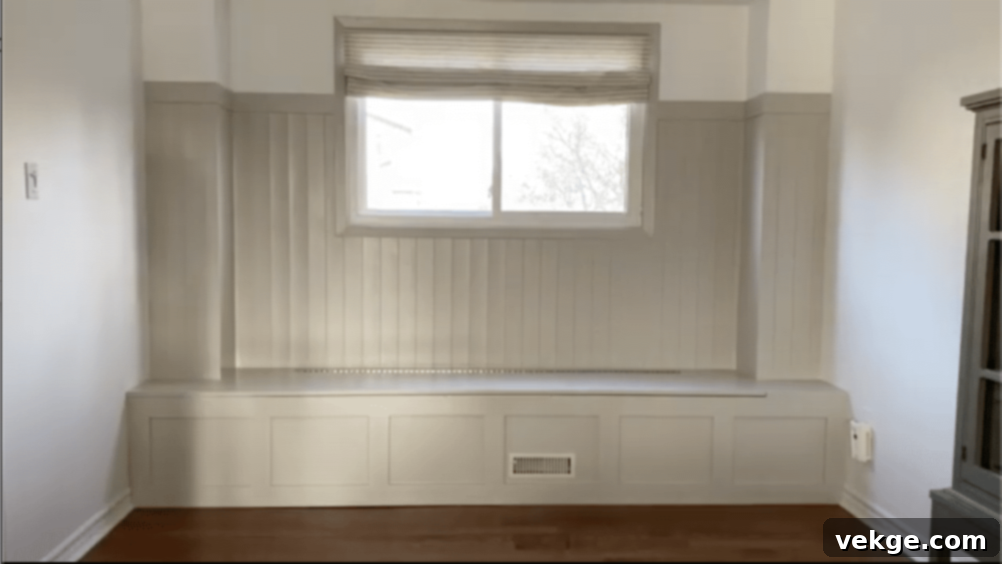
Step 1: Finalizing Your Design and Measurements
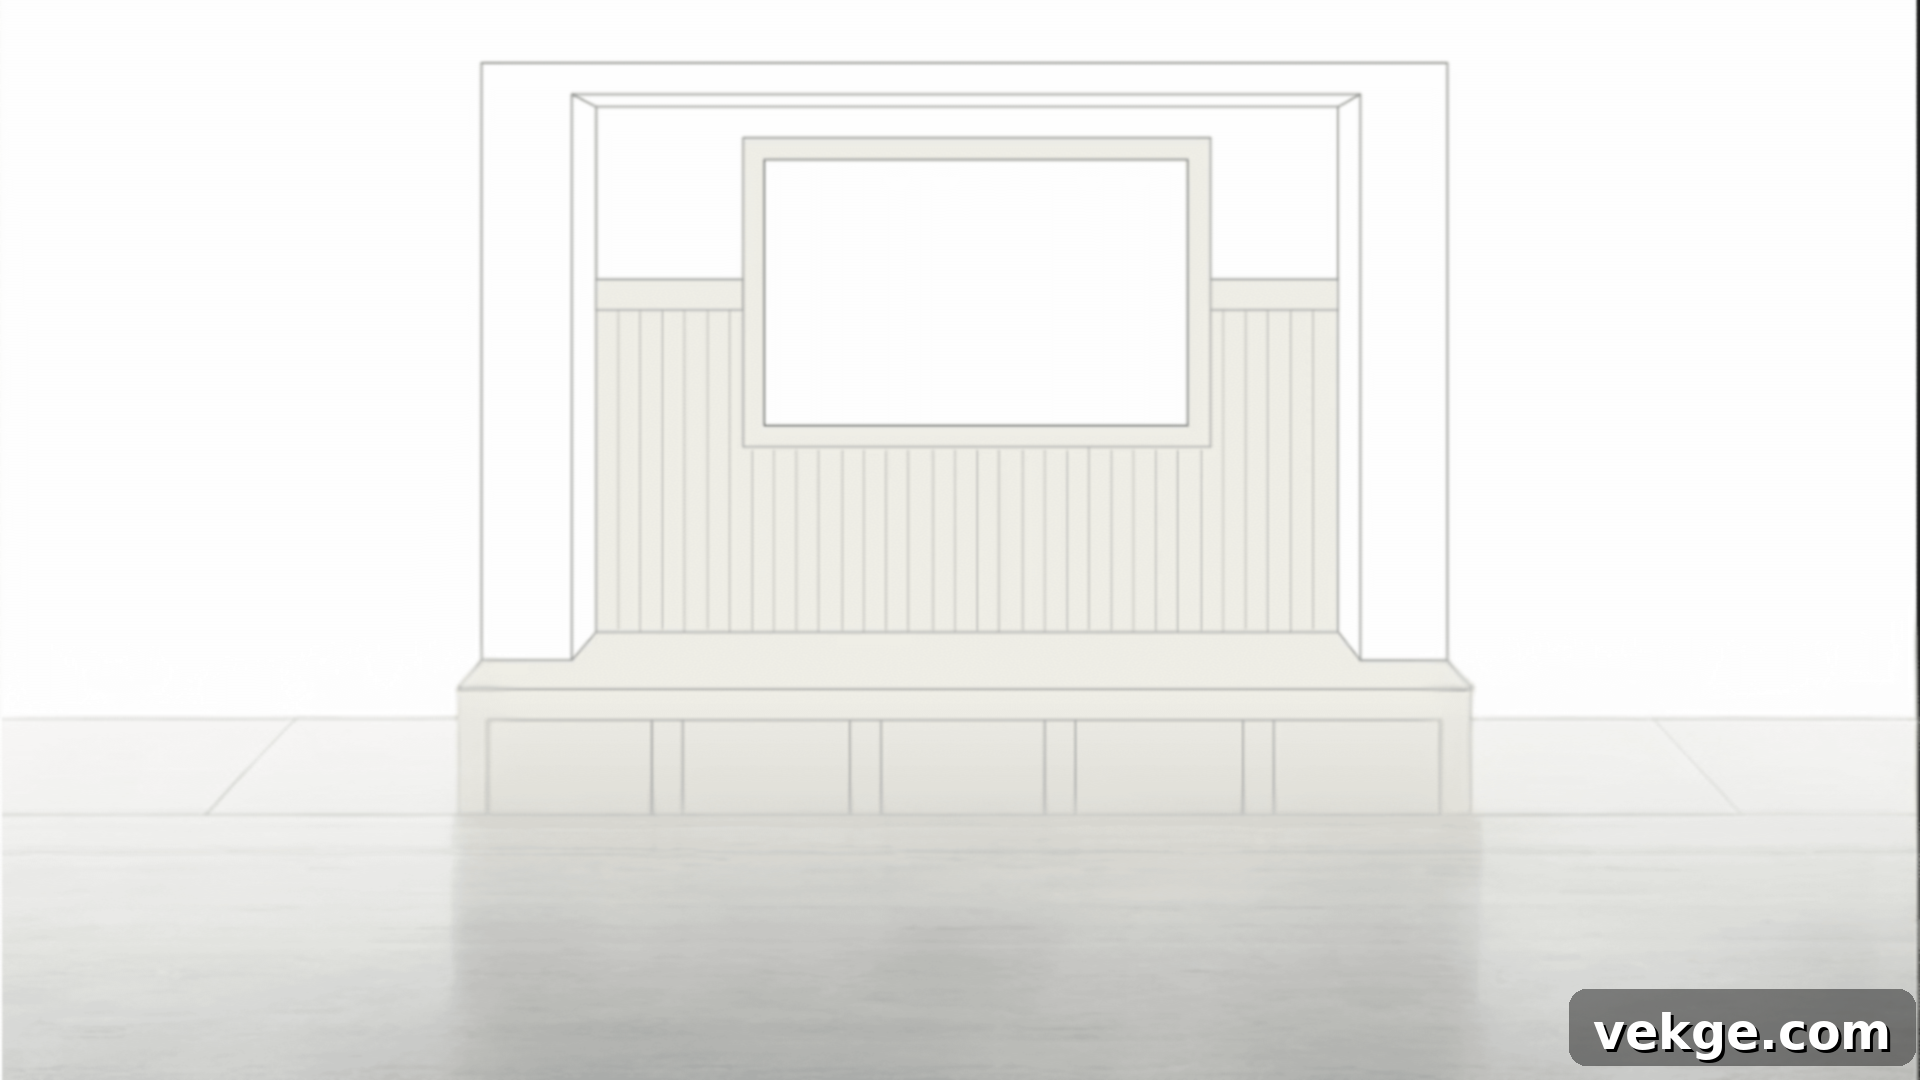
- Begin by meticulously measuring the exact space where your bench will be installed. Use a measuring tape to get precise width, height, and depth dimensions.
- If placing the bench under a window, measure the height from the floor to the bottom of the window sill. Ensure your bench’s total height (including the top and any cushion) sits below this line.
- For window placement, consider adding extra depth to the bench for a more comfortable seating experience, allowing space for a back cushion against the wall if desired.
- Create a detailed drawing of your design, including all exact measurements. This blueprint will be your guide throughout the entire build process.
- Carefully note any obstacles such as air vents, electrical outlets, or heating ducts in the area. Plan how to integrate or work around these elements in your design (e.g., rerouting ductwork or cutting openings for outlets).
Step 2: Preparing the Installation Space
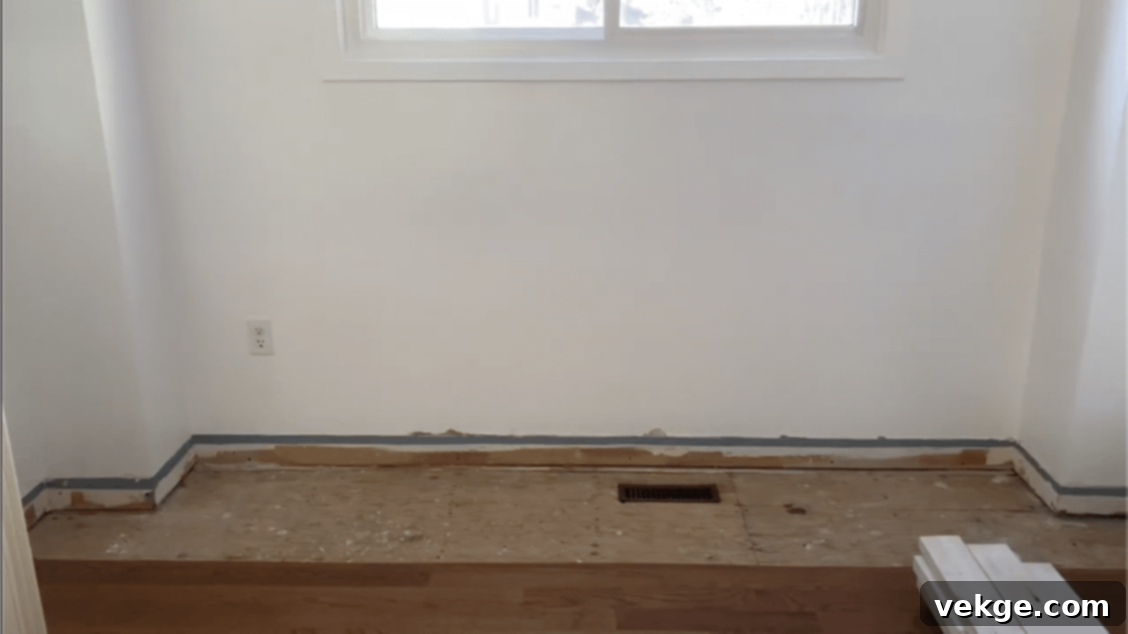
- Carefully remove any existing baseboards from the wall where the bench will sit. Use a multi-tool to score the top edge and a pry bar to gently pull them away, minimizing wall damage.
- If the bench will sit directly on the subfloor (or you want a flush look), you’ll need to remove a section of the finished flooring. Mark your cutting lines precisely using painter’s tape, ensuring they are straight and square.
- Set your circular saw blade just deeper than the thickness of your flooring. Make precise cuts along the marked lines. For corners, use a multi-tool to make clean, straight cuts where the circular saw cannot reach.
- Carefully remove the cut flooring pieces. Be cautious not to damage the subfloor beneath. This step provides a stable and level surface for your bench frame to rest on.
Step 3: Building and Installing the Base Frame
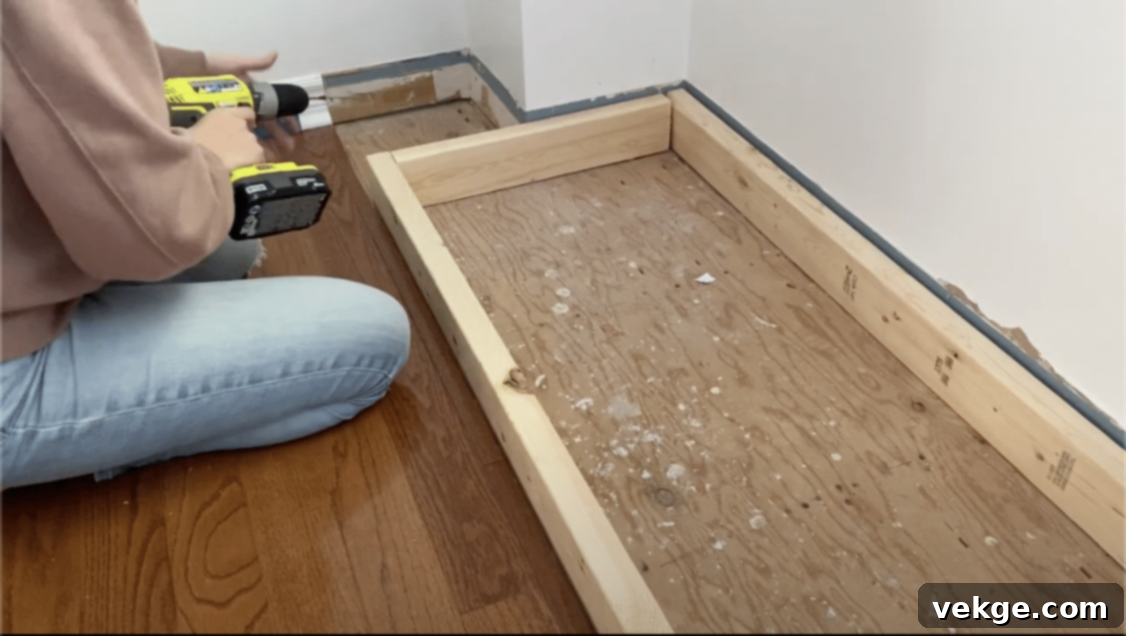
- Begin by constructing the main center frame using 2×4 lumber. This frame will define the overall shape and provide structural integrity. Use wood glue and screws for strong, durable joints.
- If your bench design includes separate sections or returns (e.g., for an L-shape), build these as individual boxes or frames. This modular approach makes assembly and leveling easier.
- As you build, constantly check that all pieces are level and square using your level and a framing square. Small deviations here can cause significant problems later on.
- Before final installation, do a test fit of the base frame in your designated spot. If it’s a dining bench, place your dining table and chairs to ensure the height and depth are comfortable and functional.
- Securely attach the completed base frame to the wall studs using long wood screws. Use a stud finder to locate the studs and ensure you are screwing into solid wood for maximum stability.
- If there are any air vents in the bench’s footprint, extend the ductwork to the front of the bench using appropriate ducting materials. Ensure proper airflow is maintained.
Step 4: Constructing the Bench Structure
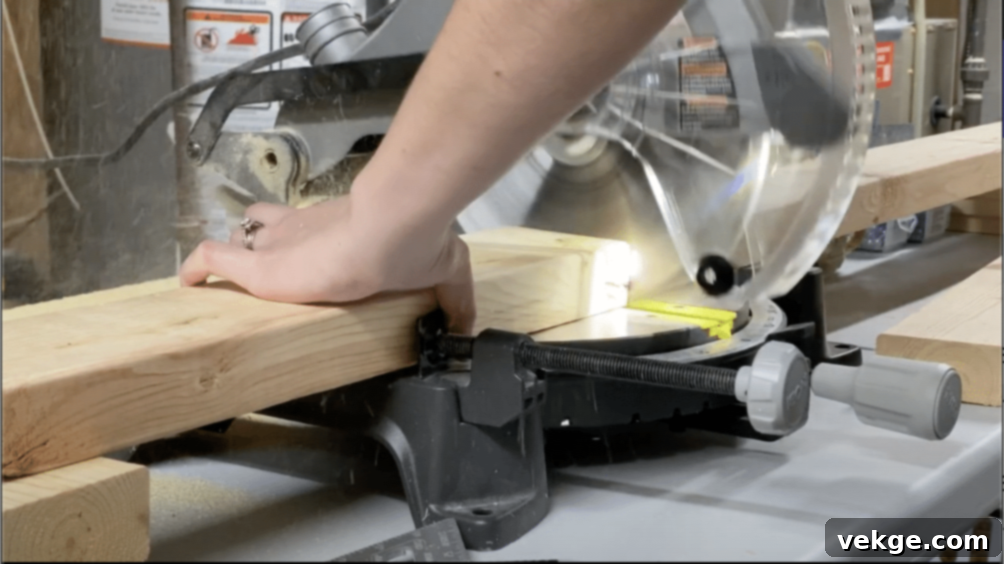
- Once the base frame is securely in place, begin covering it with 3/4″ plywood to form the front panels and side walls of the bench structure. Use wood glue and finishing nails or screws for attachment.
- Attach a 3.5-inch baseboard (or your chosen trim style) to the bottom front of the bench. This provides a finished look and helps integrate the bench with existing baseboards in the room.
- If your design features multiple sections or a paneled look, space trim pieces (e.g., 1×4 boards) evenly across the front of the bench to create a decorative façade.
- If using multiple plywood panels for the front, strategically place a center trim piece to cover any seams, making them appear intentional and seamless.
- Create a 2-inch wide stationary strip from 3/4″ plywood for the back portion of the bench top. This strip will be permanently affixed to the wall and will serve as the anchor for your lid.
- Cut the main lid piece (or pieces, if you have multiple lift-tops) from 3/4″ plywood to the exact dimensions. Ensure it fits snugly but can open freely.
- Join the lid to the stationary back strip using a continuous hinge (also known as a piano hinge) for smooth operation and strong support. If using multiple lids, install hinges for each.
- Cut and attach side pieces (if applicable) to complete the bench top, ensuring all edges are flush and square.
- Apply edge banding to all exposed plywood edges. This gives the plywood a finished, professional look, hiding the raw layers and preparing it for paint or stain.
Step 5: Applying the Finishing Touches
- Thoroughly fill all nail holes, screw depressions, and minor imperfections with wood filler. Apply generously and allow it to dry completely.
- Once dry, sand the entire bench surface with medium-grit (120-grit) sandpaper to remove excess filler and smooth rough areas. Follow up with fine-grit (220-grit) sandpaper for a silky-smooth finish, ensuring all surfaces are ready for primer and paint.
- Apply two coats of a high-quality shellac-based or stain-blocking primer. This step is crucial for an even paint finish, preventing wood tannins from bleeding through, and ensuring excellent paint adhesion.
- After priming, apply caulk around all seams, joints, and where the bench meets the wall. This fills any small gaps, creating a truly built-in, seamless appearance and preventing dust accumulation.
- Paint the bench with two to three coats of a durable, furniture-grade paint. Allow ample drying time between coats and light-sand between coats for the smoothest finish.
- Finally, add your custom-made or store-bought cushions for seating comfort. Install any lid handles, pulls, or soft-close lid supports at this stage.
Key Construction Tips for Success:
- Measure Twice, Cut Once: This old adage is paramount in woodworking. Double-checking all measurements before cutting will save time and materials.
- Test-Fit Pieces: Before permanently fixing components, dry-fit them to ensure they align correctly and the dimensions are accurate.
- Be Flexible: Be prepared to make small adjustments as needed. Not all walls are perfectly straight or square.
- Take Your Time: Rushing can lead to mistakes. Work patiently and methodically for the best, most professional results.
- Safety First: Always wear safety glasses, gloves, and a dust mask when cutting, sanding, and painting.
For a more detailed visual guide on the process, click here.
Built-In Storage Bench Design Inspiration: Find Your Perfect Style
A built-in storage bench isn’t just about functionality; it’s also a statement piece that can enhance your home’s aesthetic. Explore these diverse design inspirations to spark ideas for your own custom project, understanding how different features can suit various spaces and needs.
1. Elegant Window Seat Storage Setup
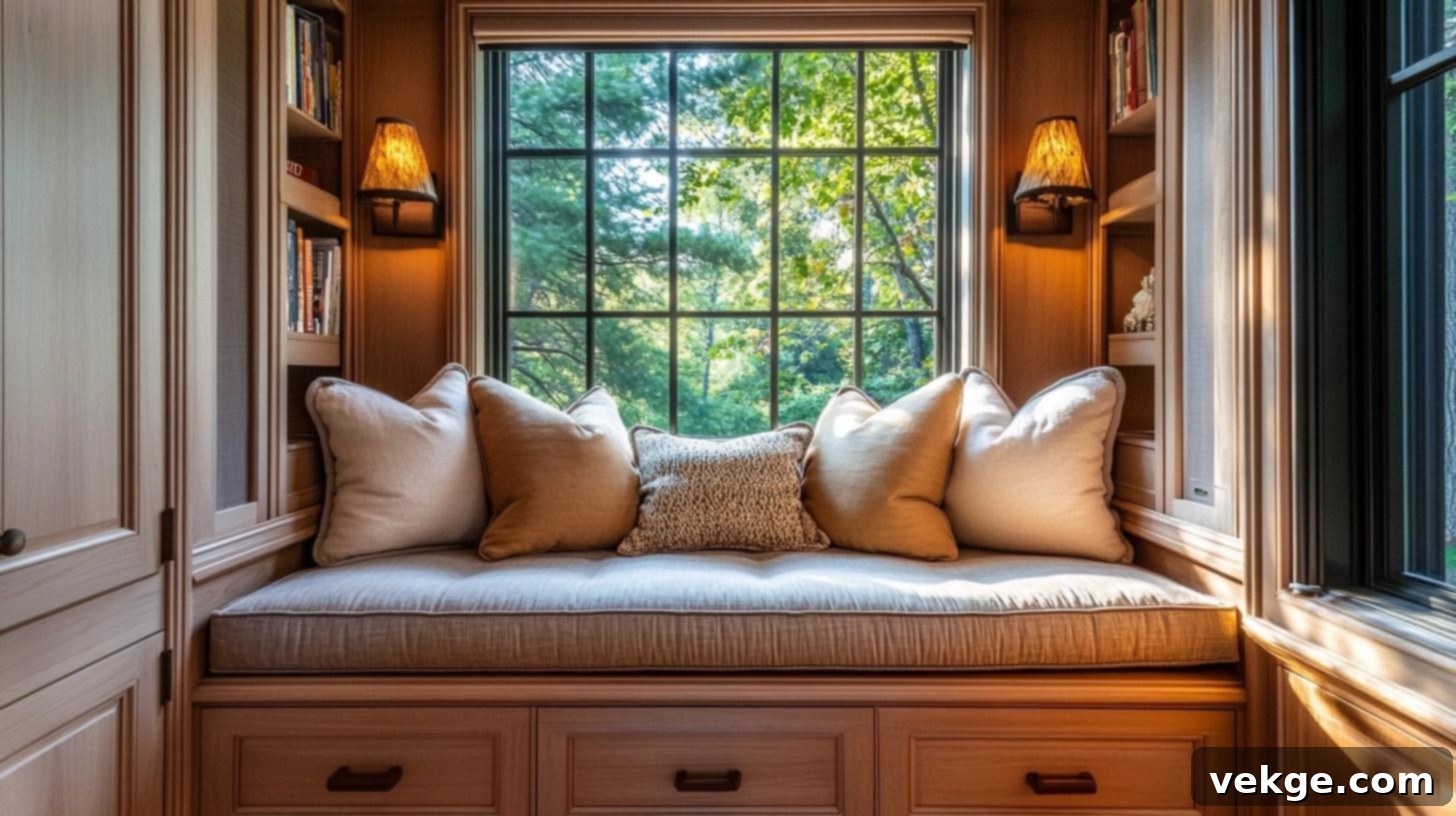
This wide bench unit stretches gracefully from wall-to-wall beneath a trio of expansive windows, featuring a crisp white paint finish that perfectly matches the existing window and door trim. Deep storage compartments are cleverly hidden beneath three individually hinged seat tops, each adorned with plush gray cushions, inviting relaxation. The design incorporates tall side panels that not only create a beautifully framed look but also serve as practical mini bookcases with built-in shelves. This makes the spot ideal for storing favorite books, cozy blankets, or decorative items, all while providing a sun-drenched, comfortable haven for reading or simply enjoying the view.
- Storage Type: Lift-top compartments, offering ample space for large, seasonal items.
- Best Location: Living rooms, dedicated reading nooks, or spacious bedrooms with prominent windows.
- Extra Options: Consider adding integrated side shelves for books, USB charging ports for devices, or accent lighting within the shelves.
- Style Match: Versatile enough for both traditional and modern homes, particularly those seeking a bright and open feel.
2. Efficient Entryway Organization Station
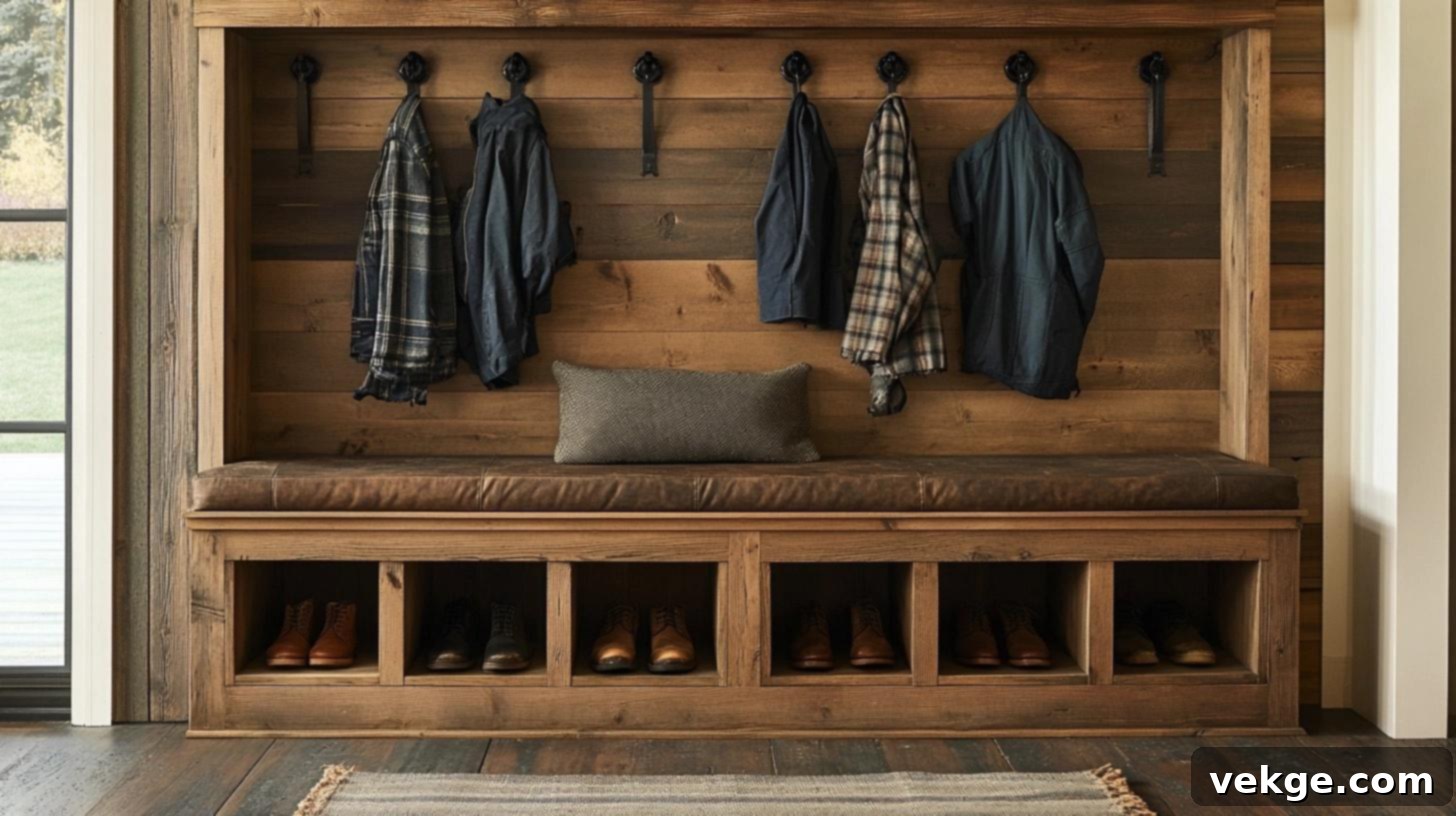
A robust dark wooden bench extends along the entryway wall, serving as a highly functional organization hub. Below the main seating area, six open cubbies provide easy and accessible storage for shoes, boots, and everyday essentials, keeping the floor clear of clutter. The simple, yet comfortable, cushioned seat lifts to reveal additional hidden storage, perfect for stowing away seasonal items like gloves, scarves, or hats. Matching side panels reach elegantly to the ceiling, complete with sturdy hooks installed at varying heights for coats, backpacks, and umbrellas. This practical design not only keeps the entryway immaculate but also offers a convenient spot to sit comfortably while preparing to leave or arriving home.
- Storage Type: Open cubbies for quick access, combined with a lift-top compartment for concealed storage.
- Best Location: Front door areas, mudrooms, or side entryways in busy family homes.
- Extra Options: Integrate small name tags for each cubby, add decorative storage baskets, or incorporate a mirror panel above the bench.
- Style Match: Excellent for busy family homes, practical apartments, or any space needing a dedicated drop-zone.
3. Seamless Dining Area Corner Setup
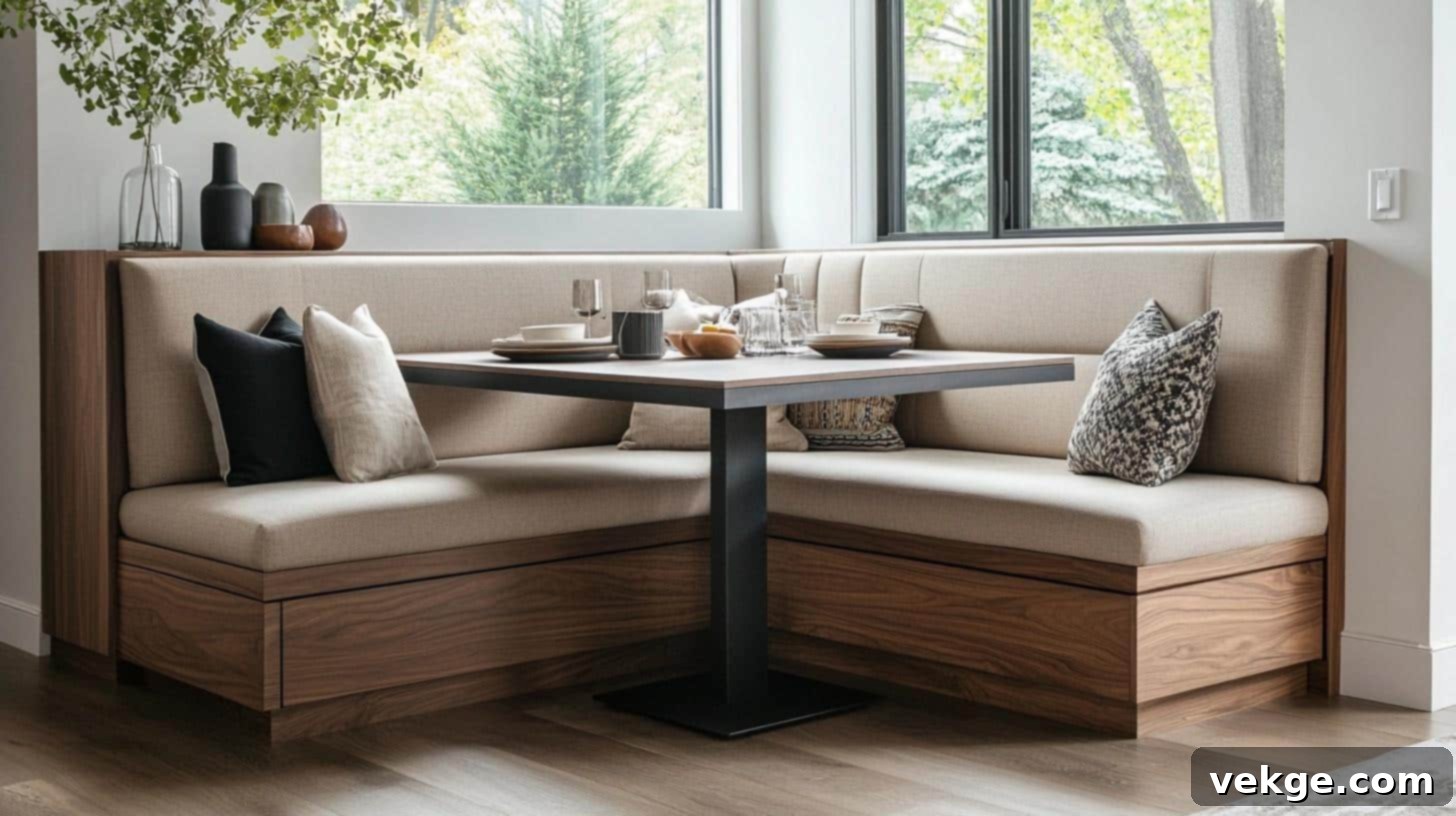
This sophisticated L-shaped seating unit gracefully wraps around a dining area corner, maximizing seating capacity in a compact footprint. Its clean lines and crisp white finish create a seamless extension of the walls, making the space feel larger and more cohesive. Each section of the bench includes deep storage beneath lift-up seats, offering an ideal solution for stowing away extra table linens, rarely used serving dishes, or seasonal decor. The integrated backrest is designed at an optimal height for comfortable dining, providing excellent lumbar support. With its extended length, this elegant banquette comfortably accommodates six to eight people, making it perfect for family meals or entertaining guests in a stylish, space-efficient manner.
- Storage Type: Deep lift-top compartments, ideal for bulkier items or dining essentials.
- Best Location: Kitchen nooks, dining rooms, or open-plan living areas where space is at a premium.
- Extra Options: Consider adding pull-out drawer units for more organized storage, or discreet electrical outlets for charging devices.
- Style Match: Perfect for small spaces, modern apartments, or open-plan homes seeking a custom dining solution.
4. Durable Outdoor Seating and Storage Solution
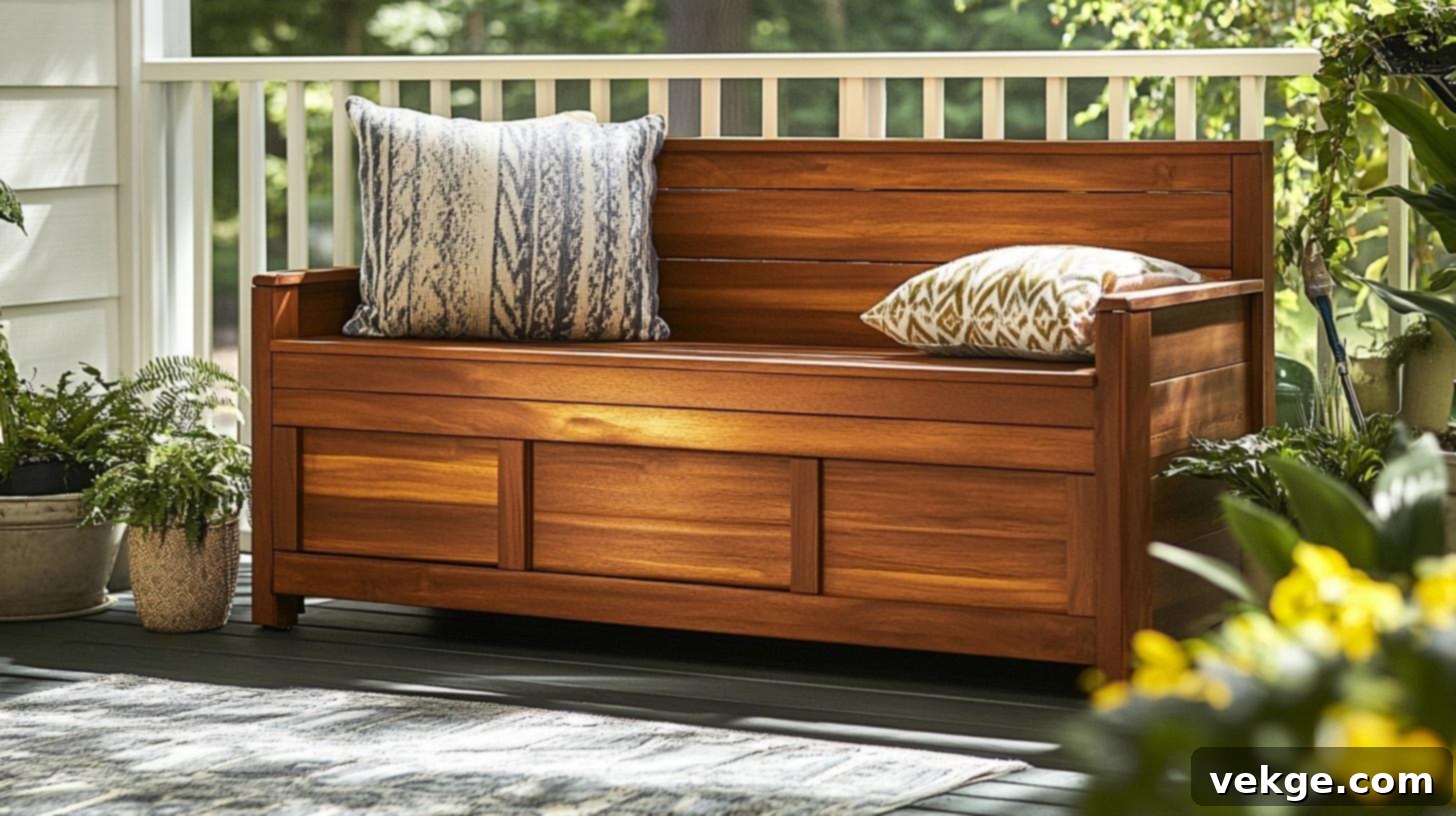
This robust and attractive cedar bench lines the full length of a deck, providing both ample seating and essential outdoor storage. Constructed from natural cedar, known for its weather resistance, the bench is sealed to withstand the elements, ensuring longevity. It features three separate top-opening compartments, each designed to protect garden supplies, outdoor tools, and seat cushions from moisture and dirt. The natural wood finish beautifully complements any outdoor setting, blending seamlessly with greenery and other natural materials. Built-in drainage systems actively prevent water accumulation, safeguarding stored items. The thoughtful seat height allows for comfortable relaxation and an unobstructed view of the garden or landscape, making it a perfect addition to any patio or deck.
- Storage Type: Weather-tight boxes with hinged tops, designed to protect contents from outdoor elements.
- Best Location: Decks, patios, balconies, or garden areas where practical outdoor storage and seating are needed.
- Extra Options: Incorporate strategic drainage holes, add locks for security, or build in small side tables for drinks.
- Style Match: Ideal for garden spaces, rustic outdoor areas, or modern decks looking for functional, natural elements.
5. Sophisticated Bedroom End Unit
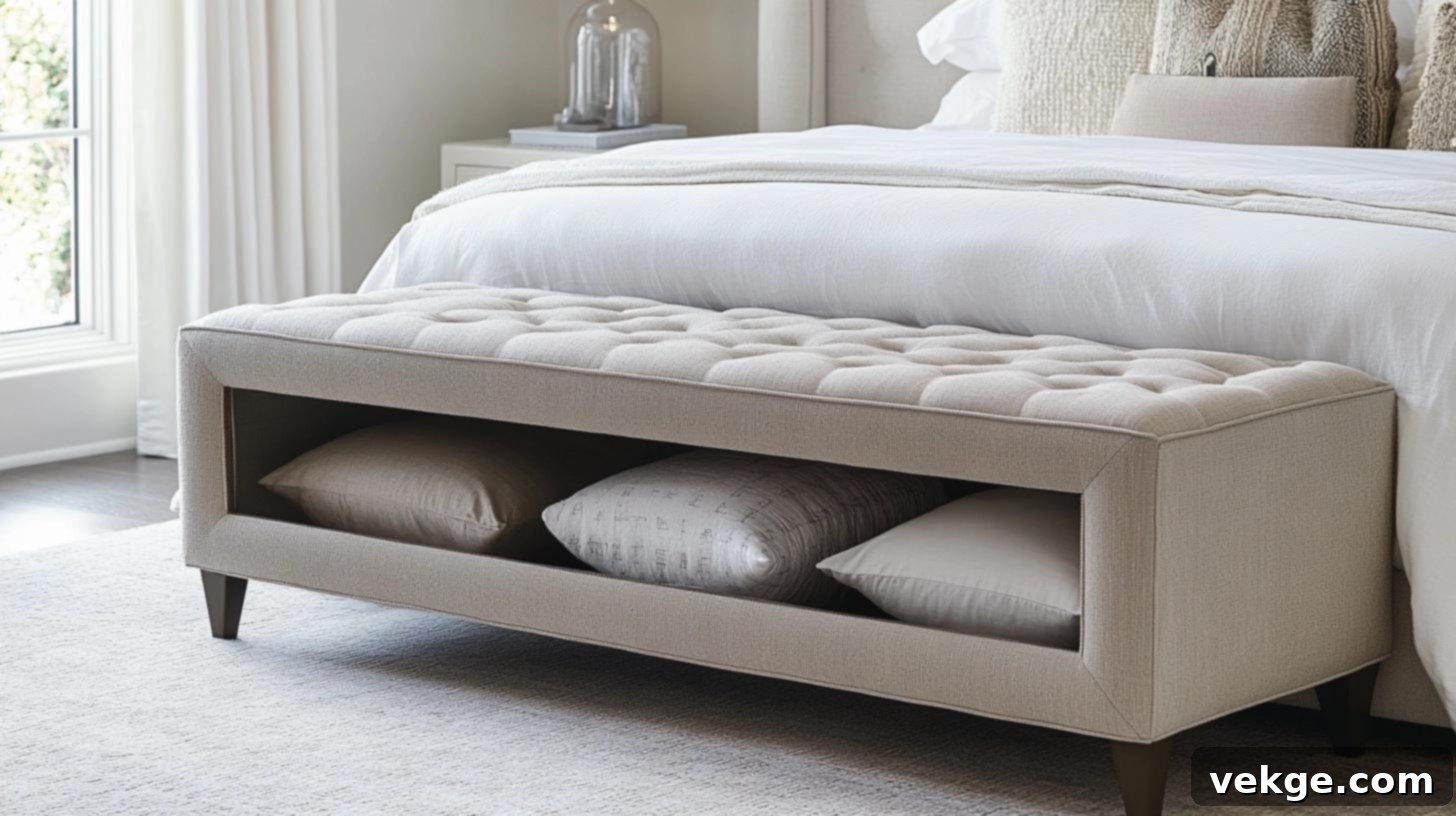
This sophisticated bench stretches six feet across the foot of a bed, creating a luxurious and practical extension of the bedroom. It is beautifully upholstered in a soft velvet fabric in a warm gray tone, adding a touch of elegance and comfort. The design features two spacious drawers that pull out smoothly from the sides, offering discreet storage for folded garments, accessories, or personal items. The center section of the bench ingeniously lifts up, revealing additional storage space perfect for larger items such as extra bedding or off-season clothing. With an 18-inch seat height, it perfectly aligns with standard bed heights, creating a unified and harmonious look in the room while providing convenient access to stored belongings.
- Storage Type: Combination of smooth-gliding side drawers and a central lift-top compartment.
- Best Location: Master bedrooms, guest rooms, or large dressing areas.
- Extra Options: Customize with different fabric choices (e.g., linen, leather), add discreet caster wheels for mobility, or include internal dividers for organization.
- Style Match: Complements modern, classic, and eclectic room designs, enhancing both style and utility.
6. Functional Hall Seating Unit with Hooks
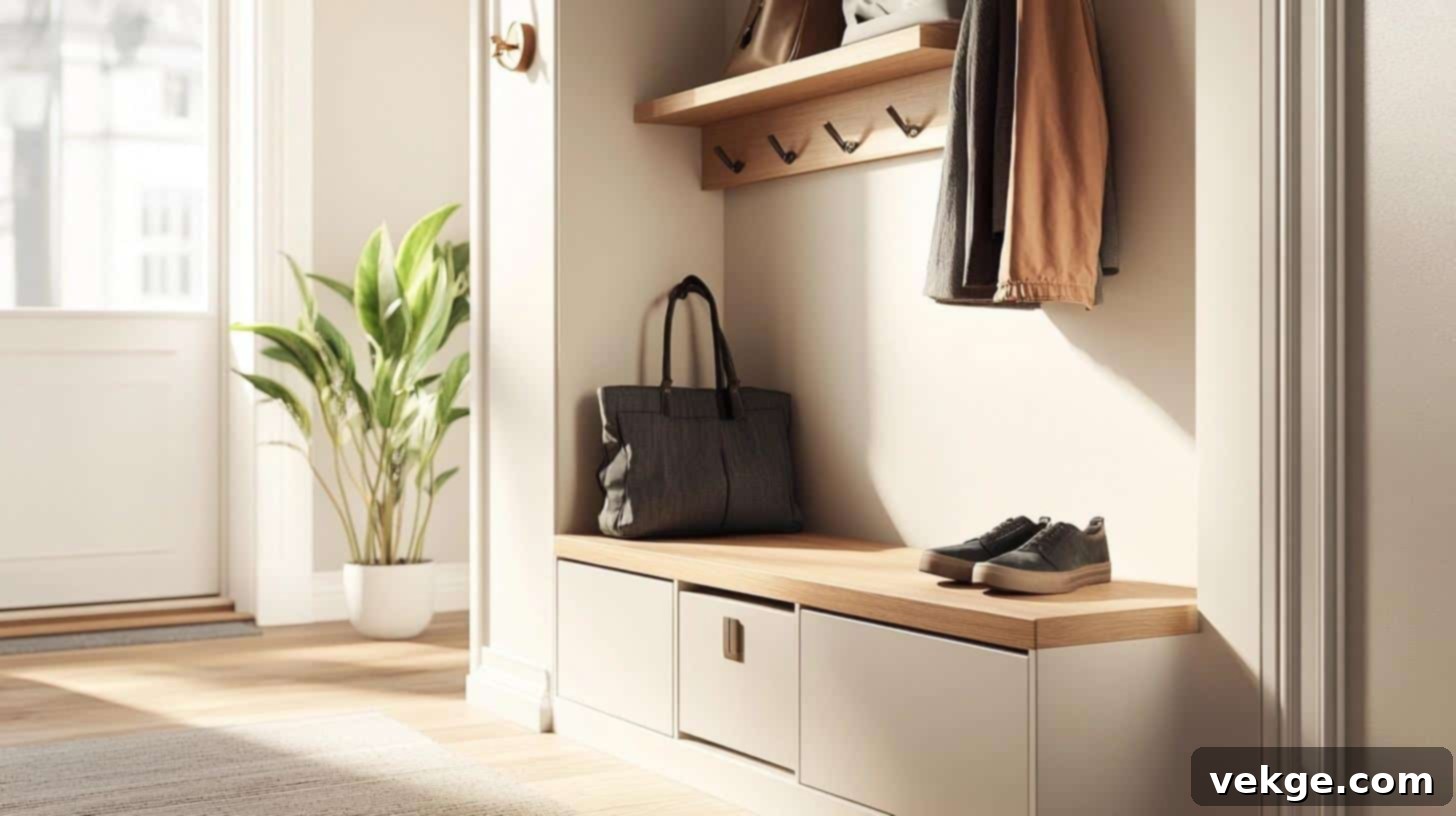
This streamlined bench runs the full length of a hallway, providing a highly organized and inviting drop-zone. It features a tall back panel adorned with six matte black hooks, perfect for hanging coats, bags, and hats, keeping them off the floor and easily accessible. Below the comfortable seat, four pull-out drawers offer hidden storage for shoes, winter gear, or other entryway essentials, maintaining a tidy appearance. The seat itself, finished in warm oak, lifts to reveal a larger storage compartment, ideal for bulkier items like blankets or sports equipment. The wall panels behind the bench are finished in white shiplap, adding appealing texture and a touch of farmhouse charm, while the bench serves as a practical and stylish spot for putting on or taking off shoes.
- Storage Type: A clever mix of pull-out drawers, a lift-top compartment, and open hooks for versatile organization.
- Best Location: Main hallways, back entryways, mudrooms, or tight corridors in family homes and condos.
- Extra Options: Incorporate mirror panels above the bench for quick checks, add integrated lighting, or include charging stations.
- Style Match: Particularly suited for family homes, farmhouse-inspired interiors, or contemporary spaces needing a defined entry zone.
7. Clever Stair Space Storage Solution
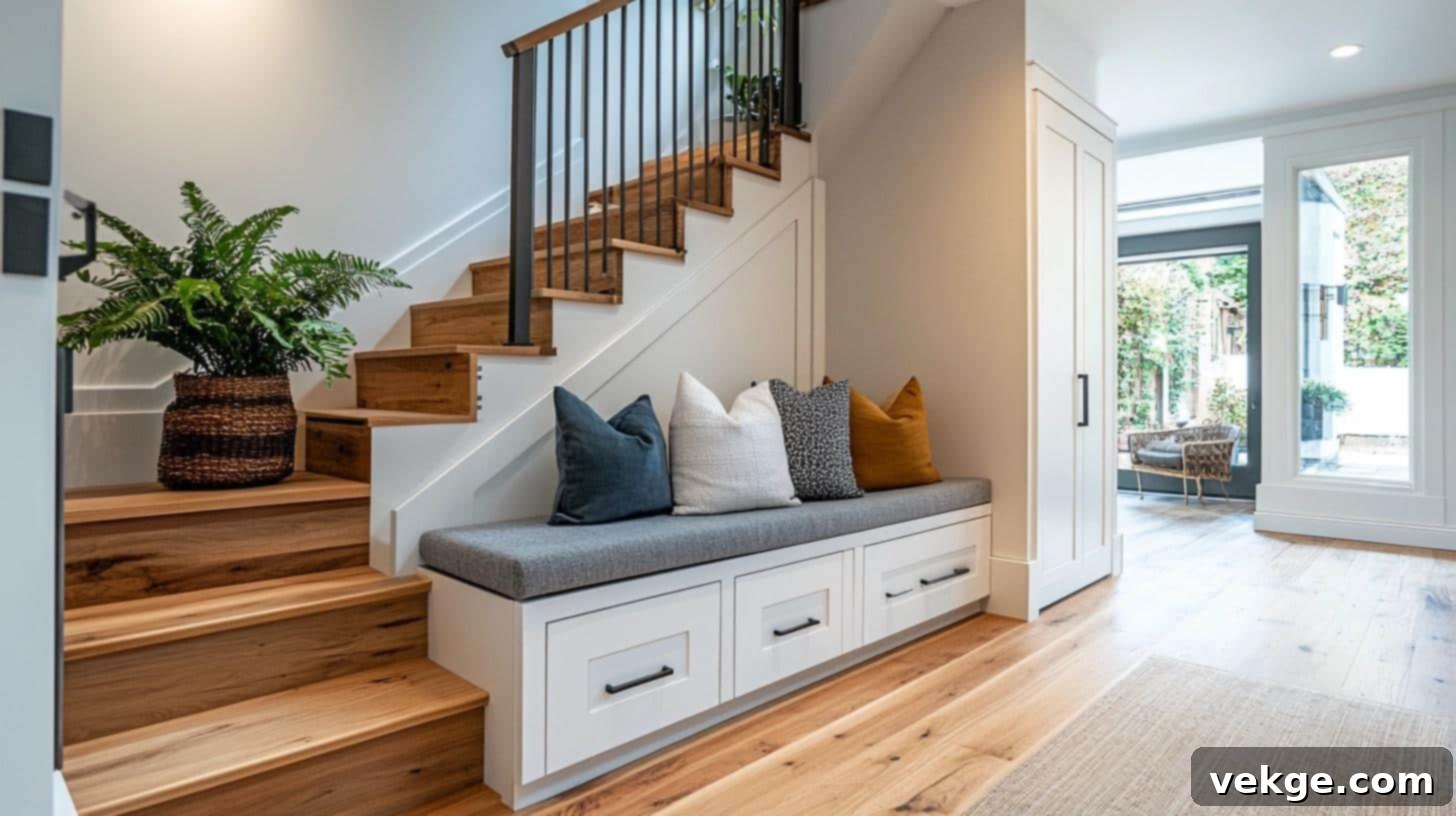
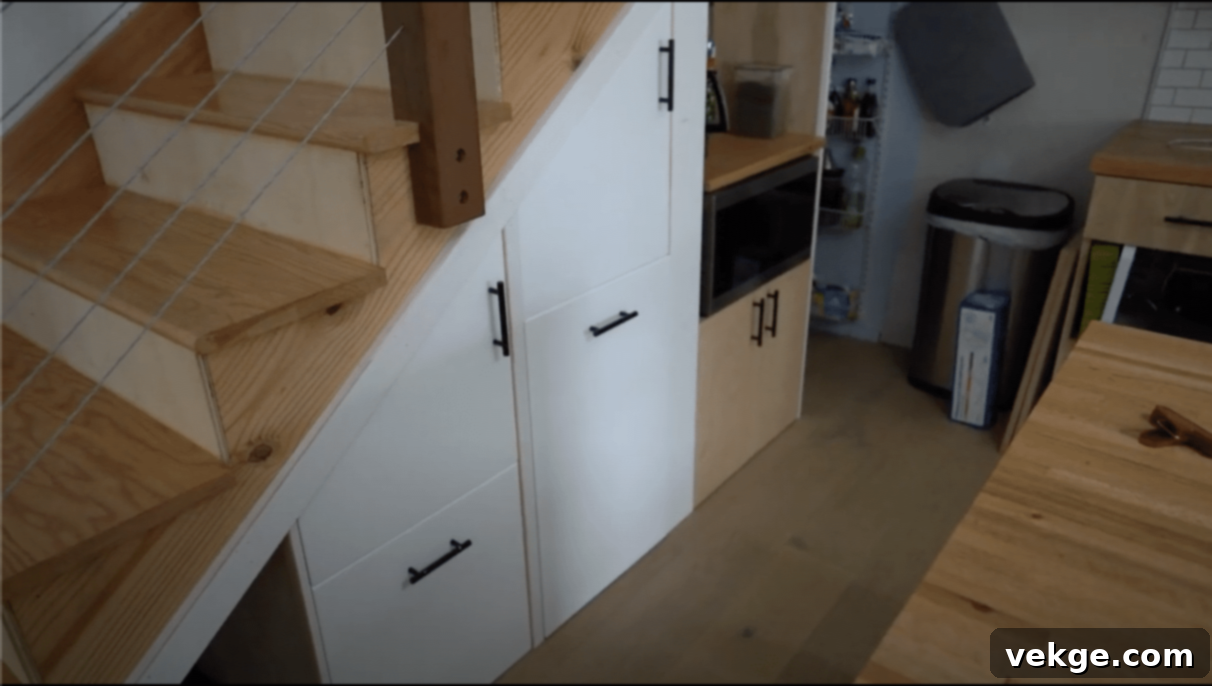
This ingenious white bench is custom-built to fit perfectly into the often-underutilized angled space beneath a staircase, maximizing square footage that would otherwise go to waste. The design features three pull-out drawers of increasing depth, cleverly following the natural incline of the stairs, providing tailored storage for various items. The drawers are topped with a continuous, comfortable cushioned seat, creating an inviting spot to relax. This clever design also incorporates integrated side shelving, offering additional display or storage options. It maintains the room’s open and airy feel while providing discreet storage for seasonal items, books, or games, demonstrating smart space utilization in a unique architectural feature.
- Storage Type: Graduated pull-out drawers, specifically designed to fit an angled space, plus optional side shelving.
- Best Location: Under-stair areas in living rooms, finished basements, or entryways of split-level homes or townhouses.
- Extra Options: Include pull-out trays within drawers, add custom dividers for organization, or incorporate lighting.
- Style Match: Excellent for split-level homes, townhouses, or any home looking to optimize unique architectural spaces.
8. Sleek Modern Wall-Mounted Bench
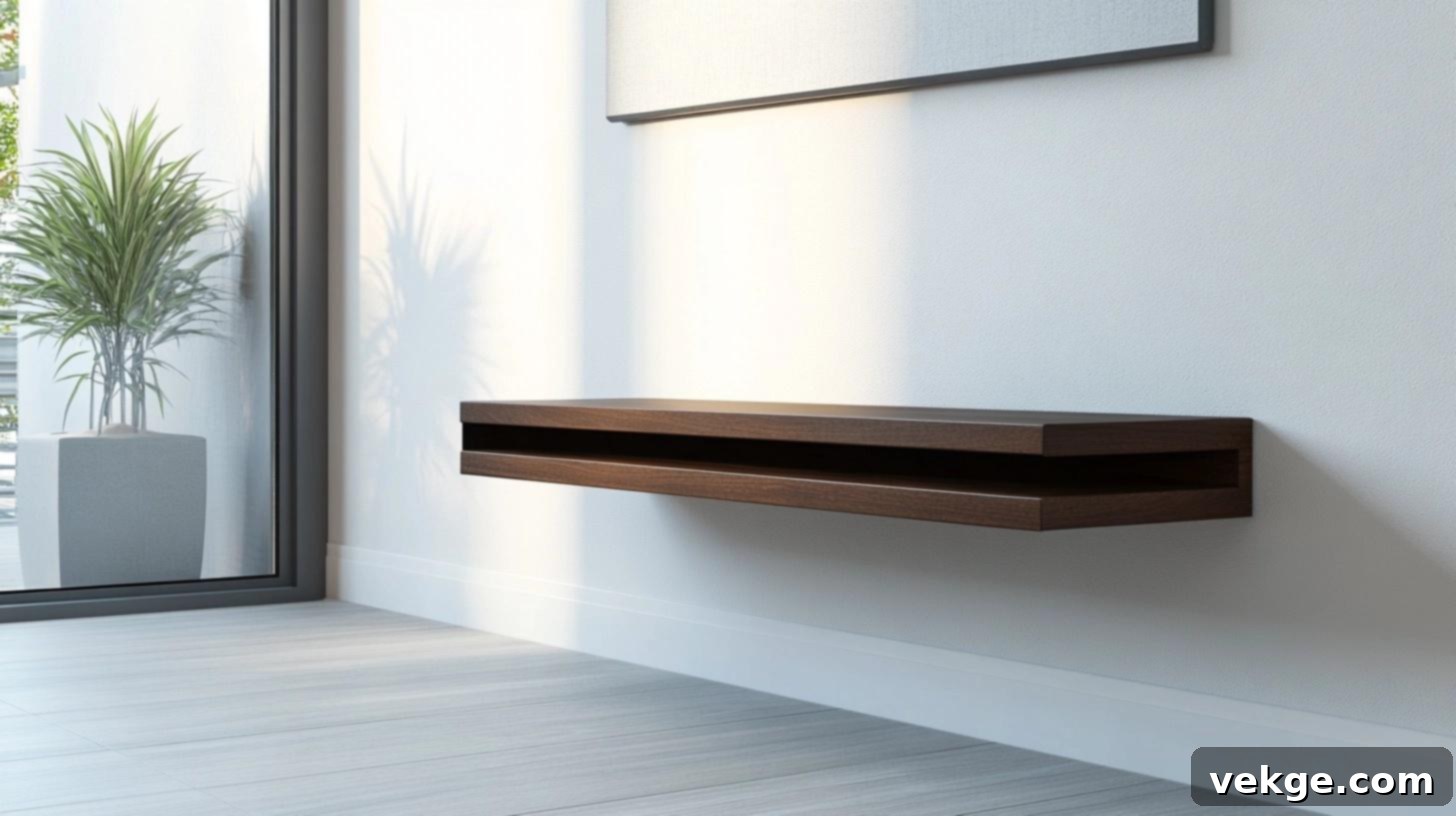
This minimalist bench appears to float effortlessly 12 inches off the floor, mounted securely to the wall to create a striking visual effect and ease of cleaning beneath. Its clean-lined design, finished in a sophisticated matte black, features two touch-latch drawers seamlessly hidden within the base. The absence of handles contributes to its sleek, contemporary aesthetic. The slim profile extends a modest 18 inches from the wall, making it ideal for narrow spaces, and is topped with a comfortable, washable linen cushion in a light gray hue. This design offers a perfect blend of modern style and practical hidden storage, making it an excellent choice for a chic, clutter-free environment.
- Storage Type: Hidden, touch-latch drawers for a minimalist look and discreet storage.
- Best Location: Small entryways, narrow hallways, apartments, or contemporary living spaces where floor space is precious.
- Extra Options: Integrate LED strip lighting along the bottom edge for a floating effect, or discreet charging ports within the bench.
- Style Match: Perfectly suited for contemporary spaces, minimalist homes, urban lofts, or any modern interior design.
9. Inviting Bay Window Seating
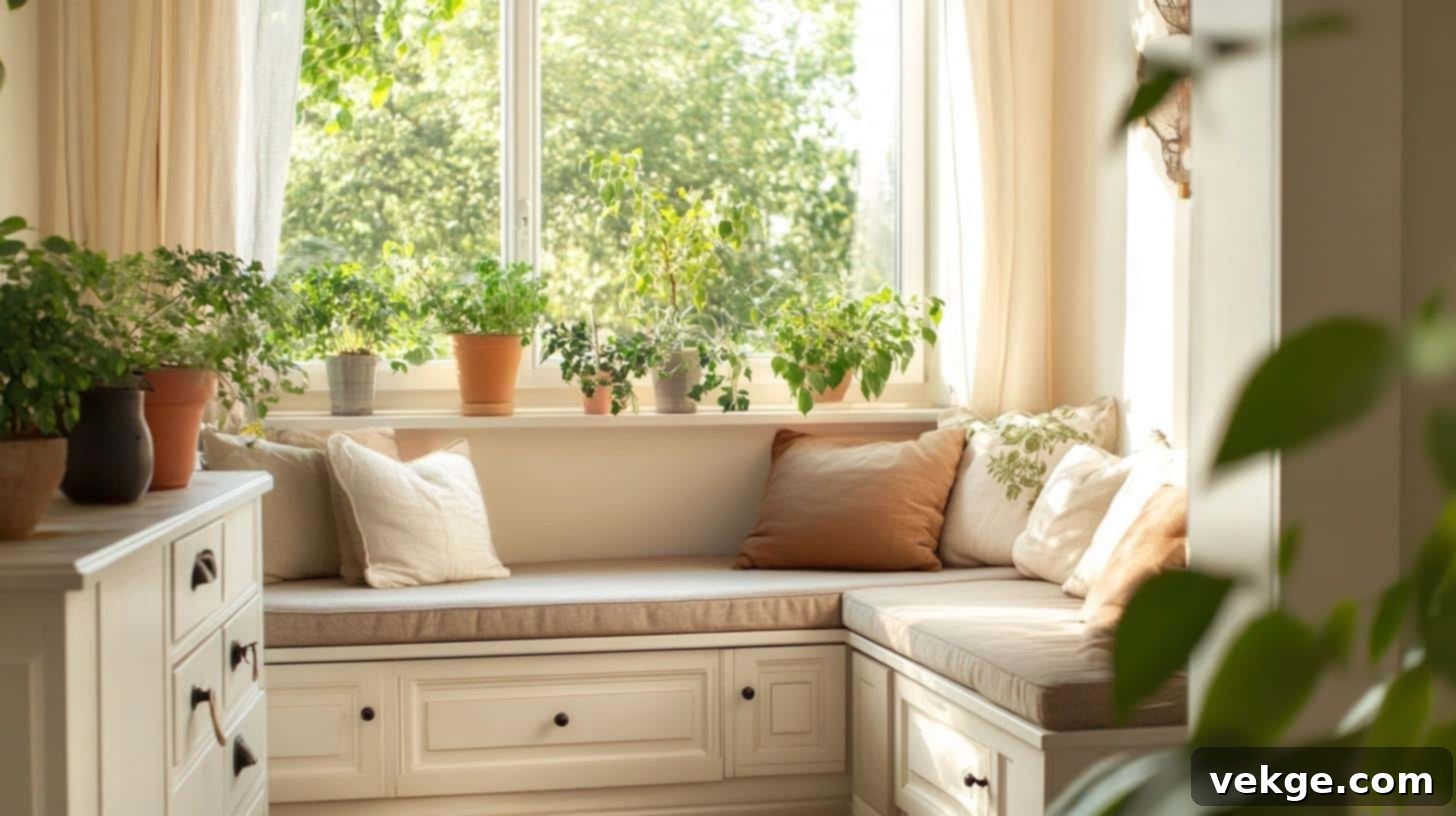
This beautifully crafted multi-section bench is custom-designed to follow the unique angles of a bay window perfectly, creating three distinct and inviting seating zones. Each section is equipped with its own generous storage compartment concealed under individual hinged seats, all finished in a clean white that brightens the space. The bench is adorned with comfortable navy cushions, adding a pop of color and plush seating. With a comfortable depth of 24 inches, it accommodates leisurely lounging while providing ample space to store larger items such such as board games, extra throw pillows, or seasonal decorations. This design maximizes the charm and utility of a bay window, creating a focal point for relaxation and organization.
- Storage Type: Sectioned lift-top compartments, allowing for organized storage of various items.
- Best Location: Breakfast nooks, living rooms with bay windows, studies, or sunrooms.
- Extra Options: Incorporate bookshelf ends, add integrated power outlets, or include pull-out reading lights.
- Style Match: Enhances period homes, traditional renovations, or classic interiors seeking architectural detail and comfort.
10. Playful Kids’ Room Storage Bench
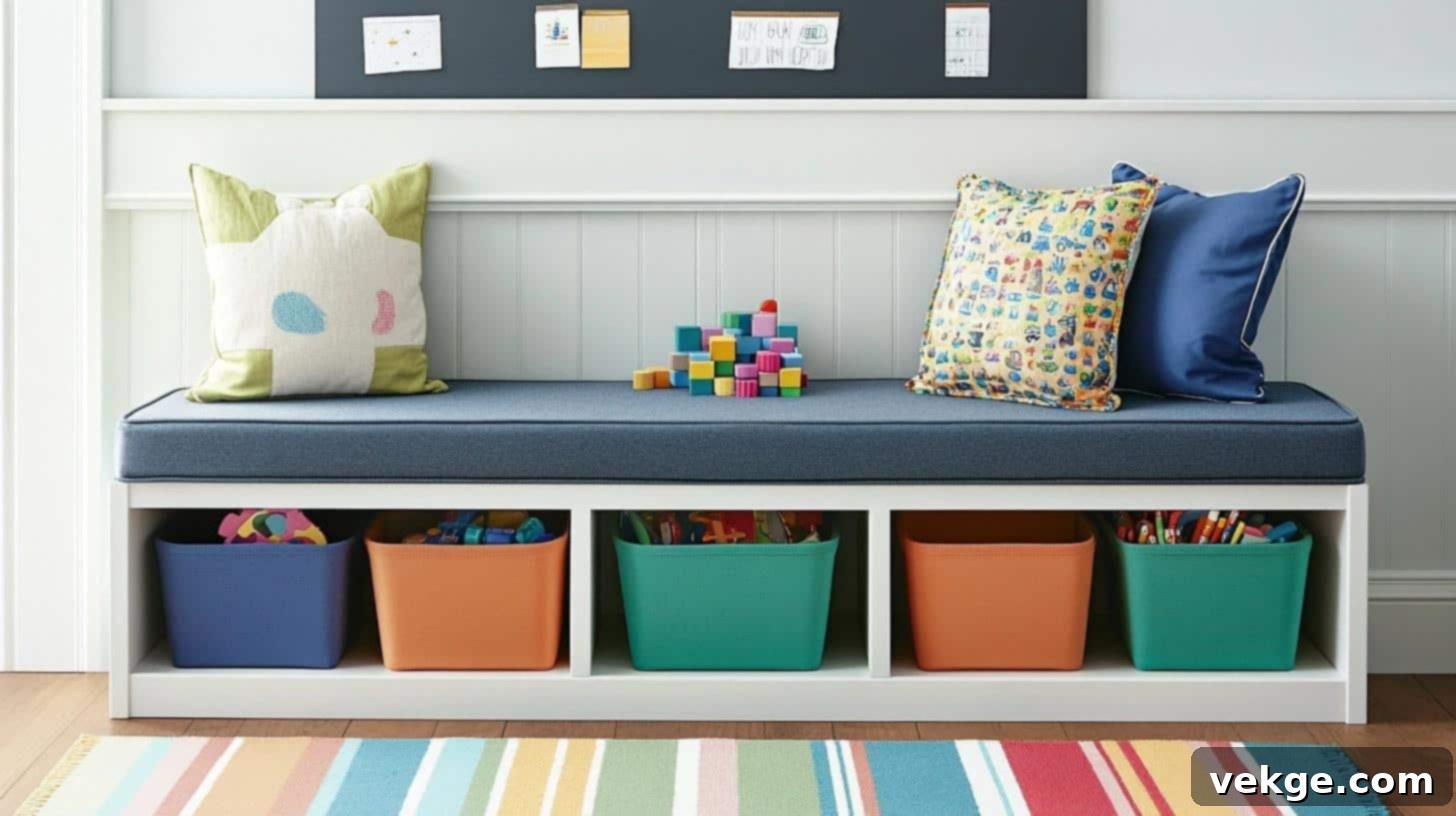
This vibrant and highly practical bench is specifically designed for a child’s room, featuring six accessible open cubbies, each fitted with removable canvas bins in primary colors. This makes toy organization fun and easy for little ones. The solid wood construction ensures durability and stands at a child-friendly height of 16 inches, perfect for small children to sit on comfortably. The seat cushion, covered in a durable, stain-resistant fabric, lifts up to reveal additional spacious storage, ideal for larger toys, games, or dress-up clothes. A charming white beadboard backing adds a classic touch and protects the wall from scuffs and marks, making this bench a perfect blend of fun, safety, and functionality for any playroom or bedroom.
- Storage Type: A mix of open cubbies with bins and a lift-top compartment for varied toy storage.
- Best Location: Playrooms, children’s bedrooms, or family living areas designated for kids’ activities.
- Extra Options: Add fun labels to cubbies, install safety hinges that prevent lid slamming, or incorporate colorful drawer pulls.
- Style Match: Perfect for children’s spaces, daycares, or family homes looking for kid-friendly organization solutions.
Alternative Options: Buying vs. Building Your Storage Bench
Deciding whether to build your own storage bench or purchase a ready-made one involves weighing several factors. Each option has distinct advantages and disadvantages depending on your budget, time, skill level, and desired outcome. Here’s a comprehensive comparison to help you make an informed decision.
When to Consider Buying a Storage Bench Instead
While DIY projects offer great satisfaction, there are specific scenarios where buying a pre-made storage bench might be the more practical choice:
- Limited Free Time: If your schedule is packed, a DIY project, even a relatively quick one, can be challenging to complete.
- Lack of Woodworking Skills: If you don’t possess basic carpentry skills or feel uncomfortable using power tools, buying might be safer and lead to a better finish.
- Small Living Space: Without a dedicated workshop or garage, finding space for tools, materials, and the construction process can be difficult.
- Immediate Need: If you need a storage solution quickly, a ready-made bench can be assembled and used almost instantly.
- No Access to Tools: Acquiring all the necessary tools can be a significant upfront cost if you don’t already own them.
- Physical Limitations: Heavy lifting, precise cutting, and prolonged standing can be demanding.
Where to Buy Ready-Made Storage Benches
If buying is your preferred route, numerous retailers offer a wide array of storage bench options:
- Large Home Improvement Stores: Retailers like The Home Depot and Lowe’s offer various styles and sizes, often with assembly required.
- Online Marketplaces: Websites such as Wayfair, Overstock, Amazon, and Etsy provide an extensive selection, from budget-friendly to high-end designs.
- Local Furniture Shops: For unique pieces and personalized service, consider visiting independent furniture stores.
- Department Stores: Many department stores (e.g., Pottery Barn, Crate & Barrel) carry stylish and often higher-quality options.
- Small Woodworking Shops: For semi-custom or handcrafted pieces, local artisans might offer specialized solutions.
- Import Furniture Stores: Can be a source for unique designs and often competitive pricing.
Pros and Cons: Building Your Own vs. Buying Ready-Made
To help you decide, here’s a breakdown of the advantages and disadvantages of each option:
| Aspect | Building Your Own | Buying Ready-Made |
|---|---|---|
| Cost | Generally lower material costs, saving significantly on labor. You control the budget by choosing materials. | Higher initial price point due to design, manufacturing, and labor costs. Limited control over individual component expenses. |
| Customization | Achieve an exact fit for your unique space and choose all materials, colors, and features. Truly one-of-a-kind. | Fixed, standard sizes and limited style options. You choose from what’s available, which may not perfectly match your needs. |
| Flexibility | Can make design changes or adjustments during construction, adapting to unforeseen site conditions or evolving preferences. | Fixed design with no modifications possible after purchase, other than minor cosmetic changes. |
| Time Commitment | Requires a significant time investment for planning, material sourcing, cutting, assembly, and finishing. | Quick setup, often just requiring minor assembly (e.g., attaching legs) or no assembly at all. Immediate use. |
| Skills and Tools | Necessitates basic to intermediate woodworking skills and an array of power and hand tools. | No specific tools or DIY skills are needed, making it accessible to everyone. |
| Product Details | Results in a fully customized, unique project that perfectly integrates into your home and reflects your personal touch. | Clear product details, reviews, and specifications are available upfront, allowing for easy comparison shopping. |
| Quality Control | You control the quality of materials and craftsmanship directly, ensuring a sturdy and durable build. | Quality can vary greatly; reliant on the manufacturer’s standards and potentially lower for budget options. |
| Satisfaction | Immense personal satisfaction and pride in creating something functional and beautiful with your own hands. | Convenience and instant gratification of solving a problem without the effort of building. |
Community Tips and Advice from Experienced DIYers
Learning from the experiences of others can save you time, money, and frustration. We’ve gathered practical tips and suggestions from various home improvement forums, social media groups, and DIY communities to provide you with tested advice for building your own storage bench.
Real User Experiences and Lessons Learned
- “Level Your Floor First”: “I learned the hard way that not all floors are perfectly level. I had to spend extra time shimming under one side of my bench base to ensure it was stable. Always check your floor level before starting the frame.”
- “Buy Extra Wood”: “Always, always buy a little extra lumber or plywood. Even experienced builders make mistakes, and having backup pieces means you won’t have to stop your project mid-flow for a quick trip back to the hardware store.”
- “Paper Templates are Gold”: “Before making any cuts on expensive plywood, I cut out paper or cardboard templates first. It helps visualize the fit and avoids wasting material on wrong cuts.”
- “Test Bench Height with Existing Furniture”: “If your bench is going to be used with a dining table, make sure to test the bench height with your actual dining chairs and table. What looks good on paper might not be comfortable in practice.”
- “Soft Pads for Lids”: “After my first bench lid kept slamming shut loudly, I put small felt pads or rubber bumpers on the inside edge where the lid meets the frame. It makes closing silent and gentler.”
Troubleshooting Common Issues During Construction
- Uneven Floor Fixes:
- Use Shims: Place thin wood shims under the lowest points of your bench base to level it precisely.
- Add Adjustable Feet: For freestanding benches, consider installing adjustable furniture feet to compensate for unevenness.
- Build a Flat Sub-Base: If the floor is significantly uneven, construct a perfectly level sub-base frame first, then build your bench on top of it.
- Bench Stability Solutions:
- Add Corner Braces: Internally, reinforce corners with L-brackets or triangular wood blocks for added rigidity.
- Increase Wall Anchors: If attaching to a wall, use more screws into studs, or use heavy-duty toggle anchors if studs are unavailable.
- Install Front Support Legs: For very long benches or those supporting heavy loads, integrate discreet support legs in the front center.
- Storage Access Problems (Lid Issues):
- Install Quality Hinges: Invest in heavy-duty, continuous (piano) hinges for long lids, ensuring smooth operation and preventing sagging.
- Add Lid Supports: Install gas springs or friction hinges designed to hold the lid open and prevent accidental closing.
- Make the Top Lighter: If the lid is too heavy, consider using a lighter-weight plywood or breaking it into multiple smaller, easier-to-lift sections.
- Keep Edges Smooth: Ensure all lid edges are sanded smooth and have a slight chamfer or round-over to prevent snagging or pinching.
General Tips from Experienced DIYers:
- Label Everything: Before taking apart existing structures or cutting new pieces, clearly label them for easy reassembly.
- Work in a Well-Lit Space: Good lighting is crucial for accurate cuts, clear measurements, and seeing imperfections.
- Keep Saw Guide Lines Visible: Use a pencil and straightedge to draw clear cut lines, and ensure they remain visible as you cut.
- Test Joints Before Final Assembly: Dry-fit all components to ensure they align and join correctly before applying glue or driving permanent fasteners.
- Clean Your Workspace Often: A tidy workspace is a safer and more efficient workspace. Remove sawdust and debris regularly.
- Ask for Help with Heavy Lifts: Don’t try to lift heavy panels or assembled sections by yourself. Enlist a helper to prevent injury.
- Take Photos of Each Step: Photos can be invaluable if you need to backtrack or remember how something was assembled.
- Keep All Your Screws Sorted: Use small containers or a divided box to keep different sizes and types of screws organized.
- Use Guides for Straight Cuts: When using a circular saw, clamp a straightedge or a factory-edge board as a guide for perfectly straight cuts.
Most importantly: There’s no need to rush. Building a custom piece for your home is a rewarding process. Take breaks when needed, focus on safety first, and enjoy the journey. A well-built bench takes time, but the effort is undoubtedly worth it.
Conclusion: Your Custom Storage Bench Awaits
Building a custom built-in storage bench is a project that requires careful planning, patience, and attention to detail. However, the satisfaction of creating a functional, beautiful, and perfectly integrated piece of furniture for your home is truly rewarding and far outweighs the effort.
With this comprehensive guide, you now have the knowledge and steps to design and construct a storage bench that not only fits your space impeccably but also addresses your unique storage and seating needs. Remember the core principles: measure twice and cut once, consistently check for level and square, and approach each step methodically.
Whether you ultimately decide to build your own bench or opt to purchase a ready-made solution, the choice depends on your individual skill set, available time, and specific requirements. If you choose the DIY route, always prioritize safety, utilize your tools correctly, and don’t hesitate to ask for assistance with heavy or complex tasks.
The most consistent piece of advice from the DIY community is clear: begin with thorough planning and maintain patience throughout the entire process. These two elements are key to a successful outcome.
Are you ready to transform an ordinary space into an organized and inviting area? Gather your materials list, clear your workspace, and embark on your custom storage bench project today!
And if you complete your own built-in bench, we’d love to hear how it went. Share your experience, photos, and any additional tips in the comments section below!
Frequently Asked Questions About Built-In Storage Benches
What are built-in benches commonly called?
Built-in benches are known by several names, often depending on their specific location and design. They are frequently called banquettes when used in dining areas or kitchen nooks, window seats when installed under windows, or simply nook seating. In entryways, they might be referred to as mudroom benches or hall benches.
How much does it typically cost to build bench seating?
The cost to build a DIY storage bench can vary significantly but generally ranges from $150 to $400 for materials alone. This cost is highly dependent on several factors: the type and quality of wood (e.g., plywood, solid lumber), the overall size and complexity of the bench, and any additional features like high-quality hinges, soft-close lid supports, durable paint, or custom seat cushions.
How deep should a built-in bench be for comfortable seating?
For optimal comfort, a built-in bench should generally be 16 to 20 inches deep. This measurement provides adequate support for most adults. If you plan to add a back cushion, it’s advisable to increase the overall depth of the bench by an additional 3 to 4 inches to account for the cushion’s thickness and maintain comfortable seating space.
Can I incorporate a built-in bench in a small space?
Absolutely! Built-in benches are exceptionally well-suited for small spaces precisely because they maximize functionality without consuming excessive floor area. They can be strategically placed in corners, under windows, or along otherwise unused wall sections. By offering both seating and storage in a single, streamlined unit, they provide significant utility in compact environments, making small rooms feel larger and more organized.
