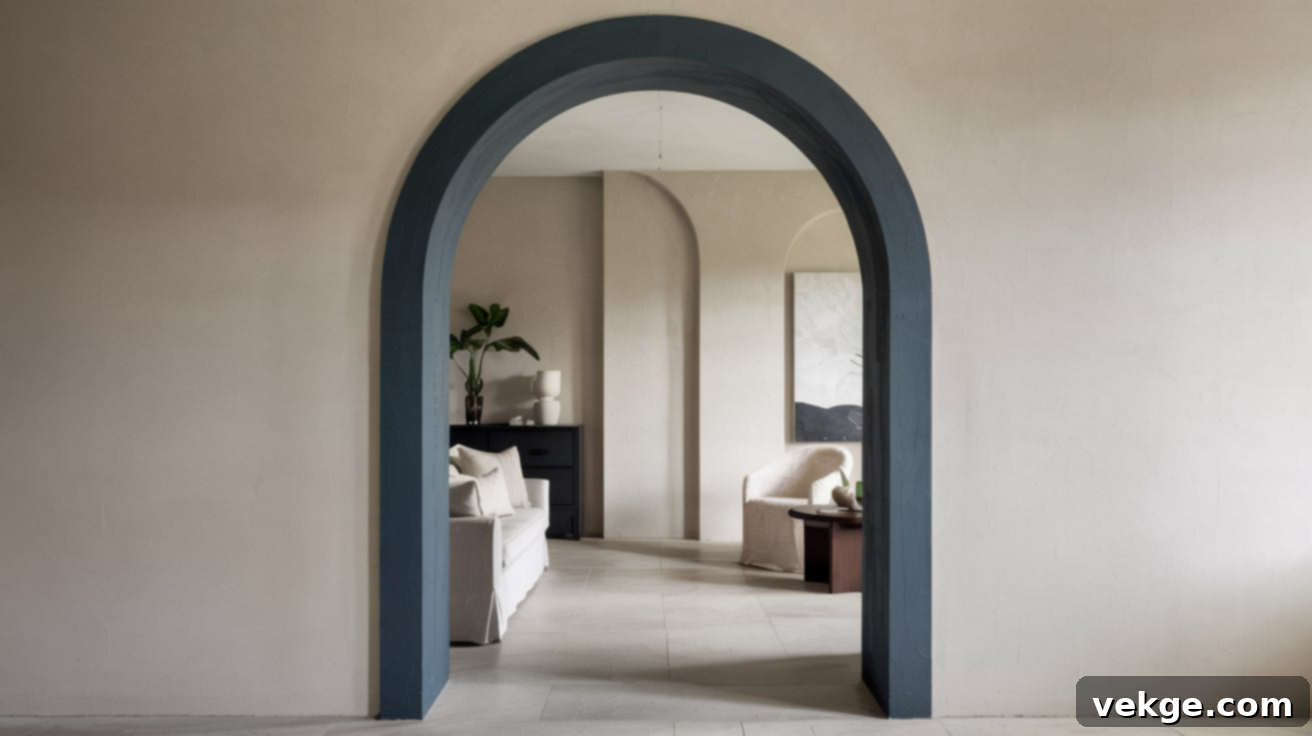
Transform Your Home: A Complete DIY Guide to Building a Beautiful Arched Doorway
Imagine stepping into a room where every line flows gracefully, offering a softer, more inviting feel. A simple, well-crafted arched doorway can achieve this transformation, adding architectural charm and a touch of timeless elegance to any space. Far from being a complex, professional-only project, building a beautiful arched doorway is a surprisingly accessible DIY endeavor. Many homeowners, just like you, have discovered the profound impact a single, elegant curve can have on a room’s entire ambiance. It creates a visual softness, encourages a relaxed atmosphere, and significantly elevates your home’s aesthetic without requiring an extensive budget or highly specialized tools.
If you possess fundamental DIY skills, are willing to dedicate a bit of time, and have a clear, step-by-step guide to follow, you can absolutely construct a smooth, custom archway that perfectly complements your home’s interior design. This comprehensive article is designed to be your ultimate companion, breaking down the entire process into manageable steps. Forget expensive pre-made kits or unnecessary stress; we’ll show you how to build a durable, stunning archway with your own hands, from basic framing to the final smooth finish. Get ready to enhance your living space with a bespoke feature that reflects your personal style and adds significant value. Let’s embark on this rewarding journey together!
Your Step-by-Step Guide to Building a Custom Arched Doorway
Success in any home improvement project begins with meticulous planning. Before you make any cuts or structural changes, it’s crucial to visualize the exact shape and dimensions of your desired arch. Clearly marking everything ensures accuracy, helps you avoid costly mistakes, and provides a clear roadmap to follow throughout the construction process. Investing adequate time in this initial planning phase will set you up for a smooth, efficient, and ultimately satisfying build.
Essential Tools and Materials You’ll Need
Before diving into the construction of your new arched doorway, it’s vital to gather all the necessary tools and materials. Having everything ready and organized will streamline your workflow, prevent interruptions, and save you multiple trips to the hardware store. Below, you’ll find a detailed list to ensure you’re fully prepared for every stage of your DIY arched doorway project.
- Pencil and string: These simple yet effective tools are essential for precisely marking and drawing the perfect, smooth arch curve onto your plywood sheets, ensuring a symmetrical and aesthetically pleasing design.
- A measuring tape: Crucial for accurate measurements throughout the project, from determining the arch’s height and width to spacing internal blocking. Precision here ensures your archway is perfectly sized and proportioned.
- Drywall saw: Specifically designed for cutting drywall, this tool will be used for scoring and snapping drywall strips to cover your arch’s curved surface, and for making any necessary cuts in existing drywall.
- Jigsaw: Your primary tool for cutting the intricate curved shapes from the plywood sheets. A jigsaw offers the necessary control and precision to achieve clean, smooth edges for your arch forms.
- Drill: Indispensable for pre-drilling holes and securely fastening the wooden frame components and drywall sheets into place with screws. A good drill ensures strong, stable construction.
- Screwdriver or drill bit set: For quickly and efficiently driving various types of screws, ensuring a strong and stable construction. Different bits will be needed for wood and drywall screws.
- Utility knife: Versatile for scoring drywall, cutting tape, and various other light cutting tasks, making it a handy tool for many steps of the project.
- Drywall knife (or taping knife): Used for expertly applying, spreading, and feathering the mudding compound (joint compound), crucial for achieving seamless joints and a perfectly smooth finish.
- Sandpaper or a sanding block: Vital for smoothing out dried mudding compound, eliminating imperfections, and preparing the finished surface for primer and paint, ensuring a professional look.
- Plywood sheets (½ inch thick recommended): These sheets will form the structural sides of your arch, providing rigidity and the foundational curve. Ensure you have enough for two matching arch forms.
- 2×4 wood blocks (or similar dimensional lumber): Used for creating strong blocking and framing within the existing wall structure, providing essential support and stability to the entire arch.
- Drywall sheets (typically ¼ inch or flexible drywall is recommended for tighter curves): This material will cover your framed arch, providing a durable, paint-ready surface. For bending, thinner drywall or specific flexible drywall products work best.
- Drywall screws (1¼ inch to 1⅝ inch): Specifically designed to securely fasten drywall to wood framing without damaging the paper face, offering excellent holding power.
- Wood screws (2-3 inch, various lengths): For securely attaching the plywood arch sides to the existing framing and the internal blocking, ensuring a robust structure.
- Mudding compound (joint compound): Used to fill screw holes, tape seams, and create a perfectly smooth, uniform surface that is ready for painting. You might need all-purpose or lightweight varieties.
- Water (in spray bottle): Essential for gently dampening and softening standard drywall, making it more pliable and easier to bend around the arch’s curve without breaking.
- Flexible corner bead (vinyl or paper-faced metal): Applied to the outer edges of the arch to create a crisp, durable, and protective corner, ready for mudding and ensuring a clean, finished appearance.
- Staple gun: Useful for quickly and securely attaching corner bead and the smaller internal blocking pieces, speeding up the framing process.
1. Prepare and Measure the Doorway Opening
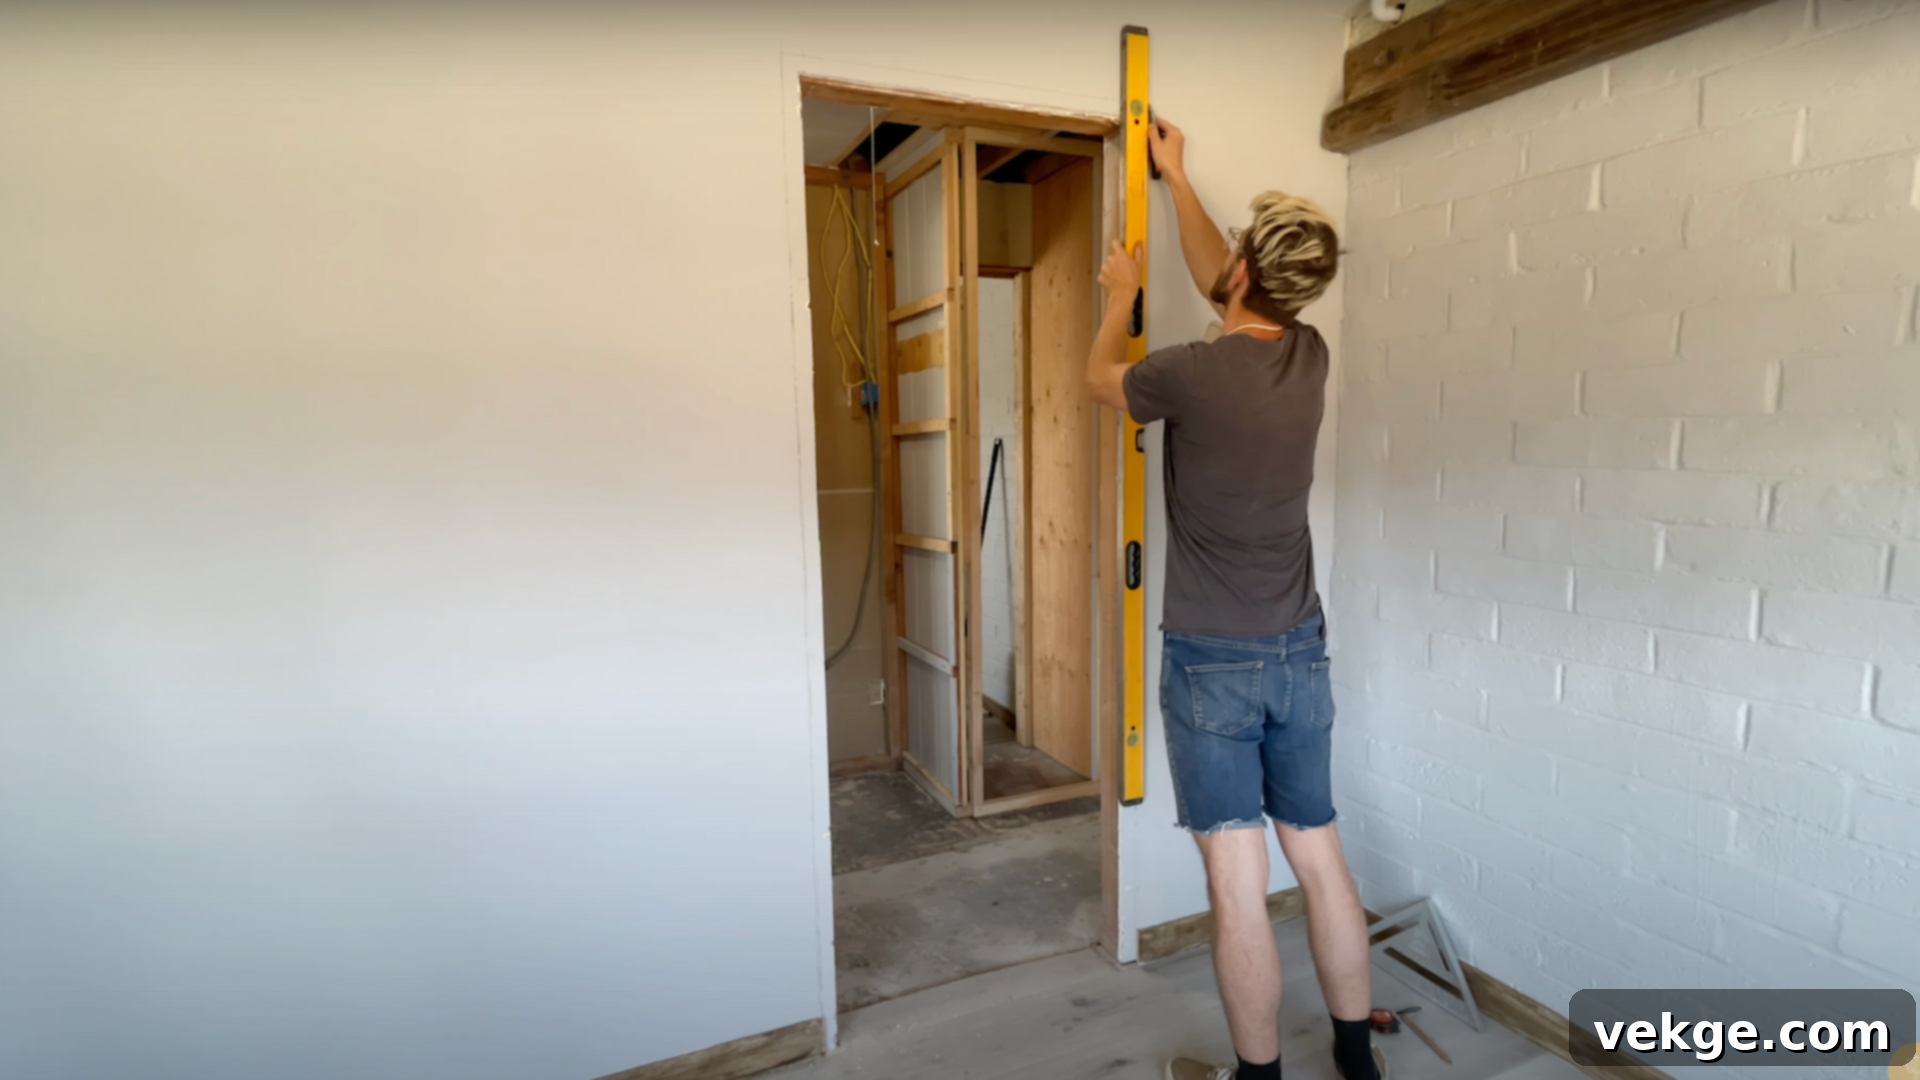
Begin by carefully removing the existing door from its hinges and then thoroughly dismantling the old door jamb and trim. This step ensures you have a clean, unobstructed opening to work with. Using a utility knife, cut back the drywall approximately 1.5 inches on all sides of the opening. This exposes the existing wall framing, which is crucial for securely attaching your new arch structure. Next, take precise measurements of the door’s total width. To determine the ideal arch height, divide the door’s width by two, and then add an additional 1 to 2 inches. This calculation will help you define how far down the arch will gracefully curve into the doorway, creating a balanced and visually appealing look.
2. Create and Mark the Plywood Arch Template
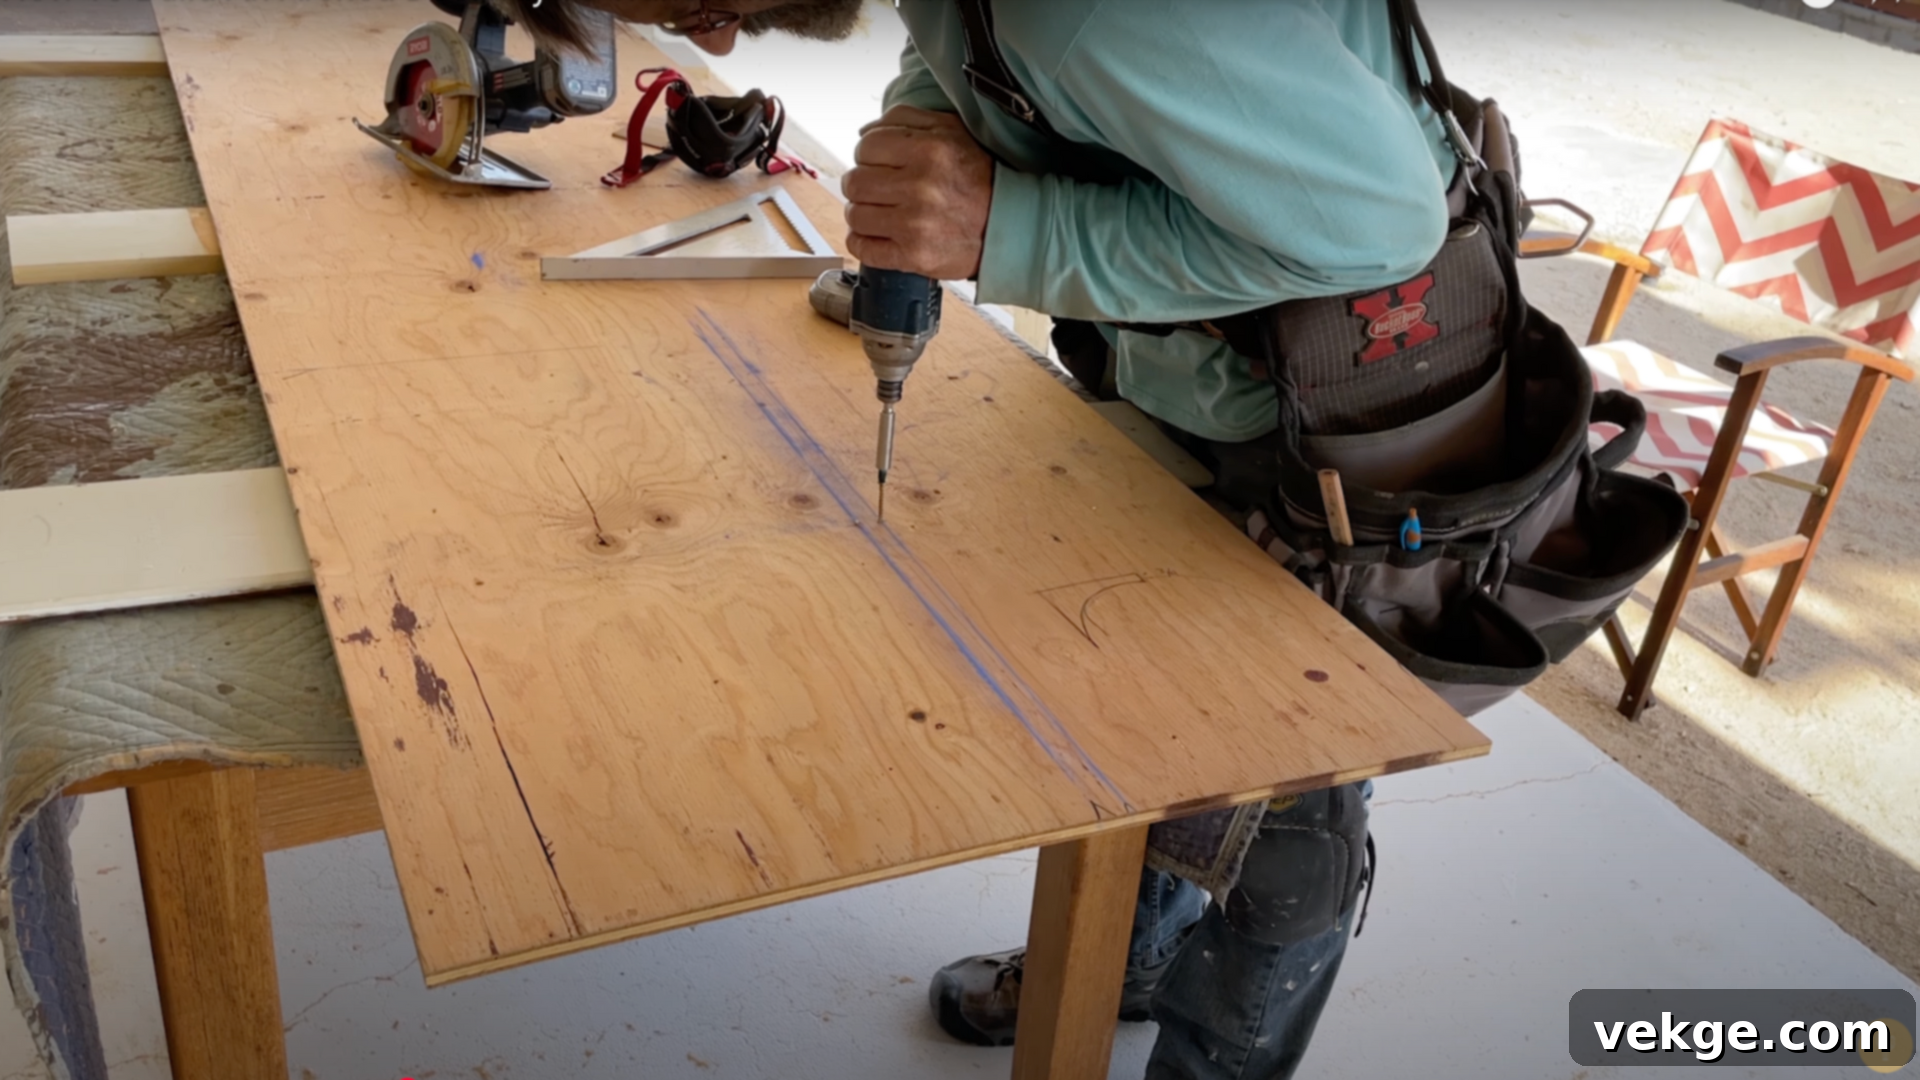
Take a sheet of ½-inch plywood and cut a precise rectangle. The width of this rectangle should match the width of your doorway opening, and its height should be equal to half of that width (or your desired arch height from step 1). This forms the basic template for your arch. To draw a perfect half-circle, find the exact center point along the top edge of your plywood rectangle. Place a small screw at this center point. Tie a string to the screw and attach a pencil to the other end of the string. The length of the string, from the screw to the pencil tip, should be exactly half the width of your plywood rectangle (the radius of your arch). Holding the string taut, pivot the pencil around the screw to draw a smooth, symmetrical half-circle. Carefully connect the ends of this half-circle to the bottom corners of your plywood rectangle, ensuring clean, flowing lines for your arch shape.
3. Precisely Cut and Duplicate the Arch Forms
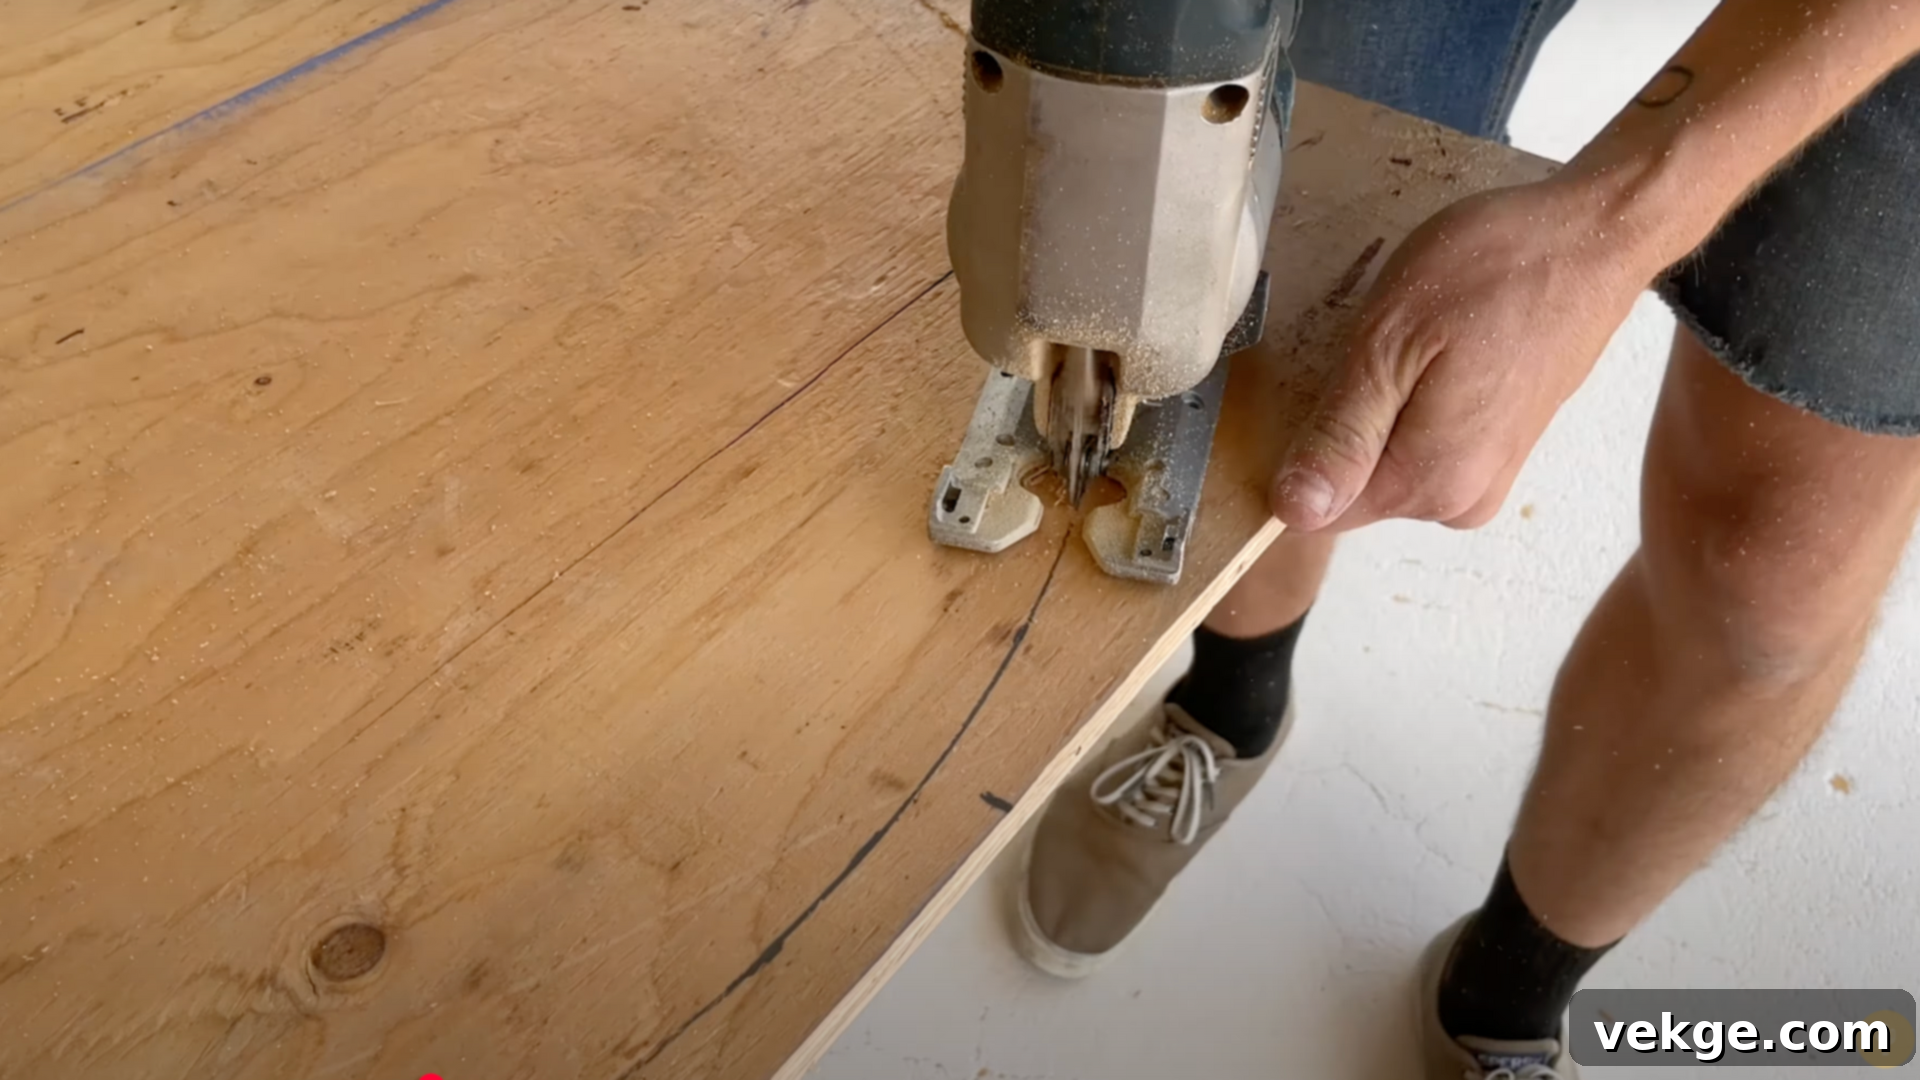
With your arch template clearly marked on the plywood, carefully use a jigsaw to cut along the drawn line. Take your time during this step, moving slowly and steadily to ensure a smooth, clean curve without any jagged edges. Once you have successfully cut out your first plywood arch piece, use it as a master template. Place this finished arch piece onto another sheet of ½-inch plywood and meticulously trace its exact shape. Then, use your jigsaw again to cut out the second piece. The goal here is to create two perfectly matching arch forms – one for each side of your doorway opening. Accuracy in this step is paramount for a symmetrical and professional-looking finished archway.
4. Install Initial Structural Blocking for Support
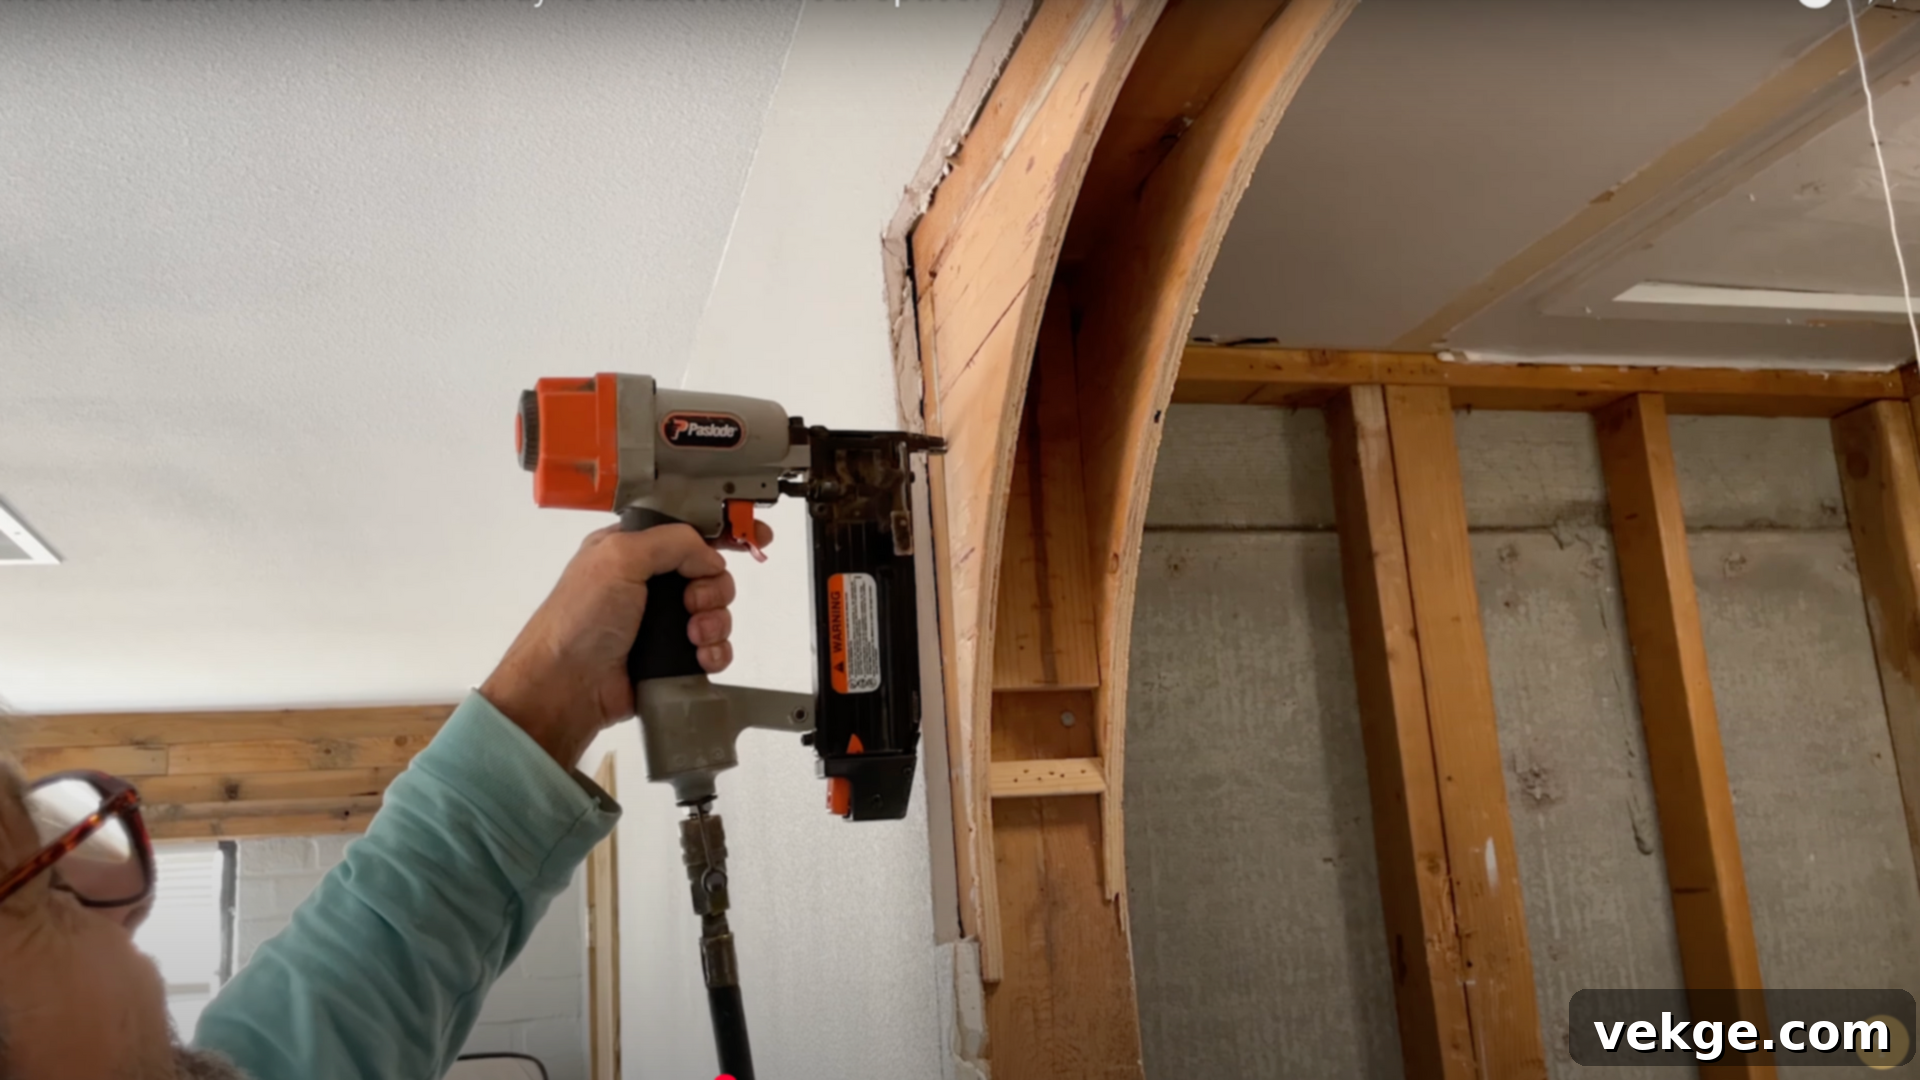
Now it’s time to build the foundational support for your arch. Measure the depth of your existing wall framing and consider the thickness of your plywood arch forms. Cut 2×4 wood blocks (or similar appropriate lumber) to fit securely within this space. These blocks will serve as attachment points for your plywood arches. Carefully screw these blocking pieces into the existing vertical studs and horizontal headers of your doorway framing, ensuring they are level and plumb. Once the blocking is firmly in place, position one of your plywood arch forms against the blocking on one side of the doorway. Use strong wood screws to securely fasten the plywood arch to these newly installed 2×4 blocks. Repeat this process for the second plywood arch form on the opposite side of the doorway, making sure both arches are parallel and aligned.
5. Install Internal Blocking Between the Arch Forms
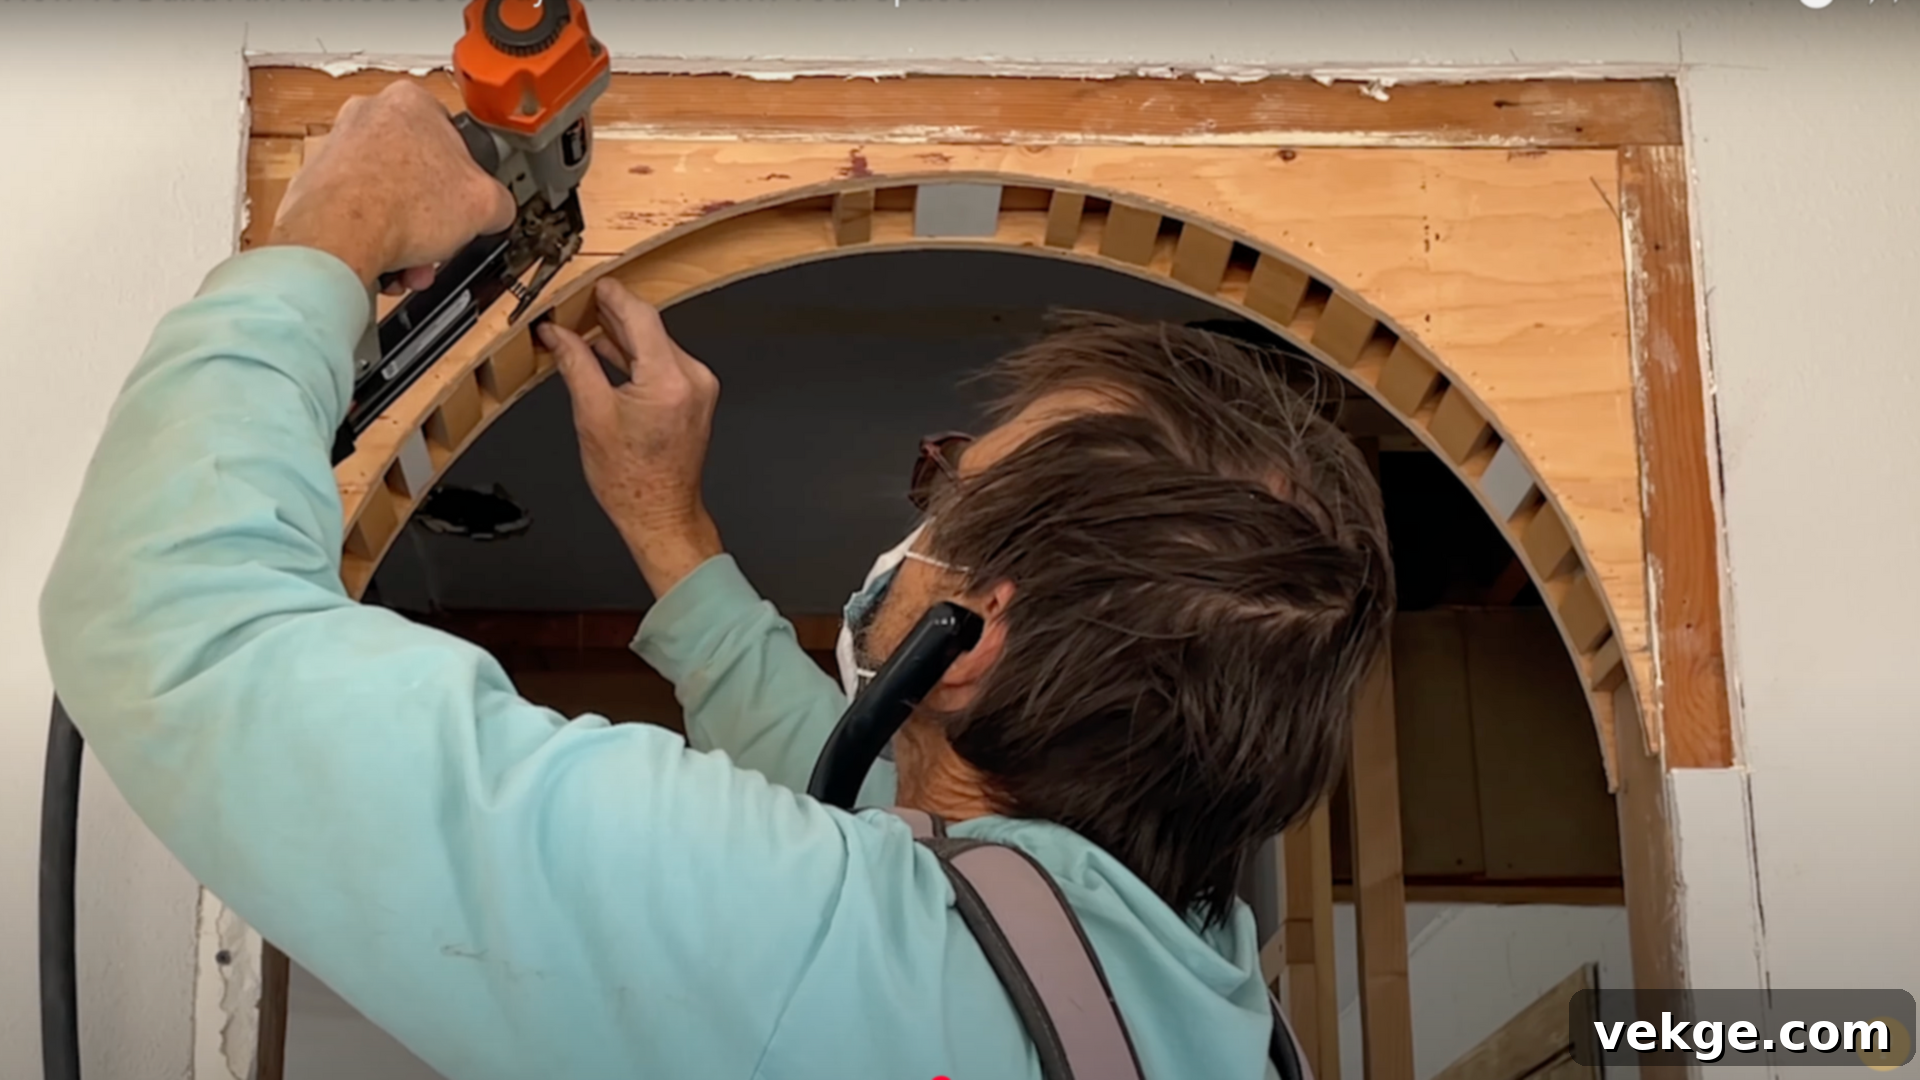
This critical step provides the necessary support for your curved drywall. Cut numerous thin blocks, roughly 1 inch wide, from scrap plywood or thin lumber. These blocks need to fit snugly between the two installed plywood arch forms. Begin attaching these internal blocking pieces along the entire curve of the arch. For optimal support and to facilitate a smooth drywall bend, space these blocks approximately every ¾ inch. You can use a staple gun or small nails to quickly and securely fasten these blocks in place. The closer the spacing, the more continuous support your drywall will have, leading to a much smoother, more resilient curve. Ensure the faces of these blocks are flush with the edges of your plywood arches to create a uniform surface for the drywall.
6. Cut, Score, and Attach Curved Drywall
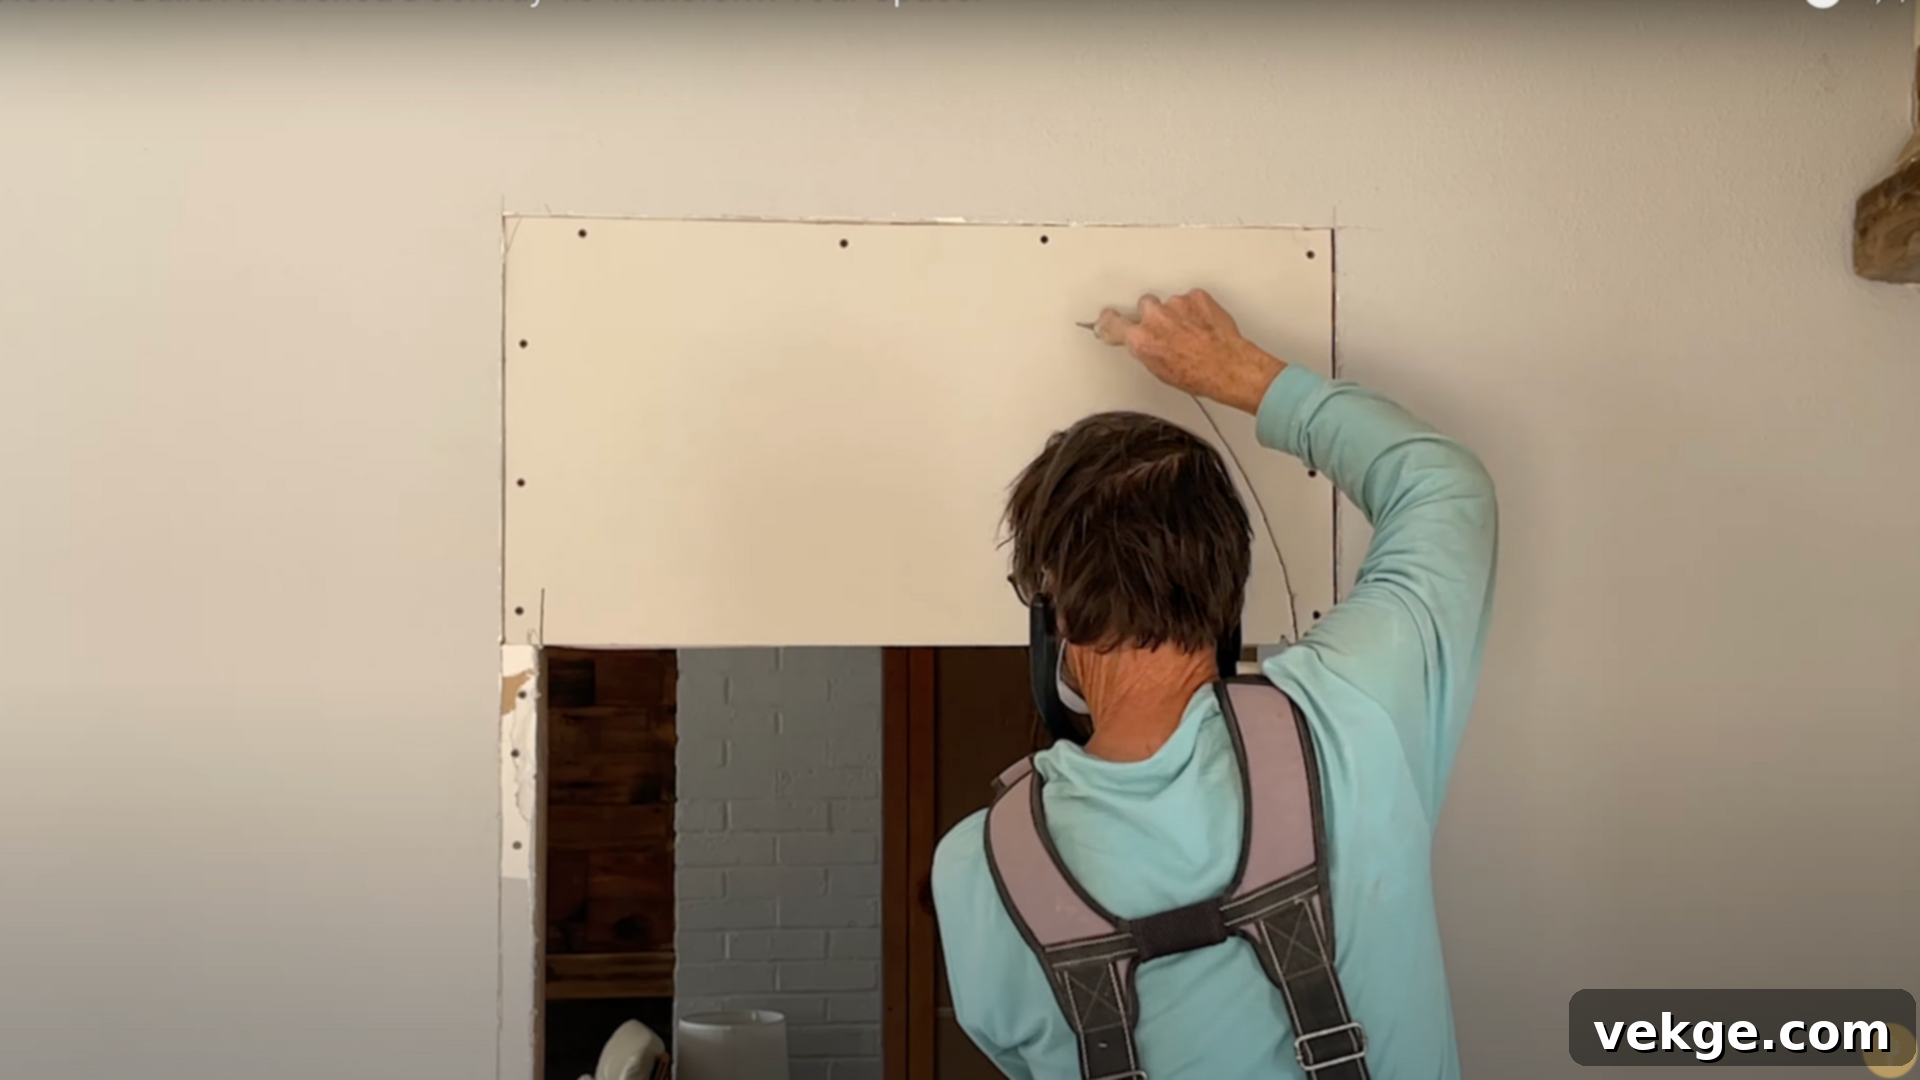
Measuring the length of the arch’s curve can be done with a flexible tape measure. Cut a strip of drywall to this length, ensuring its width matches the distance between your two plywood arches. To bend standard drywall around the curve without it cracking, you’ll need to score the back (non-paper side). Using your utility knife, make parallel cuts every 1 inch along the entire length of the drywall strip, going deep enough to cut through the paper and gypsum but not completely through the front paper. Carefully snap along each scored line. This allows the drywall to become flexible and conform to the curve. For even tighter curves, misting the back of the drywall with water from a spray bottle can help soften it further. Gently bend the scored drywall strip around the arch, aligning its edges with the plywood forms. Using drywall screws, start from the top center and work your way down each side, fastening the drywall securely to the internal blocking and the edges of the plywood arches. Ensure screws are slightly countersunk and spaced appropriately.
7. Finish with Flexible Corner Bead and Mudding
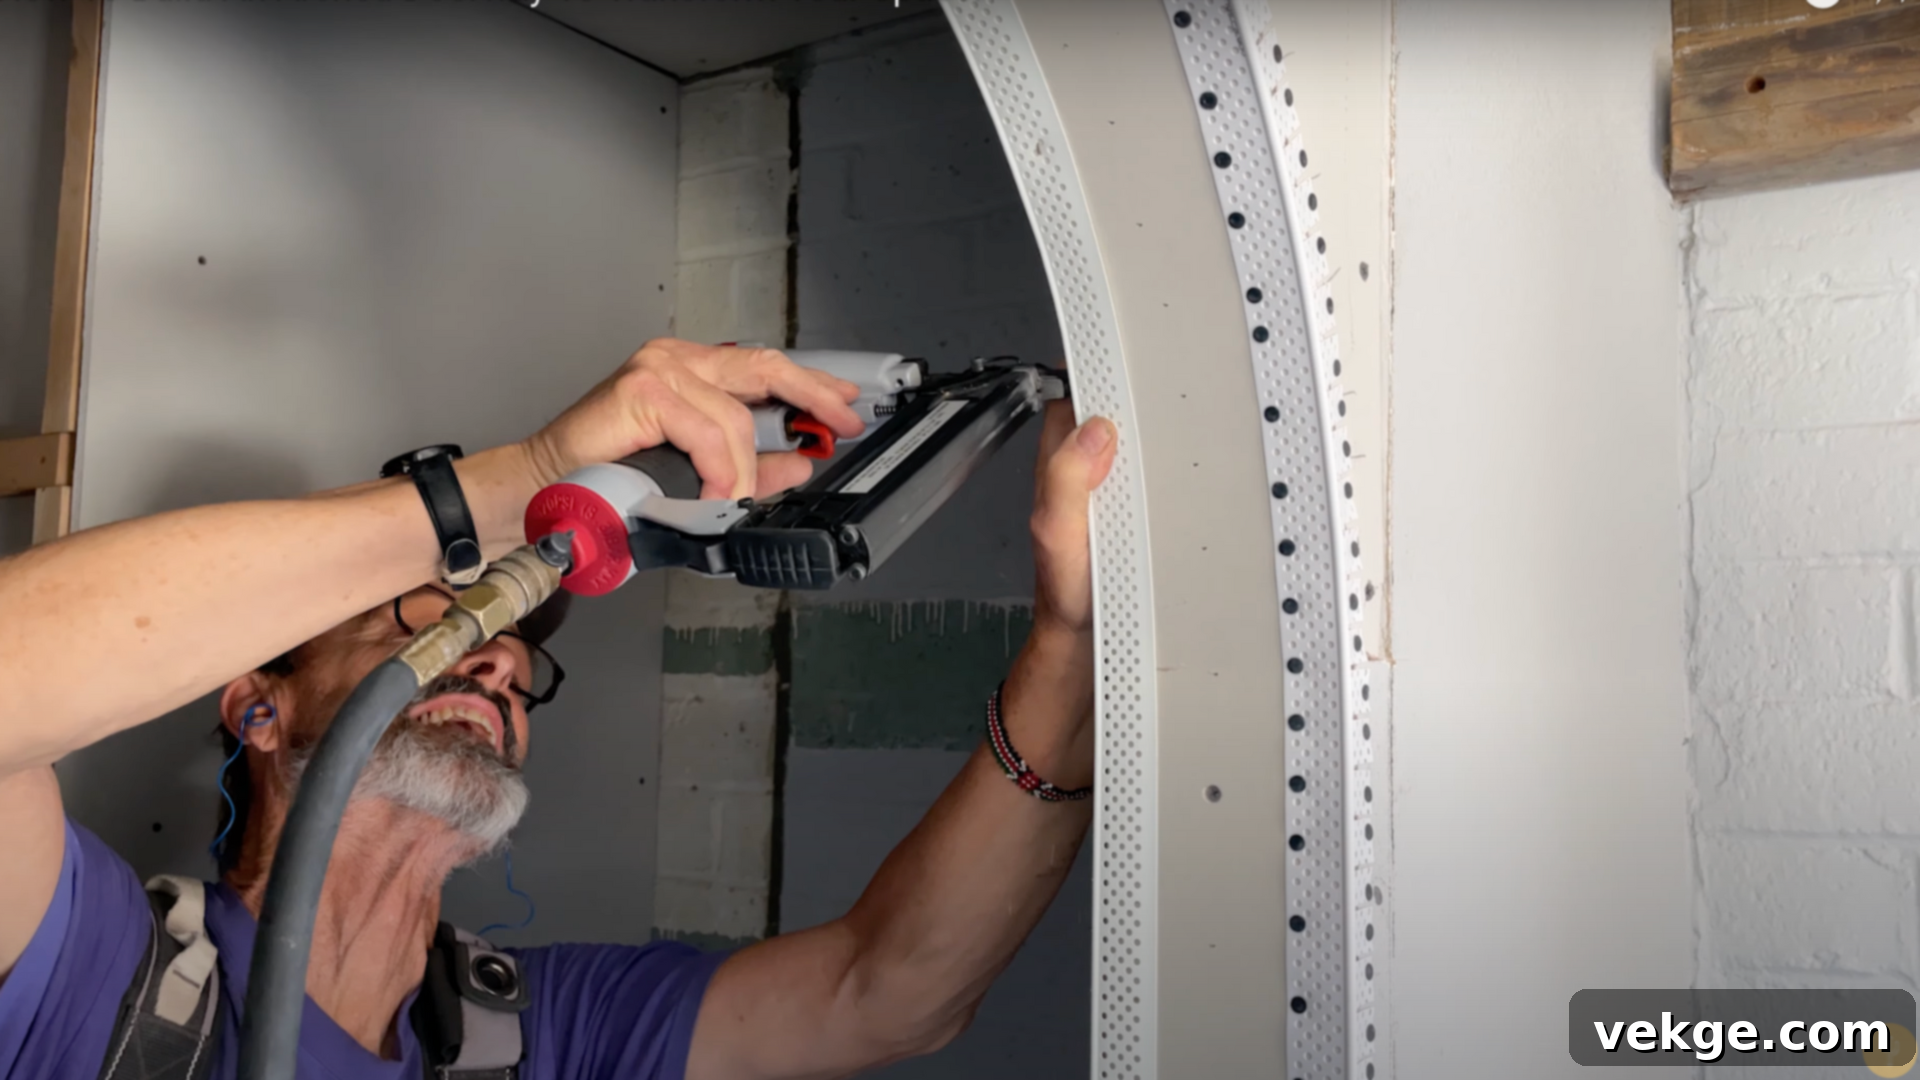
To create a crisp, durable, and protective edge for your new archway, apply flexible corner bead along all exposed corners of the drywall. Vinyl or paper-faced metal flexible corner bead works best for curves. Secure it firmly with a staple gun, ensuring it follows the arch’s contour perfectly. Once the corner bead is in place, it’s time for mudding. Apply thin, even coats of joint compound (drywall mud) over all seams, screw holes, and the corner bead. Use your drywall knife to feather the edges smoothly into the surrounding wall, ensuring no harsh lines. Allow each coat to dry completely, then lightly sand with fine-grit sandpaper or a sanding block to achieve a smooth surface. Repeat the mudding and sanding process as needed (typically 2-3 coats) until the surface is perfectly smooth and seamless. Once the final coat is dry and sanded, your beautiful new arched doorway is ready for primer and paint!
For a visual walkthrough and further clarity, you can watch the following YouTube video:
Finishing Touches: Paint and Trim Options for Your Arched Doorway
Once the construction and mudding are complete, the final aesthetic touches truly bring your arched doorway to life. The choices you make for paint and trim will significantly influence its visual impact and how it integrates with the rest of your home’s decor.
You have several stylistic options for painting your newly installed arch. For a clean, seamless, and understated look, consider painting the arch the exact same color as the surrounding walls. This creates a cohesive blend, making the arch feel like an organic extension of the room’s architecture. Alternatively, if you want the arch to stand out as a distinctive architectural feature, choose a contrasting or complementary color. A darker shade or a different hue can highlight its graceful curve, turning it into a focal point. Consider the existing color palette of your home and the mood you wish to create within the space.
Adding simple trim around the base of the arch, where it meets the floor, or along the edges where it transitions into the wall can elevate its appearance, giving it a more polished and finished feel. Trim adds definition and can mask minor imperfections. When selecting trim, it’s crucial to maintain consistency with the existing architectural style of other rooms in your home. This ensures that your new arched doorway feels integrated and intentional, rather than an isolated design element.
Matching Other Arches and Architectural Elements in Your Home
If your home already features other arched doorways or architectural curves, it’s a good idea to consider how your new arch will relate to them. Take time to examine their shapes, dimensions, paint finishes, and any existing trim. If your goal is to create a cohesive flow throughout your home, aim to keep the new arch relatively close in size, style, and general proportion to the existing ones. This creates a harmonious and intentional design language.
However, don’t feel entirely constrained. You could also choose to introduce a slight variation in the new arch’s design. Perhaps a slightly different curve radius or a unique trim profile could add a subtle layer of interest without clashing. This approach allows for a touch of individuality while still acknowledging the home’s overall aesthetic. Ultimately, the decision to match exactly or introduce a slight variation depends on your home’s existing layout, your personal design taste, and the overall narrative you want to tell with your interior architecture.
Conclusion: Embrace Your Newly Transformed Space
Congratulations! Now that you’ve navigated this comprehensive guide, you possess all the knowledge and practical steps required to confidently build a beautiful arched doorway in your home. You’ve learned how to meticulously plan the shape, construct a sturdy frame, carefully bend and attach drywall, and achieve a professional, seamless finish—all without the need for expensive, pre-packaged kits. This project empowers you to transform your living space with your own hands, adding significant architectural interest and a touch of bespoke elegance.
Remember, even seemingly small home improvement projects like adding an archway can profoundly impact how a space feels. It can make a room appear more inviting, soften harsh lines, and create a more relaxed, put-together atmosphere. The key to a successful outcome lies in patience and attention to detail. Take your time with each step, particularly when marking your curves and bending the drywall; these are crucial for achieving that coveted smooth, professional finish. By following these instructions carefully, you’ll soon be enjoying a stunning new feature that elevates your home’s aesthetic and leaves a lasting impression. Looking for more rewarding DIY tips and home improvement ideas? Explore our other guides and start building something new and exciting today!
Frequently Asked Questions About Building Arched Doorways
1. Can I build an arched doorway in a load-bearing wall?
Yes, it is possible to create an arched doorway in a load-bearing wall, but it is significantly more complex and requires careful structural considerations. You will need to ensure that the existing header (the beam above the opening that supports the wall above) remains fully intact and that no critical framing components are removed. This often involves installing temporary supports and potentially reinforcing the header. If you are uncertain about identifying load-bearing walls or how to properly support them, it is highly recommended to consult with a qualified structural engineer or experienced contractor before attempting any cuts. Incorrectly altering a load-bearing wall can compromise the structural integrity of your entire home.
2. What’s the most budget-friendly way to achieve this look?
To minimize costs for your DIY arched doorway, utilize any leftover drywall scraps and surplus wood you might have from previous projects. Instead of purchasing new materials, make a point to salvage and repurpose what you already own. When it comes to finishing, skip expensive decorative trim or complex moldings. Opt for a simple, clean aesthetic by painting the arch the exact same color as the surrounding walls. This technique not only saves money on materials but also creates a seamless, integrated look that doesn’t draw attention to the arch as a separate, costly addition. Strategic material use and minimalist finishing are key to keeping this project affordable.
3. Do I need help, or can I complete this project alone?
For most standard-sized doorway arches, this project is certainly achievable for a solo DIY enthusiast, especially if you possess basic carpentry tools and a good amount of patience. The process involves several individual steps that can be managed by one person. However, for larger openings or if you find yourself struggling with the weight and manipulation of full plywood sheets or drywall panels, an extra set of hands can be incredibly helpful. Having an assistant to hold pieces in place while you fasten them, or to help lift heavy sections, can significantly ease the process, improve accuracy, and make the overall experience more efficient and less physically demanding.
4. What type of drywall is best for creating curves?
For achieving smooth curves on an arched doorway, thinner drywall sheets are generally preferred. Quarter-inch (¼ inch) thick drywall is the most common choice as it offers greater flexibility than standard ½-inch sheets, making it much easier to bend without cracking, especially for tighter radii. Some manufacturers also produce specialized “flexible drywall” specifically designed for curved applications, though it might be less readily available and more expensive. If you are using standard ¼-inch drywall, scoring the back paper and gypsum at regular intervals (as detailed in step 6) and lightly misting it with water will further enhance its pliability.
5. How long does it typically take to build an arched doorway?
The total time required to build an arched doorway can vary significantly based on your DIY experience level, the complexity of the arch shape, and how quickly the joint compound dries between coats. On average, you can expect the construction phase (framing, cutting, and attaching drywall) to take one to two full days of focused work. The mudding and sanding process, which involves multiple layers and drying times, will add another two to three days. Factor in additional time for priming and painting. Therefore, from start to finish, the entire project generally spans anywhere from 3 to 5 days, allowing for adequate drying and curing times.
