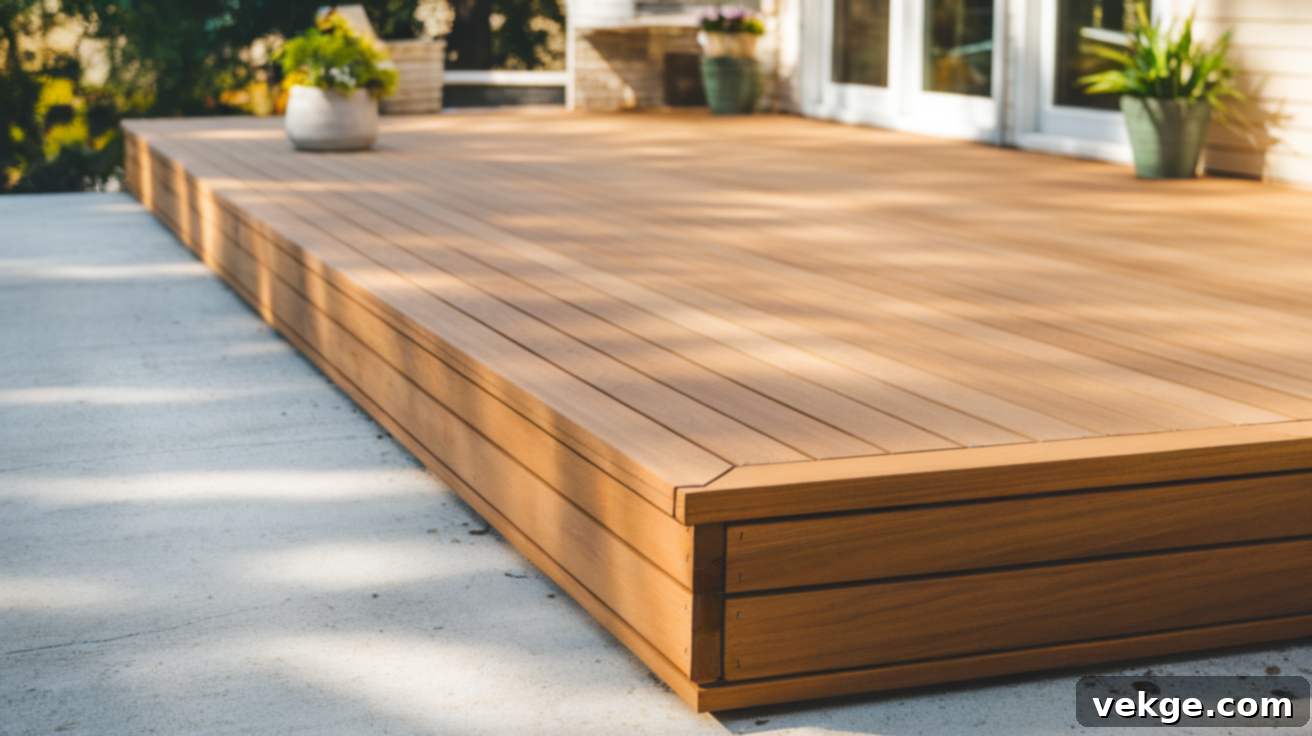
Transform Your Outdoor Space: A DIY Guide to Building a Deck Over a Concrete Porch
Is your concrete porch looking tired, cracked, or simply outdated? Do you dream of a beautiful, inviting outdoor living space but dread the thought of costly and complicated renovations? You’re not alone! Many homeowners face this common dilemma, and the solution might be simpler and more affordable than you think.
Building a deck directly over an existing concrete porch is an ingenious and highly effective way to breathe new life into your home’s exterior without breaking the bank. This method offers a host of benefits: it instantly upgrades your porch with a fresh, stylish aesthetic, significantly enhances your home’s curb appeal, and adds tangible value. Best of all, it bypasses the need for extensive excavation, complex foundation work, or messy demolition, making it an ideal DIY project for many.
This comprehensive guide will walk you through every easy step, from preparation to the final touches, to help you transform your worn-out concrete slab into a stunning, functional deck. Whether you’re a seasoned DIY enthusiast or new to home improvement, our clear instructions and practical tips will empower you to tackle this project with confidence.
Ready to embark on your journey to a more beautiful outdoor area? Keep reading to discover how to create the deck of your dreams!
Can You Build a Deck Over a Concrete Porch? Absolutely!

Yes, building a deck over a concrete porch or patio is not only possible but also a highly recommended option for homeowners seeking an efficient and cost-effective outdoor upgrade. This innovative approach allows you to revitalize your outdoor space without the significant expense and disruption associated with demolishing the existing concrete or constructing a new, elaborate foundation.
However, before you dive into design and material choices, a crucial first step is to thoroughly assess the condition of your existing concrete slab. While the method is adaptable, the concrete foundation must be structurally sound. Inspect the surface carefully for any significant cracks, crumbling areas, or severe unevenness. Minor imperfections can often be repaired, but substantial damage might require professional assessment to ensure a stable base for your new deck. A solid, well-maintained concrete slab provides the perfect canvas for a long-lasting and beautiful deck structure.
How Much Does It Cost to Build a Deck Over Concrete?
The cost of building a deck over a concrete porch can vary widely, influenced by several key factors. These include the size and complexity of your deck, your choice of decking materials, and whether you opt for a DIY approach or hire a professional contractor.
For a DIY deck project, you can generally expect material costs to range between $1,500 and $5,000. This estimate depends heavily on your material selection. Pressure-treated lumber, a popular and durable choice for its affordability and resistance to rot and insects, typically falls on the lower end of this spectrum. In contrast, composite decking, while a larger initial investment, offers superior longevity, minimal maintenance requirements, and a wide array of colors and finishes, making it a valuable long-term investment.
If you decide to engage a professional contractor, be prepared for higher overall costs, as labor fees will be added to the material expenses. Professional installation can add anywhere from $3,000 to $10,000 or more, depending on the scope of work and local labor rates. While a contractor provides convenience and expertise, handling the project yourself can lead to significant savings, making a beautiful new deck more accessible.
To budget effectively, factor in not just the decking boards and joists, but also fasteners, concrete anchors, shims, potential sealants, and any specialized tools you might need to purchase or rent.
Essential Materials You’ll Need for Your Deck Project
Before you begin the exciting transformation of your concrete porch, gathering all the necessary materials is crucial for a smooth and efficient build. Here’s a detailed list of what you’ll need, along with insights into each item’s purpose and popular choices:
- Decking Material: This is the visible surface of your deck.
- Pressure-Treated Wood: A cost-effective and common choice. It’s chemically treated to resist rot, fungal decay, and insect infestation, making it suitable for outdoor use. Options include pine, fir, or cedar. Remember to allow freshly treated wood to dry thoroughly before sealing.
- Composite Decking: Made from a blend of wood fibers and recycled plastic, composite decking offers exceptional durability, resistance to fading, staining, and scratching, and requires very little maintenance (no sealing or staining needed). While more expensive upfront, its longevity and low upkeep often justify the investment. Popular brands offer various colors and textures.
- Joists (or Sleepers): These are the structural framework components that support your decking boards and elevate them above the concrete slab.
- Typically made from pressure-treated lumber (e.g., 2x4s or 2x6s), joists must be strong enough to bear the weight of the deck and foot traffic. They create a crucial airspace between the deck boards and the concrete, which is essential for drainage and ventilation to prevent moisture issues.
- Deck Screws: Specifically designed for outdoor use, these fasteners secure your decking boards to the joists.
- Choose rust-resistant screws, such as stainless steel or coated exterior screws, to prevent unsightly stains and ensure long-term holding power. Lengths of 2.5 to 3 inches (50-75mm) are common. Look for screws with self-tapping tips and special threads to prevent wood splitting.
- Concrete Anchors: If your local building codes or design requires attaching the deck frame to the concrete, these anchors are essential.
- Options include expansion anchors, wedge anchors, or sleeve anchors, designed to provide a secure mechanical connection to masonry. Always check local regulations to determine if anchoring is required for your specific project.
- Shims/Spacers: Critical for achieving a perfectly level deck, especially on an uneven concrete porch.
- These small pieces of wood or composite material are placed under joists to adjust their height. They are invaluable for correcting slight variations in the concrete slab and ensuring proper water drainage away from your home.
- Joist Tape/Protection (Optional but Recommended): A self-adhesive, waterproof membrane applied to the top of joists.
- This protects the joists from moisture penetration, especially at fastener points, and significantly extends the lifespan of your deck frame. It’s a small investment that offers substantial long-term benefits.
- Wood Preservative/Sealer (for wood decks): Essential for protecting pressure-treated wood from UV damage, moisture, and mildew.
- Applying a high-quality sealant or stain will help maintain the wood’s appearance and structural integrity for years to come.
- Tools: Don’t forget essential tools like a drill, miter saw, circular saw, measuring tape, level (spirit or laser), string line, safety glasses, and hearing protection.
Now that you’ve gathered your arsenal of materials and tools, let’s dive into the practical process of building your beautiful new deck!
Step-by-Step Process of Building a Deck Over Your Concrete Porch
Constructing a deck over an existing concrete slab involves a series of methodical steps, each crucial for ensuring the stability, longevity, and aesthetic appeal of your new outdoor space. Below, we’ve broken down each part of the process to guide you through this exciting transformation.
Step 1: Prepare the Concrete Slab – The Foundation for Success
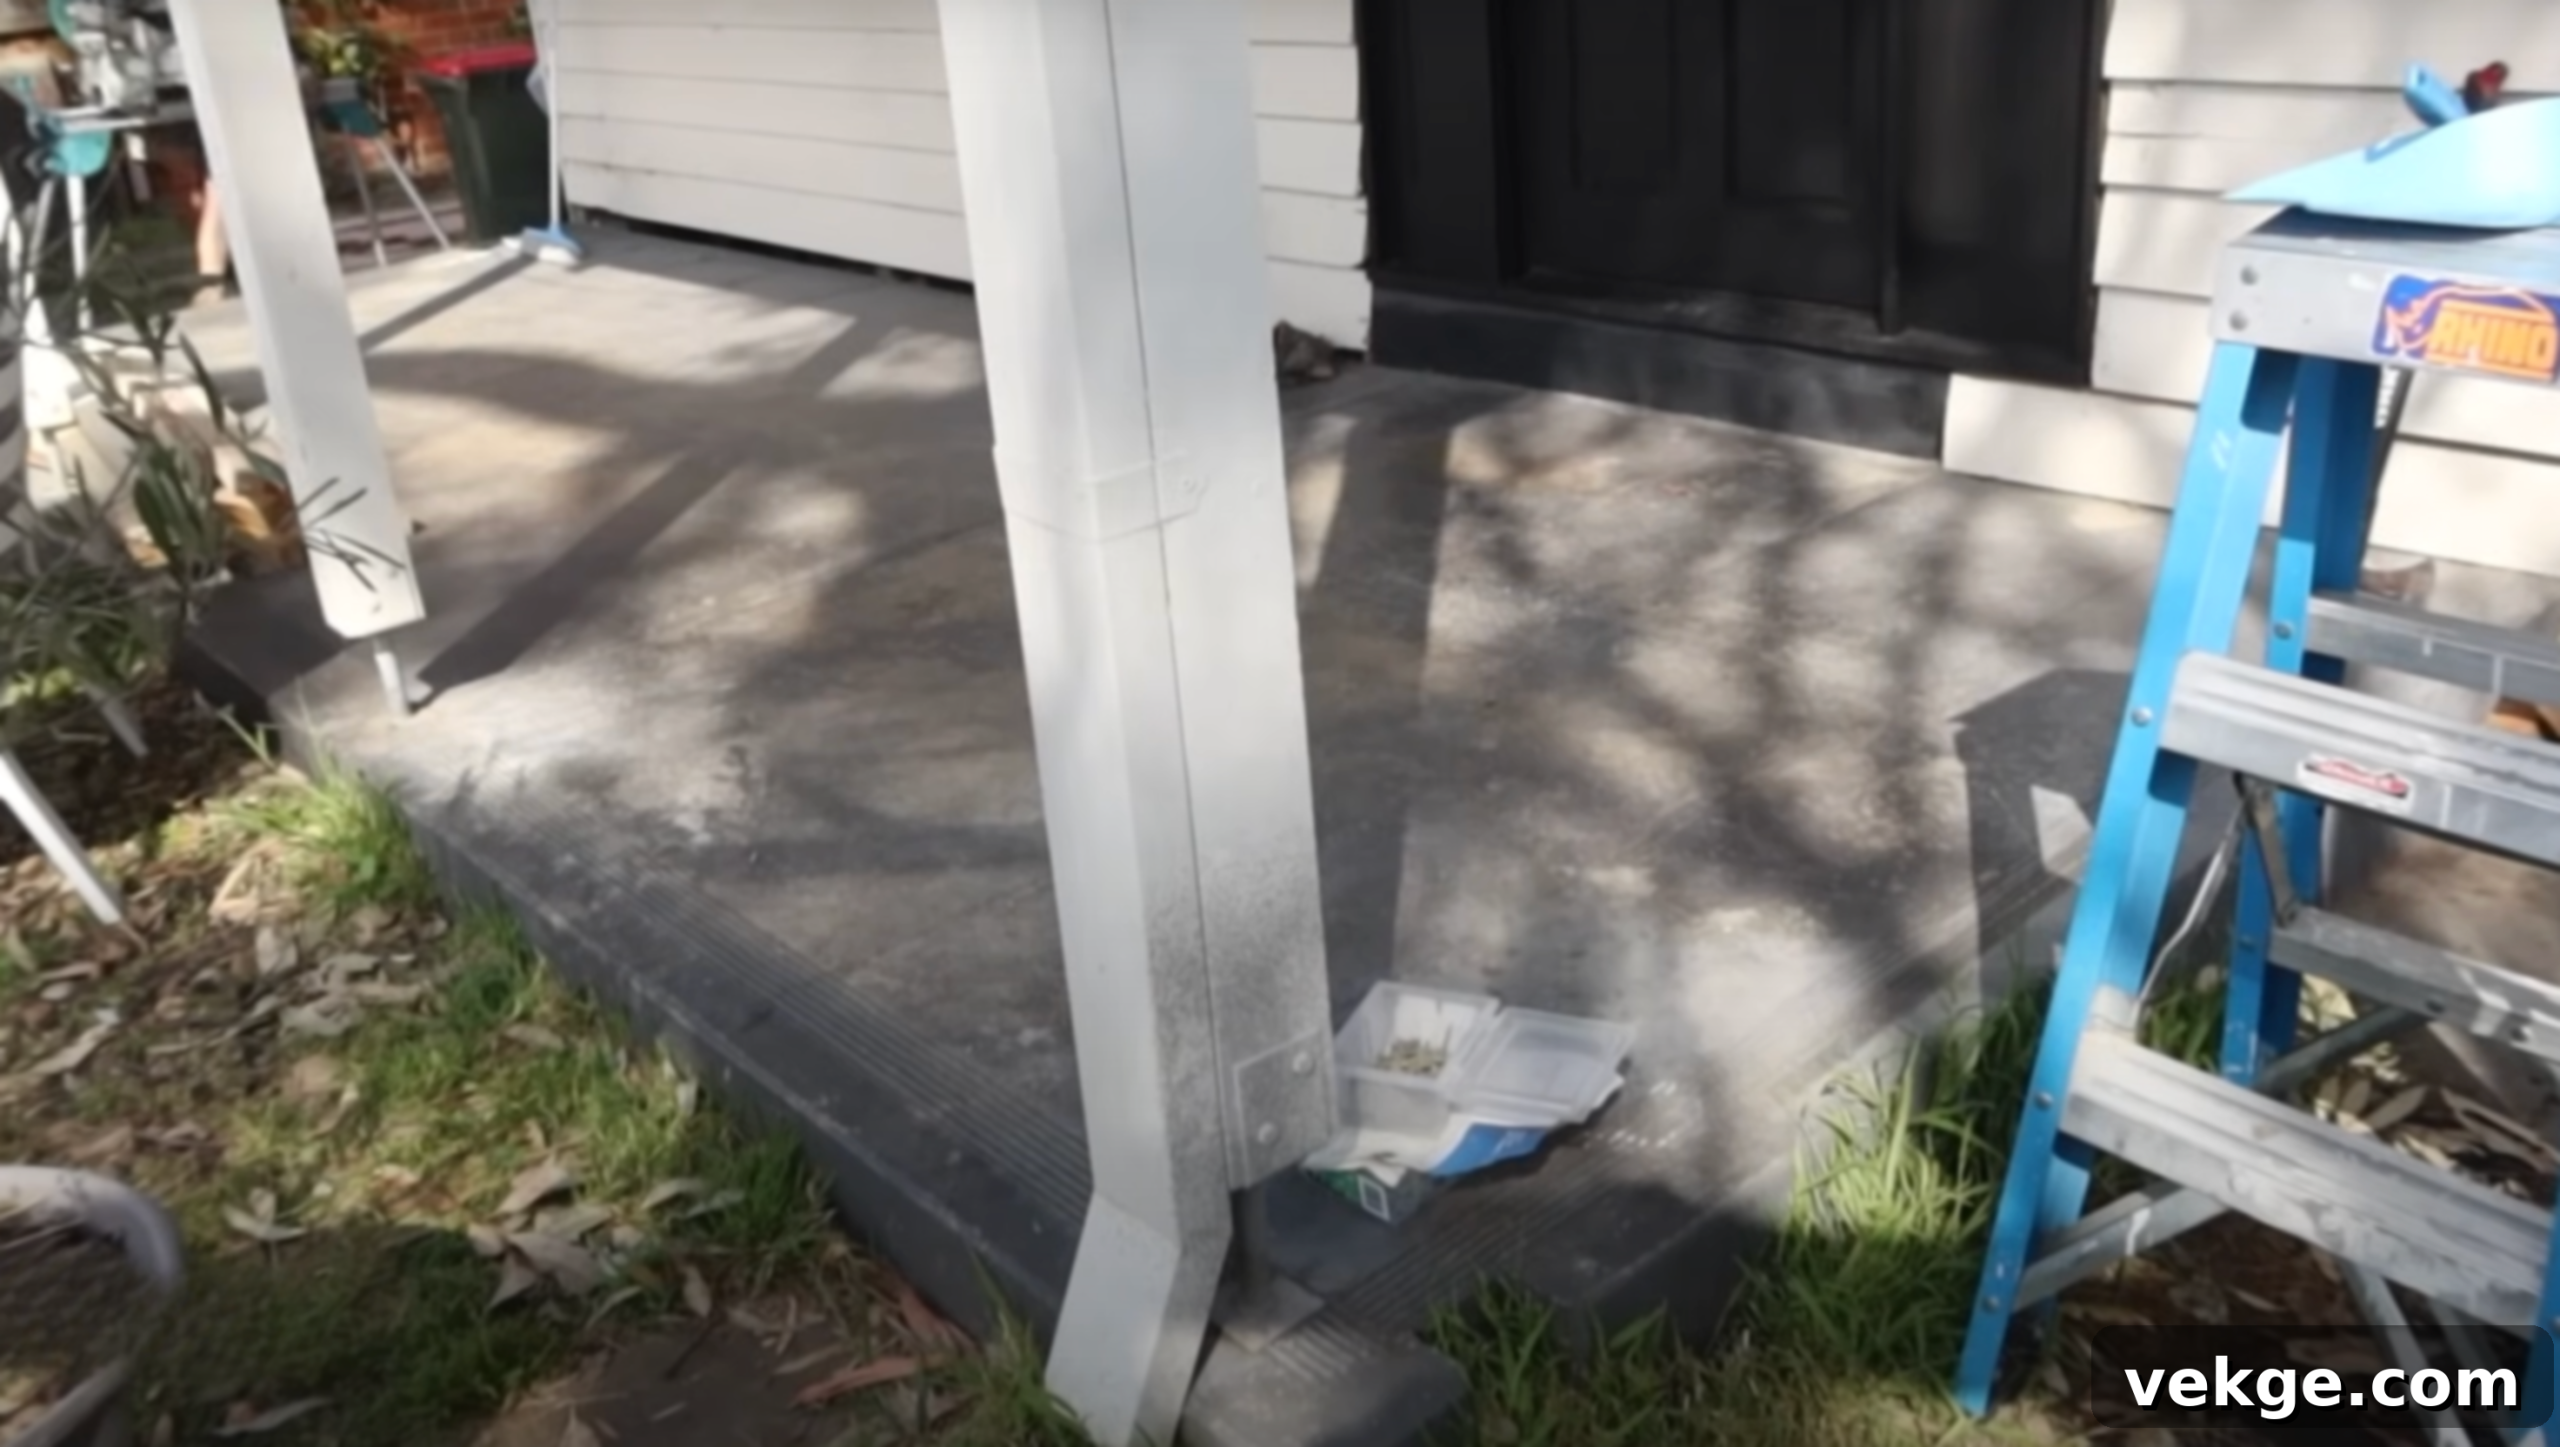
The success of your deck hinges on a solid and well-prepared foundation. Begin by meticulously inspecting your concrete slab for any existing damage. Look for cracks, spalling (flaking or crumbling), or significant unevenness. Minor cracks can often be repaired with concrete patching compounds, while deeper issues might require more substantial fixes or professional advice. Address any repairs before proceeding, as a compromised base will affect the entire deck structure.
Next, thoroughly clean the slab. Remove all dirt, debris, leaves, moss, and stains using a power washer or a stiff brush with a concrete cleaner. A clean surface not only allows for better adhesion if you’re using adhesives but also provides a clear view for the next crucial step: leveling.
Once the slab is clean and repaired, it’s time to check for levelness and determine the necessary adjustments. Run a string line tightly across the entire slab, securing it at opposite ends. Use a spirit level or, for greater precision, a laser level to identify high and low spots. As a practical test, you can use a 10mm packer or a scrap piece of wood to gauge the height at various points along the string line. If the packer touches the string line, it indicates a high point where the joist would be too high without adjustment. Conversely, if there’s a noticeable gap between the packer and the string line, that area is a low spot that will require shimming under the joists. This detailed assessment ensures your deck will be perfectly level and drain correctly.
Step 2: Lay Down the Joists – Creating the Deck’s Backbone
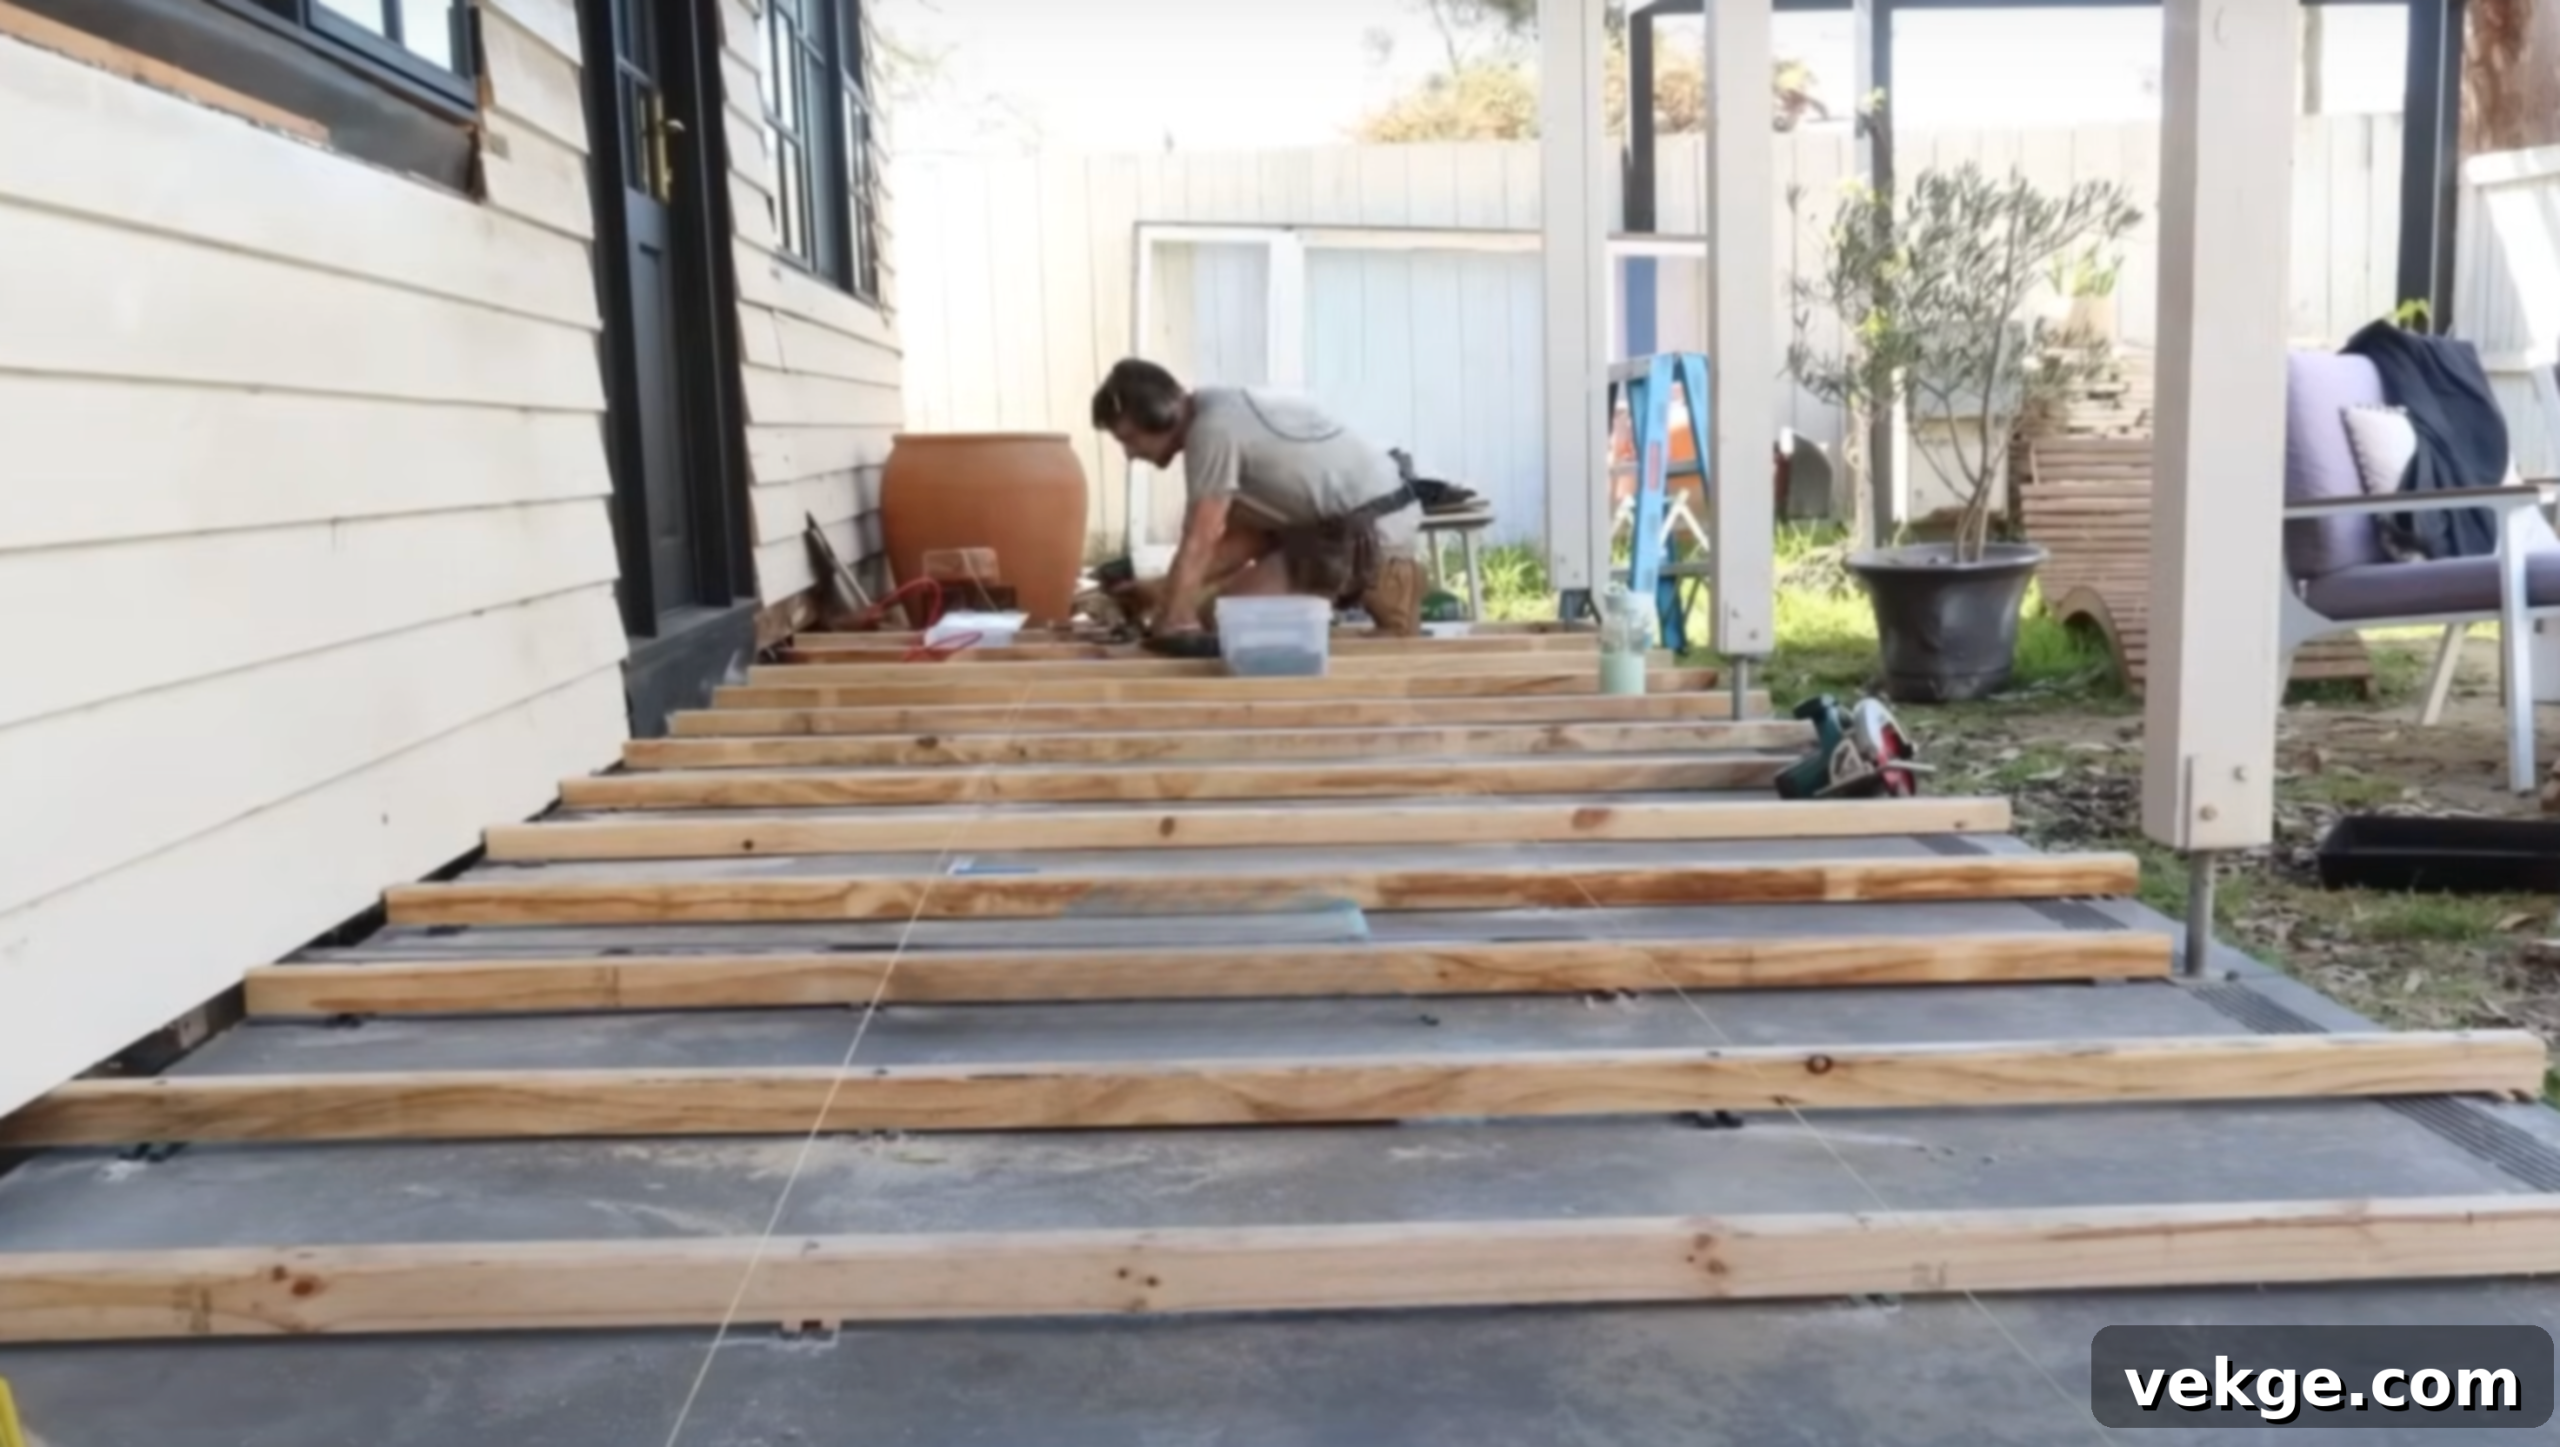
With your concrete slab prepped and leveled, the next critical step is installing the joists, which form the skeletal framework of your deck. These joists, typically pressure-treated lumber (e.g., 2x4s or 2x6s laid flat), will run parallel to each other across the length of the slab, providing the necessary support for your decking boards. The spacing between joists is usually dictated by your decking material (e.g., 16 inches on center for most composite and wood decking) – always consult manufacturer guidelines for optimal spacing.
Begin by laying out your perimeter joists. These should be precisely aligned and carefully leveled using the string line technique established in Step 1. Secure them to the concrete slab if required by local building codes or your design plan, using concrete anchors. For added protection and longevity, consider applying joist tape to the top surface of each joist. This self-adhesive, waterproof membrane will protect the wood from moisture penetration, especially at screw points, and significantly extend the lifespan of your deck frame.
Once the perimeter joists are in place and leveled, install the interior joists. Use the string line and your 10mm packer (or a similar spacer) to continuously check for height consistency. If the packer touches the string line, indicating a high spot, you may need to slightly plane down the joist or adjust its position. If there’s a gap, carefully insert shims underneath the joist until it makes even contact with your string line. This meticulous process ensures all joists are perfectly level and aligned, creating a robust and even surface for your decking material.
Step 3: Create a Bay Area for Decking – Ensuring Precision
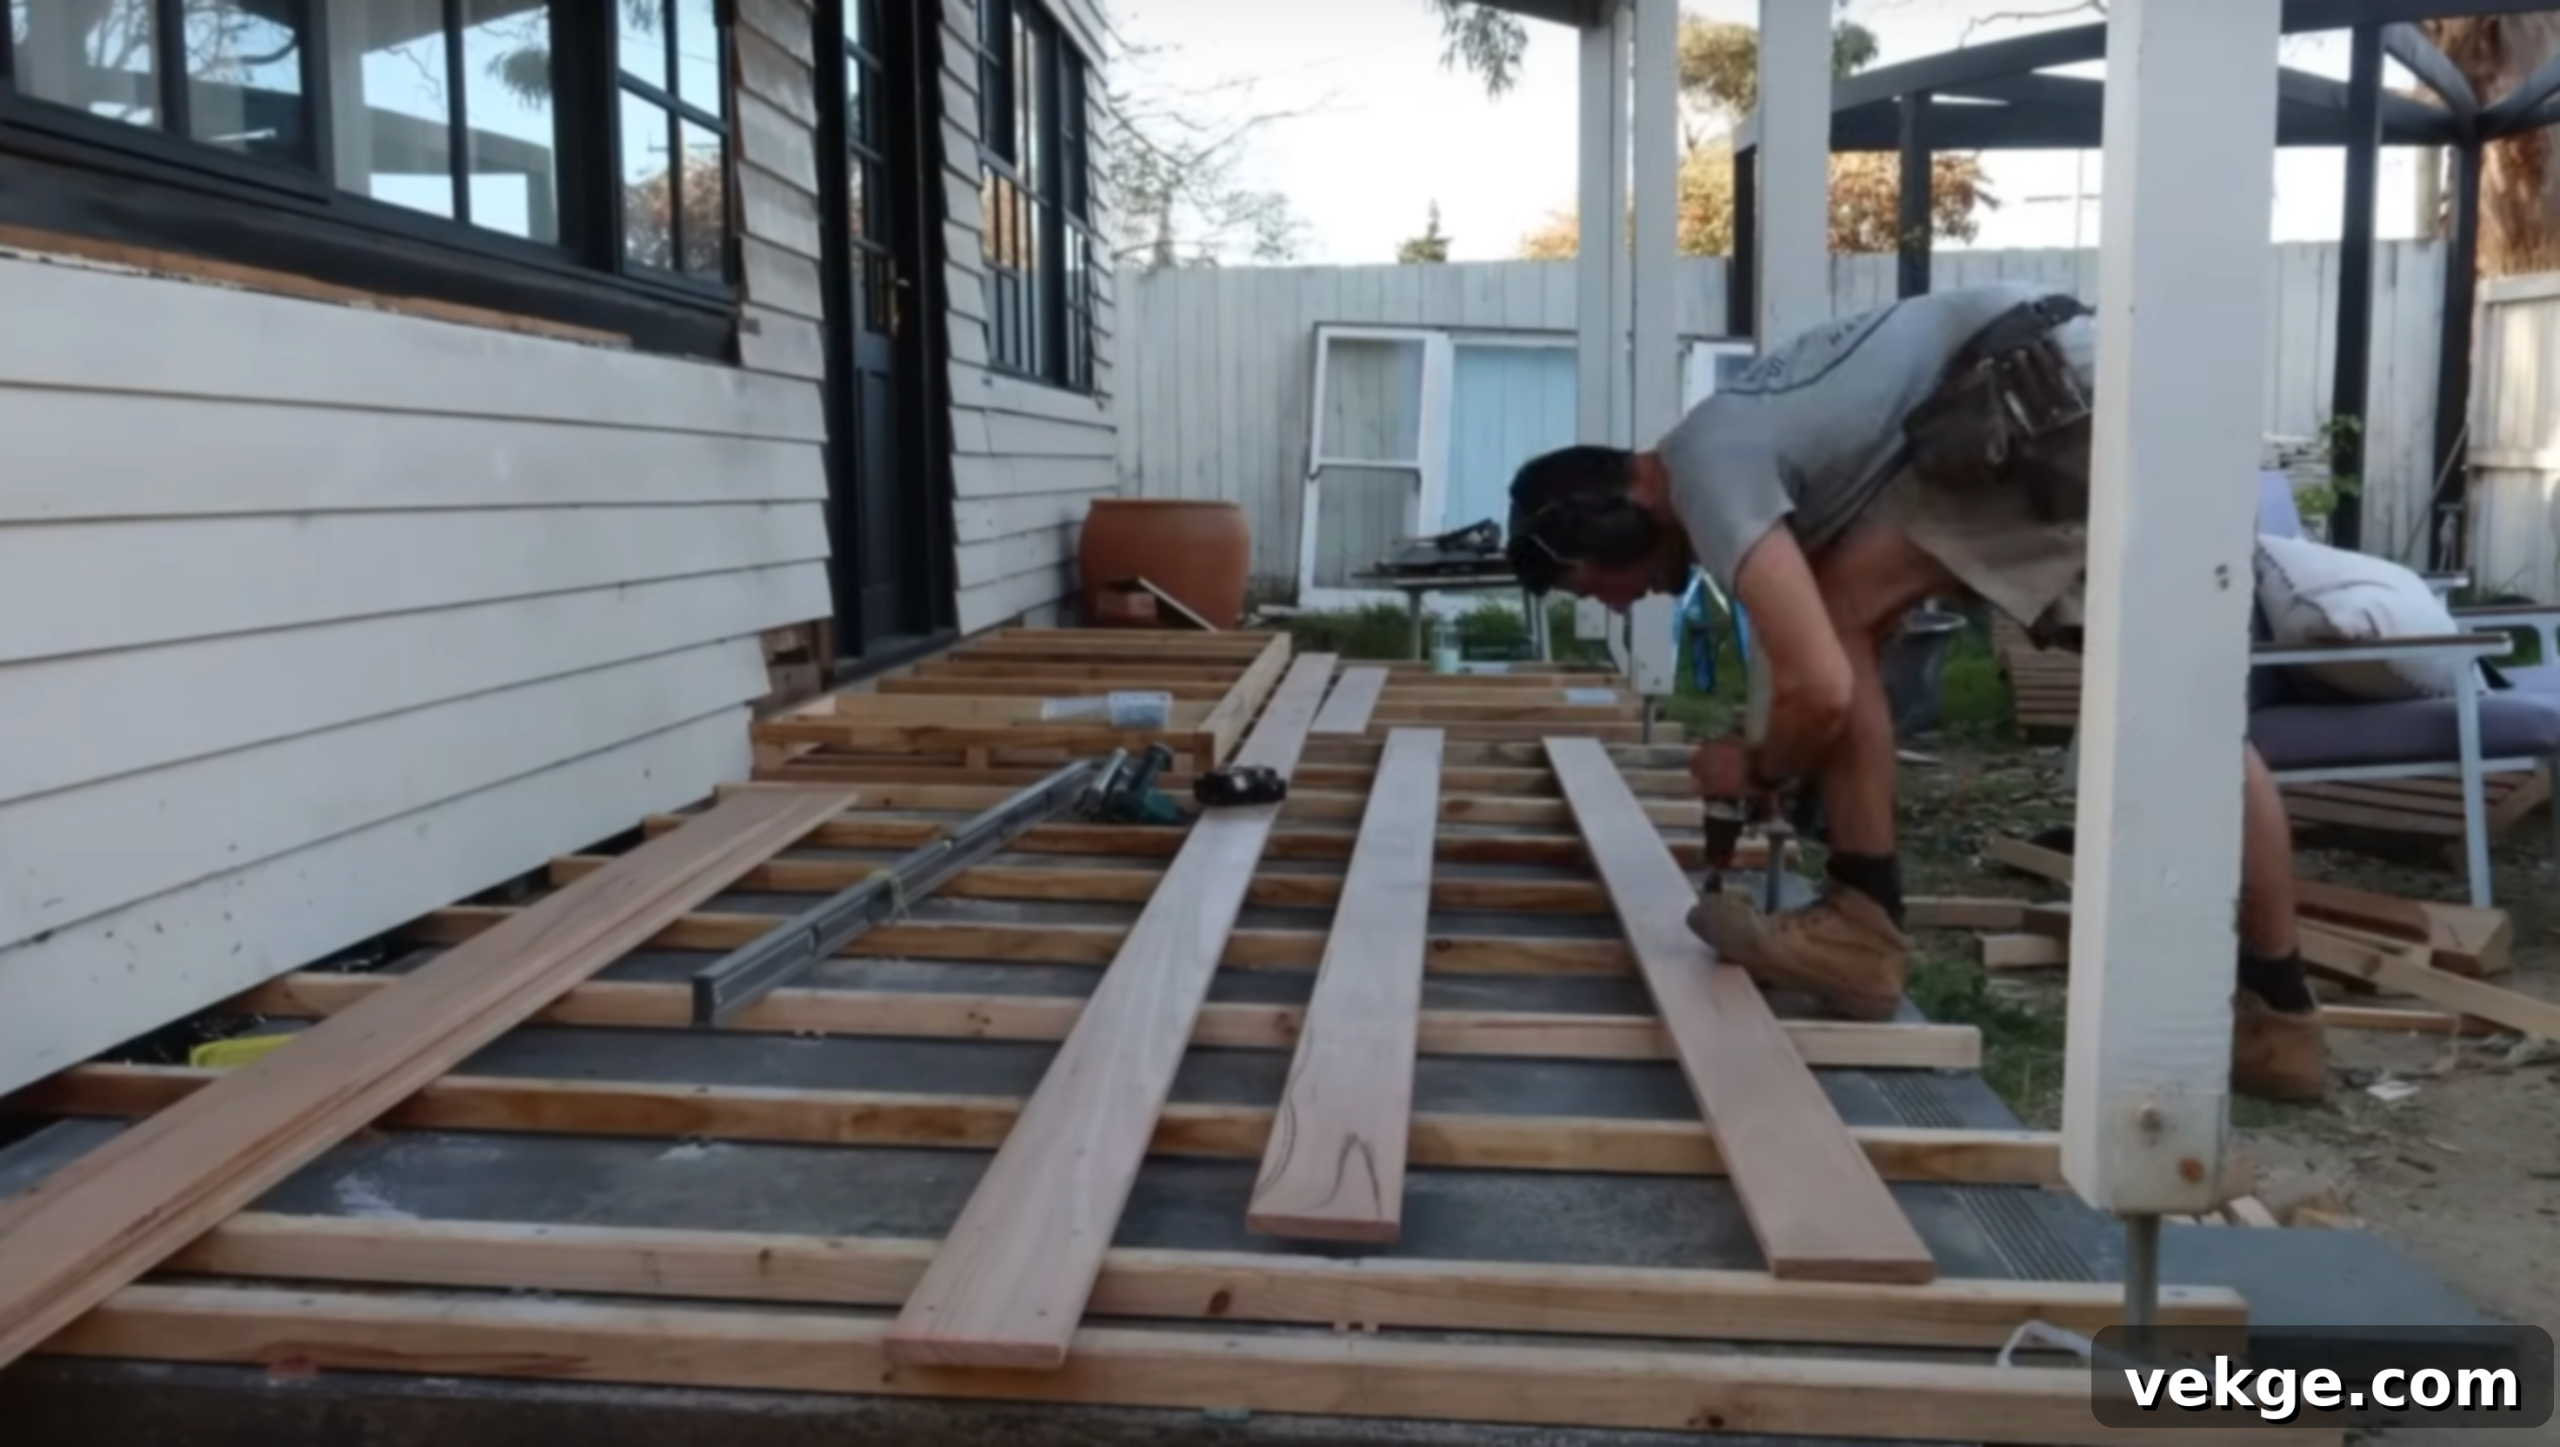
Now that your joists are securely in place, it’s time to prepare for the precise installation of your decking boards. This step involves creating a “bay” area, a technique that helps ensure your decking boards remain perfectly straight and consistently spaced across the entire deck surface.
Start by laying your first decking board along one edge of the deck. This board is crucial as it sets the alignment for all subsequent boards, so ensure it is absolutely straight and perfectly perpendicular to your joists. Secure it temporarily if needed. Next, create your bay by positioning a second, perfectly straight decking board parallel to the first. The distance between these two boards should be enough to comfortably fit four to five additional decking boards, allowing you to work in manageable sections.
To maintain consistent gaps between the boards and prevent them from shifting during installation, use wedges or specialized decking spacers. These tools are inserted between the boards, holding them firmly in place at the correct spacing. The bay system provides a controlled environment, making it easier to install multiple boards at once while guaranteeing even gaps. Once your bay is set up and the first few boards are installed and perfectly aligned and spaced, you can move the second “guide” board to create the next bay, progressively working your way across the deck.
Step 4: Install Decking Boards – The Visible Transformation
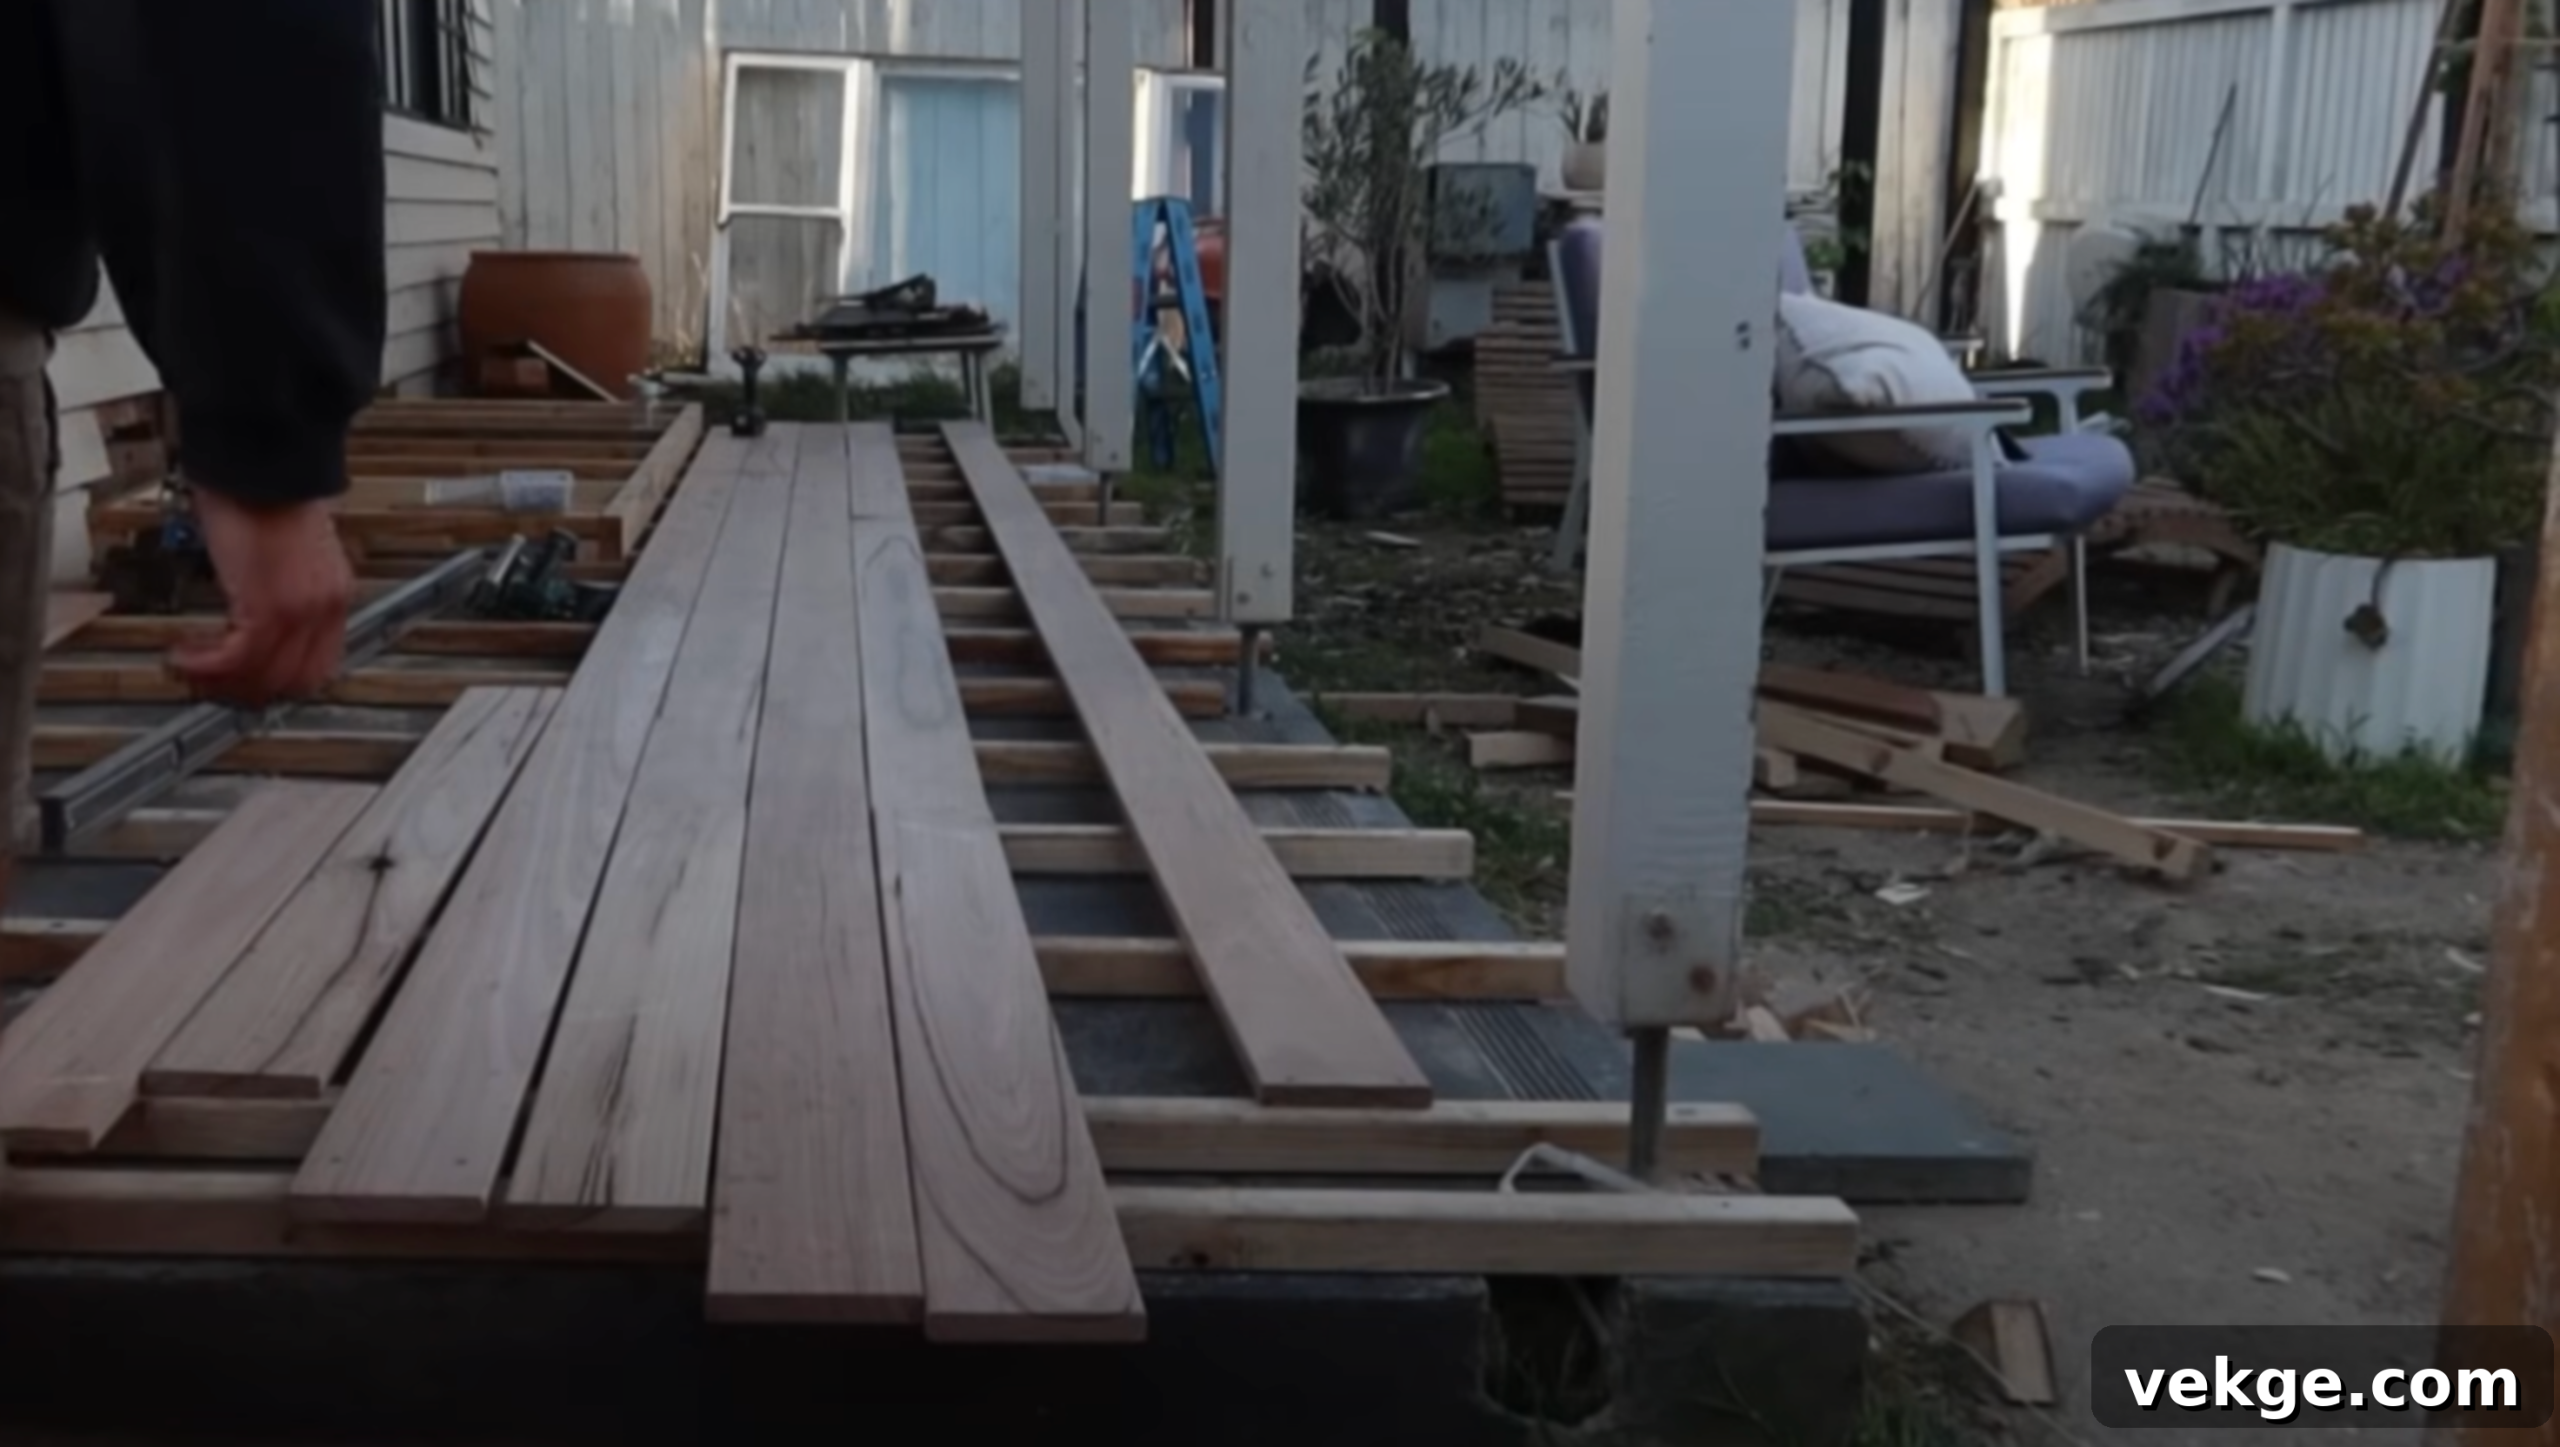
With your bay area established, you’re ready for the satisfying task of installing the main decking boards. Working from your first perfectly aligned board, begin to lay and secure the remaining boards one at a time. For each board, maintain a consistent gap between it and the adjacent board. These gaps are not merely for aesthetics; they are vital for proper water drainage, allowing moisture to escape from the deck surface, and for accommodating the natural expansion and contraction of the wood or composite material due to temperature and humidity changes. A common gap size is 1/8 to 1/4 inch, but always refer to your decking manufacturer’s recommendations.
When securing the boards, use high-quality, weather-resistant deck screws (e.g., 50mm or 2-inch stainless steel or ceramic-coated screws). Drive two screws through each board into every joist it crosses. Ensure the screws are driven flush with the deck surface or slightly countersunk to prevent tripping hazards and create a neat finish. For wood decking, pre-drilling pilot holes can prevent splitting, especially near the ends of the boards. For a cleaner, fastener-free look, consider using hidden fastening systems, which clip into the sides of the boards and secure them from underneath.
Once all boards are installed, you may have some overhanging edges. Use a circular saw with a straightedge guide to carefully trim these edges for a perfectly clean and professional finish. This final trim will define the precise perimeter of your new deck.
Step 5: Add the Front Door Landing – Seamless Transitions
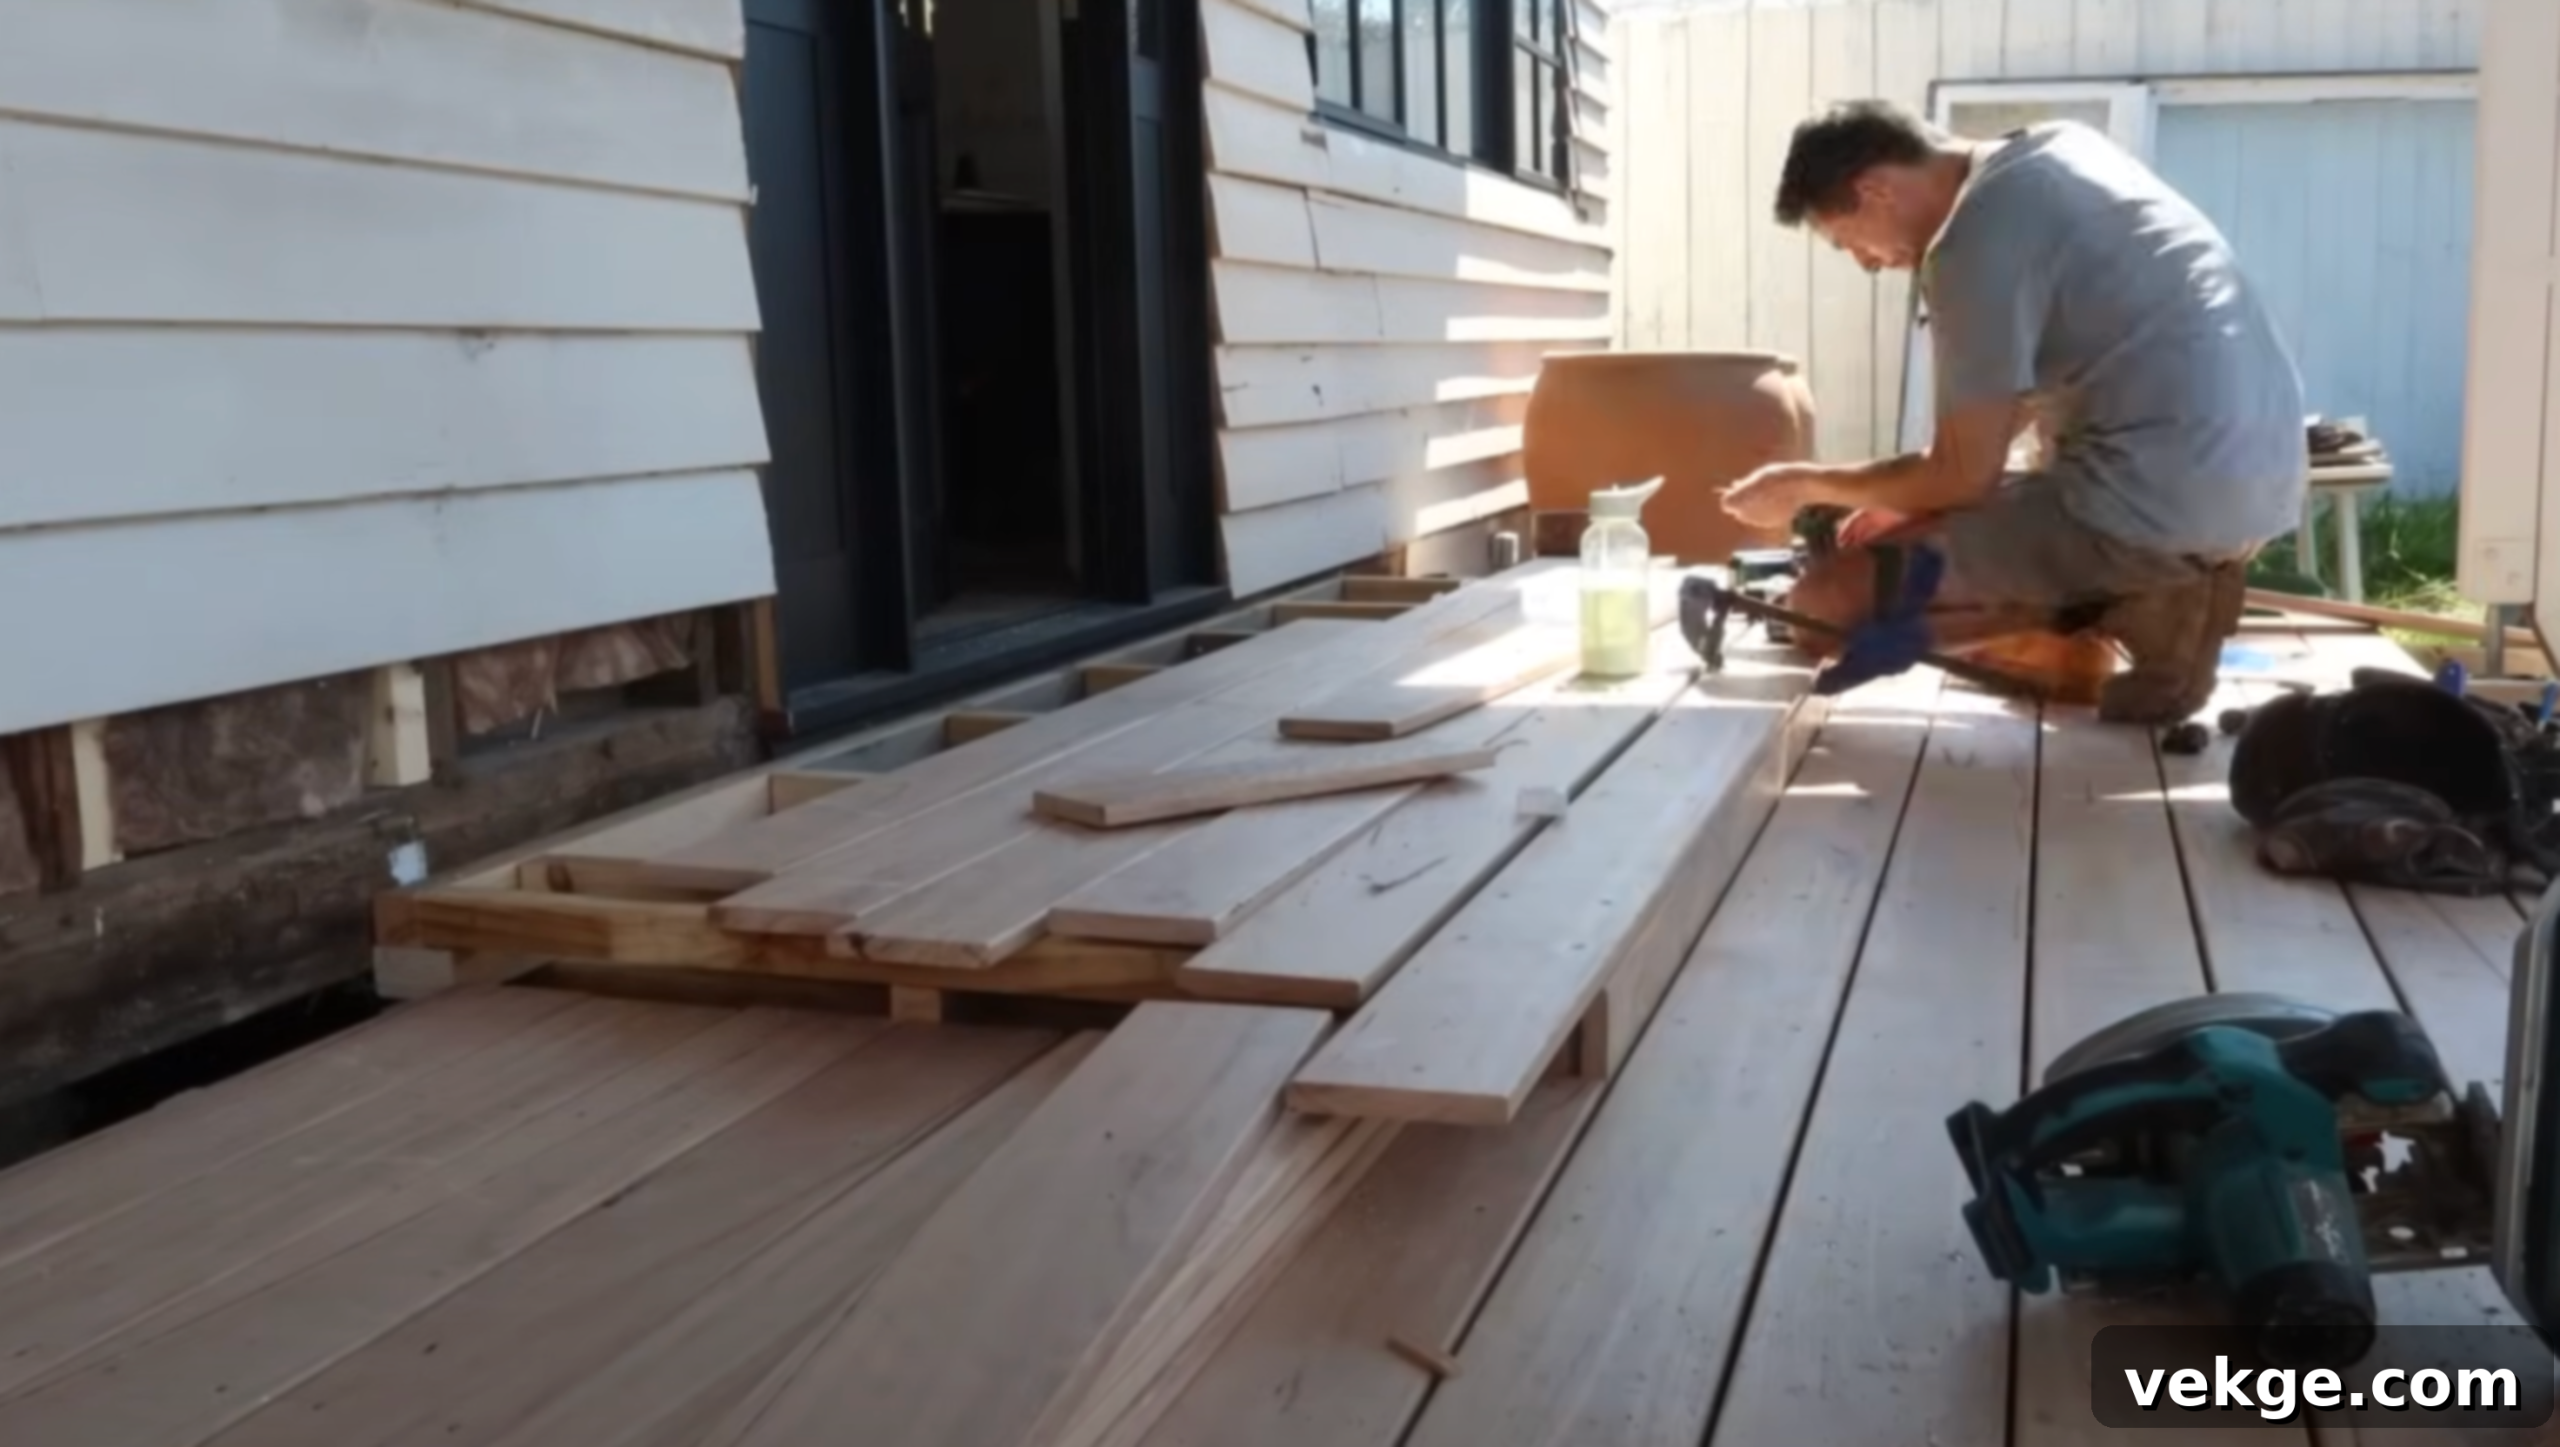
If your deck project surrounds a front door, creating a well-integrated landing is essential for safety, aesthetics, and a smooth transition from your home to the new outdoor space. For this project, a step-up of approximately 90mm (or about 3.5 inches) at the front door can create a comfortable and natural entry point.
This landing can be achieved by extending the deck frame (joists and supporting structure) underneath the door threshold, ensuring the decking boards come up to the desired height. You might need to build a small, independent frame for the landing section if it’s elevated higher than the main deck structure, or if it needs to connect to an existing step or threshold. Ensure the landing is wide and deep enough to provide a safe and stable platform for stepping in and out of your home. Consider incorporating a non-slip surface if the landing will be exposed to rain or moisture.
To enhance the aesthetic appeal and create a more dynamic look, consider adding decorative elements around the landing. Planters filled with vibrant greenery or flowers can frame the doorway, adding a welcoming touch. Varying the levels of your deck or adding built-in seating near the landing can also create visual interest and functional zones within your outdoor area, making your entrance truly grand.
Step 6: Install Joist Protection (Optional but Highly Recommended)
While often considered an optional step, installing joist protection is a smart investment that can significantly extend the lifespan of your deck. Joist protection typically involves applying a self-adhesive, waterproof tape (often butyl or asphalt-based) to the top surface of your joists before the decking boards are installed.
The primary benefit of joist protection is moisture prevention. When rain or condensation seeps through the gaps between decking boards, it can sit on top of the joists, leading to water accumulation. This constant exposure to moisture, combined with the penetration points created by deck screws, can accelerate wood decay, rot, and the growth of mold and mildew, even in pressure-treated lumber. The tape acts as a barrier, sealing off the joist from moisture and protecting the integrity of the wood, particularly where screws pierce the joist, which is a common entry point for water.
This step is particularly beneficial in areas prone to heavy rainfall, high humidity, or intense sun exposure, where temperature fluctuations can lead to condensation. While it adds a small amount to your material cost and installation time, the long-term benefits of a healthier, more durable deck frame far outweigh the initial investment, saving you from costly repairs or premature deck replacement down the line.
Step 7: Fine-Tune the Deck Gaps – The Mark of Quality Craftsmanship
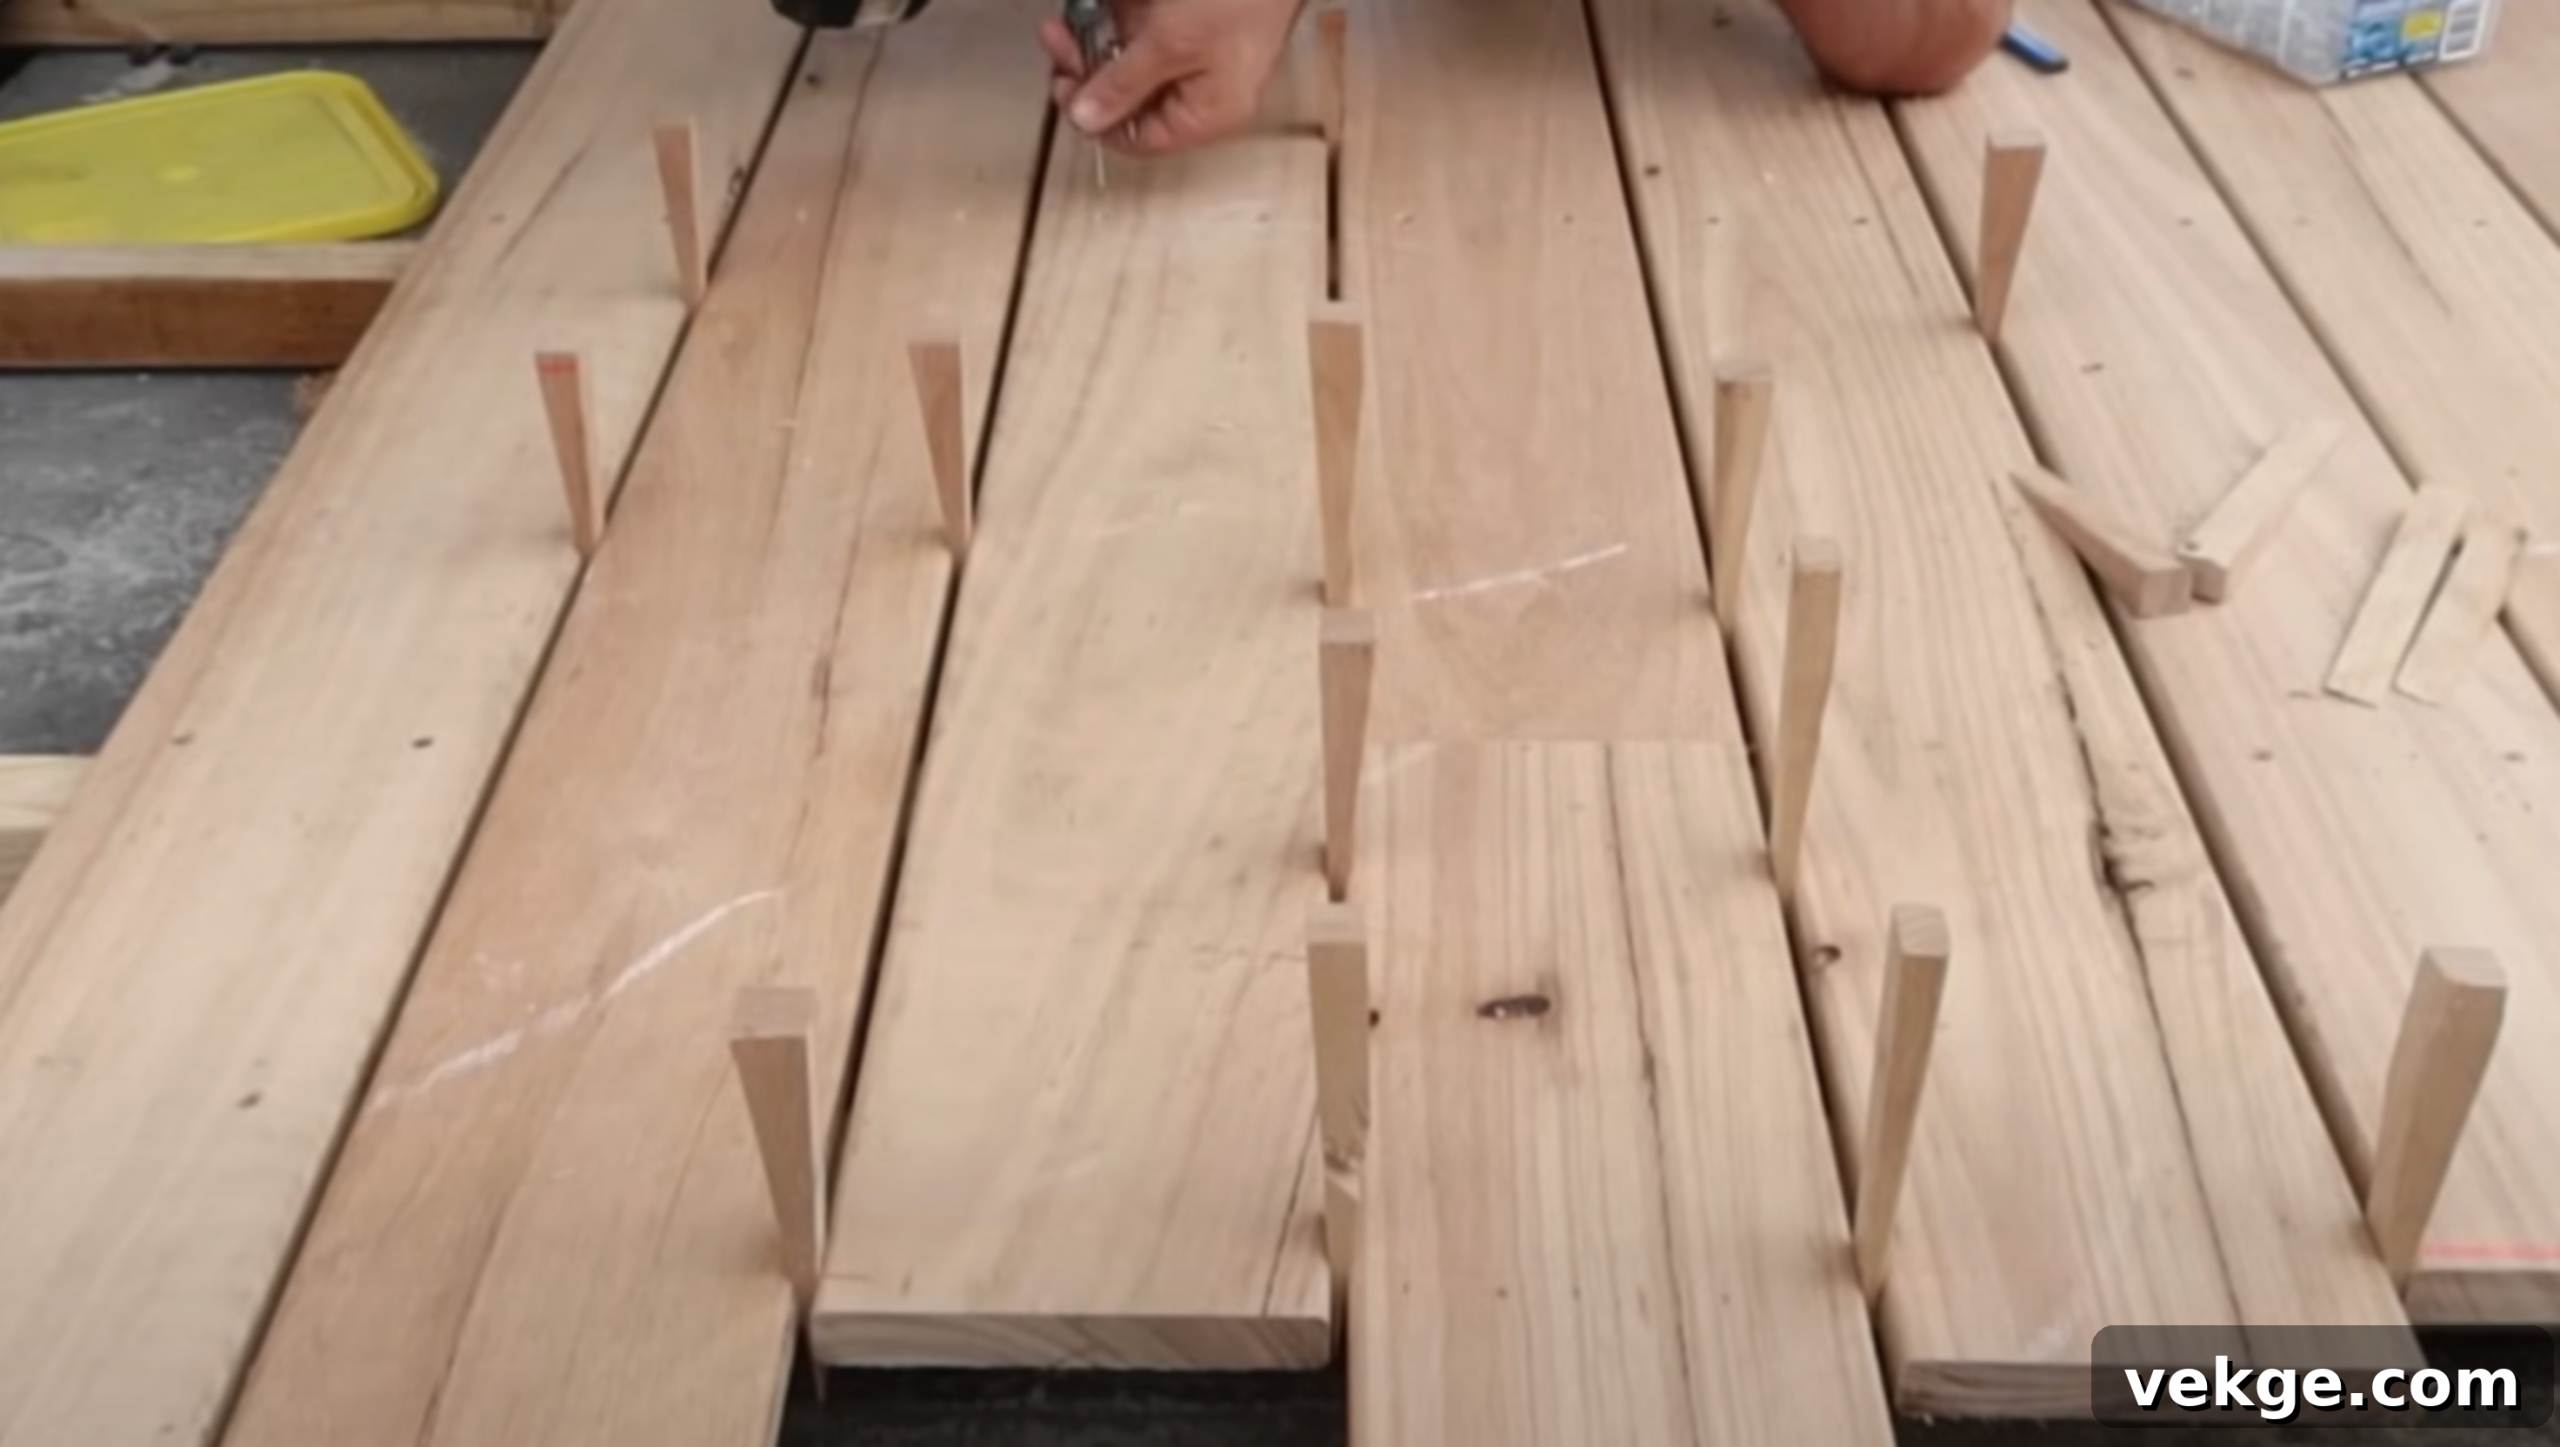
Once all your decking boards are secured in place, a crucial final step for a professional finish is to fine-tune the spacing between them. Even with careful installation, slight variations in board thickness or minor shifts can result in uneven gaps, which can detract from the overall appearance of your deck.
This is where specialized decking spacers or simple wedges, often made from decking offcuts, become invaluable. Working your way along the length of the deck, insert these wedges into the gaps to make small adjustments. If a gap is too tight, gently tap a wedge to widen it. If it’s too wide, you might carefully use a rubber mallet to slightly nudge an adjacent board closer, then insert a wedge to hold the new spacing. Maintain consistent spacing, typically 1/8 inch or 1/4 inch as recommended by your material manufacturer, across all boards. This meticulous attention to detail ensures that all the gaps are uniform, creating a visually pleasing, smooth, and consistent finish that speaks volumes about the quality of your work.
Step 8: Finish and Seal the Deck – Protection and Beauty
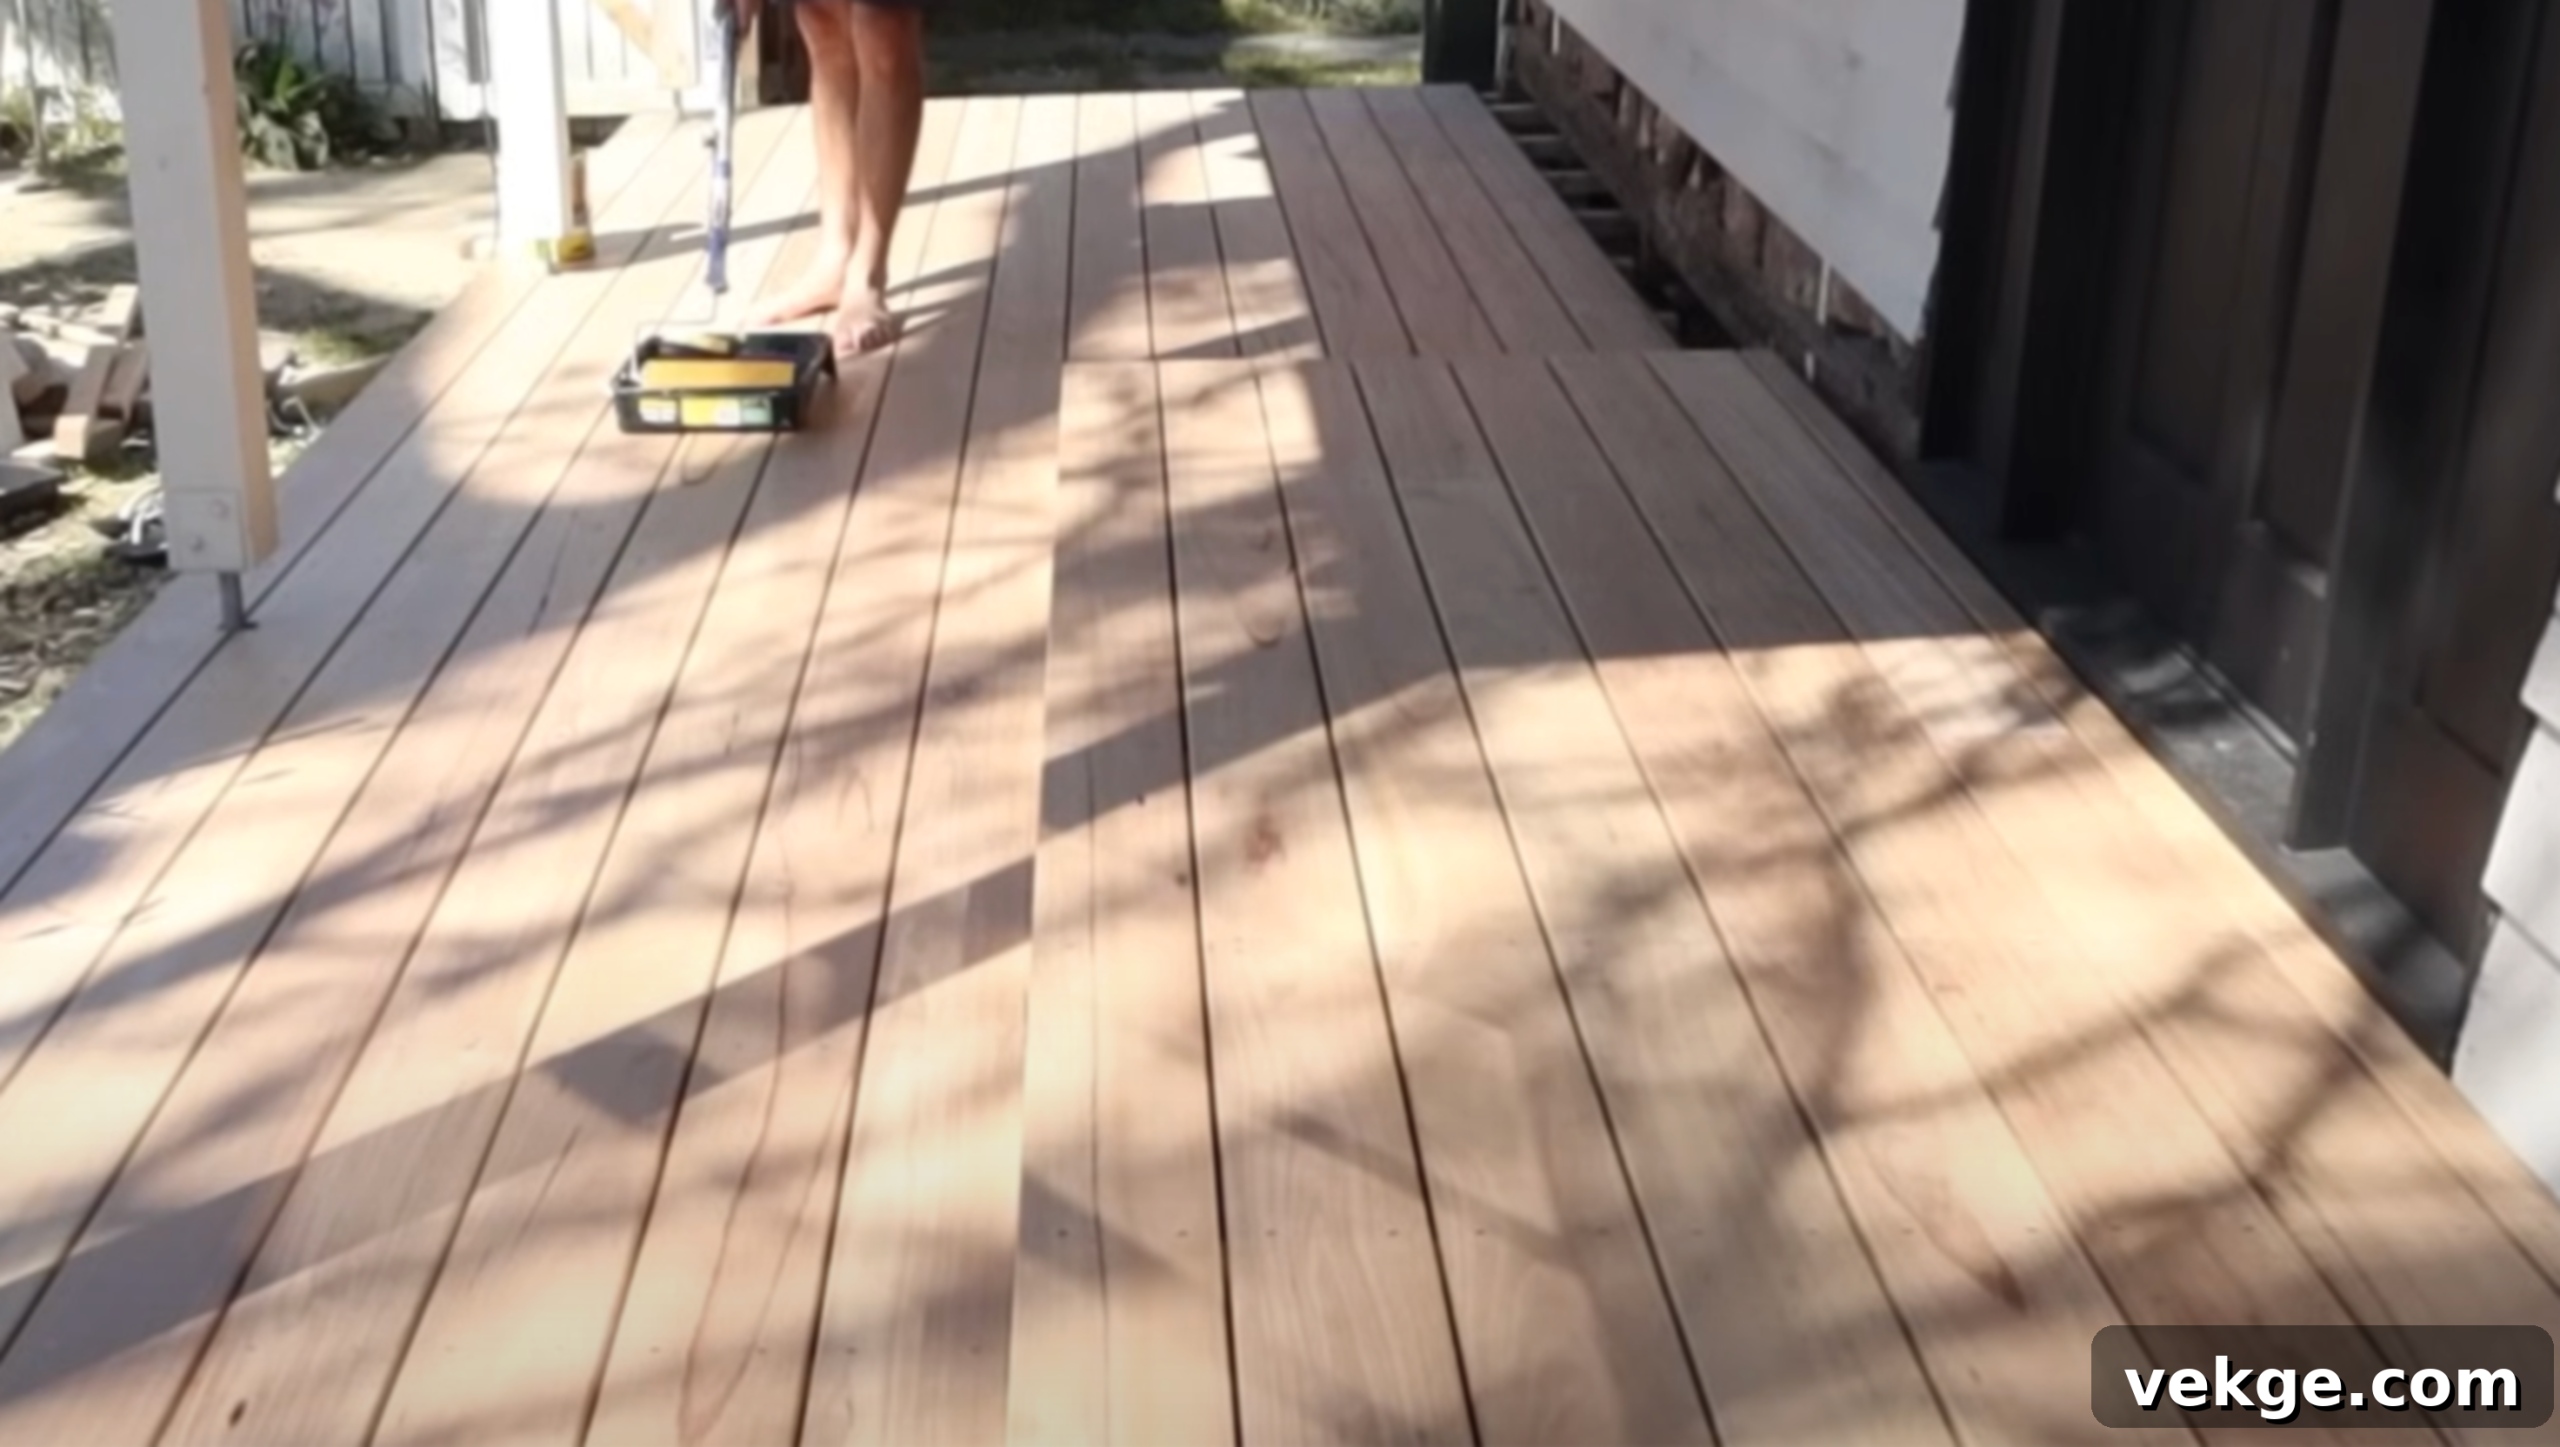
After all the boards are installed, leveled, and gapped to perfection, it’s time for the final touches that will protect your investment and enhance its beauty. Take a last thorough look over the entire deck surface. Check for any protruding screws, splintered edges, or minor imperfections that need addressing. Sand down any rough spots to ensure a smooth, splinter-free surface. If you have any overhanging board ends, now is the time to perform a final, precise trim with a circular saw to achieve perfectly straight edges.
For wood decking, such as popular hardwoods like Blackbutt or traditional pressure-treated pine, applying a high-quality sealant or stain is paramount. This protective layer shields the wood from the harsh elements – UV rays, rain, and humidity – which can cause fading, cracking, and rot. Sealants help repel water, while stains add color and UV protection. Choose a product that penetrates the wood for long-lasting defense. Apply the finish according to the manufacturer’s instructions, typically using a roller, brush, or sprayer, ensuring even coverage. This step is critical to keeping your deck looking vibrant and ensuring it lasts for many enjoyable years.
Want to see the entire process in action? Watch the video below for a step-by-step visual guide on building a deck over a concrete slab:
Common Mistakes to Avoid While Building a Deck Over Concrete
Even with careful planning, DIY projects can sometimes encounter pitfalls. Being aware of common mistakes can help you navigate your deck-building journey more smoothly and ensure a long-lasting, beautiful result. Here are a few critical errors to avoid:
- Neglecting Concrete Preparation: Skipping the initial inspection and repair phase of your concrete slab is a recipe for disaster. Building on a cracked, crumbling, or severely uneven surface will inevitably lead to an unstable and prematurely failing deck. Always ensure the concrete is clean, sound, and adequately leveled before starting any framing.
- Improper Joist Spacing and Leveling: Inconsistent spacing between joists can cause decking boards to sag or become unstable over time. More critically, failing to properly level the joists will result in an uneven deck surface, which not only looks bad but can also create tripping hazards and lead to improper water drainage. Meticulously measure, space, and shim your joists.
- Forgetting About Drainage and Ventilation: This is perhaps one of the most critical overlooked aspects when building over concrete. If water becomes trapped beneath your deck, it will lead to serious moisture problems, including rot, mildew, and pest infestation for wood components, and potential odors. Ensure there is adequate airflow and a slight slope to allow water to drain away from your house and escape from under the deck. Using joist tape and creating an air gap between the concrete and joists (via sleepers or shims) is essential.
- Using Incorrect Fasteners: Employing indoor screws or non-weather-resistant fasteners for an outdoor deck is a common mistake. These will rust, weaken, and stain your decking boards, compromising the structural integrity. Always use exterior-grade, corrosion-resistant deck screws (stainless steel or coated) designed for the specific decking material.
- Ignoring Local Building Codes and Permits: Before starting any significant outdoor construction, always check with your local municipality for building codes and permit requirements. Failing to obtain necessary permits or adhere to codes can lead to fines, forced demolition, or issues when selling your home.
- Inadequate Expansion Gaps: Both wood and composite decking materials will expand and contract with changes in temperature and humidity. Failing to leave appropriate gaps between boards and around perimeter elements can lead to buckling, warping, or cracking of your decking.
Conclusion: Enjoy Your Transformed Outdoor Living Space!
To recap, building a deck over an existing concrete porch is an incredibly smart, cost-effective, and rewarding way to enhance your home’s outdoor appeal and functionality. It eliminates the need for extensive demolition and complex foundation work, making it an accessible DIY project for many homeowners.
By carefully selecting the right decking materials, whether it’s the classic charm of pressure-treated wood or the low-maintenance durability of composite, you can create a personalized outdoor sanctuary that perfectly matches your style and budget. Our detailed, step-by-step guide has provided you with the knowledge and confidence to tackle this transformation, from meticulous slab preparation and precise joist installation to the final touches of sealing and fine-tuning.
Remember, the key to a successful project lies in careful planning, patience, and attention to detail at every stage. Gather the right tools, allocate sufficient time, and don’t rush the process. The result will be a beautiful, sturdy deck that not only adds significant value to your home but also provides a fantastic space for relaxation, entertainment, and making cherished memories for years to come.
Ready to get started and unlock the full potential of your outdoor area? Don’t forget to explore other helpful blogs and resources for more DIY tips and tricks to inspire your next home improvement project!
