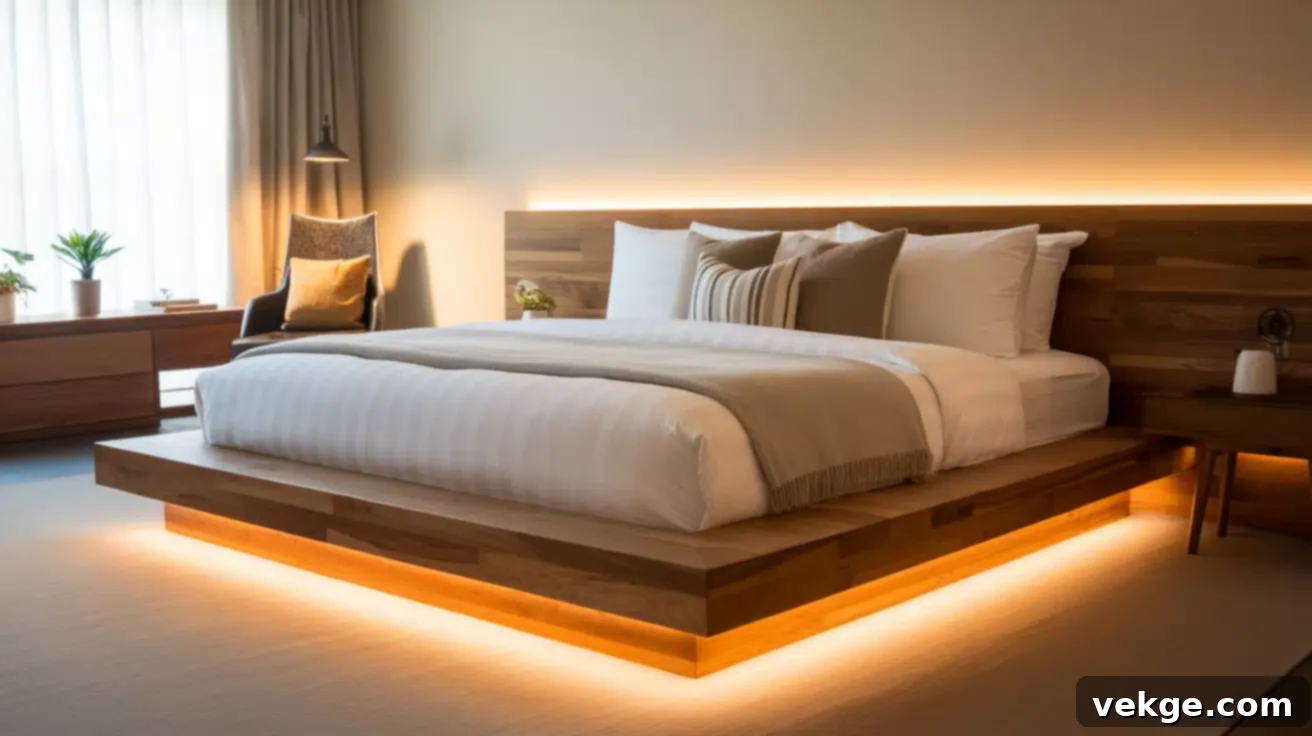
Build Your Dream Bedroom: A Comprehensive DIY Guide to a King Size Platform Bed
Imagine sleeping better, waking up refreshed, and knowing you saved a significant amount of money in the process. Building your own king-size platform bed is not just a weekend project; it’s an investment in your comfort, your budget, and your personal style. Platform beds offer a sleek, modern aesthetic and eliminate the need for a bulky, expensive box spring, immediately cutting down on costs and simplifying your bedroom.
When you embark on this rewarding DIY journey, you gain complete control over the final product. Want extra storage? Integrate custom drawers. Prefer a specific wood tone to match your existing décor? You choose every plank. Or perhaps you desire a simple, clean-lined design that radiates minimalist charm. The possibilities are endless, and the satisfaction of crafting a central piece of furniture for your home is unparalleled.
The best part? A handcrafted platform bed can cost significantly less than comparable store-bought options, yet it boasts superior durability and a lifespan that will see you through many years of peaceful sleep. This comprehensive guide is designed to empower you with the knowledge and confidence to construct a strong, beautiful DIY king-size platform bed that perfectly aligns with your aesthetic preferences and financial goals.
Understanding Platform Beds: The Foundation of Modern Comfort
Platform beds have become a staple in modern bedrooms, celebrated for their clean lines, practicality, and cost-saving benefits. Let’s delve into what makes these bed frames a smart choice for any homeowner looking to upgrade their sleep space.
What is a Platform Bed?
At its core, a platform bed is a streamlined bed frame featuring a solid or slatted flat surface designed to directly support your mattress. Unlike traditional bed frames that require a box spring for mattress support and height, platform beds eliminate this extra component. They typically sit lower to the ground, contributing to a contemporary, airy feel in the room and promoting better airflow around your mattress. This all-in-one design simplifies setup and often results in a more stable sleeping surface.
Benefits of a DIY Platform Bed
- Cost Savings: The most immediate benefit is avoiding the purchase of an expensive box spring. Furthermore, building your own frame with readily available lumber is almost always more budget-friendly than buying a pre-fabricated bed from a retail store.
- Integrated Storage Solutions: Many platform bed designs offer ingenious built-in storage options, such as drawers or hidden compartments underneath. This is a game-changer for smaller bedrooms, providing extra space for clothes, linens, or seasonal items without cluttering your floor.
- Superior Durability and Stability: Because platform beds are designed for direct mattress support, they often feature a robust internal structure. When built correctly, they are incredibly strong, minimizing the squeaks and wobbles often associated with older or less sturdy bed frames, leading to a more peaceful night’s sleep.
- Modern Aesthetic: Their inherently low profile and clean design make platform beds a perfect fit for contemporary, minimalist, or even Japandi-style interiors. They create a sense of spaciousness and understated elegance.
- Improved Mattress Life: The firm, even support provided by a platform bed’s slats or solid base can help prevent mattress sagging and promote better air circulation, potentially extending the life of your mattress.
Popular Platform Bed Types
The beauty of a DIY project lies in its customizability. You can adapt any of these popular styles to your specific taste:
- Floating Platform Beds: These designs create the illusion that the bed is hovering above the floor, often achieved with recessed bases or clever leg placement. They offer a highly modern and sophisticated look.
- Platform Beds with Integrated Storage: Featuring drawers, shelves, or lift-top mechanisms, these beds maximize functionality, making them ideal for small spaces or anyone needing extra organizational options.
- Simple, Clean-Lined Designs: Focusing on minimalist aesthetics, these beds emphasize natural wood grain, precise joinery, and an uncluttered appearance, often without a headboard or footboard.
- Modern Legged Designs: Incorporating sleek, often metal or tapered wooden legs, these beds lift the platform slightly higher, offering a refined, airy feel.
- Rustic/Farmhouse Style Frames: Crafted from reclaimed wood, rough-sawn lumber, or distressed finishes, these beds bring warmth, character, and a connection to nature into the bedroom.
Choosing the Right Design for Your Platform Bed
Before you gather your tools and wood, it’s crucial to thoughtfully consider your design choices. Your ideal bed frame will be a harmonious blend of budget, aesthetics, available tools, and your personal skill level.
Key Factors to Consider Before Building
Making informed decisions at this stage will ensure a successful and satisfying build:
- Budget: Determine how much you’re willing to spend. This will influence your choice of wood (e.g., pine is cheaper than oak), fasteners, and finishing materials.
- Desired Aesthetic: What style best complements your bedroom? Modern, rustic, industrial, minimalist? Look for inspiration online and in furniture catalogs to narrow down your vision.
- Tool Availability & Skill Level: Be realistic about your woodworking expertise. Some designs require complex joinery (like dovetails or mortise and tenon), while others rely on simple butt joints with screws and brackets. If you’re a beginner, opt for simpler designs that use basic tools.
- Storage Needs: Do you need extra storage? If so, consider designs with built-in drawers or ample space underneath for bins. This can significantly impact the complexity and material requirements.
- Room Size & Layout: Measure your bedroom carefully. A king-size bed takes up considerable space. Ensure there’s enough room for walking around, opening drawers (if applicable), and for other furniture.
- Mattress Type: While platform beds are generally compatible with most mattresses, if you have a very heavy or specialized mattress, you might need to reinforce your slat system or use a solid plywood deck for optimal support.
Design Inspirations for Your King Size Platform Bed
To help you visualize the possibilities, here are a few popular design concepts:
1. Simple and Sturdy Platform Bed
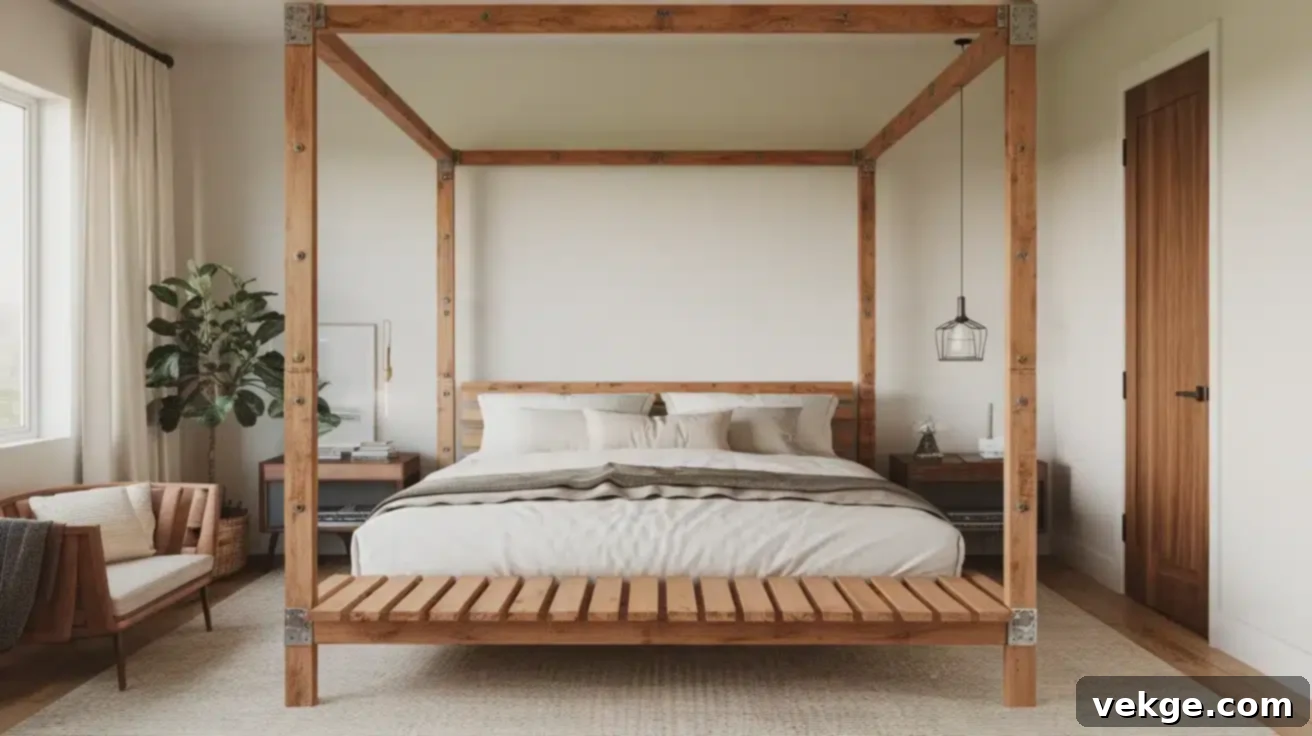
This timeless design prioritizes strength and longevity. It typically uses robust 4×4 posts for the corners, providing excellent stability, and 2×8 boards for the side and end rails. The mattress support is achieved by an inner frame of 2x4s, onto which slats are securely attached. Steel L-brackets at all corner joints and strategic points reinforce the structure, ensuring a solid, long-lasting bed. This design is perfect for those who want a reliable, no-frills bed that can withstand years of use.
2. Modern Platform Bed with a Minimalist Look
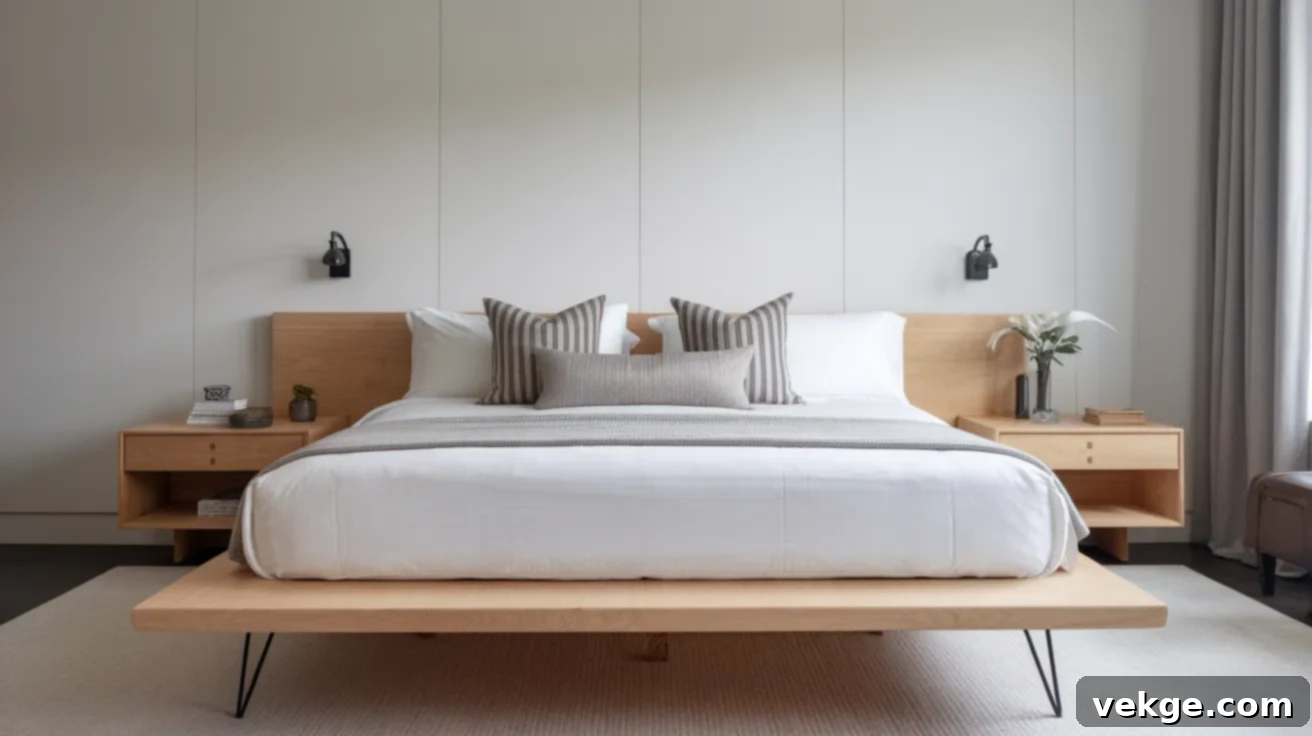
Inspired by sleek Japanese aesthetics, this design focuses on clean lines and an understated presence. It often features hidden screws and dowel joinery to maintain a smooth, uninterrupted surface. The bed appears to “float” thanks to recessed base supports or stylish steel hairpin legs (typically 6 inches tall). Pine or high-grade plywood are excellent material choices for their durability and smooth finish, making this bed tough enough for nightly use while exuding a sophisticated, contemporary vibe.
3. Budget-Friendly King Platform Bed (Under $100)
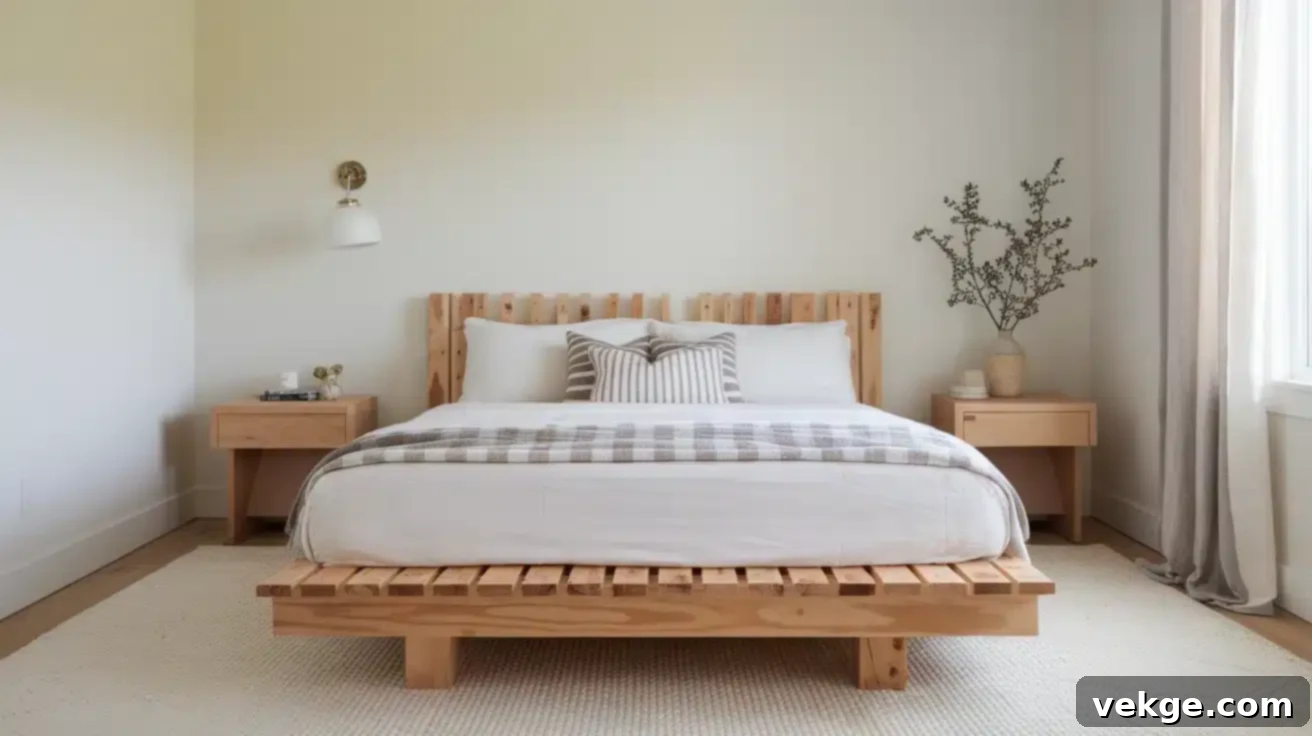
Yes, it’s possible to build a sturdy king-size platform bed for under $100 using readily available lumber like common pine 2x6s. This design often utilizes straightforward construction techniques, such as pocket holes for strong and easy-to-hide joints. The mattress support can be achieved with simple 1×4 or 1×6 slats, or even tongue-and-groove boards for added rigidity. A simple stain or paint finish that complements your room can transform this economical frame into a stylish and functional piece.
4. Platform Bed with Built-in Storage
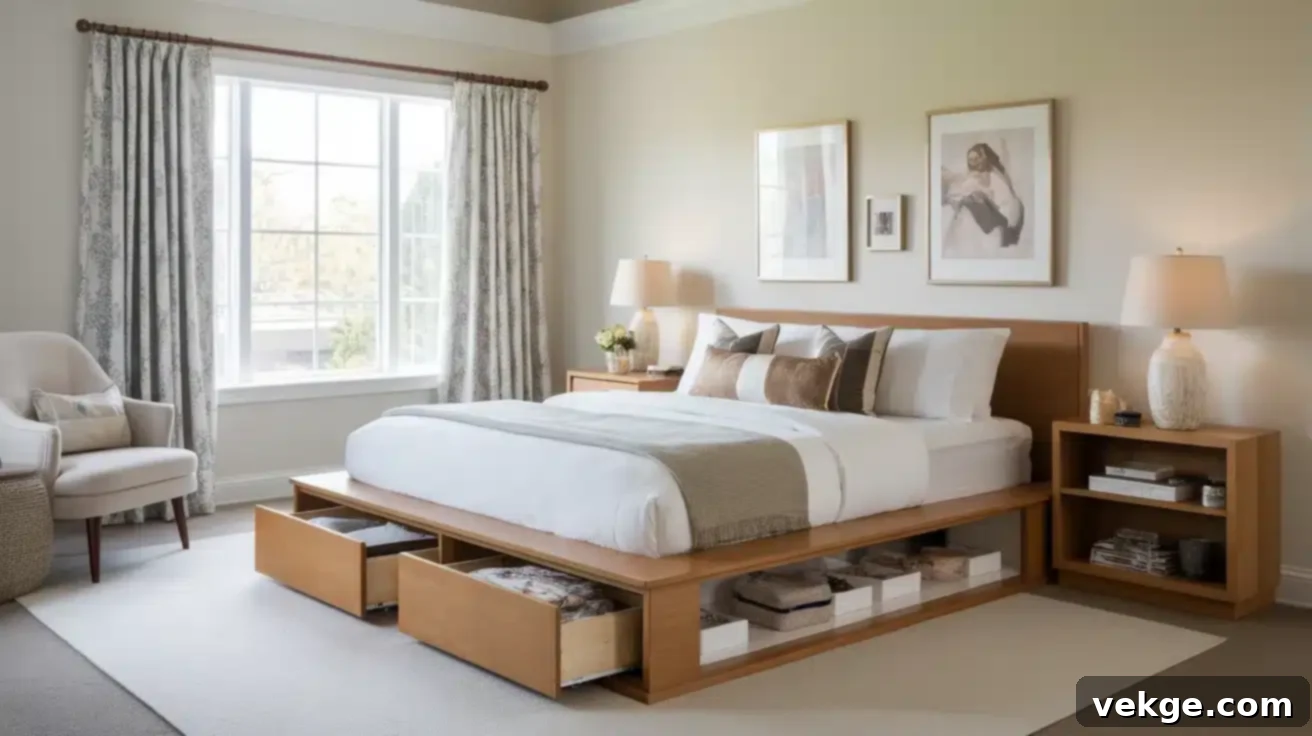
For those needing maximum organization, this clever design is a lifesaver. It typically features multiple drawers on the front or sides, along with open shelving or hidden compartments within the frame. A smart design will allow for easy disassembly, making moving less of a hassle. Robust plywood construction for the frame and corners ensures stability, even with fully loaded drawers. These beds transform under-bed space into valuable, accessible storage, perfect for small apartments or decluttering your home.
Materials and Tools Needed for Your DIY King-Size Platform Bed
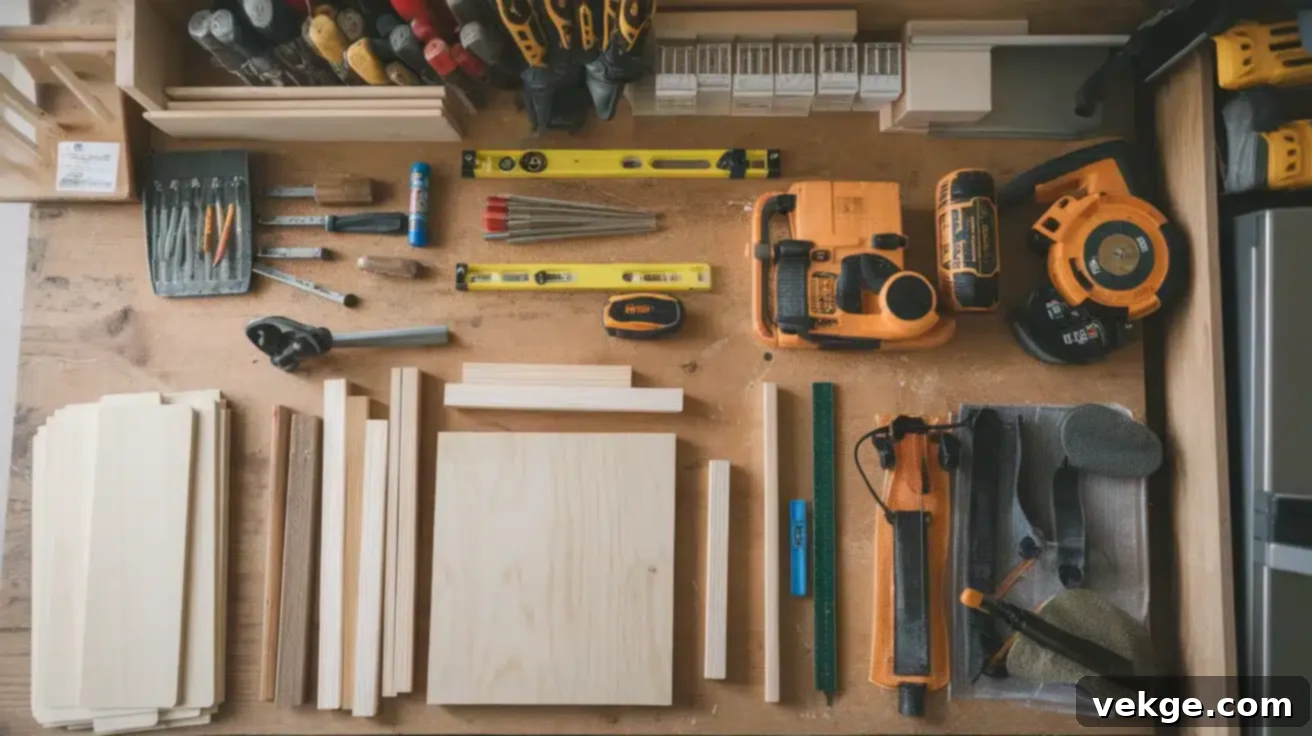
Gathering all your materials and tools before you start is crucial for a smooth and efficient building process. Here’s a comprehensive list of what you’ll likely need:
Essential Building Materials
- Lumber for Frame and Supports:
- 2x4s (or 2x6s/2x8s depending on design): For the main frame, side rails, end rails, and internal support ledgers.
- 1x3s or 1x4s: For the mattress slats. Ensure these are strong and straight.
- Plywood Sheets (¾” thickness): Often used for a solid platform deck (instead of slats) or for building a headboard, drawers, or structural components.
- Wood Screws:
- 2½” wood screws: For joining thicker frame pieces.
- 1¼” wood screws: For attaching slats and other thinner components.
- Wood Glue: Provides additional strength and stability to all wood-to-wood joints, reducing potential squeaks.
- Corner Brackets: Steel L-brackets are excellent for reinforcing corner joints, especially for large king-size frames.
- Center Support Beam and Legs: Absolutely essential for a king-size bed to prevent sagging in the middle. This often consists of a long 2×4 or 2×6 running down the center, supported by one or more vertical legs.
- Optional: Casters (for movable storage), drawer slides, metal legs (e.g., hairpin legs), decorative trim.
Recommended Tools
- Measuring Tape: For precise measurements – measure twice, cut once!
- Pencil: For marking cuts and drill points.
- Circular Saw: Your primary tool for cutting lumber. A miter saw is even better for perfectly square and angled cuts.
- Drill/Driver: Essential for pre-drilling holes and driving screws.
- Drill Bits: Various sizes for pilot holes and countersinking screws.
- Sander (Orbital or Belt Sander): For smoothing rough edges and preparing surfaces for finishing.
- Level: To ensure your frame is perfectly flat and square during assembly.
- Clamps (at least 2 large ones): To hold pieces securely while gluing and screwing.
- Screwdriver: For manual tightening or when your drill is too bulky.
- Speed Square or Framing Square: For ensuring perfectly square corners.
Finishing Materials
- Sandpaper: Start with 80-grit for shaping and smoothing, then finish with 120- or 220-grit for a silky smooth surface.
- Wood Stain or Paint: To achieve your desired aesthetic.
- Polyurethane Finish (or other clear coat): To protect the wood and provide a durable, long-lasting surface.
- Brush, Roller, or Rag: For applying stain, paint, and finish.
Crucial Safety Equipment
- Safety Glasses: Always protect your eyes from flying debris.
- Ear Protection: Essential when using power tools like saws and drills.
- Work Gloves: To prevent splinters and provide a better grip.
- Dust Mask/Respirator: Protects your lungs from wood dust and fumes from finishes.
Step-by-Step Guide to Building Your DIY King-Size Platform Bed
This is where your vision truly comes to life! Approach each step with care and patience. Rushing often leads to avoidable mistakes that can be time-consuming to fix.
Step 1: Cutting the Wood to Size
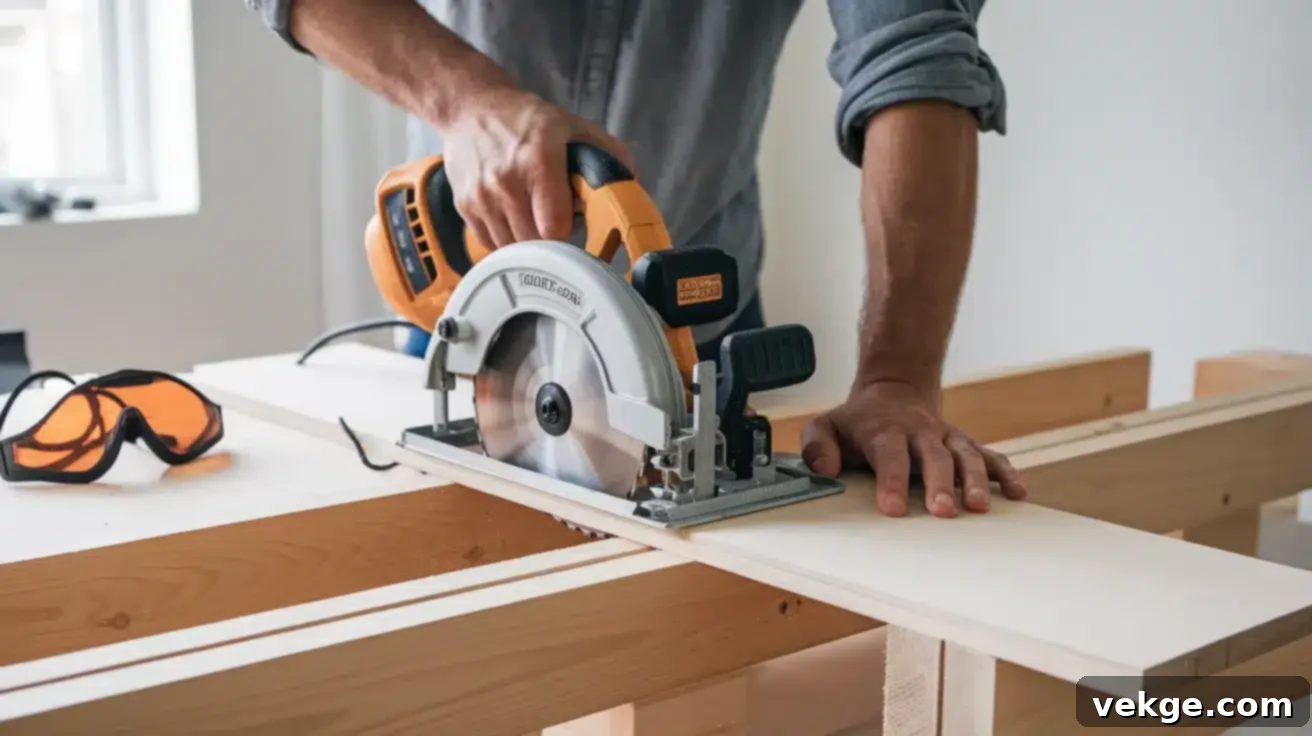
- Measure Twice, Cut Once: This woodworking adage is paramount. For a standard king-size mattress (76″ W x 80″ L), your frame’s inner dimensions should match or be slightly larger than these measurements.
- Side Rails: Cut two pieces of your chosen lumber (e.g., 2x8s) to approximately 80 inches long.
- End Rails: Cut two pieces to approximately 76 inches long. (These lengths will be adjusted based on your chosen joinery method – e.g., if side rails butt into end rails, or vice versa.)
- Support Slats: Measure the inside width of your assembled frame. Cut your 1×3 or 1×4 slats to this exact length. You’ll need approximately 15-20 slats for adequate support, spaced 2-3 inches apart.
- Center Support Beam: Cut a 2×4 or 2×6 to the length of the inside of your side rails (approx. 80 inches).
- Support Legs: If your design includes them, cut your 4×4 or 2×4 legs to your desired bed height (e.g., 6-12 inches).
- Safety First: Always use appropriate safety gear (glasses, ear protection) when operating power saws.
Step 2: Sanding and Staining/Painting
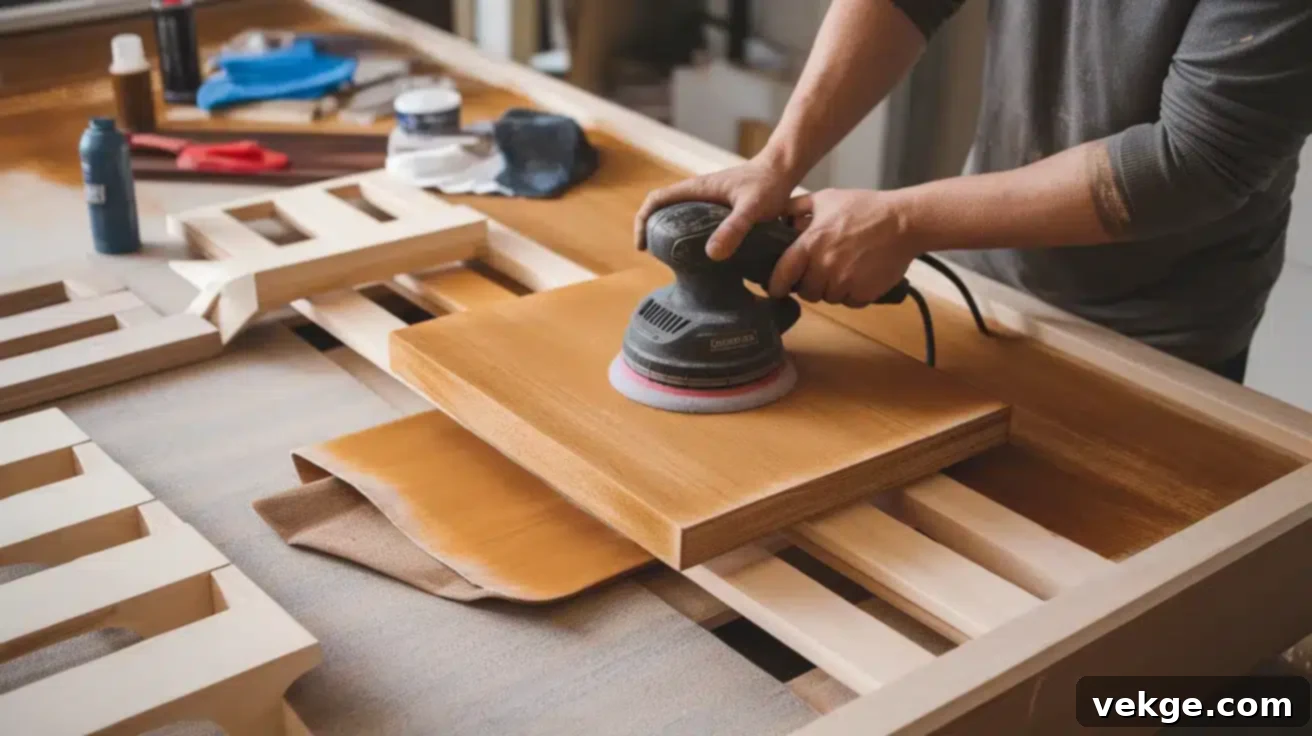
- Smooth Edges: Use your sander (starting with 80-grit, then moving to 120 or 220-grit) to smooth all cut edges, surfaces, and remove any splinters from every piece of wood. A smooth surface is key for a professional finish and preventing snags.
- Clean Dust: Wipe down all sanded pieces thoroughly with a tack cloth or damp rag to remove dust. This ensures the stain or paint adheres properly.
- Apply Finish: Apply your chosen wood stain or paint in even strokes or coats. Follow the manufacturer’s instructions for application and drying times. If staining, apply with the wood grain for best results.
- Allow Drying: Let all components dry completely before proceeding to assembly. This prevents smudging and ensures a durable finish. You might need multiple coats, with light sanding between coats for paint.
Step 3: Assembling the Base Frame
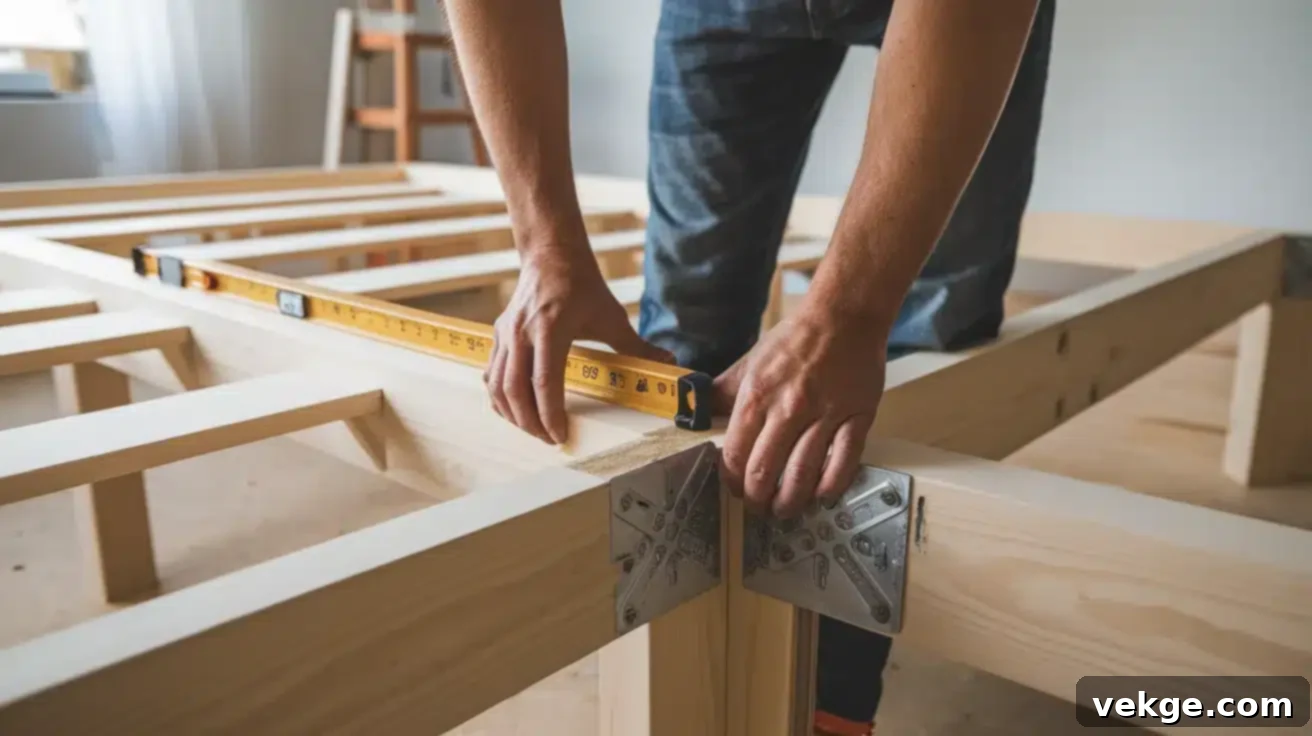
- Join Corners: Lay out your side and end rails. Apply wood glue to the ends and join the four corners of your frame using wood screws (pre-drill pilot holes to prevent splitting). Reinforce each corner with steel L-brackets on the inside for maximum strength. Ensure the frame is perfectly square using your framing square or level.
- Attach Legs (if applicable): If your design has individual legs, attach them securely to the corner posts or recessed areas of the frame using strong bolts or lag screws.
- Install Center Support Beam: This is critical for a king-size bed. Install your 2×4 or 2×6 center support beam running from the head to the foot of the bed. Secure it to the end rails with screws and L-brackets. Add one or two vertical support legs directly under this beam, touching the floor, to prevent any sag.
- Add Slat Ledgers: Attach 2×2 or 1×2 ledgers along the inside of your side rails (and potentially the center beam) at the desired height. These ledgers will support your mattress slats. Use wood glue and screws.
- Attach Slats: Place your cut slats across the frame, resting on the ledgers. Space them evenly, typically 2-3 inches apart. Secure each slat to the ledgers with 1¼” screws. Ensure they are firmly attached but don’t overtighten.
Step 4: Adding Storage (Optional)
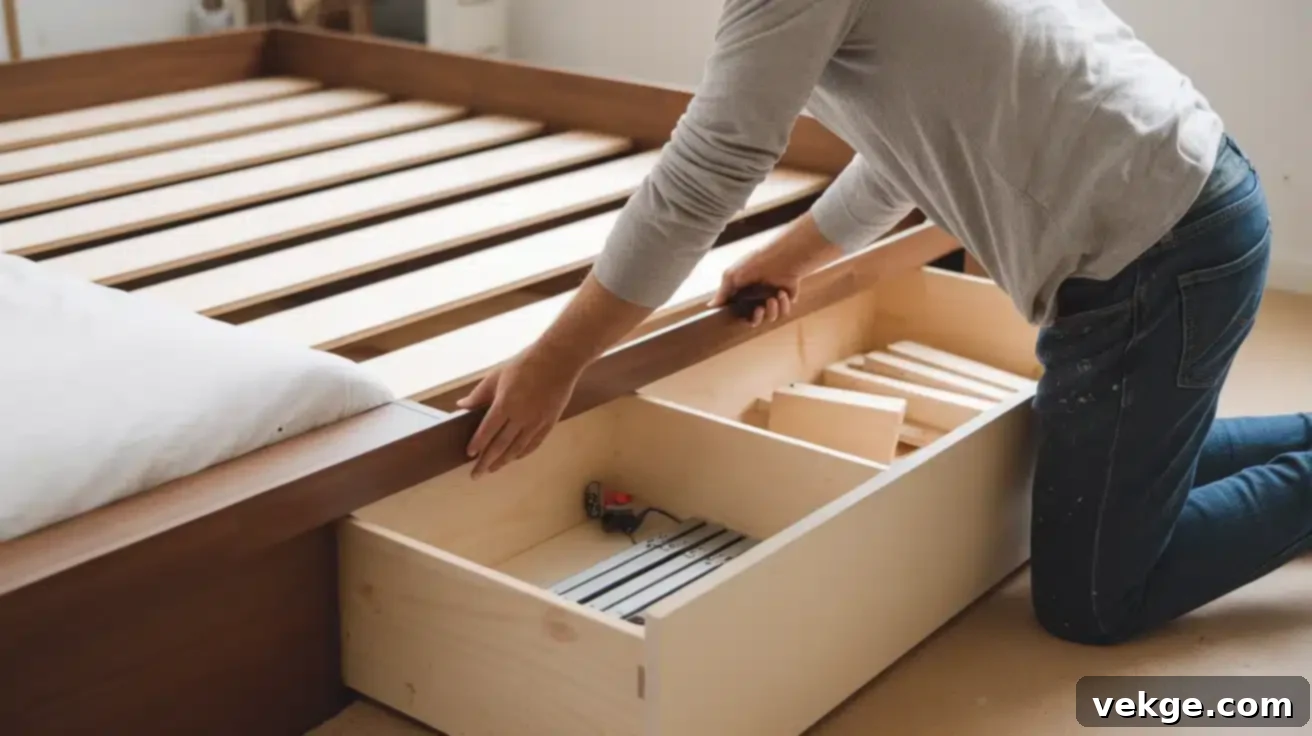
- Design and Build Drawer Boxes: If your design includes built-in drawers, construct simple plywood boxes. Ensure their dimensions allow them to slide easily under your bed frame, clearing any legs or supports.
- Install Drawer Slides: Attach heavy-duty drawer slides to the bed frame and the drawer boxes for smooth operation.
- Alternatively, Use Bins: For a simpler storage solution, consider using sturdy, store-bought plastic or fabric bins that fit neatly under your elevated platform bed.
- Clearance Check: Always double-check that your drawers can open fully without hitting bed legs or other furniture.
Step 5: Attaching the Headboard (Optional)
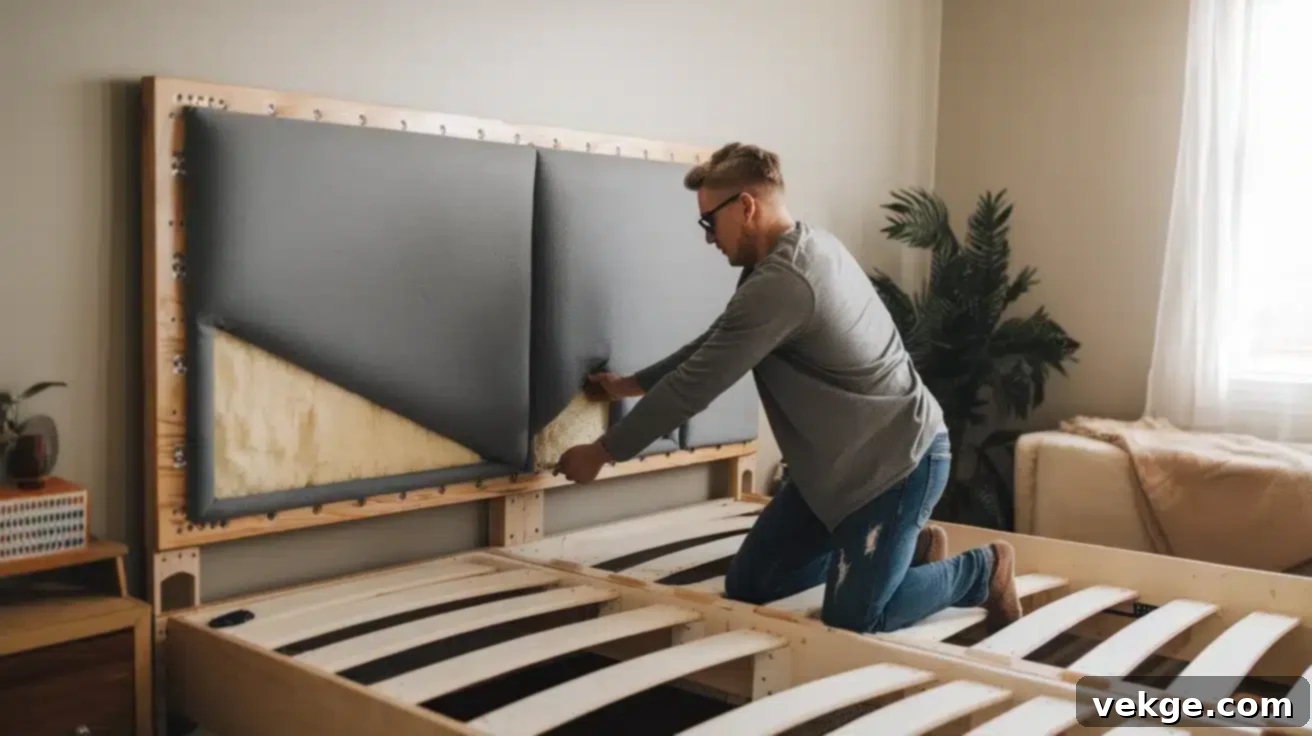
- Construct or Prepare Headboard: Build your headboard (e.g., a simple plywood panel, an upholstered design, or a reclaimed wood piece) separately.
- Secure Attachment: Connect your headboard to the bed frame using strong bolts and T-nuts or heavy-duty metal brackets. Ensure it’s firmly secured to prevent wobbling.
- Comfort & Aesthetics: For added comfort and a luxurious feel, consider padding your headboard with foam and covering it with a fabric that complements your bedroom decor, especially if you enjoy reading or sitting up in bed.
Step 6: Final Touches and Placement
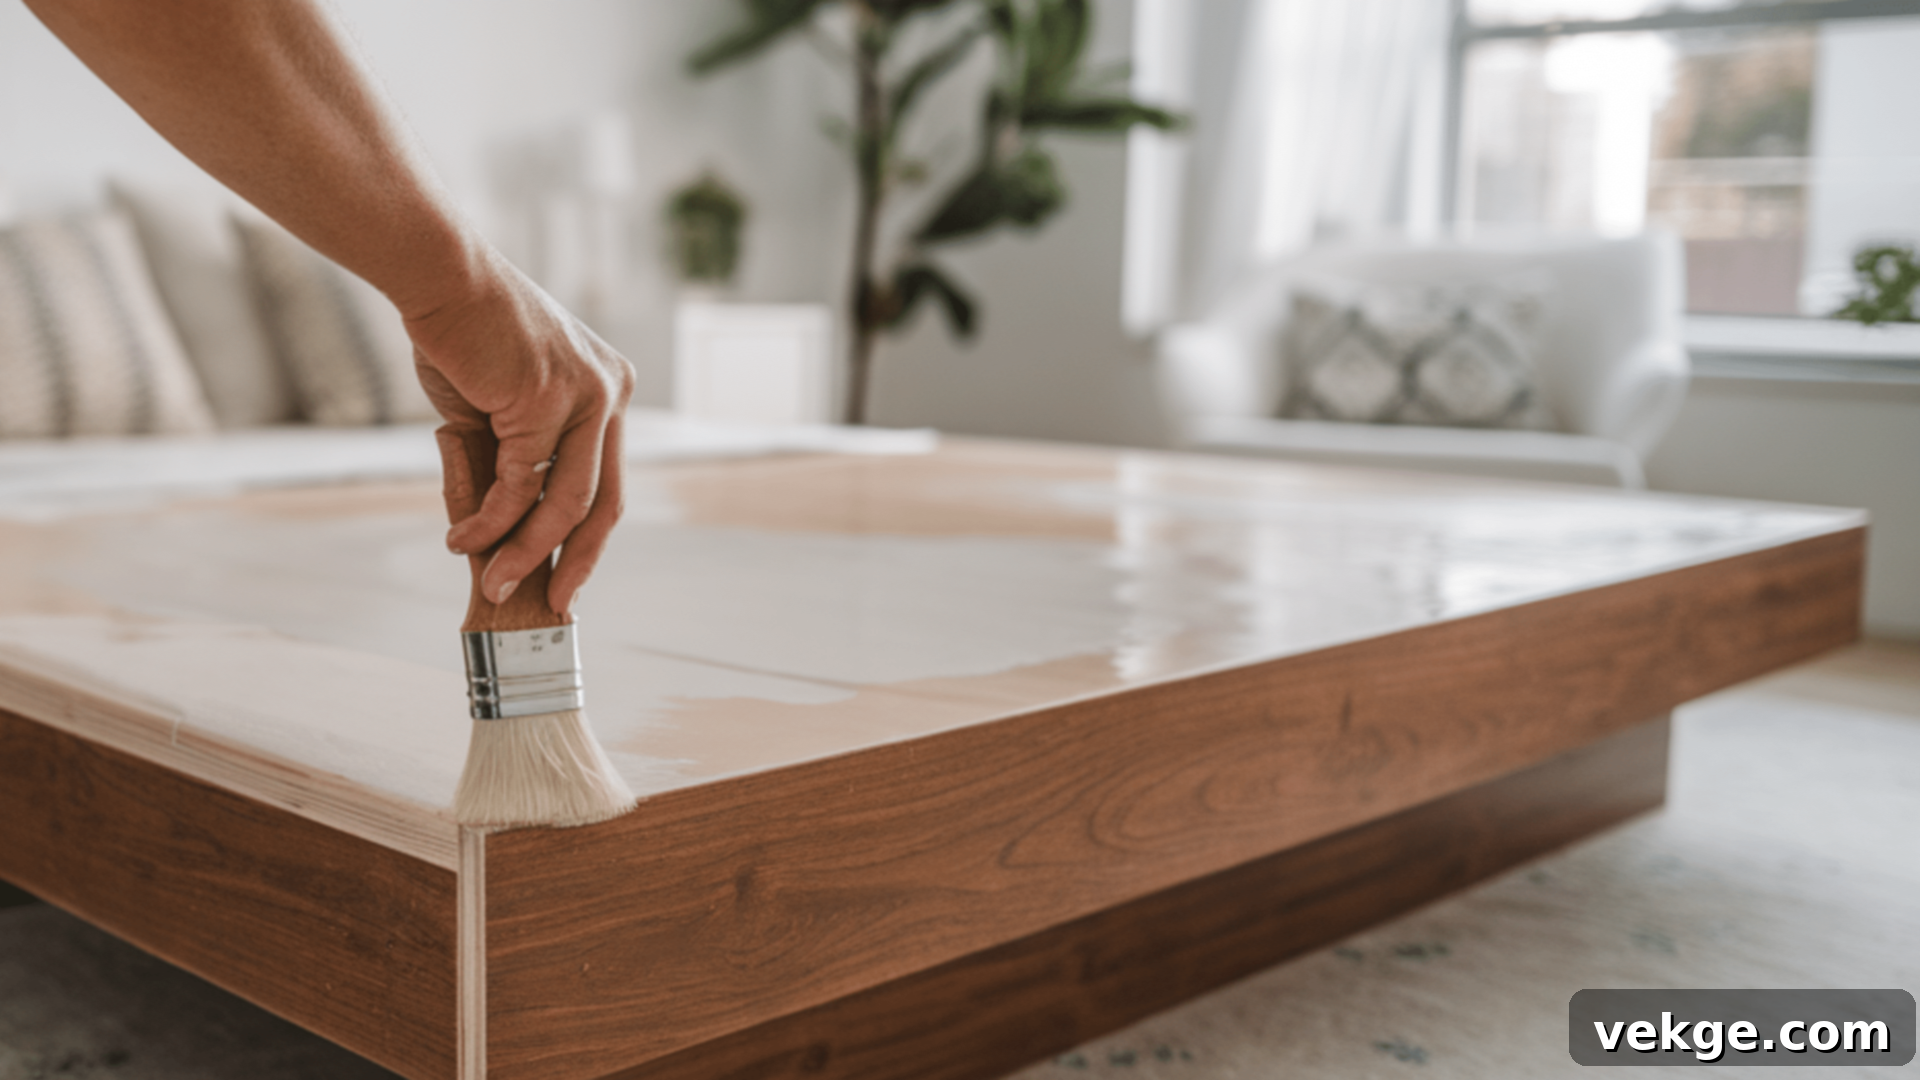
- Apply Clear Coat: Once any paint or stain is fully dry, apply one or more coats of polyurethane or another protective clear finish. This seals the wood, protects against wear and tear, and adds a beautiful sheen. Lightly sand with 220-grit sandpaper between coats for a super smooth finish.
- Tighten All Fasteners: Perform a final inspection. Go around the entire bed frame and ensure all screws and bolts are securely tightened. This is crucial for stability and preventing future squeaks.
- Add Felt Pads: Apply felt pads to the bottom of your bed legs or frame to prevent scratching your floor and to make it easier to move.
- Strategic Placement: Before adding your heavy king-size mattress, position your new bed frame exactly where you want it in the room. Once the mattress is on, it will be much heavier and harder to maneuver.
Troubleshooting Common DIY Bed Issues
Even the most meticulously planned DIY projects can encounter minor setbacks. Don’t be discouraged! These common issues are easily fixable and will help ensure your bed stands strong for years. As a fellow DIYer, I’ve faced these very problems and found simple, effective solutions.
1. Frame Wobbling? Strengthening Tips
A shaky bed is a nuisance that can disrupt your sleep. Here’s how to ensure rock-solid stability:
- Reinforce Corners: Even if you used them initially, double-check your corner brackets. Add additional or larger steel L-brackets where the side and end rails meet the legs.
- Regular Tightening: Periodically (every six months or so), re-tighten all screws and bolts throughout the frame. Wood can expand and contract, causing fasteners to loosen slightly over time.
- Add a Fifth Leg (or More): For king-size beds, a central support running head-to-foot is vital. If you only have one central leg, consider adding a second or third along this beam. A fifth leg directly in the center of the bed provides excellent, long-term anti-sagging support.
- Cross-Bracing: For extreme wobbles, consider adding diagonal cross-braces on the underside of the frame, especially between legs.
2. Slats Bending or Mattress Sagging? Proper Spacing and Support Fixes
Waking up to a mattress that feels like it’s sinking in the middle usually points to insufficient slat support. This is easily remedied:
- Optimal Slat Spacing: Ensure your slats are spaced no more than 2 to 3 inches apart. Wider gaps can cause modern foam mattresses to sag through the gaps.
- Thicker Slats: If you used thin 1×3 slats, consider replacing them with sturdier 1×4 or even 1×6 lumber for enhanced support.
- Robust Center Beam: Re-evaluate your center support beam. It should be a strong piece of lumber (e.g., 2×4 or 2×6) running the entire length of the bed, supported by at least 1-3 vertical legs that firmly touch the floor.
- Plywood Deck: For the ultimate non-sagging solution, replace all slats with a ¾-inch thick sheet of plywood placed directly on the ledgers. Ensure this plywood sheet also has central support.
3. Creaking Noises? How to Prevent and Fix Them
Those midnight creaks can be incredibly annoying. Most creaking results from wood rubbing against wood under pressure. Silence your bed with these tricks:
- Lubricate Joints: Apply a thin layer of paraffin wax, beeswax, or even candle wax to any areas where wooden parts meet and rub, particularly at the joints of your frame and where slats meet the ledgers.
- Felt Pads or Fabric Buffers: Place small felt pads or thin strips of old t-shirt fabric between the ends of the slats and the side ledgers. This creates a quiet buffer that works like magic, preventing direct wood-on-wood friction.
- Check for Loose Fasteners: A loose screw or bolt can cause movement and subsequent noise. Go through and tighten everything again.
- Eliminate Movement: If possible, ensure the bed frame is not rocking against a wall. Add furniture pads to the back of the headboard if it’s contacting the wall.
Customization Ideas to Make Your Bed Truly Unique
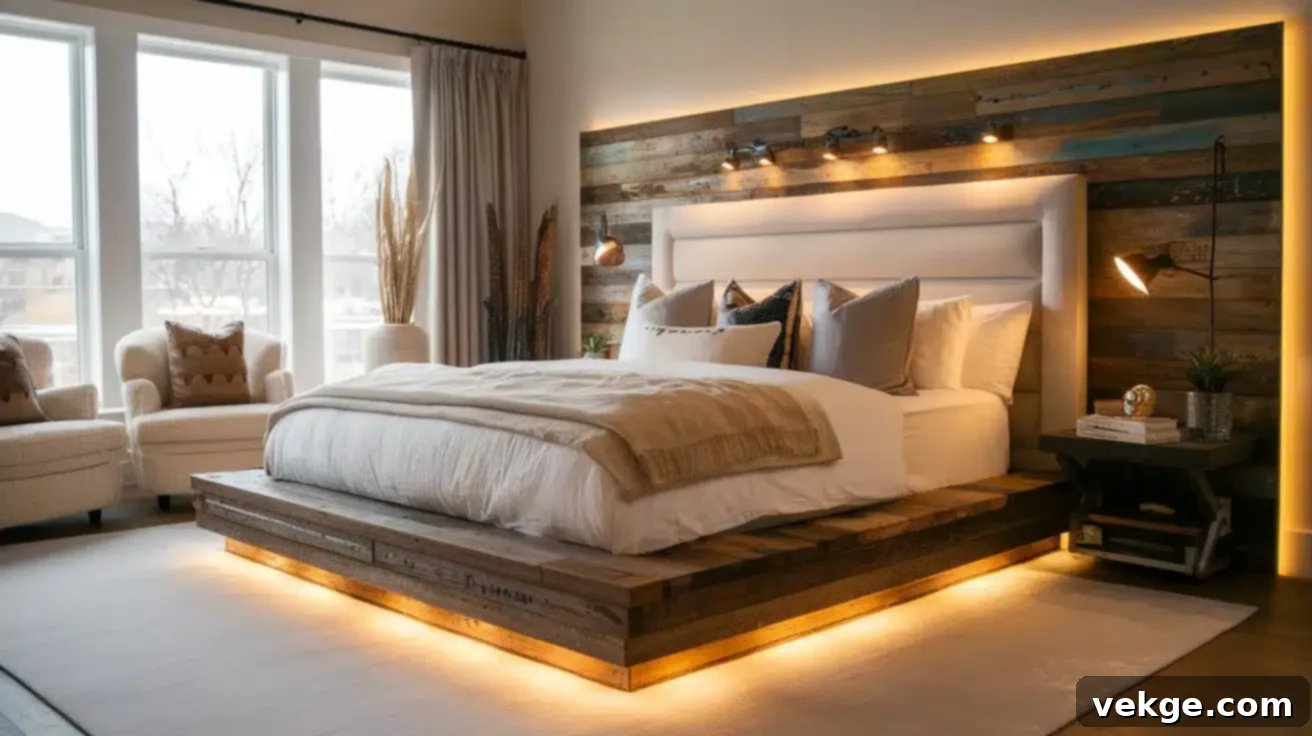
Once you’ve successfully built the core of your platform bed, it’s time to unleash your creativity! Small personal touches can dramatically transform the feel and functionality of your bedroom. These simple changes can elevate your DIY project from functional to truly spectacular and uniquely yours.
Adding LED Lighting Under the Bed
For a futuristic glow, stick battery-powered or plug-in LED light strips to the underside of your bed frame. This creates a soft, ambient light perfect for late-night bathroom trips (no more stubbed toes!) or simply setting a cozy, relaxed mood. Choose color-changing strips for added fun, and you’ll feel like you’re sleeping in a sci-fi movie or a luxurious boutique hotel.
Using Reclaimed Wood for a Rustic Look
Infuse your bed with character and history by constructing parts of the frame or the headboard from reclaimed wood, such as old barn wood, pallet wood, or fence boards. Each knot, scratch, and nail hole tells a story, giving your bed a one-of-a-kind, lived-in feel. Lightly sand the wood just enough to remove splinters while preserving its unique marks and varied color tones. Seal it with a clear coat to highlight its natural beauty.
Upholstering the Frame for a Soft-Touch Finish
For a touch of luxury and comfort, consider upholstering your bed frame. This involves attaching foam padding to the visible parts of the frame (like the headboard or side rails) and then covering it with your chosen fabric. This not only softens the aesthetic and reduces the pain of accidental late-night bumps but also allows you to introduce color, texture, and pattern into your bedroom design. Use a staple gun and fabric adhesive to ensure the fabric is taut and neatly wrapped around corners.
Integrating Charging Stations
Modern convenience is key! Discreetly install USB charging ports or power outlets directly into the side rails or headboard of your bed. This eliminates messy cables running across the floor and keeps your devices within easy reach, creating a truly smart and functional bedroom.
Maintenance and Longevity: Keeping Your DIY Bed in Top Shape
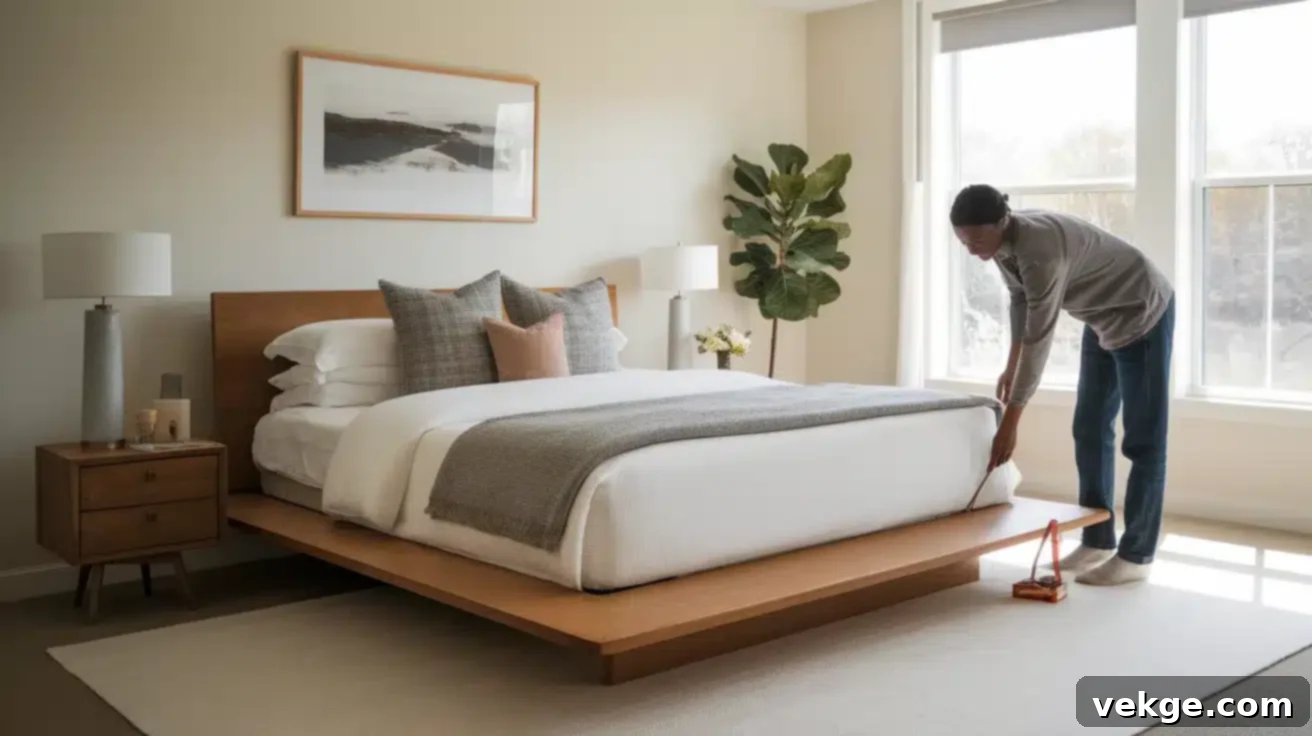
Just like any cherished piece of furniture you use daily, your DIY king-size platform bed needs a little ongoing care to maintain its strength, beauty, and quiet operation. These simple maintenance tips will help your handcrafted creation last for many comfortable years to come, truly making it an heirloom piece.
How to Reinforce a DIY Bed for Durability
- Routine Fastener Check: Make it a habit to check all visible screws, bolts, and other fasteners every six months (or annually). Tighten any that feel loose. Wood can shrink and expand with humidity changes, causing minor loosening.
- Add Extra Support Blocks: In areas of high stress, such as the corners or directly under the central support beam, consider adding small wooden blocks or corner gussets glued and screwed into place. These distribute weight and add significant rigidity.
- Ensure Center Beam Integrity: For king-size beds, the center support beam is your workhorse. Periodically inspect it for any signs of bowing or cracking. Ensure its supporting legs are firmly touching the floor and haven’t shifted. If necessary, add another leg or reinforce the existing ones.
- Consider Metal Reinforcement: For exceptionally heavy mattresses or if you tend to toss and turn vigorously, strategically placed metal brackets at major load-bearing joints can significantly enhance long-term durability.
- Even Weight Distribution: Avoid constantly placing heavy items or repeatedly jumping on one specific spot on the bed, as this can concentrate stress and lead to premature wear.
Best Ways to Clean and Care for Wooden and Metal Frames
- For Wooden Frames:
- Regular Dusting: Dust your wooden frame weekly with a soft, dry microfiber cloth. This prevents dust buildup and keeps the finish looking fresh.
- Immediate Spill Cleanup: Wipe up any spills immediately with a slightly damp cloth to prevent liquid from soaking into the wood and causing stains or damage.
- Annual Wax or Polish: Once a year, apply a thin, even coat of furniture wax or a high-quality wood polish. This protects the finish, restores its luster, and creates a barrier against moisture and dust.
- Avoid Harsh Cleaners: Never use abrasive cleaners, strong chemicals, or excessive water on your wooden frame, as these can strip the finish or damage the wood.
- Environmental Considerations: Keep your wooden bed away from direct sunlight, heating vents, or radiators. Extreme temperature fluctuations and dry air can cause wood to crack, warp, or fade over time.
- For Metal Frame Components (e.g., legs, brackets):
- Wipe Down: Periodically wipe metal parts with a slightly damp cloth to remove dust and grime. Follow with a dry cloth to prevent water spots.
- Prevent Rust: If your metal components are not stainless steel, ensure they remain dry to prevent rust. If rust appears, gently remove it with a fine-grade steel wool or rust remover, then apply a protective clear coat.
- Check Tightness: Metal connections can also loosen; ensure all bolts and screws holding metal parts are tight.
Conclusion: Enjoy Your Handcrafted King-Size Platform Bed
Congratulations! We’ve journeyed together through the entire exciting process of creating your very own king-size platform bed. From the initial spark of choosing the perfect design that reflects your personal style to meticulously cutting wood, assembling the sturdy frame, and adding those all-important finishing touches, you now possess the comprehensive know-how to build a magnificent bed that perfectly fits your needs, aesthetic vision, and budget.
Remember, the true beauty of a DIY project isn’t just in the finished product, but in the journey itself. Your first DIY bed doesn’t have to be flawlessly perfect; every small challenge overcome and every lesson learned builds your skills and confidence for future projects. Embrace the imperfections – they tell the unique story of your creation.
The greatest reward? That unparalleled sense of accomplishment. Imagine the pride you’ll feel when friends and family visit, admire your stunning new bedroom centerpiece, and ask, “Where did you buy that amazing bed?” You can simply smile and say, with genuine satisfaction, “I made it myself!”
Now, go forth, build, and enjoy the unparalleled comfort and pride of sleeping in a bed crafted by your own hands. I’d absolutely love to see your creations, so please don’t hesitate to share photos of your finished platform bed. Happy building and sweet dreams!
