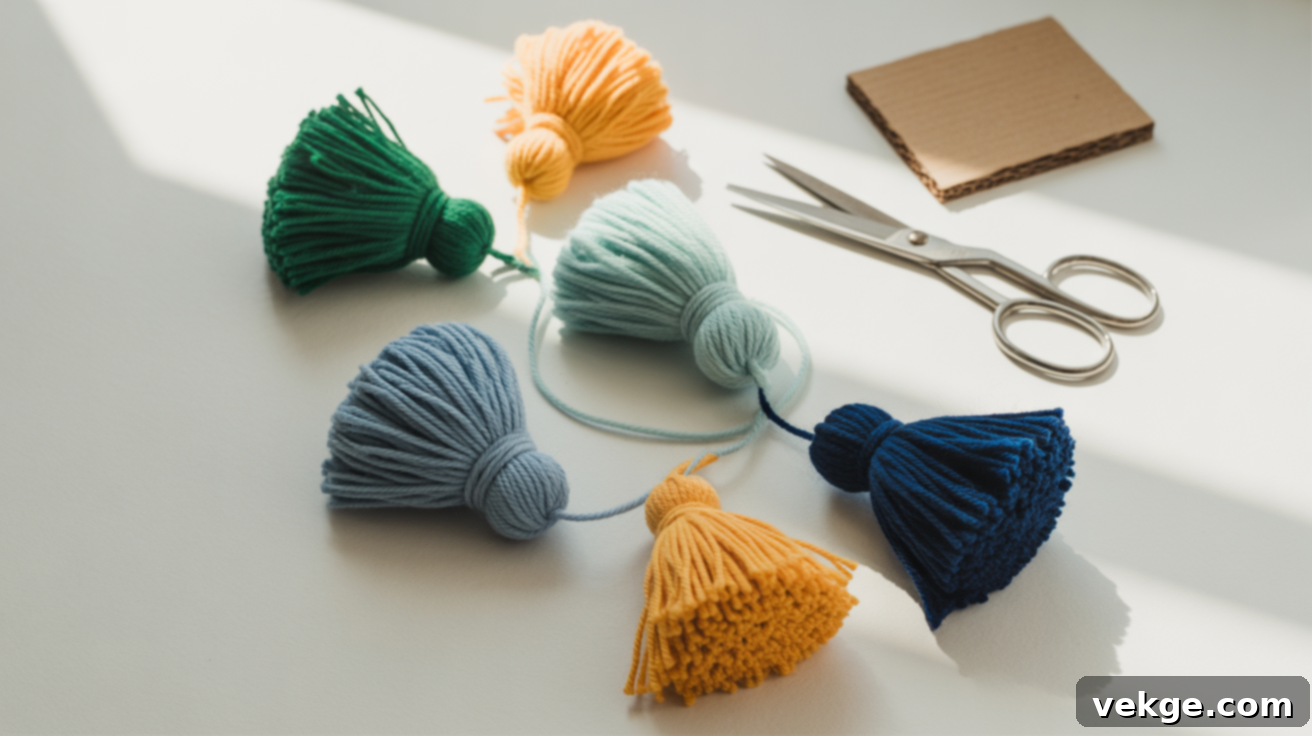
Master the Art of Tassel Making: Your Ultimate Guide to Perfect Yarn Tassels
If you’ve ever admired the charming flourish a tassel adds to a handmade item, but felt intimidated by the idea of making one yourself, you’re in the right place. Tassels are far more than just decorative accents; they are a simple yet powerful way to elevate the look and feel of almost any craft project. Whether you’re adding a playful touch to a scarf, a sophisticated finish to a blanket, a quirky detail to a bookmark, or even personalizing a keychain, a well-made tassel can truly bring the entire piece together.
Many people struggle with creating tassels that look neat, even, and professionally finished. The good news is, achieving this polished look is much simpler than you might imagine. You don’t need a special workshop full of expensive tools or years of crafting experience to master this technique. This comprehensive guide is designed to demystify the process, showing you exactly how to make yarn tassels using basic, readily available supplies you likely already have around your home.
We’ll walk you through everything from selecting the right materials and step-by-step construction methods to creative ways of attaching your finished tassels and even how to troubleshoot common issues. By the end of this tutorial, you’ll not only know how to craft stunning tassels but also how to ensure they are durable and look fantastic for years to come. Prepare to transform your crafting projects with these versatile and beautiful embellishments. Ready to add that perfect finishing touch?
How to Make a Yarn Tassel: Step-by-Step Guide
Creating beautiful yarn tassels is a quick and satisfying process, perfect for crafters of all skill levels, from absolute beginners to seasoned pros. The core technique involves simply wrapping yarn around a base, tying it off, and trimming. Depending on the size of tassel you desire, you can use your fingers, a piece of cardboard, or even a fork as your wrapping guide. Follow these detailed steps to craft your very own neat and uniform tassels.
What You’ll Need
Gathering your supplies before you begin will make the tassel-making process smooth and enjoyable. Most of these essential items are probably already lurking in your craft stash or kitchen drawer. The quality of your tools can significantly impact the final look of your tassel, so choose wisely.
- Yarn: The heart of your tassel! You can use virtually any type of yarn you like, from acrylic to wool, cotton, or even blends. Thicker yarn, such as chunky or bulky weights, will naturally create fuller, more voluminous tassels with fewer wraps. Conversely, thinner yarns like fingering or sport weights will result in finer, more delicate tassels, requiring more wraps to achieve a similar fullness. Experiment with different fibers and weights to see how they impact the drape and texture of your finished product. Consider combining colors or textures for unique effects!
- Scissors: Sharp scissors are absolutely crucial for achieving clean, crisp cuts. Dull blades can fray your yarn, leading to messy, uneven ends that are difficult to tidy up. A good pair of dedicated craft scissors will make cutting through multiple strands of yarn much easier and ensure your tassel has a professional, polished finish.
- Needle or Crochet Hook: These tools are indispensable for attaching your finished tassels to various projects. A large-eye yarn needle is perfect for sewing tassels onto fabric, knitwear, or crochet projects, allowing you to easily thread the tassel’s hanging loop. A crochet hook can be helpful for pulling the loop through tighter stitches or for creating a secure slip knot attachment.
- Cardboard (optional): This acts as an excellent wrapping guide, especially for creating uniform tassels of a specific size. Simply choose a piece of sturdy cardboard (like from a cereal box or a greeting card) that is the exact height you want your finished tassel to be. Wrapping around cardboard ensures consistent length for all your strands, resulting in a much neater tassel compared to freehand wrapping.
- Fork: For crafting exceptionally tiny tassels, perhaps for delicate jewelry, miniature decorations, or petite bookmarks, a common kitchen fork is your secret weapon. The tines provide a small, stable base for wrapping, making it surprisingly easy to create perfect little embellishments.
- Comb (for fraying ends): If you desire a softer, fluffier, or more fringed finish for your tassel, a fine-tooth comb (or even a pet brush for a very shaggy look) can be used. Gently comb through the bottom strands to separate and fluff the fibers, creating a beautiful, airy texture. This technique is especially effective with loosely spun or fuzzy yarns.
- Beads or Buttons (if relevant): To add an extra layer of detail, weight, or decorative flair, consider incorporating beads or small buttons. These can be threaded onto the hanging string before the tassel is tied, placed around the “head” of the tassel, or even integrated into the strands for a truly unique look.
Step 1: Prepare the Hanging String
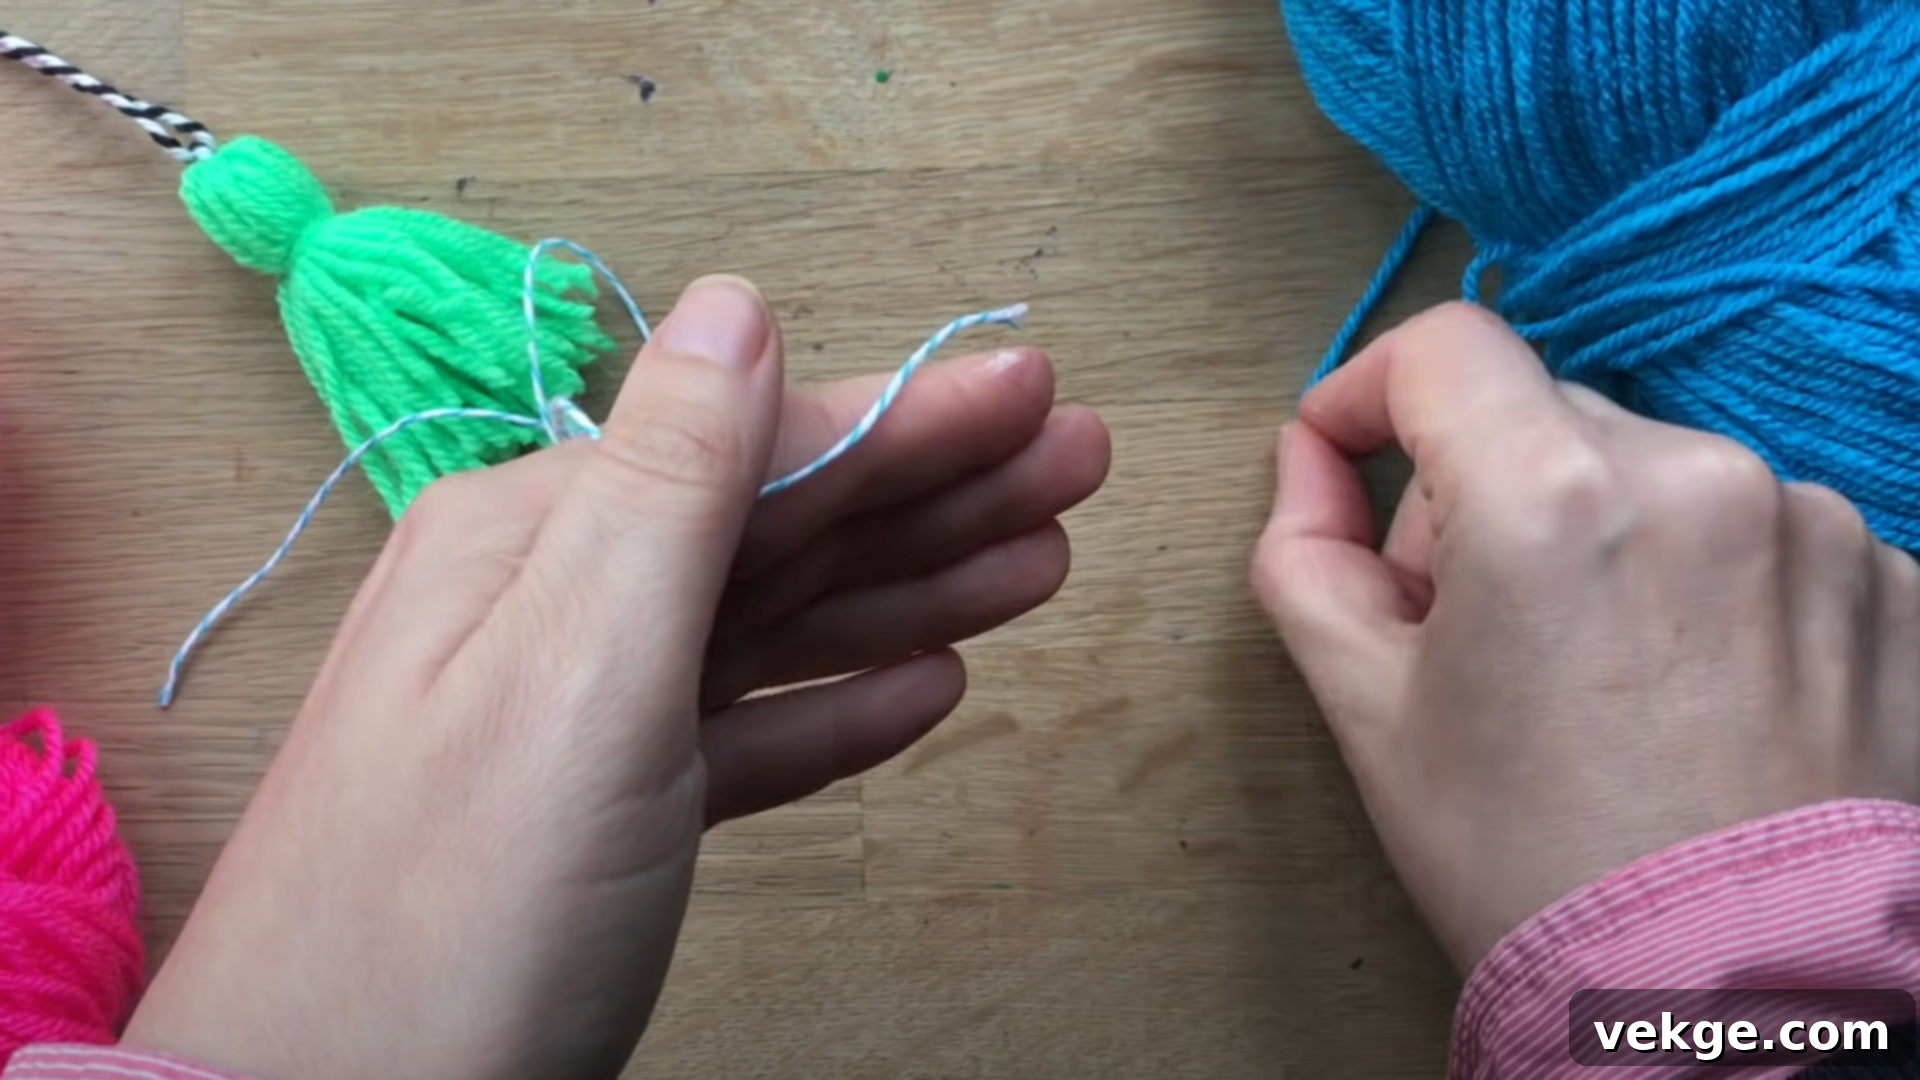
Begin by cutting a separate piece of strong yarn or string, typically about 8-12 inches long, depending on how long you want the hanging loop to be and your preference for handling. This piece will form the loop from which your finished tassel will hang or be attached to a project. It’s crucial to use a sturdy material for this string, especially if the tassel will be subjected to pulling, movement, or regular handling, such as on a keychain or bag. Avoid using thin or weak yarn that might easily break or fray, as this is the primary point of connection for your tassel.
Step 2: Wrap Yarn Around Your Fingers (or chosen tool)
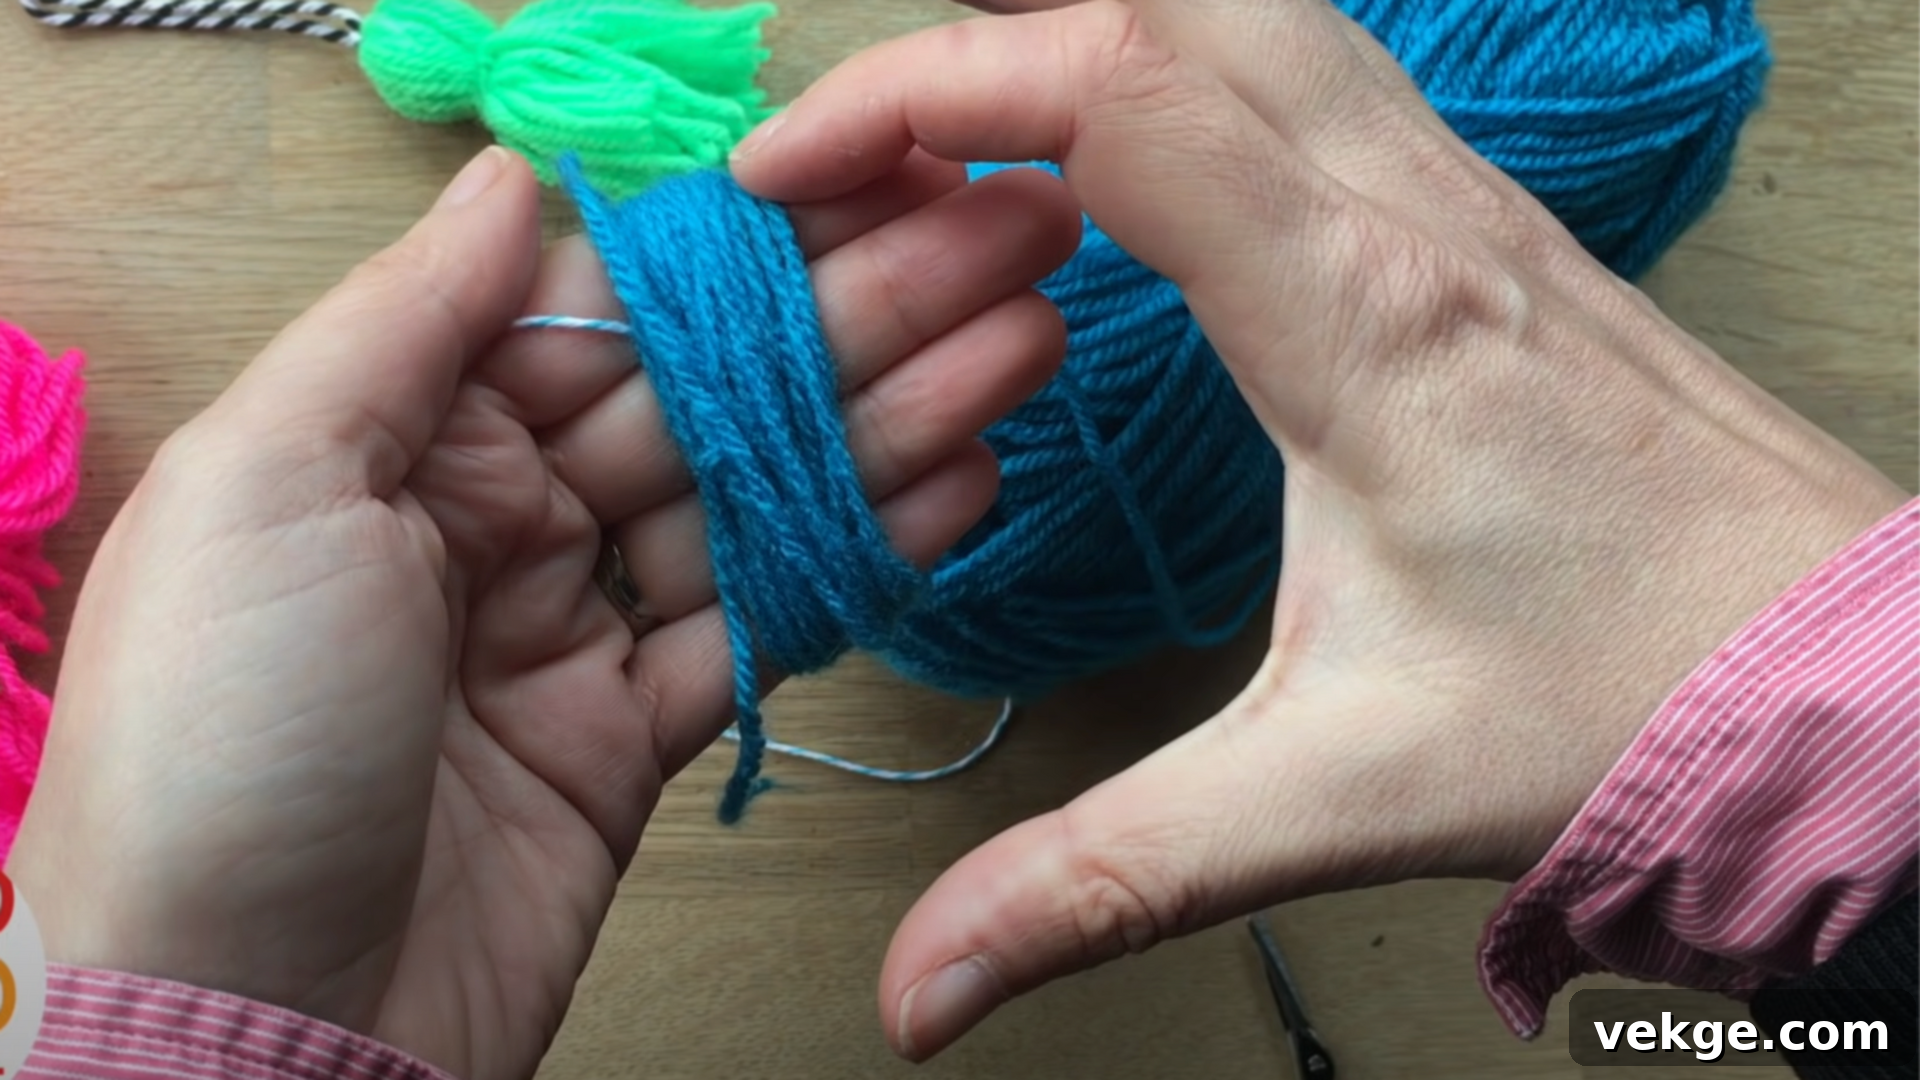
Now, take your pre-cut hanging string and lay it horizontally across the palm of your hand, allowing the ends to dangle. This string will be tied around the top of your wrapped yarn later. Next, take your main tassel yarn and begin wrapping it around all four of your fingers (or around your chosen cardboard piece or fork). The number of times you wrap the yarn will directly determine the fullness and thickness of your tassel. For a moderately full tassel, aim for about 20 to 40 wraps. For a very chunky or dense tassel, you might go up to 50-70 wraps. Maintain a consistent tension as you wrap – not too tight that it constricts your fingers or the cardboard, but not so loose that the strands sag. The height of your fingers (or cardboard) will dictate the final length of your tassel’s strands, so choose your wrapping base accordingly.
Step 3: Tie the Top
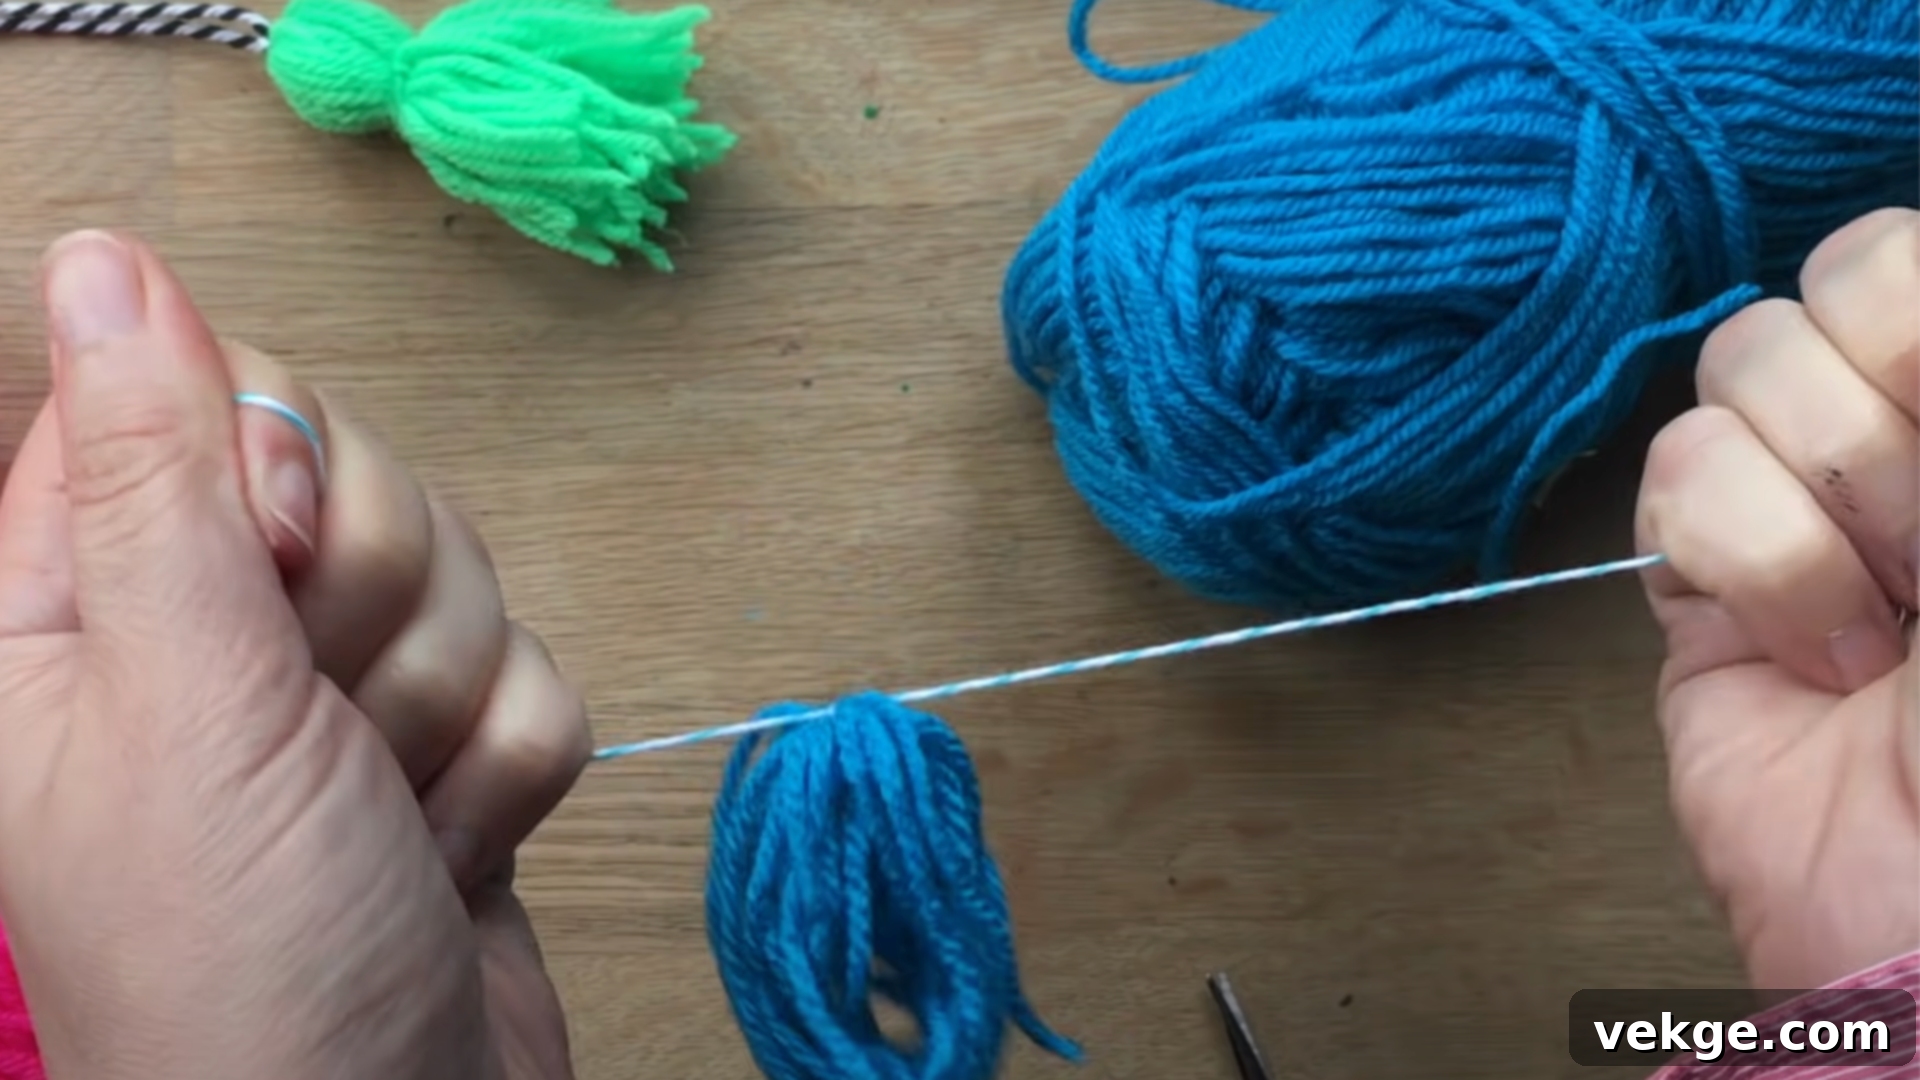
Once you’ve completed your desired number of wraps, carefully slide the entire bundle of looped yarn off your fingers or cardboard. Take the two ends of the hanging string you positioned earlier, bring them up around the top of the looped yarn, and tie them together in a very strong, tight knot. A double knot or even a surgeon’s knot is recommended here to ensure it won’t unravel. Pull the knot as tightly as possible to secure all the wrapped strands at the very top. This knot creates the sturdy loop from which your tassel will suspend, so its integrity is paramount.
Step 4: Cut the Bottom Loops
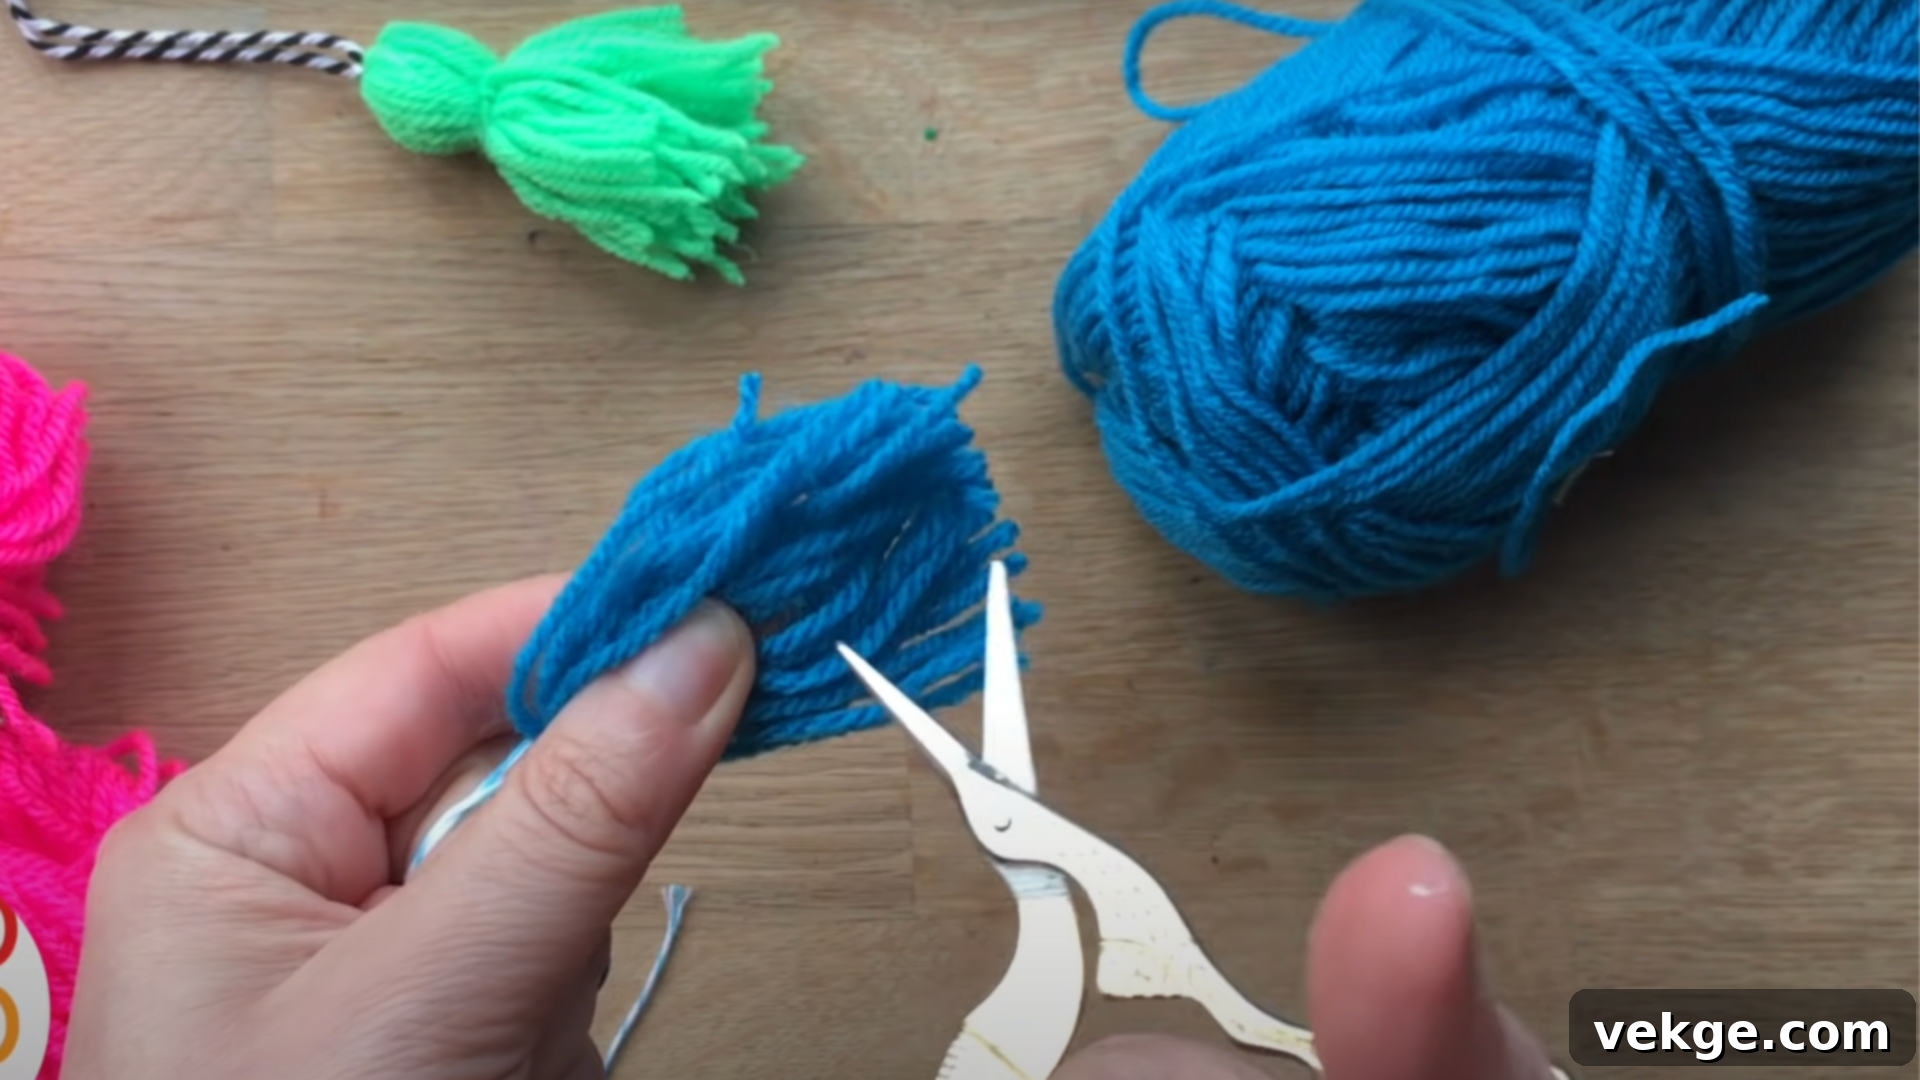
With the top securely tied, identify the folded, looped end of your yarn bundle – this is the opposite end from where you just tied your knot. Using your sharp scissors, carefully and cleanly cut through all the loops. Try your best to make this cut as straight and even as possible in one swift motion. The goal is to free all the individual strands so they hang freely. Taking your time and using sharp scissors here will prevent frayed ends and contribute significantly to a neat, professional-looking tassel from the outset.
Step 5: Shape the Tassel Head
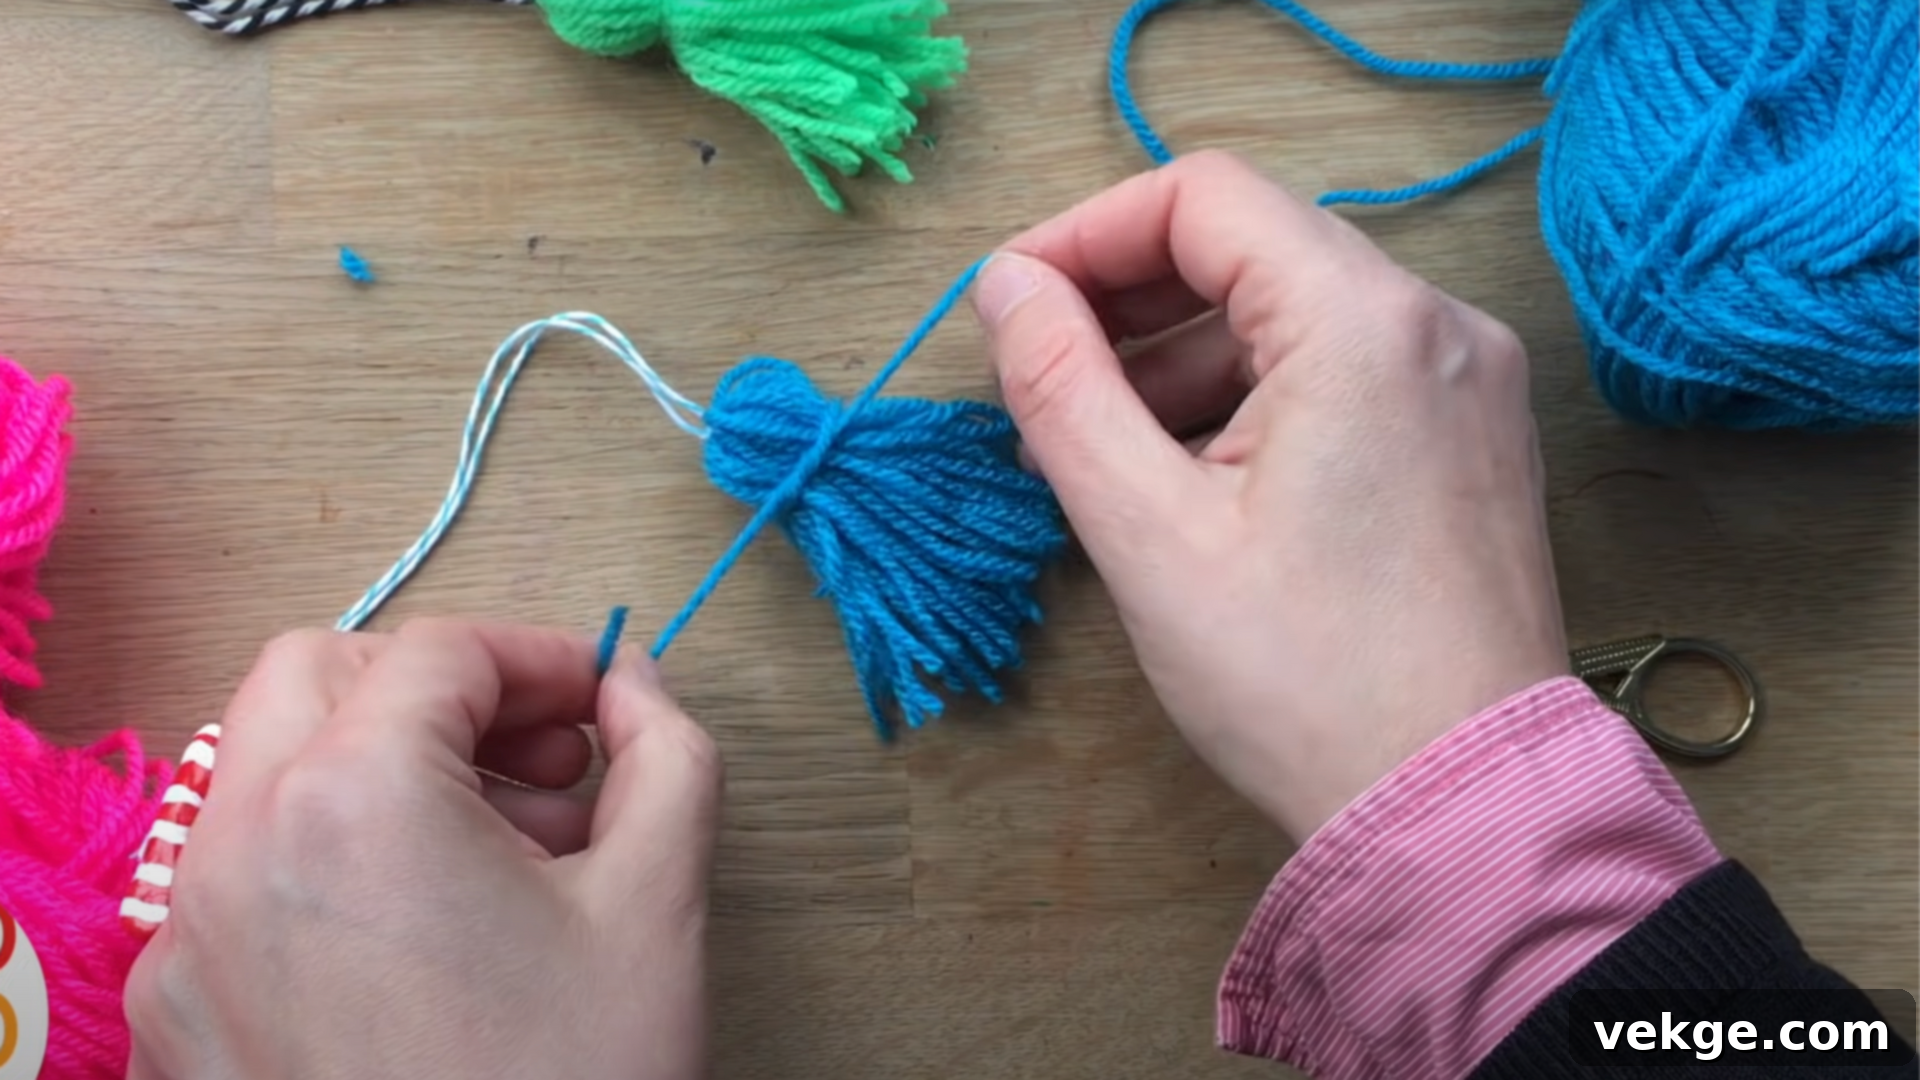
To give your tassel its distinctive “head” shape, cut another piece of yarn, about 10-12 inches long. Gather all the hanging strands of your tassel together, making sure they are as straight and aligned as possible. Take the new piece of yarn and tie it around the main body of the tassel, approximately half an inch to an inch below the top knot you made in Step 3. Wrap this new yarn tightly around the tassel body several times, creating a defined, cinched-in section. After wrapping, tie a secure double knot to hold this shape firmly in place. You can then trim the ends of this tying string to blend with the tassel strands or weave them into the head with a needle for an invisible finish. This step creates the classic tassel silhouette and prevents the strands from splaying out too high.
Step 6: Final Trim
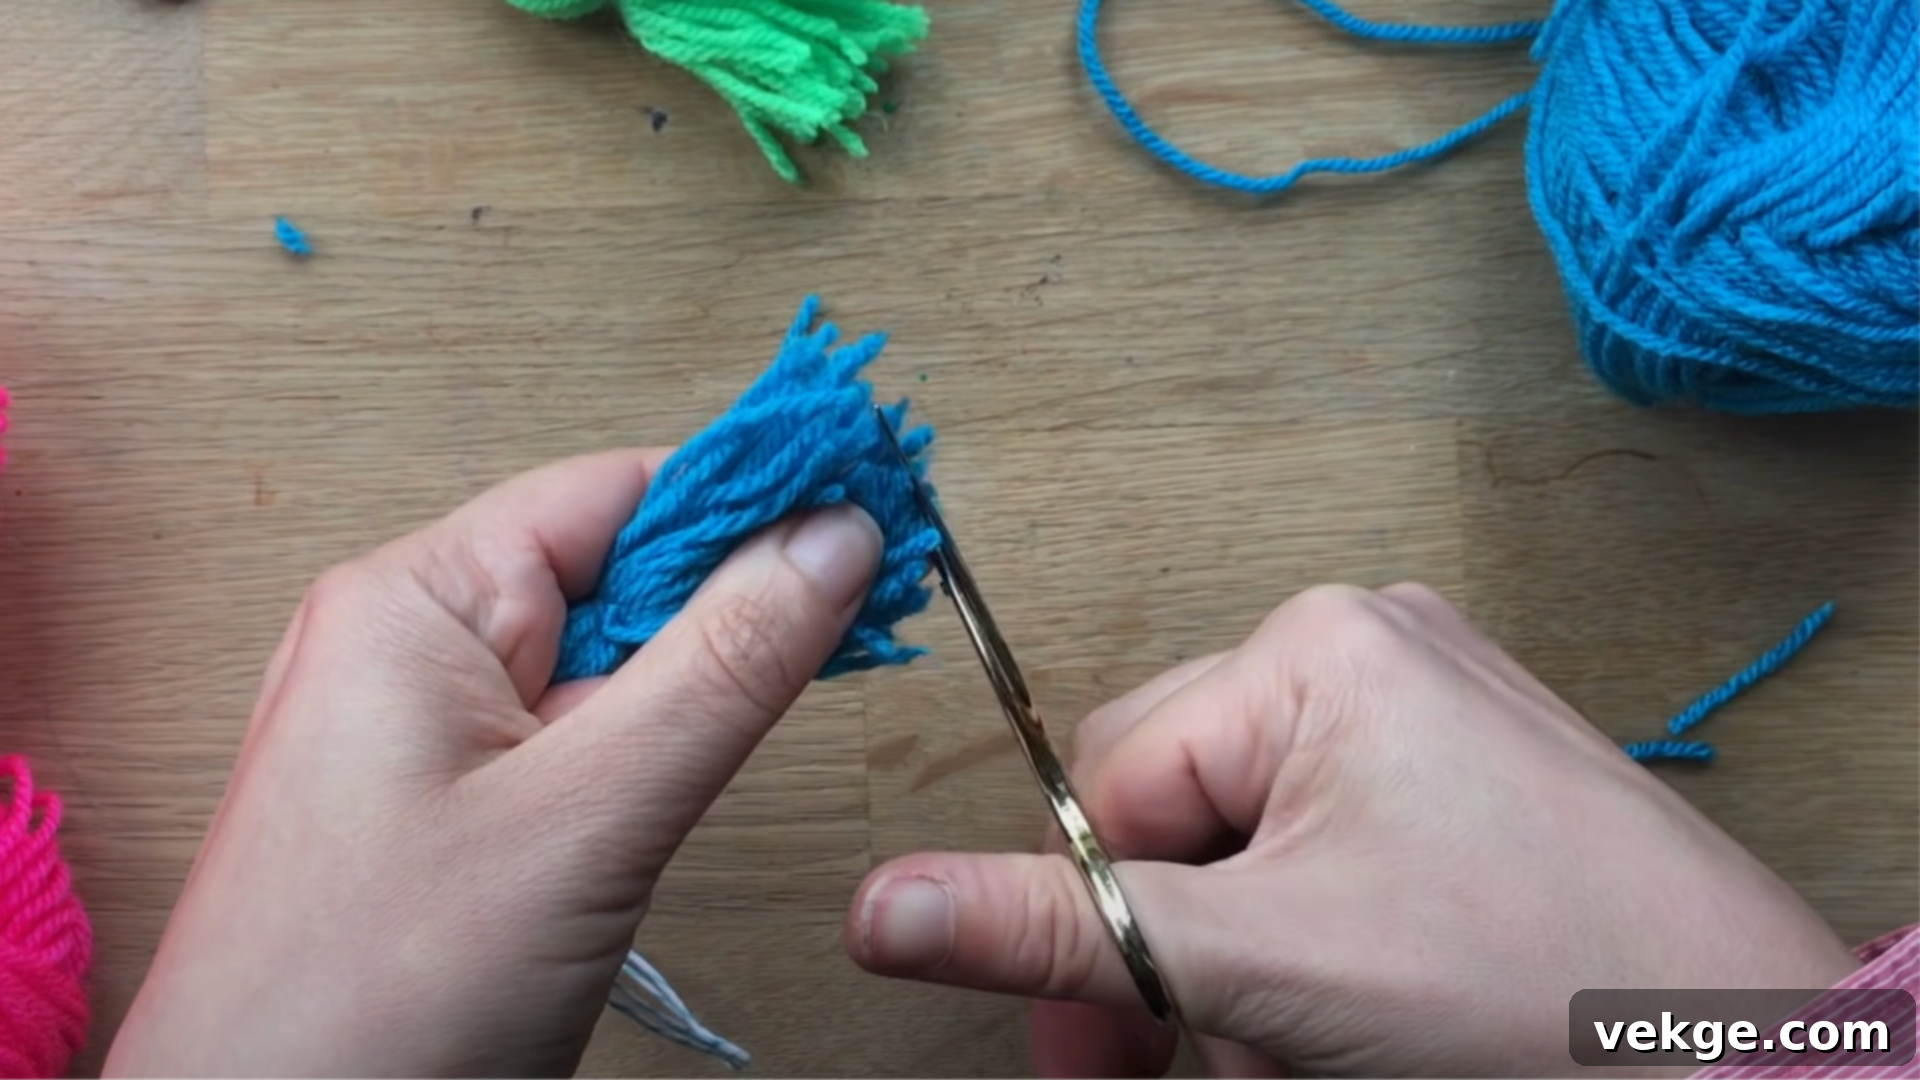
Almost done! Hold your tassel by its hanging loop, allowing all the strands to dangle freely and settle. Gently pull the strands straight and pat them down to ensure they are all aligned. Now, using your sharp scissors, carefully trim the bottom of the tassel to make all the strands an even length. It’s often helpful to trim in small increments to avoid cutting too much at once. For a perfectly straight edge, you might lay the tassel flat on a cutting mat and use a ruler as a guide. If you prefer a soft, feathery look, gently comb through the ends with a fine-tooth comb to fluff out the fibers, as discussed in the ‘What You’ll Need’ section. This final trim ensures a crisp, polished appearance for your beautiful handmade tassel.
Attaching Tassels to Your Project
Once your beautiful yarn tassel is complete and perfectly trimmed, the final and equally important step is to securely attach it to your chosen project. The best method for securing your tassel will depend largely on the type of item you’re working with—be it fabric, a string, a wooden bead, or a metal ring. A properly attached tassel not only looks better but also ensures its longevity, preventing it from detaching or getting lost over time. Below, we explore common methods for effective attachment.
Sewing or Knotting
The choice between sewing and knotting largely depends on the project’s material and your desired level of permanence.
- Sewing for Fabric and Yarn Projects: If you’re attaching your tassel to a soft surface like a knitted scarf, a crocheted blanket, or a fabric cushion, a yarn needle (or darning needle) is your best friend. Thread the top loop of your tassel through the eye of the needle. Then, carefully sew the tassel’s loop directly into your project. Make several strong passes through the fabric or yarn stitches, creating a secure attachment point. You can use an invisible stitch or incorporate the tassel’s loop subtly into the project’s existing texture. This method provides a very stable and integrated attachment that can withstand regular use.
- Knotting for Rigid Items and Loops: For items such as bookmarks, keychains, zipper pulls, or pre-existing loops on bags, a tight double knot or a larks head knot (cow hitch) might be all you need. Simply pass the tassel’s hanging loop through the attachment point (e.g., a hole in a bookmark or a keychain ring), then thread the body of the tassel through its own loop. Pull firmly to create a secure knot. This method is quick, easy, and doesn’t require extra tools beyond your hands, making it ideal for projects where a sewn attachment isn’t practical or necessary.
Securing for Durability
To ensure your tassel withstands the test of time and regular handling, especially on high-wear items, consider adding an extra layer of reinforcement. After you’ve tied or sewn your tassel into place, a tiny drop of clear-drying fabric glue or strong craft adhesive can be applied directly to the knot or the wrapped “head” of the tassel. This helps prevent the knot from loosening, deters fraying of the tying string, and ensures the head maintains its shape. For tassels on bags, clothing, or items that will be frequently used, opting for stronger thread or a more robust yarn for the hanging loop and tying string can also make a significant difference. A well-secured tassel will not only last longer but will also maintain its attractive shape and appearance, continuing to enhance your project with enduring charm.
Fixing Tassel Problems
Even with simple crafts like tassel making, small issues can arise that affect the final look. Don’t be discouraged if your first few attempts aren’t perfect! Understanding common problems and how to fix them will help you achieve cleaner, more consistent results and avoid frustrating slip-ups in the future. Here are some solutions to frequently encountered tassel problems:
- Wrap your yarn evenly. A common issue is an uneven-looking tassel, often caused by inconsistent wrapping. If some loops are loose and others are tight, or if the yarn isn’t aligned neatly, the tassel will appear crooked or lopsided. To prevent this, try to maintain consistent tension throughout the wrapping process. Using a flat, stable surface (like a piece of cardboard) as your wrapping guide can greatly help in keeping your wraps uniform and controlled, resulting in a perfectly straight and balanced tassel.
- Keep the yarn snug, not tight. Finding the right wrapping tension is key. If you wrap the yarn too tightly around your fingers or cardboard, it becomes incredibly difficult to slide the bundle off without distorting its shape or even causing discomfort. Conversely, if the yarn is wrapped too loosely, the loops won’t hold their shape well, leading to a flimsy or messy tassel. Aim for a snug but comfortable tension that allows the yarn to stay in place without being overly stretched or compressed.
- Double-check strand alignment before trimming. Before you pick up your scissors for the final trim, hold the tassel by its hanging loop and gently shake it, then lightly comb through the strands with your fingers. This helps all the individual strands settle and align naturally. Trimming slowly, in small sections, while continuously checking the length and evenness will help you achieve a perfectly balanced edge, avoiding a jagged or uneven bottom.
- Use sharp scissors only. This point cannot be overstressed. Dull scissors are the enemy of a neat tassel. They don’t cut cleanly; instead, they chew through the yarn, leaving frayed, jagged, or crushed ends. This not only makes your tassel look untidy but can also lead to more shedding and a less durable product. Invest in a good pair of sharp craft scissors and reserve them for yarn and fabric only to maintain their edge.
- Always tie a strong knot. The security of your tassel hinges on the strength of its knots. Weak or single knots, particularly the one at the top that gathers all the loops, can loosen over time, causing the tassel to fall apart or its strands to become dislodged. Always use a double knot, or consider a more robust knot like a surgeon’s knot, ensuring it’s pulled as tightly as possible. A secure knot is foundational to a long-lasting tassel.
- Reinforce sewn tassels if needed. For tassels attached to items that will experience heavy use, such as bags or garments, extra reinforcement is a wise step. When sewing, use sturdy, matching thread and pass it through the tassel’s loop and the project’s attachment point more than once. For ultimate security, a tiny dab of clear-drying fabric glue applied to the knot where the tassel’s head is formed, or to the sewing stitches, can provide excellent peace of mind against unraveling or slipping.
- Wrap more yarn for a thicker tassel. If your finished tassel looks too thin, sparse, or lacks volume, the most common reason is simply not enough wraps. Thin-looking tassels benefit greatly from additional loops. For a good, full appearance, try increasing your wraps to 30-40, or even 50+ for a very plush effect. The more yarn you wrap, the denser and more luxurious your tassel will appear.
- Mix yarn types or colors for fullness. If you’re working with a very fine yarn or if your tassel still seems too light even after many wraps, get creative! Try combining two strands of yarn as you wrap, or incorporate different yarn types and colors for a unique, multi-textured, and fuller effect. You can also create two smaller tassels and layer one directly on top of the other, or side-by-side, to create a compound, fuller tassel.
- Use smooth, medium-weight yarn. While fluffy or loosely spun yarns can create interesting textures, they can also shed more easily and be harder for beginners to control and trim neatly. For your first few tassels, or if you’re aiming for a very crisp look, opt for a smooth, medium-weight yarn (like a worsted weight acrylic or cotton). These yarns are easier to manage, wrap evenly, and cut cleanly, leading to more predictable and satisfying results.
Wrapping Up
Congratulations! You’ve now mastered the art of making perfect yarn tassels from start to finish. Gone are the days of uneven, messy tassels; with this guide, you have all the knowledge and tips to create beautiful, uniform embellishments every time. The best part? You’ve achieved this using simple supplies and straightforward techniques, proving that stunning handmade accents don’t require complex tools or advanced skills.
Whether you’re adding a vibrant flourish to a cozy blanket, crafting a charming bookmark, personalizing a set of keys, or adding a unique touch to a gift, you now possess the complete steps and expert advice to do it right. Remember the key takeaways: keep your yarn wraps consistent and even, tie your knots firmly and securely, and always trim with care using sharp scissors. These fundamental practices will ensure your tassels are not only aesthetically pleasing but also durable.
You’ll be amazed at how much a small, well-crafted tassel can elevate and personalize your handmade projects, transforming them from good to truly great. Don’t stop here! If you enjoyed this simple, effective guide, be sure to explore our other DIY posts and crafting tutorials. Keep learning new ways to bring your yarn projects and creative ideas to life, and continue adding your unique, handmade touch to everything you create!
