Craft Your Perfect Holiday: The Ultimate Guide to DIY Christmas Trees
This holiday season, why settle for an ordinary Christmas tree when you can create something truly extraordinary? Crafting your own DIY Christmas tree offers an unparalleled opportunity to infuse your holiday decorations with a personal touch, making your home feel uniquely festive and inviting. Beyond the aesthetic appeal, embarking on a DIY tree project is a rewarding experience that can bring immense joy, foster creativity, and even become a cherished tradition for family and friends.
Forget the generic store-bought options that lack character and often come with a hefty price tag. With this comprehensive guide, you’ll discover how to design and build stunning DIY Christmas trees that perfectly match your individual style, space, and budget. Whether you envision a rustic wooden masterpiece, a charming tabletop accent, or a whimsical hanging design, we’ve got you covered. You’ll learn about the best materials, essential tools, and easy-to-follow, step-by-step methods that anyone can master, regardless of their crafting experience.
Having explored and perfected various DIY Christmas tree techniques, I’m thrilled to share my insights and tested methods with you. By the end of this guide, you won’t just have a unique holiday decoration; you’ll possess the confidence and know-how to craft the perfect DIY Christmas tree that will be admired for seasons to come. Let’s make this holiday season unforgettable with a handmade centerpiece!
DIY vs. Store-Bought Christmas Trees: Which Is Right for Your Holiday?
Deciding between a DIY Christmas tree and a pre-made store-bought option involves weighing several factors, from cost and time to customization and environmental impact. While convenience often draws people to store-bought trees, the long-term benefits and personal satisfaction of a handmade creation are truly unmatched. Let’s compare the key aspects to help you make an informed choice for your festive decor.
| Feature | DIY Christmas Trees | Store-Bought Trees |
|---|---|---|
| Initial Cost | $20-50 (materials) – Often more budget-friendly, especially with repurposed items. | $50-200+ – Prices vary greatly based on size, features, and realism. |
| Time Investment | 2-4 hours per tree (initial build). A fun, engaging activity. | 15-30 minutes setup (yearly). Quick and straightforward. |
| Customization | ✓ Full control over size, style, color, and theme. Truly one-of-a-kind. | × Limited to available options in stores; often difficult to modify. |
| Size Options | ✓ Any size possible, from tiny desktop trees to large focal points. | × Standard sizes only, which may not fit unique spaces. |
| Storage Needs | ✓ Often designed to be flat-packed or compact, saving space. | × Bulky boxes needed; can take up significant storage room. |
| Skill Required | Basic crafting skills, patience, and a willingness to learn. | No special skills; simply assemble according to instructions. |
| Durability | 3-5 years with care (can last longer if well-constructed and maintained). | 5-10 years average (quality varies greatly by manufacturer). |
| Eco-Friendly | ✓ Can use recycled, reclaimed, or natural materials, reducing waste. | × Often plastic-based (PVC), contributing to landfill waste over time. |
| Repairs | ✓ Easy to fix, modify, or refresh with new paint or decorations. | × May need full replacement if parts break or lights fail. |
| Personal Value | ✓ High sentimental value, creating cherished memories and unique stories. | × Limited personal connection; primarily a functional decoration. |
| Setup Time | First time: 2-4 hours. Reuse: 30 minutes (if design allows). | 15-30 minutes yearly (assembly and fluffing). |
| Maintenance | Simple cleaning, occasional touch-ups, and minor repairs. | Regular dusting, branch adjusting, and light checking. |
As you can see, opting for a DIY Christmas tree offers significant advantages in terms of personalization, creative freedom, and often, a more sustainable approach to holiday decorating. While the initial time investment is higher, the joy and unique outcome make it a truly worthwhile endeavor.
How to Craft a Rustic Wooden Christmas Tree Decoration
A wooden Christmas tree brings a touch of rustic elegance and timeless charm to any holiday display. It’s durable, reusable, and offers a beautiful canvas for various decorating styles. This step-by-step guide will walk you through creating a sturdy and stylish wooden tree that will become a cherished part of your holiday traditions for years.
Getting Started with Your Tools and Materials
Before you begin, gather all your necessary tools and materials. Having everything organized will streamline your crafting process and ensure a smooth experience. Precision and quality materials are key to a lasting finished product.
| Materials | Tools |
|---|---|
| 2 6′ 1×2 pine boards (select straight, knot-free boards for best results) | Miter saw (for precise angled cuts) |
| Minwax Stainable Wood Filler (to conceal imperfections and nail holes) | 220 grit sandpaper (for smooth finishes) |
| Purdy 2″ Angled Nylox Paint Brush (ideal for edges and detailed work) | Pin nailer (for strong, inconspicuous joins) |
| Purdy Revolution Jumbo Mini Roller Frame (for efficient paint application on flat surfaces) | Wood glue (for durable, long-lasting bonds) |
| Purdy White Dove 1/4″ Nap Mini Roller Cover (provides a smooth, lint-free finish) | Tack cloth (to remove dust before painting) |
| Purdy Paint Pail (for easy paint access and less mess) | Purdy Premium Folding Multi-Tool (useful for various tasks, including opening cans) |
| Sherwin-Williams ProClassic Interior Acrylic Latex Paint (Accessible Beige and a custom match color – choose colors that complement your home decor) |
Step 1: Prepare Pine Board Segments with Precision
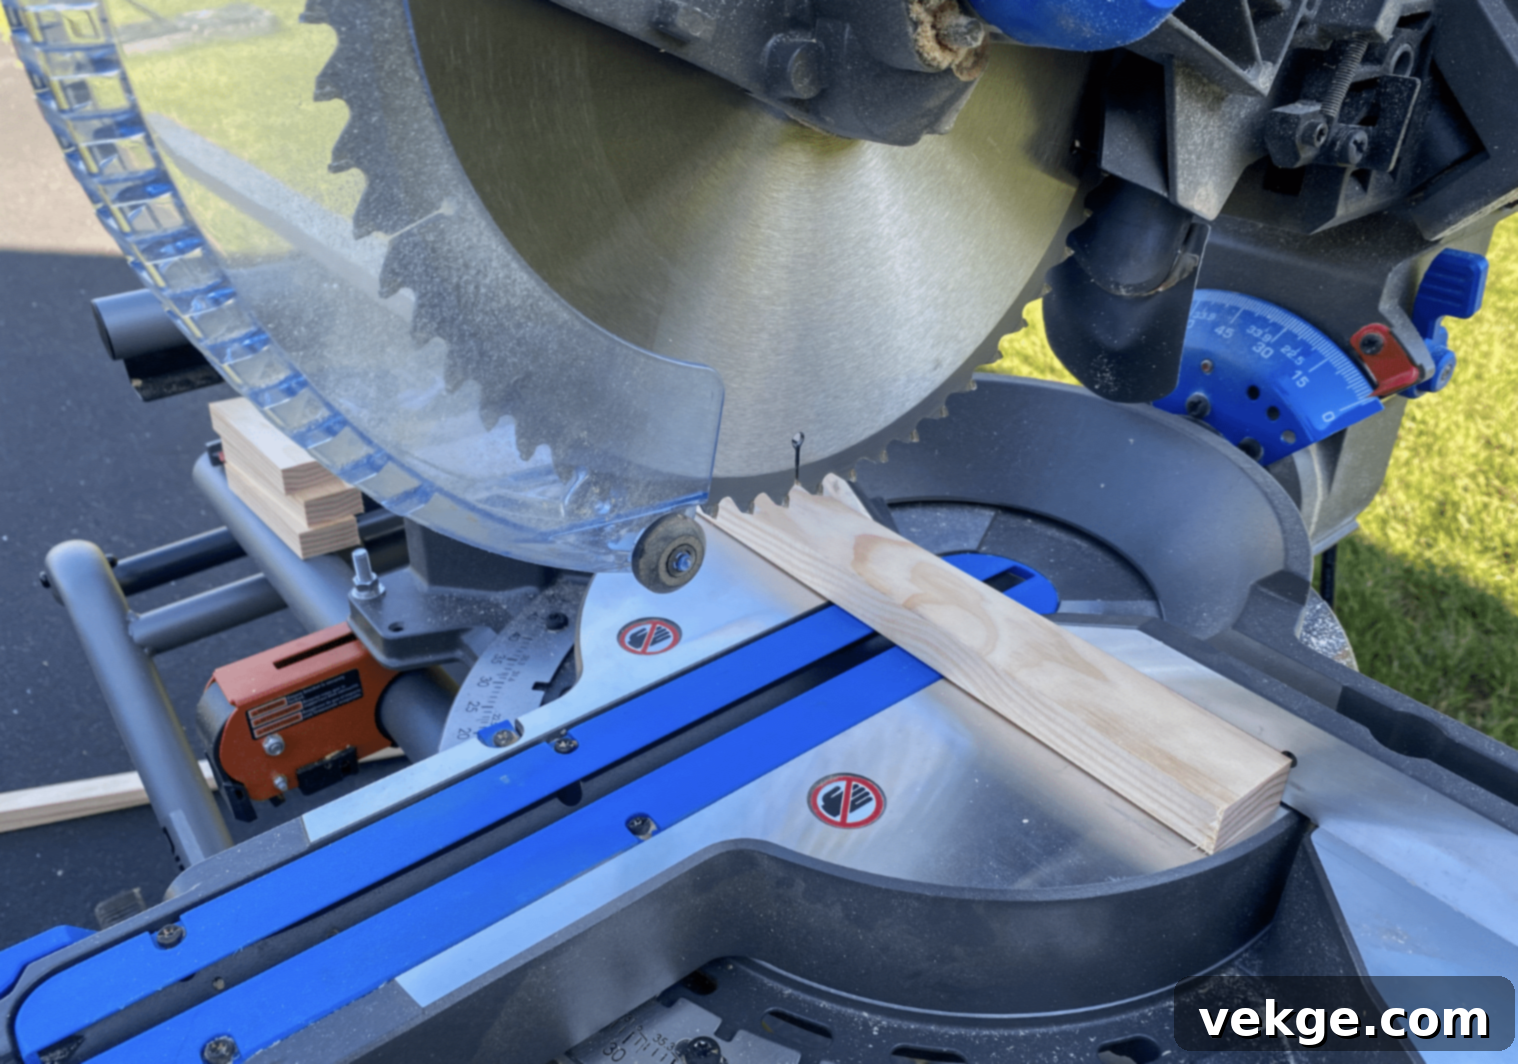
The foundation of your DIY Christmas tree lies in accurate cuts. Using a miter saw, carefully cut your two 6-foot 1×2 pine boards into the following segments. The 30-degree angles are crucial for creating the iconic tree shape, so take your time and measure twice, cut once.
- Create 3½-inch pieces for the trunk (cut at 30-degree angles for a stable base and top).
- Make 10¼-inch pieces for the base (these will form the widest part of your tree).
- Cut 5¼-inch pieces for the lower branches (providing a medium width).
- Form 7-inch pieces for the upper right sections (contributing to the tree’s tapering shape).
- Shape 6⅛-inch pieces for the upper left areas (complementing the upper right sections).
Ensure all cuts are clean and precise. Safety is paramount when operating a miter saw, so always follow manufacturer guidelines and wear appropriate protective gear.
Step 2: Smooth the Wood Surfaces for a Professional Finish
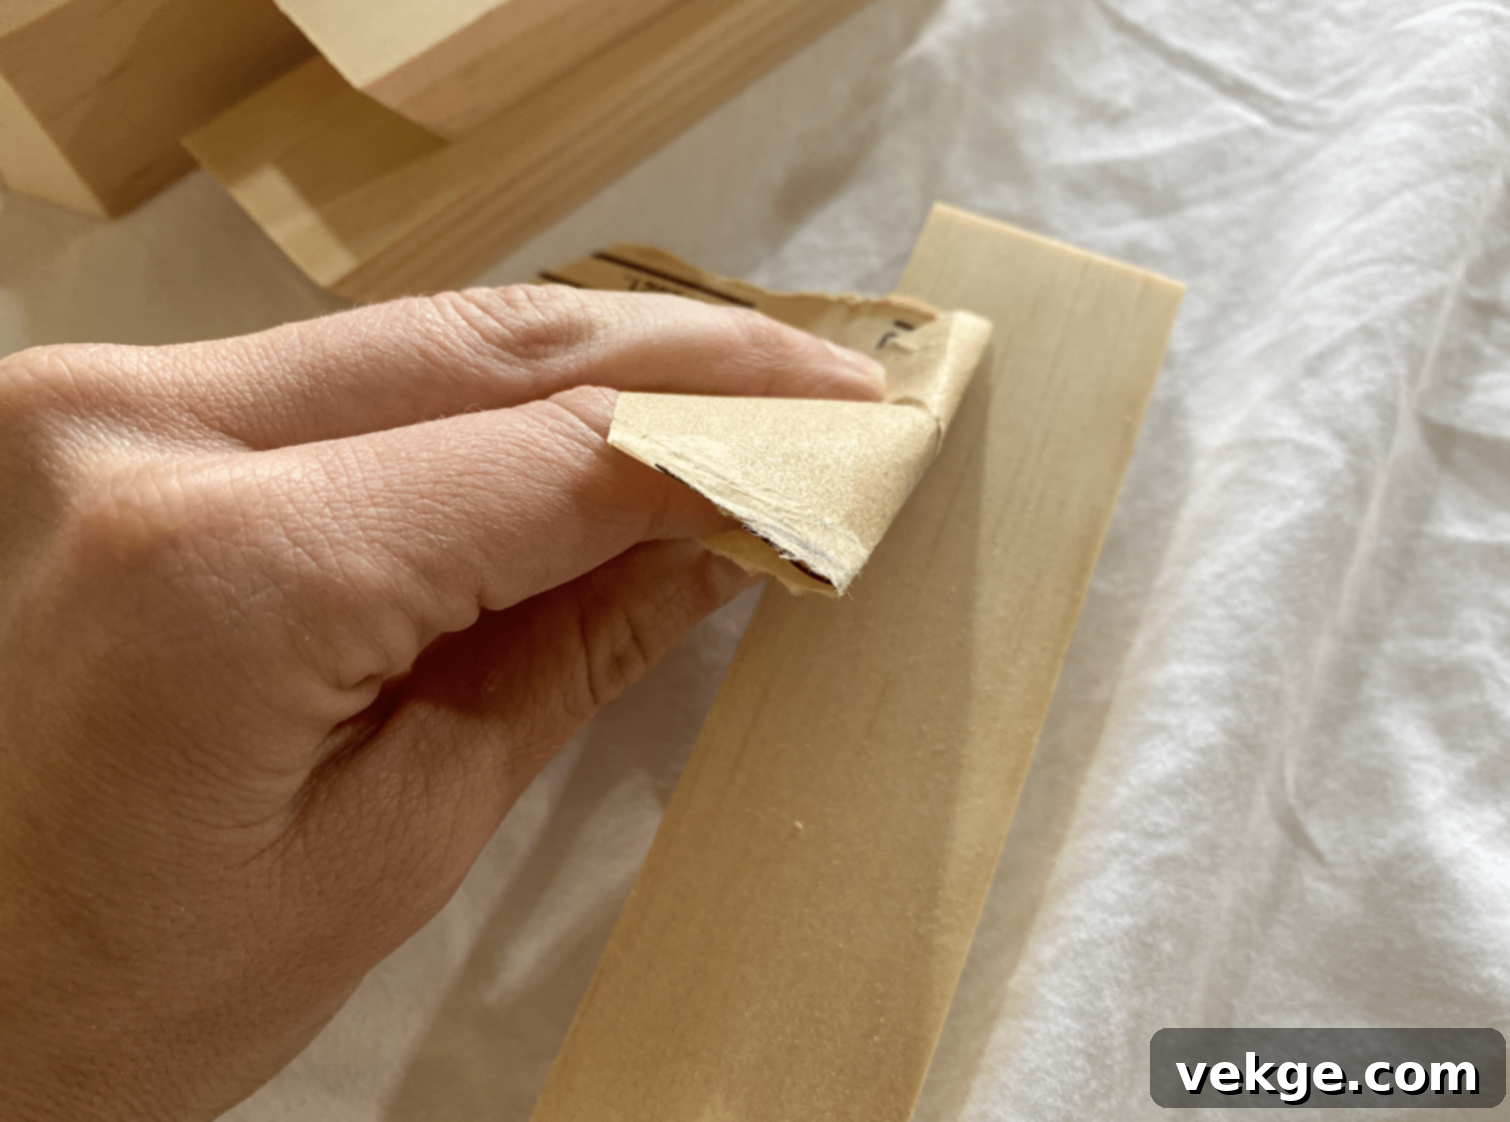
Achieving a professional-looking DIY Christmas tree requires attention to detail, especially when it comes to surface preparation. Proper sanding not only makes the wood smooth to the touch but also ensures better paint adhesion and a more refined final appearance.
- Use 220-grit sandpaper on all pieces. This fine grit is perfect for achieving a silky-smooth finish without scratching the wood.
- Work in the direction of the wood grain. Sanding against the grain can create visible scratches that will show through paint.
- Wipe each piece thoroughly with a tack cloth after sanding. This removes all fine dust particles, which are essential for paint to adhere properly and prevent a grainy finish.
- Check edges for smoothness. Pay special attention to the cut edges, as these are often rougher and can cause splinters.
Step 3: Construct the Tree Framework with Care
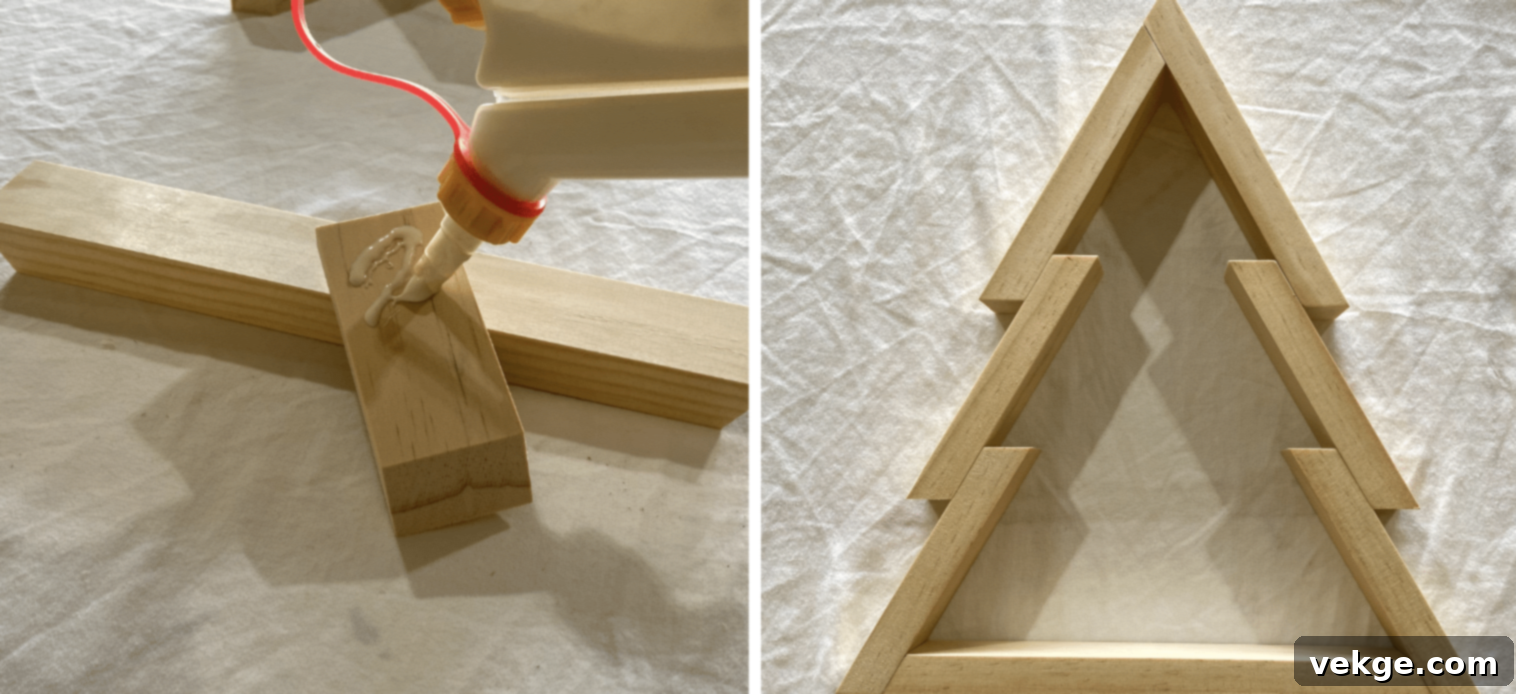
Now comes the exciting part: assembling your DIY Christmas tree! This step requires a bit of patience and precision to ensure a strong and visually appealing structure. Wood glue provides the long-lasting bond, while the pin nailer offers immediate stability.
- Carefully line up the pieces to form your desired tree shape on a flat surface. This dry fit helps you visualize the final product and make any necessary adjustments before applying glue.
- Apply a thin, even layer of wood glue at each joint where two pieces meet. Don’t overdo it, as excess glue can squeeze out and create a messy finish.
- Overlap sideboards by approximately one inch. This overlap strengthens the joint and adds to the rustic aesthetic of the wooden tree.
- Use a pin nailer to hold pieces securely in place while the glue dries. The small pins are less noticeable than larger nails and provide instant support.
- Let the wood glue set fully. While pins offer immediate hold, the glue needs adequate time to cure for maximum strength (24 hours recommended). Avoid moving the tree during this period.
Step 4: Seal and Fill Gaps for a Flawless Surface
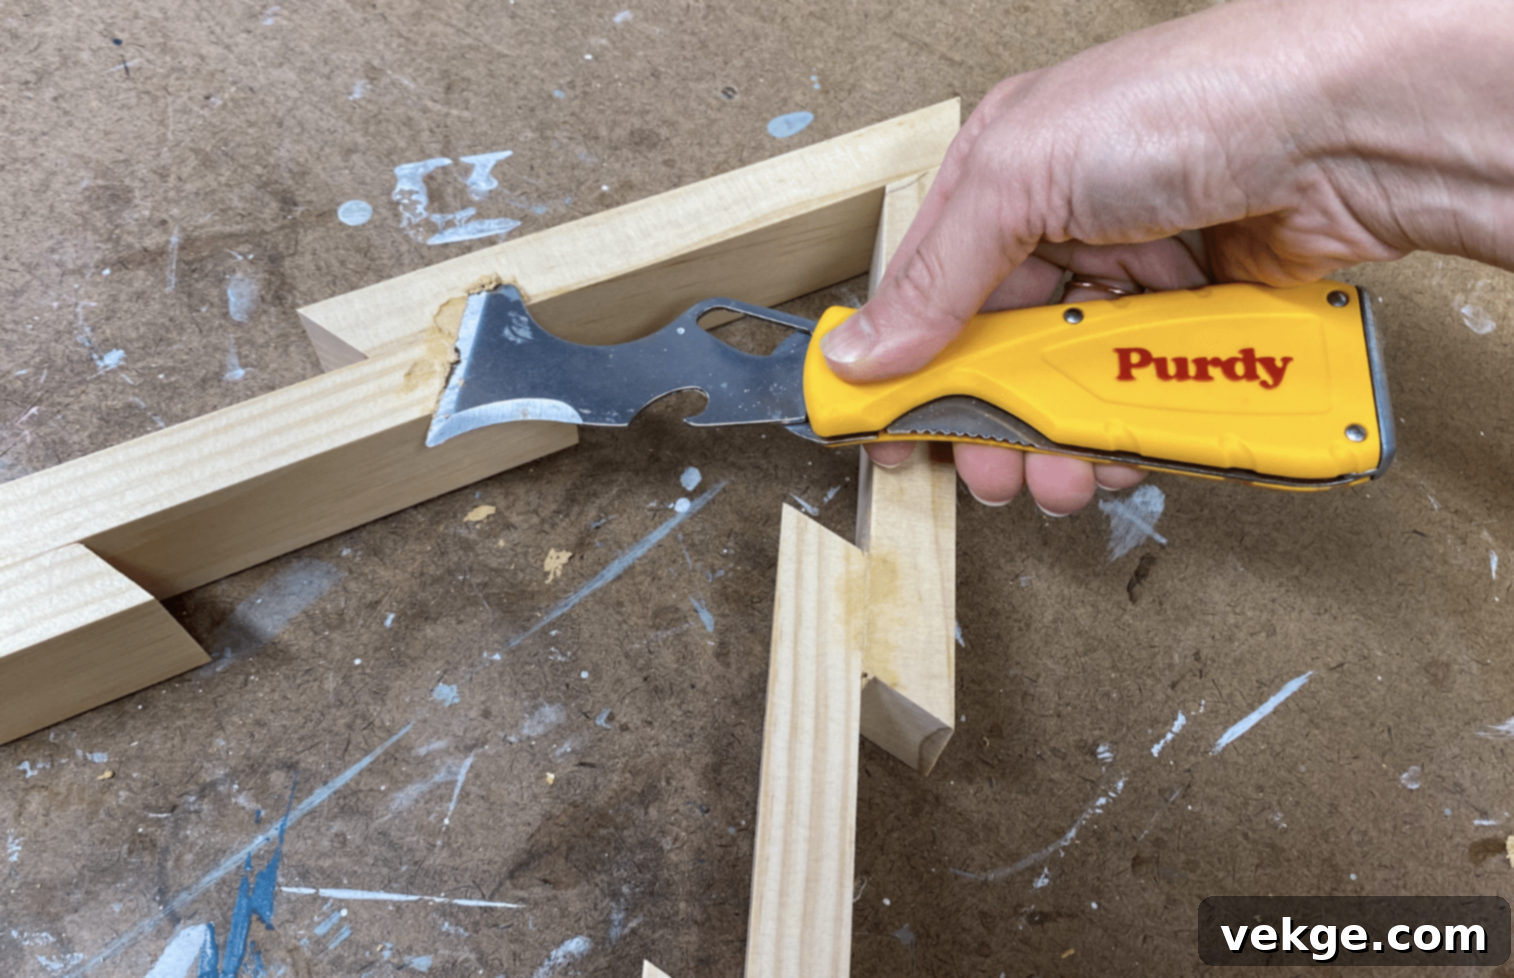
Even with careful assembly, small gaps or nail holes can appear. This step is crucial for creating a seamless surface that will look professionally finished once painted. Wood filler is your ally in achieving this polished look for your DIY Christmas tree.
- Fill any small holes, gaps, or imperfections with wood filler. Pay attention to the pin nail holes for an invisible finish.
- Press the filler firmly into the gaps using a putty knife or your finger. Ensure it’s slightly overfilled, as it will shrink slightly as it dries.
- Smooth the surface completely, removing any excess filler around the patched area.
- Wait for the filler to dry according to the manufacturer’s instructions. Drying times can vary based on thickness and humidity.
- Once dry, sand the filled areas until they are perfectly even and flush with the surrounding wood. Use your 220-grit sandpaper and wipe away dust with a tack cloth.
Step 5: Apply Base Paint for a Vibrant Finish
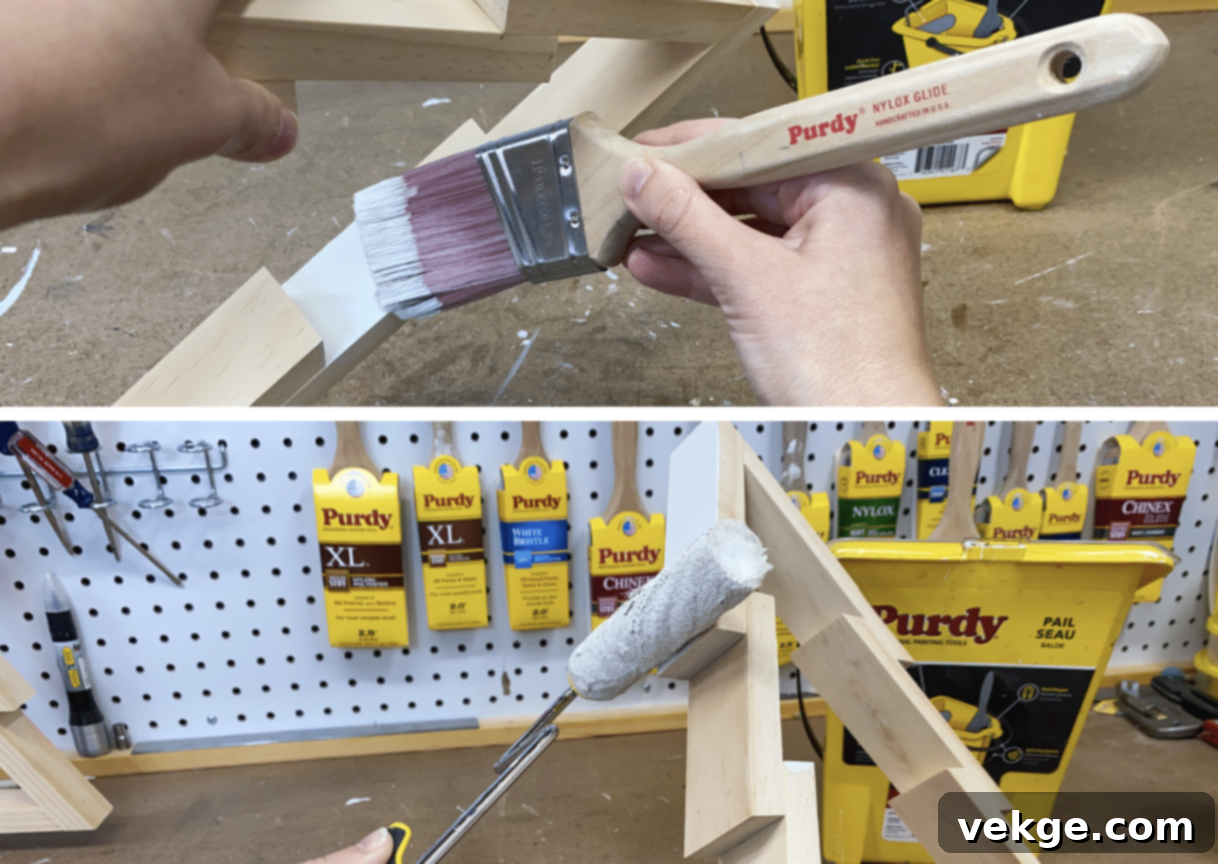
Now it’s time to bring your DIY Christmas tree to life with color! Painting not only protects the wood but also allows you to customize your tree to perfectly complement your existing holiday decor and home aesthetic. Two thin coats are always better than one thick coat for a smooth, even finish.
- Choose paint colors that match your home’s style and your holiday theme. Sherwin-Williams ProClassic Interior Acrylic Latex Paint offers excellent durability and a beautiful finish.
- Use an angled brush for neat edges and corners where the mini roller might not reach. This ensures crisp lines and full coverage.
- Apply paint with a mini roller for flat areas. This method provides a smooth, even coat quickly and efficiently, minimizing brush strokes.
- Add two coats for the best coverage and color saturation. A second coat deepens the color and hides any imperfections from the first coat.
- Let each coat dry fully before applying the next. Rushing this step can lead to sticky paint, smudges, or an uneven finish.
Completion: Displaying Your Handmade Wooden Christmas Tree
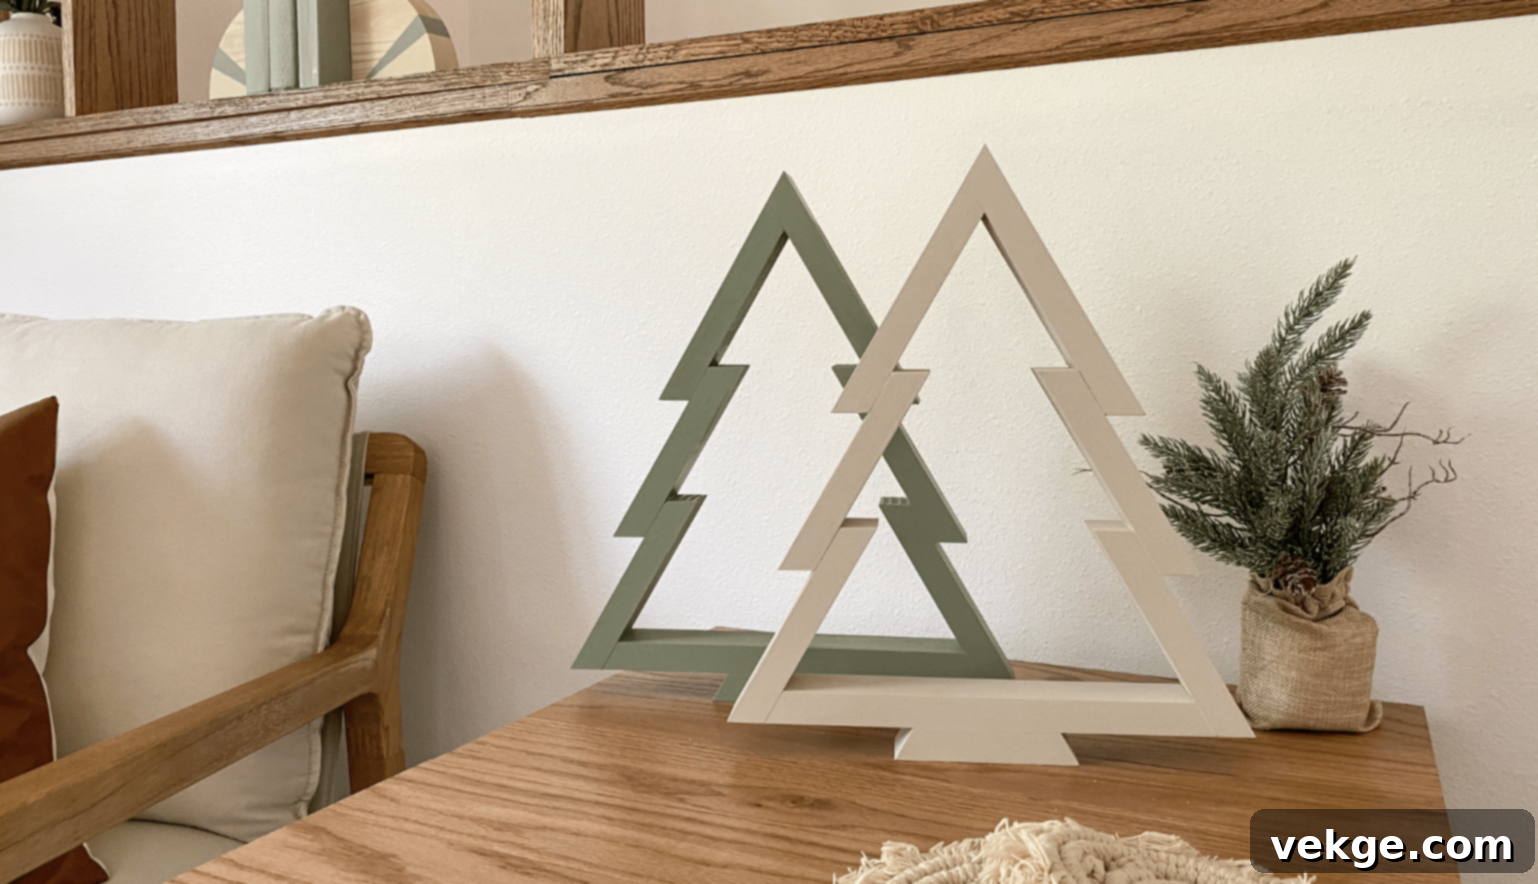
Congratulations, your beautiful DIY wooden Christmas tree is complete and ready to become a festive focal point in your home! The finished piece is not just a decoration; it’s a testament to your creativity and effort. Its versatile design allows for various display options:
Place it proudly on a mantelpiece as a rustic centerpiece, adorn a shelf to add height and interest, or set it on a side table to welcome guests. These handcrafted wooden trees are incredibly durable and designed to last for many years, making them sustainable and eco-friendly additions to your holiday collection. Consider crafting several in different sizes and varying shades of green, white, or even metallic colors to create a charming, layered display that adds depth and festivity to any room. Decorate them with mini lights, small ornaments, or tiny bows to enhance their unique charm.
Alternative Festive Trees: Creative Ideas Beyond Wood
While wooden trees offer classic charm, the world of DIY Christmas trees is vast and full of creative possibilities! If wood isn’t your preferred medium, or if you’re looking for something uniquely different, explore these imaginative alternatives that cater to various styles, spaces, and skill levels. Each project offers a chance to express your holiday spirit in a fresh and personal way.
1. DIY Triangle Wreath Christmas Tree: Perfect for Small Spaces
For a minimalist yet charming DIY Christmas tree, a triangle wreath offers a fantastic solution, especially for those living in apartments or homes with limited floor space. This project is incredibly simple, requiring just three sturdy sticks (collected from nature or craft stores), your choice of artificial flowers or greenery, and basic craft supplies like twine and hot glue. Form an elegant triangle with the sticks, securing the corners firmly with twine for durability. Then, using hot glue, attach your chosen flowers, berries, or leaves, ensuring a balanced arrangement that delights the eye. This quick, 30-minute project results in a beautiful, space-saving wall decoration that exudes natural elegance and warmth. Hang it above a console table or in a hallway for an instant festive update.
Watch the complete tutorial below to create your unique triangle wreath tree and bring a touch of natural artistry to your home.
2. Decorated Branch Christmas Tree: Nature’s Elegance Indoors
Embrace the beauty of the outdoors by transforming natural branches into a stunning DIY Christmas tree. This quick and eco-friendly project is perfect for adding an organic, rustic touch to your holiday decor. Begin by collecting several sturdy, shapely branches of varying lengths – fallen branches from your yard or a local park work wonderfully. Arrange them artfully in a tall, heavy vase or a decorative pot, using pebbles, sand, or floral foam at the base to provide stability. Once your branches are securely placed, let your creativity flourish! Drape them with delicate fairy lights, hang lightweight ornaments, or even spray-paint them white or silver for a snowy effect. This nature-inspired creation takes approximately an hour to complete and fits perfectly in any corner, bringing an understated elegance to your living space.
Watch the detailed tutorial below to make your branch tree come alive with festive charm and personal touches.
3. DIY Hanging Christmas Tree: Modern and Space-Saving
For a truly contemporary and space-efficient holiday decoration, consider crafting a DIY hanging Christmas tree. This innovative design is ideal for small apartments, minimalist decor styles, or for adding a unique focal point above a dining table. The project utilizes birch logs (or any attractive wood dowels) cut into nine progressively shorter tiers, giving the illusion of a traditional tree shape when assembled. Wrap the logs with luxurious yarn in shades of green or mossy tones to create a soft, textural, and natural effect. Connect these tiers with strong twine or fishing line, ensuring even spacing for a balanced silhouette. To complete your aerial masterpiece, entwine delicate twinkle lights around the yarn-wrapped logs and hang a selection of lightweight ornaments. This project takes about two hours to complete, resulting in a mesmerizing, floating tree that captivates and charms.
Watch the step-by-step guide below to build your unique hanging tree and elevate your holiday decor.
4. DIY Origami Christmas Tree Garland: Festive Flair for Any Space
Add a delicate and charming touch to your holiday decorations with a DIY origami Christmas tree garland. This project is wonderfully versatile, perfect for adorning your porch, draping across a mantel, or embellishing an indoor wall. Using simple paper and basic folding techniques, you can create a series of enchanting mini Christmas trees that are then strung together to form a festive garland. This is an excellent option for last-minute holiday decorating or for engaging children in a fun, creative activity. Choose papers with festive patterns or colors to match your theme. The beauty of origami lies in its simplicity and elegance, making this garland a sophisticated yet playful addition. You can easily complete this project in under an hour, transforming any space with its handmade charm.
Follow the detailed video tutorial below to create your beautiful origami Christmas tree garland and infuse your home with holiday spirit.
5. DIY Cone Christmas Trees: Versatile Tabletop Delights
Simple cardboard cones offer an incredibly versatile base for creating a collection of beautiful DIY Christmas trees. These charming tabletop decorations can be customized in endless ways to suit any decor style, from elegant and rustic to whimsical and modern. This project explores three distinct methods, each taking approximately an hour to complete, allowing you to craft a varied and visually appealing display.
- Paper-Wrapped Trees: Transform plain cones using decorative napkins or festive scrapbook paper and Mod Podge. The technique involves tearing or cutting paper into small pieces and adhering them to the cone, creating a unique mosaic effect.
- Twine-Wrapped Trees: For a rustic, natural look, wrap cones tightly with jute cord or decorative twine, securing it with hot glue. This creates a textured, earthy appearance perfect for farmhouse or bohemian styles.
- Natural-Looking Trees: Cover cones with small pine cone pieces, dried leaves, or even faux moss for an organic, woodland-inspired design. This method brings the beauty of nature indoors.
Mix and match these styles and sizes to create an enchanting forest display on your entryway table, dining centerpiece, or windowsill.
See the full techniques in our video tutorial below to master these delightful cone Christmas trees.
6. DIY Paper Christmas Tree: Elegant and Eco-Friendly
Discover the art of creating charming paper Christmas trees in various sizes, perfect for adding a refined touch to your holiday decor. This DIY Christmas tree project is both budget-friendly and eco-conscious, utilizing simple materials to achieve surprisingly elegant results. All you need is paper in your chosen colors and patterns (a weight of 120-150 gsm works best for structure and foldability), a wooden skewer or dowel for the trunk, and basic craft tools like scissors, glue, and a ruler. You can easily craft these trees to be 8 or 12 inches tall, making them ideal for tabletop displays, adorning shelves, or as unique window decorations. The beauty of paper trees lies in their intricate layers and the ability to customize them with different colors and textures, creating a truly personalized festive accent.
Ready to craft your own collection of elegant paper trees? Follow the detailed video guide below for step-by-step instructions and folding techniques.
7. DIY Yarn Christmas Tree: Cozy, Textured, and Sparkly
Bring a cozy and whimsical touch to your holiday decor by transforming simple foam cones into delightful DIY yarn Christmas trees. This project is incredibly budget-friendly, often costing under $10 for materials, and allows for immense creativity in color and texture. You’ll need foam cones, your favorite yarn colors, Mod Podge (or a similar craft glue), plastic wrap, and optional embellishments like glitter or mini LED lights. The core technique involves wrapping yarn snugly around a plastic-covered foam cone, then sealing it with a water-diluted Mod Podge mixture. Once dry, the yarn shell retains its shape, creating a unique, textured tree. Add battery-operated fairy lights intertwined within the yarn or a sprinkle of glitter for extra sparkle. While the active crafting time is relatively short, each tree requires about 24 hours for the Mod Podge to dry completely, ensuring a firm structure. This project is perfect for creating a warm, inviting atmosphere.
Watch the complete tutorial below to learn the best techniques and avoid common mistakes, ensuring your yarn Christmas trees turn out perfectly.
Dressing Up Your Tree: Essential Ornaments and Decor
Once your DIY Christmas tree is crafted, the real magic begins with decoration! The right ornaments, lights, and toppers can transform your handmade tree into a dazzling display that captures the essence of the holidays. This section will guide you through thoughtful choices and creative techniques to make your unique tree truly shine.
Incorporating Lighting for a Festive Glow
Lighting is crucial for bringing your DIY Christmas tree to life, creating warmth and sparkle. For most handmade trees, especially those not designed for heavy electrical loads, battery-operated LED string lights are an excellent choice due to their safety and flexibility. When applying lights, begin wrapping from the bottom and work your way up, spacing the lights evenly around the branches or structure. Consider using warm white lights for a classic, cozy glow, or multi-colored lights for a more playful look. Always keep extra batteries on hand to ensure your tree remains illuminated throughout the season. For paper or delicate trees, consider placing lights *behind* them to cast a soft, enchanting glow and create beautiful shadows, rather than directly on the structure.
Adding Garlands and Ribbons for Depth and Texture
Garlands and ribbons add wonderful depth, texture, and color to your DIY Christmas tree. To achieve a professional look, wrap garlands in a graceful spiral pattern, starting at the top and gently working your way down to the base. You can use various materials, from traditional tinsel and bead garlands to more natural options like burlap or even homemade popcorn strings. For ribbons, especially wired ones, you can create elegant bows that hold their shape beautifully. Mix thin, delicate garlands with wider, more substantial ribbons to create visual interest. Remember to leave ample space between your garland loops and ribbon cascades to allow your treasured ornaments to hang freely and truly shine.
Creative Topper Ideas to Crown Your Creation
Every DIY Christmas tree deserves a special topper to complete its festive look. The topper is the crowning glory, adding a personal touch and drawing the eye upward. Instead of a traditional star or angel, consider creating something unique:
- Ribbon Bow: Craft an oversized, multi-loop bow from wide, wired ribbon in a complementary color.
- Paper Star: Fold an intricate origami star or cut a dimensional paper star, perhaps adorned with glitter.
- Natural Elements: Cluster several painted pinecones together, or create a mini bouquet of faux berries and evergreen sprigs.
- Personalized Item: Use a cherished family heirloom, a meaningful handcrafted ornament, or even a small, decorative initial.
Ensure your chosen topper is proportionate to your tree – a good rule of thumb is that it should be about one-fifth of the tree’s total height to look balanced and harmonious.
Crafting Tips and Solutions: Making Your Project Easier
Embarking on a DIY Christmas tree project should be a joyful and stress-free experience. These tested tips and practical solutions for common issues will help streamline your crafting process and ensure your project is both enjoyable and successful.
Efficient Crafting Tips for a Smooth Project
- Prepare Your Workspace: Before you even begin cutting or gluing, clear a dedicated area. Lay down a drop cloth or newspaper to protect surfaces, and ensure you have adequate lighting and ventilation. This helps maintain focus and minimizes mess.
- Gather All Materials First: There’s nothing more frustrating than having to stop mid-project to search for a missing item. Double-check your list and have everything within arm’s reach before starting.
- Work in Manageable Segments: Instead of trying to complete the entire tree in one sitting, break down the project into smaller, 30-minute tasks. This prevents fatigue and allows for necessary drying times.
- Clean As You Go: Wipe up glue drips, sweep sawdust, or put away tools after each major step. A tidy workspace is a safe and efficient workspace.
- Allow Parts to Dry Completely: Patience is key, especially with glue and paint. Rushing drying times can compromise the structural integrity and finish of your tree.
- Keep a Basic Tool Kit Nearby: Have essentials like scissors, a utility knife, a ruler, and a pencil readily available for quick adjustments or unexpected needs.
- Use a Timer for Glue-Drying: For specific drying times, set a timer to ensure adequate curing, preventing premature handling that could weaken joints.
Troubleshooting Common DIY Issues and How to Fix Them
- Wobbly Tree? If your tree feels unstable, especially a freestanding design, consider adding a wider, heavier base. This could be a cross-brace made from additional wood or a weighted platform securely attached to the bottom.
- Uneven Paint Coverage? This often happens when paint is applied too thickly. The solution is to apply multiple thin layers, allowing each to dry completely. A high-quality roller or brush also helps.
- Loose Decorations? If ornaments or embellishments aren’t staying put, switch from craft glue to hot glue. Its quick drying time and strong bond are ideal for securing small, decorative elements.
- Bent Branches (for wire or flexible designs)? Gently reshape them by hand. For persistent bends, use floral wire or thin craft wire to support and hold them in the desired position until they retain their shape.
- The Tree Won’t Stand Flat? Check the bottom surface for any unevenness. A quick sanding or shimming with small felt pads can often fix this issue.
- Materials Not Sticking? Ensure all surfaces are clean, dry, and free of dust or grease before applying adhesive. Sometimes, a light sanding can improve adhesion.
- Gaps in Decoration Coverage? Don’t fret! Fill in sparse areas with smaller ornaments, extra sprigs of faux greenery, or strategically placed festive picks to create a fuller look.
After the Holidays: Maintenance and Storage Tips
To ensure your beautiful DIY Christmas tree remains a cherished part of your holiday celebrations for many years, proper maintenance and smart storage are essential. A little care after the festivities will pay dividends in preserving your handmade creation.
Keeping Your Tree Beautiful Year After Year
- Gentle Dusting: Use a soft, dry brush or a microfiber cloth to gently dust your tree regularly throughout the holiday season, especially before packing it away.
- Prompt Touch-Ups: If you notice any paint chips, scuffs, or loose pieces, address them immediately. A small amount of matching paint or glue can prevent minor damage from worsening.
- Avoid Direct Sunlight: Prolonged exposure to direct sunlight can fade colors and weaken materials, especially paper or fabric elements. Store and display your tree in a shaded area.
- Fix Loose Parts Right Away: Don’t ignore wobbly joints or detached decorations. A quick repair now will save you bigger headaches next season.
- Clean with a Dry Cloth Only: Unless specifically designed for wet cleaning, use only a dry cloth to prevent water damage or staining, particularly on wooden or paper trees.
- Check for Loose Connections: For lighted trees, periodically inspect wire connections and battery compartments to ensure everything is secure and working properly.
- Repair Any Damage Before Storing: Before packing your tree away, make all necessary repairs. This ensures it’s ready to go when you unpack it next year.
Smart Storage Solutions to Preserve Your Creation
- Use Sturdy Storage Boxes: Invest in high-quality, durable plastic containers or heavy-duty cardboard boxes that are appropriately sized for your tree. Avoid flimsy boxes that can collapse.
- Wrap for Protection: Individually wrap delicate parts of your tree in bubble wrap, tissue paper, or soft cloth to prevent scratches, breakage, and dust accumulation.
- Store in a Dry, Cool Place: Attics, basements, or garages are fine, but ensure the area is free from extreme temperature fluctuations and excessive humidity, which can damage materials.
- Label Boxes Clearly: Label your storage containers with “DIY Christmas Tree” and a brief description of its contents. This makes retrieval next year much easier.
- Keep Small Parts Organized: Place any detachable small parts, extra decorations, or special tools in clearly labeled zip-top bags within the main storage box.
- Stack Larger Pieces Carefully: If your tree disassembles, stack the larger components flat or on their sides to prevent warping or crushing.
- Add Silica Gel Packets: To combat moisture in humid environments, place a few silica gel packets inside the storage box to absorb dampness and prevent mold or mildew.
Conclusion: Embrace the Joy of Your Handmade Holiday Creation
Creating your very own DIY Christmas tree is an experience that transcends simple holiday decorating. It’s an opportunity to infuse your home with personal history, unique style, and a heartwarming sense of accomplishment. Each method we’ve explored, from the rustic charm of a wooden design to the delicate whimsy of paper crafts, offers a chance to express your creativity while providing a budget-friendly alternative to mass-produced decor.
We’ve journeyed through diverse approaches to crafting these special festive trees, covering everything from sturdy, full-sized wooden constructions to charming tabletop versions and innovative hanging designs. The most wonderful aspect of these projects is that they don’t demand expert craftsmanship or expensive materials. With a basic set of supplies, a dash of patience, and a willingness to explore, you possess all the tools needed to create a unique tree that perfectly complements your space and aesthetic.
Remember, the true beauty of a DIY Christmas tree lies not in its perfection, but in its individuality. Every slight imperfection, every unique detail, adds character and makes it unequivocally yours – a narrative piece born from your own hands and imagination. As you gather your materials and embark on your crafting adventure, focus on the joy of the creative process. After all, the most cherished holiday decorations are those imbued with personal meaning, stories, and the love poured into their creation. May your handmade tree bring warmth, wonder, and lasting memories to your home this festive season!
