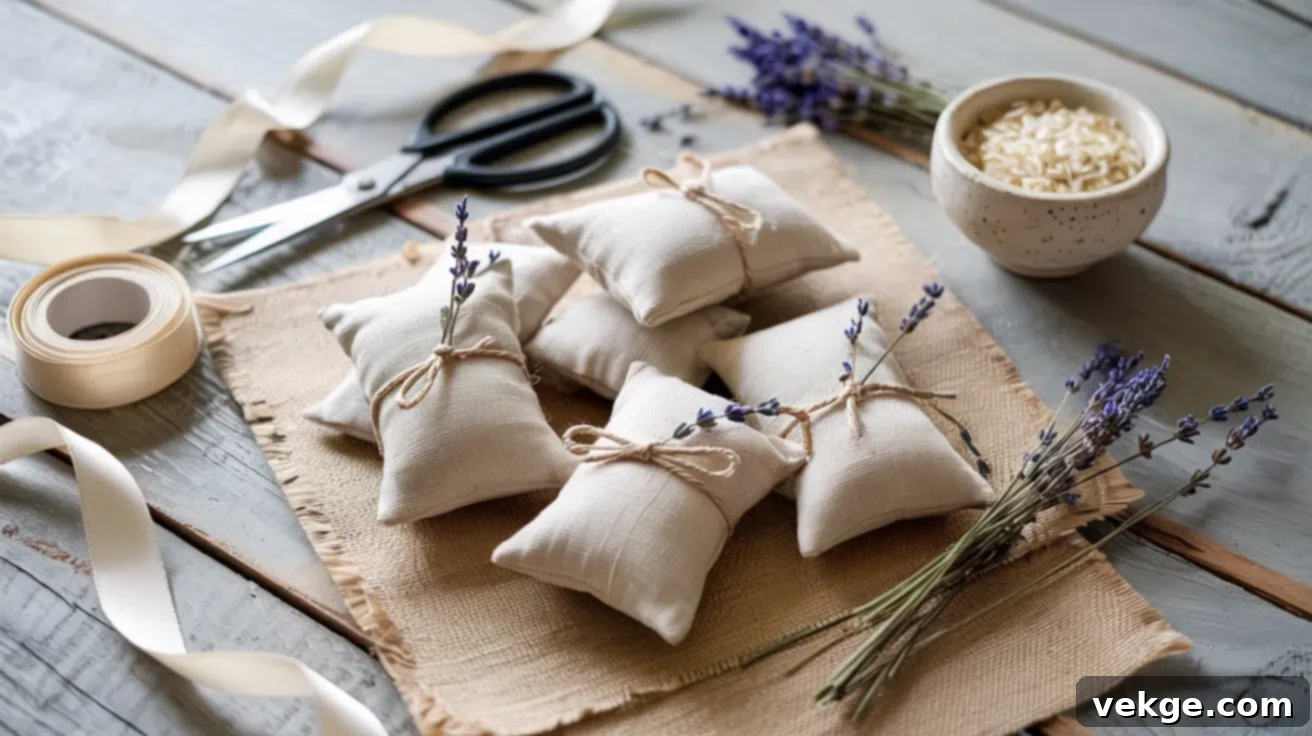
DIY Lavender Sachets: Your Complete Guide to Handmade Fragrance (Sewn & No-Sew Methods)
Imagine opening a drawer to a burst of fresh, calming scent, or giving a truly personal, handmade gift that speaks volumes. If you’ve ever yearned for these simple pleasures, then homemade lavender sachets are your perfect solution. These delightful fabric pouches, filled with aromatic lavender, offer a touch of elegance and tranquility to any space, making them ideal for personal use or thoughtful presents.
This comprehensive guide will walk you through everything you need to know about creating your own DIY lavender sachets. Whether you’re comfortable with a needle and thread or prefer a quick, no-sew approach, we’ve got you covered. You’ll discover the essential materials, learn step-by-step instructions for both sewn and no-sew methods, and find invaluable tips on how to make the fragrant scent last longer. We’ll also explore creative ideas for customizing and styling your sachets, as well as inspiring ways to package, gift, or even sell them. Let’s dive in and craft something truly special and fragrant together!
Why Homemade Lavender Sachets Are a Delightful DIY Project
Crafting your own lavender sachets at home offers numerous benefits that store-bought alternatives simply can’t match. It’s a deeply rewarding endeavor that puts you in complete control of every detail, from the intensity of the scent to the aesthetics of the fabric. This personal touch ensures your sachets perfectly align with your preferences and needs, making them uniquely yours.
One of the primary advantages is the ability to choose premium, natural ingredients. You can select high-quality dried lavender buds, ensuring a pure and potent fragrance free from artificial additives often found in commercial products. Moreover, crafting these fragrant sachets allows for immense creativity. You can opt for soothing, classic lavender, or experiment with calming blends by adding other dried herbs like chamomile or essential oils for an enhanced aroma. This customization extends to the fabric itself – repurpose scraps of beautiful cotton, linen, or silk that you already have, turning them into something both useful and beautiful.
Beyond personal satisfaction, homemade lavender sachets are incredibly budget-friendly. By using materials often found around the house or purchased in bulk, you significantly reduce costs compared to buying pre-made versions. They also make exceptional handmade gifts for any occasion – be it a small celebration, a thoughtful gesture of appreciation, or simply to spread everyday freshness. The care and effort invested in a handmade item resonate deeply with recipients, making your gift truly memorable.
Environmentally conscious crafters will also appreciate the eco-friendly aspect of DIY sachets. By choosing sustainable fabrics and natural fillings, you create a product that is biodegradable and reduces reliance on synthetic air fresheners. In essence, making your own DIY lavender sachets isn’t just a craft; it’s an enjoyable way to bring natural fragrance, personal style, and a touch of serenity into your home and the lives of others.
How to Make Lavender Sachets: Step-by-Step Guide
Embark on your lavender sachet crafting journey with these easy-to-follow instructions. We’ll explore two distinct methods – a classic sewn approach and a convenient no-sew technique – ensuring there’s a perfect option regardless of your skill level or available time. Choose the method that best suits your comfort and creativity, and get ready to infuse your space with the calming aroma of lavender.
Method 1: Sewn Lavender Sachets (Beginner Friendly)
This traditional method involves basic stitching, making it suitable for anyone comfortable with a hand needle or a sewing machine. The result is a durable, secure pouch with a charming, rustic, and unmistakably handmade feel. Even if you’re new to sewing, these steps are straightforward and designed for success.
Gather Your Materials
- Dried lavender buds (choose high-quality, fragrant buds for the best results, whether store-bought or from your garden)
- White rice (an excellent, inexpensive filler that adds weight and helps absorb and release the scent over time)
- Cotton fabric (opt for breathable, tightly woven cotton in your favorite patterns or solid colors; quilting cotton works wonderfully)
- Rotary cutter or sharp fabric scissors
- Cutting mat and a clear ruler (for precise, straight cuts)
- Iron and ironing board (optional, but highly recommended for crisp seams and a professional finish)
- Sewing machine or a hand needle and matching thread (polyester or cotton thread are ideal)
- Pins (to hold fabric pieces securely in place)
- Paper (for making a simple funnel)
- Tape (to secure your paper funnel)
- Ribbon or twine (for optional decorative bundling or hanging)
Step 1: Cut the Fabric
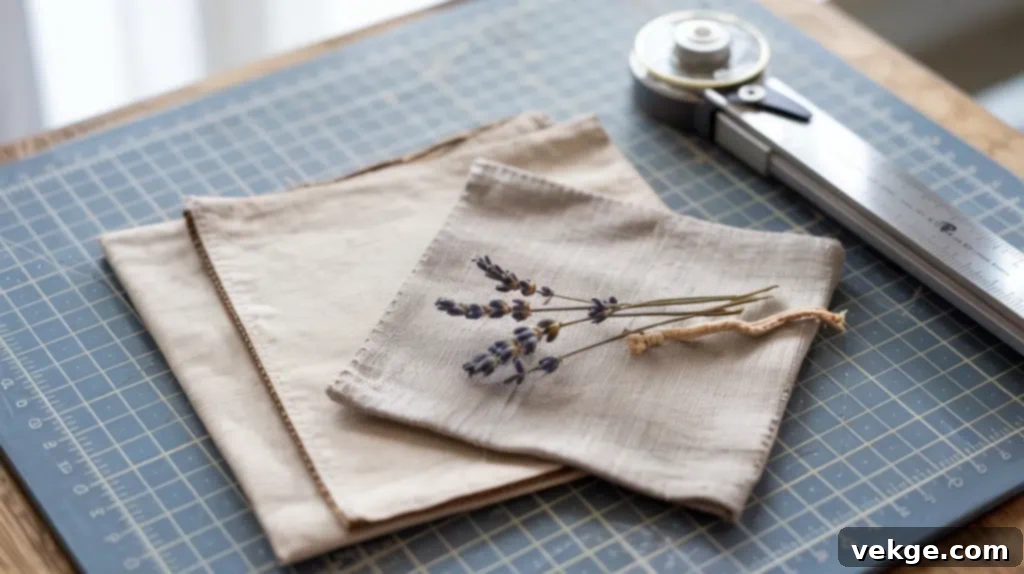
Begin by cutting two identical fabric squares. A common and versatile size is 5 inches by 5 inches, which yields a finished sachet of approximately 4.5 inches after seam allowances. For optimal accuracy, lay your fabric flat on a cutting mat and use a rotary cutter and ruler. Before measuring, always trim away the fabric selvage (the woven edge) to ensure clean, straight edges for your sachet.
Once cut, take a moment to press both fabric pieces flat with a warm iron. This crucial step removes any wrinkles or creases, making the subsequent pinning and sewing much easier and more precise. If you desire a slightly firmer sachet that holds its shape better, you can add a lightweight fusible interfacing to one or both fabric pieces before sewing, though this is entirely optional for a soft, malleable sachet. Finally, stack your cut squares precisely, ensuring all edges align perfectly, preparing them for the next sewing step.
Step 2: Sew Three Sides
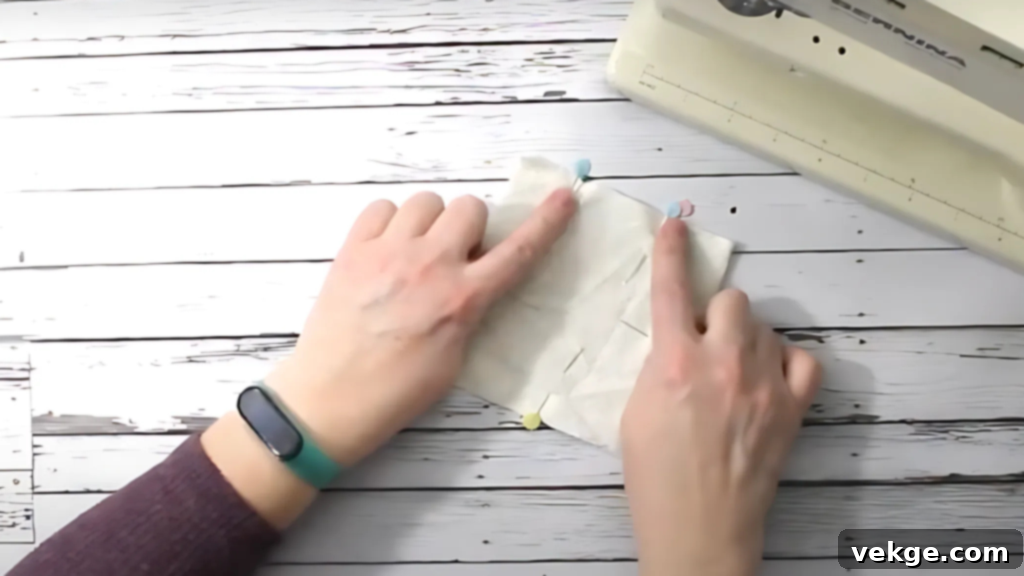
Place your two fabric squares right sides together, ensuring the patterns (if any) are facing inwards. Secure the edges with pins, placing them perpendicularly to the seam line. Crucially, leave an approximate 2-inch opening unsewn on one side of the sachet; this gap will be used for turning and filling. Mark this opening clearly with double pins at both the start and end points, serving as a visual reminder not to stitch it closed prematurely.
Using a ¼-inch seam allowance (the distance from the raw edge of the fabric to your stitching line), begin sewing from one double pin, around the corners, and ending at the other double pin. When you reach each corner, keep the needle down in the fabric, lift the presser foot, pivot the fabric 90 degrees, and then lower the presser foot to continue sewing. Remember to backstitch at the very beginning and end of your seam lines to firmly secure the stitching and prevent it from unraveling. Once sewn, trim the corners diagonally close to the seam, being careful not to cut through your stitches. This step helps reduce bulk in the corners, ensuring they turn out neatly and sharply in the next stage.
Step 3: Turn Right Side Out
Carefully push the fabric through the 2-inch opening you left unsewn, turning the sachet pouch right side out. This will reveal your sewn seams and the chosen fabric pattern. To achieve crisp, well-defined corners, gently push them out from the inside. A blunt tool like a pencil, a wooden dowel, or the tip of a paintbrush (being careful not to poke through the fabric) works perfectly for this. This step is crucial for giving your lavender sachet its intended neat and square final shape.
Once the corners are properly pushed out, press the entire sachet flat with an iron. Pay special attention to the seams, pressing them open or to one side to ensure they lie smooth and flat. This pressing step gives the pouch a polished appearance and prepares the opening for a clean final closure. At this point, inspect for any stray or loose threads and trim them neatly. Also, double-check that the opening edges are folded inwards, aligning with the sewn seam, ready to be filled and stitched closed.
Step 4: Fill the Sachet
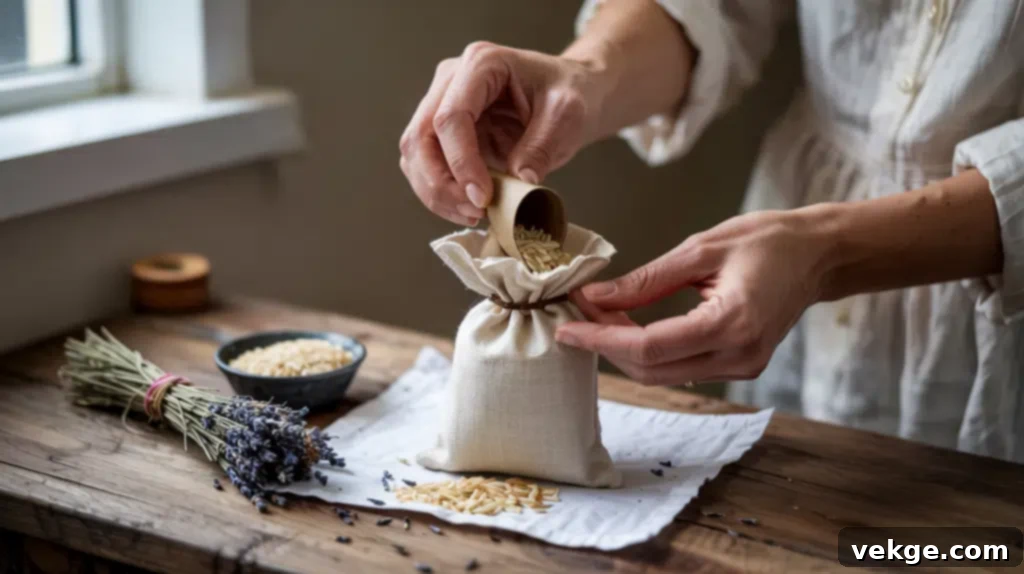
To make filling easier and mess-free, create a simple funnel by rolling a piece of paper into a cone and securing it with tape. Insert this funnel into the sachet’s opening. Begin by adding a small scoop of white rice. The rice serves multiple purposes: it adds a satisfying weight to the sachet, acts as a filler, and, most importantly, helps to absorb and slowly release the lavender’s essential oils, making the scent last significantly longer.
Follow the rice with your dried lavender buds. You can alternate layers of rice and lavender, shaking the sachet gently after each addition to help the mixture settle evenly and prevent clumping. It’s important not to overfill the sachet; leave approximately 1 inch of empty space at the top. This ensures you have enough fabric to easily sew the opening closed without the filling spilling out. If any spillage occurs during filling, simply tap the pouch gently on a flat surface to resettle the contents.
Step 5: Sew the Sachet Closed
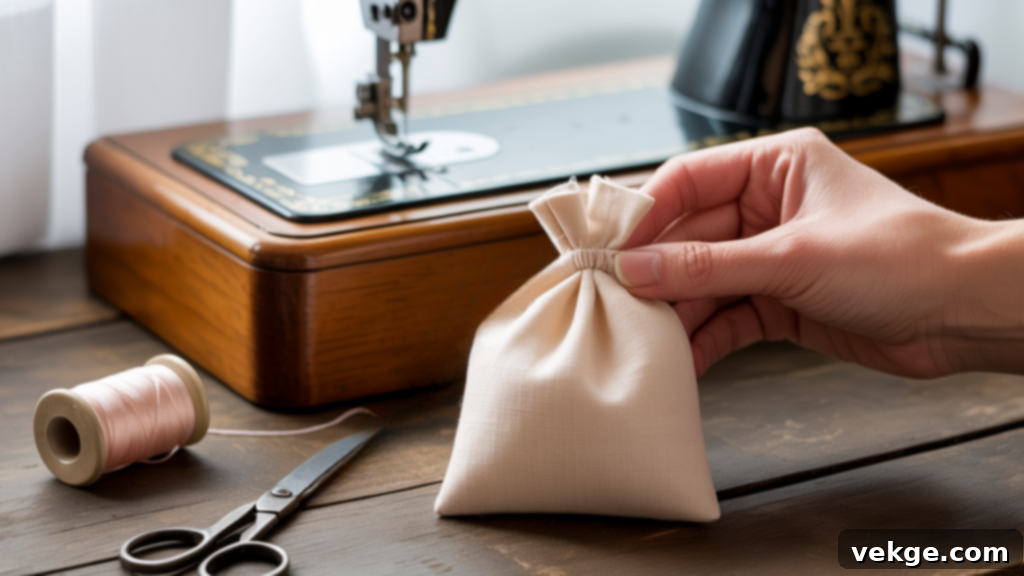
With your sachet filled, it’s time to seal the opening. Carefully fold the raw edges of the opening inwards, aligning them precisely with the existing seam line. Press this folded edge with an iron for a crisp finish. Now, stitch this opening closed using either your sewing machine or a hand needle. If using a machine, sew a straight stitch very close to the folded edge, creating a neat, almost invisible closure. If sewing by hand, a ladder stitch (also known as an invisible stitch) is ideal for a seamless look, or a simple whipstitch for a more rustic appearance. Ensure your stitches are small, even, and secure to prevent any filling from escaping.
Once the sachet is securely closed, gently massage the pouch with your hands. This helps to distribute the lavender and rice mixture evenly throughout the sachet, ensuring a balanced shape and consistent scent release. It also helps to fluff up the contents. Finally, give your sachet a quick inspection and trim any remaining excess threads to maintain a tidy and professional finish. Your sewn lavender sachet is now complete!
Step 6: Finish and Bundle (Optional)
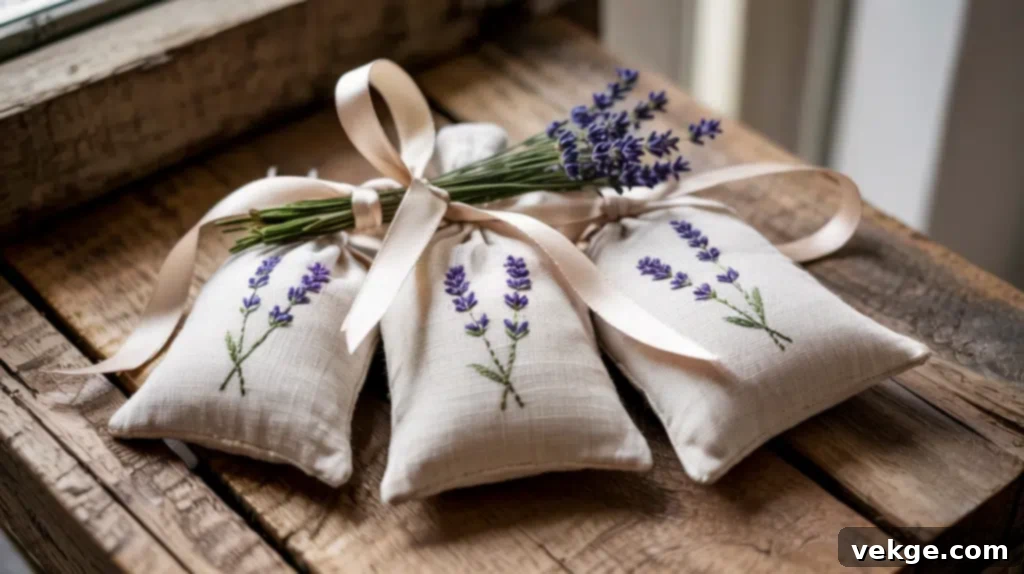
If you’ve crafted multiple DIY lavender sachets, consider bundling them for an appealing display or as a charming gift set. Arrange your sachets by stacking them neatly, perhaps alternating colors or patterns for visual interest. Once arranged, take a length of complementary ribbon, twine, or natural raffia.
Wrap the ribbon around the stacked sachets, crossing it underneath to secure the bundle. Then, bring the ends back up to the top and tie them into a decorative bow or a simple knot. For a refined look, trim any excess ribbon ends diagonally. This simple bundling technique elevates your individual sachets into a cohesive and attractive set, perfect for adorning a closet shelf, brightening a dresser, or presenting as a thoughtful present. It’s an easy yet impactful way to add a polished final touch to your handmade creations.
Watch the full video below to see each step in action and follow along as you create your lavender sachets:
Method 2 – No-Sew Lavender Sachets
For those seeking a quicker, mess-free alternative to traditional sewing, the no-sew method is a fantastic choice. This technique is especially perfect for crafting with kids, tackling last-minute projects, or simply when you prefer a “glue-and-go” solution. It requires no stitching at all, relying instead on fabric-safe adhesives or pre-made pouches to create beautiful and functional sachets with ease.
Tools and Materials for No-Sew Sachets
- Cotton fabric (lightweight, breathable fabrics like quilting cotton scraps or fat quarters work exceptionally well)
- Paper or cardboard template (for consistent tracing of your desired sachet shape)
- Pencil or fabric marker (for lightly marking cutting lines on your fabric)
- Aleene’s Fabric Fusion Peel & Stick Tape (or any similar permanent, fabric-safe adhesive tape specifically designed for no-sew projects)
- Pinking shears or sharp fabric scissors (pinking shears are ideal for cutting and simultaneously preventing fabric fraying)
- Dried lavender buds (your primary scented filler; ensure they are high quality for lasting fragrance)
- Optional: Lavender essential oil (to boost fragrance intensity or refresh sachets later)
- Scrap paper (to easily create a funnel for filling)
- Stamps, fabric patches, or peel-and-stick labels (for optional decorative customization)
- Ribbon or twine (for bundling multiple sachets, especially when preparing them as gifts)
Step 1: Choose and Prepare Your Fabric
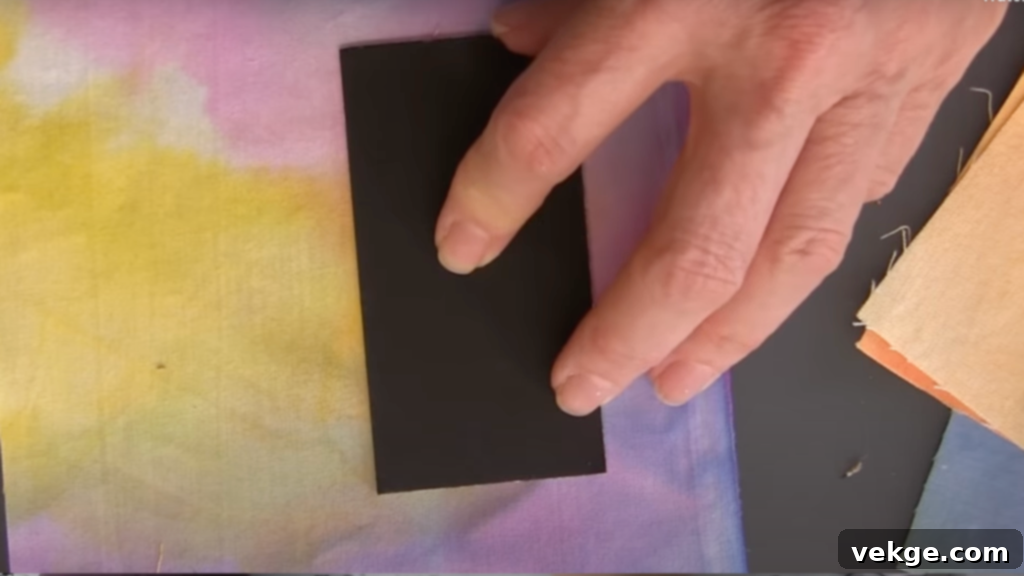
Start by selecting two pieces of fabric in your desired color or pattern. Feel free to mix and match coordinating or contrasting fabrics to add visual interest to your no-sew lavender sachets. To ensure uniformity, create a reusable template from cardboard or thick paper in your chosen sachet size – a standard square (e.g., 5×5 inches) or rectangle works well.
Lay your fabric flat and place the template on the wrong side (the side that won’t be visible). Use a pencil or a disappearing fabric marker to lightly trace around the template onto the fabric. This provides precise cutting lines for creating identical sachet shapes. Having clear lines is essential for accurately applying the adhesive tape and maintaining consistent sizing across multiple sachets, which is especially important if you plan to make a batch for gifting or selling.
Step 2: Apply Fabric Tape Along the Edges
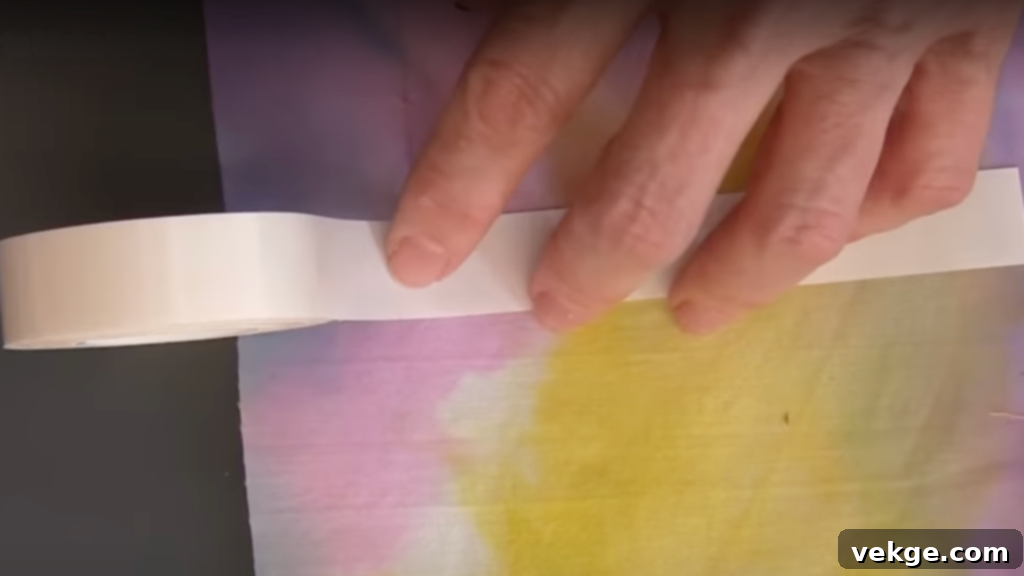
Using your chosen fabric-safe adhesive tape, such as Aleene’s Fabric Fusion Peel & Stick Tape, carefully apply the tape along three edges of one of your traced fabric shapes. Ensure the tape follows the drawn lines precisely, leaving one entire side open. This open side will be where you fill the sachet with lavender later.
Press the tape firmly onto the fabric, applying even pressure to ensure a strong bond. Pay close attention to the corners: instead of overlapping the tape strips, butt the edges of the tape together at each corner. This technique prevents the adhesive from sticking in unintended areas and creates a cleaner, more secure seal. This carefully applied tape will form the structural “seams” of your sachet, holding the fabric together without any need for stitching, creating a neat and sealed interior for your fragrant filling.
Step 3: Cut the Fabric and Secure the Seal
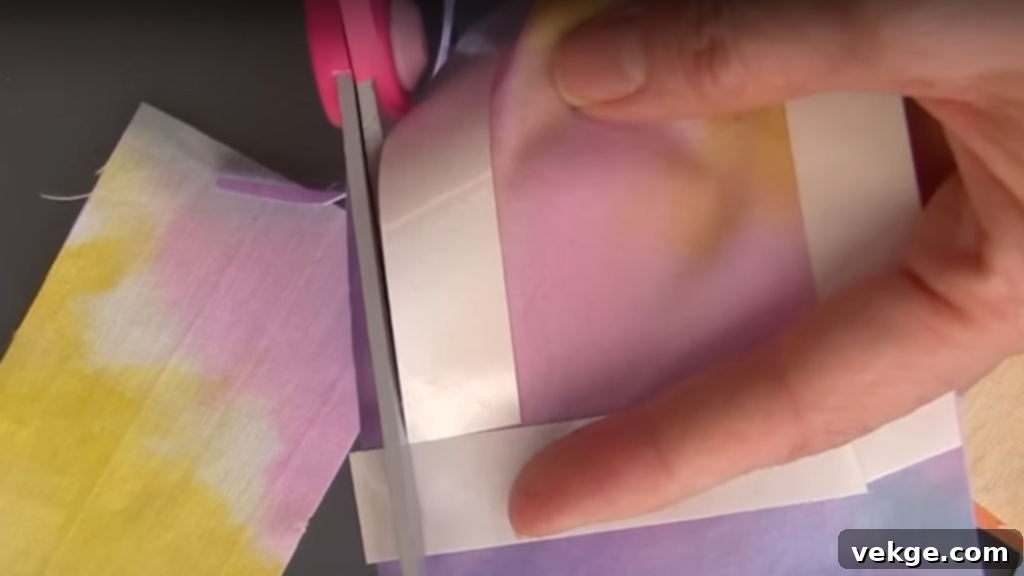
Once the tape is firmly applied, carefully cut your fabric along the outer edge of the marked shape. Before proceeding, press the taped edges down again, perhaps with the warmth of your hand or a brayer, to ensure maximum adhesion. Next, gently peel off the paper liner from only the three taped sides, leaving the top side (your opening) still covered.
Take your second piece of fabric and place it wrong side down over the exposed sticky tape, carefully aligning all three taped edges. Press down firmly across the taped areas to create a strong seal between the two fabric pieces. Now, using pinking shears, trim the fabric along the outer edge of the sealed tape line. Pinking shears create a zigzag edge that is not only decorative but also highly effective at preventing the fabric from fraying, giving your no-sew lavender sachet a neat and durable finish.
Step 4: Customize Your Sachet (Optional)
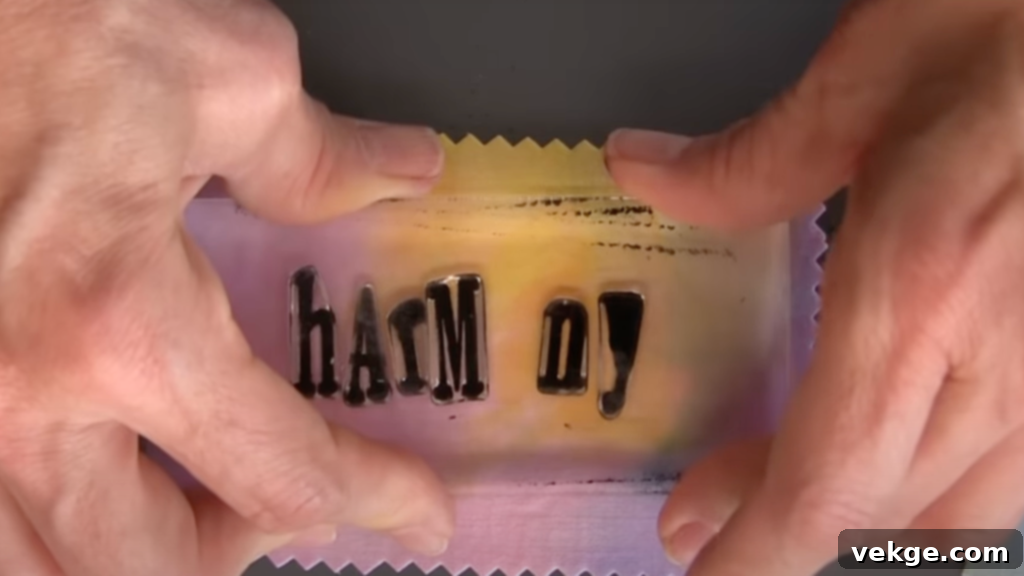
Before filling your sachet, this is the perfect moment to add any desired decorative details, allowing the adhesives or inks to dry completely. Personalize your sachets with fabric-safe stamps to print inspiring words like “calm,” “breathe,” or “harmony” directly onto the fabric. If you find yourself missing a specific letter or design, don’t be afraid to get creative! Substitute with a small heart stamp, a leaf design, or another element that adds charm.
For a beautiful layered look, consider using peel-and-stick fabric sheets. You can cut these into intricate shapes – stars, flowers, or monograms – and apply them as unique appliqué decorations. Fabric markers or paint pens can also be used for freehand drawing or adding small details. This customization step truly makes each DIY lavender sachet a reflection of your style or a tailored gift for its recipient.
Step 5: Fill the Sachet with Lavender
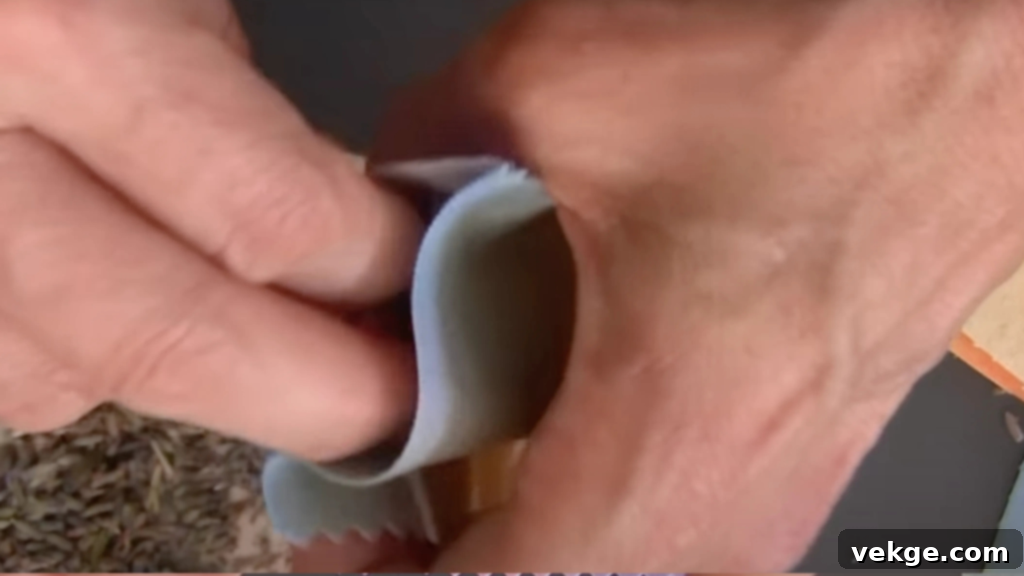
Just like with the sewn method, a simple paper funnel will make filling your no-sew sachet a breeze. Roll a piece of scrap paper into a cone, secure it with tape, and insert the narrower end into the open side of your sachet. This impromptu funnel doesn’t need to be perfect; it just needs to be functional to prevent spills.
Start by adding a scoop of white rice to the sachet. The rice provides a pleasant weight and helps sustain the lavender’s fragrance. Next, fill with your dried lavender buds. For an extra potent and lasting aroma, consider adding 2-3 drops of pure lavender essential oil directly onto the filling. Gently shake the sachet to mix the contents and ensure even distribution. Remember to leave approximately an inch of space at the top – this unfilled margin is crucial for easily sealing the final side without any overflow. This smooth filling process is key to a perfectly formed fragrant sachet.
Step 6: Seal the Last Side of the Sachet
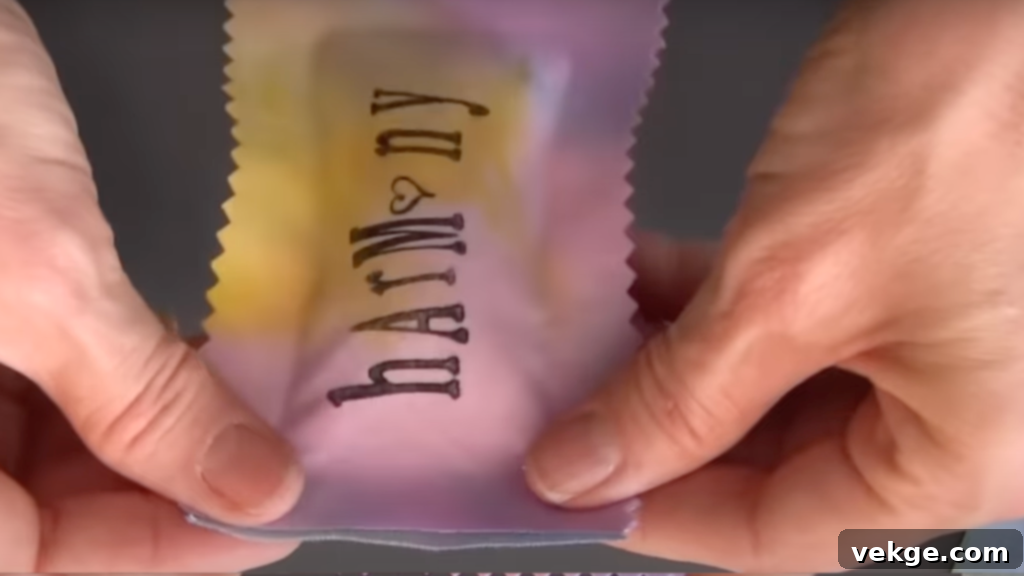
Now for the final, satisfying step! Carefully peel off the last paper backing strip from the adhesive tape along the open edge of your sachet. Align the top edge of the fabric precisely and firmly press it down to close the sachet, ensuring it adheres strongly to the exposed tape. Run your fingers along the newly sealed edge, applying consistent pressure to reinforce the bond. Double-check for any small gaps or areas that may not have sealed completely, pressing them again if needed. If desired, you can use your pinking shears to give this final sealed edge a clean, decorative zigzag cut, matching the other three sides. With this final step, your no-sew lavender sachet is fully sealed and ready, no stitching required!
Step 7: Gift or Use Your Sachets
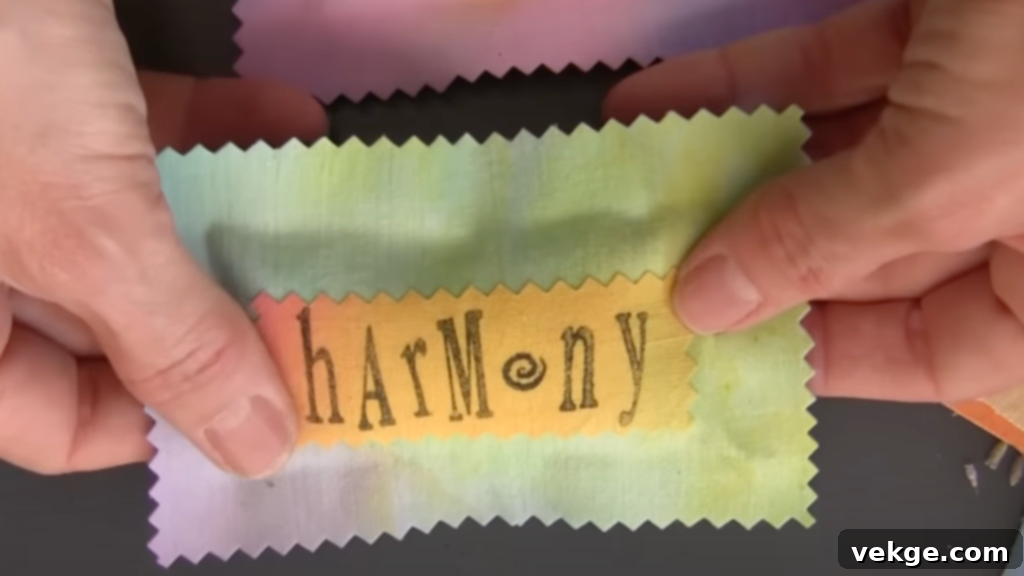
Congratulations, your no-sew lavender sachet is now complete and ready to bring a touch of natural fragrance wherever it goes! The beauty of these fragrant sachets lies in their versatility. Tuck them into dresser drawers to keep clothes smelling fresh, place them in closets to deter moths and infuse linens with a calming scent, or pop one into your suitcase for a delightful aroma on your travels. They even work wonderfully in your car or tucked into your handbag for a personal touch of aromatherapy on the go.
These no-sew wonders are especially fantastic for gifting. Gather several together, perhaps with coordinating fabrics, stack them neatly, and tie them with a pretty ribbon or rustic twine. Sharing these handmade gifts with friends, family, or colleagues is a simple yet heartfelt way to spread comfort and joy. These DIY lavender sachets offer a straightforward, elegant, and aromatic addition to any space, requiring absolutely no stitching!
For a more detailed walkthrough of the process, check out the video below:
How to Make Your Lavender Sachet Scent Last Longer
One of the most common questions about homemade lavender sachets is how to maintain their delightful aroma over time. With proper handling and occasional rejuvenation, your sachets can continue to release their calming fragrance for weeks or even months, significantly reducing the need for frequent replacement. Here are some expert tips to ensure your fragrant sachets remain potent and pleasing.
Preservation Tips for Lasting Fragrance
To help the natural fragrance of your lavender sachets stay noticeable and vibrant for an extended period, incorporate these simple practices into their care and storage routines:
- Store in Airtight Containers: Before placing new sachets into drawers or closets, or if you’ve made a batch for later use, store them in airtight containers. Glass jars or sealed plastic bags are ideal. This prevents the delicate essential oils from dissipating prematurely, effectively “trapping” the scent until you’re ready to use them.
- Add Orris Root Powder: For an extra boost in scent longevity, consider adding a small amount of orris root powder to your lavender filling mixture. Orris root is a natural fixative, meaning it helps to anchor and preserve other volatile scents, making the lavender aroma linger much longer than it would on its own. A teaspoon per sachet is usually sufficient.
- Avoid Direct Sunlight and Heat: Just like with essential oils, prolonged exposure to direct sunlight and high temperatures can degrade the delicate compounds in lavender, causing the scent to fade rapidly. Place your sachets in cool, dark environments like drawers, closets, or under pillows.
Refreshing Old Lavender Sachets
Over time, even with the best preservation, the potent aroma of dried lavender buds will naturally weaken. But don’t despair – reviving your sachets is a quick and easy process! To restore their inviting fragrance:
- Gently Squeeze and Agitate: The simplest method is to gently squeeze or massage the sachet a few times. This action crushes the dried lavender buds slightly, releasing the trapped essential oils and reinvigorating the scent.
- Reapply Essential Oil: For a more potent refresh, carefully add one or two drops of pure lavender essential oil directly onto the sachet fabric or, if possible, gently open a small seam to add drops directly onto the filling. Be conservative – a little goes a long way! After adding the oil, gently knead the sachet to distribute the scent. Let it sit for a few minutes before placing it back in use.
- Avoid Oversaturating: It’s crucial not to oversaturate the sachet with essential oil. Too much oil can cause the fabric to become damp, potentially leading to oil stains, mildew, or reduced airflow, which can actually hinder scent release. Repeat the refreshing process every few weeks or whenever you notice the fragrance diminishing.
Innovative Ideas and Styling Inspiration for Your Sachets
While the calming scent of lavender is a treat in itself, the visual appeal of your DIY lavender sachets can elevate them from simple fragrant sachets to miniature works of art. Unleash your creativity by personalizing them with various fabrics, shapes, and decorative details that reflect your unique taste or suit a special occasion like weddings, baby showers, or seasonal events.
Decorative Touches to Personalize Your Sachets
Adding embellishments is a fantastic way to make each homemade lavender sachet truly distinctive:
- Embroidery: For a classic and elegant touch, embroider initials, small floral patterns, or delicate geometric designs onto your sachets. This adds a sophisticated, custom feel.
- Rubber Stamps: Rubber stamps used with fabric-safe ink are incredibly versatile for printing clean shapes, patterns, or short phrases onto the fabric. Experiment with different colors and designs to match your sachet’s theme.
- Fabric Markers or Paint Pens: These tools offer an easy way to draw directly onto the fabric. You can freehand designs, write messages, or use stencils for cleaner, more intricate patterns.
- Appliqué: Cut fabric shapes from contrasting materials and attach them with fabric glue or simple stitches for a layered, textural effect. This is particularly effective for thematic designs.
- Trim and Embellishments: Add delicate lace, decorative ribbon, small buttons, or pom-pom trim around the edges of your sachets. These small details can significantly enhance their charm while maintaining a natural and straightforward overall style.
Seasonal or Themed Sachets for Every Occasion
Tailor the style of your fabric sachets to specific occasions or seasons by thoughtfully selecting colors, fabric prints, and shapes:
- Weddings or Baby Showers: Opt for soft pastels, delicate floral patterns, or crisp white fabrics. Custom tags with the couple’s initials or the baby’s due date make them perfect favors. Heart-shaped or tiny onesie-shaped sachets could also be charming.
- Holiday Cheer: During Christmas, use red and green plaid, snowflake patterns, or fabrics with festive motifs. For Halloween, try orange and black or whimsical ghost shapes.
- Seasonal Themes:
- Fall: Embrace warm tones like rust, mustard, and deep greens. Add complementary scents like cinnamon sticks, dried orange peel, or rosemary alongside your lavender for an autumnal blend. Leaf or pumpkin shapes would be perfect.
- Spring: Choose fresh greens, light blues, and cheerful floral prints. Enhance with a hint of mint or rose petals. Bird or butterfly shapes could capture the essence of spring.
- Summer: Bright, bold colors, nautical stripes, or fruit patterns work well. Consider adding a touch of lemon zest or peppermint to the lavender for a refreshing summer aroma.
These small, thoughtful details transform your simple lavender sachets into memorable keepsakes and fitting accents for any moment or celebration.
Packaging & Gifting Ideas for Your Handmade Sachets
Once your beautiful homemade lavender sachets are complete, the way you package them can be just as important as the sachet itself, especially if you plan to share them or store them. Thoughtful packaging not only enhances their aesthetic appeal but also plays a crucial role in preserving their delicate scent and adding a polished, professional finish. You can easily adjust your packaging ideas to match the season, the occasion, or the specific style of the sachets you’ve created.
How to Present Your Fragrant Sachets
Choosing the right packaging can turn a simple sachet into a cherished gift or a well-organized storage solution:
- For Single Sachets:
- Small Glass Jars: Place a single sachet in a charming mini glass jar, perhaps with a custom label indicating the scent and creation date. This looks elegant and effectively seals in the fragrance.
- Kraft Paper & Twine: For a rustic, natural look, wrap individual sachets in a square of kraft paper, folding the edges neatly, and tie with natural twine or raffia. A sprig of dried lavender tucked into the twine adds a lovely touch.
- Cotton or Organza Drawstring Bags: These soft, lightweight bags are perfect for individual sachets. They allow the scent to subtly diffuse while offering a refined presentation. You can even stamp or embroider the bags for extra personalization.
- For Grouped Sets (Ideal for gifts or selling):
- Recycled or Decorative Boxes: Arrange multiple sachets artfully in a small recycled box (e.g., a repurposed jewelry or gift box). Line the box with tissue paper or crinkle-cut paper for cushioning and visual appeal.
- Paper Pouches or Bags: For a more casual option, place a few sachets in a sturdy paper pouch or small gift bag. You can customize these with stamps, stickers, or a handwritten note.
- Ribbon Bundling: As shown in Method 1, simply stacking and tying sachets with a beautiful ribbon creates an elegant bundle that showcases your craftsmanship.
Always opt for packaging materials that can be easily reused or recycled, aligning with the natural ethos of your DIY lavender sachets. Remember, simple, well-planned details elevate the entire presentation, making your handmade gifts feel even more thoughtful and prepared.
Build a Side Income with DIY Lavender Sachets
Transforming your passion for crafting homemade lavender sachets into a small business or a fulfilling side income can be a surprisingly practical and rewarding venture. These charming fragrant sachets possess several inherent advantages that make them excellent candidates for sale, appealing to a wide and diverse range of customers.
Firstly, they are inherently low-cost to make. With affordable materials like bulk lavender buds, rice, and fabric scraps, your initial investment is minimal, allowing for a healthy profit margin. They are also incredibly easy to package, as discussed earlier, meaning less time spent on preparation and more on crafting or marketing. The universal appeal of lavender – known for its calming and refreshing properties – ensures a broad customer base looking for natural natural air fresheners, thoughtful gifts, or closet and drawer fresheners.
Whether you’re selling your DIY lavender sachets online through platforms like Etsy, showcasing them at local craft markets, or offering them as an add-on product within an existing service (like a spa or boutique), sachets can seamlessly fit into various business models. To succeed, focus on a few key areas:
- Quality Ingredients: Source high-quality dried lavender buds and durable, beautiful fabrics. Customers appreciate a premium product that looks good and smells authentic.
- Simple, Elegant Presentation: Invest time in creating appealing packaging. Clear labeling, perhaps with your brand name and scent, and thoughtful bundling can significantly enhance perceived value.
- Consistent Scent and Craftsmanship: Ensure each sachet delivers a consistent level of fragrance and is well-constructed, whether sewn or no-sew. This builds trust and encourages repeat purchases.
- Marketing and Storytelling: Share the story behind your sachets. Highlight their handmade nature, the benefits of lavender, and the care you put into each one.
With minimal materials and a modest effort, this product offers excellent repeat value. Many customers will return for more sachets or purchase them as gifts. Furthermore, lavender sachets pair beautifully with other related home or wellness items you might create, such as handmade soaps, essential oil blends, or linen sprays, allowing you to expand your product line strategically.
Conclusion: Embrace the Art of DIY Lavender Sachets
You’ve now unlocked the secrets to creating exquisite DIY lavender sachets, transforming simple materials into beautiful, fragrant pouches that can elevate any space. Whether you’ve chosen the timeless elegance of the sewn method or the efficiency of the no-sew technique, you now possess easy, effective ways to infuse your surroundings with the soothing aroma of lavender.
Remember the invaluable tips on scent preservation – a gentle squeeze, an occasional drop of essential oil, and proper storage are all it takes to keep your sachets fresh and potent for weeks on end. Don’t forget the joy of customization, too; personalizing your homemade lavender sachets with unique fabrics, decorations, or seasonal themes is a wonderful way to make them truly your own or craft deeply personal handmade gifts. These small fabric sachets are more than just air fresheners; they are tiny vessels of comfort, creativity, and thoughtful intention.
If you’re eager to explore more easy, creative, and practical DIY projects, I invite you to delve into my other blog posts. There’s a world of simple, fun, and rewarding crafts waiting for you to discover and enjoy!
