Transform Your Entryway: The Ultimate DIY Guide to Building a Custom Hall Tree
Is your entryway a constant battleground of tripping hazards? Shoes scattered everywhere, jackets piled high, and nowhere convenient to sit down and put on your footwear? This common household dilemma can make coming and going a daily frustration, setting a chaotic tone for your home right from the front door.
That’s precisely the situation I faced, leading me to embark on a DIY journey that would genuinely revolutionize my space. The solution? A custom-built hall tree. This versatile piece of furniture isn’t just a bench or a coat rack; it’s a comprehensive entryway command center, elegantly combining essential storage, a comfortable seating area, and an instant upgrade to your home’s aesthetic. It transformed my perpetually messy entrance into a welcoming, organized, and functional space.
In this in-depth guide, I’ll walk you through my entire process, sharing everything you need to know to build your own magnificent hall tree. From meticulously selecting the right materials to executing each construction step with precision, you’ll gain the confidence and knowledge to tackle this rewarding woodworking project. If your entryway is yearning for an overhaul, struggling with clutter, or simply lacking that perfect organizational hub, this detailed guide is exactly what you need to create a functional and stylish solution.
What is a Hall Tree and Why Building Your Own is a Game-Changer
A hall tree is a multi-functional piece of furniture specifically designed for entryways, mudrooms, or even large hallways. Its primary purpose is to consolidate all your on-the-go essentials into one tidy, accessible location. Typically, a well-designed hall tree integrates several key components:
- A Bench: Provides a convenient spot to sit down while putting on or taking off shoes, or simply a place to set down bags upon arrival.
- Hooks: Essential for hanging coats, jackets, hats, scarves, purses, and backpacks, keeping them off the floor and easily reachable.
- Storage Compartments: Often includes cubbies, shelves, or even drawers for shoes, gloves, keys, mail, and other small items, preventing clutter.
Beyond its organizational prowess, a hall tree also adds significant aesthetic appeal, becoming a focal point that welcomes guests and enhances your home’s first impression. But why should you consider building one yourself rather than buying a pre-made unit?
- Unparalleled Customization: This is perhaps the biggest advantage. When you DIY, you’re not limited by standard sizes or designs. You can precisely tailor the dimensions to fit your specific space – whether it’s a narrow hallway or a spacious mudroom. You choose the exact layout, the number of hooks, the size of cubbies, and the overall style to seamlessly match your existing home decor. Want extra drawers? A built-in mirror? A specific type of wood? It’s all within your control.
- Significant Cost Savings: High-quality, store-bought hall trees can be surprisingly expensive, often ranging from hundreds to over a thousand dollars, especially for solid wood pieces. By sourcing your own materials and investing your time, you can often build a superior, custom piece for a fraction of the retail cost.
- Enhanced Functionality & Personalization: A DIY hall tree allows you to incorporate specific features that cater exactly to your family’s needs. Need taller cubbies for boots? A dedicated charging station for phones? A corkboard for notes? These personalized touches make your hall tree incredibly practical and uniquely yours, ensuring every inch serves a purpose.
- The Pride of Accomplishment: There’s immense satisfaction in building something with your own hands. Not only do you get a highly functional and beautiful piece of furniture, but you also gain new skills and a tangible testament to your craftsmanship.
- Boosted Home Value & Organization: A well-designed and built-in hall tree can be a desirable feature for potential homebuyers, indicating thoughtful organization and a welcoming atmosphere. It transforms a chaotic zone into an orderly and inviting space, reducing daily stress.
Planning Your Custom Hall Tree Project
Before you even pick up a saw, a thoughtful planning phase is crucial for a successful and stress-free build. This stage sets the foundation for a functional, durable, and aesthetically pleasing hall tree.
Assess Your Space and Needs
Begin by meticulously measuring the area where your hall tree will reside. Consider the width, height, and depth, keeping in mind existing elements like light switches, electrical outlets, and door swings. Don’t forget to account for walking paths and traffic flow to ensure your new furniture doesn’t become an obstacle. Next, list your family’s specific needs:
- Seating: If a comfortable spot to sit and tie shoes is paramount, ensure the bench is sturdy, at an appropriate height (typically 17-19 inches), and wide enough for practical use.
- Shoe Storage: How many pairs of shoes need a home? Do you prefer open cubbies for quick access, hidden bins for a cleaner look, or pull-out drawers for maximum discretion? Consider various shoe sizes, including boots.
- Coat & Bag Storage: Estimate the number of coats, backpacks, and bags that will regularly hang on the tree. This dictates the number and placement of hooks, and possibly a top shelf for less frequently used items.
- Small Item Storage: Think about keys, mail, sunglasses, pet leashes, and other small items that often accumulate. Drawers, small cubbies, or even a shallow shelf can keep these organized.
- Personal Touches: Do you want a mirror for last-minute checks, a message board for reminders, or even integrated charging ports for devices?
Choose Your Design Style
Your hall tree isn’t just practical; it’s a prominent piece of furniture that contributes significantly to your home’s decor. Select a style that harmonizes with your existing aesthetic:
- Shiplap: Adds a beautiful, rustic texture and a cozy, coastal, or modern farmhouse vibe. Shiplap panels are easy to install on the back panel and can be painted any color.
- Farmhouse: Characterized by distressed finishes, natural wood tones, and often simple, sturdy construction. This style evokes warmth and comfort, sometimes incorporating X-bracing or traditional detailing.
- Modern: Emphasizes clean lines, minimalist details, and often a monochromatic or neutral color palette. This sleek look often utilizes smooth finishes and can incorporate metal accents or integrated lighting.
- Built-in: Creates a seamless, custom look, making the hall tree appear as though it’s an original part of the house’s architecture. This option typically offers superior stability and a polished finish but requires more precise measurements and potentially more complex installation. It’s ideal for a permanent solution.
- Freestanding: Offers flexibility if you like to rearrange furniture or plan to move. While still sturdy, a freestanding unit can be a simpler build, often with a slightly more relaxed aesthetic. Ensure it’s anchored to the wall for safety, especially if it’s tall.
Think of your hall tree as the first impression visitors get of your home’s interior design. Make it count by choosing a style that truly reflects your personality and complements your space.
Time Commitment and Skill Level
Building a hall tree is a deeply rewarding project, but the time it takes can vary significantly based on your experience and the complexity of your design. For experienced DIYers with a well-equipped workshop, you might comfortably complete a basic design in about 5 to 8 hours of focused work. However, for beginners embarking on their first large woodworking build, expect to spend 10 to 15 hours or potentially more. This estimate includes time for cutting, assembly, sanding, and finishing. Don’t rush the process; allow ample time for drying paint/stain and careful assembly to ensure a high-quality, durable result.
Building a Hall Tree: A Comprehensive Step-by-Step Guide
Follow these detailed steps to construct a robust, highly functional, and aesthetically pleasing hall tree that will keep your entryway organized and looking sharp for years to come.
Tools & Materials Checklist
Before you begin any cuts, gather all your necessary tools and materials. Having everything at hand will streamline the process and prevent interruptions. Don’s forget appropriate safety gear like eye protection and ear protection.
- Drill/Driver: Essential for pre-drilling pilot holes, driving screws, and assembling parts. A cordless model offers excellent portability.
- Saw: A circular saw is ideal for quickly and accurately cutting larger boards to size. If you don’t have one, a jigsaw or even a good hand saw can work for smaller projects, though it will be more labor-intensive. A miter saw is excellent for precise crosscuts and angles, if available.
- Sander: An orbital sander significantly speeds up the process of smoothing surfaces and edges, preparing the wood for finishing. For manual sanding, a sanding block with various grit sandpaper (100-220 grit) will suffice.
- Tape Measure & Pencil: For accurate layout and precise measurements. “Measure twice, cut once” is the golden rule.
- Level: Crucial for ensuring all components are straight and plumb, preventing a wobbly or crooked finished product.
- Wood Glue: Provides exceptional strength to joints when used in conjunction with screws, creating a much more durable piece.
- Wood Screws: Ensure you have an adequate supply of screws in various lengths appropriate for your wood thickness.
- Clamps: Essential for holding pieces securely in place while glue dries and screws are driven, ensuring tight joints.
- Optional but Recommended:
- Pocket Hole Jig: (e.g., Kreg Jig) Creates strong, hidden joints, giving a cleaner finish.
- Nail Gun (Brad Nailer): Speeds up assembly for non-structural parts like trim or back panels.
- Speed Square / Combination Square: For marking perfectly square lines.
- Safety Glasses & Ear Protection: Always prioritize safety when working with power tools.
- Materials:
- Wood Boards/Plywood: Based on your design, choose your preferred wood type (pine, oak, birch plywood, etc.).
- Finishing Supplies: Sandpaper, wood filler, primer, paint or wood stain, polyurethane or clear coat.
- Hardware: Hooks, drawer pulls/knobs (if applicable).
Step 1: Build the Bench Base
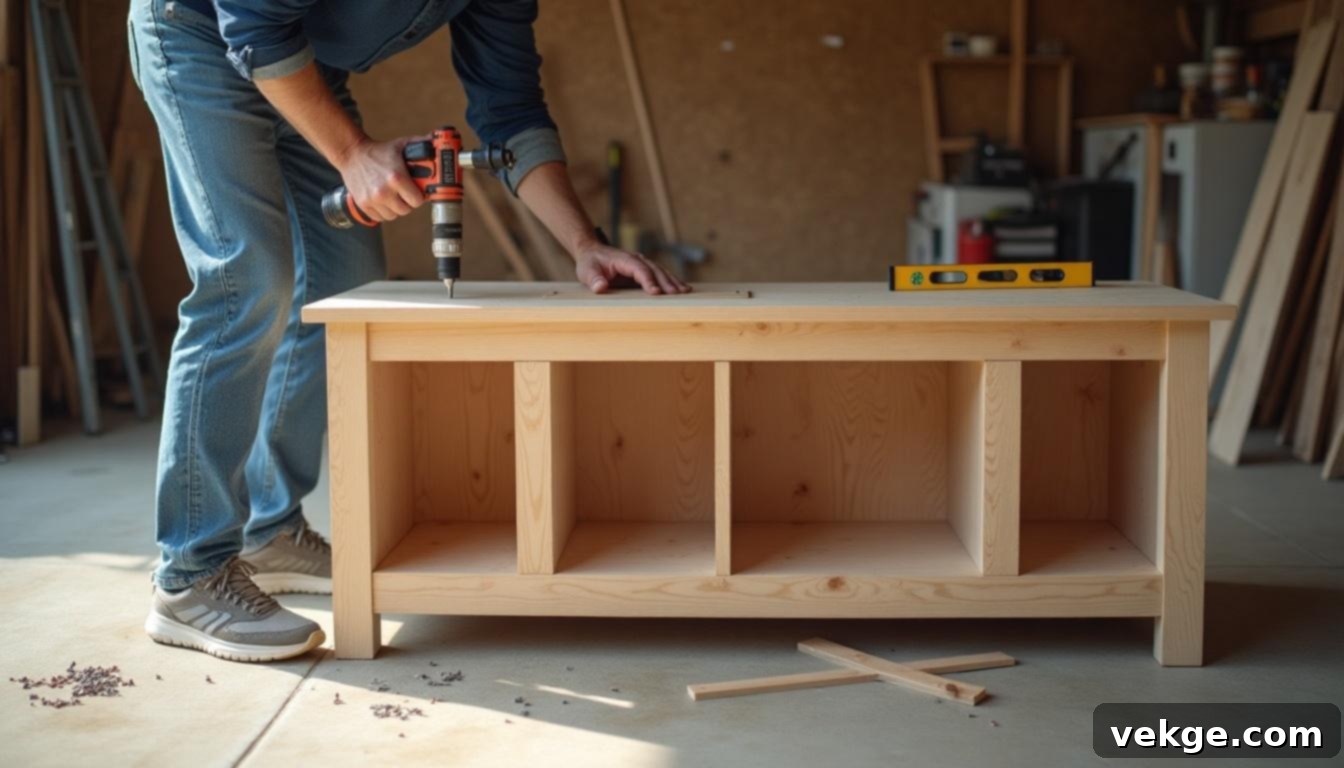
The bench is the foundational element of your hall tree, bearing significant weight, so its construction must be robust. Begin by cutting a sturdy wooden board for the bench top to your desired length and depth. Next, cut two side panels or legs, ensuring they are identical in height and perfectly square. For maximum stability and strength, join these components using wood glue and screws (pocket holes are an excellent option here for hidden fasteners). For longer benches, add a central support brace or divider underneath the bench top to prevent sagging over time. At this stage, you can also integrate the framework for shoe cubbies or leave an open space beneath the bench if you plan to use baskets or bins. Use your level frequently to ensure the bench base is perfectly flat and won’t wobble once completed.
Step 2: Construct the Back Panel
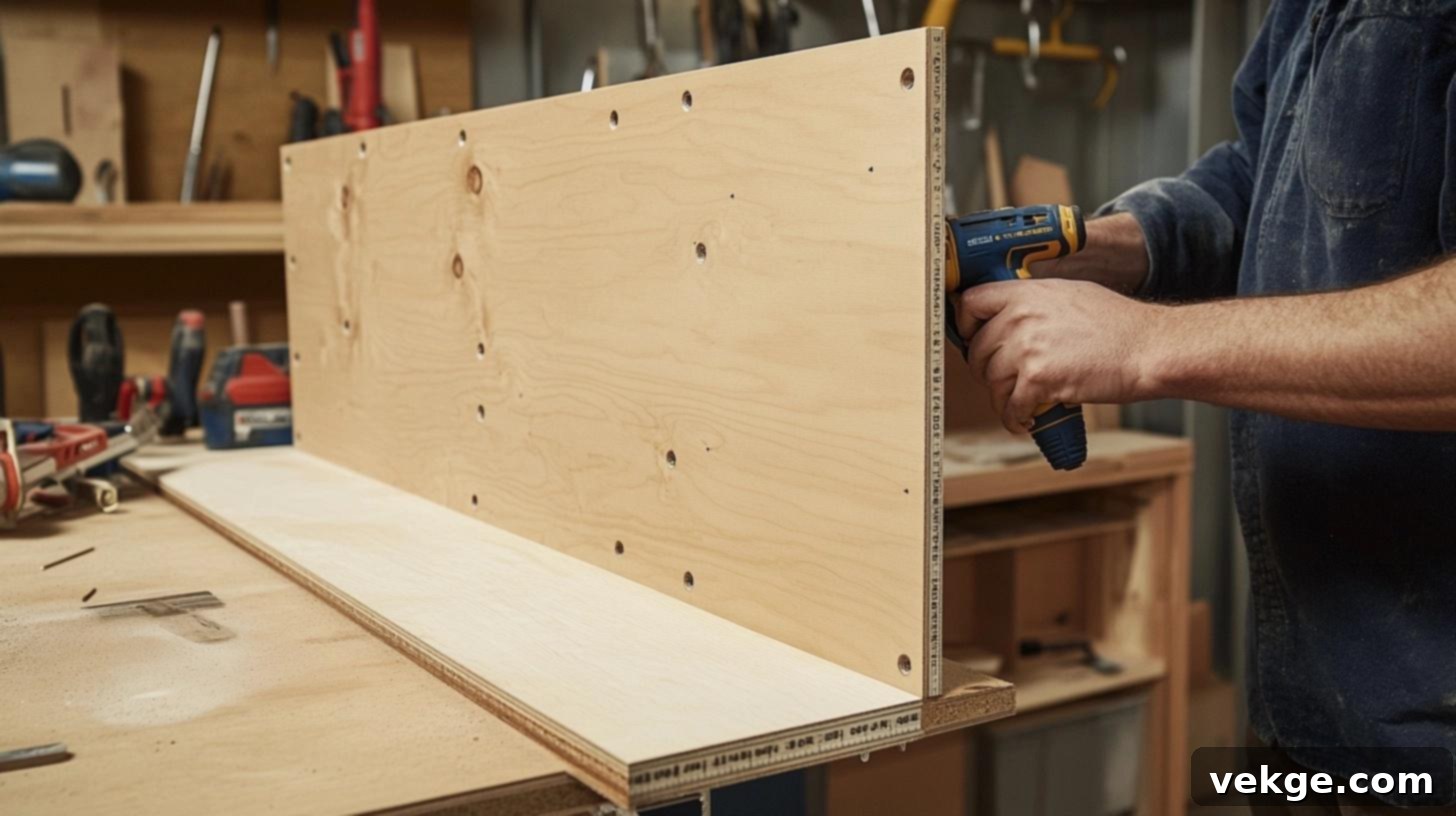
The back panel forms the upright structure behind the bench and is where your hooks, shelves, and potentially a mirror will be mounted. Cut a large, flat sheet of plywood, beadboard, or individual shiplap planks to match the width of your bench and extend to your desired height. Ensure the edges are clean and square. Attach this panel vertically to the back of the bench using wood glue and screws, driving them up through the back of the bench into the bottom edge of the panel. For extra stability, especially with taller designs, you might add side supports or cleats running from the bench to the top frame (to be added later). This panel needs to be strong and perfectly straight to properly support the items it will hold.
Step 3: Add Storage Components
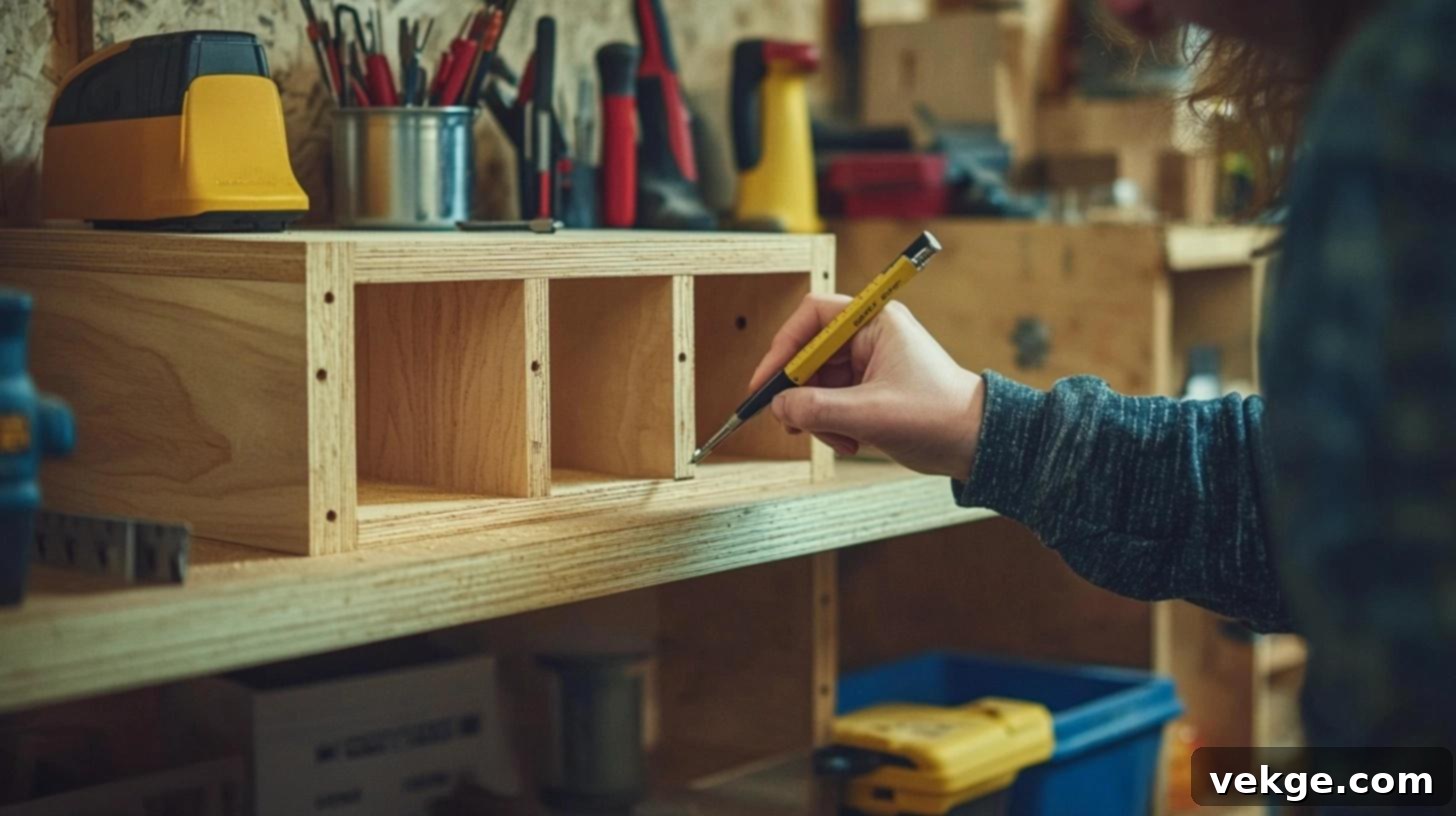
Now, it’s time to customize your storage. Measure and cut smaller boards to create dividers for shoe cubbies beneath the bench or shelves on the back panel. If you opt for open cubbies, assemble them using wood glue and screws, ensuring all internal joints are strong. For drawers, construct simple boxes with a bottom and sides, adding drawer slides for smooth operation if desired. Alternatively, you can build simple bins that slide into the cubbies. Above the hooks, consider adding a smaller, shallower shelf for decorative items, hats, or small storage baskets. Carefully measure the spacing for these components, considering the height needed for different shoe types or items. Secure all shelves and dividers firmly with screws and wood glue.
Step 4: Assemble the Top Frame
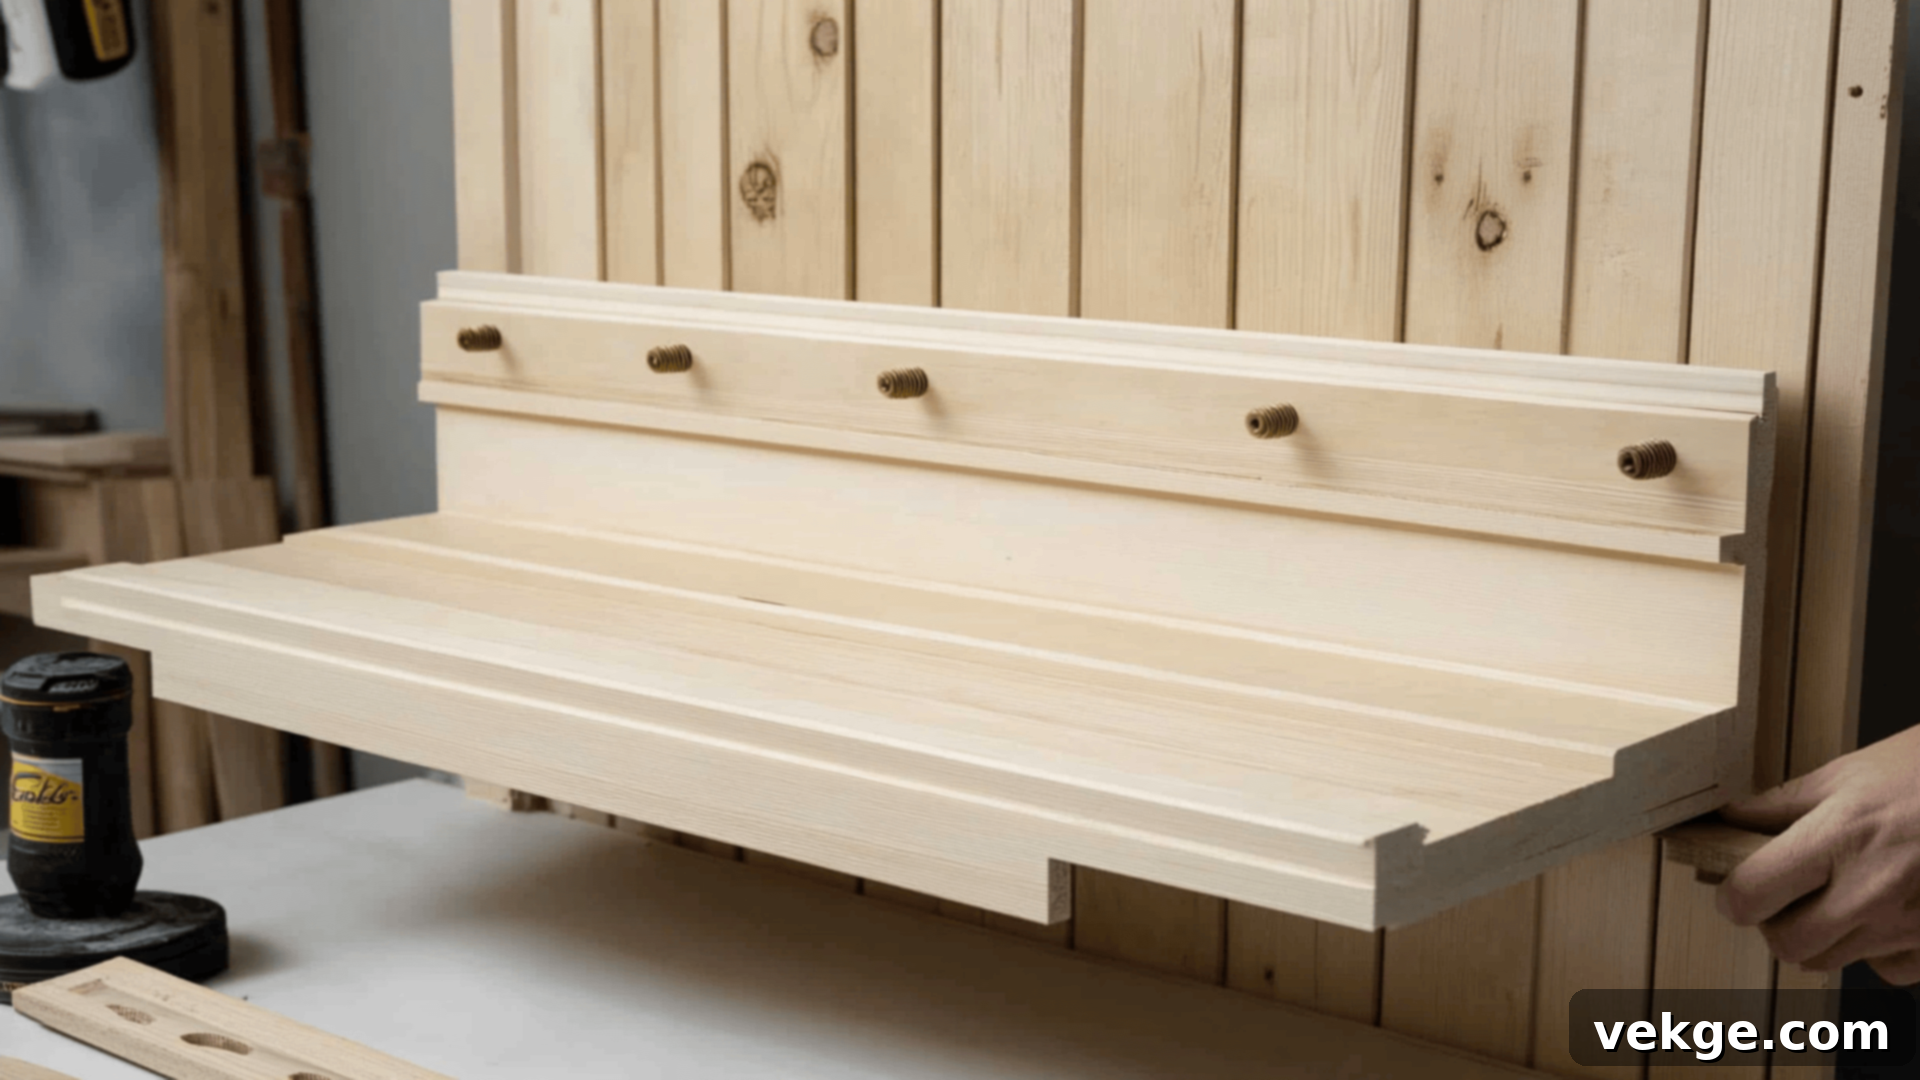
The top frame not only completes the aesthetic of your hall tree but also adds structural rigidity. Cut a wide board to serve as the top shelf, extending slightly beyond the back panel and side supports (if you have them). You can add short side pieces to create a “boxed-in” look or for decorative trim. This top piece also provides a robust anchor point for potential crown molding or a decorative ledge. Attach it securely from the top down into the back panel and any side supports using screws and wood glue. Ensure it is perfectly level and square to maintain a professional, finished appearance. This upper section is also a great place to hide wiring for built-in lighting or charging stations.
Step 5: Sand, Prime, and Paint/Stain
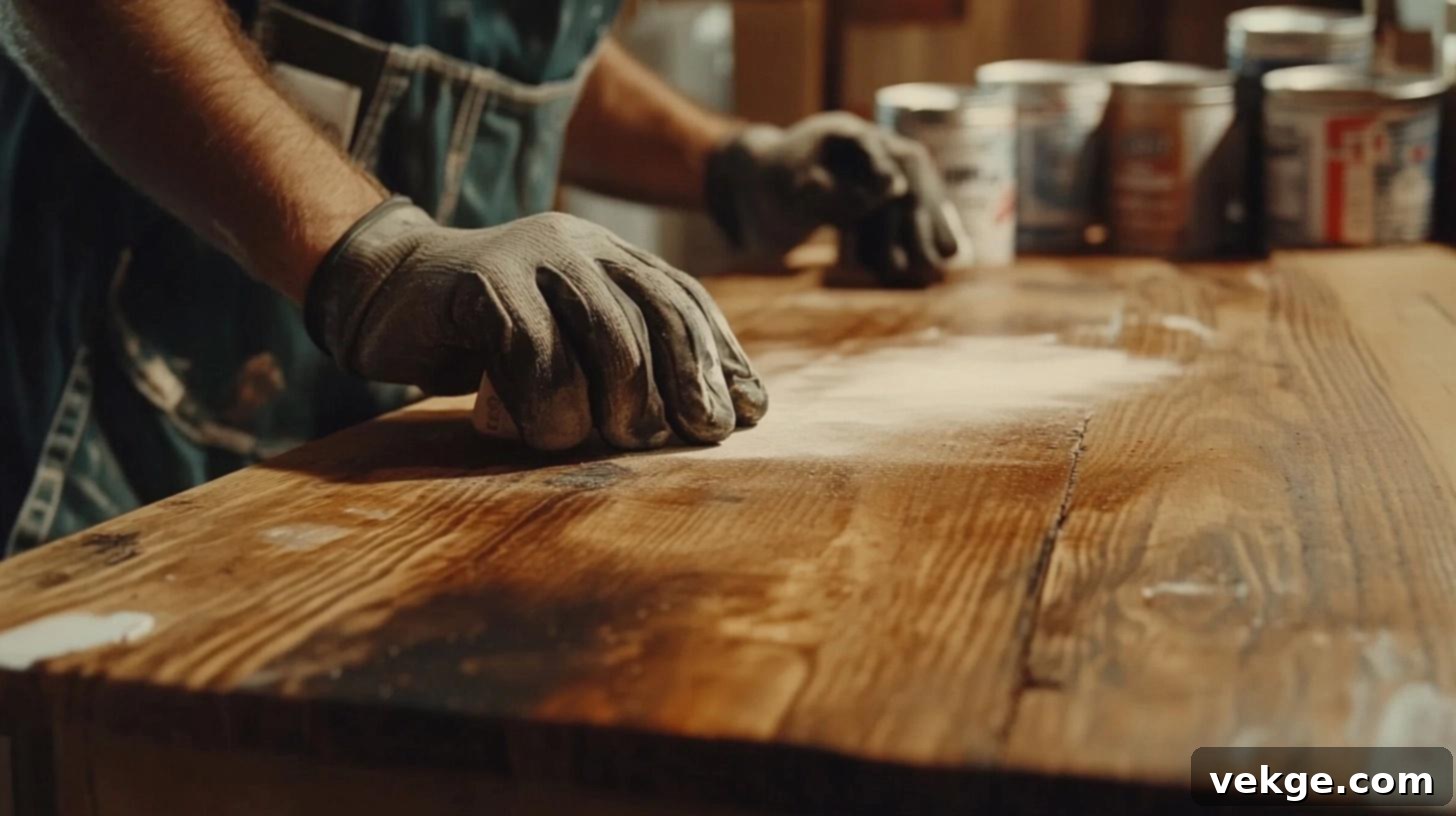
This critical step determines the final look and durability of your hall tree. Start by thoroughly sanding all surfaces, corners, and edges. Begin with a coarser grit sandpaper (e.g., 100-120 grit) to remove any rough spots, glue residue, or imperfections, then progressively move to a finer grit (e.g., 180-220 grit) for a super-smooth finish. After sanding, meticulously wipe away all dust with a tack cloth or a damp rag. If you plan to paint, apply one or two coats of a high-quality primer to ensure even color adhesion and prevent wood tannins from bleeding through. If staining, apply your chosen wood stain evenly, wiping off excess according to product instructions. Finally, apply two to three thin coats of paint or a clear protective finish (like polyurethane or lacquer), allowing each coat to dry completely and lightly sanding between coats (with 220+ grit) for a silky-smooth, durable surface. Do not rush this step; a well-finished hall tree looks professional and lasts significantly longer.
Step 6: Add Hooks and Final Touches
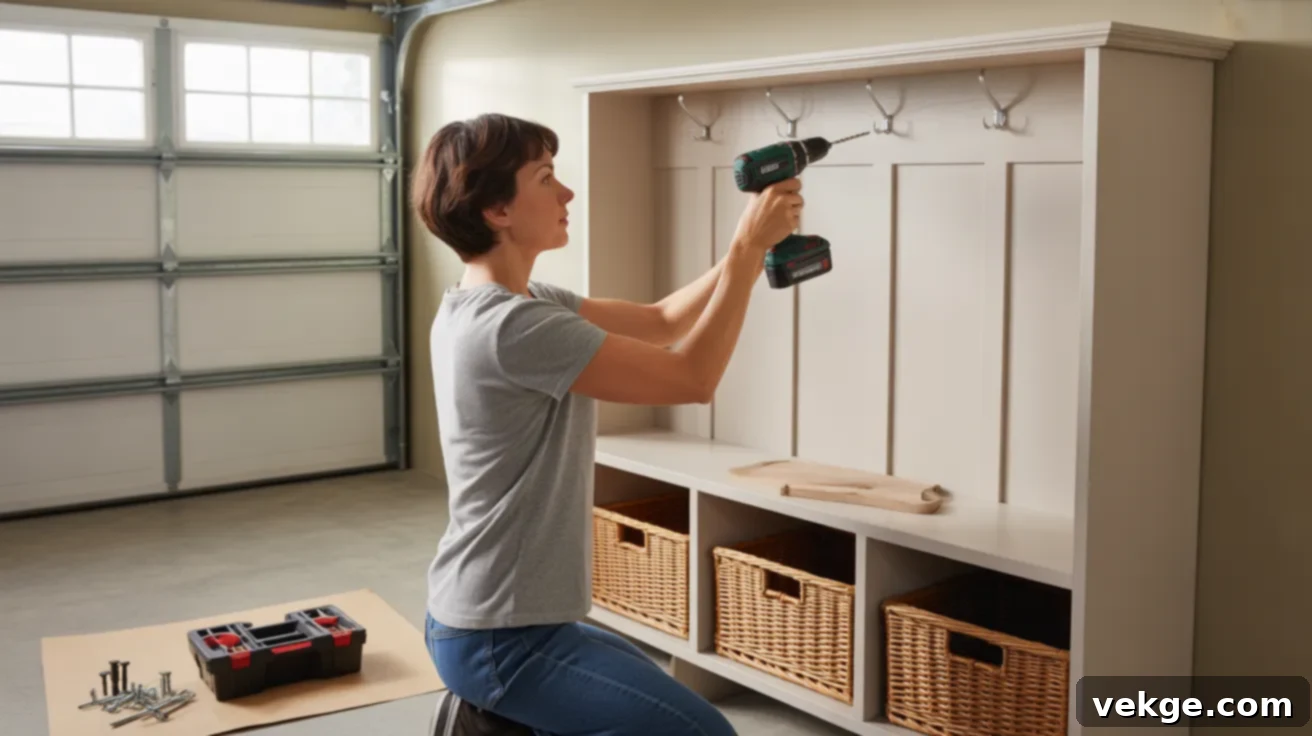
With the finish completely dry, it’s time to install the hardware. Carefully measure and mark the desired locations for your coat hooks, ensuring they are spaced appropriately for easy access and at a practical height for both adults and children. Pre-drill small pilot holes before screwing in the hooks firmly to prevent wood splitting. If you’ve included drawers, attach your chosen drawer pulls or knobs. For freestanding units, consider adding felt pads or rubber feet to the bottom of the bench to protect your flooring. For taller hall trees, especially those in homes with children or pets, it is crucial to anchor the unit securely to the wall using anti-tip hardware to prevent accidental tipping. Finally, personalize your new hall tree with decorative baskets, a comfortable cushion for the bench, or a small plant. Step back and admire your handiwork – your custom-built hall tree is now ready to bring organization and style to your daily life!
Best Materials to Use for Your Hall Tree (Wood Types, Finishes)
The choice of materials significantly impacts both the durability and the final appearance of your DIY hall tree. Understanding the characteristics of different wood types and finishes will help you make informed decisions.
- Pine or Common Boards: These are excellent choices for budget-friendly projects. Pine is soft, easy to cut, and takes paint beautifully, making it perfect for painted farmhouse or modern designs. While softer, it’s still sturdy enough for a hall tree, especially when properly joined.
- Plywood (Cabinet-Grade or Birch): A versatile and cost-effective option for large back panels, bench tops, and especially for building storage cubbies or drawers. Birch plywood, in particular, offers a smooth, stable surface with a clean edge that can be left natural, stained, or painted for a contemporary look. Ensure you buy formaldehyde-free options for indoor use.
- Hardwoods (Oak, Maple, Poplar): For a premium, highly durable hall tree that will last generations, hardwoods like oak or maple are superb. They are stronger and more resistant to dings and scratches. Oak offers a distinct, attractive grain that looks fantastic when stained, while maple provides a smoother, finer grain. Poplar is a more affordable hardwood, known for its smooth texture and excellent paintability.
- MDF (Medium-Density Fiberboard): While not as strong as solid wood or plywood, MDF is very smooth, takes paint exceptionally well, and is warp-resistant. It can be a good choice for back panels or drawer fronts where structural strength isn’t the primary concern, but ensure edges are sealed properly to prevent moisture absorption.
Finishes:
- Wood Stain: Ideal for showcasing the natural beauty and grain of hardwood or good quality plywood. Stains penetrate the wood fibers, enhancing their character and creating a warm, rich feel. Available in a vast array of colors, from light naturals to deep mahoganies.
- Paint: Offers limitless color possibilities and a clean, opaque finish, perfect for matching specific decor styles (e.g., bright modern, distressed farmhouse). Paint also effectively covers imperfections in less expensive wood, like pine. Always use a primer first for optimal adhesion and longevity.
- Polyurethane/Clear Coat: Essential for protecting your finished hall tree from daily wear and tear, moisture, and scuffs. Polyurethane (water-based or oil-based), lacquer, or varnish creates a durable, protective layer. Water-based options dry faster and yellow less over time, while oil-based polyurethanes offer superior durability and a slightly warmer amber tone.
Choose your materials based on your budget, your woodworking skill level, the tools you have available, and your desired aesthetic for the finished piece.
Innovative Features to Add to Your Custom Hall Tree
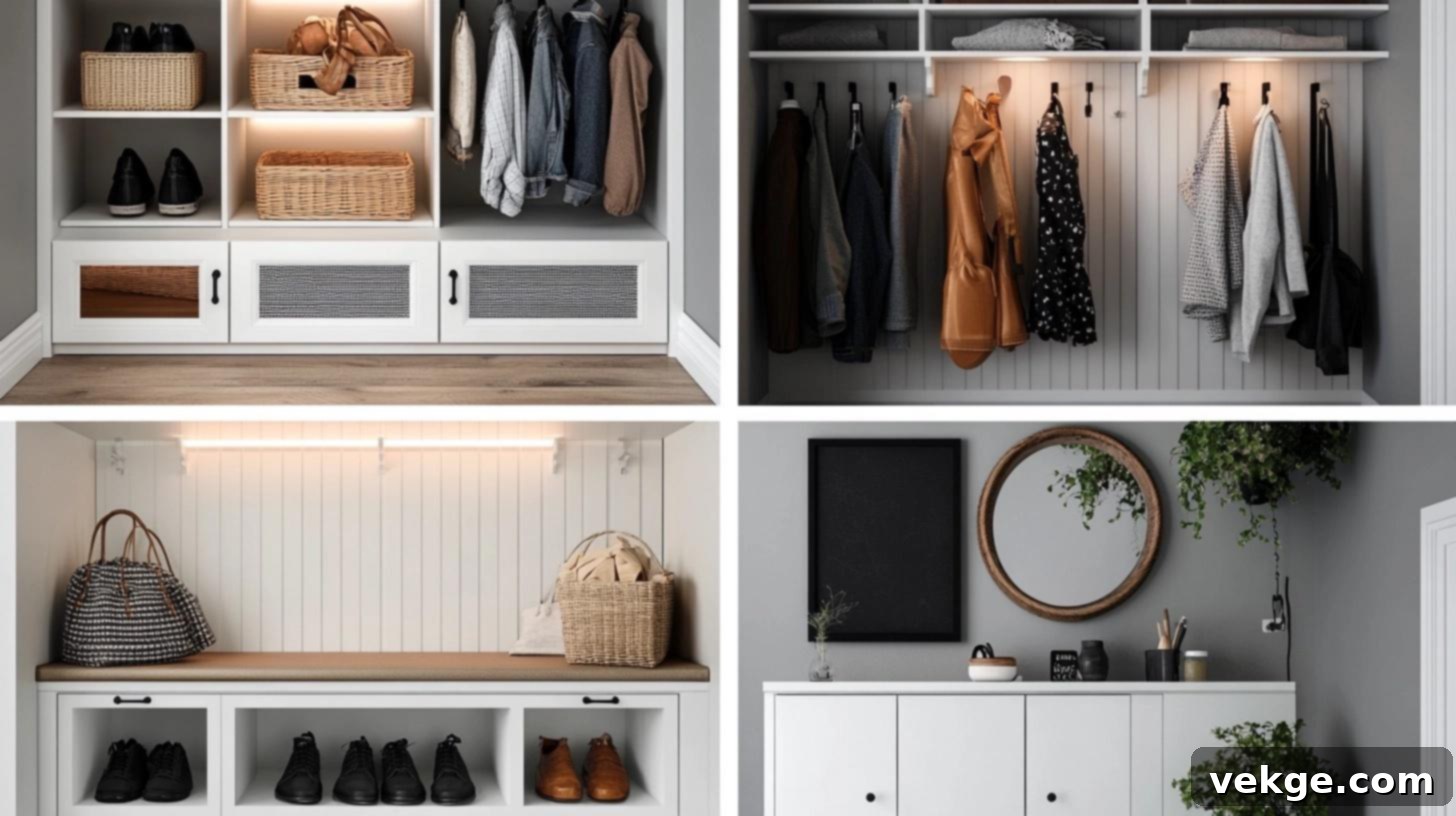
To truly elevate your hall tree from a simple storage unit to a highly functional entryway hub, consider incorporating these clever features that boost storage, enhance utility, and add daily convenience.
1. Optimized Shoe Storage Compartments
Beyond basic cubbies, think about specialized shoe storage. Design open cubbies for frequently worn shoes, ensuring they are tall enough for boots and wide enough for multiple pairs. Alternatively, integrate pull-out drawers with slatted bottoms for ventilation, keeping shoes hidden and aired out. For a truly organized look, consider individual shoe slots or adjustable shelves to accommodate different shoe heights. Using sturdy, moisture-resistant wood or adding removable mats can protect the interior from dirt and dampness. Measuring your family’s most common shoe sizes before building ensures a perfect fit, making daily tidying effortless.
2. Overhead Cabinets or Shelves for Seasonal Storage
Maximize vertical space by adding an enclosed cabinet or a deep shelf above the coat hooks. This area is perfect for storing out-of-season items like winter hats, gloves, scarves, sun hats, or even luggage that’s used less frequently. Enclosed cabinets provide a neat, clutter-free look, while open shelves allow for stylish baskets that can hold a variety of items. Ensure these overhead components are securely fastened and easily accessible, perhaps with sturdy step stools if they are very high. This feature keeps seasonal items out of sight but within reach when needed, without taking up precious floor space.
3. Built-in Lighting or Charging Stations
Modernize your hall tree by integrating technology. Install a small LED light strip or discreet puck lights under the top shelf or within cubbies to illuminate the area, making it easier to find keys or bags in dim lighting. For ultimate convenience, incorporate a hidden power strip or USB charging ports into one of the cubbies or a small, dedicated drawer. This creates a dedicated charging spot for phones, tablets, smartwatches, or earbuds, keeping cords tidy and devices powered up for when you head out the door. Always consult with an electrician or ensure proper safety measures if working with electrical components.
4. Mirror Panel or Interactive Message Board
Make your hall tree a last-minute check-in point before you leave. Mounting a full-length or decorative mirror on the back panel provides a quick glance to ensure you’re looking your best. Alternatively, integrate a chalkboard, corkboard, or whiteboard panel. This serves as a central hub for family reminders, grocery lists, chore charts, or inspirational messages, helping everyone stay organized and connected. Position the mirror or board at eye level for effortless use, transforming your entryway into a truly smart and functional space.
Styling Your Hall Tree for a Cohesive Look
Once the construction is complete, the final touches of paint, stain, and decor are what truly bring your hall tree to life and integrate it seamlessly into your home’s aesthetic.
Paint or Stain Options for Your Desired Aesthetic
- Paint: Opting for paint offers a clean, uniform color that can dramatically transform the mood of your entryway. It’s ideal for hiding wood grain, creating a sleek modern look, or achieving a classic farmhouse style with crisp whites or soft pastels. Use a high-quality, durable paint (like an enamel or semi-gloss) that can withstand daily wear and tear. A carefully chosen color can visually expand a small space or provide a vibrant focal point.
- Stain: If you’ve used beautiful hardwoods like oak or maple, staining allows the natural wood grain to shine through, creating warmth and character. Stains come in various shades, from light natural tones to deep, rich browns, offering a timeless and elegant finish. Always test your stain on a scrap piece of wood first to ensure it achieves your desired color before applying it to the entire piece.
- Protective Topcoat: Regardless of whether you paint or stain, a clear protective topcoat (like polyurethane or lacquer) is essential. This layer guards against scratches, scuffs, moisture, and daily grime, ensuring your hall tree remains beautiful and durable for years to come.
Decor and Accessory Ideas to Personalize Your Space
Thoughtful decor can enhance the functionality and visual appeal of your hall tree without adding clutter:
- Comfortable Bench Cushions: Add a custom-fit cushion to the bench for enhanced comfort and a pop of color or texture. Choose durable, easy-to-clean fabrics.
- Stylish Baskets and Bins: Utilize woven baskets, fabric bins, or decorative boxes in cubbies or on shelves. These are perfect for corralling shoes, hats, scarves, gloves, dog leashes, or mail, keeping the space tidy and visually appealing.
- Area Rug: Place a small, durable rug or runner directly in front of or under the bench. This not only adds warmth and defines the space but also protects your flooring from dirt and moisture brought in from outside.
- Personalized Touches: Hang a small, framed piece of art, a family photo, or a decorative sign with a welcoming message above the hooks. A small potted plant or a vase of fresh flowers on the top shelf can add a touch of natural beauty and freshness.
- Functional Decor: Use decorative trays for keys and sunglasses, stylish coat hooks that complement your aesthetic, or a unique mirror frame to enhance the overall design. Remember to keep decor minimal to maintain the hall tree’s primary function: organization.
Common Mistakes to Avoid When Building Your Hall Tree
Even seasoned DIYers can make mistakes. Being aware of these common pitfalls will help ensure your hall tree project goes smoothly, resulting in a safe, sturdy, and beautiful piece of furniture:
- Inaccurate Measurements: This is the most frequent and costly mistake. Always “measure twice, cut once.” Double-check all dimensions, especially if you’re working with custom cuts. Use a quality tape measure and a reliable square for precise marking. Incorrect measurements can lead to wasted materials and ill-fitting components.
- Skipping Pilot Holes: Driving screws directly into wood, especially hardwoods or near edges, can cause the wood to split. Always drill pilot holes slightly smaller than the screw shank before driving screws to ensure clean, strong, and split-free joints.
- Neglecting Wood Glue: Screws alone might hold pieces together, but wood glue significantly enhances the strength and longevity of joints. Always apply a thin, even bead of wood glue to mating surfaces before screwing them together, then clamp them until the glue dries for maximum durability.
- Lack of Clamping: Clamps are essential for holding pieces tightly in alignment while glue dries and screws are driven. Without proper clamping, joints can be loose, crooked, or weak. Invest in a good set of clamps for any woodworking project.
- Poor Sanding and Finishing: Rushing the sanding process leaves rough spots and imperfections that become glaringly obvious under paint or stain. Skipping primer can lead to uneven color or bleed-through. Inadequate topcoats mean poor protection. Take your time with finishing steps for a professional and durable result.
- Ignoring Structural Integrity: The bench must be able to support significant weight. Ensure adequate support (e.g., center braces for longer benches) and strong joinery. For tall, freestanding hall trees, always anchor them to the wall using anti-tip hardware to prevent tipping, especially in homes with children or pets.
- Overlooking Space Constraints: Before building, visualize the hall tree in its intended spot. Ensure there’s enough room for door swings, walking paths, and clearance for coats hanging on hooks. A quick sketch or even taping out the dimensions on the floor can prevent an awkwardly placed piece.
- Not Planning for Functionality: Don’t just build; build with purpose. Think about the specific items your family needs to store and ensure there are appropriate spaces for them. A hall tree that looks good but doesn’t meet your functional needs will quickly become another source of clutter.
Wrapping Up: Your Journey to an Organized Entryway
You now possess a comprehensive blueprint for transforming your chaotic entryway into a beautifully organized and highly functional space. From the initial planning stages, including assessing your specific needs and choosing a design style, to meticulously selecting the right wood and executing each construction step, you have all the knowledge to build a custom hall tree that perfectly suits your home.
We’ve explored how to enhance your hall tree with innovative features like optimized shoe storage, integrated charging stations, and versatile message boards, making it a true command center for your daily routines. Furthermore, you’re now equipped to avoid common construction pitfalls, ensuring your project is not only successful but also safe and built to last. Styling your finished piece with the right paint, stain, and accessories will add that final touch of personalization and cohesion to your home decor.
Building your own hall tree is more than just a woodworking project; it’s an investment in your home’s organization, aesthetic appeal, and daily peace of mind. Not only will you save money compared to purchasing a pre-made unit, but you’ll also gain the immense satisfaction of creating a custom piece that perfectly addresses your unique needs. So, gather your tools, refine your plan, and embark on this rewarding DIY journey. Everything you need is right here to guide you every step of the way.
Ready to build your first or next hall tree and reclaim your entryway? Bookmark this ultimate guide, share it with fellow DIY enthusiasts, and get ready to enjoy an organized, welcoming, and stylish entrance that truly works for you and your family!
