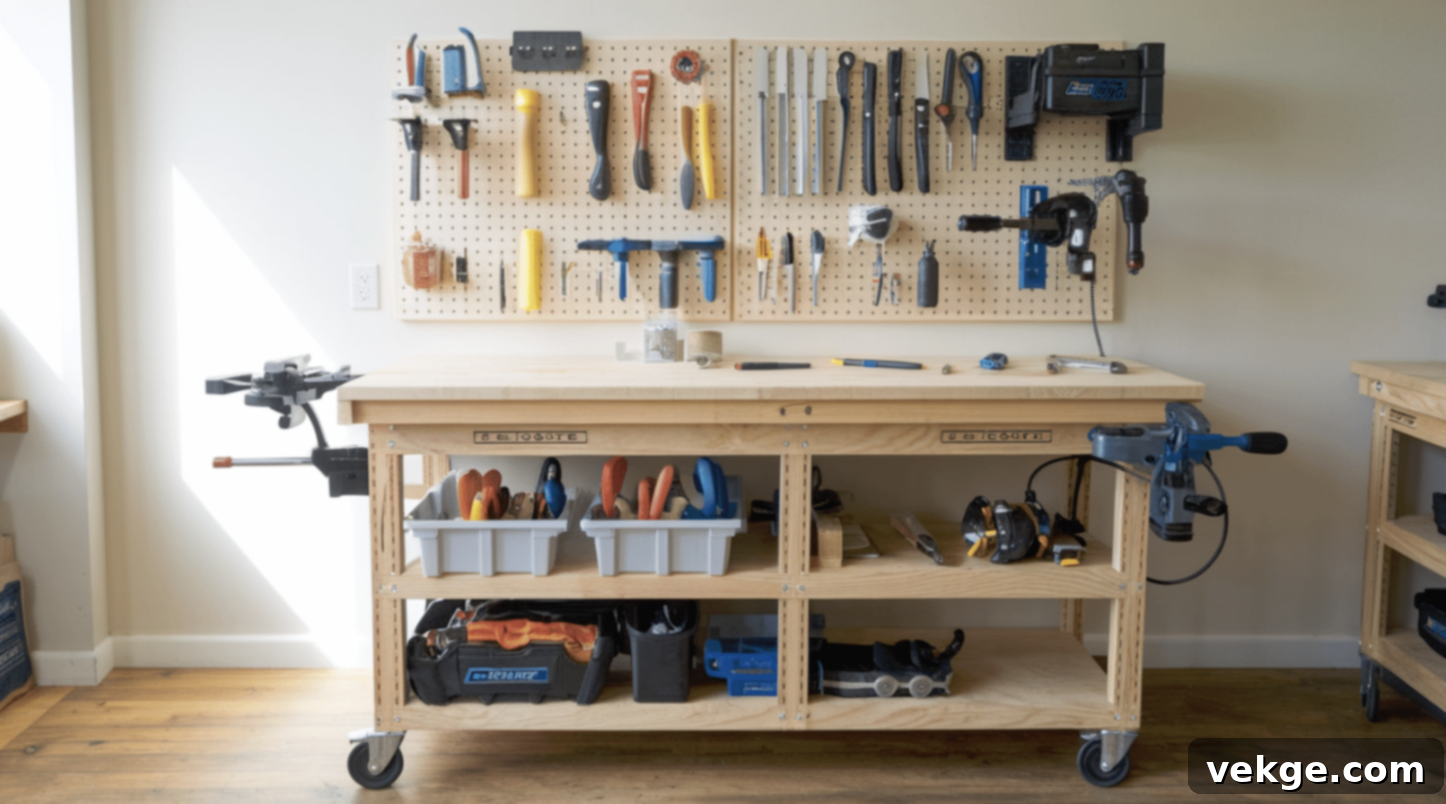
Master Your Workshop: Step-by-Step Guide to Building Your Own DIY Workbench
Every serious DIY enthusiast, woodworker, or home improvement warrior knows that a reliable, sturdy workbench is the undisputed heart of any functional workshop. It’s more than just a surface; it’s the foundation upon which countless projects, repairs, and creative endeavors will come to life. Whether you’re a seasoned craftsman or just starting your journey into the world of making, investing in a high-quality workbench is paramount. And what could be more rewarding, or cost-effective, than building one yourself?
Creating your own workbench offers unparalleled advantages. Not only is it significantly cheaper than purchasing a pre-built commercial unit, but it also allows for complete customization. You can tailor its dimensions, features, and even its aesthetic to perfectly match your specific needs, available space, and the types of projects you typically undertake. Imagine a workbench designed precisely for your height, with integrated storage where you need it most, and robust enough to handle your heaviest tasks without a wobble.
This comprehensive guide will walk you through every essential step of crafting your ultimate DIY workbench. We’ll delve into the crucial decisions you need to make before you even pick up a saw, detail the materials and tools you’ll require, provide clear, step-by-step instructions for assembly, and inspire you with innovative ideas to personalize and upgrade your creation. Get ready to embark on a fulfilling project that will empower all your future DIY dreams!
Choosing the Right Workbench for Your Workshop Needs
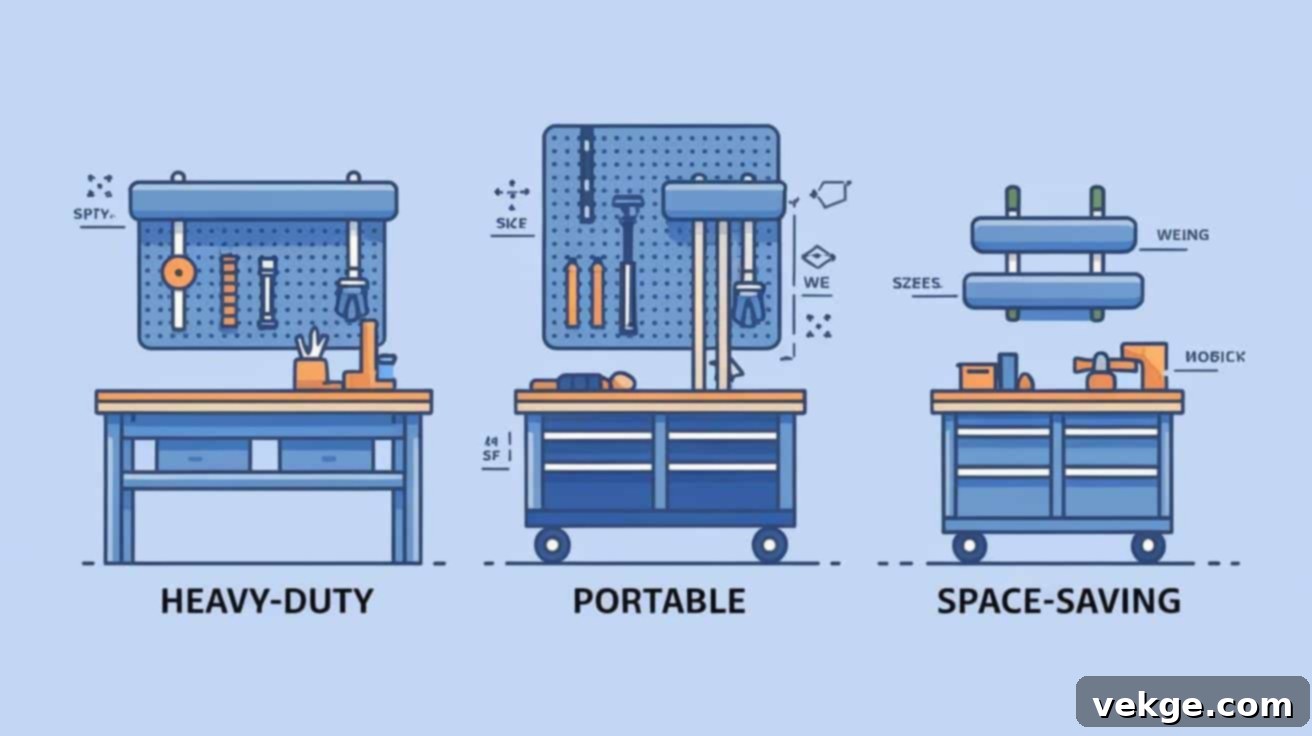
Before you begin the exciting process of cutting wood and driving screws, taking the time to plan your workbench is crucial. A well-thought-out design ensures that your new workspace will be efficient, comfortable, and perfectly suited to your specific activities. Consider your available space, the portability you might require, and the nature of your typical projects. Let’s break down these critical considerations to help you make informed decisions:
Stationary vs. Mobile Workbenches: Which is Right for You?
The first major decision often revolves around mobility. Do you need your workbench to stay in one fixed location, or do you anticipate needing to move it around your workshop or garage?
- Stationary Workbenches: If you’re fortunate enough to have a dedicated, permanent workspace, a stationary bench is often the superior choice. These benches are typically built heavier and can be anchored to the floor or wall, providing maximum stability for heavy-duty tasks like planing, mortising, or using large power tools. Their inherent solidity allows for more forceful operations without the risk of movement, making them ideal for woodworking, metalworking, or any project requiring significant leverage and a rock-solid foundation.
- Mobile Workbenches: For those with limited space, a multi-purpose garage, or a need to reconfigure their workspace frequently, a mobile workbench equipped with casters is a game-changer. These allow you to easily roll your bench into a corner when not in use, move it closer to a power outlet, or even bring it outdoors for dusty tasks. When selecting casters, always opt for double-locking wheels. These not only prevent the wheel from rolling but also lock the swivel mechanism, ensuring your bench stays absolutely still when you’re working, preventing dangerous movement during cutting or drilling.
Small vs. Large Workbenches: Sizing It Up
The size of your workbench should be a direct reflection of your available space and the scale of your projects. Don’t build a massive bench if it’s going to clutter your workspace, nor a tiny one if you’re frequently tackling large items.
- Compact Workbenches: If you’re primarily engaged in smaller crafts, electronics repair, delicate assembly, or simply have very limited room, a compact workbench can be incredibly efficient. These often feature clever storage solutions and can sometimes even fold away. They are perfect for tasks that don’t require extensive surface area but still benefit from a dedicated, stable platform.
- Spacious Workbenches: For those who frequently work on larger furniture pieces, vehicle components, or multiple projects simultaneously, a larger workbench provides invaluable real estate. A generous surface allows for better material handling, ample space for tools, and room for sub-assemblies. Just ensure you measure your available floor space carefully to avoid overcrowding.
Light-Duty vs. Heavy-Duty Workbenches: Matching Strength to Task
Consider the forces and weights your workbench will need to withstand. A robust build for heavy tasks is overkill for light crafting, and vice-versa.
- Light-Duty Workbenches: If your projects involve light crafting, small repairs, painting, or electronics work, a light-duty bench constructed from 2x4s and a plywood top will likely suffice. These are quicker and cheaper to build, offering adequate stability for non-strenuous activities.
- Heavy-Duty Workbenches: If you plan on tackling substantial woodworking projects, using heavy power tools like a router or planer, clamping large workpieces, or working with metal, a heavy-duty workbench is essential. These benches typically feature thicker lumber (like 4x4s for legs), reinforced joints, a substantial top (such as solid core doors or multiple layers of plywood), and often incorporate a vise. Their robust construction ensures they can absorb significant impact and weight without flexing or failing, providing a safe and reliable platform for demanding tasks.
Materials & Tools You Need to DIY a Work Bench
Building your own workbench is a straightforward project that doesn’t require a specialized arsenal of tools. With a thoughtful selection of materials and a few common power and hand tools, you’ll be well on your way. Here’s what you’ll need:
Essential Materials
- Lumber Choices:
- For Legs and Frame: Sturdy dimensional lumber like 2x4s, 3x4s, or even 4x4s are ideal. 2x4s are great for lighter benches, while 4x4s offer maximum stability for heavy-duty applications. Always select straight, un-warped pieces of wood to ensure a level and stable finished product. Pine is a popular, cost-effective choice, but hardwoods like oak or maple offer superior durability if your budget allows.
- For the Work Surface: Common choices include MDF (Medium-Density Fiberboard) for a smooth, uniform surface, plywood (especially Baltic Birch or cabinet-grade plywood for a tougher top), or even repurposed solid-core doors or old tabletops for an eco-friendly and robust option. For heavy-duty use, consider doubling up plywood layers or adding a sacrificial hardboard top that can be easily replaced.
- Fasteners:
- Screws: You’ll need a variety of screw lengths for different applications. 2 ½” and 1 ¼” self-tapping wood screws are excellent for joining frame components and attaching the top/shelf. For extra strength in structural joints, consider using 3” drywall screws or specialized construction screws. Ensure all screws are appropriate for wood and have a good grip.
- Bolts: For ultimate strength and the ability to disassemble, consider using carriage bolts or lag bolts with washers and nuts at critical joint points, especially if building a very heavy-duty or mobile bench.
- Optional Add-ons for Enhanced Functionality:
- Casters: If mobility is a priority, invest in high-quality double-locking casters. Look for heavy-duty options that can support the weight of your bench plus your heaviest projects.
- Brackets: Corner braces or L-brackets can add significant stability to the frame, particularly at leg-to-frame connections.
- Power Strips: A multi-outlet power strip with surge protection mounted to a leg or side of the bench provides convenient access to electricity for your tools.
- Pegboard: A sheet of pegboard for the back of your bench is an excellent vertical storage solution.
- Wood Glue: For even stronger joints, always apply wood glue before screwing or bolting lumber together.
Essential Tools
- Cutting Tools:
- Miter Saw: Ideal for precise, repeatable crosscuts and accurate angles, making frame assembly much easier.
- Circular Saw: A versatile tool for making straight cuts on larger sheets of plywood or MDF for your workbench top and shelves. A straightedge guide will ensure perfectly straight lines.
- Drilling Tools:
- Cordless Drill or Impact Driver: Indispensable for pre-drilling pilot holes (to prevent wood splitting) and driving screws efficiently. An impact driver offers more torque for driving long screws.
- Drill Bits: A good set of wood drill bits, including countersink bits for a flush screw finish.
- Measuring & Marking Tools:
- Tape Measure: Essential for all measurements. Always measure twice!
- Speed Square or Combination Square: Crucial for marking accurate 90-degree angles and checking squareness during assembly.
- Straightedge: A long ruler or a level can serve as a straightedge for marking long cuts.
- Pencil: For marking all your cuts and drill points.
- Safety Gear: Your safety is paramount!
- Safety Glasses: Always wear eye protection when cutting, drilling, or sanding.
- Ear Protection: Protect your hearing from noisy power tools.
- Work Gloves: Protect your hands from splinters and minor abrasions.
- Dust Mask/Respirator: Especially important when cutting MDF or sanding, to avoid inhaling fine dust particles.
- Clamping Tools:
- Wood Clamps: Several clamps (bar clamps, F-clamps, or C-clamps) are invaluable for holding pieces securely in place while you measure, drill, and screw, ensuring square and stable joints.
Step-by-Step Guide to Building a DIY Workbench
With your materials gathered and tools at the ready, it’s time to bring your workbench to life. Follow these steps carefully for a sturdy and reliable build:
Step 1: Precision Cutting Your Materials
- Measure Accurately: Using your tape measure and pencil, meticulously mark all your lumber pieces according to your chosen dimensions. For a versatile mid-sized bench, common dimensions might be 60 inches long by 24 inches deep, while larger projects might benefit from a 72-inch long by 30-inch deep surface. Remember the adage: “Measure twice, cut once.”
- Make Clean Cuts: Use your miter saw for precise crosscuts on the frame pieces. For the workbench top and bottom shelf (if using a large sheet of plywood or MDF), a circular saw guided by a straightedge will ensure perfectly straight, clean edges. Always ensure your saw blades are sharp for optimal results and wear all appropriate safety gear.
Step 2: Assembling the Top and Bottom Frames
- Construct Rectangular Frames: Begin by building two identical rectangular frames: one for the top and one for the bottom. These frames typically consist of two longer pieces (front and back rails) and two shorter pieces (side rails). Butt the short side rails between the longer front and back rails, creating a flush, strong joint.
- Secure with Screws and Glue: Apply wood glue to all mating surfaces before joining. Then, pre-drill pilot holes to prevent wood splitting and secure each joint with at least two 2 ½” or 3” wood screws.
- Check for Squareness: As you assemble each frame, constantly use your speed square or combination square to check that all corners are perfectly 90 degrees. A square frame is critical for a stable and level workbench. Clamps can be incredibly useful here to hold pieces square while you drive screws.
Step 3: Attaching the Legs for Stability
- First, the Top Frame: With your top frame assembled, position your chosen leg material (e.g., 2x4s or 4x4s) flush with the inside corners of the frame. Ensure the legs are perfectly vertical and square to the frame. Apply wood glue to the contact surfaces, pre-drill, and then secure each leg to the top frame using multiple 2 ½” or 3” screws. You might screw through the frame into the leg, or use corner brackets for added strength.
- Flip and Attach the Bottom Frame: Carefully flip the partially assembled workbench over. Position the bottom frame between the legs. A common and highly effective placement for the bottom frame is approximately 6 to 8 inches up from the ground. This height allows for a sturdy bottom shelf while keeping the workbench’s center of gravity low for enhanced stability. Ensure the bottom frame is level and square to the legs before gluing and screwing it into place. Again, use clamps to hold everything firmly while securing.
Step 4: Reinforcing for Maximum Durability
- Add Cross Bracing: To prevent racking (side-to-side wobble), consider adding diagonal cross-braces between the legs on the long sides, or even on all four sides. These can be simple 2x4s cut at an angle or even plywood gussets at the corners.
- Consider Bolting: For heavy-duty benches, especially those with 4×4 legs, replacing some screws with carriage bolts and nuts at critical load-bearing joints (like where legs meet the frame) will provide superior strength and allow for future disassembly if needed.
Step 5: Installing the Work Surface and Bottom Shelf
- Secure the Workbench Top: Place your chosen work surface (MDF, plywood, etc.) on top of the assembled frame. Ensure it’s flush with the edges or overhangs evenly, depending on your preference. Pre-drill pilot holes and secure the top to the frame using 1 ¼” screws, spacing them every 6-8 inches around the perimeter and along any internal cross members. For a perfectly smooth surface, countersink the screw heads so they sit flush or slightly below the surface.
- Install the Lower Shelf: Position your bottom shelf material onto the bottom frame. Ensure it fits snugly and is level. Secure it to the bottom frame with 1 ¼” screws, again pre-drilling and countersinking as needed. This shelf adds rigidity to the structure and provides invaluable storage space for tools, materials, or project components.
Customizations & Upgrades for Your Workbench
You’ve successfully built the core of your workbench—a fantastic achievement! But why stop there? The beauty of a DIY project is the freedom to customize and upgrade it to perfectly suit your workflow and specific needs. Here are some popular enhancements to take your workbench to the next level:
Optimizing Storage and Accessories
Keeping your tools organized and easily accessible is key to an efficient workspace.
- Integrated Pegboard Backing: Mounting a large sheet of pegboard to the back of your workbench instantly creates vertical storage for hand tools, frequently used items, and small accessories. This frees up valuable surface area and keeps everything within arm’s reach.
- Bench Vise Integration: A sturdy bench vise is indispensable for holding workpieces securely for cutting, drilling, filing, or sanding. Plan to install one on one end of your bench. For maximum stability, reinforce the mounting area underneath the workbench top with an extra layer of plywood or a solid block of wood before attaching the vise.
- Side Brackets and Hooks: Install simple L-brackets or hooks on the sides of your workbench to hang clamps, extension cords, or other long-handled tools, keeping them organized and off the floor.
- Under-Bench Drawers or Cabinets: For enclosed storage and to keep dust off sensitive tools, consider adding custom-built drawers or small cabinets beneath the workbench top, or even fitting pre-made storage units into the lower shelf area.
Adding Mobility with Casters
If you opted for a mobile workbench, the right casters are critical for safety and ease of movement.
- Choosing the Right Casters: Select heavy-duty, double-locking casters. Double-locking means they prevent both the wheel from rolling and the swivel mechanism from turning, providing maximum stability when the bench is in use. Ensure the casters’ weight rating exceeds the total anticipated weight of your workbench plus your heaviest projects.
- Adjustable Feet: If mobility isn’t a concern, or if you want to be able to level your bench on an uneven floor, consider installing adjustable leveling feet instead of or in addition to casters. These allow you to fine-tune the height and ensure a perfectly stable, wobble-free surface.
Enhancing Power and Lighting
Convenient access to power and adequate lighting are crucial for comfortable and safe operation.
- Integrated Power Strip: Mount a robust power strip with multiple outlets (and preferably surge protection) to one of your workbench legs or a side apron. This eliminates the need for trailing extension cords and keeps power readily available for your drills, sanders, and other tools.
- Dedicated Lighting: Good lighting is paramount for precision work and safety. Consider installing an overhead LED shop light directly above your workbench, or attach a flexible task light directly to the bench frame. Adequate illumination reduces eye strain and helps you spot details and potential hazards.
Common Mistakes to Avoid While Making a Workbench
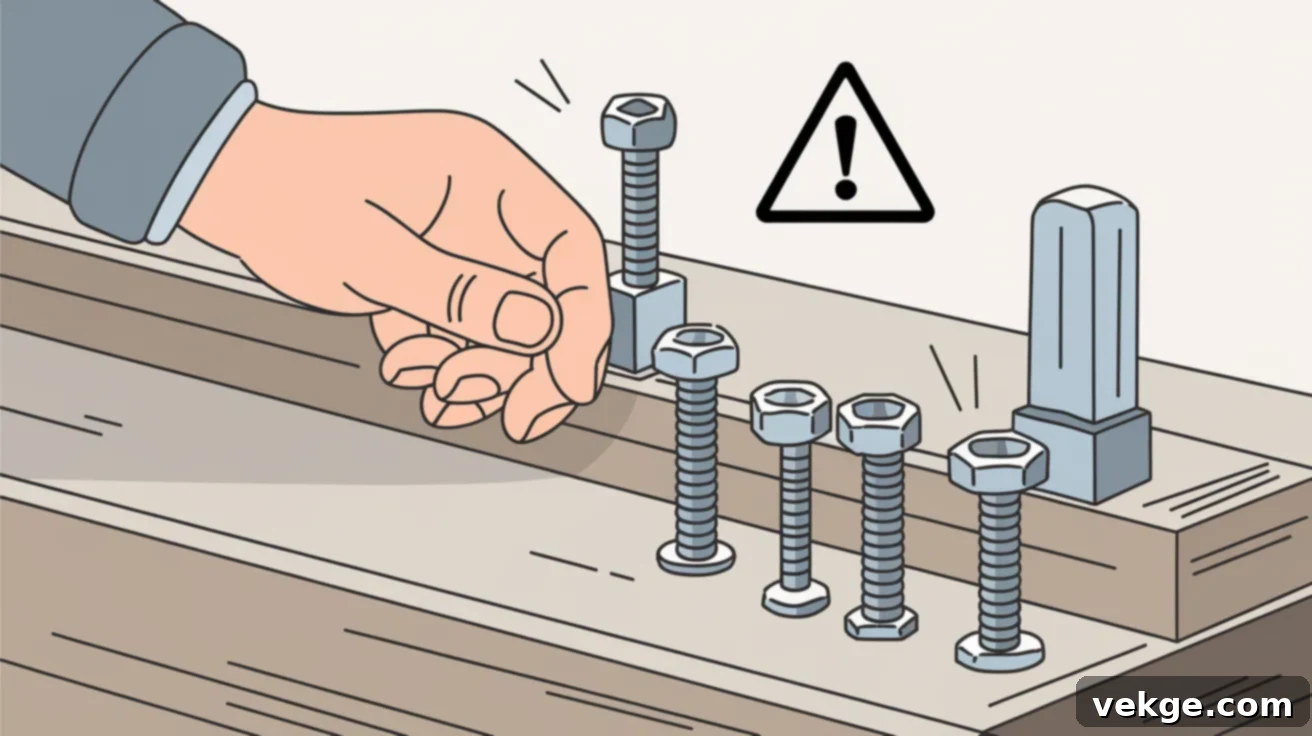
Even simple DIY projects can go awry if common pitfalls aren’t anticipated. Avoiding these mistakes will save you time, frustration, and ensure your workbench is built to last.
1. Using Low-Quality or Warped Wood
- Consequences: Warped wood leads to an uneven, unstable, and ultimately frustrating workbench. Low-quality wood may lack the strength and durability required for workshop tasks, leading to premature wear or even failure. Pressure-treated wood, while excellent for outdoor use, can leach chemicals and is generally not recommended for indoor projects where you’ll be spending a lot of time.
- Solution: Always carefully inspect each piece of lumber before purchase. Look down the length of boards to check for warps, twists, and bows. Select straight, knot-free pieces that are appropriate for the load and stress your bench will endure. Opt for kiln-dried lumber for greater stability.
2. Not Measuring Properly
- Consequences: Inaccurate measurements are a primary cause of frustrating fit issues, misaligned joints, and a wobbly final product. Small errors compound quickly in construction.
- Solution: Embrace the “measure twice, cut once” philosophy. Use a reliable tape measure, and mark your cuts clearly with a sharp pencil. Employ a speed square or combination square religiously to ensure all cuts are precisely 90 degrees (or whatever angle is required). When cutting multiple pieces of the same length, cut one, then use it as a template for the others, or set up a stop block on your miter saw.
3. Overlooking Stability
- Consequences: A wobbly workbench is not only annoying but also dangerous. It compromises precision for tasks like drilling and sawing and can cause tools or materials to fall, potentially leading to injury or damage.
- Solution: Ensure all leg-to-frame connections are incredibly secure. Use multiple screws or bolts at each joint, and consider adding wood glue for extra strength. Cross-bracing or diagonal supports are highly effective at preventing racking. If using casters, make sure they are heavy-duty, double-locking wheels to prevent any unwanted movement during use.
4. Skipping Reinforcements
- Consequences: An under-reinforced workbench will flex under load, wear out quickly, and may not safely support heavy tools or projects. Critical areas like vise mounts can tear out if not properly strengthened.
- Solution: Don’t skimp on reinforcement. Add diagonal cross-bracing to the frame, particularly for the lower shelf, which also adds rigidity to the entire structure. If you plan to mount a bench vise, reinforce the specific mounting area with an extra layer of plywood or a solid block of wood glued and screwed underneath the workbench top. This distributes the stress and prevents the top from failing.
5. Not Planning for Future Upgrades
- Consequences: Building a workbench without considering future needs can lead to immediate limitations, requiring awkward retrofits or even a complete rebuild later on.
- Solution: Think ahead! Even if you don’t install every feature immediately, design your bench with potential upgrades in mind. For example, leave space for future drawers, or consider the optimal placement for a power strip or an integrated vise. If your space allows, building a slightly larger workbench than you initially think you need can accommodate an expanding tool collection or larger projects down the line. Consider adding channels or knock-outs for future electrical wiring.
Free Printable Blueprints
To make your project even easier, here are three free printable workbench blueprints tailored for different needs and skill levels. These visual guides can help you visualize the build and ensure accuracy.
Basic DIY Workbench
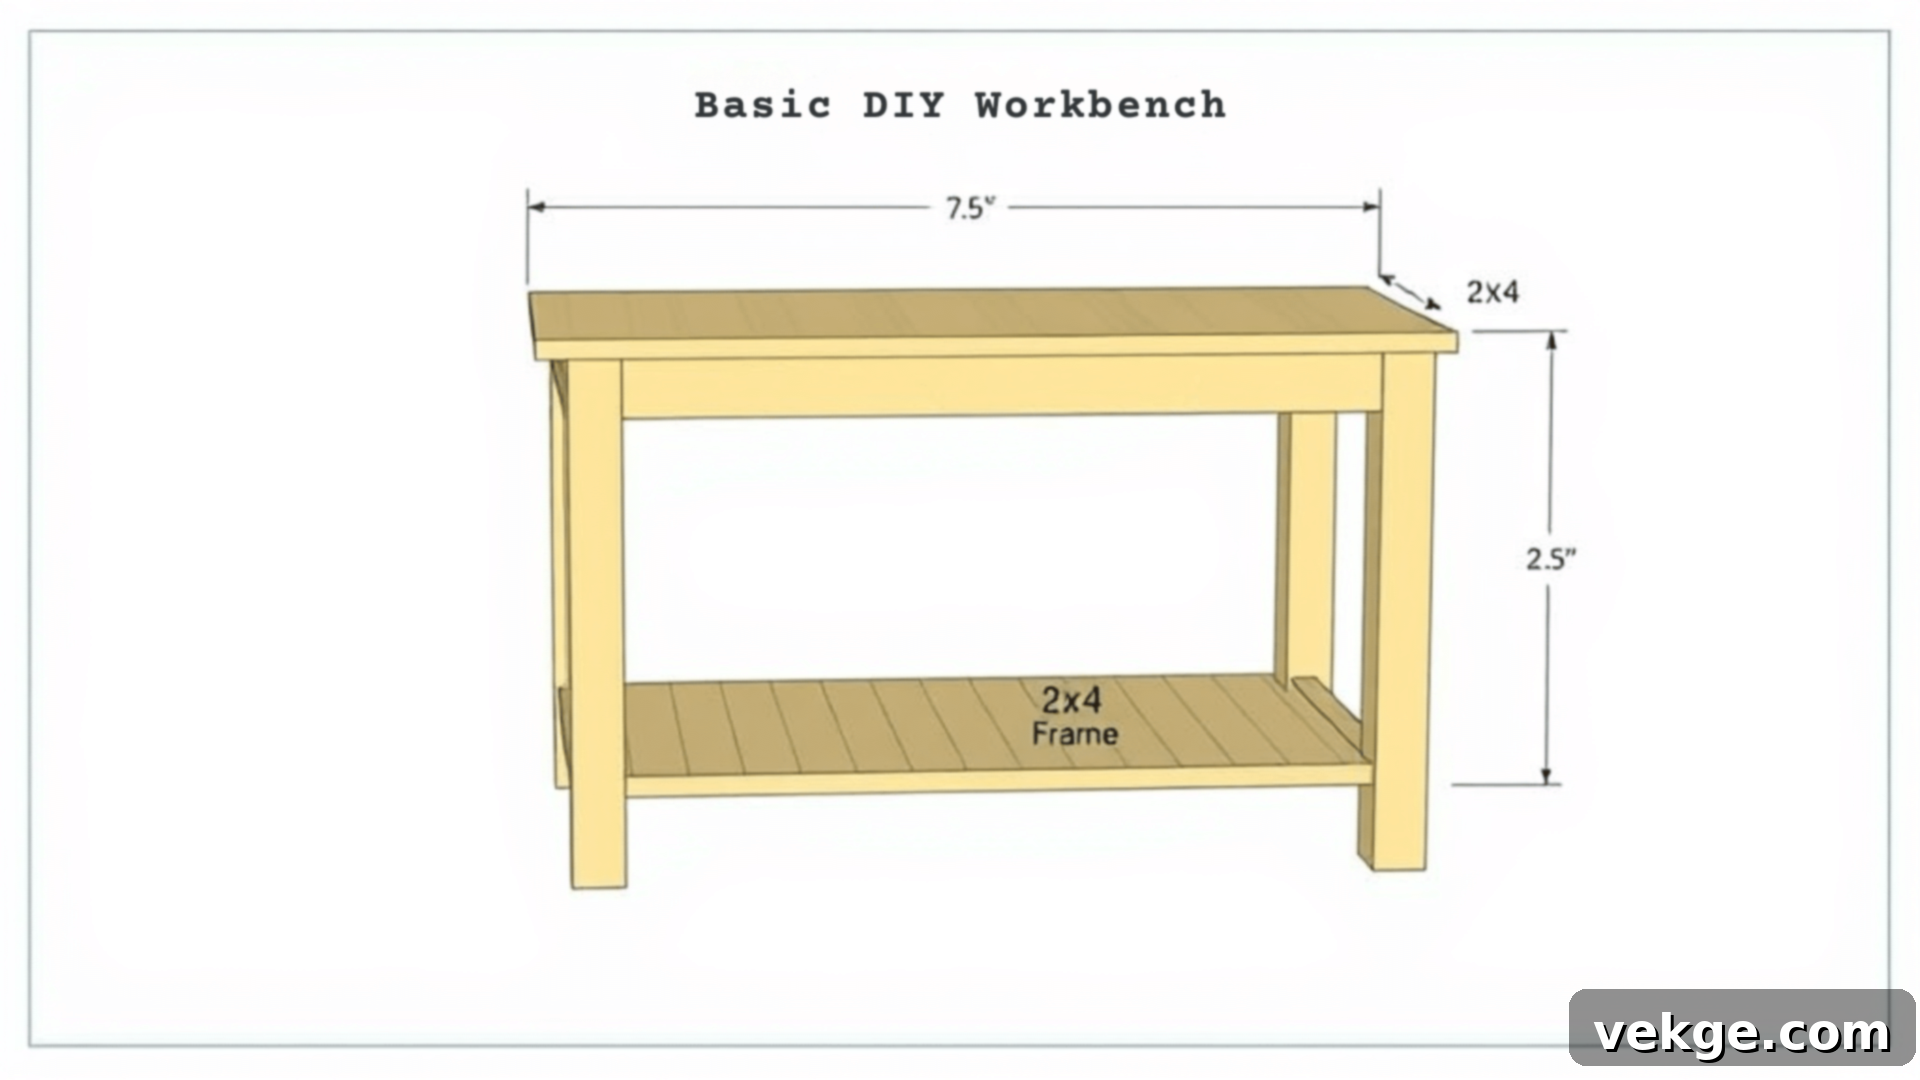
- Perfect for Beginners: This design is straightforward, requiring minimal cuts and basic joinery techniques.
- Simple 2×4 Frame: Utilizes readily available 2×4 lumber for the frame, making it cost-effective and easy to source.
- Plywood Top and Bottom Shelf: Provides a functional work surface and useful storage with common sheet goods.
- Minimal Tools Required: Can often be built with just a circular saw, drill, and tape measure. Sturdy enough for general home repairs, crafting, and light woodworking tasks.
Heavy-Duty Workbench with Pegboard Backing
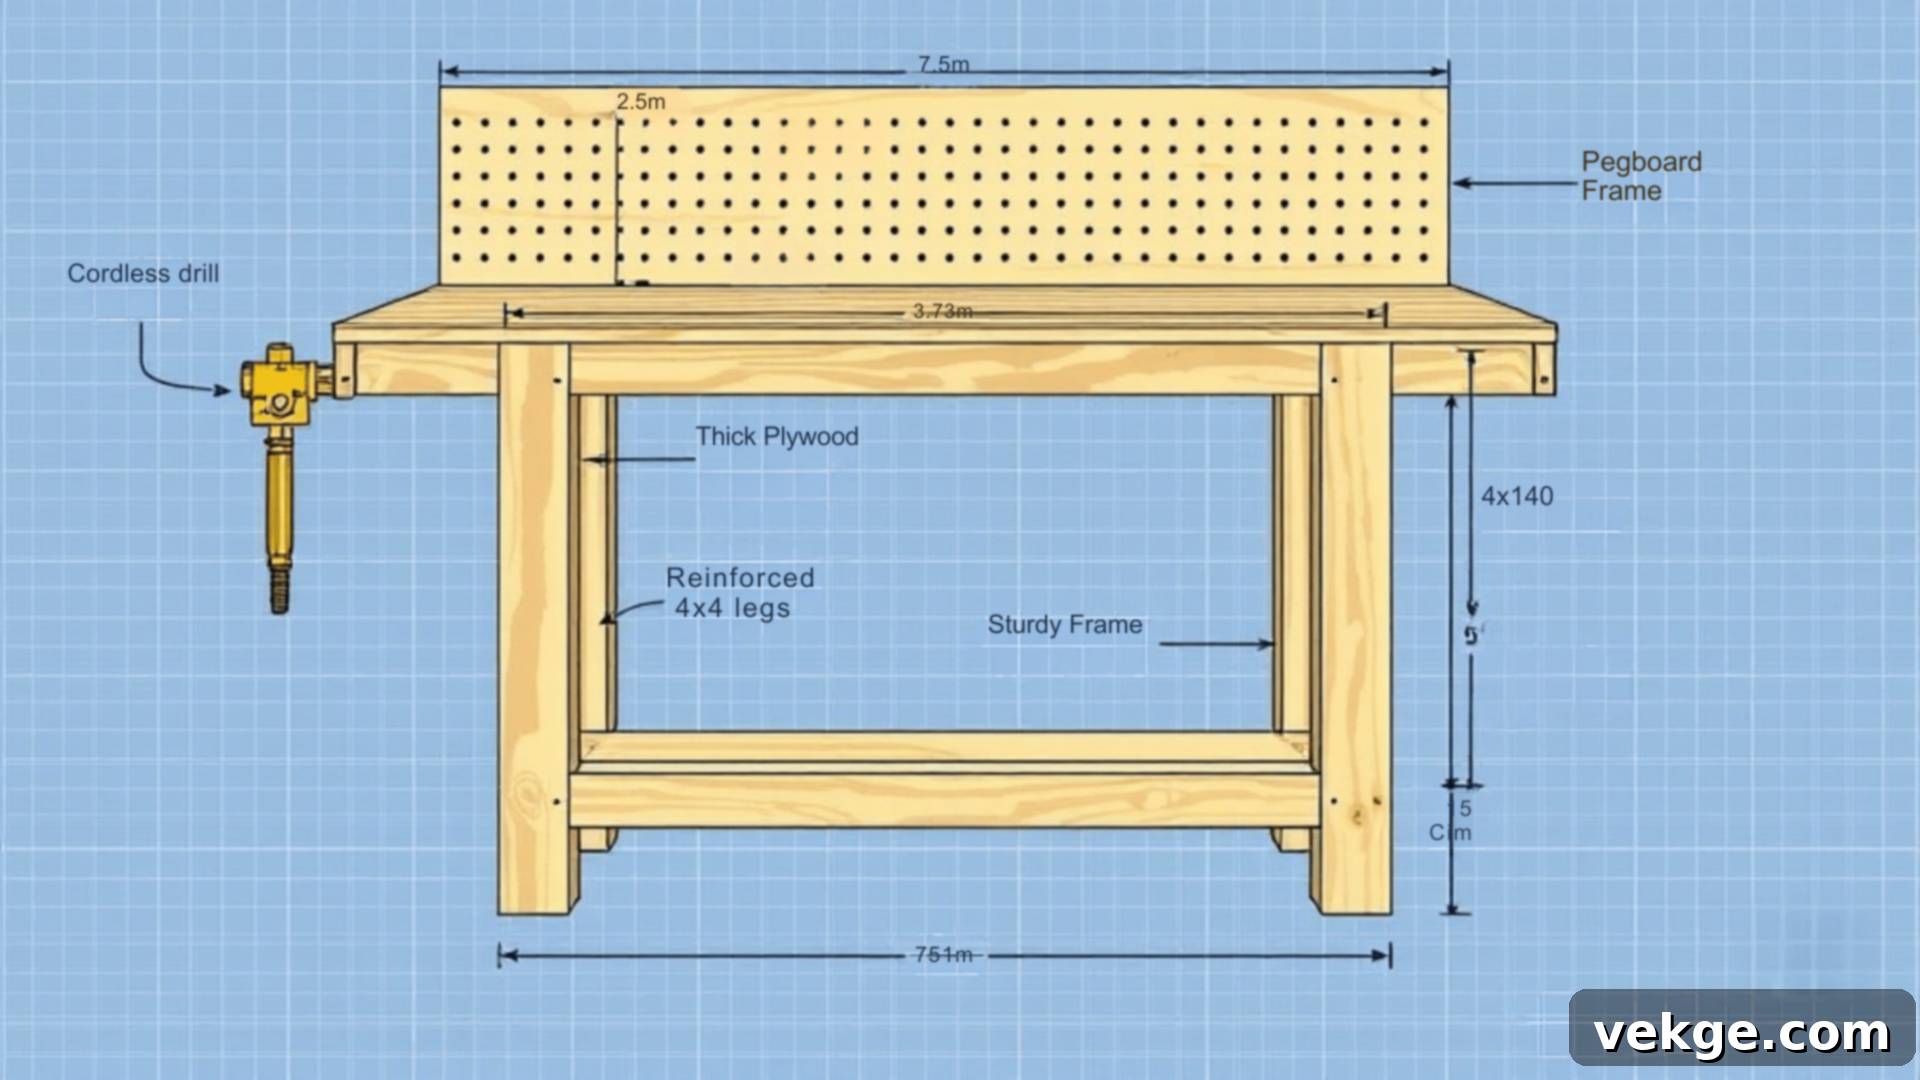
- Ideal for Woodworking and Garage Use: Designed to withstand significant stress and weight.
- Reinforced 4×4 Legs: Provides exceptional stability and support for heavy tools and vigorous work.
- Integrated Pegboard Storage: Keeps frequently used tools organized and within easy reach, maximizing workspace efficiency.
- Vise Mount: Includes provisions for securely mounting a bench vise, essential for clamping and holding workpieces. This design is built for serious workshop applications.
Mobile Workbench with Storage Drawers
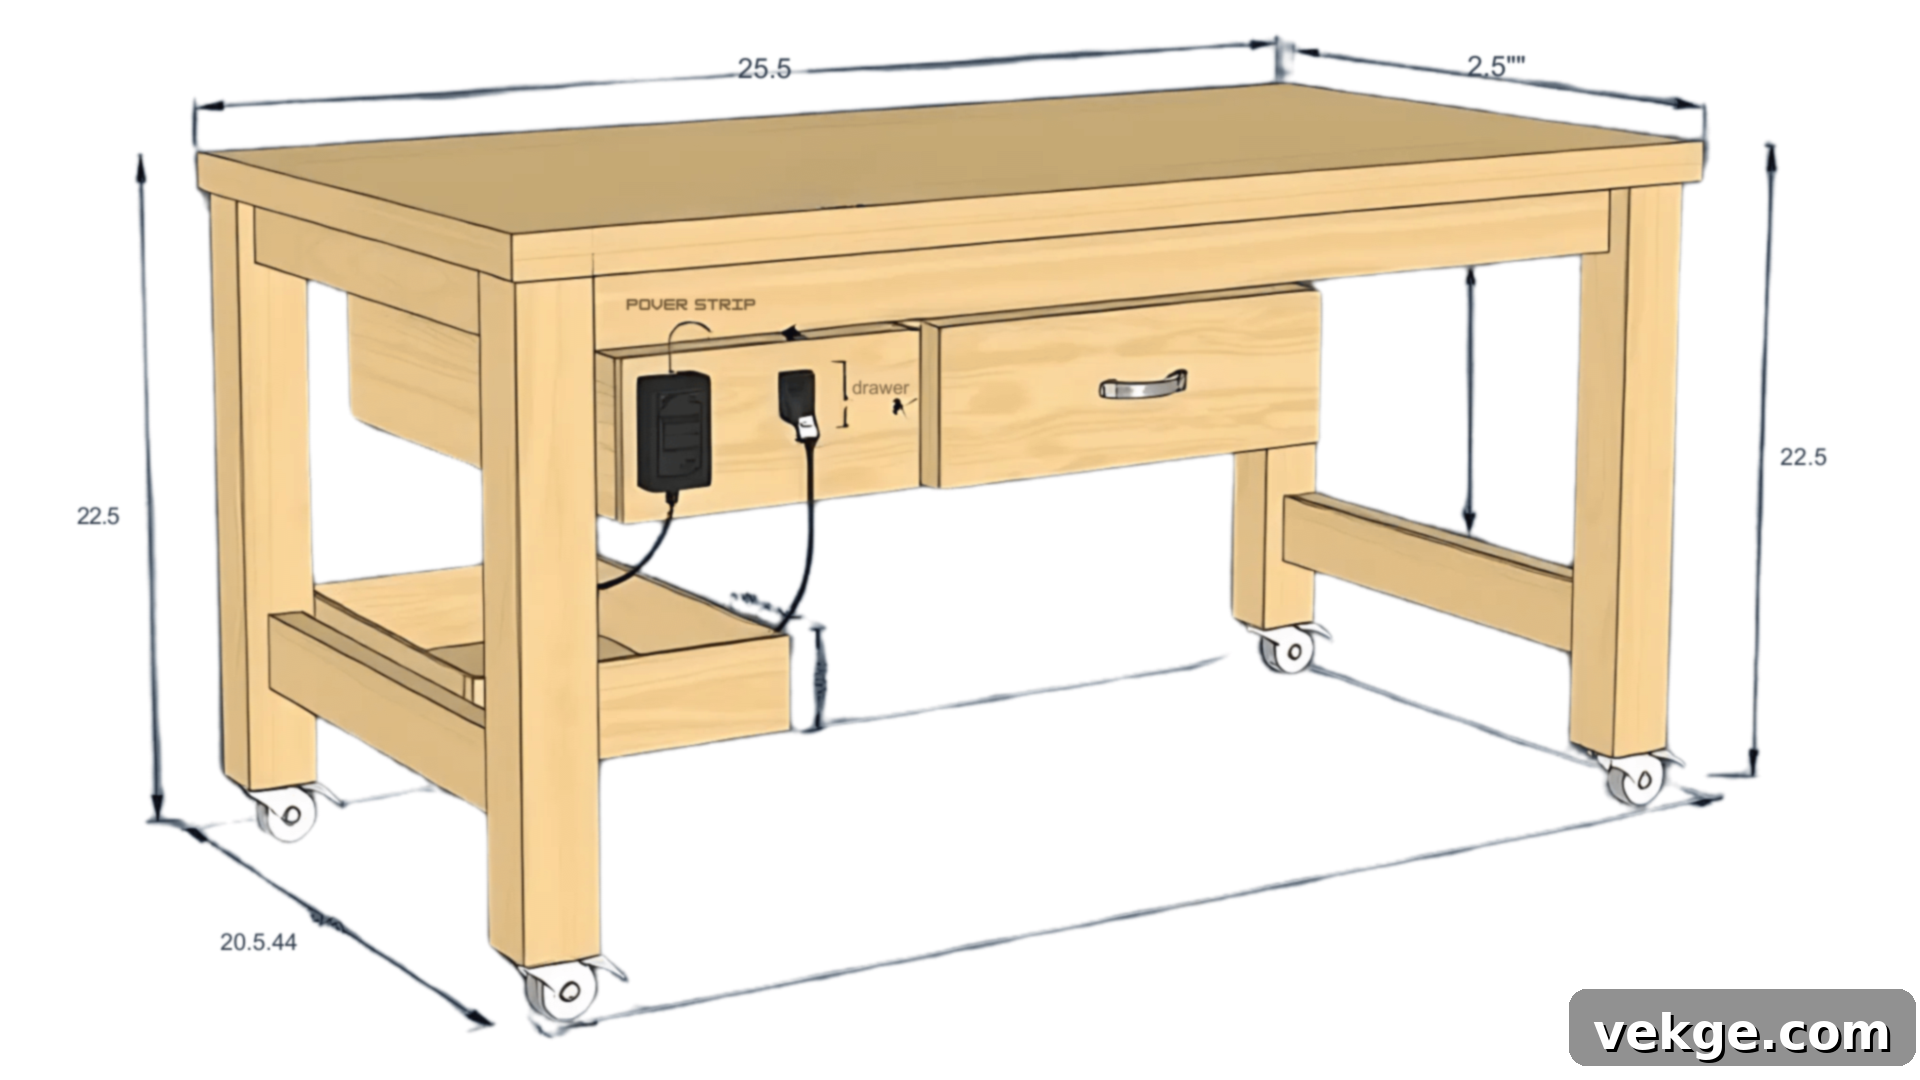
- Best for Small Spaces or Movable Workspace: Equipped with heavy-duty casters for effortless relocation around your workshop.
- Built-in Drawers: Offers convenient, enclosed storage to keep smaller tools, hardware, and accessories organized and protected from dust.
- Power Strip Mount: Incorporates a dedicated space for a power strip, ensuring easy access to electricity for your portable power tools. This design combines versatility with smart storage solutions.
Maintenance & Long-Term Care of Your Workbench
You’ve invested your time and effort into building an awesome workbench – now let’s ensure it stays in prime condition for many years of productive work! Regular maintenance isn’t just about aesthetics; it’s about preserving its functionality, stability, and safety. Here are some essential tips for keeping your DIY workbench in tip-top shape:
Preventing Wobbling & Weakness
Over time, due to vibrations, heavy use, and changes in humidity, screws can loosen and joints can weaken, leading to an unwanted wobble.
- Routine Fastener Checks: Make it a habit to periodically (e.g., every 3-6 months) check all screws, bolts, and nuts on your workbench. Use a screwdriver or wrench to tighten anything that feels loose. Pay particular attention to the leg-to-frame connections and any areas under heavy stress (like where a vise is mounted).
- Inspect for Damage: Visually inspect the frame and work surface for any signs of cracks, splits, or significant damage. Address small issues immediately. For minor cracks in wood, wood glue and a clamp can often provide a lasting fix. For deeper damage to the work surface, consider patching it or adding a new sacrificial layer of hardboard.
- Leveling Adjustments: If your workbench has adjustable feet or casters, check its levelness occasionally, especially if you move it frequently. Adjust as needed to ensure a stable, wobble-free working surface.
Choosing Durable Finishes and Regular Cleaning
Protecting your workbench surface from spills, scratches, and wear is crucial for its longevity.
- Protective Finish: Apply a durable finish to your workbench top. Options include:
- Polyurethane: Offers excellent resistance to chemicals, abrasion, and moisture. Apply several thin coats for best results.
- Linseed or Tung Oil: Penetrates the wood, providing a natural, hard-wearing finish that is easy to repair. It will require periodic reapplication.
- Paint: A good quality floor paint or epoxy paint can create a very tough, cleanable surface, especially if you’re not concerned with showing the wood grain.
This finish will shield the wood from spills, grease, and impacts, making it easier to clean.
- Sacrificial Top Layer: For the ultimate protection, consider adding a replaceable layer of thin hardboard (MDF or Masonite) on top of your main workbench surface. This layer can take all the abuse from cutting, gluing, and painting, and can be easily replaced when it gets too worn or damaged, preserving your primary workbench top.
- Regular Cleaning: Keep your workbench clean! Wipe down the surface regularly to remove sawdust, dirt, and spills. Use a bench brush or shop vacuum to clear debris, especially before starting new projects. Promptly clean up any chemical spills to prevent staining or damage to the finish. A clean workbench is a safer and more efficient workbench.
- Rust Prevention: If you work with metal or in a humid environment, consider waxing or oiling any exposed metal parts of your workbench (e.g., vise components) to prevent rust.
Conclusion
Congratulations! You now possess all the knowledge, inspiration, and practical steps required to design and construct your very own perfect DIY workbench. From carefully considering the ideal style and size for your needs to mastering the assembly process and customizing it with smart storage, convenient power, and ample lighting, you are fully equipped to build a workbench that is not only robust and functional but also uniquely yours.
Remember, the profound satisfaction of a DIY project extends far beyond the final product. It’s in the careful planning, the precision of each cut, the secure joining of every piece, and the pride of seeing something substantial take shape under your own hands. Embrace the learning process, enjoy every moment of creation, and don’t hesitate to infuse your workbench with personal touches that reflect your individual craftsmanship and style.
With your new, custom-built workbench ready and waiting, a world of enhanced productivity, creative freedom, and successful projects awaits. Now that you have the ultimate foundation, it’s time to roll up your sleeves and dive into your next exciting DIY adventure!
