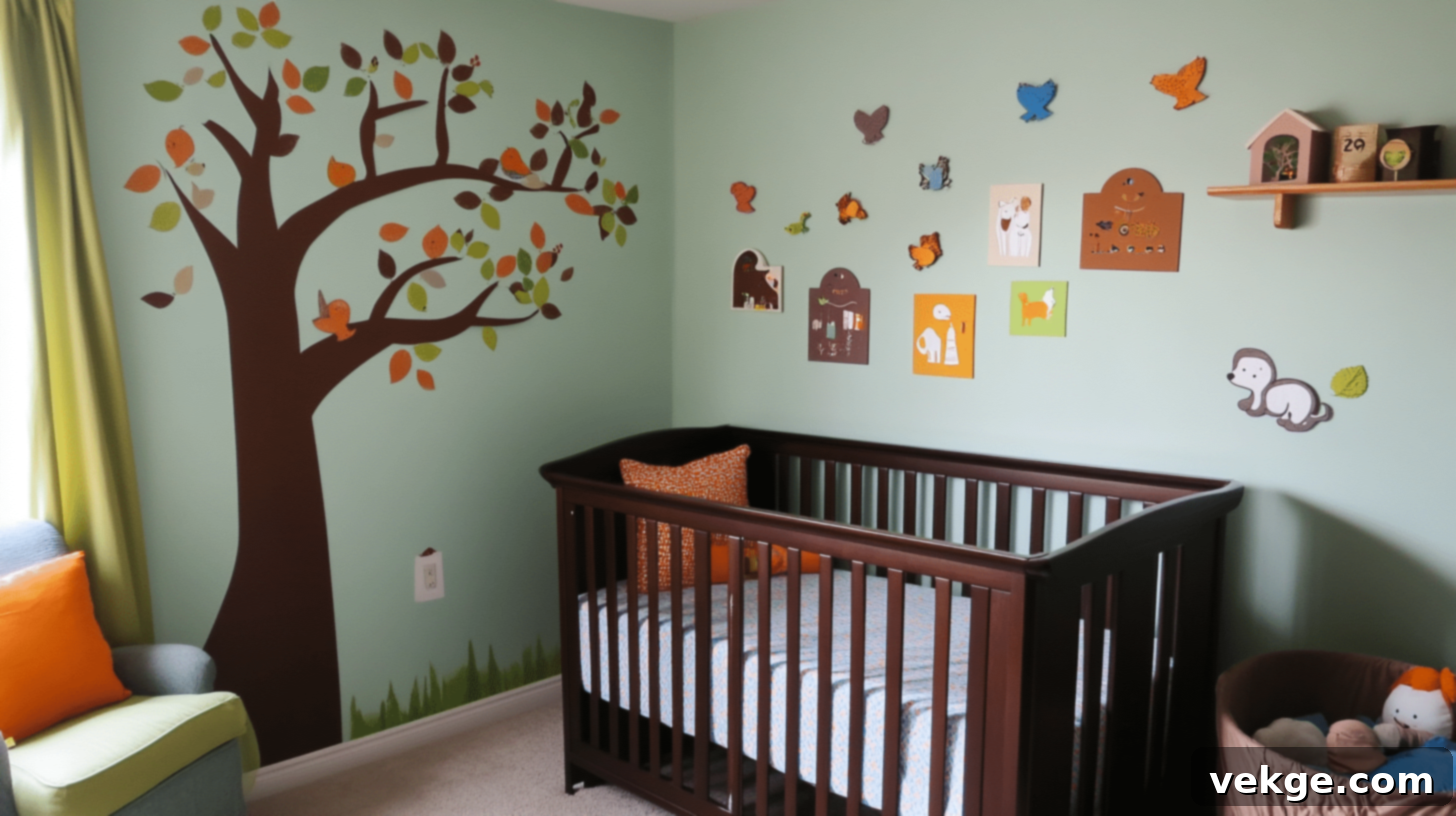
DIY Nursery Decor on a Budget: 19 Adorable & Affordable Ideas for Your Baby’s Room
Preparing for a new baby is an incredibly exciting journey, but it often comes with a significant financial consideration, especially when it comes to setting up the nursery. I vividly remember the sticker shock when I started browsing for nursery items – it felt like my wallet was getting lighter just looking at the price tags! However, I soon discovered that creating a beautiful, personalized, and cozy space for my little one didn’t have to drain my savings.
Here’s the wonderful news: you can design a truly magical nursery filled with charm and personal touches without spending a fortune. With a dash of creativity, some basic craft supplies, and a little know-how, you can craft unique decorations that make your baby’s room incredibly special and reflect your love.
I’ve personally tried and tested these 19 budget-friendly DIY nursery decoration ideas, all designed to be simple and accessible. These projects require minimal crafting skills and often use basic materials you might already have around your home. Each idea is a step towards saving money while infusing warmth, character, and a deeply personal touch into your baby’s first room.
Are you ready to embark on a fun, creative journey to make something truly special for your little one? Let’s dive into these imaginative and simple ideas that will help you create the nursery of your dreams without the hefty price tag.
How to Plan Your Budget-Friendly Nursery Decor
Effective planning is the cornerstone of any successful DIY project, especially when you’re aiming for a budget-friendly nursery. Here’s a structured approach I found incredibly helpful in creating a cohesive and cost-effective baby room:
1. Define Your Color Palette
First, I highly recommend selecting a concise palette of 2-3 main colors for your nursery. When I was planning my baby’s room, I discovered that limiting the color choices helped me maintain focus and made decisions, from paint to fabric scraps, much easier. This creates a harmonious look and prevents the room from feeling cluttered or overwhelming. Think about soothing pastels, vibrant accents, or classic neutrals that appeal to you.
2. Hunt for Hidden Treasures at Home
Before you even think about buying new materials, take a thorough look around your home. You might be surprised by the items you already possess that can be repurposed for the nursery. I personally found old picture frames that transformed into charming art, fabric scraps perfect for bunting, and mason jars that became adorable organizers. Old blankets, sweaters, or even vintage books can also be excellent starting points for unique decor.
3. Create a Detailed “Must-Have” List
To keep my projects organized and ensure I covered all bases, I found it beneficial to categorize my essential decor items. My list typically included:
- Wall Decorations: Art prints, banners, mobiles, shelves.
- Storage Solutions: Baskets, bins, jars, crates for diapers, toys, and clothes.
- Lighting Options: Soft lamps, string lights, decorative lanterns for a calming ambiance.
- Comfort Items: Decorative pillows, small rugs, cozy blankets (ensure all are baby-safe and supervised).
This organized list helps you prioritize and ensures you don’t miss any key elements for functionality and aesthetics.
4. Set a Realistic Budget
Establishing a clear budget before you start is non-negotiable for a truly budget-friendly nursery. I found it incredibly helpful to jot down an estimated cost for materials for each potential project. This preventative step was crucial in stopping me from overspending on supplies and helped me make smart choices, often leaning towards repurposing over buying new. Remember, a budget isn’t restrictive; it’s a guide to creative problem-solving.
5. Prioritize Safety Above All Else
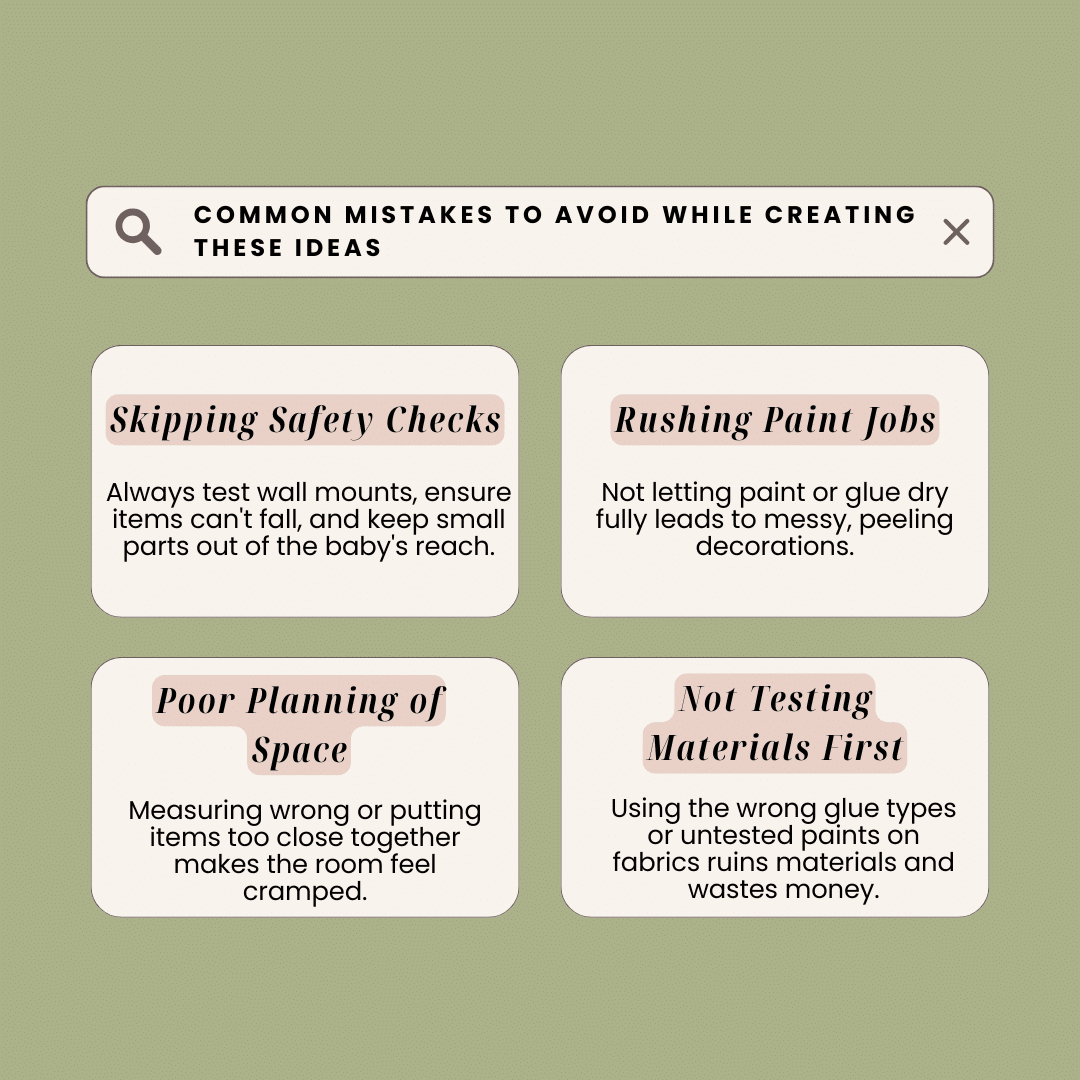
When crafting for a baby’s room, safety is paramount. I meticulously ensured that all my DIY items were securely fastened to walls or furniture and that I used only baby-safe, non-toxic materials. It’s vital to avoid any small pieces that could be choking hazards, sharp edges, or long strings that could pose a strangulation risk within your baby’s reach. Always double-check your creations for stability and security.
Best DIY Nursery Decor Ideas on a Budget
Now for the fun part! Here are 19 creative and cost-effective DIY projects to bring charm and personality to your baby’s nursery. Each idea includes the necessary tools, materials, and a simple step-by-step guide to help you get started.
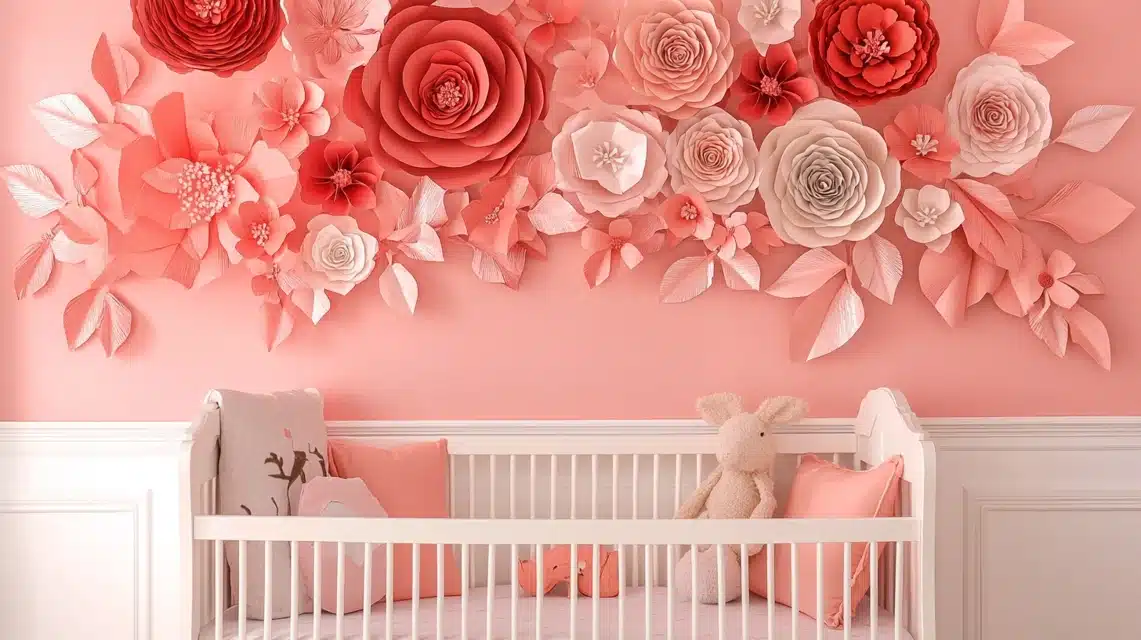
1. Handmade Paper Flowers Wall Display
Transform a plain nursery wall into a blooming garden with these enchanting handmade paper flowers. This DIY project allows for incredible customization in terms of color and size, creating a whimsical and delicate focal point without breaking the bank. It’s an ideal way to add a touch of elegance and softness, perfect for a serene baby’s sanctuary.
Tools & Materials Required
- Colored cardstock paper (approx. $5 for 50 sheets)
- Sharp scissors
- Hot glue gun and several glue sticks
- Pencil for tracing
- Ruler for measuring
- Command strips or removable adhesive tabs for hanging
- Circle templates of different sizes (can use household items like bowls or lids)
Step-by-Step Process
- Draw circles of various sizes onto your chosen colored cardstock.
- Carefully cut out all your drawn circles.
- Fold each circle precisely in half, then fold it again in quarters.
- Round the outer edge of each folded quarter-circle to create a petal shape.
- Gently unfold the paper and use scissors to curl each petal inward slightly, giving it dimension.
- Layer different-sized flowers together, placing smaller ones on top of larger ones.
- Secure these layers firmly with hot glue in the center.
- Create approximately 5-7 flowers in your chosen colors and sizes for a balanced display.
- Arrange and attach them to the wall using command strips for easy removal and adjustment.
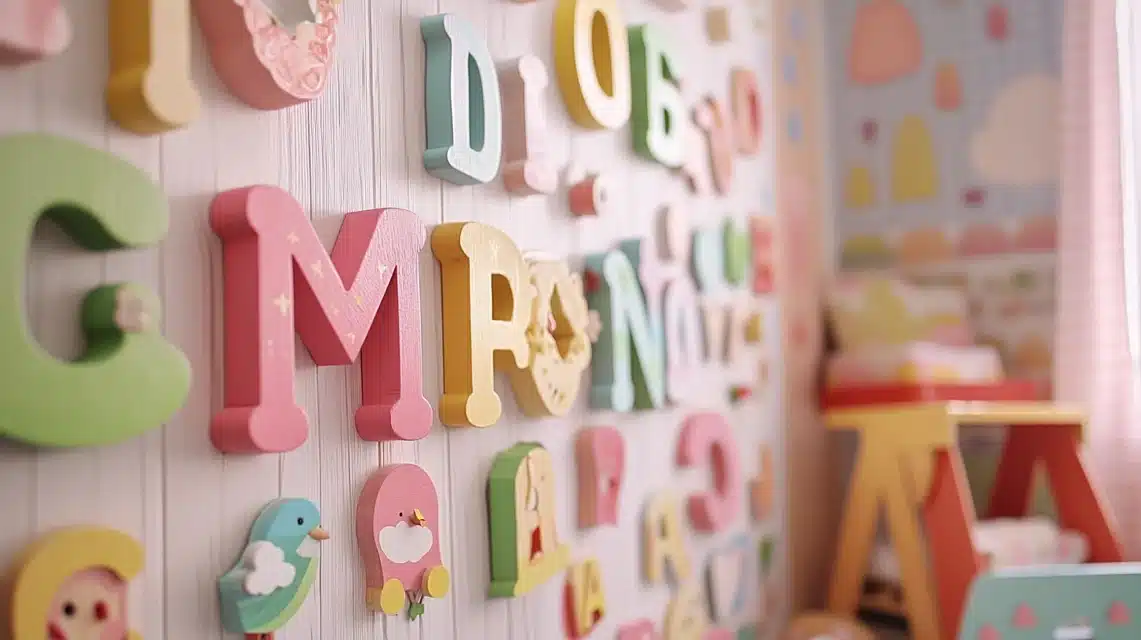
2. Painted Wooden Letters
Personalize your baby’s nursery with their name or a sweet message using painted wooden letters. This simple yet impactful project adds a custom touch and allows you to match the letters perfectly to your nursery’s color scheme. It’s a classic decor item that feels warm and inviting.
Tools & Materials Required
- Unfinished wooden letters (typically $2-3 each, depending on size)
- Acrylic paint in your chosen nursery colors (ensure it’s non-toxic and baby-safe)
- Assorted paintbrushes
- Fine-grit sandpaper
- Command strips or double-sided mounting tape
- Newspaper or drop cloth to protect your workspace
Step-by-Step Process
- Gently sand each wooden letter until it’s smooth to the touch, removing any rough edges.
- Wipe off any dust with a clean, damp cloth and allow it to dry completely.
- Apply a uniform base coat of acrylic paint to each letter, ensuring even coverage.
- Allow the first coat to dry thoroughly before applying a second coat for a vibrant, opaque finish.
- If desired, paint patterns, dots, stripes, or other designs onto the letters once the base coats are dry.
- Let the letters dry completely for at least 24 hours to ensure the paint is fully cured.
- Attach command strips or strong mounting tape to the back of each letter.
- Carefully arrange and press the letters onto the wall to spell out a name or word.
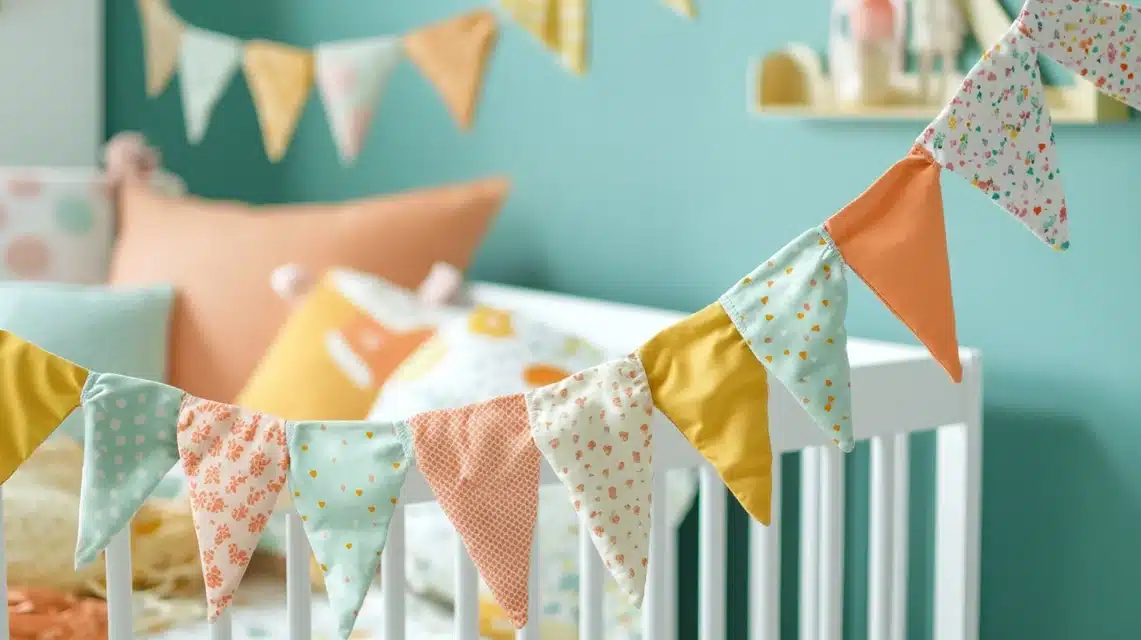
3. No-Sew Fabric Bunting
A string of cheerful fabric bunting is a classic nursery decoration that adds instant charm and a playful touch. This no-sew version makes it incredibly easy for anyone to create, even without sewing skills. Use fabric scraps from other projects or choose new patterns that complement your nursery theme for a cozy, handmade feel.
Tools & Materials Required
- Assorted fabric scraps or fat quarters ($1-2 each, often found in craft stores)
- Twine or decorative ribbon ($3 for a roll)
- Sharp fabric scissors
- Iron and ironing board
- Ruler or measuring tape
- Fabric glue ($4, ensure it dries clear and flexible)
- Cardboard triangle template (e.g., 6×8 inches)
Step-by-Step Process
- Cut a triangle template from sturdy cardboard, approximately 6 inches wide at the top and 8 inches long.
- Trace the template onto your chosen fabric scraps and carefully cut out multiple fabric triangles.
- Iron each fabric triangle flat to remove any creases and ensure a neat finish.
- Fold down the top edge of each triangle by about 1 inch.
- Apply a thin line of fabric glue inside this folded edge.
- Carefully insert the twine or ribbon into the fold, ensuring it runs along the top edge.
- Press the folded fabric firmly to secure the twine and allow the glue to bond.
- Space the fabric triangles approximately 2 inches apart along the twine for an even look.
- Let the fabric glue dry completely for at least 2 hours before hanging.
4. Upcycled Book Page Mobile
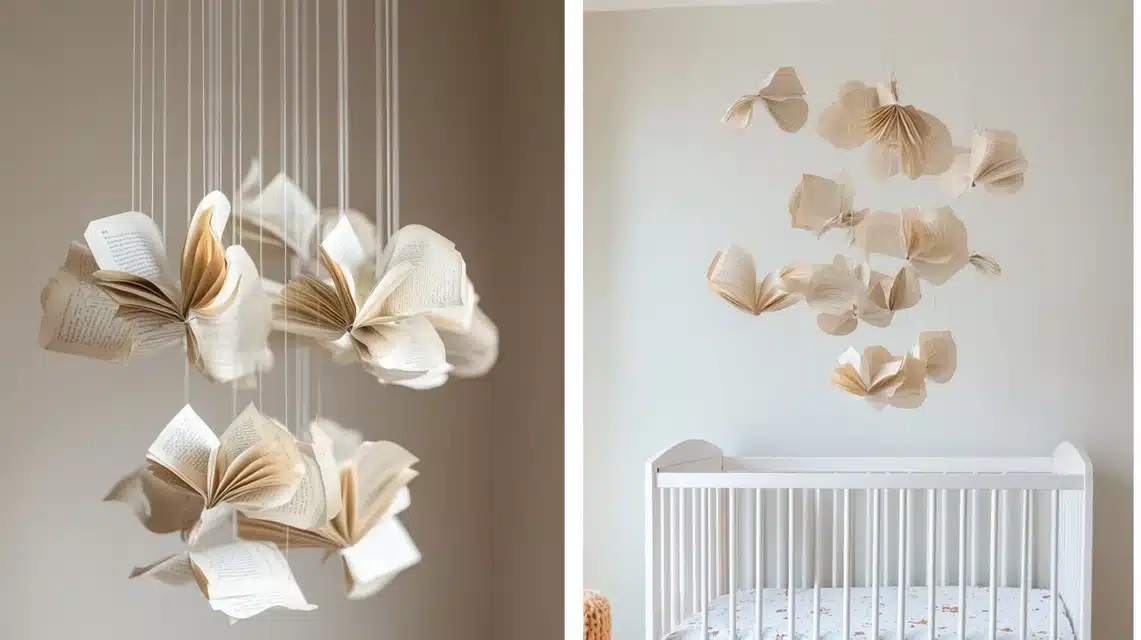
Create a dreamy and literary mobile using pages from an old children’s book. This charming project adds a vintage or whimsical touch to the nursery, offering gentle movement and a unique focal point above the crib. It’s an excellent way to repurpose beloved stories into new art.
Tools & Materials Required
- Pages from an old children’s book (look for interesting illustrations or classic texts)
- Embroidery hoop (a small one, around $2)
- Clear fishing line ($3 for a spool)
- Sharp scissors
- Hole punch
- Small pieces of clear tape
- Paper templates for shapes like butterflies, stars, or clouds
Step-by-Step Process
- Gently remove individual pages from the book, being careful not to tear them.
- Using your templates, cut out various shapes (e.g., butterflies, stars, leaves) from the book pages.
- Punch a small hole at the top of each cut-out shape.
- Cut pieces of fishing line in varying lengths to create different hanging levels.
- Thread a fishing line through the hole of each shape and secure it with a small piece of clear tape or a tiny knot.
- Tie the other end of each fishing line to the embroidery hoop, distributing the shapes evenly.
- Adjust the lengths until the shapes balance nicely and hang freely.
- Add a loop of ribbon or additional fishing line to the top of the embroidery hoop for hanging the mobile securely from the ceiling.
5. Simple String Art Heart
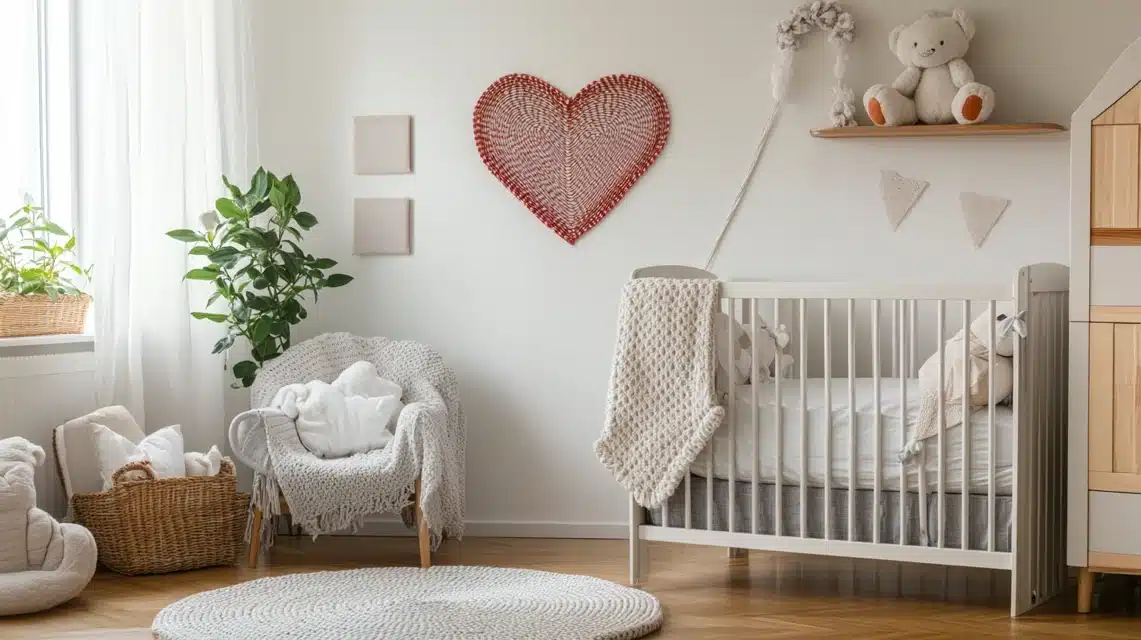
A heartwarming piece of string art can add a lovely texture and a personal touch to your baby’s room. This project is surprisingly simple to create and allows for endless color combinations with the string. A heart shape is perfect for a nursery, symbolizing love and warmth.
Tools & Materials Required
- Small wooden board (a common size, around $5)
- Small nails (a box typically costs $3)
- String or embroidery floss in your preferred color ($2)
- Hammer
- Heart-shaped template (can be printed or hand-drawn)
- Pencil
- Ruler (optional, for straight lines if desired)
Step-by-Step Process
- Sand the wooden board until it is smooth and free of splinters.
- Draw or trace your heart pattern onto the center of the wooden board using a pencil.
- Carefully place nails around the outline of your heart design, spacing them evenly (about 0.5 to 1 inch apart).
- Hammer the nails halfway into the board, ensuring they are sturdy but not fully embedded.
- Tie one end of your string or embroidery floss to a starting nail with a secure knot.
- Begin wrapping the string around the nails, crisscrossing it to create a dense, web-like pattern inside the heart.
- Continue wrapping until the entire heart shape is filled to your liking.
- Secure the end of the string with another knot to one of the nails and trim any excess.
- Add a picture hanging hook or command strips to the back for easy display.
6. Painted Mason Jar Organizers
Mason jars are incredibly versatile and can be transformed into beautiful and functional organizers for tiny baby essentials. Painting them in your nursery’s colors adds a decorative touch, perfect for storing cotton balls, pacifiers, small toys, or even tiny socks. They’re a charming way to keep clutter at bay.

Tools & Materials Required
- Several clean mason jars (various sizes, can be repurposed from food jars)
- Acrylic paint ($5 for a set of colors, ensure non-toxic)
- Assorted paintbrushes
- Fine-grit sandpaper (optional, for better paint adhesion)
- Clear sealer or topcoat (e.g., Mod Podge Outdoor or a clear spray sealant, around $4)
- Ribbon, twine, or lace for decoration
- Labels (optional, for clear organization)
Step-by-Step Process
- Wash the mason jars thoroughly with soap and water, then allow them to dry completely.
- Lightly sand the outer surface of each jar (optional but recommended for better paint grip).
- Apply a thin, even first coat of acrylic paint to the outside of each jar.
- Let the first coat dry completely, which may take an hour or more depending on paint thickness.
- Apply a second coat of paint for full coverage and vibrant color. Allow this to dry fully.
- Once the paint is completely dry, apply a clear sealer to protect the paint and give a smooth finish.
- Add decorative ribbon, twine, or lace around the neck of the jars for extra charm.
- Create and attach labels if you wish to clearly identify the contents of each jar.
7. Framed Button Art
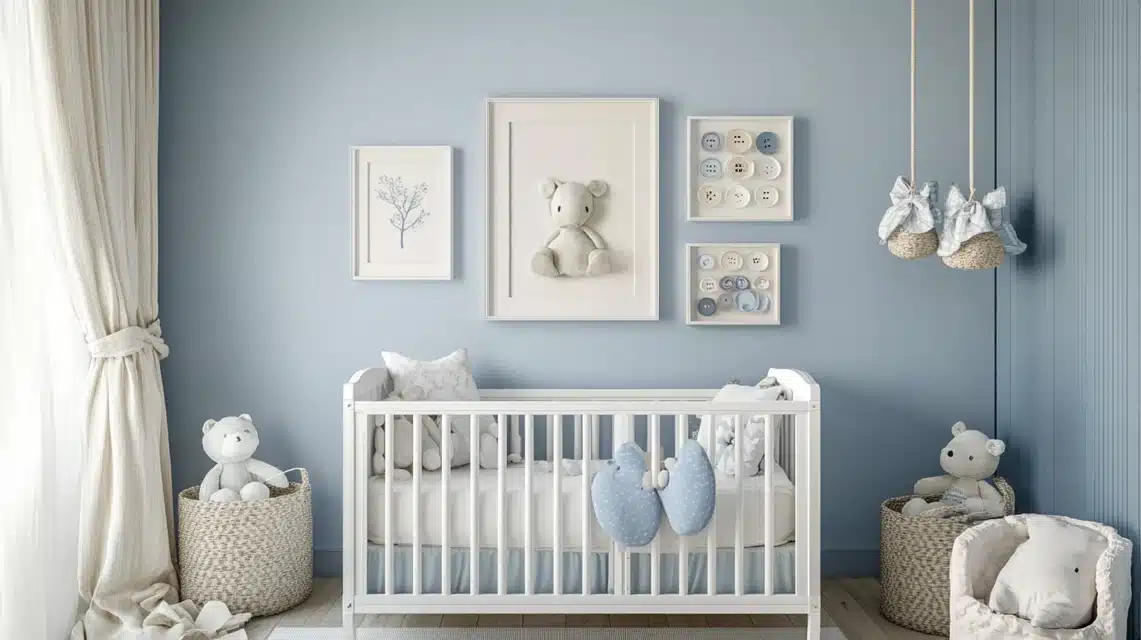
A unique piece of button art framed on the wall can add a delightful pop of color and texture to the nursery. This project allows for endless creativity in patterns and themes, from animals to abstract designs, and is a fantastic way to use up a collection of buttons. It’s an unexpectedly sophisticated touch for a baby’s room.
Tools & Materials Required
- An old or inexpensive picture frame ($5 from a thrift store or craft shop)
- Assorted buttons in various sizes and colors ($3-4 for a bag)
- Canvas or thick cardstock paper that fits the frame
- Hot glue gun and several glue sticks
- A simple pattern template (e.g., a heart, a letter, an animal silhouette)
- Pencil for tracing
Step-by-Step Process
- Draw or trace your desired design onto the canvas or thick paper that will fit inside your picture frame.
- Sort your buttons by color, size, or shape to make the assembly process easier.
- Lay out your button pattern loosely on the design to visualize the arrangement before gluing.
- Begin gluing the buttons from the center of your design and work outward, using a small dot of hot glue for each button.
- Continue adding buttons, overlapping them slightly if needed to create a full, textured look.
- Fill in any small gaps with tiny buttons or beads to ensure the design is complete.
- Let the glue dry completely for a few hours to ensure all buttons are securely attached.
- Place your finished button art carefully into the picture frame and hang it in the nursery.
8. Wall-Mounted Floating Shelves
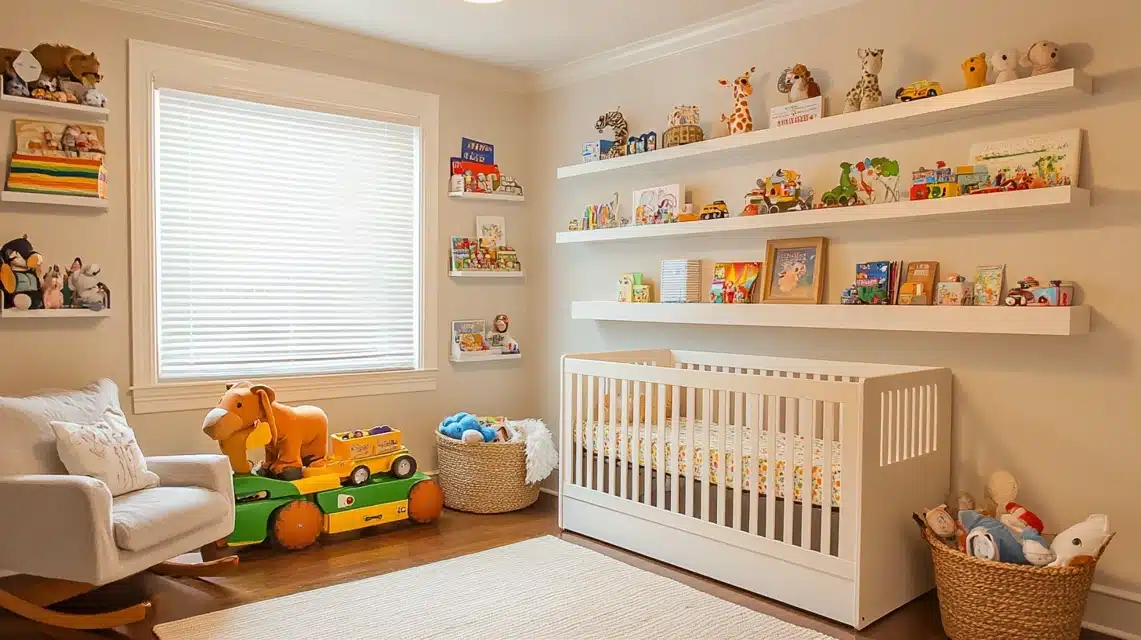
Floating shelves are a fantastic way to add both decor and functional storage to a nursery. They offer a clean, modern look and are perfect for displaying books, small toys, or other decorative elements. Building them yourself ensures they fit your space perfectly and saves significantly on cost.
Tools & Materials Required
- Wooden planks (pine or common board, around $10 for a few feet)
- Floating shelf brackets ($8 for a pair)
- Screwdriver or drill
- Level
- Pencil for marking
- Wall anchors (if not screwing into studs)
- Medium-grit sandpaper
- Paint or wood stain (optional, to match nursery decor)
Step-by-Step Process
- Sand the wooden planks smooth, removing any rough edges or splinters.
- If desired, paint or stain the shelves in your chosen color, then allow them to dry completely.
- Hold a shelf against the wall in your desired position and use a pencil to mark where the brackets will go.
- If not drilling into a stud, install appropriate wall anchors at your marked points.
- Attach the floating shelf brackets to the wall, ensuring they are level with each other.
- Place the shelf onto the installed brackets and use a level to double-check its horizontal alignment.
- Secure the shelves to the brackets with screws from underneath, following the bracket manufacturer’s instructions.
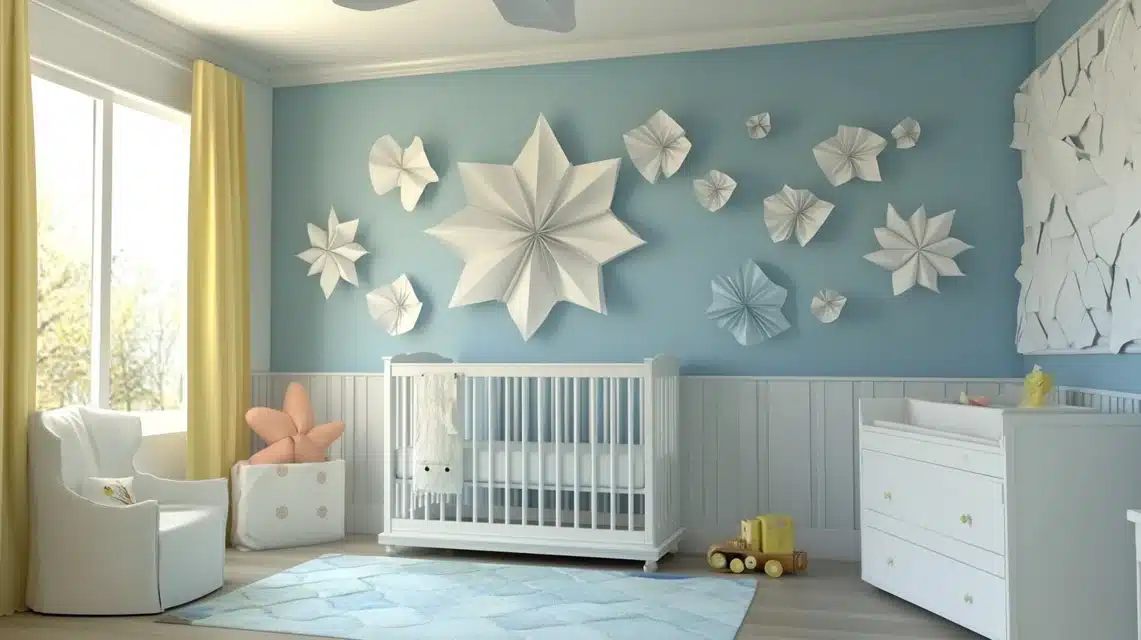
9. Paper Pinwheel Display
Paper pinwheels add a playful, whimsical, and colorful element to any nursery wall. They are incredibly easy to make and can be scaled to various sizes, creating a dynamic and visually interesting display. Choose patterned papers that align with your nursery’s theme for a truly coordinated look.
Tools & Materials Required
- Patterned or colored paper (a stack of scrapbook paper for $5)
- Sharp scissors
- Push pins or thumbtacks
- Craft glue or hot glue
- String or fishing line (optional, for hanging)
- Ruler
- Pencil
Step-by-Step Process
- Cut your paper into perfect squares of various sizes (e.g., 6×6 inches, 8×8 inches).
- Fold each paper square diagonally from corner to corner, then unfold.
- Make a cut along each diagonal fold, stopping about 1 inch from the center of the square.
- Take one corner of each cut section and fold it towards the center of the square. Repeat for alternate corners.
- Secure all four folded corners in the center with a push pin, thumbtack, or a dab of glue.
- Optionally, add a decorative button or a contrasting paper circle to cover the center pin.
- If hanging, attach a piece of string or fishing line to the back of the pinwheel.
- Create multiple pinwheels in different sizes and patterns for a varied display.
- Arrange and attach the pinwheels to the wall using additional push pins or command strips.
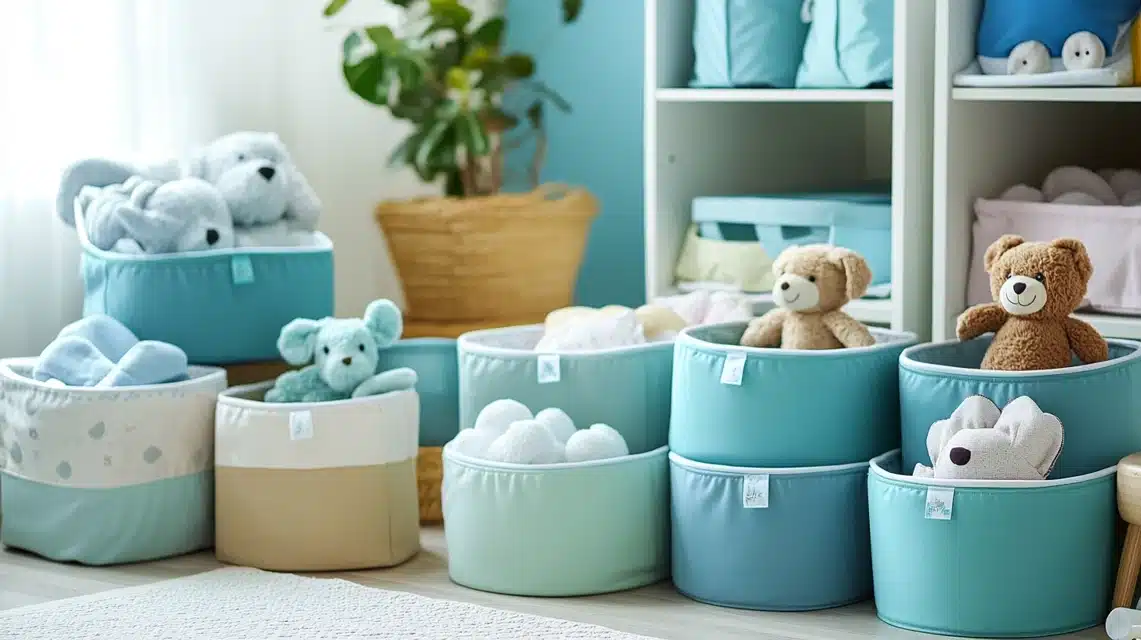
10. Fabric-Covered Storage Boxes
Cardboard boxes can be transformed into chic and practical storage solutions for the nursery by covering them with fabric. This DIY project is perfect for organizing diapers, wipes, small blankets, or toys, keeping the room tidy while adding a decorative element. Choose fabrics that complement your nursery’s color scheme and theme.
Tools & Materials Required
- Sturdy cardboard boxes (repurpose shoe boxes, delivery boxes, etc.)
- Fabric of your choice ($5-10 per yard, depending on type)
- Sharp fabric scissors
- Hot glue gun and plenty of glue sticks
- Ruler or measuring tape
- Iron (optional, for crisp fabric)
Step-by-Step Process
- If using new fabric, iron it smooth to remove any wrinkles.
- Measure all sides of your cardboard box, adding a few inches for overlap.
- Cut fabric pieces to size, ensuring enough excess to wrap around edges neatly.
- Starting with one side, apply hot glue to the box and carefully press the fabric onto it, smoothing out any bubbles.
- Neatly fold and glue the corners, ensuring a clean, tailored finish.
- Wrap the fabric over the top edges and glue it down on the inside of the box.
- Optionally, add decorative trim, ribbon, or handles for a more refined look.
- If your box has a lid, repeat the process to create a matching fabric-covered lid.
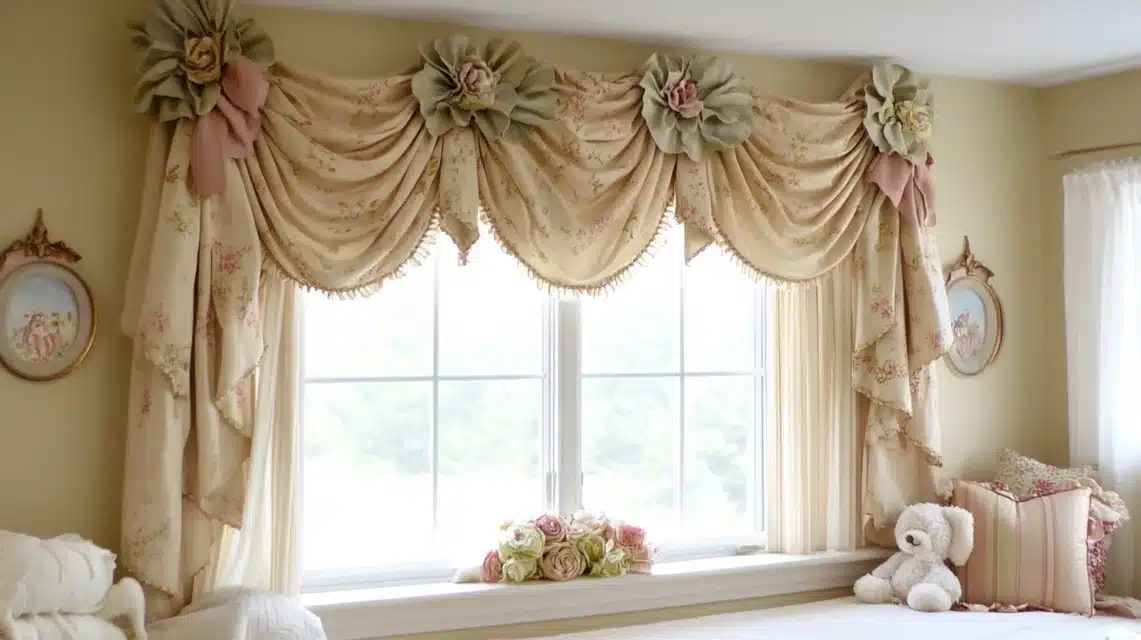
11. Window Valance From Old Sheets
A simple valance made from an old sheet or fabric can add a soft, decorative touch to your nursery window without the expense of custom curtains. This project is a fantastic way to recycle textiles and infuse your baby’s room with personalized color and pattern. Choose a lightweight fabric for an airy feel.
Tools & Materials Required
- Old sheets, pillowcases, or fabric remnants (zero cost if repurposed)
- Curtain rod ($8 for a basic adjustable one)
- Sharp fabric scissors
- Iron and ironing board
- Sewing pins (optional, for precise folding)
- Fabric glue (for a no-sew option) or sewing machine/needle and thread
- Measuring tape
Step-by-Step Process
- Measure the width of your window and decide on the desired length of your valance.
- Cut your fabric to size, adding extra length for a rod pocket at the top and a hem at the bottom and sides.
- Iron all edges flat and create neat hems by folding and pressing the fabric twice.
- Fold down the top edge to create a pocket for the curtain rod, ensuring it’s wide enough for the rod to slide through easily.
- Secure all hems and the rod pocket using fabric glue or by sewing them.
- Optionally, add decorative trim, fringe, or appliqués along the bottom edge for extra flair.
- Install curtain rod brackets above your window and thread the valance onto the rod.
- Hang the valance, adjusting the gathers for an even and appealing look.
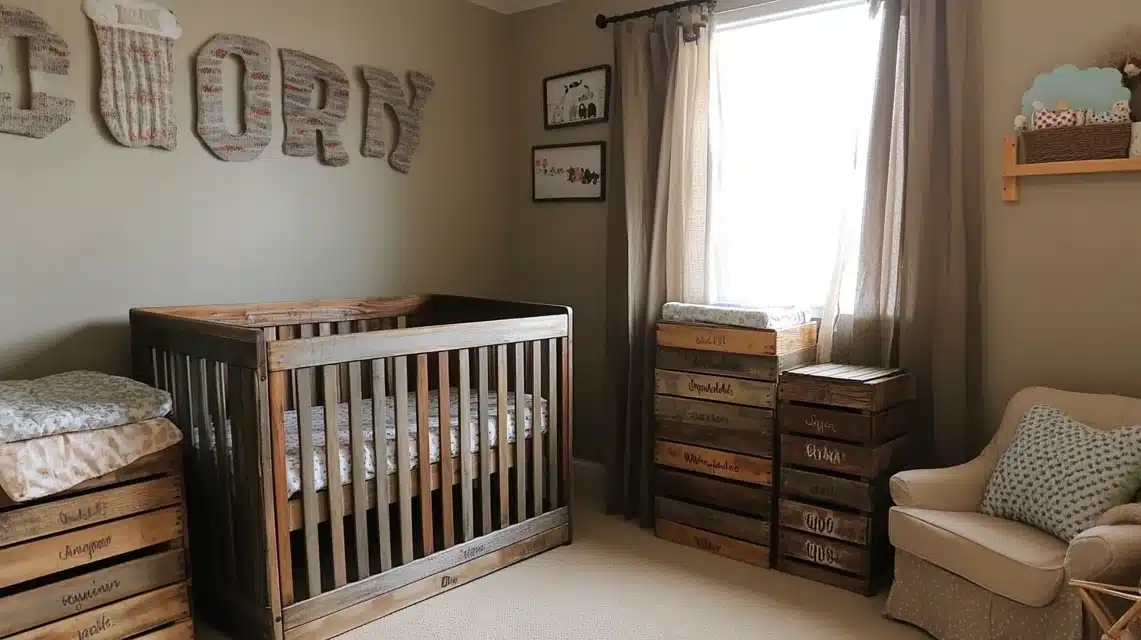
12. Painted Wooden Crates
Wooden crates are incredibly versatile for nursery storage, and painting them allows for complete customization to fit your decor. They can be stacked, placed on the floor, or even mounted on the wall (securely!) to hold books, toys, or diapering supplies. This adds a rustic yet clean organizational solution.
Tools & Materials Required
- Unfinished wooden crates ($8 each, often found at craft stores or hardware stores)
- Acrylic or latex paint (ensure non-toxic, baby-safe)
- Paintbrushes or rollers
- Medium-grit sandpaper
- Clear sealer or topcoat (optional, for durability)
- Wall brackets and screws (if mounting on wall)
- Screwdriver or drill
Step-by-Step Process
- Sand all surfaces of the wooden crates until they are smooth, removing any splinters.
- Wipe off any sawdust with a damp cloth and allow the crates to dry completely.
- Apply a coat of primer if the wood is very porous or you are using light paint colors over dark wood.
- Paint the crates with your chosen color, ensuring even coverage on all sides.
- Allow the first coat to dry fully, then apply a second coat for a professional finish.
- Once the paint is completely dry, apply a clear sealer for added protection and durability (especially if they will be handled frequently).
- If mounting on the wall, attach sturdy wall brackets to the back of the crates, ensuring they are level.
- Mount the crates securely to the wall, making sure they are well-anchored and cannot fall.
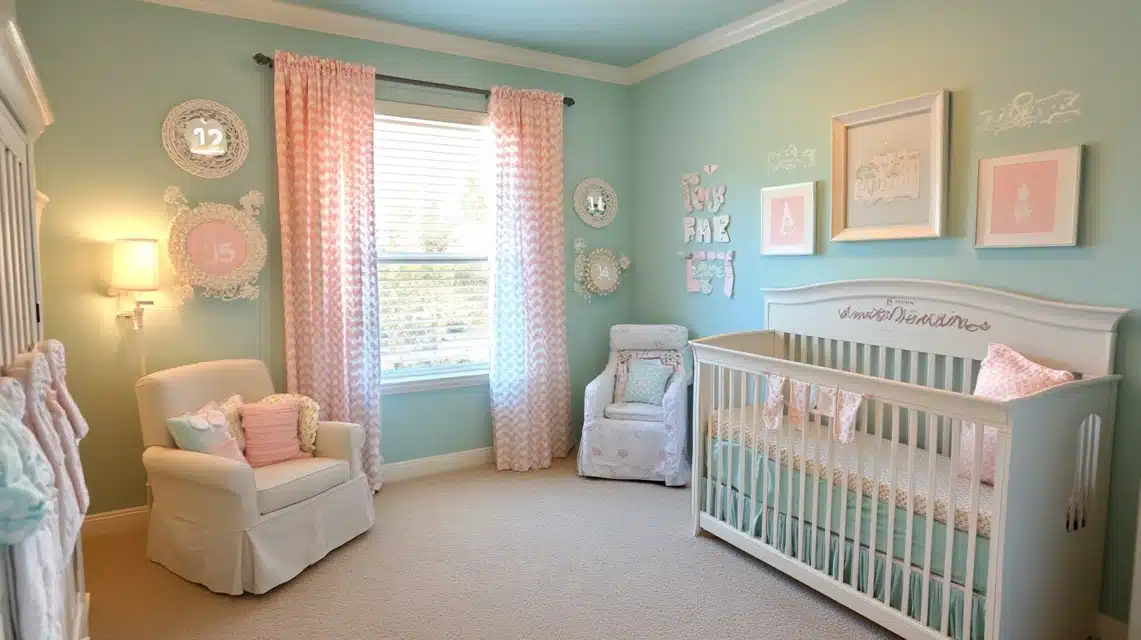
13. Wall Name Banner
A personalized name banner for your baby’s room creates a heartfelt focal point and celebrates their arrival. Using soft felt, this project is easy, budget-friendly, and offers endless possibilities for color and shape. It’s a wonderful way to add a custom touch above the crib or changing table.
Tools & Materials Required
- Felt sheets in various colors ($1 each from craft stores)
- Sharp scissors
- Letter templates (can be printed from a computer or drawn freehand)
- Matching ribbon or twine for hanging
- Hot glue gun and glue sticks
- Ruler (for straight banner cuts)
Step-by-Step Process
- Print or draw letter templates for your baby’s name or chosen word.
- Trace the letters onto felt sheets and carefully cut them out.
- Cut out banner shapes (rectangles, triangles, or cloud shapes) from contrasting felt colors for the letter backgrounds.
- Arrange the felt letters onto their respective banner shapes to ensure proper spacing and alignment.
- Using a hot glue gun, securely glue each felt letter onto its banner shape.
- Once all letters are attached, arrange the banner shapes in order along a length of ribbon or twine.
- Glue the top edge of each banner shape over the ribbon, ensuring even spacing between each letter.
- Allow the glue to dry completely before hanging the personalized name banner on the nursery wall.
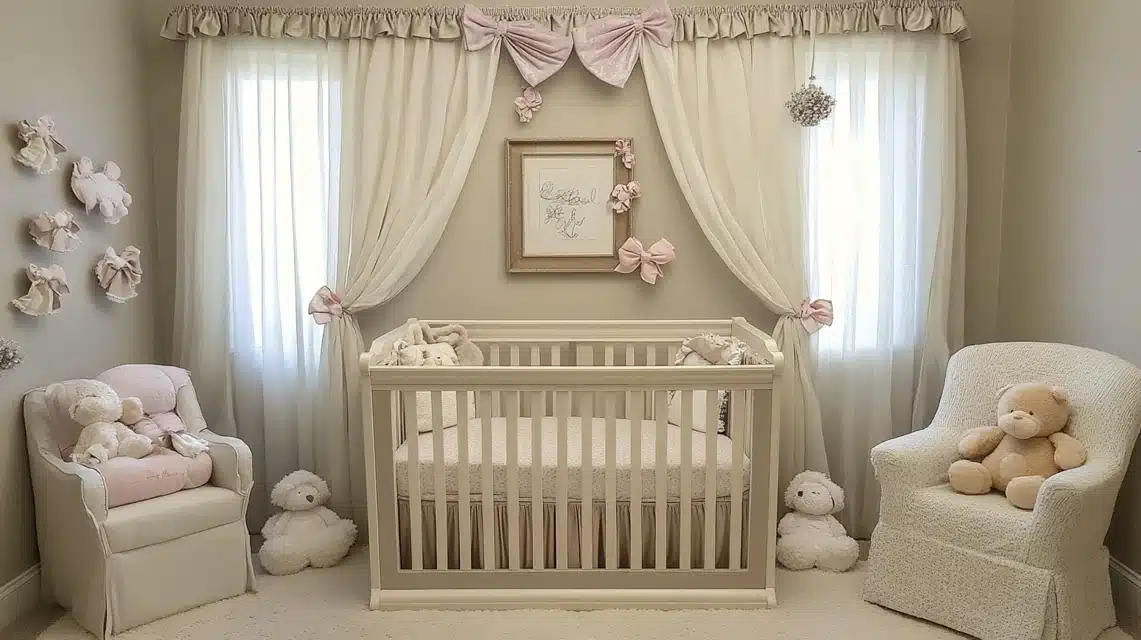
14. Repurposed Picture Frame Bow Holder
For little girls with an abundance of adorable bows and headbands, a repurposed picture frame bow holder is both functional and decorative. It keeps accessories organized and easily visible while adding a charming, elegant touch to the nursery wall. It’s an ingenious way to upcycle an old frame into a practical decor piece.
Tools & Materials Required
- An old or inexpensive picture frame (any size will work, consider a larger one for more bows)
- Ribbon in various widths and colors
- Staple gun and staples (or strong fabric glue)
- Paint (optional, to update the frame’s color)
- Sharp scissors
- Hooks or hanging hardware for the wall
Step-by-Step Process
- Remove the glass, matting, and backing from the picture frame, keeping only the frame itself.
- If desired, paint the frame to match your nursery decor and allow it to dry completely.
- Cut several lengths of ribbon, each long enough to stretch across the width of the frame with some overlap.
- Lay out the ribbons on the back of the frame, spacing them evenly apart.
- Using a staple gun (or strong fabric glue), securely attach one end of each ribbon to the back of the frame.
- Pull each ribbon taut across the frame and staple the other end to the opposite side, ensuring they are straight.
- Add appropriate hanging hardware to the back of the frame, if it doesn’t already have it.
- Mount the finished bow holder on the nursery wall and start hanging all those adorable bows and headbands!
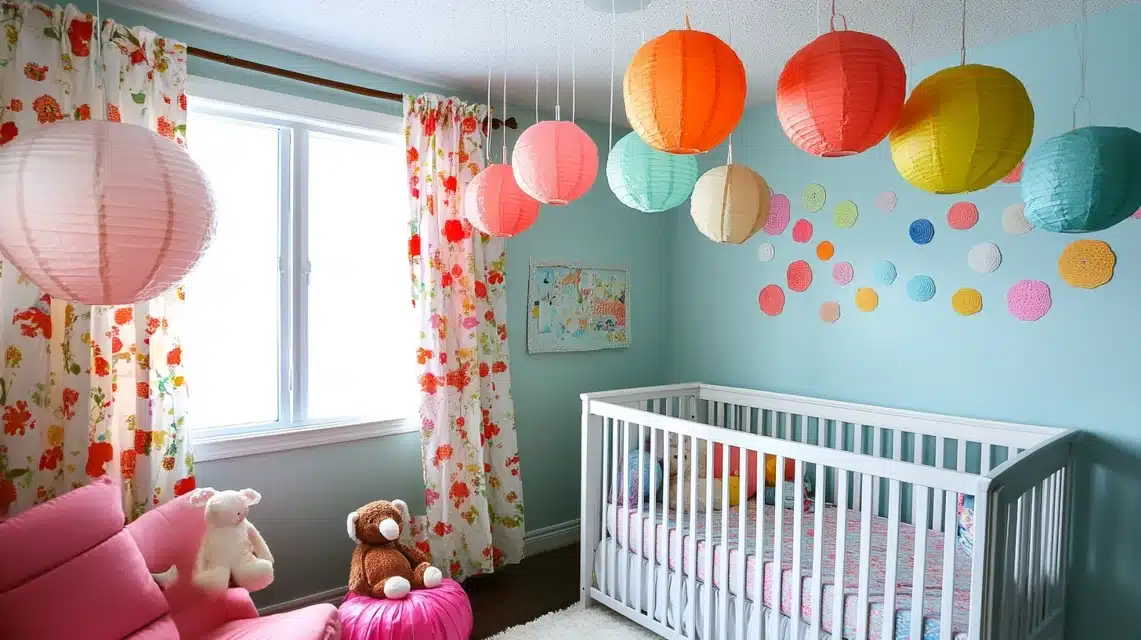
15. Paper Lantern Cluster
A cluster of paper lanterns creates a soft, diffused light and a whimsical atmosphere in the nursery. Hung at varying heights, they add depth and visual interest, making the room feel magical. Opt for string lights inside for an enchanting glow, ensuring all electrical components are safely out of reach.
Tools & Materials Required
- Paper lanterns in various sizes and colors ($2 each)
- Battery-operated string lights or LED light pucks (if internal lighting is desired)
- Clear fishing line or decorative ribbon for hanging
- Small ceiling hooks or command hooks
- Scissors
- Tape (optional, for securing lights inside)
Step-by-Step Process
- Carefully assemble each paper lantern according to its instructions.
- If using, insert battery-operated string lights or an LED light puck into each lantern, securing the battery pack with tape if needed.
- Cut varying lengths of fishing line or ribbon for hanging each lantern.
- Attach a ceiling hook or command hook to the ceiling where you want your cluster.
- Tie one end of the fishing line to the top of a lantern and the other to a ceiling hook, varying the hanging lengths to create a cluster effect.
- Space the lanterns evenly, ensuring they don’t bump into each other.
- Double-check all connections and ensure lights are secure if used.
- Test the lights to ensure they function correctly and create the desired ambiance.
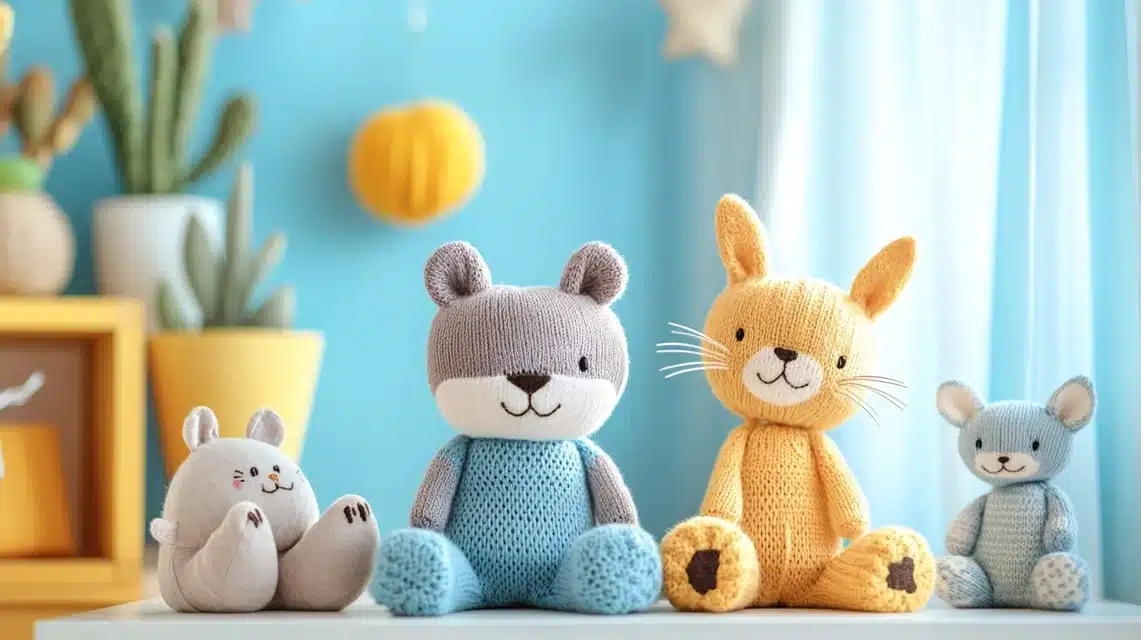
16. Sock Animal Friends
Transform colorful, clean socks into adorable, cuddly animal friends for your baby’s nursery! These handmade soft toys add a personal and whimsical touch, perfect for decoration or gentle play (under supervision). It’s a wonderful way to use mismatched socks and create unique companions.
Tools & Materials Required
- Clean, patterned or colorful socks (new or freshly washed)
- Fiberfill stuffing ($4 for a bag)
- Buttons or felt scraps for eyes/nose (use felt for infants to avoid choking hazards)
- Embroidery thread or regular sewing thread
- Sharp scissors
- Sewing needle
- Small felt scraps for ears, tails, or other details
Step-by-Step Process
- Turn the sock inside out. Depending on the animal, you might draw lines to create the head, body, and limbs.
- Sew the bottom of the sock closed (or create a shape for the head/body) using a strong stitch.
- Turn the sock right side out.
- Firmly stuff the sock with fiberfill to create the animal’s body shape.
- Use felt scraps to cut out ears, a nose, or other features.
- Carefully sew on buttons for eyes (if for older children/display) or securely sew on felt circles for baby-safe eyes. Add a felt nose and mouth.
- Add any final details like a tail or embroidered patterns.
- Display the sock animal friends safely, away from the crib if they contain small parts, or as supervised play items.
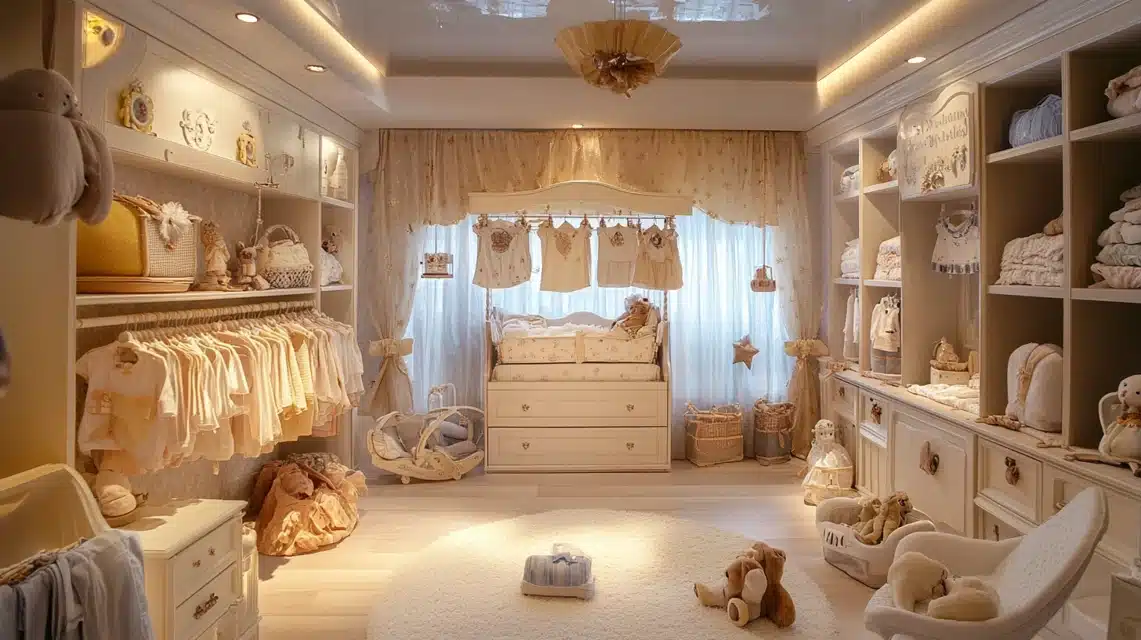
17. Baby Clothes Display Line
Showcase those adorable tiny baby outfits and cherished onesies on a simple display line. This creative solution acts as both decor and a nostalgic display, adding a personal and heartwarming touch to the nursery. It’s a wonderful way to admire growth and memories.
Tools & Materials Required
- Decorative twine or sturdy string
- Mini clothespins ($3 for a bag)
- Small wall hooks or decorative nails
- A selection of special baby outfits, onesies, or booties
- Level
- Hammer (if using nails)
- Pencil
Step-by-Step Process
- Decide where you want your display line. Mark two points on the wall, ensuring they are at an appropriate height and distance apart.
- Install wall hooks or hammer in decorative nails securely at your marked points.
- Tie one end of the twine to a hook or nail, then stretch it across to the other, tying it securely.
- Use a level to ensure the line is perfectly straight before finalizing the knots.
- Attach mini clothespins to the twine at regular intervals.
- Clip your special baby outfits, tiny socks, or booties onto the clothespins.
- Space the items evenly to create a visually appealing display.
- Ensure the ends of the twine are very secure and that no items can easily fall into the crib.
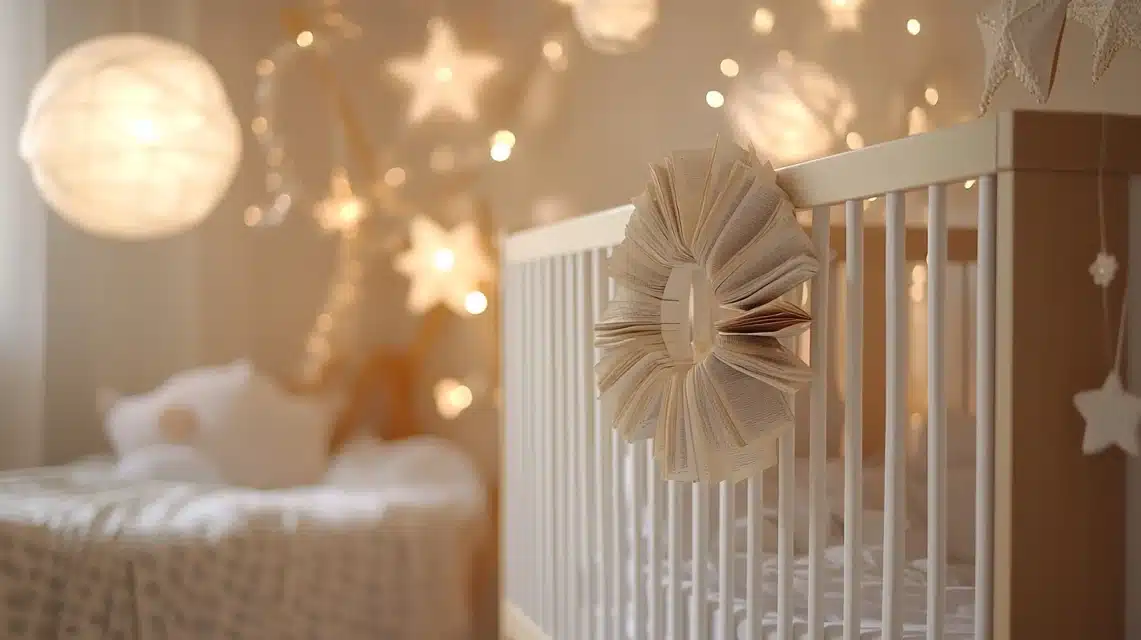
18. Book Page Wreath
A wreath crafted from the pages of an old book offers a sophisticated and charming decor piece for the nursery. It adds a touch of vintage elegance and a subtle nod to the magic of storytelling. This project allows you to create a beautiful, textured wall hanging with minimal expense.
Tools & Materials Required
- Pages from an old book (a paperback novel works well)
- Wreath form (straw, foam, or wire, around $4)
- Hot glue gun and plenty of glue sticks
- Sharp scissors
- Ribbon or burlap for decoration and hanging
- Spray paint (optional, if you want to add a subtle color wash)
Step-by-Step Process
- Carefully remove several pages from an old book.
- Roll each book page into a cone shape, securing the tip with a tiny dab of hot glue. You’ll need many of these.
- Begin gluing the paper cones to the wreath form, starting from the innermost edge and working your way outwards.
- Continue layering the cones, overlapping them slightly, to create a full and textured wreath.
- Fill in any visible gaps with smaller cones or by adjusting existing ones to ensure a lush look.
- Once the wreath is covered, add a decorative ribbon bow or a simple loop for hanging.
- Attach a sturdy hanger to the back of the wreath.
- Mount the finished book page wreath on the nursery wall or door.
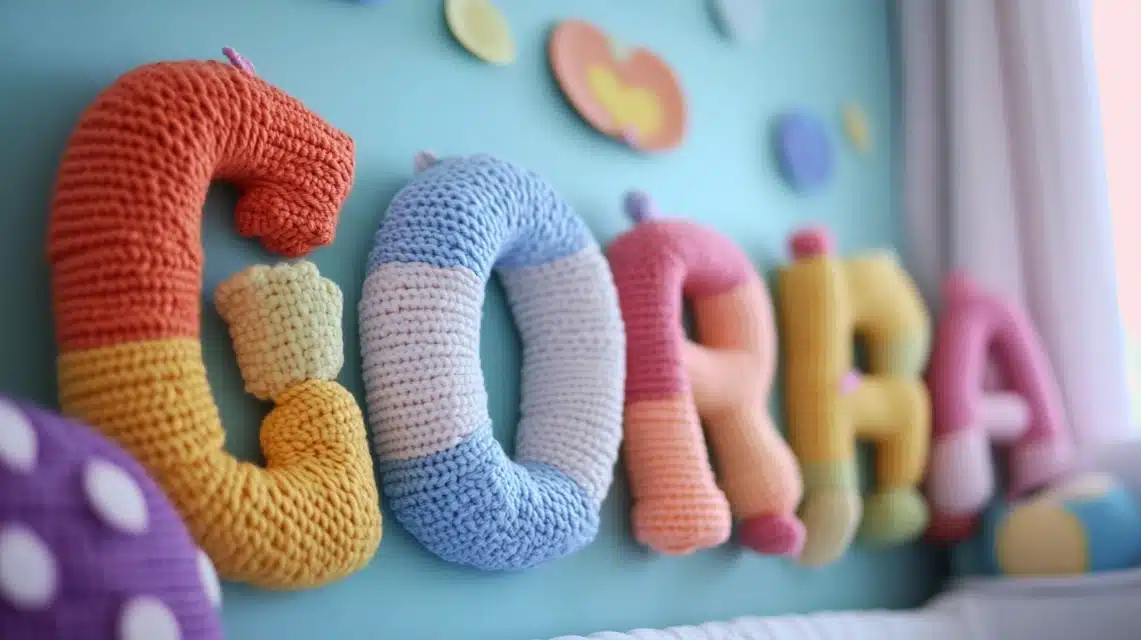
19. Yarn-Wrapped Letters
Yarn-wrapped letters are a cozy and textured addition to any nursery, spelling out your baby’s name or a sweet word like “LOVE” or “DREAM.” This project is relaxing to create and allows for endless color combinations and textures with different yarns. It adds softness and a handcrafted charm to the wall.
Tools & Materials Required
- Cardboard or wooden letters (around $2 each, often found at craft stores)
- Yarn in your chosen colors and textures ($3 per skein)
- Sharp scissors
- Hot glue gun and a few glue sticks
- Small hooks or ribbon for hanging
Step-by-Step Process
- Begin by applying a small dot of hot glue to the back of a cardboard or wooden letter, preferably at a corner.
- Press the end of your yarn onto the glue and hold until secure.
- Start tightly wrapping the yarn around the letter, covering all surfaces. Ensure each wrap is snug against the previous one to avoid gaps.
- Periodically add a small dab of hot glue to the back of the letter to secure the yarn as you go, especially on corners and intricate curves.
- Continue wrapping until the entire letter is completely covered in yarn.
- If desired, change yarn colors mid-letter for a striped or multi-colored effect. Secure the old color with glue and start the new color the same way.
- Trim any excess yarn and glue the final end securely to the back of the letter.
- Create small loops of yarn or ribbon on the back for easy hanging.
- Arrange your finished yarn-wrapped letters on the wall to spell out a name or meaningful word.
Approximate Budget Analysis to Create This Idea
Creating a beautiful, custom nursery on a budget is absolutely achievable! Based on the materials required for the 19 DIY projects listed above, here’s an approximate budget analysis. Remember, these are estimates, and costs can vary depending on where you source your materials (e.g., craft stores, discount stores, repurposing items from home).
| Category | Item | Cost ($) |
|---|---|---|
| Basic Supplies | Paint and brushes (acrylic, non-toxic) | 10 |
| Hot glue gun and glue sticks | 8 | |
| Basic tools (scissors, ruler, sandpaper) | 7 | |
| Mounting items (Command strips, wall hooks) | 5-10 | |
| Total (Basic Supplies) | 25-35 | |
| Wall Decor Projects | Wooden letters (for name/message) | 12 |
| Cardstock paper for flowers/pinwheels | 5 | |
| Picture frames (repurposed or inexpensive) | 8 | |
| String art supplies (board, nails, string) | 5 | |
| Wall hooks and hangers | 5 | |
| Total (Wall Decor Projects) | 30-40 | |
| Storage Solutions | Mason jars (new or repurposed) | 5-8 |
| Unfinished wooden crates | 8-10 | |
| Fabric for covered boxes | 5 | |
| Labels and extras for organization | 5 | |
| Total (Storage Solutions) | 20-30 | |
| Fabric Items | Fabric for bunting (scraps or fat quarters) | 8 |
| Old sheets for valance | 0 (reused) | |
| Felt for banners (sheets) | 7 | |
| Yarn for wrapping letters/decor | 5 | |
| Extra ribbon and trim | 5 | |
| Total (Fabric Items) | 25-35 | |
| Decorative Elements | Paper lanterns (with optional lights) | 10 |
| Book pages (reused from old books) | 0 (reused) | |
| Buttons and small embellishments | 5 | |
| Sock animal supplies (stuffing, felt) | 8 | |
| Total (Decorative Elements) | 20-30 |
Based on these estimates, your Overall Total Budget Range for creating a beautifully decorated nursery with these DIY projects would be approximately $120 – $170. This demonstrates how much you can save compared to purchasing ready-made decor while achieving a unique and personal space!
How to Personalize & Customize These DIY Nursery Ideas
One of the greatest joys of DIY decor is the ability to infuse your unique style and your baby’s personality into every piece. Here’s how you can personalize and customize these ideas:
1. Creative Color Changes
I’ve found that simply changing the colors is the easiest and most impactful way to make any item seamlessly match your nursery theme. Consider these adjustments:
- Paint wooden items: Use acrylic or latex paints (ensure they are non-toxic) in your chosen shades for wooden letters, crates, or shelves.
- Pick coordinating fabrics and papers: Select fabric for bunting or storage boxes, and cardstock for paper flowers or pinwheels, that perfectly fit your nursery’s palette.
- Mix and match yarn: For yarn-wrapped letters, combine different colored yarns to create stripes, ombré effects, or a multi-toned, textured look.
2. Incorporating Your Baby’s Name
Adding your baby’s name or initials makes the nursery feel truly special and dedicated to them. Here are a few ideas:
- Labels on storage: Paint or stencil your baby’s name (or initials) onto painted storage boxes or mason jars.
- Integrated wall art: Instead of simple shapes, incorporate the initial of their name into button art or string art designs.
- Name-themed hangings: Use the Wall Name Banner project, but also consider creating a mobile with letters that spell out their name.
3. Thoughtful Size Adjustments
Tailor the size of your DIY creations to perfectly fit the dimensions of your nursery, ensuring everything looks proportionate and intentional:
- Wall art scale: Make paper flowers or string art pieces larger to fill an empty wall, or smaller to fit into a gallery wall arrangement.
- Shelf dimensions: Adjust the length of floating shelves to perfectly span a specific wall space or fit between windows.
- Mobile components: Scale paper shapes for mobiles up or down to suit the visual balance of the mobile and the room.
4. Clever Mix and Match Combinations
Don’t limit yourself to just one project! Combining different DIY ideas can create a rich, layered, and visually appealing nursery:
- Layered wall decor: Add small, decorative buttons to framed art pieces, or place paper flowers around painted wooden letters.
- Textured displays: Mix yarn-wrapped letters with fabric bunting for a variety of textures on a single wall.
- Integrated storage: Place painted mason jar organizers on wall-mounted floating shelves for a cohesive look.
5. Innovative Material Swaps
Experimenting with different materials can dramatically change the look and feel of a project, allowing for even greater personalization:
- Fabric alternatives: Instead of plain cotton, use denim for storage boxes for a more rugged look, or soft flannel for bunting for a cozy feel.
- Paper alternatives: Switch paper for felt in some projects like pinwheels or mobiles for a softer texture and muted look.
- Rope instead of yarn: Try cotton rope or macrame cord instead of yarn for wrapped letters for a more bohemian or natural aesthetic.
6. Seamless Theme Integration
If your nursery has a specific theme, ensure your DIY projects align with it. This creates a cohesive and immersive environment for your baby:
- Woodland wonderland: Add tiny felt forest animals to the fabric bunting or paint woodland creatures onto wooden crates.
- Celestial dreams: Include stars, moons, or rocket ships in your book page mobile or as elements in paper flower displays.
- Under-the-sea adventure: Put sea creatures like fish, whales, or mermaids in your button art or as designs on painted mason jars.
How to Make the Nursery Cozy & Comfortable for Your Little One
Beyond aesthetics, a baby’s nursery should be a haven of comfort and calm. Here are my top tips for creating a truly cozy and nurturing environment:
1. Soft, Layered Lighting Options
I quickly learned that lighting makes an enormous difference in creating a serene atmosphere. Avoid harsh overhead lights and instead focus on layered, gentle illumination:
- Vary light sources: Hang paper lanterns at different heights to create soft, ambient light across the room.
- Warm bulbs: Use soft white or warm-toned LED bulbs in all lamps and fixtures to mimic natural light.
- Strategic nightlights: Place dim nightlights in corners or near the changing table for gentle guidance during nighttime feeds without fully waking the baby.
- Adjustable window treatments: Keep window treatments light enough to let in natural light during the day but provide room-darkening capabilities for nap times and night.
2. Inviting Texture Mixing
Adding a variety of textures appeals to a baby’s developing senses and makes the room feel more inviting and plush:
- Soft underfoot: Place soft, washable rugs on the floor to provide a comfortable surface for crawling and play, and to absorb sound.
- Layered fabrics: Mix different fabric types on windows, such as sheer curtains under blackout drapes, or use varying textures in your DIY bunting.
- Diverse materials: Incorporate a mix of smooth wood, fuzzy faux fur, soft knits, and quilted items through blankets, pillows, and wall hangings.
3. Smart and Accessible Storage
An organized room feels calmer. Smart storage keeps things neat but always within easy reach:
- Easy-reach baskets: Put daily-use items like burp cloths, swaddles, or small toys in open, accessible baskets on shelves or the floor.
- Decorative boxes: Store extra supplies, seasonal clothes, or keepsakes in your painted fabric-covered boxes.
- Pretty jars for small items: Use your painted mason jars for cotton swabs, pacifiers, or hair accessories.
- Changing area efficiency: Keep all diapering items (diapers, wipes, creams) immediately next to the changing area for convenience and safety.
4. Comfortable Seating Area
A designated comfy spot is essential for feeding, cuddling, and reading to your baby:
- Plush cushions: Ensure your glider or rocking chair has soft, supportive cushions for extended periods of holding and feeding.
- Nearby side table: Keep a small table or floor bin next to the chair for water, a book, or your phone.
- Footrest for relaxation: Add an ottoman or footrest to elevate your feet, enhancing comfort during those long nights.
- Supplies within arm’s reach: Stock a small caddy or basket with burp cloths, nipple cream, and other essentials right by your seating area.
5. Optimal Temperature Control
Maintaining a comfortable room temperature is crucial for your baby’s sleep and well-being:
- Sunlight management: Use curtains or blinds to block out harsh sunlight and help regulate the room’s temperature, especially on hot days.
- Blanket readiness: Keep a light, breathable blanket handy for cooler moments, ensuring it’s used safely and not in the crib for unsupervised infants.
- Air circulation: Use a small, quiet fan in the summer to help circulate air, positioning it safely away from the crib.
- Draft checks: Regularly check windows and doors for drafts, sealing any gaps to maintain consistent warmth in colder months.
6. Effective Sound Management
Creating a peaceful and quiet space helps your baby sleep soundly:
- Sound-absorbing decor: Add soft items like thick rugs, upholstered furniture, and fabric wall hangings to absorb sound and reduce echoes.
- Noise containment: Store noisy toys in closed boxes or fabric bins to minimize ambient sounds when not in use.
- Quiet drawers: Apply felt pads to the bottoms of drawers and cabinet doors to prevent loud slamming.
- Door stoppers: Use soft door stoppers or wedges to prevent doors from slamming shut, preserving quiet sleep.
Top 5 Organizational Hacks for a Tidy Nursery
A well-organized nursery is a functional nursery. Keeping things in order not only makes daily routines smoother but also creates a calmer environment for both parent and baby. Here are my top 5 organizational hacks:
| Category | Tip |
|---|---|
| Group Storage System | Put similar items in clear containers or bins so you can easily see what’s inside. |
| Label every box and bin clearly – even if you think you’ll remember, a label saves time! | |
| Sort items by size and type (e.g., all bibs together, all bodysuits in one drawer). | |
| Keep frequently used daily items at eye level or within easy arm’s reach. | |
| Store extra or seasonal supplies higher up or in less accessible spots. | |
| Door Space Utilization | Add over-the-door hooks to the back of the nursery door for robes, blankets, or even a diaper bag. |
| Hang a clear, over-the-door shoe organizer for small items like socks, headbands, or feeding supplies. | |
| Store small, lightweight items in the organizer’s pockets for quick access. | |
| Place frequently used things in the lower pockets for convenience. | |
| Keep a small stash of diaper supplies here for emergencies or quick changes. | |
| Clothing Management | Sort clothes by size, and then by type (e.g., 0-3 month onesies, 3-6 month sleepsuits). |
| Use drawer dividers or small bins within drawers to keep different clothing types separate. | |
| Roll smaller items like onesies, pajamas, and blankets to save space in drawers. | |
| Keep the next size up of clothing ready and easily accessible for when your baby grows. | |
| Regularly remove too-small items (weekly or bi-weekly) to avoid clutter and make space. | |
| Supplies Station Setup | Assemble a dedicated changing table caddy with all essentials for quick and easy diaper changes. |
| Always keep wipes within arm’s reach – never too far! | |
| Organize creams, lotions, and powders in small, labeled bins or compartments. | |
| Store extra packages of diapers and wipes in larger boxes or drawers below the changing table. | |
| Check your supply stock weekly to ensure you’re always prepared. | |
| Toy Control & Rotation | Use open bins or baskets to categorize toys by type (e.g., soft toys, rattles, blocks). |
| Rotate toys monthly to keep things fresh and prevent your baby from becoming overwhelmed with too many options. | |
| Keep favorite or currently used toys easy to reach, while others are stored away. | |
| Store books spine-out on shelves for easy browsing and selection. | |
| Designate specific spots for toys to make cleanup easy for older children and adults alike. |
Conclusion
Creating a cozy, functional, and adorable nursery for your little one truly doesn’t mean emptying your wallet. As I’ve shown through these ideas, with a little creativity and a willingness to embrace the DIY spirit, you can craft a space that is brimming with personality and love, all while staying well within a reasonable budget.
By utilizing these 19 budget-friendly DIY projects, many parents can achieve a beautifully decorated baby’s room for an overall estimated cost of just $120-170. This empowers you to save significant funds that can be allocated to other essential baby needs.
Remember to always prioritize safety in all your DIY projects. Ensure that items are securely fastened, use non-toxic materials, and keep any small pieces or long cords well out of reach of tiny hands. Take your time to plan your design, gather your materials, and work through each step with care. Your baby’s room should be a beautiful sanctuary that is both practical and safe.
I would absolutely love to hear how these ideas transform your nursery! Don’t hesitate to start with just one or two projects that best fit your personal style and budget. Leave a comment below to share your wonderful creations or ask any questions you might have. For more budget-friendly tips and creative ideas for your baby’s room, be sure to explore my other guides, such as my detailed instructions on DIY Baby Mobiles.
