DIY Gnome Crafting: Your Complete Guide to Creating Adorable Handmade Gnomes for Every Season
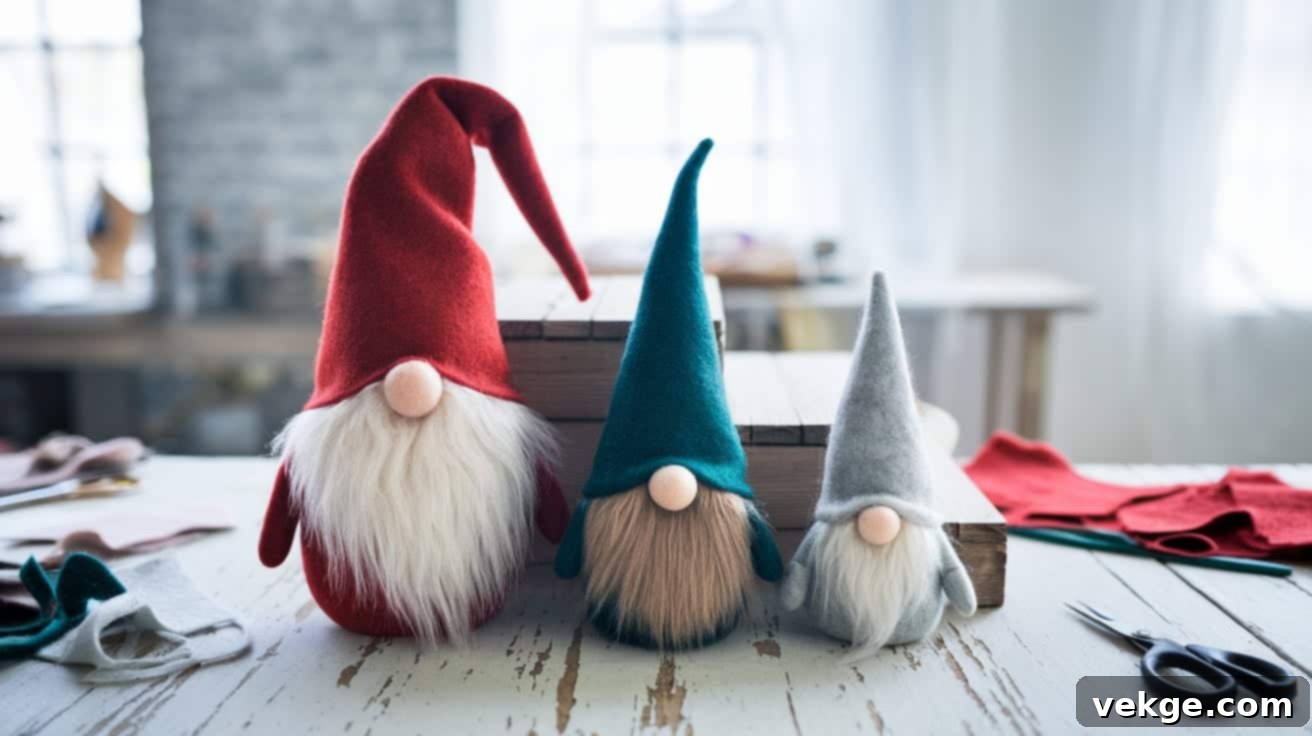
Small in size yet immeasurably grand in charm, handmade gnomes have lovingly woven their way into the hearts of craft enthusiasts and home decorators across the globe. These whimsical figures, instantly recognizable by their iconic pointy hats and luxuriant fluffy beards, possess an unparalleled ability to infuse warmth, character, and a touch of playful magic into any living space, not just during holidays but throughout the entire year.
The enduring appeal of gnomes lies in their remarkable versatility. Whether gracing a mantelpiece as festive Christmas decorations, peeking out from spring flower arrangements, or adding a cozy touch to autumnal displays, gnomes effortlessly adapt to every season, celebration, and decor theme. Their seemingly simple yet captivating design makes them an ideal project for crafters of all skill levels, from absolute beginners to seasoned artisans. More than just a craft, creating these delightful figures offers an expansive canvas for personal touches, imaginative flair, and profound creative expression.
If you’ve ever dreamt of crafting your own charming gnome collection, this comprehensive guide is your perfect starting point. We’ll delve into everything you need to know about gnome crafting, equipping you with essential techniques, exploring a diverse range of material options, and sparking your imagination with inspiring ideas to bring these lovable, mythical characters vibrantly to life. Prepare to embark on a delightful DIY gnome-making journey filled with easy-to-follow steps, budget-friendly options, and endless possibilities for unique handmade creations!
Getting Started with Your Gnome Crafts Journey
What Are Gnome Crafts and Why Are They So Popular?
Gnome crafts involve creating enchanting decorative figures that bring a unique blend of charm and character to any home or garden. These small, often bearded figures with their distinctive pointy hats have deep roots in Scandinavian folklore, where they were traditionally known as “tomtes” or “nisse.” In these tales, gnomes were benevolent household spirits, guardians of the farm and family, ensuring good fortune and protecting against mischief.
Today’s crafted gnomes offer a fresh, modern take on these traditional designs, making them perfectly suited for contemporary home decor. They come in a vast array of sizes and styles, from tiny ornaments that can adorn a shelf to large, whimsical garden guardians, each capable of exuding its own unique personality and style. Their popularity has surged due to their endearing appearance and the joyful experience of crafting them, providing a comforting and whimsical element to any setting.
One of the most appealing aspects of DIY gnomes is their accessibility. Crafters can easily make them using simple, readily available materials found at home or at local craft stores. The basic gnome design typically consists of three main components: a weighted body that allows them to stand, a prominent, often fluffy beard, and a cone-shaped hat that gives them their iconic and unmistakable silhouette.
Essential Materials and Tools You’ll Need for Gnome Making
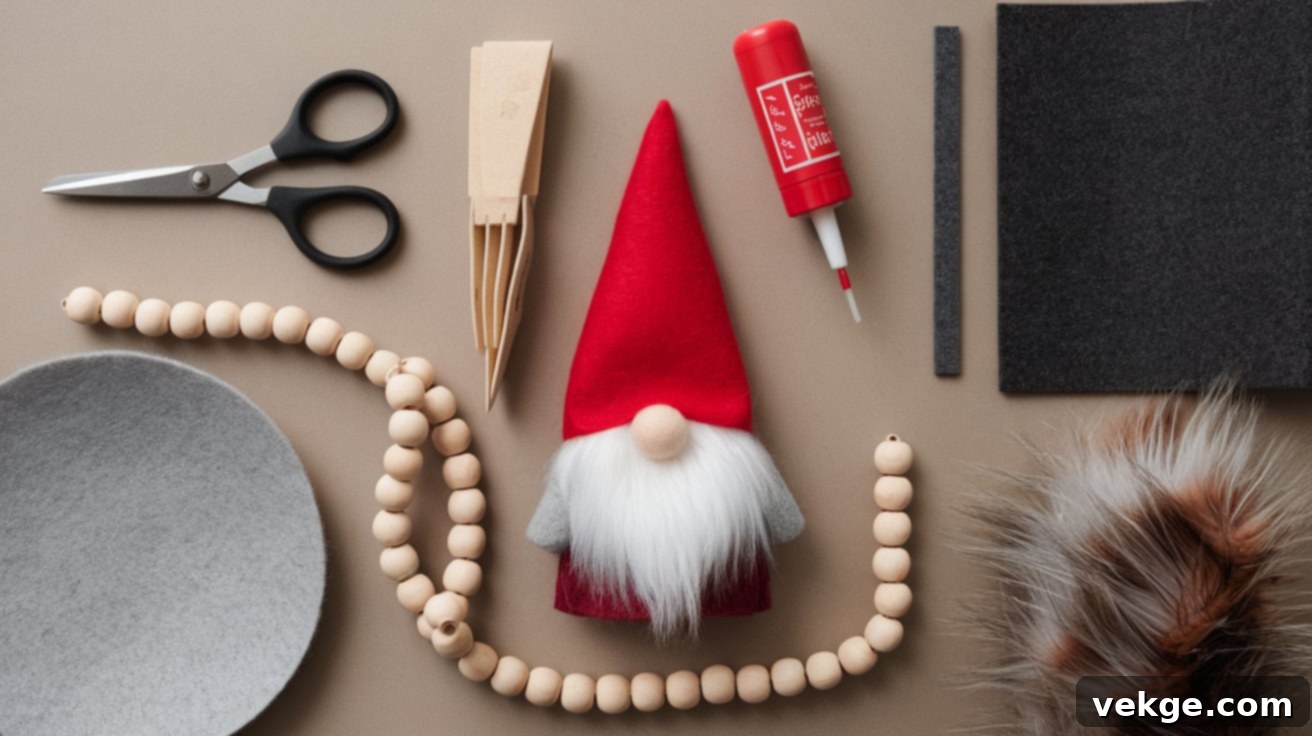
Gathering your supplies is the first exciting step in your gnome crafting adventure. The core materials for handmade gnomes are often simpler than you might anticipate. You’ll primarily need a sturdy base material like socks or a piece of fabric for the gnome’s body, along with a filling agent such as rice, poly pellets, or even dried beans to provide weight and stability. For the signature beard, faux fur fabric or a generous skein of yarn works wonderfully, offering a range of textures and colors.
The gnome’s distinctive hat is typically crafted from felt or a soft cotton fabric, allowing for flexibility in shaping and decoration. To complete the facial features, small wooden beads or even felt balls are perfect for creating the nose. Essential tools for assembly include a hot glue gun (and plenty of glue sticks!), sharp fabric scissors, and a measuring tape to ensure precise cuts and proportions. Having a craft knife can also be incredibly useful, especially when working with faux fur.
For those looking for budget-friendly alternatives, creativity is key! Old sweaters or fuzzy socks can be repurposed for the gnome’s body, adding unique textures. Instead of faux fur, a beard can be intricately crafted from a thick, fluffy yarn, creating a distinct and charming look. Many successful crafters frequent dollar stores, thrift shops, or simply repurpose materials they already have at home, proving that beautiful gnomes don’t require expensive supplies.
Top Tips for Successful Gnome Crafting Every Time
Embarking on any craft project means prioritizing safety and smart practices. When working with a hot glue gun and sharp tools like scissors or craft knives, safety should always come first. Ensure you have a clean and organized workspace to prevent accidents, and if children are involved, always provide close supervision. Teaching them proper tool handling early on instills good crafting habits.
A crucial tip for creating realistic and attractive beards is in how you cut faux fur. Always use a craft knife or the very tips of sharp scissors to cut only the fabric backing from the back side, rather than cutting through the fur strands themselves. This technique helps preserve the natural flow and length of the fur, creating a much better-looking beard and preventing unnecessary wastage of often expensive material. Always remember: cut from the back!
For beginners, store-bought patterns can be incredibly helpful, offering clear guidelines and measurements to ensure a successful first project. However, don’t be afraid to experiment! You can easily create your own unique gnome patterns using simple paper templates. Start with crafting smaller gnomes to practice your techniques and build confidence before moving on to larger, more intricate projects. This incremental approach allows you to master the basics and refine your style, leading to more satisfying results.
Seasonal and Holiday Gnome Ideas to Inspire Your Creativity
1. Festive Christmas Gnomes
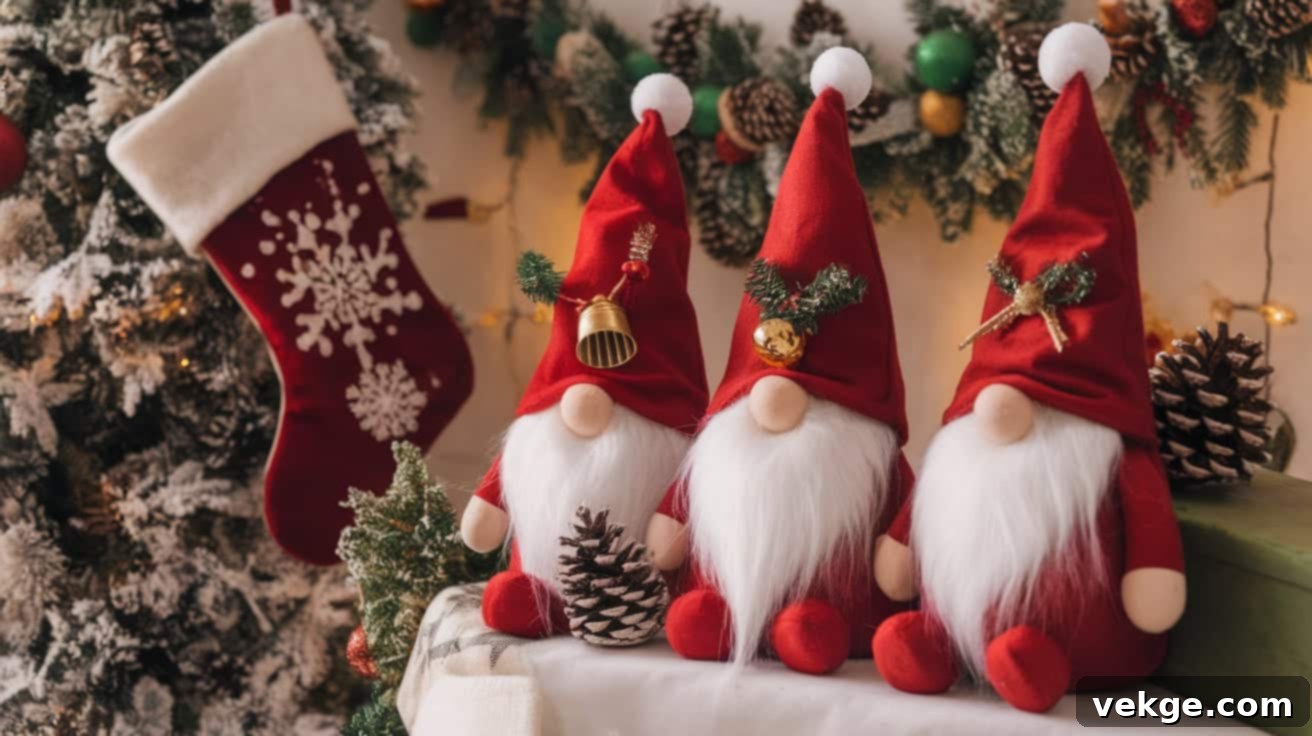
Christmas gnomes are perhaps the most popular and beloved of all seasonal gnome designs, adding an extra layer of joy and festive cheer to holiday decorations. Small gnome ornaments can be hung on Christmas trees, offering a charming, personalized touch, while larger gnomes make perfect centerpieces for holiday tables or welcoming figures by the fireplace. These delightful characters embody the spirit of the season, bringing smiles to all who see them.
Classic Santa-style gnomes typically feature vibrant red hats and long, flowing white beards, creating an unmistakable holiday look. Using soft materials like fuzzy socks for the body and plush fabrics for the hats enhances their cozy appeal, making them perfect as heartfelt handmade gifts. To truly enhance the holiday spirit, many crafters embellish their Christmas gnomes with tiny bells, miniature pine cones, sparkling ribbons, or even miniature candy canes. Placing these gnomes near stockings, on mantels, or tucked into wreaths instantly creates a warm and inviting winter wonderland atmosphere throughout the home.
2. Spooky and Playful Halloween Gnomes
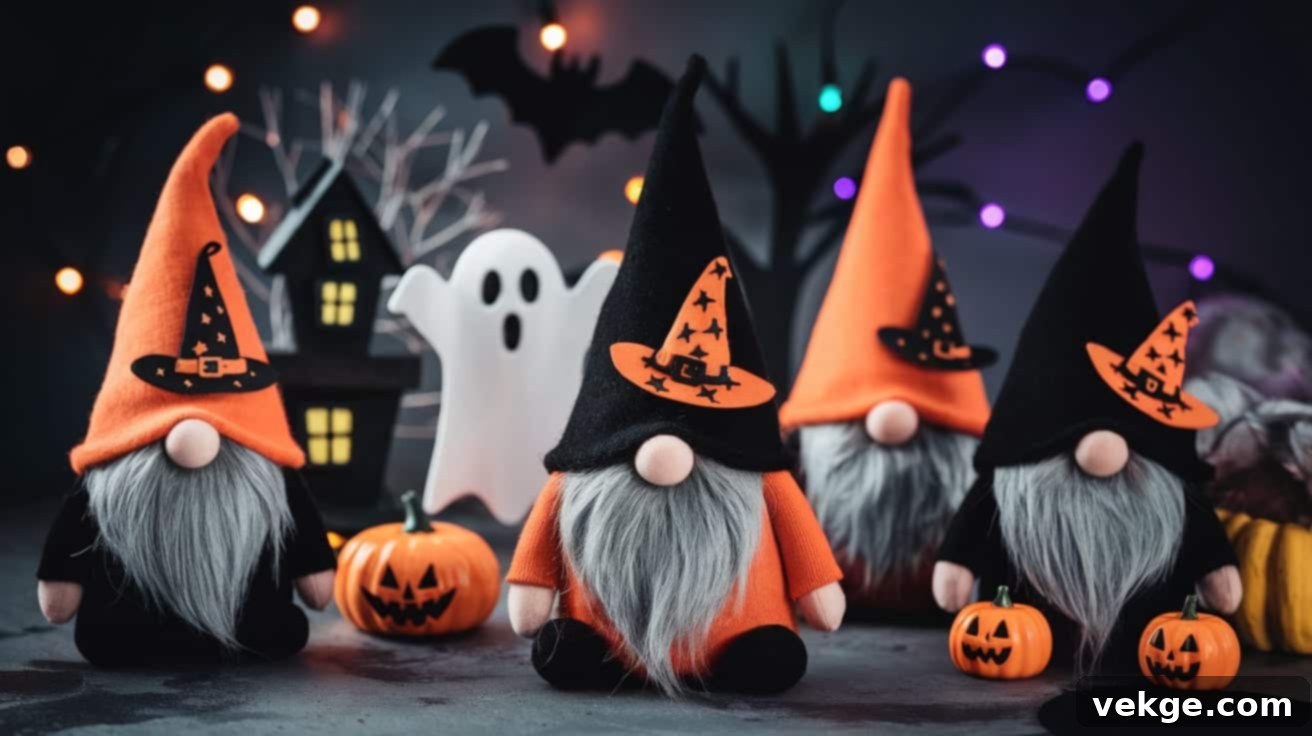
Halloween gnomes embrace a wonderfully playful spooky style, perfect for adding whimsical fright to your seasonal decor. They often sport black hats and beards in shades of gray, black, or even deep purple and orange. Small additions can dramatically transform a regular gnome into a Halloween masterpiece: think tiny witch hats, mini pumpkins, spooky spiderwebs, or even miniature broomsticks. Consider using fabrics with Halloween-themed patterns, such as bats, ghosts, or classic orange and black plaids.
For an extra eerie effect, incorporate light-sensitive or glow-in-the-dark materials. Adding small, battery-operated tea lights or LED string lights inside transparent or lightly colored gnome bodies can make these figures glow mysteriously at night, creating a truly enchanting and slightly spooky ambiance. These gnomes are fantastic for decorating entryways, party tables, or as fun companions for trick-or-treaters.
3. Cozy Fall and Autumn Gnomes
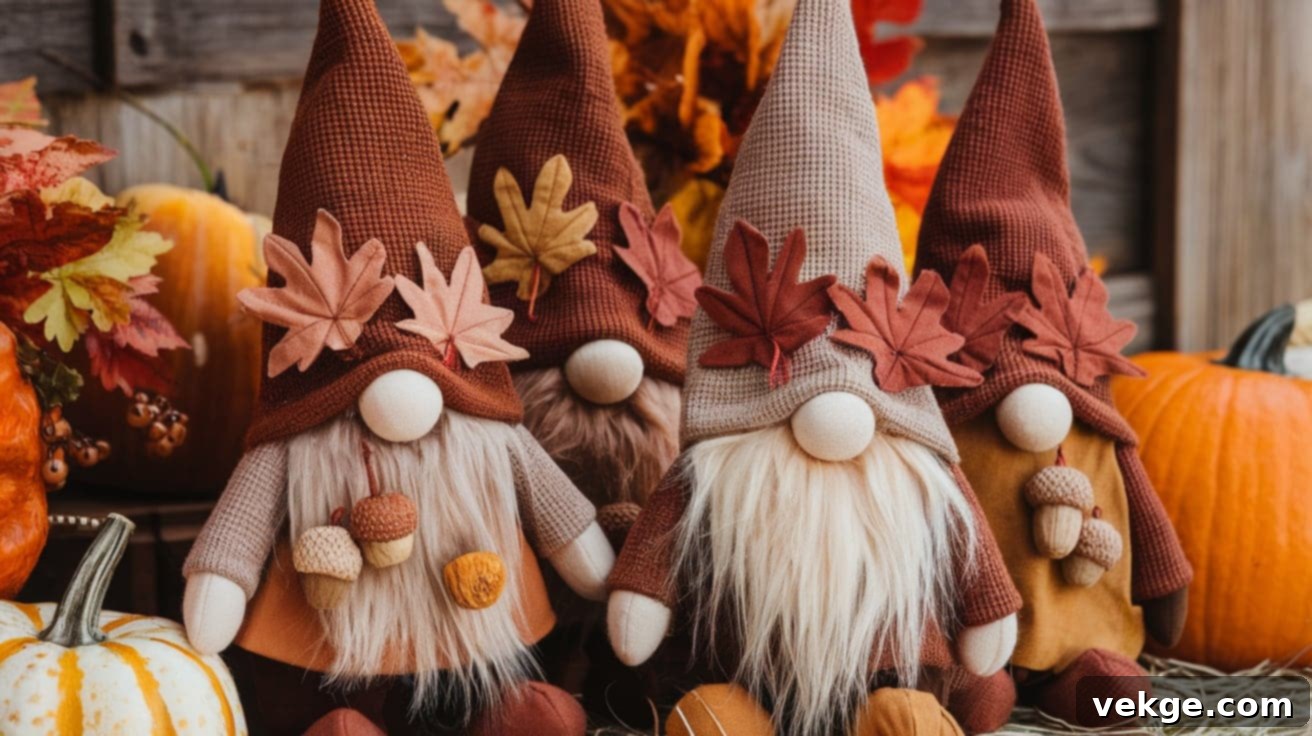
Fall gnomes beautifully showcase the rich, warm color palette of autumn, bringing a sense of coziness and harvest abundance to your home. Design choices for these gnomes often feature earth-toned fabrics such as deep reds, burnt oranges, golden yellows, and forest greens. Incorporating natural materials like miniature pine cones, small acorns, dried berries, or cinnamon sticks enhances their seasonal appeal, reflecting the bounty of the harvest.
These gnomes frequently sport hats in shades of brown, rust, or deep orange, often with matching accents. Crafters might add small fabric leaves, tiny gourds, or even miniature hay bales to the gnomes’ hats or bases for an extra touch of autumn flair. Placed alongside pumpkins, cornucopias, or fall foliage, these handmade gnomes create a welcoming and rustic atmosphere perfect for Thanksgiving and the entire autumn season.
4. Fresh Spring and Easter Gnomes
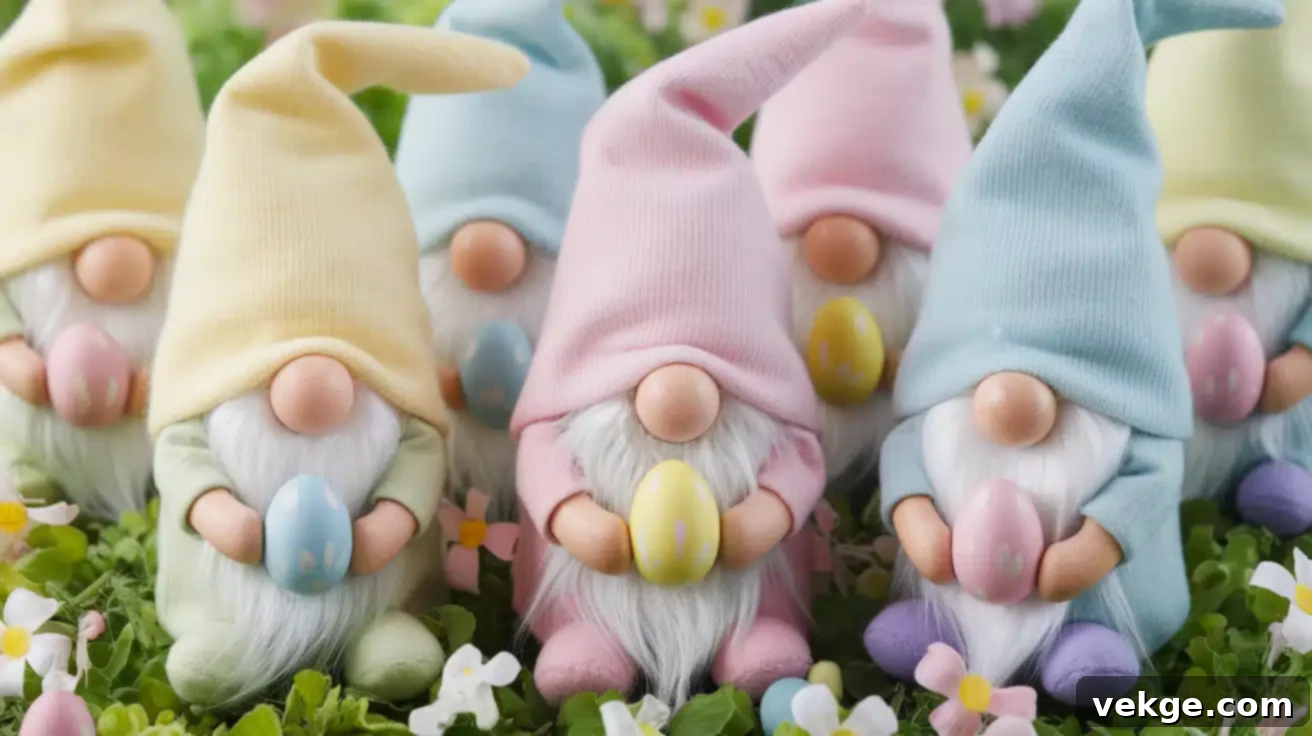
Springtime brings wonderful opportunities for creating gnomes in delicate pastel colors and light, airy designs that celebrate renewal and fresh beginnings. Easter-themed versions of these charming figures often sport soft yellow, blush pink, sky blue, or mint green hats, adorned with coordinating decorations. Their beards might be lighter in color, perhaps cream or a very light gray, to match the gentle spring aesthetic.
Small fabric flowers, painted wooden eggs, delicate butterflies, or tiny ladybugs perfectly complement these seasonal figures, adding to their fresh appeal. Crafters often enjoy creating pairs or groups of spring gnomes and displaying them among fresh flowers, potted plants, or vibrant greenery to truly capture the essence of the season. The key to successful seasonal gnomes lies in selecting materials and colors that authentically match the traditional elements and emotional feel of each holiday, making them not just decorations, but true harbingers of the season.
Step-By-Step DIY Gnome Crafting: A Beginner’s Guide
STEP 1: Creating the Stable Base for Your Gnome
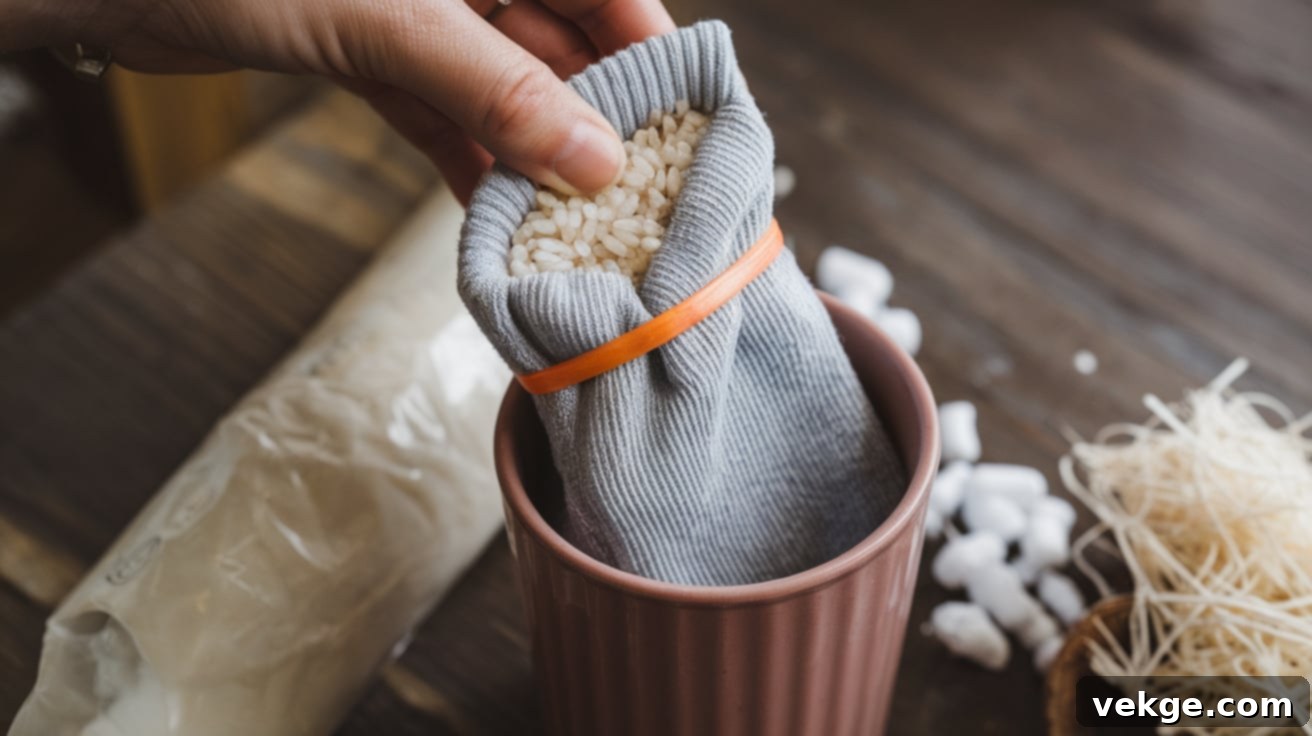
The foundation of a great gnome is a stable and well-weighted base. Begin by measuring approximately 48 ounces (or about 3 cups) of rice, poly pellets, or dried beans for the gnome’s body. This amount typically provides a good weight for a medium-sized gnome, ensuring it stands upright without tipping. Next, gently stretch a sock (preferably a plain, thick one) over a large cup or a wide-mouthed jar. This makes the filling process much easier and prevents spills.
Carefully pour the measured filling into the sock, ensuring it settles evenly at the bottom. Once filled, gather the sock’s opening tightly and secure it with a strong rubber band, twisting it several times to create a firm closure. For added security and to ensure the base maintains its shape, apply a small amount of hot glue around the rubber band. This crucial step prevents any filling from escaping and gives your gnome a solid, dependable foundation.
STEP 2: Crafting the Signature Gnome Beard
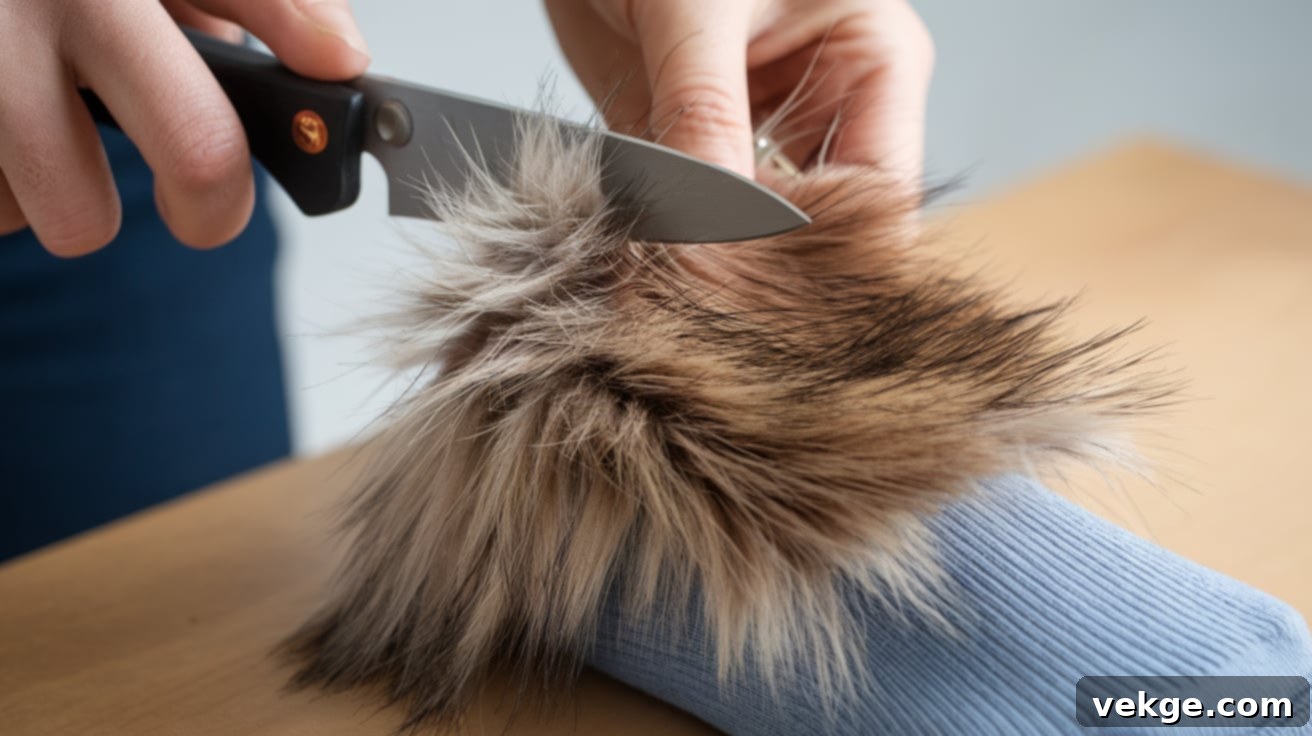
The beard is a defining characteristic of any gnome, giving it personality and charm. If using faux fur, carefully cut your desired beard shape from the back side of the fabric using a sharp craft knife or the very tips of your scissors. Remember the golden rule: cut only the fabric backing to keep the fur strands intact, ensuring a natural, flowing finish. A common beard shape is a gentle U or V, wide at the top and narrowing towards the bottom.
Once cut, position the fur beard on the gnome’s body. Start by placing the top edge of the beard approximately 1 to 1.25 inches below the secured top of the sock base. This placement allows enough space for the hat to sit comfortably later. Use hot glue to firmly attach the beard to the body. As you glue, gently shape the fur to angle slightly downward from front to back, allowing it to drape naturally and giving the gnome a more organic appearance.
STEP 3: Adding the Charming Facial Features
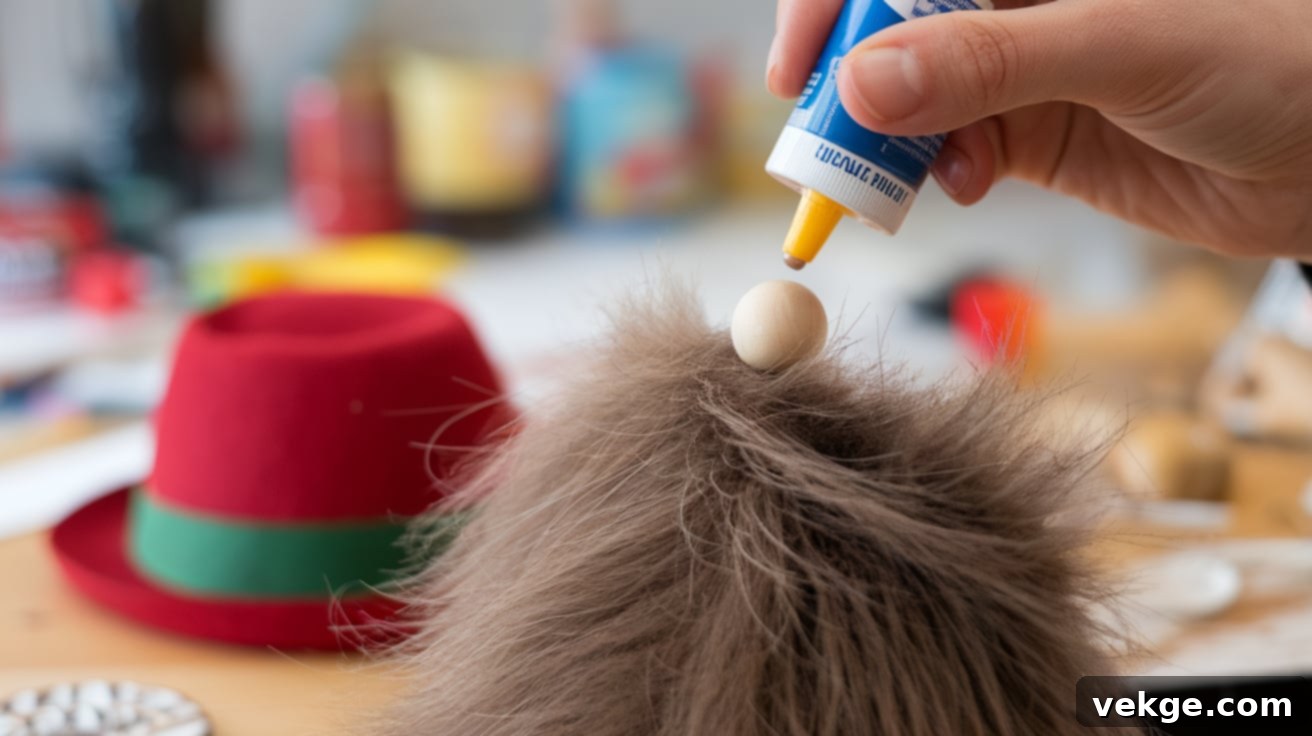
The gnome’s nose is a small but incredibly important detail that brings personality to your creation. For the nose, select a wooden bead or a small pom-pom ball that is proportionate to your gnome’s size. Position this element in the center of the upper beard area, just above where the beard begins to fan out. Apply a generous dab of hot glue to secure it firmly in place, pressing gently until the glue sets.
Once the nose is securely attached, you’ll want to make it look like it’s emerging naturally from the beard. Gently fluff the fur around the nose using a fork, a comb, or even your fingertips. This step helps to blend the nose seamlessly into the beard, creating a more finished, realistic, and charming look for your gnome. Take your time with this step, as it significantly impacts the gnome’s overall expression.
STEP 4: Crafting the Iconic Gnome Hat
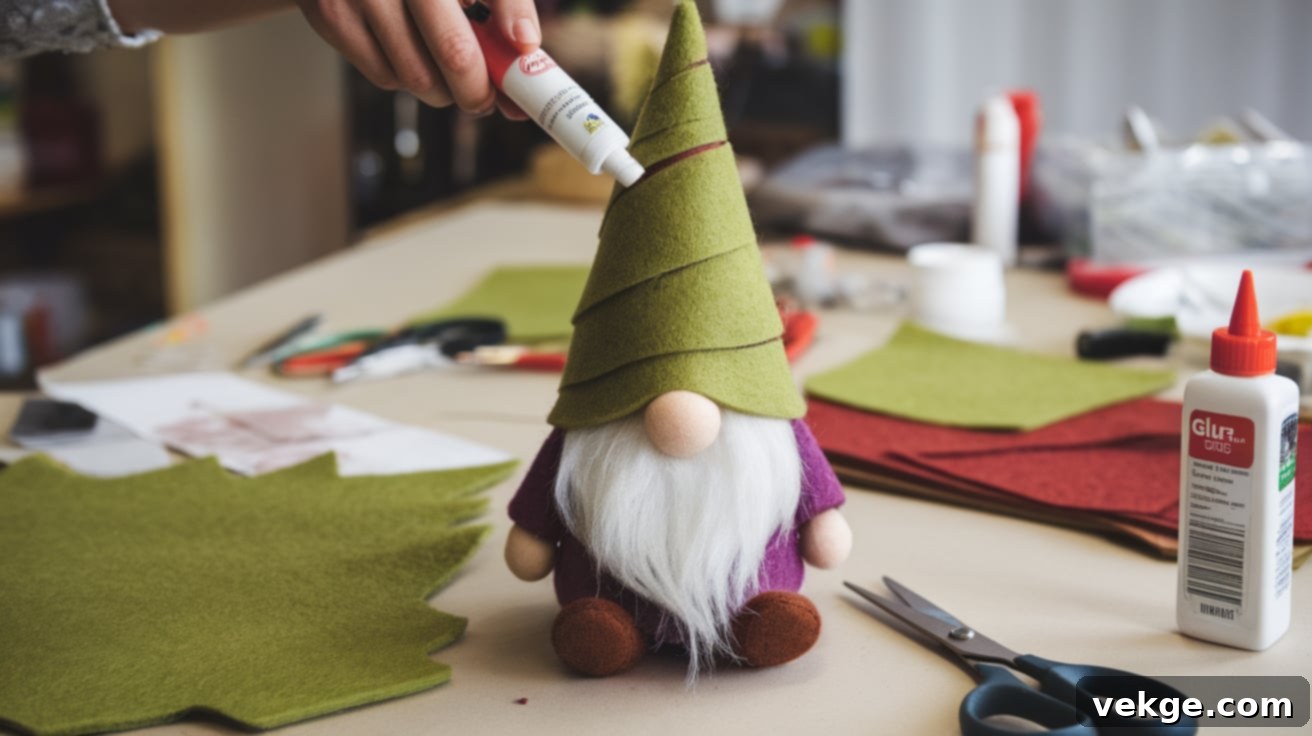
The hat is arguably the most recognizable feature of a gnome, giving it its whimsical silhouette. For the hat, select your chosen felt or fabric and cut it into a cone-shaped pattern. You can easily find free printable cone templates online, or simply draw a large semi-circle and cut it out. To form the classic pointed shape, roll the fabric from one of its shorter edges toward the longer, curved edge.
Once you’ve achieved the desired cone shape, secure the hat’s seam with a line of hot glue. Alternatively, if you prefer a more durable finish, you can hand stitch or machine stitch the seam. Before making the final attachment, gently test the fit of the hat on your gnome. Ensure it covers the top of the sock base and sits nicely over the top of the beard and nose. Adjust the size if necessary for proper sizing and a balanced look.
STEP 5: Final Assembly and Decorative Touches
With the hat crafted, it’s time for the final assembly of your gnome. Apply a generous line of hot glue around the top edge of the gnome’s head, where the hat will sit. Carefully position the hat, making sure it partially covers the top of the beard and frames the nose perfectly. Hold it in place for a moment to allow the glue to set firmly. This placement is key to giving your gnome its characteristic mysterious and charming look, where only the nose peeks out from beneath the hat and beard.
Now, it’s time for those special finishing touches that truly bring your gnome to life. Consider adding a small pom-pom to the hat’s tip using matching yarn or fabric for a playful accent. You can also shape the hat as desired, creating gentle folds, bends, or a slight curl at the tip to add more character and individuality. This basic method is incredibly versatile and works wonderfully for creating gnomes of various sizes and styles. Small adjustments to your initial measurements will allow you to craft figures of different proportions while maintaining that undeniable gnome charm. Don’t be afraid to experiment with different embellishments like tiny buttons, fabric patches, or even small wire-rimmed glasses for a truly unique personality!
Video Tutorial for Visual Learners
For more detailed visual instructions and helpful tips, we highly recommend checking out this excellent video tutorial by Patti J. Good. It’s a fantastic resource for crafters of all levels!
Advanced Gnome Crafting Techniques and Ideas
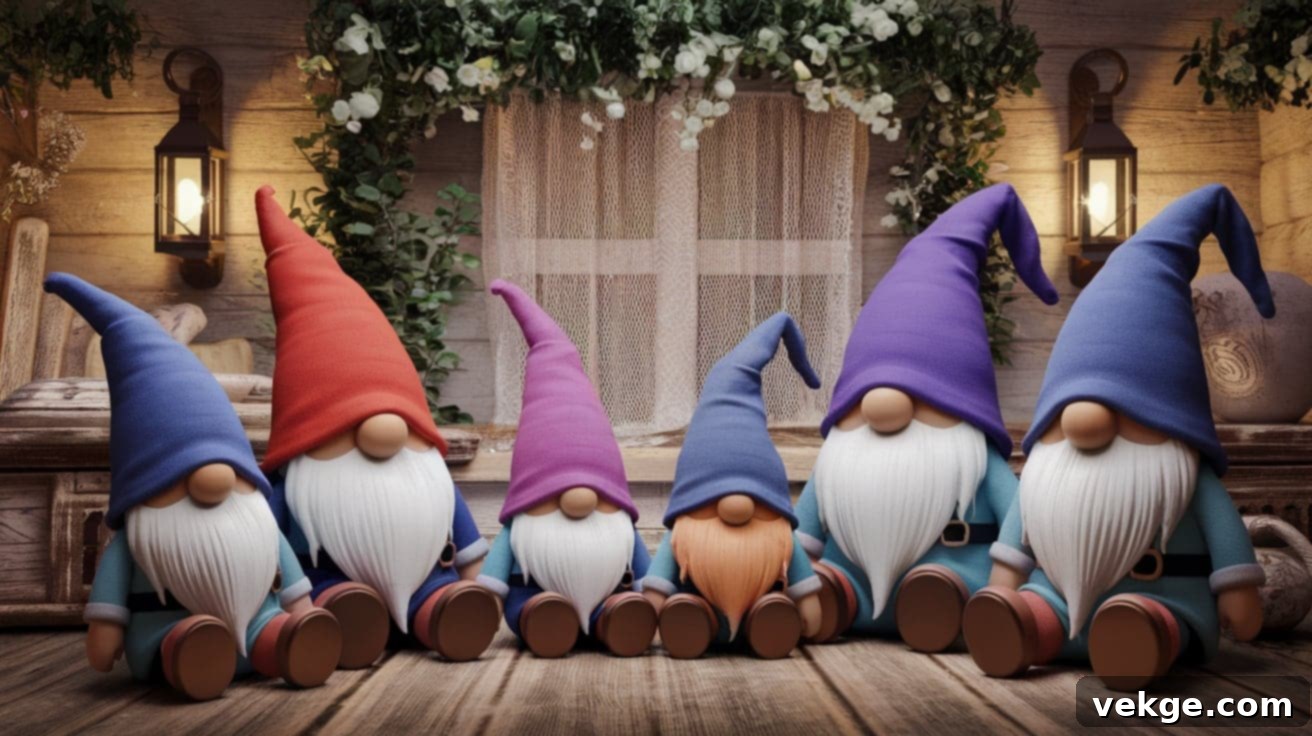
Once you’ve mastered the basics, a whole new world of advanced gnome crafting opens up, allowing for even more intricate and personalized creations.
Creating Charming Gnome Families
Crafting entire gnome families requires careful attention to size proportions to achieve a cohesive and visually appealing look. A good starting point is to make “parent” gnomes stand roughly 12 inches tall, while “child” gnomes can range from 6 to 8 inches. To maintain consistent features and styles across the family, begin with a basic pattern and adjust measurements by scaling them up or down by approximately 25% for each family member. This ensures all gnomes share a family resemblance while varying distinctly in size.
Matching fabric textures and colors, or using a harmonious color palette, helps create strong visual connections between family members. For instance, consider using the same hat material but in different shades or patterns to subtly indicate relationships. You can also give each family member a unique accessory that reflects a hobby or personality trait, making your gnome family truly special and full of character.
Crafting Thoughtful Personalized Gnomes
Personalizing your handmade gnomes transforms them into incredibly special and memorable gifts. Adding names to gnomes is a popular touch, which can be done using small wooden letters, delicate fabric paint, or even embroidered initials on their hats or bases. These personalized gnomes are perfect for birthdays, anniversaries, or simply as a thoughtful gesture for loved ones.
Beyond names, personal touches can include tiny accessories that reflect hobbies, interests, or professions. Imagine an artist gnome holding a mini paintbrush and palette, a reader gnome with a tiny book, a gardener gnome with miniature tools, or even a chef gnome wearing a small apron and carrying a tiny spoon. These intricate details make each gnome truly unique and speak volumes about the recipient, adding a deeply personal layer to your craft.
Designing Custom Features for Unique Gnomes
Don’t limit yourself to traditional gnome features! Customizing elements like beards, hair, and accessories allows for endless creativity. For female gnomes, instead of the traditional beard, you can craft beautiful braided yarn hair, perhaps adorned with small fabric flowers, delicate ribbons, or even miniature bows for an extra feminine touch. These female gnomes bring a delightful diversity to your collection.
Male gnomes, too, can sport a wide array of beard styles – short and neatly trimmed, long and flowing, curly and voluminous, or sleek and straight. Varying the beard cut, texture, and style helps create distinct personalities for each gnome. Experiment with different colors of faux fur or yarn to further enhance their unique characteristics. You can also explore adding tiny spectacles, fabric patches, or even small, wired arms and legs to give your gnomes more dynamic poses and expressions.
Celebrating with Special Occasion Gnomes
Gnomes can be tailored for almost any special occasion, making them delightful celebratory decorations or gifts. Birthday gnomes can hold tiny present boxes, wear festive party hats, or even have a miniature cupcake glued to their hands. Wedding gnomes are incredibly charming, often created as a pair in coordinating outfits – perhaps one with a mini veil and the other with a tiny bow tie or top hat, celebrating the happy couple.
Anniversary gnomes can feature metallic accents that match traditional anniversary materials, such as golden buttons for a 50th anniversary or silver threads for a 25th. Even less common holidays like Valentine’s Day, St. Patrick’s Day, or graduation can be celebrated with appropriately themed gnomes holding hearts, shamrocks, or miniature diplomas. These specialized gnomes add a festive touch to any milestone.
Professional Finishing Techniques for Durability
For gnomes meant to last and withstand handling, consider incorporating professional finishing techniques. Applying a fabric stiffener to hats can help them maintain their shape over time, especially for gnomes that will be displayed in high-traffic areas or given as cherished gifts. This technique ensures the hats remain perfectly pointed and upright.
For larger display gnomes, especially those that might be placed outdoors or on uneven surfaces, adding weighted bases is highly recommended. You can use heavier fillings like pebbles or add a small flat weight (like a washer or a piece of heavy cardboard) to the bottom of the base. This addition significantly enhances stability, preventing your charming gnomes from tipping over and ensuring they stand firmly wherever they are placed.
Expenses and Cost Considerations for Gnome Crafting
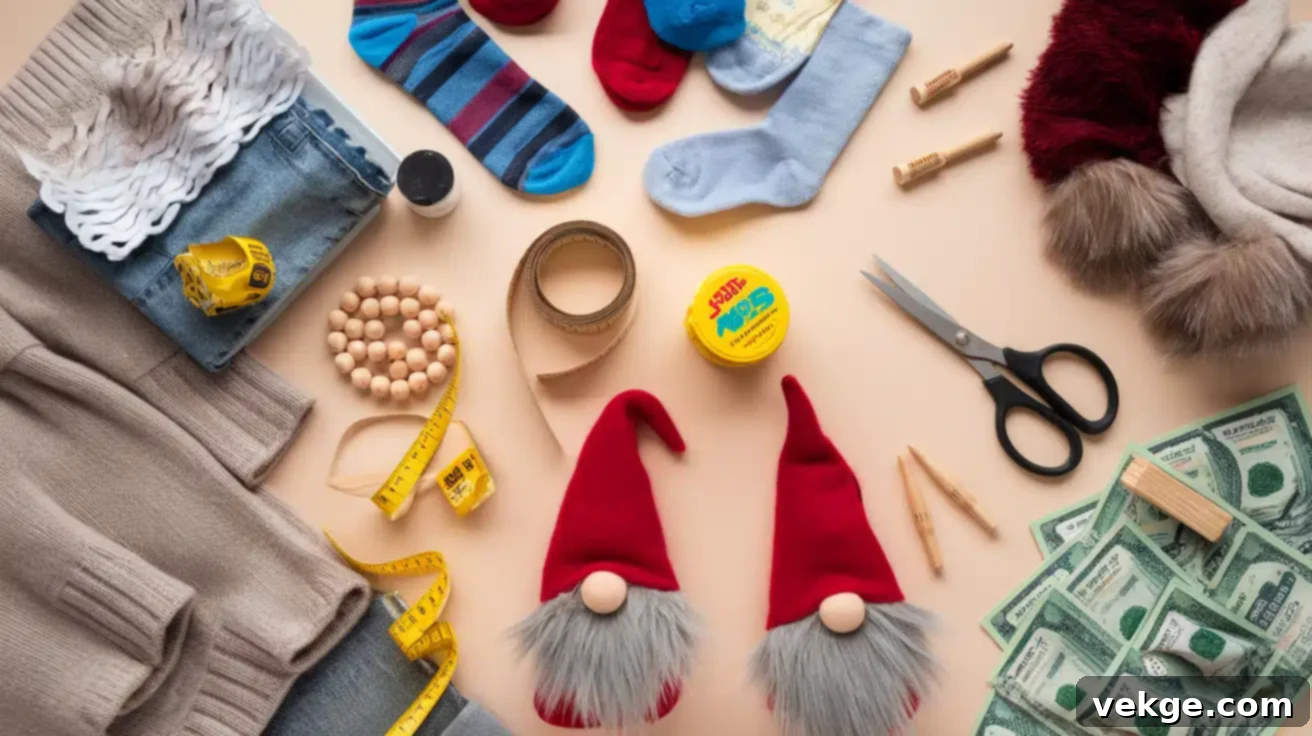
Understanding the costs associated with gnome crafting can help you plan your projects effectively, whether you’re making a single gnome or an entire collection.
Basic Material Costs for Your First Gnomes
Getting started with gnome crafting doesn’t have to break the bank. Starter supplies for multiple projects typically range between $15 and $30. This initial investment covers core items like a bag of rice, a few pairs of socks, felt sheets, and basic decorative elements. Most dollar stores or budget-friendly retailers offer affordable socks, various colors of felt, and essential tools like hot glue guns, making it easy to gather supplies without excessive spending.
Faux fur often represents the highest individual cost in gnome crafting, with pieces ranging from $8 to $20 depending on quality, type, and size. To maximize cost efficiency, consider buying larger pieces of faux fur when possible; a bigger piece can yield enough material for several gnomes, significantly reducing the per-gnome cost for this key component.
Budget-Friendly Options to Save on Supplies
For crafters on a tight budget, numerous alternatives can keep expenses low without sacrificing quality or charm. Rice makes an excellent and highly affordable filling, costing roughly $1 per pound. One pound of rice is usually sufficient to fill two medium-sized gnomes, providing the necessary weight and stability. Dried beans or small pebbles are also viable, inexpensive alternatives.
Using yarn instead of faux fur for beards can significantly reduce costs. A single skein of fluffy yarn, typically priced between $3-5, can provide enough material to create beards for several small gnomes or a couple of larger ones. Old sweaters, scarves, or even repurposed fabric scraps can serve as unique and free materials for gnome bodies and hats, adding a personalized touch while keeping money in your pocket.
Investing in Quality Tools and Bulk Purchases
While budget options are great, investing in quality tools can save you money and frustration in the long run. Sharp fabric scissors and a reliable hot glue gun are foundational tools that will last longer and perform better. Expect to spend around $20-30 on good-quality tools, which can prevent material waste due to dull cuts or faulty glue applications, ultimately making your crafting experience smoother and more enjoyable.
To further reduce per-gnome costs, consider bulk buying materials, especially during seasonal sales. Craft stores often offer significant discounts on fabrics, fillers, and embellishments after major holidays. Stocking up on versatile materials like white faux fur or neutral-colored felt when they are on sale can be a smart strategy for future projects.
Understanding the Cost Per Gnome
The total material cost per gnome varies depending on its size and the materials chosen. Small ornament-sized gnomes, perfect for tree decorations or party favors, can cost as little as $2-3 each to make. Medium display gnomes, suitable for mantelpieces or shelves, typically average $5-8 in materials. These estimates assume you’re utilizing basic, accessible materials.
Larger or specialty gnomes, especially those crafted with premium fabrics, unique embellishments, or custom features, might cost anywhere from $12-15 to create. However, it’s important to remember that these costs often decrease when you’re making multiple gnomes from shared larger pieces of material, as the initial investment in items like faux fur is spread across several finished products.
Considerations for Selling Your Handmade Gnomes
If you plan to sell your beautiful handmade gnomes, proper pricing is essential. Handmade items often sell for three to four times the material cost, reflecting the time, skill, and effort invested. Small ornament-sized gnomes might sell for $8-12, while larger, more elaborate gnomes can command prices ranging from $25-40, or even more for highly customized pieces.
When selling at craft fairs or online, don’t forget to factor in packaging and presentation costs. Simple display stands, clear cellophane bags, or decorative tags can add another $1-2 per gnome to your overall expenses, but they also enhance the perceived value and appeal of your product, making them more attractive to potential buyers.
Fun and Interesting Facts You Didn’t Know About Gnomes
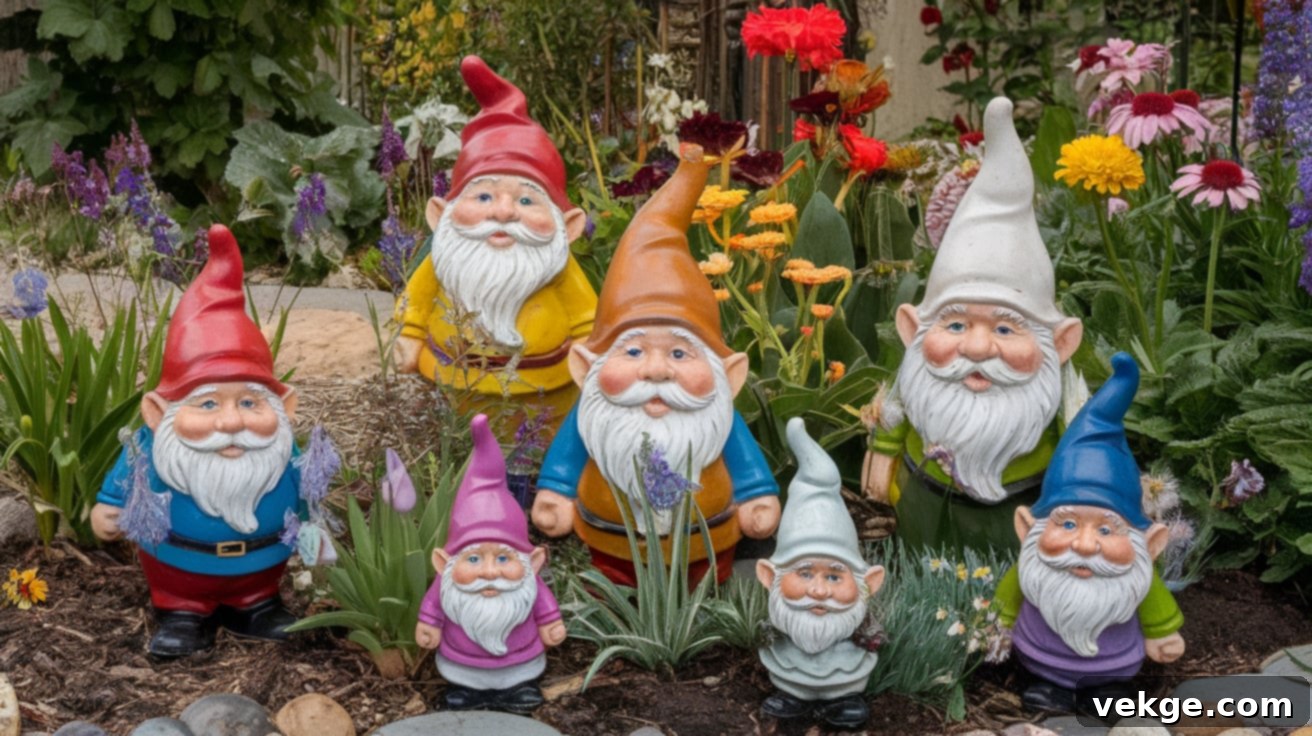
Gnomes have been a beloved part of folklore and décor for centuries, but there’s often more to them than meets the eye. These charming figures carry a rich history and a touch of magic. Here are some surprising and fun facts about these enchanting creatures that might inspire your next crafting project:
-
Ancient Origins in European Folklore: Gnomes are deeply embedded in European folklore, often envisioned as ancient earth spirits tasked with protecting underground treasures and mineral wealth. Their first recorded mention in literature comes from the renowned alchemist Paracelsus in the 16th century, who described them as elemental beings of the earth.
-
Symbols of Good Luck and Protection: In many cultures, gnomes are revered as potent symbols of good luck and prosperity. They are believed to bring blessings to homes and gardens, warding off evil spirits and providing quiet protection to their surroundings, making them much more than just decorative items.
-
The Rise of Garden Gnome Popularity: The very first garden gnome statues originated in Germany during the 19th century. These early gnomes were meticulously handmade from terracotta and quickly became cherished symbols of whimsy, charm, and a connection to nature, spreading their popularity across Europe.
-
Their Distinctive Visual Appearance: The classic image of a garden gnome – complete with a pointy red hat, a long white beard, and sturdy boots – was popularized by manufacturers in the 1800s. This iconic look has largely persisted to this day, becoming the recognizable default for these beloved figures.
-
Gnomes in Classic Literature: Gnomes have made notable appearances in various literary works, adding to their mystical allure. Most famously, they feature in C.S. Lewis’s beloved “The Chronicles of Narnia” series, where they are depicted as magical, subterranean creatures with unique abilities.
-
Guardians of the Gardens and Crops: Folklore suggests that garden gnomes aren’t just decorative; they are active protectors of plants and crops. It is believed that they come alive at night to deter pests, ward off thieves, and ensure the flourishing of the garden, adding a magical touch to their presence among the flowers.
-
Traditional Gnome “Homes” in Nature: Traditional stories often place gnomes in hidden dwellings within nature, such as inside hollow trees, beneath ancient roots, or deep within underground caves. This emphasizes their profound connection to the earth and its natural elements.
-
The Viral “Traveling Gnome Prank”: A humorous modern phenomenon, the “traveling gnome prank,” involves people “kidnapping” garden gnomes from friends’ yards and sending postcards from various exotic locations. This playful trend has inspired numerous travel ads and even real-life campaigns, showcasing the gnome’s cultural impact.
-
Varied Names Across Global Cultures: Gnomes are known by different names around the world, reflecting diverse cultural interpretations. In Scandinavian folklore, they are affectionately called “Tomte” or “Nisse,” while in English folklore, they might be referred to as goblins, dwarfs, or even brownies, each with slightly different characteristics.
-
Their Role in Medieval Magic and Alchemy: Beyond folklore, early alchemists considered gnomes one of the four elemental beings (alongside sylphs, undines, and salamanders), specifically associated with earth. They represented the magical properties of soil, minerals, and the hidden forces of the earth, connecting them to ancient mystical practices.
Wrapping It Up: Your Journey into Gnome Crafting
Gnome crafting truly opens up a world of creative possibilities, offering a rewarding experience for every skill level. From your very first simple sock gnome to an intricate collection of themed figures or a charming gnome family, each gnome you lovingly create tells its own unique story through its distinctive features and personalized touches. You’ll find that your crafting skills, patience, and imagination will grow exponentially with each new project you undertake.
We encourage you to share your wonderful gnome creations with our vibrant crafting community! We would absolutely love to see how you’ve used these ideas and techniques to bring your own special characters to life. Connecting with fellow crafters is a fantastic way to find new inspiration and share your passion.
Feel free to connect with us and the wider crafting community through the comments section below, or by tagging us in your social media posts. Your creations could inspire others! Need even more inspiration for your next project? Browse our extensive craft section for additional tutorials, seasonal project ideas, and countless ways to spark your artistic flair.
Remember, the most cherished and best gnomes are always the ones made with genuine care, a touch of personal imagination, and a sprinkle of joy. Happy crafting!
Frequently Asked Questions (FAQs) About Gnome Crafting
What Supplies Do You Need To Make A Gnome?
To make a basic gnome, you’ll typically need a sturdy base material (like a sock or fabric), a filler for weight (rice, poly pellets, or dried beans), faux fur or yarn for the beard, felt or cotton fabric for the hat, a wooden bead or ball for the nose, and essential tools such as a hot glue gun, scissors, and possibly a craft knife. Decorative elements like small embellishments, ribbons, or fabric scraps can add unique character.
How Do You Make A Gnome Out Of Household Items?
Making gnomes from household items is a fantastic way to craft on a budget! You can use an old sock or the sleeve of an old sweater for the gnome’s body. Rice, dried beans, or small pebbles from your garden can serve as the weight filler. For the beard, repurpose yarn from an old sweater, a dishcloth, or even fringes from a worn-out rug. A felt hat can be made from an old piece of cloth, and the nose can be a small pom-pom, a button, or a tightly rolled piece of fabric. Use hot glue (if you have it) or strong fabric glue to assemble your creative gnome, adding any available decorations for a personal touch.
What Are The Different Types Of Gnomes I Can Make?
The possibilities for gnome types are virtually endless! You can create traditional Christmas gnomes with red hats and white beards, whimsical Halloween gnomes with spooky accents, cozy Fall/Autumn gnomes in earth tones, or fresh Spring and Easter gnomes with pastel colors. Beyond holidays, you can design garden gnomes, Scandinavian-style “Tomte” gnomes, patriotic gnomes, or themed gnomes for specific occasions like birthdays, graduations, or even gnomes representing hobbies and professions. Your creativity is the only limit!
