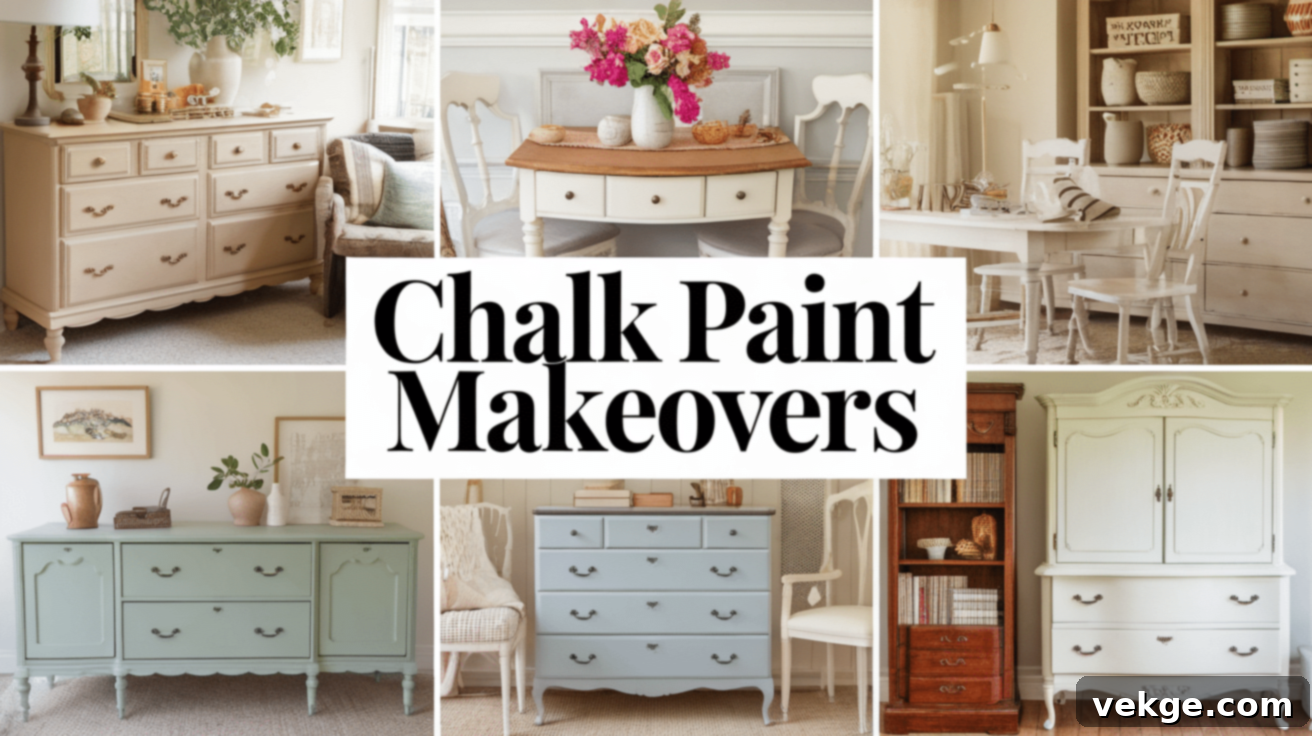
Transform Your Home: Incredible Chalk Paint Before & After Furniture Makeovers
Have you ever looked at an old, tired piece of furniture and wished you could bring it back to life? I’ve always been captivated by the idea of giving forgotten items a second chance, and when it comes to furniture, chalk paint is truly a game-changer. It’s astonishing how a simple coat of this unique paint can completely overhaul an item, turning something drab into fab.
In this comprehensive guide, I’m thrilled to share some of my favorite chalk paint before and after transformations. These examples vividly demonstrate the dramatic difference chalk paint can make, inspiring you to tackle your own furniture makeovers.
Whether you’re aiming to refresh a worn-out dresser, add character to an old chair, or simply inject a new aesthetic into your living space, chalk paint offers a quick, affordable, and incredibly satisfying solution. It’s not just about painting; it’s about upcycling, sustainability, and personalizing your home decor.
The best part about working with chalk paint? It’s remarkably user-friendly. You don’t need to be an experienced professional to achieve stunning results. Its forgiving nature makes it perfect for DIY enthusiasts of all skill levels. I’m excited to unveil the magic of chalk paint and reveal how it can work wonders on your beloved furniture. Let’s dive in and discover the incredible potential of this versatile medium!
What is Chalk Paint? Understanding this Versatile Medium
Chalk paint is a distinctive type of paint renowned for its ultra-matte, velvety finish. Unlike conventional paints, its unique formulation allows it to adhere effortlessly to almost any surface – be it wood, metal, laminate, or even fabric – often without the need for extensive preparation like sanding or priming.
This remarkable adherence is what makes chalk paint an absolute favorite for furniture makeovers. It significantly cuts down on prep time, allowing you to jump straight into the fun part: painting! This efficiency is a major draw for anyone looking to undertake quick and impactful DIY projects.
Available in an extensive palette, chalk paint colors range from serene, soft neutrals that exude elegance to vibrant, bold hues that make a statement. Its quick-drying property means you can often apply multiple coats in a single day, accelerating your project timeline. Furthermore, chalk paint is incredibly easy to distress, making it the perfect choice if you’re aiming for a charming vintage, shabby-chic, or rustic aesthetic. The smooth texture it imparts gives furniture a sophisticated, soft finish that feels both elegant and stylish, instantly elevating the piece’s overall appeal.
Chalk Paint Before and After: Transforming Old Furniture with Ease
1. Chalk Paint Cabinet Makeover
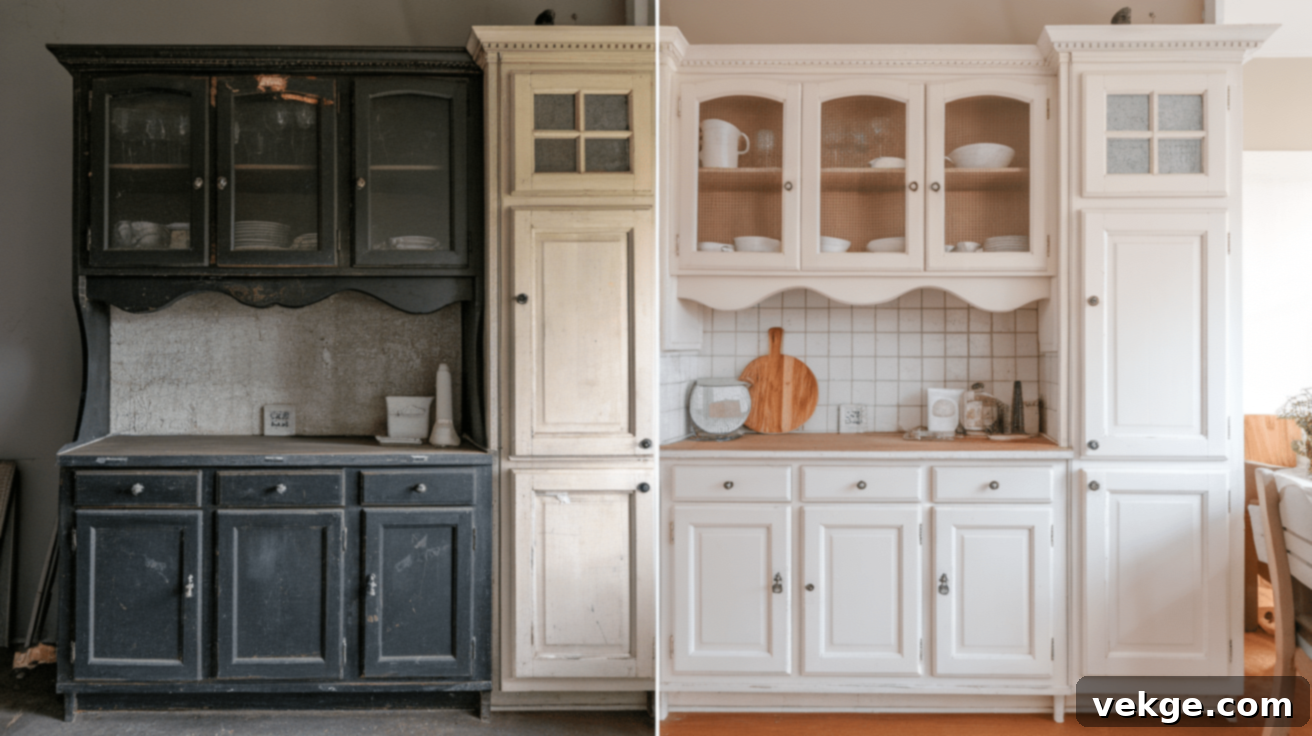
Before: The existing cabinets were old, displaying chipped paint and a dated appearance that made the kitchen or bathroom feel dark, cramped, and utterly uninspiring. They lacked character and visual appeal.
After:
- Begin by thoroughly cleaning the cabinet surfaces with a damp cloth to remove all dust, grime, and grease, ensuring a clean base for the paint.
- Apply a smooth, even coat of chalk paint in a light, neutral color such as crisp white or soft gray, covering all visible areas.
- Allow the first coat to dry completely, then apply a second coat if needed to achieve full, opaque coverage.
- For a charming vintage look, lightly distress the edges with fine-grit sandpaper (this step is optional but highly recommended for character).
- Conclude the transformation by applying a clear protective wax or a polyurethane topcoat to seal and protect the painted surface, enhancing durability.
The cabinets are now reborn with a fresh, bright, and modern appeal, boasting a soft, inviting matte finish that transforms the entire room.
2. Painted Mirror Frame Revitalization
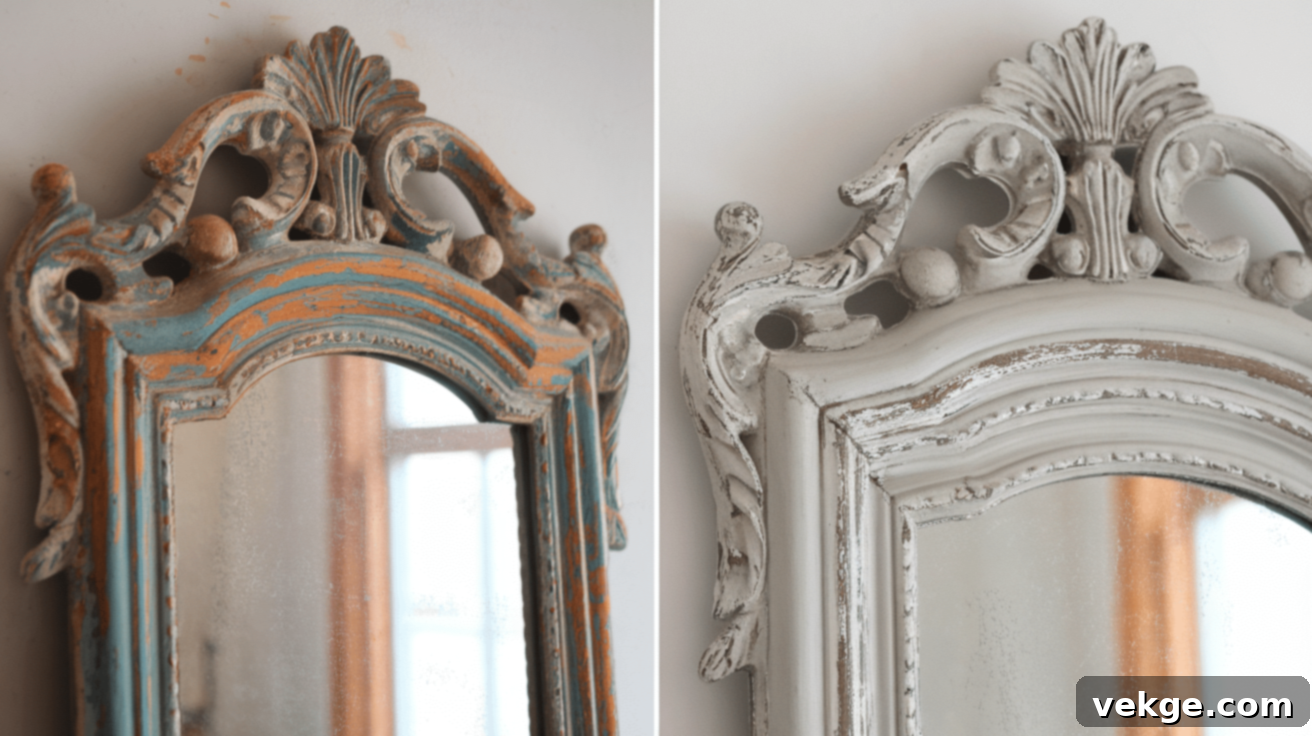
Before: The mirror frame was a plain, uninspiring wood color or a metallic finish that appeared old-fashioned and clashed with the room’s contemporary decor, failing to make any statement.
After:
- Clean the mirror frame meticulously to remove any accumulated dust, dirt, or residues, preparing it for painting.
- Apply a single, even coat of chalk paint in a carefully chosen color that beautifully complements the room’s existing palette, such as a soft white, a calming light blue, or a muted sage green.
- Allow the initial coat to dry thoroughly before assessing and applying a second coat if more depth or coverage is desired.
- Gently distress the edges and raised details for a subtle rustic or charming vintage aesthetic, adding depth and character.
- Finish by applying a clear wax or polyurethane sealant to both protect the paint and enhance its longevity, ensuring it stands the test of time.
The mirror frame now proudly displays a fresh, modern, and polished appearance, acting as a stunning focal point in the room.
3. Painted Bookshelf Transformation
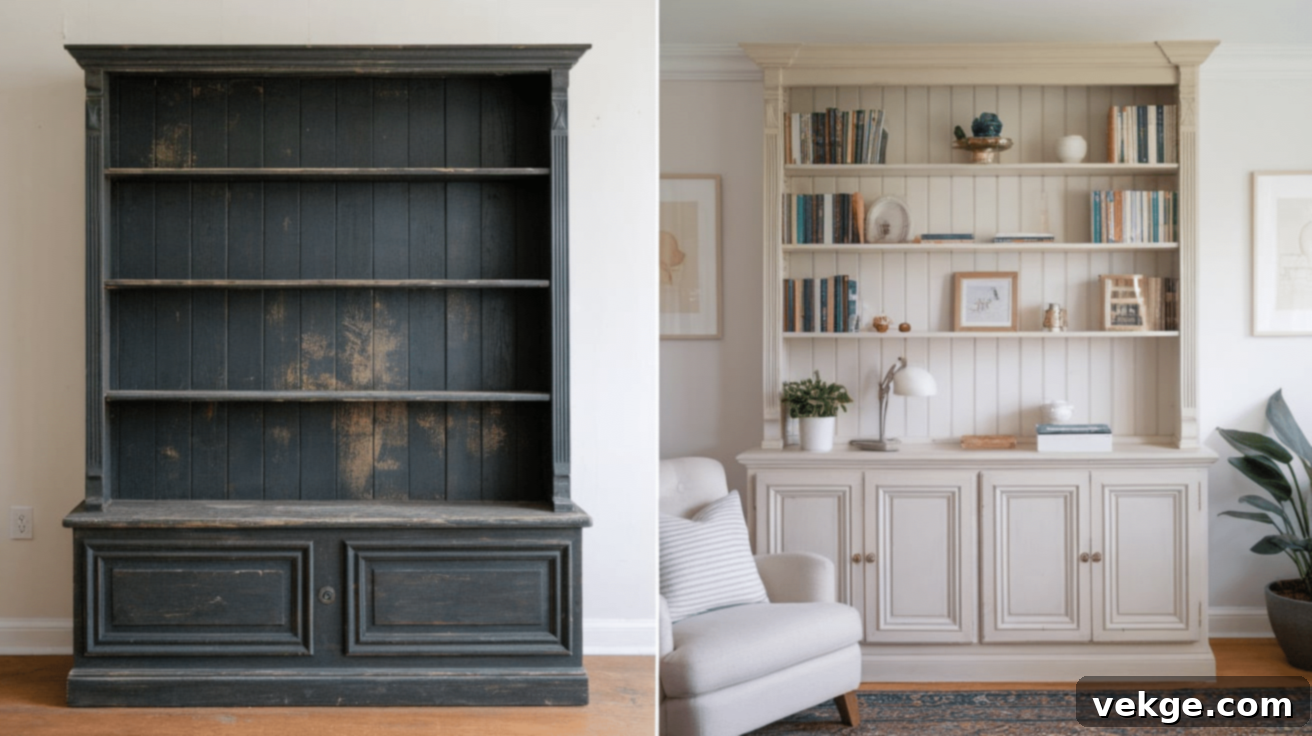
Before: The bookshelf suffered from an old, worn-out finish that not only failed to blend in with its surroundings but actively made the entire room feel dull and neglected.
After:
- Thoroughly clean the bookshelf, ensuring it is free from any dust, cobwebs, or debris, creating an optimal surface for painting.
- Apply an even coat of chalk paint, choosing either a sophisticated neutral or a bold, vibrant color that perfectly aligns with the room’s thematic design.
- Allow the first coat to dry completely without rushing, then proceed with the application of a second coat for even, full coverage.
- Optionally, lightly sand the edges and corners to distress the piece, imbuing it with a delightful vintage feel.
- Seal the painted bookshelf with a clear wax or a durable polyurethane finish to ensure lasting protection and enhanced durability.
The revitalized bookshelf now stands out as a stylish, updated, and integrated piece, significantly enhancing the room’s overall aesthetic.
4. Upgraded Nightstand: A Bedroom Makeover
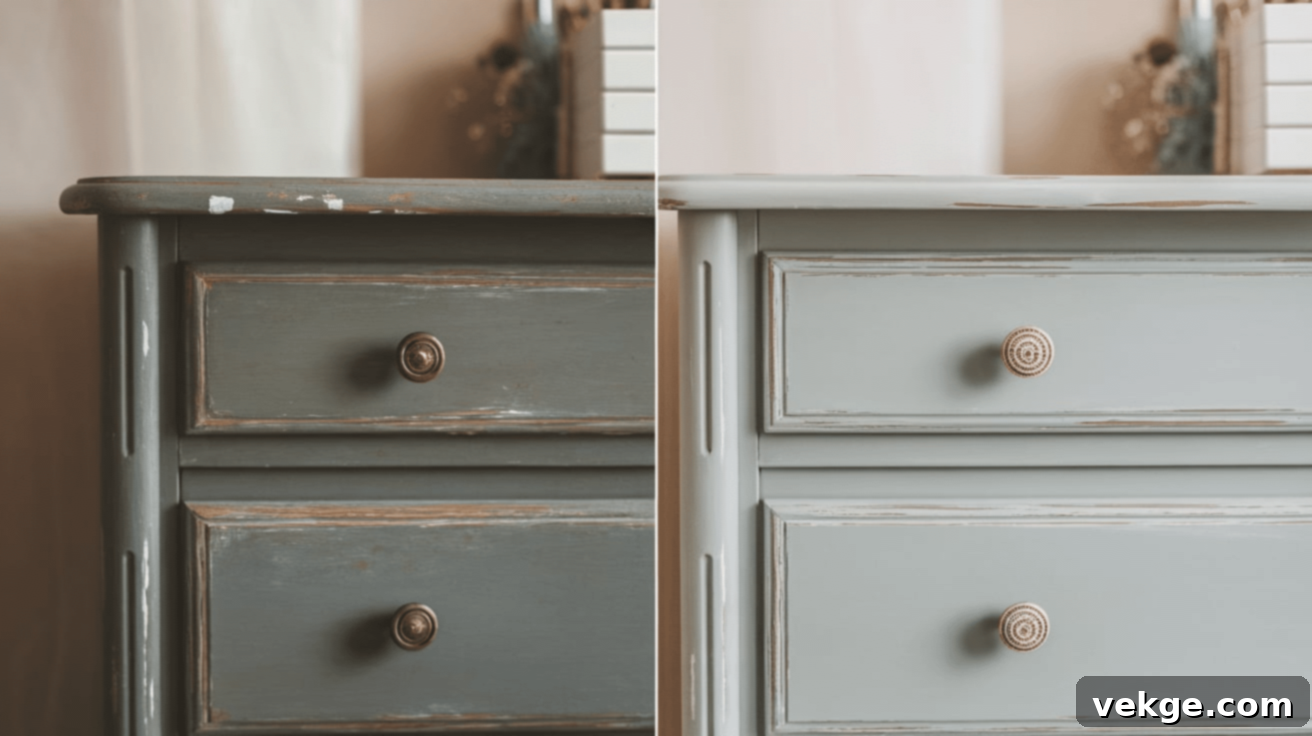
Before: The nightstand was evidently outdated, marked by dark or chipped paint that no longer harmonized with the room’s desired aesthetic, making it an eyesore rather than an asset.
After:
- Carefully dust and meticulously clean the entire surface of the nightstand, ensuring all imperfections are removed for a smooth application.
- Apply a refreshing coat of chalk paint in a contemporary color such as a serene light gray, a deep navy, or a soft pastel, transforming its look.
- Allow the first coat to dry completely, then apply a second coat to ensure uniform, flawless coverage.
- Distress the edges and raised areas to impart a charming shabby-chic or elegantly worn look (this step is optional and depends on your desired style).
- Finalize the project with a protective layer of wax or polyurethane, safeguarding the paint and prolonging its beauty.
The nightstand now boasts a fresh, clean, and inviting look that beautifully complements and enhances your bedroom decor, serving as a functional and stylish element.
5. Painted Coffee Table Refresh
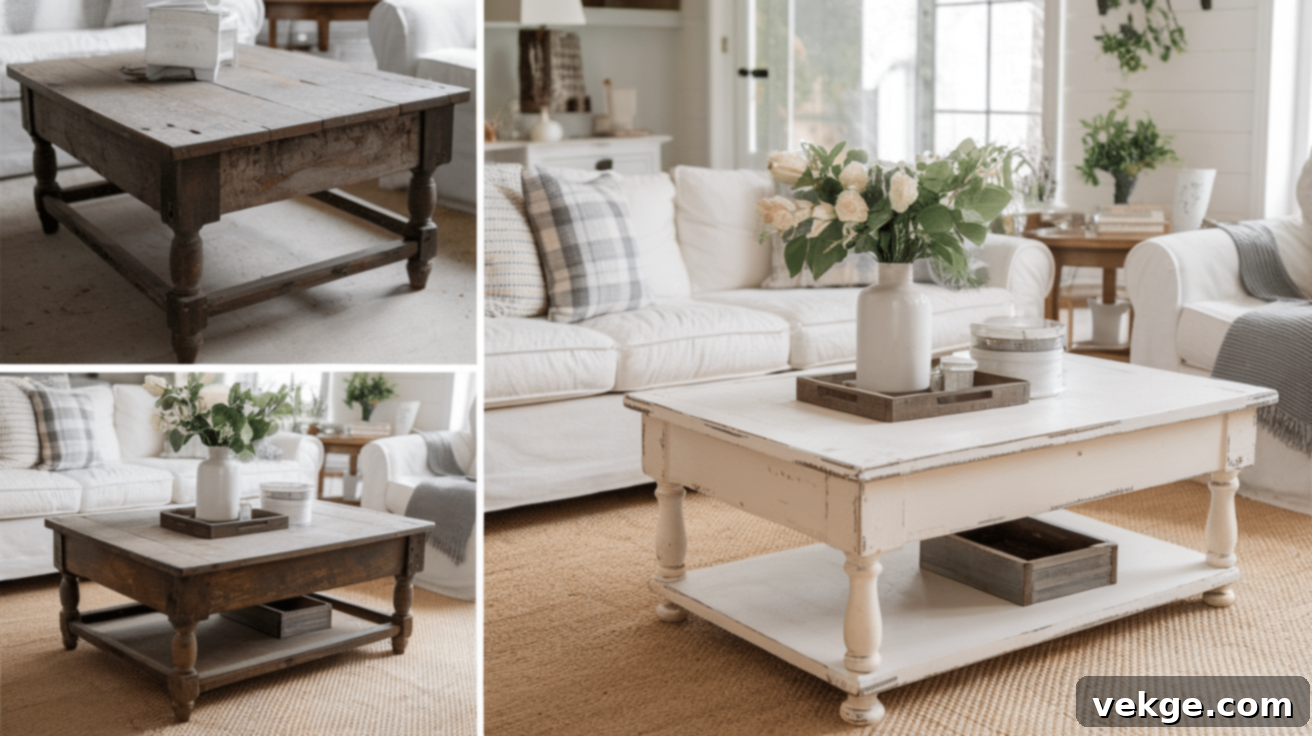
Before: The coffee table exhibited clear signs of wear, with a dull finish and numerous scratches accumulated over years of use, making it an unappealing centerpiece.
After:
- Thoroughly clean the coffee table to eliminate all dirt, grease, and debris, ensuring proper paint adhesion.
- Paint the entire surface with chalk paint, selecting a color that perfectly harmonizes with your living room’s decorative scheme.
- Allow the paint to dry fully between coats, then apply a second coat for comprehensive, even coverage.
- Use sandpaper to strategically distress the edges, creating a desirable rustic or aged effect, adding character to the piece.
- Apply clear wax or a robust polyurethane sealant to not only protect the paint but also enhance the table’s overall durability for daily use.
The coffee table is now imbued with a new, modern look, seamlessly fitting into and elevating your living room furniture arrangement.
6. Upcycle Old Chairs: Seating with Style
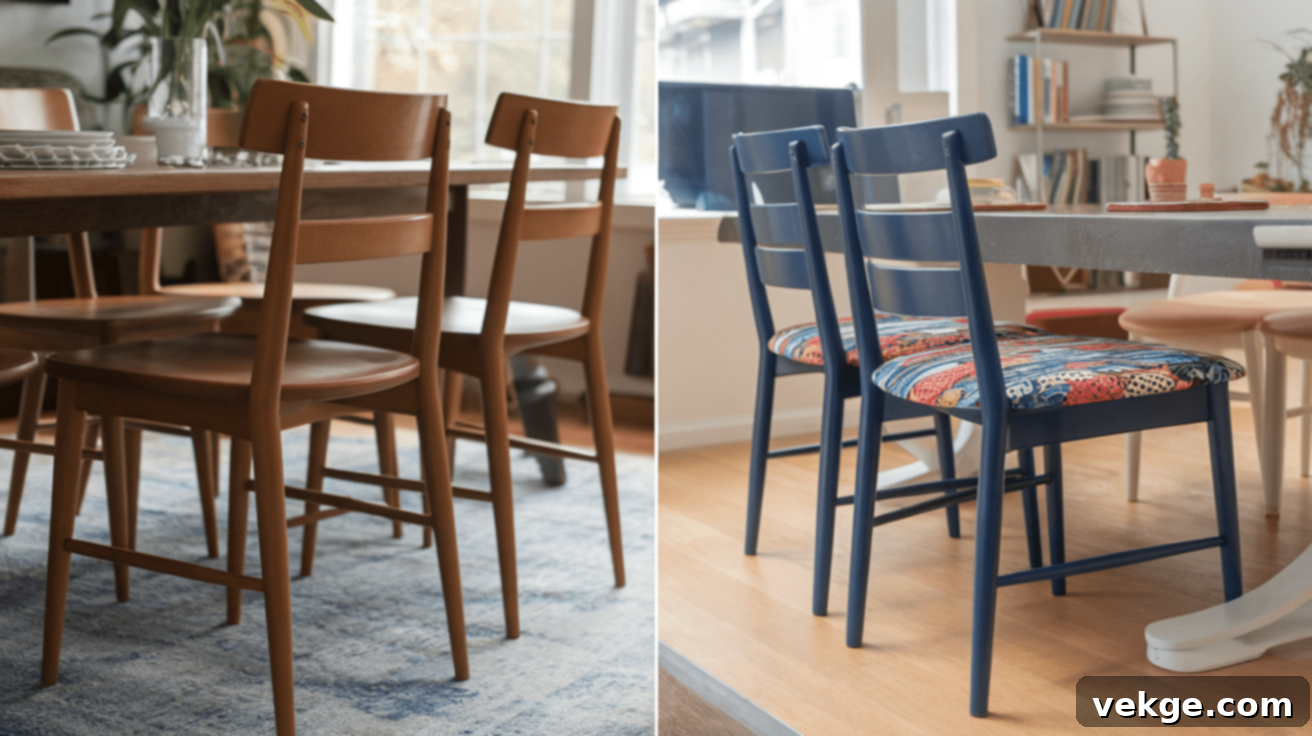
Before: The chairs were plain, utterly boring, and possessed a finish that had long lost its original charm, making them forgettable pieces of furniture.
After:
- Clean each chair meticulously with a damp cloth to thoroughly remove all dust and dirt, preparing the surface for painting.
- Apply chalk paint in a chosen color that truly reflects your personal style, perhaps a sophisticated soft gray, a refreshing mint green, or a bold navy blue.
- Allow the first coat to dry completely before deciding whether a second coat is necessary for optimal coverage and finish.
- Lightly sand the edges for a tastefully distressed look, adding depth and a touch of antique charm (this step is optional).
- For an even more dramatic update, consider adding new fabric to the seat, offering a fresh texture and renewed comfort.
The chairs are now stylishly updated, charming, and visually appealing, injecting a vibrant new feel into your dining or living area.
7. Painted Storage Trunks: Functional Elegance
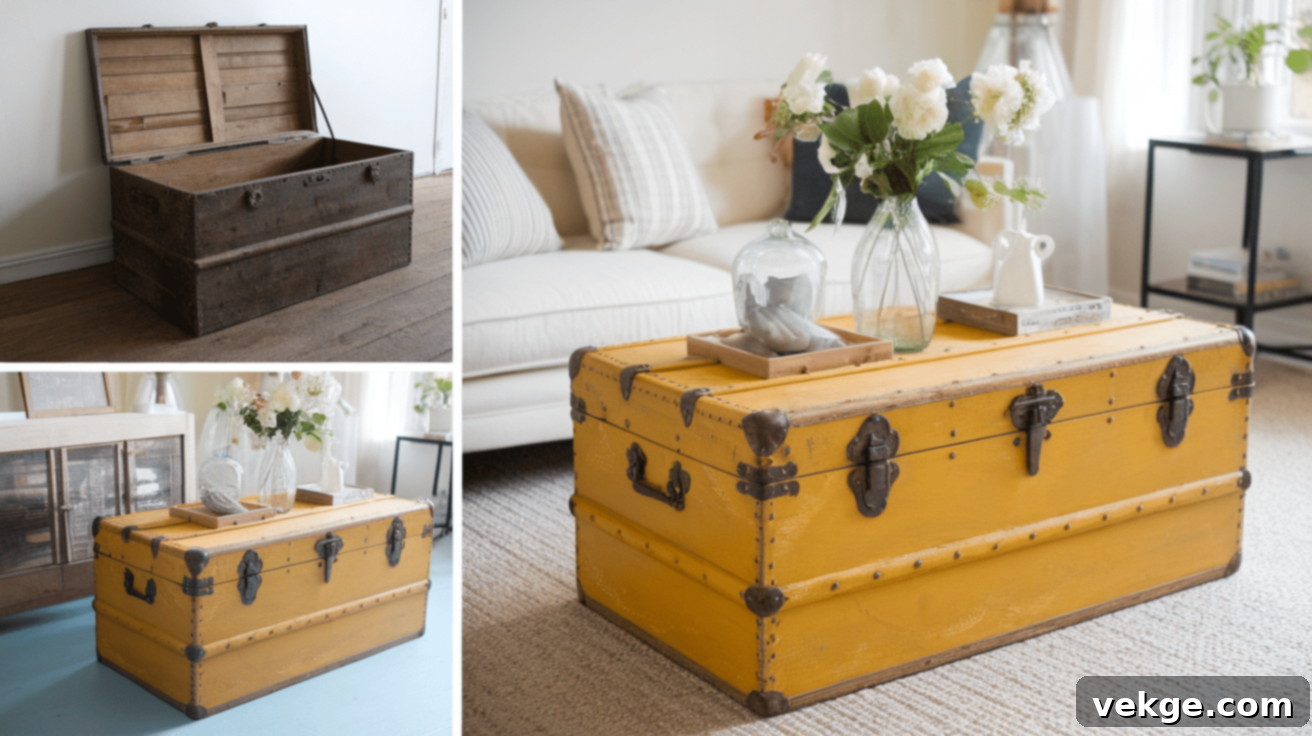
Before: The old trunk appeared faded, scratched, or suffered from a chipped paint finish, making it look undeniably tired, dull, and past its prime.
After:
- Wipe down the trunk thoroughly to remove all dust, dirt, and any loose particles, ensuring a clean and smooth surface.
- Paint the trunk with a bold statement color or a subtle neutral chalk paint color of your preference, transforming its entire facade.
- Let the first coat dry completely, then apply a second coat to achieve a rich, consistent, and durable finish.
- Distress the edges if you desire a more pronounced vintage or rustic appearance, enhancing its character.
- Apply a clear coat of wax to protect the newly applied paint, ensuring its longevity and maintaining its refreshed look.
The trunk is now wonderfully refreshed, ready to be repurposed as a stylish, highly functional storage piece that complements any room.
8. Chalk Painted Planters: Greenery with Flair
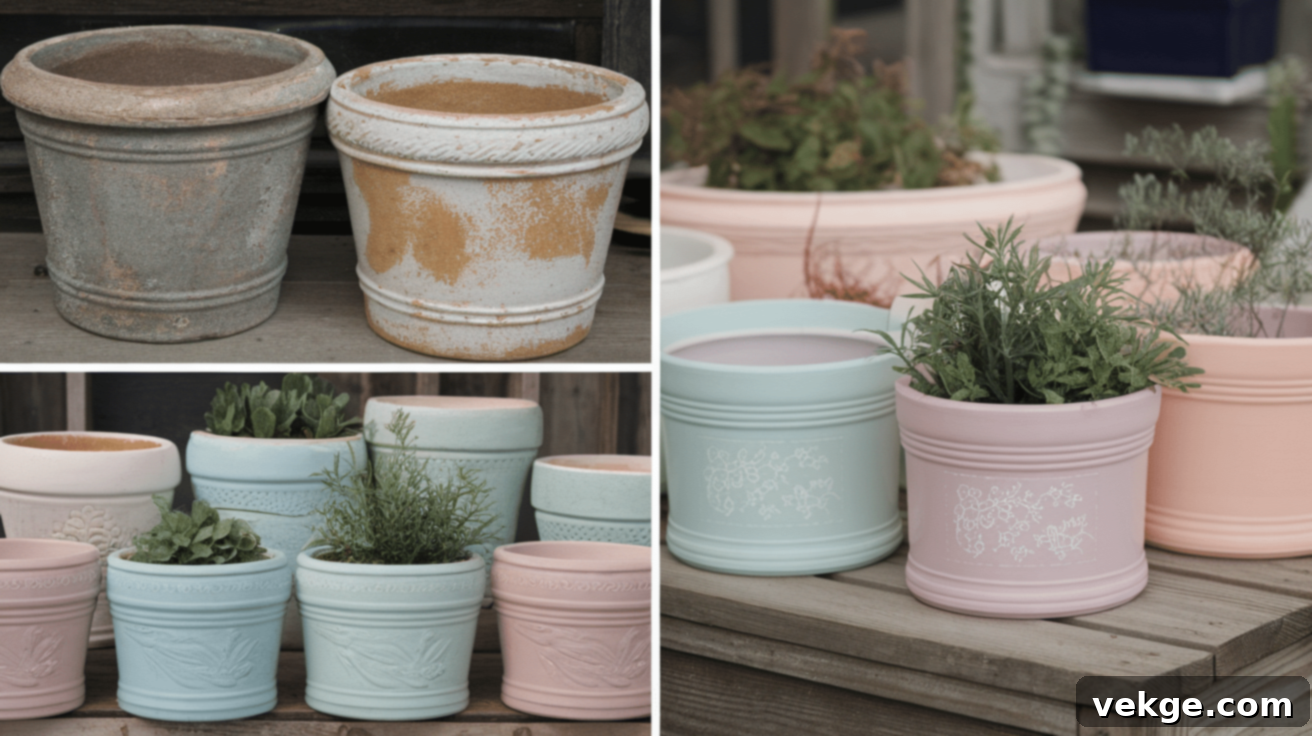
Before: These were plain, often inexpensive planters that looked utterly dull and failed to match your room’s curated decor, adding no aesthetic value.
After:
- Clean the planters meticulously to remove any dirt, dust, or residue, ensuring the paint adheres flawlessly.
- Apply a generous coat of chalk paint to the exterior of the planters, choosing a color that perfectly complements your indoor room or outdoor space.
- Allow the paint to dry completely, then apply a second coat for full, vibrant coverage and a professional finish.
- Optionally, use a stencil to add an intricate design or a simple pattern, injecting more visual interest and personalization.
- Seal with a light coat of wax for indoor use or a clear spray sealer specifically designed for outdoor applications to protect against elements.
The planters now exude style and sophistication, seamlessly integrating with your home’s decor, transforming simple plants into decorative accents.
9. Painted Picture Frames: Elevated Art Displays
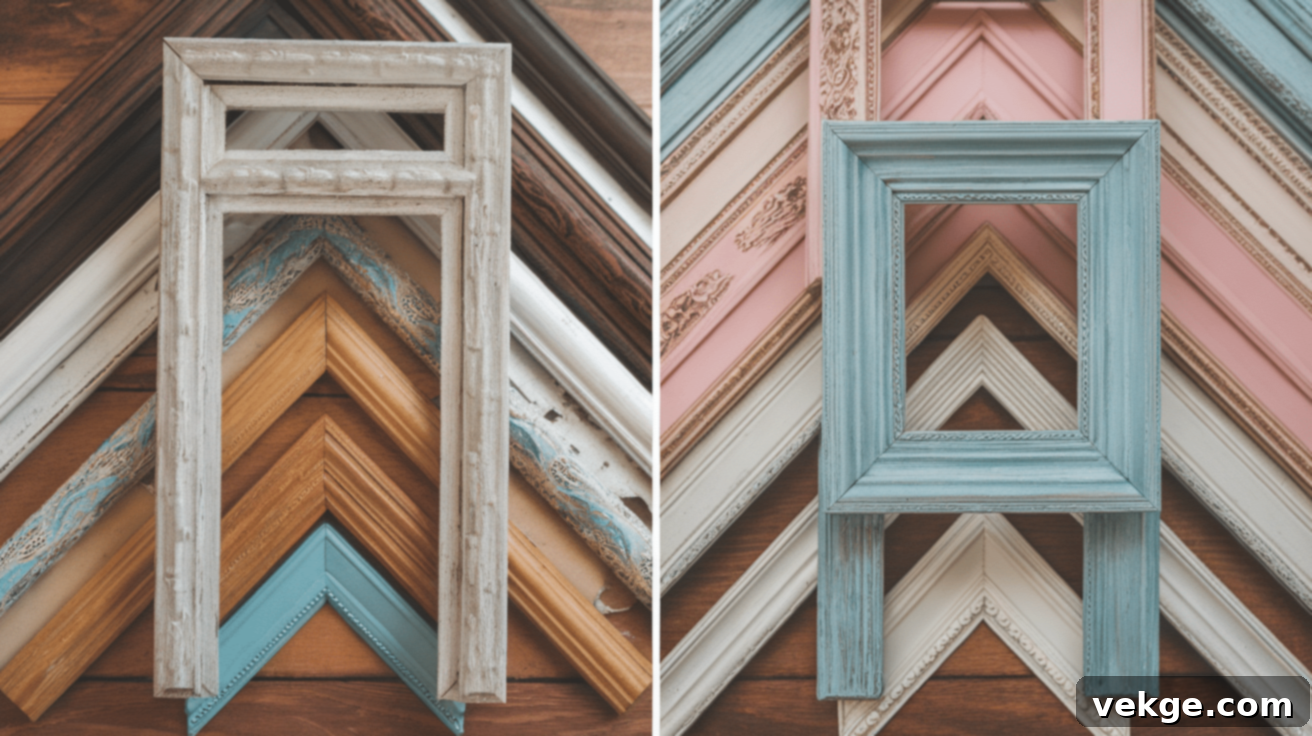
Before: The picture frames were plain, outdated, and did little to add character or visual appeal to your home, simply holding photos without enhancing them.
After:
- Clean the frames thoroughly with a damp cloth to remove all dust and prepare the surface for painting.
- Apply a smooth coat of chalk paint in a color that perfectly harmonizes with your home decor, enhancing the visual appeal.
- Allow the paint to dry sufficiently, then apply a second coat if needed to ensure even color and opacity.
- Lightly sand the edges and raised details for a subtly distressed look, adding a touch of vintage charm (this step is optional).
- Apply a protective wax or polyurethane sealant to seal and protect the paint, ensuring the frames remain beautiful for years.
The frames are now chic and modern, beautifully highlighting your cherished photos or artwork, making them stand out with renewed elegance.
10. Revamp Your Desk: A Productive Workspace
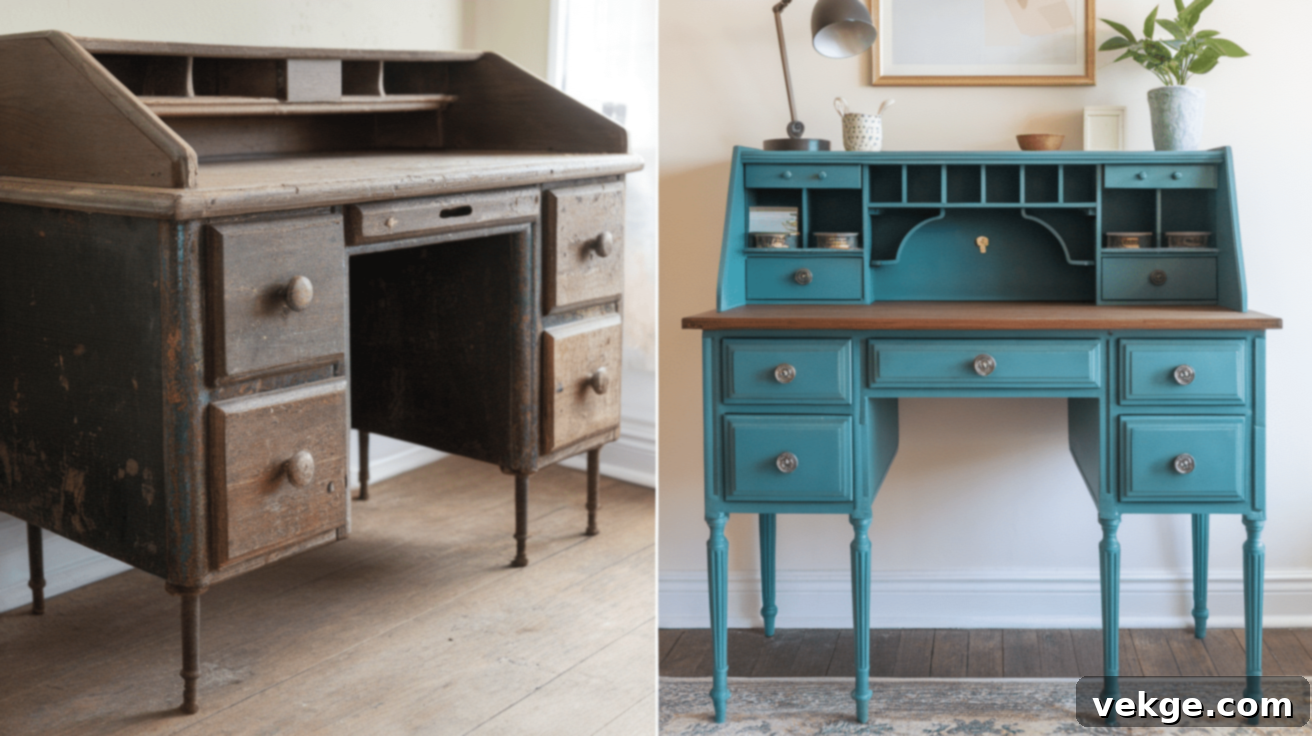
Before: The desk appeared dull, marred by chipped paint or a worn-out finish that no longer aligned with your functional or aesthetic workspace requirements.
After:
- Clean the desk meticulously to remove any dust, dirt, or debris, creating a perfectly smooth canvas for painting.
- Apply chalk paint in a color that ideally suits your office or workspace, potentially a calming blue, a vibrant green, or a sophisticated charcoal.
- Allow the first coat to dry thoroughly, then apply a second coat if necessary to achieve consistent and deep color coverage.
- Distress the edges and high-traffic areas to give it a vintage, rustic feel, adding character and warmth (this step is optional).
- Seal the desk with a durable wax or polyurethane finish for added longevity and protection against daily wear and tear.
The desk now boasts a fresh, inviting new look and feel, contributing to a more welcoming and functional environment in your workspace.
11. Chalkboard Wall Makeover: Interactive & Fun
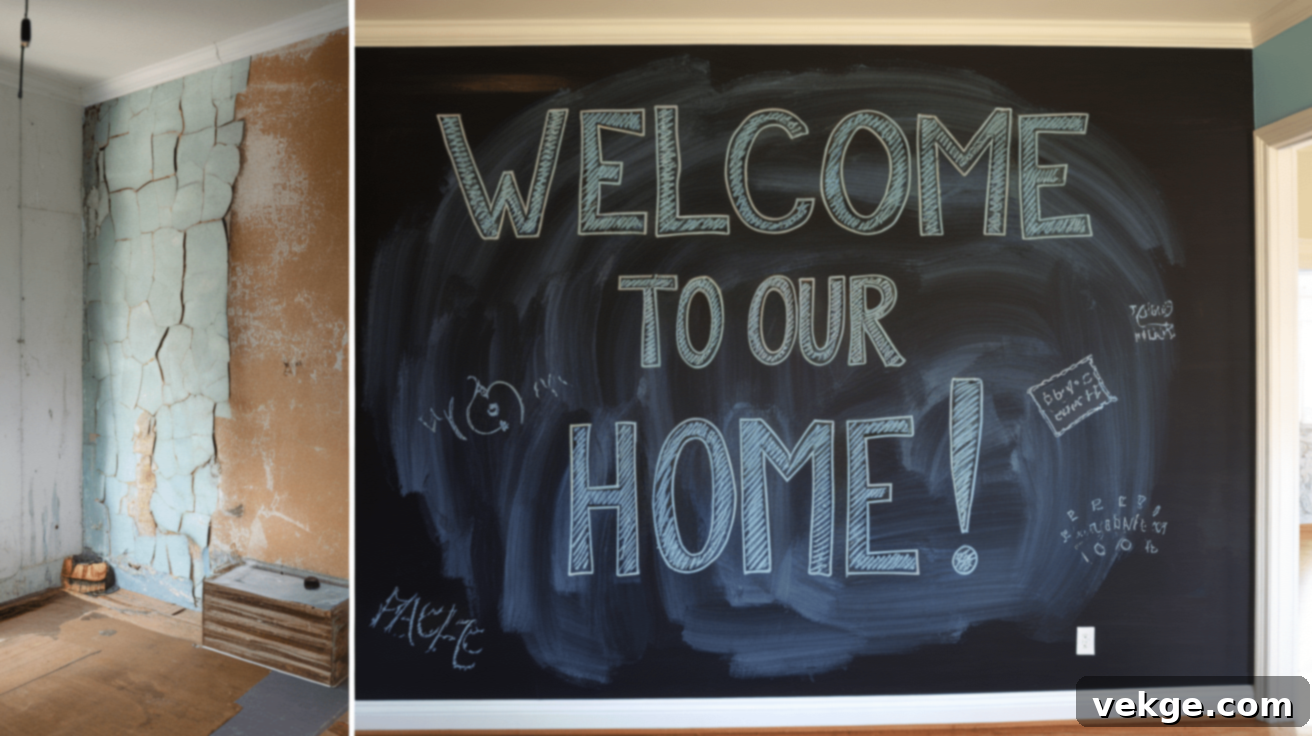
Before: A plain, perhaps distressed, or simply boring wall in your kitchen, office, or kids’ room cried out for personality and practical purpose.
After:
- Clean the wall meticulously to remove all dust, dirt, and any greasy residues, ensuring optimal paint adhesion.
- Apply chalkboard paint in two to three thin, even coats, patiently transforming the wall into a functional and creative chalkboard surface.
- Crucially, wait for each coat to dry completely before applying the next, preventing streaks and ensuring a smooth finish.
- Once thoroughly dry, “season” the chalkboard by gently rubbing the side of a piece of chalk over the entire surface, then wiping it clean. This prepares the surface for optimal use.
Your wall now serves as a dynamic, fun, and highly functional space where you can freely write notes, compile lists, draw doodles, or create ever-changing art.
12. Update an Old Mirror: Reflecting New Style
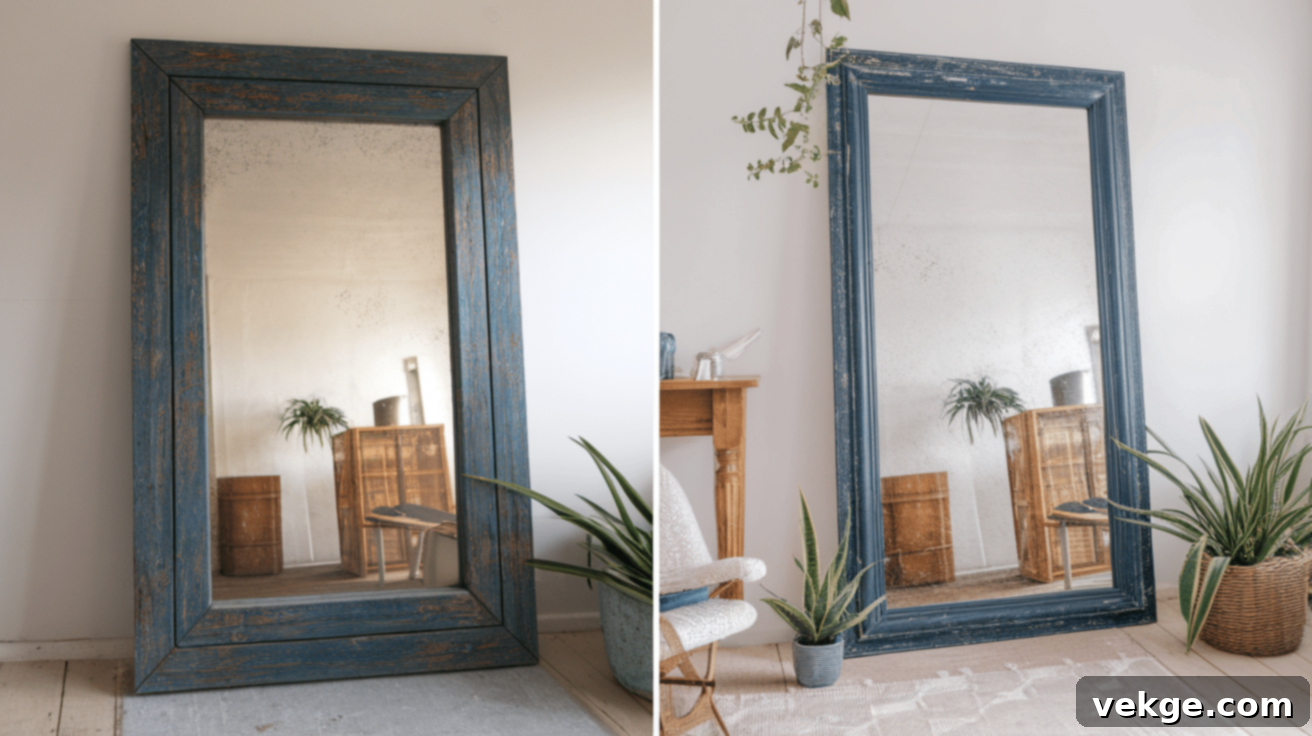
Before: The mirror frame looked noticeably outdated, perhaps with a dull finish or simply plain wood that starkly contrasted with the room’s evolving style.
After:
- Clean the frame meticulously to remove any dust, dirt, or grime, ensuring a pristine surface for painting.
- Apply a smooth coat of chalk paint in a carefully selected color that perfectly complements the room’s current decor, unifying the space.
- Allow the paint to dry fully, then apply a second coat if deemed necessary to achieve a deeper color and even coverage.
- Lightly sand to strategically distress the edges, creating a captivating antique or time-worn look, adding a sense of history.
- Finish with a protective wax or polyurethane sealant to shield the paint and preserve its fresh appearance over time.
Your mirror frame is now stylishly updated and chic, seamlessly fitting and enhancing the overall aesthetic of your room.
13. Painted Serving Tray: Decorative & Useful
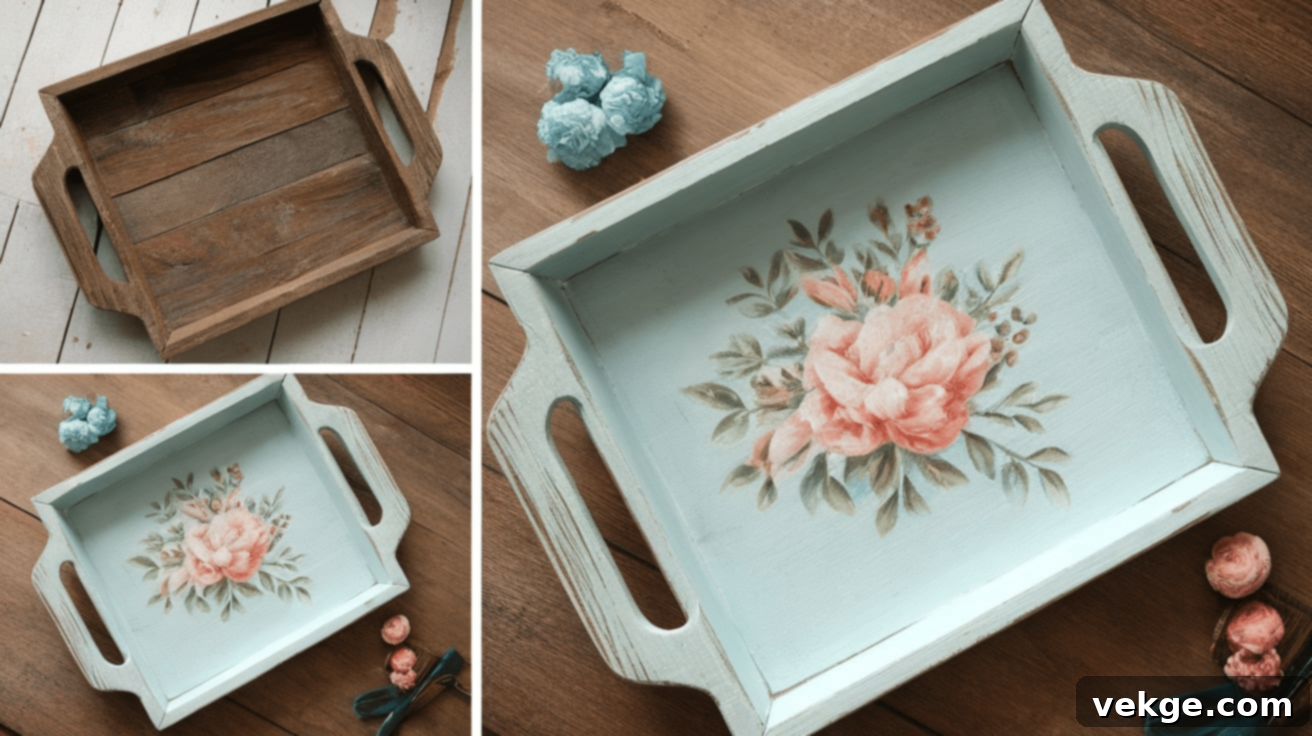
Before: A plain wooden serving tray that looked boring, perhaps even out of place, in your elegant living or dining area, failing to contribute to the decor.
After:
- Clean the tray thoroughly, ensuring it is free from any dust, dirt, or greasy fingerprints for optimal paint adhesion.
- Apply a vibrant coat of chalk paint in a color that beautifully matches or harmoniously contrasts with your kitchen or living room’s scheme.
- Once the first coat dries completely, apply a second coat to ensure full, even, and rich coverage across the entire surface.
- Distress the edges for a charmingly worn, vintage look, adding character and warmth to the piece (this step is optional).
- Seal with a durable wax or a clear protective finish for enhanced durability and to make it resistant to light spills.
The tray is now both functional and stylish, serving as a perfect piece for serving guests or as a beautiful decorative accent in your home.
14. Create a Chalkboard Tray: Personalized Messages
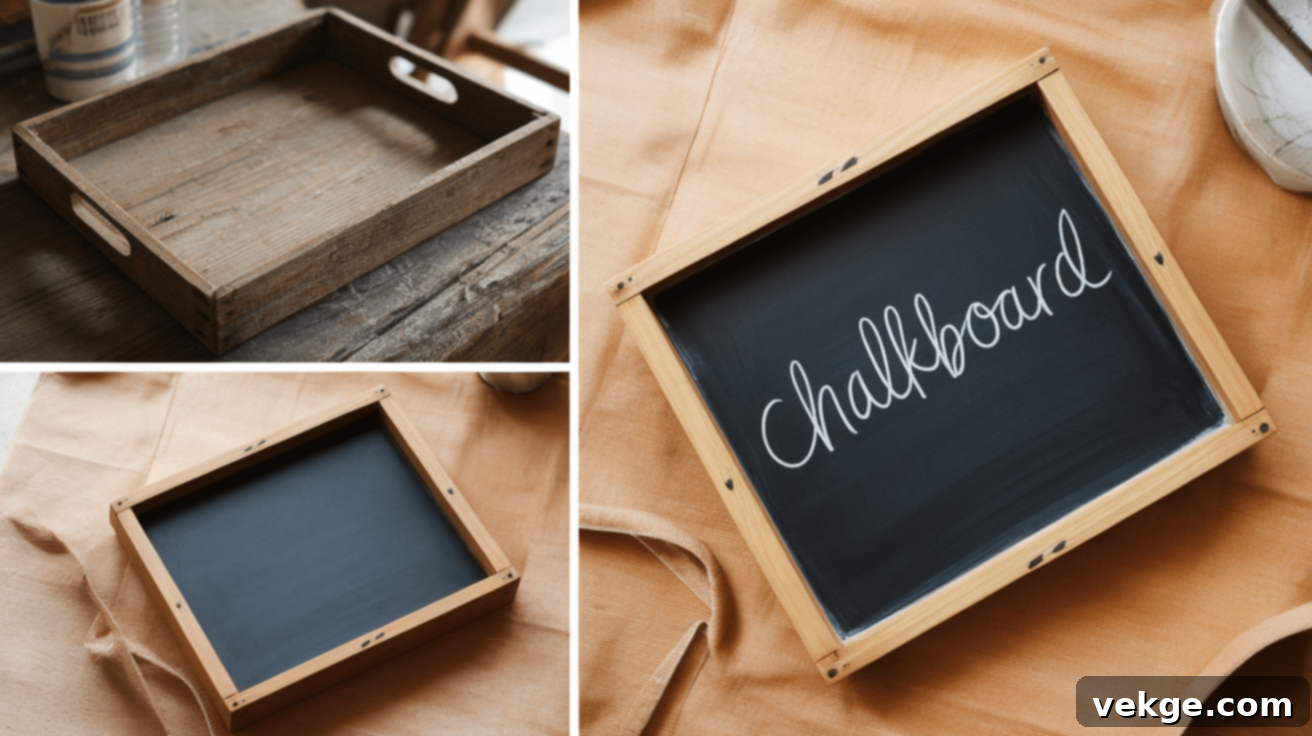
Before: A simple, perhaps unassuming, tray that you envisioned transforming into a fun, interactive, and personalized piece for your home.
After:
- Clean the tray thoroughly to remove any dirt, dust, or residue, ensuring a smooth and clean surface for painting.
- Apply specialized chalkboard paint to the entire surface of the tray, ensuring an even and complete coating.
- Allow the paint to dry for several hours, or as per manufacturer instructions, and apply a second coat if required for full opacity.
- Once completely cured, use chalk to write personalized messages, seasonal greetings, or decorative designs on the tray, making it uniquely yours.
This easy-to-make chalkboard tray will quickly become a beloved, functional, and endlessly fun addition to your home, perfect for notes or unique displays.
15. Chalk Paint for Drawers: A Fresh Look
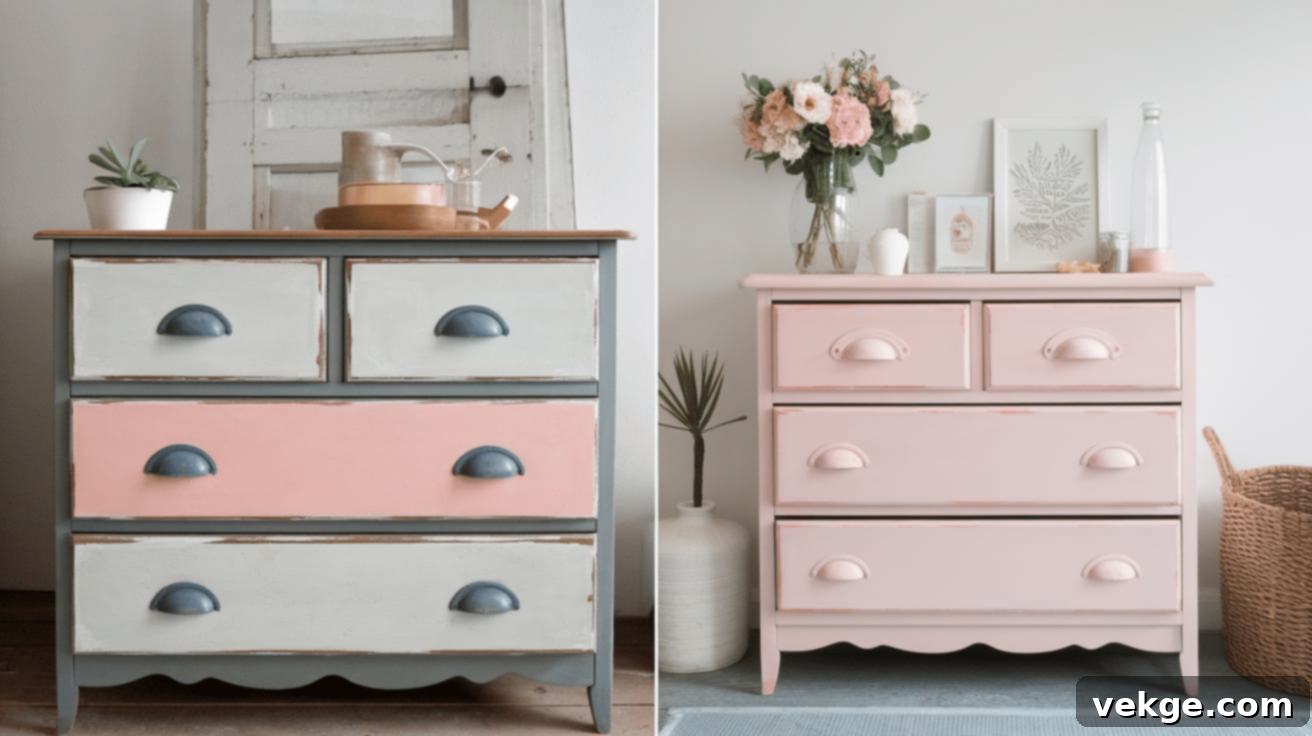
Before: A drawer set that appeared old, scuffed, and unappealing, no longer complementing your room’s decor and desperately needing an update.
After:
- Clean the drawers thoroughly to remove all dirt, dust, and any accumulated grime, ensuring a smooth painting surface.
- Apply a consistent coat of chalk paint to the drawer fronts, choosing a color that refreshes the entire piece.
- Allow the first coat to dry completely, then apply a second coat if needed to achieve optimal coverage and a flawless finish.
- Sand the edges lightly for a tasteful distressed look, adding a touch of character and antique appeal (this step is optional).
- Finish with a protective wax or durable polyurethane sealant for added longevity and resistance to daily wear.
Your drawers will now exude a stylish and fresh appearance, perfectly suited for any room, offering both beauty and renewed functionality.
Why Use Chalk Paint? Unlocking its Many Advantages
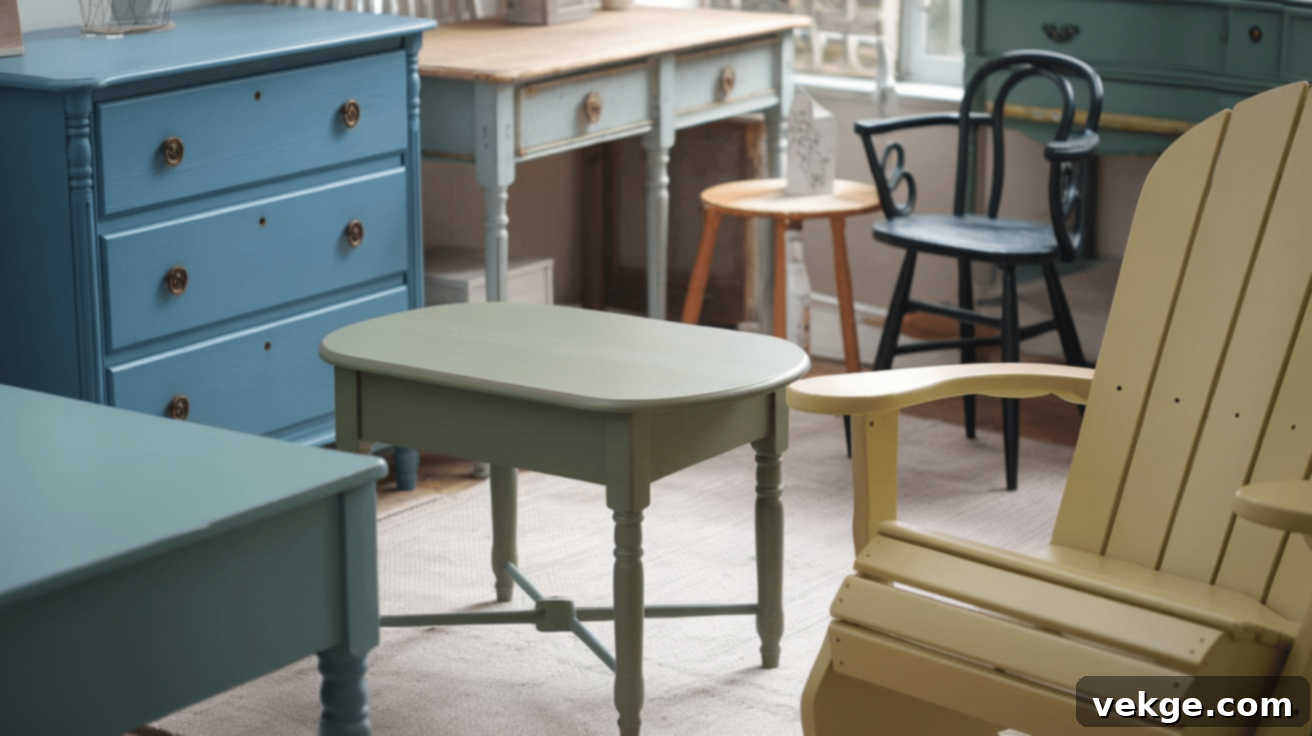
There are numerous compelling reasons why chalk paint has become such a widely popular and cherished choice for furniture makeovers and DIY projects:
Easy to Use
Chalk paint stands out for its incredible ease of application. It demands minimal preparation, freeing you from the tedious and time-consuming tasks of sanding, stripping, or priming furniture before painting. This characteristic makes it an ideal choice for beginners embarking on their first DIY project or for seasoned crafters seeking a quick and simple transformation without the usual fuss.
Versatile for Many Surfaces
The versatility of chalk paint is truly remarkable. It adheres beautifully to an extensive array of surfaces, including various types of wood, metal, ceramic, brick, concrete, and even fabric. This adaptability means it can revitalize a wide range of furniture pieces, from dressers, chairs, and tables to cabinets, picture frames, and decorative accents, offering endless creative possibilities.
No Stripping or Sanding Required
One of the most significant advantages of chalk paint is its exceptional ability to adhere to most surfaces without requiring the laborious process of sanding down or stripping off old finishes. This feature alone saves immense amounts of time and effort, making furniture restoration projects far more accessible and enjoyable for everyone.
Creates a Beautiful Matte Finish
The signature matte, velvety finish of chalk paint is inherently elegant and perfectly suited for cultivating a vintage, rustic, or even a modern farmhouse aesthetic. This unique texture can be easily enhanced through distressing techniques, allowing you to add character, depth, and a bespoke, aged look to any piece, giving it a rich, storied feel.
Quick Drying
Chalk paint boasts a remarkably fast drying time, often allowing you to apply multiple coats within a single day. This rapid drying feature means your projects can be completed in a fraction of the time compared to traditional paints, letting you enjoy your newly transformed pieces much sooner.
Durable Finish
Once properly sealed with a protective clear wax or a durable polyurethane topcoat, chalk paint creates a surprisingly robust and resilient finish. This protective layer ensures that your newly painted furniture can withstand the rigors of daily use and wear and tear, maintaining its beautiful appearance for many years to come.
How to Get a Textured Chalk Paint Furniture Finish
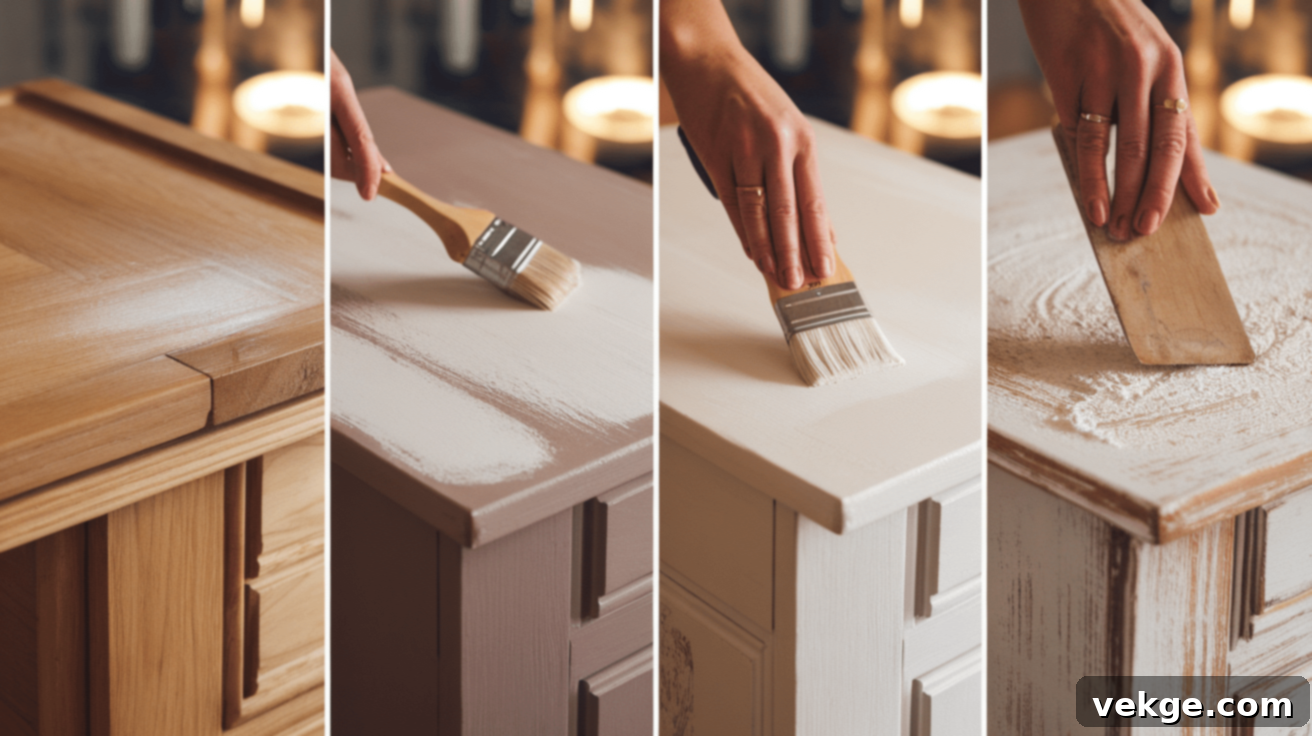
A textured finish achieved with chalk paint can dramatically add depth, character, and a unique tactile quality to your furniture pieces. The beauty of chalk paint lies in its versatility, allowing you to effortlessly create various textures to match your specific aesthetic preferences. Here’s how to achieve captivating textured looks:
Layering Chalk Paint for Depth
To create a richly layered effect, apply two or more distinct layers of different-colored chalk paints. Once the final layer of paint is dry, gently sand the edges or any raised areas. This technique strategically reveals the underlying colors, giving the piece a beautifully weathered, authentically rustic, or elegantly aged feel that tells a story.
Using a Dry Brushing Technique
Instead of applying chalk paint with a heavily loaded brush, try the dry brushing technique. Lightly dip your brush into the paint, then wipe off most of the excess paint on a paper towel or scrap material until the brush is almost dry. Apply this lightly loaded brush to the furniture in quick, feathery strokes. This method results in a subtle, textured finish with delicate streaks of color, adding dimension without overwhelming the piece.
Texturing with Plaster or Clay Additives
For a more pronounced texture, consider mixing chalk paint with a small amount of plaster of Paris or a fine clay powder. This creates a thicker, more paste-like consistency. Apply this mixture to your furniture to achieve a rough, almost stone-like or stucco appearance. This technique is perfect for crafting a truly vintage, rustic, or authentic farmhouse look, providing a unique tactile experience.
Sponge Painting for Organic Texture
Employ a natural sea sponge or a synthetic sponge to apply chalk paint for an organic, subtly textured finish. Dab the sponge into the paint, then lightly press and dab it onto the furniture surface. This technique creates a soft, bumpy, and irregular texture that mimics natural stone or aged plaster, offering a distinct visual and tactile interest without any sanding.
Distressing for Natural Wear and Tear
After applying your final coat of paint and allowing it to dry, use a fine-to-medium grit sanding block or sandpaper to distress specific areas. Focus on corners, edges, raised details, and any spots that would naturally show wear over time. This targeted distressing technique enhances the texture, creates an authentic aged look, and adds considerable character to the piece, giving it a sense of history.
Choosing the Right Brand of Chalk Paint for Your Project
Selecting the appropriate chalk paint brand is a crucial step in ensuring you achieve the best possible results for your furniture makeover. The market offers a plethora of brands, but their qualities and characteristics can vary significantly. Here’s a look at some of the top brands highly regarded by DIY enthusiasts, and key factors to consider when making your choice:
1. Annie Sloan Chalk Paint: The Original Innovator
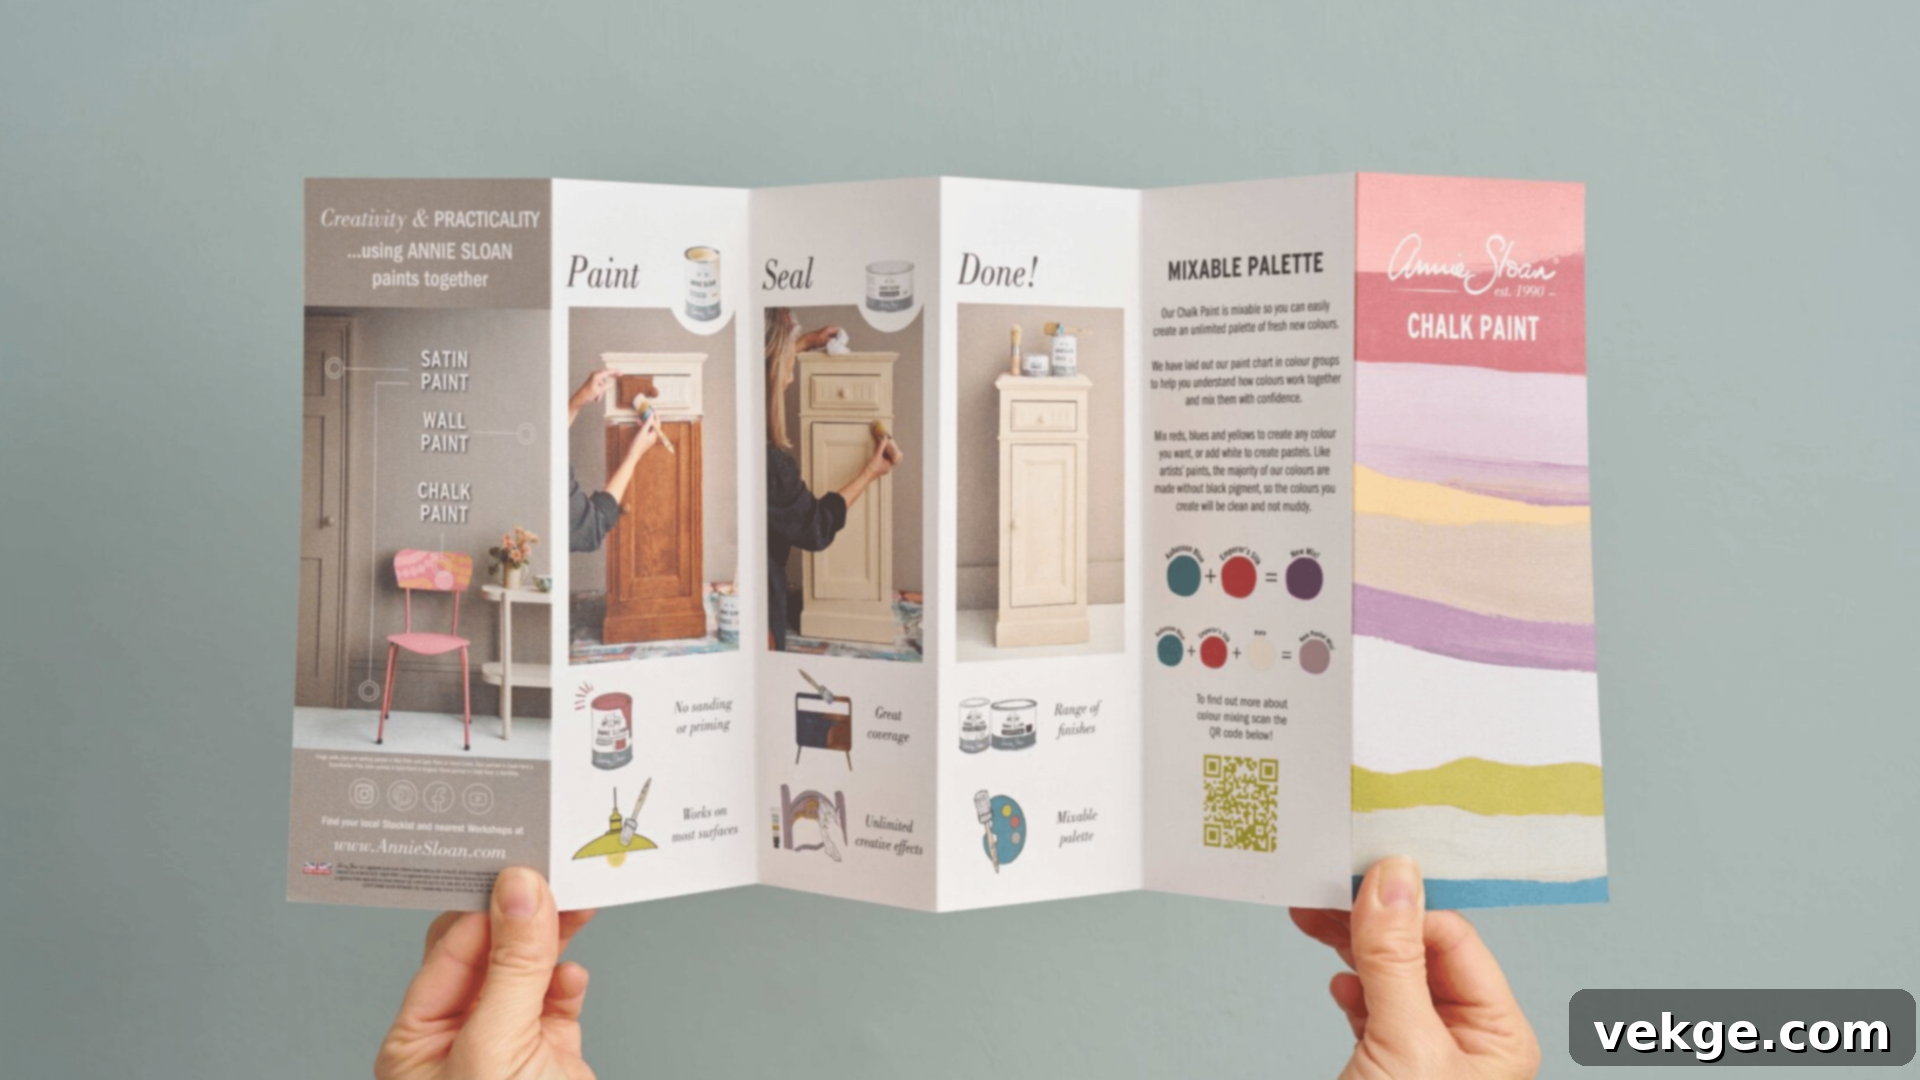
Annie Sloan is widely recognized as the original chalk paint brand, a pioneer in the world of furniture painting, and remains one of the most popular and trusted options. It is celebrated for its consistently smooth finish, exceptional ease of use, and an exquisite, diverse range of colors. Annie Sloan chalk paint’s premium formulation allows it to be applied directly to virtually any surface without the need for priming, making it a favorite among both novices and professionals.
2. Rust-Oleum Chalked Paint: Accessible Quality
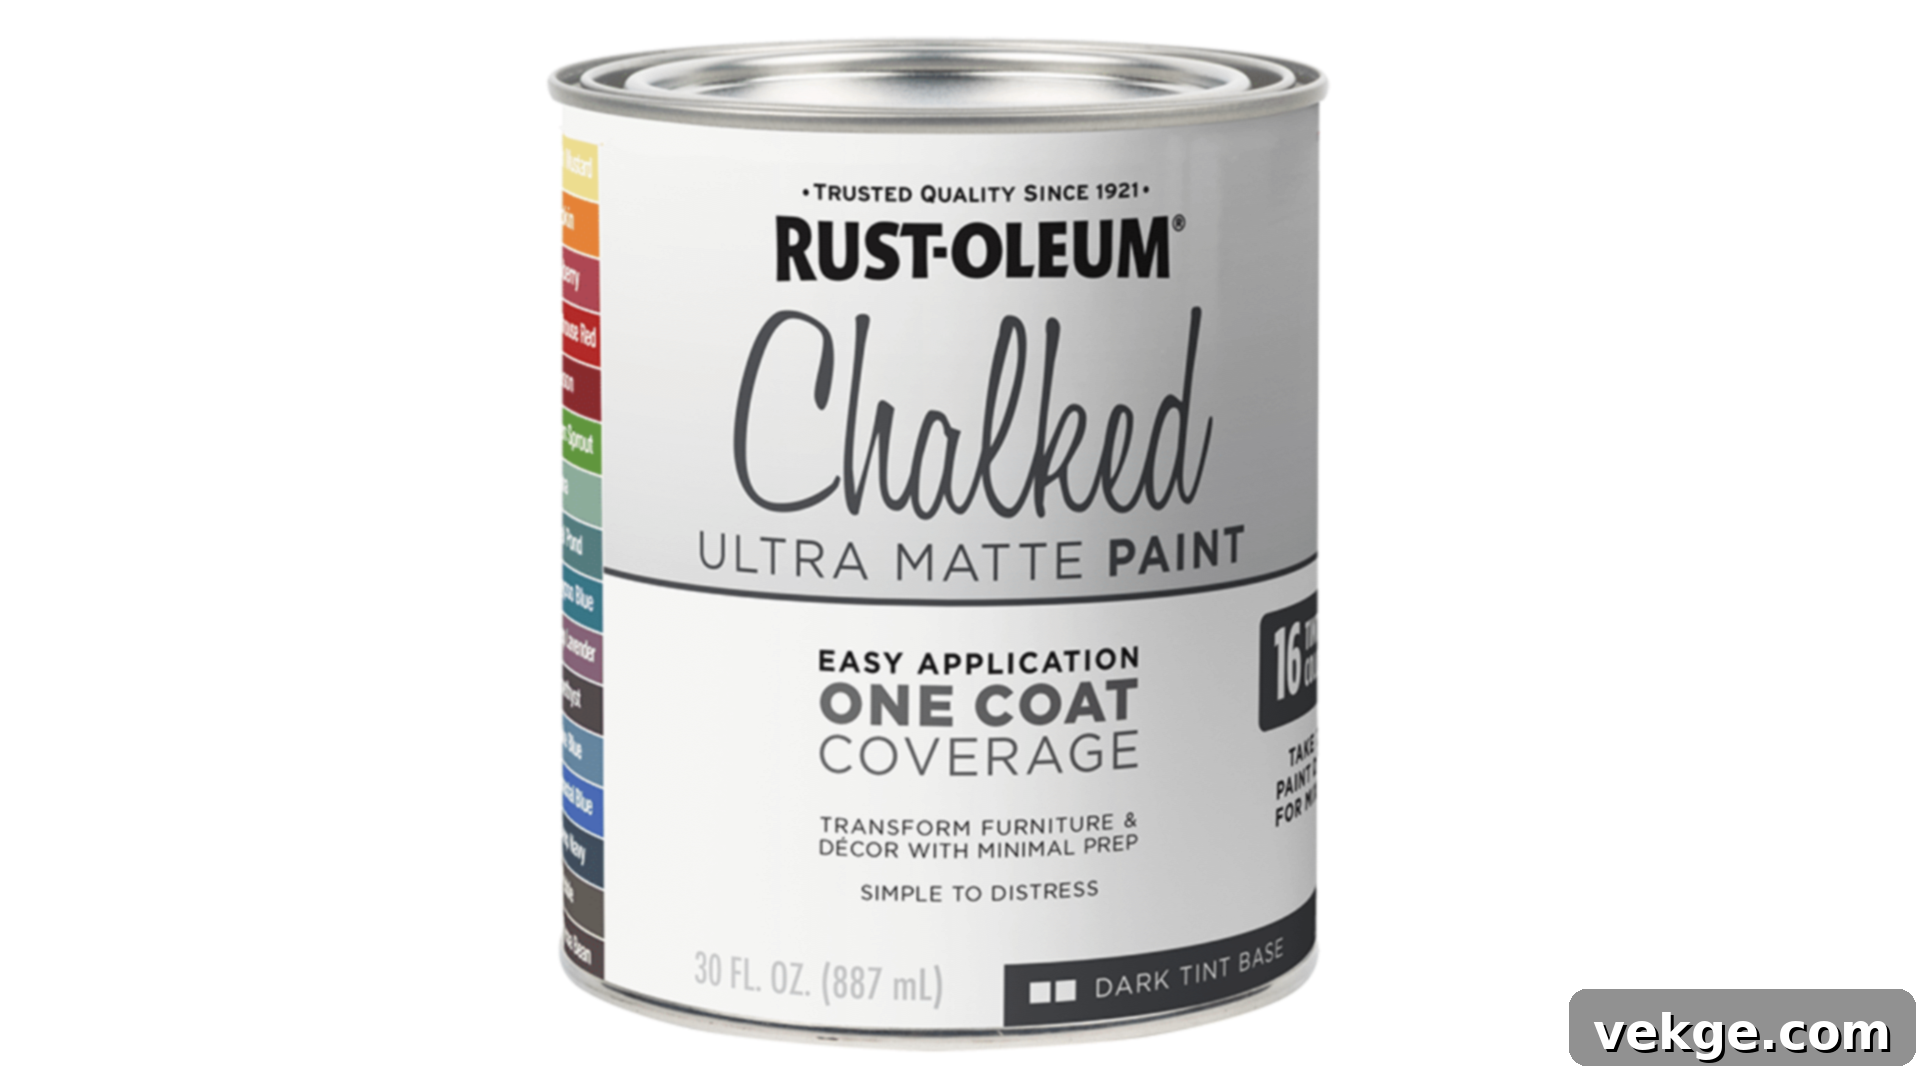
Rust-Oleum Chalked Paint offers an excellent and highly affordable option, particularly for those who are just beginning their journey with DIY chalk paint projects. This brand is known for its user-friendly application, impressive coverage, and wide availability at most major home improvement stores, making it a convenient choice for spontaneous makeovers.
3. FolkArt Home Décor Chalk Paint: Artistic Versatility
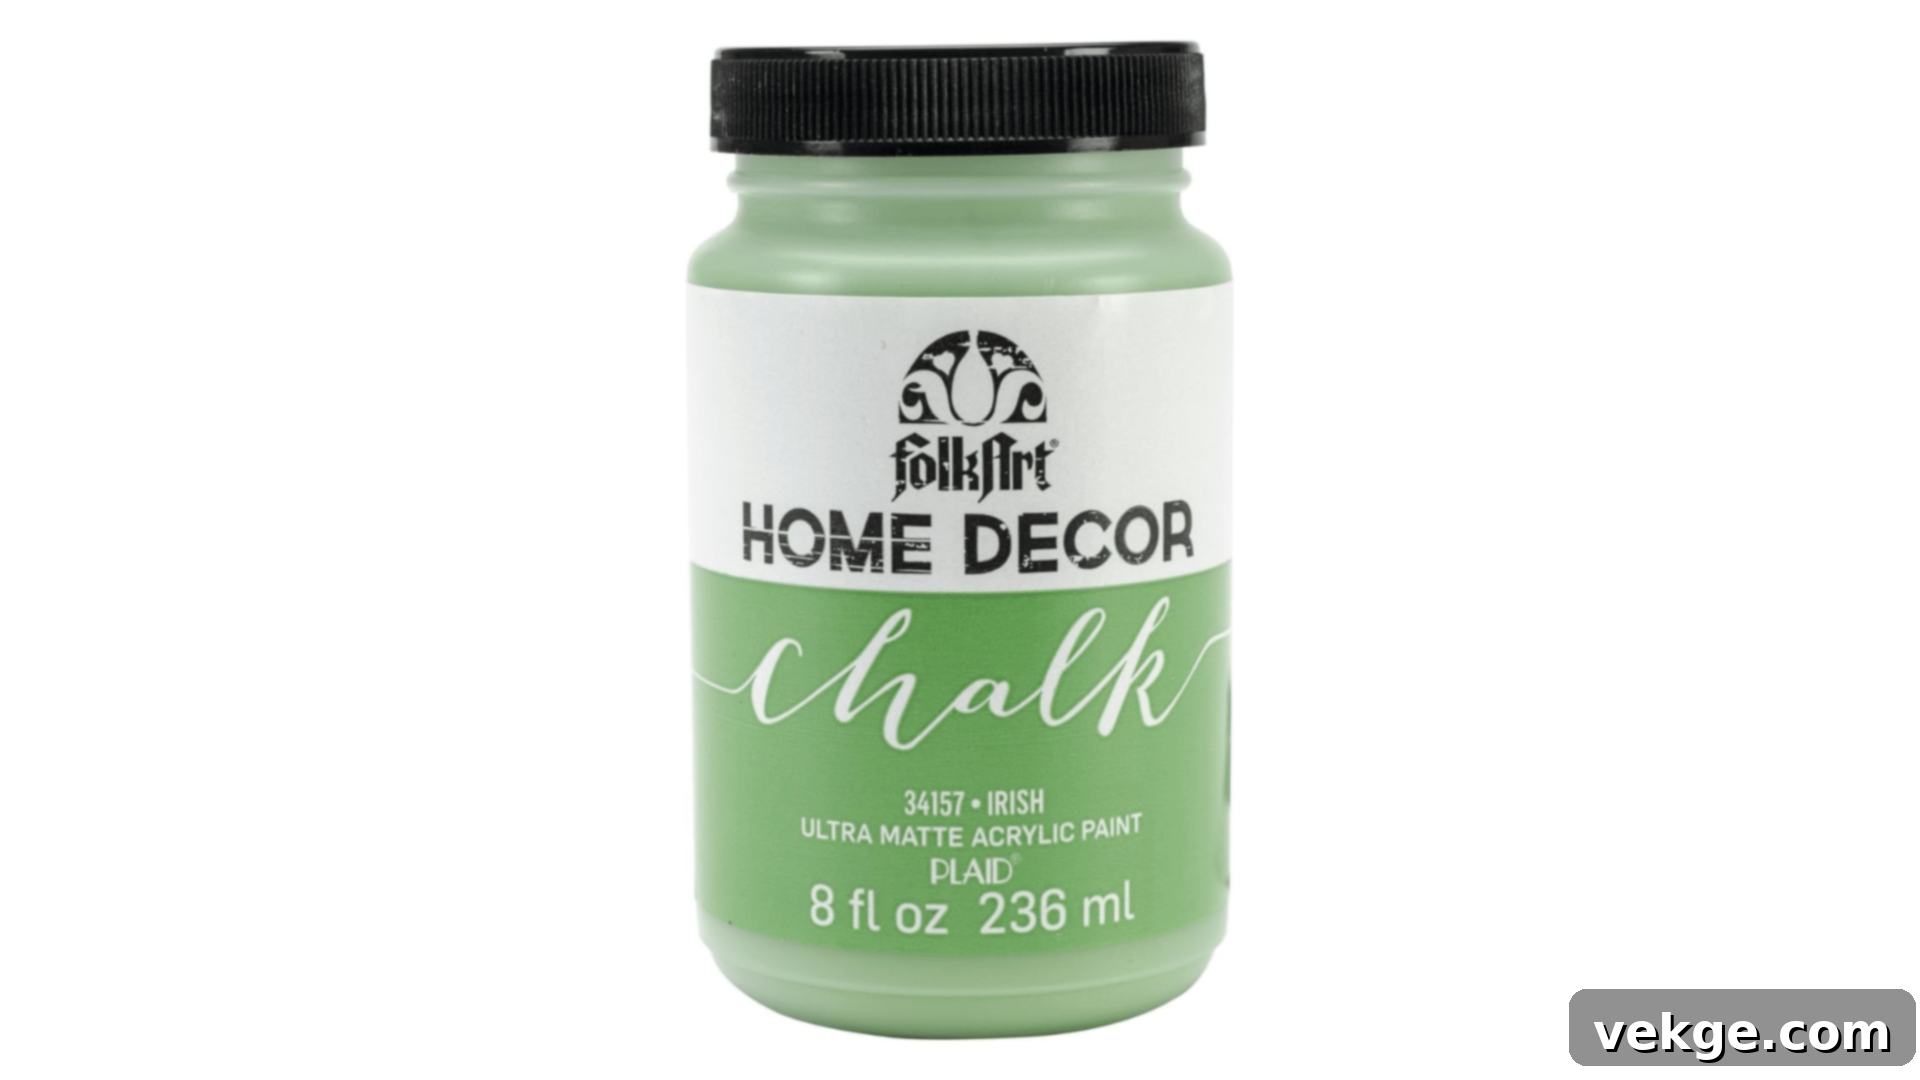
FolkArt Home Décor Chalk Paint provides a smooth, high-quality finish that is ideal for a myriad of furniture transformations. This brand is especially valued for its remarkable versatility, outstanding coverage, and a generous selection of colors, empowering artists and crafters to bring their creative visions to life with ease.
4. Behr Chalk Decorative Paint: Beginner-Friendly Durability
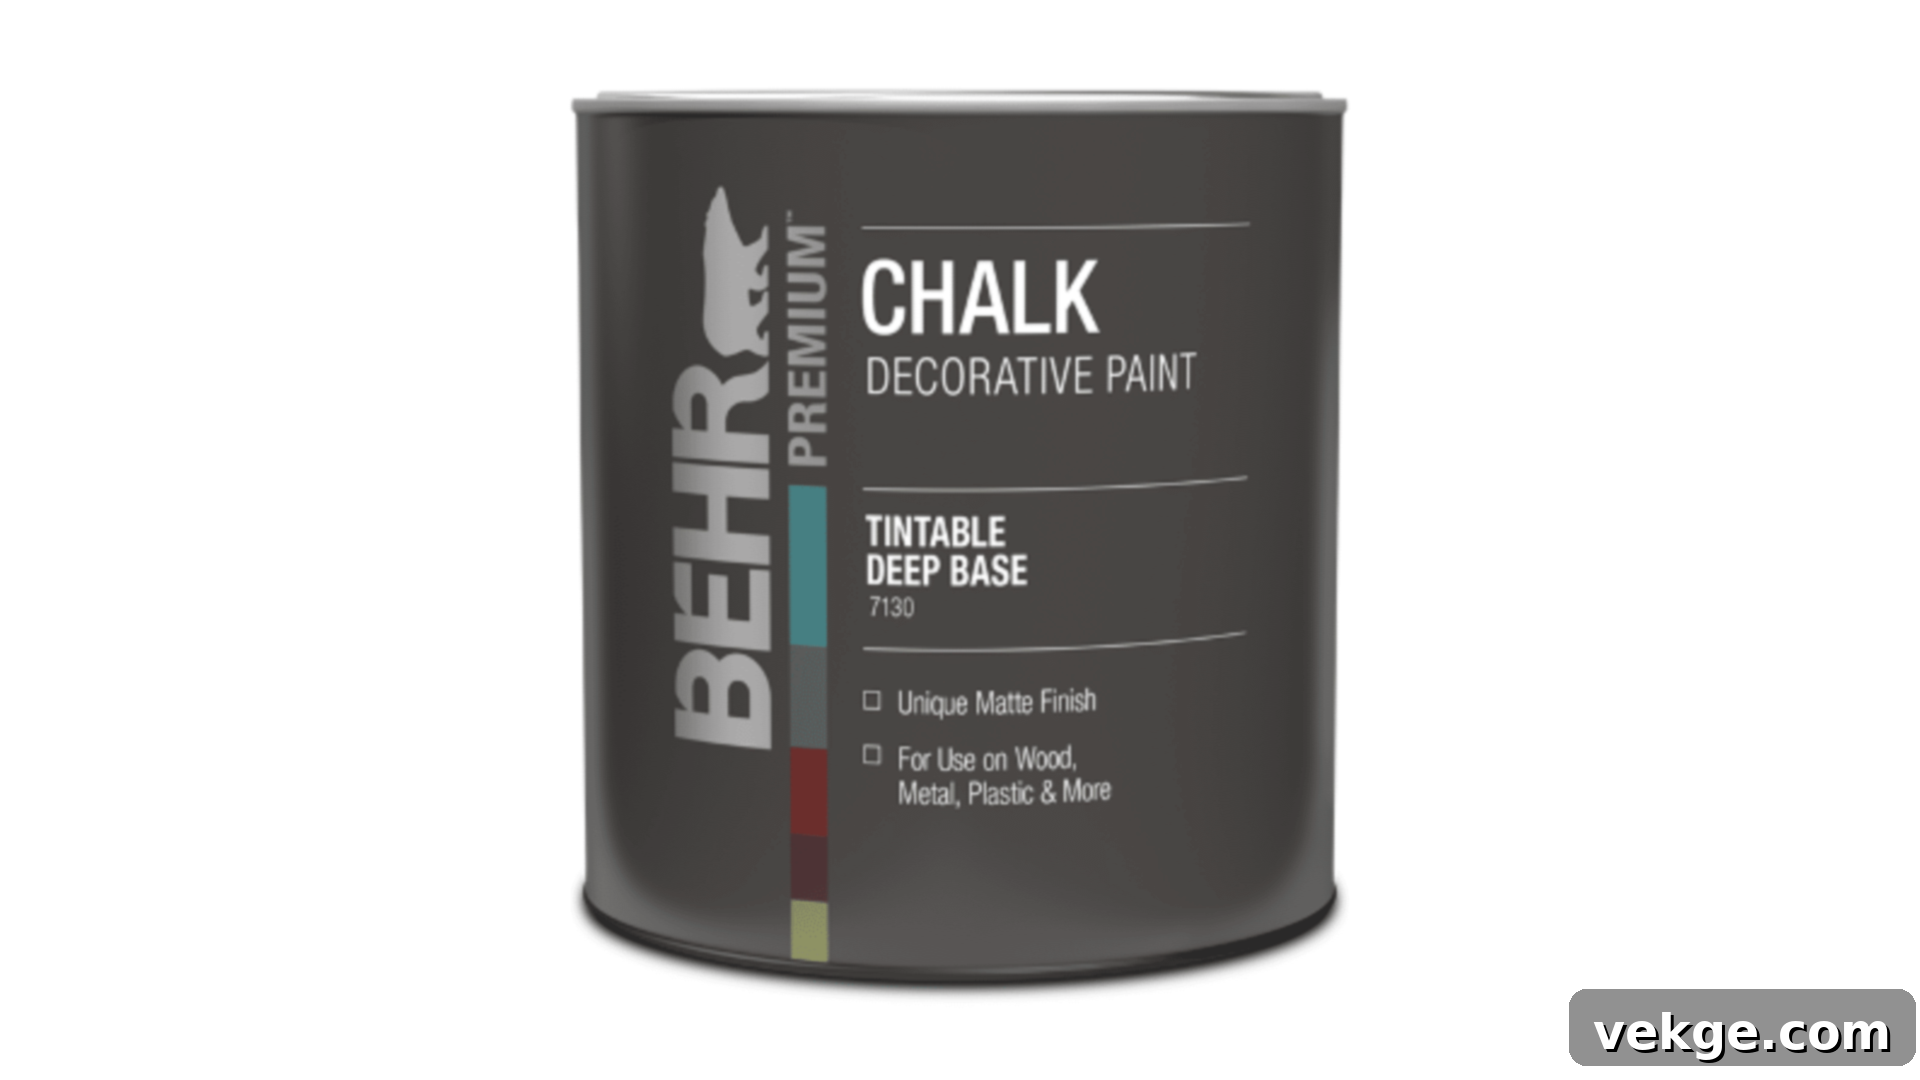
Behr Chalk Decorative Paint is another fantastic option, especially well-suited for beginners due to its ease of availability and cost-effectiveness. It offers a durable finish, although some users might find that achieving the smoothest finish requires slightly more effort compared to some premium brands. However, its affordability and resilience make it a solid choice.
When selecting the perfect chalk paint brand, always consider these vital aspects:
- Finish: Chalk paints can offer varying degrees of matte, from ultra-flat to a slightly more satin or even a subtle sheen once sealed. Choose a finish that aligns with the specific aesthetic you envision for your piece.
- Color Selection: While many brands boast a wide array of colors, explore different palettes to find the exact shades that will best complement and enhance your project and existing decor.
- Ease of Use: Some chalk paints have a thinner consistency, making them incredibly easy to work with and spread evenly. Others might be thicker, requiring a bit more effort to achieve a perfectly smooth application. Don’t hesitate to try small samples from different brands to discover which consistency and application feel best suited to your personal painting style.
More Chalk Paint Furniture Techniques to Explore
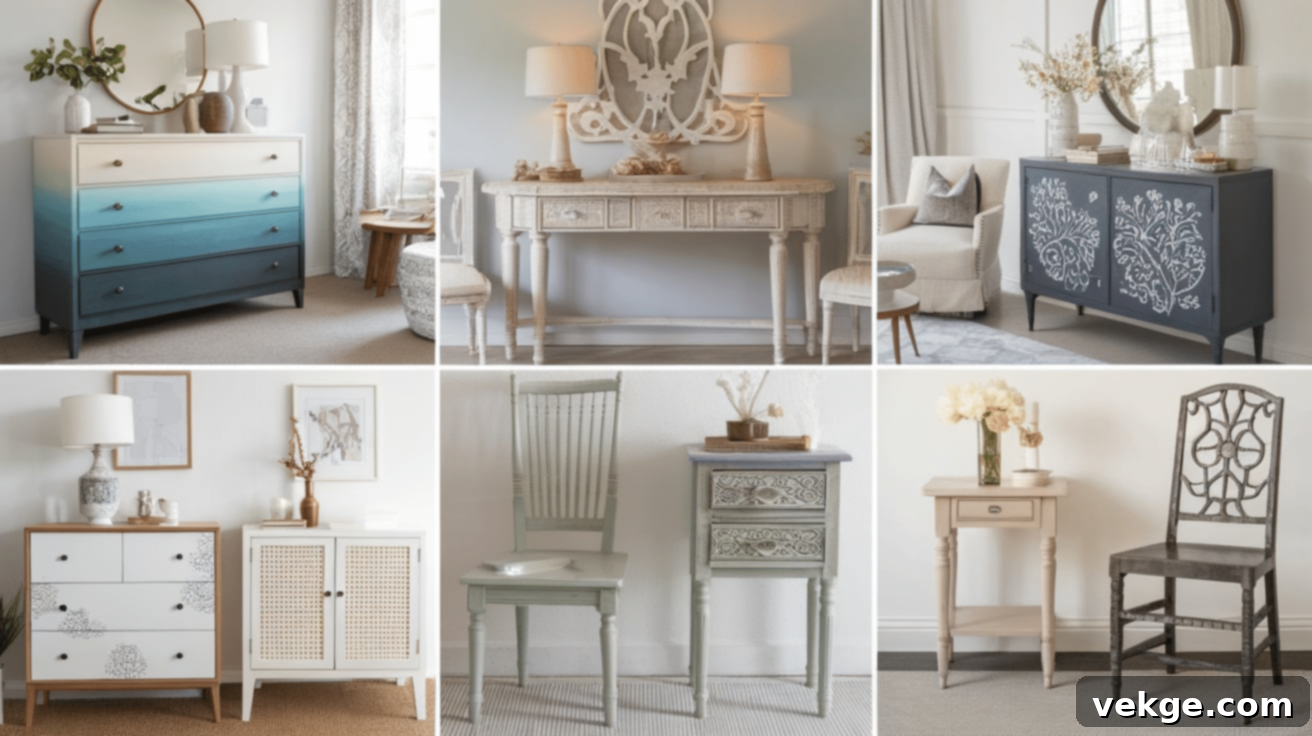
Chalk paint’s magic extends far beyond simply creating a flat, solid color finish. Its unique properties open up a world of creative possibilities, allowing you to employ a variety of techniques to craft truly stunning and personalized furniture pieces. Here are a few more advanced and artistic techniques to experiment with and elevate your furniture makeovers:
Ombre Effect: Gradient Beauty
For a sophisticated and visually striking ombre effect, blend two or more harmonizing chalk paint colors, transitioning smoothly from a lighter shade to a darker one. Achieve this by applying a base color, then gradually introducing and blending darker shades towards the bottom or edges of the piece. The key is seamless blending while the paint is still wet, creating a beautiful gradient that adds depth and modern elegance.
Stencil Designs: Personalized Patterns
Adding intricate or bold stencil designs to your furniture is an effortless yet impactful way to infuse personality, intricate patterns, or meaningful motifs. Use a high-quality stencil to apply contrasting chalk paint colors for patterns, decorative designs, or even inspirational quotes on drawer fronts, tabletops, or cabinet panels. After stenciling, you can lightly distress the piece to soften the design and give it a beautifully aged, integrated look.
Decoupage: Artistic Layering
For a truly creative and unique touch, incorporate decoupage into your furniture transformation. After painting your furniture with a base coat of chalk paint, apply decorative paper (such as maps, sheet music, floral patterns, or newspaper clippings) to specific areas like drawer fronts, tabletops, or side panels using a decoupage medium. Once the paper is adhered and dry, seal it with several coats of a durable sealer. This technique not only adds visual interest and a custom narrative but also introduces a unique texture to your furniture.
Wax and Paint Combo: Enhanced Depth
While a clear wax finish is standard for protecting chalk paint, combining wax directly with the paint can create an even more distressed and dimensional look. Apply a coat of chalk paint, and while it’s still slightly wet, gently rub in tinted wax (like dark wax or white wax) using a cloth. This technique allows the wax to penetrate and mix with the wet paint, creating an instant aged effect, enhancing crevices, and imparting a rich, textured finish that catches the light beautifully.
Crackling Effect: Vintage Authenticity
If your goal is to achieve an authentic, antique-like appearance with visible cracks and a true sense of age, a crackle medium is your secret weapon. Apply a base layer of chalk paint, followed by a specific crackling medium, and then a second coat of chalk paint in a contrasting or complementary color. As the top coat dries, it will react with the crackle medium, creating a network of fine cracks that reveal the base color beneath, resulting in a wonderfully textured, weathered, and charmingly rustic look.
Maintaining Your Painted Furniture: Ensuring Longevity
After investing your time and effort into beautifully transforming your furniture with chalk paint, proper maintenance is key to preserving its fresh, appealing look for many years. Here’s a comprehensive guide on how to care for your cherished painted pieces:
1. Clean Gently and Regularly
To keep your painted furniture looking pristine, use a soft, non-abrasive cloth moistened with a gentle cleaning solution. Avoid any harsh chemicals, abrasive cleaners, or scrub brushes, as these can easily damage or strip away the protective finish and paint. A simple mixture of mild dish soap and warm water is usually sufficient and highly effective for most surfaces, ensuring the integrity of the chalk paint finish.
2. Protect from Excessive Moisture
While chalk paint, once sealed, offers good durability, it’s crucial to shield your painted furniture from prolonged or excessive moisture exposure. Always wipe up spills immediately with a soft, dry cloth to prevent water rings, stains, or potential damage to the paint and sealant. For high-moisture areas, consider additional layers of a waterproof sealant.
3. Reapply Protective Wax Periodically
Over time, especially on high-traffic furniture pieces like tabletops or chairs, the protective wax finish may naturally wear down. To maintain optimal protection and enhance the paint’s durability, it’s recommended to reapply a fresh coat of clear wax every 6 to 12 months, or as needed. Simply buff the wax into the clean, painted surface and allow it to cure, revitalizing the protective barrier.
4. Effortlessly Touch-Up Scratches and Blemishes
Should your painted furniture incur minor scratches or scuffs, the beauty of chalk paint lies in its easy repairability. You can simply touch up the damaged area with a small amount of the original chalk paint. Apply a thin, even layer, allow it to dry completely, and then reapply a bit of protective wax to seamlessly match the surrounding finish, making imperfections virtually disappear.
5. Guard Against Direct Sunlight Exposure
Prolonged exposure to direct, intense sunlight can cause chalk-painted furniture, like any painted surface, to fade or yellow over time. To preserve the vibrant color and integrity of your finish, position furniture away from direct sunlight, or utilize window treatments such as curtains or blinds to block harmful UV rays during peak hours.
Chalk Paint Tips and Tricks for Flawless Results
To ensure your chalk paint projects are as successful and enjoyable as possible, here are some essential tips and tricks gleaned from years of experience:
1. Invest in a Quality Brush
The right brush makes all the difference. For the smoothest, most streak-free finish, invest in a good quality synthetic brush. If you’re aiming for a more textured, rustic, or distressed look, a natural bristle brush is ideal as it holds more paint and creates distinctive brushstrokes. Clean your brushes thoroughly after each use to prolong their life.
2. Always Test Before Committing
Before painting your entire piece, always test your chosen chalk paint on a small, inconspicuous area of the furniture, or on a scrap piece of similar material. This critical step ensures that the paint adheres properly to the specific surface and, equally importantly, confirms that you are happy with the color and desired finish under different lighting conditions.
3. Respect Drying Time Between Coats
Even though chalk paint is known for its quick-drying properties, never rush the drying time between coats. Allowing each coat to dry completely, typically 30 minutes to 1 hour (or as per manufacturer instructions), is crucial. This patience prevents streaking, ensures even coverage, and allows for proper adhesion, leading to a smooth, professional-looking finish that will last.
4. Use Painter’s Tape for Precision
If your project involves painting along precise edges, creating sharp lines, or working around existing hardware, painter’s tape is your best friend. Apply high-quality painter’s tape firmly to the areas you want to protect or delineate. This technique guarantees clean, crisp lines and prevents paint bleed, giving your finished piece a professional and polished appearance.
5. Avoid Overloading Your Brush
A common mistake is overloading the brush with too much paint. Instead, apply chalk paint in thin, even coats. This approach prevents drips, minimizes brush marks, and ensures consistent coverage. It’s always better to apply several thin coats to build up color and coverage than to try and achieve it in one thick, uneven layer.
6. Mix Paint for Custom Colors
Chalk paint is wonderfully forgiving and incredibly easy to mix. If you can’t find the exact shade you envision, don’t hesitate to get creative! Experiment by mixing different chalk paint shades together to create your own unique, custom hue that perfectly matches your vision and complements your decor. This allows for endless personalization and truly bespoke results.
Conclusion: Embrace the Magic of Chalk Paint
Chalk paint is undeniably a fantastic and accessible option for updating, revitalizing, and completely transforming furniture, offering an endless realm of possibilities for creative makeovers. From achieving elegantly textured finishes to mastering innovative techniques like ombre and decoupage, chalk paint empowers you to customize your furniture pieces to perfectly suit your unique style and taste.
By diligently choosing the right brand that aligns with your project needs and diligently applying proper maintenance techniques, you can ensure that your cherished chalk paint creations will remain beautiful and durable for many years to come. This commitment to quality and care ensures that your hard work translates into lasting beauty.
With a blend of practice, patience, and a touch of adventurous spirit, chalk painting can evolve into an incredibly fun, rewarding, and deeply personal way to refresh old pieces, infuse new life into forgotten treasures, and ultimately make your home feel brand new, reflecting your individual flair. Chalk paint truly unlocks endless creativity and unparalleled opportunities for personal expression in all your furniture restoration and DIY projects.
Frequently Asked Questions About Chalk Paint
How do I get a textured finish with chalk paint?
To achieve a textured finish with chalk paint, you can employ various techniques such as dry brushing, layering different colors and sanding lightly, mixing the paint with plaster or clay, or using a sponge to dab the paint, which creates an organic, bumpy texture.
Can chalk paint be used on all types of furniture?
Yes, chalk paint is highly versatile and can be used on almost any type of furniture material, including wood (raw or finished), laminate, metal, and even some fabrics. Its excellent adhesion typically eliminates the need for sanding or priming.
What is considered the best brand of chalk paint?
Several brands are highly regarded for chalk paint. Annie Sloan is often cited as the original and most popular. Other excellent options include Rust-Oleum Chalked Paint, FolkArt Home Décor Chalk Paint, and Behr Chalk Decorative Paint, each offering unique qualities and finishes.
Do I need to sand furniture before applying chalk paint?
One of the biggest advantages of chalk paint is that it generally does not require sanding or priming before application. However, it is always crucial to thoroughly clean the surface to remove any dirt, grease, or grime for the best adhesion and a lasting finish.
How long does chalk paint take to dry between coats?
Chalk paint typically dries remarkably quickly, often within 30 minutes to 1 hour, allowing for multiple coats to be applied in a single day. Always refer to the specific manufacturer’s instructions for precise drying times and ensure each coat is fully dry before applying the next.
