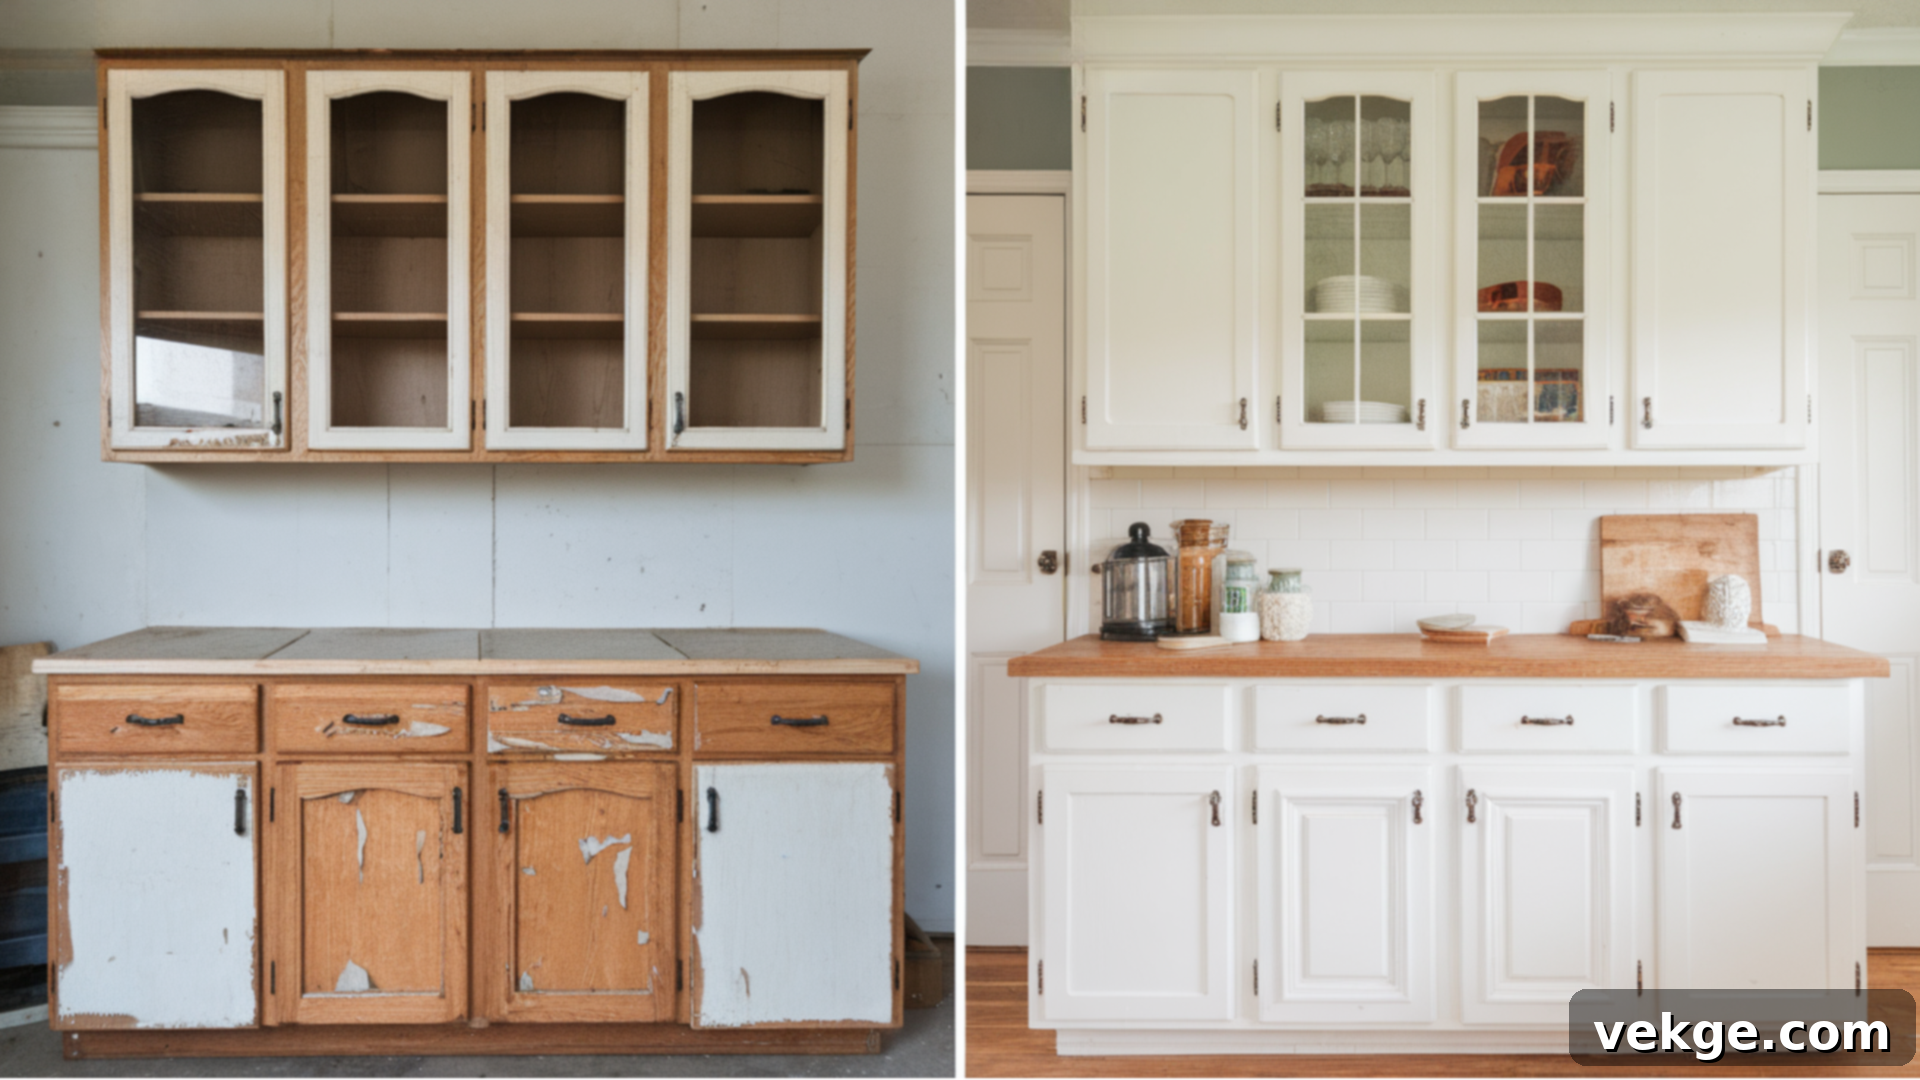
Cabinet Refacing: The Ultimate Guide to a Budget-Friendly Kitchen Transformation
Is your kitchen feeling tired and outdated, but the thought of a full-scale renovation seems daunting and expensive? Many homeowners face this dilemma, staring at worn cabinet doors and wishing for a fresh, modern aesthetic. Fortunately, there’s a transformative solution that delivers dramatic results without breaking the bank or enduring weeks of construction chaos: cabinet refacing. This innovative approach allows you to completely revitalize your kitchen’s look, making it feel brand new.
This comprehensive guide will walk you through everything you need to know about cabinet refacing. We’ll explore what refacing truly entails, how it compares to simpler options like painting or more extensive projects like full cabinet replacement, and inspire you with stunning before-and-after transformations. You’ll gain a deep understanding of the process, from selecting the right materials and estimating costs to deciding whether to tackle it yourself or hire a professional.
By the time you finish reading, you’ll be equipped with the knowledge to confidently plan, budget for, and maintain your newly refaced cabinets. Get ready to discover how a strategic and smart update can dramatically enhance your kitchen’s appeal and functionality, giving it a whole new lease on life.
What is Cabinet Refacing? Transform Your Kitchen Without a Full Remodel
Cabinet refacing, sometimes called cabinet resurfacing, is an ingenious method to completely update the aesthetic of your kitchen or bathroom without the significant expense and disruption of a full cabinet replacement. Essentially, it’s a cosmetic overhaul that focuses on the visible components of your cabinetry.
The core principle of cabinet refacing involves retaining your existing cabinet boxes – the structural framework that is typically still in good condition. Instead of tearing out these sturdy foundations, you replace all the external elements: the cabinet doors, drawer fronts, and hardware (like hinges, knobs, and pulls). Concurrently, a new, thin layer of material, such as high-quality wood veneer or durable laminate, is meticulously applied to all the exposed surfaces of the cabinet frames. This includes the stiles (vertical pieces), rails (horizontal pieces), and side panels.
The result is a striking transformation that gives your cabinets a brand-new, modern appearance, virtually indistinguishable from new custom cabinetry, all while preserving the underlying structure. This process breathes new life into your space, offering a refreshed look that feels custom-designed without the extensive time, cost, or waste associated with a complete renovation.
Cabinet Refacing vs. Refinishing vs. Replacing: Key Differences
When considering an update for your cabinets, it’s crucial to understand the distinct approaches available. While all three — refacing, refinishing, and replacing — aim to refresh your kitchen’s look, they vary significantly in scope, cost, and impact. Here’s a detailed breakdown of how cabinet refacing stands apart from its alternatives:
- Cabinet Refacing: This method focuses on aesthetic transformation. You keep your existing cabinet boxes and layout, but all visible surfaces receive a complete makeover. This includes replacing all cabinet doors and drawer fronts with new ones, covering the existing cabinet frames with matching wood veneer or laminate, and upgrading all hardware. It offers the visual impact of new cabinets at a fraction of the cost and time.
- Cabinet Refinishing (or Painting): This is the most budget-friendly option. It involves sanding, priming, and then painting or staining your existing cabinet doors, drawer fronts, and frames. While it can offer a fresh color and updated look, it doesn’t change the door style or address any underlying structural issues. The original door profiles remain, and the durability of the finish largely depends on the quality of the prep work and paint used.
- Cabinet Replacing: This is a full-scale renovation. It involves completely demolishing and removing all old cabinets and installing entirely new ones. This option allows for a complete redesign of your kitchen layout, including changing the footprint, adding new features, or reconfiguring cabinet placement. It’s the most expensive and time-consuming option, generating significant waste, but provides ultimate flexibility in design and functionality.
In summary, refacing strikes a perfect balance: it delivers the visual transformation and style upgrade of new cabinetry without the prohibitive costs, extensive timelines, or environmental impact of a full replacement. It’s an ideal choice for homeowners seeking a fresh, modern aesthetic with minimal disruption.
Ideal Scenarios for Choosing Cabinet Refacing
Deciding when cabinet refacing is the right choice for your home involves evaluating several factors, primarily the condition of your existing cabinetry and your renovation goals. Here are the situations where refacing truly shines as an optimal solution:
- Sound Cabinet Structure: The most crucial prerequisite for refacing is that your existing cabinet boxes must be in good structural condition. This means no significant water damage, mold, extensive warping, or crumbling particleboard. If the foundations are solid, refacing leverages this strength, saving you the expense of new construction.
- Satisfactory Layout: Cabinet refacing preserves your current kitchen layout. If you’re content with the arrangement of your appliances, sink, and overall kitchen footprint, refacing is ideal. It allows for a dramatic visual update without the need for extensive plumbing, electrical, or structural changes that come with altering a floor plan.
- Budget-Conscious Renovation: Refacing offers the appearance of new, high-end cabinets at a significantly lower cost than a complete replacement. This makes it an attractive option for homeowners seeking a major aesthetic upgrade while adhering to a stricter budget.
- Time-Saving Project: A full kitchen remodel can take weeks or even months. Cabinet refacing, by contrast, is typically completed in a matter of days, minimizing disruption to your daily life. This quick turnaround is perfect for those who need a swift transformation.
- Enhancing Home Value for Sale: If you’re preparing your home for sale, refacing can provide an excellent return on investment. It instantly modernizes the kitchen, a key selling point, making the home more appealing to potential buyers without overspending on a full remodel that might not align with a buyer’s specific tastes.
- Eco-Friendly Choice: By reusing existing cabinet boxes, refacing reduces landfill waste, making it a more environmentally sustainable option compared to replacing all cabinetry.
In essence, if your cabinets are structurally sound, your layout works, and you’re aiming for a fresh, modern look without the expense, time, or mess of a complete overhaul, cabinet refacing is an exceptionally smart and rewarding choice.
Your Step-by-Step Guide to a Stunning Cabinet Refacing Makeover
Embarking on a cabinet refacing project can seem daunting, but with a clear, structured approach, you can achieve professional-looking results. This comprehensive guide will walk you through each critical step, ensuring you understand the process from initial planning and material selection to the final touches. Whether you’re considering a DIY project or simply want to understand what a professional will do, these steps will prepare you to transform your kitchen or bathroom cabinets without the need for a full, costly remodel.
Essential Tools and Materials for Your Cabinet Refacing Project
Successful cabinet refacing hinges on careful preparation, and that includes gathering all the necessary tools and materials before you begin. Having everything organized and on hand will not only prevent frustrating interruptions but also ensure your project progresses smoothly and efficiently from start to finish. Here’s a detailed list of what you’ll typically need, along with approximate cost ranges to help you budget effectively:
| Item | Approximate Cost Range | Notes |
|---|---|---|
| Cabinet doors & drawer fronts | $25 – $200+ per piece | Depends on the material (laminate, wood veneer, solid wood) |
| Veneer or laminate sheets | $85 – $225 per linear foot | Laminate: $85–$118; Wood veneer: $125–$225 |
| Contact cement/adhesive | $15 – $40 per gallon | 1 gallon covers 200–300 sq. ft.; most kitchens need 1–2 gallons |
| Screws & screwdriver | $10 – $30 total | Screws: $5–$10/box; Screwdriver set: $10–$20 |
| Paint or stain | $20 – $70 per quart/gallon | 1 gallon covers 300–400 sq. ft.; varies by quality |
| Cabinet hardware | $2 – $15 per piece | Handles, pulls, hinges (budget to designer options) |
| Measuring tape & level | $15 – $35 total | Measuring tape: $5–$15; Level: $10–$20 |
| Utility knife or jigsaw | $10 – $50 each | Knife: $10–$20; Jigsaw: $30–$50 |
| Sanding block/electric sander | $5 – $60 | Sanding block: $5–$10; Electric sander: $30–$60 |
Thorough preparation in this stage cannot be overstated. Double-check your inventory against this list to ensure no critical items are overlooked. This attention to detail will build your confidence and allow you to move through each subsequent step of the refacing process with ease and precision, leading to a superior final outcome.
Step 1: Meticulously Measure and Thoroughly Assess Your Existing Cabinets
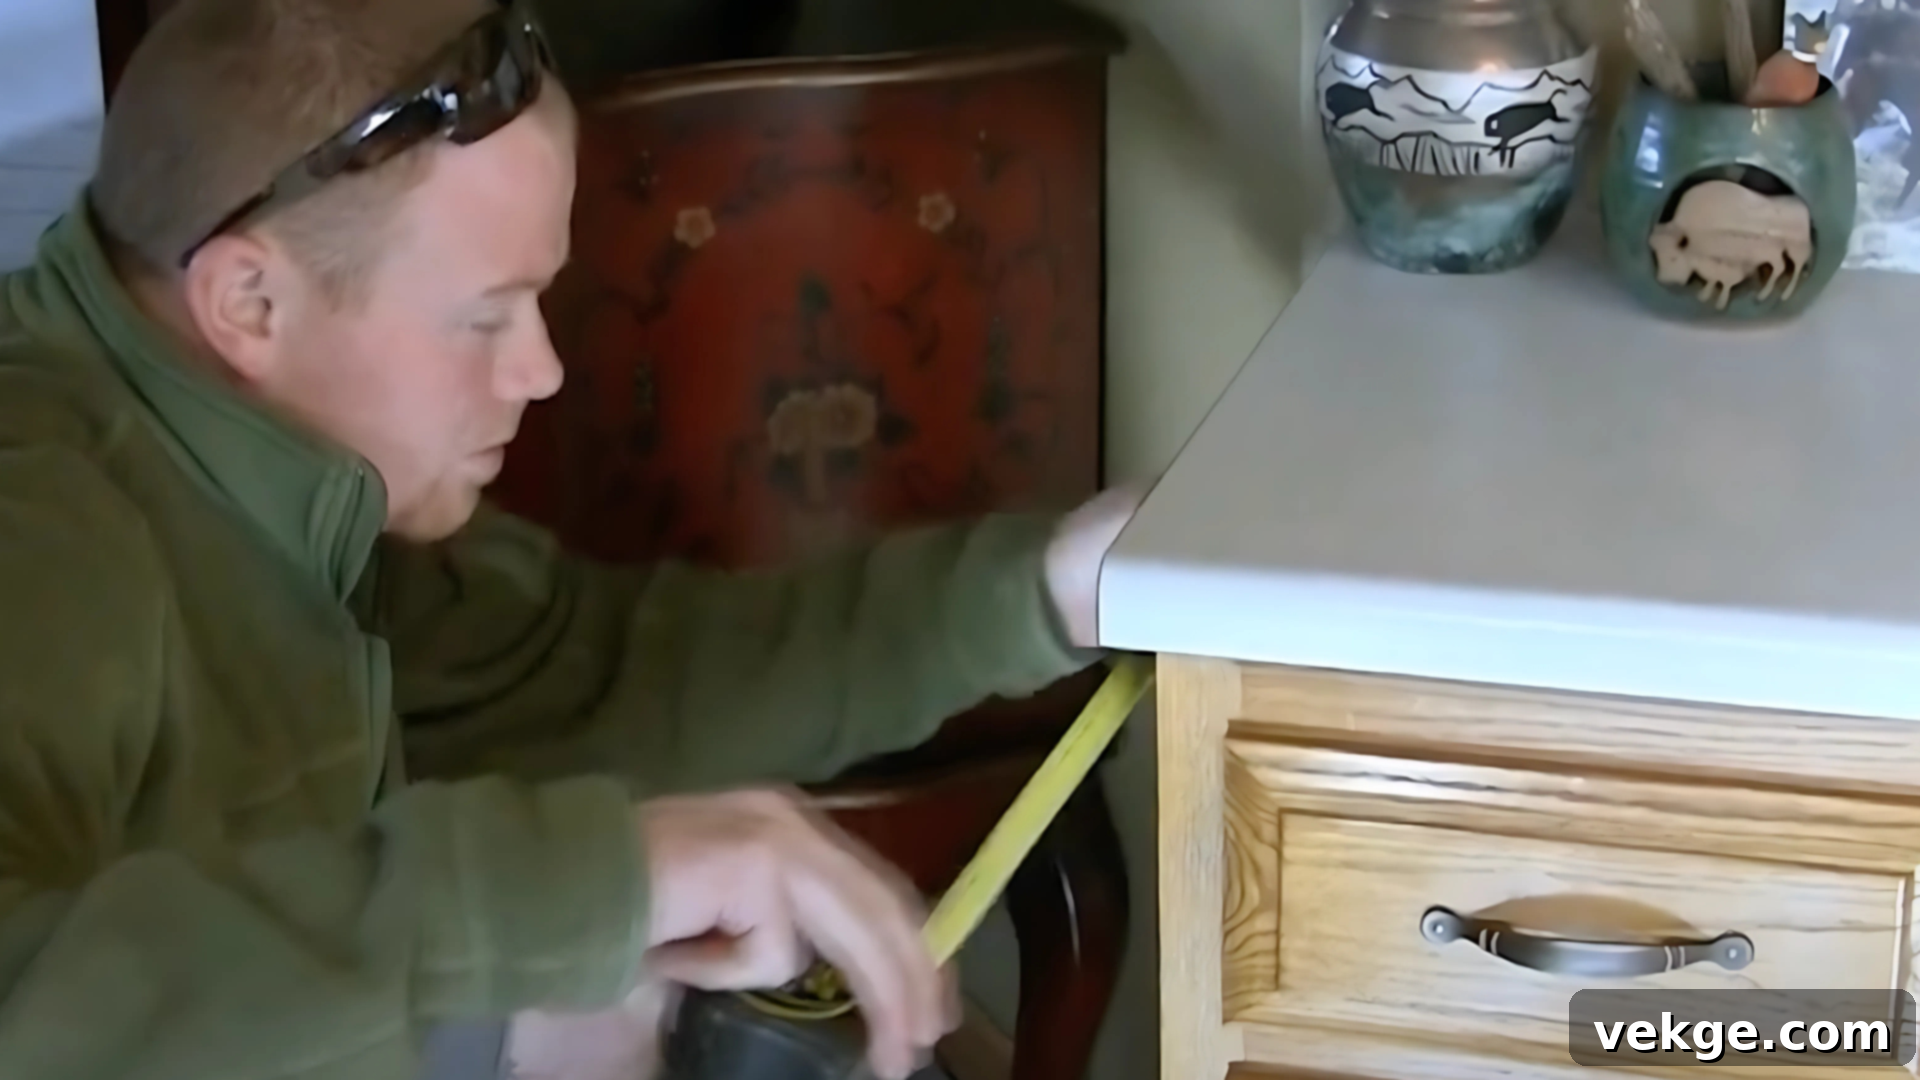
The foundation of a successful cabinet refacing project lies in precise measurements and a comprehensive assessment of your current cabinetry. Begin by meticulously measuring every single cabinet opening – not just the width and height, but also noting specific hinge placements, existing moldings, and all exposed areas of the cabinet frames that will receive new veneer or laminate. Accuracy here is paramount; even a slight miscalculation can lead to ill-fitting doors and fronts.
As you measure, carefully document each dimension. Consider using a detailed diagram or spreadsheet to keep track of measurements for each door, drawer front, and frame section. Simultaneously, conduct a thorough inspection of all cabinet frames for any signs of damage, such as water stains, warping, loose joints, or structural imperfections. Any identified issues, no matter how minor, must be addressed and repaired before proceeding to the next steps. This initial assessment ensures your cabinet boxes are solid and ready to serve as a reliable base for the new surfaces.
Take your time with this critical first step. Double-checking your measurements and performing a diligent structural inspection now will save you considerable time, effort, and potential cost in rectifying alignment or structural problems later in the project. Remember, accurate measurements are not just important; they are absolutely essential for a flawless and professional-looking refacing outcome.
Step 2: Carefully Remove Components and Prepare Cabinet Frames

With measurements complete, it’s time to prepare the canvas for your transformation. Begin by systematically removing all existing cabinet doors, drawer fronts, decorative headers, and any trim pieces. Work with caution and care during this process; the goal is to detach these elements without causing any damage to the underlying cabinet frames, which will remain in place. Labeling each door and drawer front as you remove it can be helpful if you plan to reuse hardware or if you want to understand the original configuration.
Once all external components are removed, the focus shifts to preparing the cabinet face frames. This involves thoroughly sanding down all visible surfaces to create an optimal bonding surface. Start with a medium-grit sandpaper (e.g., 100-120 grit) to remove old grime, rough patches, peeling paint, or any existing finish. Follow up with a finer grit (e.g., 180-220 grit) for a smooth, even surface. After sanding, meticulously clean the entire surface to eliminate all dust, grease, and debris. A tack cloth or a damp cloth with a mild degreaser works well to ensure the new veneer or laminate adhesive will bond securely.
Finally, inspect the frames again for any minor imperfections. Any small holes, chips, dents, or damaged areas should be filled precisely with high-quality wood filler. Once the filler is dry, sand these areas smooth so they are flush with the surrounding surface. The objective of this step is to achieve a perfectly clean, smooth, and even foundation, critical for the flawless application of your new veneer or laminate in the subsequent stages.
Step 3: Precisely Cut and Apply Veneer to Cabinet Face Frames
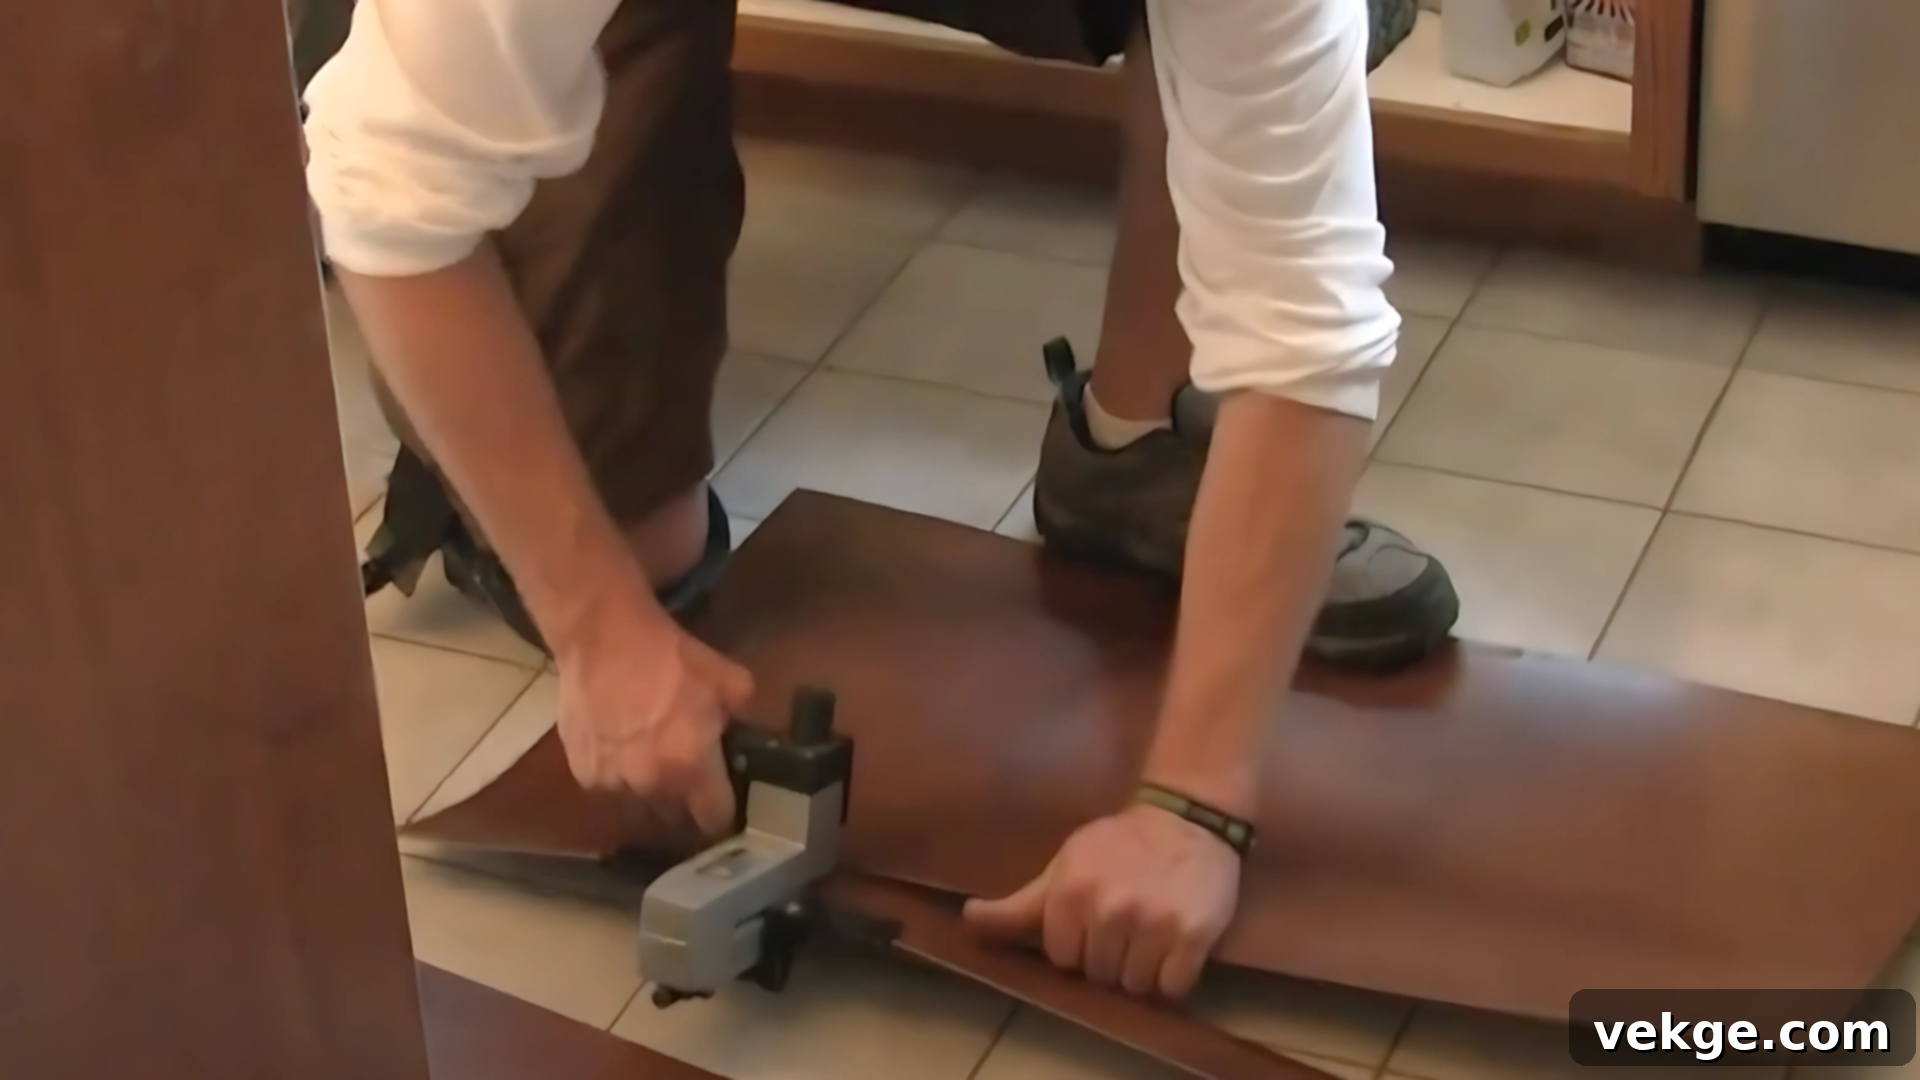
This step brings your vision to life as you begin applying the new surface material. First, meticulously measure and cut your chosen self-adhesive veneer or laminate sheets to precisely match the dimensions of each section of your cabinet face frames. Use a sharp utility knife and a straight edge for clean, accurate cuts. Pay particular attention to edges and corners, ensuring each piece is cut perfectly square and slightly oversized to allow for precise trimming later.
Before applying, position the veneer dry to confirm the fit. Once satisfied, carefully peel back a small section of the adhesive backing. Align the veneer with one edge of the cabinet frame and slowly press it into place, working your way across the surface. As you progressively remove the backing, use a specialized smoothing tool, a J-roller, or a felt-covered block to firmly press the veneer onto the frame. This action helps to eliminate any trapped air bubbles and ensures a strong, even bond. Work methodically to prevent creases or uneven adhesion.
After the veneer is fully adhered, use your sharp utility knife and a straight edge to carefully trim any excess material flush with the cabinet edges. Precision here is key for a seamless, professional appearance. Take your time to ensure all edges are clean and neatly aligned before moving on to the next section or step.
Step 4: Complete Veneer Application for Cabinet Rails, Stiles, and Dividers
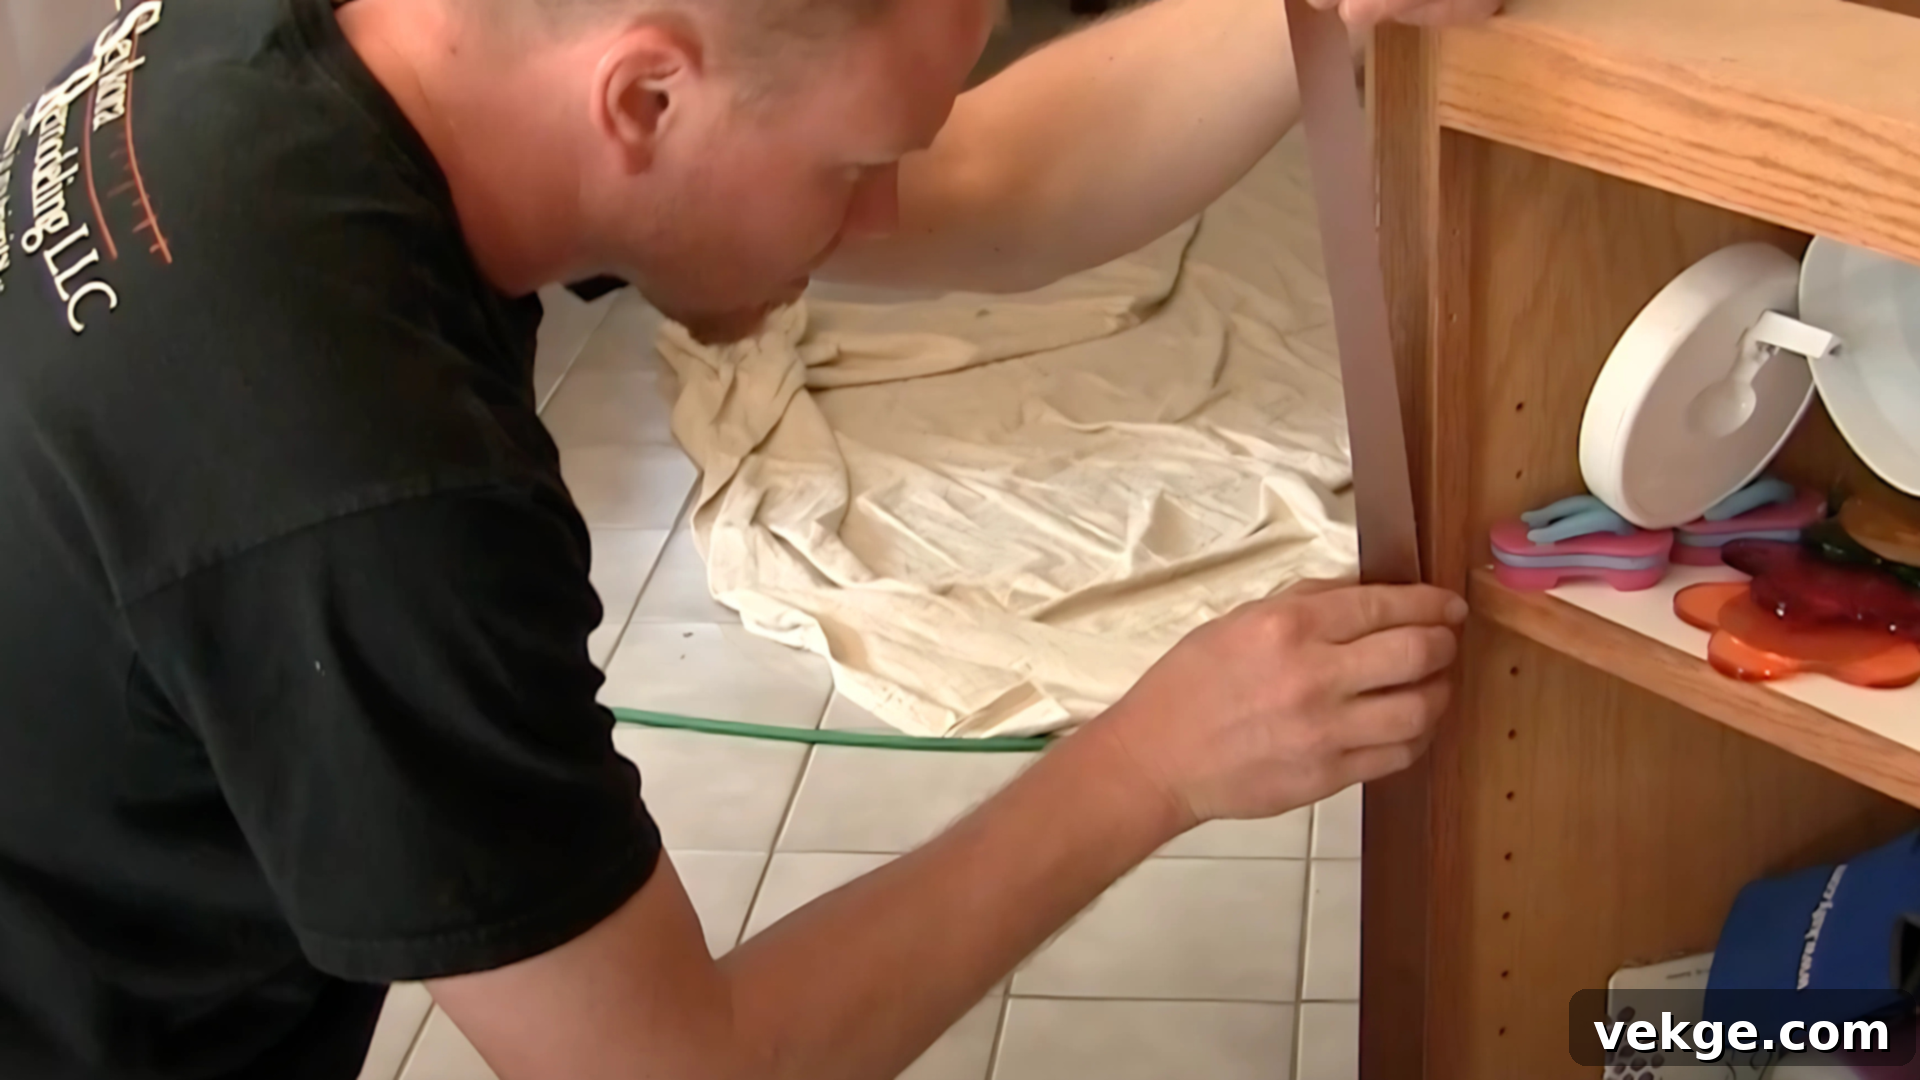
With the main face frames covered, turn your attention to the remaining exposed sections of the cabinet structure. This includes the vertical stiles (the upright parts of the frame), the horizontal rails (the cross-pieces), and any center dividers within larger cabinet openings. These smaller, often more intricate areas demand careful attention to detail.
Measure and cut veneer strips to precisely fit each of these individual sections. Just as in the previous step, apply these strips meticulously. Start by peeling back a small portion of the adhesive, aligning the veneer perfectly, and then slowly pressing it into place, using your smoothing tool to eliminate air bubbles and ensure firm contact. Work patiently and methodically, paying close attention to corners and junctions to prevent any creases, overlaps, or unsightly gaps.
The consistent and neat application of veneer across all these elements is crucial for achieving a truly professional and unified appearance. This stage is where the entire cabinet frame truly begins to take on its new, polished look, laying the groundwork for the installation of your new doors and hardware and completing the seamless transformation of your existing boxes.
Step 5: Install and Align Your New Cabinet Doors and Drawer Fronts
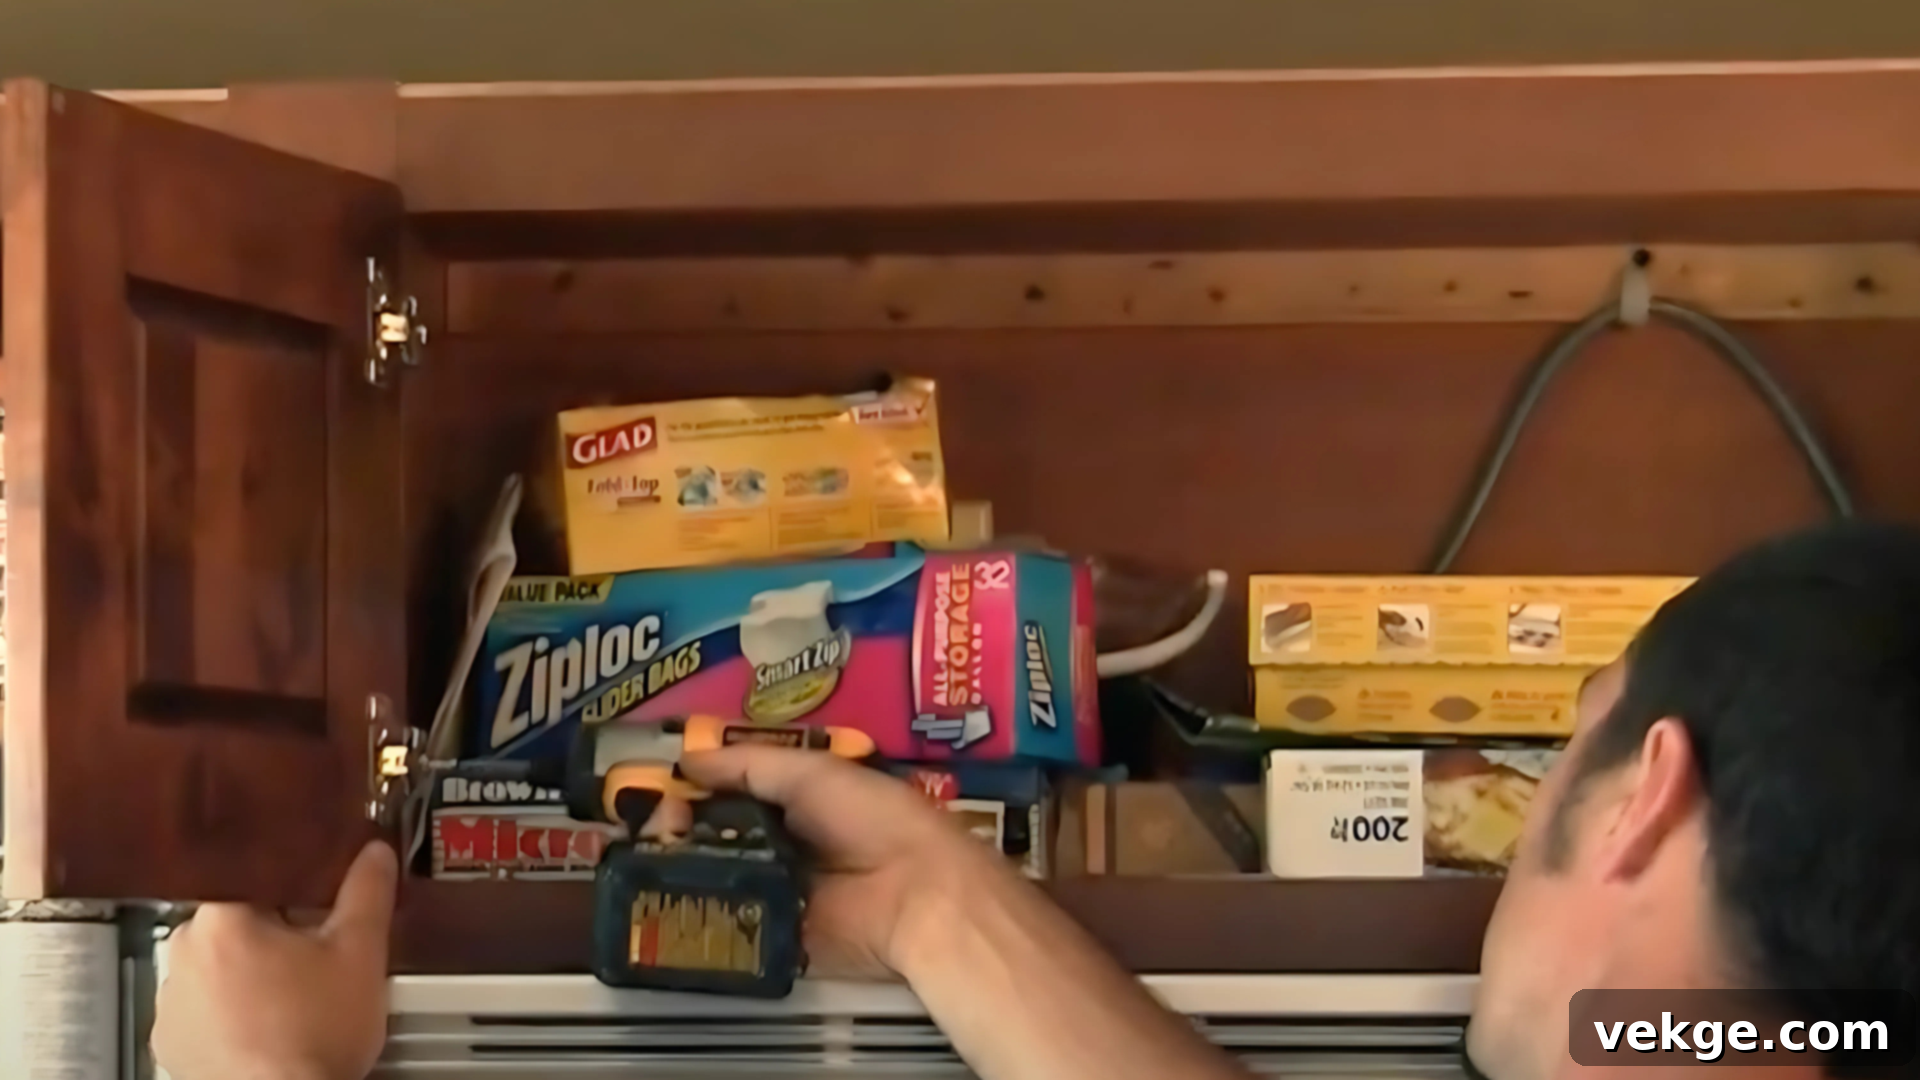
Once all the veneer has been expertly applied and allowed to cure according to manufacturer instructions, the most exciting part begins: installing your brand-new cabinet doors and drawer fronts. For the doors, carefully align the pre-drilled hinge holes on the doors with the corresponding holes or mounting plates on your cabinet frames. Attach them securely using the appropriate screws and a screwdriver, taking care not to overtighten.
After each door is hung, gently close it and check its alignment. Ensure it is perfectly level, operates smoothly, and fits snugly within its opening without rubbing against adjacent doors or the cabinet frame. Most modern hinges offer multi-directional adjustment screws, allowing for minor tweaks to achieve perfect spacing and alignment. Don’t hesitate to use these to fine-tune the fit.
For the drawer fronts, carefully align each one with its existing drawer box. Use clamps to temporarily hold the front in place, ensuring it’s level and centered, then attach it securely from the inside of the drawer box with screws. Step back frequently during this stage to assess the overall appearance. Confirm that all doors and drawer fronts are straight, evenly spaced, and consistent across the entire cabinet run. This meticulous attention to detail in alignment is what elevates a good refacing project to a truly professional and stunning outcome.
Step 6: Final Adjustments, Hardware Installation, and Thorough Clean-Up
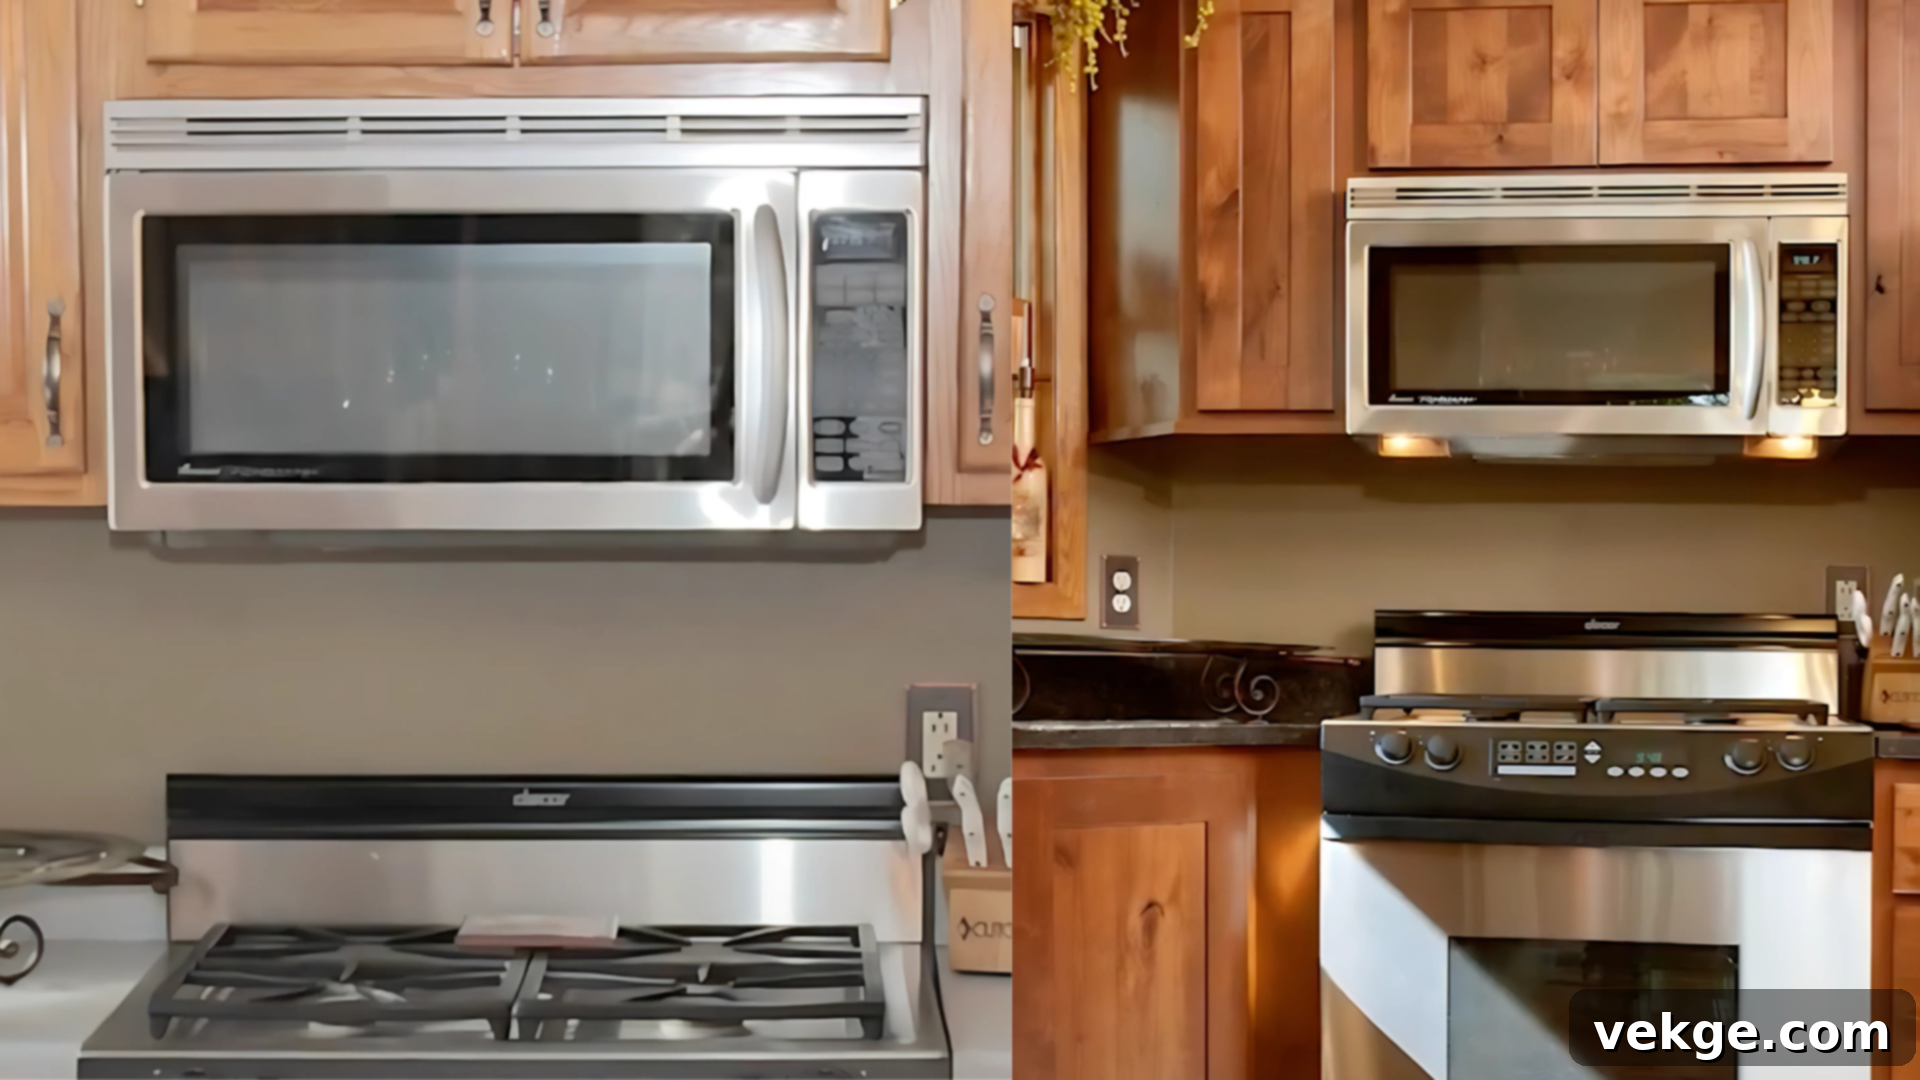
Once your new doors and drawer fronts are securely mounted, the final touches are what truly bring your refacing project to perfection. Begin by methodically checking every single door and drawer front. Open and close them several times, ensuring they operate smoothly and quietly. If you notice any slight gaps, uneven spacing, or doors that don’t quite close flush, now is the time to make those fine adjustments using the hinge screws. Patience here will pay off with a polished and functional result.
Next, install your chosen cabinet hardware – the knobs and pulls that will define the style and functionality of your new cabinets. Carefully mark and drill pilot holes (if not pre-drilled) to prevent splitting, then securely attach each piece. Once all hardware is in place, give your newly refaced cabinets a thorough cleaning. Use a soft, damp cloth and a mild cleaner to wipe away any fingerprints, dust, or adhesive residue that may have accumulated during the installation process. This reveals the true beauty of your refreshed cabinetry.
Finally, clear away all tools, scraps, and protective coverings. Ensure your work area is spotless. This comprehensive final step ensures that your newly refaced cabinets are not only visually stunning but also perfectly functional and ready to be enjoyed in your beautifully refreshed kitchen or bathroom. You’ve successfully completed a transformative home improvement project!
For a visual demonstration of these steps, watch the complete video tutorial below, providing invaluable insights and practical tips to guide you through your own cabinet refacing journey:
Inspiring Before-and-After Cabinet Refacing Transformations
One of the most compelling aspects of cabinet refacing is the dramatic visual impact it delivers. These before-and-after examples showcase just how effectively this technique can rejuvenate a tired kitchen, offering a glimpse into the incredible potential for your own space. Witness how simple changes in door style, color, hardware, and finishes can completely redefine a room’s character, all without the need for a full, disruptive remodel.
1. Dramatic Door Style Overhaul
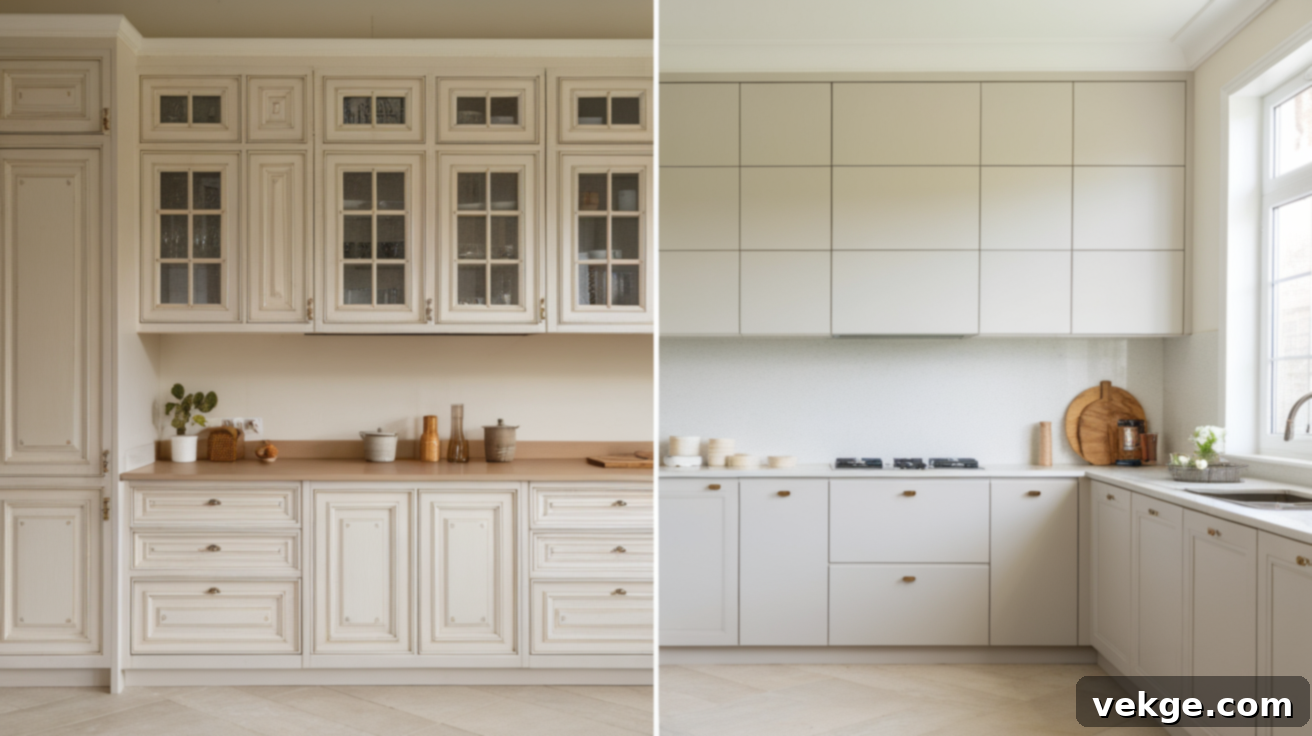
Before: Many older kitchens feature cabinet doors with outdated designs, such as ornate raised panels, arch-top cathedral styles, or simplistic, plain flat doors that betray their age. These styles can make a kitchen feel heavy, visually cluttered, or simply out of step with contemporary design trends.
After: Cabinet refacing provides the perfect opportunity to completely reimagine your kitchen’s aesthetic by upgrading to modern door styles. Swapping out old doors for sleek shaker-style (known for their clean lines and recessed center panel), minimalist flat-panel (slab) doors, or elegant glass-front doors can instantly create a fresh, streamlined, and sophisticated ambiance. This change alone can transform a kitchen from dated to decidedly modern, offering a truly custom look.
2. Vibrant Color Transformations
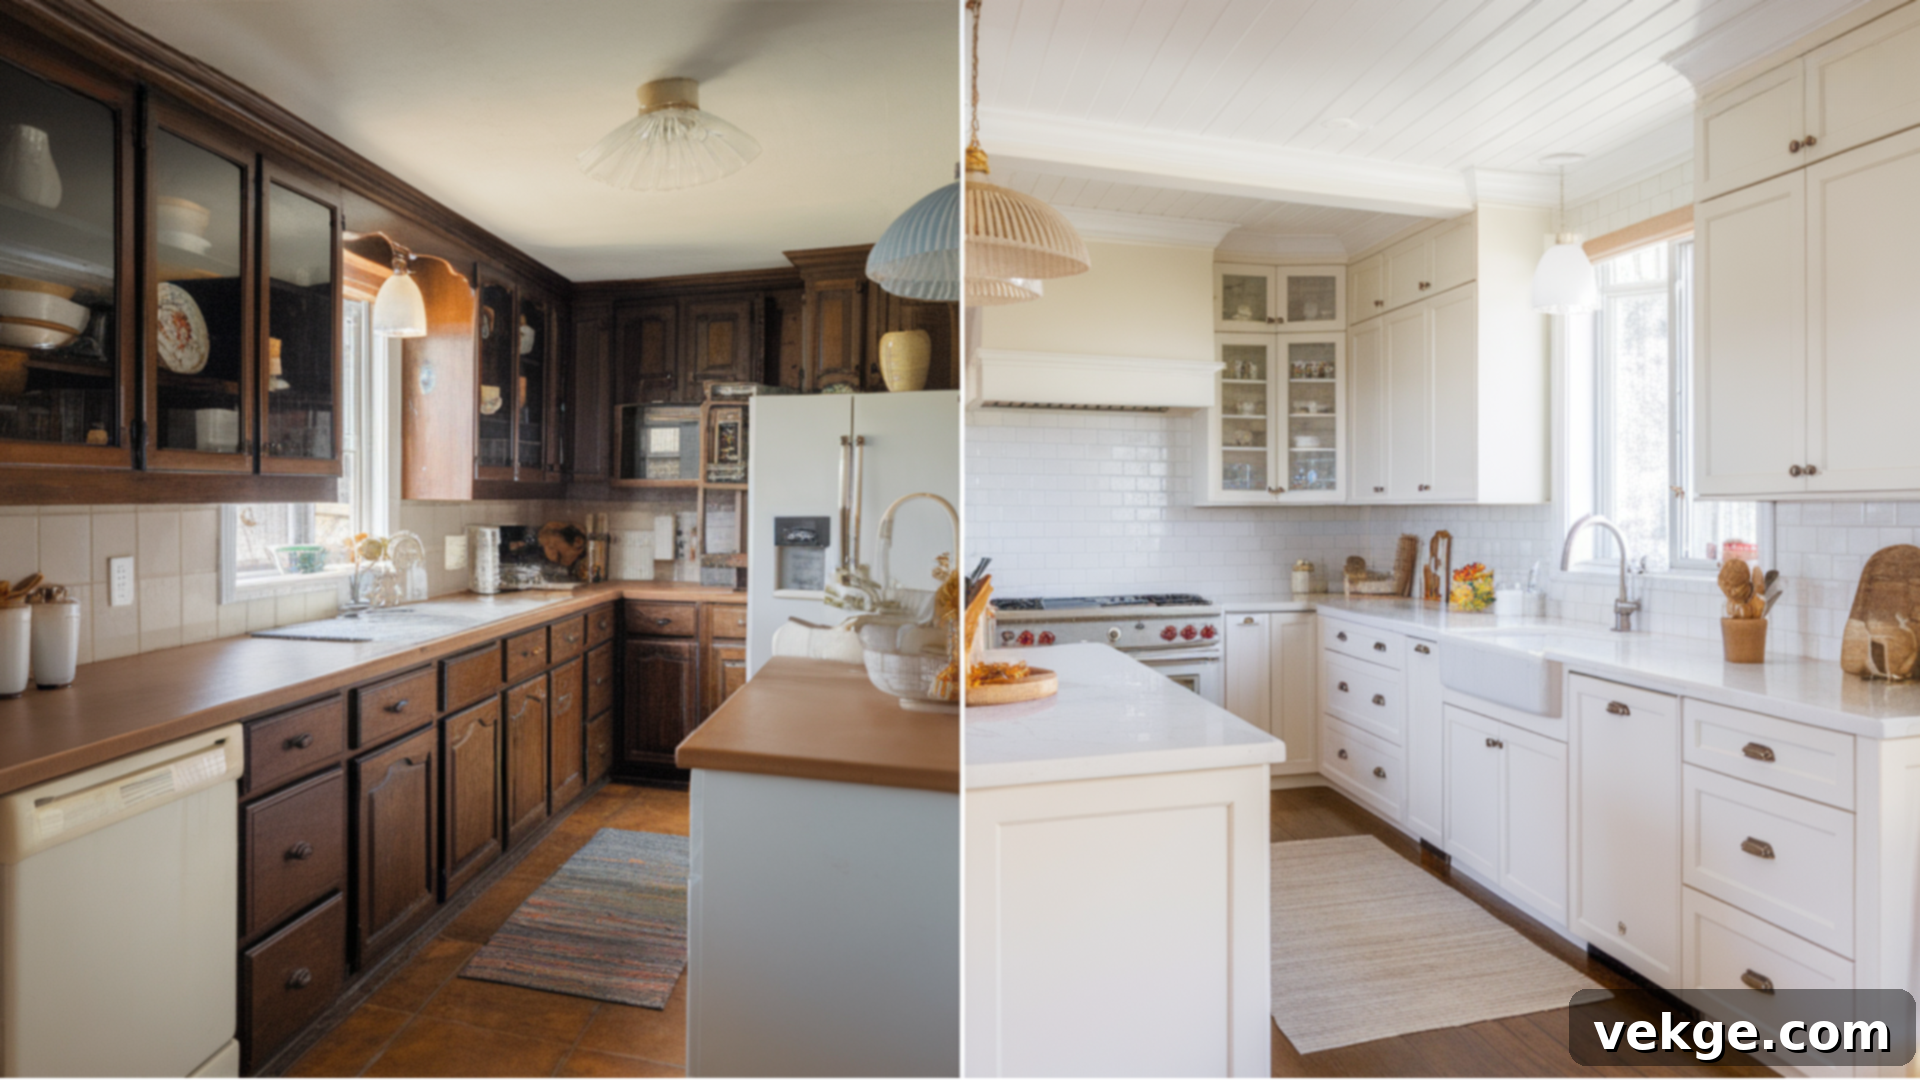
Before: Overly dark or warm-toned cabinet finishes, such as a heavy brown, honey oak, or cherry wood, were once popular but can now make a kitchen feel enclosed, dimly lit, and undeniably outdated. These colors absorb light, visually shrinking the space and diminishing its overall appeal.
After: One of the most impactful transformations achieved through refacing is a complete color change. Opting for new doors and veneer in bright white instantly creates a sense of spaciousness, cleanliness, and modern elegance. Soft grays offer a sophisticated, contemporary look, while bolder choices like navy blue or deep forest green can establish a dramatic focal point and infuse personality. The ability to select virtually any color allows you to dictate the entire mood and style of your kitchen, from airy and bright to bold and luxurious.
3. Modern Hardware Enhancements
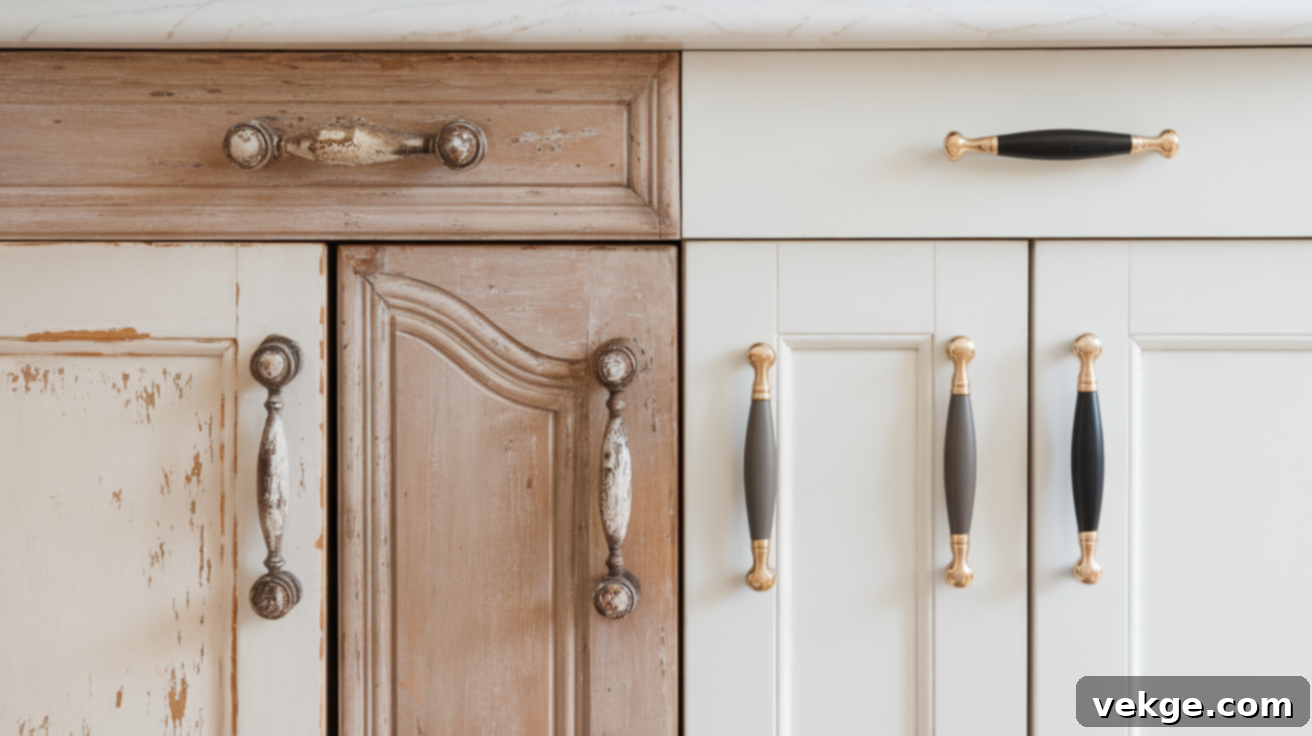
Before: Even if your cabinet doors had a decent style, outdated or deteriorating hardware can instantly betray the age of your kitchen. Chipped paint, tarnished brass, or simply unfashionable knobs and pulls can detract significantly from an otherwise well-maintained space, making the entire kitchen feel neglected and past its prime.
After: Cabinet refacing is the perfect opportunity to select brand-new hardware that complements your new door style and overall kitchen aesthetic. Upgrading to sleek, modern handles, contemporary bar pulls, or classic, refined knobs in finishes like brushed nickel, matte black, champagne bronze, or polished chrome can dramatically elevate the design. New hardware acts as the “jewelry” of your cabinets, providing a cohesive, high-end finishing touch that ties the entire updated look together and significantly enhances functionality.
4. Cohesive Veneer and Laminate Finishes
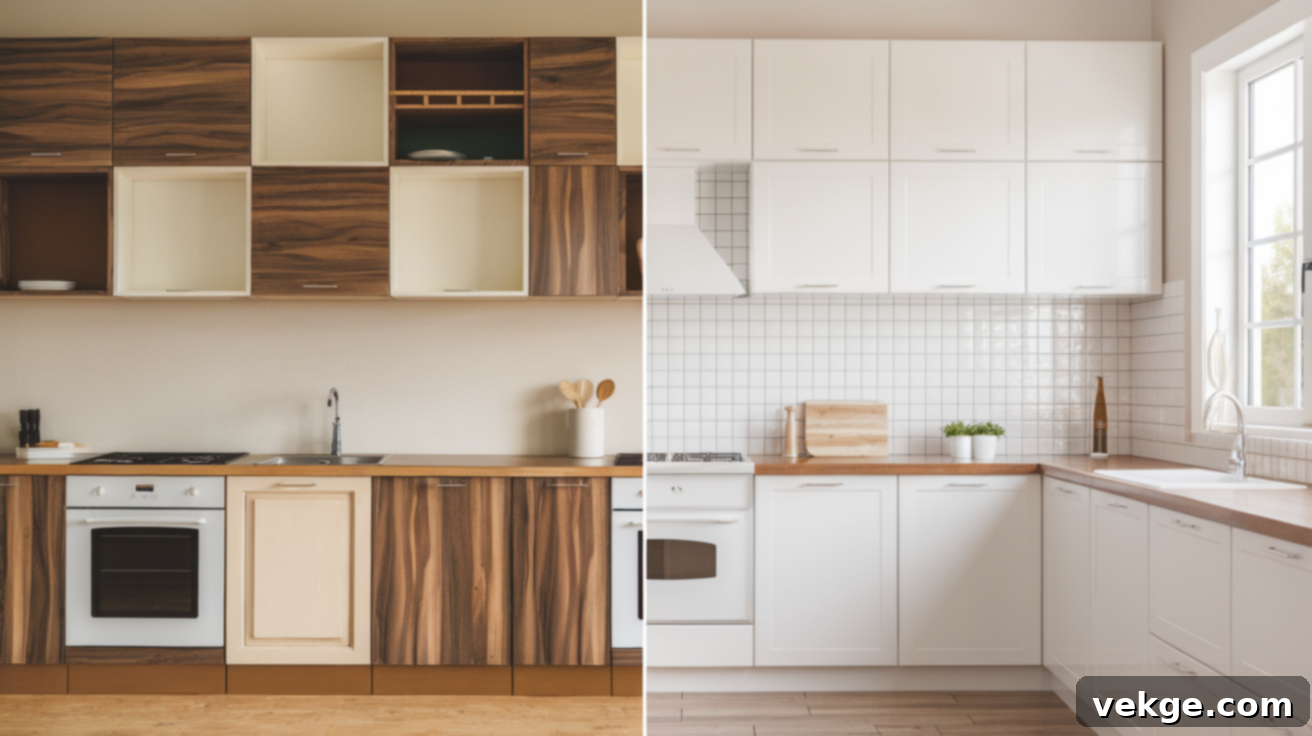
Before: While the cabinet doors receive the most attention, the visible parts of the cabinet boxes – the face frames and side panels – often sport the original, potentially dated or worn finish. If you were only to replace doors, these exposed elements might clash with your new aesthetic, creating an inconsistent and unfinished look.
After: A key component of cabinet refacing is the application of new veneer or laminate to these visible cabinet box surfaces. This ensures a seamless integration with your new doors and drawer fronts. Whether you choose a real wood veneer for a natural grain, a durable laminate for consistent color and texture, or Thermofoil for a sleek, modern finish, this step guarantees a cohesive, high-quality appearance across your entire kitchen. The result is a unified, custom-built look that truly completes the transformation.
5. Enhanced Functionality with Modern Features
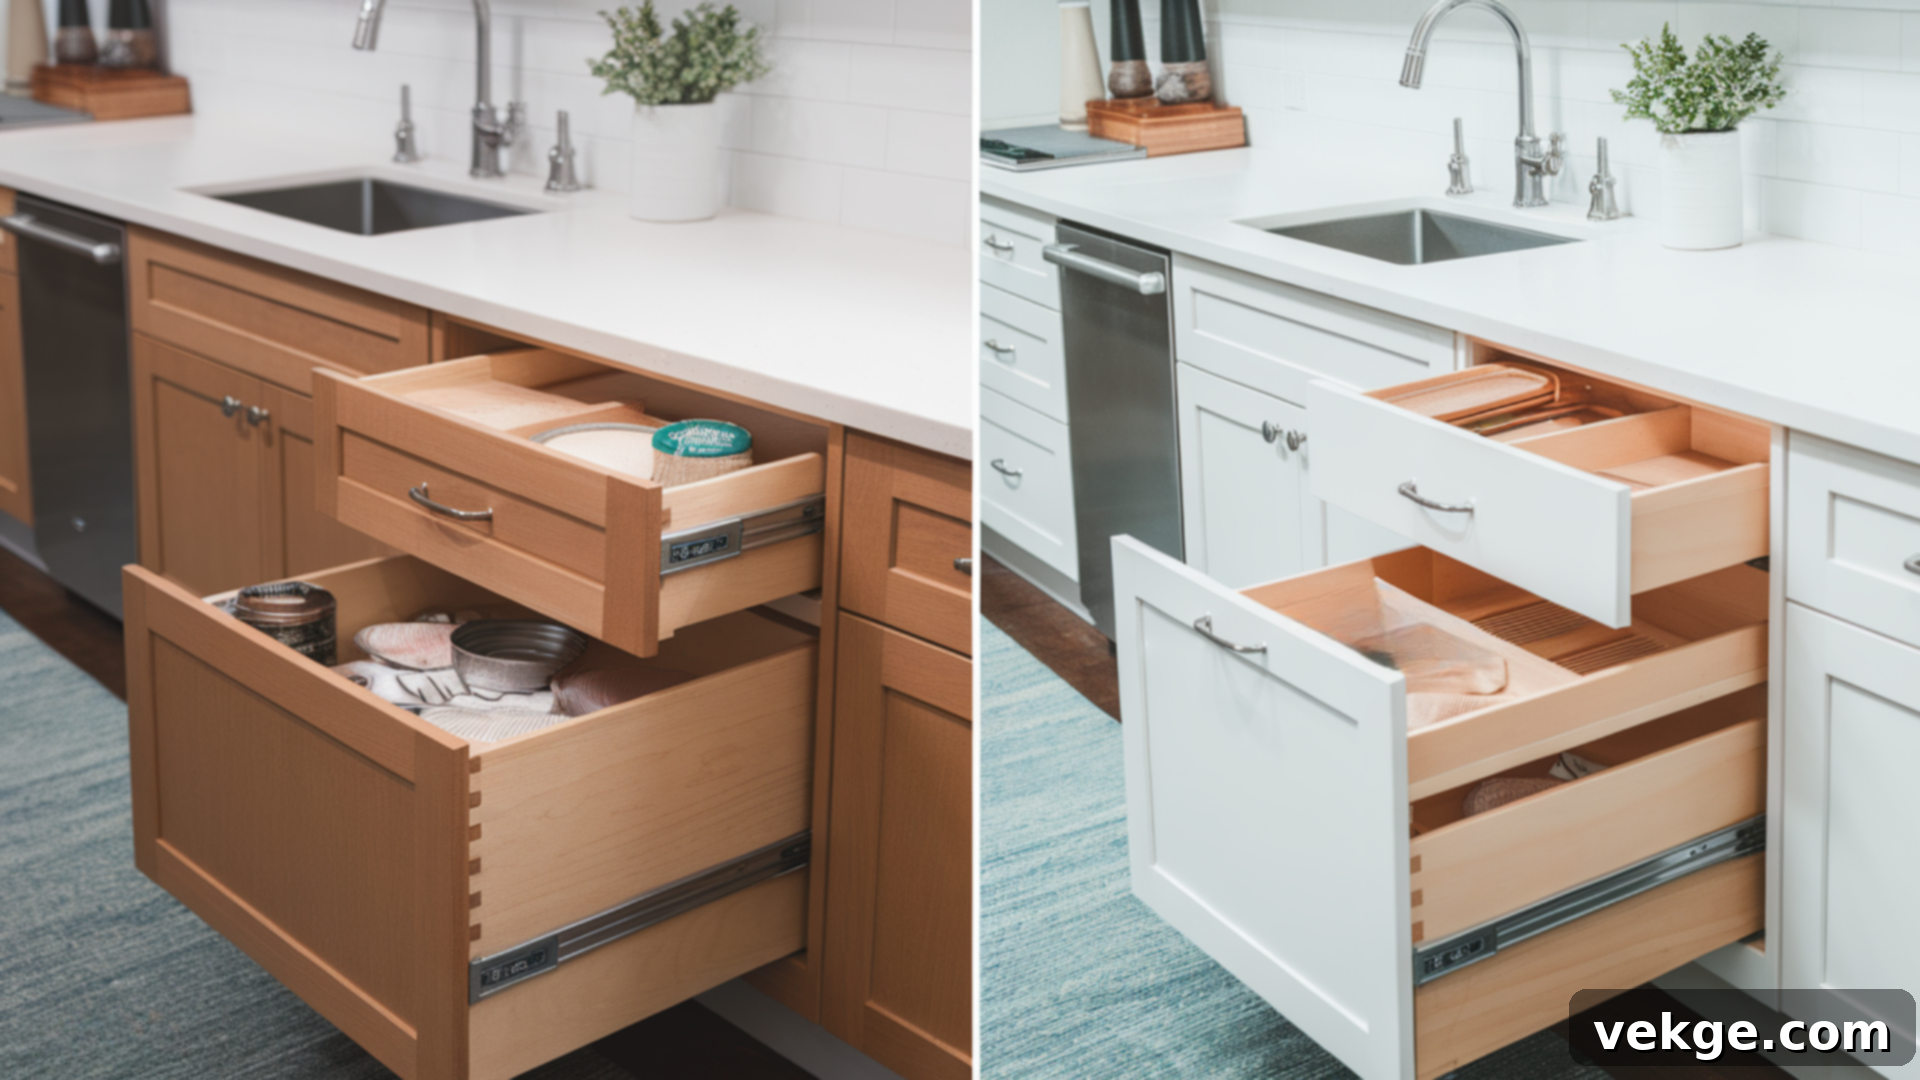
Before: Beyond aesthetics, older cabinets often fall short in terms of modern convenience and ergonomic design. They typically feature standard, noisy hinges, fixed shelves, and a lack of organized storage solutions, leading to cluttered spaces and inefficient workflow in the kitchen.
After: Cabinet refacing is an ideal time to incorporate significant functional upgrades. While the basic cabinet boxes remain, you can easily install new, soft-close hinges and drawer slides that eliminate slamming and add a touch of luxury. Furthermore, consider integrating pull-out shelves or rollout trays for easier access to pots and pans, adding built-in dividers for cutlery, or installing specialized spice racks and waste bin pull-outs. These additions dramatically enhance the usability and organization of your kitchen, marrying updated style with superior functionality.
Understanding Cabinet Refacing Costs: A Detailed Breakdown
One of the most appealing aspects of cabinet refacing is its cost-effectiveness compared to a full cabinet replacement. However, the final price can fluctuate significantly based on several factors, including the size of your kitchen, the quality of materials chosen, and whether you opt for a DIY approach or professional installation. Gaining a clear understanding of these variables will empower you to plan and budget for your refacing project with greater accuracy and confidence.
Average Cabinet Refacing Costs by Kitchen Size
The scale of your kitchen naturally plays a significant role in determining the overall cost of refacing. More cabinets mean more materials and labor. Here’s a general guide to average professional refacing costs based on typical kitchen dimensions:
- Small Kitchens (typically under 100 sq ft): For kitchens with a limited number of cabinets, perhaps a galley kitchen or a compact U-shape, expect costs to range approximately from $2,000 to $5,000. This usually covers basic materials like laminate and standard door styles.
- Medium Kitchens (100–200 sq ft): Most standard-sized kitchens fall into this category. Here, refacing projects generally cost between $5,000 and $9,000. This range allows for mid-range material choices, such as wood veneers, and a wider selection of door styles and hardware.
- Large Kitchens (over 200 sq ft): Expansive kitchens with abundant cabinetry, islands, or extensive pantry units will naturally incur higher costs. Prices can range from $9,000 to $15,000+, especially if you opt for premium wood veneers, custom finishes, or incorporate many modern functional upgrades.
It’s important to note that these figures are averages and include both labor and materials. Your specific choices in door style, veneer type, hardware, and geographic location will ultimately influence your final expenditure.
Key Factors Influencing Cabinet Refacing Costs
Beyond kitchen size, a number of specific elements can significantly swing the final price of your cabinet refacing project. Understanding these factors will help you make informed decisions and manage your budget effectively:
- Material Selection: This is often the biggest cost driver. Laminates are generally the most affordable, offering durability and a wide range of colors. Wood veneers, providing the authentic look and feel of real wood, are a step up in price. Solid wood doors and drawer fronts, particularly from exotic or premium wood species, represent the highest investment. The chosen finish (e.g., stained, painted, glazed) also impacts cost.
- Labor Rates and Professional Expertise: Hiring experienced, reputable cabinet refacing specialists will typically cost more than a general handyman. However, their expertise ensures precision, quality craftsmanship, and often comes with a warranty. DIY efforts, while saving on labor, transfer the time and risk to the homeowner.
- Geographic Location: Costs for services and materials can vary widely by region. Metropolitan areas and regions with a higher cost of living generally have higher labor rates and material prices compared to rural areas.
- Condition of Existing Cabinets: While refacing is ideal for sound cabinet boxes, if your existing frames require significant repairs due to water damage, structural instability, or extensive wear and tear, these additional restoration costs will be added to your total bill. Addressing these issues beforehand is crucial for the longevity of your refacing.
- Hardware Upgrades and Functional Enhancements: The cost of new hinges, knobs, and pulls can range from budget-friendly to high-end designer options. Additionally, incorporating modern features like soft-close mechanisms, pull-out shelves, drawer organizers, or custom inserts will add to the overall project cost.
- Complexity of Design: Custom design elements, intricate door styles (e.g., full inset), or specialized finishes can increase material and labor costs due to the additional skill and time required.
By weighing these factors, you can make strategic choices that balance your desired aesthetic, durability, and budget for your cabinet refacing project.
DIY Cabinet Refacing vs. Hiring a Professional: Cost and Considerations
The decision to tackle cabinet refacing yourself or enlist professional help is a significant one, with direct implications for both your budget and the final outcome. Each approach presents a distinct set of advantages and challenges:
DIY Cabinet Refacing:
- Cost: Opting for the DIY route can result in substantial savings on labor costs. You can expect to spend approximately $1,000 to $4,000 on materials alone, depending on the size of your kitchen and your choice of laminates, veneers, doors, and hardware.
- Pros: Significant cost savings; complete control over material selection and project timeline (within reason); the satisfaction of completing a home improvement project yourself.
- Cons: Requires considerable time, patience, and a high level of DIY skill. Mistakes, such as miscut veneers, improper adhesion, or uneven door alignment, can be costly to fix and may require professional intervention, ultimately negating initial savings. There’s also the need to purchase or rent specialized tools.
- Best For: Highly experienced DIYers with ample time, a keen eye for detail, and a willingness to learn intricate techniques.
Professional Cabinet Refacing:
- Cost: Hiring a professional cabinet refacing company typically ranges from $4,000 to $12,000+, encompassing all materials, labor, and often a warranty on their work. The higher end of this range usually applies to larger kitchens or premium material choices.
- Pros: Guaranteed quality and a professional finish; quick completion time (often within 3-5 days); access to a wider range of high-quality materials and custom options; eliminates the stress and physical labor for the homeowner; includes clean-up and disposal of old materials. Many professionals also offer warranties on their workmanship and materials.
- Cons: Higher upfront cost compared to DIY; less direct control over the day-to-day process; scheduling flexibility might be limited by the contractor’s availability.
- Best For: Homeowners seeking a high-quality, long-lasting result with minimal hassle and disruption, or those who lack the time, tools, or expertise for a complex DIY project.
Ultimately, your choice should balance your budget, your confidence in your DIY skills, and your desired level of finish. For most homeowners, the peace of mind and superior results delivered by a professional make it a worthwhile investment.
Beware of Hidden Costs and Potential Upsells
When obtaining quotes for cabinet refacing, it’s crucial to scrutinize the estimates carefully to avoid unexpected charges. While a base price might seem attractive, several elements can inflate the final bill if not explicitly included:
- Removal and Disposal Fees: Clarify if the estimate includes the hauling away and proper disposal of your old cabinet doors, drawer fronts, and any construction debris. These fees can sometimes be separate.
- Hardware: While some basic hardware might be included, upgrading to designer knobs, pulls, or specialized hinges (like soft-close) can significantly increase costs, often ranging from $5 to $30 or more per piece. Make sure the type and quantity of hardware are itemized.
- Customization and Decorative Elements: Adding crown molding, decorative trim, corbels, or specialized edge banding (beyond basic options) will incur additional material and labor costs.
- Internal Cabinet Modifications: If you decide to add pull-out shelves, lazy Susans, pantry organizers, or new internal lighting, these will be separate charges and should be discussed upfront.
- Filler and Repair Work: While minor repairs should be included in preparation, extensive structural repairs to the cabinet boxes (e.g., fixing severe water damage) might be an extra charge, or could even push you towards a full replacement.
- Permits: Though less common for refacing than for full remodels, verify if any local permits are required, and who is responsible for obtaining them and covering the associated fees.
- Special Finishes or Materials: Opting for high-gloss finishes, unique textures, or exotic wood veneers can come with a premium price tag.
To ensure full transparency, always request a detailed, itemized written estimate that clearly outlines all inclusions and exclusions. Don’t hesitate to ask questions about any line item you don’t understand to prevent any unwelcome surprises down the line.
Comprehensive Comparison: Cabinet Refacing, Painting, and Replacing
Choosing the right approach for your kitchen update can be challenging with multiple options available. To help you make the most informed decision, here’s a detailed comparison of cabinet refacing, painting, and full cabinet replacement, highlighting their key characteristics across various important aspects:
| Aspect | Refacing | Painting | Replacing |
|---|---|---|---|
| Visual Impact | New doors, fronts, and veneer for a brand‑new look | Fresh color on existing doors and frames | Completely new style, layout, and materials |
| Durability & Maintenance | Veneers resist chips; wipe clean with a damp cloth | Paint may chip or fade; it needs touch‑ups over time | Factory finishes last longest; often includes wear warranties |
| Cost | Moderate: about 30–50% of replacement cost | Lowest: paint and prep only | Highest: new cabinets, installation, and possible layout fees |
| Environmental Impact | Less waste: keeps cabinet boxes; uses fewer new materials | Least new materials; may release paint VOCs | Most waste: old cabinets to landfill; uses new wood/composites |
By carefully reviewing this comparison table, you can weigh your priorities—be it budget constraints, desired durability, style flexibility, environmental impact, or the timeline of the project. This understanding will enable you to select the best possible option that aligns perfectly with your vision and needs for your kitchen transformation.
Selecting the Perfect Materials and Finishes for Your Refaced Cabinets
The materials and finishes you choose for your cabinet refacing project are pivotal in defining your kitchen’s new aesthetic and its long-term durability. These selections will dictate everything from the visual texture and color to the resistance against daily wear and tear. A thoughtful approach to these choices ensures your refaced cabinets not only look spectacular but also perform beautifully for years to come.
Exploring Types of Veneers, Laminates, and Thermofoil
The material you choose for covering your cabinet frames and for your new doors and drawer fronts will largely determine the look, feel, and longevity of your refaced cabinets. Here are the primary options:
- Wood Veneer: This option consists of thin slices of real hardwood, such as maple, cherry, oak, or walnut, which are then applied to your cabinet boxes and used for new doors and drawer fronts.
- Pros: Offers the authentic beauty, grain patterns, and warmth of natural wood; can be stained or painted; highly durable when sealed properly.
- Cons: More expensive than laminate; susceptible to moisture if not well-maintained; slight variations in grain and color are inherent to natural wood.
- Laminate (HPL – High-Pressure Laminate): Laminates are synthetic materials made from multiple layers of paper or fabric impregnated with resin and fused under high pressure and heat.
- Pros: Highly durable, resistant to scratches, moisture, and fading; available in a vast array of solid colors, patterns, and realistic wood or stone looks; more affordable than wood veneer.
- Cons: Can look less authentic than real wood; difficult to repair if chipped or deeply scratched; edges can sometimes peel over time if exposed to excessive moisture.
- Thermofoil: This is a durable vinyl film that is thermally fused (bonded with heat and pressure) onto an MDF (medium-density fiberboard) core.
- Pros: Seamless finish with no visible seams (especially on routed door styles); highly resistant to moisture, easy to clean; available in solid colors and some simulated wood grains; generally cost-effective.
- Cons: Can be prone to heat damage (e.g., near an oven or dishwasher); difficult to repair if scratched or gouged; limited color and style options compared to paintable wood.
Each of these materials presents a unique balance of aesthetics, durability, and cost. Your choice should align with your budget, desired look, and the practical demands of your kitchen environment.
Popular Door and Drawer Front Styles
The style of your new cabinet doors and drawer fronts is arguably the most significant design decision you’ll make, as it dictates the overall aesthetic and character of your kitchen. Here are some of the most popular and timeless styles available for refacing:
- Shaker Style: Characterized by a flat recessed center panel and a simple, clean frame.
- Appeal: Extremely versatile, fitting beautifully into modern, farmhouse, traditional, or transitional kitchen designs. Their understated elegance makes them a perennial favorite.
- Slab (Flat Panel) Style: Features a completely flat, smooth surface with no ornamentation or recessed panels.
- Appeal: Ideal for ultra-modern, contemporary, or minimalist kitchens, offering sleek lines and an uncluttered look that emphasizes space.
- Raised Panel Style: The center panel is raised above the surrounding frame, often with a decorative edge profile.
- Appeal: Evokes a classic, traditional, or formal aesthetic, often found in European-style or more ornate kitchen designs.
- Recessed Panel (Cope and Stick): Similar to Shaker, but the recessed panel can have various edge profiles (e.g., beveled, ogee).
- Appeal: Offers a slight variation on the Shaker, providing a bit more detail while maintaining a clean appearance.
- Glass-Front Doors: Feature a glass insert (clear, frosted, seeded, or textured) in place of a solid panel.
- Appeal: Adds visual lightness, allows for display of decorative items, and can break up a long run of solid cabinetry, often used in upper cabinets.
When making your selection, consider your home’s architectural style, your personal taste, and the overall ambiance you wish to create in your kitchen. The right door style will seamlessly integrate with your home’s design for a cohesive and pleasing outcome.
Selecting the Perfect Hardware: Knobs, Pulls, and Finishes
Often considered the “jewelry” of your kitchen, cabinet hardware plays a crucial role in the overall aesthetic and functionality of your refaced cabinets. The right knobs and pulls can instantly elevate the design, providing a cohesive finishing touch that reflects your personal style. Here’s what to consider when choosing your hardware:
- Knobs: These are individual, typically smaller pieces (round, square, or other shapes) that are grasped with the fingers.
- Pros: Versatile and can be cost-effective; often used on cabinet doors, particularly in traditional designs. Easy to install and swap.
- Pulls (Handles): Longer, often bar-shaped or arched handles that allow you to grasp with your whole hand.
- Pros: Offer a more substantial grip, ideal for drawers and larger doors; popular in modern, transitional, and industrial designs. Can create a sleek, continuous line.
- Material and Finish Choices: The material and finish of your hardware are essential for coordinating with other kitchen elements.
- Popular Finishes: Brushed nickel (versatile, subtle), matte black (modern, bold), polished chrome (sleek, contemporary), brass/gold (luxurious, classic), bronze (rustic, traditional), and stainless steel (industrial, modern).
- Coordination: Match your hardware finish to your faucet, light fixtures, or appliance accents for a harmonized look.
- Style and Ergonomics: Beyond aesthetics, consider how the hardware feels in your hand and if it complements the door style.
- Styles: From minimalist bar pulls to ornate cup pulls or vintage-inspired designs, choose shapes that enhance your cabinet door style and are comfortable to use.
Thoughtfully selected hardware not only provides functionality but also adds significant personality and polish, making your newly refaced cabinets truly shine in your updated space.
Comprehensive Look at the Pros and Cons of Cabinet Refacing
Like any significant home improvement project, cabinet refacing comes with its unique set of advantages and limitations. A balanced understanding of both the benefits and drawbacks is crucial for making an informed decision about whether it’s the ideal solution for your kitchen or bathroom update. Let’s explore the full spectrum of what cabinet refacing offers and where it might fall short.
Advantages of Choosing Cabinet Refacing
The benefits of cabinet refacing make it a highly attractive option for many homeowners:
- Cost-Effectiveness: One of the primary advantages is the significant cost savings. Refacing typically costs 30-50% less than a full cabinet replacement, making a dramatic kitchen makeover much more accessible financially.
- Minimal Disruption: Unlike a full kitchen renovation that can drag on for weeks or months, cabinet refacing projects are usually completed much faster, often within 2 to 5 days. This means less mess, dust, and inconvenience, allowing you to get back to using your kitchen quickly.
- Eco-Friendly Solution: By reusing your existing cabinet boxes, refacing is a more sustainable choice. It significantly reduces the amount of waste sent to landfills, making it an environmentally conscious decision.
- Dramatic Aesthetic Transformation: Refacing delivers the visual impact of brand-new cabinets. You get entirely new doors, drawer fronts, and a fresh veneer over the existing frames, completely updating the style, color, and finish of your kitchen.
- Preserves Existing Layout: If you’re happy with your kitchen’s current footprint and functionality, refacing allows you to update the look without the complexities and costs associated with changing the layout, plumbing, or electrical systems.
- Increased Home Value: A modernized kitchen is a significant selling point. Refacing can boost your home’s appeal and market value, offering an excellent return on investment, especially if you’re preparing to sell.
These advantages collectively make cabinet refacing a smart, efficient, and visually rewarding choice for updating your home.
Limitations and Potential Drawbacks of Cabinet Refacing
While highly beneficial, cabinet refacing is not a one-size-fits-all solution and has certain limitations:
- Dependent on Existing Structure: The success of refacing hinges entirely on the condition of your current cabinet boxes. If they are severely damaged by water, mold, rot, or are structurally unsound and warped, refacing is not advisable. In such cases, a full replacement is often the only viable option.
- Fixed Layout: Refacing does not allow for changes to your kitchen’s layout or footprint. If you dream of moving appliances, adding an island, or reconfiguring your workspace, refacing won’t achieve these goals. It’s strictly a cosmetic update of the existing structure.
- Interior Remains the Same: While the exterior of your cabinets will be completely new, the interior of the cabinet boxes (shelving, drawer boxes) will remain as they are, unless you specifically opt for internal upgrades, which add to the cost.
- Veneer Durability: While modern veneers and laminates are durable, poor installation or excessive moisture exposure can lead to peeling or bubbling over time. Quality of materials and installation expertise are paramount here.
- Limited Customization for Cabinets: While you get new doors and veneer, you cannot easily add or remove cabinet units, change their sizes, or integrate highly customized storage solutions as you could with brand-new custom cabinetry.
- Potential for Visible Seams: Despite careful application, in some instances, very subtle seams on the veneer might be visible, particularly on the cabinet frames.
Understanding these limitations will help you determine if refacing truly aligns with your renovation objectives or if a more extensive project might be necessary.
Is Cabinet Refacing the Right Investment for You?
After weighing the pros and cons, the ultimate question remains: is cabinet refacing worth the investment for your specific situation? The answer is a resounding yes, under the right circumstances.
Cabinet refacing represents exceptional value when your primary goal is a significant visual upgrade – a complete style overhaul – without incurring the substantial cost, extensive time commitment, and significant disruption associated with a full cabinet replacement. If your existing cabinet boxes are structurally sound, free from major damage, and you are satisfied with your kitchen’s current layout and functionality, then refacing stands out as an incredibly smart and efficient choice.
It allows you to achieve a “new kitchen” look for a fraction of the price and in a fraction of the time, making your space feel fresh, modern, and inviting. For homeowners looking to revitalize their kitchen’s aesthetic, enhance its appeal for personal enjoyment, or boost resale value without embarking on a major construction project, cabinet refacing offers unparalleled returns on investment in terms of style, budget, and convenience. It truly delivers big style gains for less time and money.
Essential Maintenance Tips for Your Refaced Cabinets
Once your cabinet refacing project is complete, a little ongoing care will go a long way in preserving their pristine condition and ensuring their longevity. Proper maintenance isn’t complicated, but it is crucial for keeping your transformed cabinets looking their best for many years. Follow these key tips to protect your investment:
- Routine Cleaning Advice: Regularly wipe down your cabinet surfaces with a soft, clean, damp cloth. For tougher spots or accumulated grime, use a cloth dampened with a mild, non-abrasive soap solution (e.g., dish soap diluted in water). Always wipe dry immediately with another clean cloth to prevent moisture damage, especially on wood veneers.
- What to Avoid: Steer clear of harsh chemical cleaners, abrasive scouring pads, strong detergents, or products containing ammonia, bleach, or silicone. These can damage the veneer, laminate, or finish, leading to discoloration, peeling, or dulling.
- Tips for Enhanced Longevity: Proactive measures can significantly extend the life of your refaced cabinets.
- Control Humidity: Maintain stable kitchen humidity levels to prevent materials from expanding, contracting, or warping, which can lead to veneer delamination. Use your kitchen’s exhaust fan while cooking.
- Protect from Heat and Moisture: Avoid placing hot appliances directly against cabinet surfaces without protection. Wipe up spills immediately, especially around sinks and dishwashers, to prevent water from seeping into edges.
- Gentle Use: If you don’t have soft-close mechanisms, close doors and drawers gently to minimize impact and reduce wear and tear on hinges and finishes.
- When to Consider Repairs or Re-Refacing: Even with diligent care, wear and tear are inevitable over time.
- Immediate Repairs: Address minor issues like small nicks, scratches, or areas where veneer might be slightly lifting as soon as you notice them. Prompt repairs can prevent further damage and maintain the integrity of the surface. Specialized repair kits are available for most finishes.
- Long-Term Expectation: While a well-done refacing job can last 15-20 years or even longer, severe wear, significant changes in aesthetic taste, or widespread damage might prompt a re-refacing or a full replacement. Regularly assess the condition of your cabinets to decide when a major intervention is needed.
By adhering to these simple yet effective maintenance practices, your beautifully refaced cabinets will not only retain their fresh, updated appearance but will also provide lasting functionality and enjoyment for many years to come.
Your Transformed Kitchen Awaits: Final Thoughts on Cabinet Refacing
We’ve embarked on a comprehensive journey through the world of cabinet refacing, exploring every facet from its core definition to detailed step-by-step instructions. You now possess a clear understanding of how this powerful technique stands against alternatives like painting or full replacement, providing a unique blend of affordability and aesthetic impact. We’ve delved into the intricacies of costs, material selection, and the critical decision between a DIY approach and hiring a professional.
Beyond the technical details, you’ve witnessed inspiring before-and-after transformations, illustrating the dramatic potential of refacing to utterly revitalize a kitchen or bathroom. These real-world examples serve as a testament to what’s possible when you choose this smart renovation strategy.
Now, equipped with this in-depth knowledge, the power to decide is yours. Weigh the compelling pros against the manageable cons, consider your budget, and envision how refacing can perfectly align with your personal style and home improvement goals. Remember, diligent preparation and consistent, proper care are the keys to ensuring your refaced cabinets maintain their stunning appearance for a decade or more.
As a final, crucial piece of advice: always insist on a comprehensive, itemized written estimate from any contractor before work commences. This transparency will safeguard you against any hidden costs and ensure a smooth, surprise-free project.
Are you ready to continue your home improvement adventure? Explore our other insightful blogs on the website for a wealth of kitchen makeover tips, engaging DIY projects, and clever design tricks that you can implement to enhance every corner of your home, starting today!
