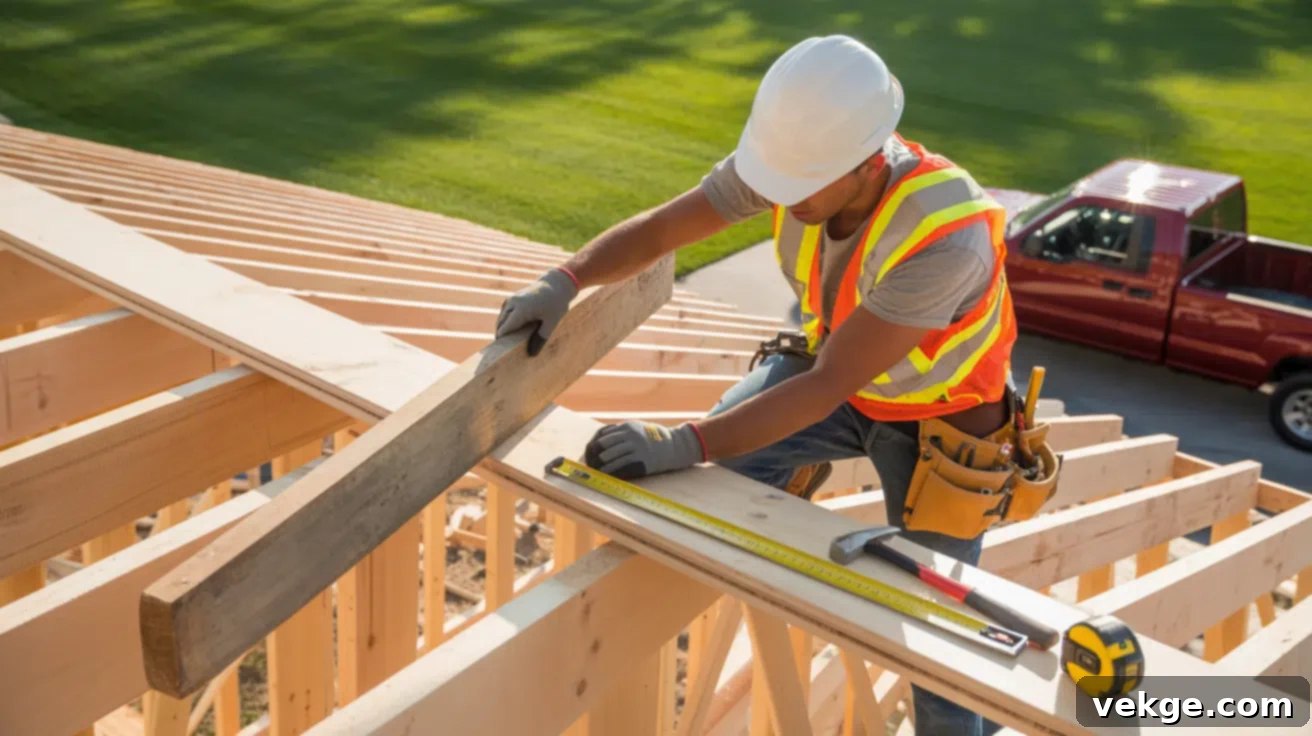
Mastering Roof Rafters: A Comprehensive Guide to Types, Installation, and Essential Tips for a Strong Roof
Have you ever looked at a roof and wondered about the hidden framework that gives it shape and strength? Beneath the shingles and decking lies a critical support system, and at its heart are roof rafters. These unsung heroes are fundamental to your home’s structural integrity, bearing the brunt of weather and time.
Whether you’re embarking on a new construction project, tackling a roof repair, or simply keen to understand your home’s anatomy, grasping the role and mechanics of rafters is invaluable. This ultimate guide will walk you through their essential functions, delve into the various types of rafters you might encounter, provide detailed instructions on how to size, space, and install them, and highlight common pitfalls to avoid. By the end, you’ll possess a clear understanding of what makes a roof robust and resilient.
A well-built roof is more than just shelter; it’s a testament to proper engineering and craftsmanship. Let’s begin our journey into the world of roof rafters and unlock the secrets to a long-lasting, sturdy roof.
The Indispensable Functions of Roof Rafters in Structural Integrity
Roof rafters are much more than mere planks of wood; they are the primary skeletal components that dictate the strength, pitch, and overall form of a building’s roof. These inclined structural beams extend from the peak (ridge) down to the exterior walls (wall plates), forming the essential framework upon which all other roofing layers rest.
Load-Bearing Role: Supporting the Entire Roof System
One of the most critical functions of rafters is their capacity to bear significant loads. They are engineered to carry the entire weight of the roofing system, which includes the roof decking, underlayment, and exterior roofing materials like shingles, tiles, or metal panels. Beyond static loads, rafters must also withstand dynamic and environmental forces such as heavy snow accumulation, the impact of rain, and powerful wind uplift. Additionally, they account for occasional live loads, such as the weight of maintenance workers or tools during repairs. A meticulously designed and installed rafter system efficiently transfers these immense forces safely to the load-bearing walls and foundation below, thereby preventing structural strain, sagging, and potential catastrophic failure of the roof.
Foundation for Roof Decking: Ensuring a Smooth and Stable Surface
Rafters create a robust and continuous foundation for the roof decking materials, typically plywood or oriented strand board (OSB). These panels, in turn, provide the immediate surface onto which the final roofing materials are applied. Without adequate and evenly spaced support from strong rafters, the roof decking can sag, warp, or become uneven over time. This not only compromises the aesthetic appeal of the roof but also leads to critical functional issues such as water pooling, leaks, and reduced insulation effectiveness. Proper rafter support ensures a flat, stable surface crucial for the longevity and performance of the entire roofing system.
Defining Roof Pitch and Shape: Guiding Water and Enhancing Aesthetics
The precise angle and length of rafters are what define the pitch or slope of the roof. This slope is vital for effective water management, allowing rain, snowmelt, and debris to efficiently drain off the roof, preventing water intrusion and minimizing the risk of ice dams. The chosen pitch also has a direct impact on several other aspects of a building: it influences the amount of headroom available in an attic, affects natural airflow and ventilation, and significantly contributes to the roof’s overall profile and architectural style. Steeper slopes, for instance, are particularly advantageous in regions prone to heavy precipitation, ensuring rapid runoff and reducing snow load.
Aesthetic Framing Value: Exposed Rafters as Architectural Elements
While often hidden, in certain architectural designs, rafters are intentionally left exposed rather than being concealed by ceilings or soffits. This design choice is frequently seen in rustic homes, barns, traditional cabins, or modern homes featuring vaulted ceilings or open-concept living spaces. Exposed rafters and their visible rafter tails not only add significant visual depth and character but also highlight the craftsmanship and structural honesty of the roof. They can become a compelling architectural feature, blending functionality with a unique aesthetic appeal.
Exploring the Diverse Types of Roof Rafters
Understanding the different types of rafters is crucial for anyone involved in roof construction or repair. Each type is designed to serve a specific purpose within the intricate framework of a roof, contributing to its overall stability and shape. Knowing their individual roles ensures that the framing is accurate, structurally sound, and capable of withstanding various loads and environmental conditions.
1. Common Rafters: The Backbone of Standard Roofs
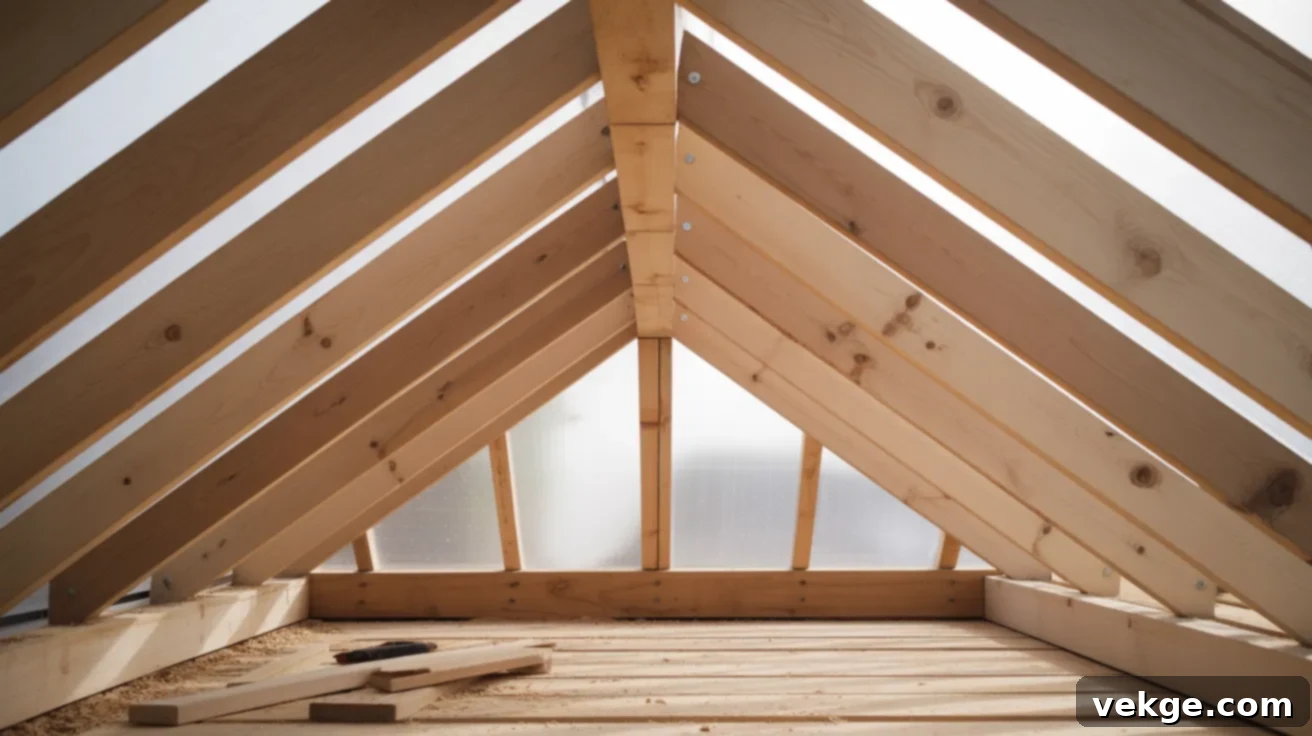
Common rafters are the most prevalent type of rafter found in basic roof designs, such as simple gable roofs, shed roofs, and gambrel roofs. They run perpendicular to the building’s exterior walls, extending from the top ridge board down to the wall plate (or eave line). These rafters are responsible for forming the primary slope of the roof and directly supporting the roof’s load. They are typically spaced evenly, often 16 or 24 inches on center, to ensure uniform support and stability for the decking. Common rafters are frequently cut on-site, which provides the flexibility for minor adjustments during the framing process, making them a practical choice for a wide range of structures from garages and small homes to sheds.
2. Hip Rafters: Defining the Corners of Complex Roofs
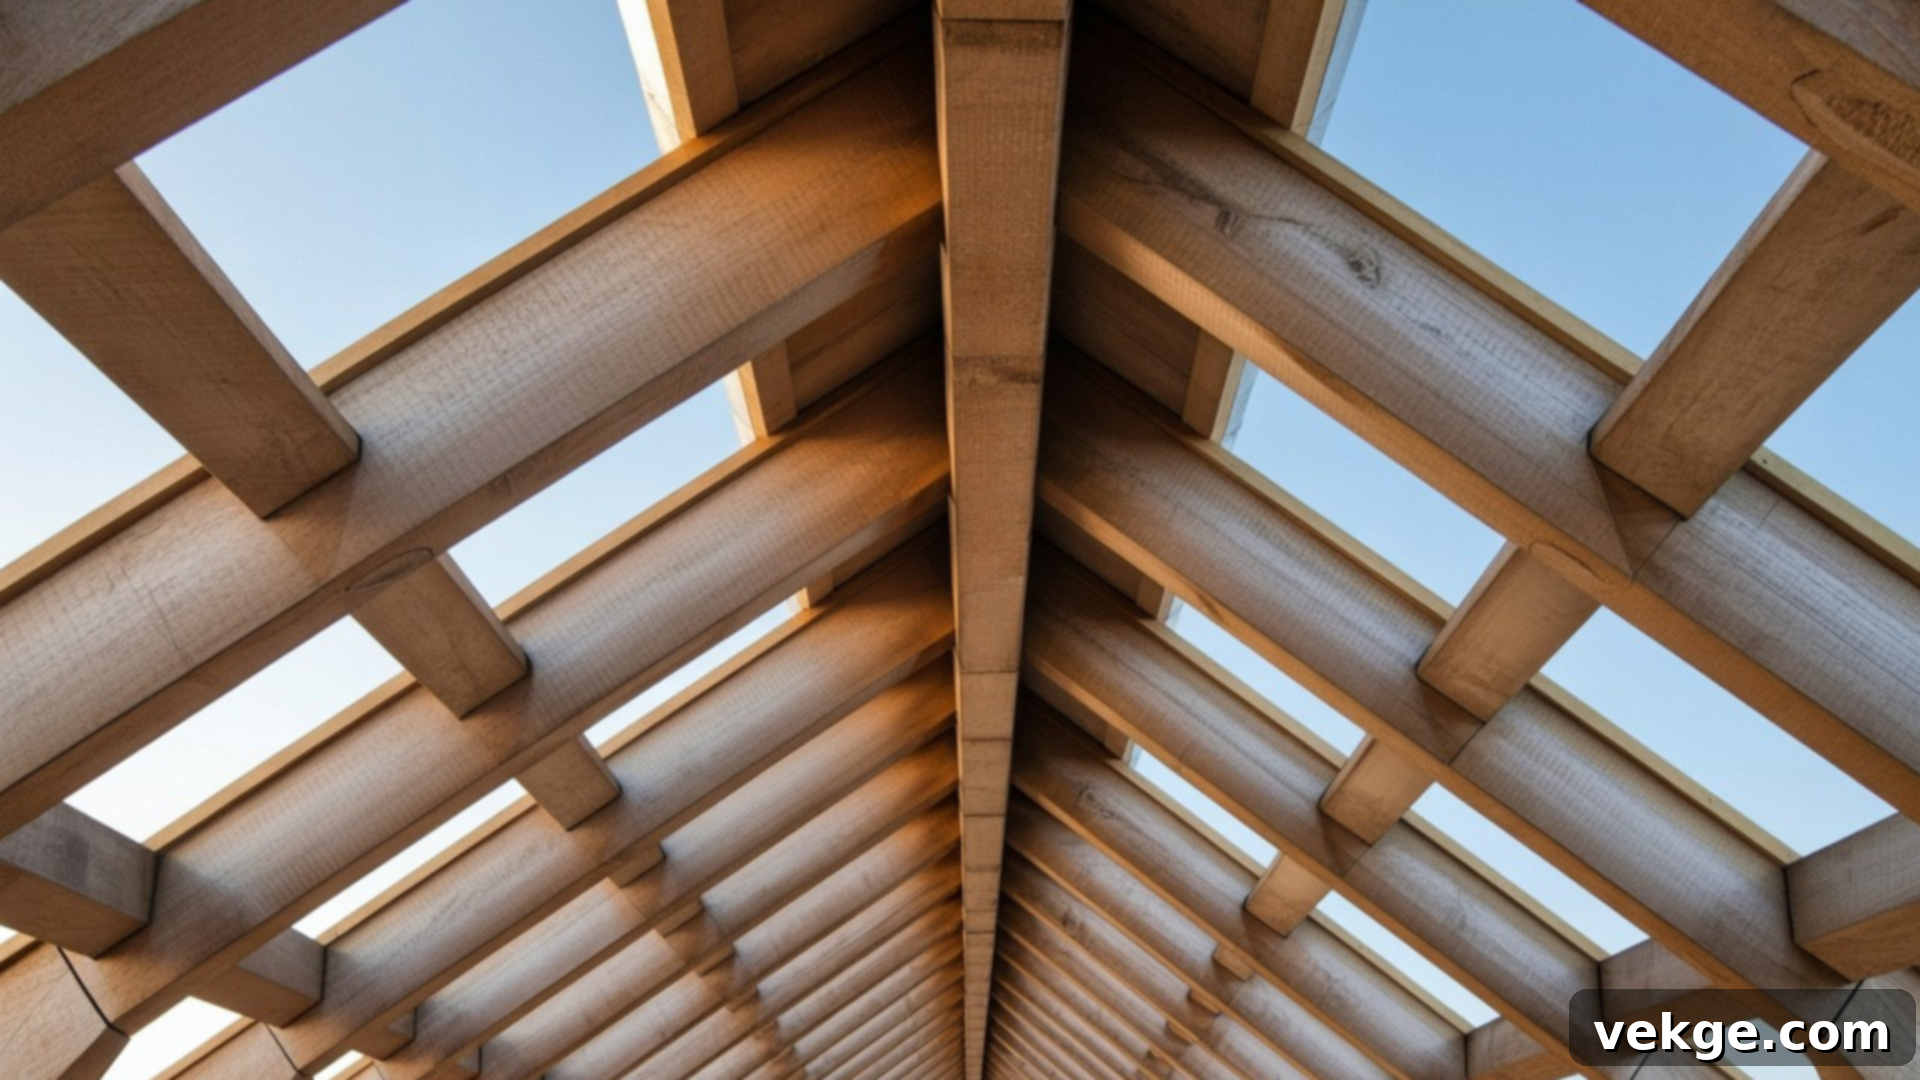
When a roof incorporates sloping sides that meet at external corners, forming a hip roof, hip rafters become essential. These rafters are positioned diagonally, extending from the main ridge board down to the building’s exterior corners. They define the outside edges of the roof and carry a significantly heavier load than common rafters because they support both the main roof sections and the shorter jack rafters that connect to them. Due to this increased load, hip rafters are often made from thicker or doubled lumber to enhance their strength. Precision in cutting hip rafters is paramount; even a slight miscalculation in the compound angle cuts can throw off the entire roof pitch and alignment. Proper support at both their upper and lower ends is critical for the stability of a hip roof, especially in areas subjected to high winds, as they contribute significantly to the roof’s rigidity.
3. Valley Rafters: Managing Water Flow at Inside Corners
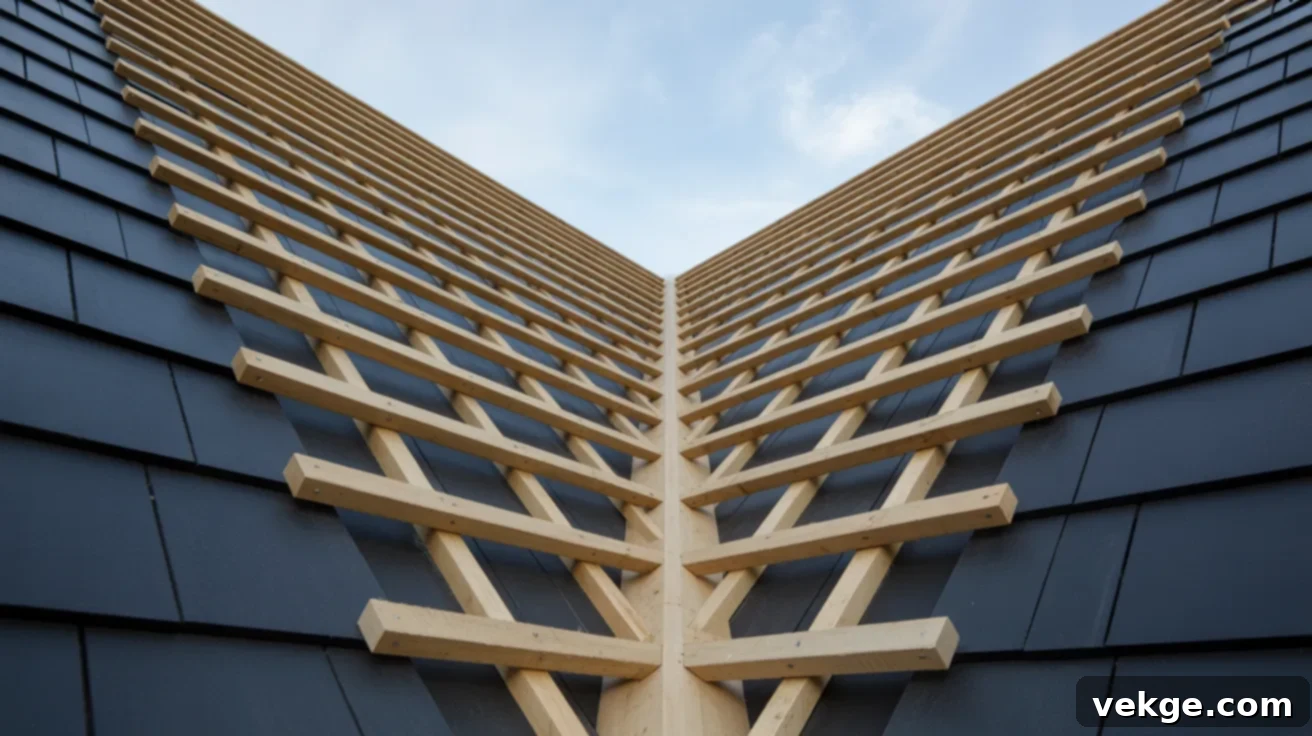
Valley rafters are employed in roof designs where two distinct roof sections meet at an internal corner, creating a V-shaped trough or “valley.” They run diagonally from the main ridge down to the eaves, forming a critical channel that collects and directs water runoff from the converging roof planes. Jack rafters, which are shorter, are attached to both sides of the valley rafter, creating the support structure for the decking in this area. Given that valleys collect substantial amounts of water, robust lumber and superior waterproofing techniques are absolutely essential to prevent leaks, which are a common issue in poorly constructed valleys. Meticulous planning, precise alignment, and strong materials are crucial when framing this complex section to ensure its long-term integrity and water-tightness.
4. Jack Rafters: Filling the Gaps in Complex Roof Structures
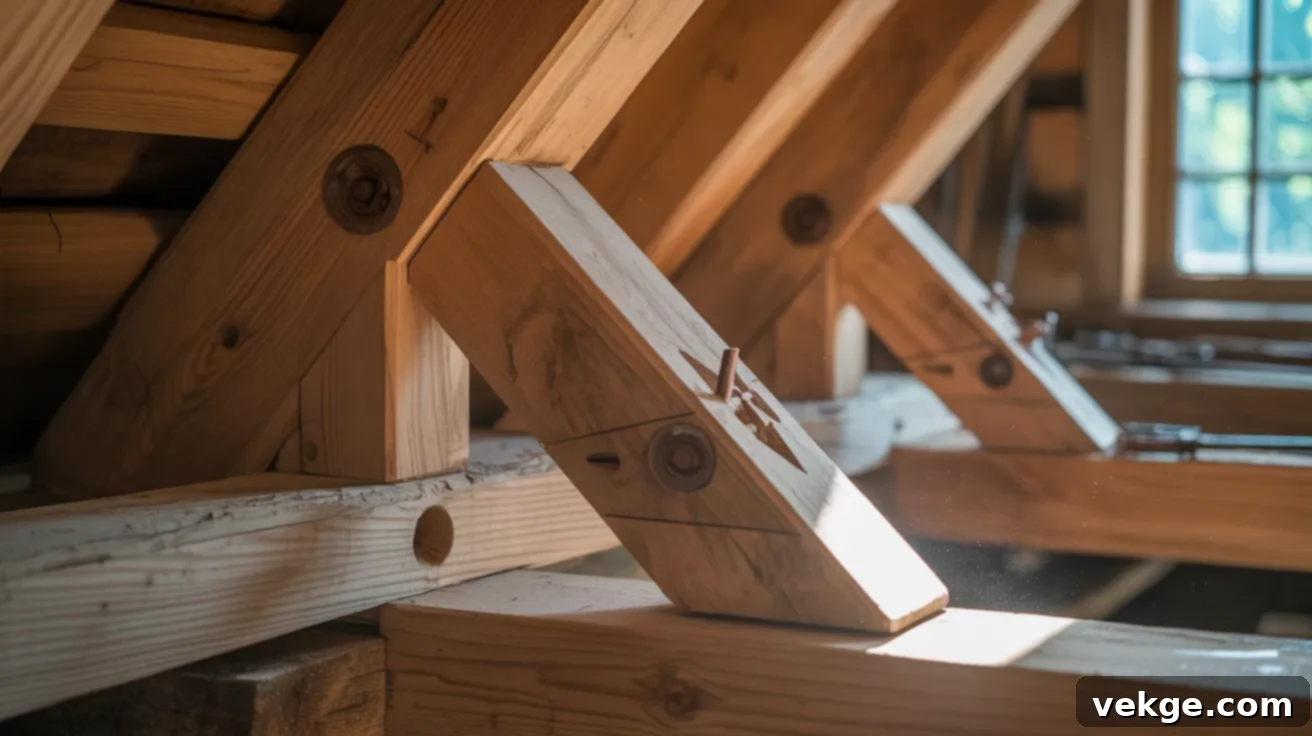
Jack rafters are shorter, sloped boards that are integral to roofs featuring hip or valley sections. Unlike full-length common rafters, they do not extend from the ridge board all the way down to the wall plate. Instead, they connect from either a wall plate to a hip rafter (known as hip jack rafters) or from the main ridge board to a valley rafter (known as valley jack rafters). These specialized rafters effectively fill the triangular or trapezoidal gaps between the main structural rafters, providing essential support for the roof deck across all sections. They ensure that the roof surface remains even and properly reinforced, distributing loads effectively and contributing to the overall strength and stability of more intricate roof designs.
5. Flying Rafters (Barge Rafters): Supporting Gable Overhangs

Flying rafters, also commonly referred to as barge rafters, are specifically used when a roof has open gable ends, creating an overhang beyond the wall line. These rafters extend past the end wall of the building and support the projecting portion of the roof. Unlike common rafters, they are not directly connected to the ridge board at their upper end; instead, they are supported by a ladder frame assembly, often cantilevered from the attic floor joists or common rafters. They typically provide support for the fascia board and help create a clean, finished edge along the roofline. While they do not carry the same primary structural load as common or hip rafters, proper bracing and secure fasteners are vital, particularly in regions exposed to strong winds, as they contribute significantly to both the structural integrity and the aesthetic finish of the gable end.
How to Set Up Roof Rafters: A Step-by-Step Installation Guide
Framing a roof with rafters is a rewarding process that requires precision, careful planning, and adherence to safety. Before you begin, gathering the correct materials and understanding each step thoroughly is crucial. The right choice of wood or engineered support system will directly impact the frame’s strength, durability, and longevity. This guide will take you through the essential steps, from material selection to final bracing.
Materials Used for Rafters: Choosing the Right Lumber
Selecting the appropriate material for your rafters is a foundational decision that influences the structural integrity, ease of installation, and cost of your roof. Here are the common types of materials used, each with its unique advantages:
1. Traditional Wood Types (Dimension Lumber: 2×6, 2×8, 2×10, 2×12)
- Common Species: Pine (especially Southern Pine), Douglas Fir, Spruce, and Cedar are widely used. Pine and fir are favored for their strength, availability, and cost-effectiveness. Cedar offers natural resistance to rot and insects, making it excellent for damp climates or exposed elements.
- Sizes: Common sizes like 2×6, 2×8, 2×10, and 2×12 are selected based on the span of the roof, the anticipated load, and local building codes. Smaller dimensions are suitable for shorter spans or lighter loads (e.g., sheds, garages), while larger dimensions are required for longer spans or heavier roofing materials (e.g., tile roofs, homes with significant snow loads).
- Advantages: Traditional lumber is easy to cut, shape, and join using standard carpentry tools. It offers significant flexibility for on-site adjustments, which is particularly beneficial in custom or complex roof designs.
- Considerations: Natural wood can have knots, bows, or twists. Careful selection of straight and sound lumber is essential. Pressure-treated lumber may be required for certain applications, especially where wood is exposed to moisture.
2. Laminated Veneer Lumber (LVL)
- Composition: LVL is an engineered wood product made by bonding thin wood veneers with adhesives under heat and pressure. The grain of each veneer runs in the same direction, creating a highly consistent and strong material.
- Advantages: LVL offers superior strength, stiffness, and dimensional stability compared to solid lumber. It is less prone to twisting, warping, or shrinking. Its consistent properties make it ideal for long spans without intermediate supports, creating more open interior spaces (e.g., large attic spaces).
- Applications: Excellent for demanding applications where long, straight, and strong rafters are needed, particularly in larger homes or commercial buildings where structural performance is critical.
- Considerations: LVL is generally heavier and more expensive than traditional lumber. While it can be cut, it requires precise planning as on-site modifications are less flexible.
3. Metal Rafters
- Materials: Typically made from steel or aluminum, metal rafters are fabricated into various shapes (e.g., C-channels, I-beams) to provide immense strength.
- Advantages: Metal rafters are incredibly strong, durable, and resistant to pests, rot, and fire. They can span very long distances with minimal deflection, making them suitable for large industrial buildings, open sheds, or structures in harsh environments. They offer excellent dimensional stability and can be a low-maintenance option.
- Applications: Common in commercial buildings, warehouses, or residential structures designed for extreme durability and longevity.
- Considerations: Metal rafters are significantly harder to cut and shape on-site, requiring specialized tools and skills. They can be more expensive and may require professional welding or bolting for connections. Thermal bridging and rust prevention need to be managed appropriately.
Step-by-Step Instructions for Rafter Installation
Once your materials are selected and ready, and your building’s top plates are level and properly laid out, you’re ready to start framing the roof. Always prioritize safety by wearing appropriate personal protective equipment (PPE) such as gloves, safety glasses, and sturdy footwear.
Step 1: Set the Ridge Board in Position
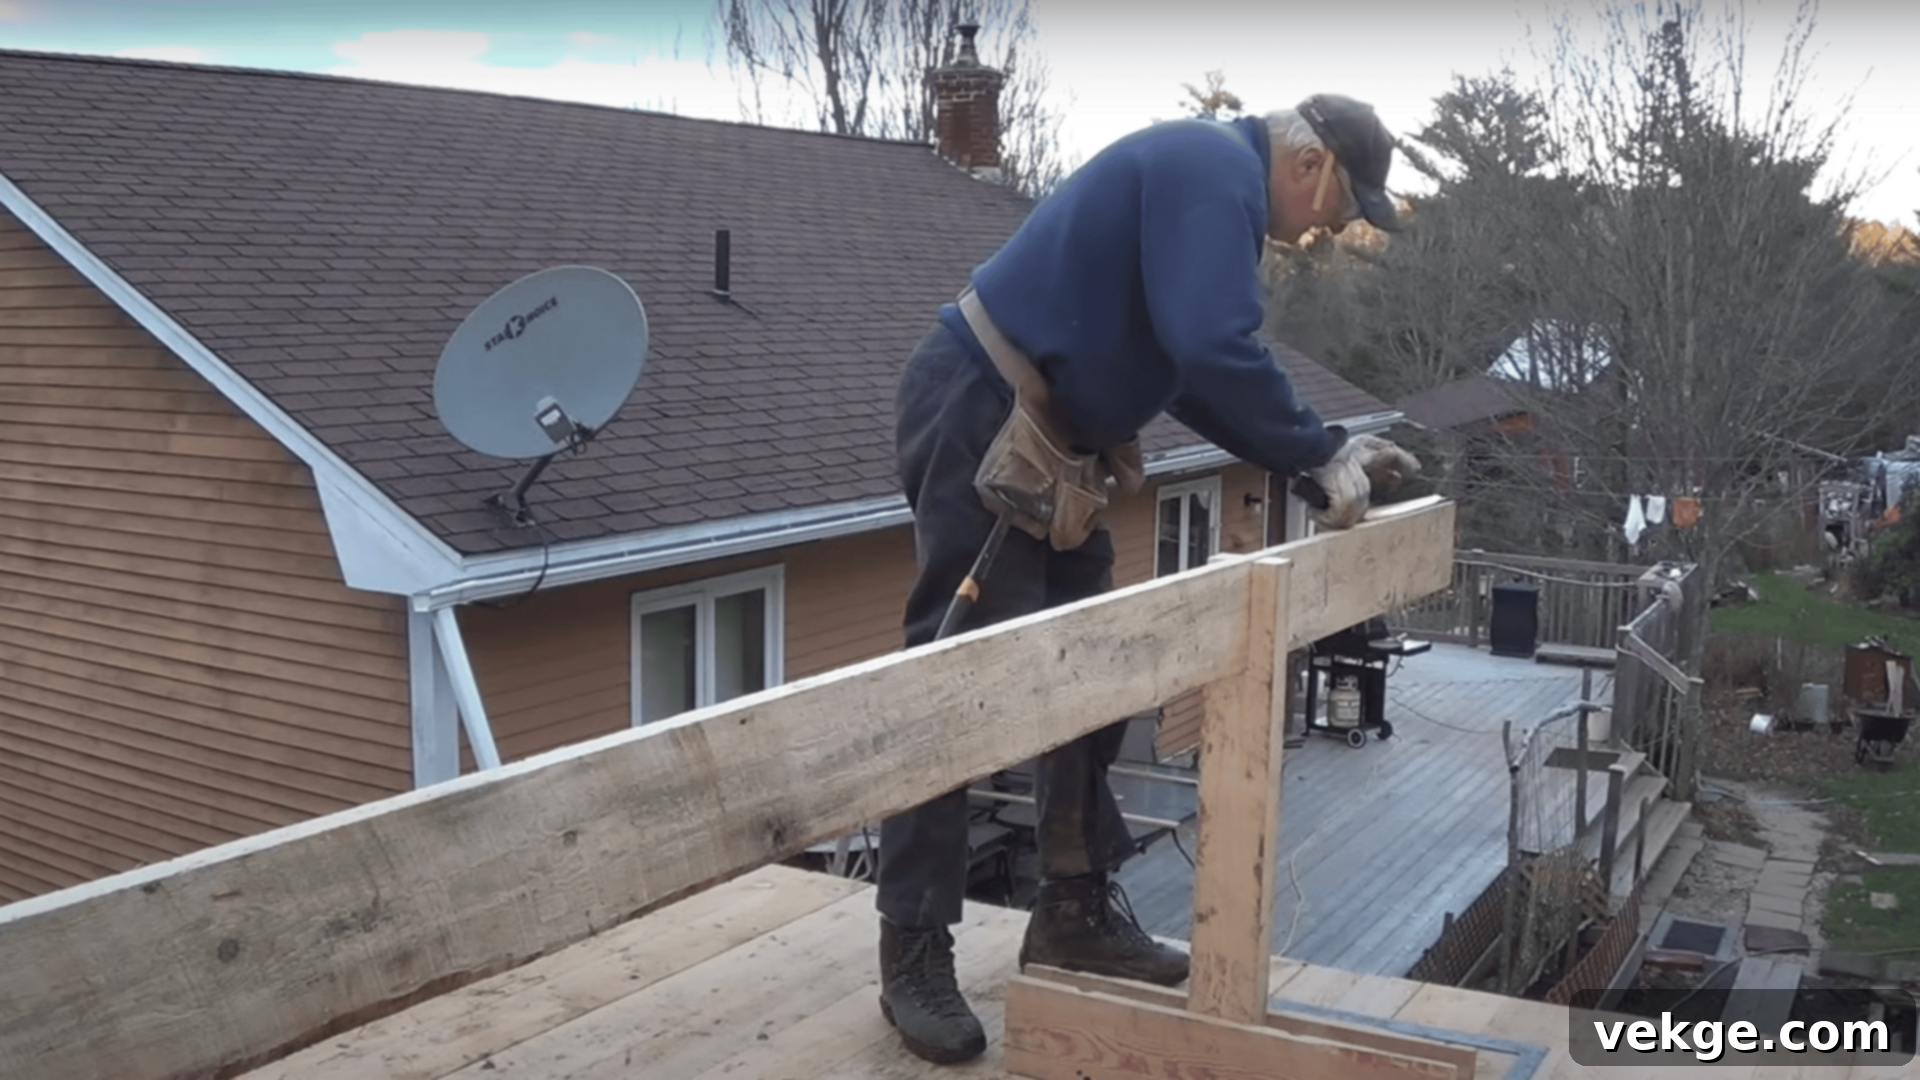
The ridge board is the horizontal member that runs along the very peak of your roof, serving as the anchor point for the top (plumb) cut of all opposing rafters. Begin by safely lifting your ridge board to its precise, intended height. Secure each end to temporary vertical supports, often 2x4s braced firmly from below or carefully supported by ladders. It is absolutely crucial that the ridge board is perfectly level, plumb, and centered along the length of the building. Use a spirit level and a tape measure to double-check its position and ensure it’s straight before fastening it. Any deviation here will directly impact the accuracy and stability of every rafter installed.
Step 2: Mark Rafter Placement on the Ridge and Wall Plates
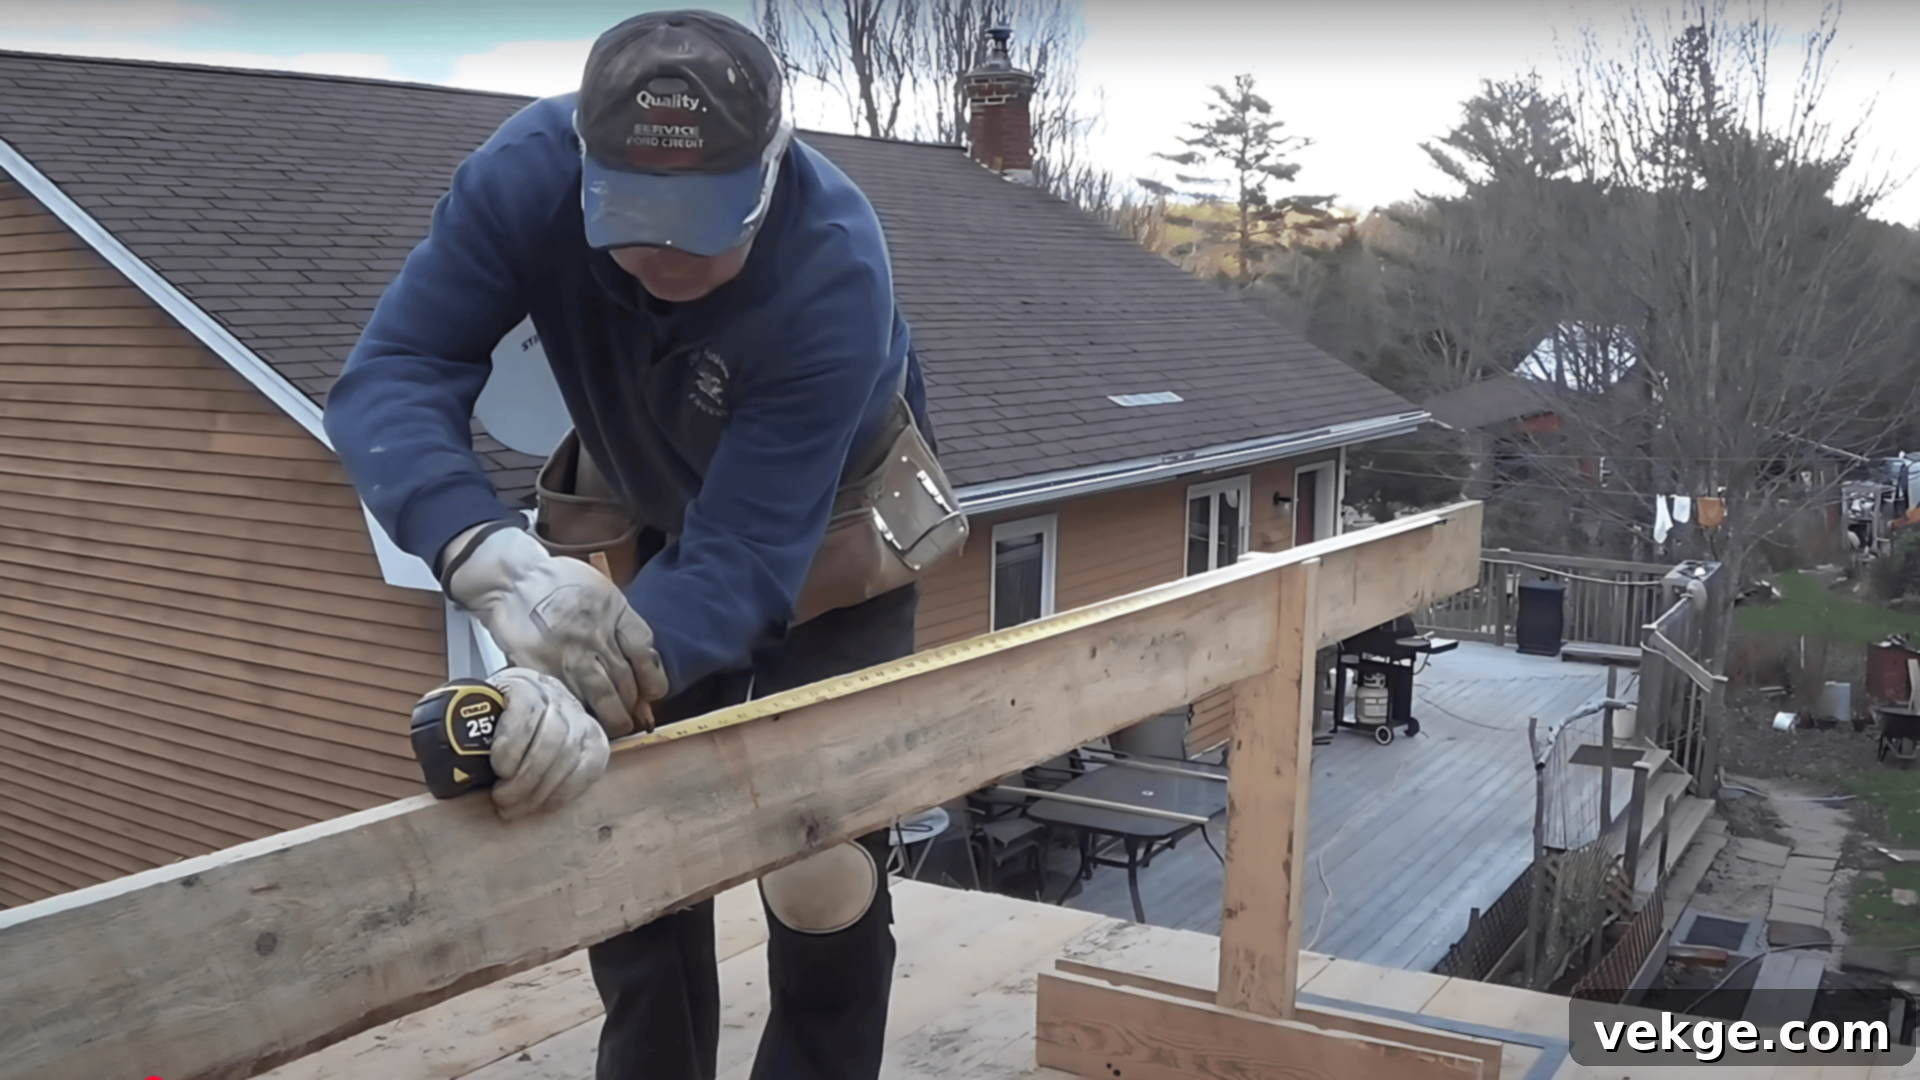
With the ridge board securely in place, the next step is to accurately mark the spacing for each rafter. Using a measuring tape and a speed square or framing square, mark the “on center” (OC) spacing for your rafters on both the ridge board and the top plates of your exterior walls. Standard spacing is typically 16 inches or 24 inches on center, as dictated by local building codes and the size of your roof decking. Start at one end of the ridge and work your way down, making clear, perpendicular lines across the face of the ridge board for each pair of opposing rafters. These marks serve as a precise guide, ensuring your roof frame is consistent, balanced, and structurally sound.
Step 3: Measure and Cut the First Rafter (Pattern Rafter)
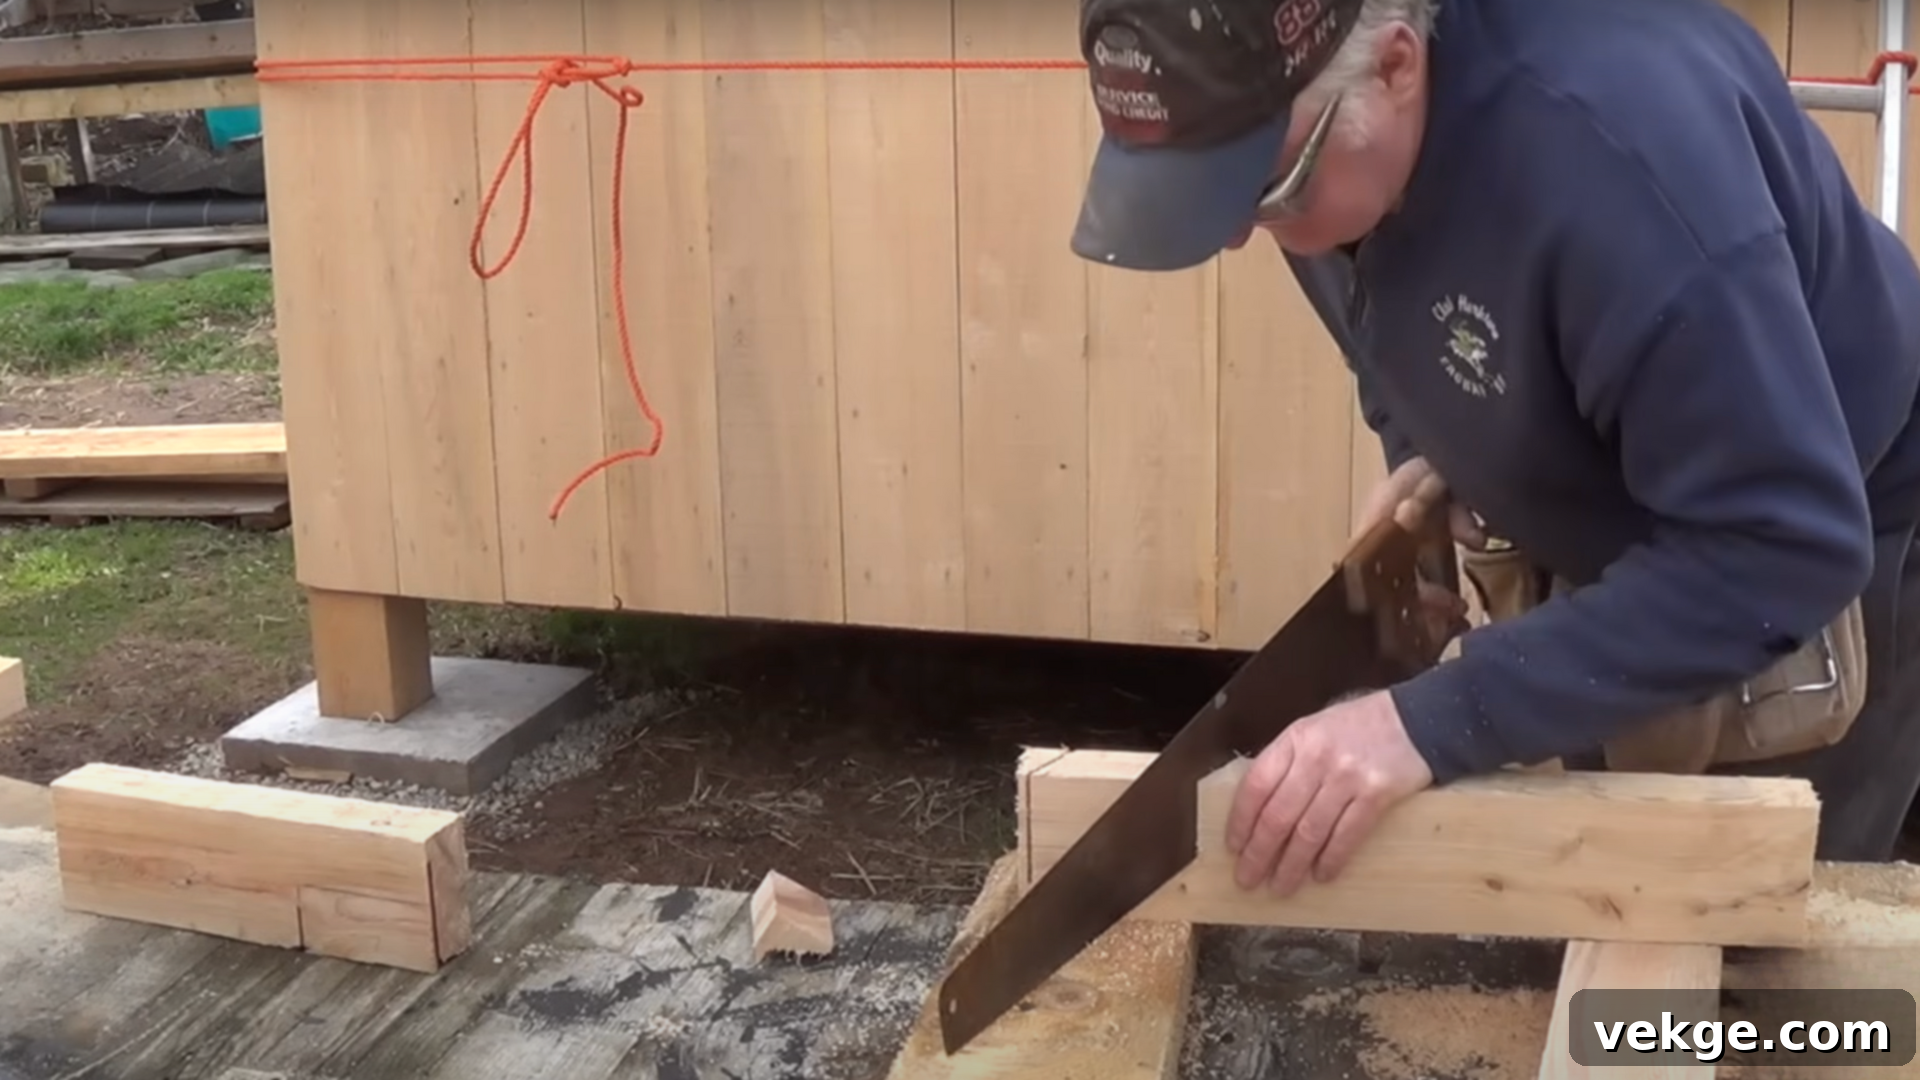
This is where the geometry of roof framing comes into play. You’ll typically cut one “pattern rafter” first, which will then serve as a template for all identical rafters. Begin by laying out the plumb cut (the vertical cut at the top that rests against the ridge board) using your determined roof pitch (e.g., 6/12, 8/12) and a framing square. From this top mark, measure down the rafter to precisely lay out the “birdsmouth” notch. The birdsmouth is a triangular cut that allows the rafter to rest securely and flatly on the wall plate. It consists of two parts: the “seat cut” (horizontal) and the “heel cut” (vertical). Use a speed square or framing square to draw these lines accurately. Once all cuts are marked (plumb cut, birdsmouth, and tail cut for the overhang), carefully cut the rafter to its full length using a circular saw for long, straight cuts and a jigsaw or handsaw for the detailed birdsmouth notch. Always test-fit your pattern rafter to ensure it sits perfectly before cutting duplicates.
Step 4: Cut Out the Birdsmouth Notch in the Rafter
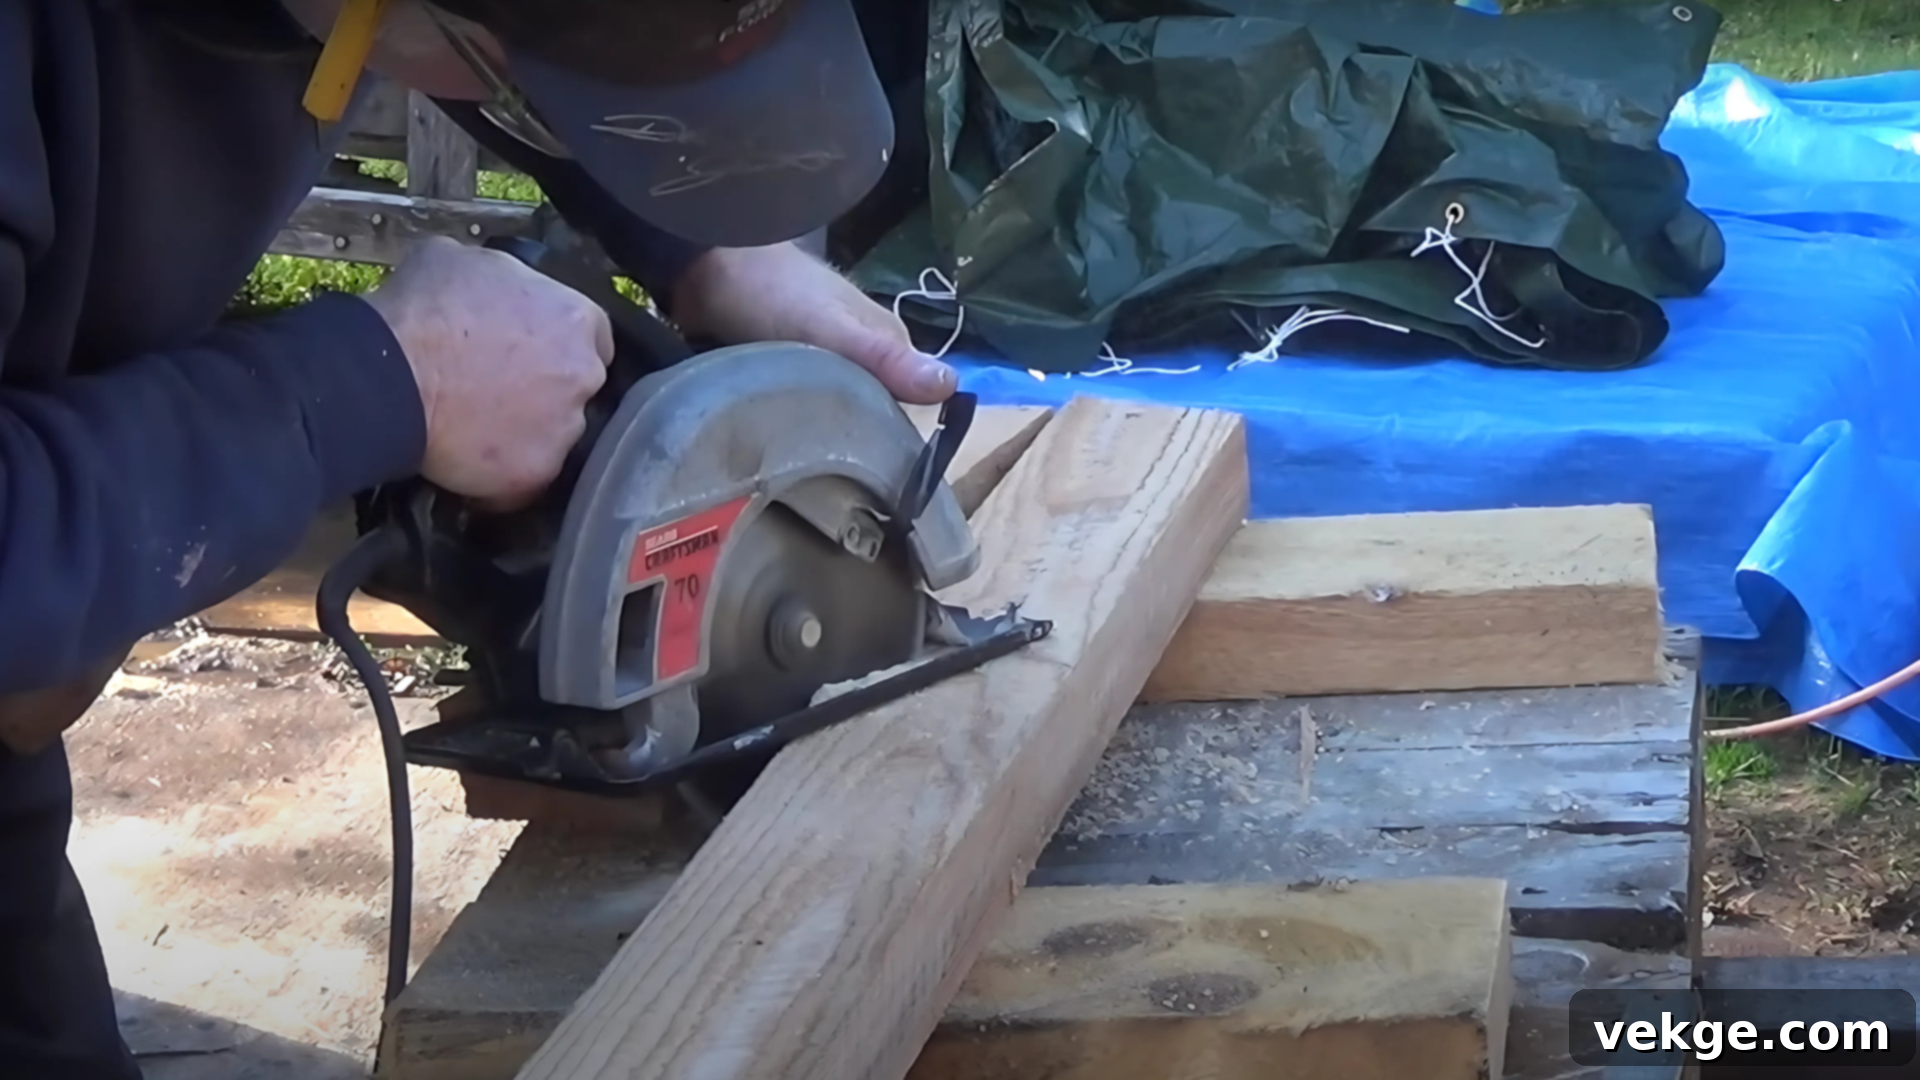
With the birdsmouth layout clearly marked on your pattern rafter (and subsequently on all other rafters), it’s time to make the cuts. Using a circular saw, make the two straight cuts that define the seat and heel of the birdsmouth. Be careful not to overcut past the marked lines, as this can weaken the rafter. For the final removal of the triangular piece, a jigsaw or even a handsaw can be used to achieve a clean and precise cut. The goal is for the notch to fit snugly and securely over the top plate of the wall, providing maximum bearing surface and preventing any rocking or instability. A perfectly cut birdsmouth is crucial for transferring roof loads effectively to the walls below. Remember to wear safety glasses and hearing protection during this step.
Step 5: Frame and Install Rafters Starting From the Ends
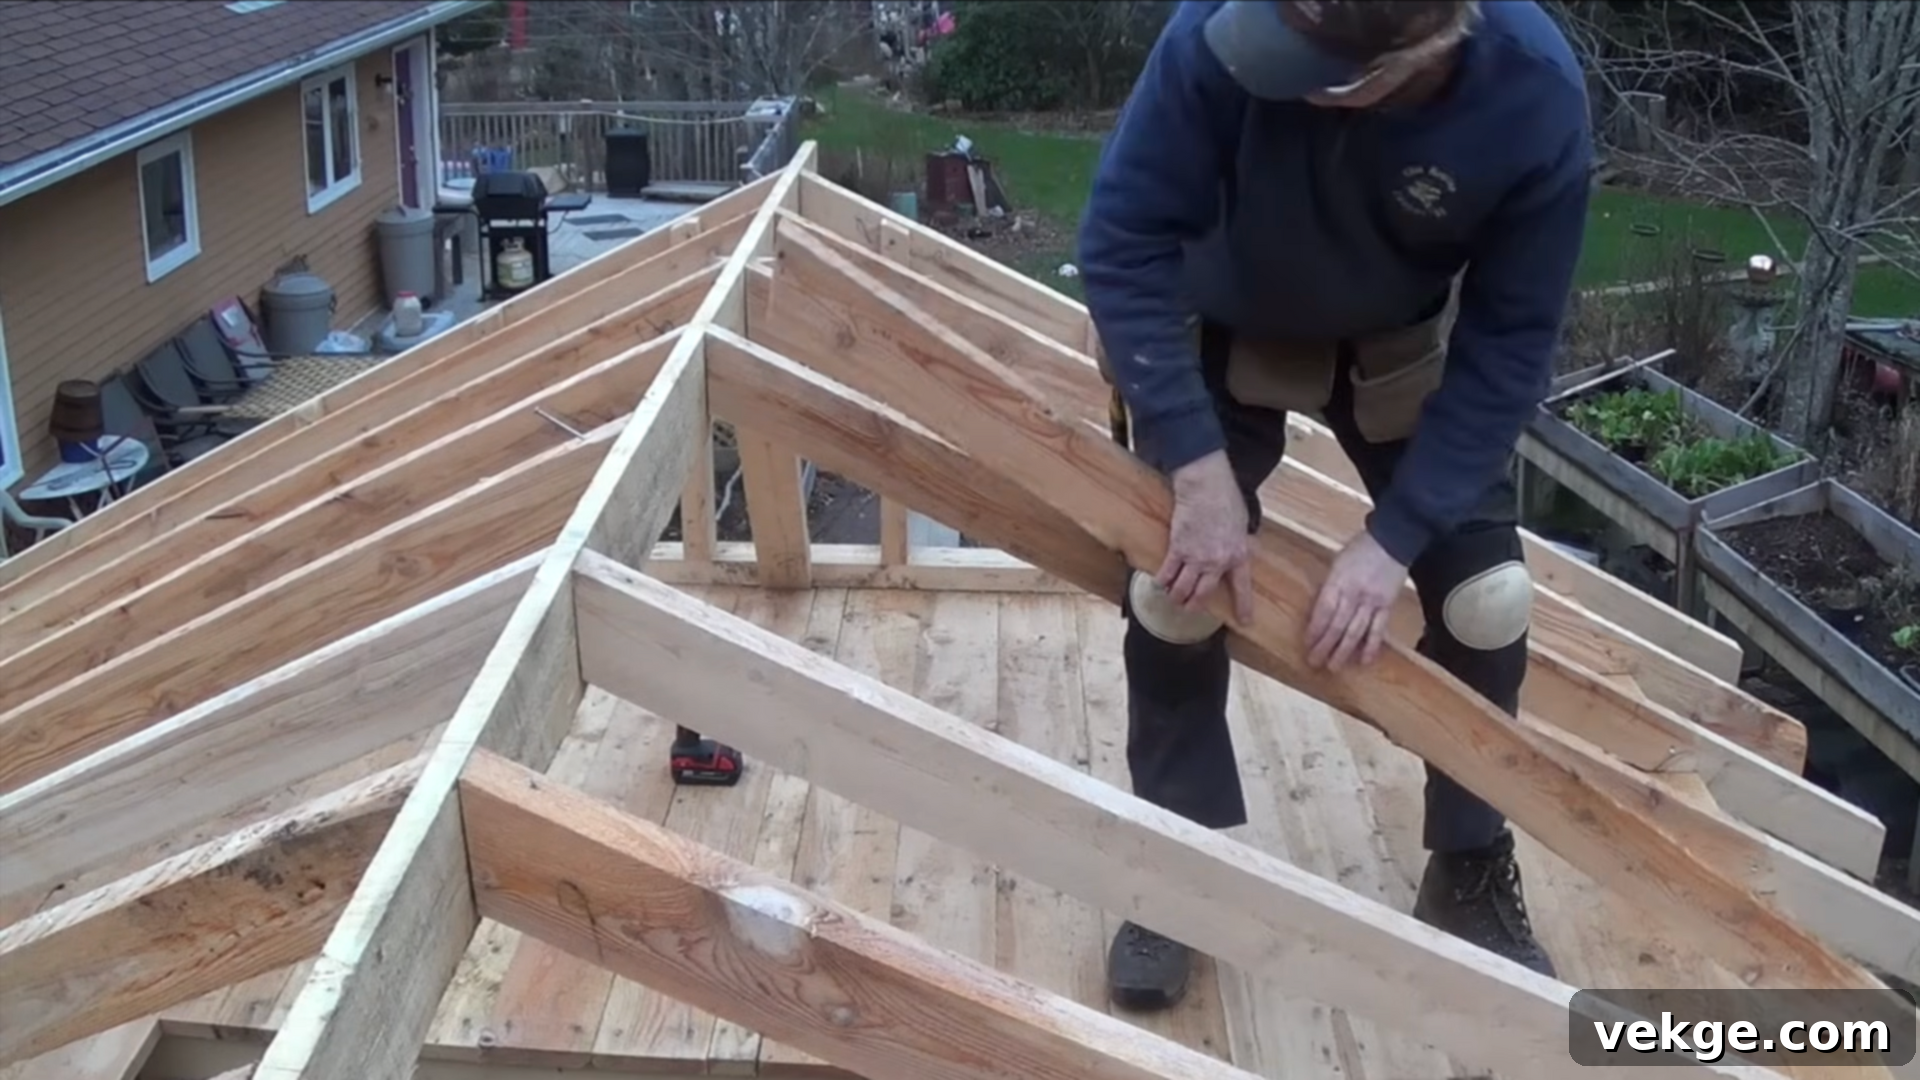
Begin the installation process by setting the end rafters on both sides of the roof, attaching them firmly to the ridge board and the exterior wall plates. These initial rafters are vital as they help to further stabilize and square up the ridge board, ensuring it remains in its correct position. Use appropriate fasteners, typically structural nails (e.g., 16d common nails) driven at an angle (toe-nailing) or metal rafter ties/brackets for stronger connections, adhering to local building codes. Once the end rafters are securely set and checked for plumb and level, proceed to install the remaining common rafters, working your way down the ridge. Align each rafter precisely with the marks you made in Step 2, ensuring they are tightly fitted and consistently spaced. Continually check your measurements and adjust as needed to maintain accuracy and a uniform roof plane.
Step 6: Add Cross-Braces for Extra Support and Stability
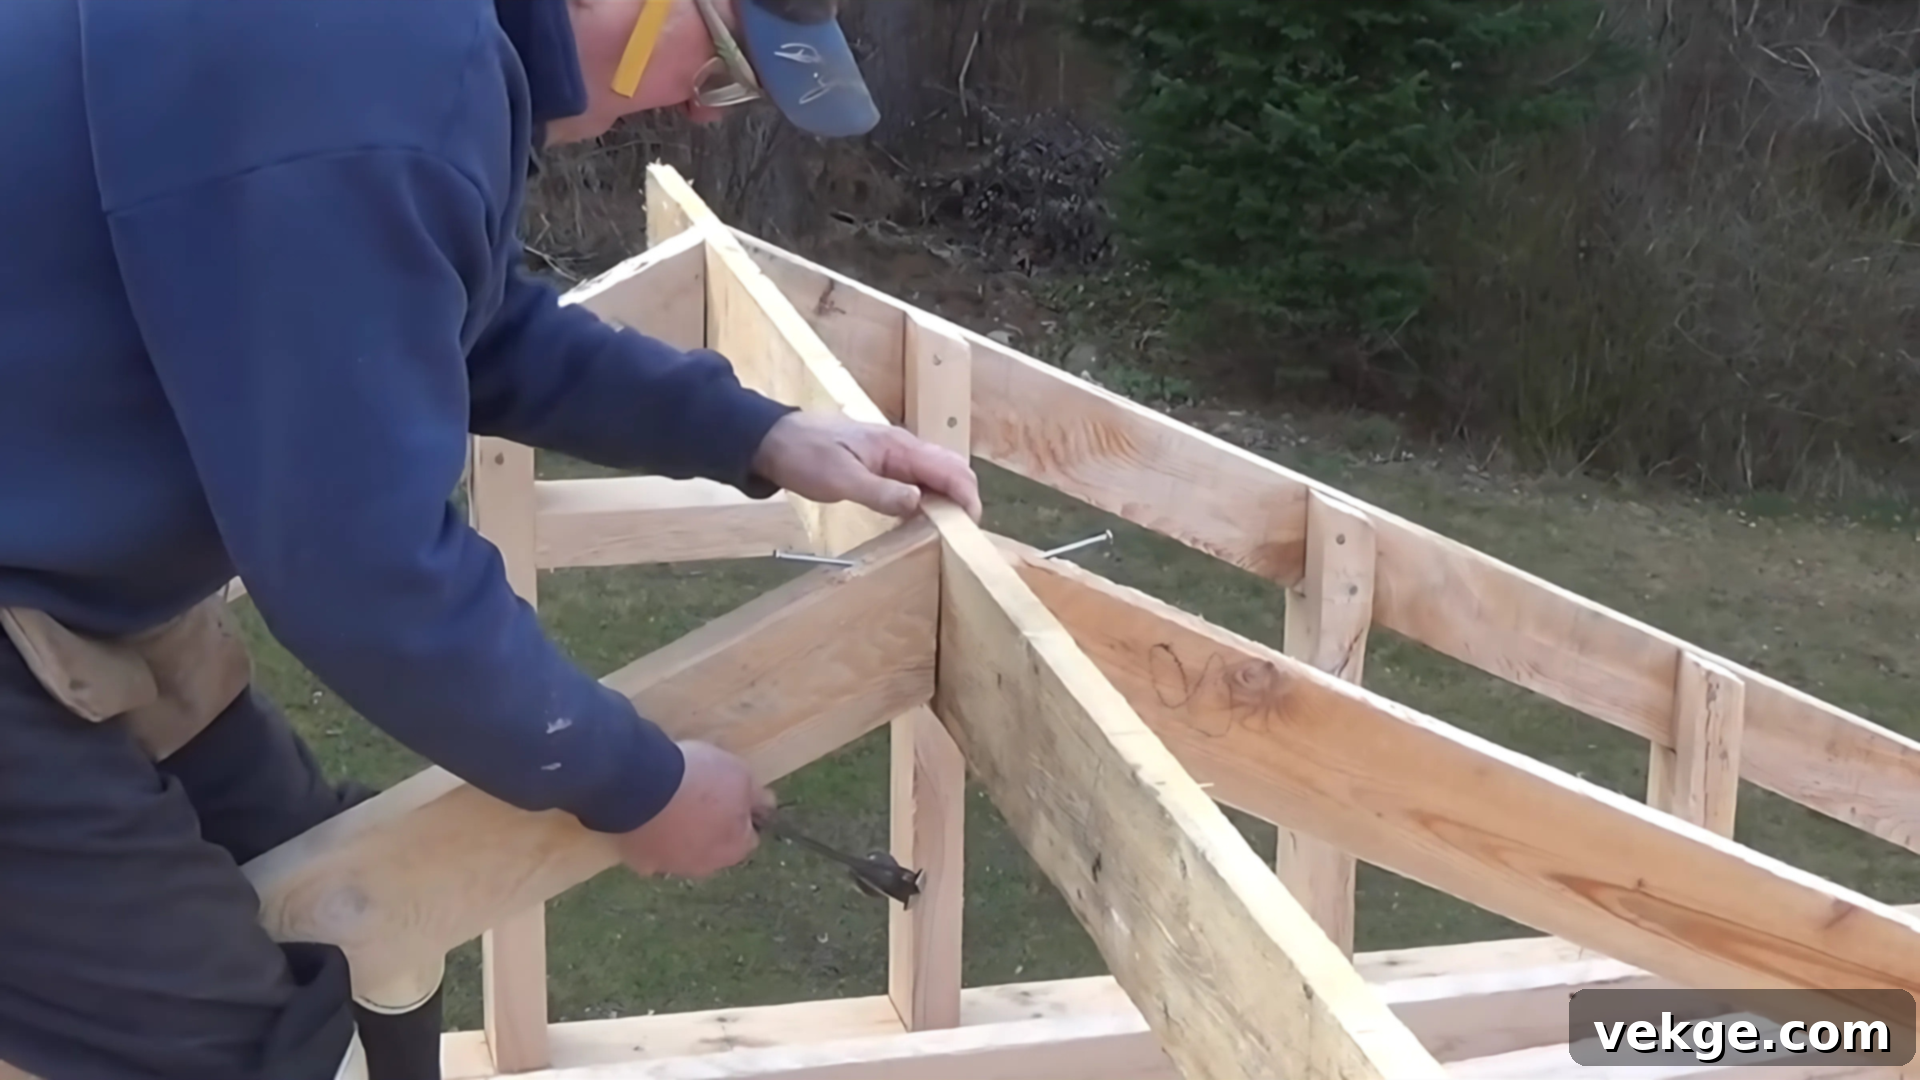
After all the rafters are installed, adding cross-braces is a critical step to enhance the structural integrity of your roof frame. These braces, such as collar ties or ceiling joists, prevent the rafters from spreading outwards under load, which could lead to sagging or structural failure. Collar ties are horizontal members installed in the upper third of the attic space, connecting opposing rafters to resist outward thrust. Ceiling joists, when used as part of the roof framing, connect the bottom ends of opposing rafters, preventing the walls from pushing outwards. For very long spans or heavy loads, additional purlins (horizontal beams) supported by bracing might be necessary to provide intermediate support to the rafters. Ensure all braces are snug, securely fastened, and installed according to engineering specifications and local building codes to create a rigid and resilient roof structure. This step is vital for the long-term stability of the entire roof.
Once you’ve gone through these detailed steps, it often helps to visualize the process in action. Check out this simple tutorial to watch each part come together in a practical demonstration.
Sizing and Spacing Guidelines for Roof Rafters: Ensuring Structural Integrity
Proper sizing and spacing of roof rafters are paramount to the structural integrity and longevity of your roof. This isn’t a step to be guessed; it requires careful calculation and adherence to engineering standards and local building codes. Incorrect sizing or spacing can lead to severe structural issues, including sagging, material failure, and even collapse. Here’s what you need to know:
- Consult Span Tables: Always refer to span tables published by lumber associations or your local building department. These tables provide maximum allowable spans for various lumber species, grades, and sizes (e.g., 2×6, 2×8, 2×10, 2×12) based on specific load conditions and rafter spacing.
- Key Factors for Rafter Size:
- Span: The horizontal distance the rafter covers from support to support (e.g., from ridge to wall plate). Longer spans require larger, stronger rafters.
- Slope (Pitch): Steeper roofs generally place less direct compressive stress on rafters than shallower roofs for the same horizontal span.
- Roof Load: This includes the “dead load” (weight of roofing materials, decking, rafters themselves) and “live load” (weight of snow, ice, wind, and temporary maintenance loads). Areas with heavy snow will require significantly larger rafters.
- Wood Species and Grade: Different wood species (e.g., Southern Pine, Douglas Fir, Hem-Fir) have varying strength properties. The grade of lumber (e.g., #1, #2) also indicates its strength and allowable defects.
- Standard Spacing: Common rafters are typically spaced 16 inches or 24 inches “on center” (measured from the center of one rafter to the center of the next).
- 16″ OC: Often used for smaller dimension rafters (e.g., 2×6, 2×8) or when heavier roofing materials (like slate or concrete tiles) are used, as it provides more frequent support. Also common for 1/2-inch thick roof decking.
- 24″ OC: Suitable for larger dimension rafters (e.g., 2×10, 2×12) or when lighter roofing materials (like asphalt shingles) are applied, especially with 5/8-inch or 3/4-inch thick roof decking.
- Load Requirements for Roofing Materials: If you’re using heavy roofing materials like ceramic tiles, slate, or metal panels, you will need to select larger dimension rafters or space them closer together compared to lighter materials like asphalt shingles or standing seam metal roofs. This ensures the roof system can adequately support the additional weight without deflection.
- Building Codes: Always adhere strictly to your local building codes. These codes provide minimum requirements for rafter size, spacing, fastening, and load limits based on regional climatic conditions (e.g., snow load, wind zones). A building inspector will verify compliance.
- Framing Calculator/Software: For complex roofs or to double-check calculations, consider using online framing calculators or professional structural engineering software. When in doubt, always consult with a licensed structural engineer or experienced building professional.
- Cut a Few Extras: It’s a wise practice to cut a few extra rafters than initially calculated. This accounts for any mis-cuts, damaged boards during handling, or unexpected changes on-site, preventing costly delays.
Comparing Roof Rafters to Other Framing Systems: Rafters vs. Trusses vs. Joists
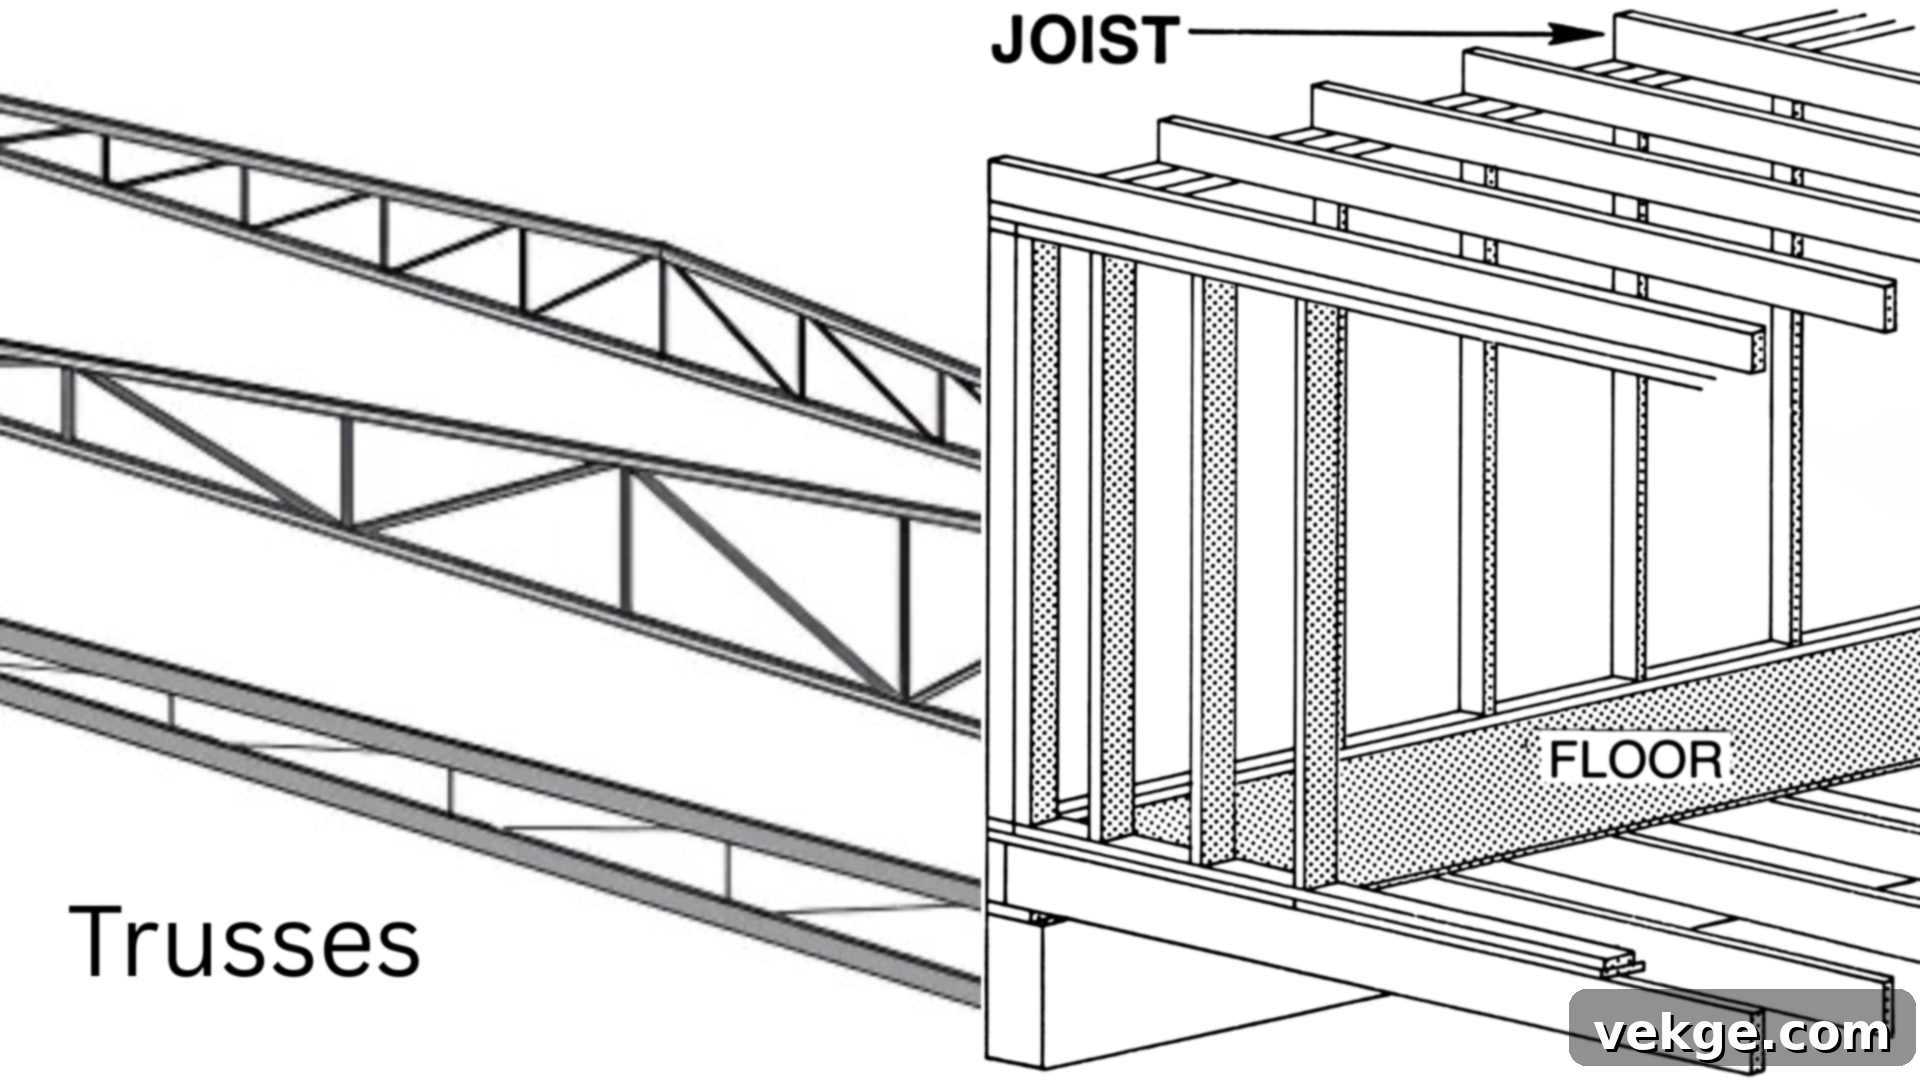
When planning a building project, understanding the distinct roles and characteristics of roof rafters, roof trusses, and floor joists is fundamental. While all three are structural framing elements, they serve different purposes and have different implications for design, cost, and construction time. Choosing the right system is crucial for optimal performance and efficiency.
1. Roof Rafters: Customization and Attic Space
As we’ve discussed, rafters are individual pieces of lumber cut and installed on-site to form the sloped structure of a roof. They typically run from the ridge board down to the exterior wall plates. Rafters are highly adaptable, allowing for significant flexibility in roof design, pitch variations, and the creation of unique architectural styles. This on-site customization makes them ideal for custom homes, complex rooflines, or situations where modifications might be needed during the framing process. A key advantage of rafter systems is the potential for creating usable attic space, which can be finished into living areas, storage, or provide ample room for HVAC systems and ductwork. However, this flexibility often translates to more labor-intensive installation and potentially higher material costs due to the need for larger dimension lumber to span distances and the individual cutting of each piece. Rafters are commonly seen in traditional homes, cabins, and sheds where attic accessibility or a specific aesthetic is desired.
2. Roof Trusses: Speed, Efficiency, and Long Spans
Roof trusses are pre-fabricated structural units engineered and assembled off-site, usually in a factory setting. They consist of multiple smaller pieces of lumber connected together in a triangular web pattern with metal connector plates. Trusses arrive at the construction site ready to be lifted and installed, which dramatically speeds up the roof framing process. Their engineered design makes them incredibly efficient at spanning long distances without intermediate supports, requiring less material than an equivalent rafter system for the same span. This efficiency often leads to lower material costs and reduced on-site labor. Trusses are a popular choice for larger residential developments, commercial buildings, and projects where construction speed and cost-effectiveness are priorities. The primary trade-off with trusses is their lack of design flexibility and the fact that their webbed configuration typically eliminates the possibility of creating usable attic space, as the internal webbing obstructs open areas. Once ordered, their design is fixed, allowing for no on-site modifications.
3. Floor Joists: Supporting Floors and Ceilings
Joists are horizontal framing members used to support floors and ceilings. Unlike rafters and trusses, which create a pitched roof, joists are installed flat between bearing walls, beams, or foundations. They are arranged in parallel rows, evenly spaced, and sized to support the specific dead and live loads of the floor or ceiling above. Joists are fundamental to nearly all multi-story homes, porches, decks, and even some flat roof constructions. They are relatively simple to measure, cut, and install, contributing to the overall levelness and stability of the horizontal surfaces in a building. Proper spacing and secure fastening of joists are crucial to prevent sagging floors, cracking drywall on ceilings, and ensuring the structural integrity of the entire building. They are a cost-effective and straightforward solution for creating horizontal load-bearing planes.
Quick Comparison: Rafters vs. Trusses vs. Joists
Understanding these distinctions is vital for making informed decisions during the design and construction phases of any project. Each system has its optimal application based on structural needs, budget, and desired architectural outcomes.
| Feature | Rafters | Trusses | Joists |
|---|---|---|---|
| Primary Use | Frame sloped roofs, often with attic space | Install full pre-fabricated roof frames | Support horizontal floors and ceilings |
| Design Flexibility | High; easy to adjust on-site for custom designs | Low; fixed shape, minimal on-site modification | Moderate; can be trimmed or altered as needed |
| Installation Speed | Slower setup due to on-site cutting and assembly | Faster to install due to pre-fabrication | Relatively quick and straightforward layout |
| On-site Cutting | Requires extensive cutting of each board | Minimal to no cutting required on-site | Some trimming and notching may be needed |
| Span Capability | Good for small to medium roof spans; limited by lumber size | Excellent for wide spans without intermediate supports | Best for flat horizontal spans between supports |
| Cost Implications | Potentially higher labor costs, more material waste | Often lower material costs, faster build, less labor | Low cost, low labor for standard applications |
| Attic Space | Allows for usable attic space (storage, living area) | Typically obstructs attic space due to web members | Forms the floor/ceiling, defines room height |
| Best For | Custom roofs, homes with desired attic space, unique pitches | Large, fast builds, cost-efficient projects, long clear spans | Floor and ceiling framing in all types of structures |
Common Mistakes to Avoid When Working with Roof Rafters
Even experienced builders can make mistakes, but being aware of common errors when framing a roof with rafters can help you avoid costly and dangerous structural problems. Precision and attention to detail are critical at every stage of the process.
- Incorrect Rafter Spacing: Spacing rafters too far apart is a critical error that severely compromises the roof’s ability to support loads. This can lead to excessive deflection, sagging of the roof decking, compromised roofing materials, and even structural failure.
Prevention: Always strictly adhere to the recommended “on center” spacing guidelines (typically 16 or 24 inches) dictated by local building codes, span tables, and the type of roof decking being used. Use a measuring tape and a framing square to mark out accurate spacing on both the ridge board and wall plates before installation. - Using Undersized Rafters for the Span or Load: Selecting rafters that are too small in cross-section (e.g., using 2x6s where 2x10s are required) for the given span or the anticipated load (dead and live loads) is a recipe for disaster. This will result in excessive bending, permanent deformation, and potential collapse, especially under heavy snow or wind.
Prevention: Always consult comprehensive span tables and local building codes. Factor in the total roof load (weight of all roofing materials, snow, wind, and maintenance loads) and the actual horizontal span. When in doubt, always size up or consult a structural engineer. - Improper Fastening and Connections: Failing to use the correct type, size, or number of fasteners (nails, screws, hurricane ties) to connect rafters to the ridge board, wall plates, and to each other (via collar ties or joists) can lead to weak connections. These connections are vital for transferring loads and resisting uplift, particularly in high-wind zones.
Prevention: Follow fastening schedules outlined in building codes. Use appropriate structural nails (e.g., 16d common for framing), metal connectors (e.g., rafter ties, hurricane clips) where required, and ensure they are properly installed. Toe-nailing should be done with sufficient nails at the correct angle. - Neglecting Adequate Attic Ventilation: A common oversight is failing to incorporate a proper attic ventilation system (e.g., soffit and ridge vents). Inadequate ventilation traps hot, moist air in the attic, leading to a host of problems: moisture buildup, condensation, wood rot, mold growth on rafters and decking, reduced insulation effectiveness, and accelerated degradation of roofing materials.
Prevention: Design and install a balanced ventilation system that includes both intake vents (typically in the soffits) and exhaust vents (typically at the ridge). Ensure clear pathways for airflow (e.g., by installing baffles at the eaves) and calculate the required net free area for ventilation based on attic size. - Poor Quality or Unsuitable Materials: Using low-grade lumber with excessive knots, warps, or rot, or selecting wood not treated for the climate, will compromise the structural integrity and longevity of your roof. Untreated wood in damp environments is particularly susceptible to decay and insect infestation.
Prevention: Carefully inspect all lumber for quality before use. Choose high-grade, straight, and sound pieces for structural elements. Select wood species and treatments (e.g., pressure-treated lumber for exposed areas or where required by code) that are appropriate for your local climate and specific application. - Incorrect Birdsmouth Cuts: An improperly cut birdsmouth notch (too deep or too shallow) can significantly weaken the rafter at its critical bearing point on the wall plate. A birdsmouth that’s too deep removes too much material, while one that’s too shallow doesn’t provide proper bearing.
Prevention: Accurately measure and mark the birdsmouth. The seat cut should ideally not exceed one-third of the rafter’s depth to maintain strength. Use a pattern rafter to test the fit before cutting all rafters.
Final Thoughts: Building a Roof That Stands the Test of Time
Understanding roof rafters is far more than just a theoretical exercise; it’s a foundational skill for anyone involved in building, repairing, or even just appreciating a home’s construction. These inclined beams are the true backbone of your roof, dictating its strength, shape, and ability to shelter and protect for decades.
By delving into the various types of rafters—from common rafters forming the basic slope to specialized hip, valley, jack, and flying rafters for complex designs—you gain insight into the intricate engineering that goes into every roof. Knowing the right materials to use, whether traditional lumber, engineered wood, or metal, ensures your roof is equipped for its specific demands. And mastering the step-by-step installation process, from setting the ridge to adding crucial cross-braces, empowers you to build with precision and confidence.
Ultimately, accurate measurements, sound material choices, and meticulous installation make all the difference between a roof that simply covers and one that truly lasts. Always prioritize safety, refer to local building codes, and don’t hesitate to consult with professionals when facing complex challenges.
We hope this comprehensive guide has illuminated the essential role of roof rafters. For more detailed tips, how-to guides, and advanced construction insights, be sure to explore other posts on roofing and building on our site. Your journey towards a stronger, more resilient home starts with a solid roof.
