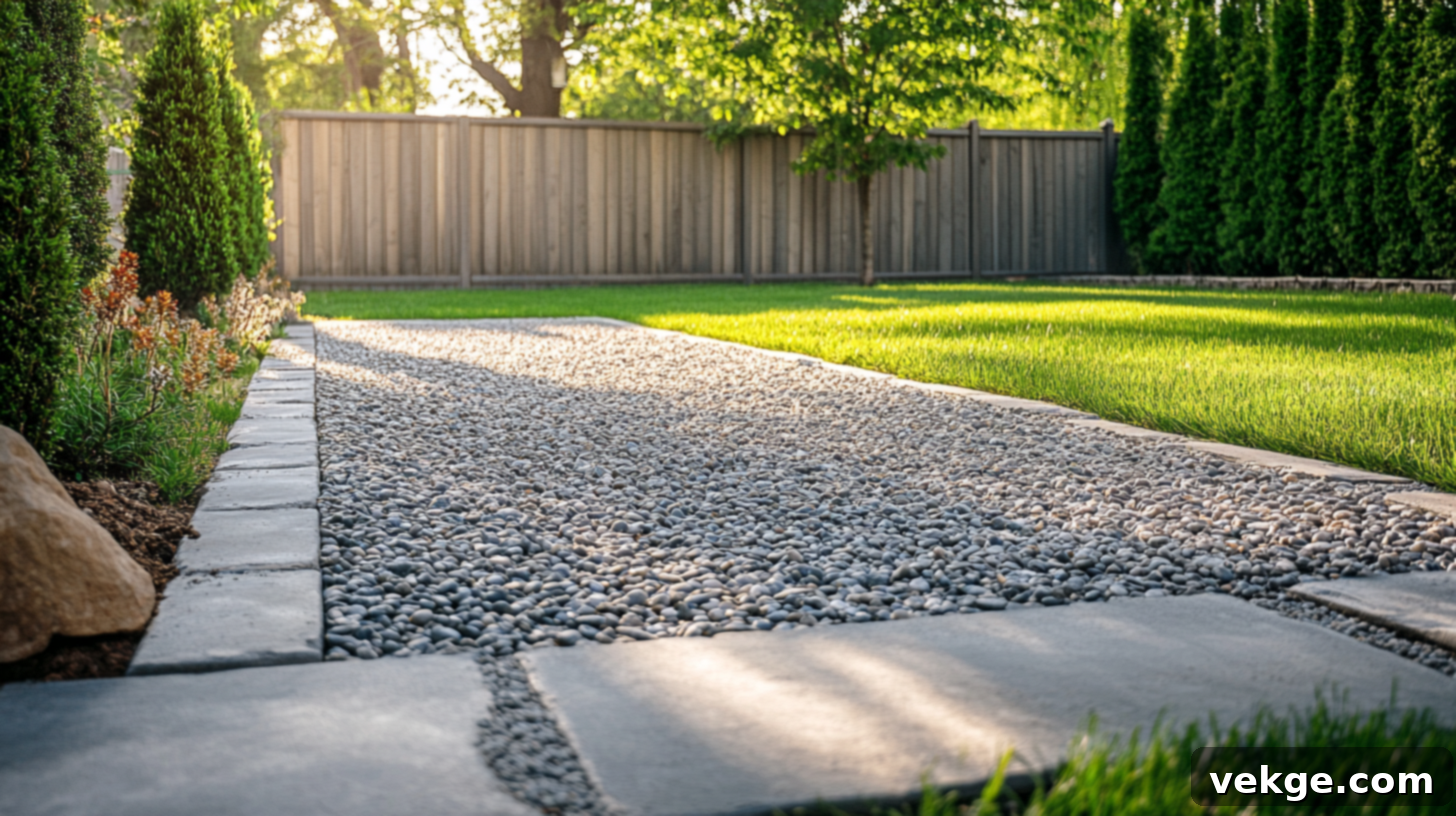
Build Your Own DIY Pea Gravel Patio: An Easy & Affordable Backyard Oasis
Dreaming of a beautiful new patio but find yourself deterred by the hefty price tags of professional installations? A DIY pea gravel patio could be the perfect, budget-friendly solution you’ve been searching for! This accessible project allows you to transform your outdoor space into a charming retreat, often completing the work in a single weekend for just a fraction of the cost associated with concrete slabs or intricate paver designs.
This comprehensive guide will lead you through every essential step of creating your own stunning backyard oasis. From the initial site preparation to adding those crucial finishing touches, we’ll cover everything you need to know. You’ll gain practical knowledge on selecting the ideal location, establishing durable borders, effectively preventing weed growth, and correctly laying the pea gravel for a smooth, inviting surface.
Imagine this: by Sunday evening, you could be relaxing on your brand-new, self-built patio, a refreshing drink in hand, filled with immense pride for the beautiful space you’ve crafted with your own hands. Get ready to embark on a rewarding home improvement journey that will enhance your backyard living experience for years to come!
Why a Pea Gravel Patio is a Smart Choice for Your Outdoor Space
Pea gravel offers a compelling combination of aesthetic appeal and practical benefits, making it an excellent material for enhancing your outdoor living area. Unlike rougher, larger stones that can be uncomfortable or even painful to walk on, pea gravel boasts a smooth, rounded texture. These small, naturally tumbled stones create a comfortable surface that feels pleasant underfoot, making it ideal for barefoot strolls or children’s play areas.
Beyond comfort, pea gravel stands out as a remarkably budget-friendly patio option. Its cost is significantly lower than that of concrete installations or traditional pavers, offering substantial savings for homeowners. This affordability doesn’t compromise on quality or beauty. Furthermore, pea gravel provides superior drainage compared to solid surfaces, effectively reducing puddles after rain and minimizing water runoff. This natural drainage helps prevent soil erosion and keeps your patio functional even after a downpour.
When compared to other common landscaping materials like crushed stone or river rock, pea gravel truly shines. Crushed stone, with its sharp, angular edges, is much harder to walk on and less aesthetically pleasing for a patio surface. River rock, while smooth, often comes in larger, less uniform sizes, making it more challenging to create a consistently flat and comfortable walking area, and can also be more expensive. For a perfect blend of comfort, cost-effectiveness, and natural beauty, pea gravel is an unbeatable choice for any outdoor space.
Step-by-Step Guide to Building Your DIY Pea Gravel Patio
Before diving into the construction, it’s crucial to gather all the necessary materials. Having everything ready and organized will streamline the process and prevent unnecessary interruptions. Once your materials are assembled, follow these detailed steps to successfully create your beautiful new pea gravel patio.
Materials Required
To ensure a smooth and efficient build, here’s a comprehensive list of materials and tools you’ll need for your pea gravel patio project:
- Pea Gravel: Approximately 4-6 cubic yards for a standard 12×20 ft patio, assuming a 2-3 inch depth. Always consider ordering slightly more than calculated to account for settling and future top-ups.
- Fieldstone or Edging Material: Approximately 2 cubic yards of fieldstone, or an equivalent amount of other border materials like landscape timbers, brick, or metal edging. This is crucial for defining your patio’s perimeter.
- High-Quality Landscape Fabric (Weed Barrier): Enough to cover your entire patio area with an additional 6-inch overlap at seams. This is your primary defense against weeds.
- Landscape Pins (Staples): A generous supply to secure the landscape fabric firmly to the ground, especially along seams and edges.
- Shovel and Rake: Essential for clearing the area, leveling the ground, and spreading the gravel evenly. A sturdy garden rake is particularly useful for fine-tuning the gravel depth.
- Measuring Tape: For accurately marking out your patio dimensions.
- Wheelbarrow: Invaluable for transporting gravel and other materials around your yard, saving you time and physical strain.
- Utility Knife or Scissors: For cutting landscape fabric to size.
- Garden Hose with Spray Nozzle: Useful for dampening the area for easier leveling, and for initial cleaning if needed.
- Work Gloves and Safety Gear: Always protect your hands and eyes during any construction project. Sturdy gloves, safety glasses, and closed-toe shoes are recommended.
- Stakes and String or Spray Paint: For precisely marking out the perimeter of your patio.
With your materials ready, let’s begin the exciting journey of building your DIY pea gravel patio!
1. Preparation of the Area
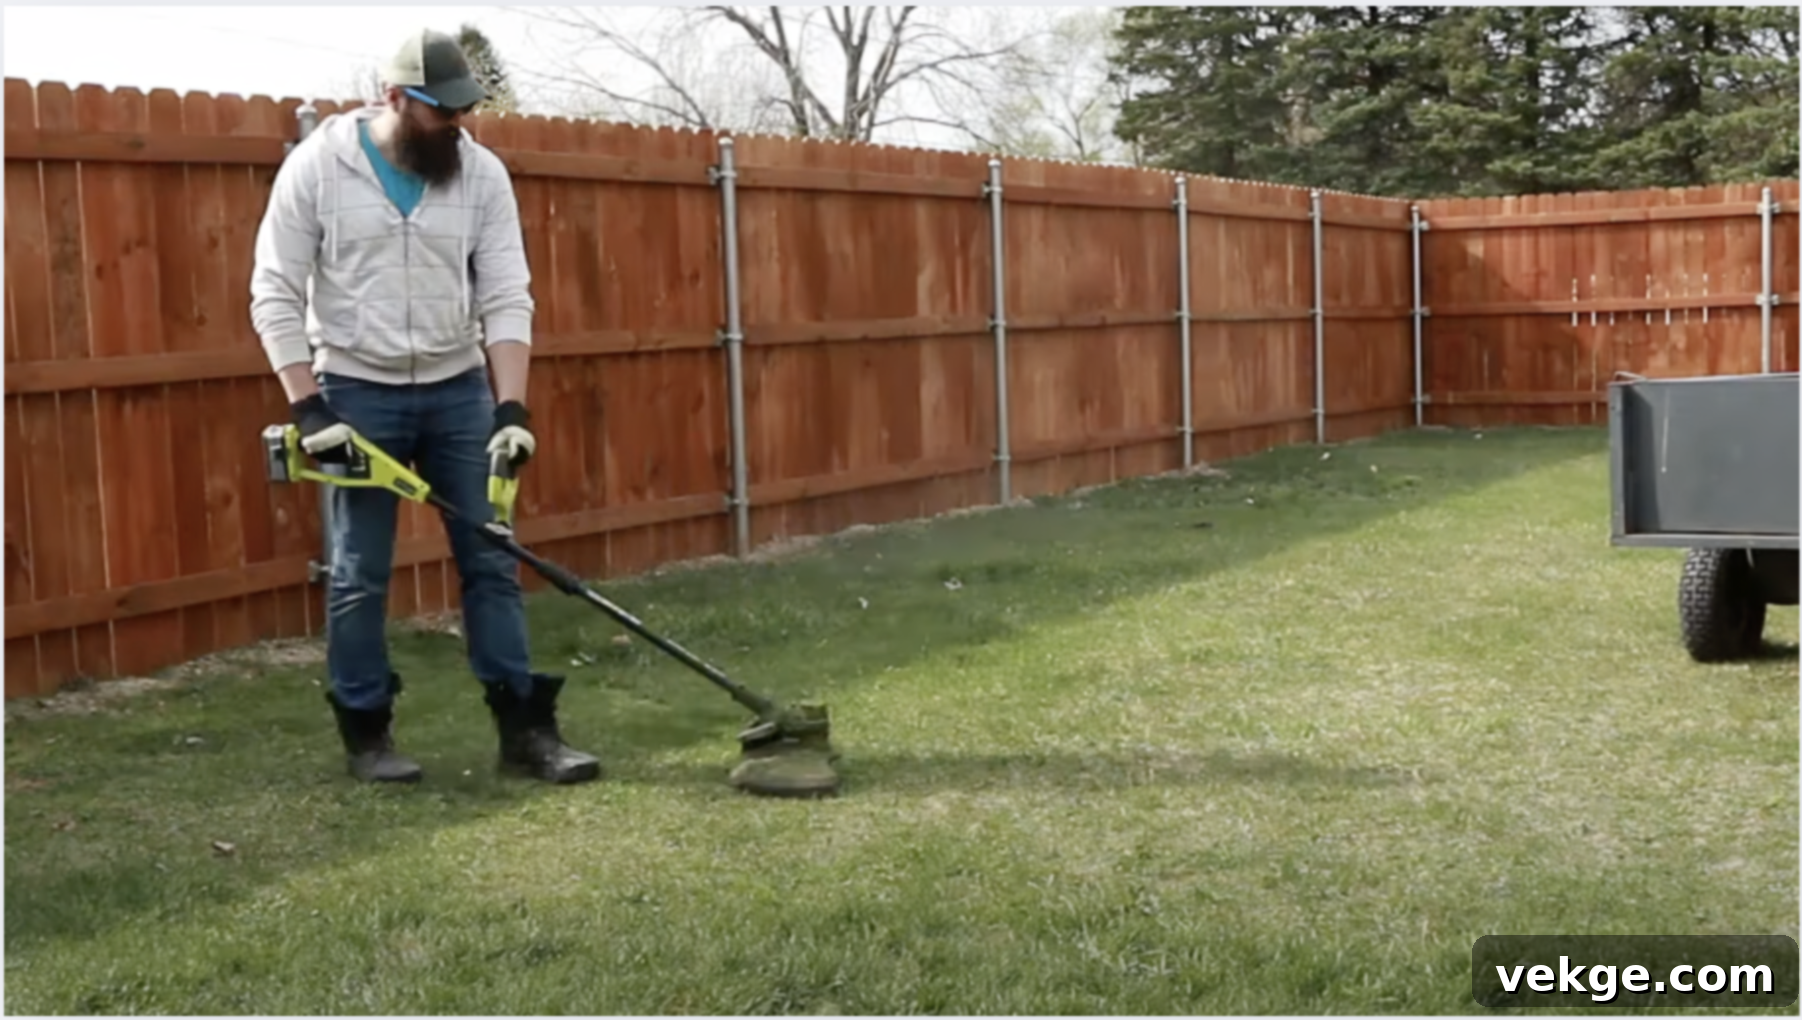
The foundation of a successful pea gravel patio lies in thorough preparation of the site. Begin by completely clearing the chosen area of any existing vegetation. Use a weed whip, string trimmer, or even a sturdy rake to remove all tall grasses, weeds, and debris. Pay close attention to the ground beneath; ideally, you want a relatively level surface. If you encounter any significant bumps or depressions, take the time to smooth them out now. Minor undulations are acceptable as the gravel will help to even them out, but large variations should be addressed by adding or removing soil.
Once cleared, precisely mark out the dimensions of your patio. Use your measuring tape to define the length and width according to your design. For instance, measure 12 feet out from a fence line and 20 feet along an adjacent side to establish a clear rectangular footprint. Utilize stakes at each corner, connected by string, or brightly colored spray paint to create a distinct outline. This clear boundary is crucial as it guides all subsequent steps, ensuring your patio is exactly the size and shape you envisioned.
2. Setting the Perimeter
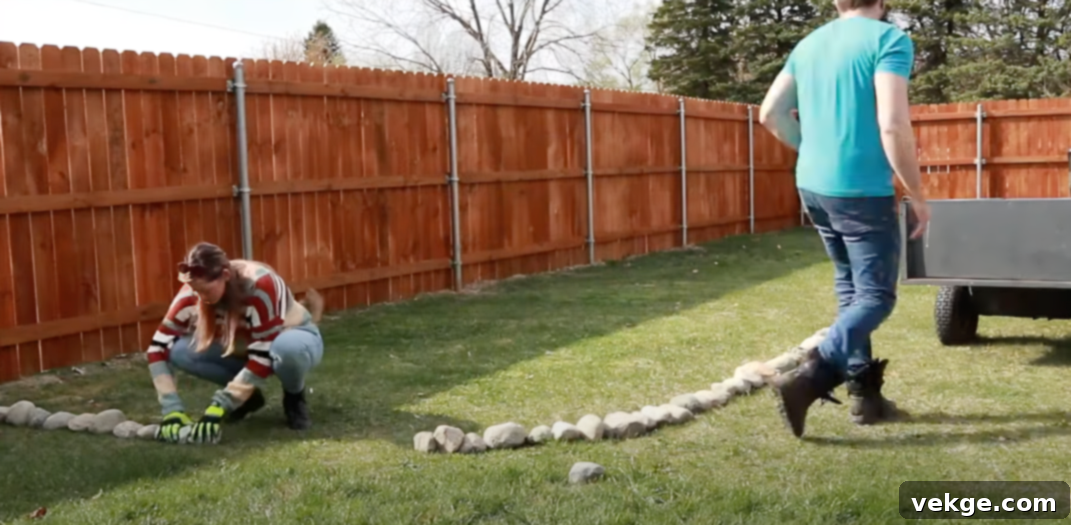
With your patio area clearly marked, the next critical step is to install a robust perimeter. This border serves multiple vital functions: it contains the pea gravel, prevents it from spreading into your lawn or garden beds, and provides a crisp, finished edge to your patio. For this step, you can use fieldstones as suggested, or opt for other materials such as landscape timbers, decorative bricks, or flexible metal/plastic edging. The key is to select a material that is durable and provides sufficient containment.
Carefully place your chosen border materials along the marked outline. For stones or bricks, ensure they are placed closely together, forming a tight, continuous line to prevent gravel seepage. You may need to gently push or tamp them slightly into the soil to ensure stability and prevent shifting over time. If using landscape timbers, ensure they are level and potentially secured with rebar stakes. A well-constructed border not only keeps your gravel tidy but also significantly contributes to the overall aesthetic appeal and longevity of your patio, giving it a professional and polished appearance.
3. Landscape Fabric Installation
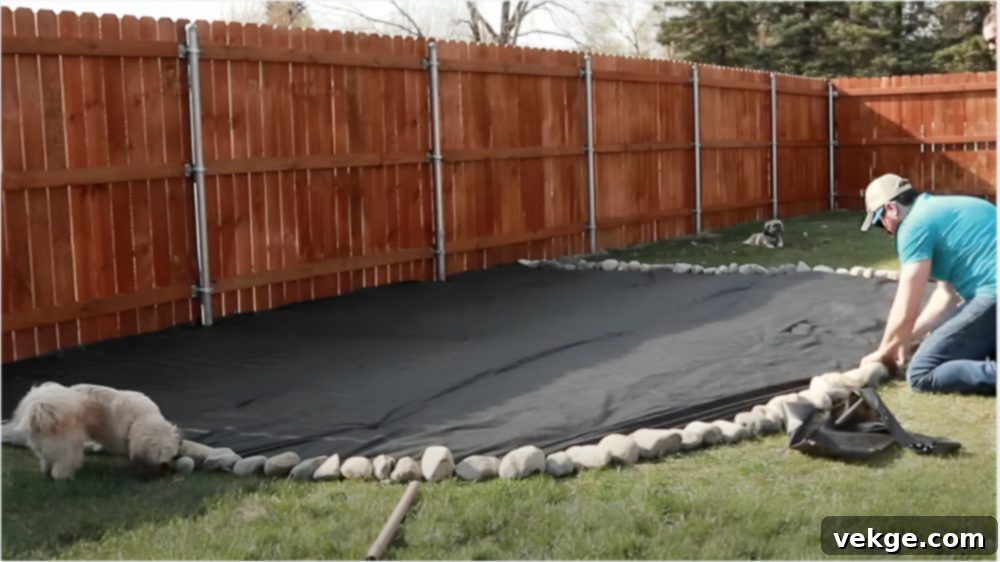
The installation of landscape fabric is a non-negotiable step for any successful pea gravel patio, acting as your primary defense against weeds. Begin by unrolling the landscape fabric to completely cover the prepared patio area, ensuring it extends slightly beyond the inner edge of your perimeter stones. When laying multiple pieces of fabric, it is essential to overlap them by at least 6 inches at any seams. This generous overlap prevents weeds from pushing through the gaps between the fabric sections.
Once the fabric is laid out, carefully tuck its edges beneath the perimeter stones or edging material you’ve installed. This helps to anchor the fabric and prevents it from showing once the gravel is down. To secure the fabric firmly in place across the entire surface, use landscape pins or staples every few feet, especially along the seams and around the perimeter. Push the pins all the way into the ground until they are flush with the fabric. Failing to secure the fabric adequately can lead to it bunching up under the gravel, creating an uneven and unstable patio surface, and potentially allowing weeds to sprout through exposed areas. This step is crucial for minimizing future maintenance and preserving the pristine look of your patio.
4. Laying the Gravel
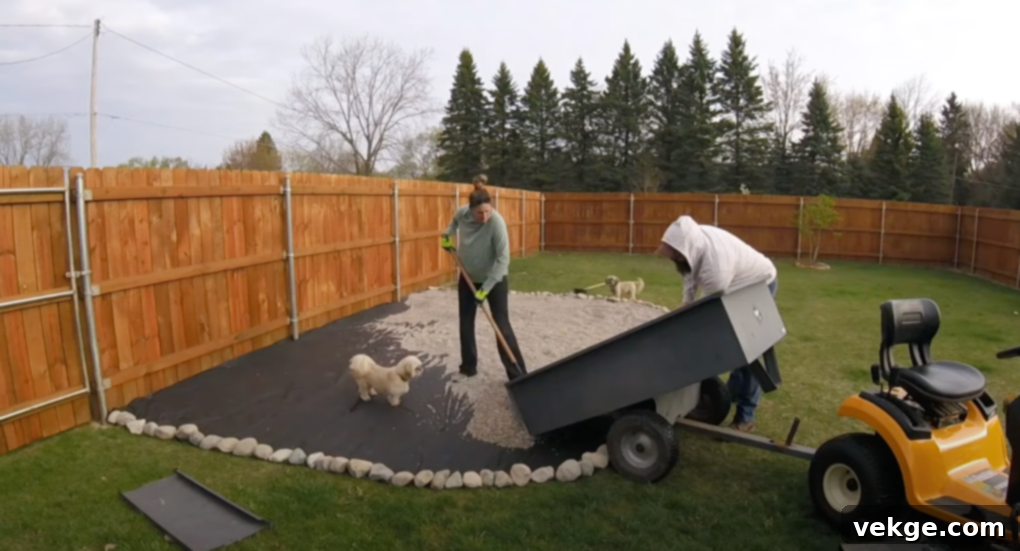
Now comes the most satisfying part of the project: adding the pea gravel! Using your wheelbarrow, transport the gravel to your patio area. Begin by pouring the pea gravel over the installed landscape fabric, starting from one corner and gradually working your way across the entire space in manageable sections. The goal is to achieve an even layer across the entire patio.
Aim for a consistent depth of approximately 2-3 inches of pea gravel. This depth is optimal for comfort, stability, and proper coverage of the landscape fabric. As you spread the gravel, use a sturdy rake to distribute it evenly. Periodically, walk across your new gravel surface to identify any low spots or areas where the gravel is too thin. Add more gravel to these areas, continuing to rake and level until the entire patio has a uniform and appealing surface. This final leveling is vital not only for the aesthetic appeal of your patio but also to ensure excellent drainage, preventing water from pooling and maintaining a comfortable, walkable space.
5. Finish the Look and Expand Your Space
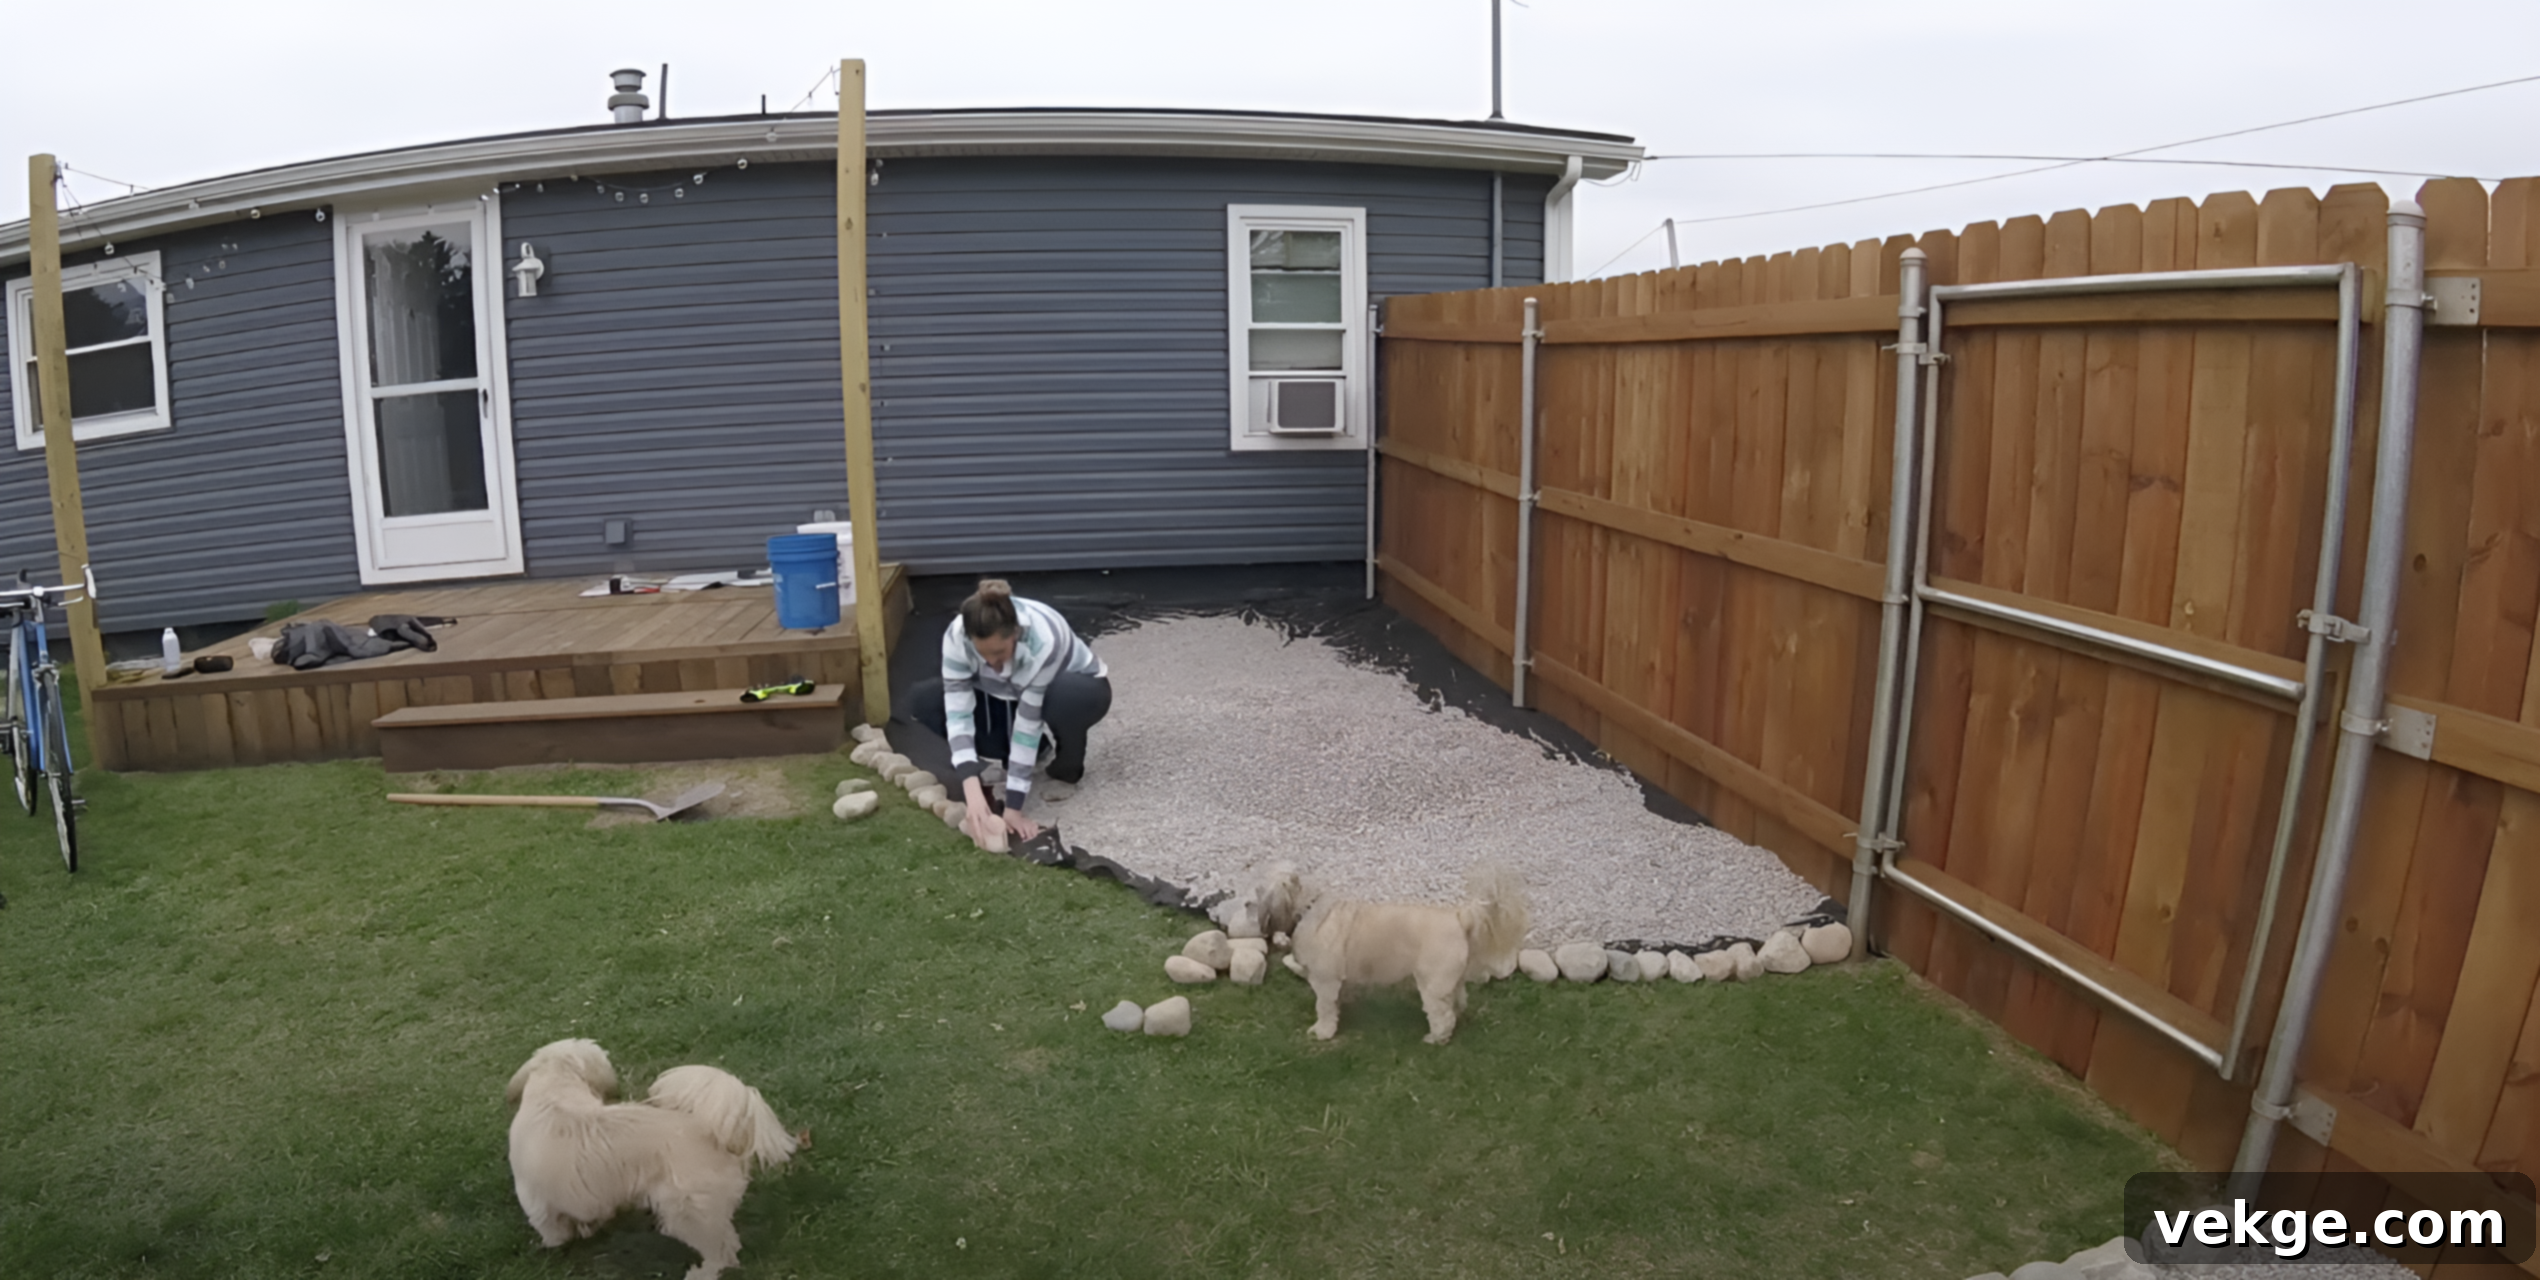
Once your main pea gravel patio is complete, it’s time to consider how you can integrate it seamlessly into your existing backyard design and maximize its utility. Extending the gravel to create inviting pathways is an excellent way to connect different zones of your yard. These paths can lead gracefully from your main patio to a lush garden, a dedicated grilling area, a cozy fire pit, or even a backyard gate. To create these extensions, simply follow the same proven steps: clear the desired path area, lay down the landscape fabric, install a suitable border, and then spread the pea gravel to the same depth as your main patio.
Furthermore, you can easily create additional functional spots, such as a designated grill area, a tranquil corner patio for reading, or a small dining nook. For these smaller, satellite areas, repeat all the steps outlined above, ensuring they complement the primary patio. By using the same type of pea gravel and consistent border materials, you will maintain a cohesive and harmonious look throughout your outdoor space. These thoughtful additions not only enhance the visual appeal of your yard but also significantly increase its practical usable space, allowing for diverse activities and enjoyment.
For those who prefer visual instructions, you can gain an even more detailed understanding of the process by watching the excellent video provided by The Inexperienced Adventures on their YouTube channel:
Essential Maintenance Tips for Your Pea Gravel Patio
While a pea gravel patio is renowned for its low maintenance, a little regular care goes a long way in preserving its beauty and functionality for many years. Consistent upkeep not only keeps your patio looking pristine but also prevents minor issues from escalating into major problems. Dedicating just a few minutes each month to these simple tasks will save you significant effort and potential repair costs down the line. Here are some effective strategies to keep your pea gravel patio in top-notch condition:
- Replenishing Gravel Annually: Over time, some gravel will inevitably be displaced or settle, leading to a slight reduction in depth. It’s a good practice to add a fresh layer of pea gravel once a year, typically in the spring. You can expect to lose about 10% of your gravel yearly through natural scattering and settling. A general guideline is to add about one new bag of gravel for every 20 square feet of patio area, or simply eye-ball areas that appear thin.
- Addressing Low Spots Promptly: After heavy rain, take a moment to inspect your patio for any noticeable dips or low spots where water might collect. Use a sturdy garden rake to gently redistribute gravel from higher, thicker areas to fill in these depressions. This simple action is crucial for maintaining a level surface, preventing unsightly puddles, and ensuring consistent drainage across your patio.
- Vigilant Weed Control: Despite the landscape fabric, a persistent weed or two might occasionally find its way through, often from seeds carried by wind or birds. Pull any weeds as soon as they appear – they are much easier to remove when small and their root systems are shallow. For more stubborn weeds, a natural solution like a vinegar-based weed killer can be effective, or a targeted herbicide if preferred. Prompt removal prevents them from taking root and becoming a larger nuisance.
- Mindful Raking Technique: To keep your gravel surface even and smooth, lightly rake it every few weeks. When raking, use short, gentle strokes rather than deep digging motions. This protects the underlying landscape fabric from being torn or exposed, ensuring it continues to provide an effective weed barrier. The goal is to smooth out disturbances, not to churn the gravel.
- Efficient Cleaning of Spills: Accidents happen, and food or drink spills can occur. For liquid spills, blot them up quickly. For solid spills or stained gravel, the best approach is to scoop up the affected pea gravel and place it in a bucket. Rinse the gravel thoroughly with water, perhaps with a mild detergent for stubborn stains, and allow it to dry completely before returning it to the patio. This keeps your patio looking fresh and minimizes the risk of attracting pests.
Common Mistakes to Avoid When Building a Pea Gravel Patio
Even for seemingly straightforward DIY home projects like a pea gravel patio, certain mistakes can lead to significant headaches, wasted time, and unnecessary expenses. Being aware of these common pitfalls beforehand can help you navigate your project smoothly and achieve a durable, beautiful result without complications. These five common errors are surprisingly easy to make but equally easy to avoid with a bit of careful planning and attention to detail.
- Skipping the Landscape Fabric: This is arguably the most critical mistake. Never, under any circumstances, place pea gravel directly onto bare soil. Without a high-quality landscape fabric acting as a weed barrier, weeds will inevitably sprout through your gravel within months, turning your beautiful patio into a maintenance nightmare. Furthermore, soil will gradually mix with your gravel, leading to a muddy, uneven, and unsightly surface, especially after rain. Invest in good fabric and install it correctly.
- Using Too Little Gravel: An insufficient layer of gravel results in an unstable and uncomfortable surface. If you use less than the recommended 2-3 inches of pea gravel, thin spots will quickly form, exposing the landscape fabric beneath or even the bare soil. This creates tripping hazards and detracts from the patio’s appearance. It’s always better to over-order slightly and have a small surplus than to run out mid-project or have a perpetually thin patio.
- Poor Drainage Planning: Failing to consider and implement proper drainage can lead to significant issues, particularly around your home’s foundation. Your patio should have a slight slope (approximately 1 inch for every 8-10 feet) away from your house or any other structures. This subtle gradient ensures that rainwater flows away from your foundation, preventing water pooling on the patio and potential moisture damage to your home.
- Weak or Inadequate Borders: The border materials you choose are essential for containing your pea gravel. Using small, lightweight, or improperly installed stones, plastic edging, or timbers for your perimeter will not effectively hold the gravel in place. Over time, gravel will migrate into your lawn, requiring constant raking and replenishment. Select heavy, stable border materials that are well-secured and won’t shift when walked on or subjected to minor impacts.
- Choosing the Wrong Gravel Type: While all gravel patios look similar in concept, the type of gravel makes a huge difference in comfort and functionality. Using angular gravel (like crushed stone) instead of smooth, rounded pea gravel will make your patio uncomfortable to walk on, particularly barefoot. The sharp edges can also be unpleasant for pets. Always stick with naturally tumbled, rounded pea gravel for a soft, inviting, and comfortable surface that defines a true pea gravel patio experience.
Wrapping Up Your DIY Pea Gravel Patio Journey
Building your own DIY pea gravel patio is more than just a home improvement project; it’s a rewarding experience that combines ease of construction, significant cost savings, and the immense satisfaction of creating something beautiful with your own hands. By diligently following these step-by-step instructions, you’ve gained the knowledge and confidence to transform a neglected patch of your backyard into a charming, functional, and aesthetically pleasing outdoor space that will serve you well for many years to come.
Remember that a little ongoing care will ensure your patio remains a source of pride. Be sure to routinely check for any low spots after rainfall, gently rake to maintain an even surface, and plan for an annual top-up of fresh gravel to keep it looking pristine. Don’t be surprised if your friends and neighbors are so impressed by your handiwork that they start asking for your expert advice on their own backyard transformations!
But why stop here? Your newly built pea gravel patio is just the beginning of unlocking the full potential of your outdoor living area. Consider enhancing its ambiance by adding solar-powered string lights or pathway lights around its perimeter for magical evenings. You could even build a simple, safe fire pit in the center for cozy gatherings, or extend your gravel with meandering paths to connect various parts of your yard, creating a harmonious and integrated landscape. Your DIY pea gravel patio is a testament to your creativity and effort. So, grab your tools and let this success inspire your next exciting backyard project today!
