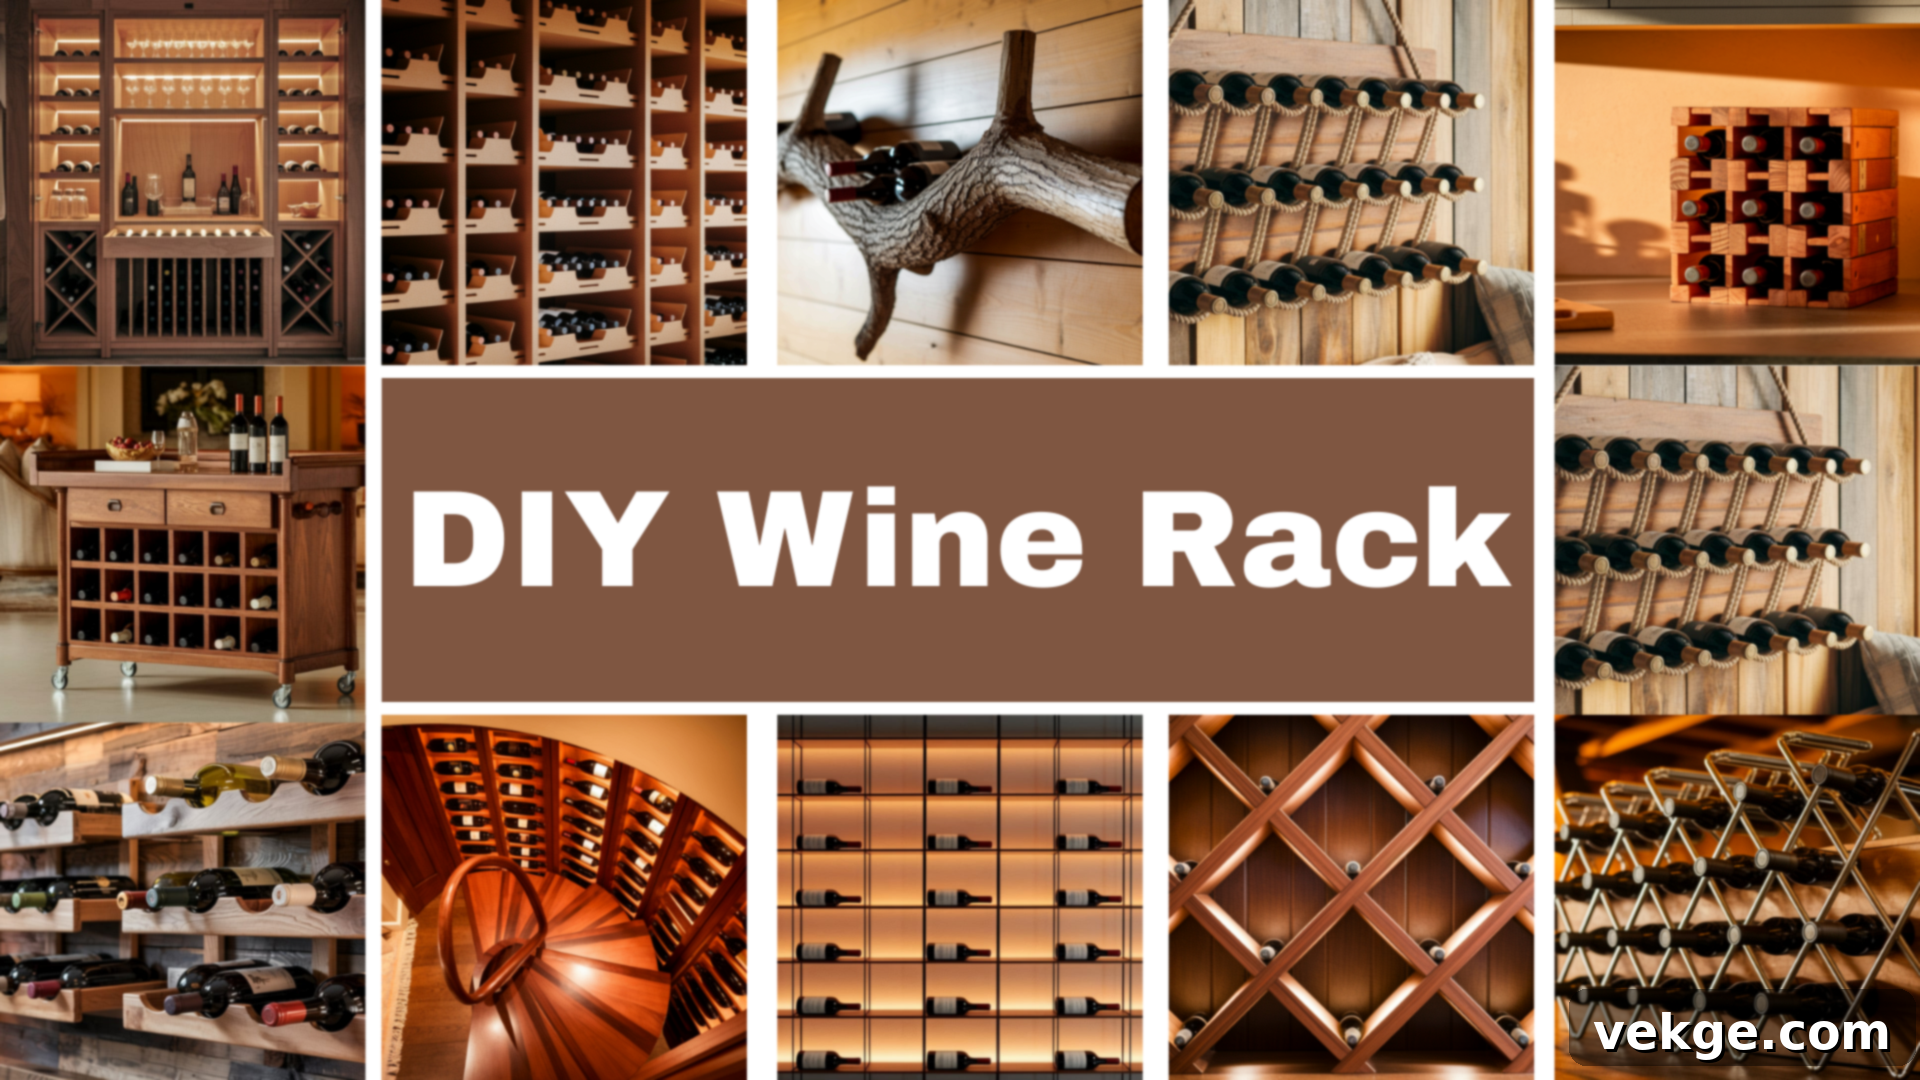
Unlock Your Inner Sommelier: 23 Creative DIY Wine Rack Ideas You Can Build Today
Dreaming of showcasing your prized wine collection without spending a fortune on store-bought solutions? Building your very own wine rack is not only more affordable but also surprisingly easy. With just a few basic tools and readily available materials, you can craft a custom wine rack that perfectly complements your home décor and fits your unique space. Whether you need a compact countertop display for your everyday bottles or an expansive cabinet for a growing collection, there’s a DIY option tailored just for you.
This comprehensive guide dives deep into 23 simple yet elegant DIY wine rack ideas that anyone, regardless of their woodworking experience, can tackle. We’ll also equip you with essential tips to avoid common pitfalls, ensuring your project is a success from start to finish. Get ready to transform raw materials into a functional and aesthetically pleasing piece that will keep your cherished bottles impeccably organized and properly stored for years to come. It’s time to uncork your creativity!
Why Embark on a DIY Wine Rack Project?
Opting to build your own wine rack is a brilliant decision for a multitude of reasons. Firstly, the most significant advantage is the considerable cost savings. Instead of investing in expensive pre-made racks, you only need to purchase basic materials like plywood, reclaimed wood, or even pallet wood, which are significantly more budget-friendly. This allows you to allocate more of your budget towards expanding your wine collection itself!
Secondly, customization is key. When you build it yourself, you have complete control over the size, allowing you to design a rack that fits into any specific nook or cranny – be it inside a cabinet, on a kitchen counter, or as a magnificent standalone piece. Furthermore, you can personalize the style and color to perfectly match your existing home décor, ensuring your new wine rack looks like it was always meant to be there. This level of bespoke integration is simply not possible with off-the-shelf options.
Beyond the practical benefits, building a DIY wine rack is an incredibly fun and rewarding project. It’s a chance to engage in a hands-on activity that results in a beautiful, useful item you’ll admire and enjoy for years. The immense sense of accomplishment you feel when you complete your creation and gently place the first bottle into its new home makes every moment of effort worthwhile. It’s more than just storage; it’s a personal statement.
Inspiring DIY Wine Rack Ideas for Every Home
Are you searching for smart, stylish, and sustainable ways to store your prized wine collection? Look no further! These inventive DIY wine rack ideas span the spectrum from straightforward beginner builds to more intricate, statement-making projects. You’re guaranteed to find an option that perfectly suits your available space, personal style, and current skill level. Each design promises to add a functional and visually appealing addition to your home, all while keeping your bottles safely and correctly stored. Why not pick one and make it your next weekend project?
1. Herringbone Pattern Wine Rack

This visually stunning wine rack is a true showstopper, featuring a captivating herringbone pattern that is both incredibly functional and aesthetically pleasing. It’s surprisingly quick to construct, primarily using eight pieces of 1×8 pine wood and the simple, effective technique of a pocket-hole jig. The real magic happens when you apply two contrasting wood stains, making the intricate pattern truly pop and adding depth to its design. After a thorough sanding to achieve a silky-smooth finish, apply your chosen topcoat, and you’ll have created a perfect, personalized gift for any wine enthusiast. The cleverly angled slots are not just for aesthetics; they securely cradle each bottle, ensuring proper storage and cork moisture.
2. Wall-Mounted Pallet Wine Rack
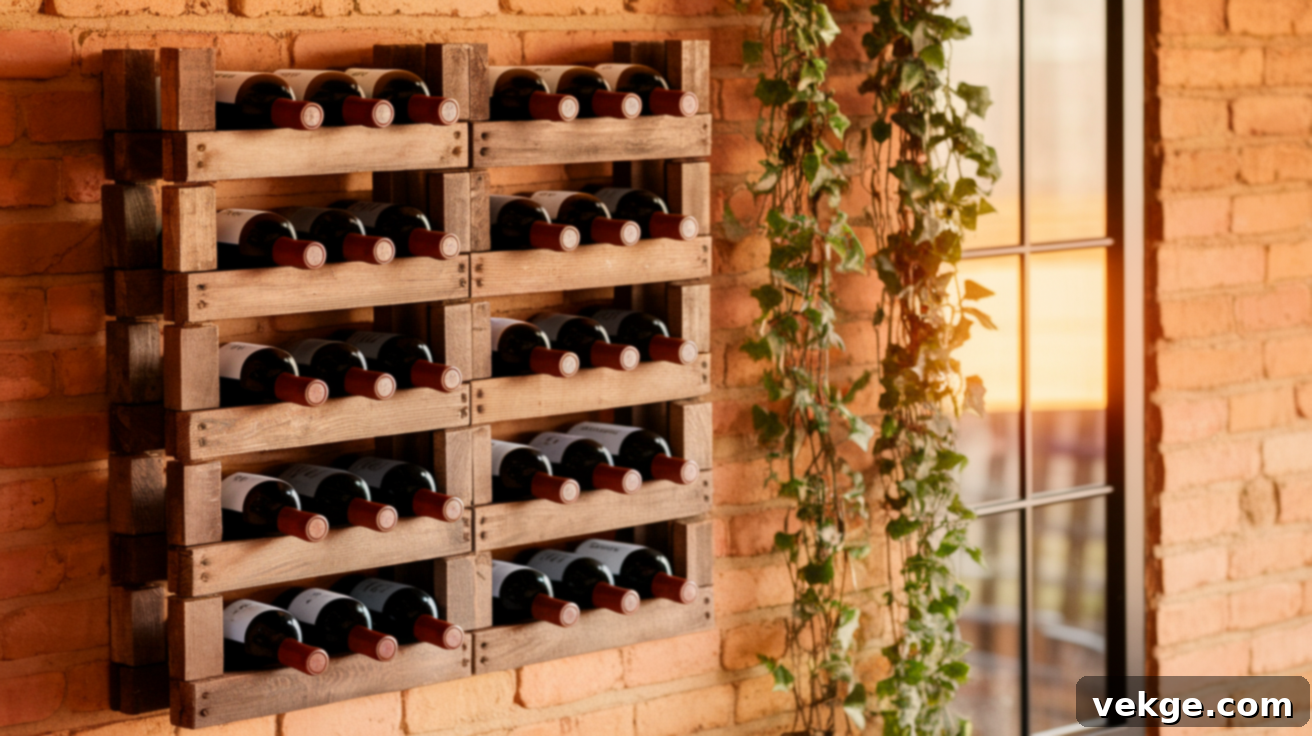
Transform discarded wooden pallets into a charming and highly functional wall-mounted wine rack. Pallets are often available for free from local businesses, offering a sustainable and eco-friendly starting point for your project. Begin by cleaning the wood, sanding it smooth to remove any splinters or rough patches, and cutting it to your desired dimensions. The natural spacing and gaps inherent in pallet boards are perfectly suited for securely holding wine bottles. You can choose to preserve the rustic, weathered look of the original wood for an authentic farm-house feel or apply a stain or paint for a more refined and finished appearance. This versatile project is also an excellent choice for enhancing outdoor entertainment areas like patios or decks.
3. Under-Cabinet Hanging Wine Rack
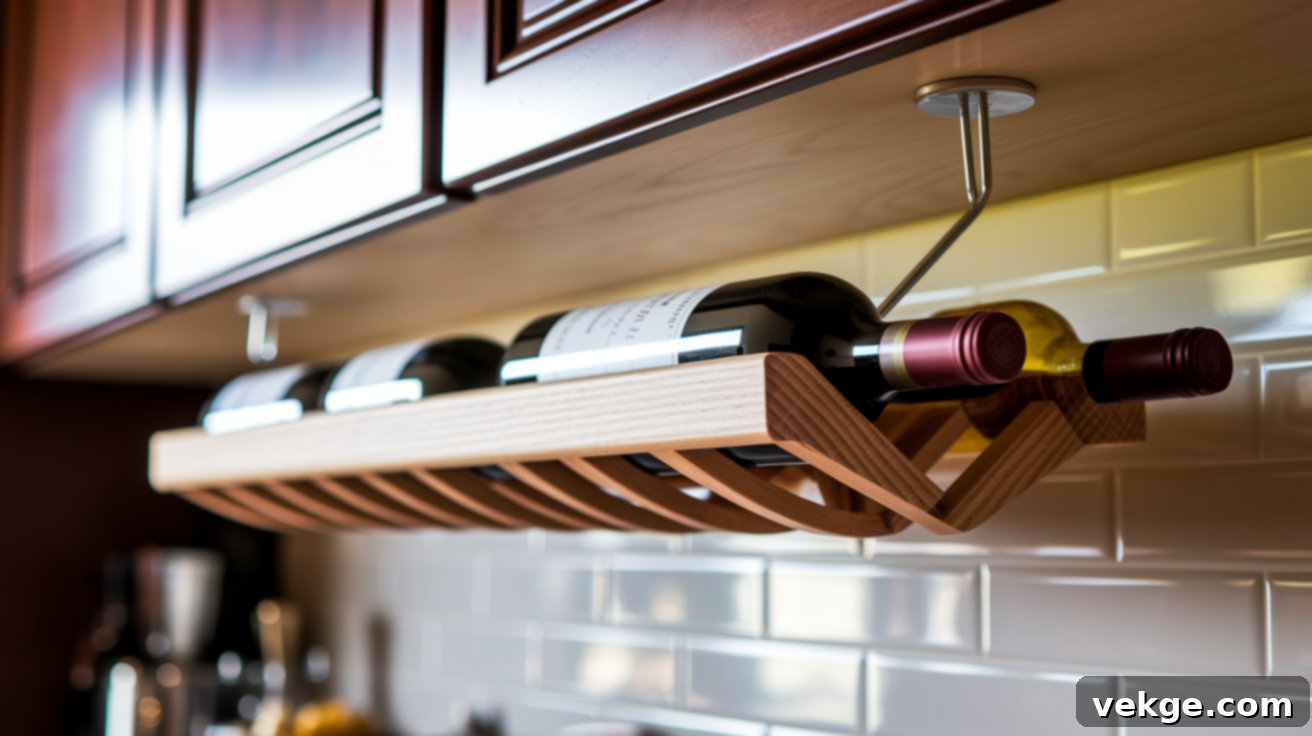
Maximize your kitchen space with this ingenious hanging rack, designed to utilize the often-overlooked area beneath your kitchen cabinets. This smart solution requires minimal materials: typically just two 1x4s and a strip of 3/4-inch plywood, all cut to the precise length of your cabinet. This sleek design can comfortably store several bottles, transforming previously wasted space into a convenient wine storage spot. The bottles are designed to slide in horizontally, ensuring that corks remain moist and your wines are properly preserved. The rack discreetly tucks away, keeping your countertops clear while ensuring your favorite vintages are always within easy reach when you’re cooking or hosting guests.
4. Grid-Style Plywood Wine Rack

Embrace durability and versatility with this robust grid-style wine rack, which can function beautifully as a standalone unit or be seamlessly integrated into existing cabinetry. Crafted from sturdy 3/4-inch plywood, its interlocking grid system creates perfectly sized compartments for individual wine bottles. The brilliance of this design lies in its clever construction: horizontal and vertical pieces fit together via precisely cut slots, eliminating the need for screws in the core structure. You can easily scale this design to any size, ensuring it fits your specific space requirements. The finished piece is remarkably heavy-duty, capable of safely supporting a significant number of bottles, making it an ideal choice for serious wine collectors.
5. Wine Box Storage Rack

Repurpose and reuse with this incredibly simple and often free wine storage solution! Empty wine boxes, typically found with built-in cardboard dividers, make perfect containers for your bottles. Many wine retailers are happy to give these away, as they would otherwise be discarded. These sturdy boxes are originally designed to protect fragile glass bottles during transit, making them inherently suitable for wine storage. Beyond wine, they offer fantastic organization for shoes, small household items, or craft supplies. You can stack multiple boxes for expanded storage capacity or personalize them with paint, stain, or decorative paper to perfectly match your home’s aesthetic.
6. Spiral Cellar Wine Rack

For the ultimate wine storage solution and an impressive architectural feature, consider creating a hidden spiral cellar beneath your floor. While this is an advanced and significant construction project, the results are truly unparalleled. A narrow, elegant spiral staircase descends into an underground space, revealing shelves capable of housing hundreds of bottles in naturally temperature and humidity-controlled conditions. The entrance to this discreet cellar can be ingeniously concealed, blending seamlessly with your existing flooring or hidden beneath a throw rug. This innovative option brilliantly conserves floor space by utilizing vertical depth and naturally maintains the ideal cool and dark environment essential for long-term wine aging.
7. Compact Countertop Rack
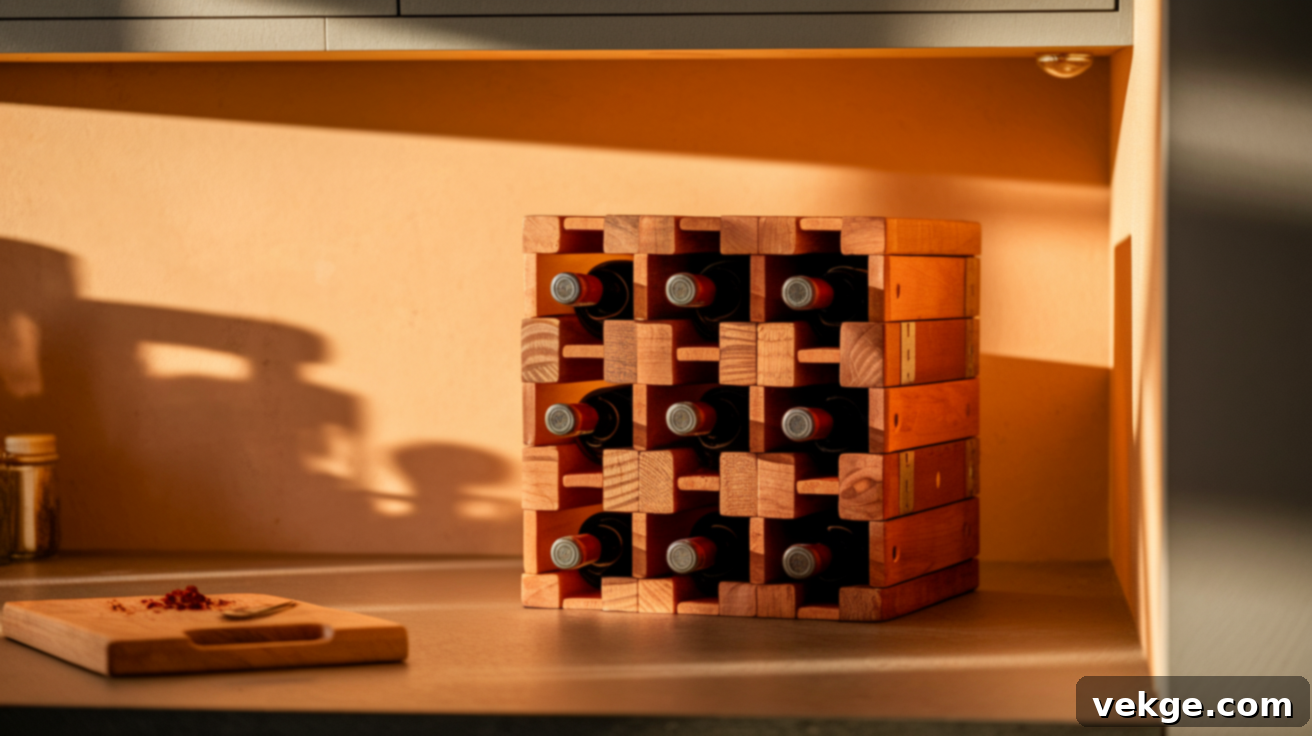
Small kitchens and limited spaces demand clever storage solutions, and this compact countertop wine rack is an absolute winner. Design and build a miniature grid rack that efficiently holds between 6 to 12 bottles, occupying a minimal footprint on your counter. This project is ideal for using up scrap wood, potentially making it an almost free endeavor that still yields a stylish and functional result. Its modest height ensures it can comfortably sit beneath upper cabinets, and its small size makes it effortlessly portable when you need to rearrange or clean. This rack is perfect for apartment living or for keeping your everyday drinking wines conveniently accessible.
8. Metal Pipe and Wood Rack

Infuse an industrial chic aesthetic into your home with a wine rack constructed from sturdy metal pipes and rich wooden boards. This distinctive style is particularly well-suited for modern interiors, lofts, or spaces embracing raw and industrial design themes. You can easily source various pipes and fittings from any local hardware store. These robust metal elements are then securely attached to sanded wooden boards, creating a strong, stable, and visually striking rack. The cool, tough urban feel of the metal beautifully contrasts with the warm, organic texture of the wood. The modular nature of pipes allows for easy adjustments to size and configuration, simply by using longer pipes or adding more wooden sections.
9. Over-the-Fridge Wine Rack
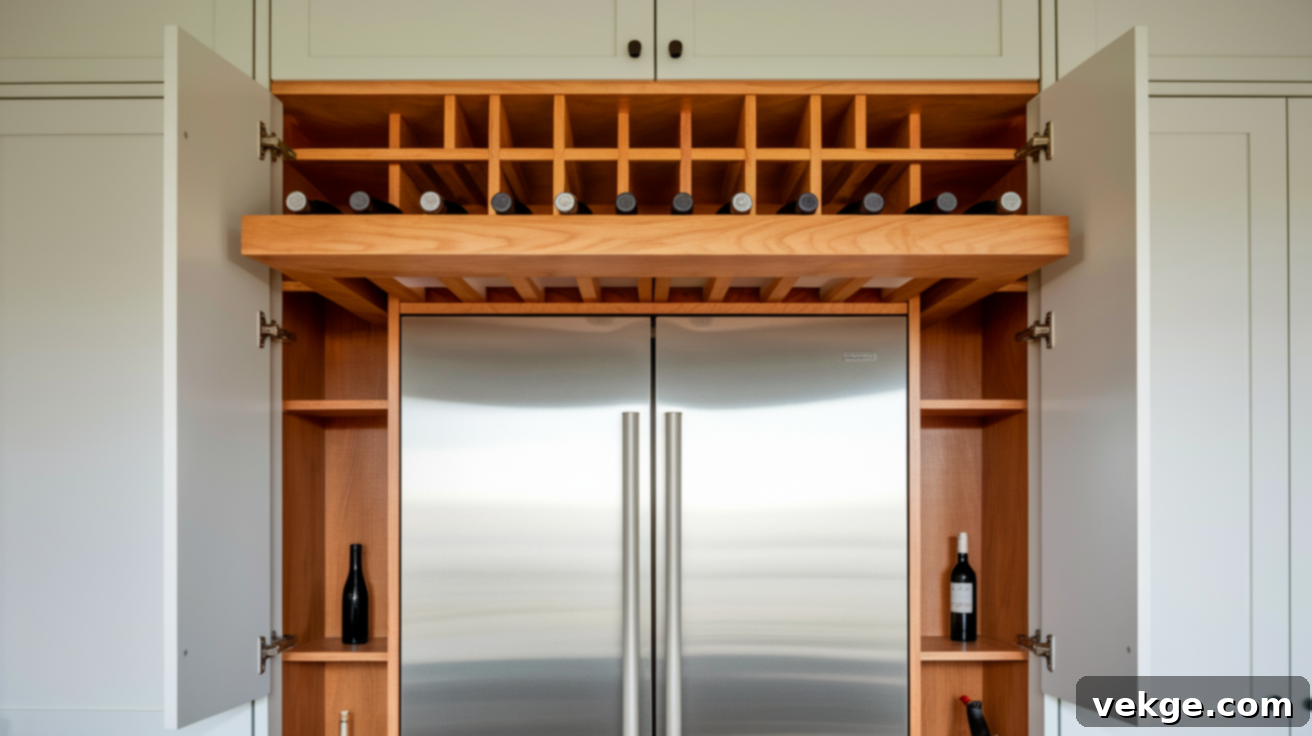
The often-overlooked space above your refrigerator is a hidden gem for creative storage, and it’s perfectly suited for a custom wine rack. While heat rises from the fridge, making it less ideal for long-term aging, this spot is excellent for wines you plan to consume in the near future. Build a custom rack designed to fit this specific dimension precisely. For an integrated look, you can cut discreet holes into existing cabinet doors above the refrigerator and add a supporting board inside to securely cradle bottles. This clever solution not only maximizes otherwise wasted space but also helps declutter your kitchen and keeps your favorite wines handy.
10. Simple Ladder-Style Wine Holder

Achieve a contemporary and minimalist look with an easy-to-build leaning ladder-style wine rack. Construct a simple ladder shape with wider “steps” or rungs specifically designed to safely hold wine bottles. The inherent leaning design means it doesn’t require complex wall mounting hardware – simply prop it securely against a sturdy wall. For added functionality, consider incorporating hooks or additional mini-racks for hanging wine glasses. The open, airy design of this rack allows for an effortless visual overview of your entire collection, while its vertical orientation ensures it occupies minimal floor space, making it perfect for smaller rooms or hallways.
11. Minimalist Wall Grid

For a sleek, modern, and space-saving wine display, create a minimalist wall grid. This elegant design involves mounting thin strips of wood to your wall, arranged into a geometric pattern of squares or rectangles. These simple frames then create discreet yet secure holders for your wine bottles, giving the illusion that the bottles are gracefully floating on your wall. When displayed in this manner, your wine bottles become an integral part of your home’s wall art. The minimal materials and straightforward construction make this an ideal weekend project, resulting in a stunning rack that frees up floor space while elevating your wine collection to a level of functional artistry.
12. Crisscross Wooden Rack
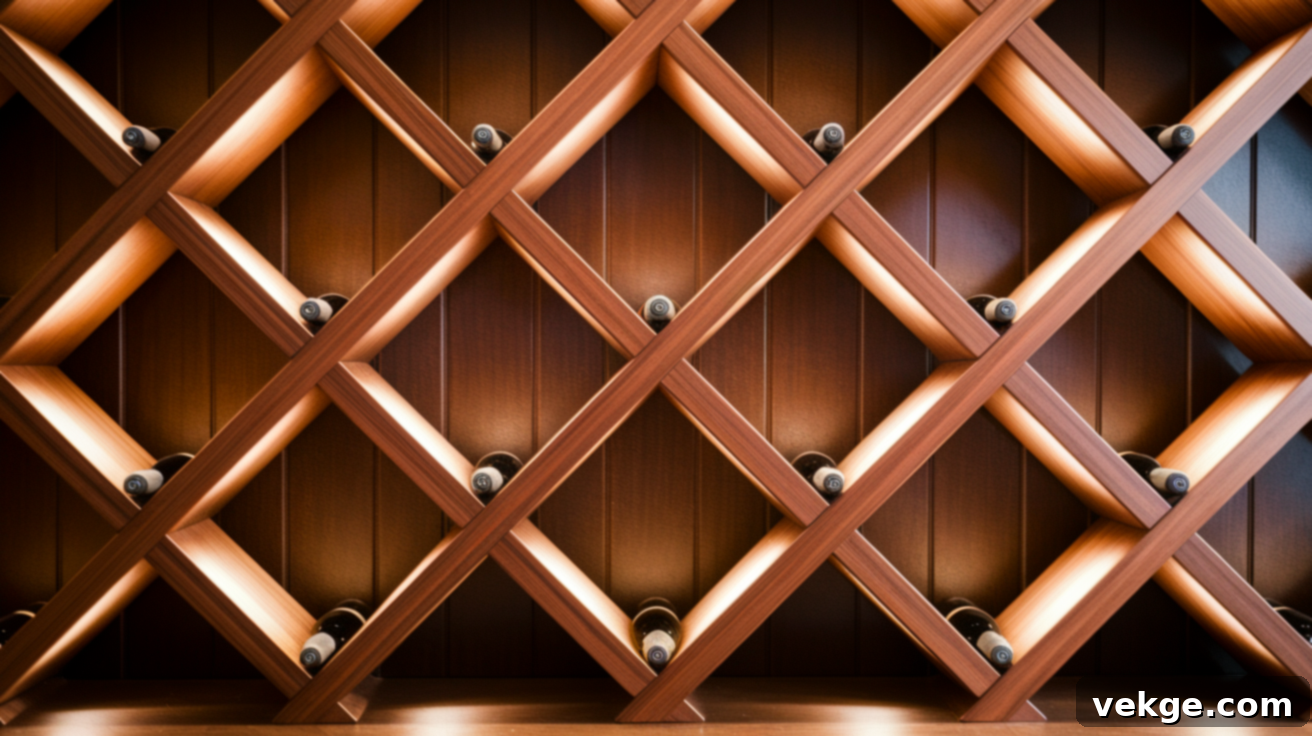
Craft a truly decorative and sophisticated wine rack using a series of crisscrossed wooden pieces that form elegant diamond-shaped compartments for your bottles. Despite its intricate appearance, this design is surprisingly approachable to build. The process involves precisely cutting wooden boards at matching angles, which are then connected to create a repeating pattern of “X” shapes. This ingenious design not only holds bottles securely in place but also functions as a beautiful piece of art in its own right. This style is particularly effective when placed on a sideboard in a formal dining room or utilized as a captivating focal point in a dedicated home bar area.
13. Wooden Crate Wine Rack

Embrace rustic charm and unparalleled flexibility with a wine storage system built from stacked wooden crates. These versatile crates can be found affordably at craft stores, or you might even inquire at local grocery stores for spare fruit crates. For increased stability and a more permanent structure, you can securely attach them together; alternatively, leave them as individual units for effortless rearranging and adaptability. Each crate offers ample space to hold several bottles, along with wine glasses or essential accessories. This adaptable option is perfect for individuals who frequently move or enjoy reconfiguring their living spaces, as it requires no permanent installation and can grow or shrink with your collection.
14. Statement Piece Wine Cabinet
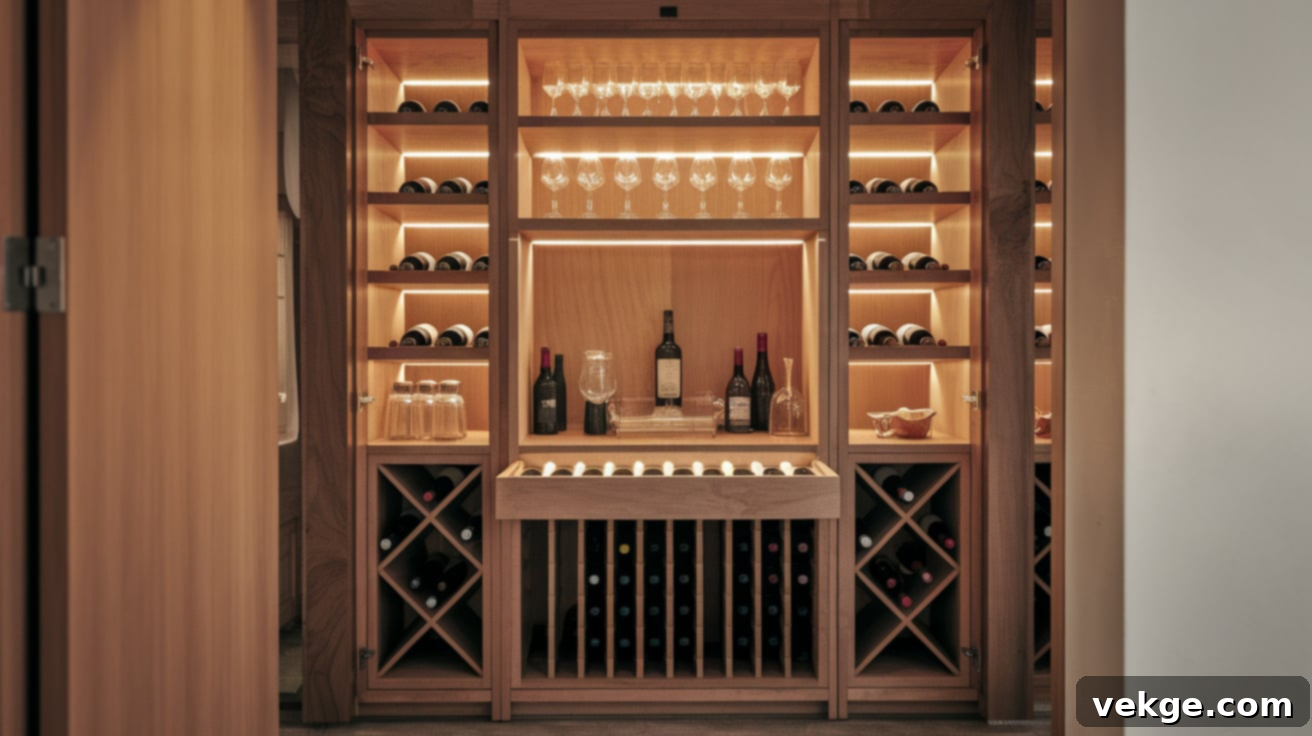
Elevate your wine storage to a grand level by creating a full-fledged wine cabinet. This ambitious yet highly rewarding project offers complete control over the size, style, and integrated features. Design it to include dedicated slots for wine bottles, ample space for hanging wine glasses, and even a convenient drawer for corkscrews, bottle stoppers, and other tools. You can finish the cabinet to perfectly match your existing furniture, making it a cohesive part of your home’s décor. While this endeavor demands more time and effort than simpler racks, the end result is a magnificent statement piece that serves as both sophisticated storage and elegant furniture, defining your entertaining space.
15. Vertical Hanging Wine Rack

Optimize your living area by saving valuable floor space with a sleek vertical wall-mounted wine rack. This innovative design utilizes wooden boards with precisely cut round holes, allowing bottles to rest horizontally – crucial for keeping corks moist – while occupying a minimal amount of wall real estate. When viewed from the front, the bottles appear to effortlessly float against your wall, creating a captivating visual effect. This clean, modern design is exceptionally well-suited for contemporary homes and smaller living spaces where floor area is a precious commodity, offering both functionality and a striking display.
16. Repurposed T-Molding Glass Rack
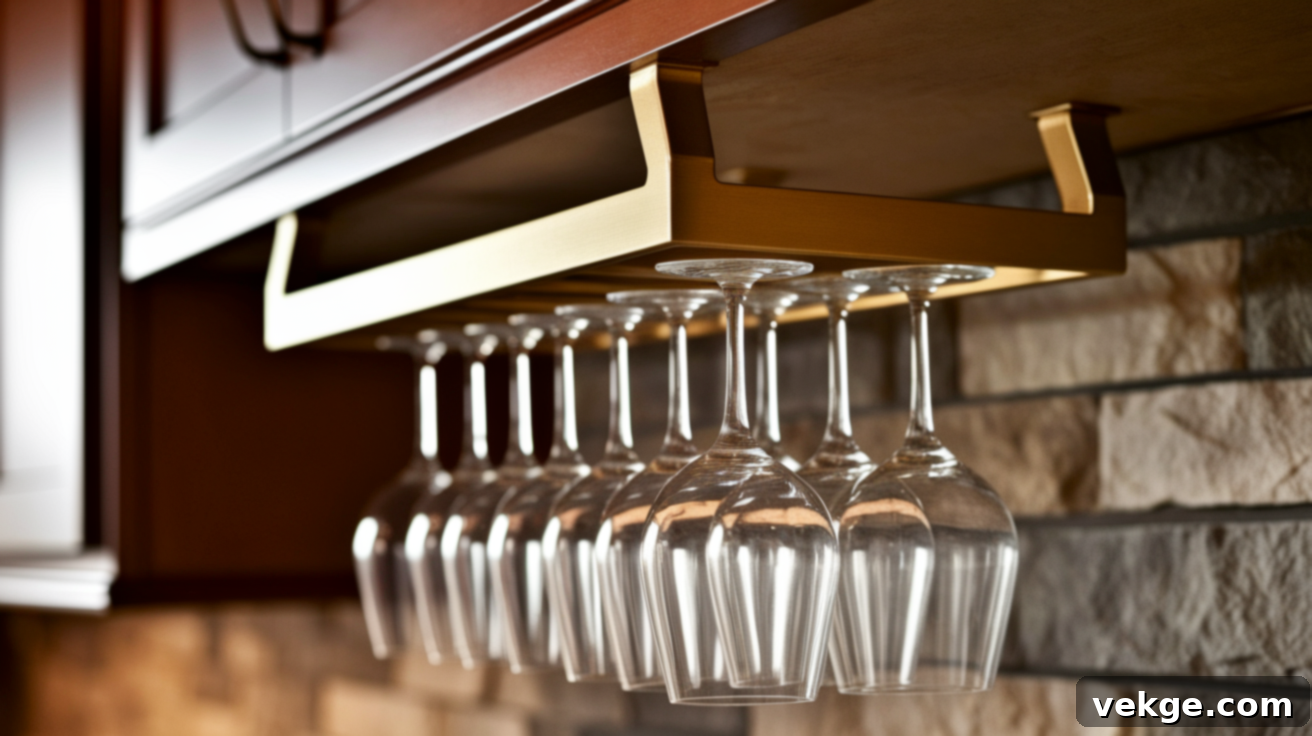
Discover an ingenious and budget-friendly hack for wine glass storage by repurposing T-molding, typically used for floor transitions. This often-overlooked material is perfectly shaped for elegantly hanging stemware. Simply cut the T-molding to your desired length, drill pilot holes, and securely attach it to the underside of a shelf or cabinet. The unique T-shape provides an ideal slot for wine glass stems to slide into, keeping them neatly organized and safely suspended. Finish the look with decorative brass screws and washers for a clean, professional appearance that keeps your glasses conveniently accessible yet protected from accidental bumps.
17. Tabletop Display Rack

Highlight your most special bottles with an elegant tabletop display rack, perfect for your dining table, kitchen island, or home bar. This charming conversation piece keeps a select few bottles within easy reach, making them readily available for meals, tastings, or social gatherings. Construct a small wooden base with carefully angled slots that present bottles at the optimal serving angle, allowing their labels to be admired. This design is particularly effective for dinner parties, enabling you to beautifully feature specific wines paired with your meal, or for smaller households where a full-scale wine rack might be unnecessary.
18. Rope and Wood Wall Rack
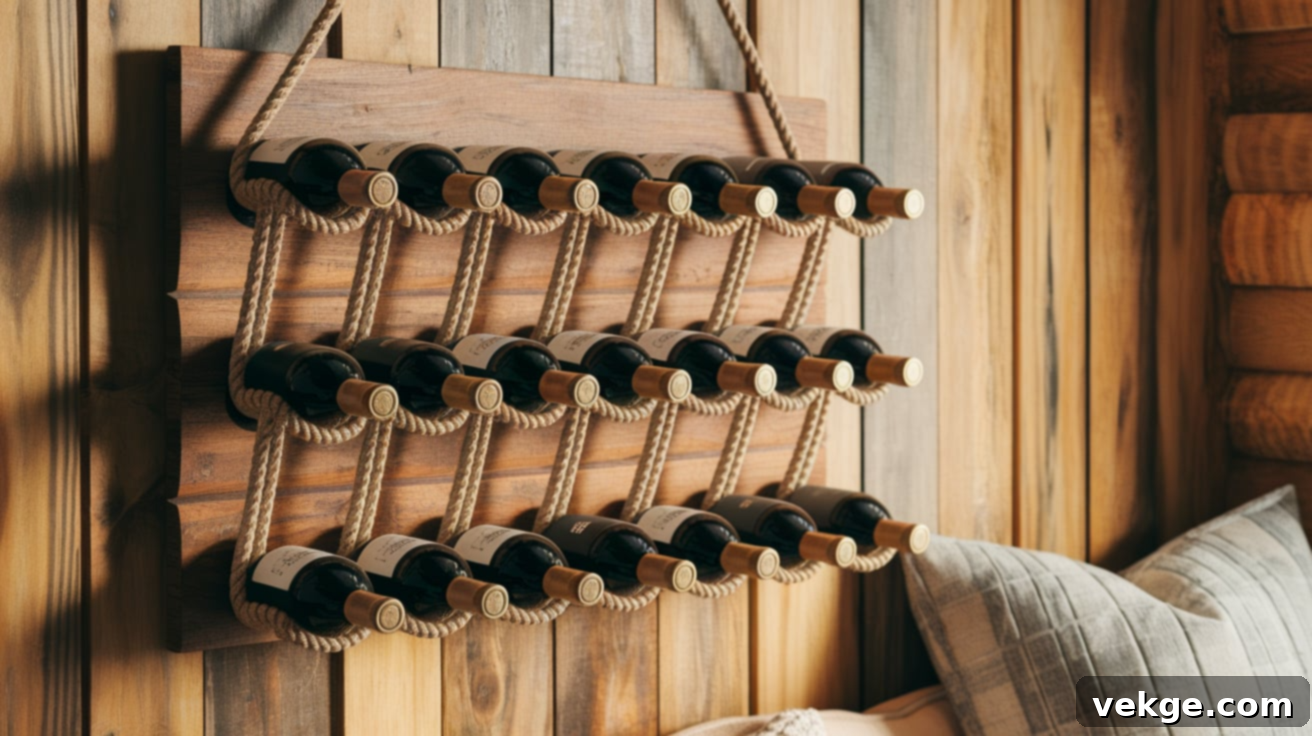
Create a distinctive wine rack with a charming nautical or rustic ambiance using a combination of rope and wood. Begin by drilling strategic holes into a sturdy wooden board, then thread durable rope through these holes to form secure loops that cradle individual wine bottles. The natural materials of wood and rope effortlessly introduce warmth, texture, and an organic feel to your space. This design is remarkably simple to construct yet offers a visually intriguing display. It integrates particularly well into beach houses, cozy cabins, or any room designed with natural, earthy themes, adding a touch of bespoke character.
19. DIY Wine Rack from IKEA Parts

Leverage the modularity and affordability of IKEA furniture to craft a customized wine rack that perfectly suits your exact needs. Start with basic IKEA shelving units or cubbies, then creatively modify them by adding X-shaped inserts or drilling precisely sized holes to accommodate wine bottles. This clever approach allows you to build upon pre-made, cost-effective components while still achieving a unique, personalized storage solution. The finished result will possess the polished appearance of a custom-built piece, but at a significantly lower cost than purchasing a specialized wine cabinet of comparable quality and design.
20. Tree Branch Wine Rack
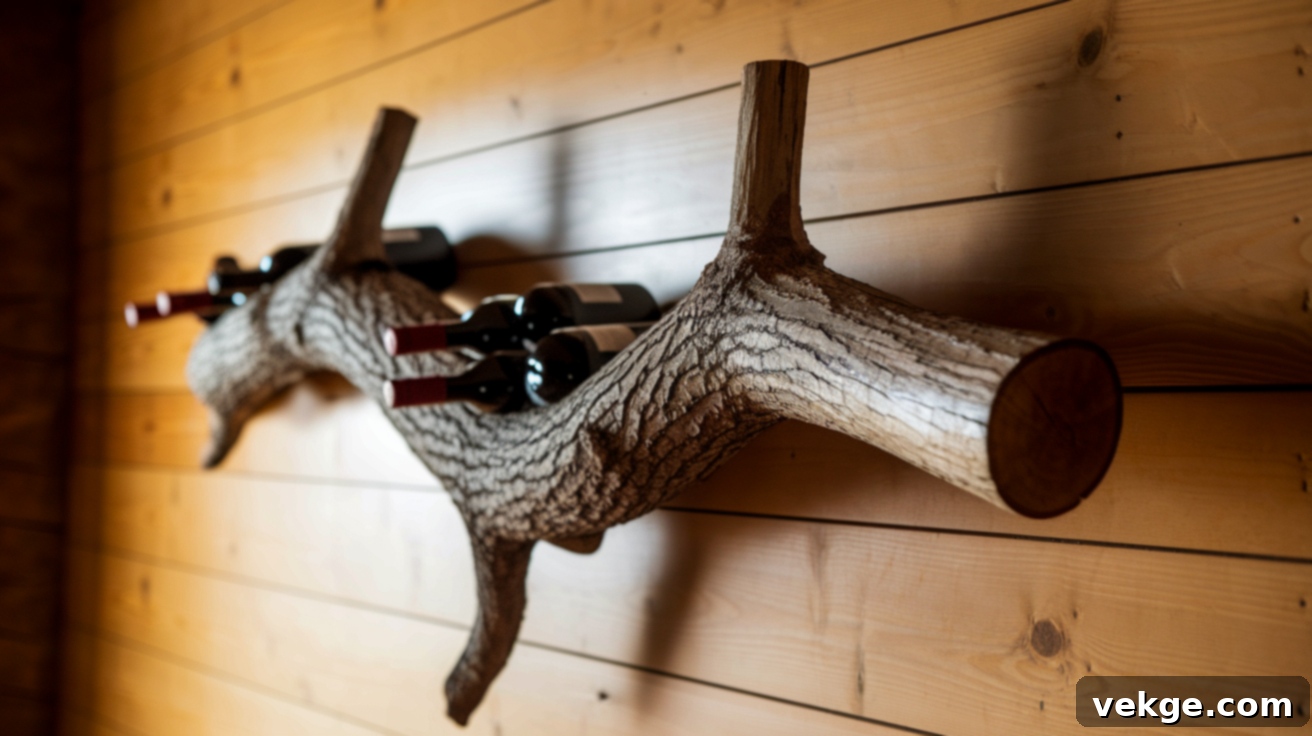
Bring the beauty of nature indoors with a truly unique wine rack fashioned from a natural tree branch. Seek out a thick, sturdy branch that features smaller offshoots or natural curves robust enough to serve as secure bottle holders. Thoroughly clean the branch, remove the bark if you prefer a smoother finish, and then mount it securely to a wall using appropriate hardware. The organic, one-of-a-kind shape of the branch will introduce a striking natural element to your home, with bottles resting safely within its inherent contours. This creative display is guaranteed to be a distinctive conversation piece and a testament to natural design.
21. Above-Cabinet Wine Storage
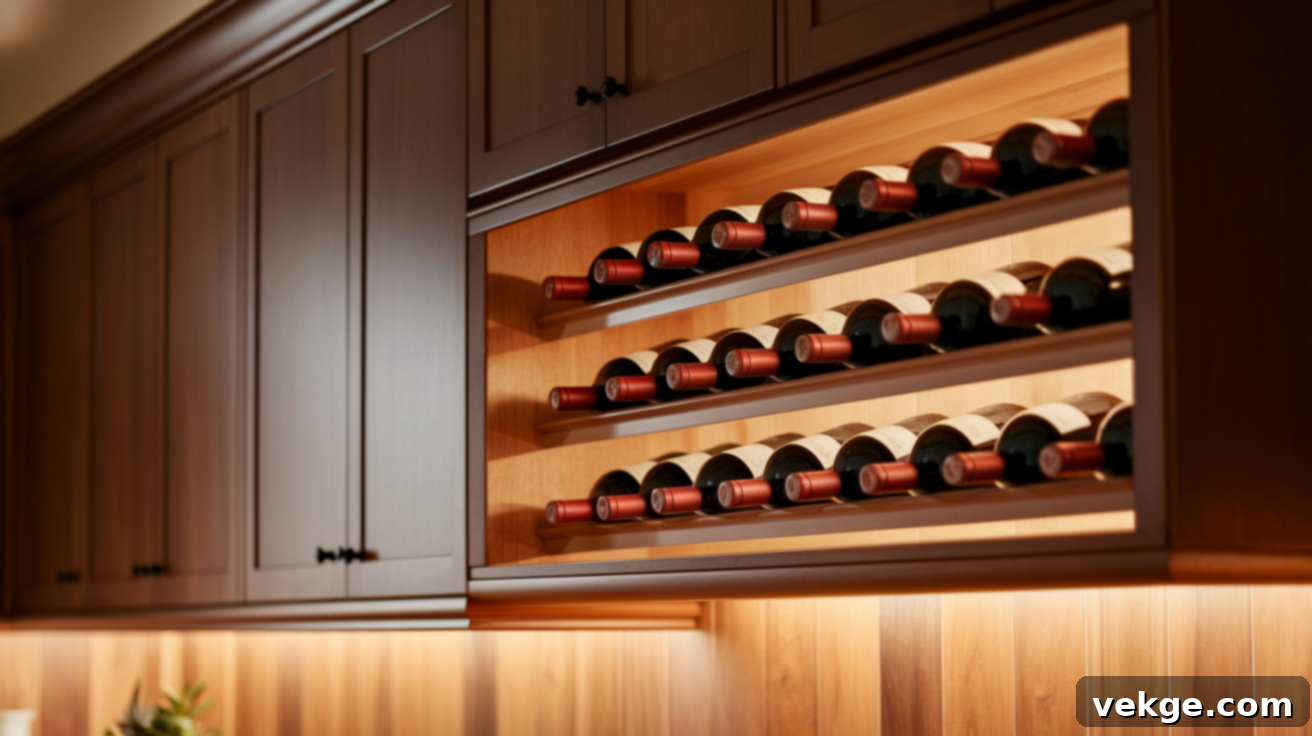
Reclaim the often-underutilized space situated above your kitchen cabinets for intelligent wine storage. This typically forgotten area is ideal for creating a simple, custom-built rack that perfectly fits its dimensions. Keep in mind that heat tends to rise, so this location is best suited for wines you intend to consume relatively soon, rather than for long-term aging. You can construct a freestanding rack that rests atop the cabinets or, for a more integrated look, modify existing cabinet doors by cutting holes to slide bottles through. This ingenious approach maximizes your kitchen’s storage potential and adds a tailored aesthetic.
22. Pegboard Wine Holder

Harness the incredible flexibility and adaptability of a pegboard to create a custom, endlessly reconfigurable wine rack. Mount a standard pegboard panel securely to your wall, then strategically insert wooden dowels or specialized pegs to form cradles that perfectly hold wine bottles. The greatest advantage of this system is its dynamic nature: you can effortlessly change the layout and configuration at any time by simply repositioning the pegs. This makes it an ideal solution for growing wine collections or for those who enjoy regularly updating their display based on their current selection of wines, offering both practicality and creative freedom.
23. Wine Rack Cart
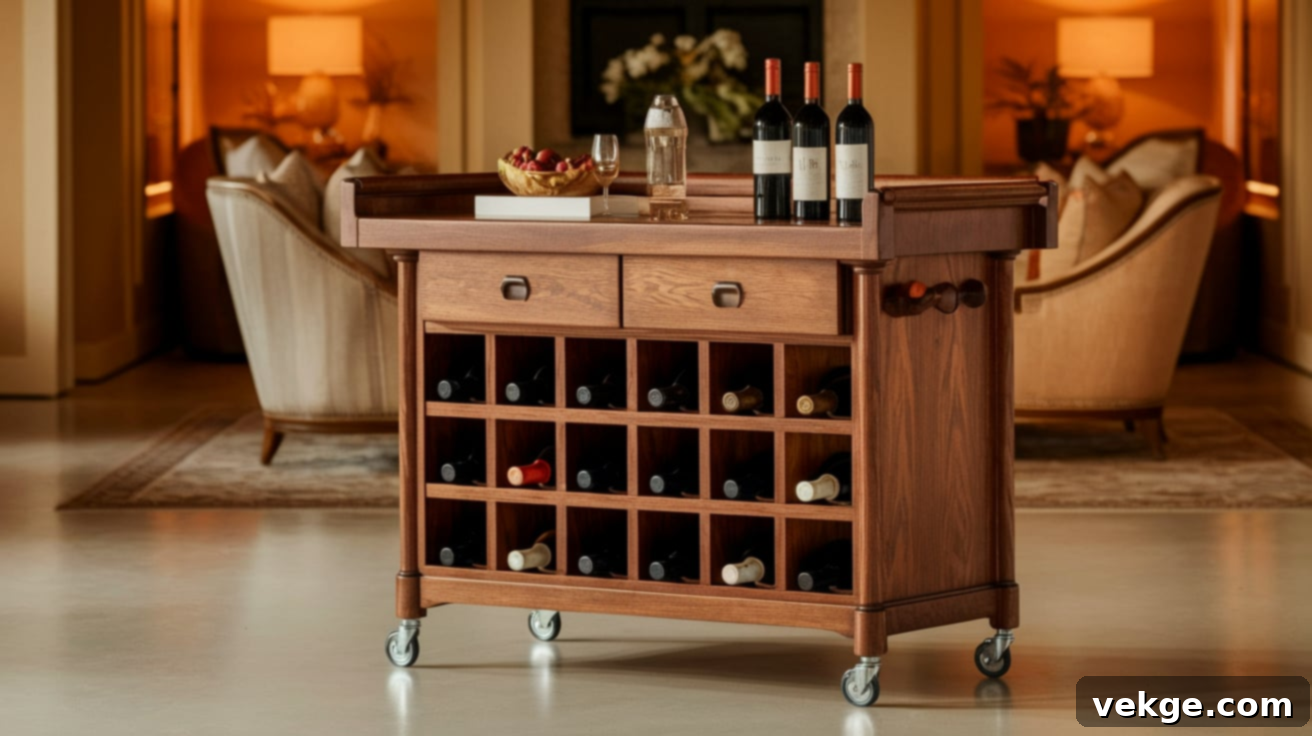
Elevate your entertaining experience by adding mobility to your wine storage with a versatile wine rack cart. Begin by building a sturdy basic wine rack structure, then attach high-quality, smooth-rolling casters to its base. Incorporate a durable top surface, perfect for serving drinks, opening bottles, or displaying glassware. This multi-functional piece can effortlessly roll from your dining room to the living room during parties, or conveniently tuck away when not in use. It’s an indispensable item for hosts and hostesses who love to serve drinks in various areas of their home, combining storage with portable serving functionality.
Step-by-Step Guide to Craft Your Own DIY Wine Rack
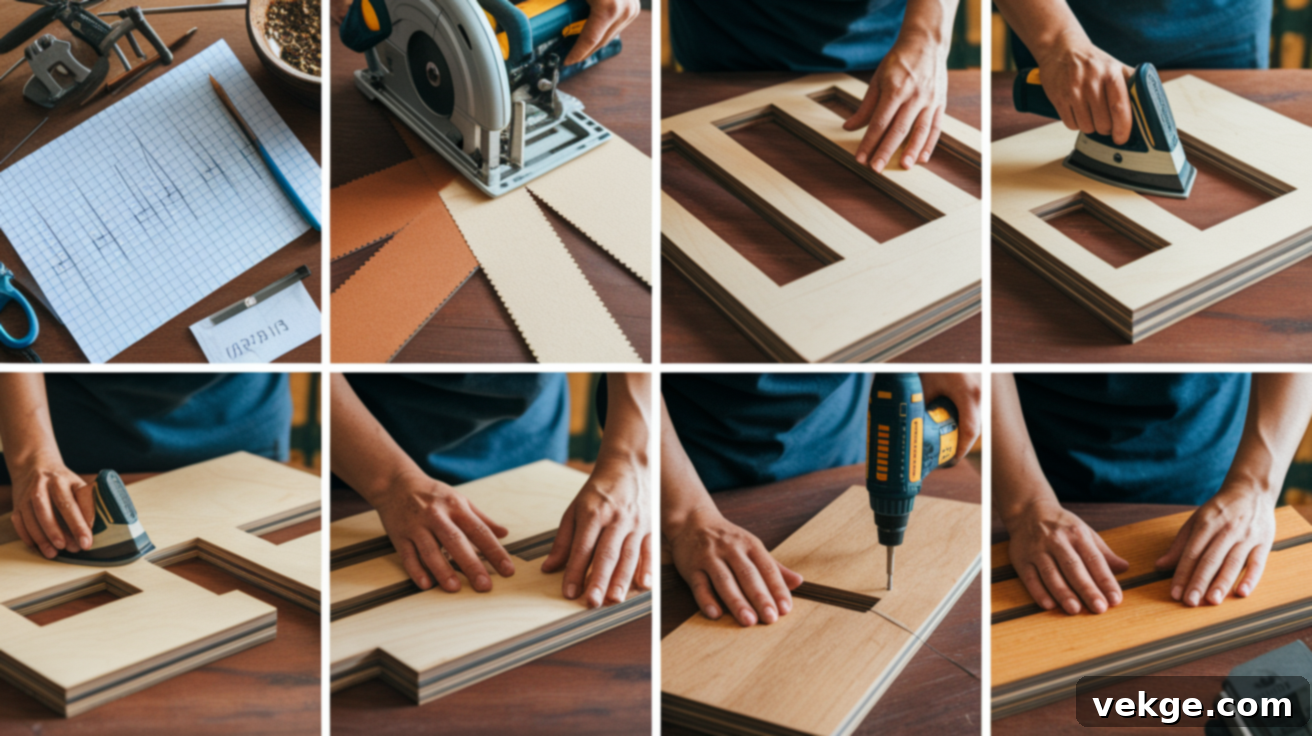
Embarking on a DIY wine rack project is a rewarding experience. Before you begin, ensure you have all the necessary tools and materials at hand. For tools, you’ll typically need a reliable drill, a jigsaw or circular saw for precise cuts, various grits of sandpaper, a rubber mallet for gentle adjustments, and an accurate measuring tape. As for materials, prepare your chosen wood – be it plywood for a modern look or reclaimed pallet wood for rustic charm – along with edge banding (if using plywood), wood glue, and finish nails or screws. Optional additions include wine glass holders, metal pipes for an industrial touch, or detailed printable design plans for complex designs. By diligently following these seven steps, you’ll be well on your way to creating a beautiful and functional wine rack for your home.
Step 1: Plan Your Design Thoroughly
The foundation of any successful DIY project is meticulous planning. Begin by clearly defining the style of wine rack you wish to build. Consider its intended location – will it be a wall-mounted feature, a freestanding floor unit, or integrated into a cabinet? Accurately determine the number of bottles it needs to accommodate, keeping potential future expansion in mind. Most importantly, honestly assess your current skill level to choose a design that is challenging but achievable. Sketch your design on paper, including precise measurements for every component. For a grid-style rack, calculate the exact number and dimensions of compartments. Before making any cuts or purchases, double-check that you have sufficient materials to execute your plan. Thorough planning is paramount to prevent wasted materials, time, and frustration.
Step 2: Precisely Cut Your Wood Pieces
With your design finalized, it’s time to cut your wood. Using a circular saw, table saw, or even a jigsaw for smaller pieces, carefully cut the plywood or solid wood according to your detailed plan. For a typical grid-style rack, you will need a back panel, top and bottom pieces, side panels, a series of vertical dividers, and horizontal shelves. Measure each dimension meticulously and mark your cutting lines with a sharp pencil. Remember the age-old carpenter’s adage: “measure twice, cut once.” Strive for straight, clean, and accurate cuts, as this ensures the best possible fit during assembly. As you cut each piece, label it clearly to avoid confusion in later stages of construction.
Step 3: Apply Edge Banding (If Using Plywood)
If you’re working with plywood, edge banding is a crucial step to achieve a professional, finished look. Plywood’s exposed layers on its cut edges can appear unfinished and detract from the overall aesthetic. Edge banding covers these layers, giving the appearance of solid wood. Apply it to any edges that will be visible in your completed wine rack. Use an ordinary household iron set to medium heat to activate the adhesive backing on the banding. Press the banding firmly and evenly onto the plywood edge, then carefully trim any excess material with a sharp utility knife or edge banding trimmer. A light sanding afterward will create a perfectly smooth, seamless finish, transforming raw plywood into furniture-quality material.
Step 4: Mark and Cut the Notches
For grid-style wine racks, precise notching is essential for creating the interlocking structure. Carefully mark the exact locations where the horizontal and vertical pieces will intersect. Use a pencil to draw clear lines for each notch. To start the cuts, use a drill equipped with a 3/4-inch spade bit (or appropriate size for your wood thickness) to create pilot holes at the ends of each notch. Then, switch to a jigsaw to meticulously cut out the notches. Focus on making straight and precise cuts to ensure a snug, secure fit when the pieces are assembled. Periodically test-fit pieces together as you go; this simple check allows you to catch and correct any errors early.
Step 5: Sand All Pieces to Perfection
Achieving a smooth, professional finish requires thorough sanding of all wood surfaces and edges. Begin with a coarser grit sandpaper (around 120-grit) to address any rough spots, saw marks, or imperfections. Gradually progress to finer grits, typically 180-grit, and then finish with a very fine 220-grit sandpaper to achieve a silky-smooth surface. Pay particular attention to all cut edges and any notches. For plywood, sand lightly to avoid sanding through the delicate veneer layer. Once sanding is complete, carefully remove all dust from the surfaces using a damp cloth or a tack rag. Proper sanding not only prevents splinters and enhances safety but also creates an ideal surface for even stain or paint application.
Step 6: Stain or Paint for Desired Finish
Applying your chosen finish – whether it’s wood stain, paint, or a clear sealant – before final assembly is highly recommended. Working with individual pieces is significantly easier than trying to reach tight inside corners after the rack is put together. Brush or wipe on your wood stain or paint in thin, even coats, always working in the direction of the wood grain. Allow each coat to dry completely according to the product instructions before applying the next. For a grid rack, finishing all separate components ensures complete coverage and a more uniform, professional appearance. This extra time and effort invested now will undoubtedly result in a much higher quality finished product.
Step 7: Assemble Your Custom Wine Rack
With all pieces cut, sanded, and finished, it’s time for the exciting final assembly. For grid racks, start by carefully fitting the notched vertical and horizontal pieces together to form the internal structure. A rubber mallet can be gently used to tap pieces into place, ensuring a secure, tight fit. Often, the interlocking nature of a grid rack means no screws are required for the main internal framework. Once the grid is complete, attach the side panels, then the top and bottom pieces, using a combination of strong wood glue and finish nails or screws for added durability. Finally, secure the back panel. Immediately wipe away any excess glue with a damp cloth. Allow all glue to dry and cure completely before placing any bottles in your new, custom-built wine rack. Your magnificent wine display is now ready!
Essential Tips for Building the Perfect DIY Wine Rack
Before you even pick up a saw, taking a moment to plan and prepare meticulously can make all the difference in your DIY wine rack project. These straightforward tips are designed to help you create a wine rack that not only looks fantastic but also functions flawlessly and endures for many years. A little thoughtful preparation now will save you countless headaches and potential reworks down the line, ensuring a smoother, more enjoyable building experience.
Measure Twice, Cut Once (and Check Again!)
This timeless woodworking adage is critical for a reason. Always, without exception, double-check your measurements before making any cuts. Even minor errors in measurement can quickly accumulate, leading to pieces that simply don’t fit together properly. Use a sharp, precise pencil for marking your lines and a reliable straight edge or speed square for drawing perfectly straight cut guides. As you progress, periodically test-fit pieces together; this simple step can help you catch any sizing issues while they are still easy to rectify. Investing extra time in accurate measurements will conserve your wood, save money, and prevent significant frustration during assembly.
Sand Smooth for Aesthetics and Safety
Rough, unsanded wood is not only unsightly but also a potential hazard, prone to causing splinters and snagging clothing. Therefore, sanding all your wood pieces thoroughly is a non-negotiable step. Begin with a coarser grit sandpaper, such as 120-grit, to remove any major imperfections or saw marks. Then, gradually work your way up to finer grits (e.g., 180-grit and finally 220-grit) to achieve a wonderfully smooth, tactile surface. Pay meticulous attention to all cut edges and corners. If using plywood, sand lightly to avoid compromising the thin decorative veneer. Smooth surfaces not only enhance the visual appeal of your finished wine rack but also make it safer and more pleasant to handle and use.
Pre-Stain or Paint Before Assembly for Flawless Finish
A professional-looking finish often comes down to timing. Apply your chosen stain or paint to individual wood pieces *before* you assemble them. This strategy offers a significant advantage: it makes it infinitely easier to reach all surfaces, edges, and especially those tricky inside corners that become nearly impossible to access once the rack is constructed. Ensure that each coat of stain or paint is completely dry according to the manufacturer’s instructions before you proceed with the final construction. This pre-finishing approach guarantees comprehensive coverage, prevents messy touch-ups, and ultimately yields a far more polished and professional-looking completed wine rack.
Get Creative with Scrap Wood and Reclaimed Materials
Before heading to the lumberyard, take a moment to survey your workshop or garage for any leftover wood from previous projects. Smaller pieces of wood are often perfect for constructing sections of wine racks or smaller designs. Think beyond new materials: old pallets, sturdy wooden crates, or even unused shelving can all be ingeniously repurposed. This approach not only results in significant cost savings but also contributes to reducing waste, making your project more sustainable. Furthermore, using reclaimed wood can inject unique character, a sense of history, and undeniable charm into your finished wine rack, making it truly one-of-a-kind.
Common Mistakes to Avoid When Building Your Wine Rack
Even seasoned DIY enthusiasts can stumble upon common errors when constructing wine racks. By being aware of these frequent pitfalls, you can save valuable time, materials, and effort. Avoiding these problems from the outset will significantly improve the outcome of your project, ensuring your custom wine rack is both durable and perfectly functional for years to come.
- Ignoring Weight Capacity: Wine bottles, when full, are surprisingly heavy, weighing approximately 3 pounds each. A rack designed to hold many bottles must be robust. Always use strong, appropriate materials for the structure and, for wall-mounted racks, ensure you use proper wall anchors capable of supporting the cumulative weight. Always test the rack’s strength and stability before loading it with your valuable wine collection.
- Incorrect Bottle Angle: For long-term storage, wine bottles should ideally be stored horizontally. This position keeps the cork constantly moist, preventing it from drying out, shrinking, and allowing oxygen to spoil the wine. Ensure your rack design allows bottles to lie flat or at a slight downward tilt towards the cork. Vertical storage for extended periods can dry out corks, compromising the wine.
- Skipping the Test Fit: It might seem like an extra step, but always test how all your pieces fit together *before* applying glue or driving in final fasteners. This simple, quick check is invaluable for identifying any measurement errors, misaligned cuts, or fit issues while they are still easy to correct. Skipping this step can lead to frustrating adjustments and potential material waste once components are permanently joined.
- Poor Ventilation Planning: Good air circulation around your wine rack is essential, especially for larger collections or in humid environments. Design your rack to allow adequate space for airflow. Proper ventilation helps prevent moisture buildup, which can lead to mold growth on labels or corks, and contributes to maintaining a more consistent temperature around your bottles. Avoid completely enclosed designs without any air vents.
Conclusion: Toast to Your Handcrafted Wine Display!
Creating your very own DIY wine rack offers a wealth of benefits: you gain substantial cost savings, achieve a truly customized storage solution tailored to your exact needs, and experience the profound satisfaction of a successful woodworking project. The diverse range of ideas shared within this guide, from quick weekend builds like pallet racks to more intricate designs such as a spiral cellar, provides options suitable for every skill level and aesthetic preference.
To ensure the best possible results and protect your valuable collection, always remember to prioritize proper bottle angle to keep corks moist, ensure adequate weight support for the combined weight of your bottles, and design for good airflow to maintain ideal conditions. Always test-fit your components before final assembly to preemptively catch any potential issues. With careful planning, a little patience, and the right approach, your handcrafted DIY wine rack will serve as a practical and elegant storage solution for years, while adding a unique, personal touch to your home.
Cheers to your new, beautifully crafted wine display!
