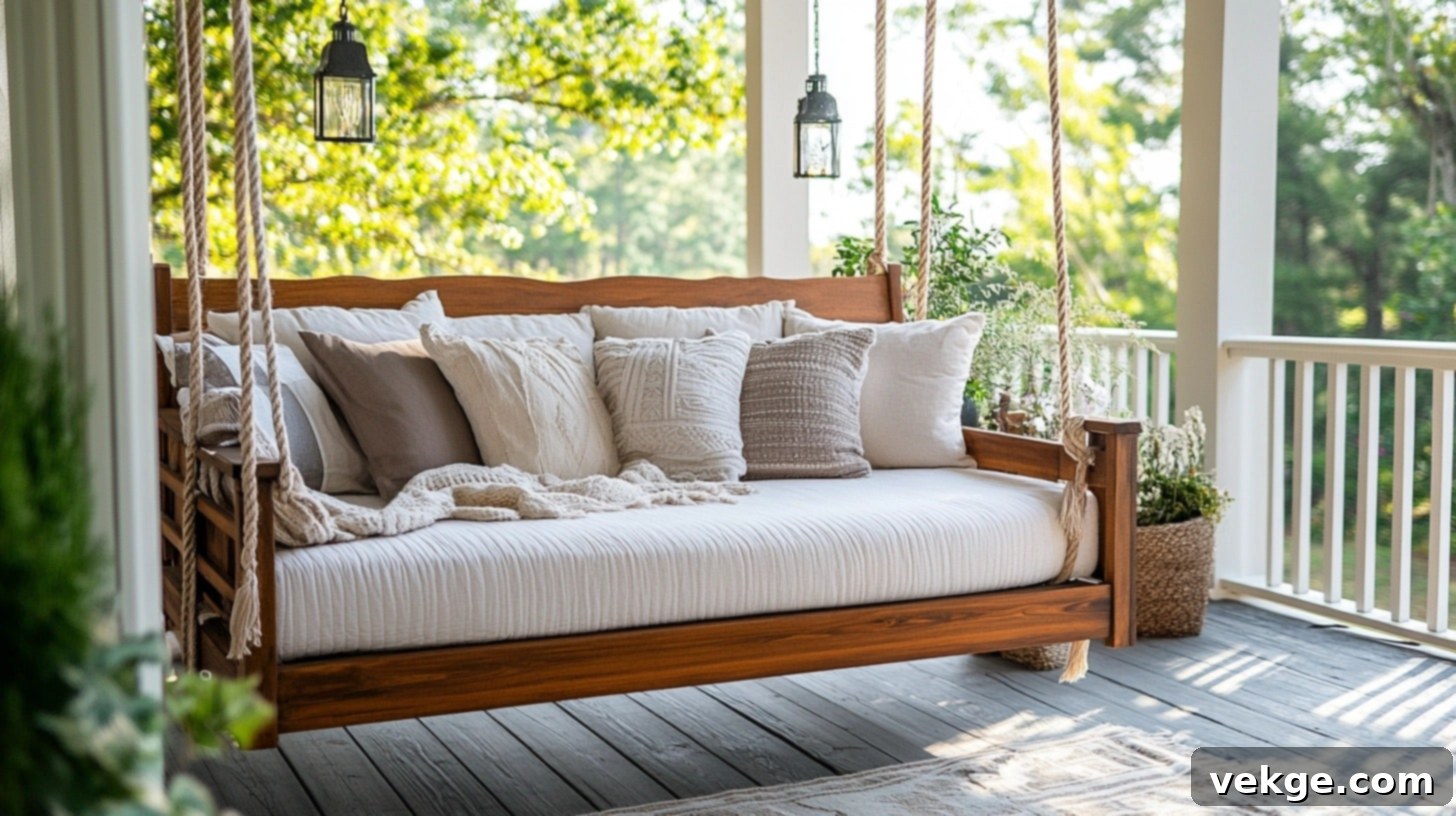
DIY Porch Bed Swing: Build Your Dream Outdoor Oasis with Our Comprehensive Guide
Imagine a serene escape right outside your door – a personal sanctuary where you can unwind, read a book, enjoy a quiet nap, or simply watch the world drift by. This idyllic vision became a reality for me when I transformed my empty porch into a beloved outdoor haven. Frustrated by the uninspiring and often overpriced options for store-bought outdoor furniture, I discovered the perfect solution: a handcrafted porch bed swing. Building my own last summer was a rewarding project, and it has since become the most cherished spot in my home to relax and rejuvenate.
The gentle, rhythmic swaying motion, combined with plush cushions and the invigorating fresh air, creates an unparalleled setting for everything from leisurely afternoon breaks to peaceful morning coffees. This isn’t just about adding furniture; it’s about crafting an experience and a focal point for countless happy memories. If you’ve ever dreamt of having such a unique and personal outdoor retreat, this guide is for you.
In this comprehensive guide, you’ll receive precise measurements, a detailed list of all necessary tools, and clear, easy-to-follow steps to construct this incredibly cozy and stylish outdoor addition. Beyond the build, I’ll also walk you through various style options to ensure your new swing seamlessly complements your home’s aesthetic. Plus, I’ll share my tried-and-tested tips for maintaining your swing in pristine condition, ensuring it remains a cherished part of your outdoor living space through all seasons. Let’s embark on this rewarding DIY journey together and create your new favorite relaxation spot!
Step-by-Step Guide to Building a Porch Bed Swing
Materials Required
Embarking on any DIY project begins with gathering the right materials and tools. For your porch bed swing, choosing quality lumber and having the correct equipment will make the building process smoother and ensure a durable, long-lasting finished product. Below is a comprehensive list of everything you’ll need, including approximate costs to help you budget for your project. Remember, investing in good wood and appropriate fasteners will pay off in the longevity and safety of your swing.
| Item | Quantity | Approx. Cost |
|---|---|---|
| Finish Nailer | 1 | $20 (rental) or $100 (purchase) |
| Tape Measurer | 1 | $10 |
| Wood Glue | 1 | $5 |
| Wood Stain | 1 | $10 |
| Wood Filler | 1 | $6 |
| Miter Saw | 1 | $40 (rental) or $200 (purchase) |
| Sand Paper | 1 pack | $5 |
| Jig Saw | 1 | $30 (rental) or $60 (purchase) |
| 4 Eye Screws (heavy-duty, suitable for hanging) | 4 | $5 |
| 1 1/4″ Finish Nails | Varies (box) | $5 |
| 2″ Finish Nails | Varies (box) | $5 |
| 1″ x 8″ x 8′ Clear Pine | 3 pieces | $75 ($25 each) |
| 1″ x 3″ x 8′ Clear Pine | 12 pieces | $60 ($5 each) |
| 1″ x 4″ x 8′ Clear Pine | 1 piece | $7 |
| 2″ x 3″ x 8′ Framing Lumber | 2 pieces | $12 ($6 each) |
| 2″ x 4″ x 8′ Framing Lumber | 1 piece | $8 |
| 1″ x 6″ x 8′ Knotty Pine | 4 pieces | $32 ($8 each) |
Note on lumber choices: Clear Pine is an excellent choice for its smooth finish and ease of working. Knotty Pine adds a rustic charm if preferred. For outdoor use, consider woods like cedar or cypress for enhanced weather resistance, though they may come at a higher cost. Always select straight, unwarped lumber for the best results.
Step 1: Constructing the Main Bed Frame
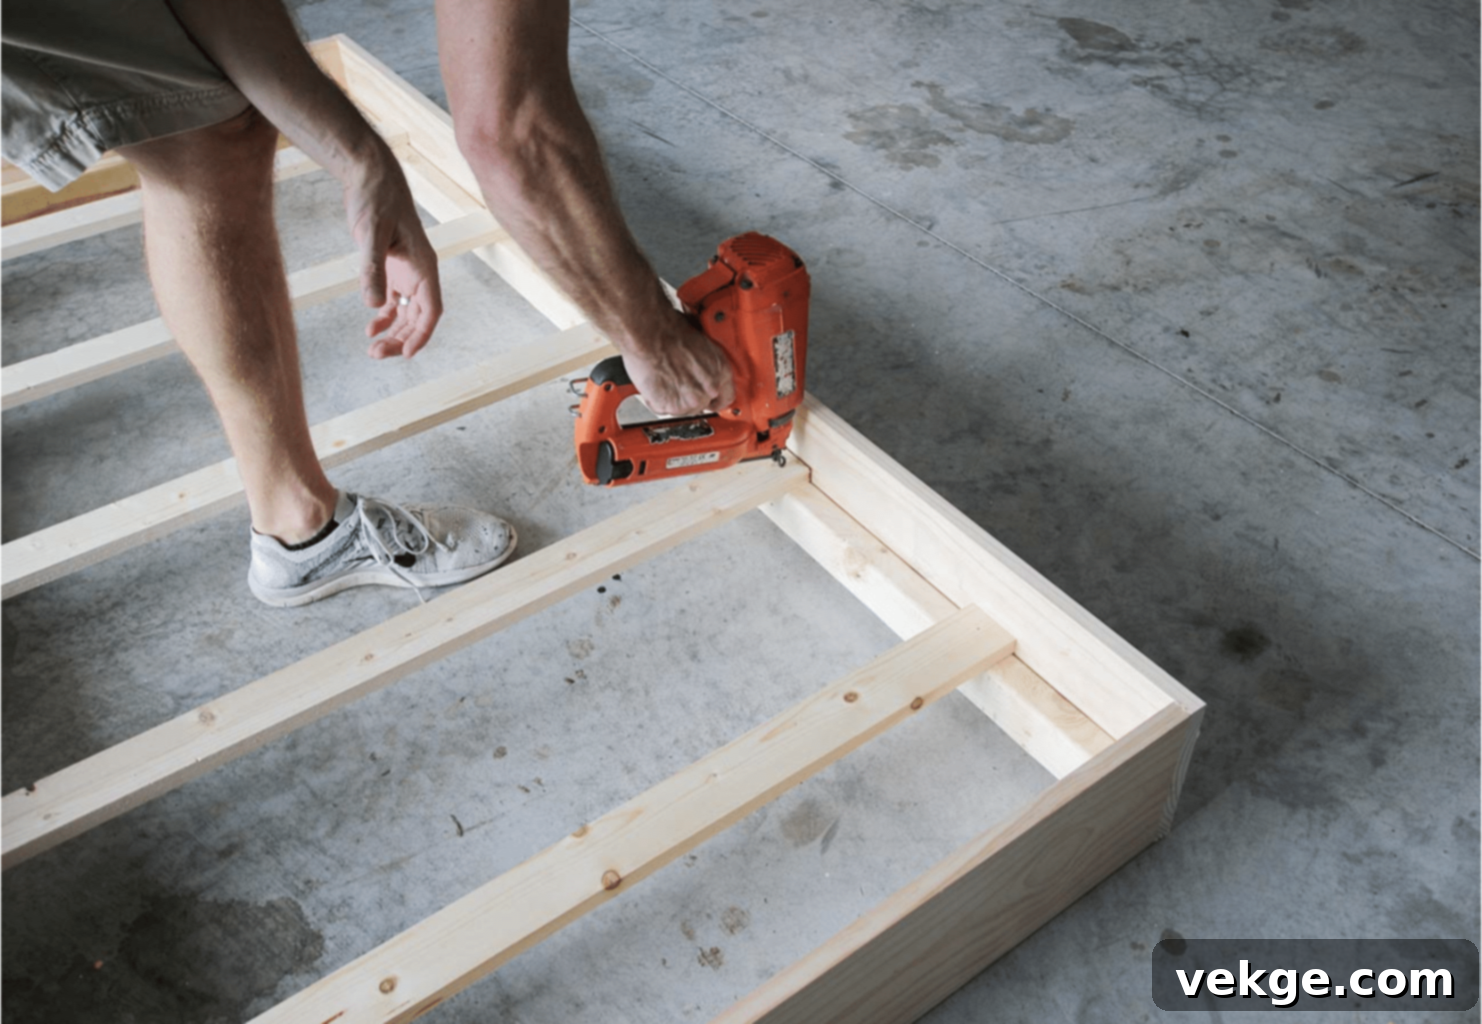
The foundation of your porch bed swing is the main frame, which will support the mattress and all other components. Precision here is key for stability and a professional finish.
- Begin by cutting your 1×8 pine boards to the desired lengths for the outer perimeter of your bed frame. For a standard twin-size mattress (39″ x 75″), you’ll typically need two 75-inch pieces and two 39-inch pieces.
- Assemble these boards into a sturdy rectangular structure. Apply a generous bead of wood glue along all joining surfaces before securing them with 2-inch finish nails. The glue provides additional strength and helps prevent future creaking.
- To reinforce the frame and provide crucial internal support, cut your 2×4 and 2×3 boards. These will form an inner support frame, flush with the top edge of the outer 1×8 frame. This internal structure is essential for distributing weight evenly and preventing sagging.
- Carefully nail and glue the support frame into place, ensuring every joint is solid. Use a carpenter’s square frequently to confirm that all corners remain perfectly square throughout this process. This will ensure your mattress fits snugly and the entire swing is structurally sound.
Step 2: Installing the Mattress Slats
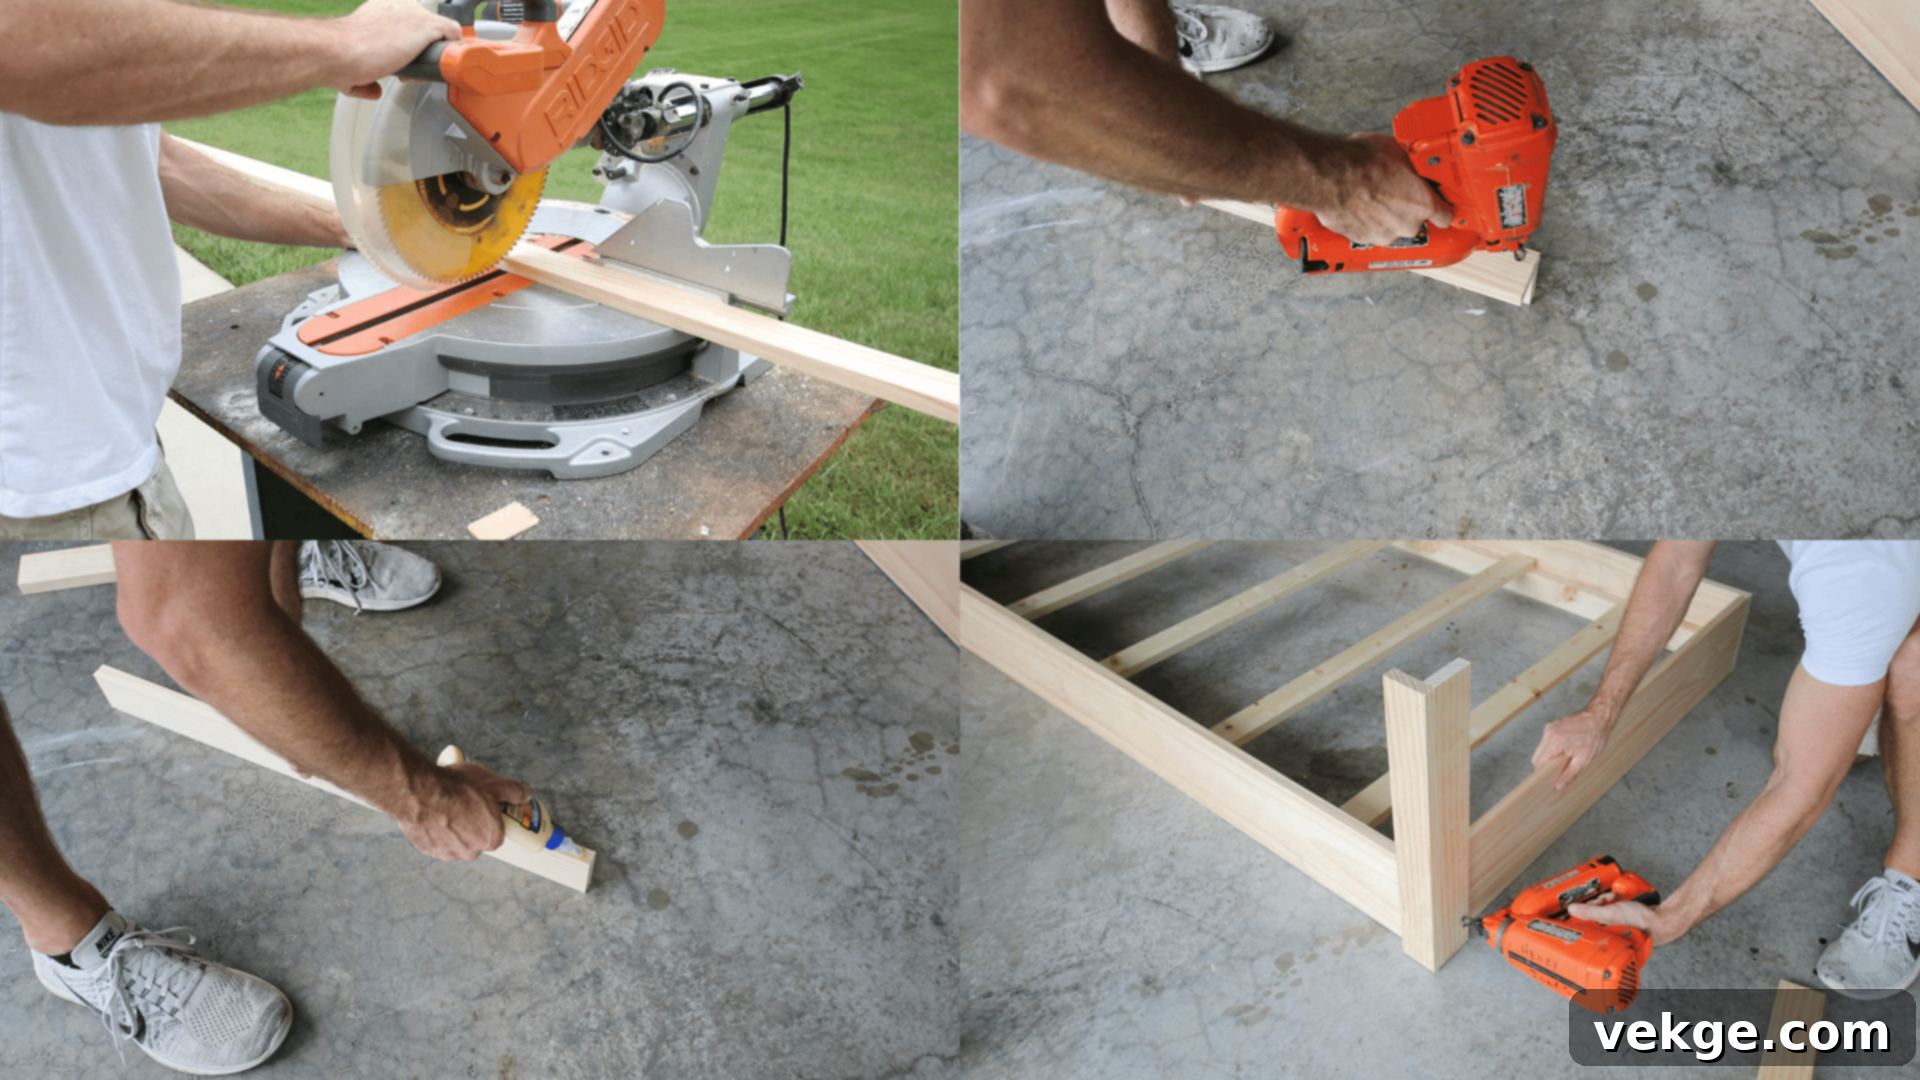
The mattress slats are vital for supporting your mattress, promoting air circulation, and enhancing the overall comfort of your bed swing. Proper spacing ensures adequate support without making the swing too heavy.
- From your 1×6 knotty pine boards, cut eight slats, each precisely 39 inches long. These dimensions are ideal for fitting across the width of a standard twin-size bed frame.
- Carefully place the slats inside the main frame, spacing them approximately 4 1/2 inches apart. You can use a scrap piece of wood cut to this length as a spacer to ensure consistent gaps between each slat. Even spacing is important for uniform support.
- Once positioned, securely nail each slat into place using 2-inch finish nails. Make sure to drive the nails flush with the wood surface. These slats will bear the weight of the mattress and occupants, so ensure they are firmly attached to the inner support frame.
Step 3: Creating and Attaching the Corner Posts
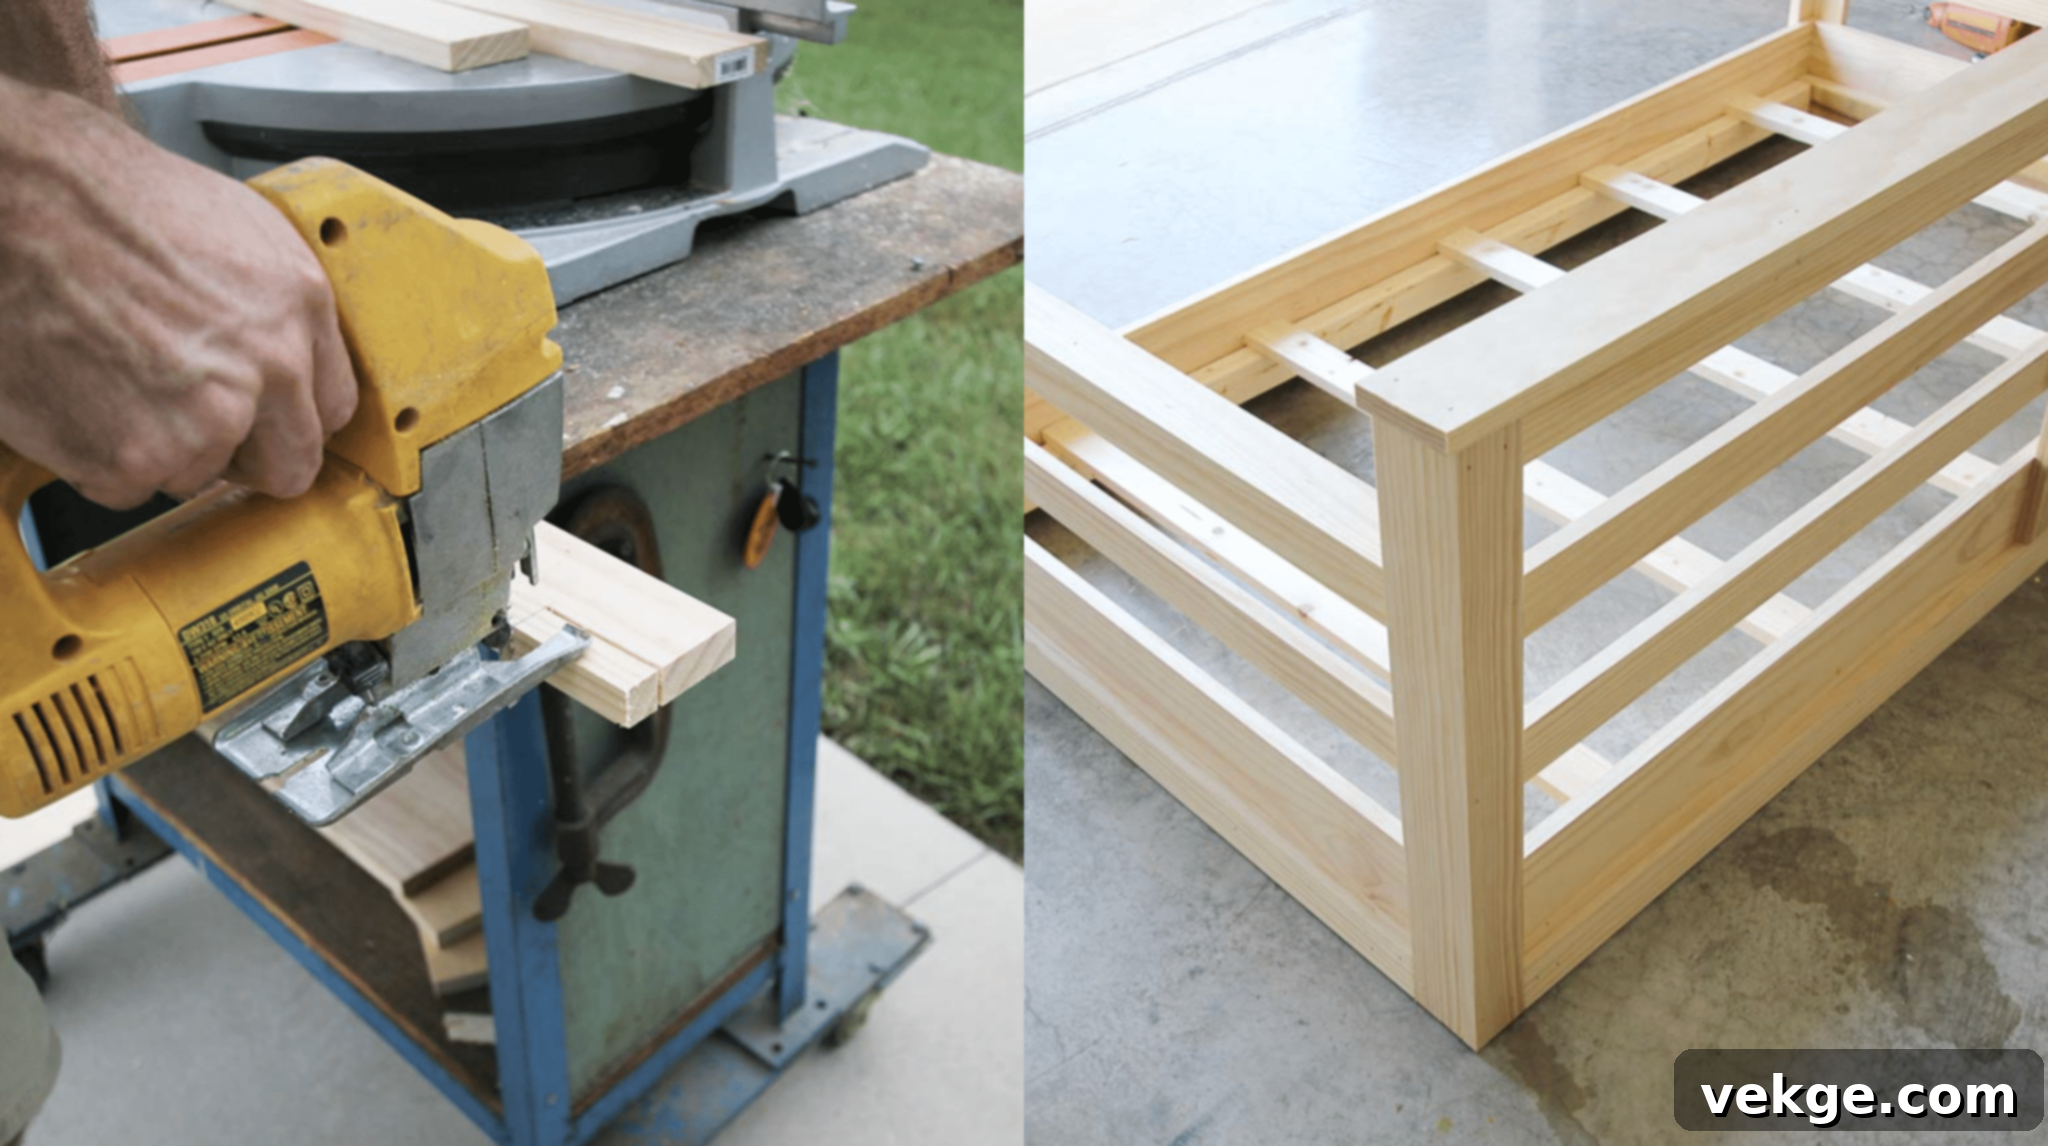
The corner posts are not only structural elements that define the shape of your swing but also anchor points for the hanging mechanism. Crafting them carefully will contribute to both the swing’s stability and aesthetic appeal.
- For each of the four corner posts, take two 1×3 boards and glue them together lengthwise to form a strong “L” shape. This configuration provides robust support and a clean, finished look. Clamp them together while the glue dries, or use a few temporary brad nails to hold them until the glue sets.
- Reinforce the glued joints by driving 2-inch finish nails along the length of the “L” shape. This creates a solid, unified post.
- Once your four “L”-shaped posts are ready, attach them to the four corners of your bed frame. Apply wood glue to the contact surfaces before securing them firmly with 1 1/4-inch nails. Ensure the posts are perfectly vertical and flush with the exterior of the frame. These posts will eventually hold the eye screws for hanging, so their stability is paramount.
Step 4: Adding the Rails and Armrests
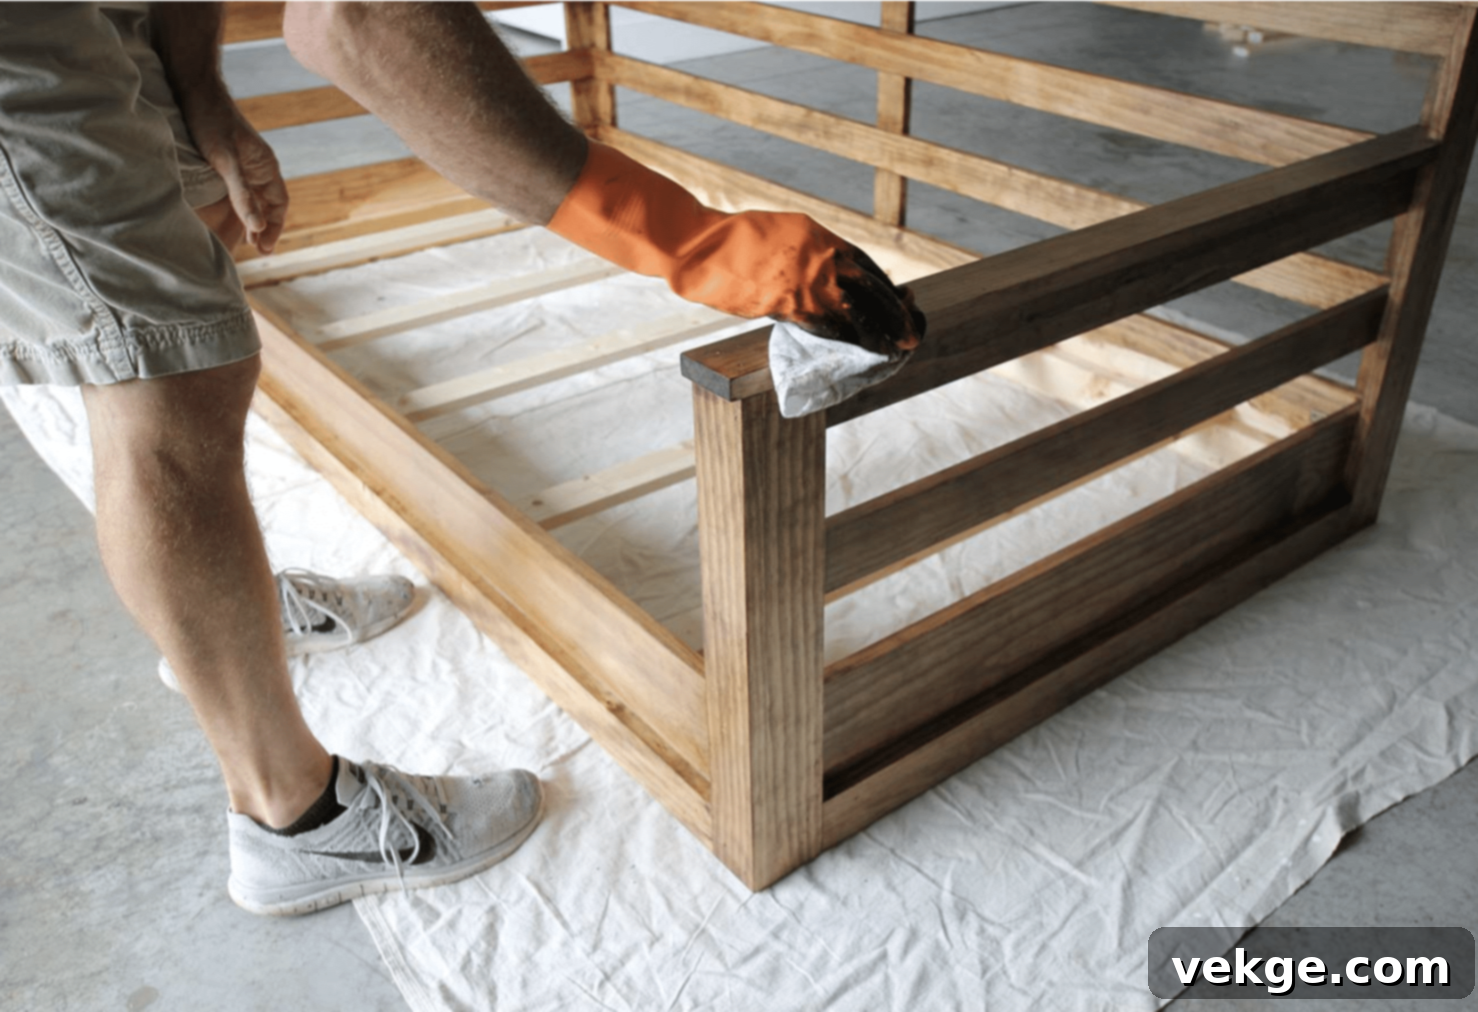
The rails and armrests define the enclosed feel of your bed swing, providing back support and a comfortable place to lean. This step brings the structure to life and adds significant comfort.
- Measure and cut your 1×3 boards to create the horizontal rails that will connect the corner posts. Start with the back rails, ensuring they span the full width of the swing between the rear posts. Secure them with wood glue and 1 1/4-inch finish nails.
- Next, cut and attach the side rails between the front and back posts. These rails, along with the corner posts, will form the protective and decorative enclosure of your swing.
- For the armrests, use additional 1×3 pieces. If you desire a more custom look, use a jigsaw to notch or curve the ends of the armrests for a softer, more ergonomic feel. Sand any cut edges smooth.
- Attach the armrests securely to the top of the side rails, ensuring they are level and comfortable.
- Finally, add decorative trim along the bottom edges of the swing, if desired, using 1×4 clear pine or similar trim pieces. This adds a finished touch and can conceal any gaps or imperfections in the main frame. Attach with nails and glue.
Step 5: Final Touches and Installing Eye Screws
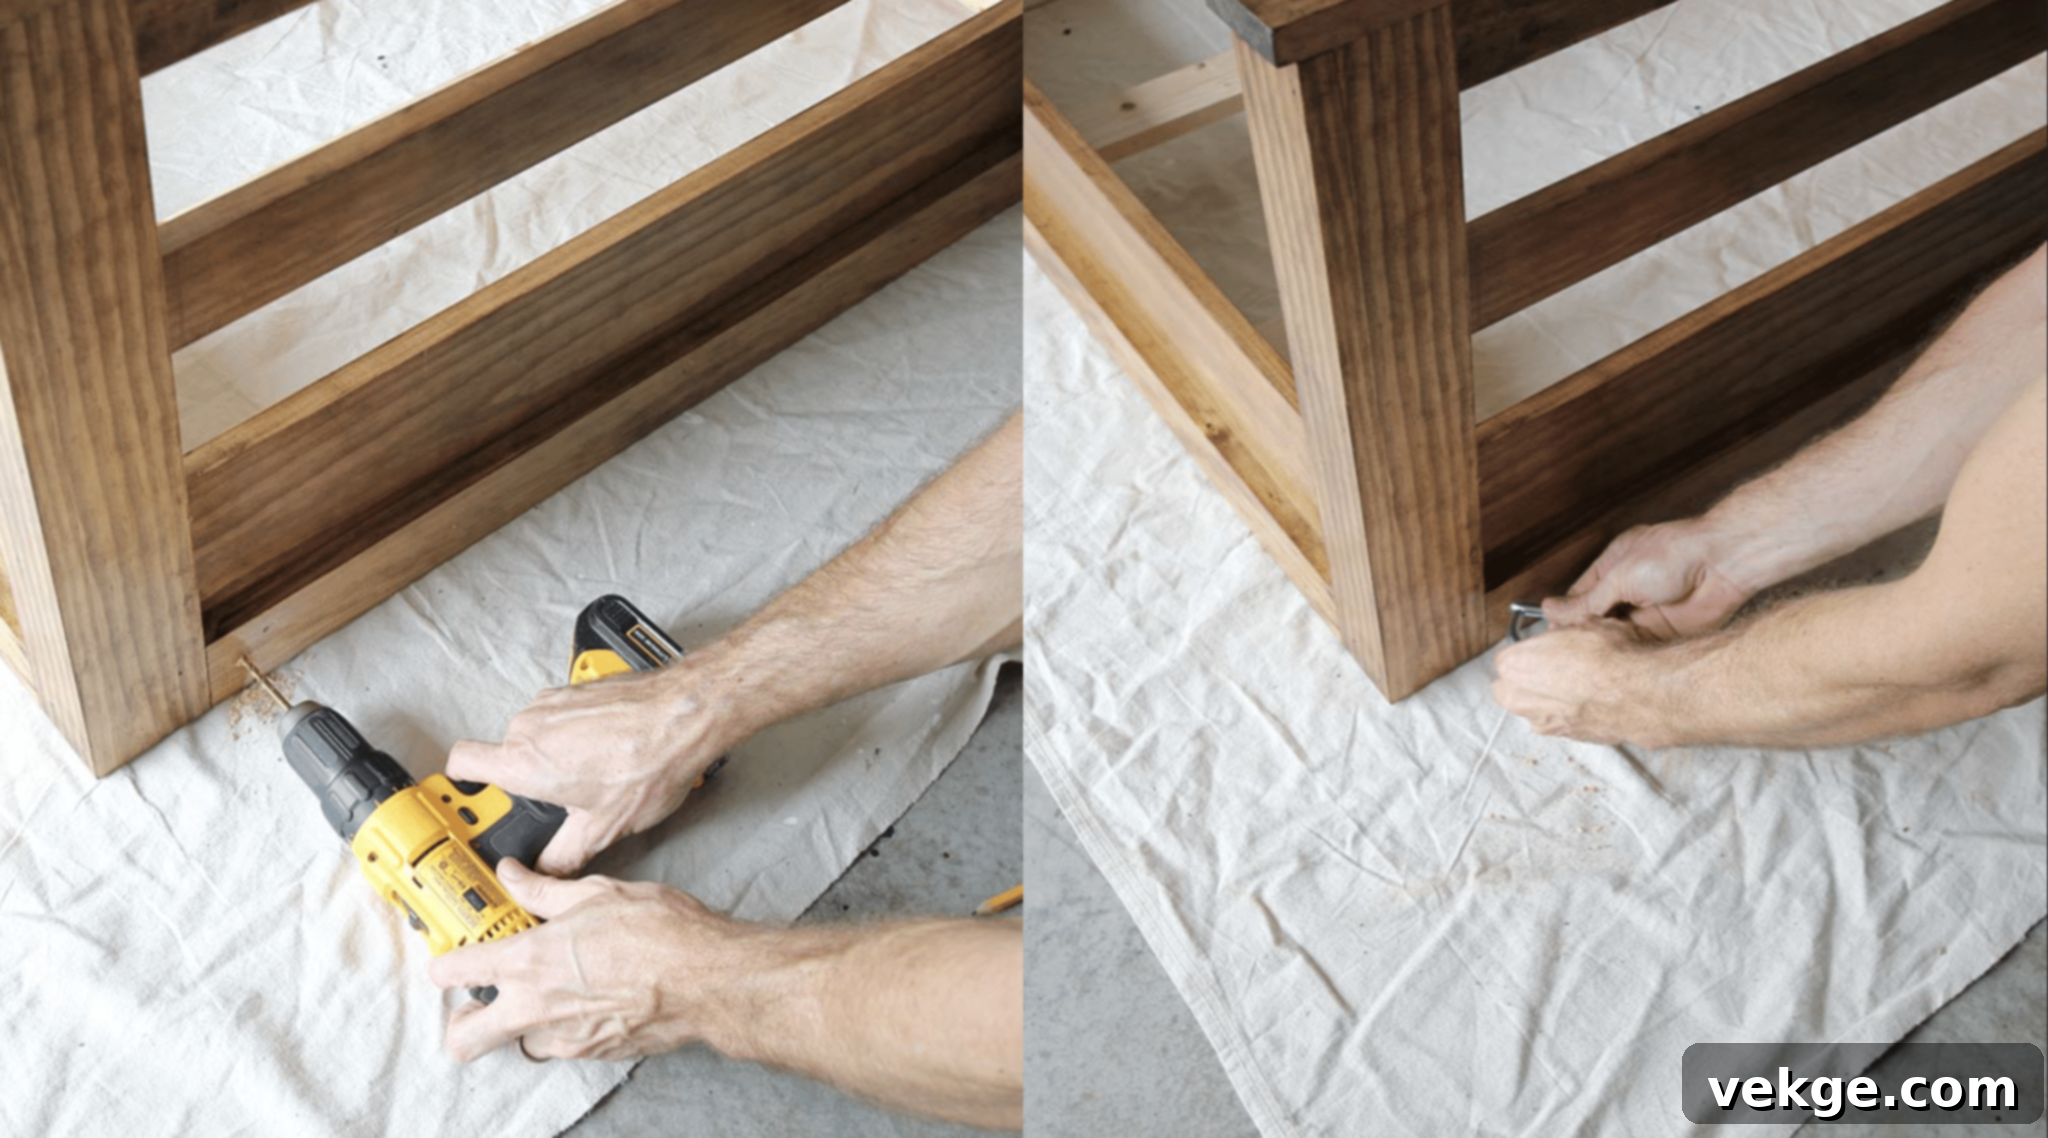
This is where your swing begins to take on its finished appearance, protecting the wood and preparing it for hanging. Attention to detail here will significantly enhance its durability and aesthetic appeal.
- Thoroughly inspect the entire swing for any nail holes, gaps, or imperfections. Fill all these with a high-quality wood filler, allowing it to dry completely as per product instructions.
- Once the filler is dry, sand the entire swing meticulously. Start with a medium-grit sandpaper (e.g., 120-grit) to smooth out any rough spots and transition to a fine-grit sandpaper (e.g., 220-grit) for a silky-smooth finish. Proper sanding is crucial for an even stain application.
- Apply your chosen wood stain, following the manufacturer’s instructions. A good stain not only enhances the wood’s natural beauty but also offers a layer of protection. Allow it to dry completely.
- For ultimate weather protection and durability, apply three coats of outdoor-rated polyurethane or spar urethane. Lightly sand with very fine grit sandpaper (e.g., 320-grit) between coats for the best adhesion and smoothest finish. This sealant will protect your swing from moisture, UV rays, and general wear and tear.
- Finally, carefully drill pilot holes for the four heavy-duty eye screws into the top of each corner post. Ensure these holes are properly aligned and centered, as they will be the attachment points for hanging the swing. Screw in the eye screws securely until they are firmly seated.
Step 6: Hanging the Swing
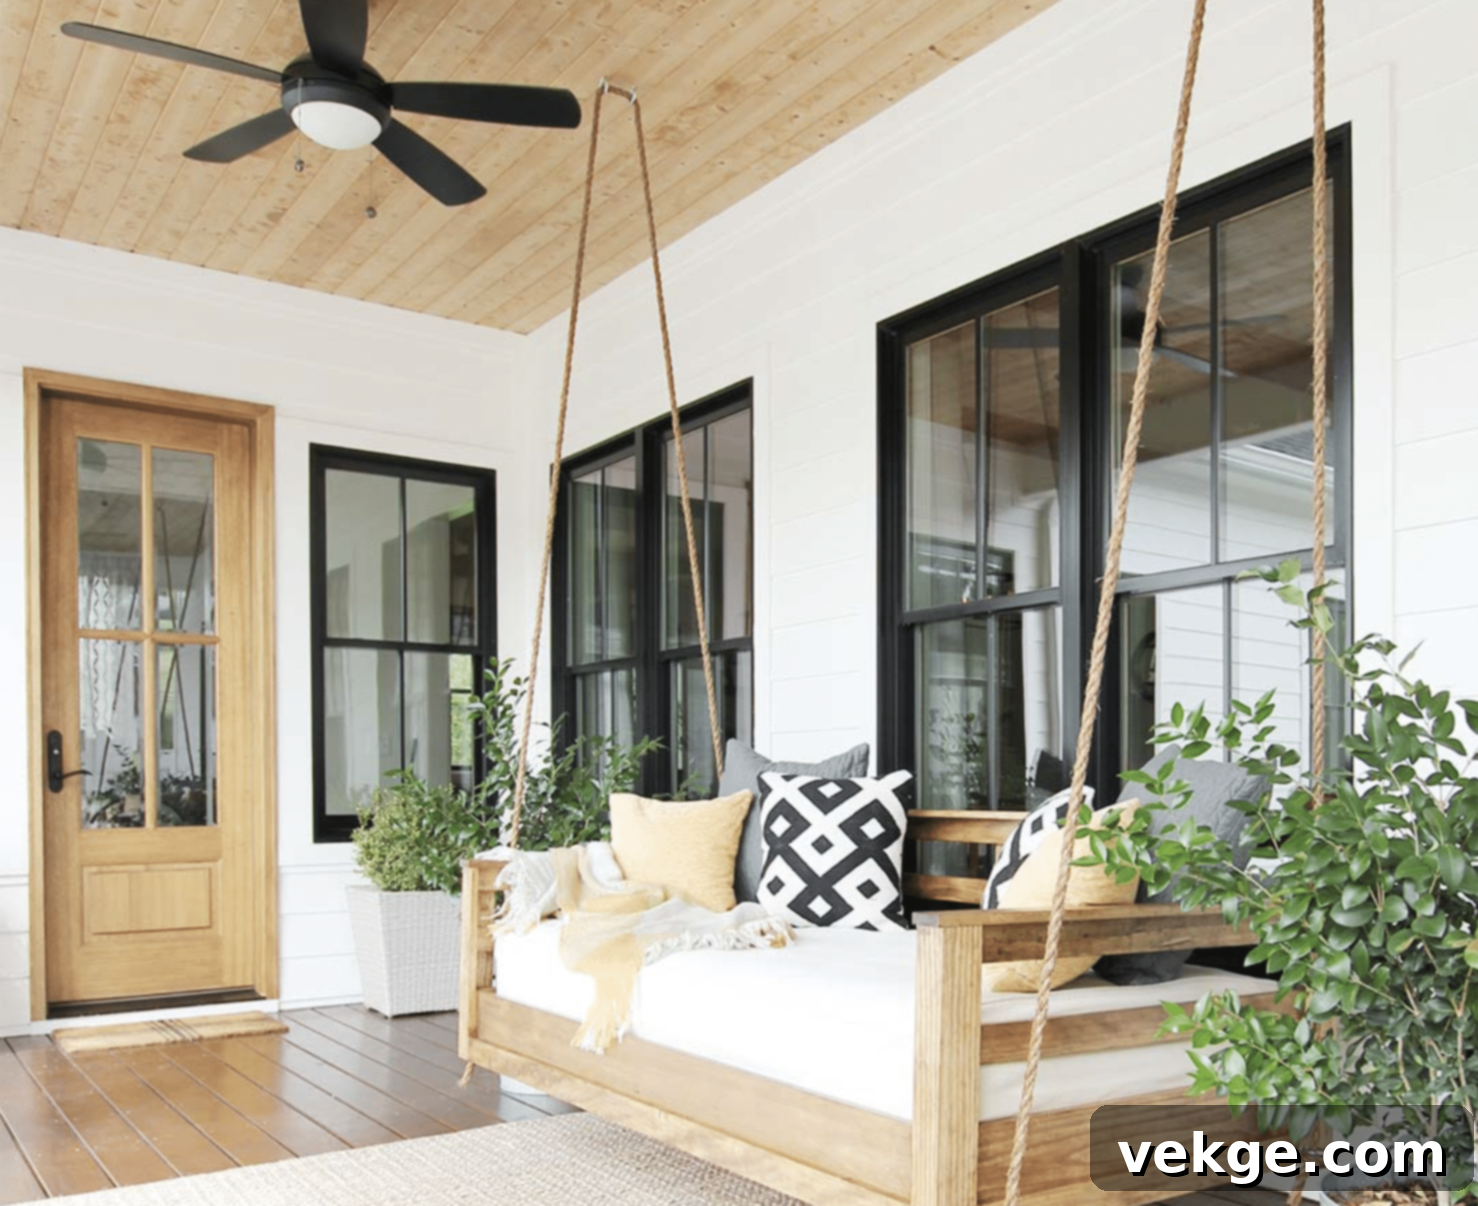
The moment of truth! Hanging your swing requires careful planning to ensure safety and proper balance. Always prioritize structural integrity when choosing hanging points.
- Identify solid ceiling joists or beams on your porch where the swing will hang. Use a stud finder to locate these structural members. It is absolutely critical that the hanging points are securely anchored into robust structural elements, not just ceiling plaster or thin planks.
- Install matching heavy-duty eye screws or specialized swing hangers directly into these ceiling joists. Ensure they are spaced correctly to align with the eye screws on your swing and can safely support the swing’s weight plus the weight of its occupants. Consult with a professional if you are unsure about your porch’s structural capacity.
- Use sturdy, weather-resistant rope (such as marine-grade synthetic rope) or heavy-duty chains to hang the swing. Measure the rope/chain length carefully to achieve your desired swing height. Attach one end to the eye screws on the swing’s corner posts and the other to the ceiling hangers.
- Once hung, perform a balance check. The swing should hang level and swing freely without rubbing against any walls or supports. Adjust rope/chain lengths as needed until it is perfectly balanced.
- Finally, add a comfortable twin-size mattress, an array of soft pillows, and any other desired cushions to complete your cozy retreat.
Congratulations! Your handmade porch bed swing is now complete and ready to provide countless hours of relaxation and enjoyment. Step back, admire your handiwork, and get ready to create lasting memories in your new favorite spot.
How to Choose the Right Size Porch Bed Swing
Selecting the perfect size for your porch bed swing is crucial for both comfort and functionality. It’s not just about fitting the swing onto your porch; it’s about ensuring it enhances your outdoor living space without feeling cramped or overpowering. The ideal size hinges on three primary considerations: your porch’s specific dimensions, the number of people who will regularly use it, and your personal comfort preferences.
First and foremost, accurately measure your porch width and depth. When planning the placement of your swing, always factor in at least 3 feet (approximately 90 cm) of clear space on each side of where the swing will hang. This critical clearance ensures that the swing can move freely and safely without bumping into walls, railings, or other furniture, preventing potential damage and ensuring a comfortable swing experience. Don’t forget to account for the depth of the swing itself, ensuring there’s enough room to walk around it when it’s stationary.
Here are standard mattress sizes that are commonly adapted for porch bed swings, offering a range of options for different needs:
- Twin Size (39″ × 75″ or approximately 99 cm x 190 cm): This is an excellent choice for smaller porches or for individuals primarily seeking a personal relaxation spot. It comfortably accommodates one person and provides a cozy, intimate feel. If space is at a premium, a twin-size swing offers maximum impact with a minimal footprint.
- Full Size (54″ × 75″ or approximately 137 cm x 190 cm): A full-size porch swing is ideal for accommodating two people comfortably, making it perfect for couples or for those who simply desire extra lounging room. It offers a more expansive surface for stretching out or snuggling up with a loved one.
- Queen Size (60″ × 80″ or approximately 152 cm x 203 cm): For the ultimate in comfort and luxurious space, a queen-size swing provides maximum lounging area, easily accommodating couples with room to spare or even a small family. This size is best suited for larger porches or outdoor areas where space is not a limiting factor.
Pro Tip for Visualization: To truly gauge how a swing will fit and feel in your space, create a life-size paper or cardboard template of your desired swing size. Lay it on your porch floor where you intend to hang the swing. Walk around it, sit on it (metaphorically!), and visualize your daily activities to ensure the size feels right for your space and won’t impede movement or other outdoor activities.
Remember: A larger swing inherently requires stronger support. Always match your chosen swing size to your porch’s structural capacity and the strength of your hanging points. Consult a structural engineer or experienced contractor if you have any doubts about your porch’s ability to safely support a heavy swing, especially for full or queen sizes. Safety should always be your top priority.
Essential Accessories For Your Porch Bed Swing
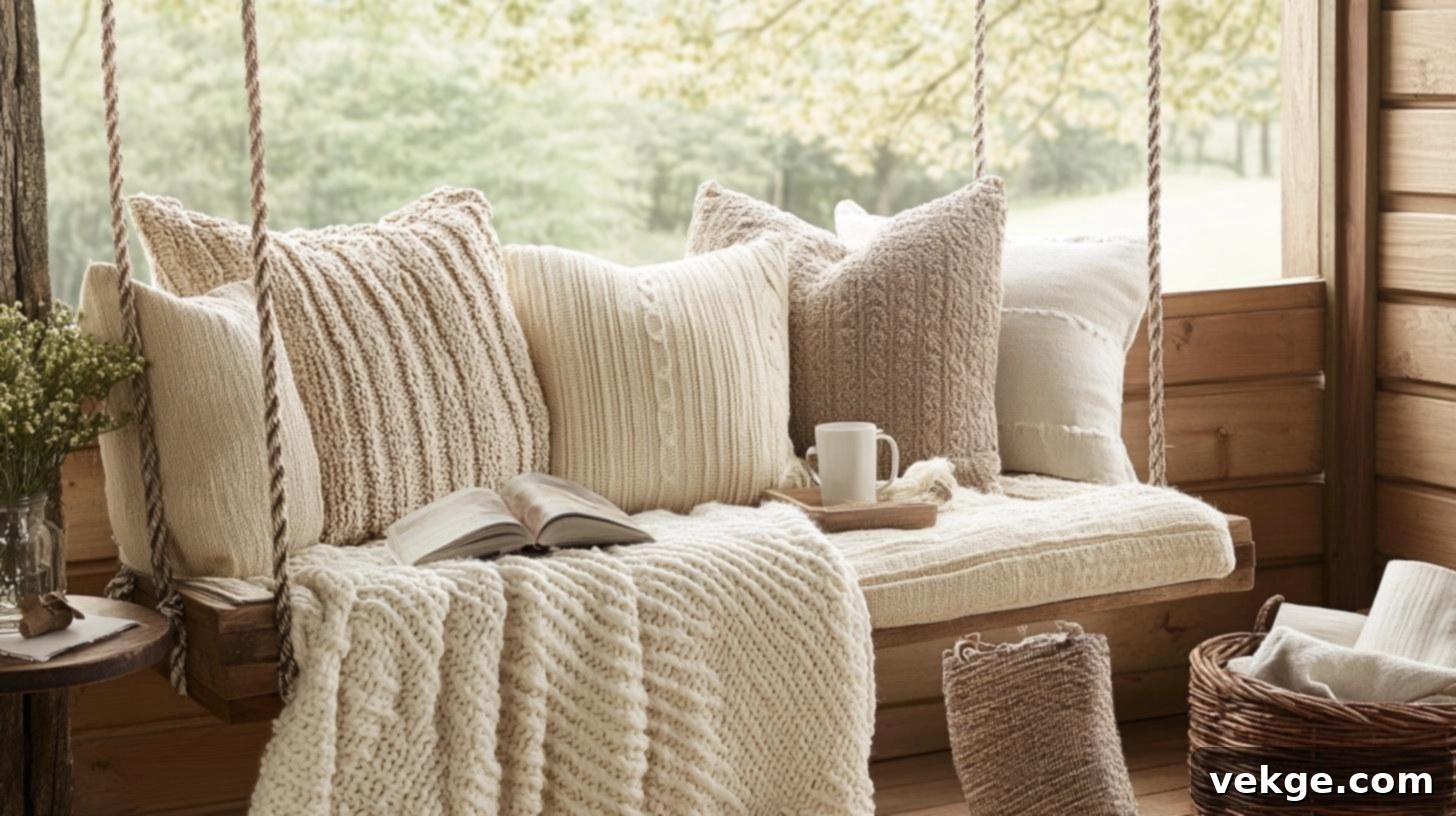
Once your porch bed swing is built and securely hung, it’s time to personalize it and enhance its comfort and functionality with the right accessories. These additions not only elevate the aesthetic but also make your swing a truly inviting and practical outdoor living space.
- Comfort Basics & Storage: To truly create a functional outdoor oasis, thoughtful storage and essential comforts are key. Place a stylish storage basket or a small, weather-resistant ottoman next to your swing for convenient access to daily items like sunscreen, bug spray, or your current reading material. Keep a stack of outdoor throw blankets ready for cooler evenings; look for materials that are quick-drying and mold-resistant. A small, sturdy end table is indispensable for holding your morning coffee, an evening beverage, or a snack. Additionally, incorporate a few waterproof storage boxes, perhaps tucked beneath the swing or on an adjacent shelf, to protect items you need close at hand from the elements.
- Cushions: The right cushions are paramount for comfort. Invest in soft, plush, and weather-resistant outdoor cushions designed specifically for porch swings or outdoor furniture. Experiment with different colors, patterns, and textures to either match your home’s existing outdoor decor or to introduce a vibrant splash of complementary color. Ensure cushion covers are removable and washable for easy maintenance.
- Pillows: Decorative pillows add an extra layer of comfort and style. Choose outdoor-grade decorative pillows with unique textures such as outdoor velvet, linen blends, or durable synthetic fabrics. Mix and match various sizes and shapes – square, lumbar, and bolster pillows – to create an inviting, layered look that offers both back and arm support.
- Shade Options: To fully enjoy your swing throughout the day, especially during peak sun hours, incorporating a shade solution is vital. Consider fitting a custom-made top cover or canopy made from lightweight, UV-resistant, and water-safe fabric. Select colors that harmonize with your porch and swing style. For ease of use and versatility, opt for easy-mount brackets that allow for quick installation and removal. Always ensure the fabric is pulled taut to prevent water from pooling, which can lead to stretching or mold growth. Alternatively, a large, cantilevered umbrella can offer flexible shade without needing to attach directly to the swing structure.
Best Woods for Your Porch Bed Swing
The choice of wood is a fundamental decision when building your porch bed swing, directly impacting its durability, aesthetic appeal, and how much maintenance it will require. Different wood types offer varying levels of resistance to weather, insects, and decay, as well as distinct grain patterns and natural colors. Below is a detailed look at some of the best wood options, helping you make an informed decision based on your budget, desired longevity, and environmental conditions.
When selecting wood, consider its natural properties. Woods with high natural oils or tight grain structures tend to be more weather-resistant. Also, think about whether you plan to stain, paint, or let the wood naturally weather over time. Regardless of your choice, always seal and protect the wood with appropriate outdoor finishes to maximize its lifespan.
| Wood Type | Cost Per Board Foot | Weather Rating | Durability | Best Used For |
|---|---|---|---|---|
| Cedar | $6-8 | High | 15-20 years | Whole structure, natural aesthetic, insect resistance |
| Pine | $2-4 | Medium | 5-10 years | Frame, seat, budget-friendly projects (requires good sealing) |
| Oak | $8-10 | High | 20+ years | Support beams, robust frames, classic look |
| Cypress | $7-9 | Very High | 25+ years | Whole structure, excellent rot and insect resistance |
| Maple | $5-7 | Medium | 15+ years | Decorative parts, smooth finish, good for painting |
| Redwood | $9-12 | Very High | 25+ years | Whole structure, superior resistance to decay and insects, beautiful color |
| Teak | $15-20 | Excellent | 30+ years | Premium builds, exceptional weather resistance, luxurious feel (high cost) |
| Douglas Fir | $3-5 | Medium | 10-15 years | Frame, backing, good strength-to-weight ratio |
Cedar: Known for its beautiful reddish hues and aromatic scent, cedar is naturally resistant to rot, decay, and insect infestation due to its natural oils. It’s relatively lightweight and easy to work with, making it a popular choice for outdoor furniture. While more expensive than pine, its longevity and low maintenance often justify the cost.
Pine: An economical and readily available option, pine is easy to cut, shape, and finish. However, it’s softer and less naturally resistant to the elements. For a pine porch swing, it’s crucial to treat it thoroughly with outdoor-rated stains and sealants, and to maintain these coatings regularly to prevent rot and extend its lifespan. Ideal for DIYers on a budget who are committed to regular maintenance.
Oak: A very strong and dense hardwood, oak is excellent for structural components where durability is paramount. It has a beautiful grain that can be stained to highlight its natural beauty. While highly durable, oak is heavier and harder to work with than pine or cedar, and its cost is on the higher side. White oak, in particular, has good natural resistance to moisture.
Cypress: Often referred to as “the eternal wood,” cypress boasts exceptional natural resistance to rot, insects, and decay, similar to cedar and redwood, but often at a slightly lower price point. It has a distinct grain and can withstand significant exposure to moisture, making it perfect for humid climates or areas prone to heavy rainfall.
Redwood: Highly prized for its striking reddish-brown color and incredible durability, redwood is naturally resistant to insects and decay, making it a top choice for outdoor projects. It’s relatively soft and easy to work with, yet extremely stable. Like cedar and cypress, it can be left unfinished to weather to a graceful silver-gray patina, or sealed to retain its vibrant color. Its premium qualities are reflected in its higher price.
Teak: The gold standard for outdoor furniture, teak is renowned for its unparalleled durability, extreme weather resistance, and luxurious golden-brown appearance. Its high oil content makes it naturally impervious to water, insects, and decay, requiring minimal maintenance. While it comes with the highest price tag, a teak porch swing is an investment that will last for decades, often exceeding 30 years.
Ultimately, the best wood for your porch bed swing will depend on your priorities: budget, expected lifespan, desired aesthetic, and willingness to perform maintenance. Carefully consider these factors before making your selection.
Common Porch Bed Swing Styles
Beyond the basic structure, the style of your porch bed swing allows you to express your personal taste and integrate the swing seamlessly with your home’s architectural style and outdoor decor. From rustic charm to modern minimalism, here are several popular styles, each with distinct features that you can incorporate into your DIY project.
1. Classic Country Style
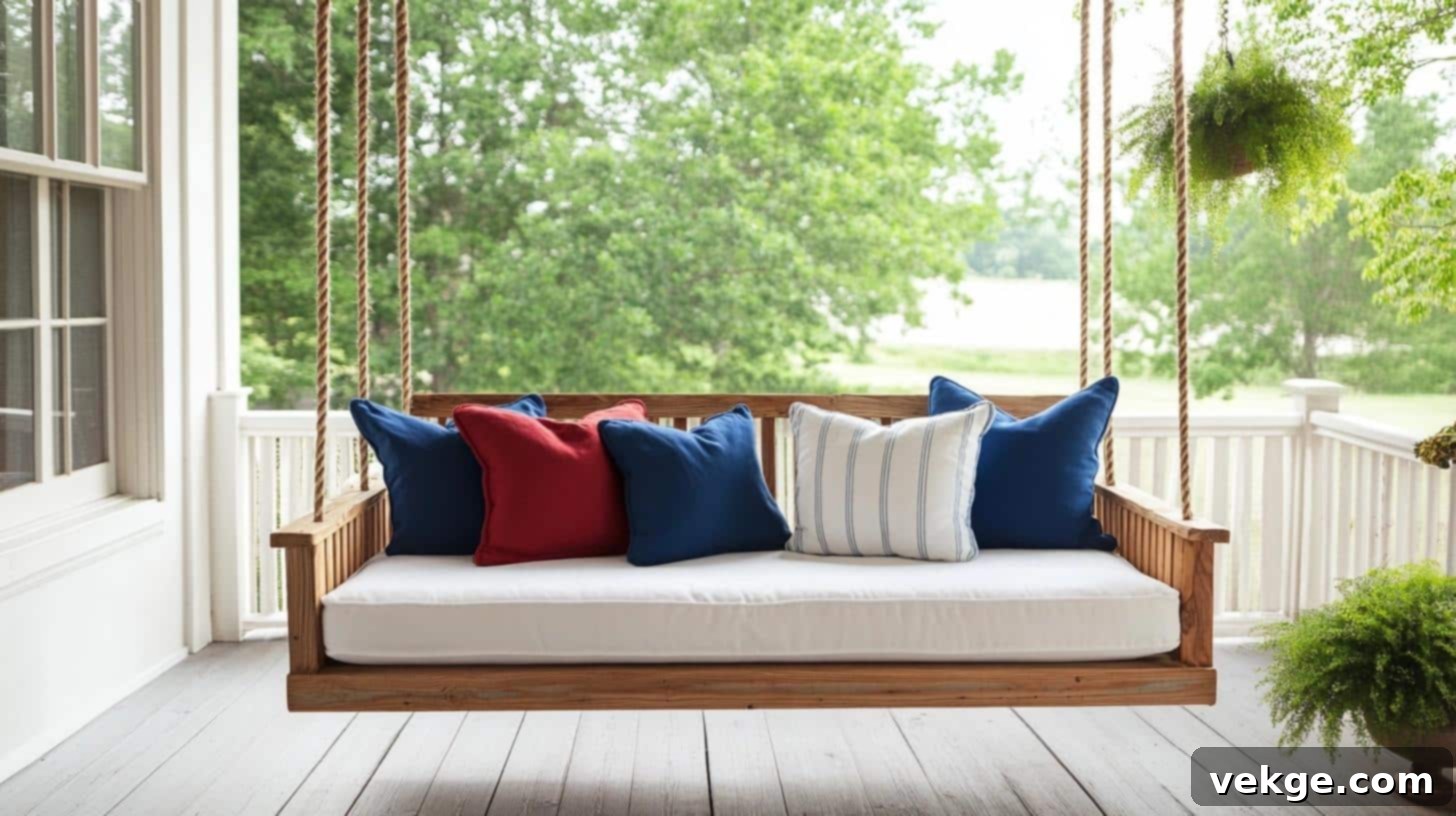
The Classic Country style evokes a sense of nostalgia and warmth, making any porch feel instantly inviting. This timeless look typically features a solid wood frame, often with visible wood grain, finished in a natural stain or a soft, distressed white paint. The back panel is characterized by neat, evenly spaced vertical slats that provide comfortable support and a traditional aesthetic. For hanging, sturdy, natural-fiber cotton ropes or classic metal chains are preferred, adding to the authentic farmhouse appeal. To complete this cozy farm-inspired look, adorn the swing with plush, overstuffed white cushions accented with charming red or blue stripes, or subtle gingham patterns.
2. Beach House Design
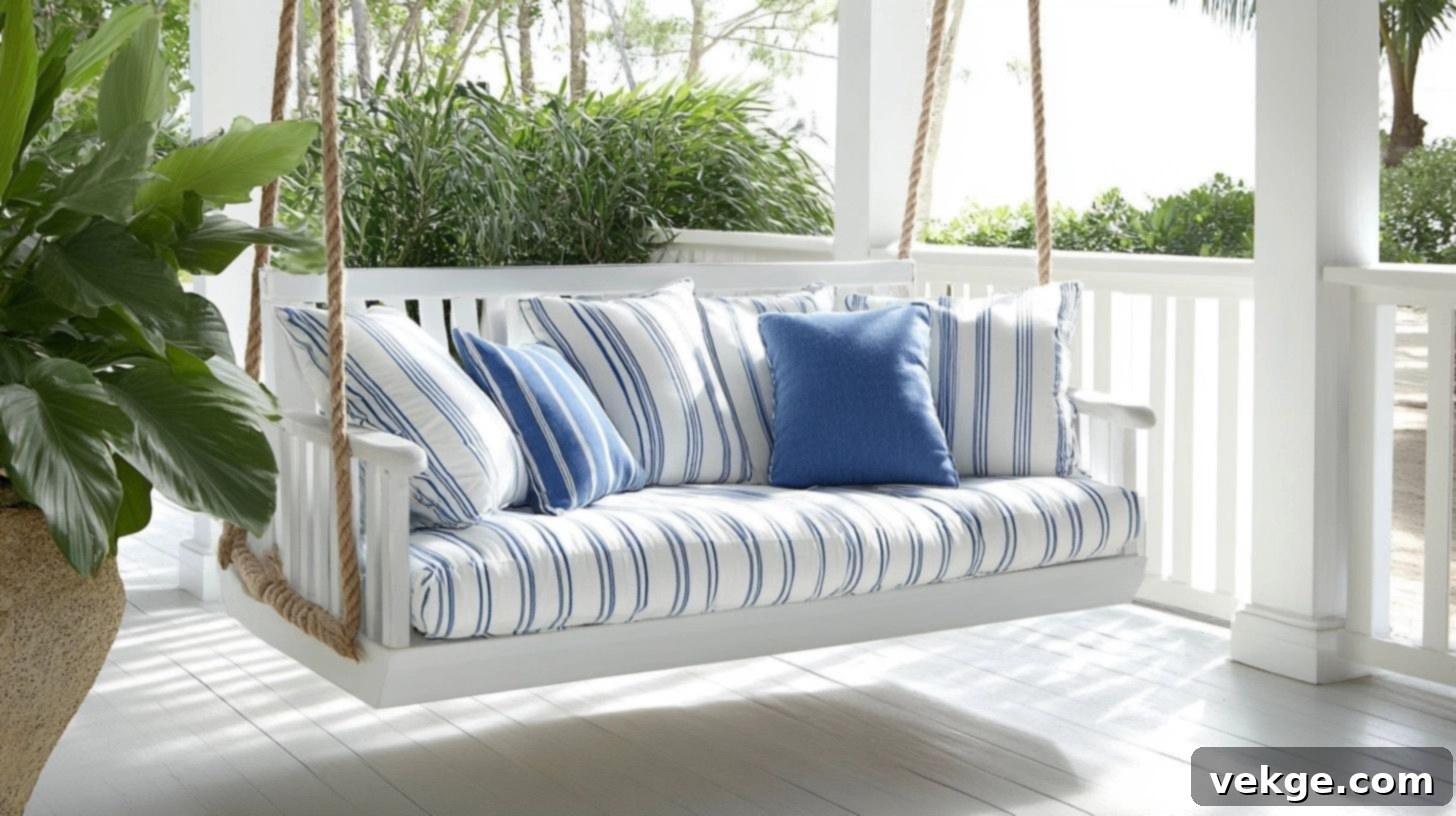
Perfect for creating a light, breezy, and open feel, the Beach House Design transforms your porch into a coastal retreat. The frame of this style is almost always painted in crisp white or a soft, weathered gray, reminiscent of driftwood. Instead of vertical slats, horizontal slats are commonly used to create an airy, expansive look that enhances the coastal vibe. Thick, braided cotton ropes, often left in their natural color, are the ideal choice for hanging, reinforcing the nautical theme. Finish the look with vibrant blue and white striped cushions, perhaps with accents of coral or sandy beige, to perfectly capture that refreshing beach mood.
3. Minimalist Look
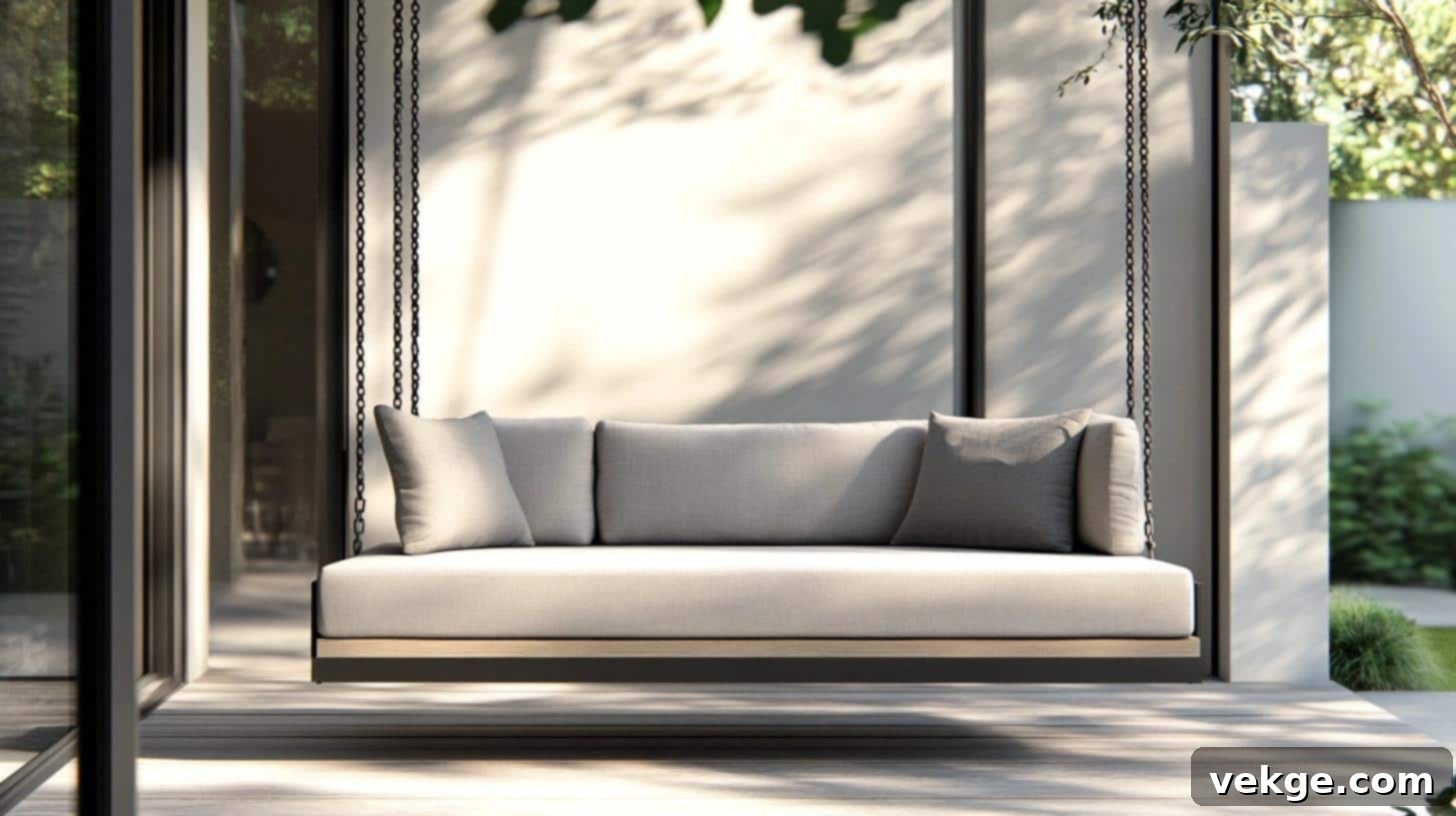
The Minimalist Look is tailored for those who appreciate clean lines, simplicity, and a clutter-free aesthetic. This design emphasizes functionality and understated elegance, with a frame built using straight, unembellished lines and devoid of any ornate details. Instead of traditional slats, slim, unadorned panels are often incorporated for the back and sides, maintaining the streamlined appearance. Black metal chains are the preferred hanging method, chosen for their sleekness and ability to maintain the swing’s simple, modern look. Complement this style with solid-colored cushions in calm, muted shades like charcoal gray, crisp white, deep navy, or natural sand tones to enhance its serene and sophisticated appeal.
4. Traditional Build
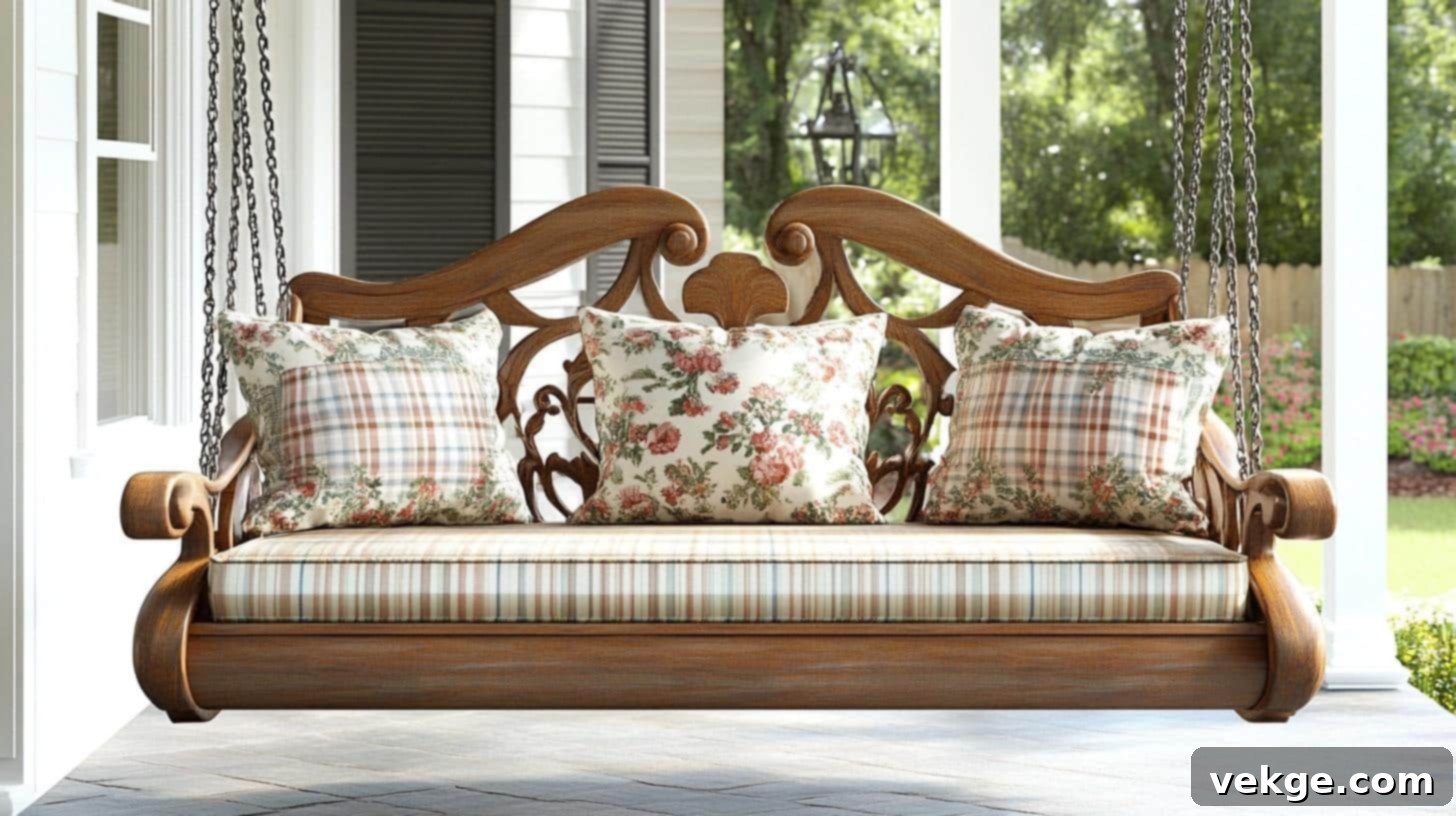
A Traditional Build showcases skilled woodwork and classic design elements, reflecting a sense of enduring craftsmanship. Every part of this swing speaks to detailed attention, often featuring a gently curved back for enhanced comfort and ergonomic support. Side panels might include small, elegant carved details or decorative turned elements that add character without being overly ornate. Standard, robust chains in finishes like antique brass, oil-rubbed bronze, or classic black are typically used for hanging, complementing the timeless aesthetic. Choose cushions with subtle, small-scale prints such as delicate florals, subtle checks, or muted plaids in soft, heritage-inspired tones to complete the refined, traditional ambiance.
5. Cottage Charm
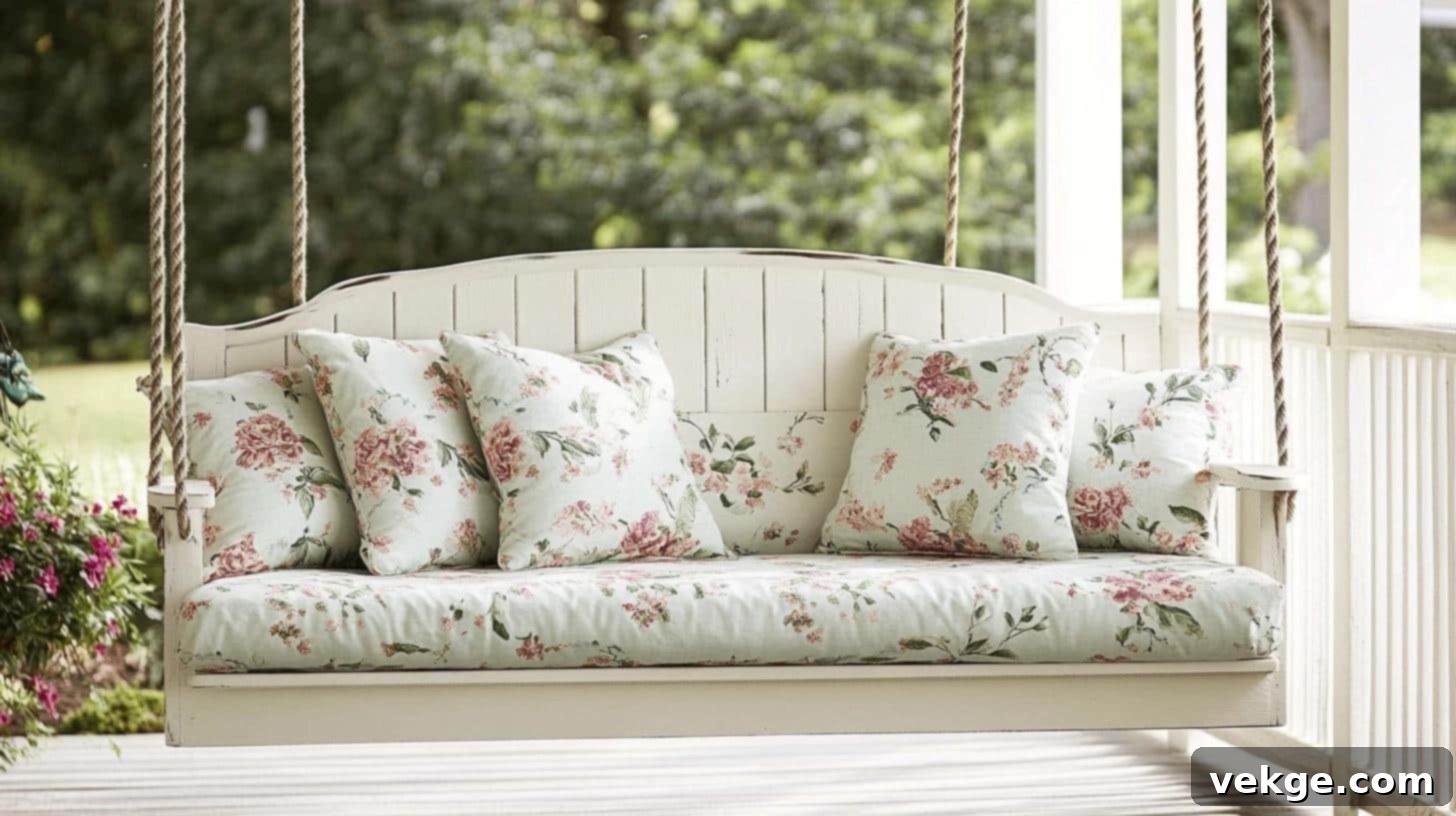
The Cottage Charm style radiates a cozy, welcoming, and slightly whimsical feel, perfect for creating an inviting outdoor nook. This design often features a classic beadboard panel for the back, perhaps with a gentle curve on top, adding a touch of quaint elegance. The swing is typically painted in a soft, often distressed white or pastel color, with subtle wear marks that enhance its character and give it a lovingly aged appearance. For hanging, a charming mix of natural ropes and delicate chains can be used, adding to its eclectic appeal. Adorn the swing with cushions featuring small, cheerful flower prints, delicate stripes, or playful patterns in light, airy colors to complete the enchanting cottage aesthetic.
6. Ranch Style
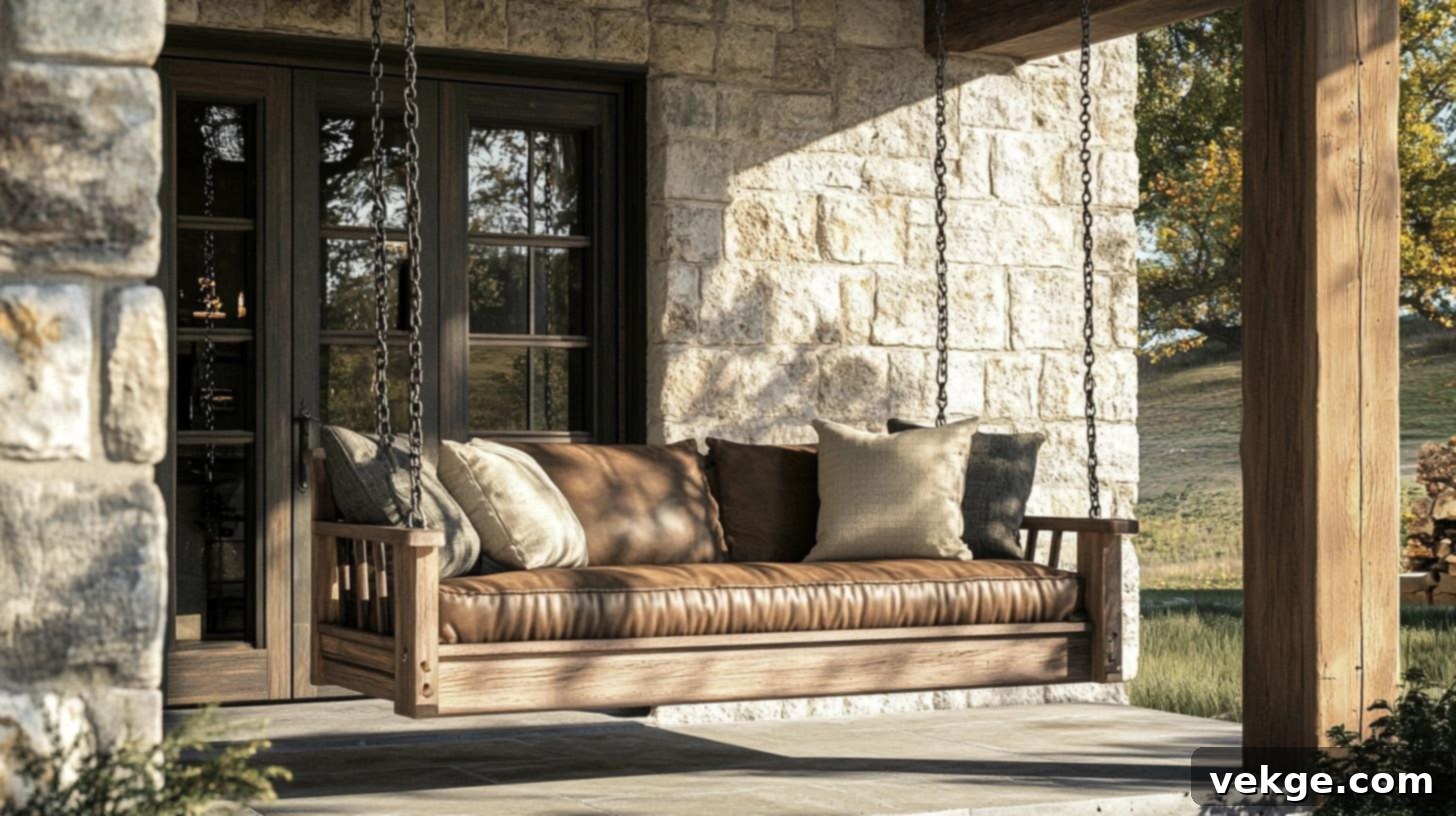
Built with robustness and longevity in mind, the Ranch Style porch swing is designed to be tough and functional for years of reliable use. This style heavily features thick, substantial cuts of wood, emphasizing strength and durability over delicate details. The wood is often kept in its natural state, showcasing its raw beauty and texture, or finished with dark, rich stains that highlight the grain and provide deep, earthy tones. Strong, heavy-duty metal chains, typically in black or dark bronze, are essential for securely holding the weight and complementing the rugged aesthetic. To enhance its durability and comfort, pair this swing with cushions upholstered in hard-wearing materials like brown leather, tough canvas, or sturdy outdoor fabrics in muted, natural colors such as olive green, deep terracotta, or earthy browns.
Essential Care Guide for Your Porch Bed Swing

To ensure your handcrafted porch bed swing remains a beautiful and safe sanctuary for years to come, regular care and maintenance are indispensable. By following a simple routine, you can protect your investment, preserve its beauty, and prevent common issues that arise from outdoor exposure. This proactive approach will extend the life of your swing and keep it looking its best through every season.
- Regular Safety Checks: Make safety a priority with monthly inspections. Take a few minutes to meticulously check all chains, ropes, and hanging hooks for any signs of rust, fraying, or wear. Ensure all screws and bolts are tightened securely, as they can loosen over time with movement and temperature changes. Each season, carefully examine the wood structure for any cracks, splits, or weak spots that could compromise its integrity. Addressing these issues early can prevent more significant problems down the line.
- Weather Protection: Your swing’s longevity heavily relies on adequate weather protection. Ensure the wood is finished with a high-quality, outdoor-rated sealant, stain, or paint designed to withstand UV rays and moisture. Reapply a water-seal coating annually, especially before the rainy or harsh weather seasons, to create a barrier against the elements. Always keep cushions dry during rain, either by bringing them indoors or covering them with a waterproof tarp. During winter months or extended periods of inclement weather, it’s best to store or cover the entire swing with a durable, breathable outdoor furniture cover.
- Daily and Weekly Care: Prevent dirt and grime buildup by performing quick, routine cleans. Gently brush or wipe off leaves, dust, and other debris before it settles and becomes harder to remove. Immediately wipe any spills to prevent staining, especially on wood and cushions. For a more thorough cleaning, prepare a mild soap solution (e.g., dish soap diluted in water) and gently scrub the wood surfaces with a soft brush or cloth. Always rinse thoroughly with clean water to remove any soap residue and, most importantly, dry the swing completely after washing to prevent water spots and mildew growth.
- Cushion Care: Cushions and pillows contribute significantly to comfort and aesthetics, so proper care is essential. Vacuum them weekly to remove loose dirt, dust, and pollen. Address any stains promptly using a spot cleaner recommended for outdoor fabrics, or follow the cleaning instructions on the cushion tags. If your cushions have removable covers, wash them as directed – usually on a gentle cycle with cold water. If the filling inside the cushions becomes flat or lumpy over time, promptly replace it to maintain optimal comfort and appearance. Always opt for outdoor-grade fabrics for covers, as they are designed to resist fading, mildew, and moisture.
- Smart Seasonal Storage: To truly maximize the lifespan of your porch bed swing, strategic storage during harsh weather conditions is crucial. If major storms, heavy snow, or prolonged freezing temperatures are anticipated, consider taking the swing down and storing it. Find a dry, sheltered spot like a garage, shed, or basement. Before storing, give the swing a thorough cleaning and ensure it is completely dry to prevent mold, mildew, or rot from developing during storage. This preventative measure will ensure your swing is fresh and ready for enjoyment when better weather returns.
Note: A quick 5-minute monthly check of all components, combined with these regular care practices, can significantly help prevent the most common problems and ensure your porch bed swing remains a safe, beautiful, and comfortable haven for many years to come.
Conclusion
Building my own porch bed swing was more than just a DIY project; it was a journey that profoundly changed how I experience and appreciate my outdoor space. It transformed an overlooked area into a personal haven, a special spot where everyday moments are elevated and cherished memories are made. From the quiet solitude of morning coffee to lively evening chats with loved ones, this swing has undeniably made every moment spent outdoors better and more memorable. It’s a testament to the power of crafting something with your own hands, infusing it with personal touch, and watching it become an integral part of your home’s story.
Now, with this comprehensive guide at your fingertips, it’s your turn to embark on this rewarding project and create your own perfect relaxation spot. You have all the detailed steps, from thoughtfully selecting the best wood to adding those crucial final touches that bring your vision to life. Take your time, approach each step with care, and always prioritize safety. Don’t be afraid to personalize your swing with colors, finishes, and cushions that perfectly reflect your unique style and complement your home’s aesthetic.
I would absolutely love to see your finished swing! Share your triumphant creations with our community by leaving a comment below with photos or any questions you might have. If you’ve discovered any ingenious building tips of your own, or if you’ve found a unique way to style your swing, please don’t hesitate to share. Let’s learn from each other, inspire creativity, and together create even more cozy, inviting, and truly special outdoor spaces for everyone to enjoy.
Frequently Asked Questions
How High Should a Porch Bed Swing Be?
The ideal height for a porch bed swing ensures both comfort and ease of use. Generally, the bottom of the swing seat should be positioned approximately 17 to 19 inches (43-48 cm) from the floor. This measurement allows most adults to comfortably touch the ground with their feet when sitting, making it easy to get on and off and to initiate the swinging motion. After installation, always test the height by sitting on the swing; your feet should be able to reach the ground without strain. Adjust the chain or rope length as needed until you find your preferred, comfortable height.
How Wide is a Porch Bed Swing?
Porch bed swings are typically designed to accommodate standard mattress sizes, which dictate their width. The most common sizes you’ll encounter or build are:
- Crib size: Approximately 28″ x 52″ (71 cm x 132 cm) – Ideal for small spaces or as a unique, cozy single-person swing.
- Twin size: Approximately 39″ x 75″ (99 cm x 190 cm) – A popular choice, perfect for one person with ample room, or two people snuggled close.
- Full size: Approximately 54″ x 75″ (137 cm x 190 cm) – Offers more generous space, comfortably seating two or providing luxurious lounging for one.
When deciding, consider your available porch space and how many people you anticipate using the swing regularly. Remember to account for extra clearance around the swing (at least 3 feet on each side) for safe swinging motion.
How Much Does It Cost to Build a Porch Swing Bed?
The cost to build a porch swing bed can vary significantly based on the materials you choose and whether you need to purchase new tools. For basic builds, using readily available pine wood and standard hardware, you can expect costs to start around $200-$300. This estimate typically covers the lumber, nails, glue, stain, and hanging hardware. However, if you opt for premium, weather-resistant woods like cedar, cypress, or redwood, or if you incorporate intricate designs and higher-end finishes, the cost can easily push to $500 or even more. Additionally, if you need to buy tools like a miter saw or finish nailer, which are not included in the basic material cost, your initial investment will be higher, though these tools can then be used for future DIY projects.
