Boost Your Home’s Curb Appeal: The Ultimate DIY Garbage Can Enclosure Guide
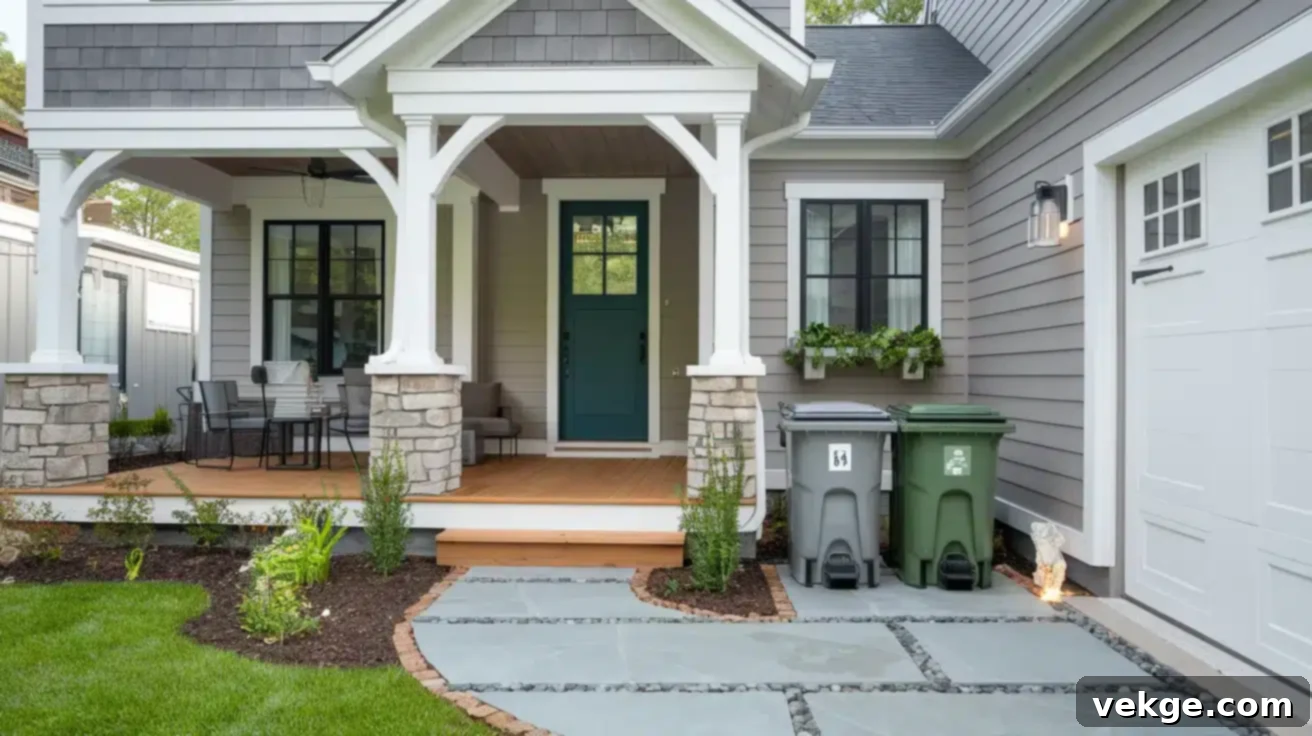
Unattractive garbage cans can significantly detract from your home’s curb appeal, often sitting in plain view of neighbors and guests. No homeowner wants unsightly trash bins to be a prominent feature of their property. They can be knocked over by wind, attracting pests, and creating a general sense of disorder in your outdoor space.
Fortunately, a DIY garbage can enclosure offers an elegant and practical solution. It effectively hides those ugly bins from view, provides crucial protection against strong winds that might otherwise tip them over, deters animals from rummaging through your trash, and ultimately adds a neat, organized look to your outdoor environment.
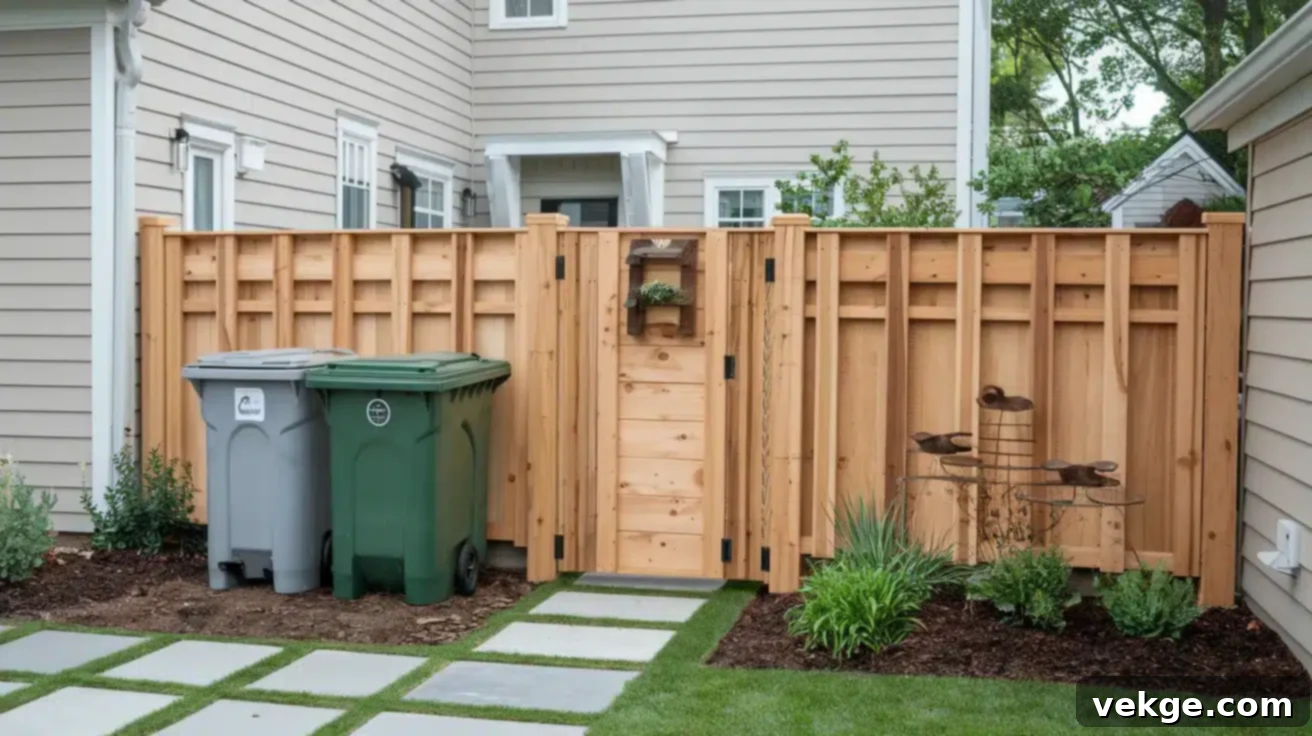
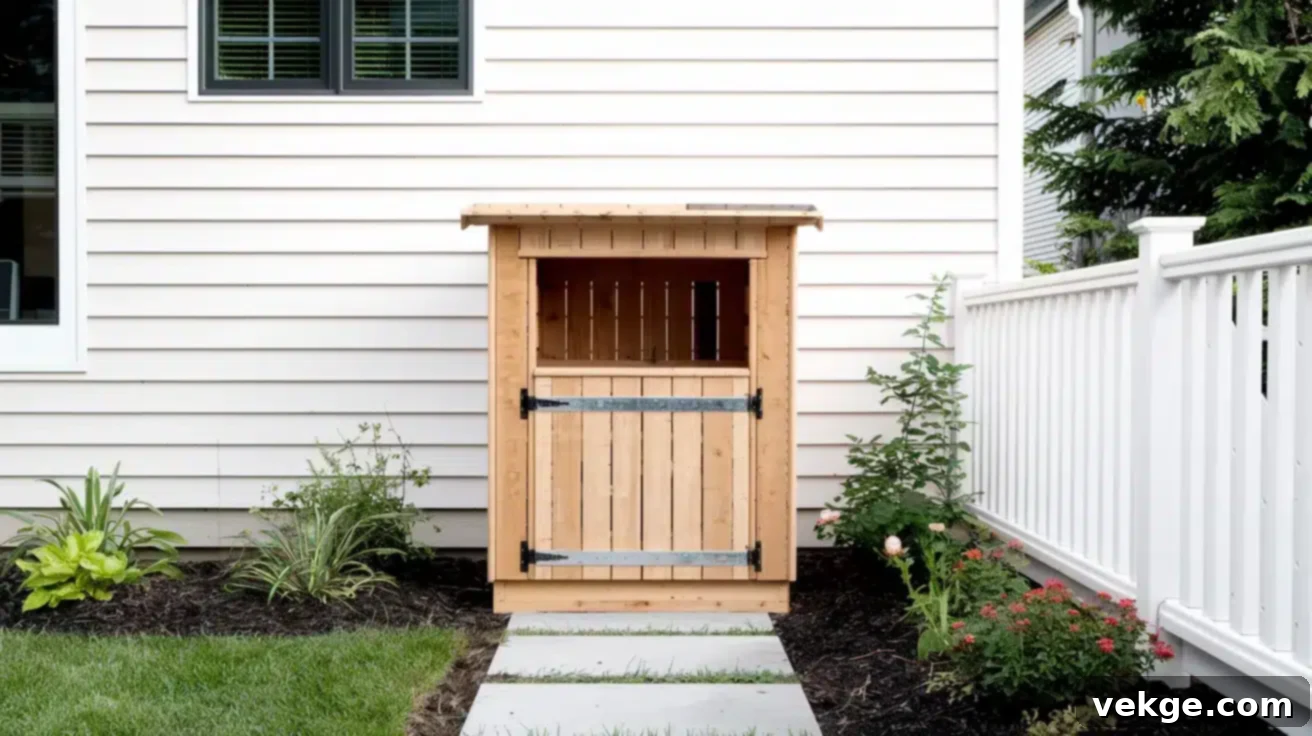
In this comprehensive guide, we’ll walk you through two distinct yet straightforward designs that you can easily build yourself. The first design features a stylish fence-style enclosure, utilizing durable cedar boards supported by sturdy posts set on a paver base. The second option is a more enclosed, box-style structure complete with a slanted roof for efficient water runoff and a convenient access door. Both designs are not only aesthetically pleasing but also highly functional, requiring only basic tools and materials readily available at any local home improvement store. No specialized skills are necessary—just follow our detailed steps, and you’ll quickly transform your property’s appearance for the better.
Planning Your DIY Garbage Can Enclosure Project
Successful execution of any DIY project begins with thorough planning. Taking the time to plan your garbage can enclosure will ensure it meets your specific needs, fits perfectly into your space, and provides long-lasting functionality.
Determine the Right Size for Your Needs
Start by counting the number of garbage cans you regularly use, including any recycling bins. Standard household trash bins typically require at least 2 feet of width each. It’s crucial to add extra space, ideally 4-6 inches, between each can to allow for easy maneuverability. You’ll need sufficient room to pull each can out separately without struggling or bumping into the enclosure. Consider not just your current needs but also any potential future additions, like an extra recycling bin or a compost container. A common mistake is building an enclosure that is just barely big enough, leading to frustration later on.
Measure Your Space and Garbage Cans Accurately
Accurate measurements are paramount. Use a tape measure to get the exact height, width, and depth of your tallest and widest bins. When planning the enclosure’s height, add a minimum of 6-8 inches of clearance above your tallest can to ensure the lid opens freely and there’s room for air circulation. For depth, aim for at least 3 feet to accommodate most standard bins and allow for easy placement and retrieval. If you’re building an enclosure for three cans, a width of approximately 8 feet (including spacing) is a good starting point. Always measure twice and cut once to avoid costly mistakes.
Choose an Appropriate Location
Selecting the ideal location is key for convenience and aesthetics. Pick a spot that is reasonably close to your house, preferably near your driveway or garage, to minimize the distance you have to carry trash. Look for level ground or be prepared to meticulously level the area before construction begins; an uneven foundation can compromise the stability and longevity of your enclosure. While you want the spot to be accessible, it shouldn’t be overly prominent or obstruct views. Before any digging, always check for underground utility lines to prevent accidental damage or injury. A call to your local utility company can help identify these lines.
Consider Access Requirements for Daily Use
Think critically about how you and your family will interact with the garbage cans daily. The path to your enclosure should be smooth and unobstructed, especially if you’ll be rolling heavy bins. For optimal convenience, orient the enclosure’s opening towards your home. This makes it easier to access and dispose of trash. Crucially, ensure there’s enough room to roll the bins easily from the enclosure to the curb on collection day. If you live in an area with significant snowfall, plan for winter conditions; the enclosure should be accessible even with snow accumulation, and its design should ideally shed snow effectively without blocking access.
Materials and Tools for Your DIY Garbage Can Enclosure
Gathering all your materials and tools before you begin will streamline the construction process, making your DIY project smoother and more enjoyable. Both enclosure designs utilize common lumber and hardware, ensuring accessibility for most DIYers.
- 3 pressure-treated 4″x4″x8′ posts (for fence-style)
- 14 cedar 1″x6″x8′ boards (for fence-style)
- 3 bags of fast-setting concrete
- 4 bags of paver base
- 4 bags of leveling sand
- 4 bags of multi-purpose sand
- 18 concrete stepping stones (16″x16″)
- Landscaping weed fabric
- 1.5″ exterior wood deck screws (1 box)
- 5 boards of 2″x4″x8′ lumber (for box-style frame)
- 13 boards of 1″x4″x8′ lumber (for box-style slats)
- 1 box of 2½” outdoor-rated pocket hole screws
- 1 box of 1¼” exterior wood screws
- 1 box of 3″ decking screws
- 2-3 hinges for door
- 1 latch for door closure
- Primer and paint or exterior stain/sealer
- Drill (cordless is ideal)
- Miter saw or circular saw (for precise cuts)
- Post hole digger (for fence-style posts)
- Shovel
- Measuring tape
- Level (a 4-foot level is highly recommended)
- Pencil for marking
- Hammer or rubber mallet
- Safety glasses (always wear for eye protection)
- String line and stakes for layout
Tip: It’s always a good idea to buy slightly more materials than you estimate, accounting for any mistakes or miscuts. Most home improvement stores allow returns of unused, unopened items, saving you time and a trip back later.
Constructing a Garbage Can Fence Enclosure

This fence-style enclosure provides a simple yet elegant screen for your trash bins, blending seamlessly into your garden or yard. Its open design allows for excellent airflow and easy access.
Step 1: Preparing the Foundation
Begin by marking the precise area for your enclosure using stakes and a string line. Once the perimeter is defined, use a shovel to carefully remove all grass and vegetation from within this area. Dig down approximately 4 inches to create a shallow trench. Use a rake to meticulously level the ground, ensuring a flat and even base for your pavers. Next, lay down a layer of landscaping weed barrier fabric over the entire excavated area, overlapping seams by at least 6 inches to prevent weeds from growing through your finished foundation. Spread 2 inches of paver base evenly across the fabric. Lightly wet the paver base, then compact it firmly with a hand tamper or plate compactor to create a solid, stable foundation. Follow with a 1-inch layer of leveling sand, smoothing it carefully with a straight board or screed to maintain a perfectly level surface. Finally, place your concrete stepping stones side by side, pressing them firmly into the sand. Minimize any gaps between stones for a clean look and improved stability. Tap each stone gently with a rubber mallet to ensure it is fully seated and level. Finish by sweeping multi-purpose sand into the gaps between the stones and watering lightly to help the sand settle and lock the pavers in place.
Step 2: Installing the Posts
Accurately mark the exact locations for your 4×4 posts. Using a post hole digger, excavate holes that are 24 inches deep and approximately 10 inches wide. These dimensions ensure adequate stability for your posts. Carefully set each 4×4 post into its respective hole. Pour one bag of dry, fast-setting concrete around the base of each post. While holding the post perfectly straight, use a level to verify its plumbness from all angles. Once aligned, add water to the dry concrete according to the manufacturer’s instructions to activate it. If necessary, use scrap wood or temporary bracing to hold the posts straight and plumb while the concrete sets. Allow the concrete to cure for at least 4 hours, or as recommended by the product, before proceeding to the next step to ensure maximum stability.
Step 3: Attaching Cedar Boards
Once your posts are securely set, mark a consistent height of 48 inches up from the ground on each post. This will serve as the top edge for your first cedar board. Align the first cedar board with this mark and securely attach it to the posts using two 1.5-inch exterior wood deck screws at each post connection point. To create uniform and aesthetically pleasing gaps between the boards, use a 3/4-inch spacer. This spacing allows for proper drainage, air circulation, and accommodates any natural expansion and contraction of the wood. Work your way downward, attaching each subsequent board with the proper spacing, ensuring they are level and securely fastened with screws. You may need to cut some boards to fit the specific length of your enclosure, using a miter saw or circular saw for clean cuts.
Step 4: Finishing Touches
With all the boards in place, it’s time for the final details. Use a saw to trim any excess post height, creating a clean, uniform top edge. Carefully sand any rough edges on the cedar boards and posts to prevent splinters and create a smooth finish. To protect the wood and enhance its appearance, apply an exterior wood stain that either complements your home’s existing colors or provides a natural, appealing look. Ensure all wood surfaces are thoroughly sealed to guard against moisture, UV damage, and rot. For an added touch of refinement, consider installing decorative post caps. If your foundation requires further stabilization or simply for aesthetic enhancement, placing decorative rocks or gravel around the base of the enclosure can complete the look.
Box-Style Enclosure Construction Steps

The box-style enclosure offers a more complete concealment of your bins, with a solid structure and a hinged door for easy access. Its slanted roof is designed for optimal rainwater runoff.
Step 1: Building Side Frames
Start by cutting 2×4 lumber to create two identical side frames. These frames will define the overall shape of your enclosure. To achieve the slanted roof for water runoff, make the front posts of each side frame shorter than the back posts. A common angle for roof pitch is 7°, which provides effective drainage. Cut the top horizontal pieces of your frames at this 7° angle to match the slope. For strong and secure joints, drill pocket holes into the ends of all horizontal frame pieces. Assemble these side frames using 2½” outdoor-rated pocket hole screws, ensuring that all corners are square and the frames are stable. Repeat this process for the second side frame.
Step 2: Connecting the Frames
Once both side frames are complete, you’ll connect them to form the main structure of your enclosure. Cut three additional 2x4s to serve as cross supports. Position two of these supports at the very top—one at the front and one at the back—connecting the two side frames. The third cross support should be placed near the bottom of the back side, ensuring it leaves enough space at the very bottom to prevent direct ground contact. This spacing protects the wood from moisture and prevents rot. Securely attach these cross supports to the side frames using either pocket hole screws or sturdy 3″ decking screws driven through the sides. These connections will create a robust and stable frame for your enclosure.
Step 3: Building the Door Frame
Carefully measure the exact dimensions of the front opening of your newly assembled enclosure frame. Based on these measurements, cut 2×4 lumber to construct the door frame. Remember to allow a small gap of about 1/8 to 1/4 inch on all sides of the door frame. This small clearance is essential for smooth and unhindered operation, preventing the door from sticking. Just as with the side frames, drill pocket holes in the ends of the horizontal pieces of the door frame for strong joinery. Assemble the door frame using screws, then test its fit within the main enclosure opening to ensure it swings freely before moving on.
Step 4: Applying Base Finish
Before installing any of the 1×4 slats, it is highly recommended to paint or stain all frame pieces. This step is considerably easier and allows for more thorough coverage than attempting to paint after assembly. Begin by applying an exterior primer to all surfaces of the frame pieces. Primer ensures better adhesion of the topcoat and provides an additional layer of protection against the elements. Once the primer is completely dry, apply your chosen exterior paint or stain. Ensure you paint both sides and all edges of each piece for maximum protection and a professional finish. Allow ample drying time between coats and before proceeding to the next step.
Step 5: Installing Slats
Now, it’s time to add the aesthetic and functional cladding to your enclosure. Cut the 1×4 slats for the sides of the enclosure. Due to the sloped top, the length of these slats will vary. It’s often easiest to start at the top and work your way down, measuring and cutting each slat individually to achieve the correct length and angle. Maintain a consistent 1/4″ gap between each board; this spacing is crucial for promoting air circulation, allowing water to drain, and accommodating natural wood expansion. Attach the slats securely to the frame using 1¼” exterior wood screws. Once the sides are complete, cut and attach the slats for the door frame, again maintaining the 1/4″ gaps. Finally, install the roof slats, ensuring they also have 1/4″ gaps to facilitate drainage and prevent water pooling.
Step 6: Adding Door Hardware
The final construction step involves installing the door hardware. Begin by attaching 2-3 sturdy exterior-rated hinges to one side of the door frame. Position the door carefully within the main enclosure opening, ensuring it is level and the gaps are even on all sides. Securely screw the other side of the hinges to the main enclosure frame. Test the door’s swing repeatedly to ensure it opens and closes smoothly without binding. Adjust the hinges as needed for perfect alignment. Finally, install a durable latch to keep the door securely closed, protecting your bins from wind and animals. For added convenience, you may also choose to install a handle on the door.
Maintenance Tips for Your Outdoor Enclosure
To ensure your DIY garbage can enclosure remains functional and attractive for years to come, regular maintenance is essential. Simple steps can significantly extend its lifespan and maintain its appearance.
Annual Sealing and Staining: Apply a high-quality exterior sealant or wood stain yearly to protect all wooden surfaces from the harsh effects of weather, including UV rays, rain, and moisture. This prevents premature wear, rot, fading, and maintains the wood’s natural beauty or painted finish.
Regular Inspection: Periodically inspect your enclosure for any signs of wear and tear. Check for loose screws, nails, or hinges, and tighten or replace them promptly to prevent structural instability or accidents. Look for any signs of wood rot, cracks, or pest damage, and address these issues early to prevent them from worsening.
Thorough Cleaning: Clean your outdoor enclosure regularly to maintain its pristine appearance. Use appropriate cleaners for your materials; for wood, a mild soap and water solution with a brush can remove dirt and mildew. For tougher stains, a gentle pressure wash can be effective, but be careful not to damage the wood. Clearing away leaves, dirt, and debris from the roof and inside the enclosure prevents moisture buildup and keeps odors at bay.
Winter Preparation: Prepare your enclosure for winter by ensuring it is clean and any vulnerable areas are sealed. Clear away any accumulated debris that could trap moisture and cause damage during freezing temperatures. If your design includes a door, ensure it closes securely to protect the bins from snow and ice. Consider covering the top of the enclosure if heavy snowfall is common, to minimize snow accumulation and potential stress on the structure.
Customization Ideas for Your Space

Your DIY garbage can enclosure doesn’t just have to be functional; it can also be a stylish addition to your outdoor living space. Here are some ideas to personalize and enhance its look:
Matching Existing Home Features: Integrate your enclosure seamlessly by choosing colors, textures, or materials that perfectly complement the rest of your home. If your house has brick accents, consider incorporating a brick base or elements into your enclosure. Match the paint color to your exterior trim, or use the same type of wood (e.g., cedar, redwood) and stain as your deck or fence. This creates a cohesive and well-designed look.
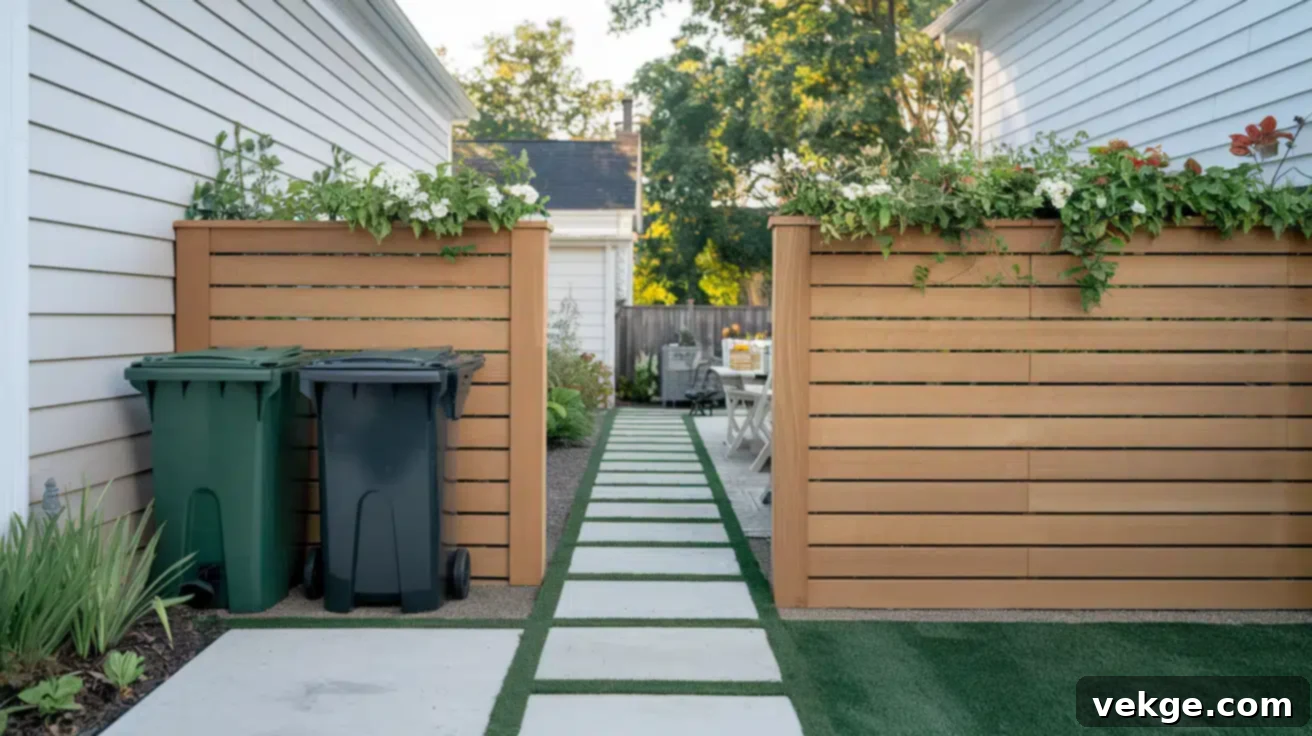
Adding Personalized Elements: Infuse your unique style by incorporating decorative items or functional additions. Attach a small trellis to one side for climbing plants like ivy or clematis, adding a touch of greenery. Mount your house numbers or a decorative plaque on the door. Consider adding small hooks inside the door for hanging garbage bags or cleaning supplies. Planters filled with colorful flowers or herbs can be placed on top of a box-style enclosure, or along the base of a fence-style one, further enhancing its aesthetic appeal.
Functional Improvements: Enhance the utility and convenience of your enclosure with clever upgrades. Install solar-powered LED lights on the interior or exterior for easy access during the evening. Consider adding a small, sturdy shelf inside for storing garbage bags, gloves, or even a small scoop for cleaning. You could also integrate separate compartments for recycling bins, making waste separation more organized. Self-closing hinges on the door can be a practical addition, ensuring the enclosure is always shut even if forgotten.
Design Variations and Material Choices: Don’t feel limited to wood. Play with different layouts and styles, mixing modern elements with traditional ones. Explore using composite decking boards for a low-maintenance option, or corrugated metal panels for a more industrial, modern look on the roof or side panels. Experiment with horizontal versus vertical slat orientations for different visual effects. For a more rustic feel, use reclaimed wood. By playing with various materials and design elements, you can create an inviting atmosphere that truly reflects your personal taste and complements your home’s architecture.
Common Mistakes to Avoid
Even simple DIY projects can go awry without careful attention to detail. Being aware of common pitfalls can save you time, money, and frustration.
- Incorrect Measurements: One of the most frequent errors is failing to measure accurately. An enclosure that’s too small means your garbage cans won’t fit, or will be extremely difficult to get in and out. An enclosure that’s too large wastes valuable space and materials. Always measure both your bins and the intended space meticulously before purchasing materials or beginning construction. Double-check all measurements before making any cuts.
- Choosing the Wrong Materials: Using indoor-grade wood or untreated lumber for an outdoor structure is a recipe for disaster. Such materials are not designed to withstand the elements and will quickly succumb to rot, warping, or pest damage, leading to premature wear and tear. Always select durable, weather-resistant materials like pressure-treated lumber, cedar, redwood, or composite decking, which are specifically designed for exterior use.
- Neglecting Drainage: Without proper drainage, water can accumulate inside the enclosure, leading to several problems. Stagnant water can promote mold and mildew growth, cause wood rot, and create unpleasant odors. Furthermore, it can damage the structure itself and even your bins. Ensure your design includes gaps between slats (as demonstrated in our plans) and consider a slightly sloped base or a gravel floor to allow water to escape effectively.
- Skipping Ground Preparation: Rushing the foundation work can undermine the entire project. If you don’t level the ground properly or install a weed barrier, the foundation can shift over time, leading to an uneven, unstable, and unsightly structure. Weeds can also grow up through the base, making the enclosure look unkempt. Always take the time to clear, level, and prepare the ground with paver base and weed fabric as outlined in the instructions.
- Forgetting Access Considerations: An enclosure, no matter how beautiful, is useless if it’s difficult to access. Forgetting to account for easy disposal of trash and retrieval of bins on collection days can lead to frustration. Ensure your design incorporates a wide, easily operable door or gate. Think about the full swing radius of the door and make sure there’s enough clearance for both you and your waste collectors to maneuver the bins effortlessly.
- Poor Post Installation (for fence-style): For the fence-style enclosure, the stability of the entire structure hinges on the proper installation of its posts. Posts that are not set deep enough, not adequately braced, or not properly anchored in concrete will lead to a wobbly, unstable, and potentially unsafe structure. Always dig holes to the recommended depth, ensure posts are plumb with a level, and allow concrete to cure fully before adding the rest of the structure.
Conclusion
Building a DIY garbage can enclosure is a highly rewarding and straightforward project that significantly enhances your yard’s appearance by keeping unsightly bins out of view. Whether you opt for the elegant fence-style design with cedar boards and a paver base or the more robust box-style enclosure with a slanted roof and door, both options provide practical, durable solutions to conceal your garbage cans and bring order to your outdoor space.
The key to a successful project lies in meticulous planning, accurate measuring, and the careful selection of appropriate, weather-resistant materials. By following our detailed step-by-step instructions, even those with basic DIY experience can achieve professional-looking results. Remember that thoughtful planning for size, location, and accessibility will ensure your enclosure is both functional and convenient for everyday use and waste collection.
Beyond construction, maintaining your enclosure is vital for its longevity and continued appeal. Commit to applying a protective sealant annually, performing regular inspections for wear, and cleaning the structure to prevent debris and odors. Furthermore, don’t shy away from customizing your enclosure; by matching it to your home’s existing features or adding personalized elements like planters or decorative hardware, you can transform a simple utility structure into an attractive, integrated part of your landscape. With these efforts, your DIY garbage can enclosure will not only boost your home’s curb appeal but also provide a durable, organized solution for years to come.
