Revitalize Your Kitchen: The Ultimate Guide to Updating Cabinets Without Replacing Them
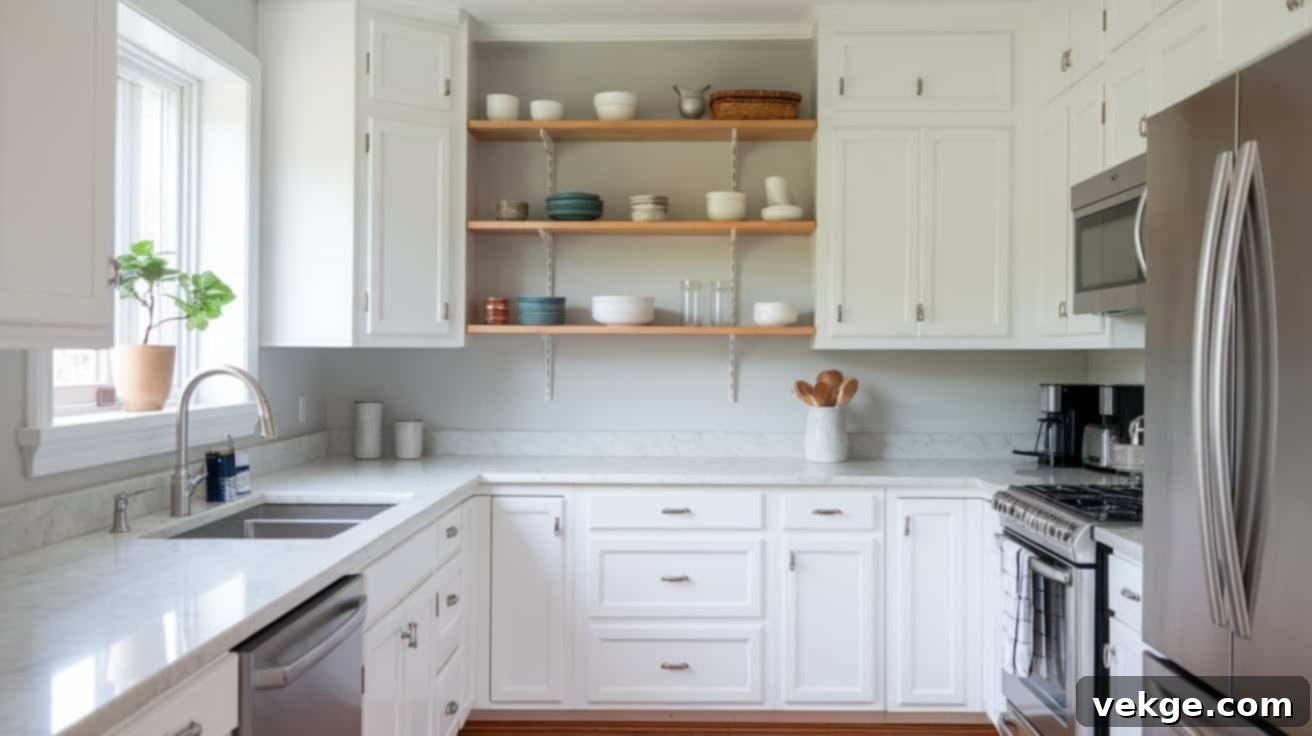
Are you dreaming of a refreshed kitchen but worried about the high costs and disruption of a full renovation? The good news is that a complete cabinet replacement is often unnecessary. Many homeowners mistakenly believe that worn or outdated cabinets automatically require an expensive overhaul. In reality, with a little strategic planning and effort, you can transform your existing kitchen cabinets, giving your entire space a stunning new look and feel without breaking the bank.
This comprehensive guide will walk you through everything you need to know about updating your kitchen cabinets effectively and affordably. We’ll cover how to assess the condition of your current cabinets, select the most impactful upgrades, and execute various DIY projects step-by-step. From a fresh coat of paint and new hardware to more significant structural enhancements like adding trim or swapping out door fronts, you’ll discover practical ways to save money, time, and reduce waste.
Embrace the satisfaction of a DIY project that not only enhances your home’s aesthetics but also boosts its functionality and value. Ready to breathe new life into your kitchen? Let’s begin by evaluating your existing cabinets and charting a course for an impressive, budget-friendly makeover. With careful attention and these expert tips, your kitchen is destined to shine.
Evaluating Your Cabinets: The Critical First Step for a Successful Makeover
Before diving into any aesthetic changes, a thorough inspection of your cabinet’s structural integrity is paramount. Start by carefully examining the frames, doors, and drawer fronts. These are the “bones” of your cabinets, and their condition dictates the scope of your renovation. Run your hands along all surfaces, feeling for soft spots, swelling, or discolouration that could indicate water damage. Pay close attention to areas around the sink and dishwasher, which are often prone to moisture.
Different cabinet materials react differently to various updates and show wear in unique ways. Solid wood cabinets are highly versatile and generally respond exceptionally well to sanding, painting, and staining. Their durability makes them ideal candidates for a complete refinish. Laminate cabinets, while durable, require specific primers to ensure paint adhesion and gentle sanding to prevent damage to the veneer. MDF (Medium-Density Fiberboard), often found in painted cabinets, also needs delicate sanding to avoid compromising its smooth surface, which can swell if exposed to too much moisture or aggressive sanding.
Next, focus on the functional hardware. Open and close every door and drawer. Listen for any squeaking hinges or grinding drawer slides. Observe if doors sag or rub against the frame, and if drawers stick or wobble when extended. Sometimes, simply replacing worn-out hinges and drawer slides can dramatically improve the functionality and feel of your cabinets, making them operate like new. Check the existing pulls and knobs for looseness or damage – these small details can significantly impact the overall user experience.
Finally, inspect the interior of each cabinet. Open them up and take a deep breath; a musty smell could point to hidden moisture issues or mould. Look into the corners and along the back panels for water stains, mildew, or warping. Even if the exterior appears worn, a strong, well-constructed interior indicates that your cabinets are excellent candidates for a refresh rather than a full replacement. Document any issues with notes and photos to help you plan your repairs effectively.
Crafting a Plan for Your Cabinet Makeover: Budget, Timeline, and Tools
A successful cabinet makeover hinges on meticulous planning. Begin by establishing a realistic budget. Research the costs of materials such as sandpaper, primer, paint, brushes, new hardware, and any repair supplies. It’s always wise to add a 20-25% contingency to your budget for unexpected expenses or supplies you might forget. Small cosmetic updates, like painting and new hardware, might range from $200 to $500, depending on cabinet count and material quality. More extensive projects involving a full repaint, hardware, and minor repairs can typically range from $400 to $1,000 for a standard kitchen, offering significant savings compared to a full replacement.
Next, develop a detailed timeline. Consider the size of your kitchen and the complexity of your chosen updates. A basic paint job for a moderately sized kitchen can often be completed over a dedicated weekend, but remember that paint requires significant drying time between coats and before reassembly. If you plan for repairs, refinishing, or adding new features like trim, allocate additional days or weekends. Breaking the project into manageable phases can help prevent overwhelm.
Gathering your tools and materials in advance will streamline the entire process. Essential items typically include:
- Screwdrivers (Phillips and flathead): For removing hardware and hinges.
- Sandpaper (medium-grit ~120, fine-grit ~220): For surface preparation.
- High-quality paint brushes and rollers: Crucial for a smooth finish.
- Painter’s tape and drop cloths: To protect surrounding areas.
- Wood filler or epoxy putty: For repairs and filling old hardware holes.
- Cleaning supplies: Degreaser, dish soap, warm water, tack cloths.
- Primer (appropriate for your cabinet material): Essential for adhesion and coverage.
- Cabinet-grade paint or stain: Choose a durable, washable finish.
- New cabinet hardware (knobs, pulls, hinges): For an updated look and improved function.
- Personal protective equipment (PPE): Face mask, safety glasses, gloves for sanding and painting.
Before disassembling anything, label each door and drawer front with a corresponding number or letter (e.g., using painter’s tape on the inside). Take detailed photos of their original positions, especially if you have custom sizing or complex hinge setups. This crucial step will simplify the reassembly process, ensuring everything goes back exactly where it belongs.
Transforming Old Kitchen Cabinets Without Replacing Them: 9 Impactful Strategies
1. Giving Cabinets a Fresh Look with Paint: The Ultimate DIY Makeover
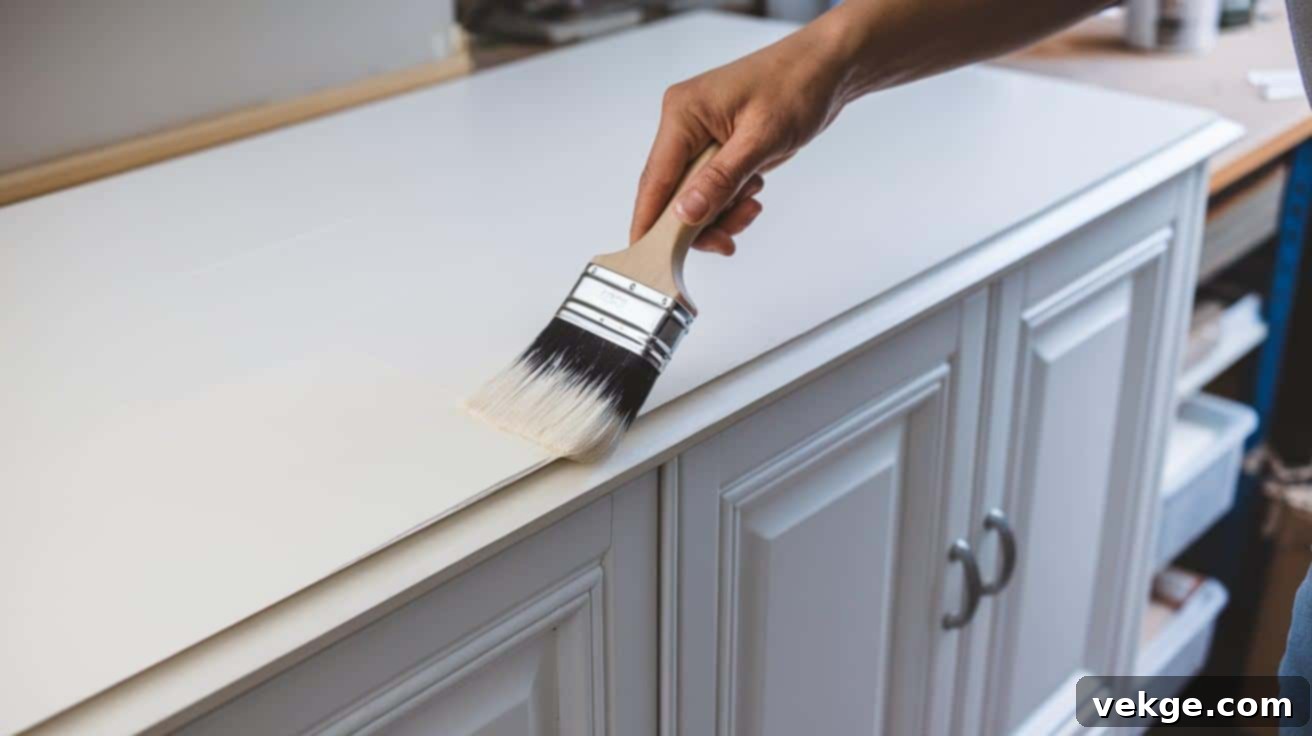
Painting is arguably the most transformative and cost-effective way to update your kitchen cabinets. The choice of paint type significantly impacts your results and the longevity of your finish. Chalk paint offers a unique, soft, matte, and often distressed look, adhering well with minimal prep. Latex or acrylic latex paint is a popular choice for its good coverage, easy cleanup, and quick drying time, but opt for a higher-quality, durable enamel finish specifically designed for cabinets. Oil-based paint creates a hard, durable shell that resists chips and scuffs, making it excellent for high-traffic areas, though it requires more ventilation and mineral spirits for cleanup.
Preparation is the key to a professional-looking paint job. Start with thoroughly cleaning all surfaces. A mixture of dish soap and warm water, or a specialized degreaser, will remove grease, grime, and old food residues. Let the cabinets dry completely before proceeding. Next, lightly sand each surface with medium-grit (120-150) sandpaper to de-gloss and create a profile for the primer to adhere to. For laminate or previously painted surfaces, a fine-grit (220) sandpaper is usually sufficient. After sanding, meticulously wipe away all dust with a tack cloth or a damp cloth, allowing it to dry fully.
Applying the right primer is non-negotiable for durability and even colour. For wood cabinets, a stain-blocking primer is essential to prevent wood tannins from bleeding through. For laminate or MDF, a bonding primer is crucial for superior adhesion. Apply thin, even coats of primer, using a good quality brush or foam roller to avoid streaks. Allow each coat to dry completely according to manufacturer instructions. Lightly sand between coats with 220-grit sandpaper and remove dust to achieve a silky-smooth base for your paint.
When painting, apply paint in thin, even layers. Use high-quality brushes for detailed areas and a fine-finish foam roller for flat surfaces to achieve a smooth, professional look. Always work in one direction to maintain consistency and prevent brush marks. Allow each coat to dry fully before applying the next, typically 4-6 hours, or overnight. Lightly sanding with 320-grit sandpaper between paint coats can further enhance smoothness. For maximum durability and protection against daily wear and tear, consider adding one or two coats of a clear, water-based polyurethane topcoat, especially on high-traffic areas like lower cabinets and drawer fronts.
2. Restoring the Natural Beauty: Refinishing & Restaining Wood Cabinets
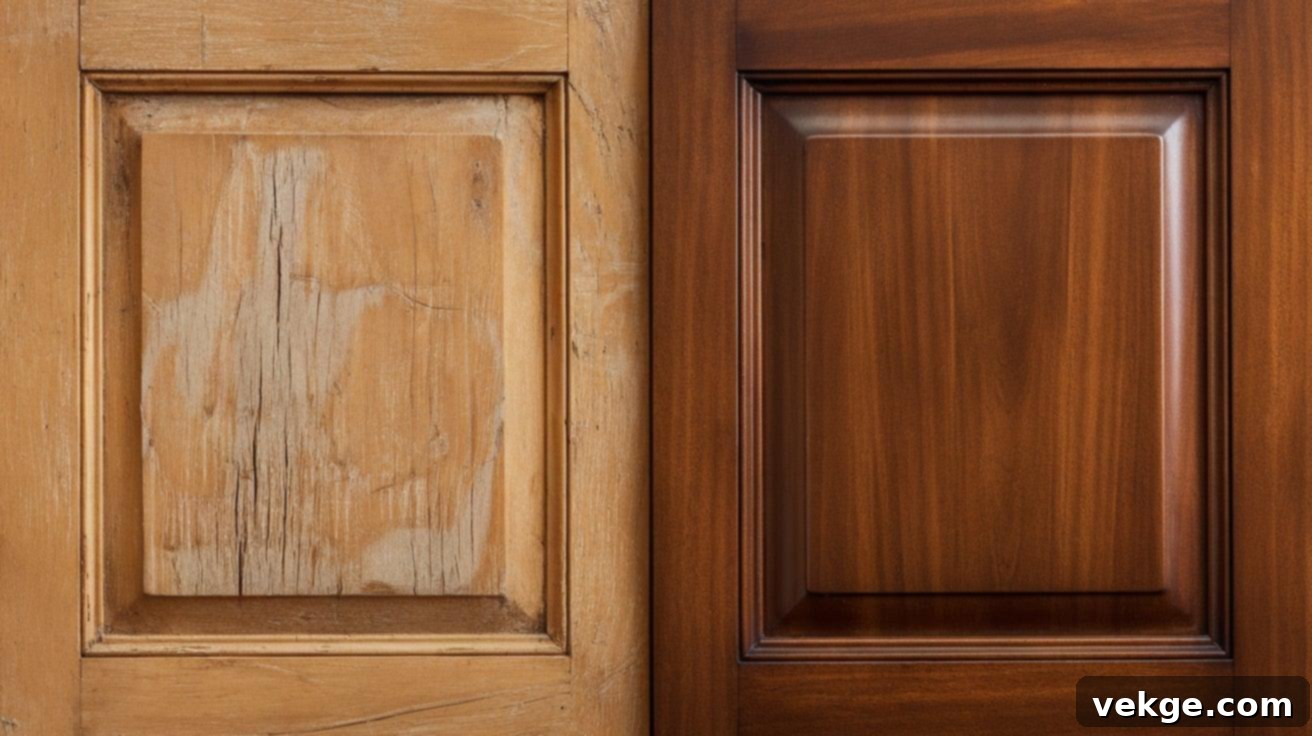
If your kitchen boasts solid wood cabinets with attractive grain, refinishing or restaining is an excellent alternative to painting. This method is ideal for cabinet materials like oak, maple, cherry, or birch, allowing their inherent beauty to shine through. Refinishing can dramatically change the tone of your kitchen while preserving the natural texture and character of the wood.
Before committing to a stain colour, always test it on an inconspicuous area of your cabinet (like the inside of a door) or on a scrap piece of similar wood. Consider colours that complement your existing flooring, countertops, and backsplash. Warm, natural tones often work best in kitchen spaces, creating a timeless and inviting atmosphere, but darker, richer stains can add a touch of modern sophistication.
The first step in refinishing is to remove the old finish. This often involves using a chemical stripper. Always follow the product instructions carefully, working in a well-ventilated area and wearing appropriate protective gear. After stripping, neutralize the surface if required and then thoroughly sand the wood. Begin with a coarser grit sandpaper (e.g., 100-120) to remove any remaining finish or imperfections, gradually moving to finer grits (150, 180, and finally 220) for a smooth, even surface. Ensure all dust is removed before staining.
For best results, apply a wood conditioner before staining, especially on softwoods like pine or maple, to ensure even stain absorption and prevent blotchiness. Apply the stain with a brush or rag, working in the direction of the wood grain. Allow it to penetrate for the recommended time, then wipe off any excess. For a deeper colour, apply additional thin coats, allowing each to dry fully before reapplication. Once you’ve achieved your desired depth of colour, protect your work with several thin coats of a durable clear topcoat, such as polyurethane, varnish, or lacquer, which will seal and protect the wood from moisture and wear. Sand lightly with very fine sandpaper (320-400 grit) between clear coats for maximum smoothness and adhesion.
3. Small Changes, Big Impact: Updating Cabinet Hardware
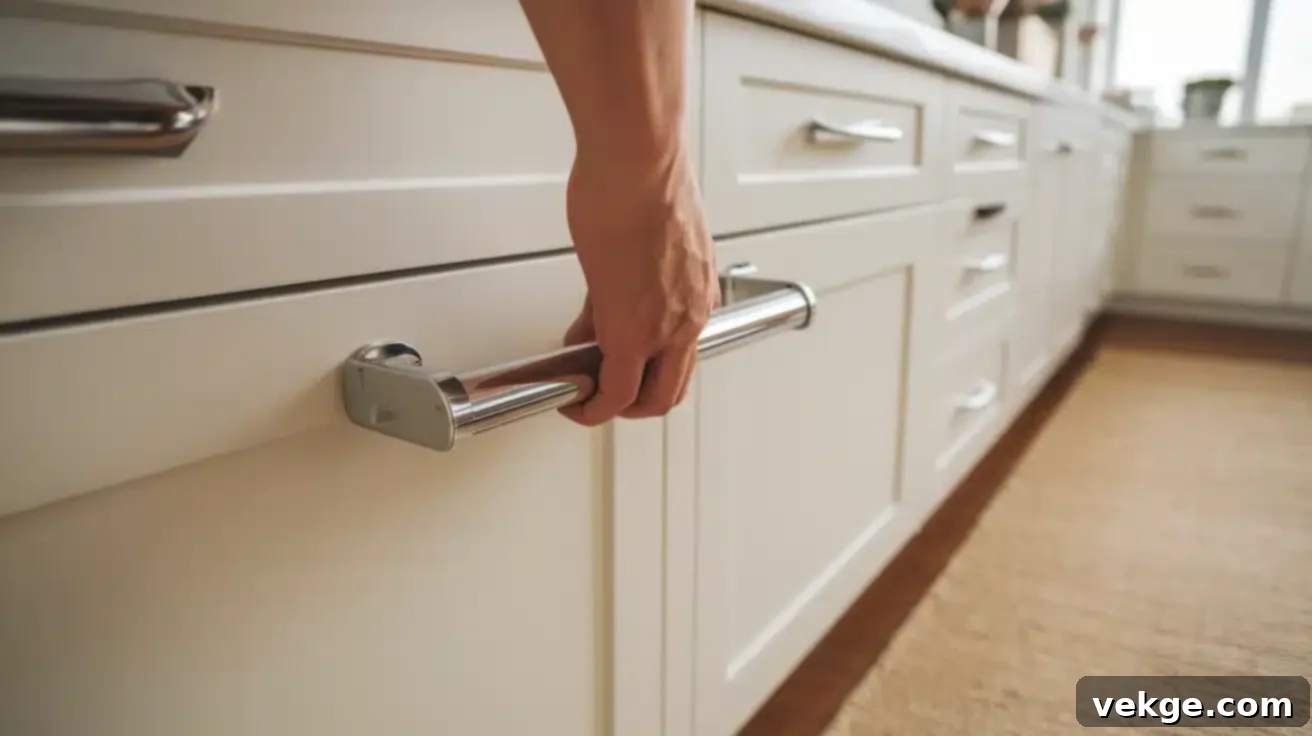
It’s astonishing how much new cabinet hardware can elevate the entire look and feel of your kitchen. Replacing old, tarnished, or builder-grade knobs and pulls with stylish new ones is one of the quickest, easiest, and most impactful updates you can make. Simple changes like switching from dated brass to sleek brushed nickel, or from a basic knob to an elegant pull, can completely transform your kitchen’s aesthetic.
When selecting new hardware, consider your home’s overall design style. For a modern aesthetic, opt for clean lines and minimalist bar pulls in finishes like matte black or polished chrome. For a traditional look, choose ornate handles or classic cup pulls in antique brass or oil-rubbed bronze. Shaker-style cabinets often pair beautifully with simple, functional pulls or classic round knobs. Don’t be afraid to mix and match – using knobs on upper cabinets and pulls on lower cabinets or drawers can add visual interest.
To create a cohesive look, try to match the finish of your new hardware to other metal accents in your kitchen, such as your faucet, light fixtures, or appliance handles. Consider unique materials like glass knobs for a touch of sparkle, ceramic for a vintage feel, or leather pulls for a contemporary and warm texture. Matte black hardware offers a striking contrast on white or light-coloured cabinets, while brass or gold can add warmth and a touch of luxury.
Installation requires precision. If you’re replacing existing hardware with pieces that use the same hole spacing, it’s a straightforward swap. However, if you’re changing the hole spacing or filling old holes, careful measurement is critical. Use a cabinet hardware template or create your own to ensure consistent placement for all knobs and pulls. Measure twice, drill once! For pulls, ensure they are horizontally level. If filling old holes, use wood filler, sand smooth, and then prime and paint before drilling new ones. Ensure all hardware is spaced evenly on each door and drawer front for a symmetrical and polished appearance.
4. Adding Trim and Molding for a Custom, High-End Touch

One of the easiest ways to elevate stock or builder-grade cabinets and make them look custom-built is by adding decorative trim and molding. This technique can drastically improve the perceived value and sophistication of your kitchen. Crown molding on the top of upper cabinets extends them visually to the ceiling, creating an elegant, built-in appearance and making the room feel taller. Beadboard panels or simple flat trim can be added to the exposed end panels of cabinet runs, transforming plain sides into charming architectural features. Even simple trim frames glued and nailed onto flat-panel doors can create the illusion of more expensive Shaker-style doors.
Consider the color and style of your trim in relation to your cabinets. Light-colored trim can create a subtle, classic look on darker cabinets, highlighting their structure. Conversely, dark trim can provide a striking contrast against white or light-coloured doors, defining the cabinet lines and adding depth. For a cohesive look, keep the molding styles consistent with your home’s architectural period and your desired kitchen aesthetic. Simple, clean-lined trim often offers the most lasting appeal and versatility.
Accurate cutting is crucial for a professional finish. Use a miter saw (or a miter box and hand saw for smaller projects) to achieve precise 45-degree angles for corners. Always cut test pieces first to ensure your angles are correct before cutting your final pieces. Apply wood glue to the back of the trim before securing it with small finishing nails. Once the trim is in place, use paintable caulk to fill any gaps between the molding and the cabinet box, creating seamless, smooth joints. After the caulk dries, paint the trim to match your cabinets for a fully integrated, custom look that will fool everyone into thinking you installed brand-new, high-end cabinetry.
5. Transforming with New Doors and Drawer Fronts: A Facelift for Your Cabinets
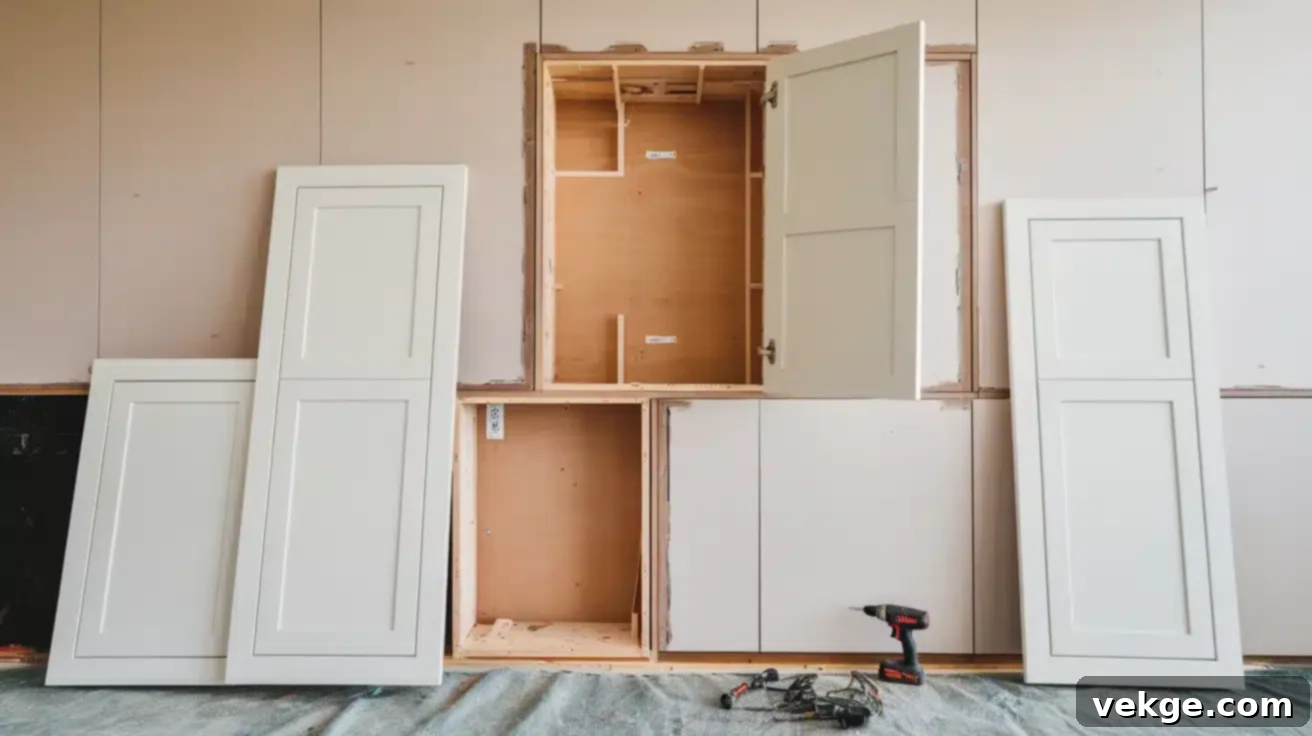
If your cabinet boxes are structurally sound but their style is severely outdated, replacing just the doors and drawer fronts is a fantastic way to achieve a completely new kitchen aesthetic without the expense and hassle of a full demolition. This approach, often called “cabinet refacing,” allows you to dramatically change your kitchen’s entire look, from traditional to modern or anywhere in between.
There’s a vast array of door styles available to suit any taste. Shaker style, with its clean lines and recessed panel, is a timeless and versatile choice that fits well in many homes, from contemporary to farmhouse. Glass-front doors (which can be clear, frosted, or textured) are perfect for showcasing beautiful dishes, glassware, or decorative items, adding an open, airy feel. Flat panel doors (slab style) are ideal for sleek, minimalist, and modern spaces. Raised panel doors offer a more traditional or classic appearance. Consider the material for your new doors as well, with options ranging from solid wood (oak, maple, cherry) to MDF or thermofoil, each offering different aesthetics and price points.
Accurate measurements are absolutely critical when ordering new doors and drawer fronts. Measure the width and height of each door and drawer front three times to ensure precision. Pay close attention to the existing hinge boring locations (the holes where hinges attach) and the direction of the door swing (left or right). Also, measure the width of your cabinet face frames, as this will determine the necessary overlay for your new doors. Creating a detailed diagram of your kitchen with all measurements and hinge specifications will minimize errors.
Installation requires careful alignment. Before attaching hinges, temporarily hold each new door in place to check for proper fit and even gaps. Use cabinet door spacers to ensure consistent spacing between doors and drawers. Start all screws loosely before tightening any, allowing for minor adjustments. Once all doors are hung, check their swing, alignment, and spacing. Modern adjustable hinges offer significant flexibility for fine-tuning door placement, ensuring a perfectly aligned and functional result. This seemingly complex task can be quite rewarding, yielding a “new kitchen” feel with minimal fuss.
6. Bringing Light to Your Space: Under-Cabinet Lighting for Ambiance and Function
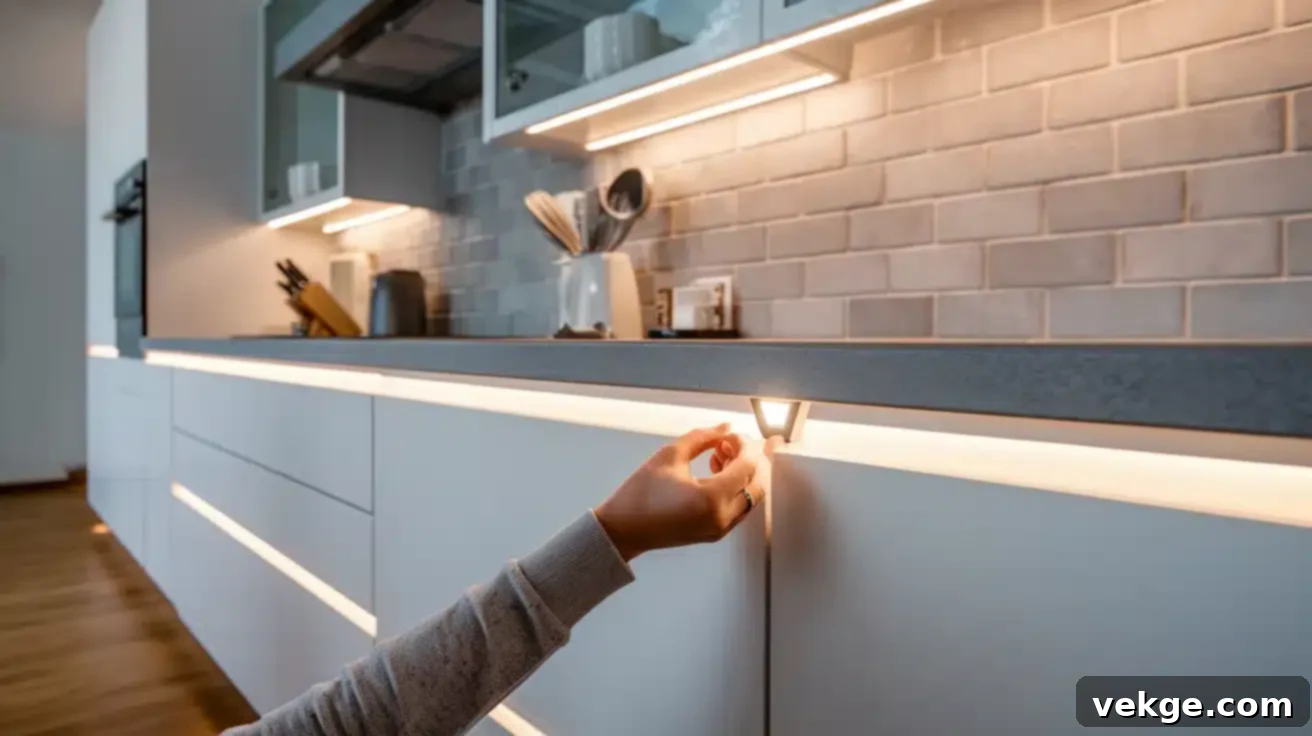
Under-cabinet lighting is a powerful yet often overlooked upgrade that dramatically enhances both the functionality and atmosphere of your kitchen. Beyond simply brightening your countertops, good task lighting directly illuminates your workspace, making food preparation safer and more enjoyable. When evenings arrive, soft under-cabinet lighting can transform your kitchen into a warm and inviting space, setting a perfect mood without the harshness of overhead lights.
There are several types of under-cabinet lighting to consider. LED strip lights are highly popular for their even light distribution, energy efficiency, and slim profile, making them virtually invisible once installed. Puck lights provide focused spots of light, often used to highlight specific areas or decorative items. For a more traditional look, bar lights offer a continuous glow. You can choose between battery-operated options for easy, no-wire installation, plug-in models for simplicity, or hardwired systems for a clean, integrated look that requires electrical work but offers superior aesthetics and control. Consider the colour temperature (warm white for a cozy feel, cool white for a brighter, more modern look) to match your kitchen’s overall lighting scheme.
Installation can be surprisingly straightforward. Many LED strip lights come with adhesive backing for quick stick-on installation. For a tidier appearance, especially with plug-in or hardwired options, hide cords using small cable channels or raceways that blend with your cabinet finish. Position switches in an easy-to-reach location, or integrate them with smart home systems for voice or app control. Always test the placement of your lights before making a final installation to ensure optimal illumination and coverage. Adding dimmers is a fantastic upgrade, allowing you to control the light intensity and create different moods, from bright task lighting to subtle ambient glow for entertaining.
7. Enhancing Style with Glass Panels: A Window into Your Kitchen’s Soul
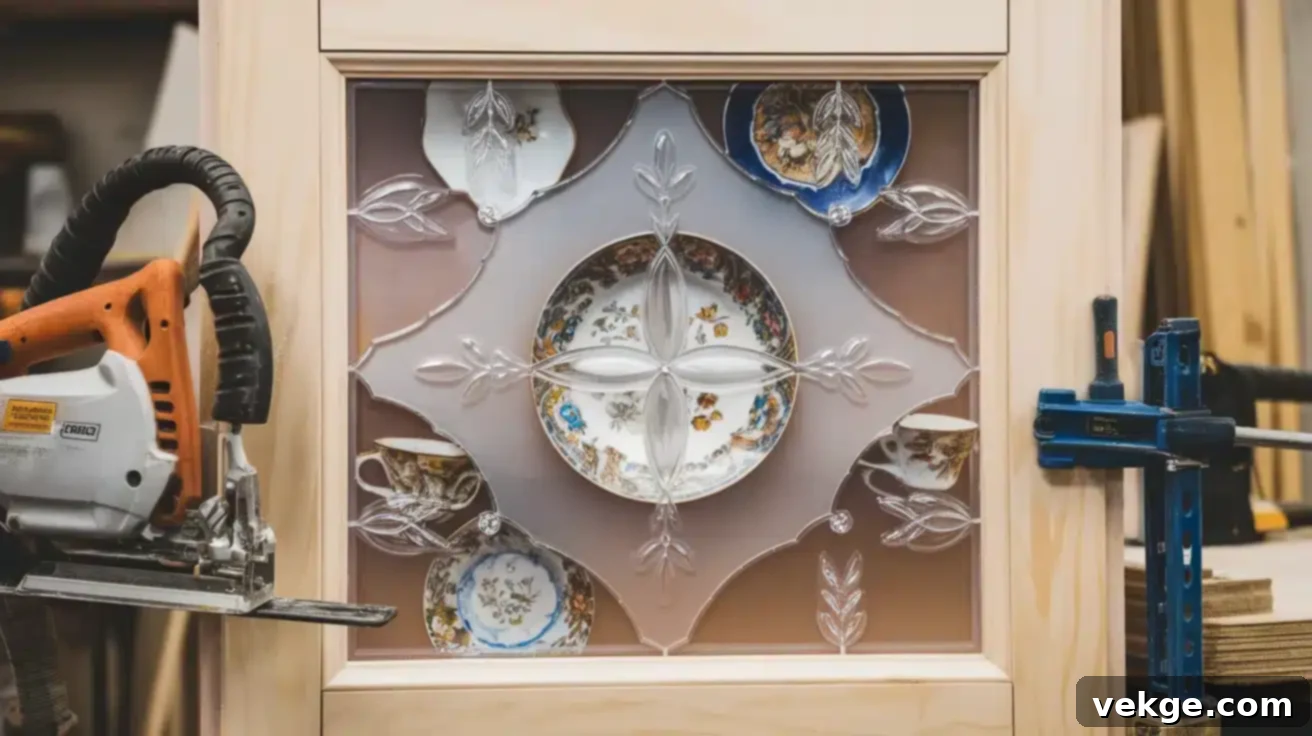
Incorporating glass panels into some of your cabinet doors is an elegant way to add visual interest, lighten the upper portion of your kitchen, and showcase your cherished items. This upgrade can make a kitchen feel more open and sophisticated, breaking up the monotony of solid cabinet fronts.
The type of glass you choose significantly impacts the aesthetic. Clear glass provides full visibility, perfect for displaying beautiful dishware, stemware, or decorative objects. Frosted glass offers a softer, more obscured view, ideal for concealing less-than-perfectly organized contents while still allowing light to filter through. Textured glass, such as reeded or patterned glass, adds architectural interest and privacy. For a vintage or farmhouse look, seeded glass, which has small bubbles, can create a charming, antique effect.
To install glass panels, first carefully remove the existing solid panels from your cabinet doors. This typically involves removing retaining clips, staples, or small wood stops. Clean the inner edges of the door frame thoroughly. Measure the opening precisely, noting whether the glass should be cut slightly smaller than the opening (for a fit with rubber strips) or exact (if using a different retaining method). It’s often best to have glass cut by a professional to ensure safety and precision. Secure the glass in place using rubber glazing strips, silicone, or small wooden trim pieces nailed around the perimeter. Ensure the fit is snug but not overly tight to prevent cracking.
Once installed, style your glass-front cabinets thoughtfully. Display only your most attractive and organized items. Consider adding small LED puck lights or strip lights inside the cabinet to illuminate your display, creating a soft glow. Keep the items neat and sparse to avoid a cluttered appearance. You can also change out your displays seasonally, adding a dynamic and personal touch to your kitchen decor.
8. Creative Finishes to Elevate Your Cabinets: Beyond a Single Coat
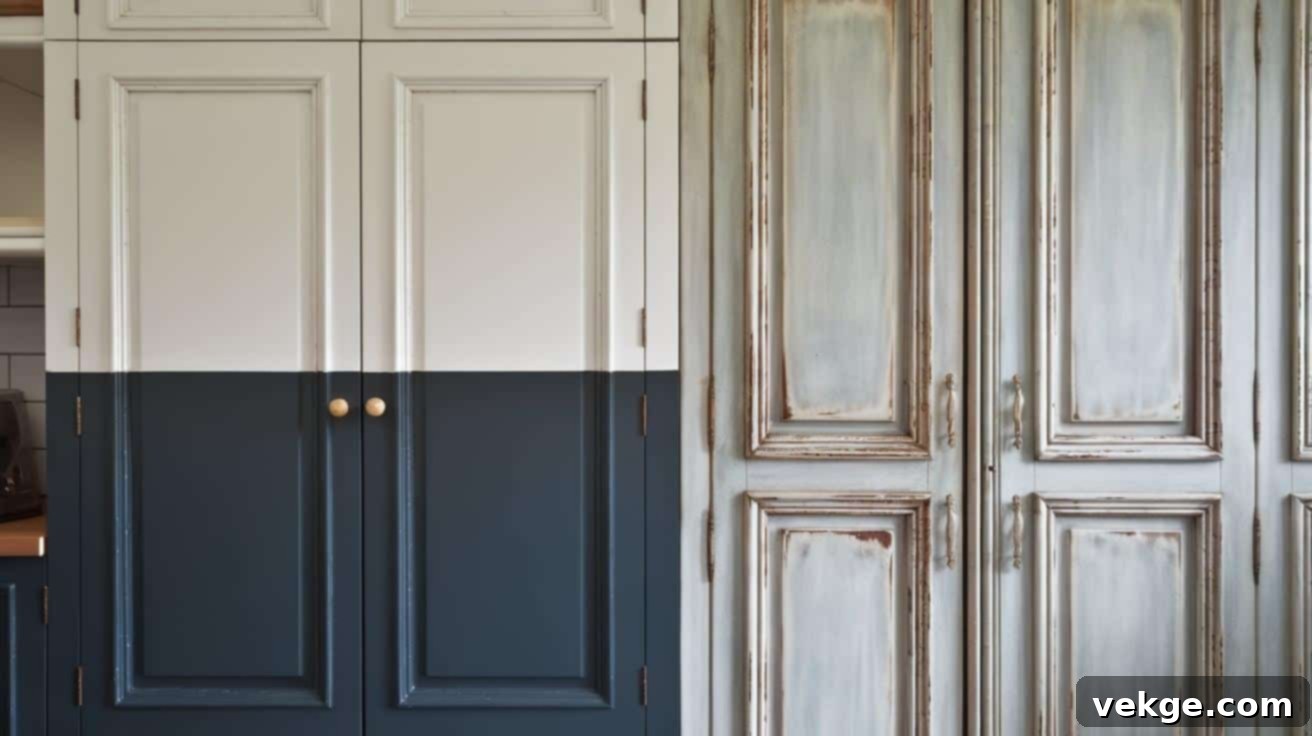
Beyond a simple solid colour, various creative painting techniques can imbue your cabinets with unique character and depth, making them look far more expensive and custom. These finishes can add personality and align your kitchen more closely with specific design styles.
- Distressing and Antiquing: To achieve a charming, aged look, gently sand the edges and raised areas of freshly painted cabinets to expose some of the base wood or a darker underlying paint colour. Apply a thin layer of dark wax or a coloured glaze into crevices and corners, then wipe back the excess. This technique creates subtle shadows and simulates years of gentle wear, perfect for farmhouse, shabby chic, or rustic aesthetics.
- Glazing: Applying a translucent glaze over a solid paint colour adds depth and warmth. Glazes can be tinted with various colours to create different effects – a dark brown glaze can soften bright white, while a lighter glaze can enhance a darker base. Brush the glaze on and then wipe it back, leaving more in the recesses and corners, creating a subtle, multi-dimensional finish.
- Colour Washing or Whitewashing: For a soft, translucent finish that allows the wood grain to show through, mix white (or a light-coloured) paint with water in a 1:1 or 1:2 ratio. Brush this thinned paint onto the wood, then immediately wipe it back with a clean rag. This creates a soft, ethereal texture and can brighten dark wood without completely obscuring its natural beauty, ideal for coastal or Scandinavian-inspired designs.
- Two-Tone Cabinets: A very popular and stylish trend is to paint upper and lower cabinets in different but complementary colours. For instance, white upper cabinets can make your kitchen feel open and airy, while darker lower cabinets (like navy, charcoal, or deep green) add grounding and sophistication. You can also paint your kitchen island a contrasting colour to serve as a focal point. Ensure the chosen colours belong to the same family or complement each other well to maintain harmony. Always test combinations on a sample board first.
- Stenciling or Decorative Accents: For a truly unique touch, consider stenciling intricate patterns onto flat cabinet panels or drawer fronts. This can add a personalized, artistic flair. Alternatively, use decorative adhesive films for a quick and temporary style change, mimicking textures like wood grain, marble, or metallic finishes.
9. Maximizing Functionality: Inside Cabinet Upgrades for Better Organization
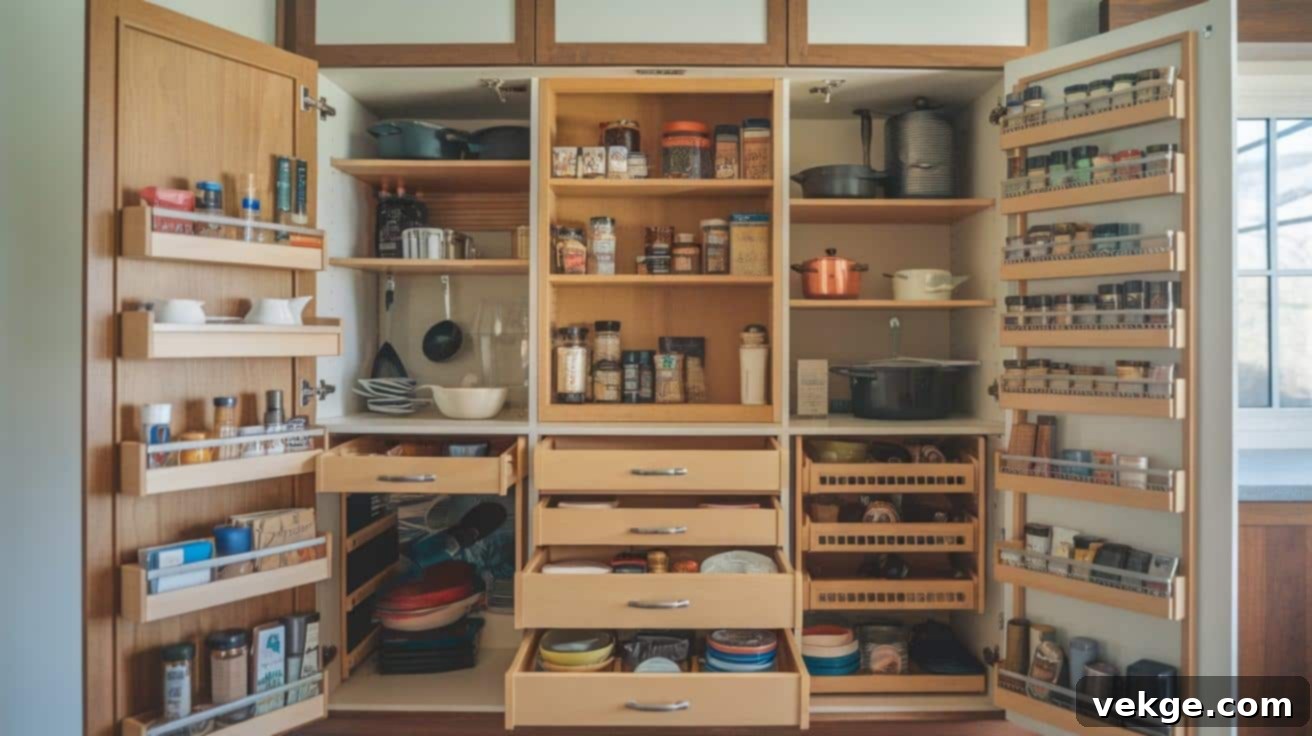
A cabinet makeover isn’t just about outward appearance; enhancing the interior functionality can dramatically improve your kitchen’s usability and organization. These upgrades, while often hidden, contribute significantly to your daily enjoyment of the space.
- Interior Cleaning and Painting: Start by thoroughly cleaning the inside of your cabinets. A fresh coat of light-coloured paint inside can brighten dark corners, making items easier to see and giving the interior a clean, refreshed feel. Adding cabinet liner paper or mats can protect shelves from scratches, spills, and makes cleaning a breeze. Choose light colours for interiors to enhance visibility and cleanliness.
- Pull-Out Shelves and Drawers: Transform deep, dark base cabinets into highly accessible storage with pull-out shelves or rollout drawers. These are perfect for heavy pots, pans, and small appliances, bringing items to you rather than requiring you to reach deep inside.
- Drawer Organizers and Dividers: Say goodbye to cluttered junk drawers. Install custom or adjustable drawer organizers for cutlery, utensils, spices, or even specific gadgets. Dividers can help keep pots and pan lids neatly stacked.
- Corner Storage Solutions: Maximize those often-awkward corner cabinets with smart solutions like “Lazy Susans” or pull-out blind corner optimizer systems, which make every inch of space usable.
- Door-Mounted Racks: Utilize the inside of cabinet doors by adding racks for spice jars, cutting boards, tin foil, or pot lids. This frees up valuable shelf or drawer space.
- Soft-Close Hinges and Drawer Slides: Upgrade to soft-close hinges and drawer slides. This small change prevents banging doors and drawers, extending the life of your cabinets and creating a quieter, more luxurious kitchen experience.
- Interior Lighting: Small, battery-operated LED lights can be placed inside pantries or dark cabinets to illuminate contents, making it easier to find what you need.
- Adjustable Shelving: If your cabinets have fixed shelves, consider adding adjustable shelf pins and new shelves to customize spacing for different-sized items, from tall cereal boxes to short spice jars.
Regularly sort items by frequency of use, placing frequently accessed items in easily reachable spots. Fixing sticky drawer slides or replacing worn-out hinges are simple repairs that greatly enhance daily functionality.
Expert Tips and Tricks for a Flawless Cabinet Makeover
- Always Test First: Before applying any paint, stain, or cleaner to your entire cabinet, test it on a hidden, inconspicuous spot (like the inside of a door or the back of a drawer front). This helps you predict how the material will react and ensures you like the final finish.
- Respect Drying Times: Patience is crucial. Rushing between coats of primer, paint, or stain can lead to uneven finishes, peeling, or a less durable result. Always allow full drying times as recommended by the manufacturer.
- Organize and Label Meticulously: Label every single door, drawer, and piece of hardware as you remove it. Take detailed photos or even draw a diagram of your kitchen layout. This seems tedious but will save immense frustration during reassembly.
- Choose Durable Materials: Especially for areas near sinks, dishwashers, or cooking zones, opt for water-resistant paints and sealants. Use strong, appropriate screws for hanging heavy doors or installing new hardware.
- Add Bumpers: Stick small clear rubber bumpers to the inside corners of cabinet doors and drawers. These prevent slamming, reduce noise, and protect your freshly painted surfaces from chips.
- Check Joints and Stability: Before painting or staining, ensure all cabinet joints are tight and stable. Use wood glue and clamps to reinforce any loose connections, as a solid foundation is key to a lasting finish.
- Timeless Design Choices: While trends are fun, for a lasting update, consider neutral colours and classic hardware styles that won’t quickly go out of fashion. Match hardware finishes to other metals in your kitchen for a cohesive, sophisticated look.
- Plan for Maintenance: Think about how easy your chosen finish will be to clean. A semi-gloss or satin paint finish is generally easier to wipe down than a matte finish. Ensure doors open fully without obstructions.
- Ventilate Properly: When using paints, primers, or strippers, ensure your work area is well-ventilated. Open windows, use fans, and wear a respirator mask to protect your health.
- Invest in Quality Tools: High-quality brushes, rollers, and sandpaper make a significant difference in the final outcome. They provide smoother finishes and are often easier to work with.
Conclusion: Your Kitchen’s Next Chapter Begins Now
Your kitchen cabinets are more than just storage; they are a central feature of your home, bearing witness to countless family meals, morning coffees, and shared laughter. With the practical and inspiring steps outlined in this guide, you now possess the knowledge and confidence to write your kitchen’s next chapter without the daunting prospect of starting entirely from scratch.
Remember that even the smallest, most thoughtful updates can lead to monumental transformations. A fresh, expertly applied coat of paint, elegant new handles, or strategically placed under-cabinet lighting can revitalize tired cabinets, turning them into the focal points of a refreshed and inviting space. These budget-friendly updates do more than just save you money; they champion sustainability by keeping good materials in use and infuse your existing space with renewed life and character.
Every kitchen has its unique charm and needs, so select the methods that best align with your personal style, functional requirements, and budget. Approach each step with care and attention to detail; diligent preparation is just as vital as the final decorative touches. Your careful effort today will undoubtedly manifest in the stunning, durable results you’ll enjoy for years to come.
Embrace the journey of transformation. Your beautifully refreshed cabinets will not only serve you well but also enhance every moment spent in the heart of your home, making your kitchen a source of pride and joy for many years to come.
