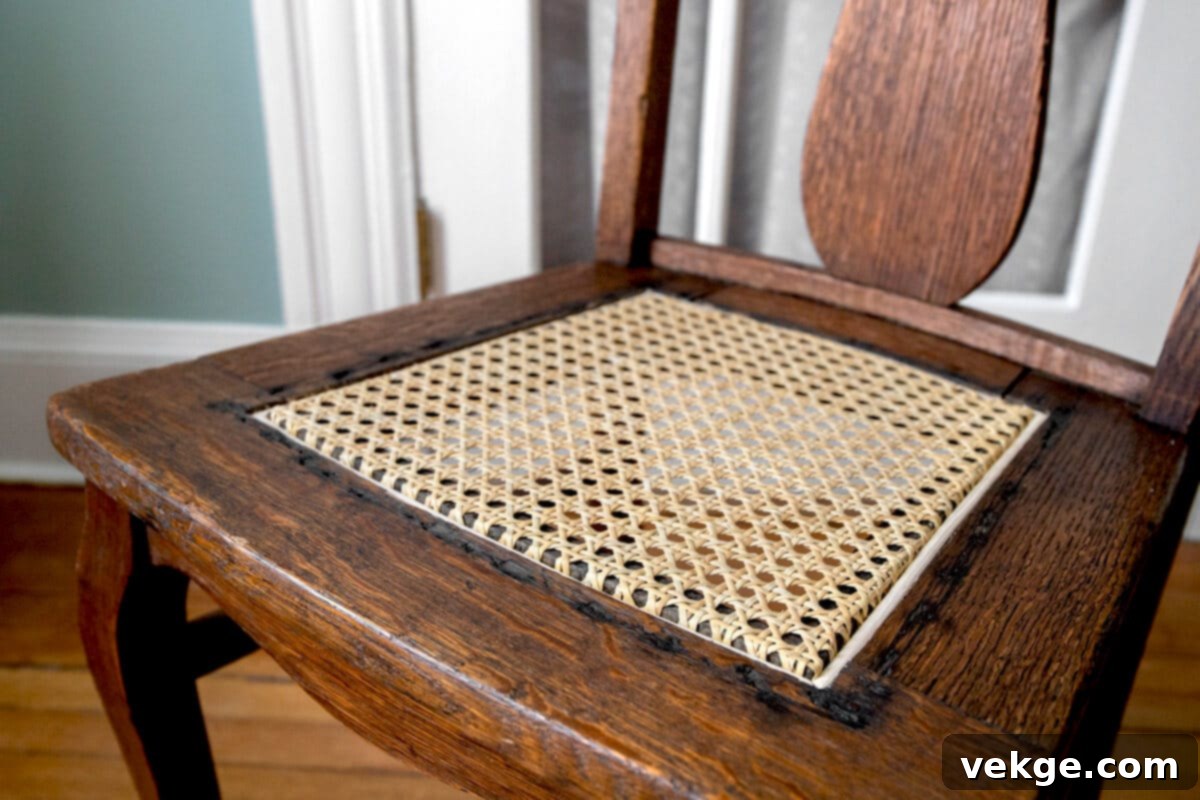
Mastering Chair Caning: Your Ultimate DIY Guide to Restoring Furniture
Is that cherished old chair looking a little worse for wear? A worn-out or damaged cane seat can detract from even the most beautiful piece of furniture. Fortunately, giving new life to an old chair through recaning is a rewarding and cost-effective way to restore its beauty and functionality. Whether you’re an experienced DIY enthusiast or a complete beginner, learning how to recane a chair can transform your beloved pieces and save you money on professional restoration.
This comprehensive guide will walk you through everything you need to know about chair recaning. We’ll cover the different types of cane and methods, explain how to meticulously remove old caning, provide detailed step-by-step instructions for weaving new cane (both hand-woven and pre-woven), and share expert tips to ensure your project looks fantastic. By the end, you’ll possess the knowledge and confidence to recane a chair like a seasoned pro, turning a daunting task into an enjoyable and empowering skill.
It might require some patience and practice, but the satisfaction of revitalizing a piece of furniture with your own hands is truly immense. You’ll not only save money but also gain a valuable craft that can be applied to future restoration projects or even creative new designs. Ready to embark on your chair recaning journey? Let’s dive in and learn how to bring that old chair back to its former glory!
Understanding Chair Caning
What is Chair Caning?
Chair caning is a traditional craftsmanship technique used to create or repair woven seats and backs on furniture. It involves meticulously weaving strands of natural cane material, typically rattan, into a specific pattern to form a durable, breathable, and aesthetically pleasing seating surface. This method has been employed for centuries, prized for its strength, flexibility, and the distinct, classic look it imparts to furniture. Chair caning is particularly popular for restoring antique chairs, creating custom designs, or simply enhancing modern pieces with a touch of timeless elegance.
Different Types of Chair Cane
When approaching a recaning project, you’ll encounter two primary types of chair cane, each suited to different applications and skill levels:
1. Hand-Woven Cane:
This traditional method involves individually weaving separate strands of cane through pre-drilled holes in the chair frame. The process is intricate and requires more time and skill but yields a deeply authentic and bespoke finish.
- Pros:
- Provides an authentic, traditional appearance, ideal for antique or period furniture.
- Allows for greater customization in patterns and design, offering unique aesthetic possibilities.
- When executed correctly, hand-woven cane is incredibly durable and can last for decades.
- Increases the historical value and integrity of antique pieces.
- Cons:
- Significantly more time-consuming and labor-intensive, requiring considerable patience.
- Demands a higher level of skill and precision, making it more challenging for beginners.
- Materials can be more expensive due to the specific preparation and individual strands required.
2. Pre-Woven Cane Webbing:
This modern alternative uses a ready-made sheet of machine-woven cane, which is cut to size and inserted into a routed groove around the chair seat. It’s a faster and often simpler method.
- Pros:
- Much faster and easier to install, significantly reducing project time.
- An excellent choice for beginners due to its straightforward application.
- Generally less expensive for materials compared to individual cane strands.
- Provides a uniform, consistent pattern without the need for intricate weaving.
- Cons:
- May not achieve the same level of authentic, traditional appearance as hand-woven cane.
- Limited to standard patterns, offering less creative flexibility.
- Can sometimes be less forgiving if not installed correctly, potentially leading to sagging if not properly tensioned.
While hand-woven cane is often preferred for preserving the original character of antique or high-value chairs, pre-woven webbing is a practical and efficient solution for simpler chairs, modern designs, or when time is a critical factor.
Choosing the Right Method for Your Project
Deciding between hand-weaving and pre-woven cane webbing is a crucial first step. Consider the following factors to make the best choice for your chair and your personal preferences:
- Your Skill Level: If you’re completely new to caning, pre-woven webbing offers a more forgiving entry point. It allows you to grasp the basics of preparing the chair and securing the cane without the complexities of intricate weaving patterns.
- The Type of Chair: For genuinely antique or historically significant chairs, hand-woven cane is almost always the recommended method to maintain authenticity and value. For mass-produced or contemporary chairs, pre-woven webbing is often perfectly suitable.
- Time and Patience Available: Hand-weaving is a meditative, long-term project that can take many hours, if not days, to complete. Pre-woven webbing can typically be installed in a few hours, making it ideal if you need a quicker restoration.
- Desired Aesthetic and Authenticity: If a perfectly traditional, hand-crafted look is paramount, hand-weaving is the clear winner. If a neat, uniform, and factory-finished appearance is acceptable, pre-woven webbing will serve your purpose well.
- Budget: While hand-weaving materials can be pricier, the labor cost for professionals is high. DIY hand-weaving saves labor costs. Pre-woven webbing materials and DIY installation are generally the most budget-friendly option.
By carefully weighing these factors, you can confidently choose the caning method that aligns best with your chair’s needs, your abilities, and your restoration goals, setting the stage for a successful and satisfying project.
Preparing the Chair for Recaning
Before you even think about weaving new cane, proper preparation of your chair is absolutely essential. This foundational step not only ensures a clean slate for your new cane but also helps identify and address any structural issues that could compromise the longevity of your restoration. This section will guide you through the safe and effective removal of old cane and the critical inspection of the chair frame.
Removing the Old Cane Safely and Effectively
The first task is to identify the type of old cane your chair has, as this dictates the removal process:
- Hand-woven cane will exhibit individual strands woven through a series of holes drilled directly into the chair frame.
- Pre-woven cane webbing will appear as a single sheet with a uniform, machine-woven pattern, typically secured into a routed groove in the chair frame.
Once you’ve identified the type, follow these steps for removal, always prioritizing safety and care for the chair frame:
- For Hand-Woven Cane: Use a pair of needle-nose pliers or snips to carefully cut and pull out the old cane strands from the drilled holes. Work gently to avoid chipping or damaging the delicate wood around the holes. You may need an awl to clear out stubborn bits of cane from each hole.
- For Pre-Woven Cane Webbing: Locate the wooden spline, a thin strip of wood, that holds the cane webbing in the groove. Carefully pry it out using a small chisel or a sturdy flat-head screwdriver. Once the spline is removed, the cane webbing can usually be lifted out. Check for any staples or glue residue and remove them meticulously with pliers or a putty knife.
- Clean the Groove/Holes: After removing the bulk of the cane, scrape off any leftover bits of cane, dried glue, or splintered wood using a putty knife, a wire brush, or fine-grit sandpaper. Ensure the groove (for webbing) or the drilled holes (for hand-weaving) are completely clean and free of debris.
- Wipe Down the Frame: Clean the entire seat frame thoroughly by wiping it down with a damp cloth to remove dust and grime. Allow it to dry completely.
- Smooth Rough Spots: Lightly sand down any rough spots or raised edges in the frame with fine-grit sandpaper (e.g., 220-grit). This creates a smooth surface for the new cane, preventing snags and ensuring a neat finish.
Inspecting the Seat Frame for Damage
After the old cane is gone, it’s crucial to conduct a thorough inspection of the chair frame. A solid foundation is vital for a long-lasting recaning job:
- Visual and Tactile Inspection: Look closely at the entire frame, paying special attention to the seat rails, legs, and joints. Feel along the wood for any irregularities. Search for common issues such as:
- Splits or cracks in the wood, especially around the cane holes or groove.
- Loose joints, indicated by wobbling or creaking when you gently apply pressure to the frame.
- Evidence of woodworm or other insect damage (small holes, powdery residue).
- Missing pieces of wood or previous clumsy repairs.
- Addressing Minor Damage:
- Small Splits/Cracks: Use high-quality wood glue (like Titebond III) to repair minor splits or cracks. Clamp the area firmly overnight to allow the glue to set properly.
- Loose Screws/Nails: Tighten any loose screws or nails. If a screw hole is stripped, remove the screw, insert a wooden dowel or toothpick with wood glue into the hole, let it dry, then re-drill a pilot hole and reinsert the screw.
- Wobbly Joints: For moderately wobbly joints, you might be able to inject wood glue into the joint and clamp it. For severely loose joints, the chair may need to be disassembled, old glue removed, and then reassembled and clamped.
- When to Seek Professional Help: For bigger structural issues, extensive wood rot, severe breaks, or complex joinery problems, it is advisable to consult a professional furniture restorer. Attempting repairs beyond your skill level could further damage the chair.
- Ensure Sturdiness: Before proceeding with recaning, ensure the frame is completely sturdy, stable, and free from any weakness. The new cane will only be as durable as the frame it’s attached to.
By investing this time in meticulous preparation, you’ll not only create a better foundation for your new cane but also ensure your restored chair will be safe and durable for many years to come.
Tools and Materials Needed
Having the right tools and materials on hand is crucial for a smooth and successful chair recaning project. The specific items you’ll need will vary depending on whether you opt for the traditional hand-weaving method or the quicker pre-woven cane webbing approach. Gather everything before you begin to avoid interruptions and ensure a more efficient workflow.
For Hand-Weaving Method:
This method requires a selection of specialized tools to handle individual cane strands and manage the intricate weaving process:
- Cane Strips: Available in various widths (e.g., 1.75mm, 2.0mm, 2.25mm) to match the size of your chair’s holes. Choose high-quality, fresh cane for best results.
- Awl: A pointed tool used to clear holes, guide cane strands, and untangle knots. Essential for precision.
- Pegs or Wedges: Small wooden or plastic pegs used to temporarily hold cane strands in place while weaving, maintaining tension.
- Caning Needle: A long, thin, blunt-tipped needle used to help thread cane through tight holes or weaves.
- Water Basin: A shallow container to soak cane strips, keeping them pliable during the entire weaving process.
- Hammer: Small tack hammer or rubber mallet for tapping pegs into place.
- Chair Clamps: Optional, but useful for stabilizing the chair during the weaving process, especially if it’s wobbly.
- Scissors or Shears: Sharp pair for accurately cutting cane strips.
- Measuring Tape or Rule: For measuring cane lengths and ensuring consistent spacing.
- Beeswax: Optional, can be used to strengthen cane ends for easier threading through holes and provide a smoother finish.
For Pre-Woven Cane Webbing Method:
This method focuses on securing a sheet of cane into a routed groove:
- Pre-Woven Cane Webbing: A ready-made sheet of woven cane. Ensure the pattern matches your chair and purchase enough to cover the seat with extra for trimming.
- Wooden Spline: A thin, pre-cut strip of wood that matches the size and shape of your chair’s groove. This locks the cane webbing in place.
- Spline Chisel or Knife: A specialized tool with a blunt edge designed to gently push the cane webbing and spline into the groove without cutting the cane.
- Rubber Mallet: Used in conjunction with the spline chisel to tap the spline securely into the groove.
- White Glue or Caning Glue: A waterproof or water-resistant glue (like Titebond III or specialized cane glue) to secure the spline and cane in the groove.
- Measuring Tape or Rule: For accurately measuring and cutting the cane webbing.
- Heavy-Duty Scissors or Utility Knife: For cutting the cane webbing to size.
- Clamps: Useful for holding the cane webbing taut and evenly stretched as you work.
- Water Basin: For soaking the cane webbing to make it pliable before installation.
- Sponge or Damp Cloth: To keep the cane moist during installation.
Regardless of the method chosen, make sure all your materials are of good quality. Fresh cane is less likely to break, and sharp tools will make your work much easier and more precise. Sourcing these items from specialty woodworking or craft suppliers often ensures higher quality and better advice.
Step-By-Step Guide to Recane a Chair
Hand-Weaving Method: The Traditional Craft
This intricate method transforms individual strands into a robust and beautiful woven seat. Patience and consistency are your best tools here.
Step 1: Soak the Cane for Pliability

- Submerge 3-5 cane strands in a basin of room-temperature water.
- Important: Avoid hot water, which can cause the cane’s tiny hairs to stick up, making it rough. Cold water can make the cane brittle and prone to breaking. Room temperature allows the cane to absorb water evenly.
- Soak the cane until it becomes fully pliable and flexible, typically for 20-30 minutes. Do not over-soak, as prolonged submersion can leach natural oils, turning the cane an unattractive gray color and weakening its structure.
- Keep unused cane submerged or wrapped in a damp cloth to maintain pliability throughout the weaving process.
Step 2: Prepare the Chair and Start the First Vertical Pass
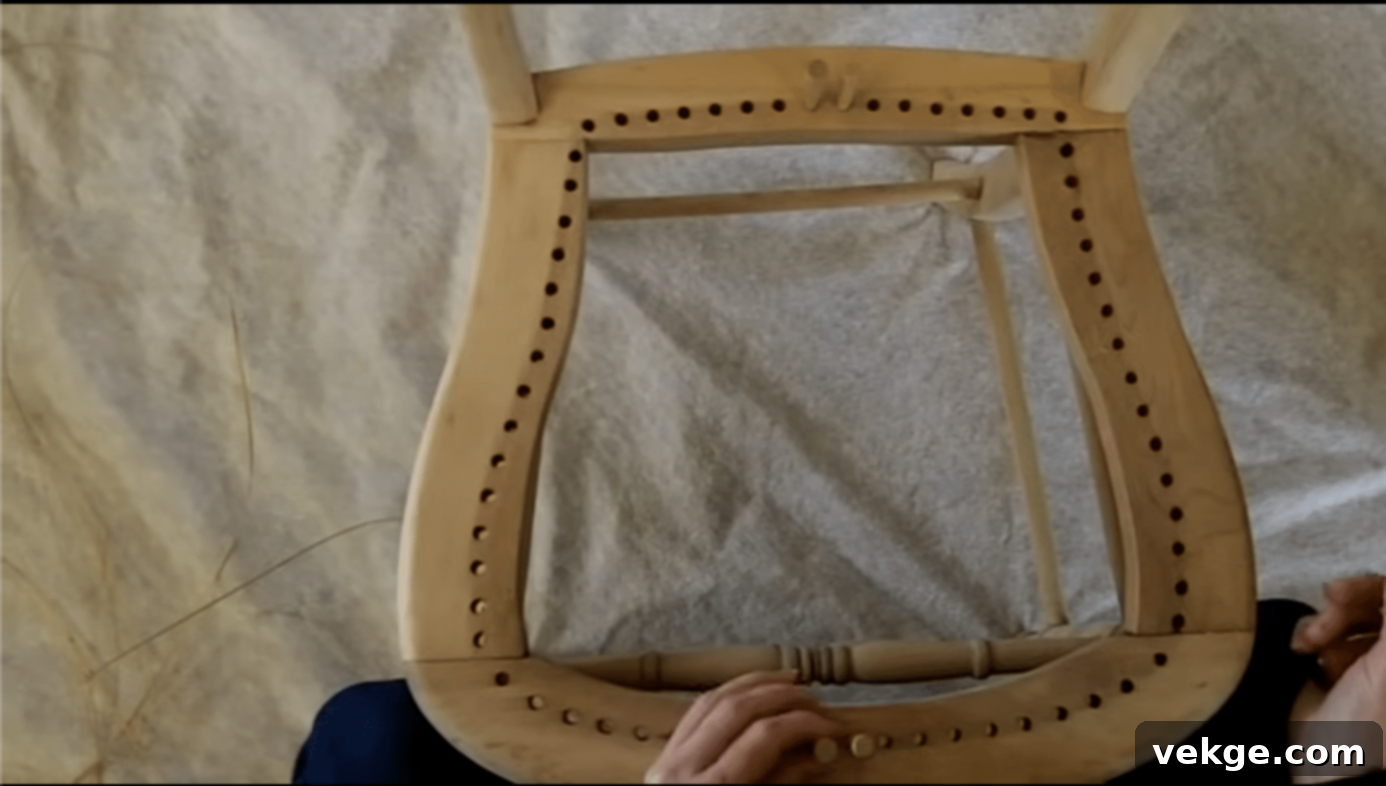
- Using a sharp awl, locate the middle holes on the front and back rails of the chair frame. These will be your starting points.
- Thread a soaked cane strand (shiny side facing up, as this is the wear surface) through the middle hole of the back rail from underneath, pulling it up through the hole.
- Leave approximately 3 inches of cane hanging underneath the seat. Secure the strand by inserting a small wooden peg into the hole, alongside the cane, to hold it firmly in place.
- Pull the cane taut, but not overly tight (it will tighten more as it dries), and thread it down through the corresponding middle hole on the front rail. Secure this end underneath with another peg.
Step 3: Weave the First Set of Vertical Strands (Pass 1)
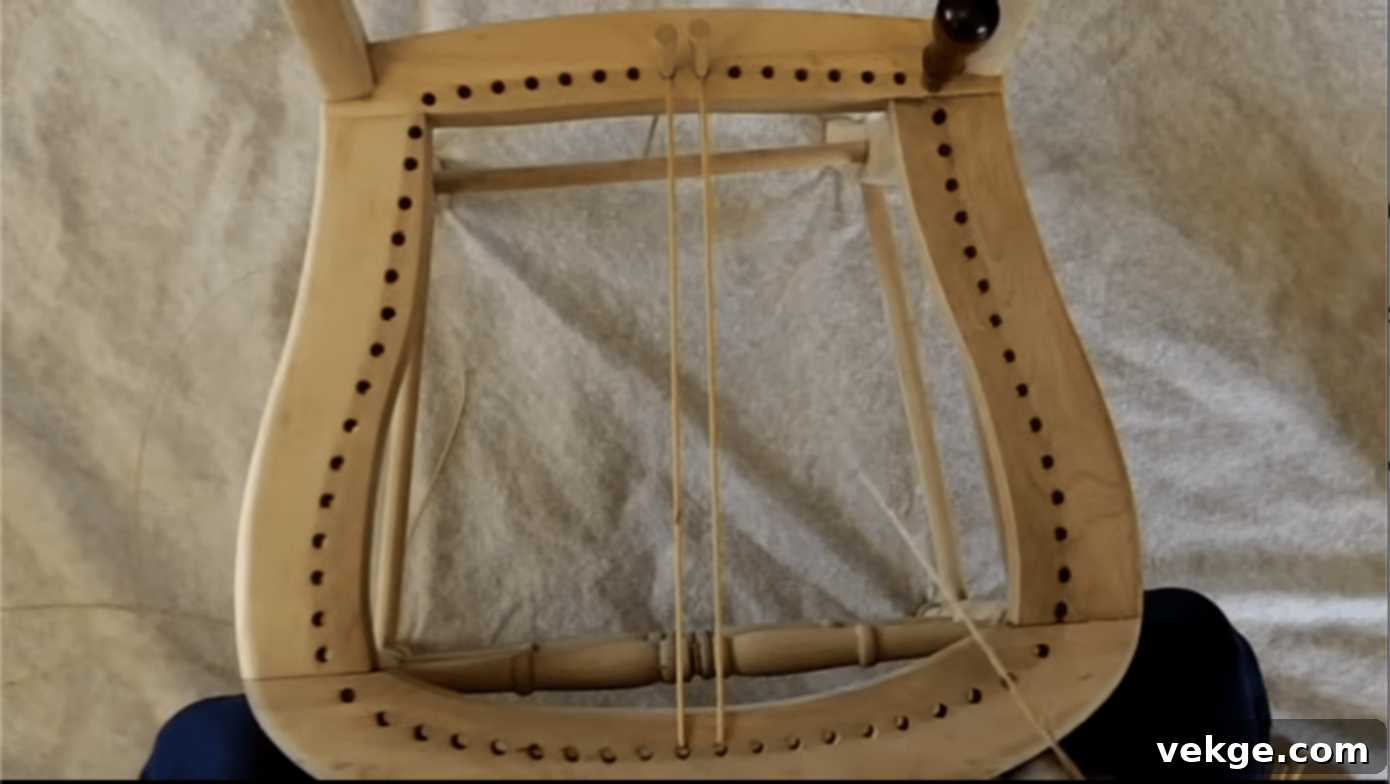
- Continue working outwards from the center. Take the cane from the back middle hole, bring it up, across the seat, and down through the corresponding front middle hole. Then, bring it up through the next adjacent hole on the front rail, across the seat, and down through the next adjacent hole on the back rail.
- Maintain consistent tension. The cane should be snug and lie flat on the bottom of the seat frame, but not so tight that it bows the frame.
- Continue this back-and-forth motion, filling all the holes in the front and back rails. If the front and back rails have different numbers of holes, you may need to skip a hole or double up in a hole on the longer side to keep your weave centered and balanced.
- Secure each end with a peg underneath the frame.
Step 4: Weave the Horizontal Strands (Pass 2)
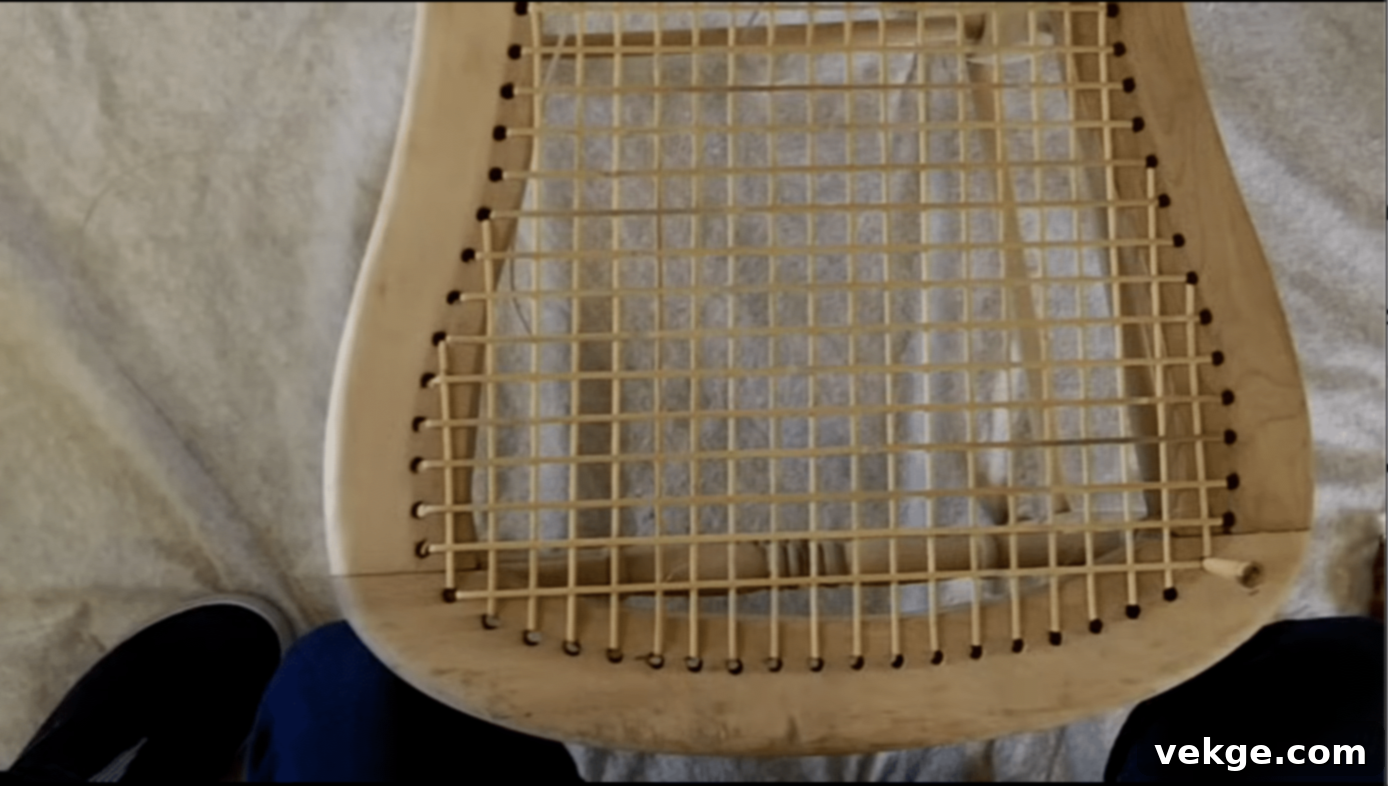
- Begin this pass in a side hole, again starting from the center and working outwards.
- Weave the cane horizontally, from side to side, passing over and under the vertical strands you just completed. Your goal is to create a simple over-under pattern.
- Ensure the cane lies flat and is pulled snugly, especially around any curved sections of the chair frame. The horizontal strands should sit neatly beside each other, parallel to the side rails.
- As with the vertical strands, use pegs to secure the cane at the start and end of each pass. Adjust for differing numbers of holes on the side rails as necessary.
Step 5: Add the Second Layer of Vertical Strands (Pass 3)
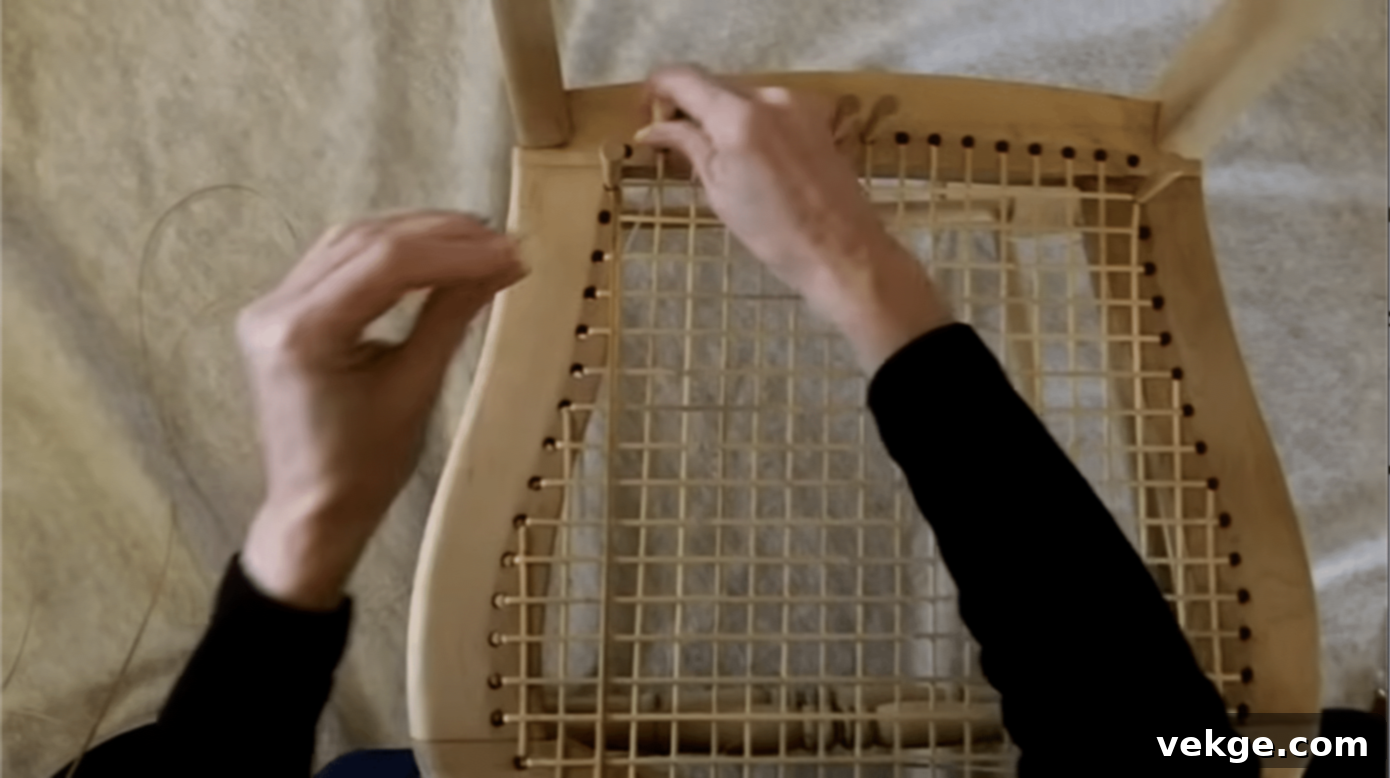
- This pass mimics Step 3 but involves weaving the new vertical strands directly to the right of the first set of vertical strands, effectively doubling the thickness of the vertical pattern.
- Start from the center holes again and work outwards, passing the cane through the same holes as the first vertical pass, but ensuring the new strand sits parallel and immediately adjacent to the existing one.
- This step significantly increases the density and strength of the weave, forming the foundation for the diagonal patterns.
Step 6: Weave the First Diagonal Layer (Pass 4)
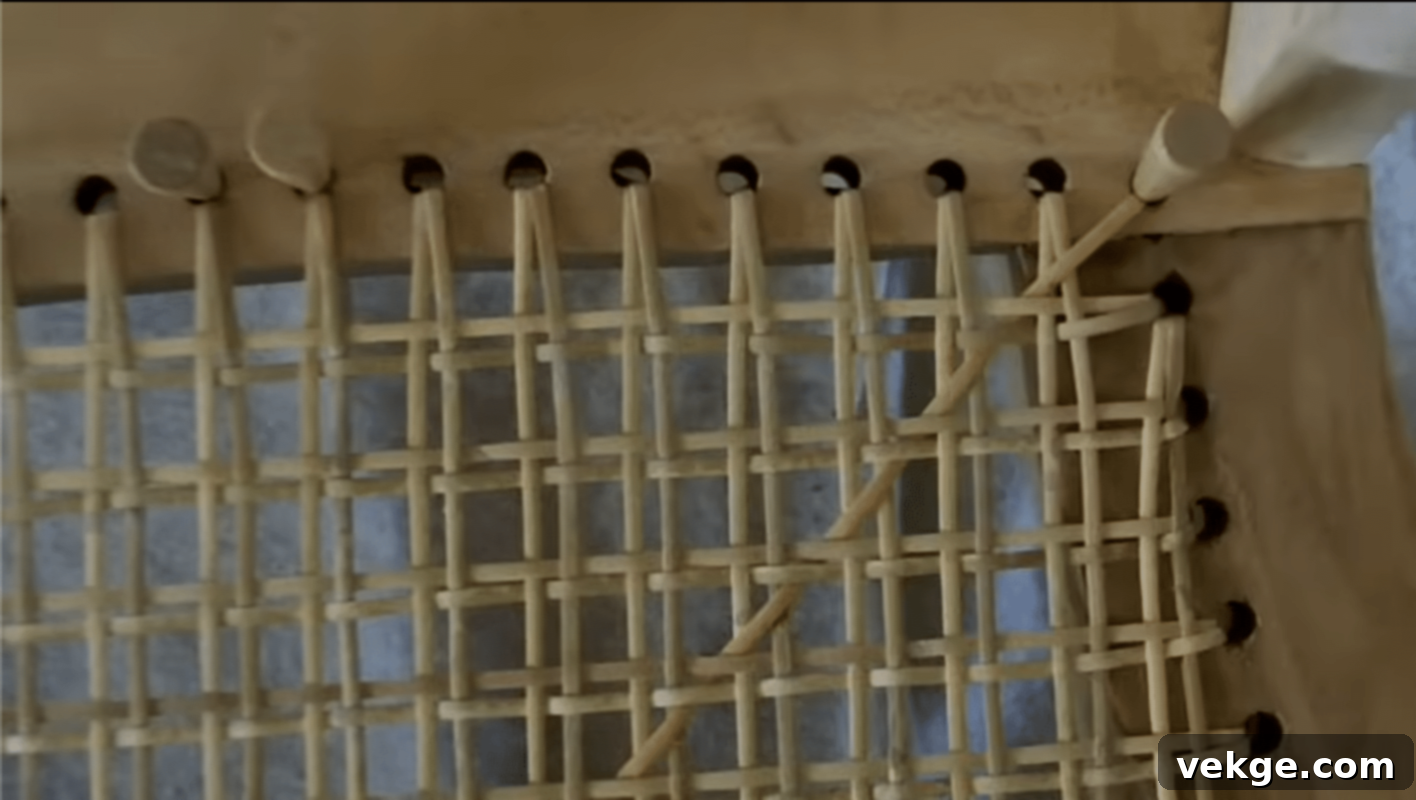
- Now, you’ll start weaving at an angle, typically beginning from a corner hole (e.g., top-left) and working towards the opposite side (e.g., bottom-right).
- Using a new cane strand, weave it diagonally across the existing grid. The pattern is usually “over two, under one” or “under two, over one,” creating an intertwining effect. For the traditional “seven-step” pattern, you’ll usually pass over the vertical pairs and under the horizontal strands.
- Keep the cane damp and pull it through evenly. Use your awl to gently separate the existing strands if needed to create space for the new diagonal.
- Maintain consistent tension and ensure the diagonal strands are parallel to each other.
Step 7: Weave the Second Diagonal Layer (Pass 5)
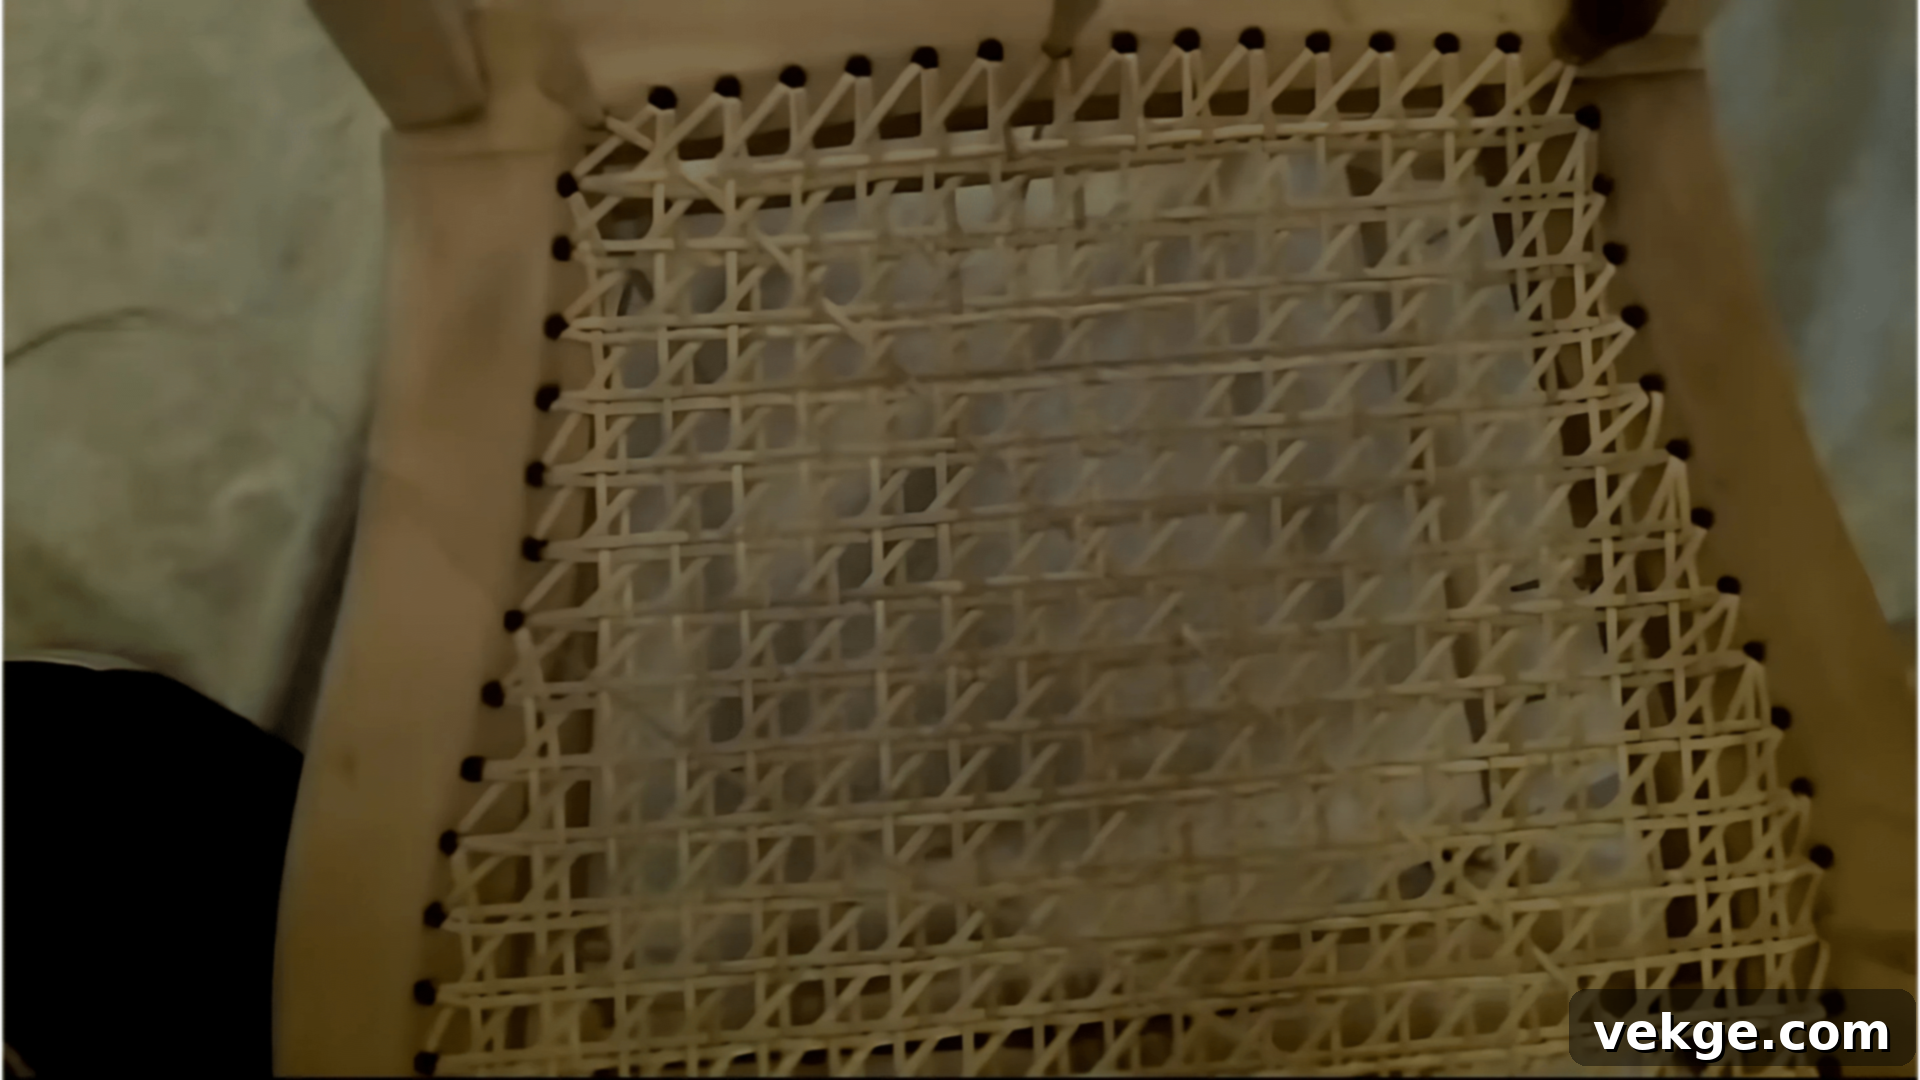
- This pass completes the “X” pattern, adding strength and visual texture. Start from the opposite corner (e.g., top-right) and weave towards the remaining opposite side (e.g., bottom-left).
- Weave these diagonal strands in the opposite direction to the previous diagonal layer, creating a criss-cross pattern. Where the first diagonal went over, this one should go under, and vice versa.
- This is often the most challenging pass due to the increasing density of the weave. Take your time, use your awl and caning needle to guide the cane through, and maintain even tension.
Step 8: Binding the Edges (Pass 6)
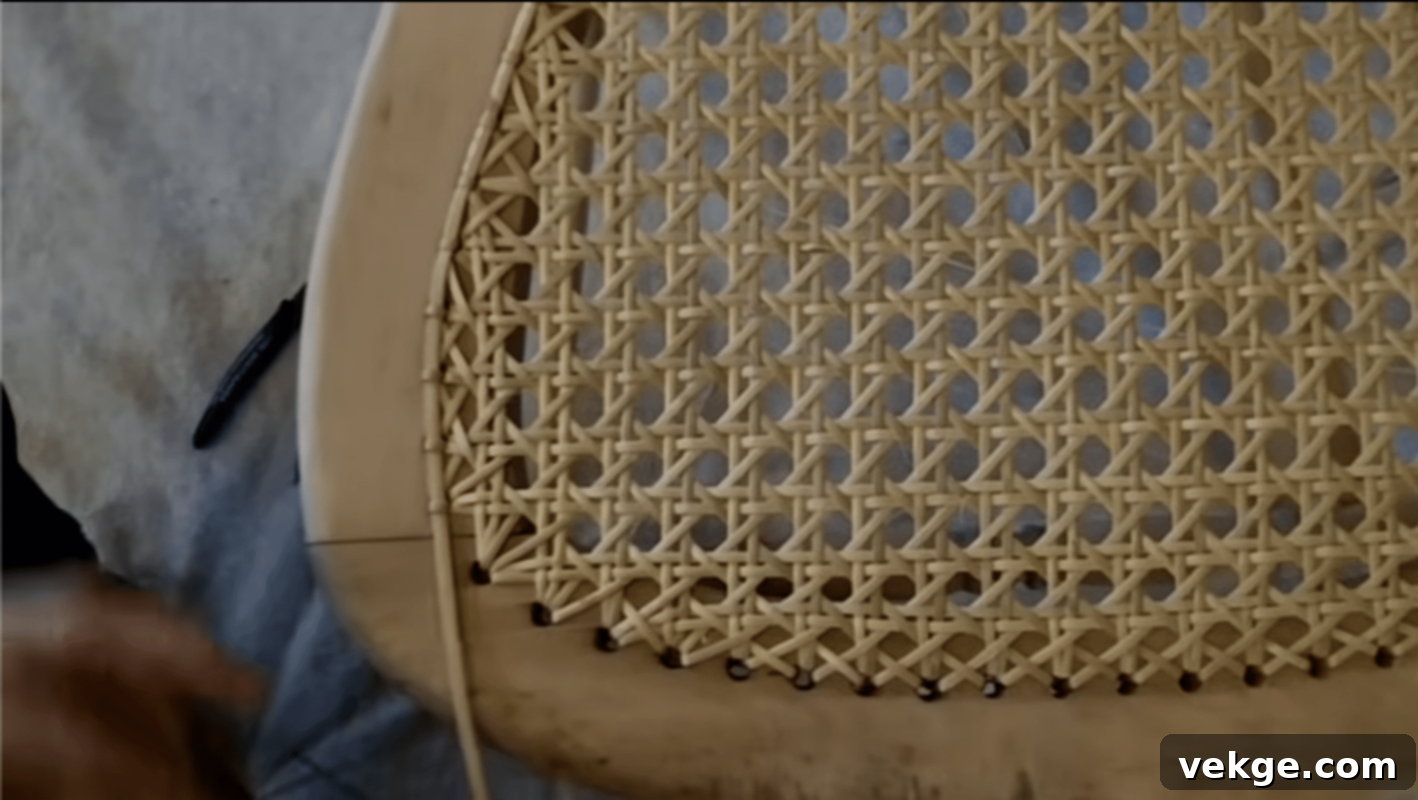
- Once all the weaving passes are complete, the final step for a hand-woven seat is to bind the edges for a neat and secure finish. Use a wider, flat binding cane (typically 4mm or 5mm wide, also soaked) for this step.
- Place the binding cane directly over the holes on the top surface of the chair frame.
- Using a narrow, thinner cane (often called “lacing cane” or “binder cane”), thread it down through a hole, loop it over the binding cane, and then back down through the same hole or the next adjacent hole. This secures the binding cane in place.
- Repeat this looping process around the entire perimeter of the seat, ensuring the binding cane lies flat and covers all the holes evenly. This creates a clean, professional edge.
Step 9: Finishing and Drying
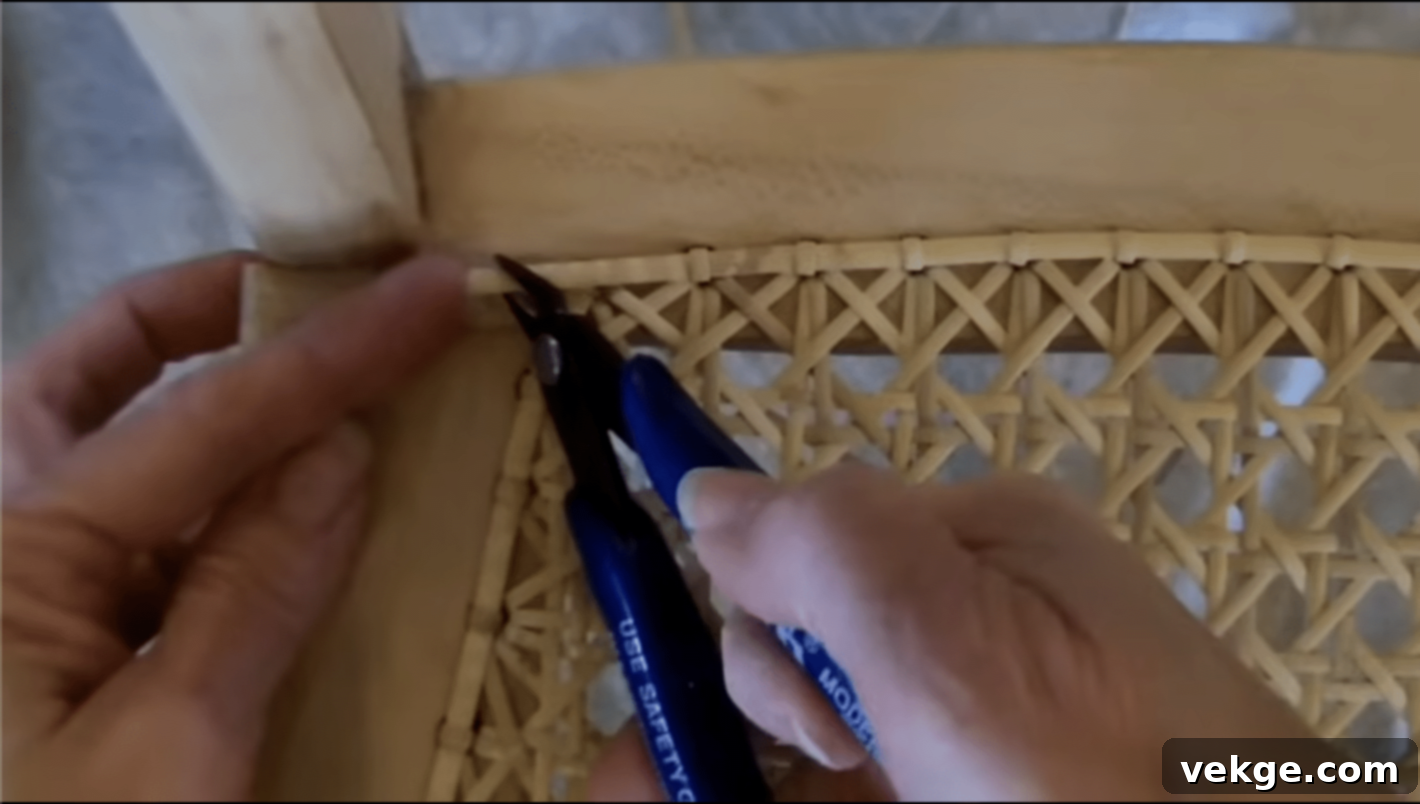
- Once all passes and binding are complete, carefully trim any excess cane strands underneath the chair, leaving about an inch of cane. Tuck these ends securely into the holes using your awl.
- Ensure all pegs are removed and all cane ends are securely tucked away.
- Inspect the entire weave for any loose ends or stray hairs. Trim these with sharp cutters for a pristine appearance.
- Allow the newly caned seat to dry completely at room temperature, which can take 24-48 hours. As the cane dries, it will naturally tighten, creating a firm, resilient seating surface. Avoid placing heavy objects on the chair until it is fully dry and taut.
For a visual demonstration of this intricate method, we highly recommend watching this detailed tutorial: Click Here.
Pre-Woven Cane Webbing Method: The Efficient Approach
This method offers a quicker and simpler way to restore a chair seat, ideal for beginners or those with time constraints. It involves fitting a pre-woven sheet into a routed groove.
Step 1: Soak the Cane Webbing for Flexibility
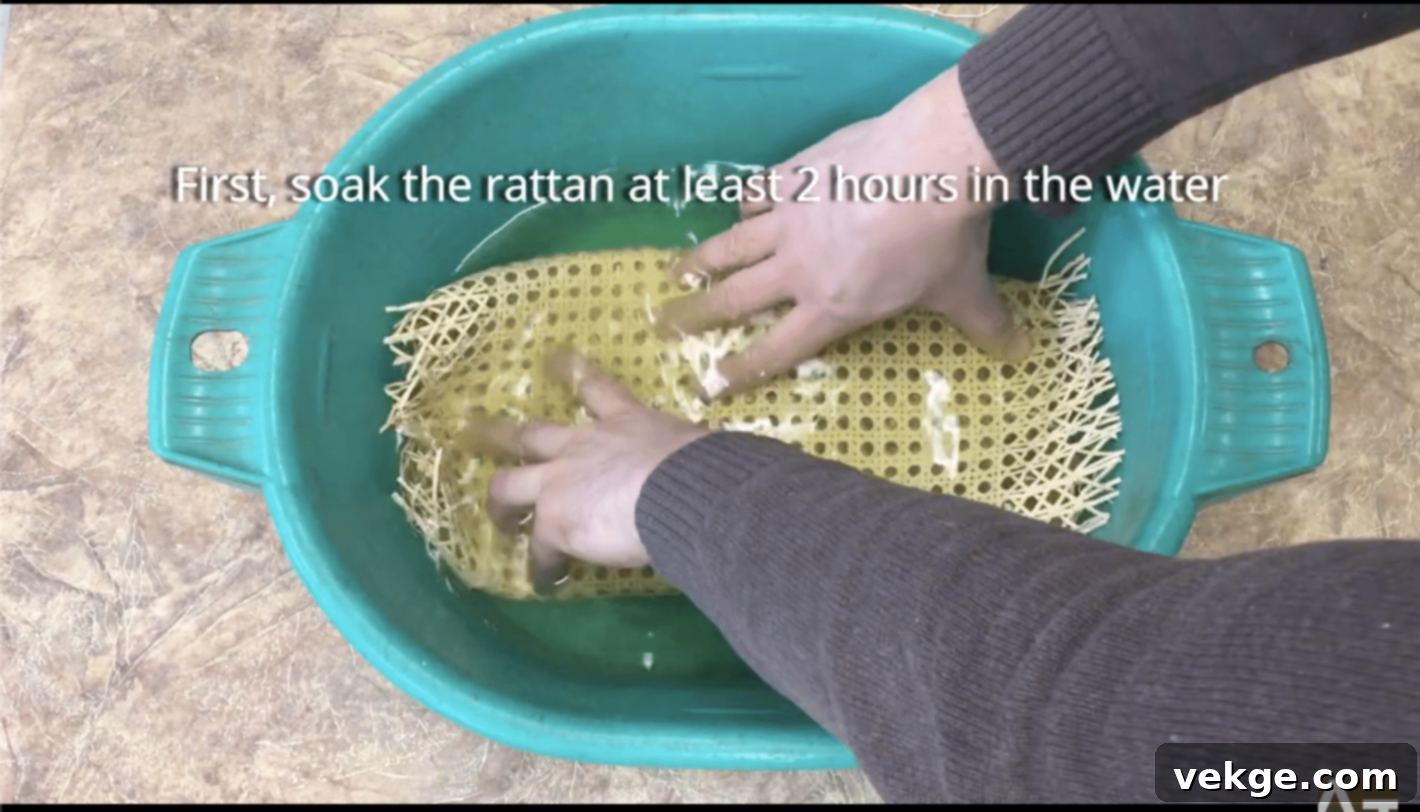
- Fill a bathtub or large basin with room-temperature water.
- Completely submerge the pre-woven cane webbing sheet in the water. Ensure it is fully saturated.
- Allow it to soak for at least 30 minutes, or until the cane becomes soft, flexible, and easy to manipulate.
- Caution: As with hand-woven cane, avoid hot water, which can damage the cane’s structure and make it brittle.
Step 2: Position the Wet Cane Webbing
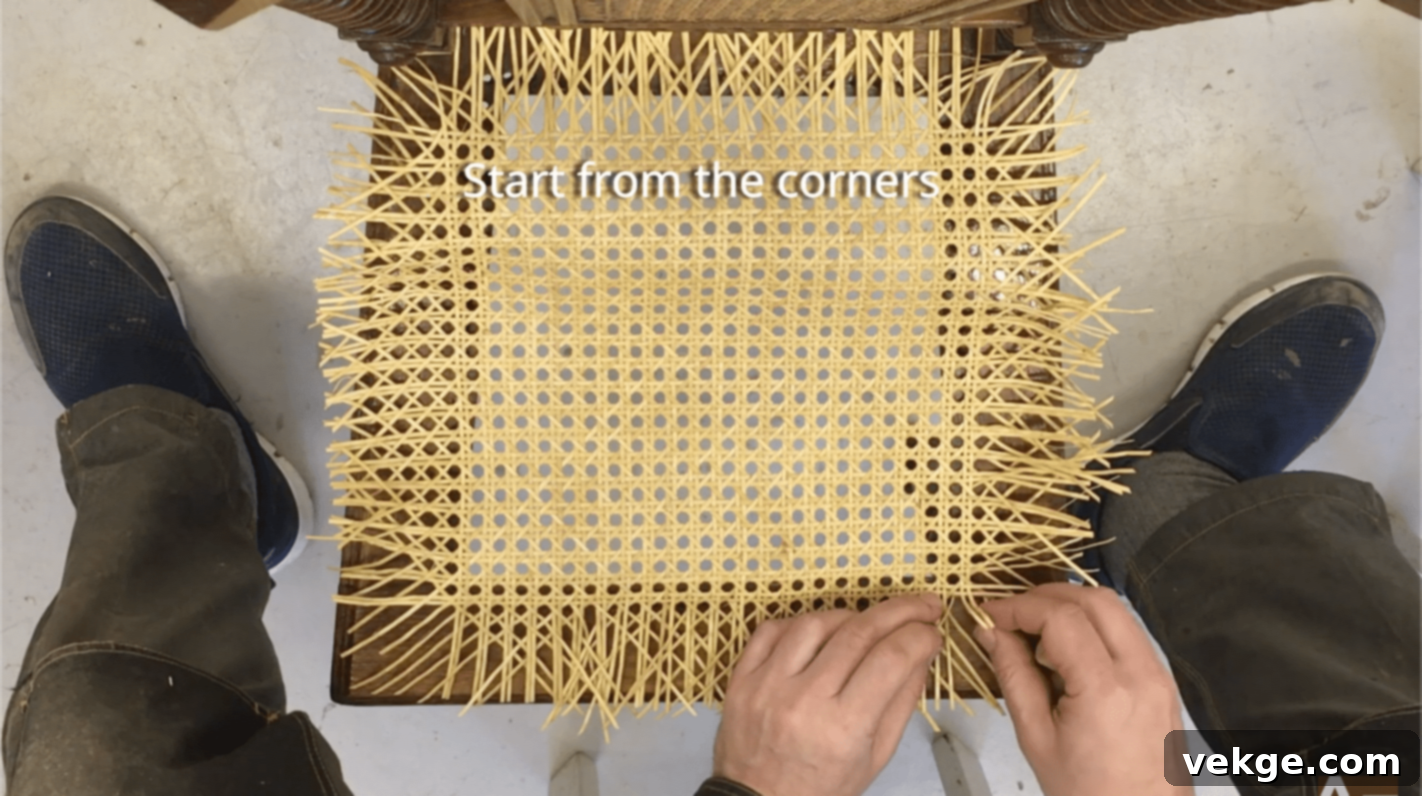
- Remove the soaked cane webbing from the water, allowing any excess to drip off.
- Carefully lay the damp cane sheet over the chair seat opening, ensuring the natural grain of the cane runs parallel to the chair’s front-to-back and side-to-side rails. Proper alignment is crucial for the final aesthetic.
- Begin by positioning one corner, aligning it neatly with the chair’s routed groove. Temporarily secure this corner with a small clamp to prevent it from shifting.
Step 3: Stretch and Align the Cane Webbing
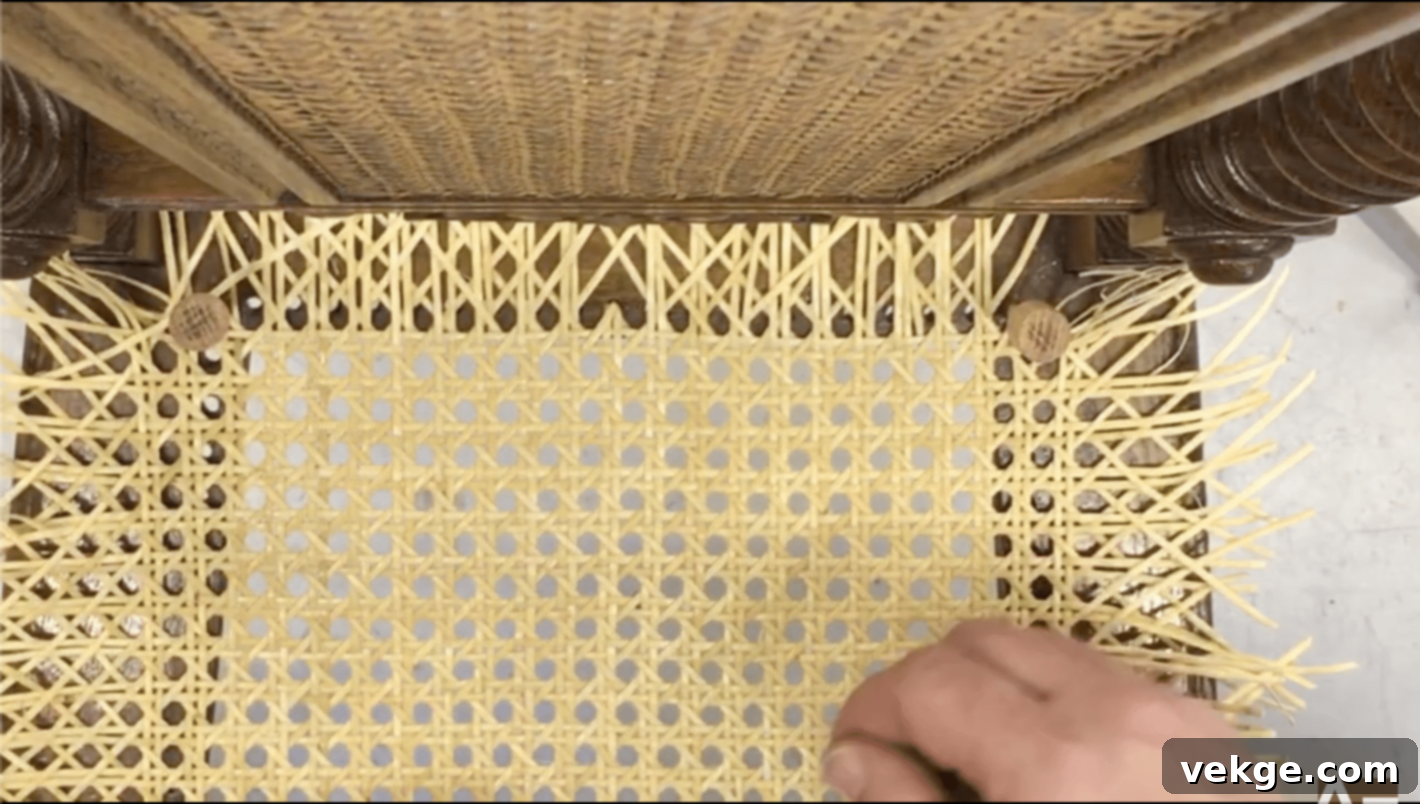
- Working outwards from the secured corner, gently stretch the cane webbing across the seat opening. Ensure the woven lines are straight and parallel to the chair frame’s edges.
- Using a spline chisel or a blunt wooden wedge, carefully begin pushing the edge of the cane webbing into the routed groove. Start in the middle of each side and work towards the corners.
- As you work, apply consistent tension across the cane. Use additional clamps along the edges to keep the cane taut and prevent it from pulling out of the groove as you proceed. The goal is an evenly stretched surface.
Step 4: Secure the Edges and Corners
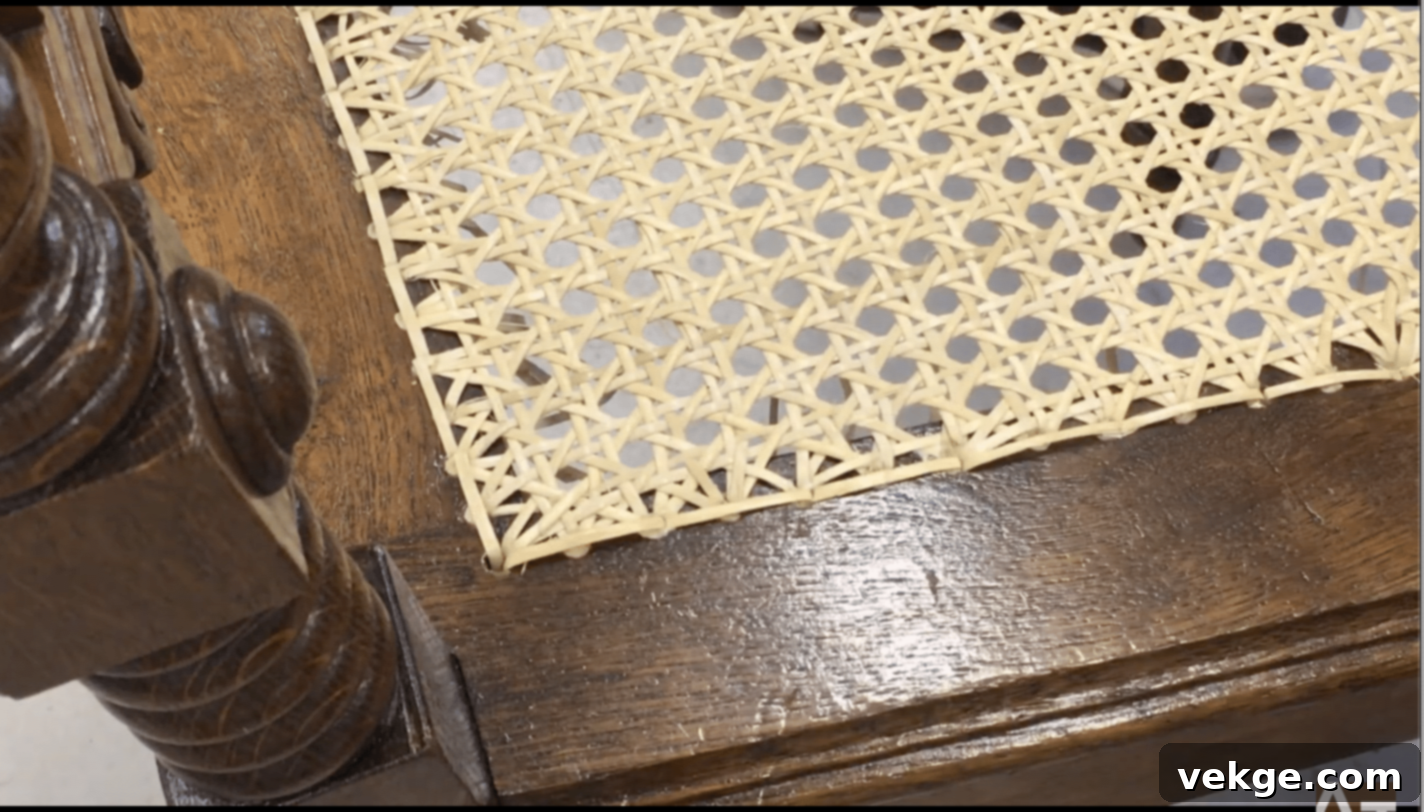
- Once the cane webbing is stretched and partially inserted into the groove around the entire perimeter, use sharp scissors or a utility knife to trim any excess cane. Leave approximately a 1/4 to 1/2 inch overhang beyond the outer edge of the groove. This excess will be pushed down into the groove.
- Carefully push the trimmed edges of the cane webbing deep into the groove, ensuring it’s fully seated and taut. Pay special attention to the corners, trimming and folding the cane neatly to fit without bulges.
- Once the cane is securely seated in the groove, apply a continuous bead of waterproof white glue or specialized caning glue into the groove, on top of the cane webbing.
Step 5: Install the Spline and Finish
- Carefully place the wooden spline (which should also be damp for flexibility) into the glue-filled groove, directly on top of the cane webbing.
- Using a rubber mallet and the spline chisel (or a blunt wooden wedge), gently tap the spline firmly into the groove. Work your way around the entire perimeter, ensuring the spline is fully seated and flush with the chair frame. The spline will press the cane securely into the groove, creating a tight seal.
- Wipe away any excess glue immediately with a damp cloth.
- Allow the glue to dry completely for at least 24 hours. As the cane webbing dries, it will naturally shrink and tighten further, creating a drum-tight seat.
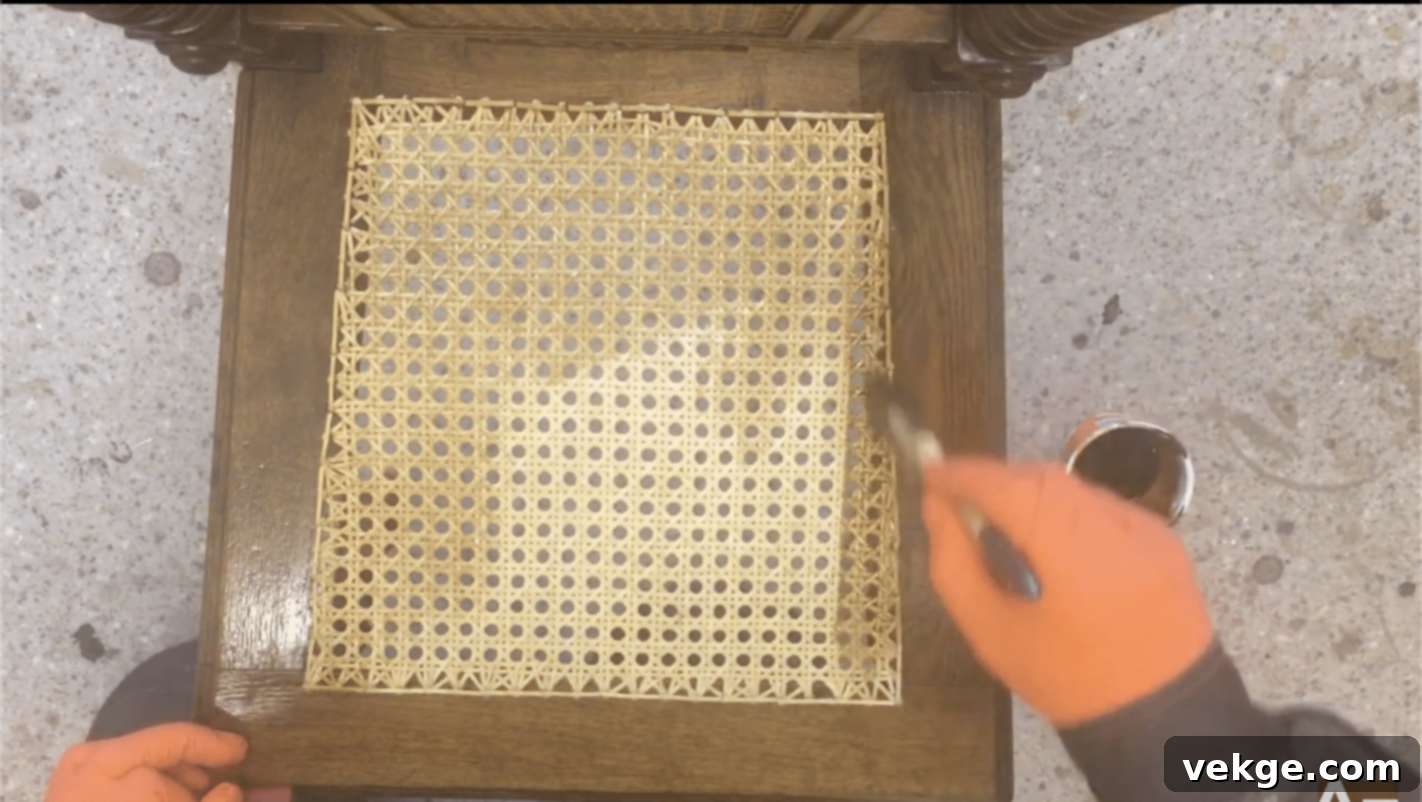
- Optional Finishing: Once the cane is completely dry, you can prepare a mixture of shellac and dye (e.g., a 50/50 ratio) if you wish to achieve a specific color or enhance durability. Apply this mixture to the cane using a brush. This step seals the cane, protects it from wear, and can give it a beautiful, aged patina. Allow it to dry fully before using the chair.
Remember, working with pre-woven cane webbing is often considered more forgiving and faster than hand-weaving, making it an excellent choice for beginners or for quick furniture restorations. For a helpful visual guide, consider watching this detailed tutorial: Click Here.
Troubleshooting Common Issues During Chair Recaning
Even with careful preparation and attention to detail, you might encounter a few common challenges when recaning a chair. Don’t be discouraged! Most issues are fixable with a bit of patience and the right technique. This section will guide you through the most frequent problems and provide practical solutions to ensure your project looks its best.
Cane Breaking or Splitting: Causes and Solutions
A frustrating issue, cane breakage can stem from several factors:
- Causes:
- Insufficient Soaking: The most common cause. If cane is too dry, it loses its flexibility and becomes brittle, prone to snapping under tension.
- Excessive Tension: Pulling the cane too tight, especially during weaving, can overstress the fibers and cause them to break or split.
- Old or Poor Quality Cane: Aged cane or cane that hasn’t been stored properly can be naturally weaker.
- Sharp Edges on Chair Frame: Rough or splintered edges in the drilled holes or groove can snag and cut the cane.
- Solutions:
- Re-Soak Immediately: If cane starts to break, stop and re-submerge it in room-temperature water for 10-15 minutes. Keep a spray bottle handy to mist your working cane.
- Replace Broken Strands: For hand-weaving, carefully untuck the broken strand’s ends and replace it with a new, properly soaked piece, re-weaving that section.
- Adjust Tension: Learn to feel for the right tension – snug but not strained. The cane should not cause the chair frame to bow.
- Inspect Frame Edges: Before starting, always sand and smooth any rough edges around holes or grooves to prevent future damage.
- Use Thicker Cane: If you consistently experience splitting with a particular cane size, consider using a slightly thicker gauge for increased durability, especially if the chair will see heavy use.
Uneven Weaving: How to Fix Mid-Process
A key to a beautiful cane seat is uniform weaving. Unevenness can appear as gaps, misaligned strands, or a distorted pattern:
- How to Identify: Regularly step back and visually inspect your work. Look for parallel lines, consistent spacing between strands, and straight patterns.
- Fixing Immediately:
- As soon as you notice an uneven section, stop weaving.
- Gently undo the problematic strands. This is where pegs in hand-weaving are invaluable for holding the rest of the weave.
- Re-weave the section slowly, paying meticulous attention to keeping strands parallel and maintaining even tension.
- Use a ruler or straight edge to periodically check your lines. Rushing often leads to mistakes, so take your time.
- Addressing Earlier Mistakes: If you’re several passes in and realize a much earlier row is uneven, you might need to undo back to where the problem started. While frustrating, it’s almost always worth the extra effort to ensure a high-quality, professional-looking final result. A small flaw at the beginning can propagate and magnify throughout the entire seat.
Loose Cane Webbing: How to Tighten it After Installation
Occasionally, even after a careful installation, pre-woven cane webbing might feel slightly loose once it dries. This can often be remedied:
- Causes:
- Not enough initial tension during installation.
- Improperly seated spline.
- Fluctuations in humidity after drying.
- Solutions:
- Gentle Dampening: Lightly dampen the entire cane webbing surface with a sponge or spray bottle filled with room-temperature water. Do not soak it thoroughly, just enough to make it slightly pliable.
- Allow to Dry Naturally: Let the moisture soak in for about 30 minutes. As the cane then slowly dries over the next 24-48 hours, it will naturally shrink and tighten, often resolving minor looseness.
- Re-check Spline: For pre-woven cane, ensure the spline is fully seated and glued into the groove. If it has popped out or is not flush, you may need to re-glue and re-tap it into place.
- Re-installation (Last Resort): If the cane remains significantly loose after trying the above, and if the spline can be removed without damage, you might need to re-soak the cane webbing, stretch it with more tension, and re-install the spline.
Remember, prevention is always better than cure: Ensure your initial weave or webbing installation is tight but not overly so, allow your finished work to dry completely before use, and consider applying a sealant to help maintain the cane’s shape and protect it over time. By addressing these common issues with confidence, you can ensure your recaned chair not only looks good but also provides lasting durability.
How to Care for Your Newly Caned Chair?
After dedicating your time and effort to meticulously recaning your chair, the last thing you want is for it to quickly deteriorate. Proper care and maintenance are paramount to preserving your handiwork and ensuring your chair remains beautiful and functional for many years. This section provides essential tips on cleaning, maintaining, and prolonging the life of your newly caned chair.
Tips on Maintaining and Cleaning Cane Seats
Regular and gentle care will keep your cane seat in prime condition:
1. Regular Dusting:
- Use a soft-bristle brush, a feather duster, or a vacuum cleaner with a brush attachment on a low setting.
- Dust weekly or bi-weekly to prevent the buildup of dirt, dust, and crumbs within the intricate weave, which can cause abrasion and discoloration over time.
2. Gentle Cleaning:
- For light dirt or spills, use a damp (not soaking wet) cloth with a small amount of mild soap (e.g., dish soap, saddle soap, or furniture soap).
- Wipe the cane gently, following the direction of the weave. Avoid rubbing vigorously, which can damage the fibers.
- Crucial: Do not saturate the cane with water, as excessive moisture can weaken the fibers and lead to sagging or mildew.
- For tougher, dried-on dirt, a soft-bristle brush (like a toothbrush) can be carefully used with soapy water, but ensure you don’t scrub too hard.
- Immediately after cleaning, dry the cane quickly and thoroughly with a clean, soft cloth or by placing a fan nearby. Good air circulation is key.
3. Avoid Harsh Cleaners:
- Never use strong chemicals, abrasive cleaners, ammonia-based products, or furniture polishes that contain silicone.
- These products can strip the cane’s natural oils, dry it out, make it brittle, or leave a sticky residue that attracts more dirt.
4. Check for Loose Strands:
- Periodically inspect your caned seat for any loose or frayed cane strands.
- Addressing small issues early on with a dab of wood glue or by carefully tucking them back into the weave can prevent them from becoming bigger, more complex problems.
5. Monitor Humidity Levels:
- Cane, being a natural fiber, thrives in environments with moderate humidity.
- If your home is excessively dry (especially during winter months with central heating), the cane can become brittle and prone to cracking. Consider using a humidifier near the chair to maintain optimal humidity levels (around 40-50%). Conversely, extremely high humidity can cause cane to sag.
How to Prolong the Life of Your Recaned Chair
Beyond cleaning, these preventative measures will significantly extend the lifespan of your beautifully restored chair:
1. Avoid Direct Sunlight and Heat:
- Prolonged exposure to direct sunlight can cause the cane to dry out, become brittle, fade its color, and lose its elasticity.
- Keep your caned chair away from windows where it receives harsh, unfiltered sunlight. Also, avoid placing it too close to heat sources like radiators, fireplaces, or heating vents.
2. Rotate the Chair or Cushions:
- If the chair must be in a spot where it receives some sunlight or uneven wear, rotate its position regularly.
- If using a thin cushion or chair pad, rotate it or flip it periodically to distribute wear evenly.
3. Use a Chair Pad or Cushion:
- For frequently used chairs, a thin, breathable cushion or chair pad can provide an extra layer of protection against daily wear and tear, reducing direct pressure on the cane fibers.
- Ensure the pad allows for some air circulation to prevent moisture buildup underneath.
4. Mind the Weight Distribution:
- Cane seats are strong but not indestructible. Avoid placing excessively heavy items on the seat.
- When sitting, try to distribute your weight evenly. Avoid putting all your weight on one small spot, which can cause localized stress and premature sagging.
5. Keep Pets Away:
- Pet claws (especially cats using it as a scratching post) and even playful chewing can quickly damage delicate cane fibers.
- Train pets to avoid the caned furniture or use protective covers if necessary.
6. Occasional Oiling (Hand-Woven Cane):
- For hand-woven cane, a light application of boiled linseed oil (diluted with an equal part of turpentine or mineral spirits) once a year or every few years can help keep the cane supple and prevent it from drying out.
- Apply sparingly with a cloth, allow to penetrate, then wipe off any excess. Do not do this for pre-woven cane with a finish, as it might interact with the sealant.
7. Promptly Address Any Damage:
- The moment you notice any minor damage, a loose strand, or a small break, address it immediately. Small repairs are much easier, quicker, and less expensive than waiting until the entire seat needs to be recaned again.
By diligently following these care and maintenance tips, you can significantly extend the life and beauty of your newly caned chair, allowing you to enjoy your craftsmanship for many years to come and preserving a valuable piece of furniture.
Conclusion
Recaning a chair, whether through the traditional hand-weaving method or the more modern pre-woven cane webbing technique, is a deeply rewarding skill that breathes new life into old furniture. What might initially seem like a complex task is entirely achievable with a healthy dose of patience, attention to detail, and a willingness to learn.
Throughout this guide, we’ve walked through the essential steps: from understanding the different types of cane and meticulously preparing your chair frame, to executing the weaving or installation processes, and finally, learning how to troubleshoot common issues. Remember the core principles: always keep your cane adequately damp, strive for consistent and even tension, and take your time at each stage. Rushing often leads to mistakes that are more time-consuming to correct.
Once your project is complete, the journey doesn’t end there. Proper care and maintenance are vital to preserving your hard work. Regular dusting, gentle cleaning, protecting your chair from direct sunlight and extreme humidity, and promptly addressing any minor damage will ensure your newly caned chair remains a beautiful and functional piece for many years.
So, gather your materials, arm yourself with this step-by-step guide, and embark on your recaning project with confidence. The satisfaction of restoring a beautiful piece of furniture with your own hands is truly unparalleled. With these newly acquired skills, you can not only preserve cherished family heirlooms but also transform thrift store finds into stunning focal points in your home. Happy recaning!
Frequently Asked Questions About Chair Recaning
How much does it cost to recane a chair yourself?
Recaning a chair yourself is significantly more affordable than hiring a professional. The material costs typically range from $20 to $50 for an average-sized chair, depending on the type of cane (hand-woven strands vs. pre-woven webbing) and the quality of the materials you choose. This estimate does not include the initial purchase of tools, which can be a one-time investment if you plan to do multiple projects.
Is caning a chair difficult for beginners?
Caning a chair can be challenging for beginners, especially the hand-weaving method which requires precision and patience to learn the intricate patterns. However, it is a highly learnable skill. Starting with pre-woven cane webbing on a simpler chair frame is recommended for first-timers, as it’s a faster and more straightforward process. Practice is key, and with each project, your skill and confidence will quickly improve.
How long does it take to recane a chair seat?
The time required to recane a chair seat varies greatly depending on the method and your experience level. For beginners attempting hand-weaving, it can take anywhere from 8 to 20 hours for a standard seat, due to the learning curve and meticulous nature of the process. Experienced caners might complete a hand-woven seat in 4 to 6 hours. Pre-woven cane webbing is much faster, typically taking beginners 2 to 4 hours to install, and experienced individuals even less time. The complexity of the chair’s shape and the size of the seat also influence the overall duration.
Can I recane a chair with alternative materials like yarn or thread?
While you can technically weave a chair seat with alternative materials like yarn, rope, or heavy-duty thread, they are generally not as durable, breathable, or structurally sound as traditional cane. These materials might be suitable for decorative purposes, temporary fixes, or chairs that will not bear significant weight. For lasting quality and authenticity, especially for seating, traditional cane (rattan) or synthetic cane designed for strength is highly recommended.
Where can I buy caning materials?
Caning materials, including cane strands, pre-woven webbing, splines, and specialized tools, are available from several sources. You can find basic supplies at larger craft stores (like Hobby Lobby or Michaels), woodworking supply shops, and hardware stores that cater to restoration projects. However, for the best selection, quality, and expert advice, online retailers specializing in caning supplies or traditional woodworking often provide the most comprehensive range of materials and tools.
