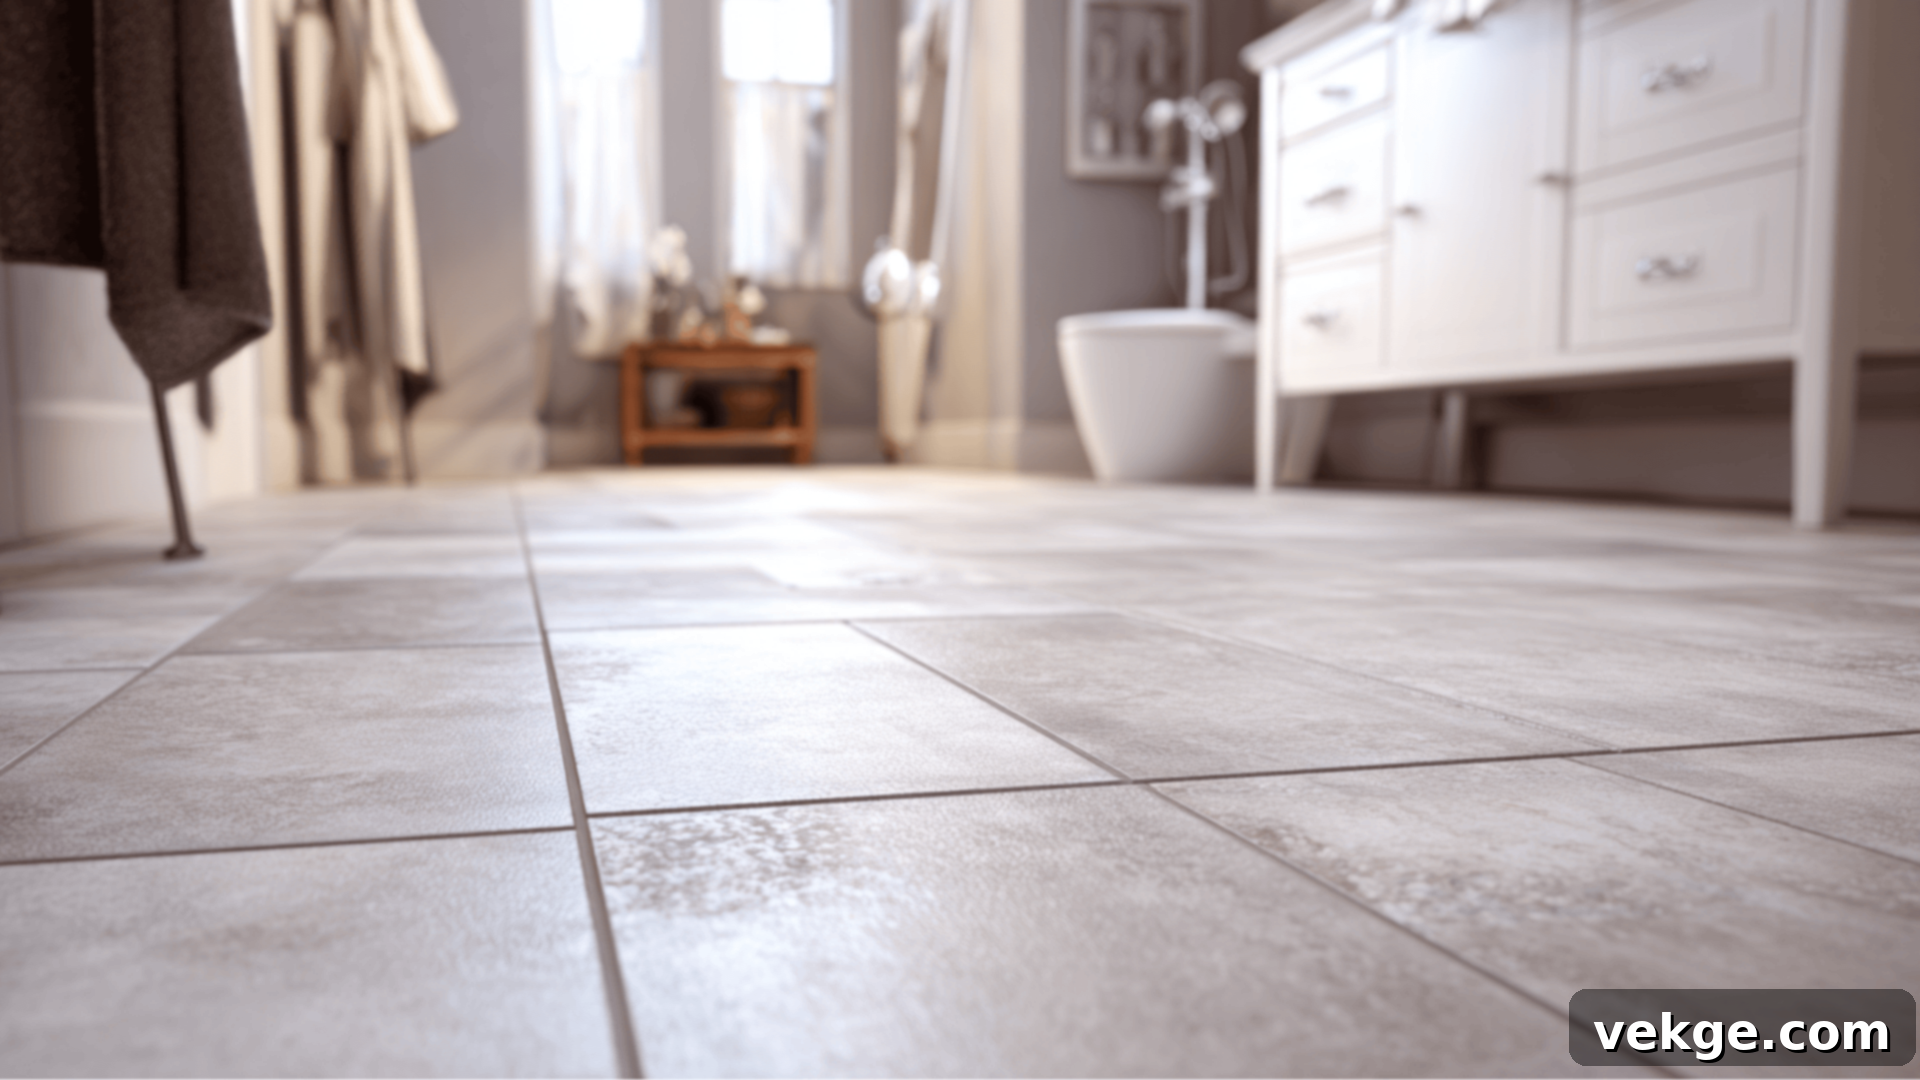
Transform Your Bathroom: The Ultimate DIY Guide to Painting Tile Floors for a Stunning, Budget-Friendly Makeover
Are you dreaming of a bathroom refresh but dreading the thought of a full-scale, expensive, and time-consuming renovation? Many homeowners face this dilemma, longing for a change without the mess, cost, and disruption that comes with traditional tile replacement. The good news is, there’s a highly effective, budget-friendly, and surprisingly simple solution: painting your bathroom tile floors. This DIY project can be completed in a single weekend, offering a dramatic transformation for a fraction of the cost and effort.
This comprehensive guide will equip you with all the knowledge and practical steps needed to successfully paint your bathroom tile floors. We’ll cover everything from meticulous cleaning and surface preparation, selecting the ideal paint and tools, to applying smooth, even coats and ensuring a durable, long-lasting sealed finish. Whether you’re looking to revitalize a rental property, update your forever home, or simply explore a creative new look, this detailed process will empower you to achieve a beautiful, brand-new bathroom aesthetic with confidence and ease.
Is Painting Bathroom Tile Floors a Smart Investment? Weighing the Pros and Cons
The idea of painting bathroom tile floors often sparks curiosity and skepticism. Is it a genuinely viable solution, or just a temporary fix? The answer lies in understanding its benefits and limitations, and setting realistic expectations.
The Upsides of Painting Your Bathroom Tiles:
- Cost-Effective: Compared to ripping out and replacing old tiles, painting is significantly cheaper, making it an ideal choice for budget-conscious homeowners. You can achieve a high-impact visual upgrade without the hefty expenses of new materials and professional labor.
- Time-Saving: A complete tile replacement can take weeks, involving demolition, laying new tiles, grouting, and extensive clean-up. Painting, however, can typically be completed within a single weekend, allowing you to enjoy your refreshed space rapidly.
- Minimal Disruption: Say goodbye to the dust, noise, and chaos associated with traditional renovations. Painting is a far less invasive process, allowing you to maintain a relatively normal household routine during the project.
- Design Flexibility: You can instantly change the color, add intricate patterns with stencils, or even mimic the look of natural stone or wood, offering immense design freedom to match your evolving style and home décor trends.
Considerations and Maintenance Expectations:
While highly beneficial, painted tile floors aren’t entirely maintenance-free. Their longevity largely depends on several factors:
- Traffic Levels: In high-traffic bathrooms, such as a main family bathroom or a kids’ bathroom, you might anticipate minor touch-ups every 2-3 years. Areas around showers, toilets, and doorways tend to see the most concentrated wear and tear.
- Preparation is Key: As highlighted by experienced DIYers, proper preparation is paramount. A thorough cleaning and correct application of primers (if needed) and topcoats can significantly extend the life of your painted floors. One homeowner reported excellent results after two years with meticulous prep, while another noted most areas held up well for five years, with only minor repairs needed near the shower area where water exposure was highest.
- Ideal Scenarios: Painting tile floors is particularly well-suited for rental properties (where permanent changes aren’t always desired), quick budget makeovers, or guest bathrooms where traffic is generally lighter. It offers an impressive aesthetic upgrade without a long-term, irreversible commitment.
- Realistic Expectations: It’s crucial to understand that painted tiles, even with the best products and application, may not last as long as newly installed ceramic or porcelain tiles. However, the ease and affordability of reapplying paint make it a highly attractive option for keeping your bathroom looking fresh and modern for years.
Your Comprehensive Step-by-Step Guide to Painting Bathroom Tile Floors
Achieving a professional-looking, durable finish on your bathroom tile floors is entirely possible with the right approach and a bit of patience. This detailed guide breaks down the process into manageable steps, ensuring you get lasting results. Remember, this entire transformation typically takes 3-4 days, primarily due to crucial drying and curing times between coats. Do not rush these stages; they are vital for the longevity and adhesion of your painted floor.
Essential Supplies You’ll Need for Painting Bathroom Tiles
Before you begin, gather all your materials. Having everything on hand will ensure a smooth, uninterrupted workflow and a superior finish. We recommend products from the Rust-Oleum HOME system for their reliability and ease of use, but similar high-quality tile painting systems can also be effective.
- Rust-Oleum HOME Base Coat: Your primary color and the foundational adhesion layer for your project.
- Rust-Oleum HOME Top Coat (Matte or Satin): The protective, durable sealant that offers water resistance and your desired final sheen.
- Crud Cutter or Included Cleaner (Bathroom-Safe Degreaser): Absolutely essential for removing grime, soap scum, oils, and residues that prevent paint adhesion.
- 3/8″ Nap Roller: Ideal for applying base coats and any optional stencil layers, ensuring good coverage on textured surfaces.
- 1/4″ Nap Roller: Perfect for the top coat, providing a smoother, thinner, and more even finish with minimal texture.
- Angled Paintbrush: Crucial for precise application along edges, behind the toilet, around fixtures, and in other tight corners.
- Stencils (Optional): For adding decorative patterns and personalized flair to your floor design.
- Painter’s Tape (e.g., FrogTape or ScotchBlue): To protect baseboards, adjacent walls, fixtures, and ensure crisp, clean lines.
- Tack Cloth: Essential for removing any dust or lint particles between coats, ensuring a perfectly smooth surface for subsequent layers.
- Small Stencil Brush or Foam Dabber: For detailed stencil work or applying paint in very hard-to-reach, intricate areas.
- Clean Rags, Vacuum, and Bucket: For thorough cleaning and maintaining overall project tidiness.
- Gloves and Knee Pads: Recommended for comfort and protection during the extensive cleaning and painting process, especially given the amount of time you’ll spend on the floor.
Step 1: The Foundation – Deep Clean Your Bathroom Tile Floors Meticulously
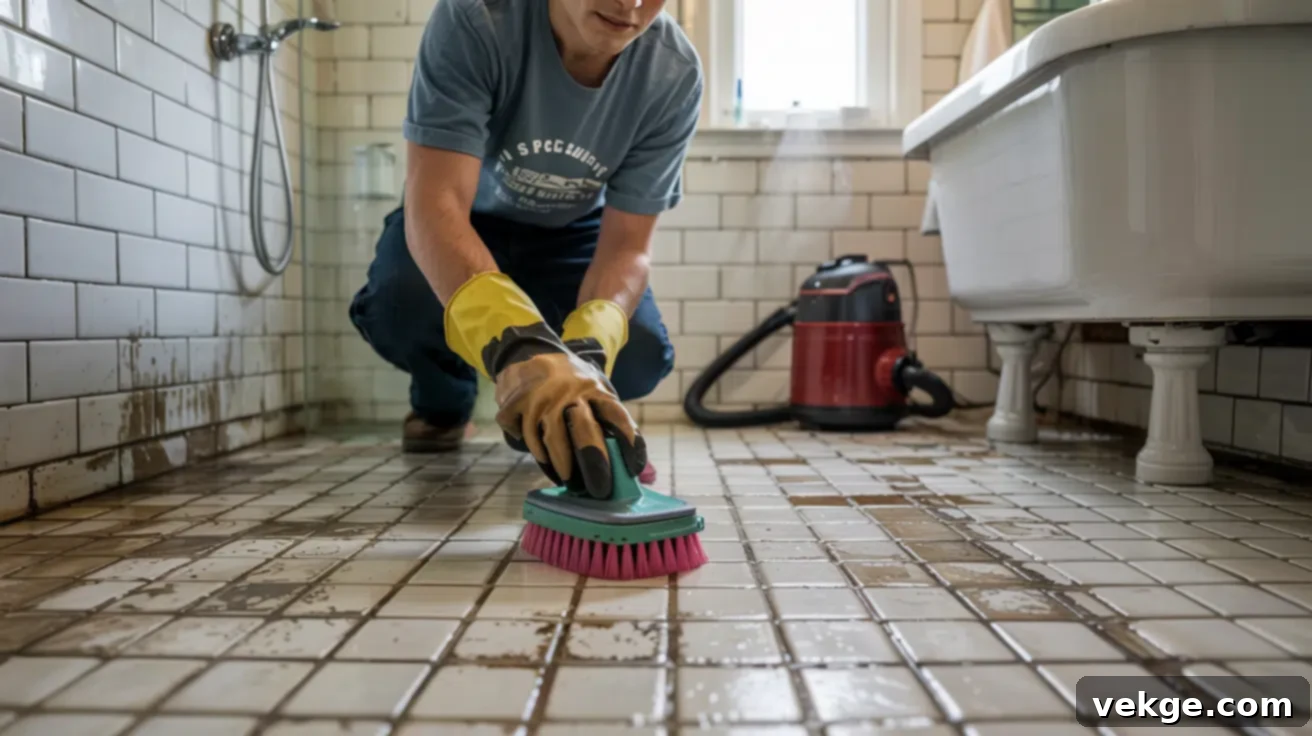
This is arguably the most critical step in the entire process. Bathrooms are notorious for accumulating layers of soap scum, hard water stains, mildew, and general grime – all of which can severely inhibit paint adhesion. A truly clean surface is non-negotiable for a lasting finish.
Begin by thoroughly vacuuming or sweeping the entire floor to remove loose dirt and debris. Don’t just skim the surface; pay close attention to grout lines and corners where grime often hides. Next, apply a powerful, bathroom-safe degreaser like Crud Cutter (or the cleaner included with your Rust-Oleum HOME kit). Liberally spray the solution over the tiles and grout, allowing it to penetrate for a few minutes as per product instructions.
Using a stiff brush, vigorously scrub every inch of your tile and grout. Focus extra attention on high-moisture areas such as around the shower, bathtub, toilet base, and vanity. Rinse the floor thoroughly with clean water multiple times, ensuring all cleaner residue is completely removed. Finally, let the floor dry completely. Any residual moisture or cleaning solution will compromise the paint’s ability to bond. With systems like Rust-Oleum HOME, the need for sanding or priming is eliminated, but only if the surface is absolutely spotless and dry.
Step 2: Protecting Your Space – Tape Off and Prepare the Bathroom for Painting
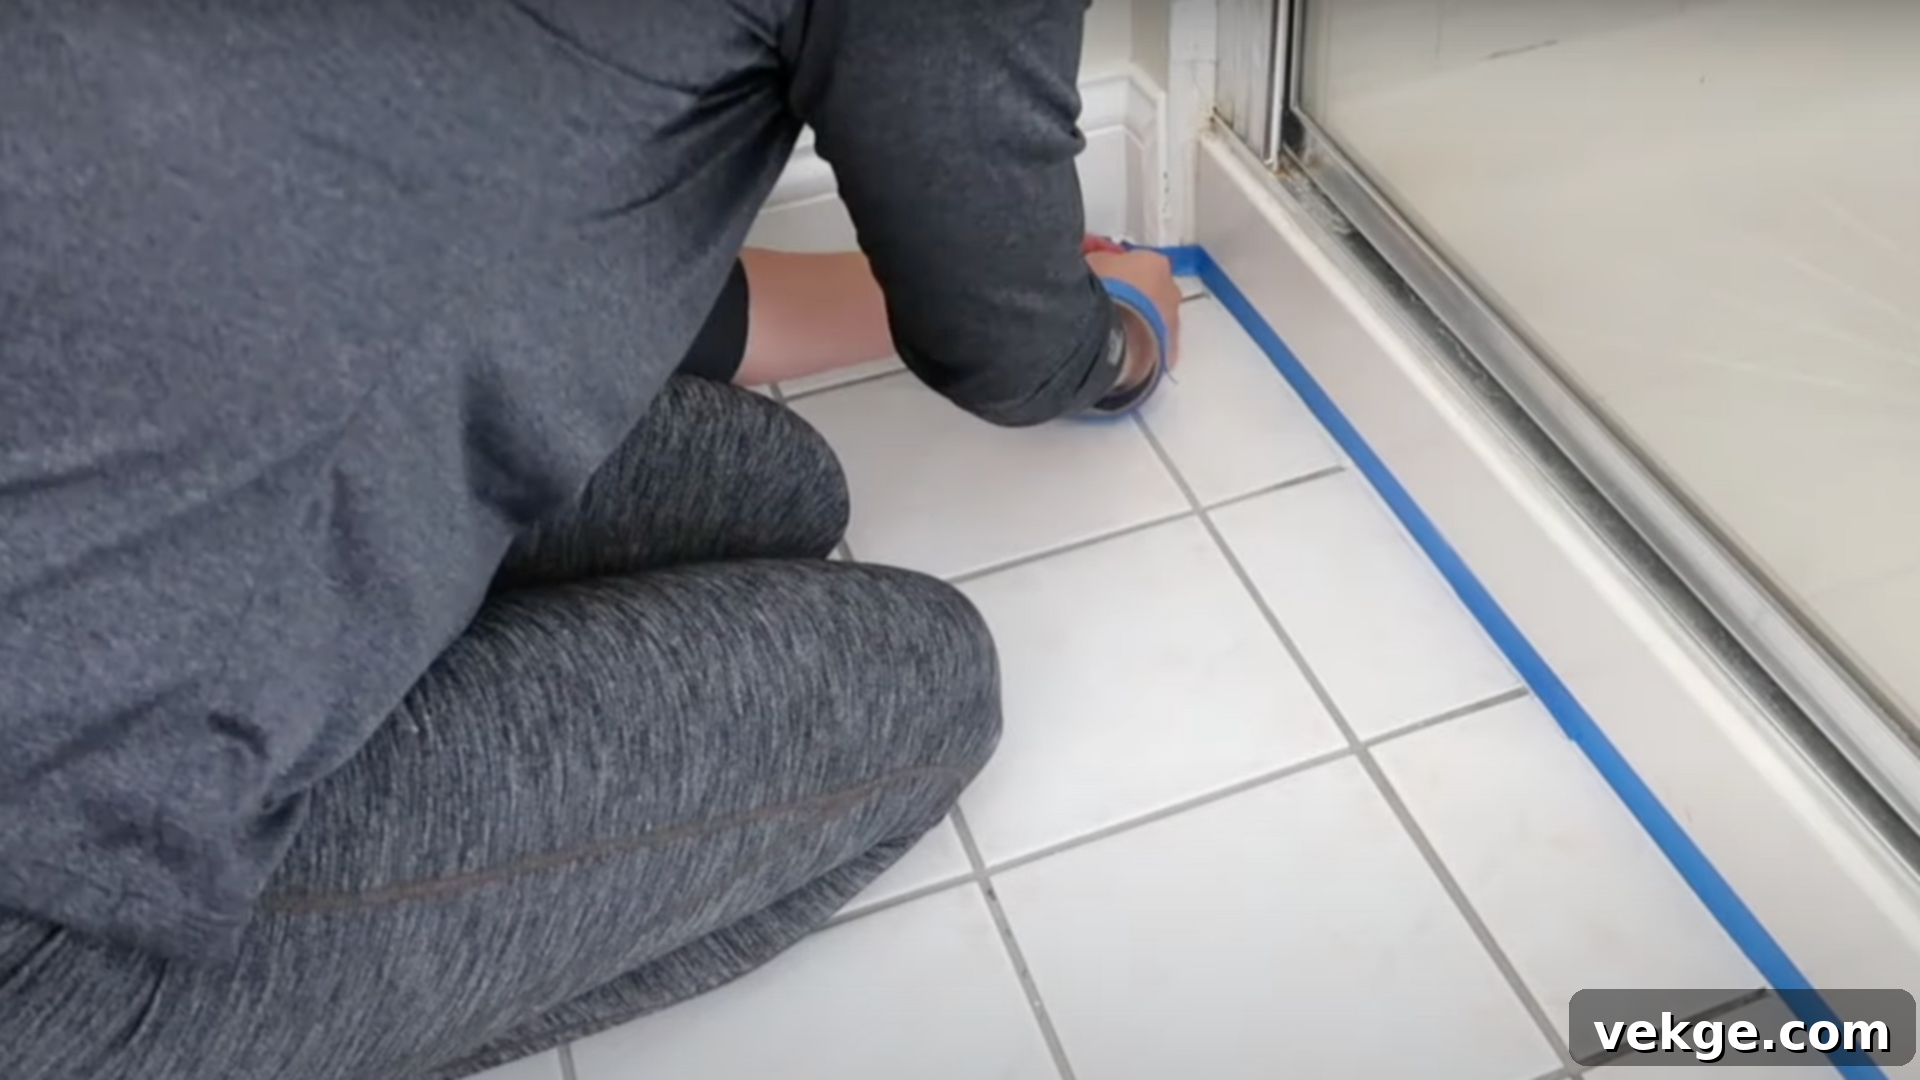
With your floor sparkling clean and dry, it’s time to protect adjacent surfaces and ensure clean paint lines. This preparation ensures a professional finish and saves you from tedious cleanup later.
Carefully apply high-quality painter’s tape along the baseboards, around the bathtub or shower edges, at the base of the toilet, and around any vanity legs or other fixtures that meet the floor. Press the tape down firmly to create a tight seal, preventing paint bleed. Crucially, remove any old, cracked, or loose caulk around the tub, shower, or toilet. Silicone caulk, in particular, will prevent paint from adhering properly, leading to peeling in these sensitive areas. You’ll re-caulk these areas after the paint has fully cured.
Ventilation is key in any painting project, especially in a humid bathroom environment. Open windows and use a box fan to ensure good airflow. This will help dissipate paint fumes and significantly speed up the drying time between coats, which is essential for proper paint curing and preventing issues like tackiness or peeling. This meticulous prep work ensures crisp, professional-looking edges and minimizes the need for touch-ups in areas prone to moisture or wear.
Step 3: Laying the Foundation – Applying Your First Base Coat
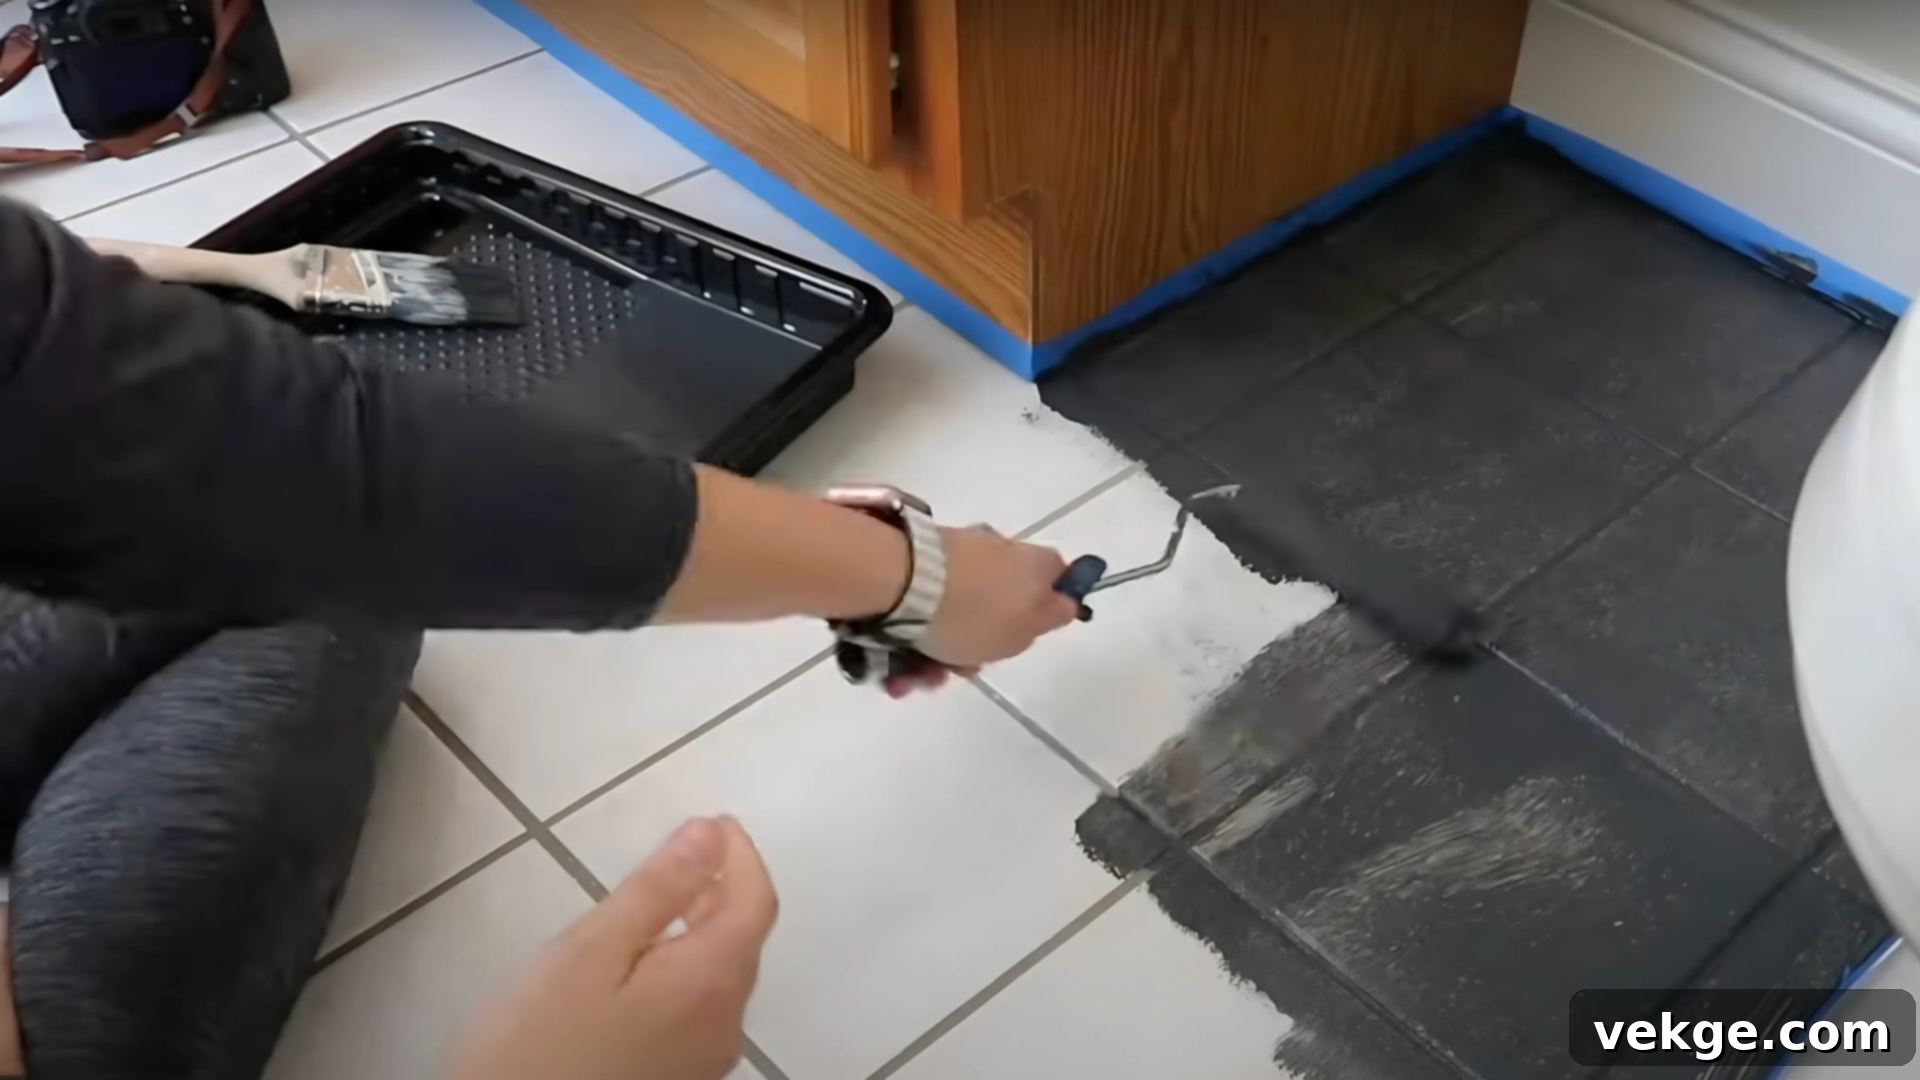
Now for the exciting part – applying the paint! Choose your desired base color; popular choices like charcoal gray, bright white, or earthy tones can dramatically change the feel of your bathroom. Before you open the can, ensure the floor is still free of any dust or debris – a quick wipe with a tack cloth can help.
Start by using your angled paintbrush to carefully cut in around the edges of the room, along the taped-off baseboards, around the toilet, and any other fixtures. Work methodically to achieve clean, straight lines. Once the edges are done, pour some Rust-Oleum HOME Base Coat into a paint tray. Using a 3/8″ nap roller, begin rolling the rest of the tile floor. Always start from the farthest point in the bathroom (e.g., the corner opposite the door) and work your way backward towards the exit. This ensures you don’t paint yourself into a corner!
Apply the paint in thin, even coats. Avoid applying too much paint at once, as thick layers can lead to drips, uneven drying, and an increased risk of peeling later. Aim for consistent coverage. Once the entire floor is covered, allow the first base coat to dry for a minimum of 6 hours. During this period, avoid walking on the floor. If absolutely necessary, wear clean socks to prevent leaving any marks or disturbing the curing paint. Proper drying time is crucial for the adhesion of subsequent coats.
Step 4: Enhancing Coverage and Durability – Applying Your Second Base Coat
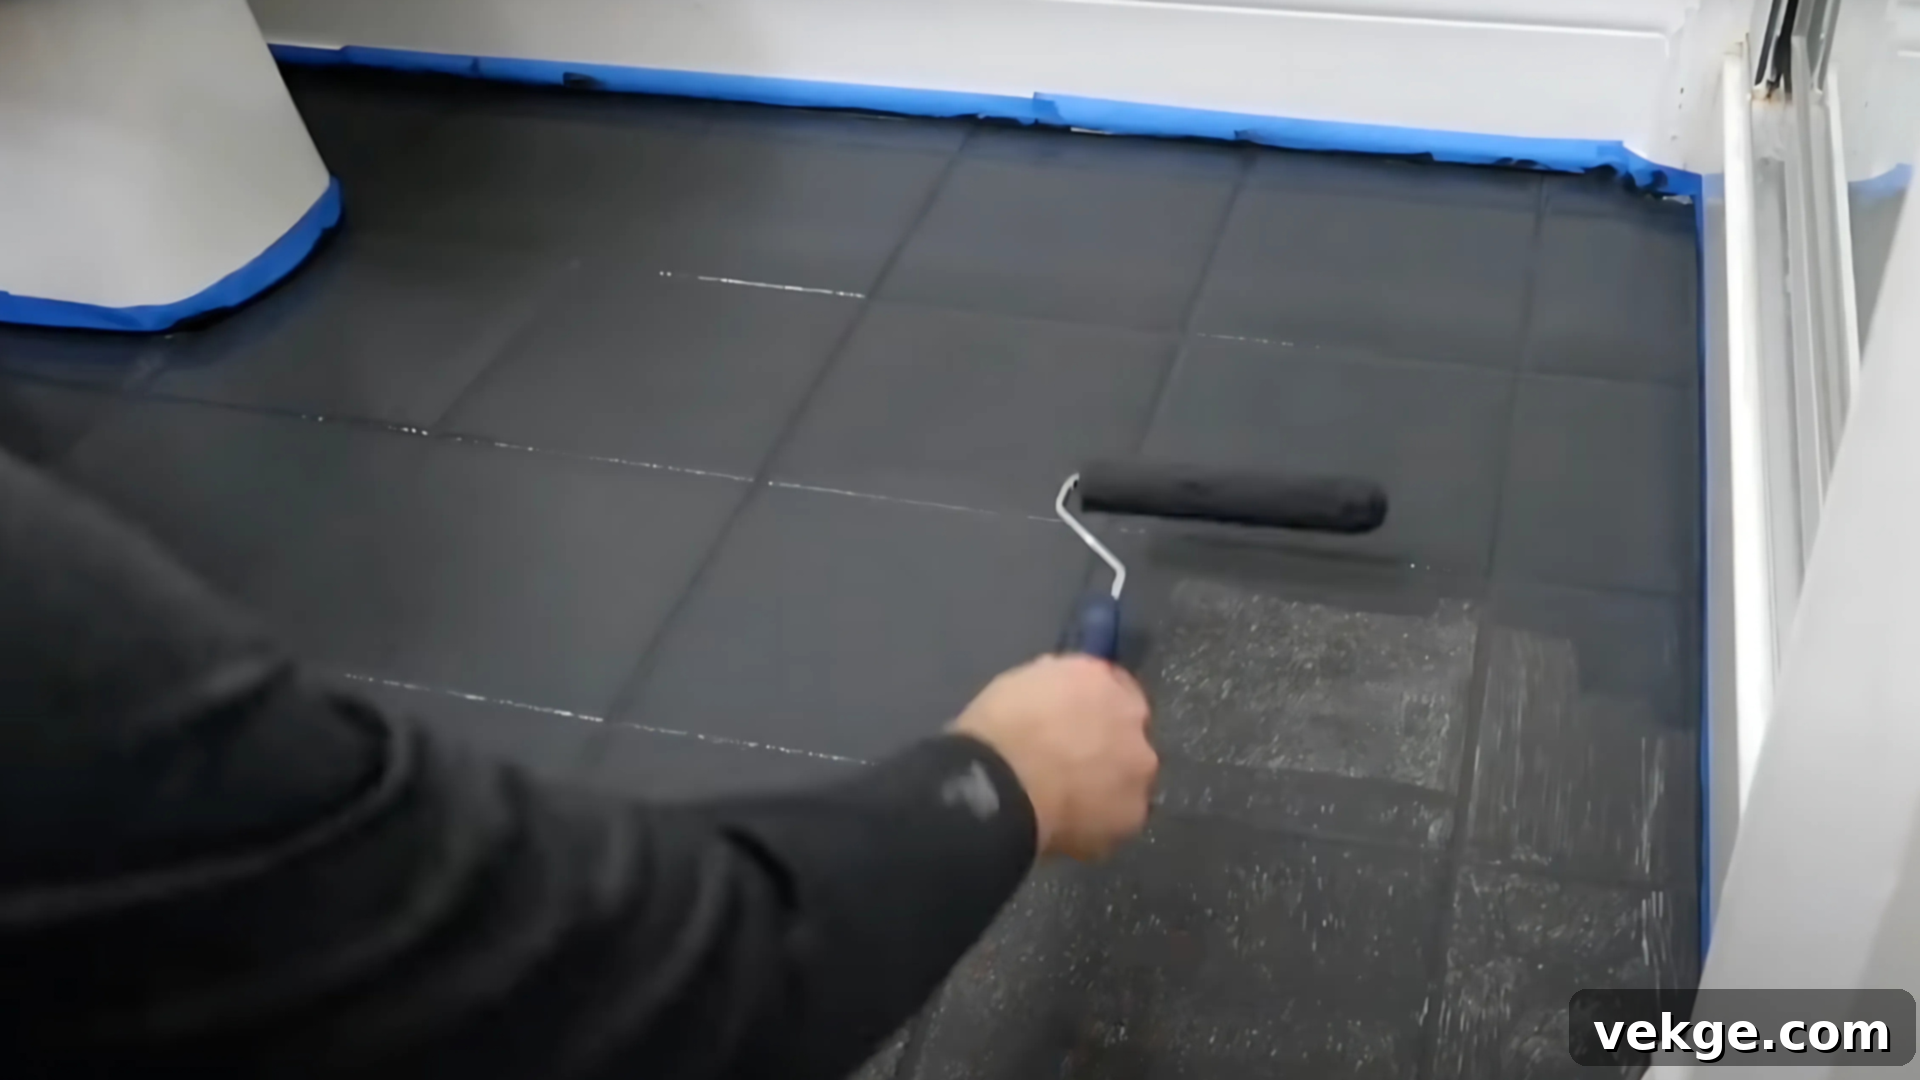
After the initial 6-hour drying period for your first base coat, it’s time to apply a second coat. This step is vital for achieving full, opaque coverage, especially if you’re working with a lighter color over dark tiles or using a darker paint shade. A second base coat also significantly enhances the overall durability and longevity of your painted floor, providing a robust foundation for the topcoat.
Before applying the second coat, quickly inspect the first coat for any missed spots or imperfections. If needed, a very light sanding with a fine-grit sanding sponge can smooth out any rough patches, followed by a thorough wipe with a tack cloth to remove dust. Then, using the same 3/8″ nap roller and angled brush, apply the second base coat with the same care and technique as the first, working from the farthest corner towards the door. Ensure the application is even and consistent.
Once the second coat is complete, this is a critical drying phase. Allow the floor to dry overnight – ideally for 12-24 hours – especially in humid bathroom environments where drying can be slower. Excellent ventilation (open windows, fan) will accelerate this process. It is absolutely essential to prevent any foot traffic during this extended curing period to avoid smudges, footprints, or compromises to the paint adhesion. Patience now will pay off with a beautiful, durable finish.
Step 5: Personalizing Your Floor – Adding an Optional Stencil Design
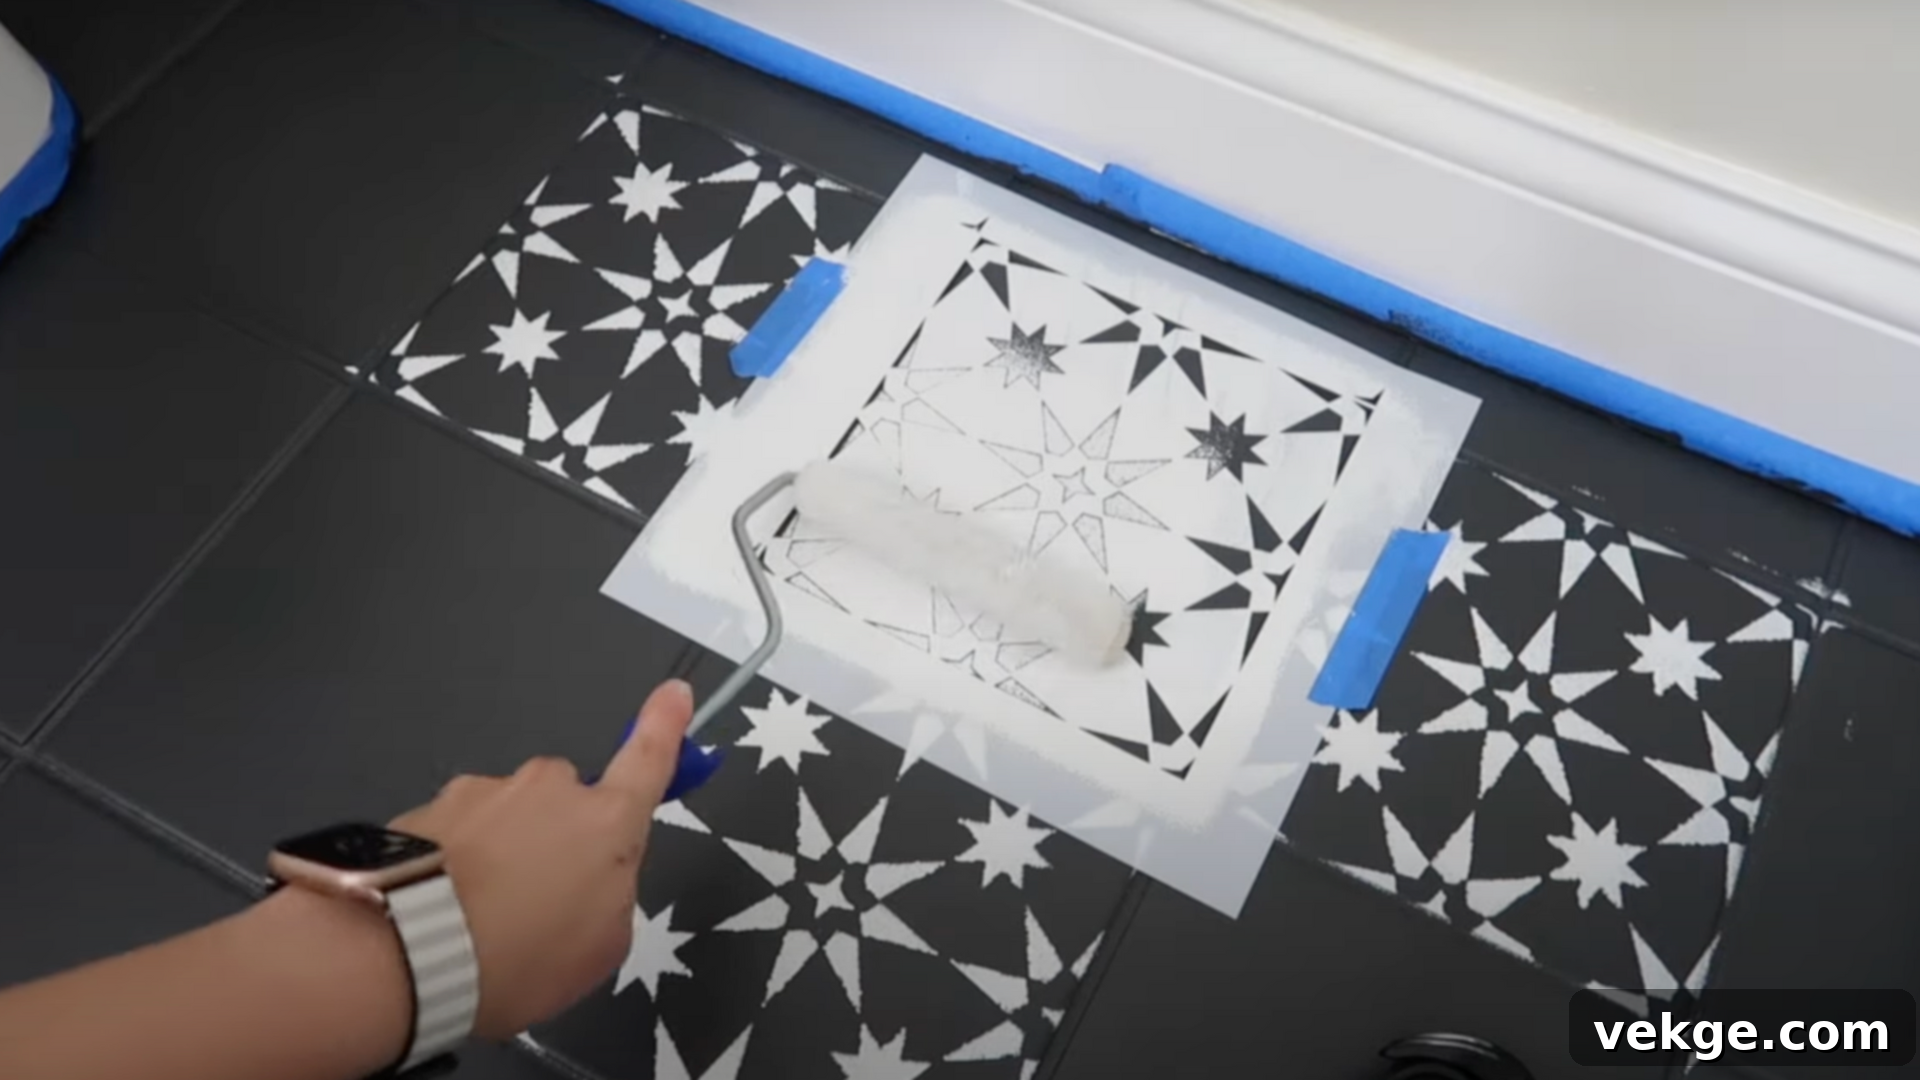
If you’re aiming for a unique, custom look, adding a stencil design is an excellent way to elevate your painted bathroom floor. Once your second base coat has completely dried and cured (minimum overnight), give the floor a final wipe with a tack cloth to ensure it’s free of any lint or dust particles that could get trapped under the stencil.
Carefully position your stencil, starting with a full, easily accessible tile. Secure the stencil firmly in place with painter’s tape to prevent it from shifting while you paint. Pay extra attention to securing edges, especially in tricky spots near corners or around the toilet. For the best results, use a small foam roller or a dedicated stencil brush. The key here is to use very little paint. Dab off excess paint from your roller or brush onto a paper towel before applying it to the stencil. This ‘dry brush’ technique is crucial to prevent paint from bleeding under the stencil, which can ruin your crisp design.
Work methodically across your floor, completing full tiles first. For edges and tight areas, you may need to carefully trim your stencil or use your small stencil brush to apply the design. Once each stencil section is complete, carefully lift the stencil straight up to reveal your design. If you notice any minor smudges or imperfections, a fine-tipped artist’s brush can be used for gentle touch-ups to achieve clean, crisp designs. Allow the stenciled paint to dry fully (usually 1-2 hours) before proceeding to the top coat.
Step 6: Sealing the Deal – Applying the Protective Top Coat for Bathroom Durability
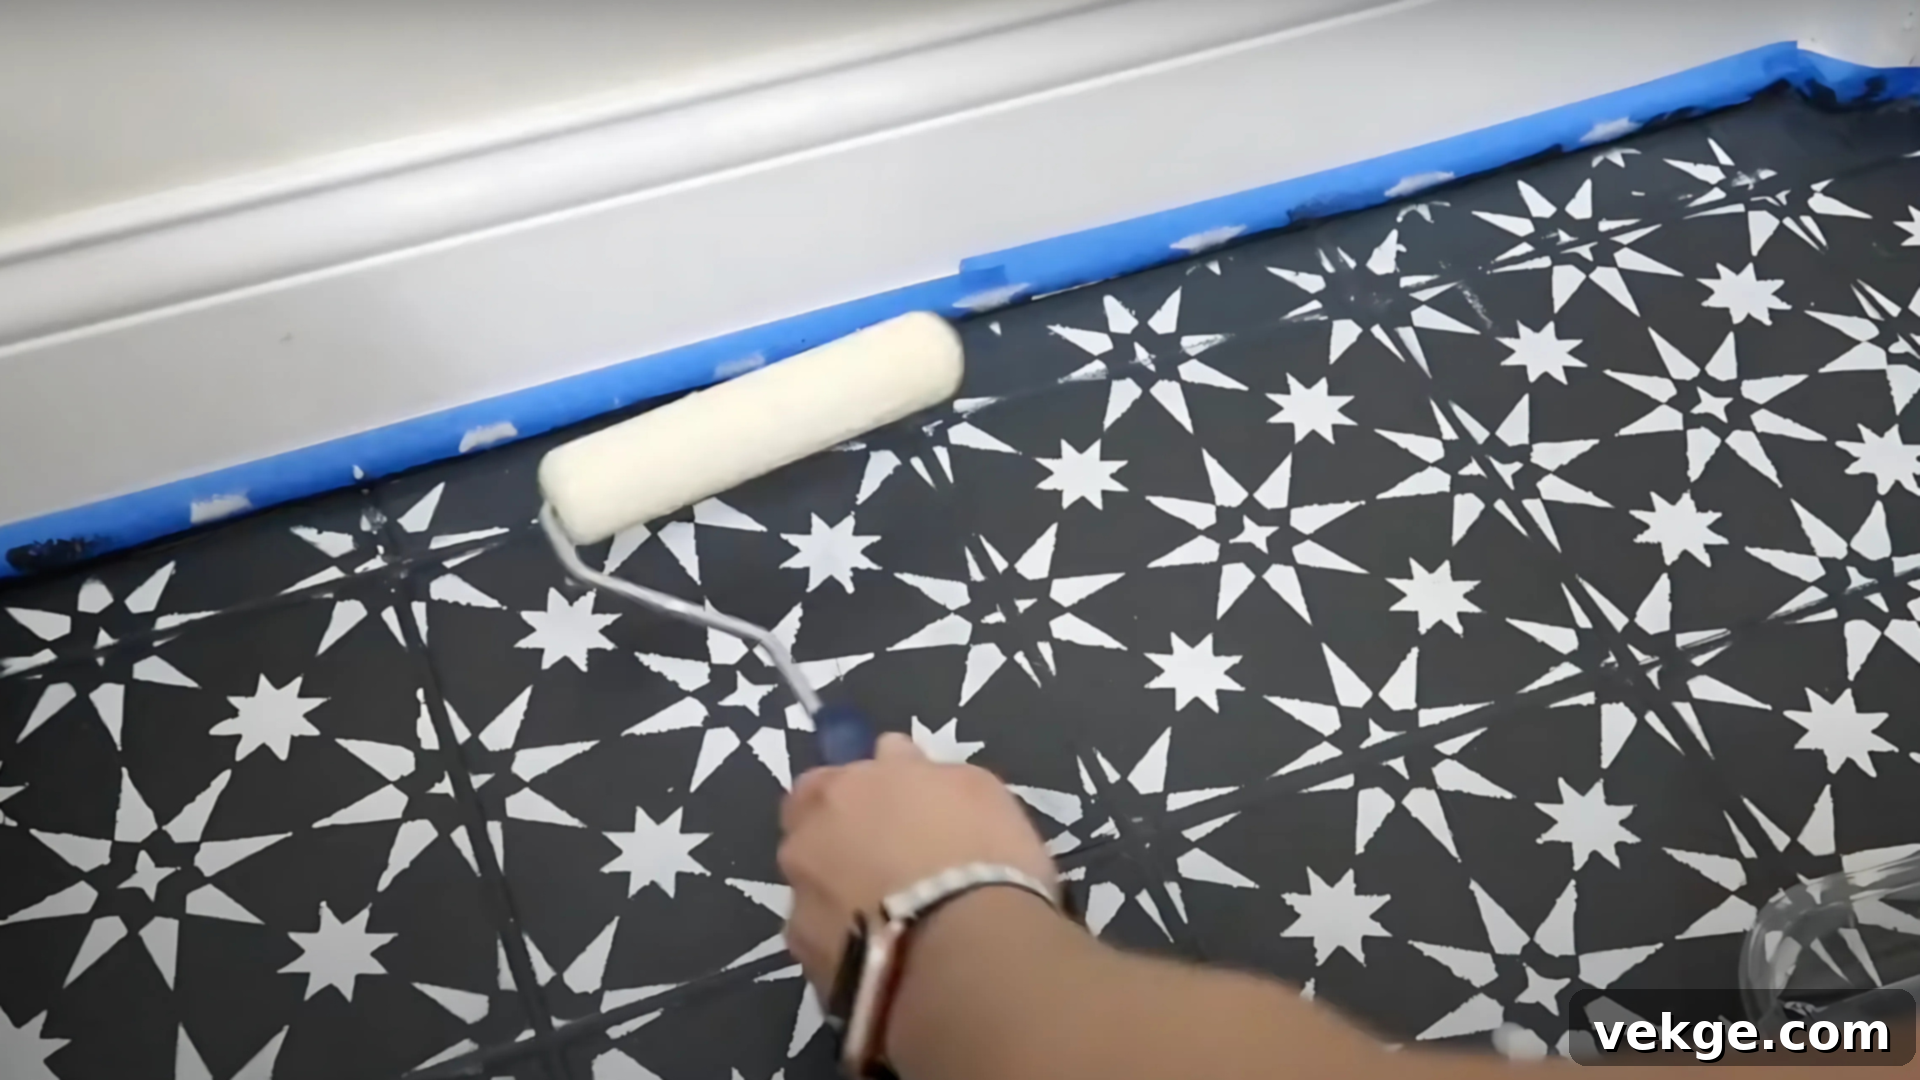
Whether you’ve added a stencil design or opted for a solid color, the top coat is your painted floor’s protective shield. After your stenciling (or your second base coat if no stencil was used) has dried for at least 2 hours, it’s time to apply the Rust-Oleum HOME Top Coat. This clear coat is essential for durability, water resistance, and providing the final finish.
Select your desired sheen: matte for a soft, contemporary look, or satin for a subtle, elegant sheen that offers a bit more reflection. Just like with the base coats, start by using your angled paintbrush to carefully ‘cut in’ along all edges, around fixtures, and in tight corners. Once the edges are complete, switch to a 1/4″ nap roller. This smaller nap is ideal for applying thin, even coats of the top coat, ensuring a smooth and streak-free finish.
Roll the top coat evenly across the entire floor, working from the farthest point towards the door. While one coat of Rust-Oleum HOME Top Coat provides basic water resistance, applying two coats is highly recommended for superior durability and protection, especially in a high-moisture environment like a bathroom. Allow the first top coat to dry for 2-4 hours before applying the second coat. This final protective layer is what will seal your paint, guard it against daily moisture, foot traffic, and wear, ensuring your beautiful new floor lasts.
Step 7: The Crucial Final Stage – Allowing Your Painted Bathroom Floor to Fully Cure
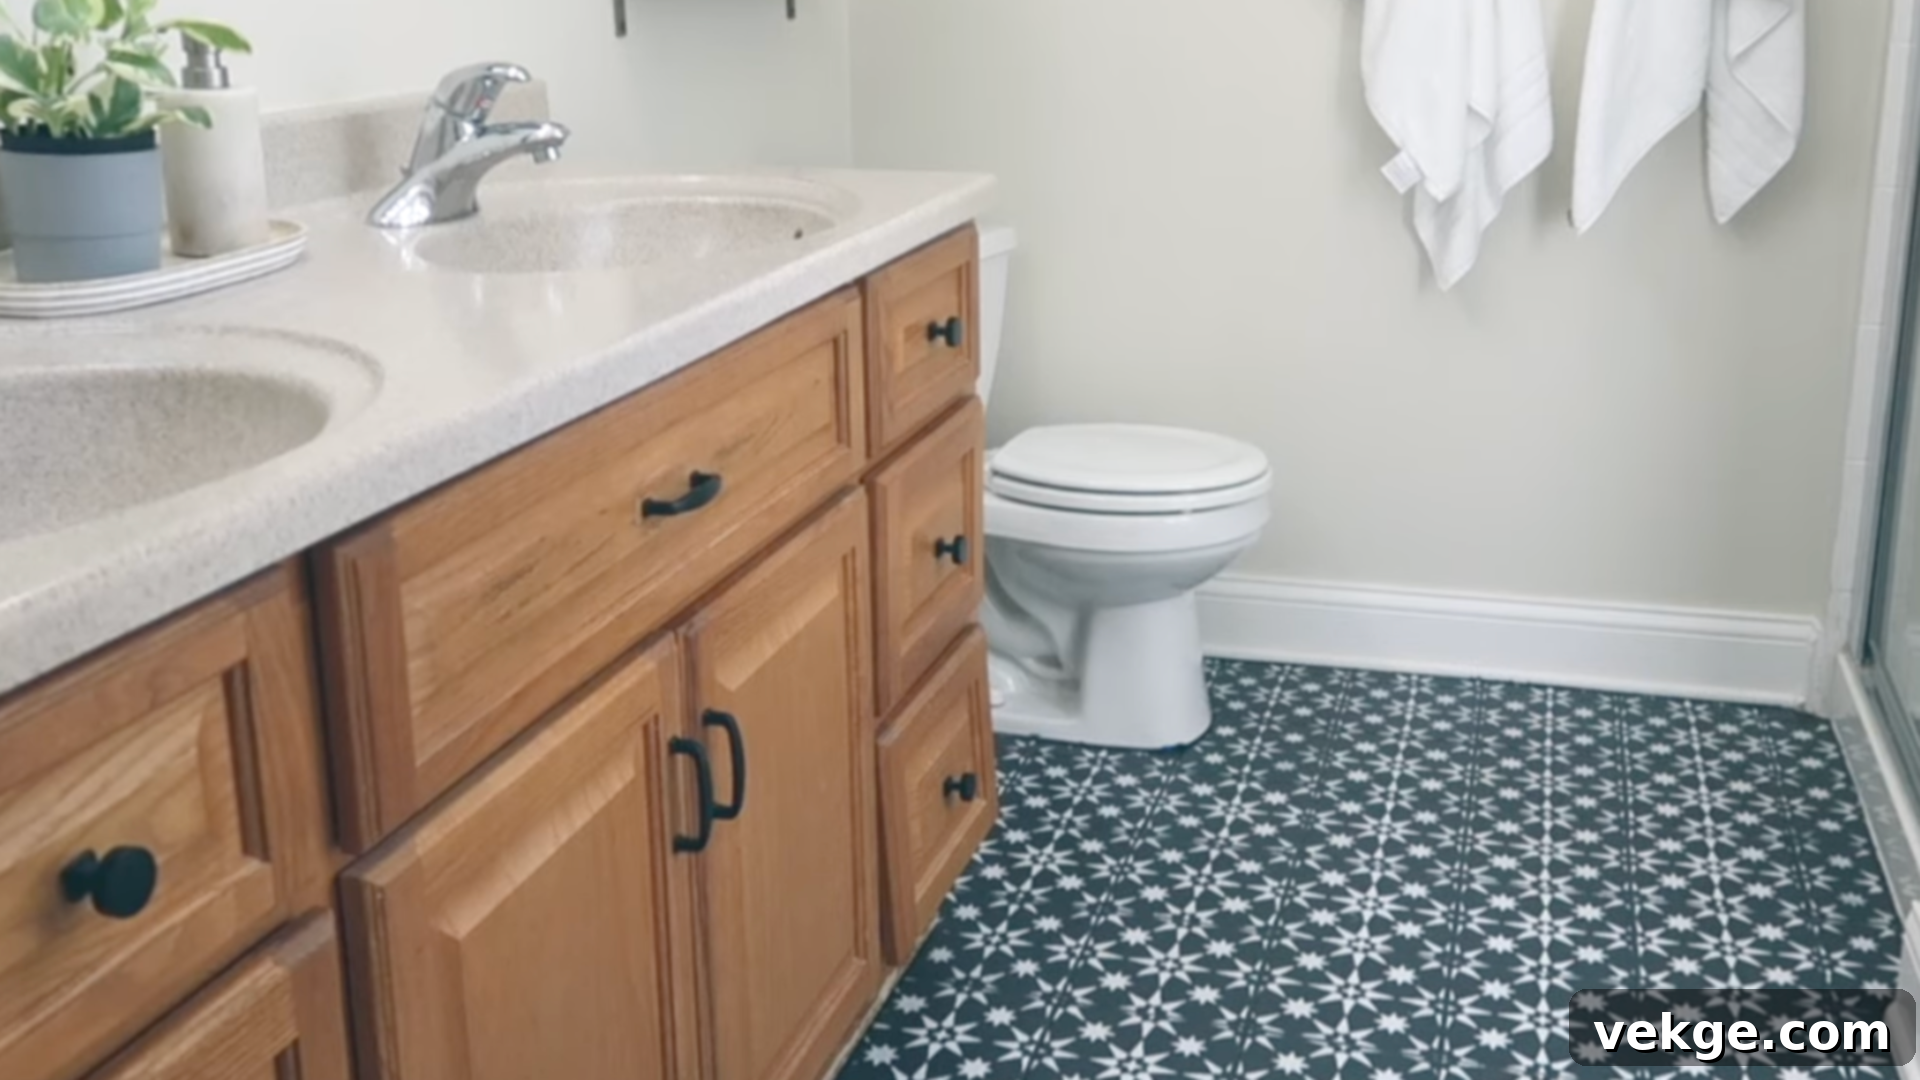
This step is arguably the most vital for ensuring the longevity and performance of your newly painted bathroom floor. While the paint may feel dry to the touch relatively quickly, it requires a significant period to fully cure and harden. Rushing this stage is a common mistake that can lead to premature peeling, chipping, and a compromised finish.
Curing Timeline for Optimal Durability:
- Light Foot Traffic (with socks): Avoid all foot traffic for the first 24 hours after applying the final top coat. After 24 hours, if absolutely necessary, you may walk on the floor gently while wearing clean, soft socks to prevent any scuffs or imprints.
- Rugs and Furniture: Keep all rugs, bath mats, and furniture off the painted floor for at least 3 full days. Placing heavy objects or rugs too soon can cause indentations or stick to the still-curing paint, potentially pulling up the finish.
- Water Exposure and Cleaning: This is extremely important: do not allow any water to touch the surface, and refrain from mopping or using any cleaning products for a full 7 days. This allows the top coat to achieve its maximum hardness and water resistance, creating a truly durable seal against the bathroom environment.
- Full Cure: Your bathroom floor will be fully cured, sealed, and ready for normal daily use and cleaning with non-abrasive products after approximately one week.
During this entire curing period, maintain good ventilation in the bathroom to aid the process. Patience during this final stage will ensure your painted tile floors stand up to the demands of a bathroom environment for years to come. Once fully cured, your bathroom floor will be waterproof, durable, and a stunning reflection of your DIY efforts!
Follow along step-by-step with this video guide to see the entire process in action:
Choosing the Best Tile Paint for Bathrooms: A Product Comparison
Selecting the right paint system is paramount for the success and longevity of your painted bathroom tiles. Different brands offer varying features, durability, and application methods. Consider your budget, desired finish, and how much traffic your bathroom experiences when making your choice.
| Brand | Type | Finish Options | Durability (Est.) | Key Notes & Ideal Use |
|---|---|---|---|---|
| Rust-Oleum HOME | Two-part system (Base + Top Coat) | Matte, Satin | 2-3 years (with proper maintenance) | Highly popular DIY choice. Easy to apply, no sanding or priming often required if the surface is meticulously cleaned. Excellent for beginners and quick refreshes. |
| Behr Premium Porch & Patio Floor Paint | Acrylic Latex Floor Paint | Multiple (Low-Lustre, Semi-Gloss, Gloss) | 3-4 years (in moderate traffic) | Designed for high-traffic areas, offering excellent water and abrasion resistance. Requires thorough cleaning and potentially a primer for best adhesion on smooth, glossy tiles. A good all-rounder for active bathrooms. |
| Fusion Mineral Paint | All-in-one Mineral Paint | Matte | 2-3 years (requires a separate tough topcoat for floors) | Known for excellent adhesion without significant prep, eco-friendly. While often “built-in topcoat” for furniture, for floors, a separate durable topcoat/sealer (like their Tough Coat) is highly recommended for longevity in bathrooms. Great for artistic finishes and achieving a chalky, vintage look. |
| Dulux Tile Paint (e.g., Dulux Renovation Range) | Specialized Tile Paint (often a 2-part epoxy or robust acrylic) | Glossy, Satin | 4-5 years (superior durability) | Often a more robust, specialized solution, sometimes requiring a two-part mixing process for maximum hardness and water resistance. Offers superior durability against scuffs, moisture, and common bathroom chemicals. Best for those seeking a more permanent, high-performance solution, though application can be more challenging and requires precise adherence to instructions. |
When weighing your options, consider the balance between budget and premium picks. For those prioritizing affordability and a relatively straightforward DIY experience, Rust-Oleum HOME stands out. Its two-step system, coupled with its ability to adhere without extensive sanding (provided the surface is impeccably clean), offers impressive results at an accessible price point. This makes it a fantastic choice for rental properties, guest bathrooms, or any situation where a quick, impactful transformation is desired without breaking the bank.
On the other hand, if maximum durability, superior water resistance, and a longer lifespan are your top priorities, investing in premium options is advisable. Two-part epoxy paint systems or specialized tile paints like some offerings from Dulux provide an exceptionally hard, protective finish. While these often come with a higher price tag and may require more advanced application techniques (including precise mixing, strict adherence to pot life, and dedicated primers), they deliver unparalleled resilience against heavy foot traffic, moisture, and chemical exposure, making them a worthy consideration for main bathrooms or high-use areas.
Maintaining Your Painted Bathroom Tiles: Tips for Lasting Beauty and Durability
To ensure your beautifully painted bathroom tile floors remain fresh, vibrant, and durable for years to come, diligent and proper maintenance is essential. While painted tiles are robust, a little care goes a long way in preserving their finish and extending their lifespan.
- Gentle Regular Cleaning: Make routine cleaning a habit. Use only mild, pH-neutral soap (like dish soap diluted in water) and soft cloths or mops. Strictly avoid harsh chemical cleaners, abrasive scouring pads, or stiff brushes, as these can dull the finish, scratch the topcoat, or even strip away the paint over time. For tougher stains, a gentle scrub with a soft brush and the same mild cleaner is usually sufficient. Always rinse thoroughly.
- Prompt Spill Cleanup: Bathrooms are prone to splashes and spills from water, toothpaste, makeup, and other products. Wipe up all liquids immediately. Allowing standing water or harsh chemicals to sit on the painted surface for extended periods can eventually compromise the topcoat, leading to softening, peeling, or water damage.
- Strategic Use of Bath Mats: Place soft bath mats or rugs in high-traffic areas, particularly outside the shower, in front of the toilet, and near the vanity. These not only add comfort and style but also act as a crucial protective barrier, absorbing moisture and reducing direct wear and tear on the painted surface from constant foot traffic.
- Keep Touch-Up Supplies Handy: It’s wise to keep a small amount of your base coat and top coat paint on hand. For minor chips or scratches that inevitably occur over time (especially in areas with heavy use or dropped items), you can perform quick, localized touch-ups. Clean the area thoroughly, lightly sand if needed for adhesion, apply a thin layer of base coat, let it dry, and then finish with a protective top coat.
- Monitor High-Wear Areas: Pay close attention to areas around the shower, toilet, and doorways. These spots typically experience the most moisture and foot traffic. If you notice any signs of wear, address them proactively with a touch-up rather than waiting for the damage to spread and require a larger repair.
- Expect Periodic Repainting: Even with the best care, painted bathroom tile floors will eventually show signs of wear, especially in high-traffic areas. Depending on use, product quality, and initial application, you should realistically expect to repaint the top coat (or the entire system) every 2 to 5 years to maintain a fresh, protective finish. This is still significantly less effort and cost than a full tile replacement!
Common Pitfalls: Mistakes to Avoid When Painting Bathroom Tile Floors
A successful painted tile project hinges on attention to detail and avoiding common mistakes. Being aware of these potential pitfalls beforehand will save you time, effort, and ensure a professional, long-lasting finish.
- Skipping Thorough Cleaning or Prep: Why it’s a mistake: Even if your chosen paint system (like Rust-Oleum HOME) claims “no sanding or priming,” it always requires a meticulously clean surface. Any residual soap scum, grease, dirt, or even dust will act as a barrier, preventing the paint from properly adhering to the tile. This is the number one cause of premature peeling and adhesion failure.
- Using Standard Wall Paint Instead of Specialized Tile Paint: Why it’s a mistake: Wall paints are formulated for vertical surfaces with minimal contact. They lack the durability, scuff resistance, and moisture-proofing properties required for horizontal surfaces like floors, especially in a high-humidity, high-traffic environment like a bathroom. Always use paints specifically designed for floors or tiles.
- Not Waiting Long Enough Between Coats: Why it’s a mistake: Patience is crucial. Applying a new coat of paint over a still-tacky or partially cured previous coat can trap solvents, leading to poor adhesion, uneven drying, blistering, or a gummy, easily damaged surface. Always follow the manufacturer’s recommended drying times precisely, even if the paint feels dry to the touch.
- Applying Excessively Thick Coats: Why it’s a mistake: While it might seem faster to apply one thick coat, heavy layers take much longer to dry, are prone to dripping, sagging, and uneven curing. This can also lead to a softer, less durable finish that is more susceptible to damage. Thin, even coats are always superior for durability and appearance.
- Forgetting to Remove Painter’s Tape While Paint is Still Wet: Why it’s a mistake: If you allow the paint to fully dry and cure over the painter’s tape, the paint film will likely bond to the tape. When you pull the tape off later, it will tear the dried paint, leaving ragged, unprofessional edges and potentially pulling up large sections of your new finish. Remove tape carefully when the paint is still slightly pliable but not wet enough to smudge, typically after the final coat has been applied and set for a short period (e.g., 30-60 minutes).
- Walking on the Floor Too Soon or Not Allowing Full Cure: Why it’s a mistake: This is another major cause of project failure. Paint needs time to not just dry to the touch but to fully harden and cure. Walking on it, placing heavy objects, or exposing it to water too early will result in permanent footprints, scuff marks, indentations, or complete adhesion failure when moisture penetrates the uncured paint. Adhere strictly to the manufacturer’s curing guidelines for foot traffic and water exposure (often 3-7 days).
- Ignoring Grout Lines (If Not Using a Full System): Why it’s a mistake: While comprehensive systems like Rust-Oleum HOME are designed to cover both tile and grout, if you’re using a different paint system where grout might remain exposed, ensure it’s properly sealed. Unsealed grout is porous and can absorb moisture, leading to issues with paint adhesion around the tile edges over time.
Conclusion: Your Transformed Bathroom Awaits!
Congratulations! You now possess a comprehensive understanding of the entire process of painting bathroom tile floors. This guide has equipped you with the knowledge, steps, and tips needed to confidently tackle this transformative DIY project. We’ve explored how a strategic approach, combined with the right materials and meticulous preparation, can revitalize a dull, outdated bathroom into a stylish, modern space – all without the significant expense, mess, or time commitment of a traditional tile replacement.
By diligently following each step outlined here, from the crucial deep cleaning and preparation, through precise paint application, to the essential final curing period, you are well on your way to achieving professional-looking and durable results. Remember, the keys to success are patience, adherence to drying times, and consistent, gentle maintenance. Don’t underestimate the power of these details in ensuring your new painted floors stand the test of time.
Are you ready to pick up that brush and bring your bathroom vision to life? Embrace the satisfaction of a DIY makeover and enjoy your beautifully updated space. For more home improvement inspiration and guides to keep enhancing your living environment, be sure to explore our other DIY projects and continue leveling up your home, one confident brushstroke at a time!
