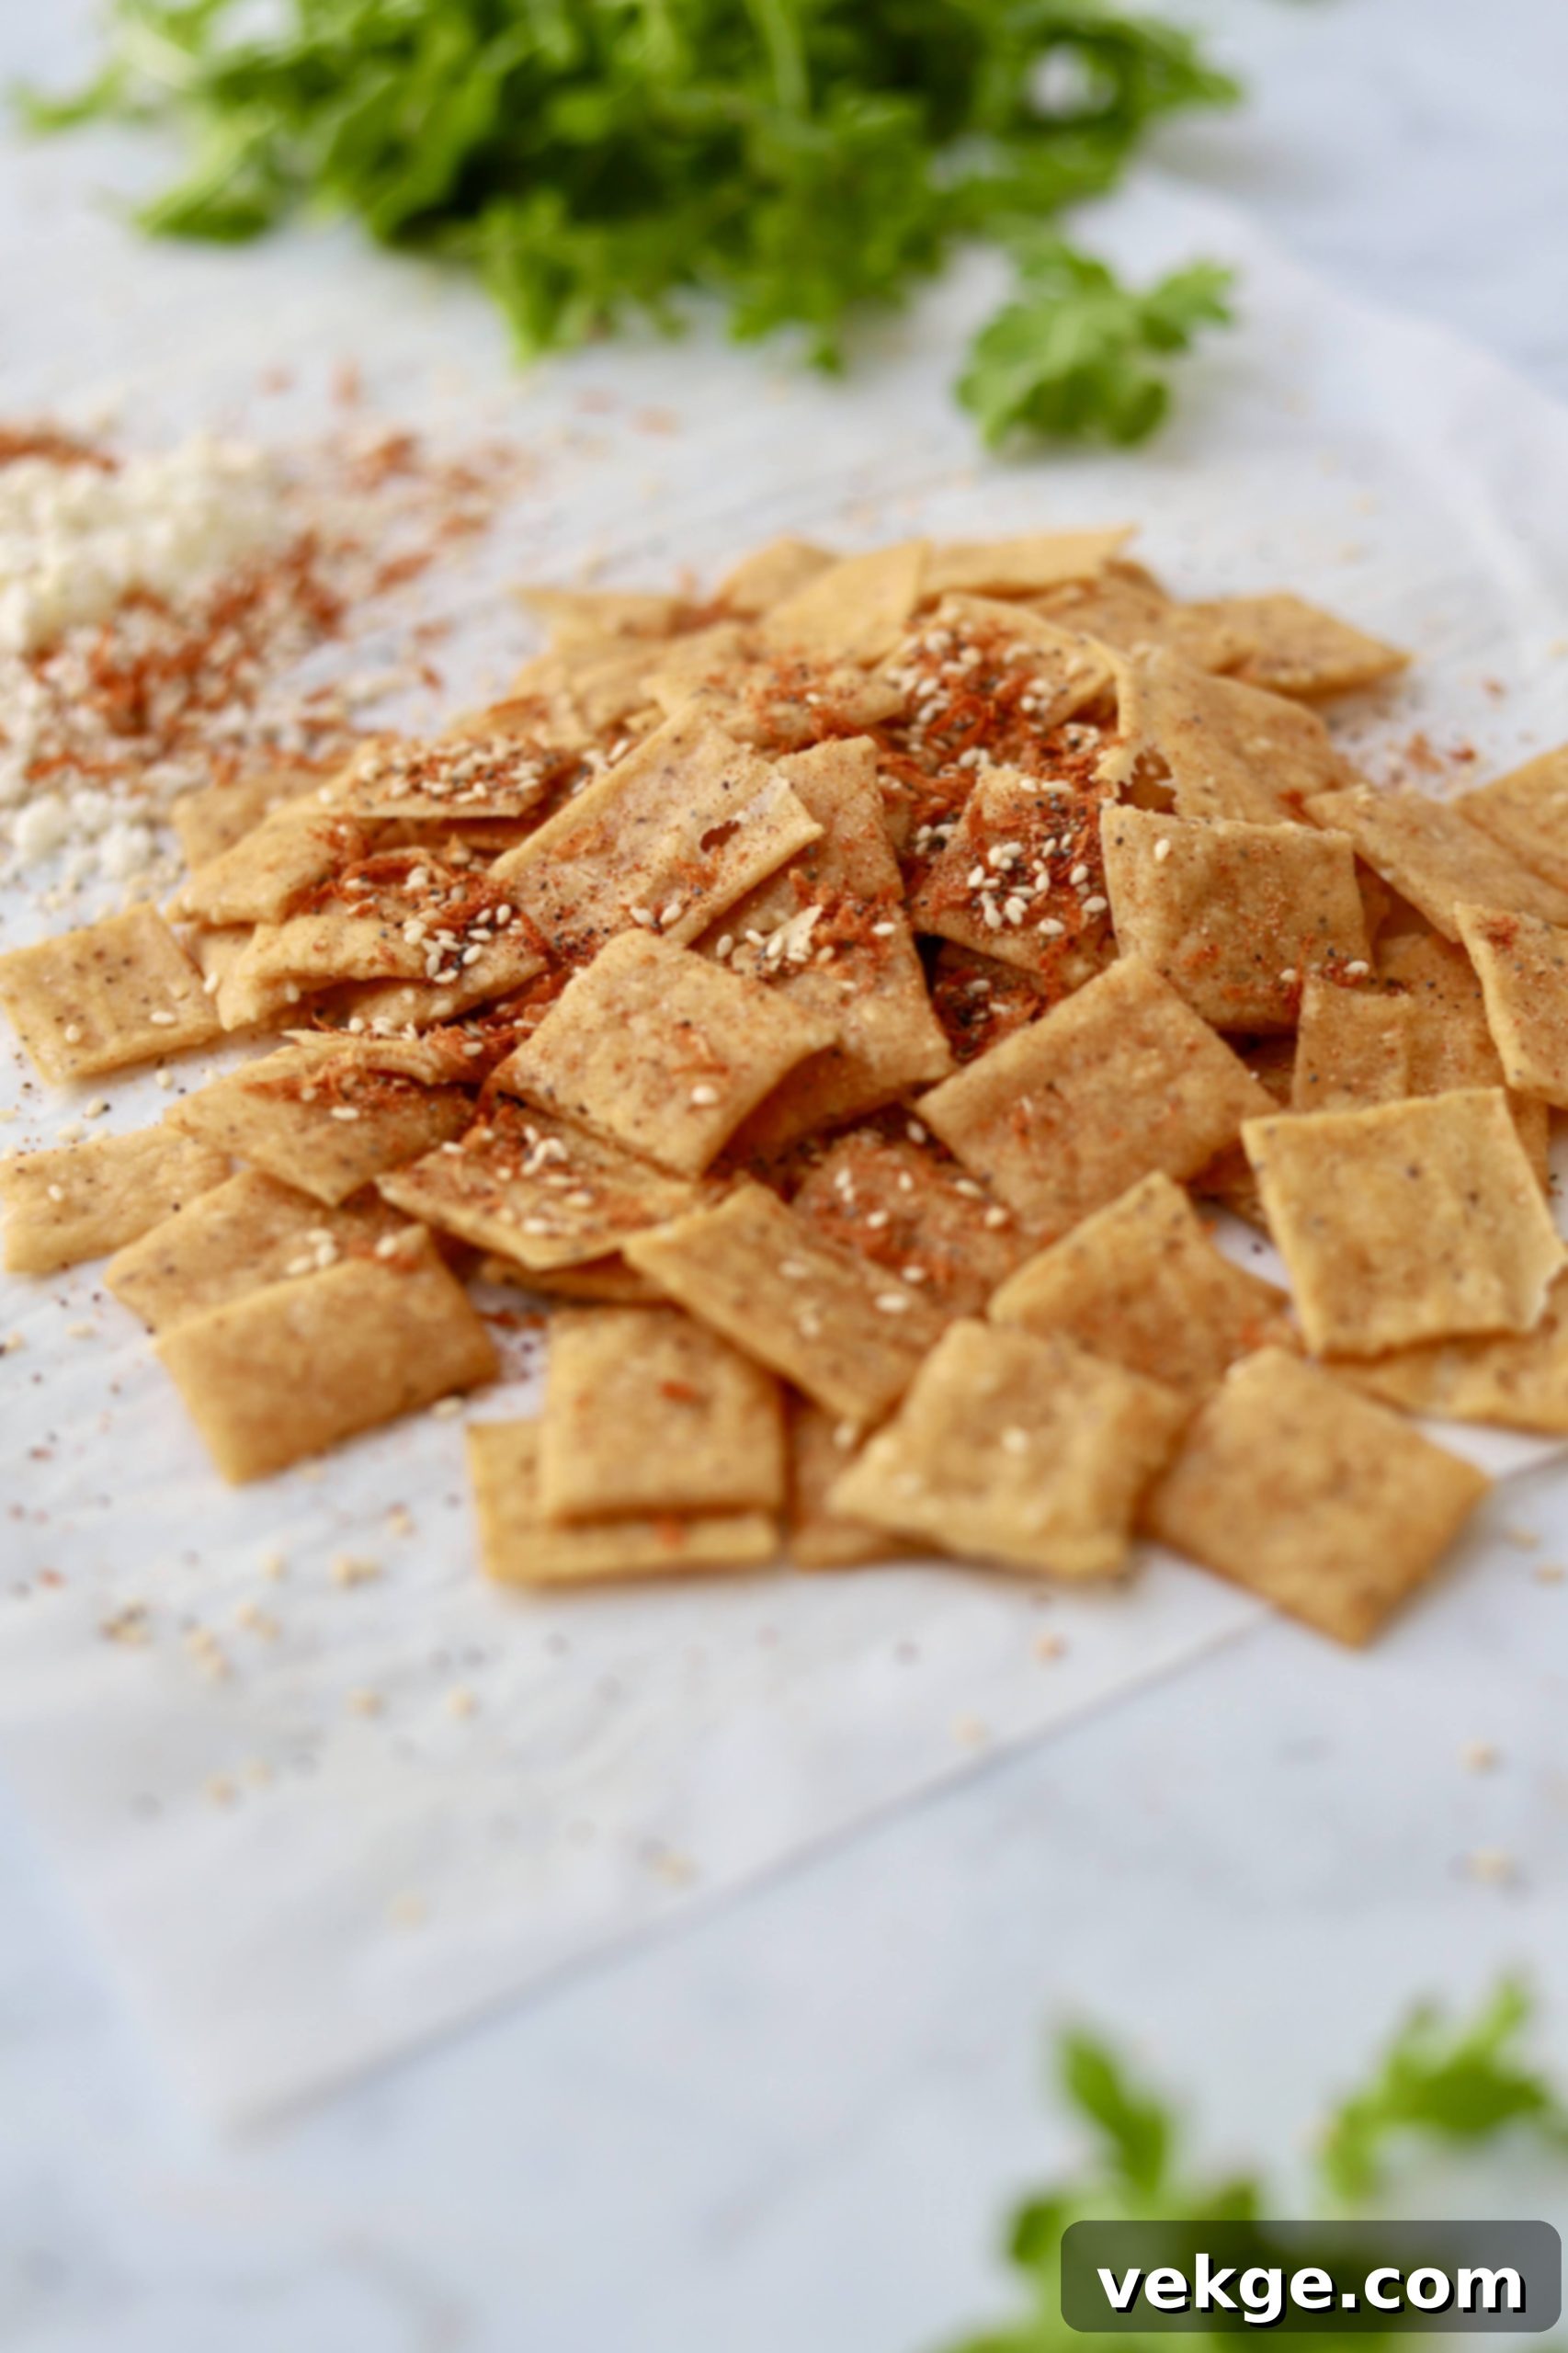
Homemade Sourdough Discard Cheeze-It Crackers: An Irresistible, Healthy Snack Recipe
Are you looking for a creative, delicious, and incredibly easy way to utilize your sourdough discard? Look no further! This recipe for homemade sourdough Cheeze-It crackers is a game-changer. Not only does it transform what might otherwise be waste into an addictively crunchy snack, but it also infuses your crackers with a unique, cheesy flavor and impressive health benefits. Prepare to be hooked!

Demystifying Sourdough: What Exactly Are Sourdough and Sourdough Discard?
If you’re new to the world of sourdough baking, you might be pondering, “What is sourdough, and why would I have something called ‘discard’?” Let’s break it down.
Understanding Sourdough: The Ancient Art of Wild Yeast Fermentation
Sourdough is essentially a synonym for “wild yeast” or “natural yeast.” It’s a living culture, a symbiotic community of wild yeasts and lactic acid bacteria (LAB) that develop from fermented flour and water. While the concept might sound a bit unconventional today, this method of leavening bread is as old as bread itself! For thousands of years, long before the commercialization of quick, dehydrated yeast in the 1930s, all bread was made using sourdough. This natural fermentation process is what breaks down, predigests, and transforms the grain (flour) in our bread.
As these microscopic organisms work their magic, they consume the sugars in the flour, producing carbon dioxide gas and lactic and acetic acids. These gases create the characteristic air pockets that give bread its rise and soft texture, while the acids impart that signature tangy flavor and contribute to the bread’s incredible keeping qualities. Beyond flavor and texture, sourdough fermentation significantly enhances the nutritional profile of bread, making nutrients more bioavailable and improving digestibility, especially for those with sensitivities to conventionally processed grains.
The Heart of Sourdough Baking: Your Sourdough Starter
Every delicious loaf of sourdough bread, and indeed many other sourdough treats, begins with a thriving sourdough starter. This starter is simply that fermented mixture of flour and water that houses your active wild yeast and bacteria. If you don’t currently have a starter but are eager to embark on this culinary adventure, there are several ways to acquire one:
- Ask Friends or Family: Many avid sourdough bakers are happy to share a portion of their mature, active starter. It’s a wonderful way to connect and get a healthy culture.
- Local Bakeries: Some artisanal bakeries that specialize in sourdough might also be willing to share a bit of their starter, often for a small fee or sometimes even for free.
- Online Purchases: If local options aren’t available, you can easily purchase dehydrated sourdough starters online. These typically come as a dormant powder that you rehydrate and “feed” back to life over a few days.
Caring for Your Sourdough Starter: A Living Companion
Once you have a starter, think of it almost like a low-maintenance pet. To keep it healthy and active, you’ll need to feed it regularly. The general routine involves using a portion of your starter for a recipe, and then replenishing the remainder with fresh flour and water. To simplify maintenance, I highly recommend storing your starter in the refrigerator unless you plan on using it within 24 hours. This slows down its metabolism, meaning it requires less frequent feeding (typically once a week or every couple of weeks).
Getting the hang of using and maintaining a starter can have a slight learning curve, but don’t be intimidated! I suggest starting by incorporating unfed, inactive, or “discard” starter into recipes that don’t rely on it for primary leavening. This includes delicious options like waffles, German pancakes, muffins, quick breads, and, of course, these irresistible sourdough discard crackers. These recipes allow you to get comfortable with the flavor and consistency of sourdough without the pressure of achieving a perfect rise.
When it’s time to feed your starter after using some for a recipe, try not to stress about exact measurements. A good rule of thumb is to maintain about one to two cups of starter in your jar most of the time. More than that can become high-maintenance with larger discard amounts, and less might not be enough for most recipes. For example, if you have just two tablespoons of starter left, you might feed it with approximately one cup of flour and just under a cup of water, mixing until it reaches the consistency of a thick pancake batter. The starter will then begin to digest and ferment this fresh “food.” Once fed, cover it loosely and return it to the refrigerator until your next baking session.
Sourdough starters are remarkably resilient. They are notoriously hardy and challenging to kill, capable of surviving in the fridge for months, even years, without a feed. While they are resilient, I do recommend freshening up your starter with a fresh feed of flour and water at least once a month to ensure its vitality and optimal performance. This keeps the beneficial microbes strong and prevents undesirable off-flavors.
Your starter will generally exist in two forms: “active” and “discard.” Understanding the difference is key to successful sourdough baking.
For more comprehensive and detailed instructions on how to maintain your sourdough starter, including feeding schedules and troubleshooting, you can find a dedicated guide in my
Natural Yeast Sourdough Sandwich Bread post.
What Is Active Sourdough Starter?
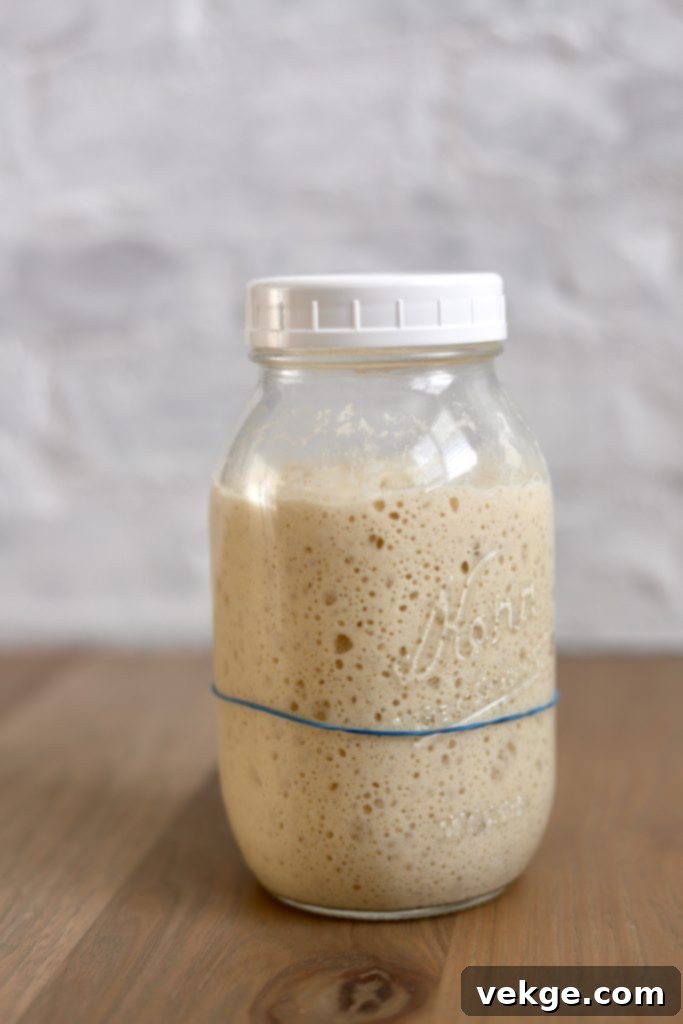
An “active starter” refers to a sourdough starter that has been recently fed (typically 4-12 hours prior) and has reached its peak of activity. This means it is robustly bubbling, has visibly risen in its jar, and is full of energetic wild yeasts ready to do the heavy lifting of leavening bread. The best way to determine if your starter is active and ready for baking is by its appearance:
- Visual Rise: Has it doubled or nearly doubled in volume since feeding?
- Bubbly Texture: Is the surface covered in numerous small air bubbles, and can you see larger bubbles within the starter itself?
- Foamy Top: Is there a slight foamy layer on the surface, indicating gas production?
- The Float Test: A common test is to drop a small spoonful of starter into a glass of water. If it floats, it’s generally active and ready to use.
These signs all indicate that your starter is vibrant, bubbly, and primed for use in recipes like bread, where its leavening power is crucial for a light and airy result.

What Is Sourdough Discard?
Sourdough “discard” is simply the portion of your sourdough starter that is removed before feeding, or an active starter that has passed its peak of activity and deflated. It’s an unfed or “hungry” starter that has eaten most of its food supply and is no longer vigorous enough to effectively leaven bread. Instead, it becomes flat, less bubbly, and often runny. At this stage, your starter is essentially reserving its energy until it gets hungry for a fresh feed of flour and water.
You might notice a layer of clear or dark liquid on top of your discard, often called “hooch.” This liquid is an indicator that your starter is very hungry. While some bakers stir it back in, I generally pour off any hooch as it can contribute a more pungent, intensely sour flavor to your discard, which might not be desirable in all recipes. Sourdough discard is a valuable ingredient, rich in flavor and beneficial microbes, making it perfect for a wide array of recipes where active leavening isn’t the primary goal.
The Hidden Potential of Sourdough Discard
One of the most exciting aspects of sourdough discard is its versatility. Instead of throwing it away (hence the term “discard”), you can incorporate it into countless recipes, significantly boosting both flavor and nutrition without altering the texture much. A half-cup of discard can be stirred into waffle, pancake, or muffin batter, adding a delightful tang. It can also be used in quick breads, cookies, tortillas, and, as you’re about to discover, these phenomenal crackers.
Beyond preventing food waste, using sourdough discard in your baking contributes to enhanced nutrition. The fermentation process increases the bioavailability of nutrients and, crucially, neutralizes phytic acid present in the grain. Phytic acid, an anti-nutrient, can bind to minerals, making them harder for our bodies to absorb. By breaking it down, sourdough makes your food more nourishing. Furthermore, discard contains prebiotics, which feed the beneficial bacteria in your gut, contributing to a healthier digestive system.
This particular recipe for Cheeze-It style crackers is a truly fantastic way to use up your discard. The inherent sourness of the starter magically translates into an incredibly savory, almost cheesy depth of flavor in the finished crackers. They are so addicting and utterly yummy, and the best part is knowing that these homemade sourdough crackers offer significant health benefits compared to their store-bought counterparts. You get all the flavor with added nutrition and no artificial ingredients!
Crafting Your Own Flavor: DIY Salad Supreme Seasoning
For this recipe, a key ingredient for that classic savory, cheesy flavor is Salad Supreme seasoning. While store-bought versions are readily available, I didn’t have any on hand for this particular batch, so I decided to whip up my own DIY version. And honestly, I now prefer the homemade blend!
Making your own seasoning blend allows you to control the ingredients, ensuring there are no anti-caking agents, MSG, or other unwanted additives. Plus, it’s a fantastic opportunity to customize the flavor profile to your personal preference. You can adjust the saltiness, spiciness, or herbaceous notes to create your perfect blend. This homemade variation of Salad Supreme isn’t just for these crackers; it’s incredibly versatile and goes great on almost everything!
- Sprinkle it over roasted potatoes or french fries for an elevated side dish.
- Mix it into pasta salads for an extra burst of flavor.
- Whisk it into homemade salad dressings for a savory kick.
- And, as you’ll soon discover, it is ESPECIALLY delicious on these homemade sourdough Cheeze-It crackers, giving them that signature savory, umami-rich taste.
Find the detailed DIY Salad Supreme seasoning recipe here!

Sourdough Cheeze-its
Print
Pin
Rate
Ingredients
- 3/4 Cup sourdough discard that is flat and runny
- 3 Tablespoons butter that has been melted then cooled
- 2-3 teaspoons of “salad supreme” seasoning see DIY recipe
Instructions
- Preheat oven to 325° F and prepare a baking sheet with a sheet of parchment paper.
- Combine discard with butter and the salad supreme seasoning. Mix well.
- Spread cracker batter out on the baking sheet in a thin and even layer.
- Bake for 10 minutes, then remove from oven and score with a pizza cutter.
- Put back into the oven and bake another 25 to 35 minutes- checking crispiness of the crackers over the last few minutes.
- Cool completely and enjoy! Add a little extra salt to taste if you want. The crackers stay good for several days in a plastic bag.
Video
Tips for Perfect Sourdough Discard Crackers
Achieving perfectly crisp and flavorful sourdough discard crackers is simple with a few helpful tips:
- Thin and Even Spreading: This is crucial for uniform crispiness. Use an offset spatula or the back of a spoon to spread the batter as thinly and evenly as possible across the parchment paper. Thicker spots will result in chewier crackers, while thinner spots might burn.
- Scoring Technique: Scoring the crackers after the initial bake helps them break apart easily and encourages even drying. A pizza cutter works wonderfully for this. Don’t worry if the lines aren’t perfectly straight; they will still taste amazing!
- Monitor Baking Closely: Oven temperatures can vary, and thin crackers can go from perfectly golden to burnt quickly. Keep a close eye on them during the last 10-15 minutes of baking. Look for a deep golden-brown color and a firm, crisp feel when you carefully lift one. If they’re still flexible, they need more time.
- Cool Completely: Allow the crackers to cool entirely on the baking sheet before breaking them apart and storing. They will crisp up further as they cool.
- Storage: Store your cooled sourdough crackers in an airtight container or a plastic bag at room temperature for several days. If they lose some crispness, a quick refresh in a warm oven (around 250°F or 120°C) for 5-10 minutes can bring them back to life.
- Flavor Variations: Don’t be afraid to experiment!
- Cheesy Boost: Add a tablespoon or two of nutritional yeast to the batter for an even stronger “cheesy” flavor, or sprinkle some finely grated Parmesan cheese on top before baking.
- Herbal Notes: Mix in dried herbs like rosemary, thyme, or oregano for an aromatic twist.
- Spicy Kick: A pinch of cayenne pepper or smoked paprika can add a delightful warmth.
- Everything Bagel: Sprinkle with everything bagel seasoning before baking for a savory, textural treat.
Why These Sourdough Discard Crackers Will Become Your Go-To Snack
These homemade sourdough discard Cheeze-It crackers offer a winning combination of taste, simplicity, and wholesome goodness. They’re a testament to the fact that “discard” is anything but waste—it’s a valuable ingredient capable of elevating everyday snacks into something extraordinary. By making them yourself, you control every ingredient, avoiding preservatives and artificial flavors commonly found in commercial crackers.
They are incredibly versatile: perfect for dipping into hummus or salsa, pairing with your favorite cheeses on a charcuterie board, or simply enjoying on their own as a guilt-free snack. The unique tangy, savory flavor profile developed through sourdough fermentation is truly unmatched. Give this recipe a try and discover the joy of transforming your sourdough discard into a crunchy, flavorful, and incredibly satisfying treat!
Happy baking, and enjoy your delicious, healthy homemade crackers!
