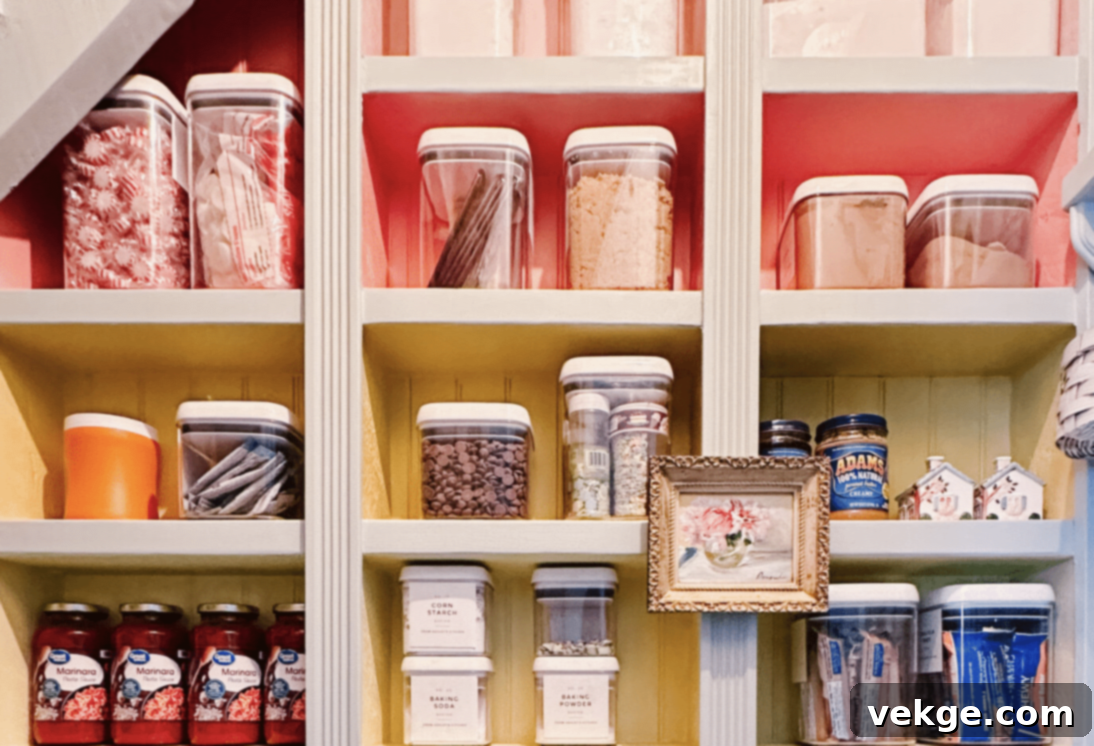
Transform Your Kitchen: A Comprehensive Guide to Building DIY Pantry Shelves for Ultimate Organization
Kitchen storage is a challenge many homeowners face. The frustration of opening cabinets to find spices hidden behind towering cans, or reaching for a bag of flour only to trigger an avalanche of other containers, is all too familiar. For years, my pantry was a chaotic mess, a constant source of stress during meal prep. However, I discovered a more effective and deeply satisfying solution: building my own custom pantry shelves.
This project is more than just a way to save money; it’s about crafting a storage system that perfectly aligns with your unique needs and the specific dimensions of your home. With a few basic tools, readily available materials, and a willingness to get hands-on, you can construct sturdy, aesthetically pleasing, and highly functional shelves that transform your pantry from disorganized to delightful.
In this comprehensive guide, I’ll walk you through every step of the process, from selecting the best materials for durability and style to preparing your space and installing your new shelves. You’ll also find smart tips for organizing your items to maximize efficiency and maintain a clutter-free environment. Get ready to reclaim your kitchen and enjoy the lasting satisfaction of a perfectly organized pantry, built by your own hands.
Benefits of Installing DIY Pantry Shelves
Embarking on a DIY pantry shelf project offers a multitude of advantages that go beyond simple storage. It’s an investment in your home’s functionality, your peace of mind, and even your culinary creativity. Here are some of the key benefits I’ve experienced and heard from countless others who’ve taken the plunge:
1. Cost-Effective Solution
One of the most immediate and appealing benefits of building your own pantry shelves is the significant cost savings. When I built my current pantry setup, I was genuinely surprised to find that the total expenditure was less than half the price of comparable pre-fabricated or store-bought units. You primarily pay for raw materials like lumber, screws, and brackets, which typically range from $50 to $150, depending on the size and complexity of your pantry. This budget-friendly approach often leaves extra funds to invest in high-quality storage containers, labels, and other organizing tools, ensuring your newly built shelves are utilized to their full potential without breaking the bank.
2. Perfect Fit for Your Space
Every kitchen, and indeed every pantry, possesses its own unique dimensions, quirks, and challenges. Unlike mass-produced shelving units that often leave awkward gaps or unusable corners, custom-built shelves allow you to meticulously utilize every single inch of available space. You have complete control over the height, width, and depth of each shelf, tailoring them precisely to your specific storage needs and the layout of your room. This means those previously awkward corners, sloped ceilings, or tight spots can be transformed into incredibly valuable and accessible storage areas, maximizing your pantry’s capacity.
3. Improved Organization
The ability to customize your shelving leads directly to vastly improved organization. With custom shelves, you can implement a thoughtful space planning strategy. Imagine sorting items by category – baking supplies on one shelf, breakfast foods on another, and snacks readily accessible for the kids. You can strategically place frequently used items at eye level, reduce bending for heavy bulk goods, and create specific, dedicated spots for tall cereal boxes, small spice jars, or even unique appliances. This meticulous planning ensures everything has its designated place, streamlining your routine, making grocery put-away a breeze, and significantly speeding up morning preparations.
4. Better Quality Control
When you take on a DIY project, you become the quality control manager. This allows you to hand-pick materials, ensuring the shelves you build are robust and durable enough to withstand the weight of heavy canned goods, bulk bags of flour, or even small kitchen appliances. Unlike some flimsy, mass-produced options that might sag, bend, or even break under pressure, you can select sturdy wood, high-grade fasteners, and appropriate support systems. This meticulous selection guarantees that your custom shelves are built to last, providing reliable and sag-free storage for years to come.
5. Personal Satisfaction and Pride
There’s an undeniable sense of accomplishment and pride that comes with using something you’ve crafted with your own hands. Every time I open my pantry and see the perfectly organized, sturdy shelves I built, I feel a surge of satisfaction. It’s a tangible reminder of my effort and ingenuity, and the practical solution I created. This personal connection to your home’s functionality is incredibly rewarding. In fact, after seeing the transformation in my own home, many friends and family members have been inspired to tackle their own pantry projects, often asking for my guidance and assistance, which only adds to the joy of sharing a valuable skill.
What Materials Are Best for DIY Pantry Shelves?
Choosing the right material for your DIY pantry shelves is a crucial decision that impacts durability, aesthetics, and cost. Each option offers a unique set of pros and cons, making it important to consider your specific needs, the amount of moisture present in your pantry, your budget, and the desired look. Below is a detailed table outlining common materials, their characteristics, and best uses to help you make an informed choice.
| Material | Pros | Cons | Best Uses |
|---|---|---|---|
| Plywood | – Affordable and readily available – Easy to cut and customize – Available in various grades and thicknesses |
– Can warp if exposed to moisture – May require edge banding for a polished look |
– Strong shelves for most pantries – Ideal for budget projects |
| MDF (Medium Density Fiberboard) | – Smooth surface, great for painting – Inexpensive and easy to work with |
– Not moisture-resistant; can swell if wet – Heavier than plywood and requires sturdy support |
– Painted shelves for dry pantries – Decorative storage |
| Solid Wood (e.g., Pine, Oak) | – Sturdy and durable – Visually appealing, can be stained or painted |
– More expensive than plywood and MDF – Susceptible to warping and cracking over time |
– Heavy-duty storage – Adds natural warmth to pantry |
| Melamine-coated Particleboard | – Smooth, scratch-resistant surface – Moisture-resistant coating makes it easy to clean |
– Heavy; may require special brackets for support – Edges may chip or peel over time |
– Clean, modern look – Low-maintenance shelving |
| Metal (e.g., Stainless Steel) | – Highly durable and strong – Moisture and rust-resistant |
– Expensive and challenging to cut/customize – Industrial look might not suit all interiors |
– High-capacity storage – Suitable for humid areas |
| Wire Shelving | – Lightweight and good ventilation for items – Easy to clean and moisture-resistant |
– Limited weight capacity; not ideal for small items – Can be noisy when items are placed on it |
– Pantry with air circulation needs – Storing cans or larger items |
| Plastic Shelving | – Lightweight and moisture-resistant – Often modular; easy to assemble |
– Lower weight capacity than wood or metal – Limited aesthetic appeal |
– Quick, temporary setups – Damp areas or rental spaces |
Carefully consider the long-term usage, humidity levels in your kitchen, and your aesthetic preferences before making your final material selection. Investing in the right material upfront will ensure your DIY pantry shelves stand the test of time and serve your organizational needs perfectly.
Preparing Your Pantry
Before you even think about cutting wood or assembling shelves, proper preparation of your pantry space is paramount. This critical phase ensures a clean, stable, and aesthetically pleasing foundation for your new storage system. Neglecting these steps can lead to structural issues, poor finishes, or even mold growth.
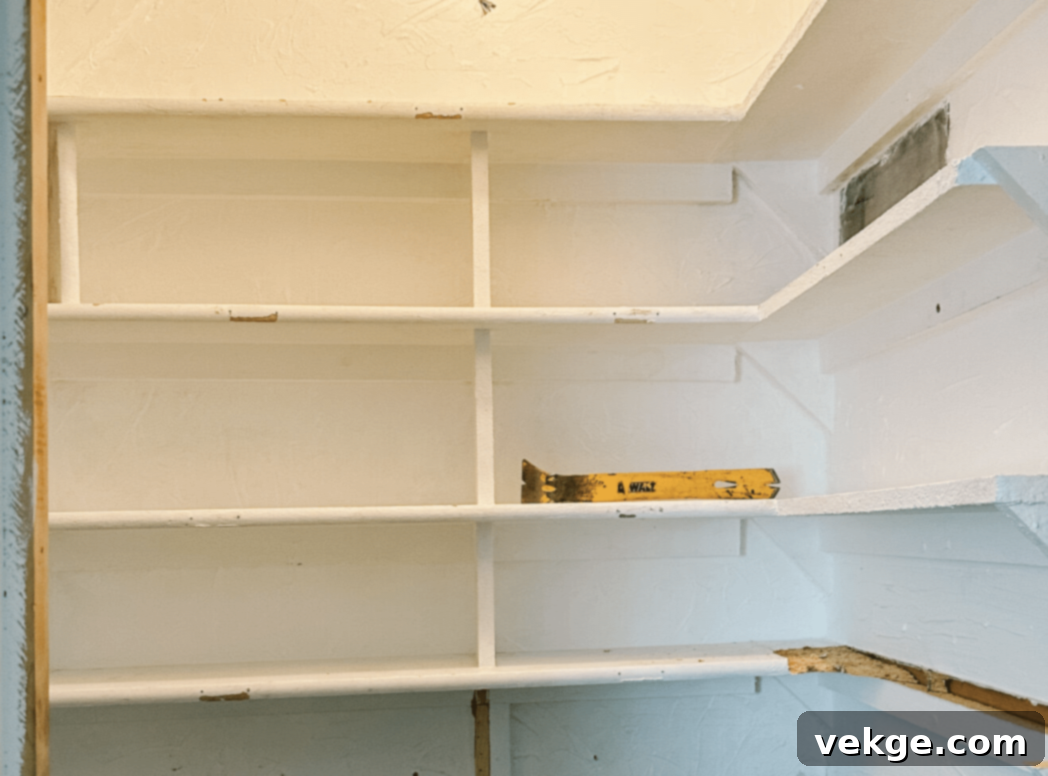
Removing Old Shelving
If your pantry currently has existing shelves, safely removing them is the first order of business. This creates a blank canvas for your custom design.
Steps to safely remove existing shelves:
- I always start by taking everything off the shelves and clearing the entire area. This prevents accidents and gives you room to work.
- Carefully remove shelf brackets using a power drill or a screwdriver. Ensure you apply steady pressure to avoid stripping screw heads.
- Pull out any wall anchors with pliers. If they are stubborn, a putty knife can be gently wedged behind them to loosen their grip before removal.
- For wire racks, meticulously examine the mounting points for specific clips or brackets that need to be disengaged. Some may require a specific tool or technique to release.
- Keep track of all removed hardware. Some pieces, like screws or anchors, might be reusable or helpful for future small projects.
Wall Repairs: Ensuring a Smooth Foundation
Once the old shelving is gone, your walls might have unsightly holes or damage. Addressing these is essential for a professional finish and proper shelf installation.
- Fill all screw holes, dings, and imperfections with spackling compound, using a small putty knife for a smooth application. Press the compound firmly into the holes.
- Allow the spackling compound to dry completely. Always check the package instructions for recommended drying times, which typically range from 4-6 hours, but can vary based on humidity and product thickness.
- Once dry, gently sand the patched areas smooth with 150-grit sandpaper. Aim for a seamless transition between the patched area and the original wall surface.
- Wipe down the walls thoroughly with a damp cloth to remove all sanding dust. This is crucial for proper paint adhesion later on.
Prepping the Space: Cleaning and Finishing Touches
A clean and freshly painted pantry not only looks better but also contributes to a more hygienic storage environment.
Cleaning steps:
- Vacuum all corners, edges, and the floor thoroughly to remove any debris, dust, or crumbs that have accumulated.
- Wash the walls and ceiling with a mixture of warm, soapy water (a mild household cleaner works well). This removes grime, grease, and any residue.
- Allow the walls to dry completely before proceeding. I usually wait a full 24 hours to ensure no lingering moisture remains, especially in older homes.
- Crucially, check for any signs of mold or persistent moisture issues. Address and fix these problems (e.g., a leaking pipe, condensation) before moving forward, as dampness can compromise your new shelves and stored food.
Painting and finishing:
- Apply a good quality primer to all patched areas, or even the entire wall, to ensure even paint absorption and a uniform finish.
- Paint the entire pantry area for a fresh, clean look. Choose a color that brightens the space and complements your kitchen decor.
- Consider using a semi-gloss or satin paint finish. These are more durable and significantly easier to clean than flat paints, which is ideal for a high-traffic area like a pantry.
- Allow the paint to dry thoroughly between coats, typically 4 hours, but always refer to the manufacturer’s instructions for optimal results.
- If your pantry requires it, add new baseboards. Remember the adage: measure twice, cut once, to ensure a perfect fit and clean appearance.
Supplies Needed For Building DIY Pantry Shelves
Having all your tools and materials ready before you begin is a golden rule for any DIY project. This prevents frustrating interruptions and ensures a smoother, more efficient workflow. Below is a comprehensive list of what you’ll need for this specific pantry shelf build, designed to create sturdy, elegant recessed shelves.
| Tools | Materials |
|---|---|
| Pencil & Level | 2×6 Lumber (for shelves) |
| Tape Measure | 2×10 Lumber (for support if needed, or wider shelves) |
| Miter Saw (or Circular Saw) | Tongue-and-Groove Bead Board (for backing) |
| Drill (with Counter-Sink Bits) | Wood Corbels (small & large – for decorative support) |
| Screwdriver | Fluted Casing or other decorative trim |
| Sandpaper (various grits, e.g., 150, 220) | Wood Screws (appropriate length for studs) |
| Caulking Gun | Wood Filler |
| Paintbrushes/Rollers | Caulk (paintable acrylic latex) |
| Spade Drill Bit (1/2″ – for curtain rod if installing) | Primer & Paint (e.g., Frosted Sage Paint) |
| Iron (for hemming curtain if applicable) | Curtain Fabric (e.g., Vintage Cake – optional) |
| Sewing Machine (optional, for curtain) | Curtain Rod and Rings (optional) |
| Pleat Tape (optional, for curtain) | Shaker Pegs (for a peg rail – optional) |
| Wood Glue | Safety Glasses & Dust Mask |
Always prioritize safety. Wear safety glasses when cutting or drilling, and use a dust mask when sanding. Having everything laid out and organized will make the building process much smoother and more enjoyable.
Step-by-Step Guide to Creating DIY Pantry Shelves
Now that your pantry is prepped and your materials are gathered, it’s time to bring your vision to life. This step-by-step guide will walk you through the construction of sturdy, attractive recessed pantry shelves, integrated seamlessly into your wall structure.
Step 1: Prepare the Wall and Frame
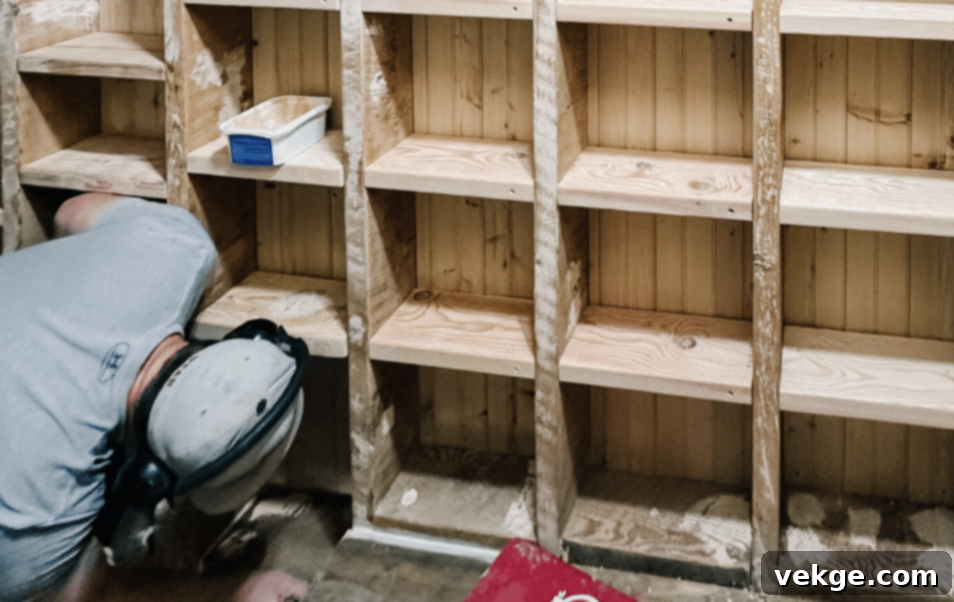
- Begin by carefully removing the drywall in the areas where your shelves will be installed to expose the wall studs. This method ensures maximum stability and a custom, built-in look. Use a utility knife to score the drywall and a drywall saw to cut, being mindful of any electrical wires or plumbing behind the wall.
- Once the studs are exposed, use a pencil and a long level to accurately mark where each shelf will go. Ensure these lines are perfectly level and evenly spaced according to the heights of items you plan to store. For instance, allow more height for cereal boxes on one shelf and less for cans on another.
- Measure the exact distance between the studs for each shelf. It’s crucial to subtract a small amount (e.g., 1/8 to 1/4 inch) from your measurement to allow for easy installation, as wall studs are rarely perfectly straight or uniformly spaced. This slight allowance prevents shelves from getting stuck during fitting.
Step 2: Install Bead Board Backing
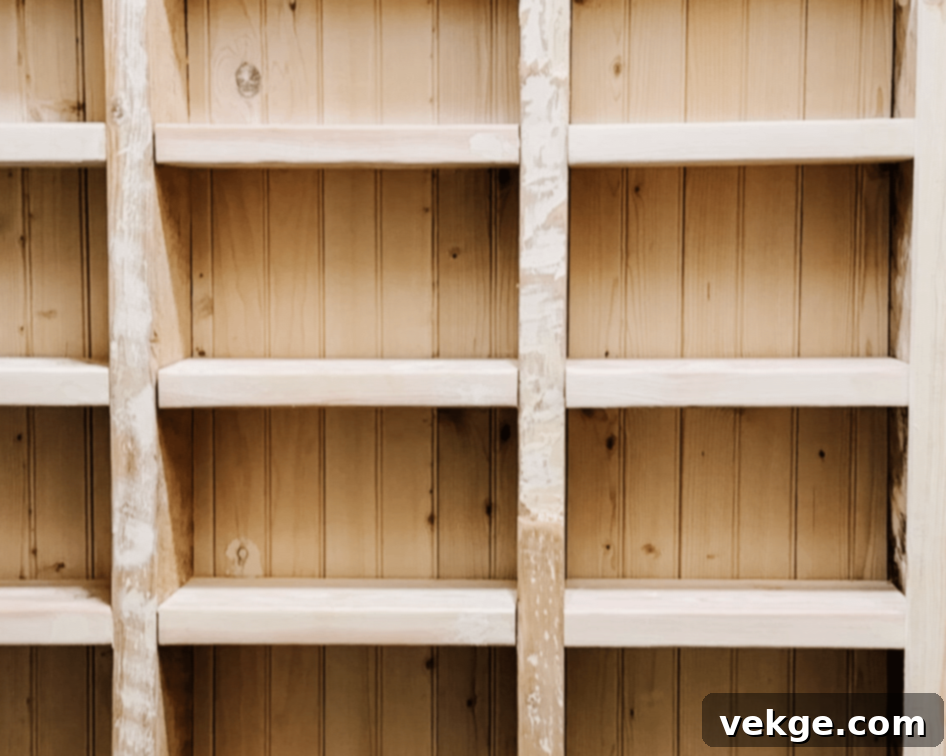
- Cut your tongue-and-groove bead board panels to fit snugly between the exposed studs, matching the height of your planned shelf sections. The tongue-and-groove design allows for seamless joining of panels.
- Secure the bead board firmly to the exposed wall studs using wood screws. Make sure the screws penetrate the studs sufficiently for a strong hold. This not only gives your pantry a charming, classic, and finished aesthetic but also adds an extra layer of structural integrity, strengthening the overall frame where your shelves will reside.
Step 3: Cut and Install Shelves
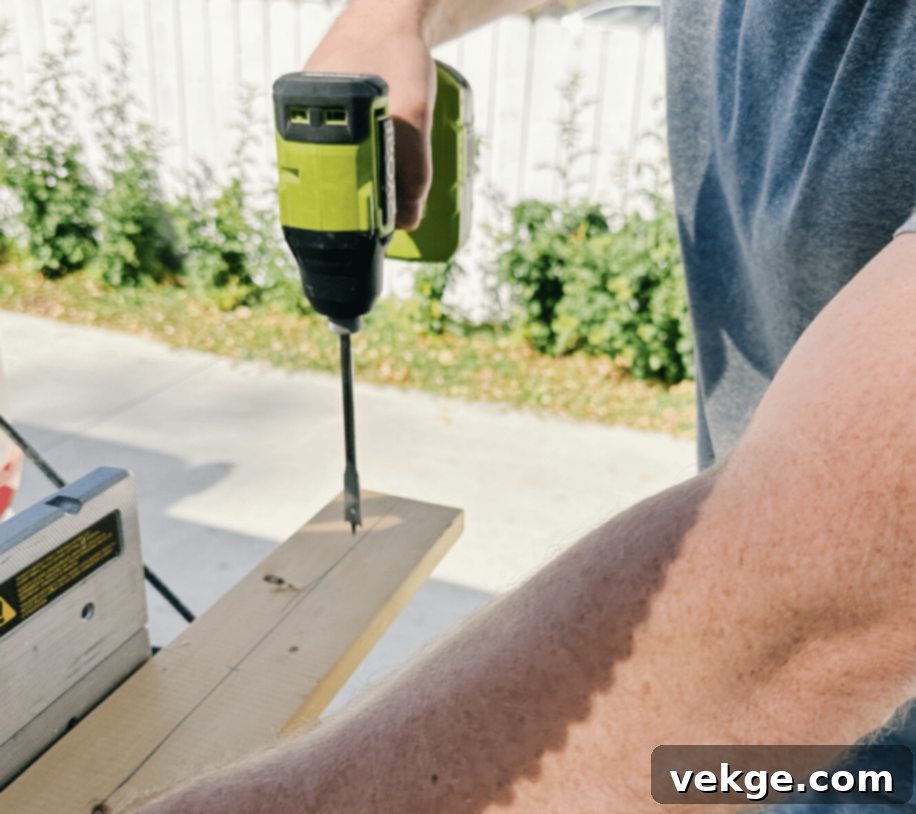
- Using the measurements from Step 1, precisely cut your 2×6 lumber (or 2×10 for deeper shelves) to the correct width for each shelf. A miter saw provides clean, accurate cuts. Sand the edges lightly to remove splinters.
- Carefully slide each shelf into place between the studs, aligning it with your marked level lines. For maximum stability and a flush look, apply a bead of wood glue along the edges where the shelf meets the studs.
- Secure the shelves by driving wood screws through the sides of the shelves directly into the wall studs. Use countersink drill bits before driving the screws to ensure the screw heads sit flush or slightly below the surface, allowing for easy filling and a smooth finish later. Adjust spacing based on the typical height of items you plan to store on each level, remembering to account for containers.
Step 4: Attach Trim for a Finished Look
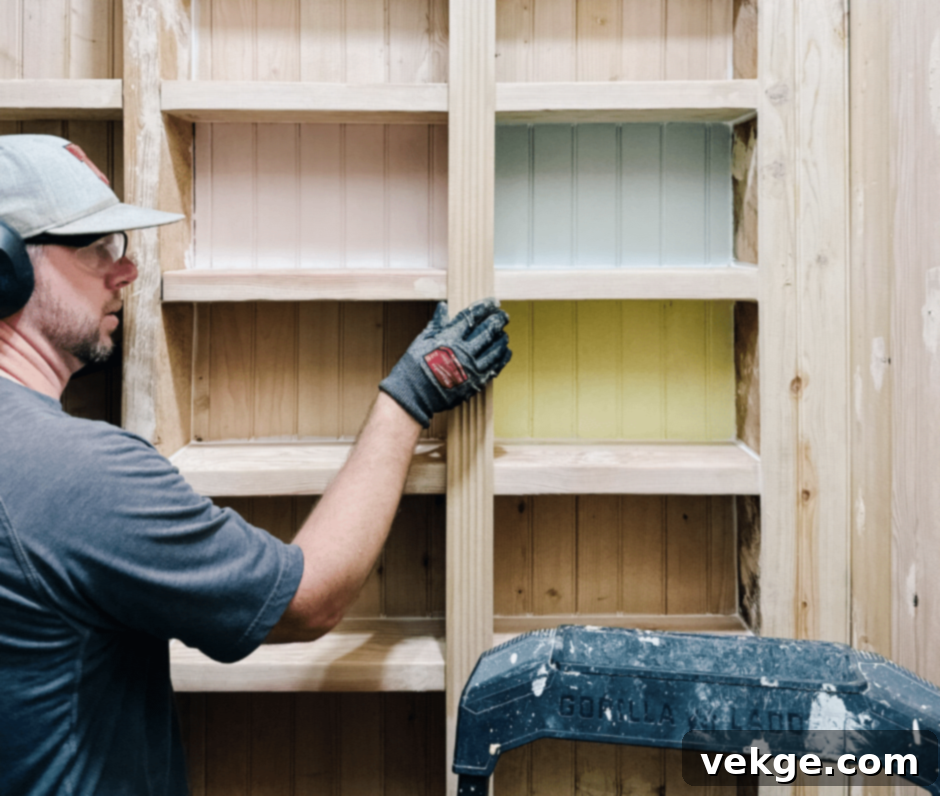
- Once the shelves are securely in place, measure and cut your fluted casing or chosen decorative trim pieces to the exact length of the front edge of each shelf.
- Carefully nail the trim along the front edge of each stud, aligning it perfectly with the edge of the shelf. Use finishing nails and a nail gun or hammer. This step is crucial for creating a clean, uniform, and professional appearance, effectively concealing the rough edges of the studs and any minor gaps. This elevates the look from functional to truly custom and polished.
Step 5: Sand, Fill, and Paint
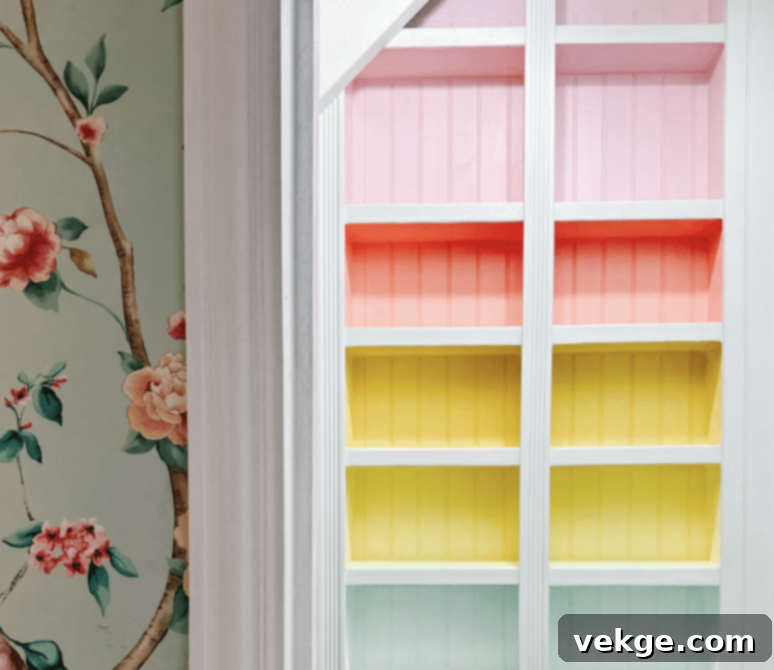
- With construction complete, the finishing touches begin. Use wood filler to meticulously cover all visible screw holes and nail holes from the trim. Allow the filler to dry completely according to package instructions.
- Once dry, sand all filled areas and any rough spots on the shelves and trim until they are perfectly smooth to the touch. Start with a coarser grit sandpaper (e.g., 150-grit) and finish with a finer grit (e.g., 220-grit) for a silky smooth surface.
- Apply paintable caulk to any seams or small gaps between the shelves, trim, and bead board. This creates a seamless, polished look, making it appear as if the shelves are one continuous, perfectly crafted unit.
- Finally, apply primer and then paint or stain the shelves in colors that complement your kitchen decor. A fresh, clean color will brighten the pantry. If you’re feeling adventurous, a subtle rainbow palette on the trim or inside the shelf backing can add a fun, personalized touch and make your pantry truly unique.
Step 6: Add a Curtain and Final Touches
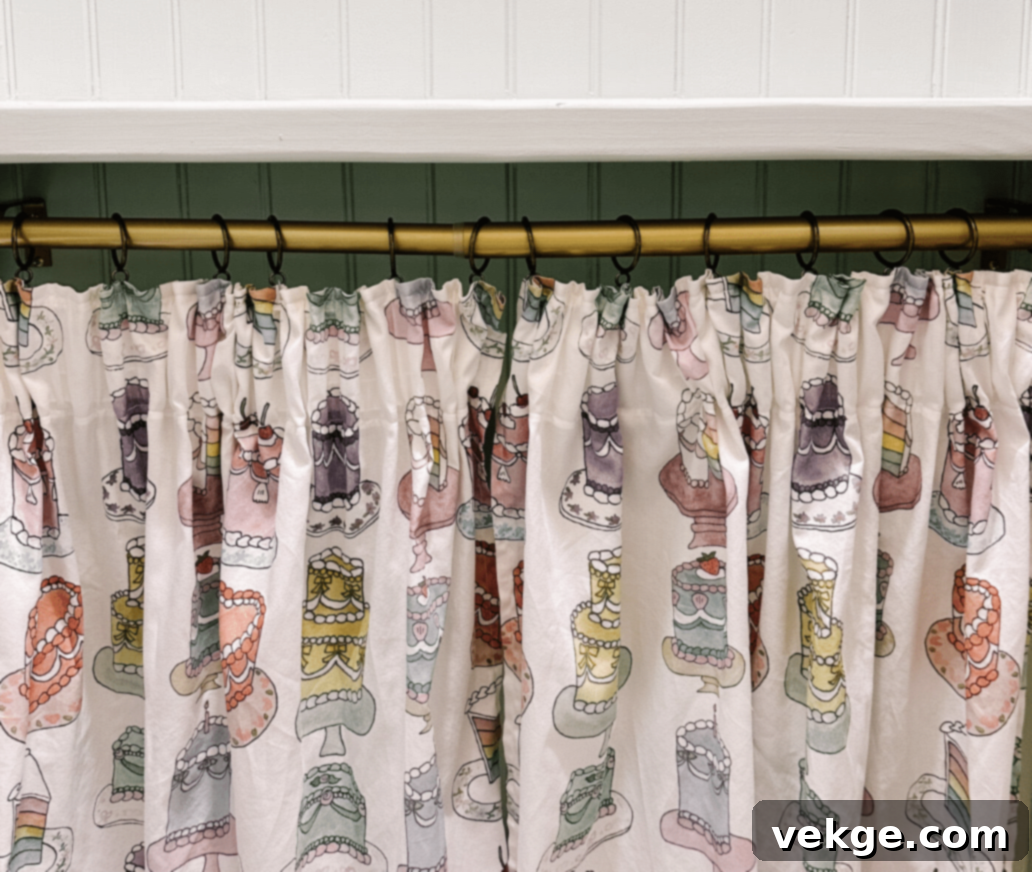
- For an added layer of charm or to conceal items stored below the bottom shelf, consider installing a decorative curtain rod. Measure and cut the curtain fabric to your desired length and width, allowing extra for hems and pleats.
- Using pleat tape, you can easily create professional-looking pleats. Hem the edges of the fabric with an iron or sewing machine for a neat finish.
- Attach drapery hooks to the pleats and hang the curtain on the curtain rod using decorative rings. This touch can add softness, color, and a traditional feel to your newly organized pantry.
- As a final practical and decorative touch, consider adding a peg rail below a shelf for hanging aprons, dish towels, or even a small dustpan. This maximizes vertical space and adds character.
Pantry Organizing Tips
Building beautiful shelves is only half the battle; maintaining an organized pantry is key to long-term success. Over the years, I’ve honed a few strategies that keep my pantry functioning efficiently and looking great. Implement these tips to get the most out of your new custom storage system:
- Zone Planning: This is my number one rule. I divide my pantry into clear, dedicated zones based on item categories: breakfast foods, baking items, snacks, canned goods, spices, and cooking oils. This makes finding items incredibly fast and, just as importantly, ensures that putting away groceries is a simple, intuitive process.
- Container Solutions: Investing in a consistent set of clear storage bins and airtight containers is a game-changer. I opt for clear containers because I can immediately see what’s inside and monitor stock levels at a glance, preventing over-buying. Square or rectangular containers are far more space-efficient than round ones, allowing you to maximize every inch of shelf space.
- Height Arrangement: Think strategically about item placement. I keep daily-use items, like bread, cereals, and common condiments, at eye level for easy access. Heavy or bulk items (e.g., large bags of rice, dog food) are stored on lower shelves for safety and ease of lifting. The top shelves are reserved for lighter, less frequently used items, such as seasonal baking supplies or extra paper towels.
- Back-Stock System (First In, First Out): To minimize food waste and keep things fresh, I strictly adhere to the “first in, first out” (FIFO) method. When I bring new groceries home, they go behind older items of the same kind. I make it a point to check expiration dates monthly, moving older products to the front so they are used first. This simple system significantly reduces waste and saves money.
- Smart Spacing: While maximizing space is important, don’t cram items in too tightly. I always leave small finger-width gaps between containers or stacks of items. This small allowance is crucial for easy removal and prevents items from getting stuck or toppling over. If your shelves are adjustable, tailor the heights to your containers, allowing just enough clearance above the tallest item.
- Label Everything: This tip seems obvious but is often overlooked. Clear, consistent labels on all containers and even shelf zones are vital, especially in a household with multiple users. Labels help everyone find what they need quickly and, more importantly, return items to their proper spots. This reduces clutter and ensures your meticulously organized system stays that way.
DIY vs. Professional Help
Deciding whether to tackle a project like pantry shelving yourself or to call in professional help can be a tricky decision. For basic carpentry tasks, such as building simple shelves, I often choose the DIY route. It’s a rewarding experience, and perfectly manageable if you possess fundamental skills like accurate measuring, safe operation of a drill and saw, and the ability to follow detailed instructions. A straightforward shelf installation project can typically be completed over a single weekend, offering significant cost savings and personal satisfaction.
However, it’s crucial to consider professional help when:
- Your project involves electrical work or plumbing changes: Any alterations to your home’s utilities should always be handled by licensed professionals to ensure safety and compliance with building codes.
- Walls require major repairs or structural support: If you suspect a wall is load-bearing, or if there’s significant damage that goes beyond simple spackling, a structural engineer or experienced contractor should be consulted. Incorrectly altering structural elements can compromise your home’s integrity.
- You’re removing load-bearing elements: This is a major structural alteration and absolutely requires expert assessment and execution. Never attempt this without professional guidance.
- Time is a significant constraint: Professionals can typically complete complex installations much faster, often in 1-2 days, compared to the potentially longer timeline for a DIY enthusiast.
- Your tools or expertise are limited: While this guide outlines basic tools, specialized custom builds might require equipment you don’t own. Professionals arrive with all the necessary, high-quality tools and extensive experience.
Some jobs simply demand expert knowledge and specialized tools. If you are ever unsure about the strength of your walls, the type of support needed for heavy loads, or the complexity of a task, it is always advisable to call a professional. Ensuring safe and durable storage for your home should always take precedence over saving a few dollars.
Conclusion
Building your own pantry shelves might initially appear to be a formidable undertaking, a project that requires advanced skills and a hefty investment of time. However, having personally guided numerous friends and family members through their own pantry transformations, I’ve witnessed firsthand how this seemingly simple home improvement project can profoundly enhance daily life. A thoughtfully designed and well-organized pantry is more than just a storage space; it’s a central hub that saves precious time, significantly reduces daily stress, and empowers you to efficiently manage your food inventory.
The beauty of this project lies in its accessibility. You don’t need to be a master carpenter or possess an arsenal of expensive tools. Success hinges on a few fundamental principles: thorough planning, careful selection of the right materials for your needs, and meticulous measurements. Take your time with each step, paying close attention to detail, and don’t be afraid to double-check your work.
The journey from a cluttered, frustrating pantry to a beautifully organized and highly functional one is incredibly rewarding. It’s a tangible representation of your effort and a daily reminder of your ability to create meaningful improvements in your home. Are you ready to embark on your pantry project and experience the satisfaction of a perfectly organized kitchen? I’d absolutely love to hear about your experience! Share your before-and-after photos and tell us how it goes in the comments below – your journey might just inspire someone else!
