Ultimate Guide to Waterproofing Your Tub Flange and Preventing Bathroom Leaks
Dealing with leaks and water damage in your bathroom can be incredibly frustrating and costly. I’ve experienced the headache of seeing water seep through walls and floors firsthand, which is often a tell-tale sign of a compromised tub flange. The good news? Properly waterproofing your tub flange is a manageable DIY project that can save you from significant repairs down the line.
This comprehensive guide will walk you through everything you need to know about effectively sealing your bathtub flange. From understanding what a tub flange is to the step-by-step application of waterproofing materials and even installing backer board and tile, you’ll gain the confidence and knowledge to protect your bathroom from water damage. With some basic tools and the right techniques, you can ensure a watertight seal and peace of mind for years to come.
I’ll share my preferred materials, the detailed process I use, and crucial tips to help you get the job done right the first time, preventing future issues and maintaining the integrity of your bathroom.
What is a Tub Flange & Its Types Explained
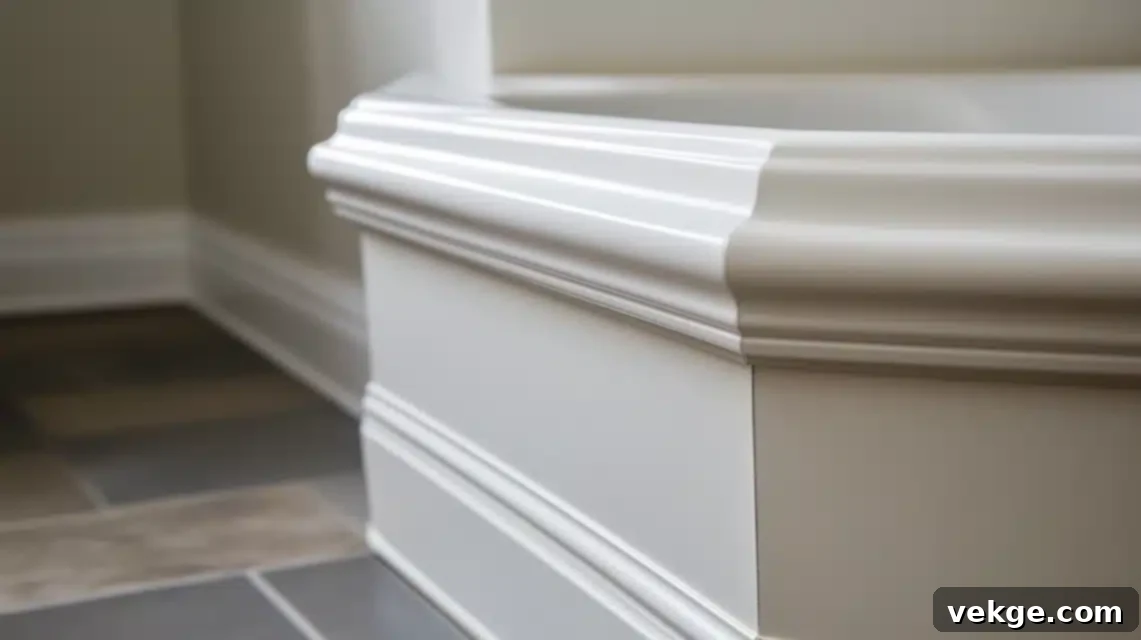
At its core, a tub flange is a critical component designed to create a watertight barrier between your bathtub and the surrounding wall. It’s essentially a raised rim or lip that runs along the edges of the tub where it meets the vertical surface of your shower or bath enclosure. Without a properly sealed tub flange, water can easily bypass the visible tile or wall surface, leading to hidden damage within the wall cavity.
Understanding the different types of tub flanges can help you identify what you’re working with and how best to approach waterproofing:
- Integral Flanges: These are the most common and often considered the most reliable type. Integral flanges are molded directly into the bathtub’s structure, forming a seamless, one-piece unit. They provide an excellent base for waterproofing as there are no seams or joints where the flange meets the tub itself, reducing potential leak points. They are typically found on acrylic, fiberglass, and cast iron tubs.
- Nailing Flanges: These flanges extend horizontally from the tub and feature pre-drilled holes, allowing you to secure the tub directly to the wall studs using nails or screws. This method provides robust structural support and helps maintain the tub’s position, preventing movement that could compromise the waterproof seal. The fastening points usually get covered by the backer board and waterproofing membrane.
- Screw-On Flanges: Less common but highly useful, screw-on flanges are aftermarket additions. These can be particularly beneficial for older tubs that lack an integrated or nailing flange, or for situations where a tub is being installed against an existing wall without direct stud access. They are attached to the tub’s edge and then waterproofed, offering flexibility and an upgrade option for challenging installations. While effective, careful installation is crucial to ensure a truly watertight connection between the add-on flange and the tub itself.
Regardless of the type, the primary objective of any tub flange is to create a robust, impenetrable seal that prevents water from migrating behind the tub walls. This simple yet vital component is your first line of defense against mold growth, structural damage, and costly repairs in your bathroom.
How to Prepare Your Bathroom Set-up for Optimal Waterproofing
Proper preparation is the cornerstone of any successful waterproofing project. Skipping these initial steps can lead to adhesion issues, ineffective sealing, and ultimately, wasted time and materials. I always dedicate sufficient time to prepare the area meticulously.
- Clear the Area Thoroughly: My first step is to remove everything from around the tub. This includes shower curtains, bath mats, toiletries, and any decorative items on nearby shelves or ledges. Not only does this protect your belongings from potential splashes or spills of waterproofing materials, but it also provides an unobstructed workspace, which is essential for precise application.
- Deep Clean the Flange and Surrounding Walls: This step cannot be overstated. The surface where your waterproofing materials will adhere must be impeccably clean. I use a strong, basic bathroom cleaner to meticulously scrub away all traces of dirt, soap scum, mildew, and any old caulk or adhesive residue. For stubborn grime, a stiff brush or scraper might be necessary. After cleaning, rinse the area thoroughly and allow it to dry completely. A clean, dry, and smooth surface ensures maximum adhesion for the waterproofing membrane or liquid.
Once the area is sparkling clean and dry, I gather all my necessary tools and materials in one convenient spot. This prevents interruptions and ensures a smooth workflow:
- Clean rags or microfiber cloths
- Effective cleaning solution (e.g., all-purpose cleaner, mold/mildew remover)
- Your chosen waterproofing material (e.g., roll of waterproofing membrane, liquid waterproofing membrane)
- Utility knife with sharp blades (essential for precise cuts)
- Caulk gun (for silicone caulk)
- Measuring tape
- Applicators (e.g., paint roller, paintbrush for liquid membrane)
- Trowel (if applying thin-set for membrane installation)
- Masking tape (for clean lines if desired)
- Protective gloves and eye protection
Ventilation is Crucial: Last but not least – I always ensure the bathroom is well-ventilated. Open a window, run the exhaust fan, or even use a portable fan to circulate air. Many waterproofing materials emit strong fumes, and good ventilation protects your health and helps the materials cure properly. This setup usually takes me about 30-60 minutes, but investing this time upfront is invaluable for the success and durability of the waterproofing project.
How to Waterproof the Tub Flange: Step-by-Step Methods
Once your bathroom is prepped, it’s time to apply the waterproofing. There are several effective methods, often used in combination, to ensure a robust, leak-proof seal around your tub flange. Here’s a detailed breakdown of the techniques I employ:
Method 1: Waterproofing Membrane Application (Sheet or Roll)
This method involves applying a physical barrier, usually a synthetic fabric or rubberized sheet, directly over the tub flange and extending onto the wall. It’s highly effective for creating a continuous waterproof layer before tile installation.
- Measure and Cut: I begin by carefully measuring the length and height required for the membrane. It’s crucial that the membrane extends at least 6-8 inches up the wall from the top of the tub flange and ideally overlaps the tub lip by at least 1-2 inches. For the length, measure the entire perimeter of the tub where it meets the wall. I then cut the membrane precisely using a sharp utility knife.
- Apply Adhesive (if necessary): Depending on the type of membrane (self-adhesive or requiring thin-set mortar), I apply the appropriate adhesive to the clean, dry wall surface. If using thin-set, I mix it to a peanut butter consistency and spread a thin, even layer with a notched trowel.
- Press into Place: I carefully press the cut membrane into the adhesive, starting from one end and working my way across. It’s vital to ensure there are no air bubbles or wrinkles, as these can compromise the seal. I use a plastic smoother or a flat hand to firmly press the membrane onto the surface, working any air bubbles towards the edges until they are expelled. Overlap seams by at least 2 inches for complete protection.
Method 2: Liquid Waterproofing Membrane
Liquid waterproofing membranes, such as RedGard or Hydro Ban, are applied like paint and cure to form a seamless, flexible, and impermeable barrier. This method is excellent for complex shapes and ensuring a continuous seal.
- First Coat Application: Using a paintbrush or a roller, I apply a thin, even coat of liquid waterproofing membrane over the entire tub flange and extending 6-8 inches up the wall. I make sure to cover every nook and cranny, paying extra attention to the corner areas. The goal is complete coverage without excessive thickness.
- Drying Time: I allow the first coat to dry completely according to the manufacturer’s instructions, which is typically around 2 hours, but can vary based on humidity and temperature. The membrane will often change color as it dries, indicating it’s ready for the next step.
- Second Coat (and sometimes Third): Once the first coat is dry, I apply a second, equally thin and even coat. This layering creates a robust barrier. For high-moisture areas or peace of mind, a third coat can be applied after the second has dried. Consistency is key for uniform protection.
Method 3: Caulk Sealing (as a final layer)
While not a primary waterproofing method on its own, caulk is essential for sealing the visible joint between the finished wall surface (e.g., tile) and the tub. It provides an aesthetic finish and an additional layer of protection against surface water penetration.
- Apply a Continuous Bead: After the main waterproofing (membrane or liquid) and tiling are completed, I apply a smooth, continuous bead of high-quality, 100% silicone caulk where the tub flange meets the bottom edge of the wall tile. Silicone is crucial here as it offers superior flexibility and water resistance compared to acrylic latex caulks.
- Smooth the Caulk: Immediately after applying the caulk, I use a wet finger, a caulk tool, or a damp sponge to smooth out the bead. This creates a clean, professional-looking, and watertight seal that prevents water from collecting in the joint.
Method 4: Corner Treatment – Critical for Leak Prevention
Corners are notorious weak points in any waterproofing system. Special attention here is vital.
- Pre-Formed Corners or Fabric Reinforcement: When using a sheet membrane, I always use pre-made corner pieces designed to fit perfectly. If those aren’t available, I cut small, overlapping sections of the membrane to create a layered, waterproof corner. For liquid membranes, I use alkali-resistant fiberglass mesh tape embedded into the first coat in all inside corners, then cover it with subsequent liquid membrane coats.
- Overlap and Seal: Ensure all corner pieces overlap the main membrane sections by at least 2 inches. This layered approach creates redundancy and prevents any tiny gaps where water could otherwise infiltrate.
Method 5: Final Sealing at the Top Edge
This final step ensures that water cannot get behind the waterproofing layer from the top.
- Seal the Upper Edge: Once the waterproofing membrane or liquid is applied and cured, I apply a final bead of caulk (or an additional layer of liquid membrane) along the top edge where the waterproofing meets the rest of the wall board. This creates a complete seal, encapsulating the protected area and preventing any water from seeping behind the waterproofing layer from above.
Important Tips I’ve Learned Through Experience
- Respect Drying Times: Always allow each layer of waterproofing material to dry fully before applying the next or proceeding with the next step. Rushing this process is a common mistake and can severely compromise the effectiveness of your waterproofing. Refer to product instructions for specific drying times.
- Corners Are Key: As mentioned, don’t ever skip the corners. They are the most common starting points for leaks due to movement and stress. Dedicated corner treatment is non-negotiable.
- Eliminate Air Bubbles: If using a sheet membrane, meticulously press out any air bubbles as you apply it. Trapped air can lead to weak spots and eventual membrane failure.
- Maintain a Dry Environment: After completing the waterproofing, keep the bathroom as dry as possible for at least 24-48 hours. Avoid using the shower or tub during this curing period to allow all materials to fully set and achieve their maximum strength and water resistance.
- Read Product Instructions: Different brands and types of waterproofing products have specific application instructions. Always read and follow the manufacturer’s guidelines carefully for the best results.
Remember to thoroughly check your work when you’re done. I always run my hand along all the seals and edges to ensure everything feels smooth, secure, and fully adhered. A little extra diligence now saves a lot of headaches later.
An Approximate Investment While Waterproofing Your Tub Flange
Understanding the costs involved can help you decide whether to tackle this project yourself or hire a professional. While DIY saves on labor, it requires an investment in materials and your time. Here’s a breakdown:
| Item | DIY Cost (Approx.) | Professional Cost (Approx.) |
|---|---|---|
| Waterproofing Membrane (Roll/Sheet) | $30-45 per roll | Included |
| Liquid Waterproofing (Gallon) | $25-35 per gallon | Included |
| Quality Silicone Caulk | $8-12 per tube | Included |
| Utility Knife & Blades | $5-10 | N/A (Professional tools) |
| Caulk Gun | $6-15 | N/A (Professional tools) |
| Measuring Tape | $5-10 | N/A (Professional tools) |
| Cleaning Supplies & Rags | $10-15 | N/A (Professional supplies) |
| Brushes/Rollers for Liquid Membrane | $5-10 | N/A (Professional supplies) |
| Labor Costs (Installation only) | N/A (Your time) | $200-400 |
| Materials Markup (Professional) | N/A | $100-150 |
| Additional Waterproofing (if needed, e.g., corners) | N/A | $50-100 |
| Total Estimated Cost | $85-140 (DIY) | $350-650 (Professional) |
Money-Saving Tips for DIY Waterproofing
- Buy Slightly More: It’s always better to have a little extra material than to run out mid-project. Returns are easier than unexpected trips to the store.
- Invest in Quality Tools: While it’s an initial expense, good quality tools like a sturdy caulk gun or a sharp utility knife can be reused for numerous other home improvement projects, making them a wise long-term investment.
- Proper Installation Prevents Future Costs: The biggest saving comes from doing the job correctly the first time. A poorly waterproofed tub flange can lead to extensive water damage, mold remediation, and structural repairs that far exceed the cost of professional installation.
- Borrow or Rent Tools: For tools you might use infrequently, consider borrowing from friends, family, or renting them from a local hardware store.
- Shop for Sales: Keep an eye out for sales on waterproofing membranes, caulk, and other supplies at your local hardware stores.
Ultimately, the DIY route offers significant cost savings if you’re comfortable and confident in your abilities. However, if you’re uncertain or time-constrained, investing in professional installation can provide assurance and prevent potentially much more expensive water damage in the future.
Installing Backer Board Around the Tub Flange for a Solid Foundation
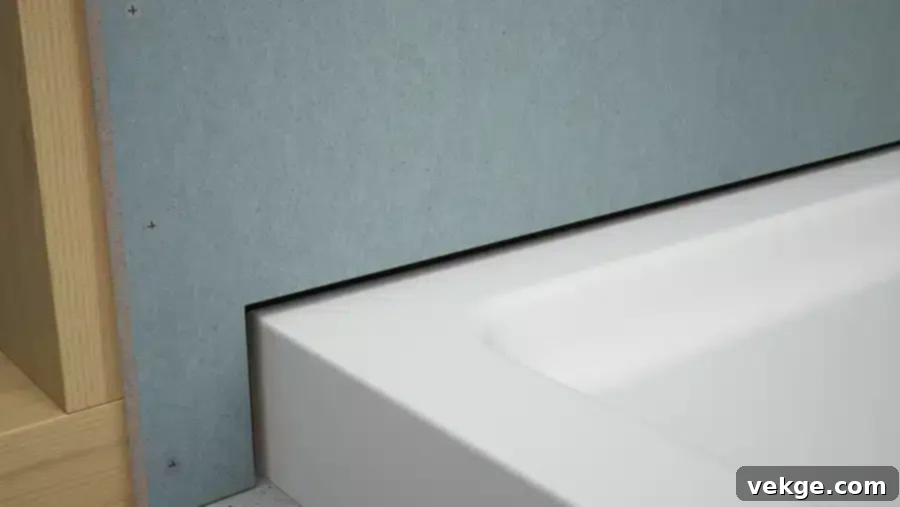
After waterproofing the tub flange itself, the next critical step for a durable and water-resistant shower or tub surround is installing cement backer board. This provides a stable, mold-resistant surface for your tiles, far superior to traditional drywall in wet areas.
Basic Materials You’ll Need for Backer Board Installation
- Cement backer board (e.g., HardieBacker, Durock)
- Moisture-resistant screws (specifically designed for backer board)
- Alkali-resistant mesh tape (for seams)
- Thin-set mortar (for seams and general board adhesion if preferred)
- Utility knife with extra blades
- Tape measure
- Level (a 4-foot level is ideal)
- Drill/impact driver for screws
- Dust mask and safety glasses (cutting backer board creates fine dust)
Step-by-Step Process for Installing Backer Board
- Measuring and Cutting with Precision: I start by precisely measuring the wall space around the tub flange. It’s crucial to cut the backer board so it stops approximately 1/8 inch above the top of the tub flange. This small gap is essential for preventing water from wicking up into the board and allows for a proper caulk or sealant joint later. I score the backer board deeply with a utility knife on one side, then snap it along the score line, and finally cut through the backing paper on the other side.
- Test Fitting Each Piece: Before I secure anything permanently, I perform a thorough test fit of each cut backer board piece. I check that they fit snugly but with the required 1/8-inch gap above the flange, and that the edges align correctly with wall studs and adjacent boards. This step ensures fewer adjustments later.
- Bottom Row Installation First: I always begin with the bottom row of backer board, placing each piece directly above the tub flange, maintaining that crucial 1/8-inch gap. I use a few galvanized roofing nails or temporary screws to hold the board in position while I prepare to secure it properly.
- Securing the Board to Studs: Once the board is in place, I use moisture-resistant screws, specifically designed for backer board, and drive them every 6-8 inches along the wall studs. It’s important to recess the screw heads slightly below the surface of the board, but not to over-tighten them. Ensure screws are placed about 3/4 inch away from the edges to prevent cracking the board.
- Working Upwards to Upper Rows: After the bottom row is securely installed, I work my way up, installing the next pieces of backer board. I continuously use my level to ensure each piece is plumb and straight, maintaining uniform gaps between boards (typically 1/8 inch). Staggering the seams like brickwork adds strength to the wall.
- Corner Treatment and Seaming: At inside corners, I ensure the backer boards meet cleanly, leaving a small 1/8-inch gap. After all boards are installed, I apply alkali-resistant mesh tape over all seams and corners. This tape is then covered with a thin layer of thin-set mortar, creating a smooth, reinforced, and waterproof transition between boards.
Expert Tips From My Experience with Backer Board
- Dust Mask and Safety Glasses: Always wear a dust mask and safety glasses when cutting cement backer board. The dust is fine and can be irritating or harmful if inhaled.
- Score Both Sides: For cleaner breaks, score the board deeply on both sides before snapping.
- Support Long Cuts: When making long cuts, use a support block or sawhorse to ensure even pressure and a straight break.
- Mark Stud Locations: Before you start, locate and mark the wall studs above where the backer board will sit. This makes it easier to hit the studs accurately when screwing in the board.
- Pre-drill Near Edges: If you need to place a screw very close to the edge of a board, pre-drilling a pilot hole can help prevent cracking.
This entire backer board installation process usually takes me about 2-3 hours for a standard tub surround. Taking your time with precise measurements and careful installation is the key to creating a solid, waterproof foundation for your tiles.
Some Common Waterproofing Mistakes to Avoid
Even with the best intentions, certain missteps can compromise your tub flange waterproofing. Being aware of these common mistakes can help you ensure a durable and effective seal:
- Skipping the Cleaning Step: Attempting to apply waterproofing membrane or liquid over a dirty, dusty, or soap-scum-laden surface is a recipe for failure. The materials won’t adhere properly, creating weak spots that will eventually lead to leaks. Always ensure the area is spotless and completely dry.
- Not Waiting Long Enough Between Coats: Patience is paramount. Rushing the drying time between coats of liquid waterproofing membrane, or before applying caulk, prevents the materials from fully curing and forming their intended bond. This results in weaker, less effective waterproofing and a significantly reduced lifespan.
- Using Regular Caulk Instead of 100% Silicone: Standard acrylic latex caulk, while suitable for dry interior joints, simply won’t stand up to constant water exposure in a shower or tub area. It will degrade, crack, and peel over time, allowing water to penetrate. Always use a high-quality, 100% silicone caulk for its superior flexibility, mildew resistance, and waterproof properties.
- Forgetting to Address the Corners: Corners are high-stress areas and are notoriously prone to leaks. Simply running a straight piece of membrane or a single coat of liquid isn’t enough. Neglecting to use dedicated corner pieces, mesh tape, or extra overlapping layers in these critical spots is akin to leaving a door open for water damage.
- Making the Membrane or Liquid Too Short: The waterproofing layer must extend sufficiently beyond the immediate tub flange area. Not extending the membrane or liquid waterproofing far enough (e.g., at least 6-8 inches up the wall and slightly over the tub lip) invites water to wick or seep behind the protective layer from above or around the edges.
- Working in a Humid Bathroom Environment: Waterproofing materials, especially liquid membranes and caulk, require a relatively dry environment to cure properly. Excessive humidity can extend drying times and negatively impact the material’s ability to form a strong, waterproof bond. Ensure good ventilation throughout the process.
- Insufficient Overlap at Seams: When using sheet membranes, inadequate overlap (less than 2 inches) at seams creates weak points. These small gaps can easily become pathways for water intrusion over time.
By consciously avoiding these common pitfalls, you can significantly enhance the effectiveness and longevity of your tub flange waterproofing, ensuring a truly leak-free bathroom.
How to Put Tile Over the Waterproofed Tub Flange
Once your tub flange is expertly waterproofed and the backer board is installed and seamed, you’re ready for the exciting step of tiling. Proper tiling not only provides the finished aesthetic but also adds another layer of protection to your waterproofed system.
| Step | Action |
|---|---|
| 1. Planning the Layout |
|
| 2. Applying the Mortar |
|
| 3. Setting the Tiles |
|
| 4. Tiling Around the Flange Area |
|
| 5. Cutting Edge Tiles |
|
| 6. Final Steps: Grouting and Sealing |
|
By following these steps, you’ll not only have a beautiful tiled shower or tub surround but also a thoroughly waterproofed system that protects your bathroom for many years.
Conclusion
You’ve now navigated the complete guide to waterproofing your tub flange, a crucial step in maintaining a healthy, leak-free bathroom. From understanding the different types of flanges and meticulous preparation to applying various waterproofing methods, installing backer board, and even tiling, you have the knowledge to tackle this project with confidence.
Remember, taking proactive measures to properly waterproof your tub flange is far simpler, less costly, and less disruptive than dealing with the aftermath of water damage, such as rotten studs, drywall collapse, or persistent mold growth. The few hours and modest investment you put into proper waterproofing now can truly save you from extensive and expensive repairs down the road.
Don’t let the fear of leaks dampen your home. By following the detailed steps and expert tips provided in this guide, you can ensure a durable, watertight seal that protects your bathroom for years to come. Your diligence will pay off in the long run, safeguarding your home’s integrity and your peace of mind.
Want to delve deeper into overall bathroom longevity? Check out my comprehensive guide on preventing bathroom mold and mildew for more tips. Or, if you’re gearing up for a larger project, take a look at my complete bathroom renovation tips to plan your dream space.
Feel free to leave a comment below if you have specific questions about your tub flange situation or need further clarification. I’d love to help you get the job done right!
Frequently Asked Questions About Tub Flange Waterproofing
How Do I Waterproof the Gap Between My Tub Flange and The Cement Board?
The gap between the tub flange and the cement backer board is a critical area. I typically use alkali-resistant mesh tape (like fiberglass mesh tape) specifically designed for tile backer board seams. I apply this tape over the gap, pressing it firmly into place. Then, I apply two to three thin, even coats of a liquid waterproofing membrane (such as RedGard or Hydro Ban) over the tape and extending onto both the flange and the backer board. It’s crucial to let each layer dry completely before applying the next, ensuring a seamless and flexible waterproof seal that bridges this important joint.
Are There Specific Products or Tapes Recommended for Waterproofing the Tub Flange?
Absolutely. For maximum reliability, I recommend using a combination of products. For general waterproofing, liquid membranes like RedGard (by Custom Building Products) or Hydro Ban (by Laticrete) are excellent choices. They are easy to apply and cure into a flexible, continuous barrier. For reinforcing seams and corners, especially the flange-to-backer board gap, alkali-resistant fiberglass mesh tape is essential. When it comes to sealing the final joint between tile and tub, always opt for a 100% silicone caulk (like those from GE Silicone or DAP) as it offers superior flexibility, water resistance, and mold/mildew protection compared to acrylic caulks.
Should the Backer Board Go Over or Stop Above the Tub Flange?
The backer board should always stop about 1/8 inch above the tub flange. This small gap is intentional and serves several important purposes. Firstly, it prevents the backer board from directly wicking up any standing water from the tub lip, which can lead to moisture absorption and potential issues over time. Secondly, this gap provides space for a crucial, flexible seal. After the backer board is installed and waterproofed, this gap is filled with a durable, 100% silicone caulk after tiling, creating a critical expansion joint that accommodates movement and forms a truly watertight barrier between the finished tile and the tub.
What’s the Best Caulk to Use for Sealing the Tub Flange and Tile Joint?
For sealing the joint between your tub flange (or the bottom row of tiles) and the tub itself, a high-quality 100% silicone caulk is the only appropriate choice. Unlike acrylic or latex caulks, silicone caulk offers superior adhesion, flexibility, and is completely waterproof. It also typically contains mildewcides to resist mold growth in moist bathroom environments. Brands like GE Silicone II or DAP Kwik Seal Ultra are excellent options. Avoid any caulk labeled “latex” or “acrylic” for this critical wet area, as they will degrade and fail over time.
