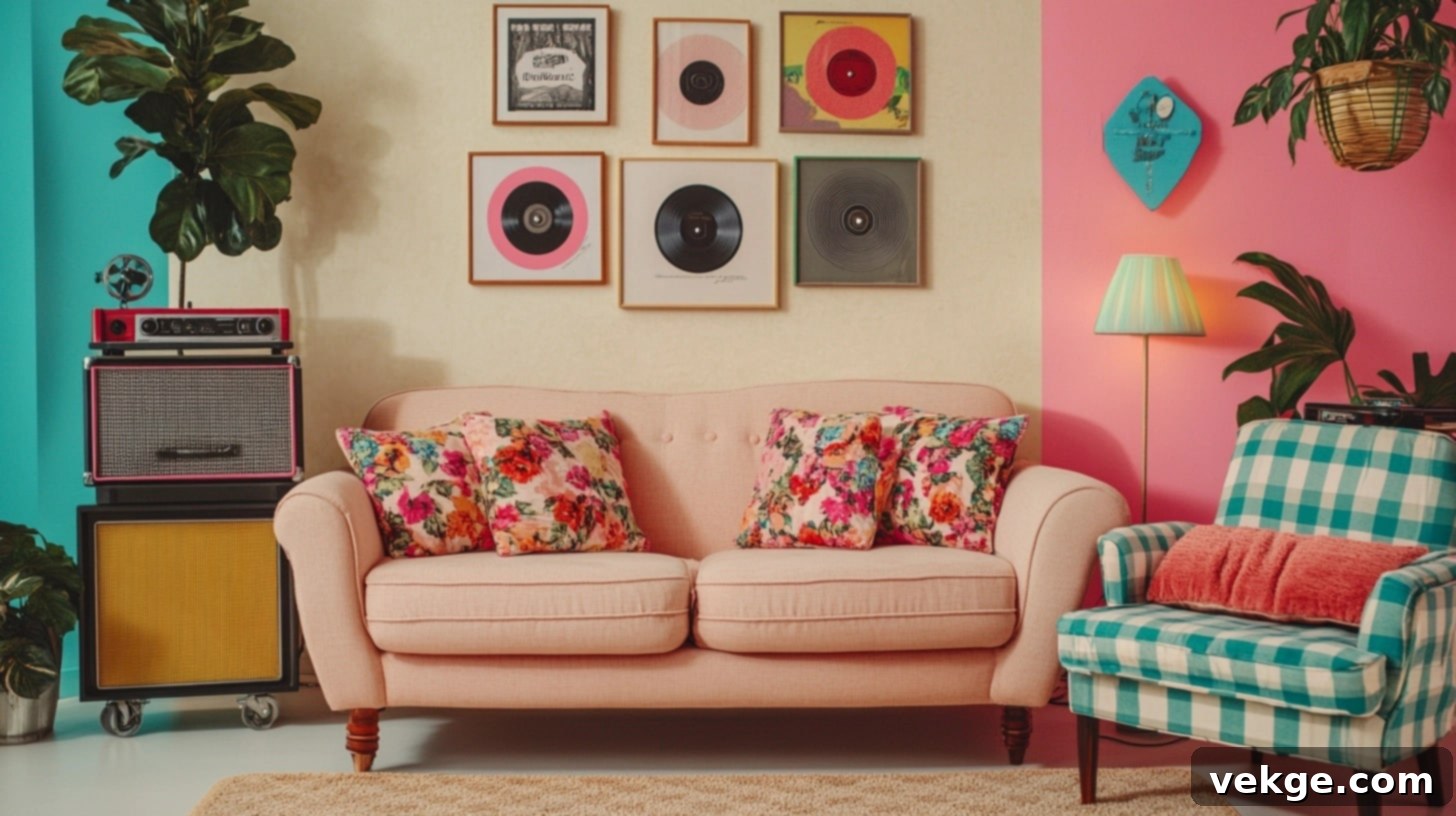
Bring Back the ’90s: Your Ultimate Guide to Nostalgic Living Room Decor & Design
Remember the distinct and incredibly cozy living rooms of the 1990s? That era holds a special charm for many of us, a blend of comfort, personality, and a touch of playful nostalgia that often feels missing in today’s minimalist designs. If you’ve been yearning to infuse your home with that familiar warmth, you’ve come to the right place.
This comprehensive guide is your personal journey back in time, meticulously crafted to help you recreate the inviting, lived-in feel of a classic 90s living room. We’ll delve into the foundational elements that made these spaces so unique and beloved – from the oversized, plush furniture that practically begged you to sink in, to the vibrant, often unexpected mix of colors and patterns that adorned every corner.
Whether your vision is a complete transformation of your main living area into a full-blown 90s homage or simply to pepper your existing decor with a few delightful throwback touches, we have you covered. Get ready to embark on a fun and creative adventure with us, as we explore how to design a space that feels both wonderfully familiar and refreshingly new. It’s time to rediscover the comfort, character, and sheer joy of 90s aesthetics.
Let’s jump into the world of 90s home decor and turn your living room into a truly unforgettable blast from the past!
Understanding the Trends and Influences That Shaped 90s Interior Design
The 1990s was a fascinating decade for home decor, marked by significant shifts from previous eras and influenced by a variety of cultural and economic factors. Understanding these undercurrents is key to authentically recreating the 90s living room vibe.
- The Shift from 80s Excess: The early 90s saw a conscious move away from the ostentatious, opulent, and often maximalist styles of the 1980s. People yearned for simpler, more comfortable, and less “loud” spaces. This meant saying goodbye to mirrored walls, neon colors, and elaborate gilding, and embracing a more subdued, approachable aesthetic focused on everyday living.
- TV and Pop Culture Impact: Television shows played an enormous role in shaping public taste. Iconic sitcoms like “Friends,” with its famously eclectic Central Perk coffee shop and Monica’s apartment, or “Seinfeld,” with its more understated yet characterful spaces, profoundly influenced how people envisioned their ideal homes. Many sought to emulate the accessible, lived-in, and stylishly casual environments they saw on screen, making these fictional spaces aspirational.
- Economic Factors: The 90s experienced a mixed economic landscape, with periods of both prosperity and recession. This duality translated into home decor, where consumers often balanced budget-friendly choices – leading to the popularity of DIY projects and thrift store finds – with occasional splurges on key furniture pieces or electronics. This blend contributed to the eclectic, “put-together-over-time” look that defined many 90s homes.
- Technology’s Growing Role: The widespread adoption of personal computers and the internet began to subtly transform living room layouts. As homes became hubs for both entertainment and nascent digital activity, furniture designs adapted to accommodate new technologies, most notably with the rise of dedicated entertainment centers designed for televisions, VCRs, and gaming consoles.
- Global Design Influences: Increased ease of international travel and media exposure brought diverse cultural aesthetics into mainstream design. People began incorporating elements from around the world into their homes, leading to a richer, more varied tapestry of decor choices. This global perspective often manifested in accent pieces, patterns, and textiles, contributing to the eclectic nature of 90s design.
Comparing Past and Present: Echoes of the 90s in Modern Design
While design trends are cyclical, it’s fascinating to observe how some core ideas from the 90s persist, albeit in refined and updated forms. This continuity highlights enduring human desires for comfort and functionality in our living spaces.
- Big Wooden TV Stands: In the 90s, the monolithic entertainment center was king, a grand wooden structure housing chunky CRT TVs, VCRs, and stereo systems. Now: We see sleek, minimalist media walls or floating credenzas designed for flat-screen TVs and hidden cables. The function remains – a dedicated space for entertainment – but the form is undeniably contemporary.
- Overstuffed Sofas: The 90s celebrated plush, deep-seated, and often patterned sofas, prioritizing ultimate comfort for lounging. Now: While patterns might be more subdued, the love for comfort continues with oversized, modular sectionals and cloud-like sofas. We still crave spaces to sprawl out and relax, just with a more tailored aesthetic.
- Lots of Small Decorations: 90s living rooms were often filled with an array of knick-knacks, figurines, framed photos, and artificial plants, creating a highly personalized, sometimes cluttered, look. Now: The trend leans towards fewer, more impactful statement pieces. However, the underlying desire to personalize a space with meaningful objects remains, albeit curated with a more minimalist eye.
Key Characteristics of 90s Living Room Design
The essence of a 1990s living room revolved around creating a space that felt genuinely comfortable, highly functional, and reflective of a blend of accessible styles. It was, above all, a welcoming hub where family and friends could effortlessly relax, converse, and simply enjoy each other’s company. Let’s explore the distinctive features that converged to give these rooms their unmistakable character and enduring appeal.
| Characteristic | Key Features |
|---|---|
| Neutral Color Palettes | Muted, earthy tones such as warm beige, soft cream, and light gray formed the backdrop, often accented with pastel pinks, blues, and a popular deep hunter green or burgundy for bold contrast and depth. |
| Patterned Fabrics | A rich variety of patterns was a hallmark, with chintz florals, classic plaids, and abstract geometric designs frequently appearing on upholstery, curtains, and throw pillows, adding visual interest and warmth. |
| Big, Comfy Furniture | Oversized, plush sofas and armchairs were central, designed with deep cushions and ample proportions to maximize comfort and encourage relaxed lounging or large family gatherings. Sectionals were also highly popular. |
| Entertainment Centers | Expansive wooden cabinets, often crafted from oak or pine, served as the room’s focal point. These units were purpose-built to house the era’s technology: large TV sets, VCRs/DVD players, and elaborate audio equipment. |
| Decorative Items | A curated mix of decor created a personalized, homey atmosphere, including realistic-looking artificial greenery, collectible figurines, ceramic pieces, and an abundance of framed family photos capturing cherished moments. |
These individual elements didn’t just exist in isolation; they converged to weave a narrative of domestic bliss and unpretentious charm. The result was a cozy, inviting, and wonderfully lived-in feel that became the quintessential signature of 90s homes. It was a design philosophy that truly embodied the welcoming sentiment: “Come in, sit down, and make yourself at home!”
Resources for Achieving the 90s Look
Embarking on a 90s-inspired living room makeover is an exciting endeavor, and finding the right resources is crucial to success. I’m thrilled to share some excellent avenues and essential tools that will help you capture that perfect nostalgic vibe. Whether your goal is to unearth authentic vintage pieces, unleash your creativity with DIY projects, or simply gather more inspiration, this section is designed to guide you. Let’s dive into the best places to shop, the indispensable tools for your DIY adventures, and where to find a wealth of additional ideas.
Where to Shop for Authentic 90s Decor
Sourcing genuine 90s items is fundamental to nailing the aesthetic. Here are my top recommendations for where to hunt for those vintage treasures:
- Online Marketplaces: Platforms like eBay, Etsy (for handmade or curated vintage), and Facebook Marketplace are treasure troves for specific 90s items. Search for keywords like “90s sofa,” “vintage entertainment center,” “chintz fabric,” or “macrame decor” to find a wide array of options, from furniture to smaller decorative accents.
- Thrift Stores & Charity Shops: These are absolute gold mines! Patience is key, but you can often stumble upon authentic 90s furniture (think sturdy wooden coffee tables or overstuffed armchairs), unique knick-knacks, patterned textiles, and vintage lamps at incredibly affordable prices. Regularly checking local stores increases your chances of a great find.
- Vintage & Consignment Shops: Many specialized vintage stores curate their collections by decade, making it easier to pinpoint 90s-era goods. While prices might be higher than thrift stores, the items are often in better condition and more carefully selected. Consignment shops are also excellent for finding quality used furniture.
- Flea Markets & Antique Fairs: These bustling hubs are fantastic for discovering one-of-a-kind 90s treasures. You’ll find everything from retro electronics and framed art to patterned glassware and unique decorative items. Be prepared to haggle for the best deals!
- Estate Sales & Garage Sales: Often overlooked, estate sales provide a direct glimpse into homes furnished decades ago. You can frequently find well-kept 90s furniture, decor, and even complete sets of dinnerware or household items. Garage sales can also yield unexpected gems at bargain prices.
Essential DIY Project Tools for a 90s Refresh
If you’re eager to add a personal, handcrafted touch to your 90s-inspired living room, having the right tools on hand will make your projects much easier and more enjoyable. Here are some tools I highly recommend for bringing your DIY visions to life:
- Fabric Paint or Dye: Perfect for transforming plain cushions, updating faded curtains, or adding a signature 90s pattern to plain fabric items without needing a sewing machine.
- Upholstery Kits: For the more ambitious, a basic upholstery kit (including a staple gun, fabric scissors, webbing stretcher, and a selection of needles) can help you recover a vintage armchair or sofa with a bold 90s-inspired pattern like plaid or floral chintz.
- Wood Stain or Paint: Essential for refreshing and customizing wooden entertainment centers, coffee tables, or side tables. You can opt for a rich oak stain to enhance natural wood grain or a pastel paint color for a softer 90s look.
- Spray Paint: A versatile tool for quick and easy color updates on smaller decorative items like picture frames, ceramic figurines, or metal accents, allowing you to match your chosen 90s color palette effortlessly.
- Craft Glue & Hot Glue Gun: Indispensable for attaching embellishments, creating decorative accents, or securely assembling smaller decor pieces for a touch of 90s kitsch.
It’s clear that some things truly never change – our inherent desire for our living rooms to be comfortable, functional, and deeply reflective of our personalities endures. However, the modern interpretation often favors a more curated approach, with less physical clutter and a greater integration of smart technology. The charm of the 90s lies in its ability to blend these elements in a uniquely inviting way.
Design Ideas and Tips to Elevate Your 90s Living Room
Let’s dive into the heart of creating that authentic 90s living room design. I’ll guide you through bringing back the characteristic colors, beloved patterns, and the undeniable sense of cozy comfort that made these spaces so incredibly special. It’s all about blending nostalgia with practical application for your modern home.
Let’s get started on transforming your space!
Revive the Color Palette
Incorporate Earth Tones and Pastels: The 90s moved away from the neon brights of the 80s, embracing a softer, more grounded aesthetic. Consider a base of calming, warm earth tones like a rich beige, a muted sage green, or a light sky blue for your walls. These shades create an inherently welcoming and soothing atmosphere. You can introduce these colors through a freshly painted accent wall, or more subtly via textiles such as throw pillows, curtains, or a cozy area rug. Don’t shy away from deep jewel tones like hunter green or burgundy for an accent, providing a bold yet classic 90s contrast.
Accent Walls with Textured Paint or Subtle Patterns: For a unique touch that truly harks back to the era, try a textured paint technique on one wall – sponge painting or rag rolling were incredibly popular in the 90s and can be updated for a contemporary feel with modern color choices. Alternatively, if patterns are more your style, look for wallpapers featuring subtle floral motifs, delicate stripes, or geometric repeats. Opt for designs with a slightly faded or “vintage” look to capture that authentic 90s charm without feeling dated.
Mix and Match Patterns with Confidence
Mixing Floral and Plaid Textiles: The 90s were a masterclass in pattern mixing, and your living room can be too! The key is to combine different patterns in a balanced, intentional way. You could pair classic chintz floral curtains with a cozy plaid throw blanket draped over your sofa. Or, consider combining a subtle striped rug with floral-patterned accent pillows. The trick is to vary the scale of the patterns (e.g., a large floral with a small plaid) and ensure they share a common color thread to maintain cohesion, creating a visually rich and inviting space that feels genuinely layered and personal.
Layering Textures for Depth: Beyond patterns, creating depth through varied textures is crucial for that quintessential 90s coziness. Imagine a soft velvet pillow nestled next to a chunky knit throw, or a smooth wooden coffee table grounding a fluffy shag rug. Look for quality, durable fabrics like corduroy, chenille, or woven cotton blends for your upholstery and accessories. These different fabric types don’t just add visual interest; they make your space feel more tactile, inviting, and inherently comfortable, encouraging guests to settle in and relax.
Go Big with Overstuffed Furniture
Cozy Seating Options: The hallmark of a 90s living room was furniture that prioritized unparalleled comfort. Focus on acquiring sofas and armchairs that are not only invitingly soft but also exceptionally well-made. Look for pieces with sturdy, solid wood frames and cushions that offer substantial support and can be fluffed or even replaced over time. Deep-seated, overstuffed sofas and chairs, possibly in a muted floral or plaid pattern, instantly evoke that 90s sense of relaxed luxury. This approach ensures your furniture combines the iconic comfort of 90s style with long-lasting quality, making it a sustainable choice.
Creating Cozy Nooks: Beyond the main seating, designate specific areas for relaxation. A comfortable armchair with good back support, perhaps a recliner or a plush glider, paired with a nearby side table and a warm reading lamp, can create an irresistible cozy nook. This dedicated space for reading, quiet contemplation, or enjoying a cup of tea embodies the 90s emphasis on personal comfort and creating functional, inviting zones within the larger living area.
Bring Back the Entertainment Center
Revamp a Vintage Entertainment Unit: The massive, often solid wood, entertainment center was the undisputed focal point of many 90s living rooms. If you find an old TV stand or a large shelving unit, consider ways to update and repurpose it for modern use. You might adjust the internal shelves to accommodate contemporary media devices, add new hardware for a fresh look, or even remove some doors to create open shelving for display. This not only breathes new life into a functional piece of furniture, preventing it from ending up in a landfill, but also allows you to create a unique, custom piece that truly reflects the era.
Alternative Display Ideas: While the original purpose was for a bulky TV, you can repurpose these large units creatively. Use shelving units or the revitalized entertainment center to show off items that are meaningful to you – a collection of vintage books, carefully chosen indoor plants (both real and high-quality artificial), or nostalgic mementos from the 90s. Choose versatile pieces that can adapt as your needs and technology evolve, ensuring your chosen display solution remains relevant and stylish for years to come.
Incorporate Nostalgic Decor
Framed Family Photos: Personalization was paramount in 90s decor. Displaying an array of framed family photos, perhaps in various styles and sizes, is a wonderful way to add warmth and a deeply personal touch. Group them together on a side table, mantlepiece, or create a gallery wall that tells your family’s story. This simple addition instantly makes any room feel more welcoming and lived-in, capturing the heart of 90s home aesthetics.
Decorate with 90s Memorabilia: Thoughtfully chosen decorative items with personal significance are key. This could be art you’ve collected, handmade crafts reminiscent of the era, or cherished objects that evoke happy memories from the 90s – perhaps a classic board game, a vintage CD player, or a specific type of ceramic figurine. These curated pieces add character and conversational points, celebrating your personal history and style.
Throw Blankets and Pillows: These are essential for layering comfort and introducing color/pattern. Add an abundance of soft throw blankets and decorative pillows in colors and patterns that align with your chosen 90s palette. Think plush fabrics, chunky knits, and a mix of floral, plaid, or textured designs. These items make your space incredibly inviting, offer instant comfort, and are easy to change with the seasons or as your taste evolves.
Add Warm Lighting for Ambiance
Vintage-Inspired Lamps: The 90s favored soft, inviting illumination over harsh overhead lights. Look for table lamps with fabric shades, ideally in warm, diffused colors like beige, cream, or a muted floral. Place them strategically on side tables, console tables, and shelves around the room to create pockets of gentle, inviting light. This layered lighting approach contributes significantly to that sought-after cozy 90s vibe, making the room feel intimate and relaxed.
Floor Lamps with Multiple Bulbs: Consider floor lamps that offer versatile lighting options, such as those with multiple adjustable heads (think torchiere lamps or multi-directional spots). These can light up a larger area with a soft glow or be directed to focus on a specific reading spot or piece of art. These versatile options are both practical for various tasks and stylish, contributing to the overall warm and inviting atmosphere.
Embrace Natural Elements
Blending Artificial and Live Plants: While live plants were definitely present, the 90s also saw the peak popularity of high-quality artificial plants, particularly large ficus trees or lush ferns. Combine a mix of well-made artificial plants (look for realistic textures and colors) with real ones to add greenery and a touch of nature to your space. This blend is practical for areas that might not receive enough natural light for live plants, ensuring your room always looks vibrant and fresh.
Wicker and Rattan Accents: Incorporate items made from natural materials like wicker, rattan, or wood to add warmth and organic texture. A woven wicker basket for blankets, a small rattan side table, or a wooden coffee table can ground the space and add a touch of rustic charm that was very common in the 90s. Look for pieces made responsibly to support ethical production practices, aligning modern values with vintage aesthetics.
Personalize Your Space with 90s-Inspired DIY Touches
One of the most rewarding ways to infuse your living room with authentic 90s charm is through personalized DIY projects. These hands-on endeavors allow you to create unique pieces that truly speak to the era, often giving forgotten items a new lease on life. Here are two detailed projects to get you started, alongside other inspiring ideas.
1. Revamp a Vintage Entertainment Center
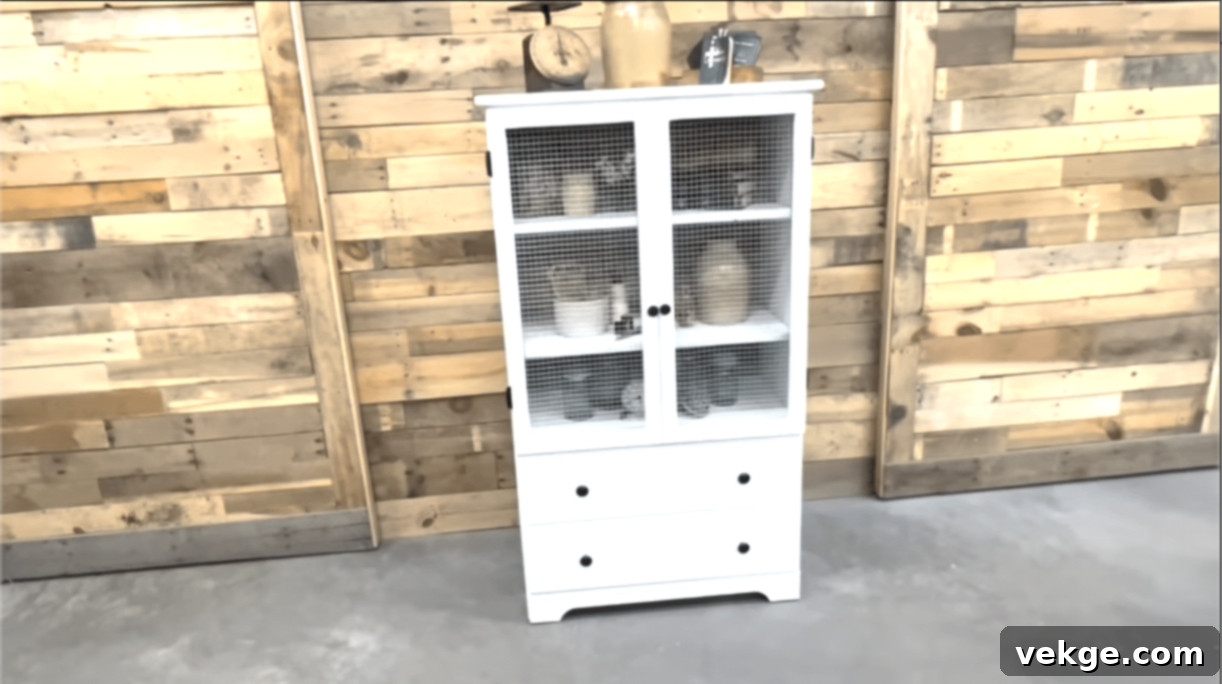
Transforming an old 90s entertainment unit from a bulky relic into a stylish, functional, and contemporary piece is a fantastic way to blend nostalgia with modern living. This detailed guide will walk you through the entire process, step-by-step, ensuring a stunning result.
What You’ll Need:
- Sandpaper (220-grit for general sanding, finer grits for finishing)
- Wood filler for patching imperfections
- High-quality primer and chosen paint (e.g., latex or acrylic for furniture)
- Shellac (essential for sealing knots and preventing bleed-through)
- New hardware (stylish knobs, pulls, or hinges to update the look)
- Wood for repairs (if needed for shelves, backing, or structural fixes)
- Cleaning supplies (degreaser, warm water, cloths)
- Safety gear (gloves, safety goggles, dust mask for sanding and painting)
- Optional: Paint sprayer for a smooth, professional finish, table saw, router
Steps:
1: Assess the Condition and Prepare
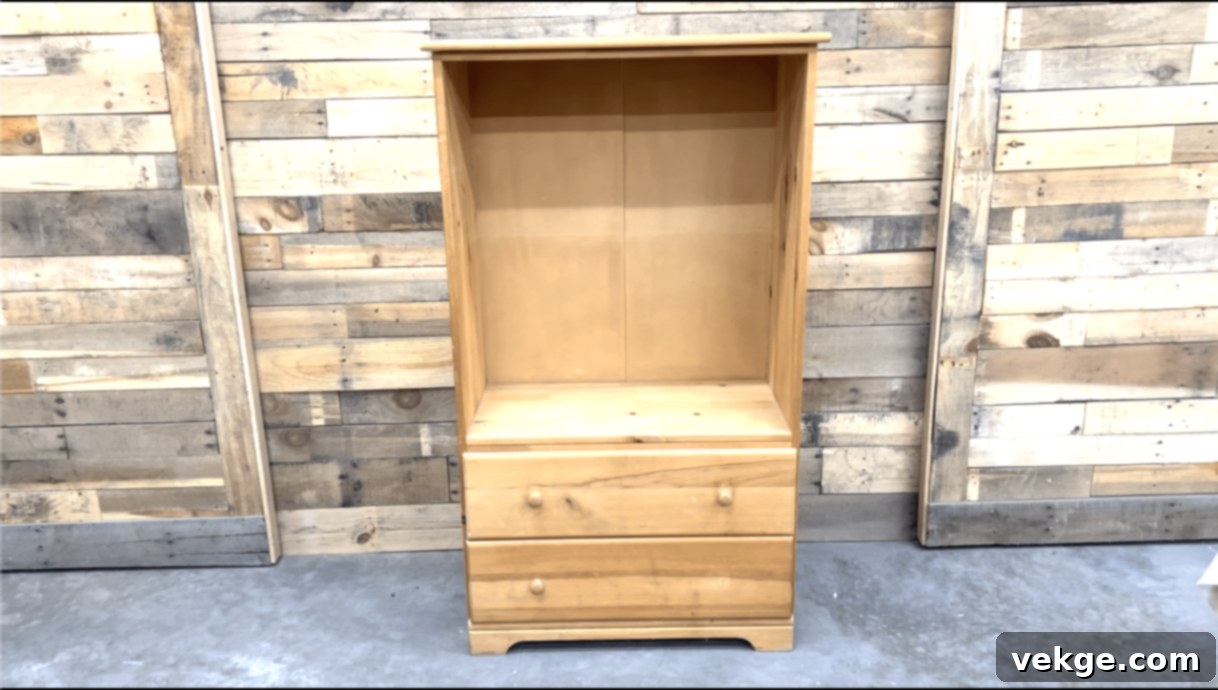
- Begin by thoroughly inspecting the unit for any existing damage: identify issues like missing shelves, damaged backing, loose joints, or deep scratches.
- Carefully remove all existing hardware (knobs, hinges, pulls) and any old backing panels (often thin particle board) that might be flimsy or outdated.
2: Replace Missing or Damaged Parts
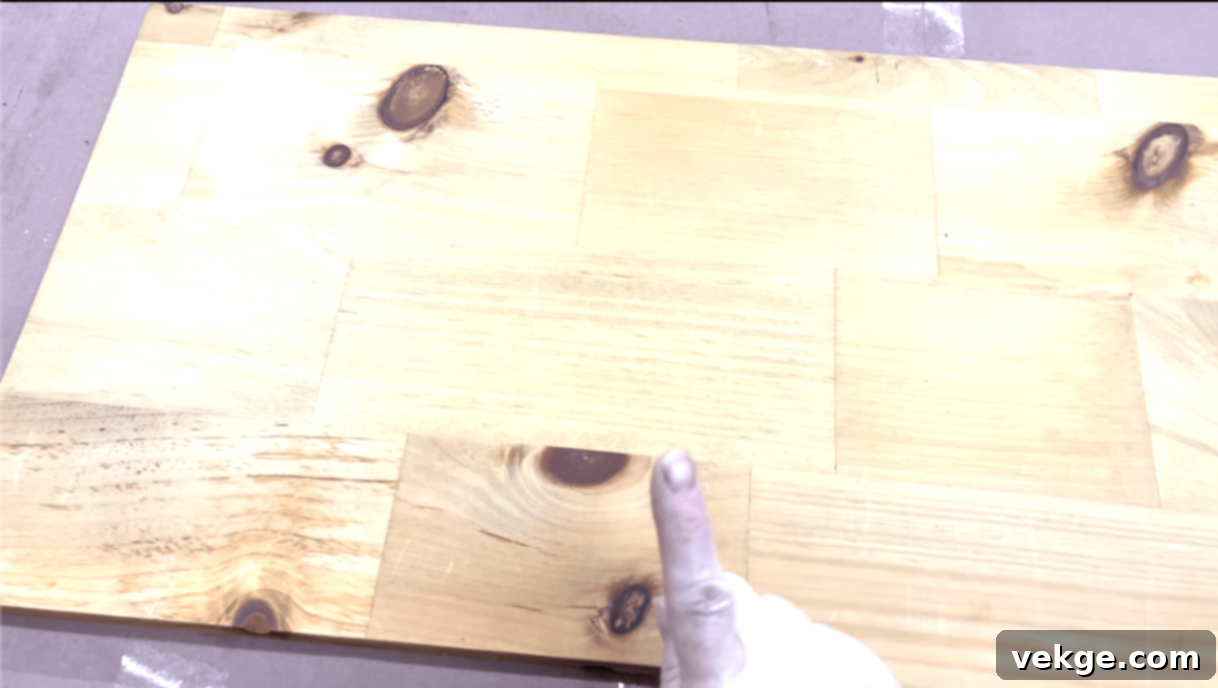
- If shelves are missing or heavily damaged, precisely cut new shelves from suitable pine wood or MDF to ensure a perfect fit within the unit’s compartments.
- Cut new decorative paneling for the backing. Consider using beadboard or a textured plywood for a more updated look than standard plain backing.
3: Update the Doors (Optional but Recommended)
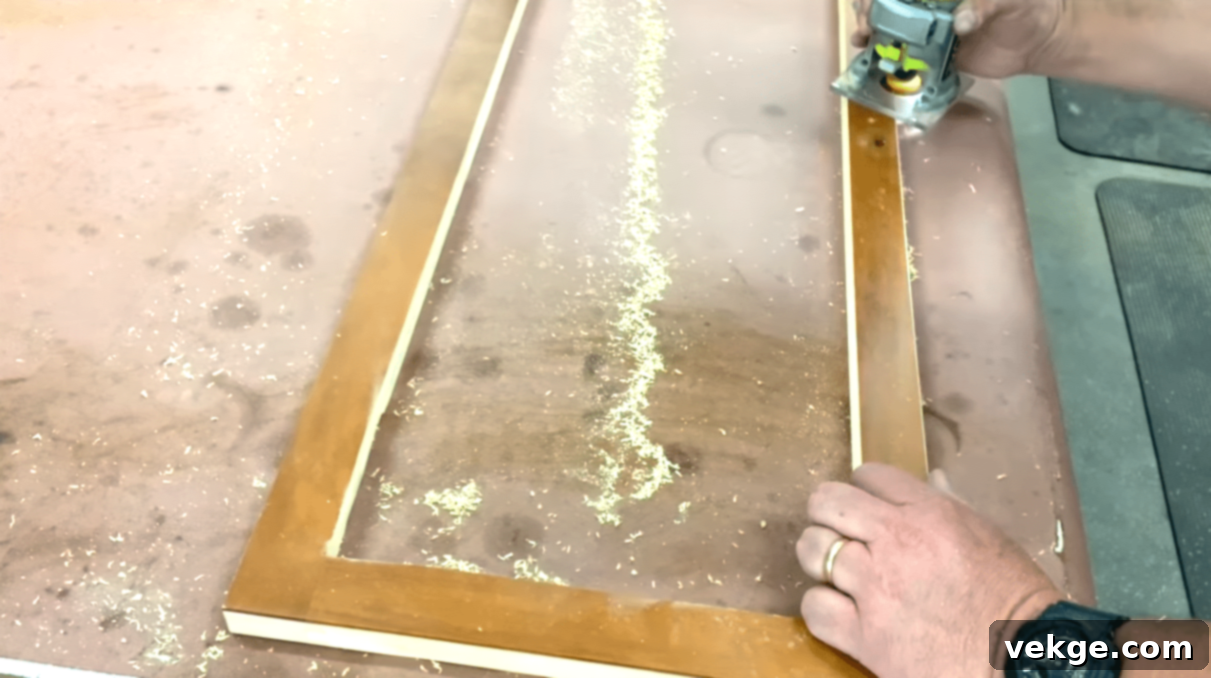
- If your doors are ill-fitting or you desire a new look, trim them to fit using a table saw for precision.
- For a more open and modern feel, consider cutting out window sections in the doors and adding glass or mesh inserts.
- Use a router to round over any sharp edges, giving the doors a softer, more finished appearance and reducing splintering.
4: Sand Everything Down Thoroughly
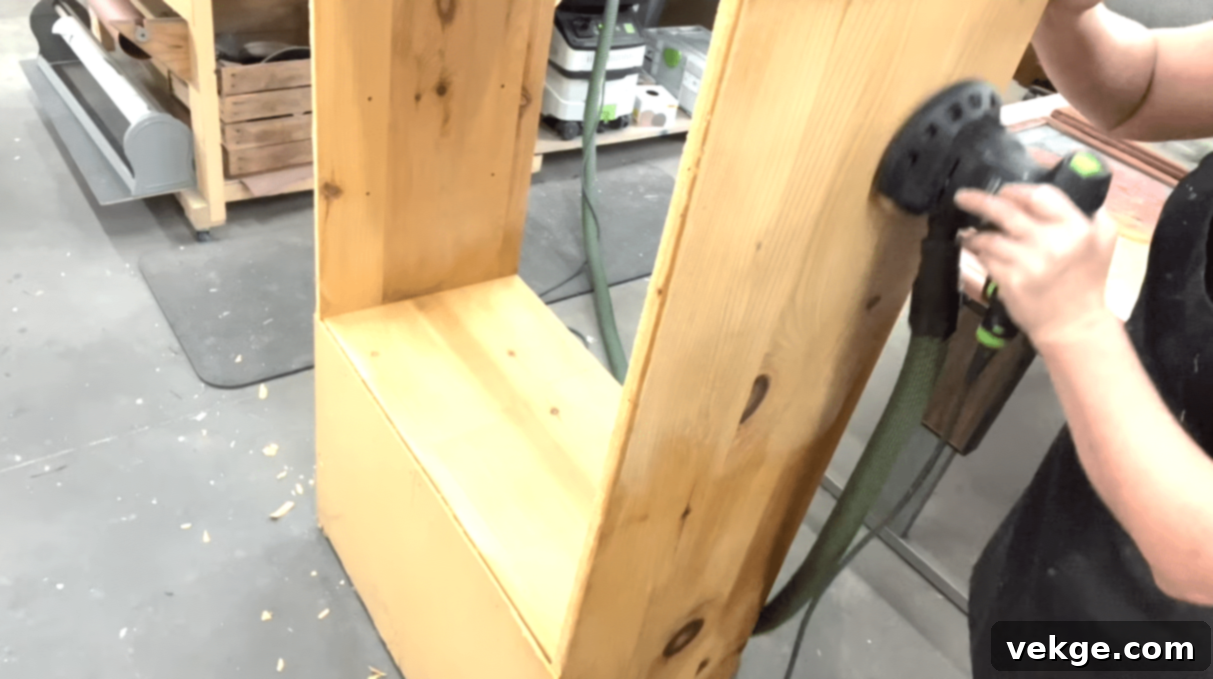
- Scuff sand the entire piece, including all surfaces, doors, and shelves, with 220-grit sandpaper. This creates a good “tooth” for the primer and paint to adhere to.
- After sanding, clean the piece thoroughly. Use warm water mixed with a degreaser to remove all dust, grime, and oils, ensuring a clean canvas for painting. Let it dry completely.
5: Prime and Seal for Longevity
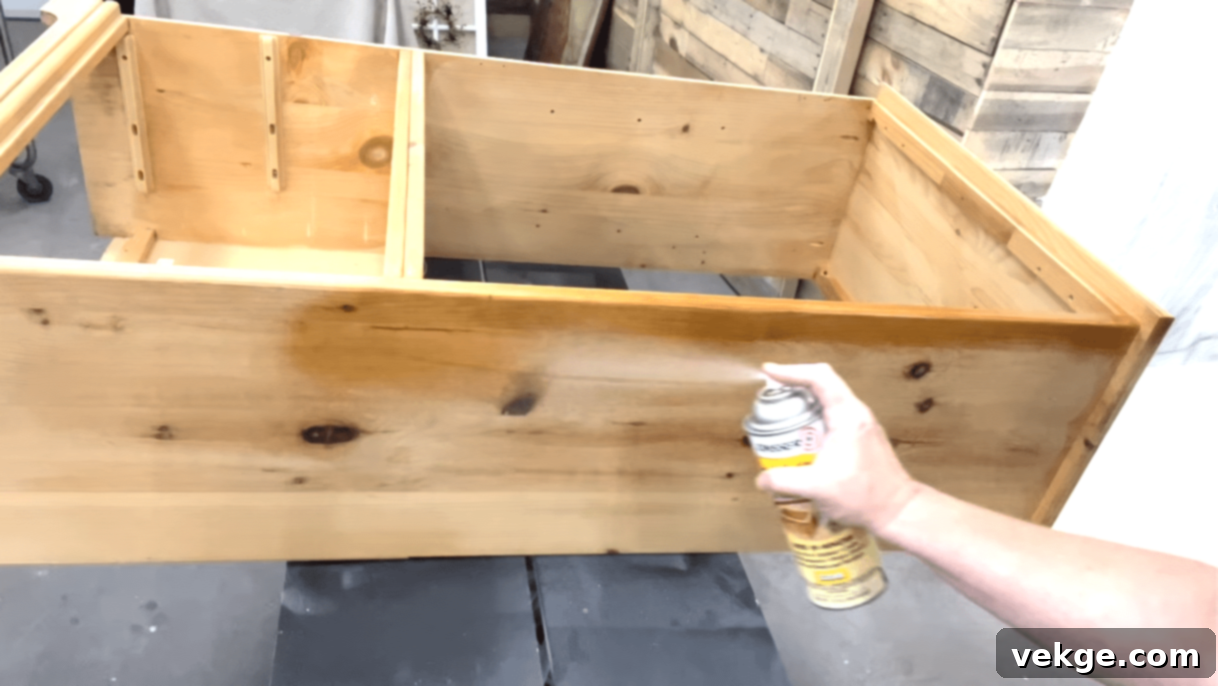
- Apply a coat of shellac (such as Zinsser B-I-N Shellac-Based Primer) to any raw wood and especially over knots. Shellac acts as a fantastic sealer, preventing wood tannins and stains from bleeding through your paint.
- If, after the shellac, any stubborn knots or dark marks still show through, apply a coat of an oil-based stain-blocking primer like Rust-Oleum red primer for extra insurance.
6: Apply Paint for Your Desired Finish
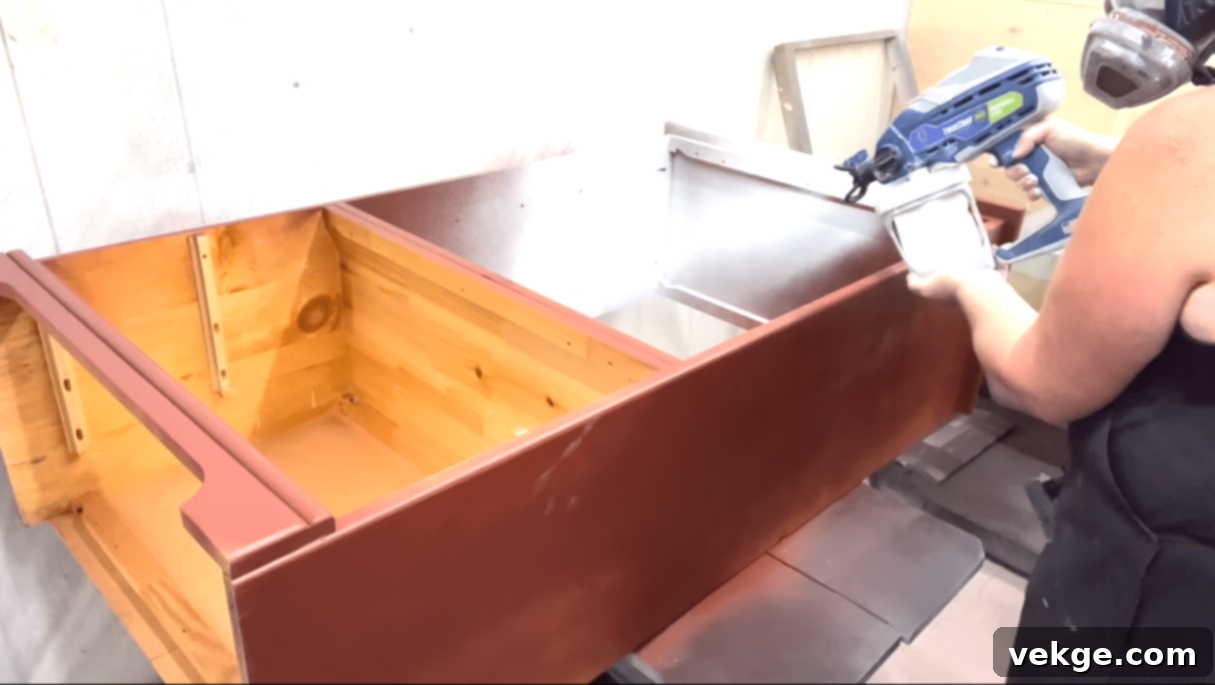
- Apply your chosen paint color. For the smoothest, most professional-looking finish, consider using a paint sprayer. If brushing, use a high-quality brush and roller.
- Apply multiple thin coats rather than one thick coat, allowing each coat to dry completely according to the manufacturer’s instructions before applying the next.
7: Touch Up and Refine Surfaces
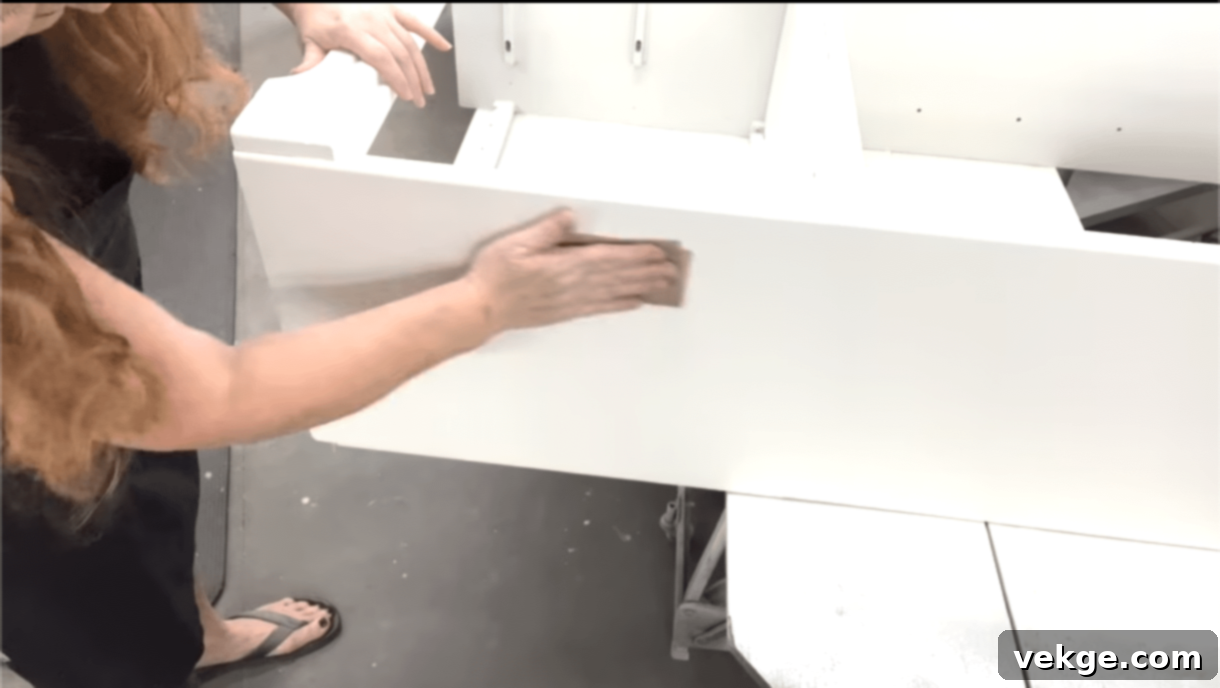
- Once the paint has dried, carefully inspect the piece. Fill any newly visible cracks, small holes, or imperfections with wood filler, letting it dry.
- Lightly sand these patched areas, and then the entire painted surface, with a very fine-grit sandpaper (e.g., 400-grit) for an ultra-smooth, professional finish. Wipe away dust.
8. Seal the Paint for Protection
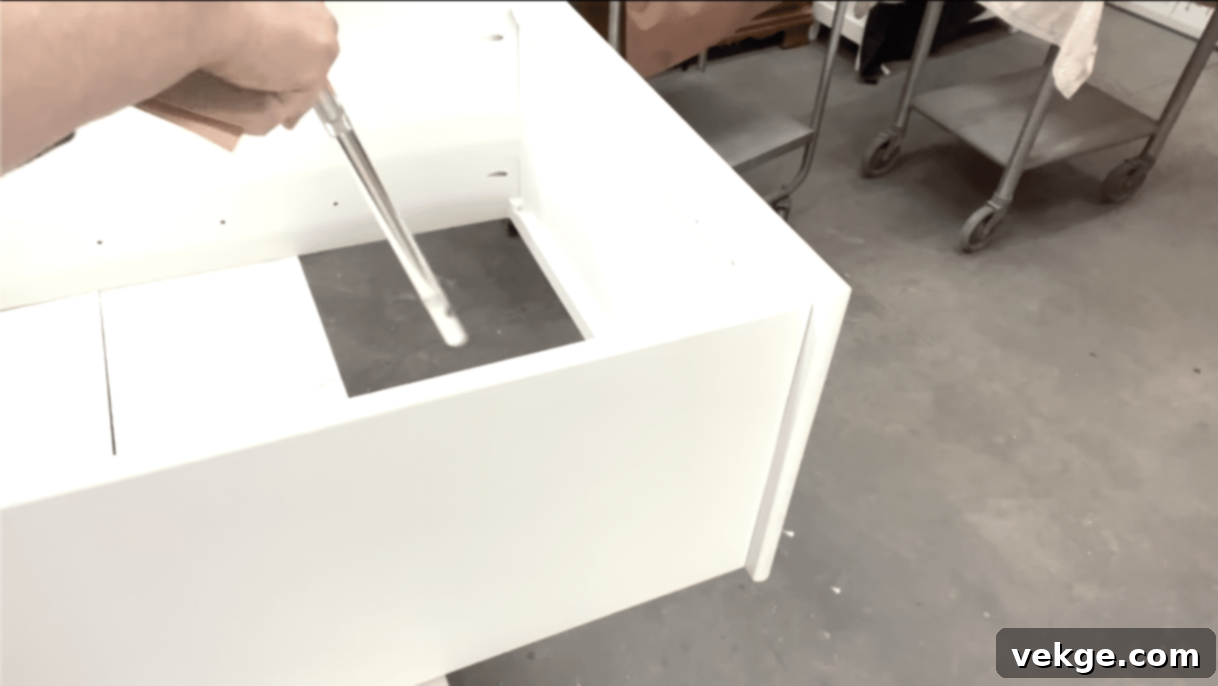
- To protect your beautiful new paint job from daily wear and tear, apply one or two coats of a clear protective sealant, such as a water-based polycrylic. This will enhance durability and provide a lasting finish.
9: Install New Hardware
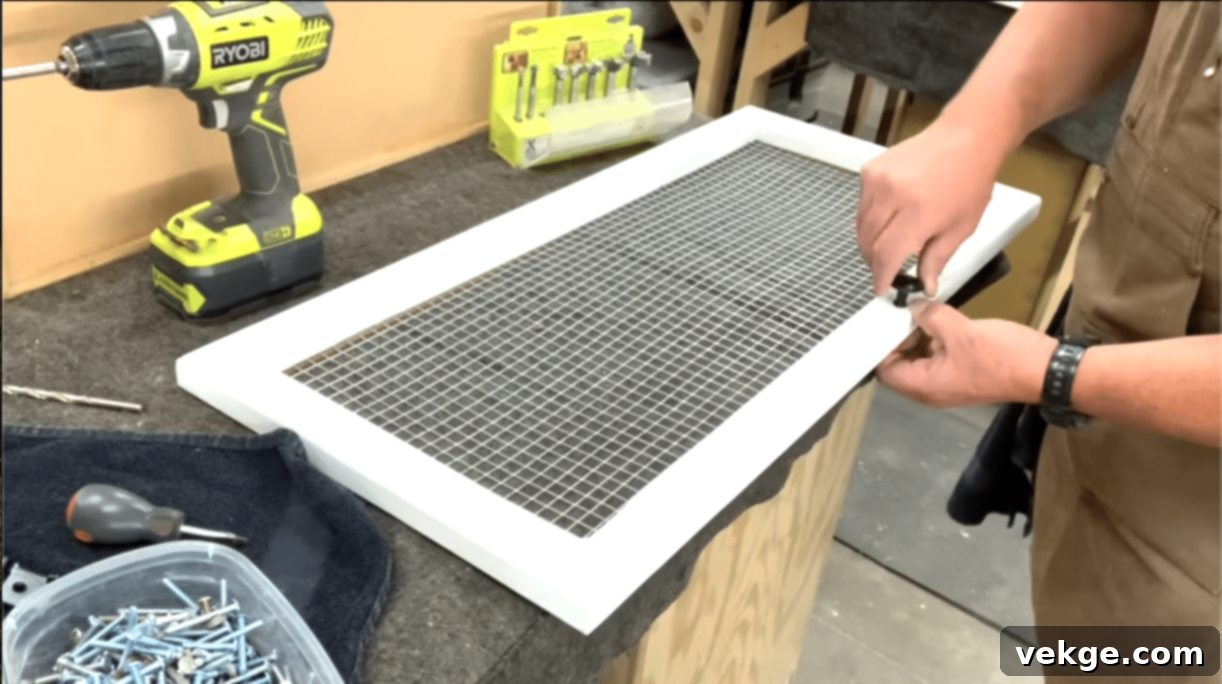
- Carefully attach your chosen new knobs, pulls, and hinges. This seemingly small step makes a huge impact on the final look and feel of your revamped unit.
- Ensure all doors and drawers open and close smoothly. Adjust hinges if necessary for proper alignment.
10: Finishing Touches and Placement
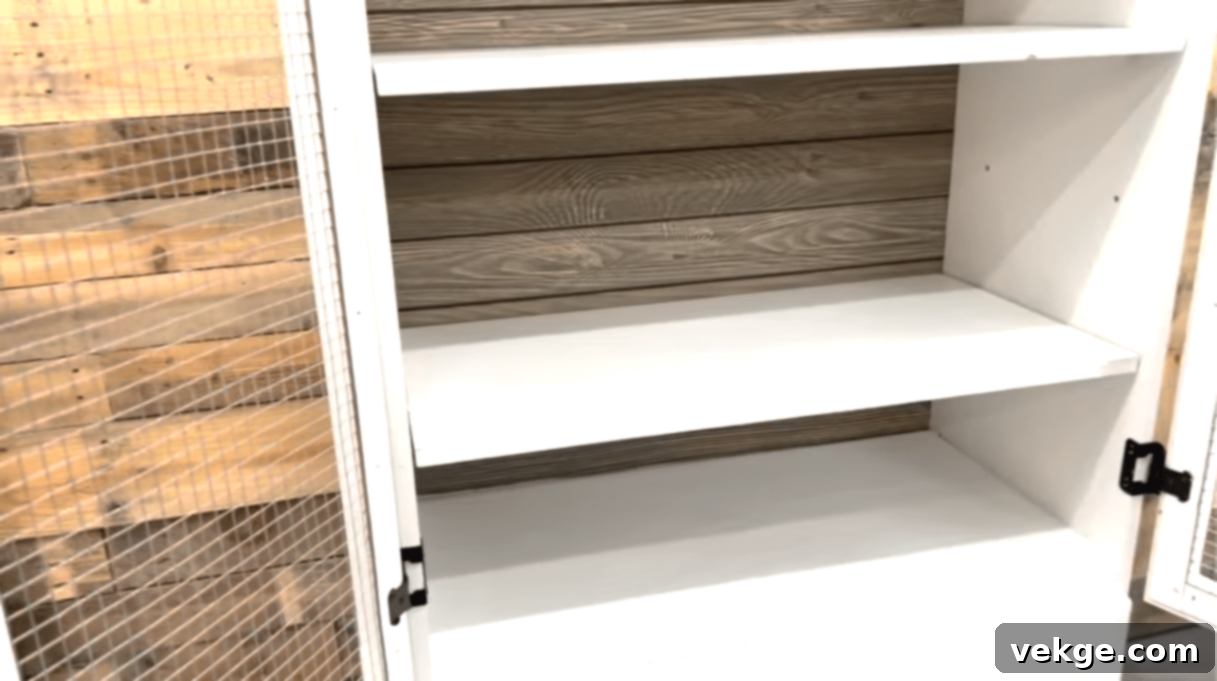
- For ease of movement and floor protection, add furniture glides or felt pads to the bottom of the unit.
- Make a final check to ensure all doors open and close smoothly and that the unit is stable.
Tips for Success:
- Always work in a well-ventilated area to ensure proper drying and for your safety.
- Never rush the prep work. Proper sanding and cleaning are the most crucial steps for a long-lasting, beautiful finish.
- When attaching hinges, use a metal ruler or shims to slightly prop doors, ensuring even spacing and easier installation.
- For an even more authentic vintage look, consider lightly distressing the edges of the unit after painting and before sealing, to mimic natural wear.
This project requires some time, patience, and effort, but the result is a truly custom, unique piece that perfectly fits your style and needs, honoring the 90s aesthetic while seamlessly integrating into your modern home. Remember to prioritize safety at every step.
To know in depth about this process, click here.
2. DIY Macramé Wall Hanging
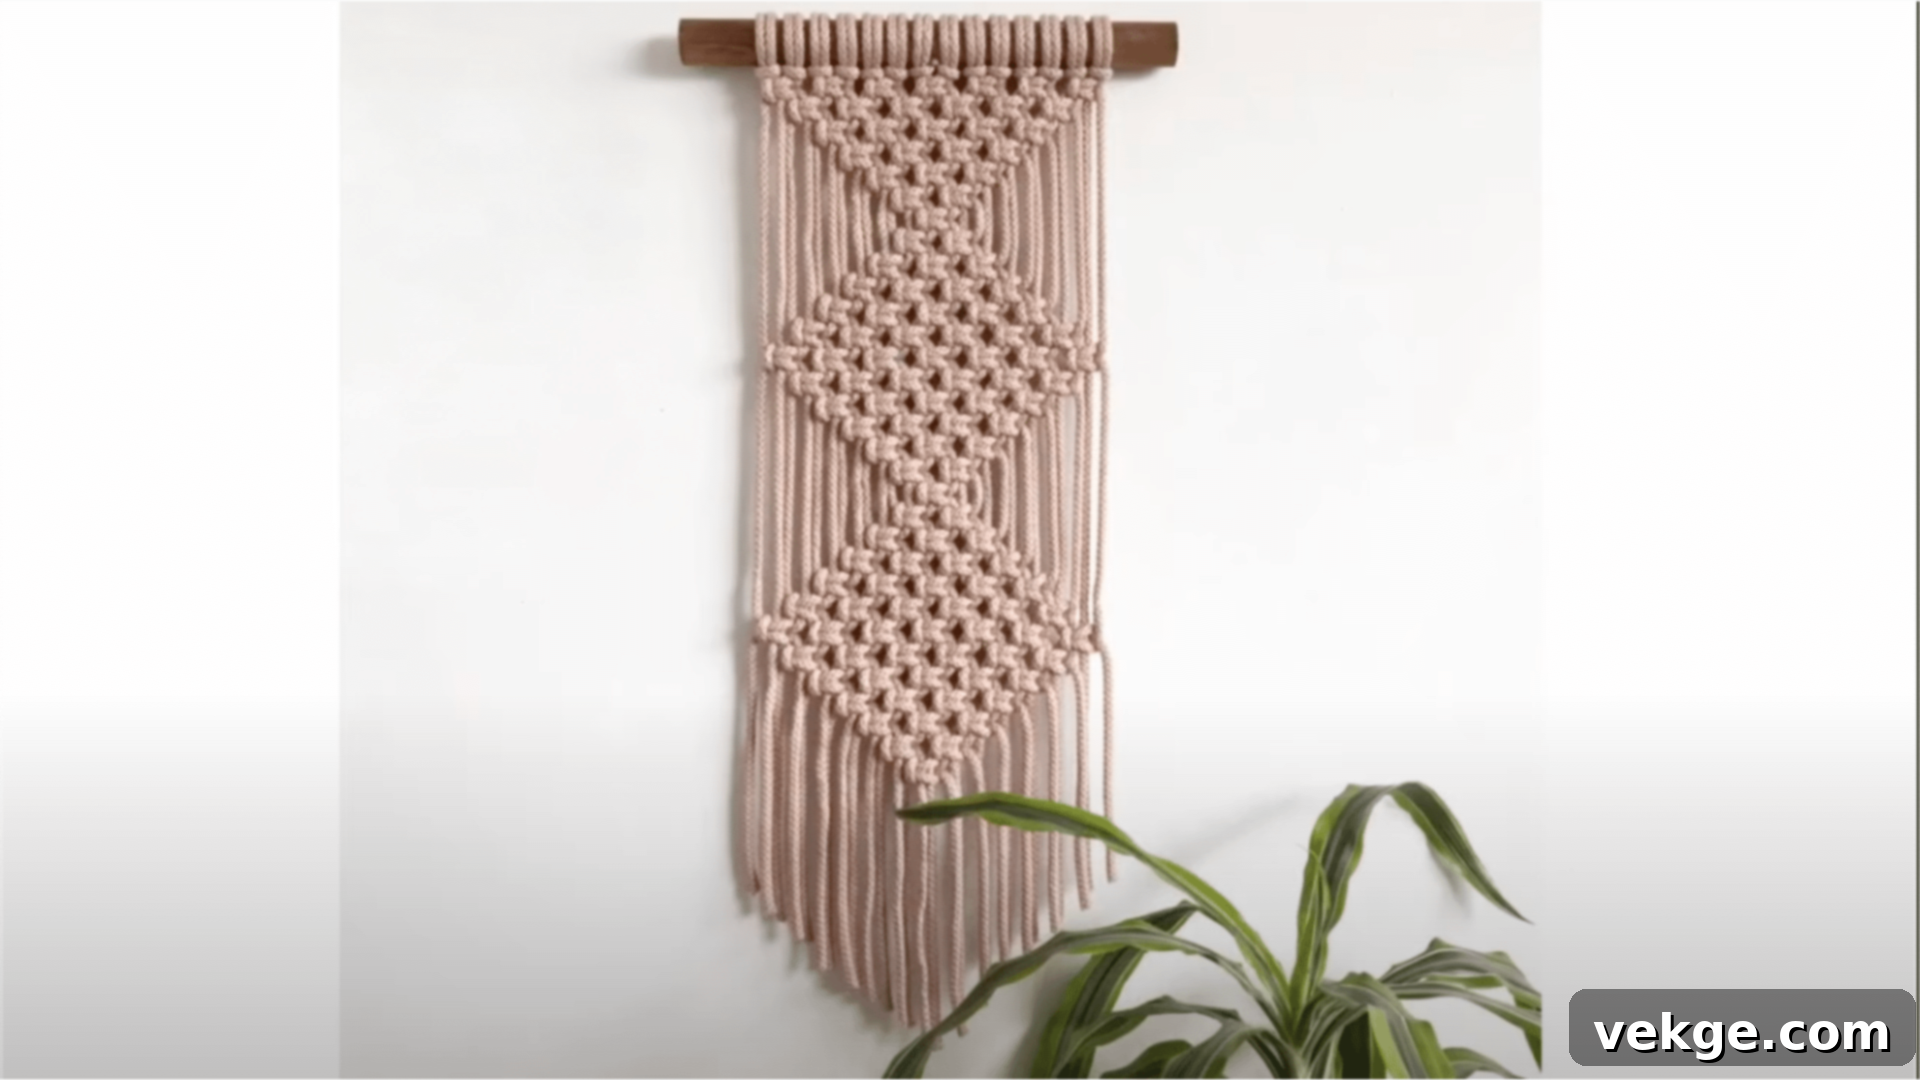
Macramé was a huge trend in the 90s (and even before), bringing organic texture and bohemian flair to living spaces. Creating your own macramé wall hanging is a fantastic, relatively simple DIY project that can add a warm, handcrafted touch to your 90s-inspired living room.
Materials Needed:
- Macramé cord (natural cotton cord is ideal, in various lengths for depth: e.g., two cords each of 60″, 75″, 90″, 105″, 115″, 130″, 145″ – adjust as desired)
- A sturdy dowel rod (the length will determine the width of your hanging)
- Sharp scissors
- Measuring tape
Steps:
1. Prepare and Cut the Cords
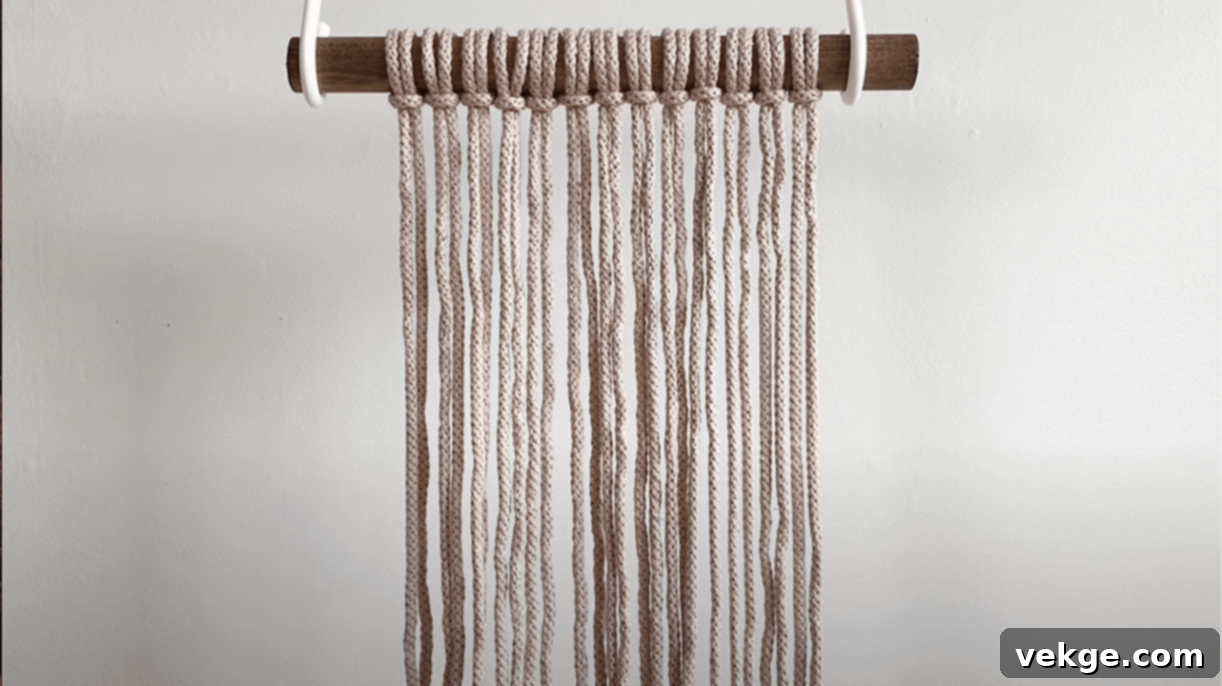
- Using your measuring tape and scissors, carefully cut all your macramé cords to the specified lengths (e.g., two cords of 60″, two of 75″, etc., up to 145″). Having multiple lengths will create a beautiful, staggered effect in your final piece.
2. Attach Cords to the Dowel Using Larks Head Knot
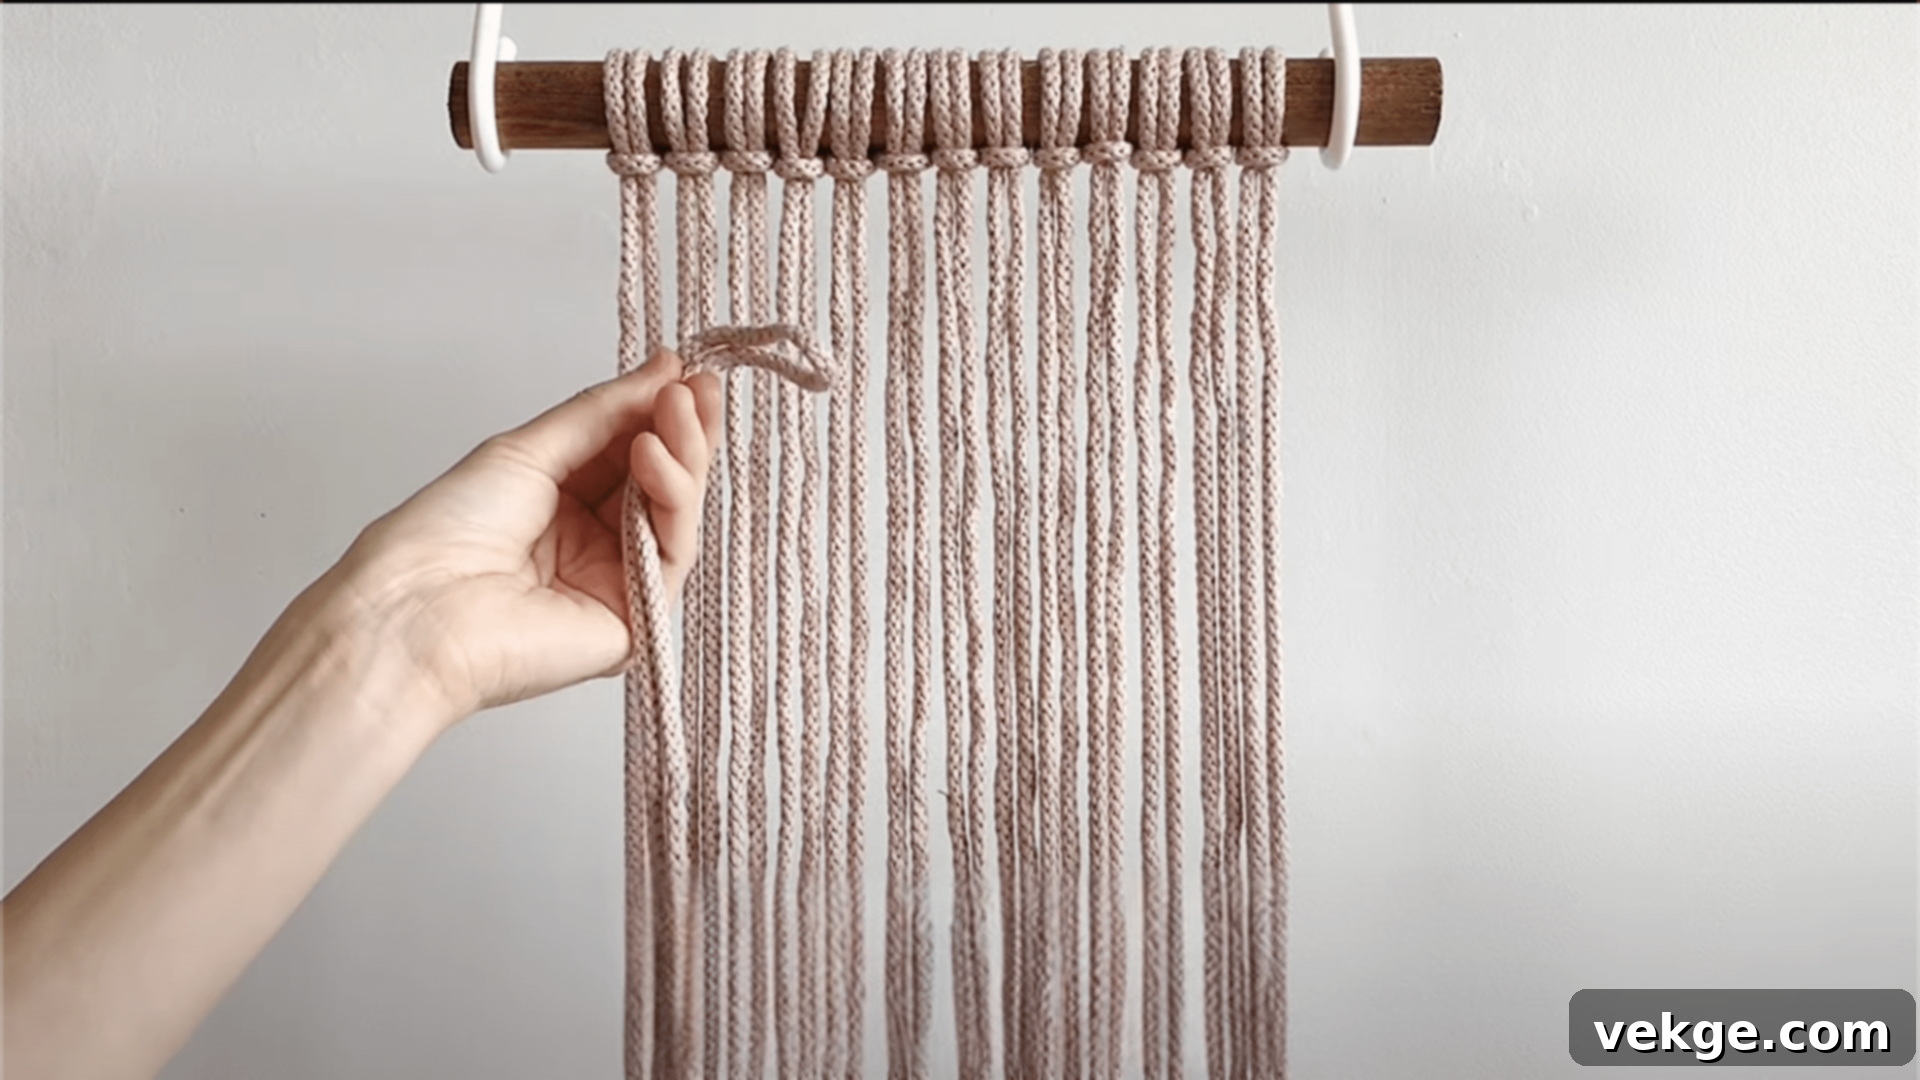
- For each cord, fold it precisely in half to find its midpoint.
- Place the folded loop of the cord over the top of the dowel rod.
- Reach through the loop from behind and pull both loose ends of the cord through the loop.
- Gently pull to tighten the knot securely around the dowel. This is the Larks Head Knot. Repeat for all cords.
3. Arrange Cords for a Graduated Look
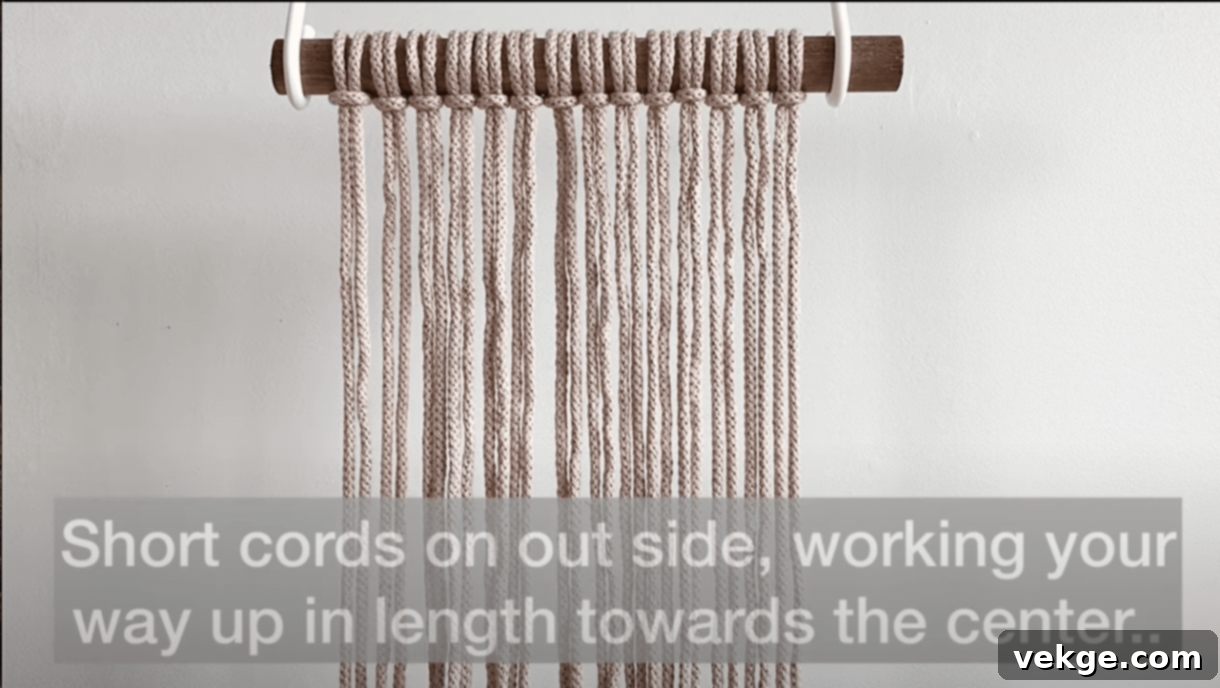
- Once all cords are attached, arrange them symmetrically. Place the shortest cords (e.g., 60″) on the far outside edges of the dowel.
- Gradually increase the length of the cords as you move inwards towards the center of the dowel.
- The longest cords (e.g., 145″) should be positioned in the very center of your arrangement. This creates a natural, tapering effect.
4. Create the First Row of Square Knots
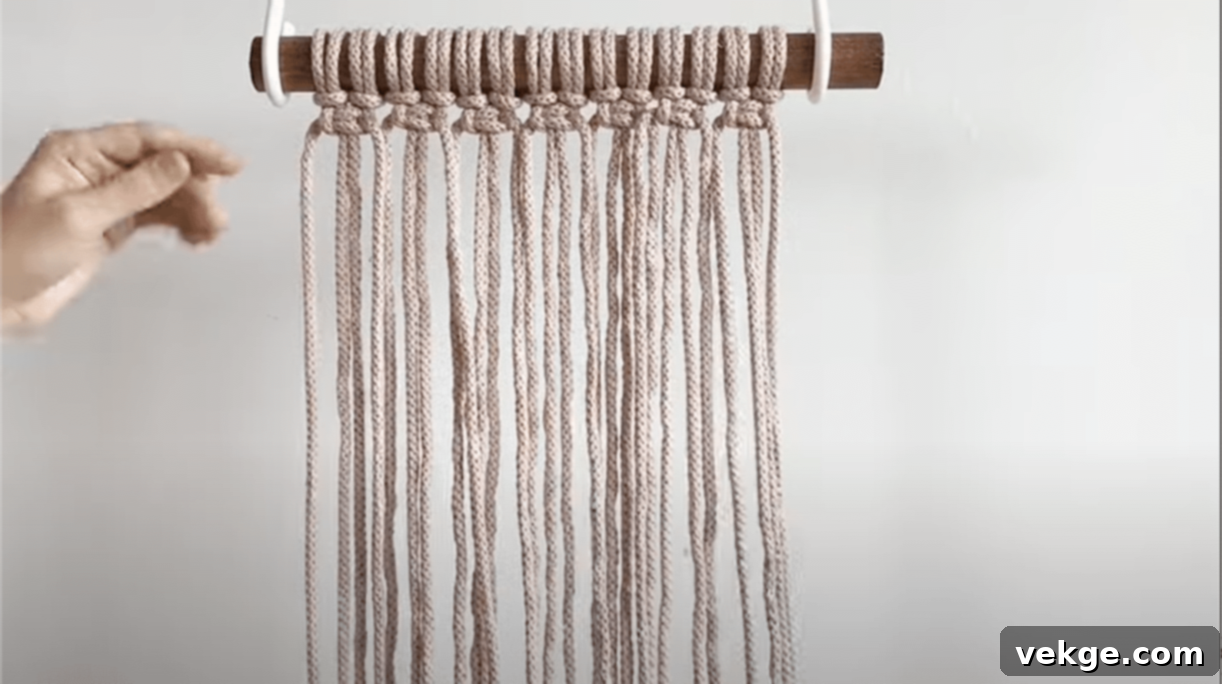
- Identify groups of four adjacent cords. Remember that each Larks Head Knot results in two cords hanging down. So, take two cords from one Larks Head Knot and two from the adjacent one.
- The two outer cords in this group of four are your “working cords,” and the two inner cords are your “filler cords.”
- To create a Square Knot: Take the left working cord, pass it over the two filler cords and under the right working cord. Then, take the right working cord, pass it under the two filler cords and over the left working cord (which is now on the right side). Pull both working cords to tighten. Repeat this process, but start with the right working cord going over first, then the left. This completes one full Square Knot.
- Repeat this process, creating Square Knots across the entire first row of your macramé piece.
5. Form the Diamond Shape (Chevron Pattern)
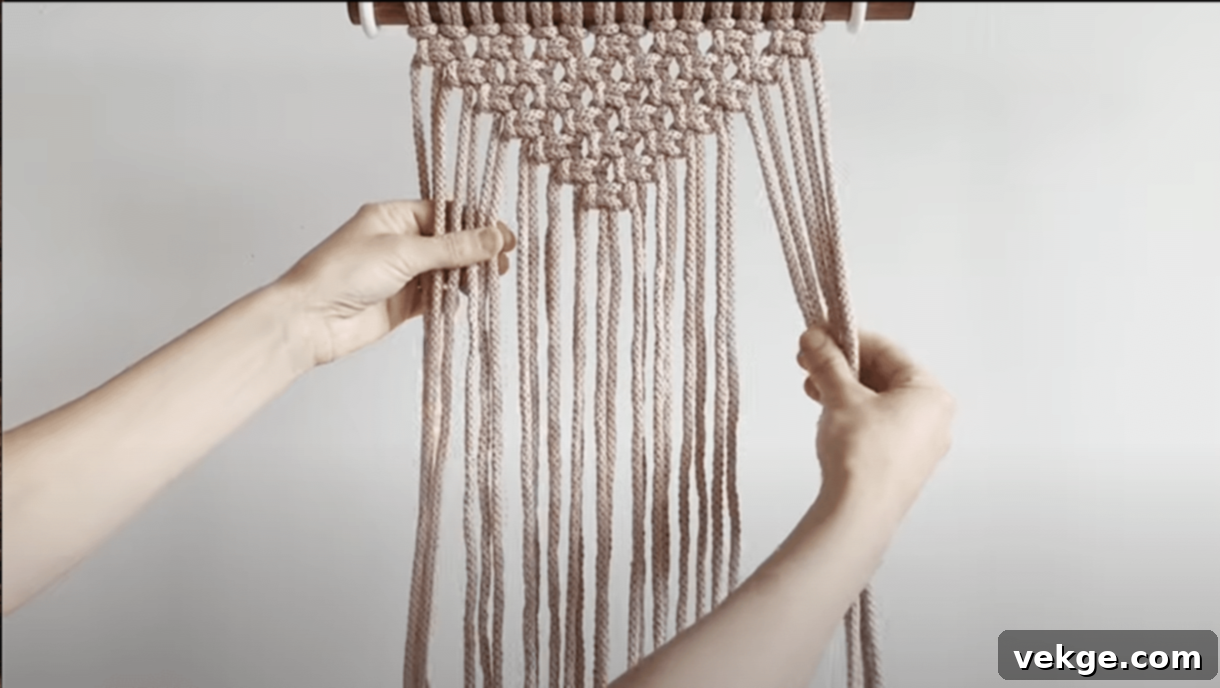
a. Create the V-shape downwards:
- For each subsequent row, you will “skip” the outermost two cords on each side. Start your Square Knots further inwards, using two fewer cords on each side compared to the previous row.
- Continue making Square Knots, moving inward and creating a distinct inverted “V” pattern.
b. Create the V-shape upwards (to close the diamond):
- Once you’ve reached the narrowest point of your “V,” begin to expand. Start from the center and add two cords to each side for each new row.
- Continue tying Square Knots, moving outward, to form the upward-pointing “V” that will close your diamond shape.
- Repeat this sequence to complete the diamond.
6. Create Second Diamond (Optional, for more elaborate design)
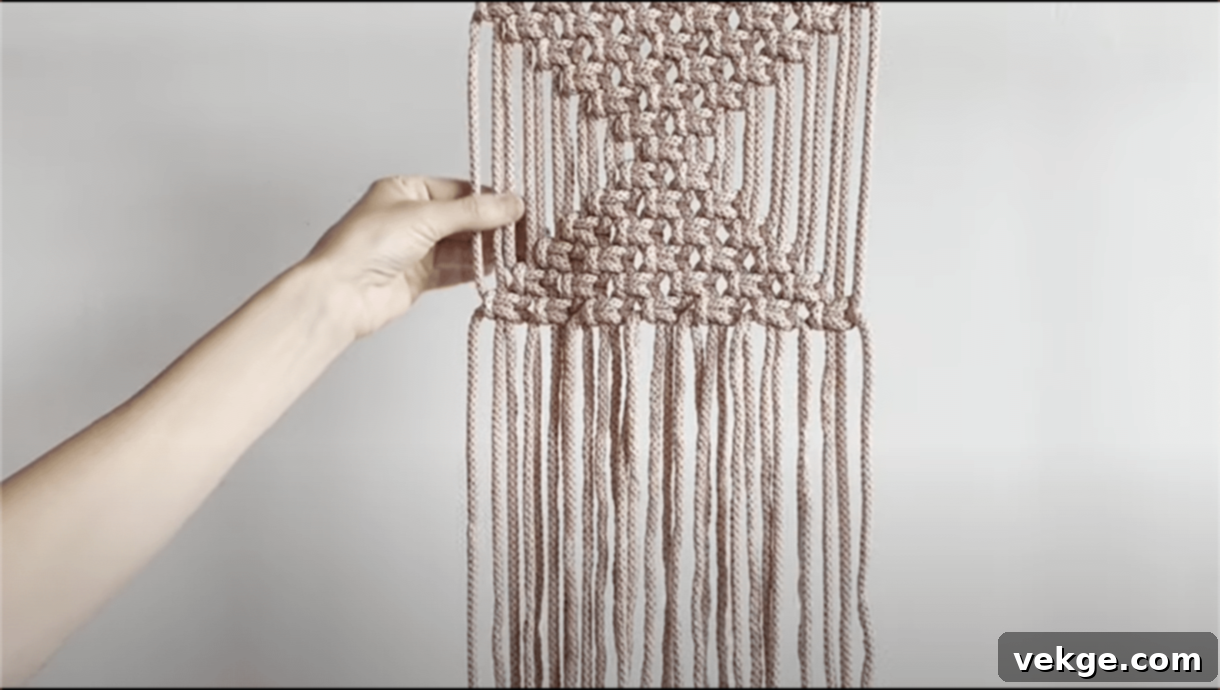
- If desired, repeat steps 5a through 5c directly below the first diamond you created. This will add more visual impact and length to your wall hanging. You can create as many diamonds as you like.
7. Finish and Refine Edges
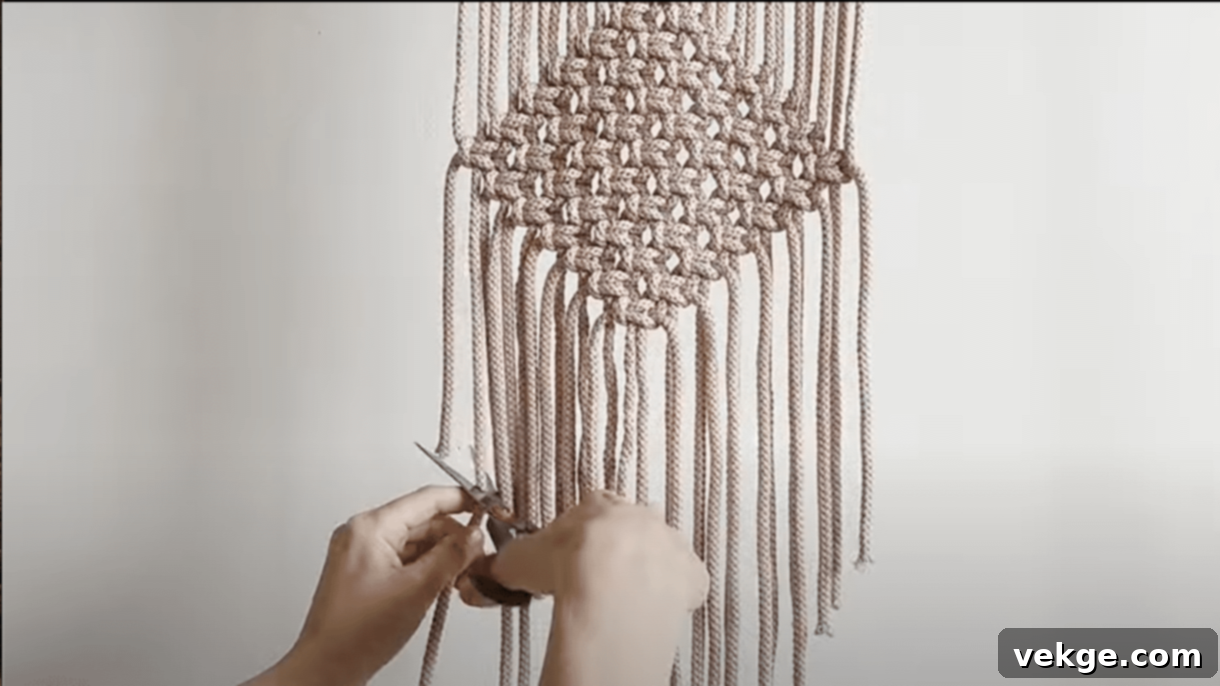
- Once all your knots are tied, go back and gently ensure all knots are tight and evenly spaced.
- Adjust the tension of the cords to ensure that the lines of your diamond shapes are straight and crisp.
- Finally, trim the bottom cords to your desired shape. A “V” shape or a straight line are common finishes.
Tips for a Perfect Macramé Wall Hanging:
- Maintain consistent tension throughout all your knots for a neat, professional, and symmetrical appearance.
- Take your time, especially when learning. It’s better to go slow and align knots properly than to rush and have to undo them.
- Ensure the side ropes have even tension to keep the overall look of the wall hanging balanced and straight.
This macramé project is generally suitable for beginners, as it primarily relies on two fundamental knots: the Larks Head Knot and the Square Knot. It should take approximately 30 minutes to an hour, depending on the complexity of your design and your familiarity with the knots. Enjoy your beautiful, handcrafted 90s-inspired wall art!
To know in depth about this process, click here.
Some Other DIY Ideas You Can Try for a 90s Vibe
1. DIY Floral Throw Pillows
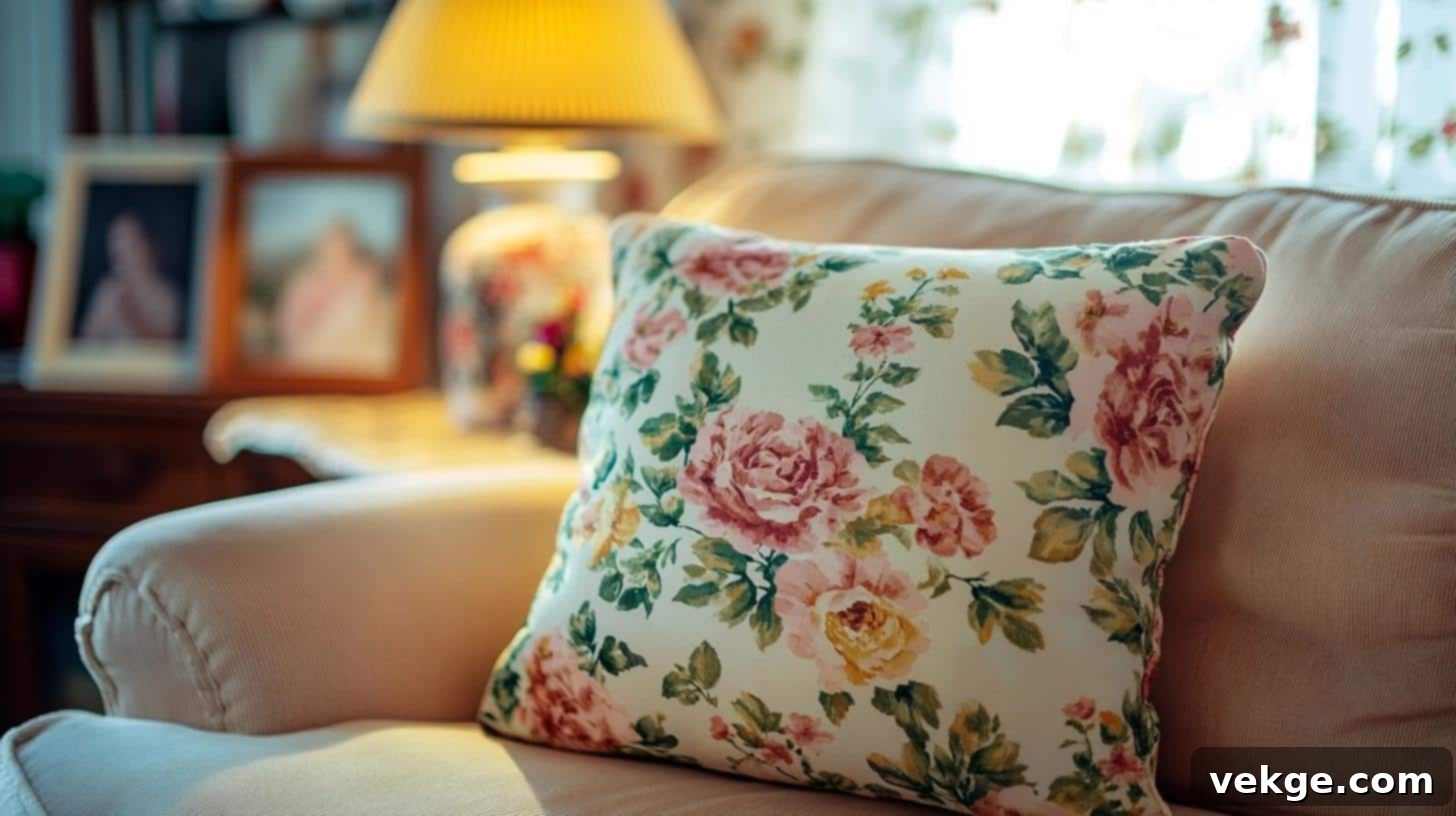
- Project Overview: Craft custom throw pillows using fabrics adorned with iconic 90s floral prints. Think chintz, muted roses, or vibrant botanical patterns. The key is to select fabrics that instantly transport you back to that decade, whether you lean towards bright and cheerful or soft and pastel hues.
- Steps: Purchase your chosen floral fabric. Cut it into desired pillow shapes (squares, rectangles, or even round for a retro touch). If you have basic sewing skills, sew the edges together, leaving an opening for stuffing, then fill with poly-fil. For a quicker, no-sew alternative, use strong fabric glue or iron-on adhesive tape to seal the edges.
- Pro Tip: For an authentic and eclectic 90s look, don’t be afraid to mix and match different patterns! Pair a large-scale floral pillow with a smaller plaid one, or combine a subtle stripe with a bold geometric design. Varying sizes and shapes of pillows will also add visual interest.
2. Sponge Painting Accent Wall
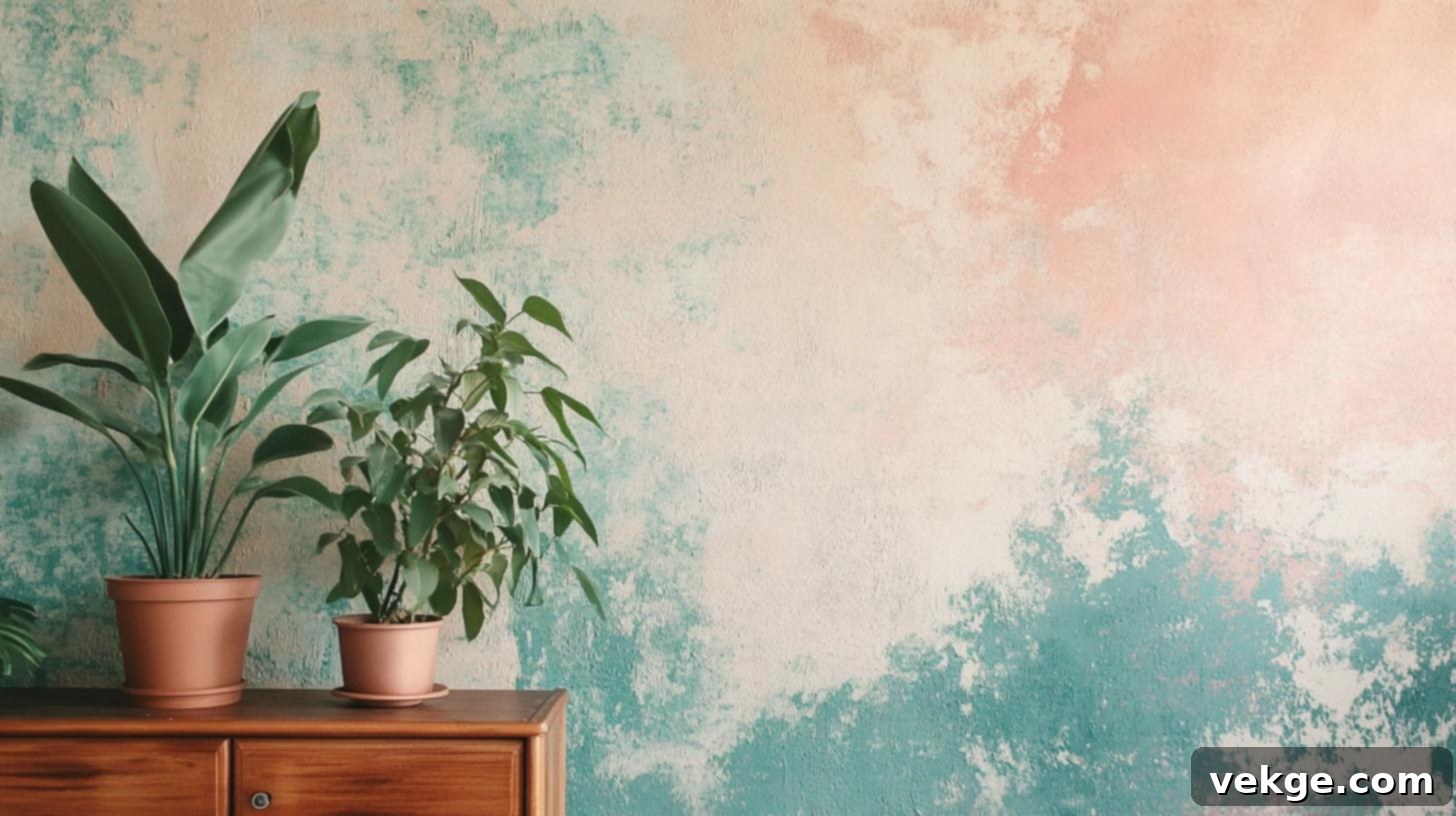
- Project Overview: Reintroduce the iconic 90s sponge-painted wall technique to add unique texture and a subtle pop of color to your living room. This method creates a soft, mottled effect that was incredibly popular.
- Steps: First, choose two complementing paint colors – one for the base coat and one for the sponging. Apply the base coat evenly to your chosen accent wall and allow it to dry completely. Then, using a natural sea sponge or a synthetic sponge torn into an irregular shape, dab the second color lightly onto the wall in a random, overlapping pattern. Experiment on a scrap piece of cardboard first to get the desired density.
- Pro Tip: For a more subtle and sophisticated nod to the 90s, use neutral tones (e.g., beige on cream, or light gray on a darker gray). If you want to embrace the vibrant side of 90s style, opt for pastel combinations like light blue and soft yellow, or a gentle peach and mint green.
3. Vintage Record Display
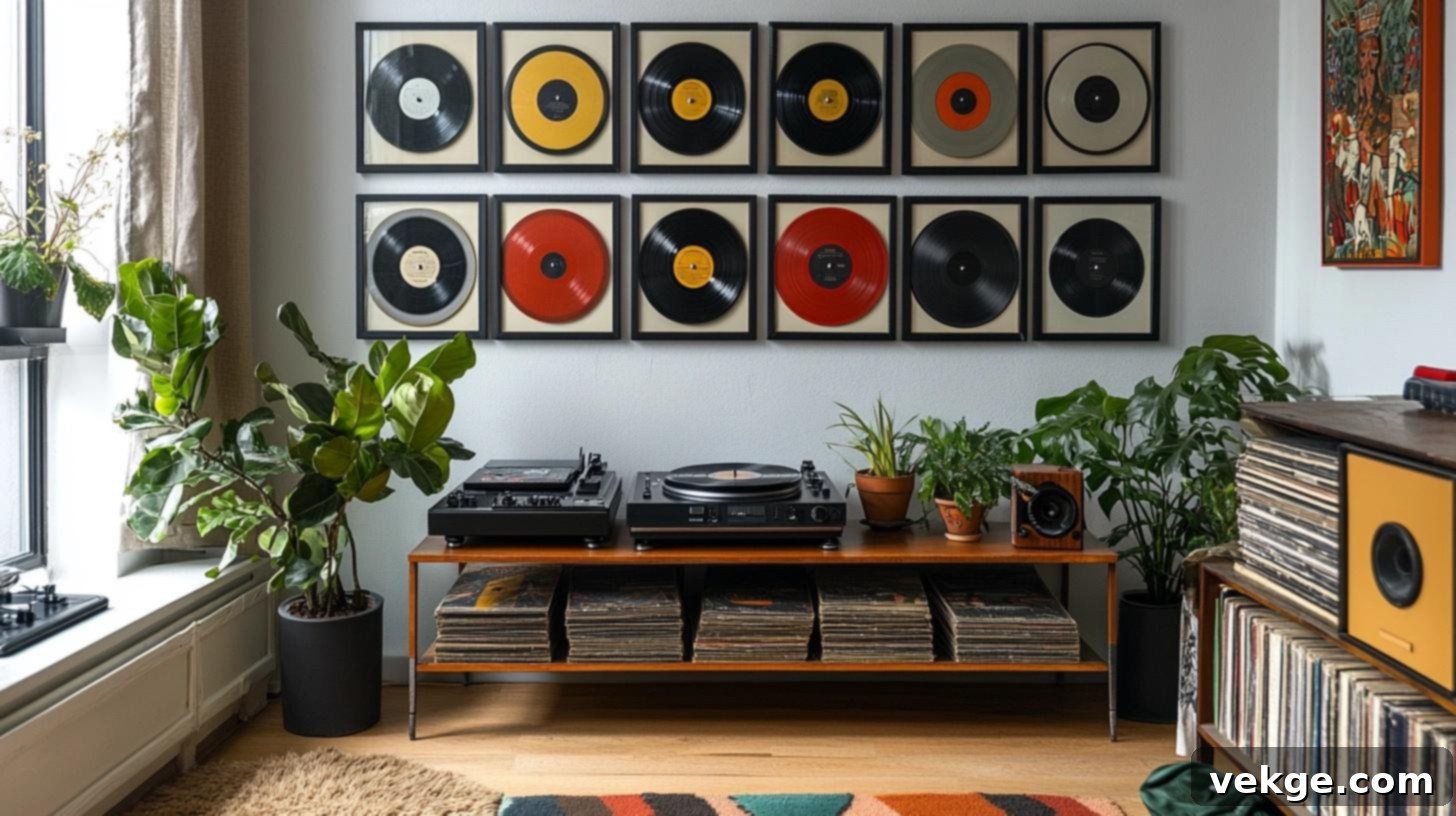
- Project Overview: Create a nostalgic music corner by displaying vinyl records as captivating wall art. This project celebrates the era’s music culture and adds a unique, artistic touch to your living space.
- Steps: Gather old vinyl records (look for classic 90s albums if you want specific nostalgia!). You can either frame them individually for a more polished look or mount them directly onto the wall using clear adhesive discs or small picture hanging strips, arranging them in an artistic and visually appealing layout. Incorporate a vintage record player (functional or purely decorative) as a central piece to complete the setup.
- Pro Tip: Design a gallery wall that features a mix of iconic 90s album covers. You can also mix records with framed band posters, concert tickets, or other music memorabilia from the decade to create a truly immersive and personal tribute to the 90s music scene.
4. DIY 90s-Inspired Slipcovers
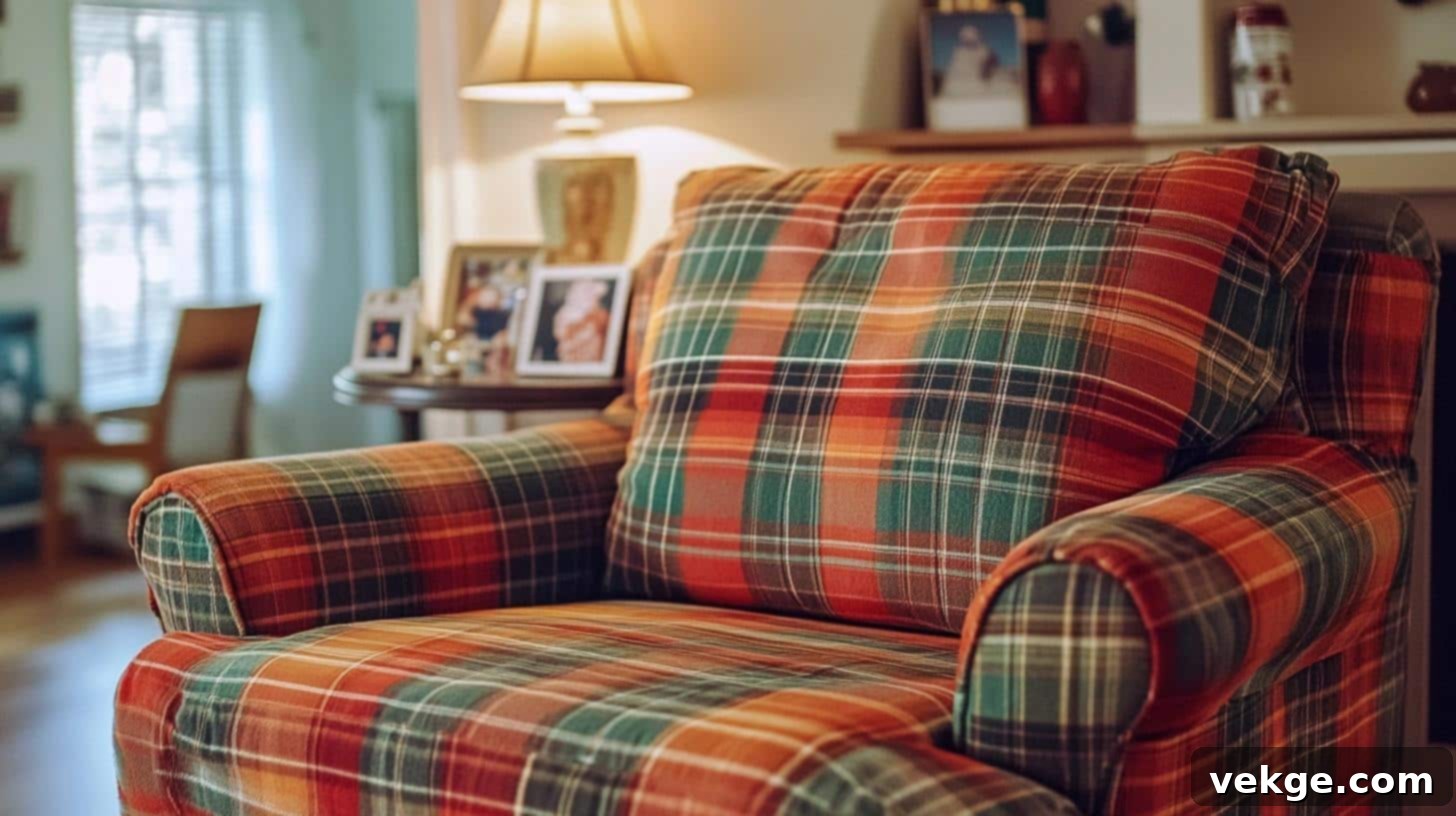
- Project Overview: Give your existing furniture a quick and dramatic 90s makeover by creating custom slipcovers. This allows you to introduce those signature 90s patterns without investing in brand new furniture.
- Steps: Carefully measure your sofa, armchair, or dining chairs to get accurate dimensions. Select 90s-style fabrics such as classic plaids (think tartan or windowpane), vibrant chintz floral prints, or even a cozy corduroy. Cut the fabric according to your measurements, allowing for seams and hems. If you can sew, stitch the pieces together for a tailored fit. For a no-sew option, use fabric glue, safety pins, or even strategically placed ties to secure the slipcover in place.
- Pro Tip: Choose washable fabrics for your slipcovers. This ensures practicality and ease of maintenance, allowing you to keep your 90s-inspired furniture looking fresh and clean with minimal effort. Look for durable cotton blends or performance fabrics with a retro pattern.
5. DIY Retro-Inspired Wall Art
- Project Overview: Unleash your inner artist by creating your own wall art that captures the essence of 90s aesthetics. This allows for ultimate personalization and a truly unique statement piece.
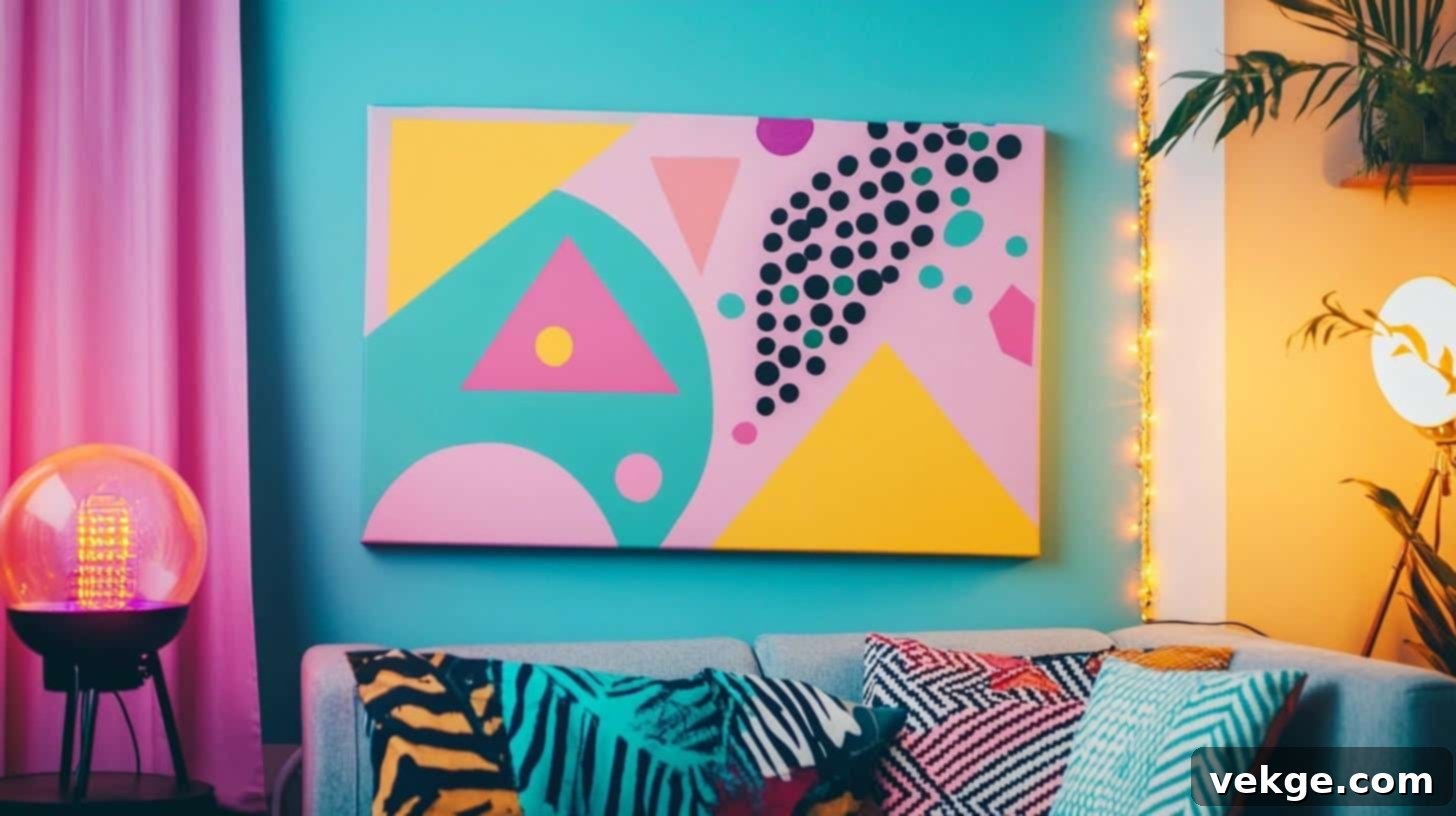
- Steps: Acquire blank canvases or wooden boards. You can paint abstract designs using vibrant, contrasting colors (think teal, purple, and orange often seen in 90s graphics), bold geometric shapes (like zigzags or squiggles), or stencil iconic 90s imagery such as cassette tapes, floppy disks, classic video game characters, or VHS covers. Utilize mixed media like fabric scraps or found objects for added texture.
- Pro Tip: For a quick and effortless project, simply print high-resolution images of your favorite 90s movie posters, band album covers, or pop culture icons. Frame them in simple, retro-style frames (perhaps a distressed wood or a pastel color) and arrange them in a gallery wall for an instant, impactful touch of nostalgic wall decor.
Conclusion: Embracing the Enduring Charm of 90s Living Rooms
As we bring our nostalgic journey through the 90s living room to a close, I sincerely hope you feel invigorated and genuinely inspired to infuse some of that undeniable cozy charm and unique personality into your own home. We’ve explored the very heart of what made these spaces so special – from the luxurious comfort of overstuffed sofas to the delightful interplay of playful patterns and an earthy-yet-vibrant color palette.
Remember, the beauty of modernizing your space with a nod to the past doesn’t mean you have to sacrifice contemporary style. The true magic lies in the artful blend: carefully integrating those cherished retro vibes with sleek, functional modern touches. This thoughtful fusion allows you to create a living room that feels both warmly familiar and wonderfully fresh, a true reflection of your unique taste and a testament to timeless comfort.
Whether your passion leads you on a thrilling hunt for authentic vintage treasures in thrift stores and online marketplaces, or inspires you to roll up your sleeves and embark on creative DIY projects, the most crucial element is to simply have fun with the process. Let your creativity flow, and enjoy the journey of personalizing your space.
Are you ready to kickstart your 90s-inspired living room makeover? We’d love to hear your initial ideas or any questions you might have. Please share your thoughts in the comments section below! Or better yet, as you make progress, why not share photos of your evolving space? Let’s keep the spirit of 90s comfort, character, and genuine homeyness alive in our homes, one inviting living room at a time!
Frequently Asked Questions About 90s Living Room Decor
What was 90s interior design called?
90s interior design wasn’t strictly defined by a single, official name, but it was broadly characterized by terms like “eclectic,” “transitional,” or “casual comfort.” It was a period that moved away from the extreme opulence of the 80s, embracing a blend of styles, often mixing traditional elements with more relaxed, contemporary touches. “Maximalist” could also apply to the sheer volume of personal items and patterns found in many homes, creating a highly personalized and sometimes busy aesthetic.
What did a typical 90s living room look like?
A typical 90s living room was all about inviting comfort and lived-in charm. It featured big, often overstuffed sofas and armchairs, frequently upholstered in patterned fabrics like chintz florals, classic plaids, or subtle stripes. Colors leaned towards warm neutrals such as beige, cream, and muted pastels, often accented with deeper tones like hunter green, burgundy, or navy. A large wooden entertainment unit, housing the television and sound system, was usually the focal point. Decor often included plenty of framed family photos, artificial plants (especially ficus trees), decorative figurines, and chunky wooden coffee and end tables.
How can I style my home like the 1990s?
To style your home with an authentic 1990s vibe, focus on creating a cozy, layered, and personalized space. Start with a warm, neutral color palette for your walls and larger furniture. Introduce patterns through textiles like floral or plaid throw pillows, curtains, and upholstery. Invest in a big, comfy, overstuffed sofa – perhaps a sectional for ultimate lounging. Display an abundance of framed family photos and personal memorabilia. Incorporate solid wood furniture, especially an entertainment center, and add plenty of greenery with both real and high-quality artificial plants. Warm, diffused lighting from multiple lamps will complete the inviting atmosphere.
What furniture was popular in the 90s?
In the 1990s, furniture prioritizing comfort and practicality was highly popular. This included large, overstuffed sofas and armchairs, often with deep cushions, ideal for lounging. Expansive wooden entertainment centers were ubiquitous, designed to house growing home electronics. Coffee tables and end tables were frequently made of wood, glass, or a combination of both, sometimes featuring brass accents. Futons gained popularity as versatile seating and sleeping options. Floral print armchairs, often in a chintz style, were common accent pieces, as was wicker or rattan furniture for a touch of natural texture and a relaxed, casual feel. These pieces collectively contributed to the cozy, eclectic, and inviting look characteristic of 90s homes.
