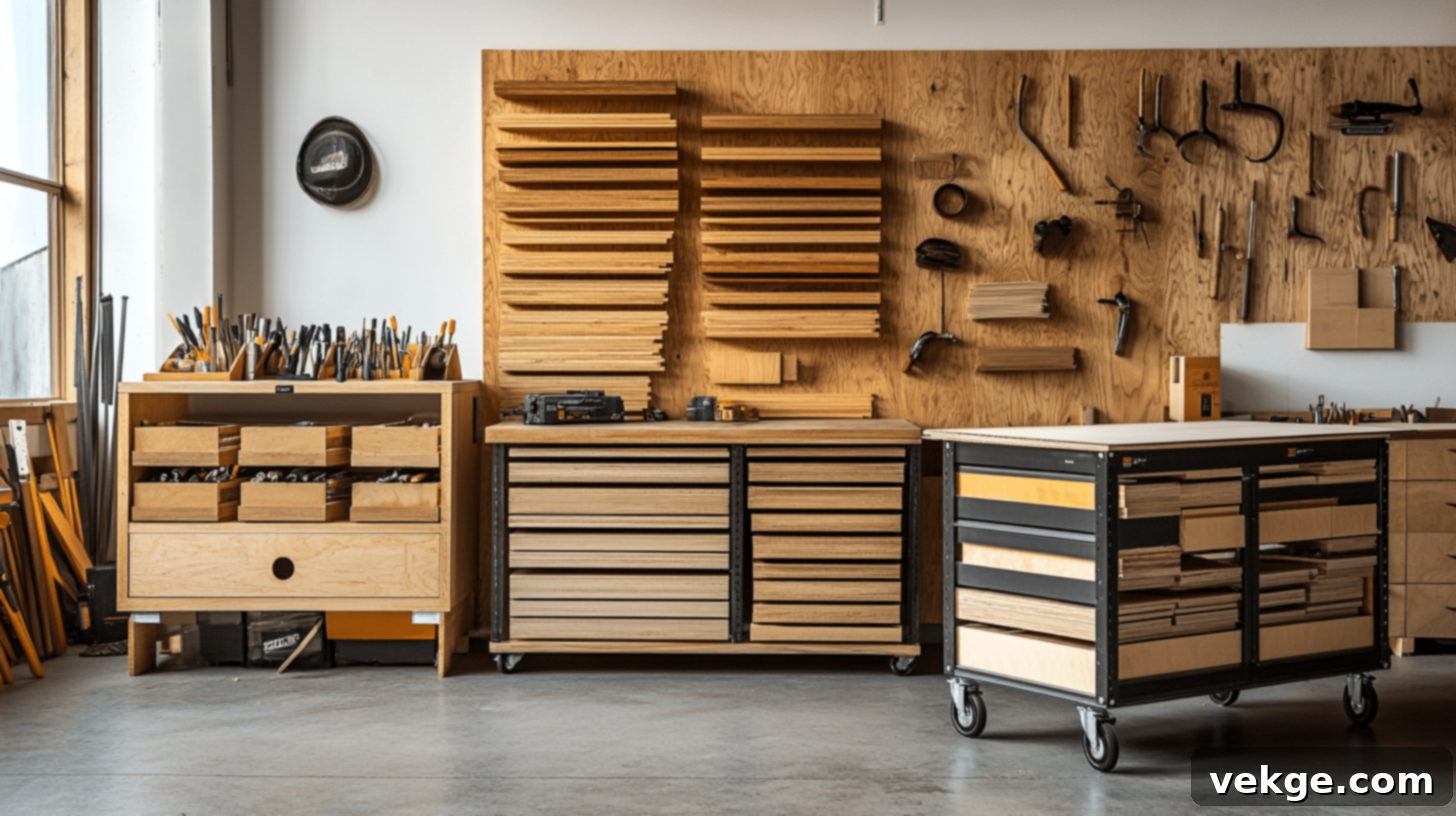
Ultimate Scrap Wood Storage Solutions: Organize Your Workshop for Efficiency and Safety
For every passionate woodworker, the accumulation of scrap wood is an inevitable, yet often challenging, aspect of the craft. These valuable remnants from previous projects, far from being mere waste, hold immense potential for future creations. However, without a systematic approach, they can quickly transform a tidy workshop into a cluttered, inefficient, and even unsafe environment. Implementing an effective and well-designed scrap wood storage system isn’t just about tidiness; it’s about transforming your workshop into a highly productive space, ensuring easy access to these useful materials, and fostering a safer working environment.
A thoughtfully organized scrap wood storage solution offers a multitude of benefits that extend far beyond simply keeping things neat. It plays a crucial role in preventing material waste by making it easier to see and utilize smaller pieces that might otherwise be overlooked. Enhanced workshop safety is another major advantage, as organized wood reduces trip hazards and keeps pathways clear. Furthermore, it significantly boosts overall productivity by streamlining the process of locating and utilizing available resources, allowing you to spend less time searching and more time creating. This comprehensive guide will walk you through various storage solutions, from practical DIY plans you can build yourself to expert organizational strategies, helping you create a system that perfectly suits your specific needs, workshop size, and working style.
Understanding Your Scrap Wood Storage Needs
Before diving into specific storage solutions, it’s paramount to thoroughly understand your unique requirements. This foundational step ensures that any system you implement will be truly effective and sustainable for your woodworking journey.
1. Assessing Your Scrap Wood Collection
Developing an effective storage solution begins with a meticulous inventory of your current scrap wood collection. Not all wood scraps are created equal; different types and sizes of wood demand distinct storage considerations. Take the time to sort through your collection, categorizing pieces to gain a clear overview. Identify broad categories such as:
- Plywood Scraps: Ranging from small offcuts to larger remnants, these often benefit from vertical storage.
- Hardwood Offcuts: Dense and heavy, these pieces (e.g., oak, maple, walnut) might need robust shelving or bins.
- Softwood Pieces: Lighter and often used for jigs or prototypes (e.g., pine, spruce), they can be stored more flexibly.
- Exotic Wood Veneers: Delicate and valuable, requiring protected, flat storage to prevent damage.
- Dimensional Lumber Pieces: Longer pieces that might be suitable for vertical or horizontal racks.
- Specialty Woods: Unique species or cuts that deserve dedicated, easily identifiable spots.
The key to successful long-term storage is recognizing which pieces are truly worth keeping. While it’s tempting to save every offcut, accumulating excessively small pieces can quickly overwhelm your system. A good rule of thumb is to consider whether a piece is large enough for a practical future project. Pieces smaller than, for example, 10 inches in both dimensions (or a specific practical minimum for your typical projects) might be better suited for a dedicated “kindling” or “firewood” bin, or even donated, while larger, more versatile pieces deserve dedicated, easily accessible storage space. Evaluate each piece based on its species, usability, and potential for future projects.
2. Identifying Space Constraints
Your workshop’s physical limitations are a critical factor in determining the most suitable storage solutions. Begin by accurately measuring available wall space, ceiling height, and floor area. These measurements will guide your decisions on whether to prioritize vertical, horizontal, or overhead storage.
When planning storage locations, always consider traffic patterns and workflow requirements. Storage should enhance, not impede, your movement around the workshop. Ensure there are clear pathways to your primary machines and workbenches. Think about the sequence of your typical projects – where do you cut, assemble, and finish? Positioning related materials close to their point of use can dramatically improve efficiency.
Natural lighting and ventilation are also important considerations in your space assessment. Properly placed storage units can help maintain good airflow, preventing moisture buildup in wood, while strategically maximizing available space without blocking windows or existing air vents. Consider how artificial lighting might also be impacted by new storage units and plan for adequate illumination in all areas.
3. Defining Your Goals
Establishing clear objectives for your storage system helps ensure the final solution not only meets your specific needs but also aligns with your long-term woodworking aspirations. Consider factors like:
- Accessibility Requirements: Do you need quick access to frequently used species, or is it okay for less common materials to be stored further out of the way?
- Frequency of Use: High-traffic items should be at eye level or easily reachable, while seasonal or project-specific wood can be stored higher or in less accessible spots.
- Mobility: Is it essential for your workflow to move materials around the workshop for different tasks, or will fixed storage suffice?
- Adaptability: Do you anticipate changes in your woodworking focus or workshop layout? A well-planned storage system should be flexible enough to accommodate future modifications.
- Budget: What is your realistic financial investment for this project?
- Aesthetics: Is it important for your storage to look clean and professional, or is pure functionality your main goal?
Your storage goals should align seamlessly with your working style and the types of projects you typically undertake. By thinking about both current requirements and future needs, you can design a robust and adaptable storage system that grows with you and your woodworking passion.
Step-By-Step DIY Scrap Wood Storage Cart
A mobile scrap wood cart is an invaluable addition to any workshop, offering both organization and unparalleled flexibility. This DIY project provides a sturdy, tiered solution for various sizes of wood scraps.
STEP 1: Prepare the Lumber
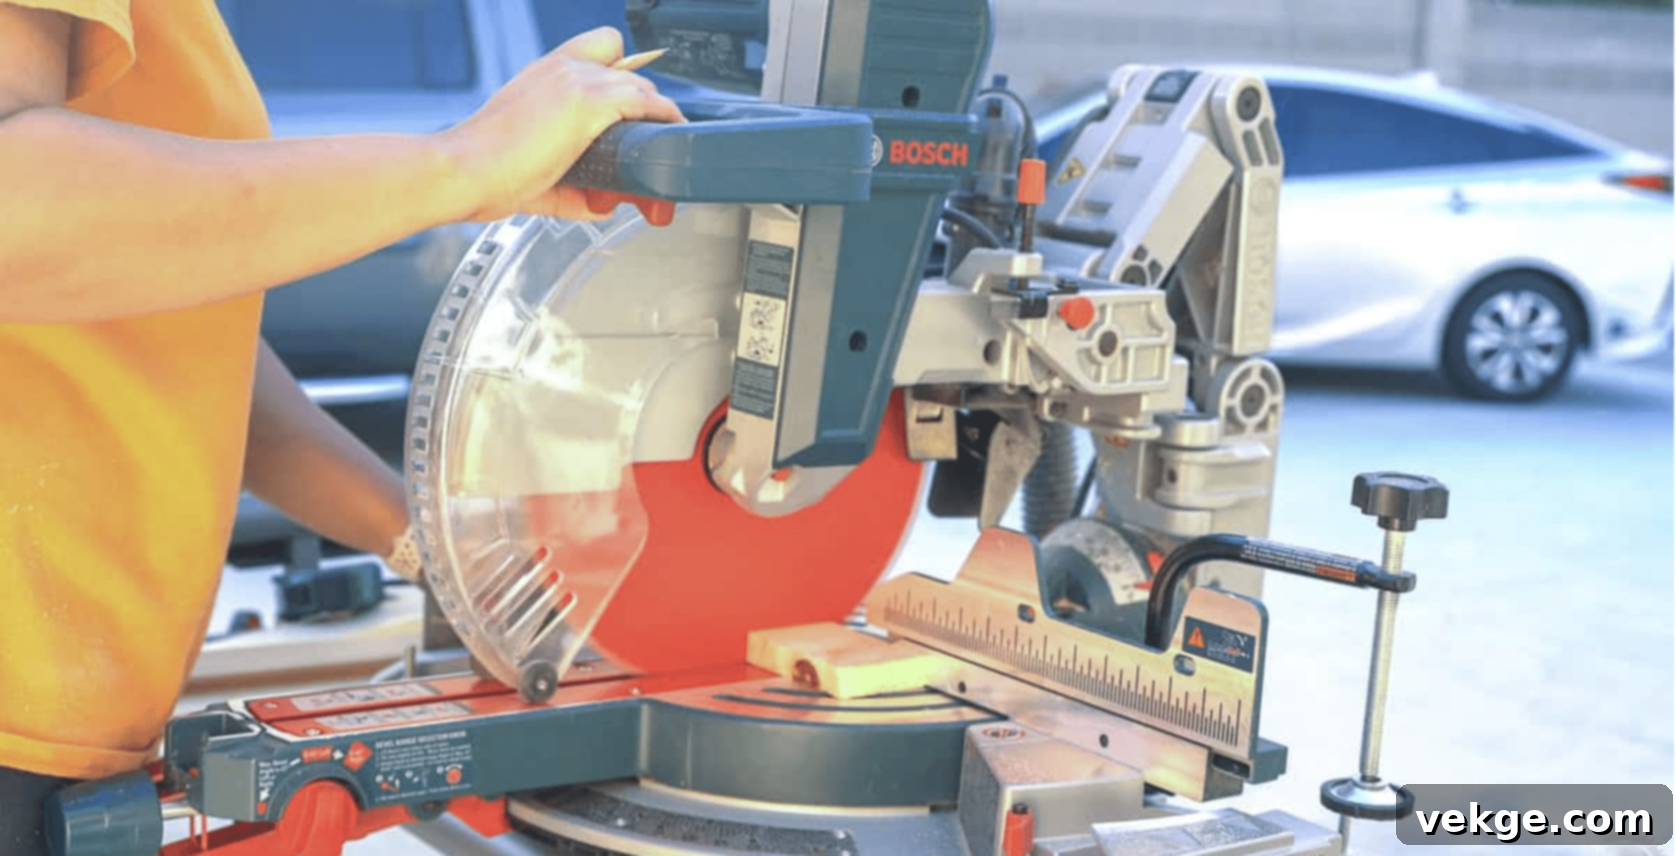
The first crucial step is to gather all the necessary lumber and cut it precisely according to your cut list or plans. This project is an excellent opportunity to “recycle” your own scrap wood; simply cut existing pieces down to the required dimensions. Ensure all measurements are accurate to guarantee a well-fitting and stable final product. While sanding the boards is generally optional for a utility cart designed to hold lumber, especially since smoothness is not a primary concern, you might choose to lightly sand edges to remove splinters and make handling more comfortable. This preparation step ensures all your materials are ready before you begin the assembly process, preventing interruptions and streamlining your build.
STEP 2: Make Pocket Holes

Pocket hole joinery is a fantastic method for assembling this cart due to its speed, strength, and concealed fasteners. Set up your pocket hole jig to drill holes appropriate for ¾-inch thick material. A Kreg 720 jig was used here, but any quality pocket hole jig (like a Kreg K4, K5, or even a cheaper alternative) will perform effectively. Before you begin drilling, ensure that the drill bit collar on your jig is securely tightened and set to the correct depth to avoid drilling holes that are too shallow or too deep. Periodically check this setting throughout the process, especially if you’re drilling many holes. Properly drilled pocket holes are essential for a smooth and efficient assembly process, ensuring strong, reliable joints for your storage cart.
STEP 3: Assemble the Frames
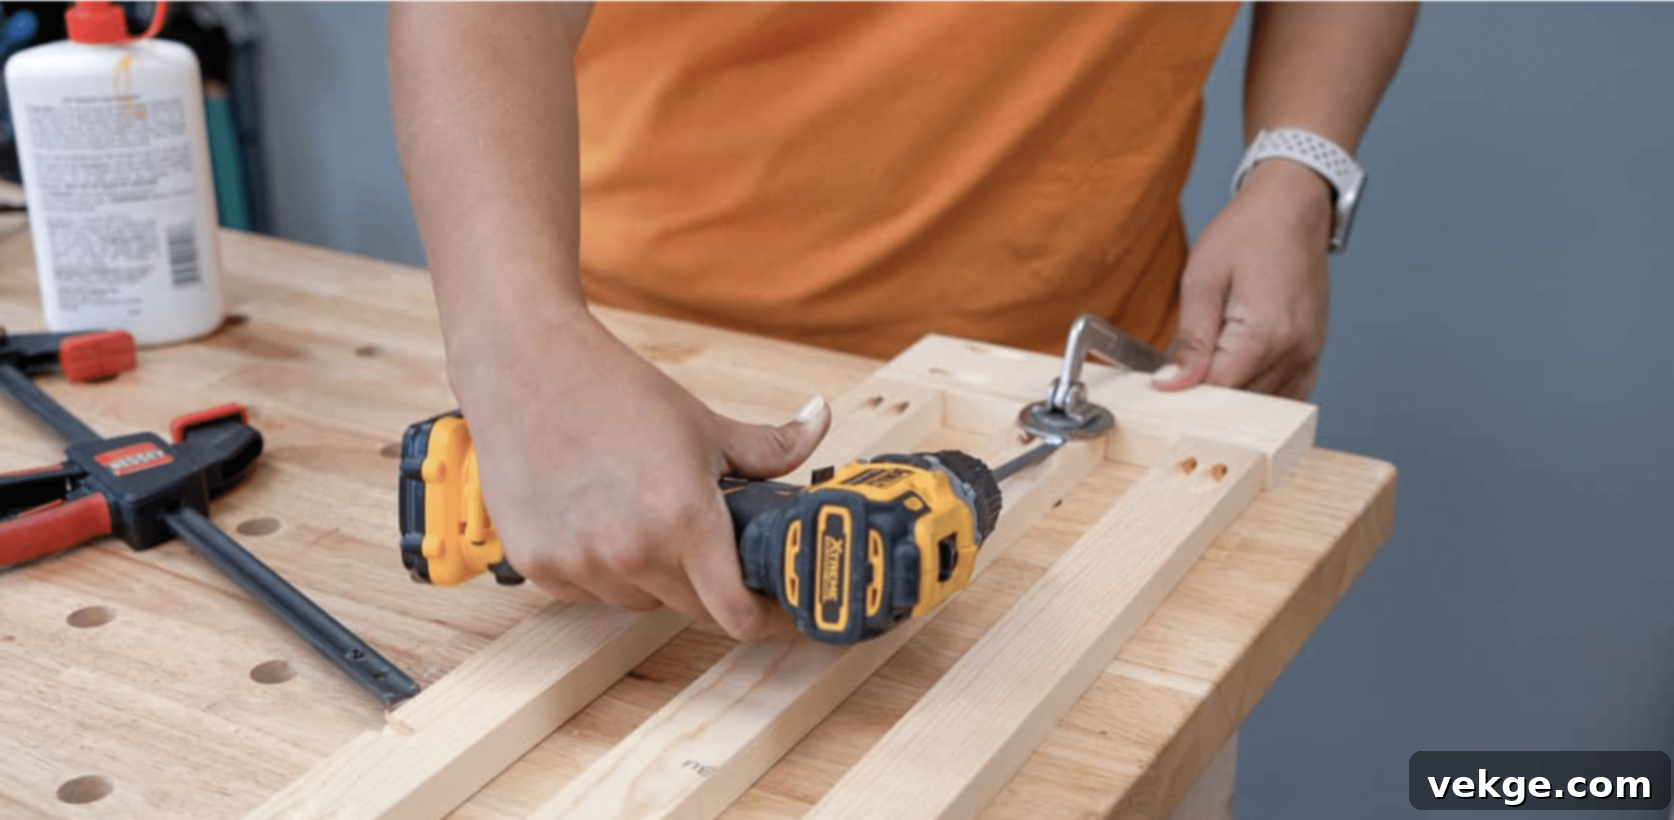
Begin constructing the cart by assembling its individual tiers. You’ll create three distinct frames: a front, a middle, and a back frame. For each frame, use wood glue in conjunction with 1 ¼-inch pocket hole screws to attach the horizontal slats to the vertical frame sides. Wood glue significantly enhances the strength of pocket hole joints, creating a bond stronger than screws alone. Utilize clamps, such as face clamps or F-style bar clamps, to hold the boards firmly in alignment and stabilize them while you drive the screws. This ensures square and flush joints. Once the basic frames are built, attach dividers to the slats on both the front and middle frames. These dividers will create the individual compartments for your scrap wood, so careful alignment is crucial for structural integrity and functionality.
STEP 4: Attach the Frames to Build the Cart
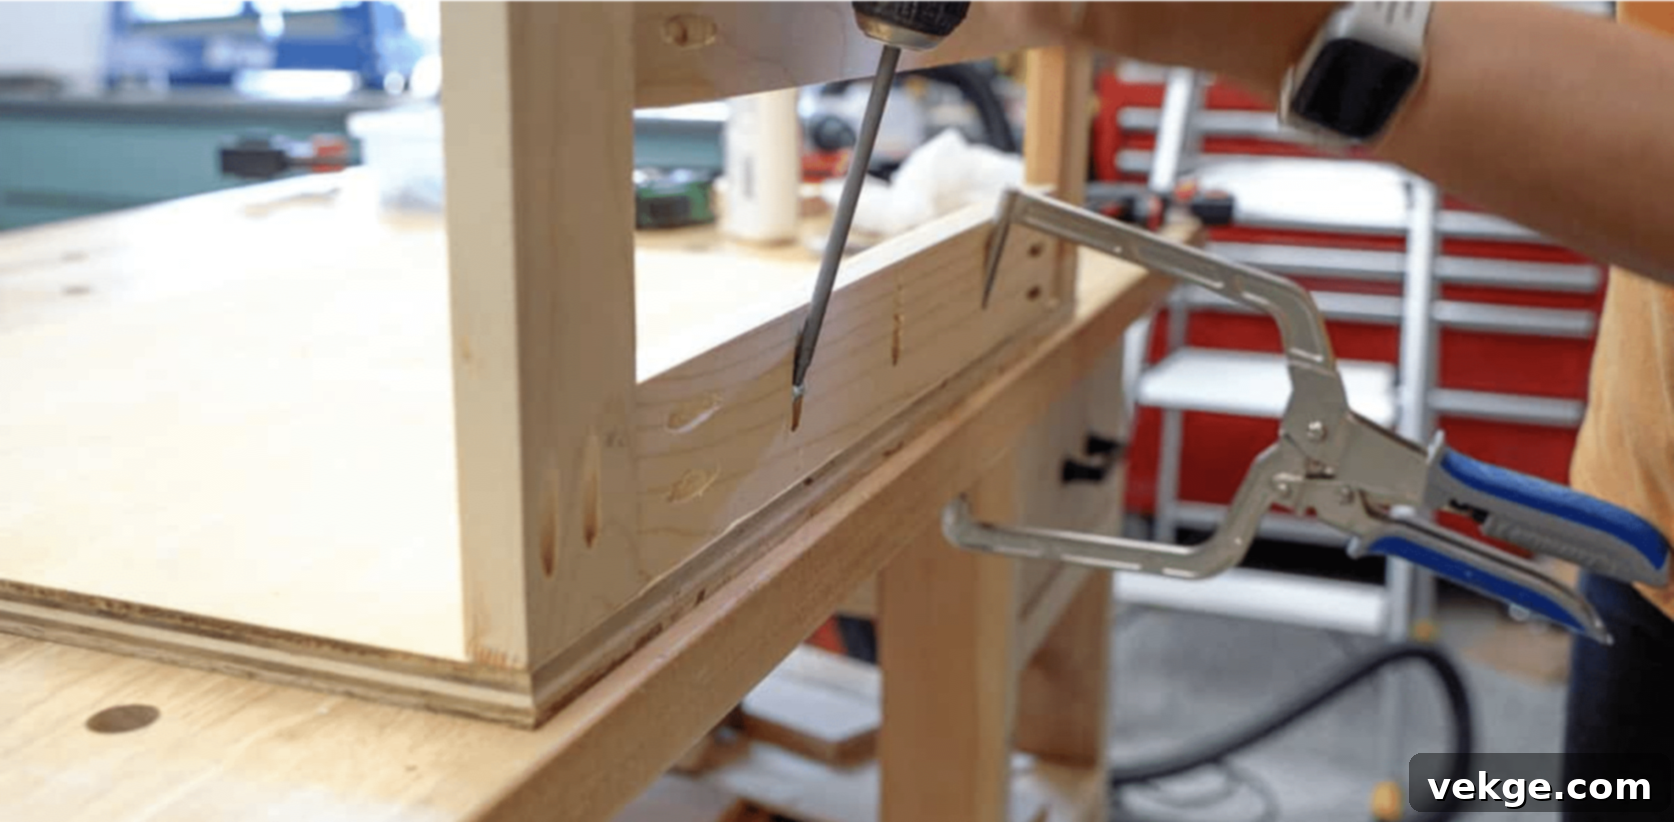
With the individual frames assembled, it’s time to bring the entire cart together by attaching them to the base plywood. Start with the back frame, aligning it precisely with the rear edge of the base. Secure it firmly with pocket hole screws, using a right-angle clamp or corner clamp to hold it perfectly square and in place during fastening. Next, attach the middle frame to the base, positioning it according to your plans, and connect its dividers to the slats on the previous (back) frame. This creates a strong, interconnected structure. Finally, the front frame is attached using the same method, securing it to the base and connecting its dividers to the middle frame. A right-angle drill attachment can prove incredibly useful for accessing tight spots and driving screws in awkward angles during this step, ensuring all connections are solid and secure.
STEP 5: Add the Casters
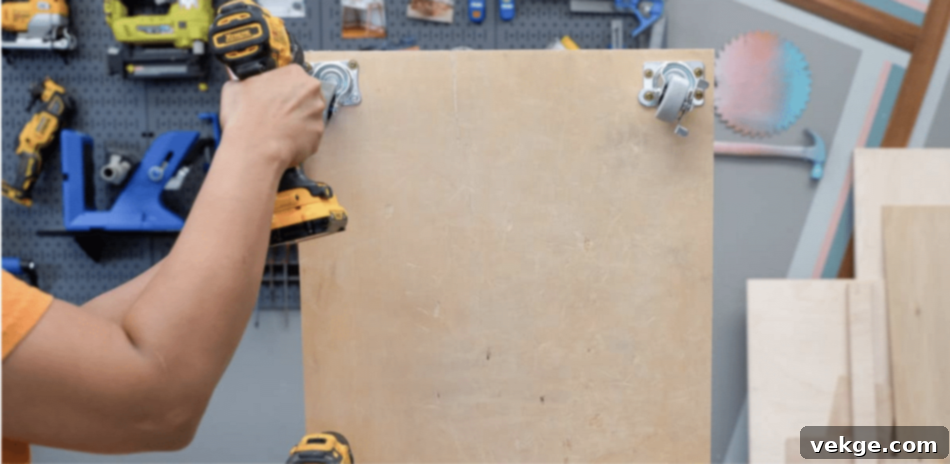
To make your scrap wood cart truly mobile and enhance workshop flexibility, attach 2-inch casters to the bottom of the base plywood. Position them near the corners for maximum stability. Use robust screws that are strong enough to securely hold the casters, the cart’s structure, and the considerable weight of the wood scraps it will carry. If the screws are slightly too long for the thickness of your base plywood, add washers beneath the screw heads to adjust the fit and prevent the screws from protruding through the top surface. Consider using locking casters on at least two of the wheels, allowing you to secure the cart in place when needed for safety and stability. Casters are a practical and highly beneficial addition, enabling you to effortlessly move the cart around your workspace as required, adapting to different project setups and clearing floor space.
Video Tutorial
For more details and a visual guide, check out this video tutorial by Shara Woodshop Diaries.
Exploring Scrap Wood Storage Options
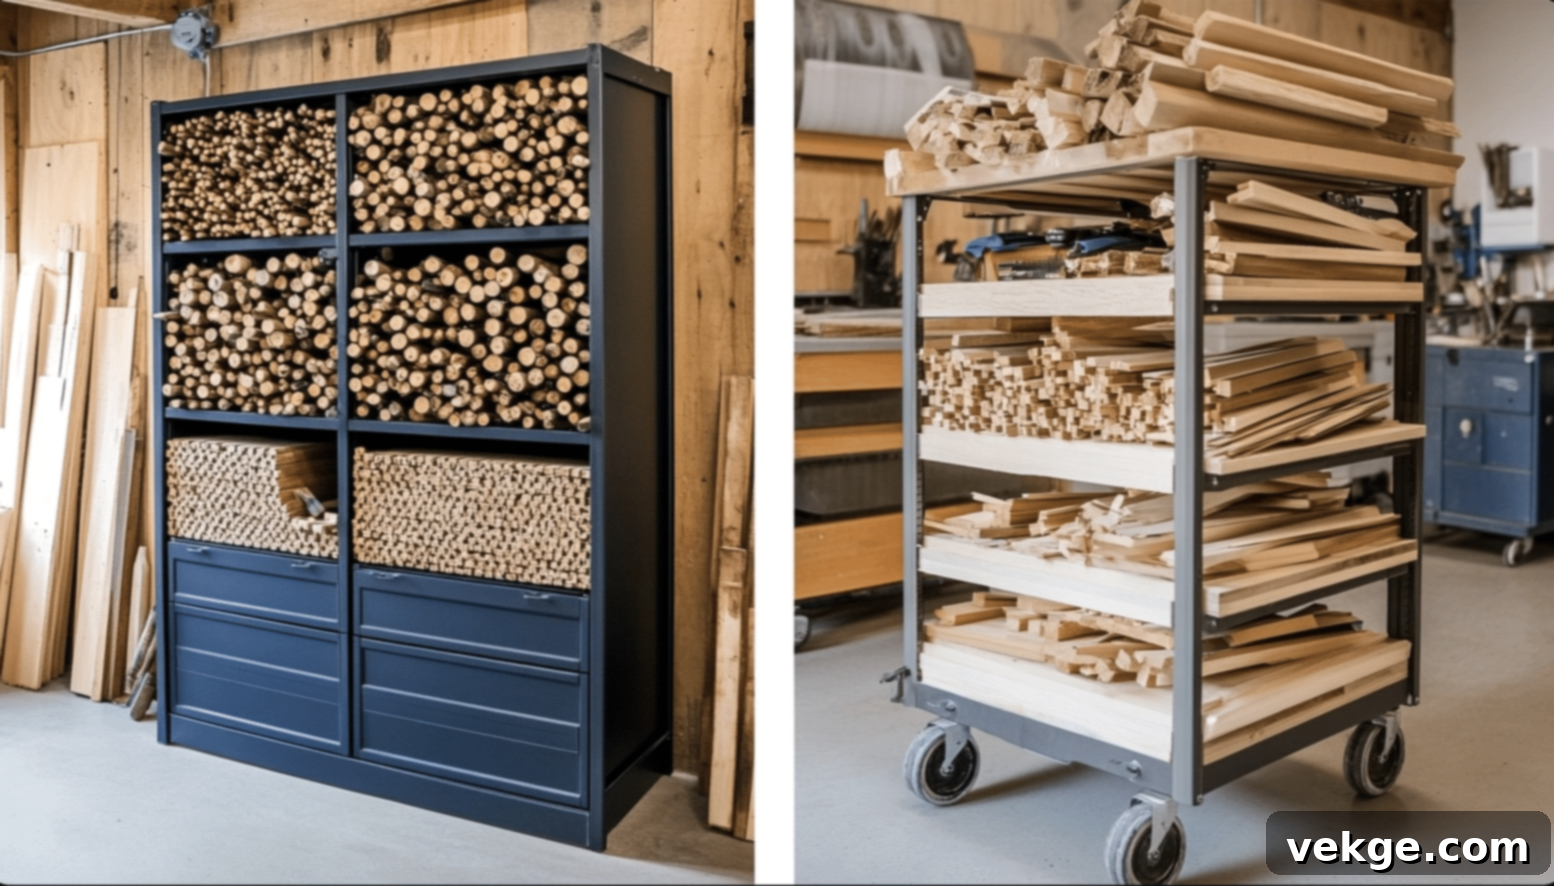
Beyond the DIY cart, a wide array of storage solutions can be tailored to your workshop’s unique characteristics and your personal working style.
1. Stationary vs. Mobile Storage Solutions
Choosing between stationary and mobile storage depends heavily on your workshop’s size, layout, and how you typically work.
- Stationary Storage Systems: These fixed installations offer superior stability and maximum capacity utilization. They are ideal for workshops with established workflows and dedicated zones for specific materials. Examples include built-in shelving units, wall-mounted lumber racks, or large, permanent bins. These systems often utilize wall space from floor to ceiling, freeing up valuable floor area and creating robust, long-term storage for heavier or less frequently moved items. They are excellent for organizing long boards, large sheet goods, or a substantial collection of various wood species.
- Mobile Storage Solutions: These offer unparalleled flexibility and convenience, particularly in smaller or multi-purpose workshops. Rolling carts, like the DIY one described above, and portable bins allow you to move materials exactly where they’re needed for a specific project, adapting effortlessly to different workspace configurations. They can be rolled out for use and then tucked away into a corner or under a workbench when not required, maximizing available floor space. Mobile solutions are perfect for frequently accessed scraps, project-specific material staging, or situations where your workshop layout changes often.
2. Vertical and Horizontal Storage Ideas
The orientation of your storage can significantly impact space efficiency and accessibility.
- Vertical Storage: This method excels at maximizing wall space utilization while keeping materials easily accessible. Wall-mounted racks with adjustable dividers are highly effective, accommodating various lengths and widths of scrap wood. Pegboard systems, combined with hooks and shelves, offer incredibly customizable storage options that can evolve with your needs, allowing you to hang smaller offcuts or tools alongside. Narrow, tall bins can also be used for vertical storage of shorter, odd-sized pieces.
- Horizontal Storage Solutions: These work exceptionally well for larger sheet goods (like plywood or MDF remnants) and longer, heavier pieces of dimensional lumber that might sag if stored vertically. Floor-based bins, stacking systems, or low-profile lumber racks can efficiently organize these materials, providing stability and easy access to frequently used pieces. Cantilevered wall-mounted racks are also a great option for horizontal storage, keeping long boards off the floor but still easily retrievable.
3. Creative and Space-Saving Designs
Innovation in storage can unlock surprising amounts of space.
- Overhead Storage Systems: These tap into often-overlooked space near the ceiling. Retractable pulley systems and ceiling-mounted racks can store longer pieces, sheet goods, or less frequently used materials safely out of the way, freeing up floor and wall space. Ensure these are securely anchored and rated for the weight they will hold.
- Fold-Away Storage Units: Provide flexible solutions for tight spaces. These systems, such as fold-down workbenches with integrated storage or collapsible bins, can be expanded for use during a project and then neatly tucked away to free up workspace when not needed.
- Under-Stair or Kick Plate Drawers: For workshops with stairs or built-in cabinets, these hidden drawers offer discreet storage for small, valuable offcuts.
4. Multi-Functional Storage Solutions
Integrating storage into existing workshop fixtures is a smart way to maximize space efficiency and workflow.
- Workbenches with Built-In Storage: A workbench that doubles as a storage unit, featuring drawers, shelves, or compartments beneath its surface, serves double duty, keeping tools and materials close to your primary work area.
- Mobile Bases with Integrated Storage: Transform stationary machines (like table saws or planers) into flexible solutions by adding mobile bases that also incorporate shelving or drawers for related accessories and scrap wood.
- Integration with Other Fixtures: Consider incorporating storage into other workshop elements like assembly tables, miter saw stations, or router tables. Shelves below a miter saw stand can hold cutoff blocks, while drawers in an assembly table can house small joinery offcuts. This approach helps maintain workshop flow while providing additional organization options.
Organizing and Maintaining Your Scrap Wood Inventory
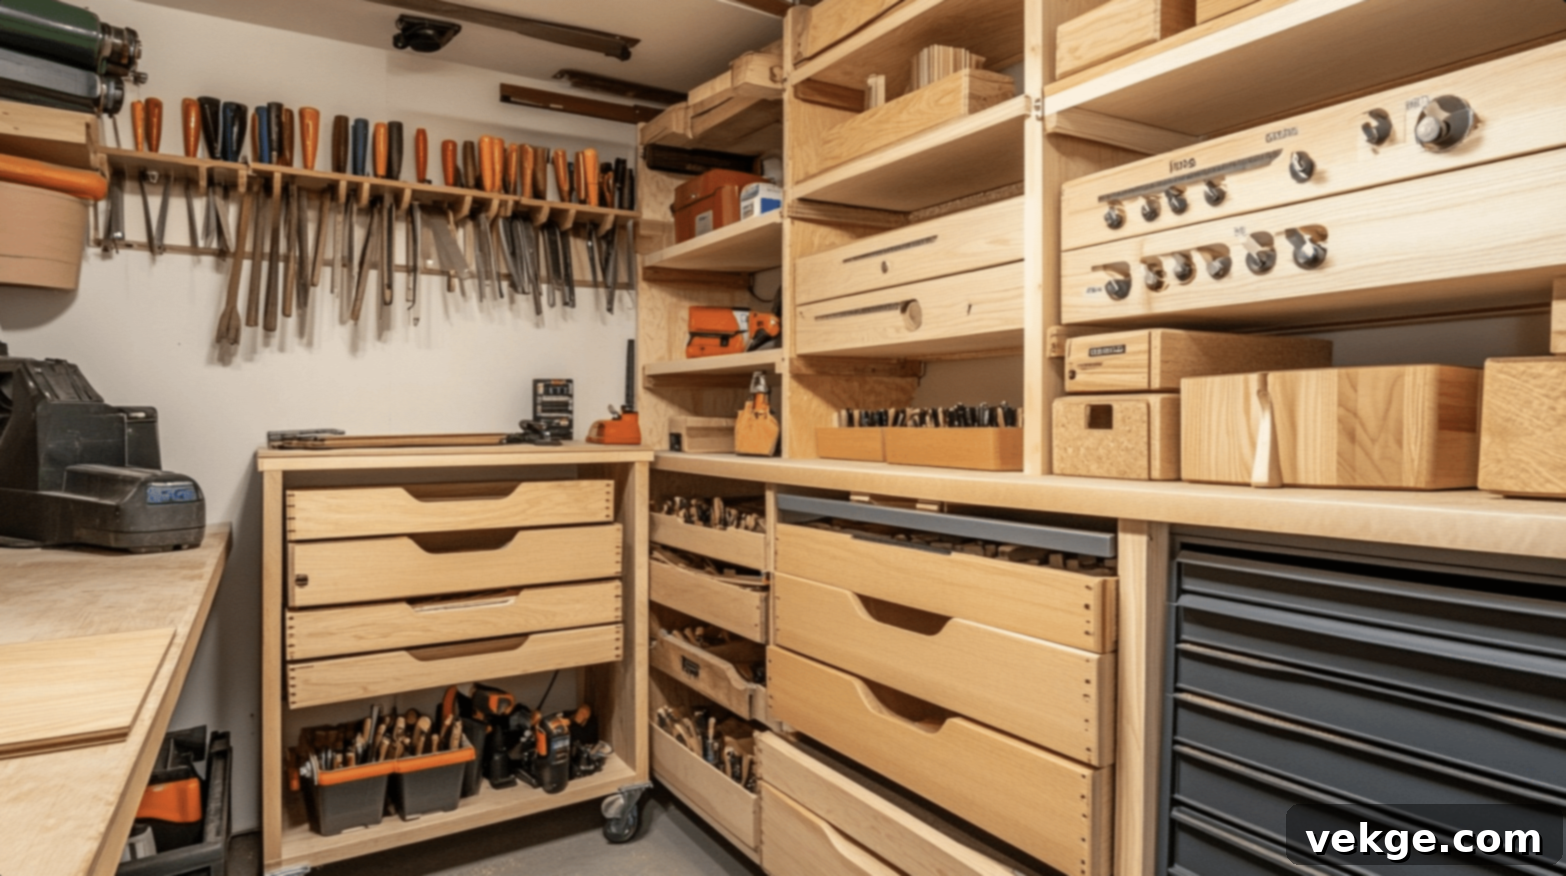
An effective storage system is only as good as the organization and maintenance practices that support it.
Effective Categorization Methods
A systematic approach to categorizing scrap wood makes retrieval and organization significantly easier, saving you time and frustration during projects.
- Material-Based Grouping: Create distinct zones for different materials. This could include categories like hardwoods (oak, maple, cherry), softwoods (pine, spruce, cedar), plywood scraps (various thicknesses), MDF/particleboard, exotic woods, and specialty materials (veneer, turning blanks). This natural grouping helps you quickly locate the right piece for your next project.
- Size-Based Organization: Within each material category, consider implementing a size-based organization system. Larger panels and longboards can be stored vertically in racks, while medium-sized pieces might work better in designated bins or on shelves. Smaller, often project-specific offcuts can be kept in labeled drawers or clear containers.
- Labeling: Clear and consistent labeling is crucial. Use permanent markers, labels, or even color-coding to identify the species, dimensions (length, width, thickness), and perhaps even the original project the scrap came from. This provides immediate information without needing to pull out and measure each piece.
Inventory Management Tools
While a physical system is essential, digital tools can further streamline your scrap wood inventory management process, turning your collection into a true asset.
- Simple Spreadsheet Tracking: A basic spreadsheet (using Excel, Google Sheets, etc.) can help monitor your available materials, their precise dimensions, and potential project applications. You can include columns for species, dimensions (L x W x T), quantity, location in your workshop, and notes.
- Mobile Apps: Various workshop organization mobile apps offer features like photo documentation, quick search capabilities, and digital labels that can be linked to physical QR codes. Apps like “My Woodshop” or general inventory apps can be adapted for this purpose.
- Regular Updates: The effectiveness of any tracking system hinges on its accuracy. Establish a routine for regular inventory updates. Document new additions immediately after a project, and just as importantly, remove used pieces from your inventory list to maintain accuracy and prevent you from searching for wood that’s no longer there.
Best Practices for Maintenance
A well-organized system requires ongoing effort to remain effective.
- Routine Schedule: Establish a routine maintenance schedule for your storage system. Monthly or quarterly reviews help identify unused materials, purge unnecessary scraps, and reorganize spaces that may have become cluttered during busy project periods.
- “One-In-One-Out” Rule: To prevent overflow and maintain manageable inventory levels, consider implementing a “one-in-one-out” rule. When adding a new scrap piece, evaluate if an existing piece of similar size or species can be repurposed, discarded, or donated.
- Cleanliness: Regularly clean your storage areas to remove wood dust and debris, which not only helps with fire prevention but also keeps your wood scraps free from grime and makes the area more pleasant to work in.
Safety Considerations in Scrap Wood Storage

Safety should always be a paramount concern in any workshop, and scrap wood storage is no exception. Improper storage can lead to serious hazards.
1. Proper Weight Distribution and Structural Integrity
Wood is heavy, and accumulated scrap wood can exert substantial weight on storage units. Therefore, structural integrity is non-negotiable.
- Anchoring: Ensure all wall-mounted systems (racks, shelves) are properly anchored directly into wall studs. Use heavy-duty fasteners appropriate for the anticipated load. Do not rely solely on drywall anchors for significant weight.
- Support Structures: Floor-based units, especially those holding large quantities of heavy hardwoods, must have adequate internal support structures to prevent bowing, collapse, or instability. Reinforce shelves or bins that will bear heavy loads.
- Regular Inspections: Implement a routine inspection schedule for all storage components. Check for loose fasteners, cracked wood, sagging shelves, or any signs of structural weakness, especially under heavy load. Address any issues promptly to prevent potential hazards.
2. Preventing Fire Hazards
Wood is flammable, and proper storage is key to mitigating fire risks.
- Clearance: Maintain proper spacing between storage units and any heat sources, including electrical equipment (motors, power outlets), heating systems, and appliances. Keep pathways clear around storage areas.
- Ventilation: Good airflow around stored materials helps prevent moisture accumulation, which can lead to mold, rot, and potentially reduce the wood’s fire resistance. Avoid stacking wood directly against walls without any air gap.
- Fire Safety Equipment: Install smoke detectors near storage areas and throughout your workshop. Keep appropriate fire extinguishers (ABC type is generally recommended for workshops) readily accessible and ensure you know how to use them.
- Dust Management: Regular cleaning to remove wood dust and debris from floors and storage surfaces is crucial. Wood dust is highly combustible and can fuel a fire rapidly. Good dust collection systems are essential.
3. Handling and Storing Treated Wood
Treated lumber (e.g., pressure-treated wood) contains chemicals that require special handling and storage.
- Separate Storage: Store pressure-treated materials separately from regular scrap wood to prevent chemical transfer and avoid accidental use in projects where it’s not suitable (e.g., indoor furniture, cutting boards).
- Ventilation: Ensure adequate ventilation around treated wood storage areas, as these materials can off-gas chemicals, especially when new.
- PPE: Always use appropriate personal protective equipment (gloves, dust mask, eye protection) when handling, cutting, or sanding treated materials to minimize exposure to chemicals and sawdust.
- Disposal: Be aware of local regulations for disposing of treated wood scraps, as they may not be suitable for regular waste streams or burning.
4. Pest Prevention
Protect your valuable wood scraps from pest infestation, which can lead to damage and spread to other areas of your workshop.
- Elevated Storage: High storage solutions keep materials off the floor, reducing the risk of moisture damage (which attracts pests) and limiting direct access for rodents and insects.
- Regular Inspections: Routinely inspect your wood for signs of pest activity (e.g., sawdust trails, boreholes, droppings). Early detection is key to prevention.
- Sealants and Deterrents: The application of appropriate wood sealants or finishes can provide an additional barrier against insect entry. In storage areas, consider using cedar blocks, diatomaceous earth, or other natural pest deterrents.
- Moisture Control: Maintain a consistent, low humidity level in your workshop to deter many wood-loving pests and fungi.
Maximizing Small Workshop Spaces

Small workshops demand creative and ingenious storage solutions to prevent clutter and maintain functionality.
Utilizing Underused Areas
Every inch counts in a compact workshop. Look for and exploit often-overlooked spaces:
- Under Workbenches: Utilize pull-out bins, sliding shelves, or custom-built drawers to transform the space beneath your workbenches into organized storage for small to medium-sized offcuts.
- Above Doors and Windows: The areas above doorframes and windows offer excellent opportunities for additional storage capacity. Install high, sturdy shelves or cubbies for less frequently accessed or seasonal scrap wood.
- Corner Spaces: Corners are often awkward and underutilized. Custom-built corner shelving, rotating corner units, or triangular bins can maximize these traditionally difficult-to-use spaces, turning dead zones into valuable storage.
- Kick Plate Drawers: If you have built-in cabinets or benches, consider adding drawers to the kick plate area for very small offcuts or project-specific pieces.
Space-Efficient Design Tips
Smart design choices can make a significant difference in small workshops.
- Modular Storage Solutions: Implement modular systems that can adapt to changing needs. Stackable bins, interchangeable shelves, or storage panels mounted on wall tracks (e.g., French cleat systems) provide flexibility and access while maintaining a small footprint.
- Fold-Down Workstations: Integrate fold-down workstations or outfeed tables with built-in storage. These can be deployed for specific tasks and then folded away to free up floor space for other activities.
- Multi-Level Vertical Systems: Take maximum advantage of vertical space. Tiered shelving, tall narrow cabinets, or sliding storage panels that reveal layers of material can optimize storage density without expanding horizontally.
- Nesting Mobile Units: Design mobile storage units that can nest together when not in use. This offers the flexibility of mobility without permanently consuming large amounts of floor space.
Improving Workshop Efficiency
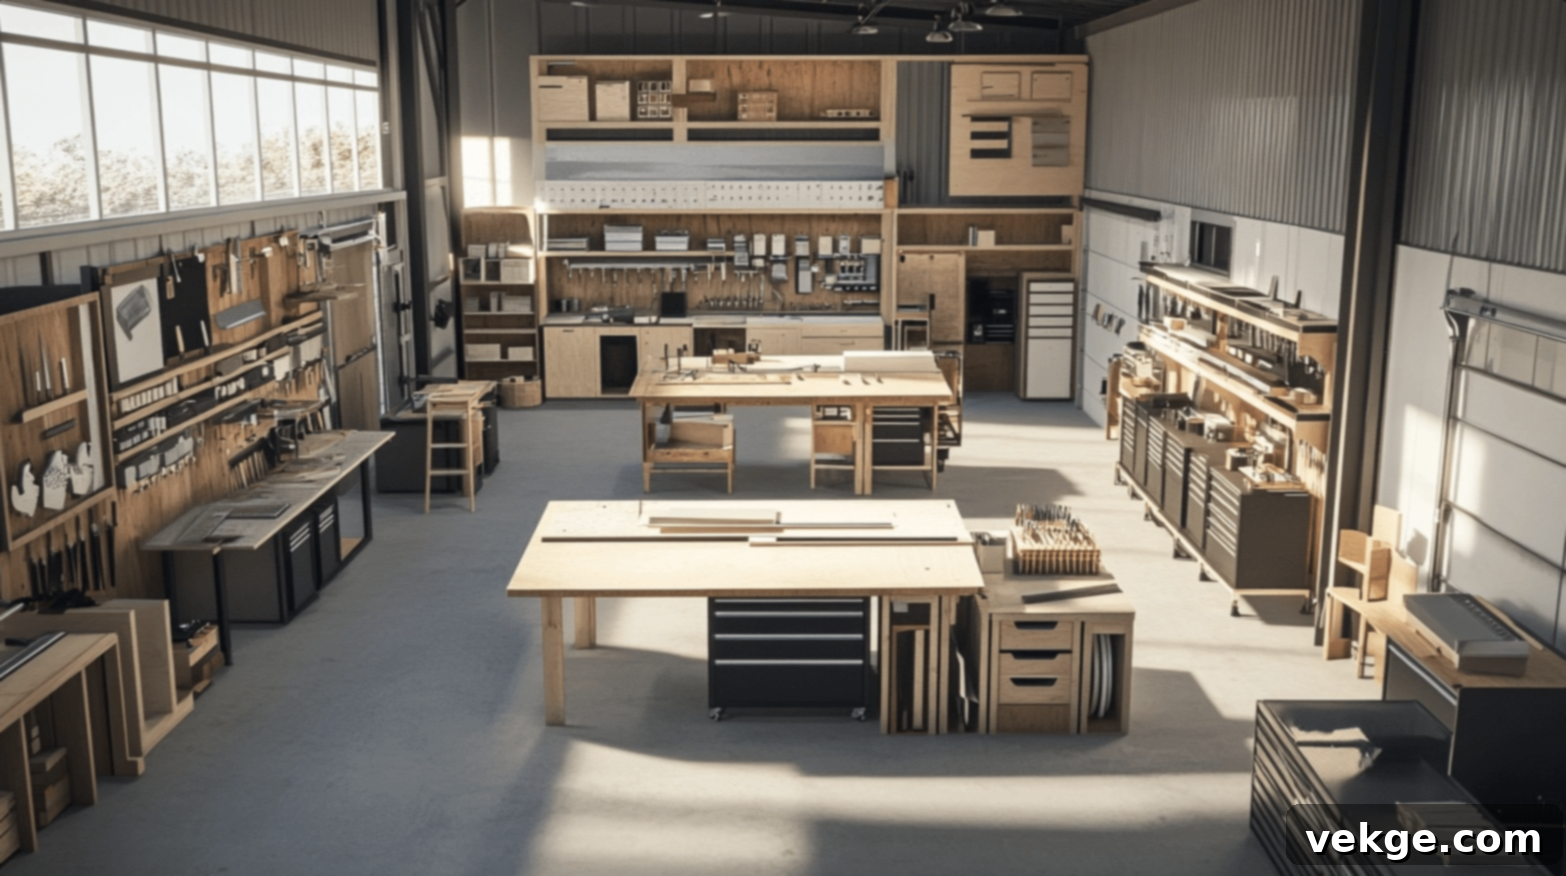
An organized scrap wood system isn’t just about neatness; it’s a direct pathway to a more efficient and enjoyable woodworking experience.
Workflow Optimization
Strategic placement of your storage systems can dramatically improve your workshop’s workflow.
- Point of Use Storage: Arrange your storage systems to support natural workflow patterns. Position frequently used materials within easy reach of primary work areas. For instance, small hardwood offcuts often used for jigs or accents should be near your workbench, while plywood scraps should be convenient to your table saw.
- Dedicated Zones: Create dedicated zones for different activities, with appropriate storage solutions supporting each area. A “cutting zone” might have vertical storage for sheet goods and a mobile cart for cutoffs, while an “assembly zone” could have bins for small components.
- Waste Management Integration: Consider the relationship between material storage and waste management. Positioning scrap storage bins or a dedicated “cut-off” bin near cutting stations reduces walking distance, minimizes mess, and improves overall efficiency. As noted, AI is becoming a powerful tool for assessing workshop waste, with many waste management companies already utilizing it to enhance sorting systems and improve recycling efficiency. Applying similar principles to your personal workshop can yield significant benefits.
Blending Tool and Material Storage
Combining tool storage with material organization is an advanced strategy for improved workflow, ensuring everything needed for a task is immediately available.
- Integrated Units: Design storage units that accommodate both tools and related materials. For example, a cabinet for router bits could also have shelves for small routing jigs or wood blanks suitable for routing.
- Modular Systems: Implement modular systems that can adapt to changing tool collections and material needs. A French cleat wall allows you to hang frequently used hand tools directly above shelves holding relevant scrap wood.
- Project-Specific Mobile Storage: Create mobile storage units that keep tools and materials together for specific projects. A cart dedicated to turning, for instance, might hold turning tools, chucks, and a selection of turning blanks. This reduces setup time and ensures you have all necessary items in one place.
Expenses and Cost Considerations
Investing in a functional scrap wood storage system can range from minimal to substantial, depending on your approach and materials.
| CATEGORY | PRICE RANGE | DETAILS |
|---|---|---|
| 1. Basic DIY Storage Solutions | $50-$150 | This budget allows for fundamental, functional storage. Expect to use readily available materials like 2x4s ($4-$6 each), common plywood sheets ($30-$45 per 4×8 sheet for utility grade), basic hardware such as screws and connectors ($20-$50 additional), and simple caster wheels ($8-$15 each for a set of four). This category covers projects like simple wall racks, basic mobile carts, or stackable bins made from construction-grade lumber. |
| 2. Mid-Range Storage Options | $150-$500 | Stepping up, this range allows for more durable materials and refined designs. You can opt for heavy-duty locking casters ($20-$30 each) for enhanced mobility and stability, high-grade plywood ($60-$80 per sheet for cabinet grade), or quality hardwood for structural elements ($4-$8 per board foot for common species like oak or maple). Additional features might include drawer slides ($15-$30 per pair), robust brackets ($8-$15 each), professional-grade hardware ($50-$100), and finishing materials (paints, sealants – $30-$50) for aesthetics and longevity. This tier supports more complex mobile carts with drawers, custom-built shelving units, or integrated workbench storage. |
| 3. Premium Storage Systems | $500-$1,500+ | At the higher end, this budget accommodates industrial-grade quality, advanced features, and custom solutions. Expect to invest in industrial-grade casters ($40-$60 each), premium hardwoods for a refined look and exceptional durability ($200-$400 for a significant quantity), professional-grade drawer systems ($100-$200 per drawer for smooth operation and high load capacity), or even automated lift systems ($200-$500) for overhead storage of large items. Custom hardware, specialized accessories, and professional design services can add another $150-$300+. This category is for extensive, highly integrated, and bespoke workshop organization systems designed for maximum efficiency and aesthetic appeal. |
Money-Saving Strategies
Achieving an organized workshop doesn’t necessarily require breaking the bank. Significant savings can be realized through careful planning and smart material sourcing.
- Material Sourcing: Watch for lumber yard sales, where 20-40% savings are common, especially on sheet goods or project offcuts. Building during off-peak seasons (typically winter) often yields better material prices due to lower demand. Also, consider repurposing materials: old furniture, pallets (if safely sourced and treated), or even robust cardboard boxes can be adapted for storage.
- Phased Implementation: Instead of building your entire dream system at once, consider a phased implementation to spread costs over time. Start with essential, high-impact storage components, such as a basic mobile cart ($75-$125) or a fundamental wall rack ($100-$200), and expand as your budget allows and your needs evolve. Many woodworkers successfully begin with these basic solutions and gradually add specialized storage units as specific requirements become clearer.
- DIY Everything: The more you build yourself, the more you save on labor costs. Even if you’re buying materials, the DIY approach is inherently more cost-effective than purchasing pre-made solutions.
- Community Resources: Check local woodworking forums or community groups for free or low-cost scrap wood donations, which can significantly reduce your material expenses for storage projects.
Conclusion
Effective scrap wood storage is not merely a convenience; it is a fundamental pillar of maintaining a productive, safe, and enjoyable workshop environment. By embracing thoughtful organization, you transform potential clutter into a valuable resource, ready to be repurposed for your next creative endeavor. Implementing the organizational strategies and diverse solutions discussed in this guide can help you create a more efficient workspace that supports and enhances your woodworking goals.
Take the first vital step today by evaluating your current storage needs and beginning with simple, impactful improvements. Remember that the perfect storage system is not static; it evolves dynamically with your workshop, your project types, and your personal working style. Stay flexible in your approach, and be willing to adapt your storage solutions as your needs change and you discover new, more efficient ways of working. Embrace the journey of continuous improvement, and don’t hesitate to share your successful storage ideas and learn from the collective experience of the woodworking community. An organized workshop is a happy workshop, fostering creativity and maximizing your time at the bench.
Frequently Asked Questions (FAQs)
How Do You Best Store Scrap Wood?
The best way to store scrap wood is by organizing it systematically according to type (hardwood, softwood, plywood, etc.) and size (long boards, medium offcuts, small pieces). Utilize vertical racks for longer pieces, wall-mounted systems for various sizes, and mobile carts or clearly labeled bins for smaller, frequently used scraps. Ensure proper ventilation to prevent moisture damage, and keep high-traffic pieces easily accessible to optimize workflow.
How Do You Get Rid Of A Lot Of Scrap Wood?
To responsibly get rid of a lot of scrap wood, consider several options. First, assess if any pieces are usable for smaller projects, jigs, or kindling. You can then donate usable pieces to local schools, community workshops, or fellow woodworkers. Large quantities of unusable wood can be taken to recycling centers that accept wood waste, composted (if untreated), or disposed of through municipal waste services, ensuring you comply with local regulations. Avoid burning treated wood due to toxic fumes.
How Do You Store Large Amounts Of Wood?
Storing large amounts of wood requires robust solutions. Utilize heavy-duty horizontal racks for dimensional lumber and sheet goods, ensuring they are well-supported to prevent sagging. Wall-mounted cantilever racks are excellent for maximizing vertical space for longer boards. Overhead storage systems can store less frequently accessed or very long pieces out of the way. Always prioritize dry, well-ventilated areas to prevent warping and pest infestations. For very large quantities, consider a dedicated lumber shed or a lean-to structure.
