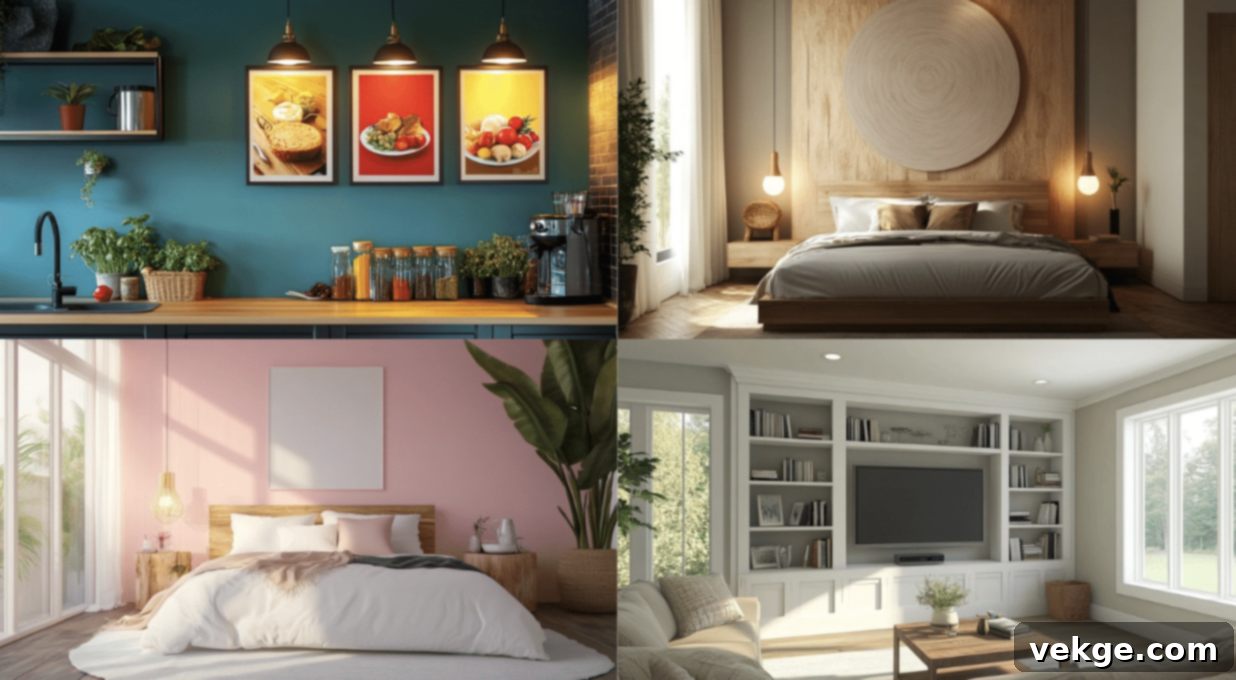
Transform Your Home: 24 DIY Accent Wall Ideas for Every Room & Budget
Plain walls can often leave a room feeling dull, uninspired, and lacking character. Many homeowners struggle with the challenge of infusing personality into their living spaces without breaking the bank. The good news is that you don’t need professional help or an extensive budget to achieve a stunning transformation. With a few basic tools and readily available materials, you can create captivating accent walls that elevate the aesthetic of any room in your home.
This comprehensive guide will walk you through 24 ingenious and simple DIY accent wall ideas, designed to help you turn any boring wall into a beautiful focal point. From imaginative paint techniques to rustic wood patterns and elegant textures, these projects are suitable for every skill level and budget. Get ready to unlock your creativity and give your home a fresh, personalized look!
Inside this guide, you will discover:
- A diverse collection of DIY accent wall ideas for various rooms and styles.
- Detailed lists of necessary materials and tools to get your project started.
- Expert tips to ensure a flawless finish for each unique design.
- Budget-friendly options that cater to different financial plans, making stylish home decor accessible to everyone.
Why Choose a DIY Accent Wall for Your Home?
A thoughtfully designed DIY accent wall can dramatically alter the ambiance and visual appeal of your room. Beyond just aesthetics, there are several compelling reasons to consider embarking on this creative home improvement project:
- Cost-Effective Transformation: Professional wall treatments, intricate wallpapers, or custom installations can be prohibitively expensive, often costing hundreds or even thousands of dollars. By opting for a DIY approach, you gain complete control over your budget, allowing you to select materials that fit your financial plan and perform the labor yourself, saving a significant amount.
- Infuse Personal Style: When you take on the task of creating an accent wall yourself, the final result becomes a genuine reflection of your unique taste and personality. Every brushstroke, every carefully placed panel, and every chosen color tells a part of your story, making your home feel truly yours and unlike any other.
- Quick Room Updates: Unlike major renovations that can drag on for weeks or months, most DIY accent wall projects can be completed efficiently, often within a single weekend. This makes them an ideal solution for a fast and impactful way to refresh any room, giving it an instant facelift and renewed energy.
- Flexibility and Adaptability: One of the greatest advantages of DIY accent walls over permanent renovations is their flexibility. Should your style evolve or you desire a new look, many DIY accent walls can be easily changed or updated without extensive effort or cost, allowing you to experiment with different trends and aesthetics over time.
- Enhanced Home Appeal: A well-executed accent wall can significantly boost your home’s visual appeal, especially if you’re planning to sell. It adds a touch of sophistication and modern design, making your property more attractive and memorable to potential buyers, potentially even increasing its market value.
- Valuable Learning Opportunity: Each DIY project presents a chance to learn new skills, whether it’s precision painting, carpentry, or tiling. These newly acquired abilities are not only satisfying to master but also empower you for future home updates and other creative endeavors around your house.
Choosing the Right Wall for Your Accent Design
Not every wall is an ideal candidate for an accent design. Selecting the perfect wall is crucial for maximizing the impact and ensuring your project enhances the room’s overall harmony. Here’s a strategic approach to picking the best wall:
- **Initial Visual Impact:** Identify the first wall that naturally catches your eye when you step into the room. This wall typically serves as a natural focal point and is perfect for an accent treatment.
- **Uninterrupted Surfaces:** Look for walls that are largely free of architectural interruptions like numerous doors, windows, or large built-ins. A solid, expansive wall provides the best canvas for your design.
- **Natural Attention Grabbers:** Some walls inherently draw attention, perhaps due to their central location or connection to other key features. Capitalize on these existing natural focal points.
- **Behind Key Furniture:** Consider walls positioned behind significant furniture pieces, such as your bed in a bedroom, a sofa in the living room, or a dining table. This creates a cohesive design statement and anchors the furniture.
Important Factors to Consider Before Selecting Your Accent Wall
Lighting Matters
The way light interacts with your accent wall can profoundly affect its appearance and mood. Understanding the lighting conditions is paramount:
- **Daylight Observation:** Spend time observing how natural sunlight moves across your walls throughout the day. A wall that receives direct sunlight might appear different from one in constant shadow.
- **Natural Light Benefits:** Note which walls receive the most natural light. Brightly lit walls can make colors pop, while more subdued lighting might enhance texture.
- **Evening Illumination:** Check how your evening artificial lighting affects the wall. Different light temperatures (warm vs. cool) can alter color perception.
- **Shadow Play:** Consider how shadows fall throughout the day, especially if your design involves textures or patterns. Shadows can add depth and drama to your accent wall.
Room Purpose
The function of the room should guide your accent wall choice, aligning the design with the space’s intended use and atmosphere:
- Living Rooms: In a living room, the wall behind the television, a fireplace, or a prominent sofa are excellent candidates. These areas naturally draw attention and can anchor the room’s primary seating arrangement.
- Bedrooms: The wall directly behind your bed is almost always the best choice for an accent wall in a bedroom. It frames the headboard, creates a cozy backdrop, and enhances the room’s serene feel.
- Kitchen: In kitchens, consider the wall space between upper and lower cabinets, or a dedicated dining nook wall. A backsplash accent wall can also be a stylish option.
- Home Office: Choose the wall you directly face while working. This allows you to enjoy your creative design while keeping your workspace visually inspiring and personal.
- Dining Room: Select the wall that faces the majority of the dining chairs. This ensures everyone at the table can appreciate the accent, making it a central feature of your dining experience.
Wall Size
Accurate measurements and an understanding of your wall’s dimensions are critical for a successful project:
- **Precise Measurements:** Carefully measure both the height and width of the chosen wall. This data is essential for calculating material quantities and planning your design layout.
- **Design Compatibility:** Double-check if your envisioned accent wall design is well-suited for the wall’s specific dimensions. Some patterns or textures might work better on larger or smaller surfaces.
- **Accessibility Check:** Ensure you can easily reach all parts of the wall during the application process. This prevents frustration and ensures a consistent finish.
- **Tools for Height:** If your wall is particularly tall, consider whether you will need a stable ladder, scaffolding, or other specialized tools to safely and effectively work on higher sections.
Essential Materials and Tools for Your DIY Accent Wall Project
Before diving into your chosen accent wall design, gather all the necessary materials and tools. Having everything organized will make the process smoother and more enjoyable.
| Materials | Tools |
|---|---|
| Paint (in your chosen colors and finishes) | Paint rollers and various brushes (for different applications) |
| Painter’s tape (for clean lines and protecting edges) | Measuring tape (for accuracy) |
| Wood panels or reclaimed planks (for wood-based designs) | Level (to ensure straight lines and even installations) |
| Stencils (for intricate patterns or consistent motifs) | Ladder or sturdy step stool (for reaching high areas safely) |
| Wallpaper (if opting for patterned or textured coverings) | Utility knife or box cutter (for precise cutting of materials) |
| Decorative tiles (e.g., ceramic, subway, mosaic) | Tile cutter or wet saw (essential for precise tile cuts) |
| Adhesive (specific to tiles or wallpaper application) | Hammer and nails or brad nailer (for securing wood elements) |
| Grout (for finishing tiled surfaces) | Caulk gun and caulk (for filling gaps and sealing edges) |
| Brick veneer (for creating a faux brick look) | Power drill or screwdriver (for various fastening tasks) |
| Shelving materials (for built-in units or floating shelves) | Sandpaper or sanding block (for smoothing surfaces and edges) |
Inspiring DIY Accent Wall Ideas for the Bedroom
1. Faux Leather Panel Wall
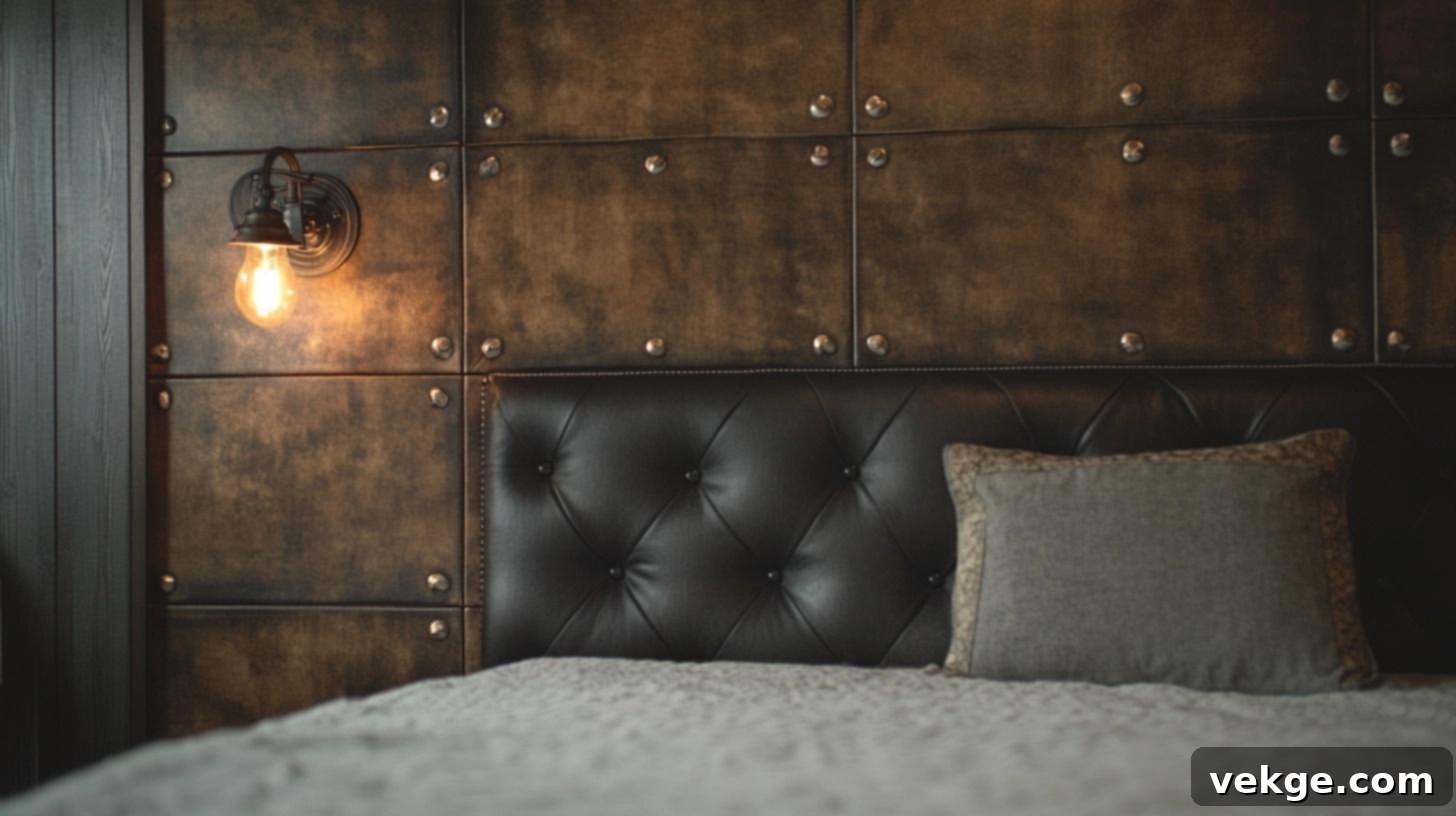
Elevate your bedroom’s sophistication with a faux leather panel accent wall. This luxurious option adds a touch of warmth, texture, and high-end design, creating a rich and inviting atmosphere behind your bed. It’s a bold statement that offers both visual interest and a unique tactile experience.
- DIY Difficulty Level: Moderate. Achieving a seamless, professional look requires careful planning, precise measurements, and patient installation of each panel.
- Budget Range: $80-200. Costs depend on the quality of faux leather and the size of the wall.
- Lighting Suggestions: Use warm, soft lighting, such as bedside lamps with fabric shades or dimmable wall sconces, to enhance the texture and deep, rich tones of the leather-like material, creating a cozy ambiance.
For more details on installing a similar design, check the complete guide on Milan Jara.
2. Floral Mural Wall
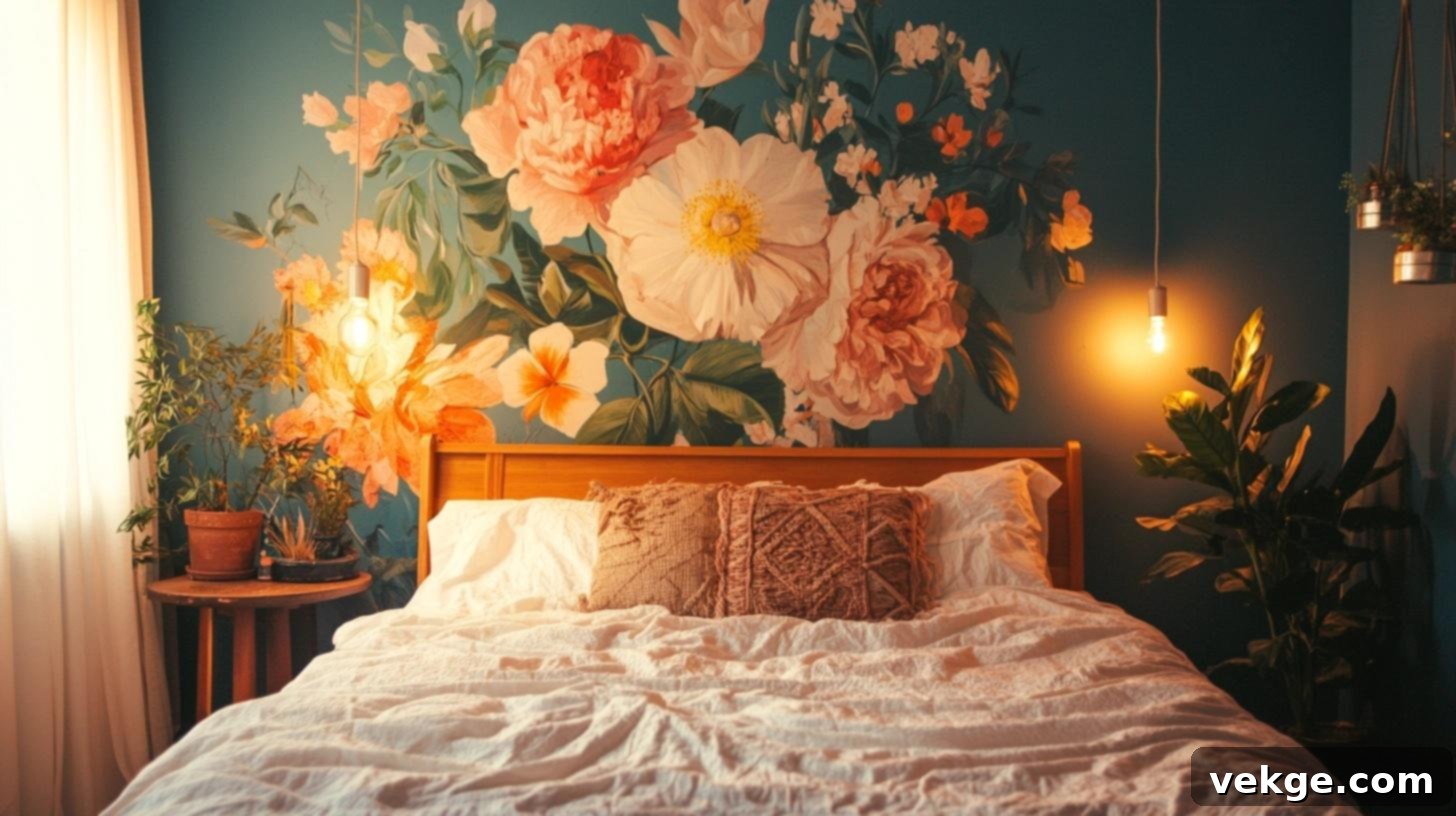
Bring the beauty of nature indoors with a stunning floral mural wall. This artistic approach allows for immense creativity, transforming a plain wall into a vibrant garden scene. Whether hand-painted or stenciled, a floral mural adds a soft, organic touch and a sense of tranquility to your bedroom.
- DIY Difficulty Level: Moderate. Artistic skill is beneficial for freehand painting, but stencils can simplify the process for those less confident in their drawing abilities.
- Budget Range: $30-80. This primarily covers the cost of paints and brushes or stencils.
- Lighting Suggestions: Opt for abundant natural lighting during the day to showcase the intricate details and colors of the mural. In the evening, use soft yellow or warm white lights to bring out the artwork’s depth and create a calming, dreamlike effect.
For more details on creating an easy floral mural, check the complete guide on addicted2decorating.
3. Mosaic Tile Accent Wall
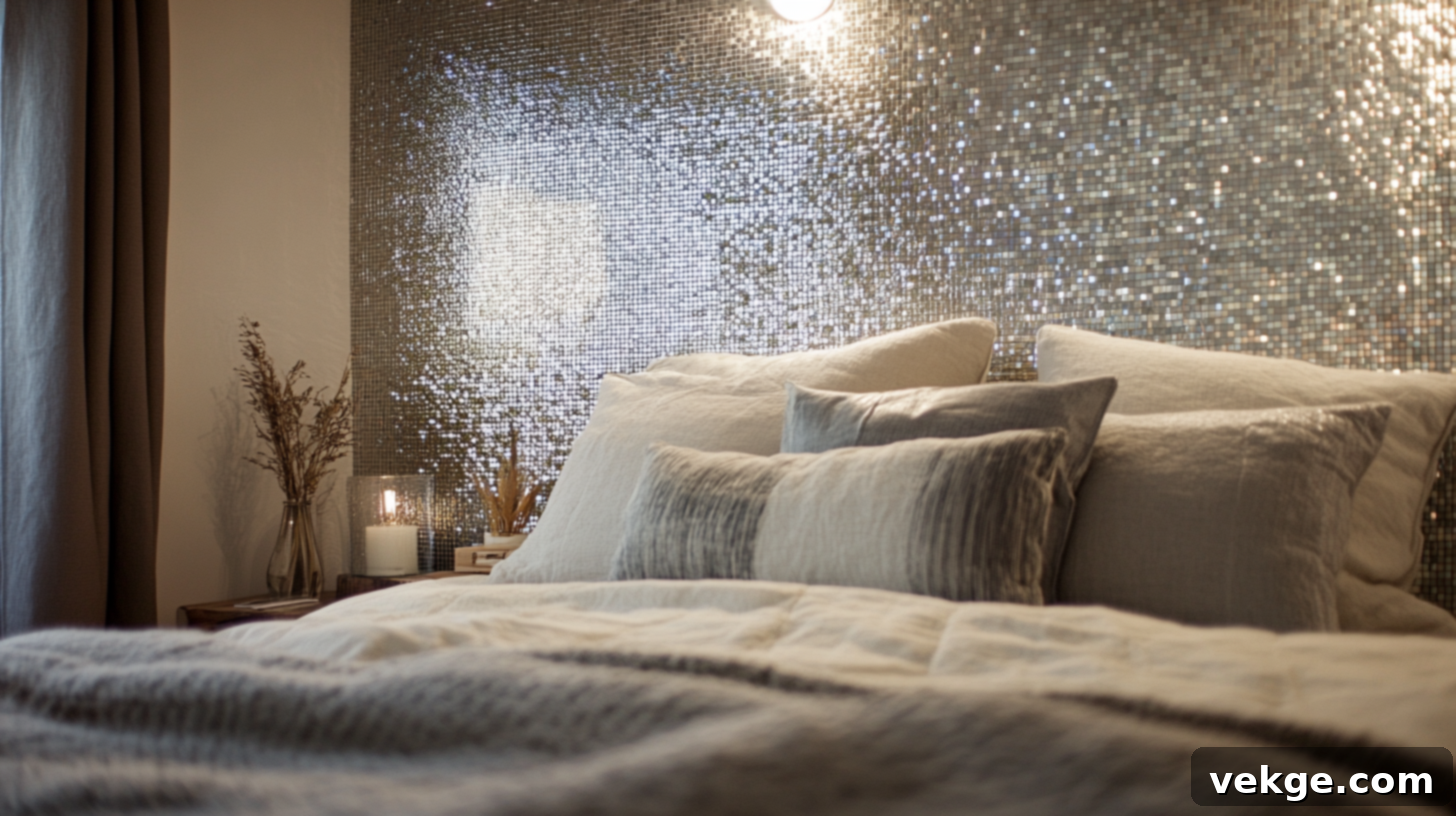
Introduce a touch of artistic flair and unique texture with a mosaic tile accent wall. This option allows for personalized patterns and color combinations, reflecting light in captivating ways. It’s a statement piece that adds both visual depth and an interesting tactile element to your bedroom decor.
- DIY Difficulty Level: Advanced. This project requires meticulous planning, precise tile cutting and placement, and careful grouting to achieve a professional and durable finish.
- Budget Range: $100-300. Costs vary greatly depending on the type and quantity of mosaic tiles chosen.
- Lighting Suggestions: Employ recessed lighting or targeted spotlights to make the individual tiles sparkle and to highlight the intricate patterns and textures within the mosaic design.
4. Paint an Accent Wall Soft Pink
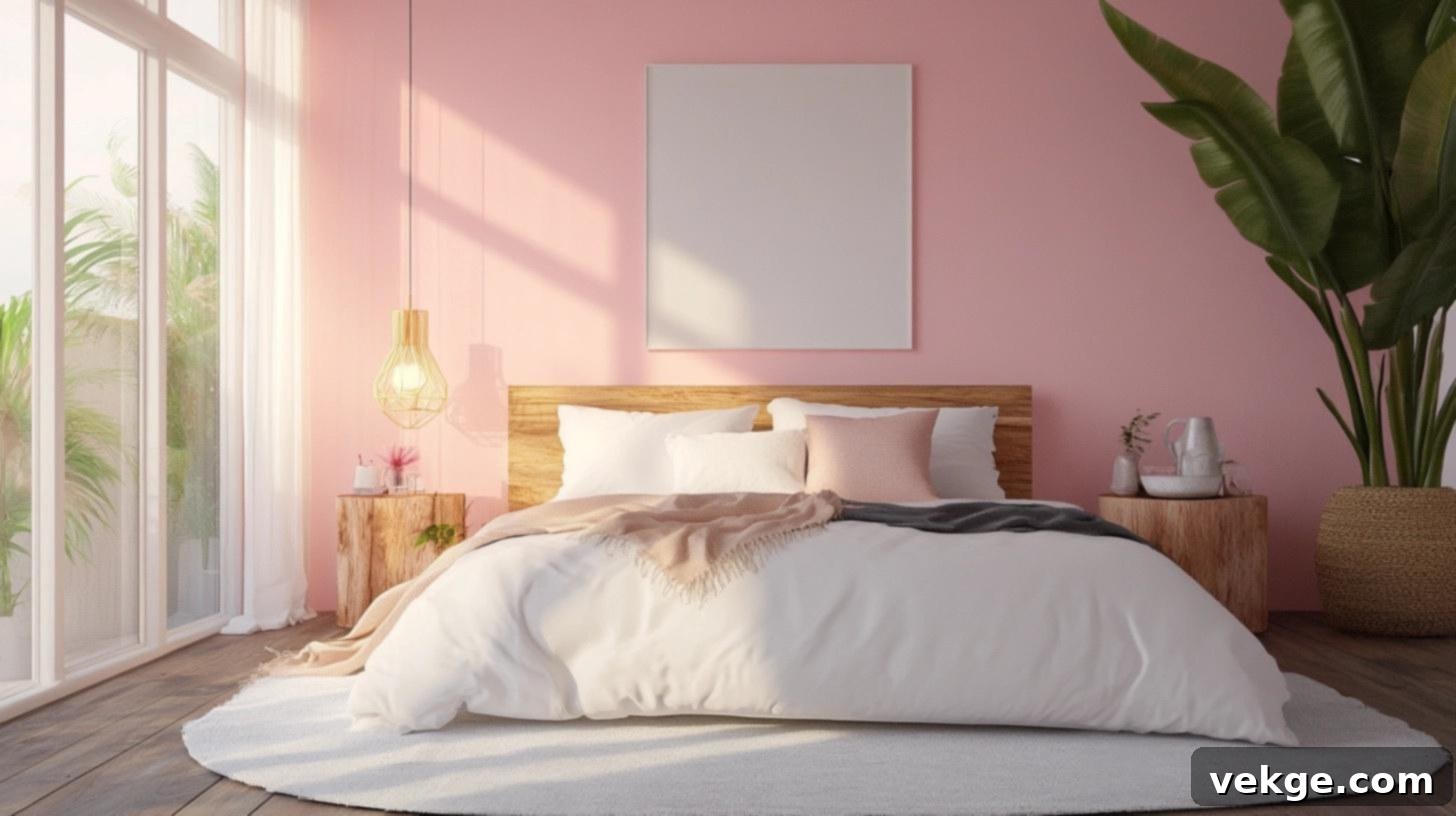
For a subtle yet impactful change, paint one wall a soft pink hue. This gentle color can instantly make a bedroom feel warmer, more inviting, and incredibly calming. It’s a simple yet effective way to add a touch of color and sophistication without overwhelming the space.
- DIY Difficulty Level: Easy. This project requires only basic painting skills, including proper surface preparation and consistent paint application.
- Budget Range: $20-50. The main cost is a can of quality interior paint.
- Lighting Suggestions: Use soft white or warm yellow lighting to beautifully enhance the pink tones, creating a tranquil and serene atmosphere perfect for relaxation.
For more details on painting an accent wall quickly, check the complete guide on 11magnolialane.com.
5. Create Pattern with Tape
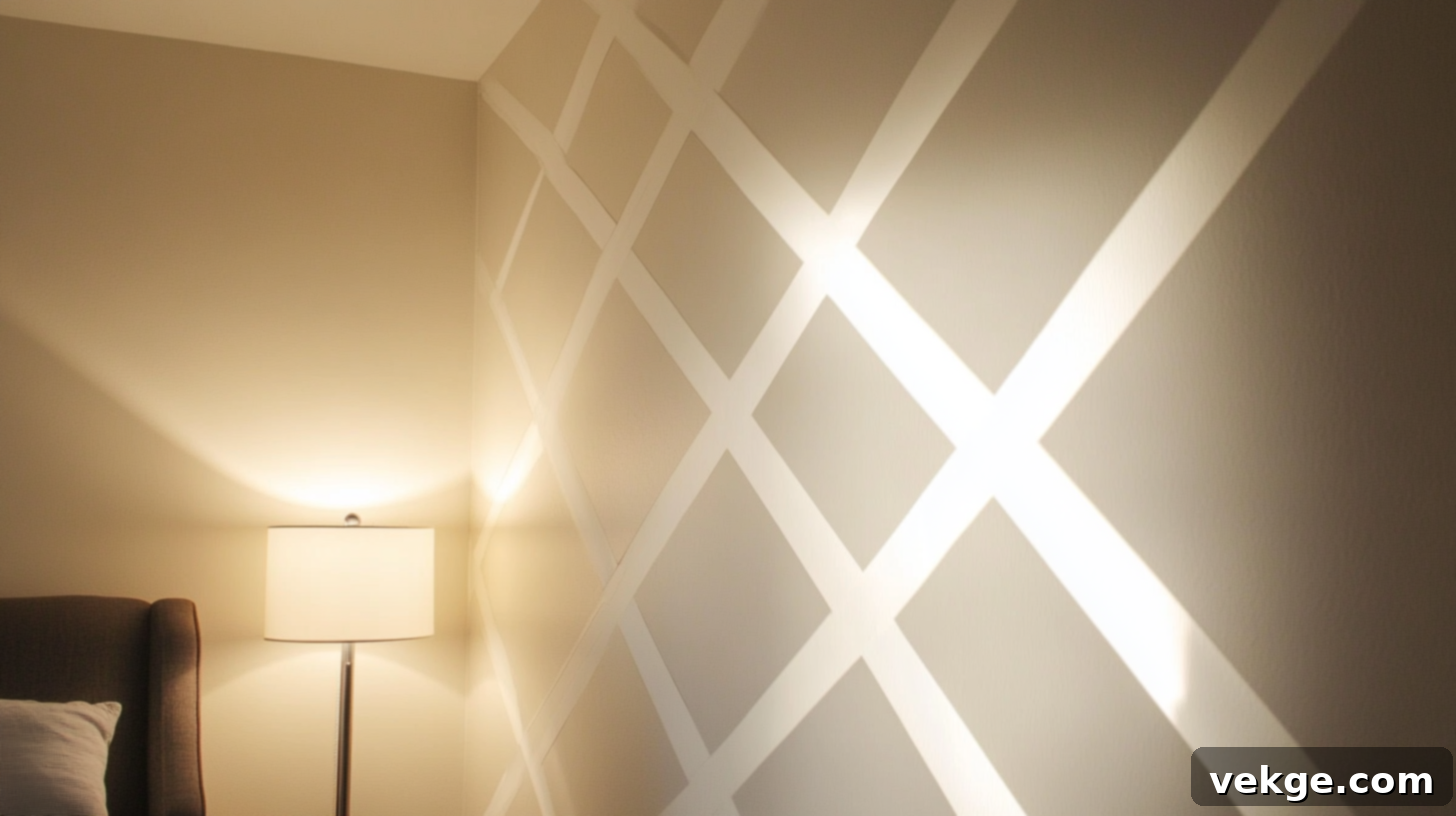
Unleash your inner artist by creating dynamic geometric patterns using painter’s tape. This method allows for endless design possibilities, from simple stripes to intricate chevron or diamond shapes. It’s a budget-friendly way to add modern artistry and visual interest to a plain wall with sharp, clean lines.
- DIY Difficulty Level: Moderate. Precision is key in applying the tape evenly and straight to ensure crisp, clean lines and a professional finish for your chosen pattern.
- Budget Range: $30-70. This covers paint and various types of painter’s tape.
- Lighting Suggestions: Natural light is ideal for showcasing the crispness and complexity of the pattern. Strategic spotlights can also be used to create intriguing shadows, adding a dramatic and three-dimensional effect to your design.
For more details on creating wall patterns with tape, check the complete guide on JustbeingKatherine.
6. Draw a Circle Over the Headboard
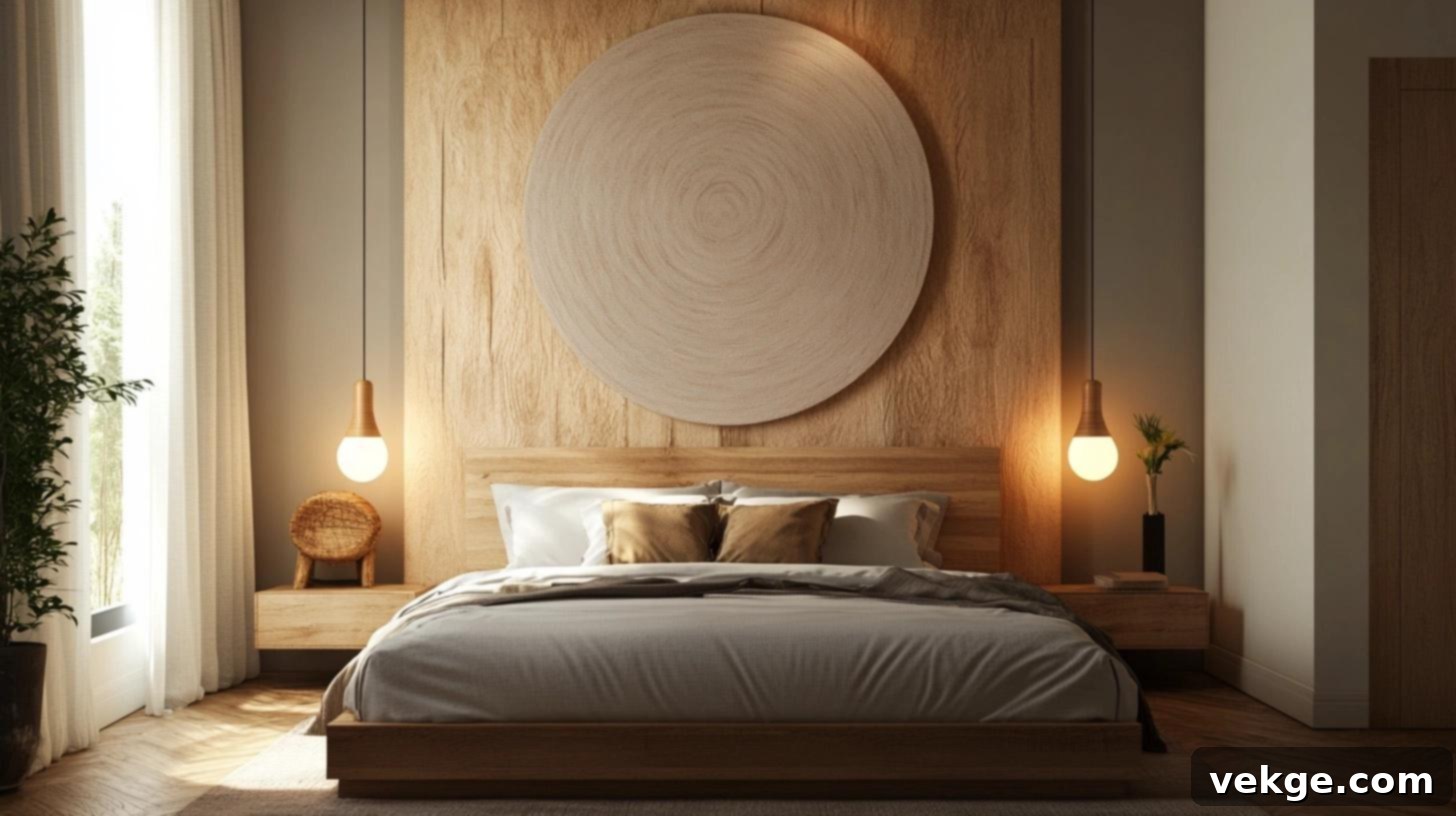
Add a modern, artistic focal point by painting a large circle above your headboard. This simple geometric shape can frame your bed beautifully, adding a soft curve that contrasts with the room’s straight lines. It’s a striking yet minimalist way to create an accent without covering the entire wall.
- DIY Difficulty Level: Moderate. A steady hand is crucial for a smooth, perfect circle, or you can use a large compass or string-and-pencil method to draw the outline.
- Budget Range: $15-40. Primarily involves a small can of paint and painting supplies.
- Lighting Suggestions: Install bedside lamps or elegant pendant lights that illuminate the circular design. This arrangement creates a cozy, intimate glow around your sleeping area and enhances the artistic focal point.
7. Two-Tone Painted Wall
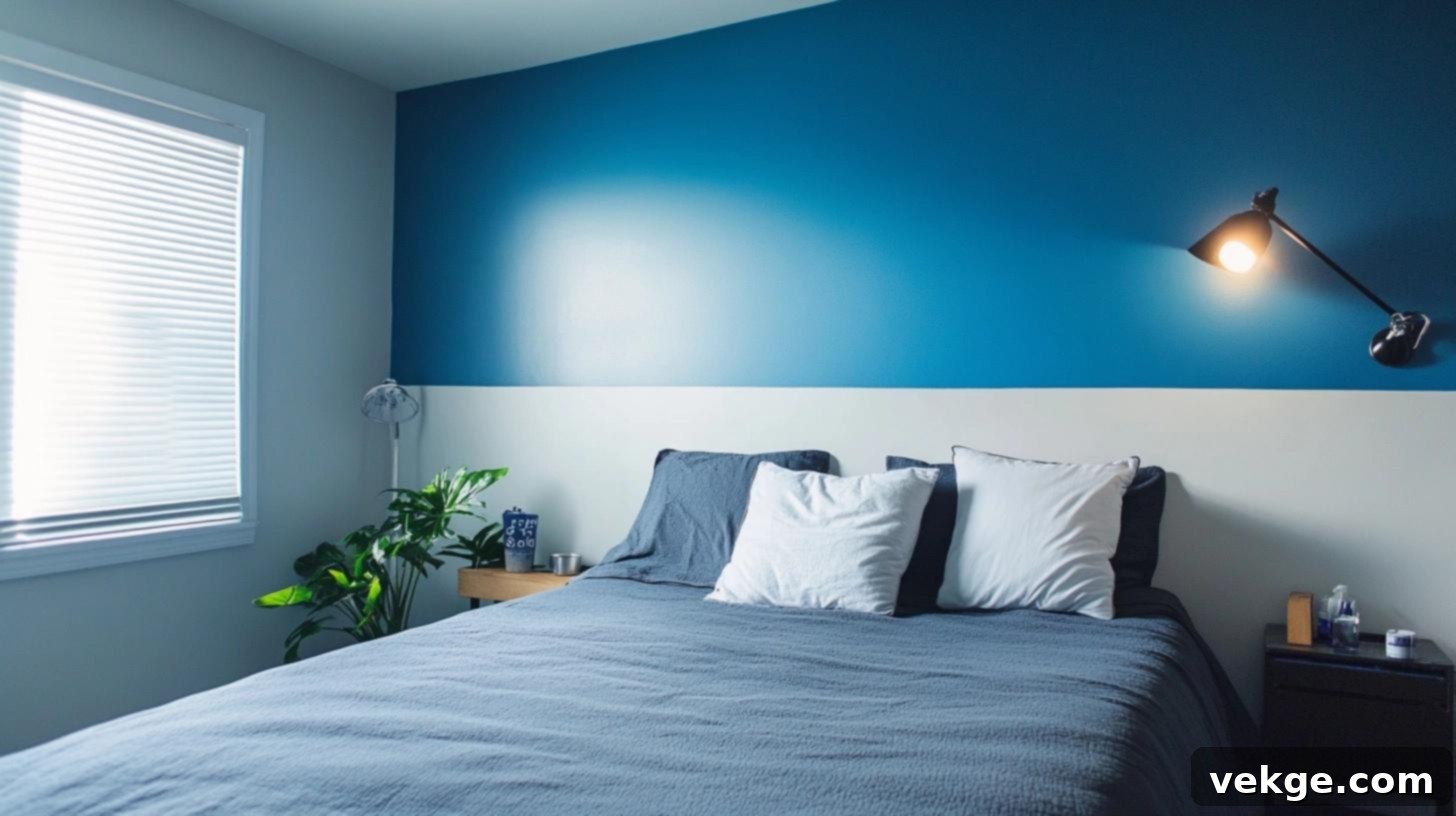
Break up a monochromatic room by painting a two-tone accent wall. This technique involves dividing the wall horizontally or vertically into two distinct colors, adding visual interest and depth. It can make a room feel taller or wider, depending on the placement of the color division.
- DIY Difficulty Level: Easy. The primary challenge is maintaining a steady hand and using painter’s tape effectively to create a clean, sharp division between the two chosen colors.
- Budget Range: $20-60. You’ll need two paint colors and tape.
- Lighting Suggestions: Utilize overhead lighting or track lighting to emphasize the striking contrast between the two colors, drawing attention to the unique design and adding architectural interest.
For more details on painting two-tone walls, check the complete guide on thediyplaybook.
8. Reclaimed Wood Wall
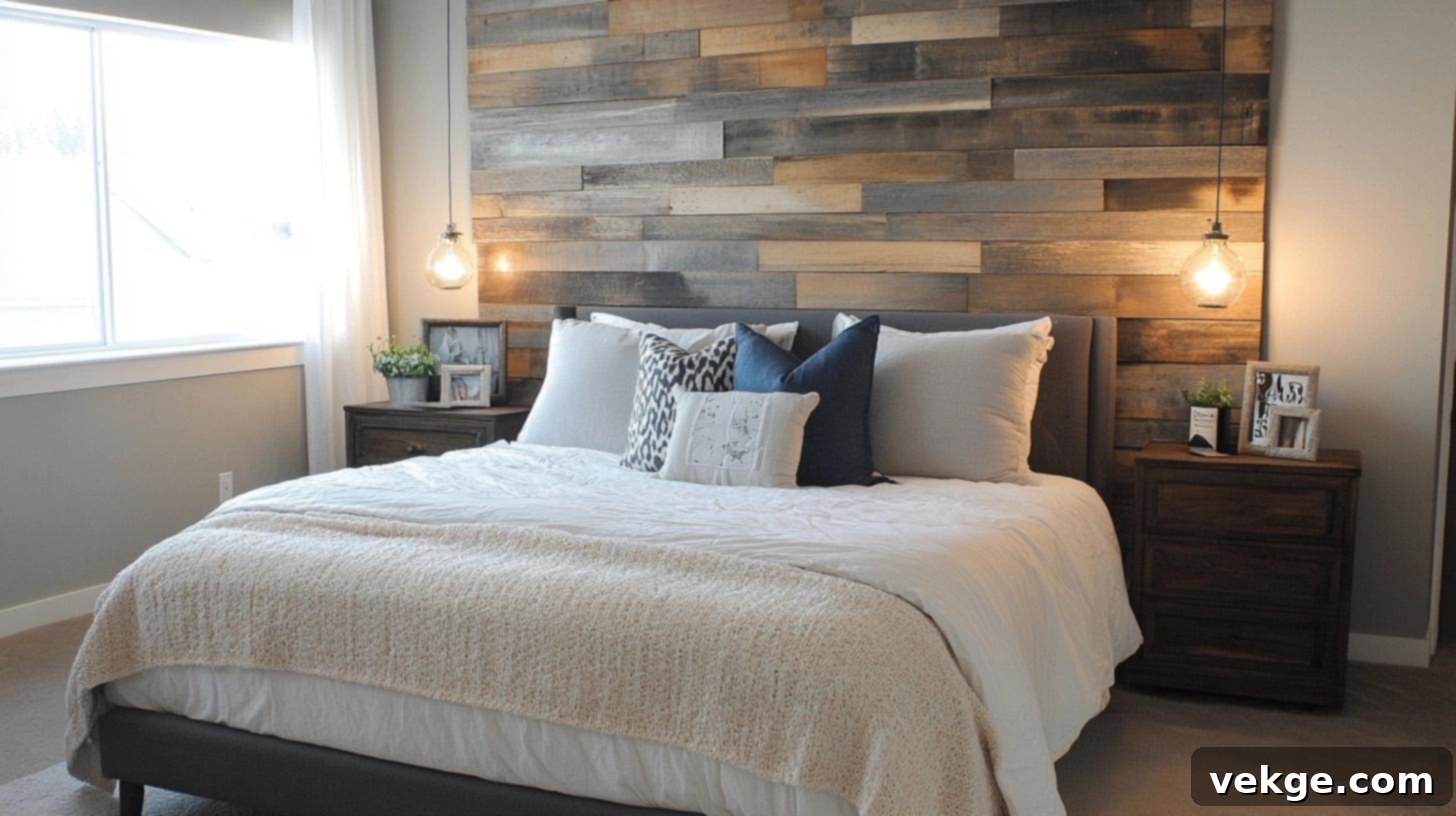
Bring rustic charm and natural warmth into your bedroom with a reclaimed wood accent wall. The unique variations in grain, color, and texture of salvaged wood planks create a rich, character-filled surface. This option adds a cozy, cabin-like feel and a strong natural element to your decor.
- DIY Difficulty Level: Moderate. This project demands accurate measurements, careful cutting of wood panels, and proper, secure attachment to the wall for a safe and lasting finish.
- Budget Range: $50-150. Costs depend on sourcing reclaimed wood or purchasing pre-treated panels.
- Lighting Suggestions: Use warm, ambient lighting, such as indirect wall washes or up-lighting, to highlight the natural tones, unique textures, and subtle imperfections of the reclaimed wood, enhancing its rustic appeal.
For more details on creating a DIY wood accent wall, check the complete guide on haleysimao.
9. Vertical Board and Batten Wall
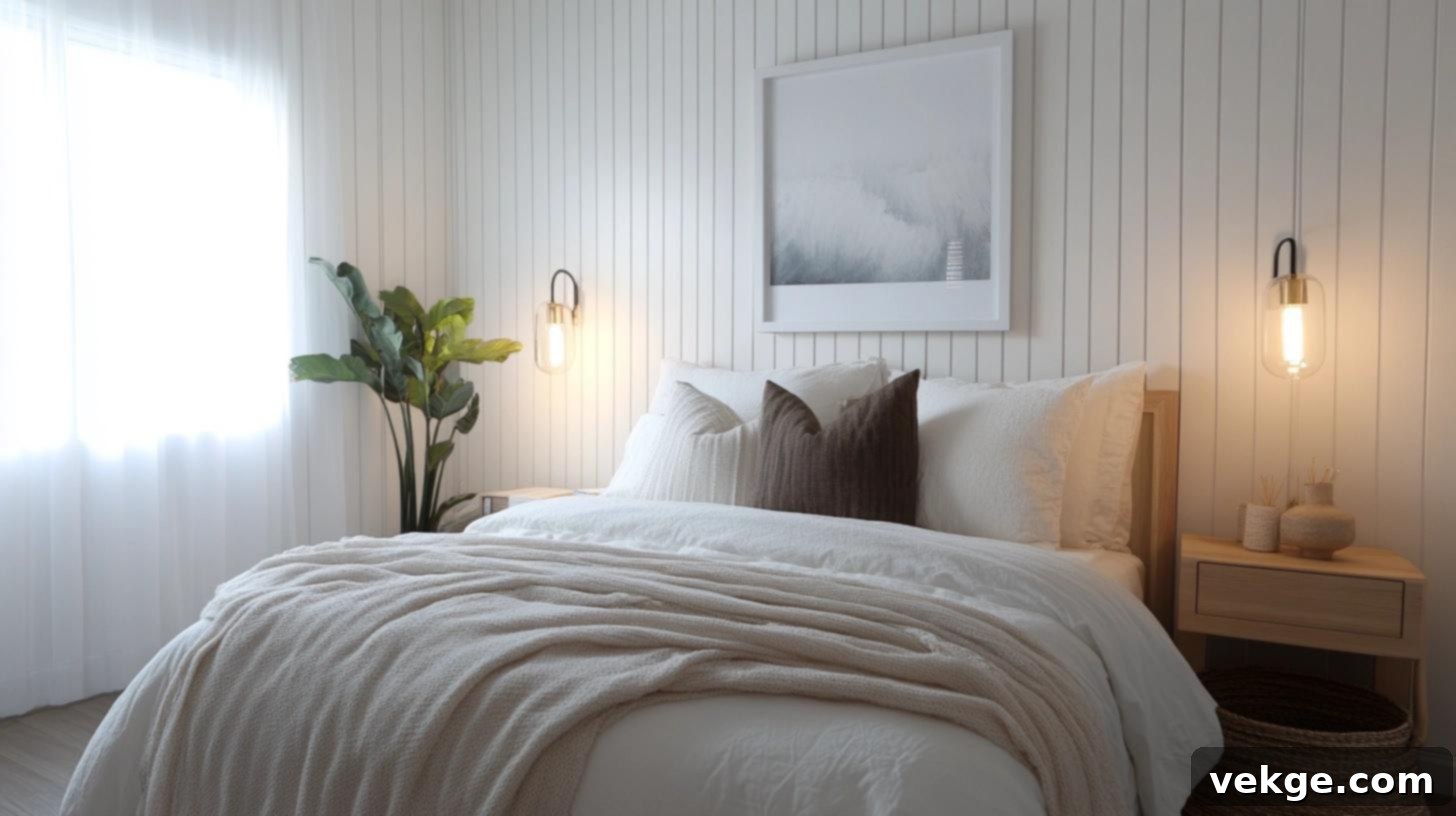
Add architectural interest and classic elegance to your bedroom with a vertical board and batten wall. This design uses thin strips of wood (battens) applied over a baseboard or wall, creating a panelized effect. It offers a sophisticated, timeless look that can make ceilings appear higher and add a refined texture.
- DIY Difficulty Level: Moderate. This project requires careful measurement and precise installation of the boards and battens to ensure even spacing and a clean, symmetrical appearance.
- Budget Range: $50-100. Costs cover lumber and paint.
- Lighting Suggestions: Employ soft ambient lighting or strategically placed wall sconces to highlight the texture and the subtle shadows created by the battens, adding depth and a sophisticated feel to the room.
For more details on a DIY board and batten wall, check the complete guide on sarahjoyblog.
Creative DIY Accent Wall Ideas for the Kitchen
10. Hexagon Tile Wall
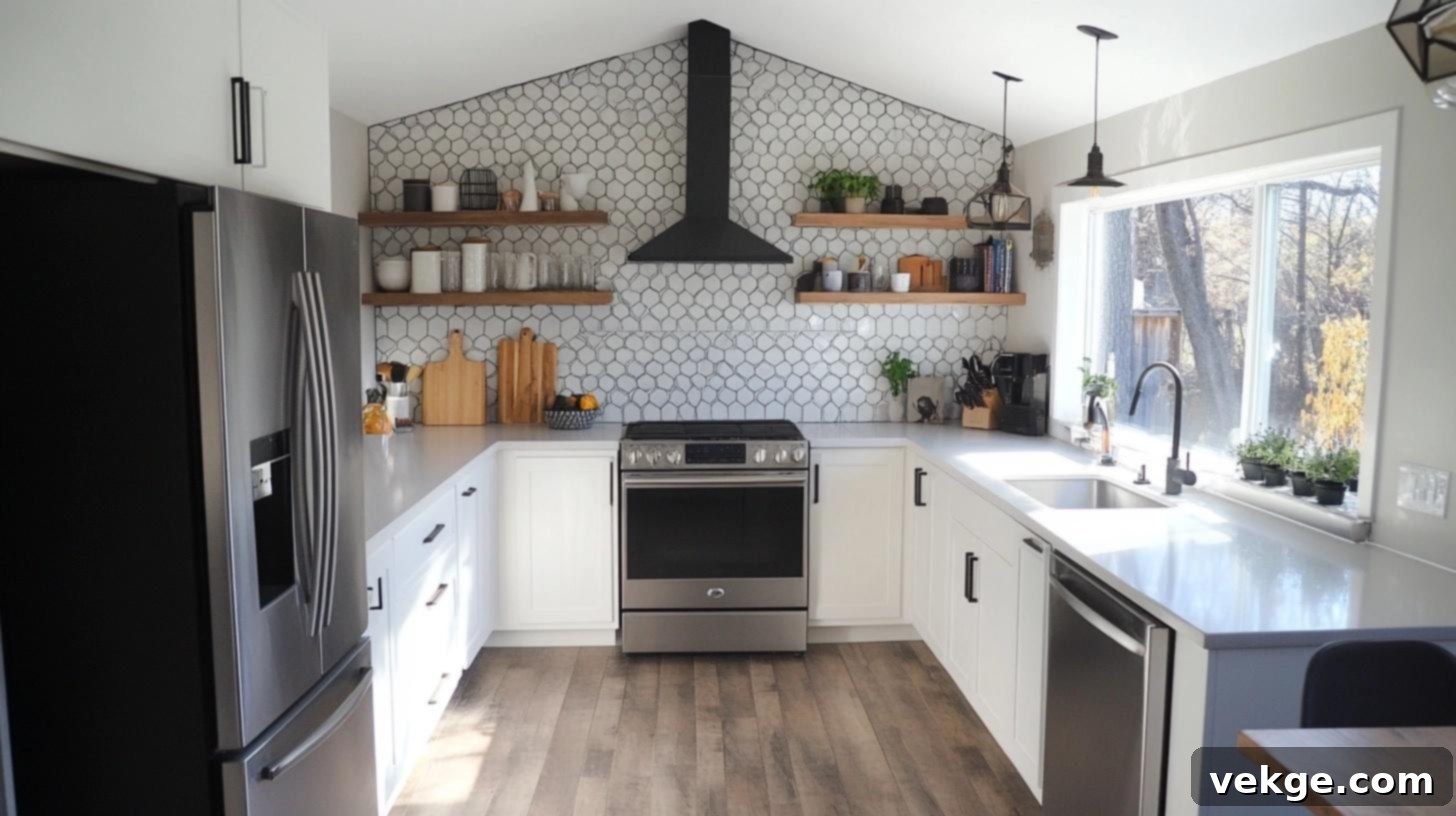
Introduce a contemporary and stylish touch to your kitchen with a hexagon tile accent wall. This geometric pattern adds visual intrigue and a modern flair, transforming a functional space into a design statement. Hexagon tiles come in various colors and materials, allowing for customization.
- DIY Difficulty Level: Advanced. This project requires precise tile placement, careful cutting (especially around edges and outlets), and meticulous grouting to achieve a professional and durable finish.
- Budget Range: $150-400. Costs depend heavily on the type and quality of hexagon tiles selected.
- Lighting Suggestions: Utilize under-cabinet lighting or targeted spotlights to highlight the unique geometric pattern of the tiles, making them “pop” and reflecting light beautifully, especially on glossy surfaces.
11. Exposed Brick Wall
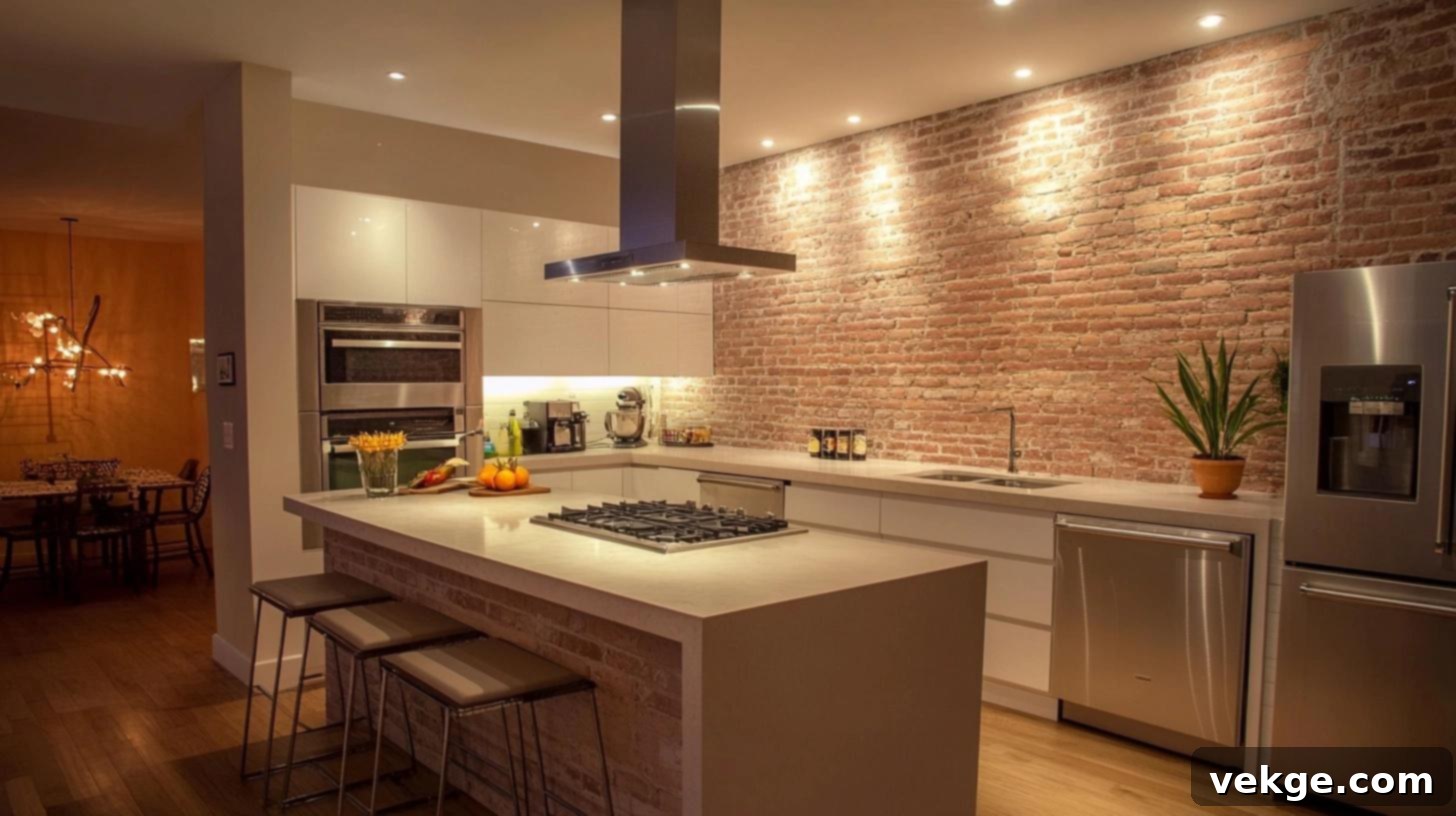
Channel an urban industrial or rustic farmhouse vibe with an exposed brick accent wall in your kitchen. Whether uncovering existing brick or installing brick veneer, this timeless texture adds warmth, character, and a sense of history to the space. It’s robust and full of natural appeal.
- DIY Difficulty Level: Moderate. This may involve the careful removal of existing drywall to expose original brick, or the precise installation of brick veneer, which requires attention to mortar lines.
- Budget Range: $100-300. Costs vary depending on whether you’re exposing existing brick or purchasing veneer.
- Lighting Suggestions: Employ warm, ambient lighting, such as pendant lights with exposed bulbs or wall sconces, to enhance the rustic and industrial feel of the brick, emphasizing its texture and natural variations.
12. Hang Baskets for Texture
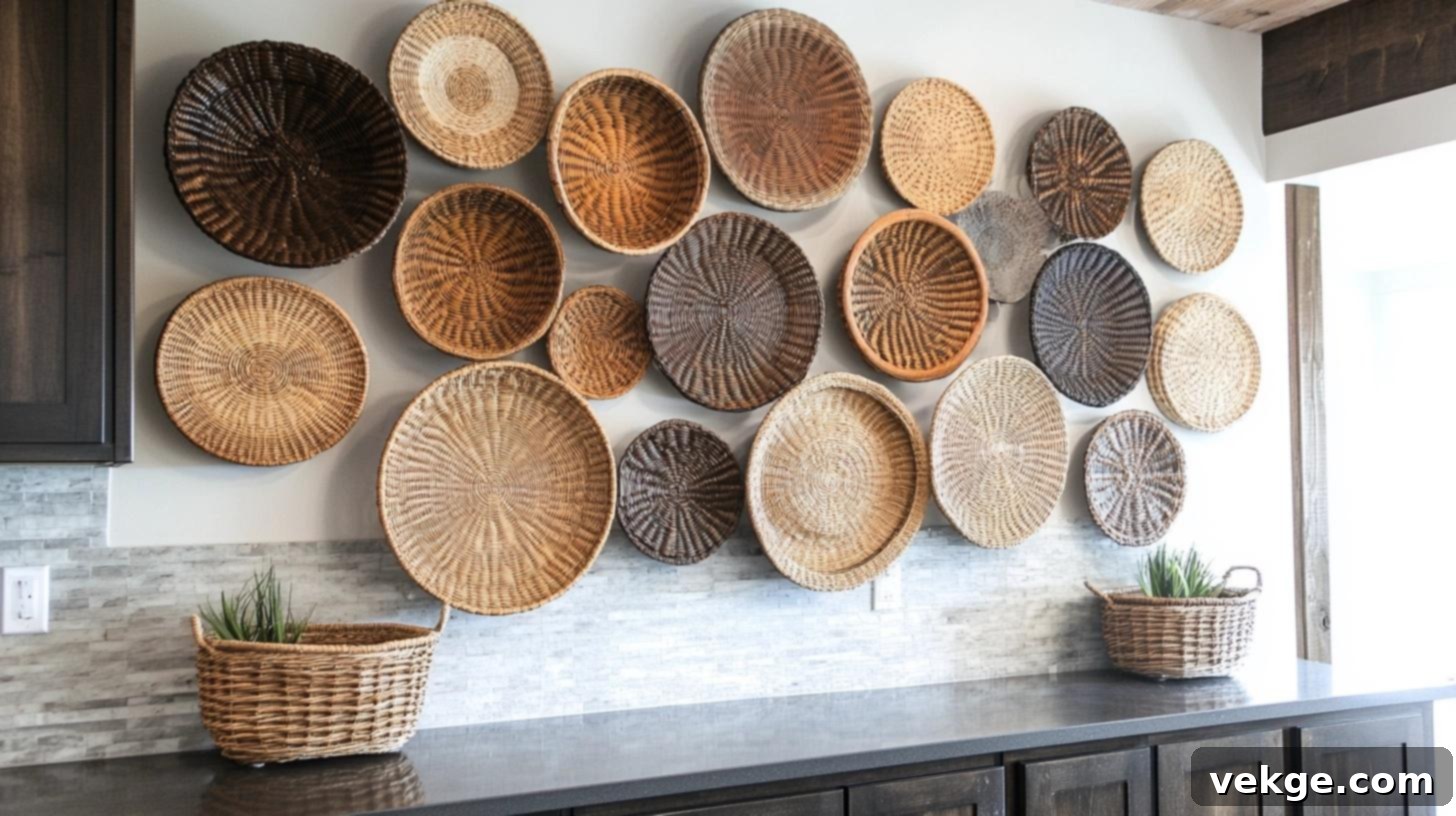
Create an eclectic and textural accent wall by artfully arranging decorative baskets. This idea is incredibly easy, budget-friendly, and adds a natural, bohemian, or farmhouse touch to your kitchen. Varying sizes and weaves of baskets can create a dynamic and charming display.
- DIY Difficulty Level: Easy. This project simply involves strategically hanging decorative baskets on the wall using nails or hooks to create a pleasing arrangement.
- Budget Range: $20-60. Costs depend on the number and size of baskets.
- Lighting Suggestions: Use soft overhead lighting or accent lights to gently illuminate the baskets, showcasing their natural textures and adding a warm, inviting feel to the kitchen wall.
For more details on DIY wall basket art, check the complete guide on uptodateinteriors.
13. Food-Themed Print Gallery
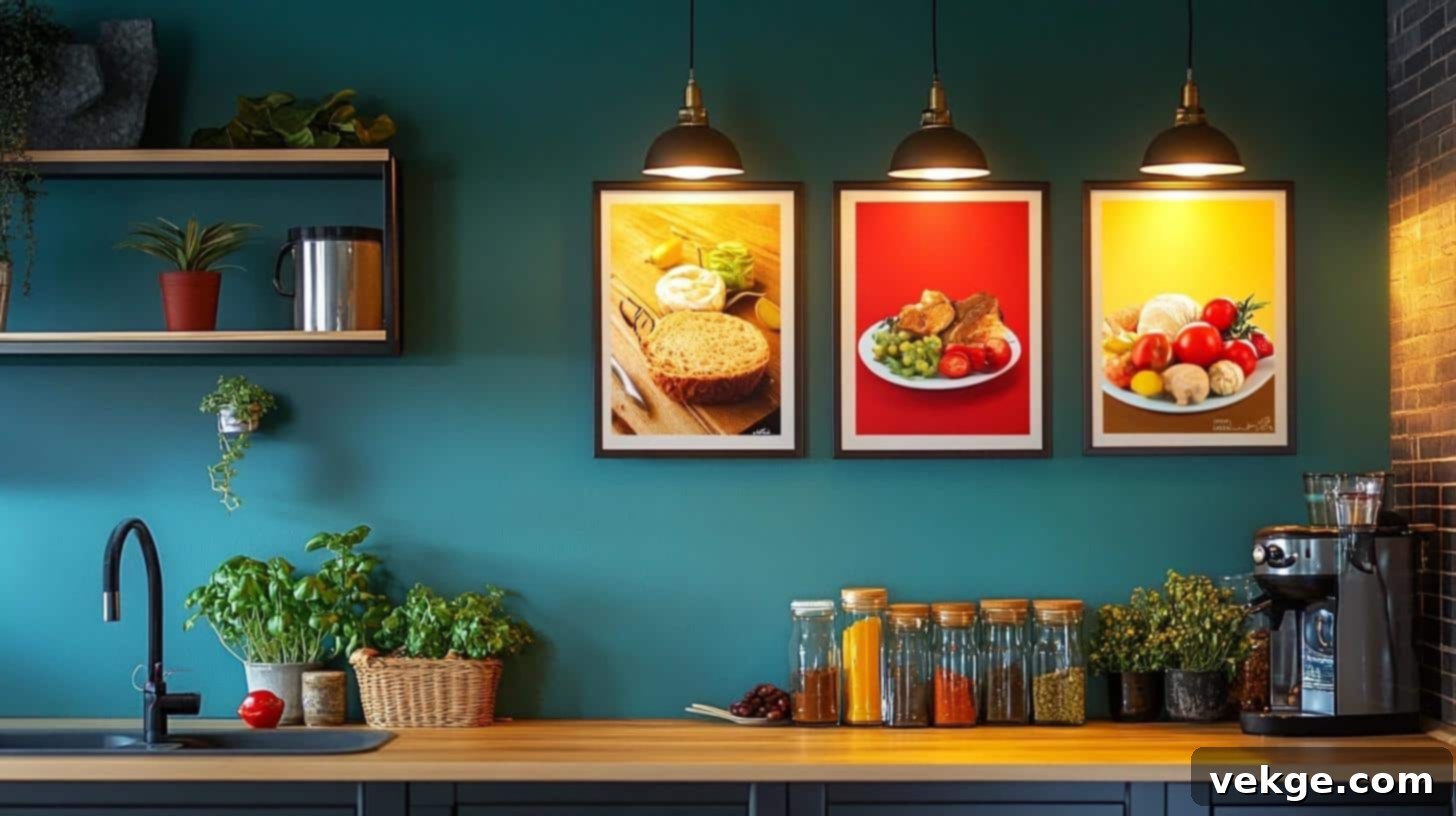
Celebrate culinary artistry by creating a gallery wall featuring food-themed prints or artwork. This simple yet effective accent adds personality and a playful touch to your kitchen. From vintage botanical prints of vegetables to modern abstract food illustrations, the possibilities are delicious!
- DIY Difficulty Level: Easy. This involves selecting, framing, and hanging various food-related artwork or prints in a cohesive arrangement.
- Budget Range: $20-80. Costs depend on the number and size of prints and frames.
- Lighting Suggestions: Employ accent lights or dedicated picture lights to highlight each print individually, creating a fun, inviting, and personalized kitchen atmosphere that celebrates the joy of food.
14. Subway Tile Wall
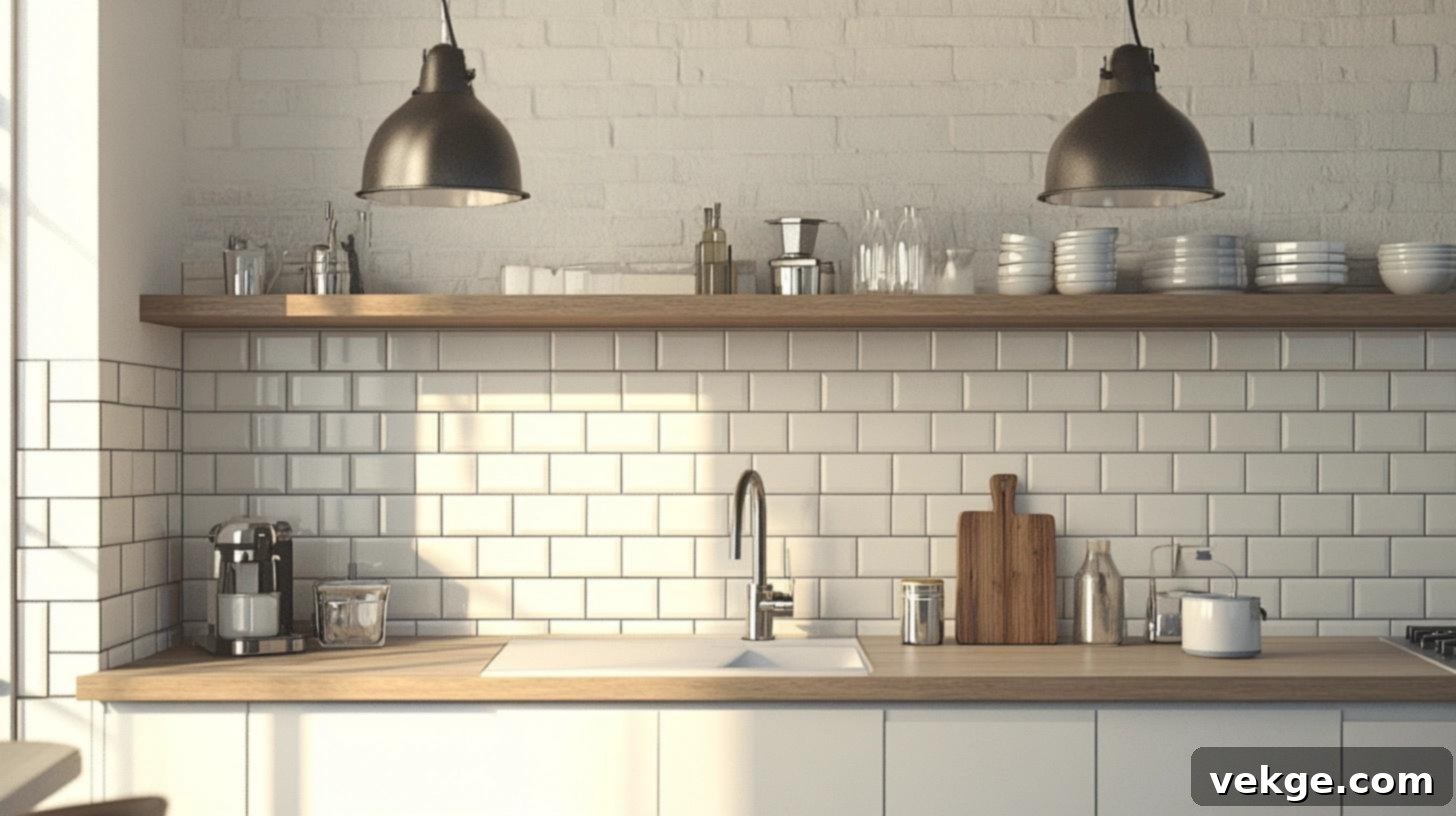
Achieve a timeless and clean look with a subway tile accent wall. This classic choice is versatile, durable, and can brighten any kitchen space. Its simple, rectangular shape and various laying patterns (like offset or stacked) offer both traditional and contemporary appeal, making it a reliable favorite.
- DIY Difficulty Level: Moderate. This project requires careful tile cutting, precise placement, and thorough grouting to achieve a smooth, professional-looking surface.
- Budget Range: $100-250. Subway tiles are generally affordable, but costs vary by material and color.
- Lighting Suggestions: Bright overhead lighting or task lighting works exceptionally well to emphasize the clean lines and reflective qualities of subway tiles, particularly those in white or lighter colors, enhancing the kitchen’s brightness.
For more details on a DIY subway tile backsplash, check the complete guide on blessthisnestblog.
15. Paint Matte Gray
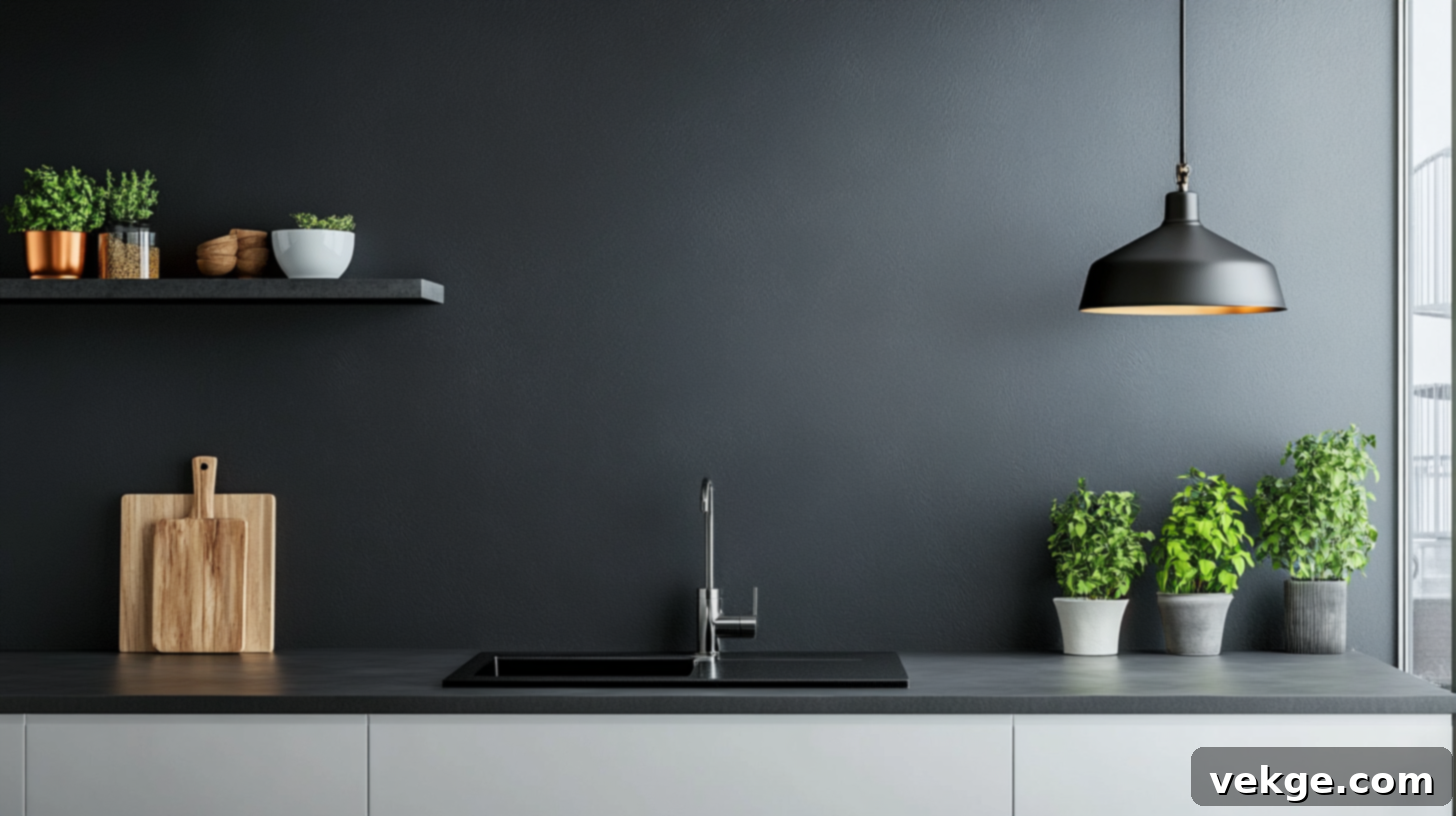
For a sophisticated and modern kitchen, consider painting an accent wall in matte gray. This color choice adds depth, elegance, and a contemporary edge without being too overpowering. The matte finish absorbs light, creating a soft, understated backdrop that complements various kitchen styles.
- DIY Difficulty Level: Easy. This project only requires basic painting skills, including good preparation and even paint application for a smooth matte finish.
- Budget Range: $20-50. A single can of matte gray paint is the main expenditure.
- Lighting Suggestions: Use warm white lighting to effectively balance the inherent coolness of gray. This combination helps create a modern, sleek, and inviting look, preventing the space from feeling too stark.
For more details on painting a matte accent wall, check the complete guide onhomemadeginger.
16. Wainscoting Wall
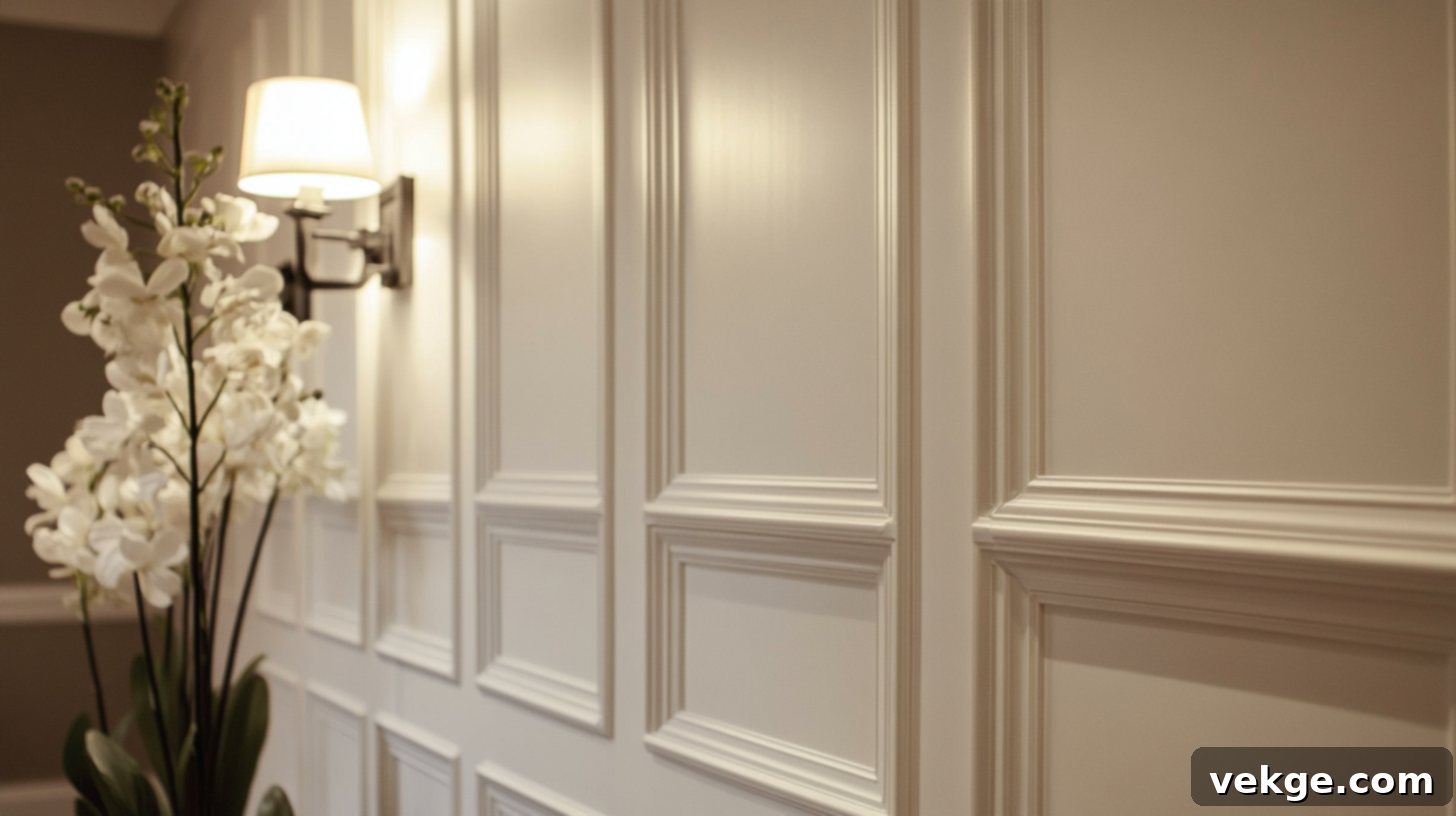
Add traditional charm and architectural detail to your kitchen or dining area with a wainscoting accent wall. This classic decorative paneling, typically applied to the lower half of a wall, introduces texture, elegance, and a sense of refined craftsmanship. It’s perfect for creating a cozy, formal, or even farmhouse-inspired atmosphere.
- DIY Difficulty Level: Moderate. This project involves careful measuring, precise cutting of panels or molding, and secure attachment to the wall to ensure a seamless and durable installation.
- Budget Range: $50-150. Costs depend on the type of molding or panels chosen and the wall size.
- Lighting Suggestions: Utilize soft ambient lighting or stylish wall sconces positioned above the wainscoting. This will help accentuate the texture, depth, and architectural details of the paneling, imparting an elegant and timeless feel to the room.
For more details on DIY wainscoting, check the complete guide on abbybarratt.
Exciting DIY Accent Wall Ideas for the Living Room
17. A Gallery Wall
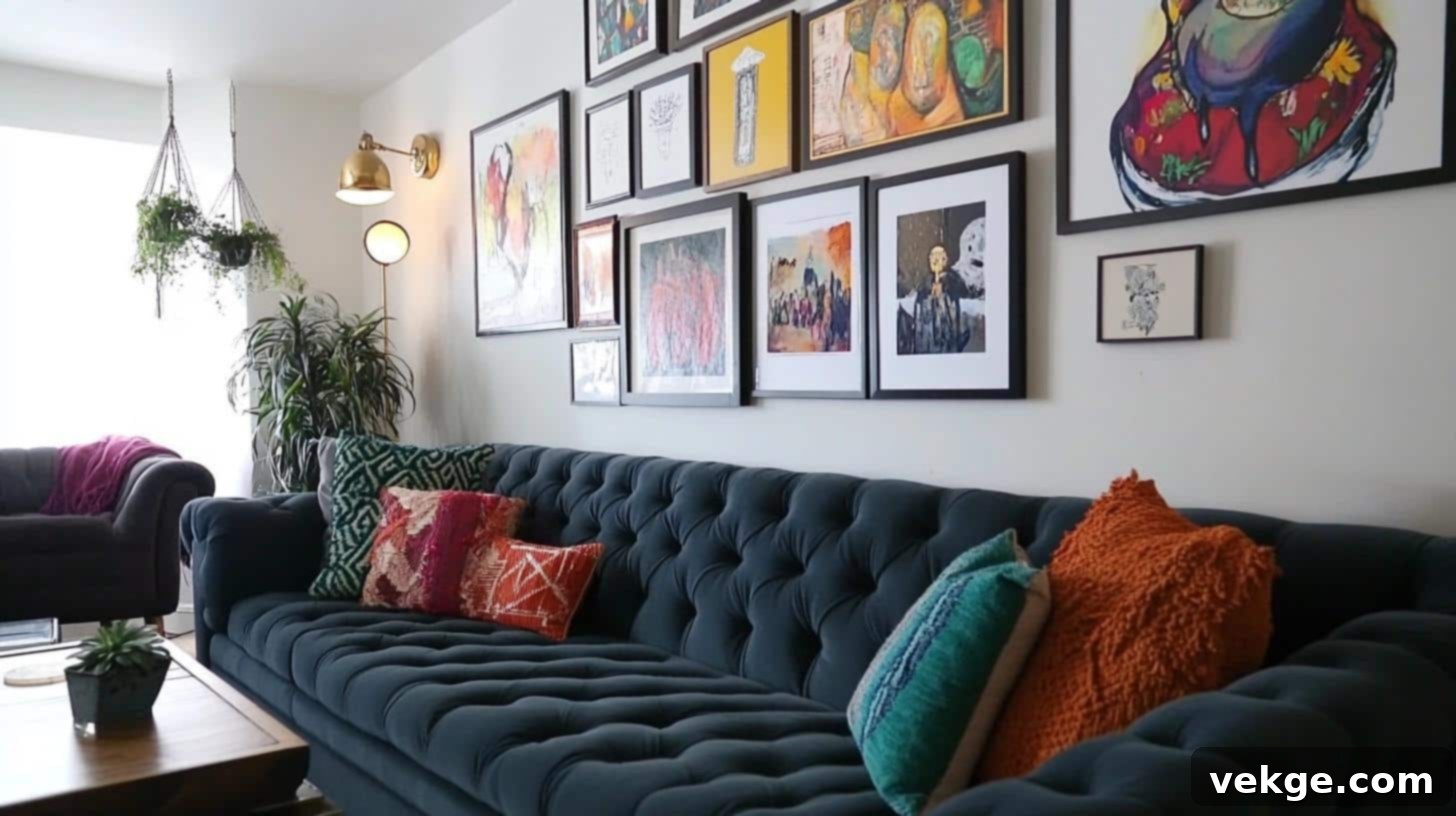
Transform a blank living room wall into a captivating display of your personal style with a gallery wall. This involves arranging a collection of framed art, photographs, mirrors, and other decorative objects. It’s an incredibly versatile and personal way to add visual interest, tell a story, and create a dynamic focal point.
- DIY Difficulty Level: Easy to moderate. While the hanging itself is simple, planning the layout and achieving a balanced, aesthetically pleasing arrangement can take time and experimentation.
- Budget Range: $50-150. Costs vary greatly depending on the number and source of frames and artwork.
- Lighting Suggestions: Use accent lights, such as adjustable track lighting or dedicated picture lights, to highlight individual art pieces. Ensure even lighting across the wall to avoid casting distracting shadows and to enhance the visual appeal of your curated collection.
For more details on how to create a gallery wall, check the complete guide on stylebyemilyhenderson.
18. Ombre Painted Wall
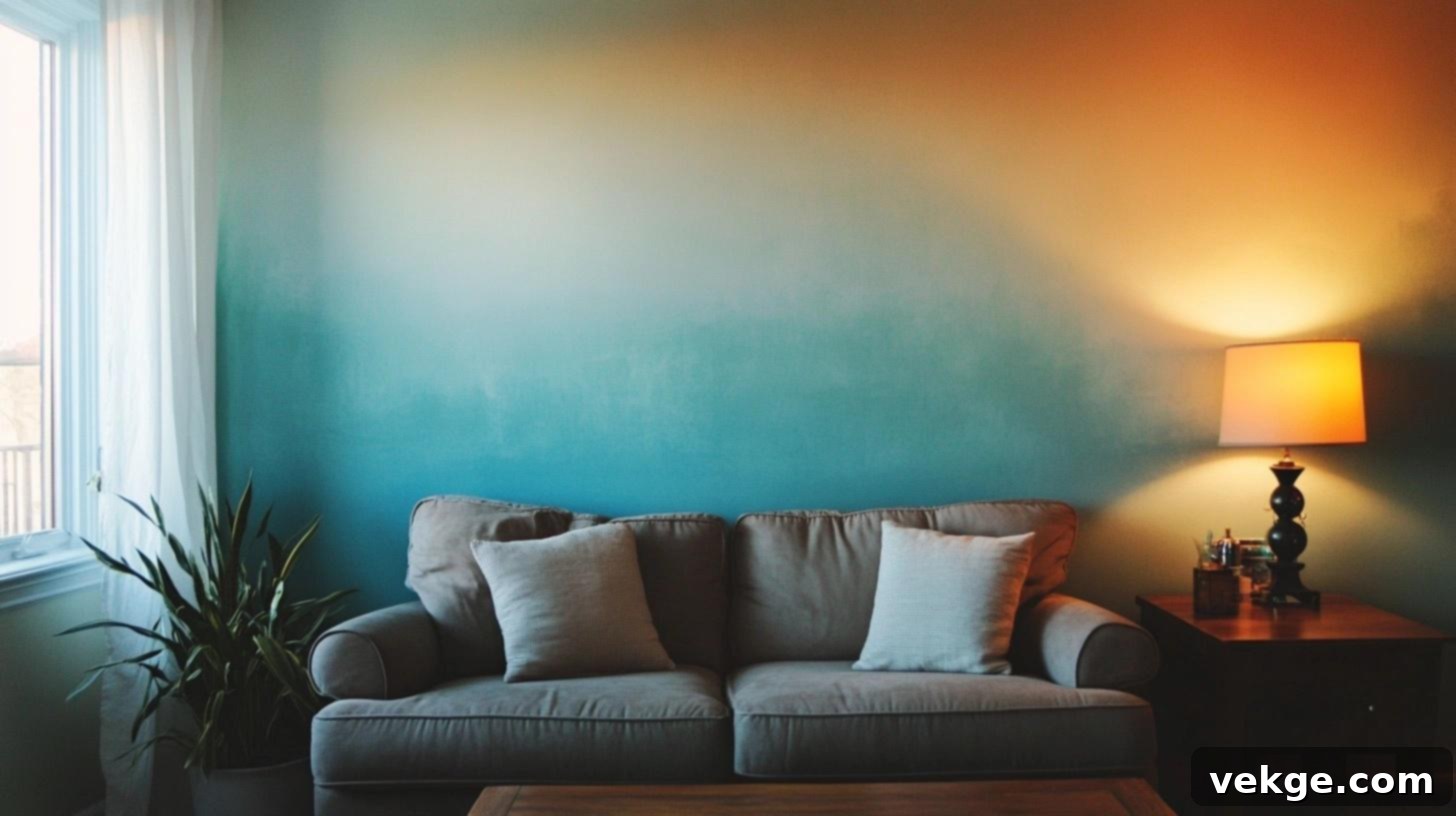
Create a stunning visual effect with an ombre painted wall, featuring a gradual transition of color from light to dark or one hue to another. This artistic technique adds depth, movement, and a serene, ethereal quality to your living room. It’s a sophisticated and modern way to introduce color and subtle drama.
- DIY Difficulty Level: Moderate. This project requires careful blending of multiple shades of paint to achieve a smooth, seamless gradient effect without harsh lines.
- Budget Range: $30-70. Costs cover two or three shades of paint and blending tools.
- Lighting Suggestions: Employ soft, diffused lighting, such as natural window light or indirect lamps, to beautifully highlight the gradual color transition. This helps create a calming and artistic atmosphere, emphasizing the wall’s unique blend of hues.
For more details on how to paint an ombre wall, check the complete guide on jacquelinebinkley.
19. Bookcase Built-In Wall
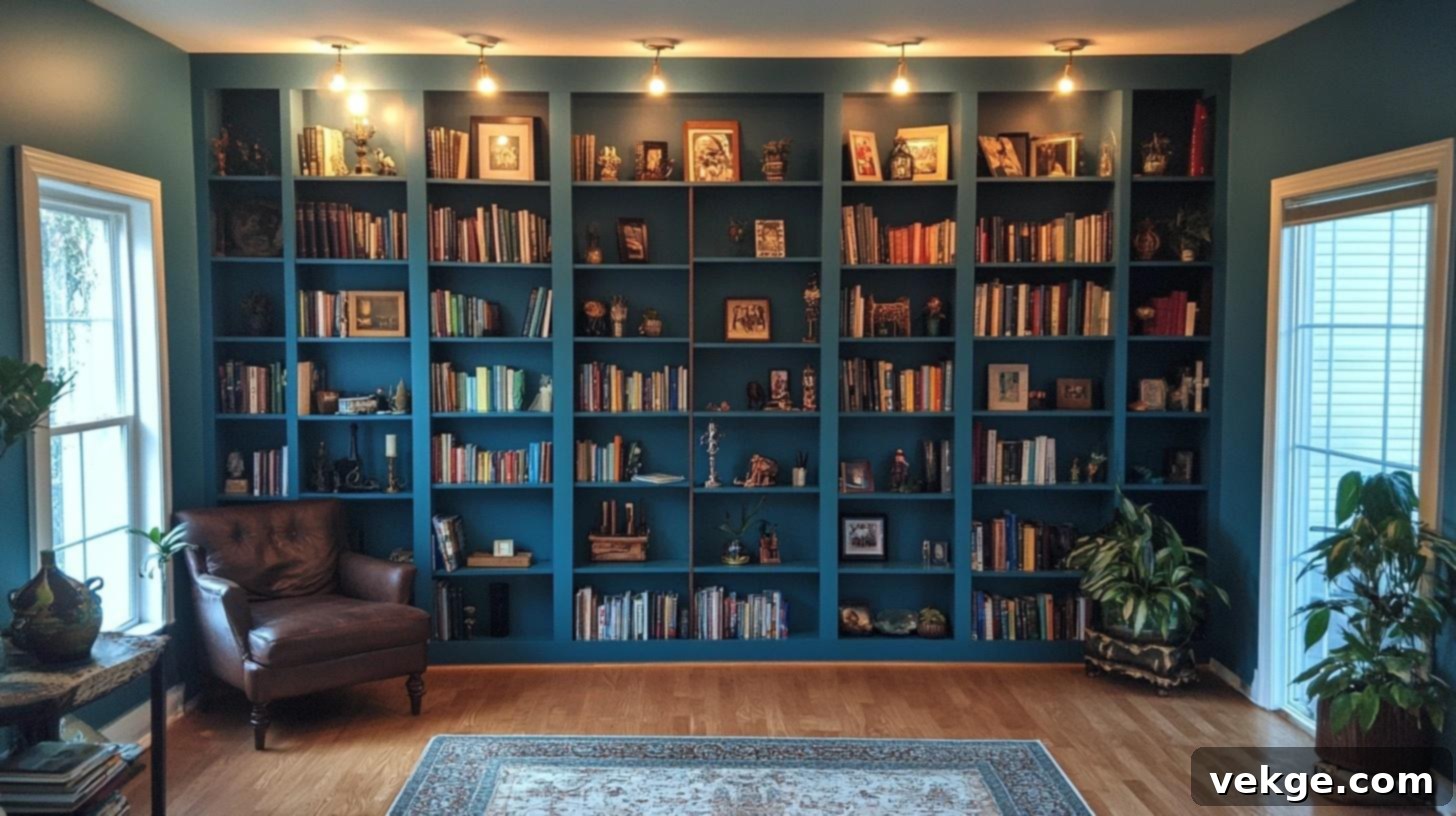
Maximize both style and storage in your living room with a bookcase built-in accent wall. This functional and beautiful design integrates shelving directly into the wall, creating a seamless, custom look. It’s perfect for displaying books, decorative items, and even housing a television, offering a sophisticated library feel.
- DIY Difficulty Level: Advanced. This project demands strong carpentry skills, including precise measuring, cutting, assembling, and securely installing custom shelves and cabinet units.
- Budget Range: $200-500. Costs depend on materials (wood, MDF) and the size of the built-in.
- Lighting Suggestions: Install discreet LED strip lights or small spotlights within the shelves. This will effectively illuminate your book collection and decorative items, adding both functionality and a warm, inviting glow to the built-in unit.
20. Decorate the TV Wall
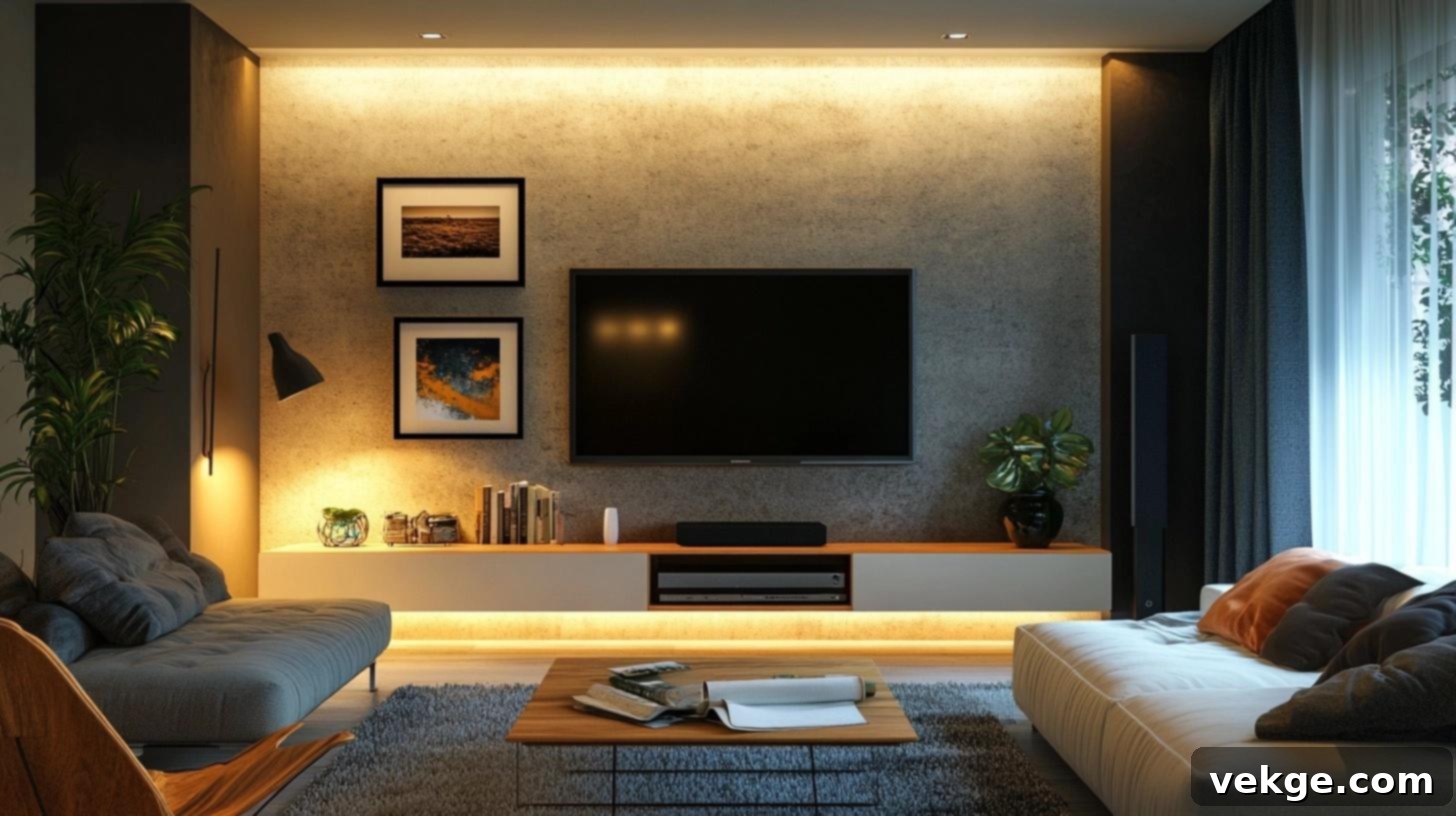
Turn your television wall from a bland necessity into a stylish focal point. By arranging pictures, framed art, floating shelves, or other decor around your TV, you can integrate it seamlessly into your living room’s design. This method helps to minimize the “black box” effect and creates a cohesive entertainment area.
- DIY Difficulty Level: Easy. This involves thoughtfully arranging existing or new decor elements around your television to create a balanced and aesthetically pleasing display.
- Budget Range: $50-150. Costs depend on the decor items chosen.
- Lighting Suggestions: Implement backlighting behind the TV (like LED strips) or use accent lights around the surrounding decor. This not only reduces glare on the screen but also adds a stylish, cinematic ambiance to your entertainment setup.
21. A Stacked Firewood Look
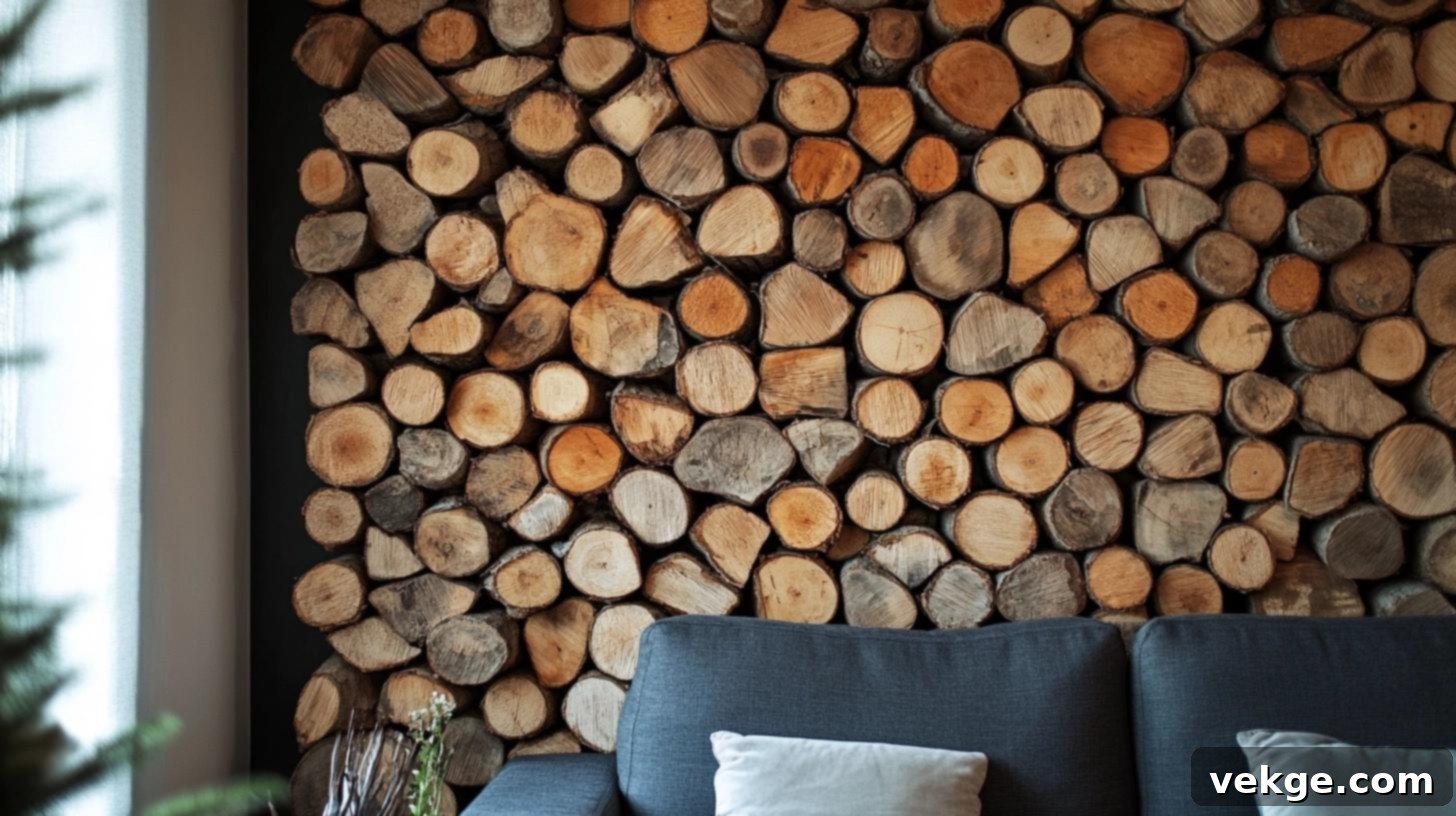
Bring the cozy warmth and rustic appeal of a cabin retreat into your living room with a stacked firewood accent wall. This unique idea involves neatly stacking logs or installing pre-cut firewood pieces to create a textural, natural feature. It’s a striking design that adds organic beauty and a comforting atmosphere, even without a real fireplace.
- DIY Difficulty Level: Easy to moderate. This project can be as simple as neatly stacking actual firewood in a decorative niche or more involved if you’re installing a faux firewood feature or veneer.
- Budget Range: $50-100. Costs depend on sourcing firewood or decorative log pieces.
- Lighting Suggestions: Use warm, ambient lighting, such as strategically placed floor lamps or wall sconces, to highlight the natural textures, varied shapes, and rich tones of the wood, enhancing its rustic and inviting charm.
22. Vertical Garden Wall
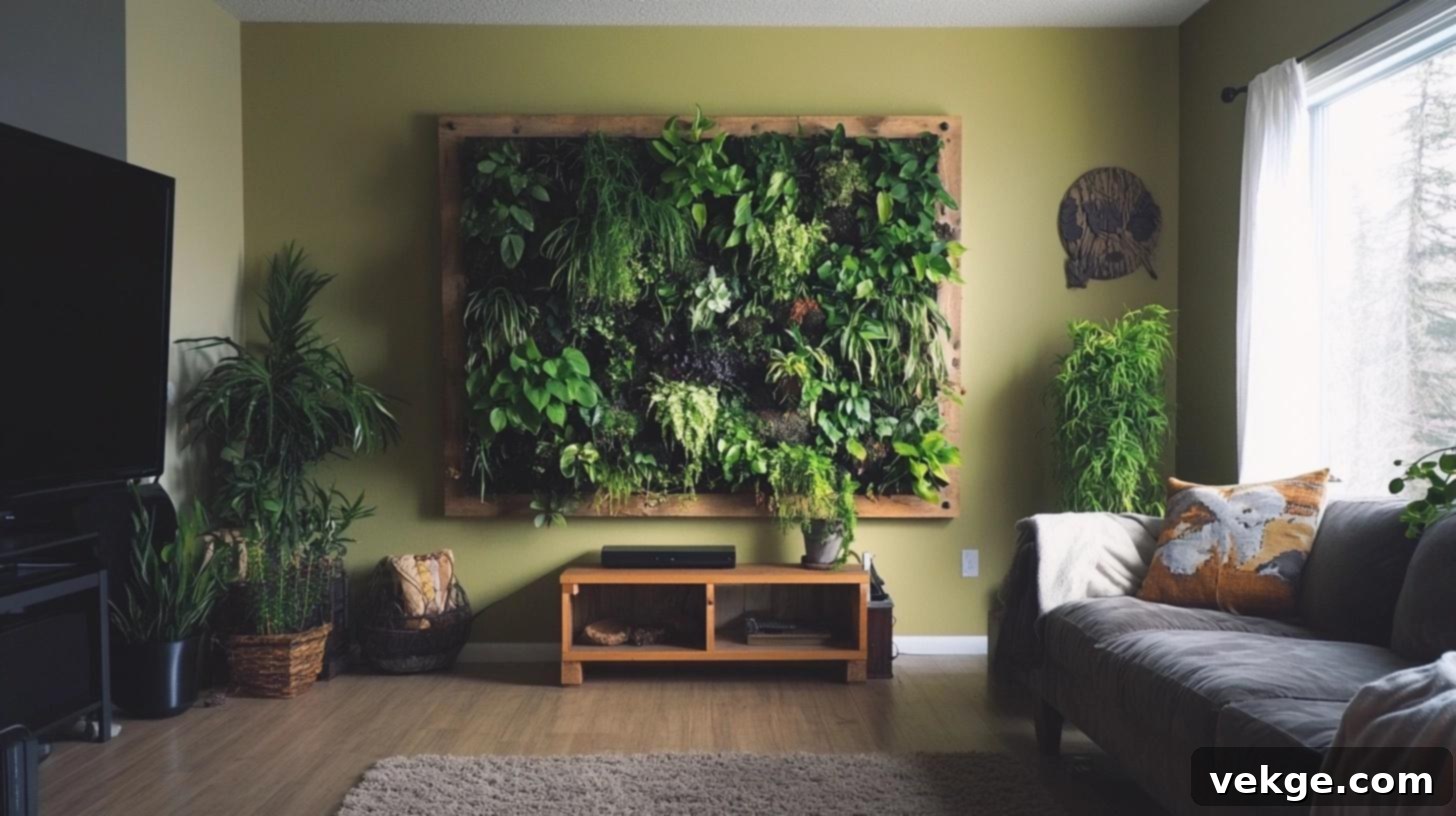
Infuse your living room with vibrant life and natural beauty by creating a vertical garden accent wall. This living wall design brings the outdoors in, improving air quality and adding a refreshing, biophilic element. It’s a visually stunning and dynamic feature that evolves over time, creating a serene and invigorating atmosphere.
- DIY Difficulty Level: Moderate. This involves installing a system of planters or a specialized framework to support the plants, along with considering proper drainage and irrigation.
- Budget Range: $100-300. Costs depend on the size of the garden, the type of plants, and the planter system.
- Lighting Suggestions: Maximize natural light exposure, or supplement with dedicated grow lights, to ensure the health and vibrancy of your plants. This also adds a fresh, green, and lively feel to the entire room.
23. Build In Shelving
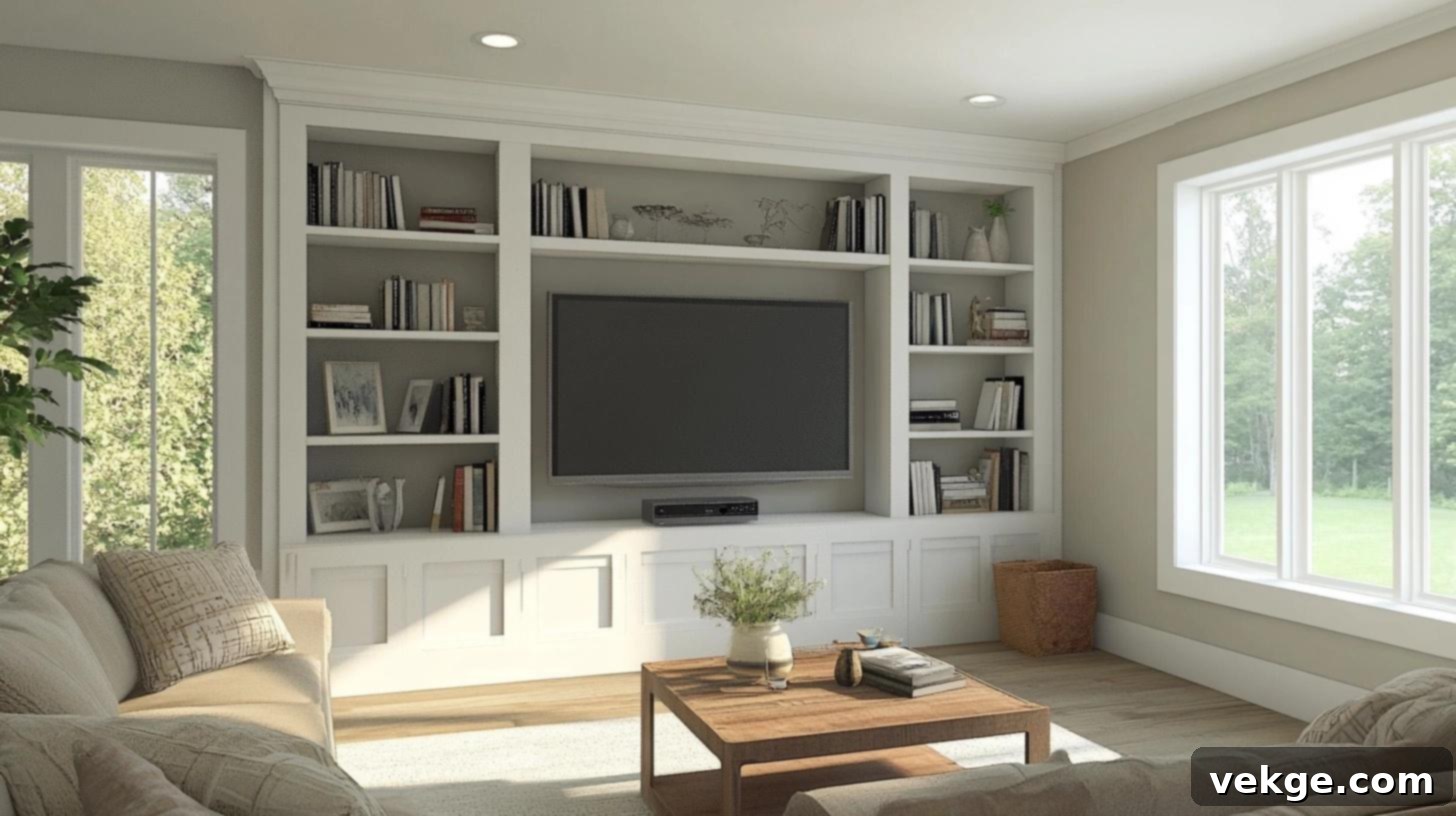
Integrate practical storage and elegant display space into your living room with built-in shelving. Unlike standalone bookcases, built-in shelves appear custom-made and seamless with the wall, offering a polished and sophisticated look. This option provides excellent functionality while serving as a beautiful architectural feature.
- DIY Difficulty Level: Advanced. This project requires precise carpentry skills for designing, cutting, assembling, and installing custom-built shelves that fit perfectly into your wall space.
- Budget Range: $200-600. Costs will vary depending on the materials used (e.g., solid wood vs. MDF) and the complexity of the design.
- Lighting Suggestions: Install recessed lights or discreet LED strips directly within the shelves. This not only adds essential functionality for illuminating your displayed items but also creates beautiful visual interest and highlights the architectural details of the built-in unit.
24. Painted Brick Wall
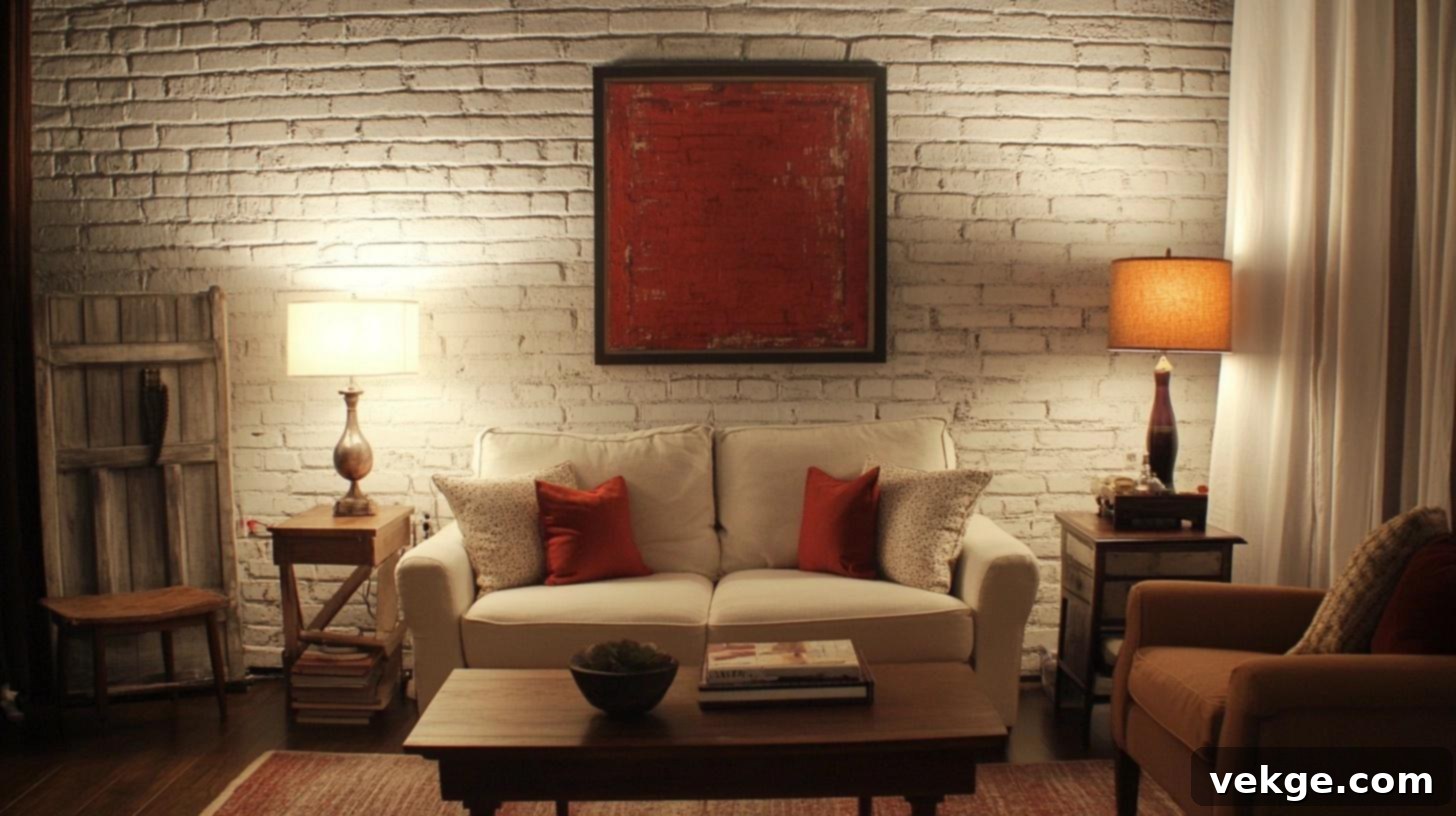
If you have an existing brick wall, consider painting it for a fresh, updated look that retains its charming texture. Painting brick in a light color (like white or a soft gray) can instantly brighten a room, while a darker hue can add dramatic depth. It combines rustic texture with a clean, contemporary aesthetic, perfect for a cozy living space.
- DIY Difficulty Level: Easy. This project simply involves properly preparing the existing brick surface and applying paint evenly, making it accessible even for beginners.
- Budget Range: $20-80. Costs depend on the type and quantity of paint needed for brick surfaces.
- Lighting Suggestions: Use soft, warm lighting, such as floor lamps or dimmable wall lights, to enhance the unique texture of the painted brick. This helps give the room a cozy, rustic yet refined feel, preventing the surface from looking flat.
For more details on how to paint a faux brick wall (which can apply to real brick too), check the complete guide on grayhousestudio.
Essential Tips for a Smooth DIY Accent Wall Project
To ensure your DIY accent wall project goes off without a hitch and yields professional-looking results, follow these practical tips before, during, and after your work.
Before You Start
- Prepare the Space: Begin by completely clearing the room of furniture or moving all items to the center and covering them. This provides ample working space and protects your belongings.
- Protect Your Floors: Lay down drop cloths or old sheets to protect your floors from paint spills, dust, or debris.
- Remove Obstacles: Carefully remove all switch plates, outlet covers, and any wall decor. Label them if necessary to ensure easy reinstallation.
- Clean the Wall: Thoroughly clean the wall surface with a mild soap and water solution to remove any dirt, dust, or grease. This ensures better adhesion of paint or materials.
- Allow for Drying: Ensure the wall is completely dry before you begin any application. Moisture can interfere with adhesion and paint finish.
Tools and Planning
- Create a Comprehensive List: Make a detailed list of all materials and tools you will need for your specific design. Check it twice before heading to the store.
- Buy Extra Supplies: It’s always wise to purchase about 10% extra supplies (paint, tiles, wood) than calculated. This buffer accounts for mistakes, miscalculations, or future touch-ups.
- Sketch Your Design: Test your design layout on paper or use painter’s tape to mock it up on the wall first. This helps visualize the final look and make adjustments beforehand.
- Gather All Tools: Have all your tools readily accessible and organized before you begin. This saves time and reduces frustration during the project.
- Verify Measurements: Double-check all your measurements. Accuracy is key to a professional finish, especially for patterned or paneled walls.
During the Project
- Start Early: Begin your project early in the day to take full advantage of natural light, which helps with visibility and color perception, and gives you ample time without rushing.
- Take Regular Breaks: Step away from the wall periodically to rest your eyes and evaluate your progress. Breaks help prevent fatigue and ensure you maintain attention to detail.
- Assess Your Work: Frequently step back from the wall to view your work from a distance. This allows you to spot imperfections or unevenness that might not be visible up close.
- Correct Mistakes Promptly: Address small mistakes, smudges, or uneven lines immediately. It’s much easier to fix them while the material is still wet or pliable.
- Keep a Damp Cloth Handy: Always have a damp cloth or paper towels nearby for quick clean-ups of spills or drips.
Safety Steps
- Ensure Ventilation: Open windows and doors to ensure good air circulation, especially when working with paints, adhesives, or other materials that emit fumes.
- Wear Protective Gear: Don safety glasses when cutting, drilling, or using power tools. Wear gloves to protect your hands from paint or adhesives.
- Use a Stable Ladder: Always use a solid, stable ladder or step stool that is properly secured. Never overreach; reposition the ladder as needed.
- Protect Others: Keep children and pets away from the work area to prevent accidents or exposure to materials.
- Read Instructions: Always read and follow all product instructions and safety warnings for paints, adhesives, and tools.
Clean-Up Tips
- Immediate Tool Cleaning: Clean all your brushes, rollers, and other tools immediately after use, following product instructions. This preserves their longevity.
- Proper Material Storage: Store any leftover paint, caulk, or other materials properly according to manufacturer guidelines for future touch-ups or projects.
- Document Your Work: Take photos of your progress and the finished accent wall. These can be great for sharing, personal records, and identifying areas for improvement.
- Allow Curing Time: Wait at least 24 hours (or as recommended by product instructions) before moving furniture back or hanging anything on the newly finished wall to allow materials to fully cure.
- Final Touch-Ups: After everything is dry and furniture is back, take one last look for any missed spots or areas needing minor touch-ups.
Wrapping It Up: Your Journey to a Transformed Space
Creating your own accent wall offers much more than just enhanced beauty for your home; it’s a deeply rewarding experience that allows you to infuse your living space with personal style and character. These 24 diverse DIY accent wall ideas vividly demonstrate that you don’t need expensive professional assistance or a bottomless budget to make your walls truly stand out. From the tranquil appeal of a floral mural to the sophisticated texture of a board and batten design, there’s a project here for every taste and skill level.
With a set of basic tools, a bit of patience, and a willingness to get creative, you can craft a space that authentically reflects who you are. Remember, the journey to the perfect accent wall begins with the thoughtful selection of the right spot and culminates in meticulous attention to detail during execution. Take your time, prioritize safety by following our guidelines, and most importantly, enjoy the enriching process of making something truly special for your home.
Ready to embark on your wall transformation project? Pick the design that most captivates your imagination and get started today! And once you’ve completed your masterpiece, we’d absolutely love to hear about your experience and see how it turned out. Share your journey in the comments below, or explore our other guides, such as tips on room color matching, for your next exciting home update.
