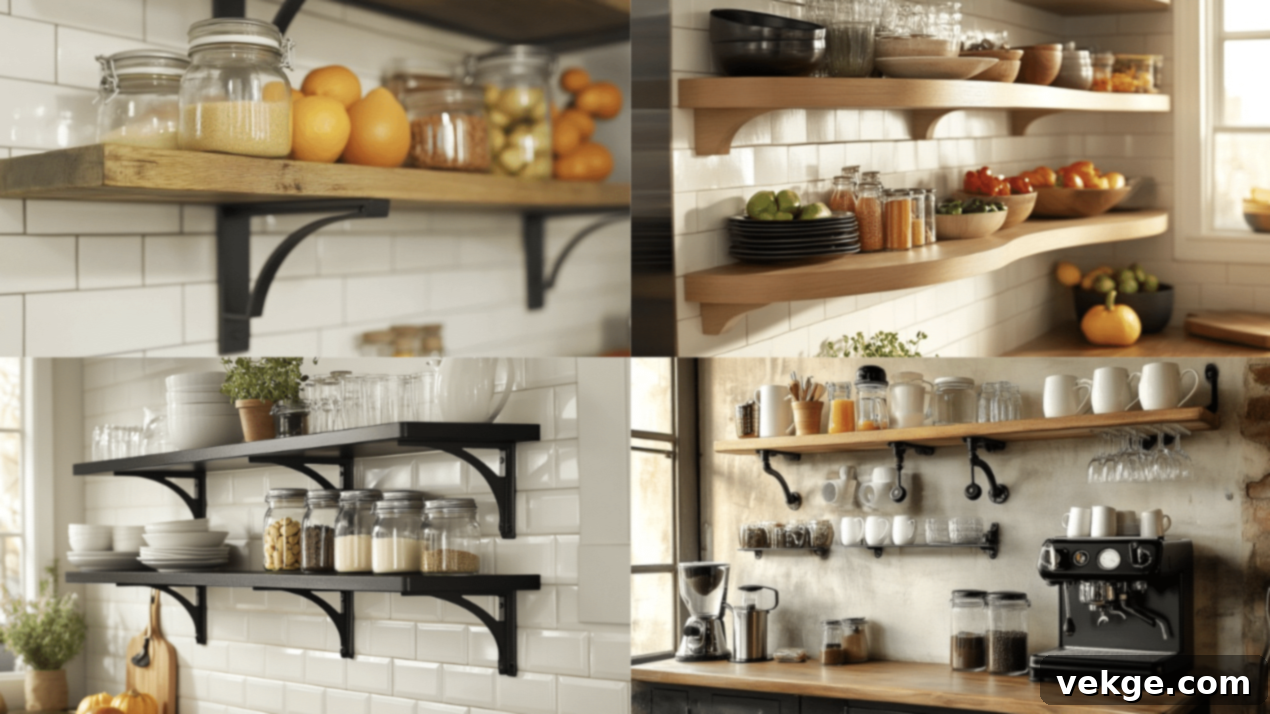
28 Kitchen Floating Shelf Ideas: The Ultimate Guide to Style, DIY & Organization for a Modern Home
Many homeowners dream of a stylish, well-organized kitchen but often face the challenge of limited space and cluttered countertops. The frustration of rummaging through cramped cabinets for ingredients or utensils is a common experience.
Imagine a simple yet effective solution that could not only make your kitchen more functional but also elevate its visual appeal.
We have exciting news! Floating shelves are a game-changer for any kitchen. These versatile additions offer an elegant way to open up your space, beautifully showcase your favorite items, and significantly improve accessibility. They merge style with practicality, making them a popular choice for contemporary kitchen designs.
In this comprehensive guide, we’ll walk you through how to use floating shelves to enhance your kitchen’s aesthetics and efficiency.
Here’s what you’ll discover:
- The compelling benefits of embracing open shelving in your kitchen.
- 28 innovative and inspiring floating shelf ideas for various kitchen styles.
- A detailed, step-by-step tutorial on how to install DIY floating shelves.
- Expert tips for styling and organizing your shelves to perfection.
- Essential maintenance advice and recommended accessories.
Prepare to transform your kitchen into a beautifully organized and highly efficient culinary haven!
Are Kitchens With Floating Shelves Still Popular in 2024?
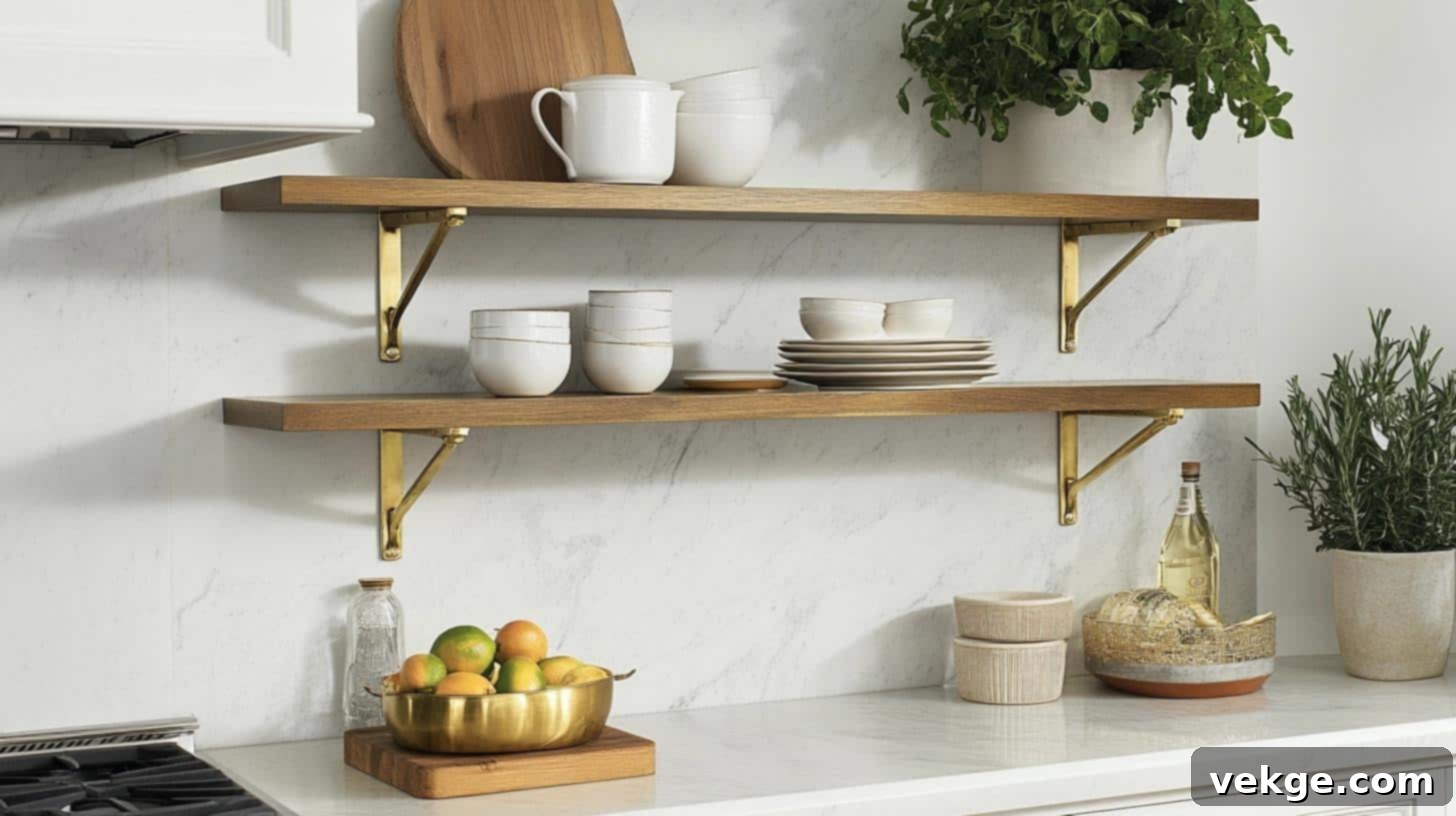
Absolutely, kitchens featuring floating shelves remain incredibly popular in 2024, proving their enduring appeal beyond fleeting trends. Their continued popularity stems from a blend of practical benefits and their remarkable adaptability to various design aesthetics.
Homeowners consistently gravitate towards the open, airy, and uncluttered look that floating shelves provide. This design element is particularly cherished in smaller kitchens, where it effectively creates an illusion of greater space and prevents the room from feeling confined. The ongoing global trend towards minimalism in home decor has also played a significant role in keeping these sleek shelves in the interior design spotlight.
For 2024, we’re observing several exciting evolutions in the floating shelf trend:
- Mixed Materials: Designers are cleverly combining different textures and finishes, such as pairing warm wood with sophisticated metal accents or sleek glass with raw concrete, to achieve a more dynamic and tactile look.
- Smart Shelving: Innovation is key, with some modern floating shelves now incorporating built-in LED lighting to highlight displayed items or integrated charging stations for convenient device power-ups.
- Eco-Friendly Options: A strong emphasis on sustainability means reclaimed wood and other environmentally conscious materials are increasingly favored, adding character and a sense of responsibility to kitchen design.
- Color Pop: While classic natural wood tones maintain their timeless appeal, bold, vibrant colored shelves are emerging as powerful statement pieces, injecting personality and contemporary flair into the kitchen.
- Curved Edges: Moving away from sharp, angular lines, softer, rounded floating shelves are gaining traction, offering a gentler, more organic aesthetic that enhances visual flow.
While open shelving might not appeal to everyone, floating shelves have solidified their position as much more than a temporary design fad. Their inherent functionality, coupled with their stylistic flexibility, ensures they remain a top choice for a wide array of kitchens in 2024 and beyond.
Benefits of Having Floating Shelves in the Kitchen
Open and Airy Feel
Floating shelves are masters at transforming the perception of space in your kitchen. By replacing bulky, traditional upper cabinets with these sleek, doorless shelves, you instantly create an illusion of increased roominess. The absence of heavy cabinet doors allows more of your wall to be visible, which naturally opens up the space visually. This effect is especially valuable in compact kitchens where every inch contributes to the overall spaciousness and comfort of the room.
Accessibility
One of the most compelling advantages of integrating floating shelves is the dramatic improvement in accessibility to your everyday kitchen essentials. Gone are the days of fumbling through dark, cluttered cabinets! With open shelving, everything you need is visibly organized and right at your fingertips. This setup is ideal for storing frequently used dishes, glasses, spices, or cooking ingredients, making your cooking process smoother and more efficient. It simplifies your routine, saving precious time and effort.
Aesthetic Appeal
Floating shelves effortlessly impart a clean, modern, and sophisticated look to any kitchen environment. Their simple lines and uncluttered appearance can immediately refresh and update your space, giving it a contemporary edge. Beyond functionality, these shelves provide an exceptional opportunity to showcase your favorite ceramic dinnerware, treasured cookbooks, artisan pottery, or other decorative items. They serve as a natural focal point, adding visual interest, depth, and a unique personal touch to the heart of your home.
Versatility
The adaptability of floating shelves to diverse kitchen styles is truly remarkable. In a sleek, contemporary kitchen, shelves crafted from polished metal or glass can perfectly complement a high-tech and minimalist aesthetic. Conversely, rustic wooden shelves can infuse a farmhouse-style kitchen with warmth, character, and country charm. For a minimalist space, simple white shelves maintain an unadulterated, clean, and understated look. This incredible flexibility means that floating shelves can seamlessly integrate with your existing decor or act as a catalyst to help you achieve an entirely new design vision for your kitchen.
28 Kitchens with Floating Shelves Ideas to Elevate Your Space
1. Back Shelves With Wallpaper
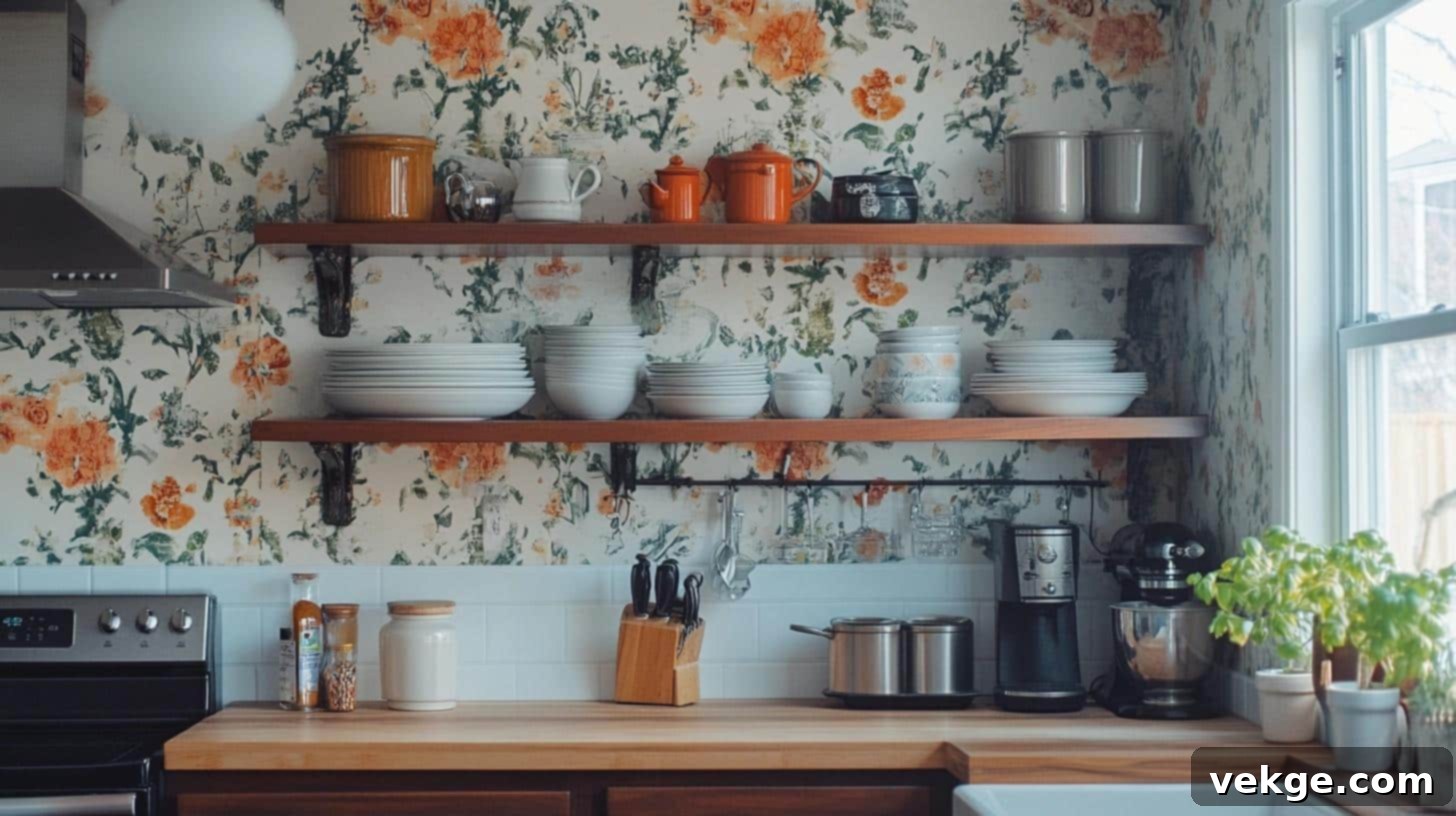
Add a unique touch of personality and visual depth to your kitchen by backing your floating shelves with stylish wallpaper. This clever design trick allows you to introduce pattern, color, and texture without overwhelming the entire room, turning a simple storage solution into a decorative statement piece. Choose a wallpaper that complements your kitchen’s existing palette for a cohesive look.
- Why It Works: Infuses personality and depth, creating a captivating backdrop for displayed items without dominating the kitchen’s overall design.
- Materials Used: Decorative wallpaper, sturdy wood shelves, and reliable mounting brackets.
- Seasonal Styling Ideas: Opt for fresh floral prints in spring to evoke new beginnings, or switch to cozy, snowy, or plaid patterns in winter for a festive feel.
- DIY Budget Range: $50-$150, varying with the quality and quantity of wallpaper and your chosen shelf material.
2. Floating Shelves with Built-in Wine Racks
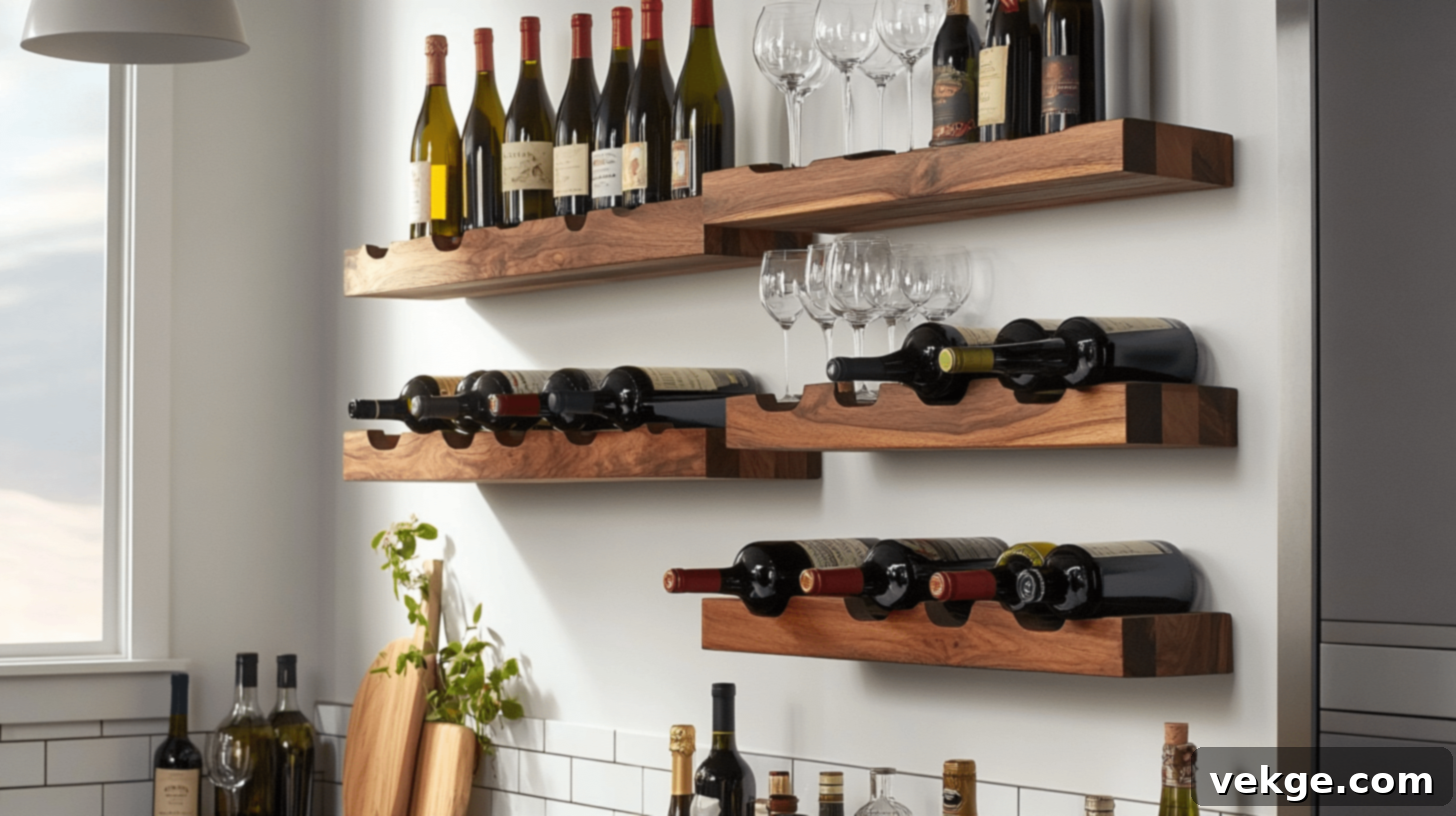
For the avid wine connoisseur, combining floating shelves with integrated wine racks offers a sophisticated and space-saving solution. This design allows you to elegantly store and display your wine collection, keeping bottles accessible while also providing space for glassware or other bar essentials above. It’s a functional addition that adds a touch of luxury to your kitchen.
- Why It Works: Masterfully blends storage with specialized function, making it an ideal choice for wine enthusiasts who appreciate both display and easy access.
- Materials Used: High-quality wood or sleek metal shelves featuring cleverly integrated wine holders for secure bottle storage.
- Seasonal Styling Ideas: During winter holidays, dress up your display with festive wine labels, holiday-themed bottle tags, and elegant glassware for entertaining.
- DIY Budget Range: $100-$300, influenced by the overall shelf size, choice of materials, and the complexity of the wine rack design.
3. Black Floating Shelves on Light Walls
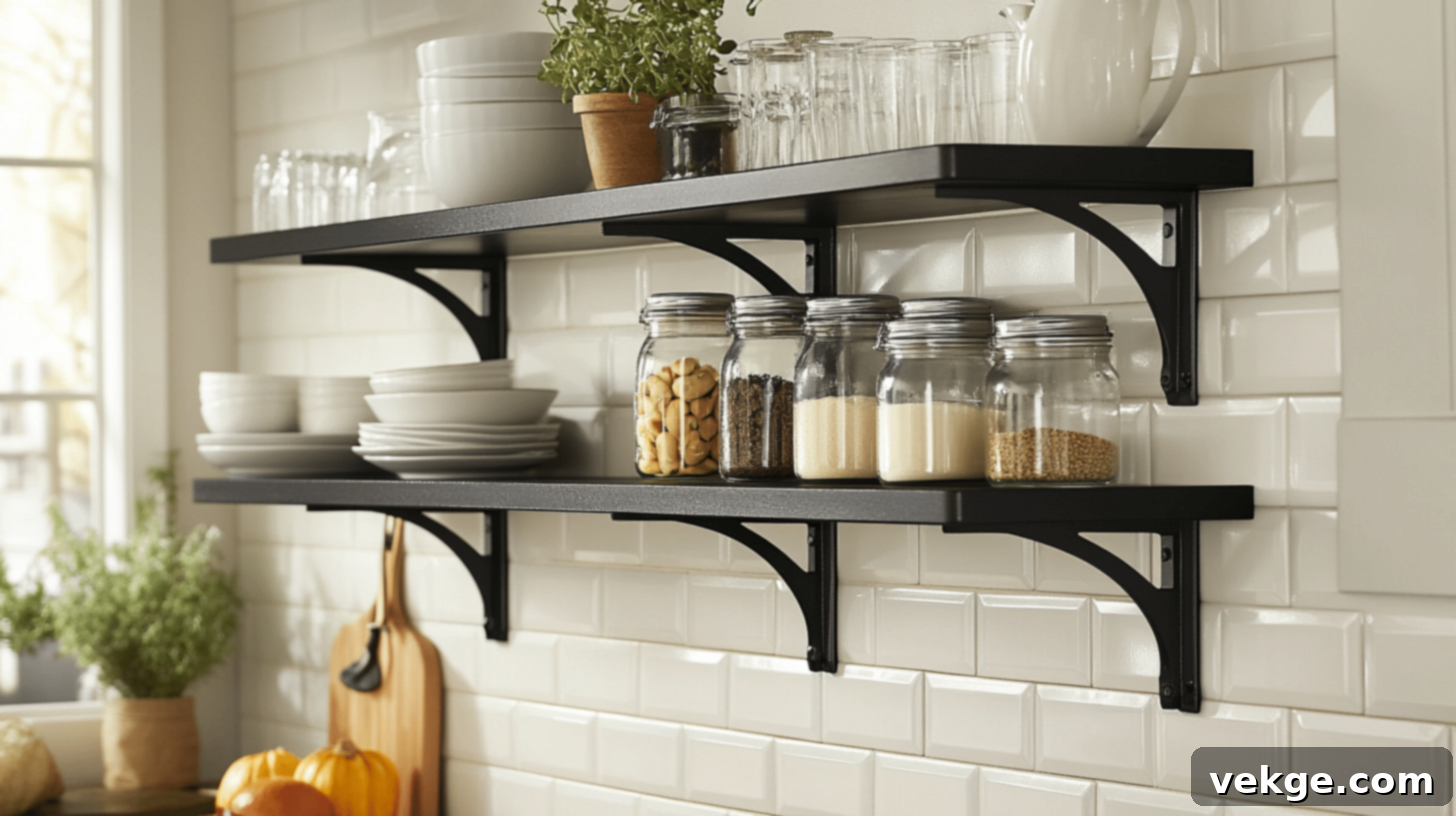
Create a dramatic and modern aesthetic by installing striking black floating shelves against a backdrop of light-colored walls. The bold contrast immediately draws the eye, making the shelves and the items displayed on them pop. This high-impact combination is perfect for contemporary or minimalist kitchens looking to add a touch of edgy sophistication.
- Why It Works: Generates a visually striking contrast, allowing the dark shelves to stand out prominently against lighter walls, enhancing their contemporary appeal.
- Materials Used: Chic matte black wood or resilient metal shelves, securely mounted with robust wall brackets.
- Seasonal Styling Ideas: Enliven the space with vibrant fresh flowers in spring, or bring in the autumn spirit with colorful pumpkins and gourds during fall.
- DIY Budget Range: $60-$200, depending on the chosen shelf material, finish, and overall dimensions.
4. Floating Shelves Around a Window
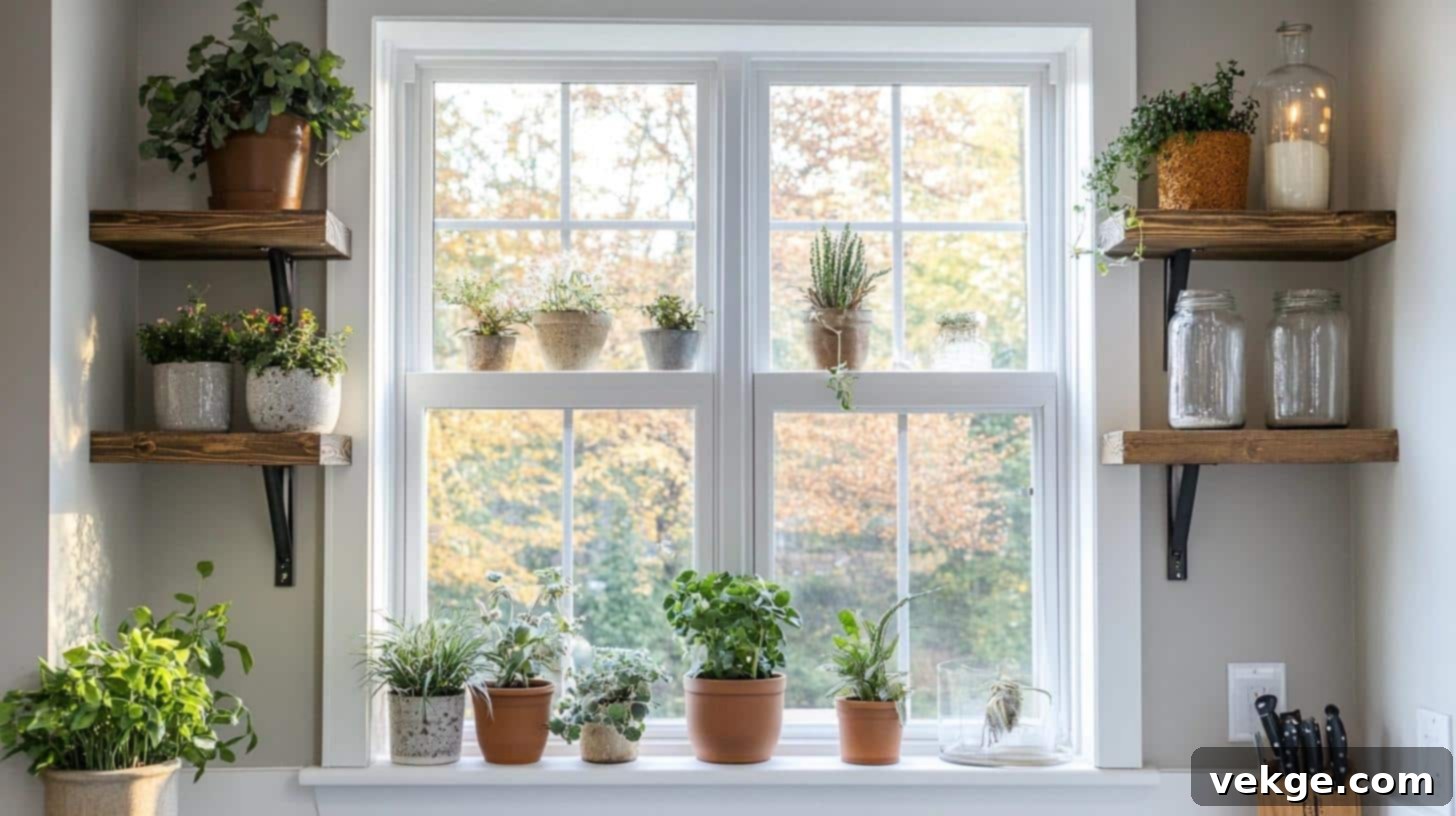
Optimize natural light and gain valuable storage by installing floating shelves around a kitchen window. This design maximizes otherwise unused wall space, creating a beautiful frame for your window while providing convenient display areas for plants, small decor, or frequently used items. It allows light to flow freely, keeping the kitchen bright and inviting.
- Why It Works: Skillfully maximizes both natural light and available storage, transforming window surrounds into functional and attractive display areas.
- Materials Used: Versatile wood or transparent glass shelves, specifically designed to fit with secure window brackets.
- Seasonal Styling Ideas: Adorn with lush green plants in summer to celebrate nature, and in winter, drape delicate string lights for a warm, cozy glow.
- DIY Budget Range: $75-$250, varying with the window size, number of shelves, and selected shelf material.
5. Wood Floating Shelves and Subway Tile
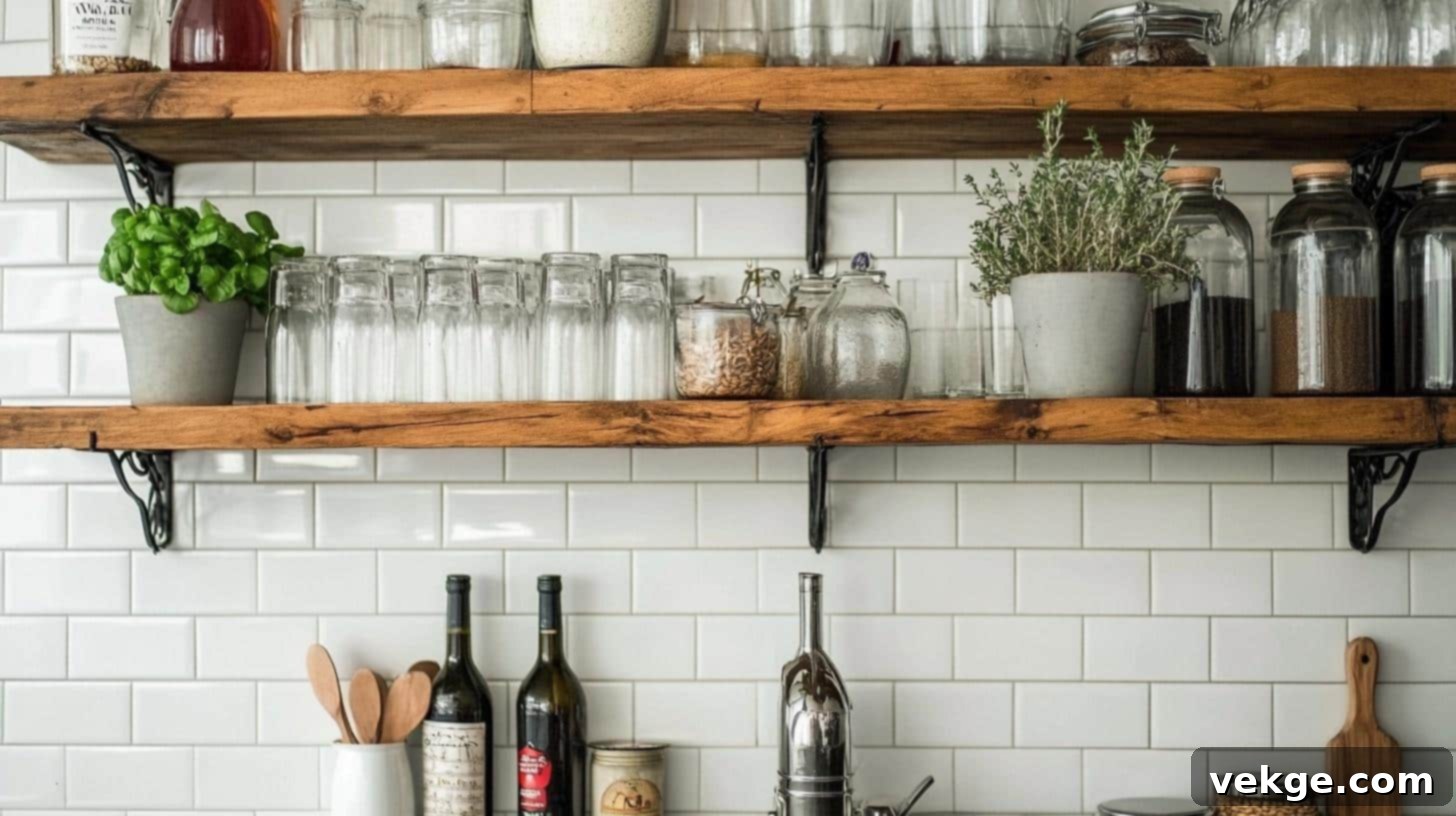
Achieve a timeless and exquisitely clean aesthetic by pairing warm wood floating shelves with classic subway tile. The crisp, clean lines of subway tile provide a perfect complement to the natural texture and warmth of wood, creating a balanced look that is both modern and inviting. This combination works beautifully in various kitchen styles, from transitional to contemporary farmhouse.
- Why It Works: Offers a consistently timeless and pristine appearance, beautifully softened and grounded by the warm, inviting touch of natural wood.
- Materials Used: Robust solid wood shelves, elegant white subway tiles for the backsplash, and sturdy metal brackets for support.
- Seasonal Styling Ideas: Display vibrant fresh herbs in stylish pots during summer, and transition to charming pinecones or small rustic candles in winter.
- DIY Budget Range: $80-$200, depending on the specific type of wood chosen and the cost of subway tiles.
6. Rounded Open Shelves
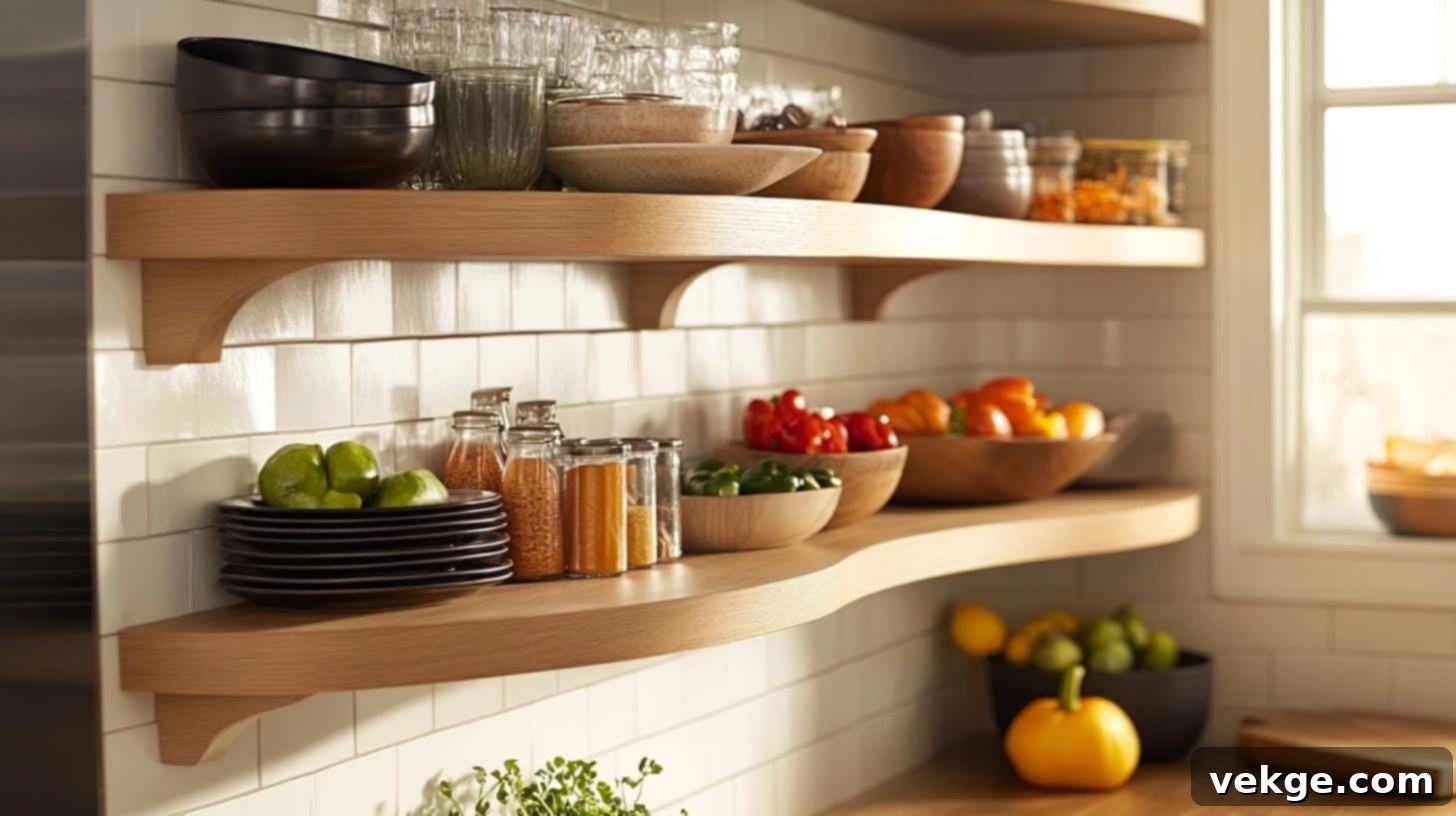
Introduce a softer, more fluid element into your kitchen design with rounded open shelves. Moving away from traditional sharp corners, curved shelving adds a touch of elegance and gentle sophistication. This unique shape can soften the overall look of your kitchen, creating a harmonious flow and a welcoming ambiance, perfect for a subtle contemporary update.
- Why It Works: Expertly softens the kitchen’s visual appeal by introducing gracefully curved, elegant shelving, creating a more organic and inviting atmosphere.
- Materials Used: Custom-cut curved wood or sleek metal shelves, secured with specially designed rounded brackets for seamless integration.
- Seasonal Styling Ideas: Feature bright, colorful ceramics or delicate spring blooms in spring, then swap them for rich, fall-themed accents like miniature gourds or rust-colored decor.
- DIY Budget Range: $100-$250, contingent on the material and craftsmanship required for custom curved shelves.
7. Open Shelf with Hooks Underneath
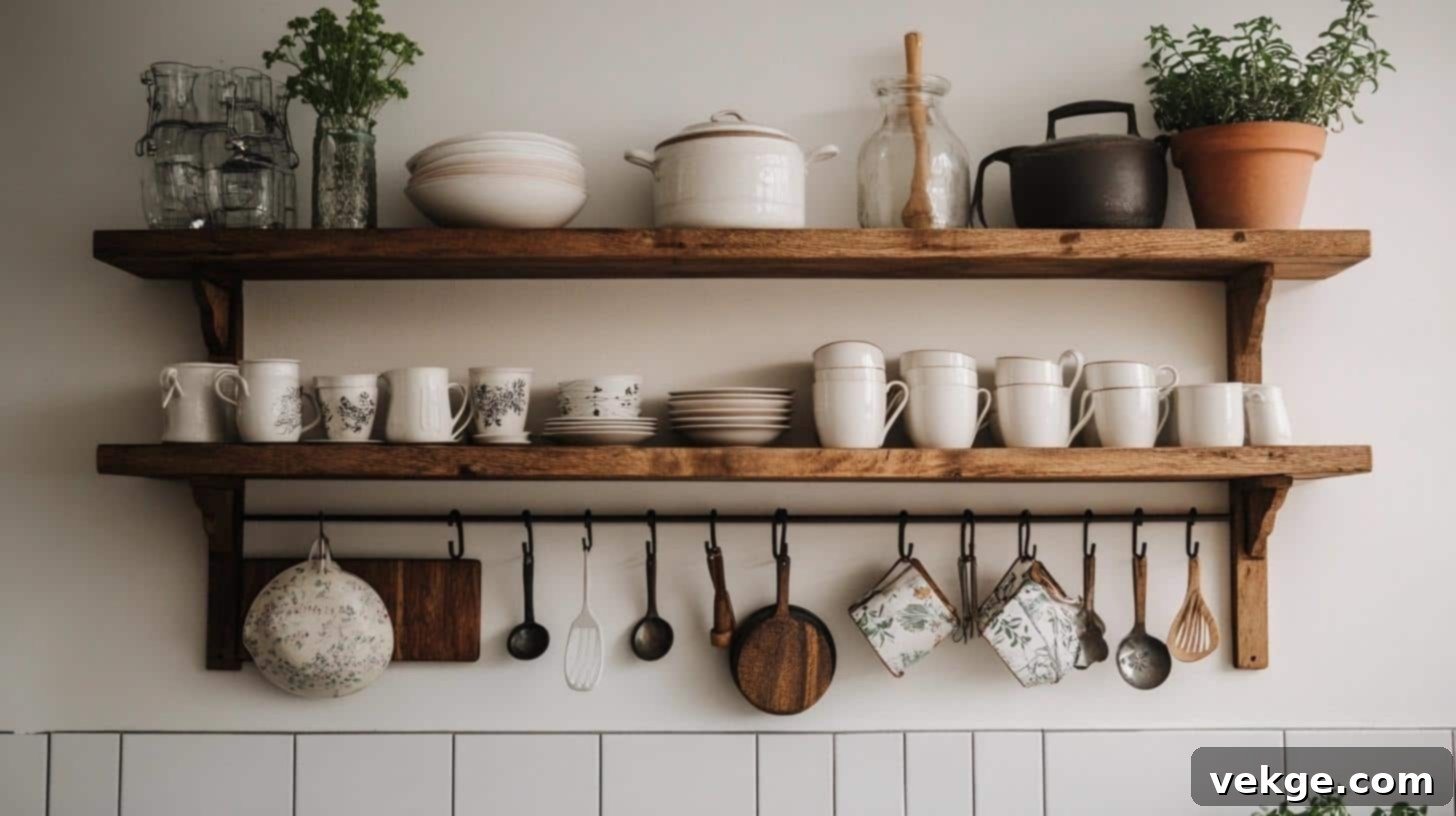
Maximize functionality with an open shelf that includes hooks integrated underneath. This dual-purpose design is incredibly practical, allowing you to store dishes or decorative items on top while providing convenient hanging space for frequently used utensils, mugs, or tea towels below. It keeps essential tools within easy reach, reducing countertop clutter and optimizing vertical space.
- Why It Works: Brilliantly combines open storage with enhanced functionality, creating a perfect spot for hanging kitchen utensils, mugs, or small accessories.
- Materials Used: Durable wood or sleek metal shelves, reinforced with sturdy hooks strategically placed underneath.
- Seasonal Styling Ideas: Adorn with festive, holiday-themed mugs in winter, and swap them for light, floral-patterned tea towels or small gardening tools in spring.
- DIY Budget Range: $50-$150, depending on the chosen shelf material, size, and the quality of the hooks.
8. Walnut Floating Shelves
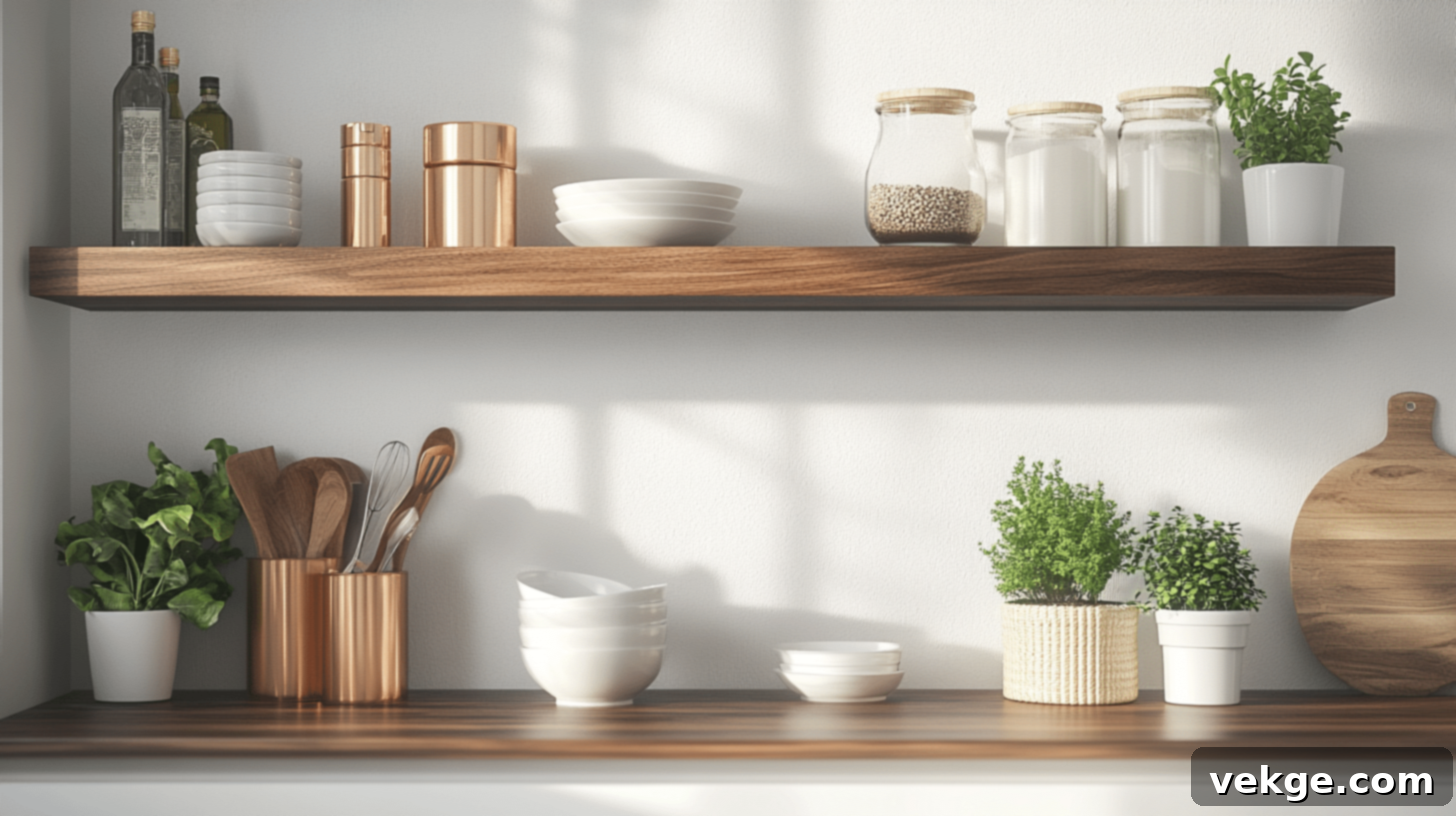
Infuse your kitchen with a sense of refined luxury and warmth by opting for rich walnut floating shelves. The deep, dark tones and beautiful grain patterns of walnut wood lend an immediate air of sophistication and elegance to any space. These shelves serve as a focal point, grounding the room with their natural beauty and providing a distinguished backdrop for your chosen display items.
- Why It Works: Introduces rich, deep tones to your kitchen, creating a sophisticated, high-end, and visually grounding aesthetic.
- Materials Used: Premium solid walnut wood for the shelves, mounted with discreet floating brackets to maintain a clean, seamless look.
- Seasonal Styling Ideas: Showcase gleaming copper accents or warm earth-toned ceramics in fall, and transition to minimalist white décor or clear glass items in summer for a fresh contrast.
- DIY Budget Range: $100-$300, influenced by the precise size, thickness, and grade of the walnut wood.
9. Metal Kitchen Floating Shelves with Wood Cabinetry
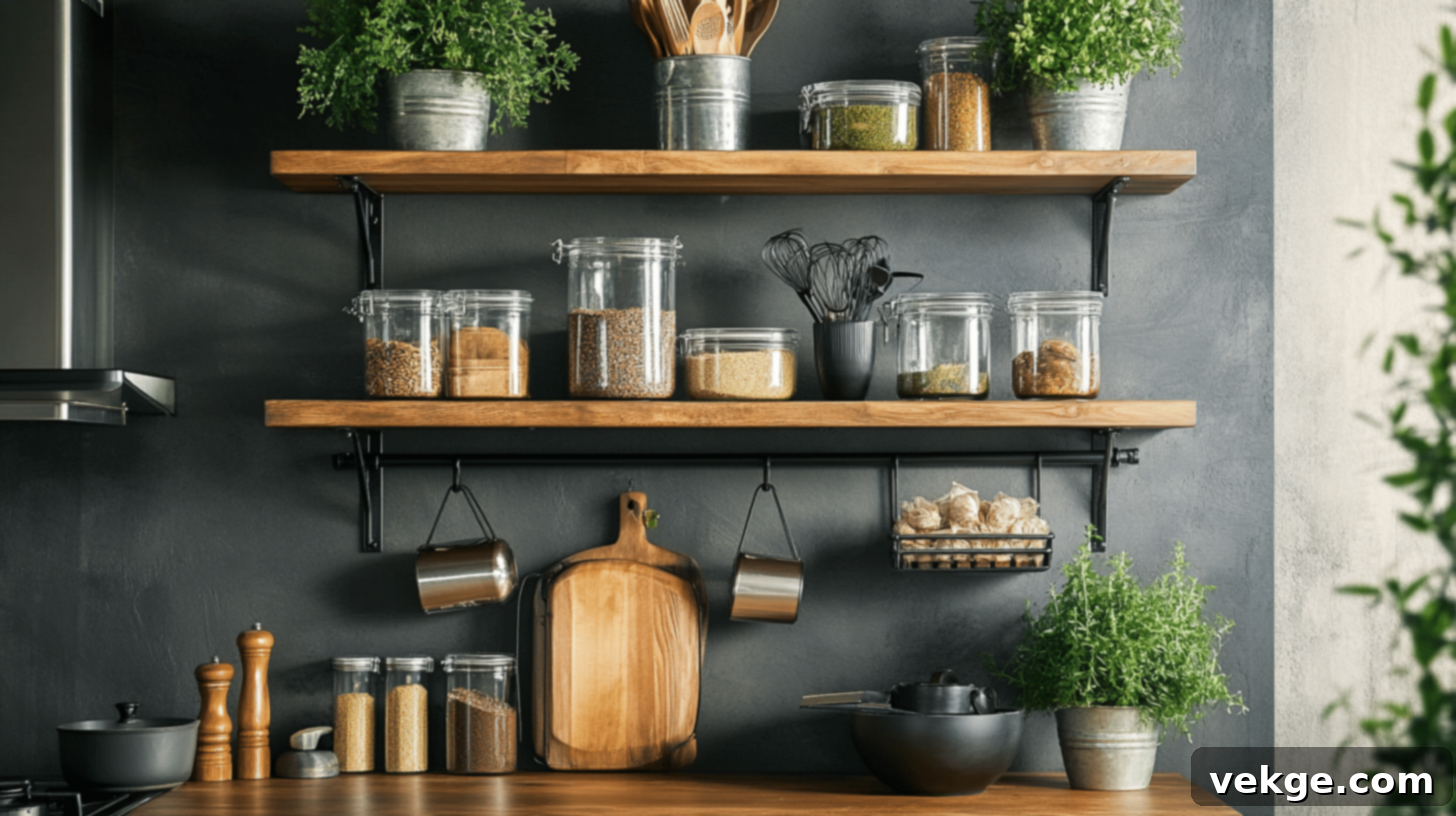
Achieve a perfectly balanced and visually engaging kitchen by harmoniously blending industrial metal floating shelves with warm, traditional wood cabinetry. The stark, modern lines of metal provide a captivating contrast to the organic texture of wood, creating a dynamic design that is both contemporary and inviting. This fusion offers a unique character, ideal for transitional or industrial-chic kitchens.
- Why It Works: Artfully blends robust industrial elements with the inherent warmth of wood, resulting in a balanced, textured, and visually dynamic kitchen design.
- Materials Used: Sleek metal shelving units, thoughtfully paired with classic wooden cabinetry for a cohesive yet contrasting look.
- Seasonal Styling Ideas: Combine metallic accents with vibrant greenery or fresh flowers in spring, and for winter, incorporate industrial-style lanterns or dark, matte ceramics.
- DIY Budget Range: $150-$400, dependent on the quality of both the metal and wood components chosen.
10. Floating Shelves with Built-in Lighting
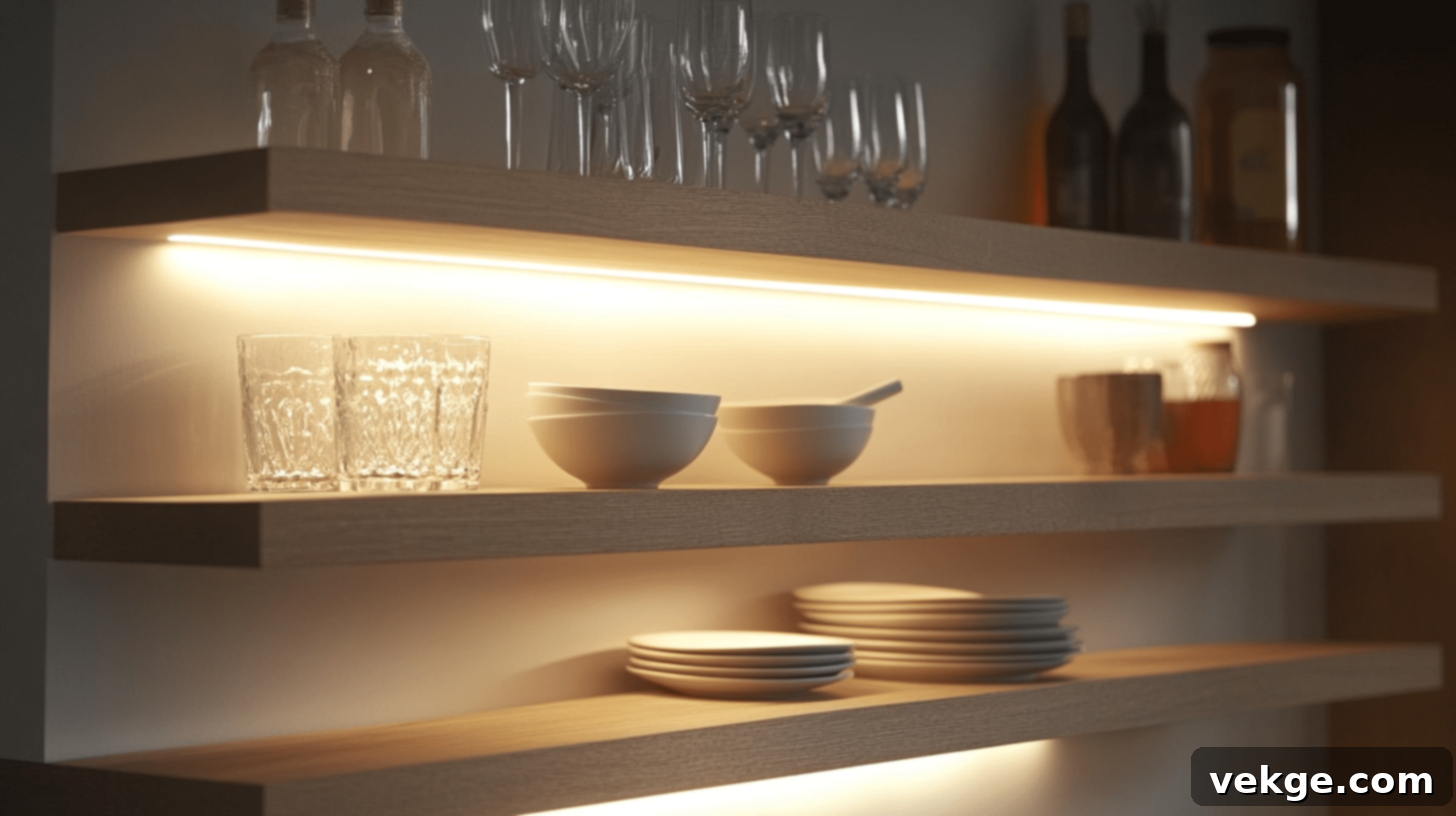
Illuminate your kitchen with elegance and practicality by integrating built-in lighting directly into your floating shelves. This sophisticated design not only casts a warm glow, enhancing the ambiance of your space, but also highlights the items displayed on the shelves, turning them into captivating focal points. It’s a fantastic way to add both style and functionality, especially in areas needing extra task or accent lighting.
- Why It Works: Provides both functional illumination and stylish storage, ensuring displayed items are beautifully highlighted while adding an ambient glow to the kitchen.
- Materials Used: Custom wood or glass shelves embedded with discreet, energy-efficient LED lighting systems.
- Seasonal Styling Ideas: During the winter months, adorn the shelves with glowing ornaments or festive string lights; in summer, showcase bright kitchenware or colorful glass objects that catch the light.
- DIY Budget Range: $100-$250, influenced by the chosen shelf material and the complexity and type of integrated lighting.
11. Industrial Kitchen Open Shelving with Neutral Color Scheme
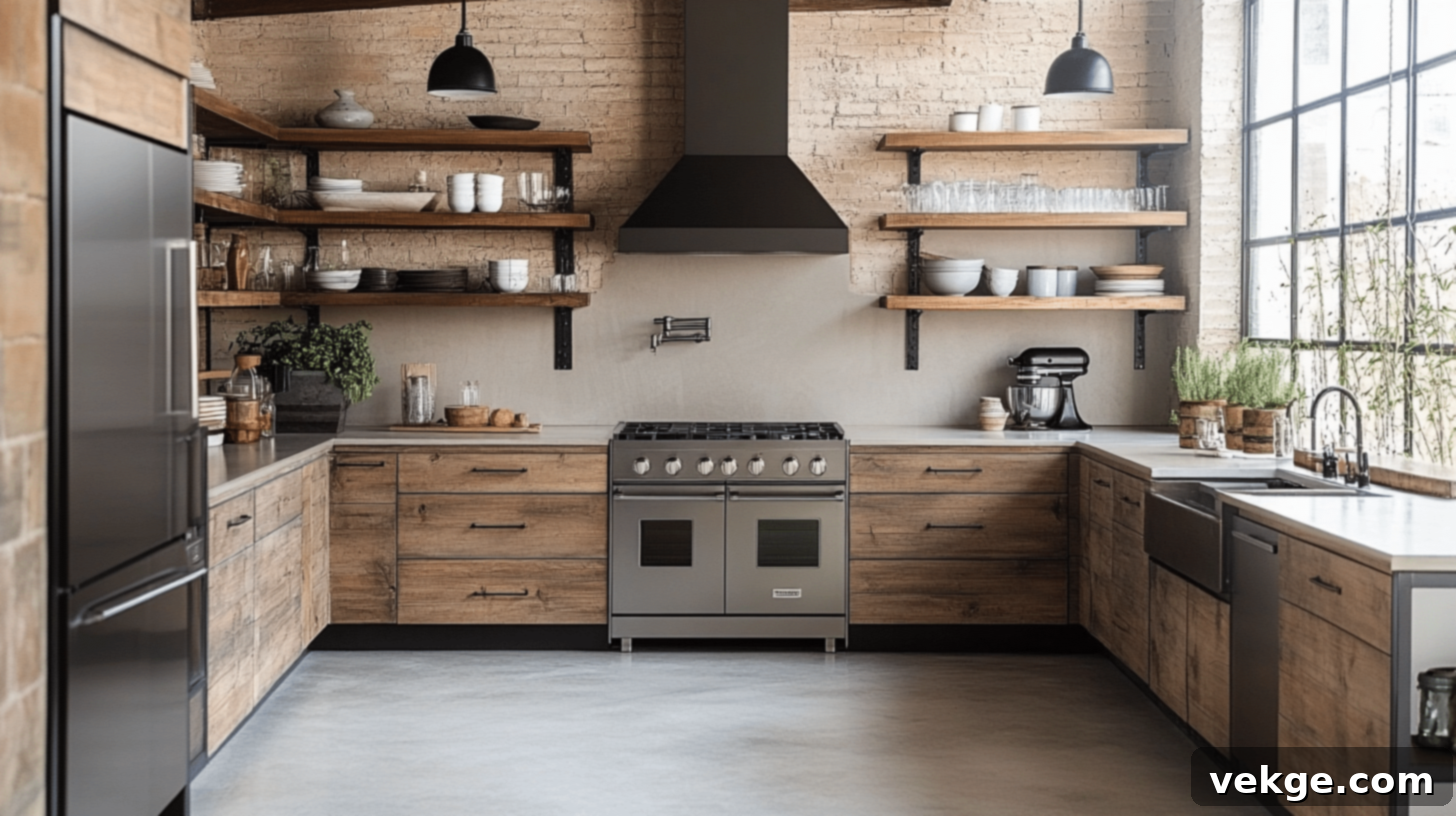
Embrace a raw, modern aesthetic by combining industrial-style open shelving with a serene, neutral color scheme. This design choice brings together rugged materials like metal and unfinished wood with soft, understated hues, creating a sleek yet inviting atmosphere. The neutral backdrop allows the architectural elements of the shelving and any displayed items to truly stand out, perfect for a minimalist industrial look.
- Why It Works: Expertly fuses raw, robust materials with a calming neutral palette, creating a sleek, contemporary, and effortlessly stylish kitchen environment.
- Materials Used: Sturdy metal or solid wood shelving units, complemented by a neutral wall paint, often featuring exposed brackets for an authentic industrial feel.
- Seasonal Styling Ideas: Introduce darker, moodier accents or metallic elements in winter for a sophisticated touch, and liven up the space with fresh plants or light-colored ceramics in spring.
- DIY Budget Range: $150-$300, depending on the quality and type of shelf material and the chosen decorative elements.
12. Rustic Wooden Shelves Above a Farmhouse Sink
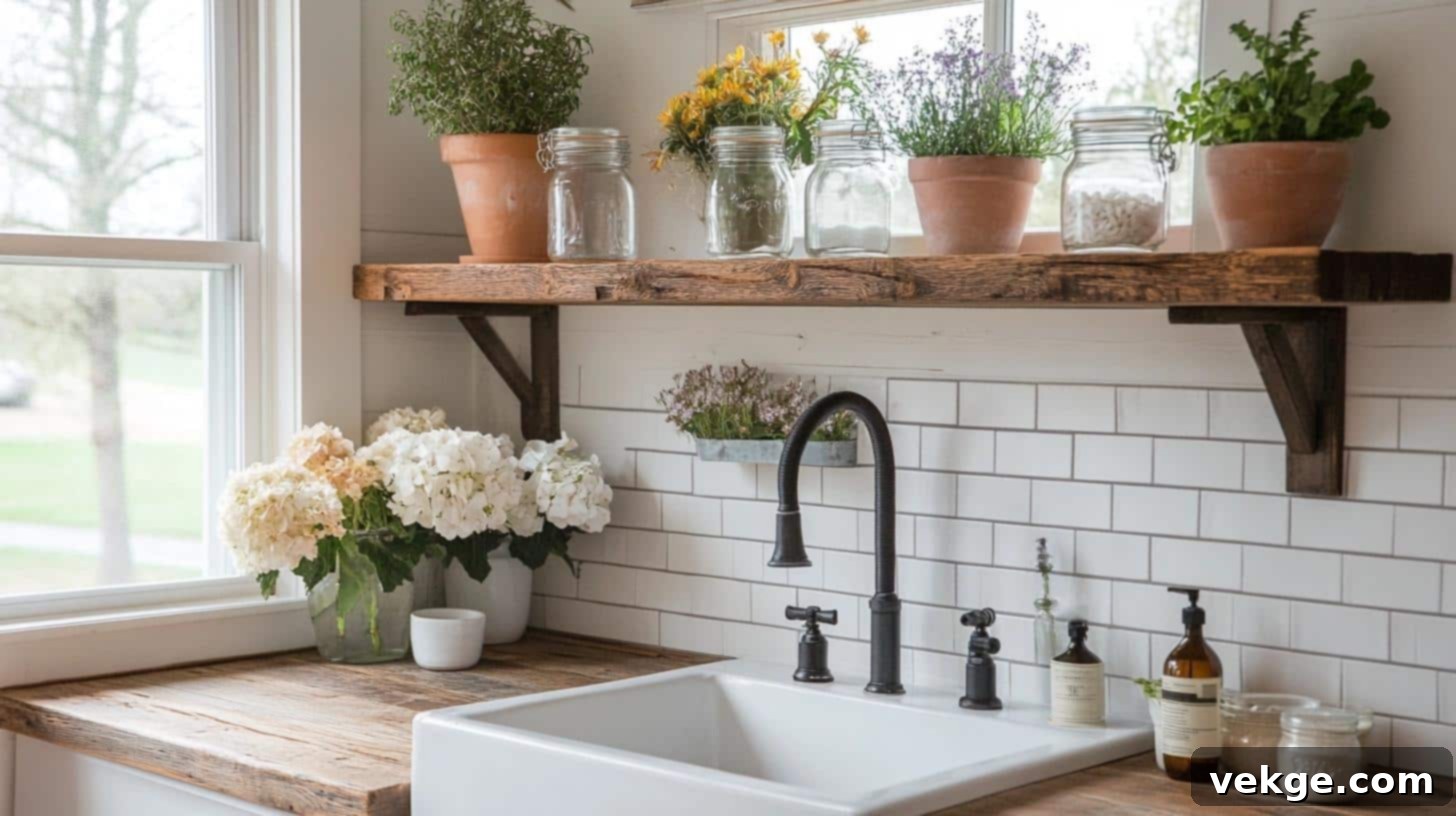
Enhance the charm of your farmhouse kitchen by installing rustic wooden shelves directly above a classic farmhouse sink. This arrangement perfectly complements the cozy, natural aesthetic of the style, providing a convenient space for frequently used items like dish soap, sponges, or small plants. The warmth of the wood against the sink area creates a focal point that feels both practical and welcoming.
- Why It Works: Beautifully complements the quintessential farmhouse style, injecting a cozy, authentic, and naturally inviting look into the kitchen.
- Materials Used: Characterful reclaimed wood for the shelves, paired with robust rustic brackets that enhance the country aesthetic.
- Seasonal Styling Ideas: In spring, display mason jars filled with seasonal flowers or fresh herbs; come fall, adorn with candles, small pumpkins, or dried arrangements for a warm harvest feel.
- DIY Budget Range: $70-$200, influenced by the type and source of reclaimed wood and the style of the chosen brackets.
13. Colorful Floating Shelves
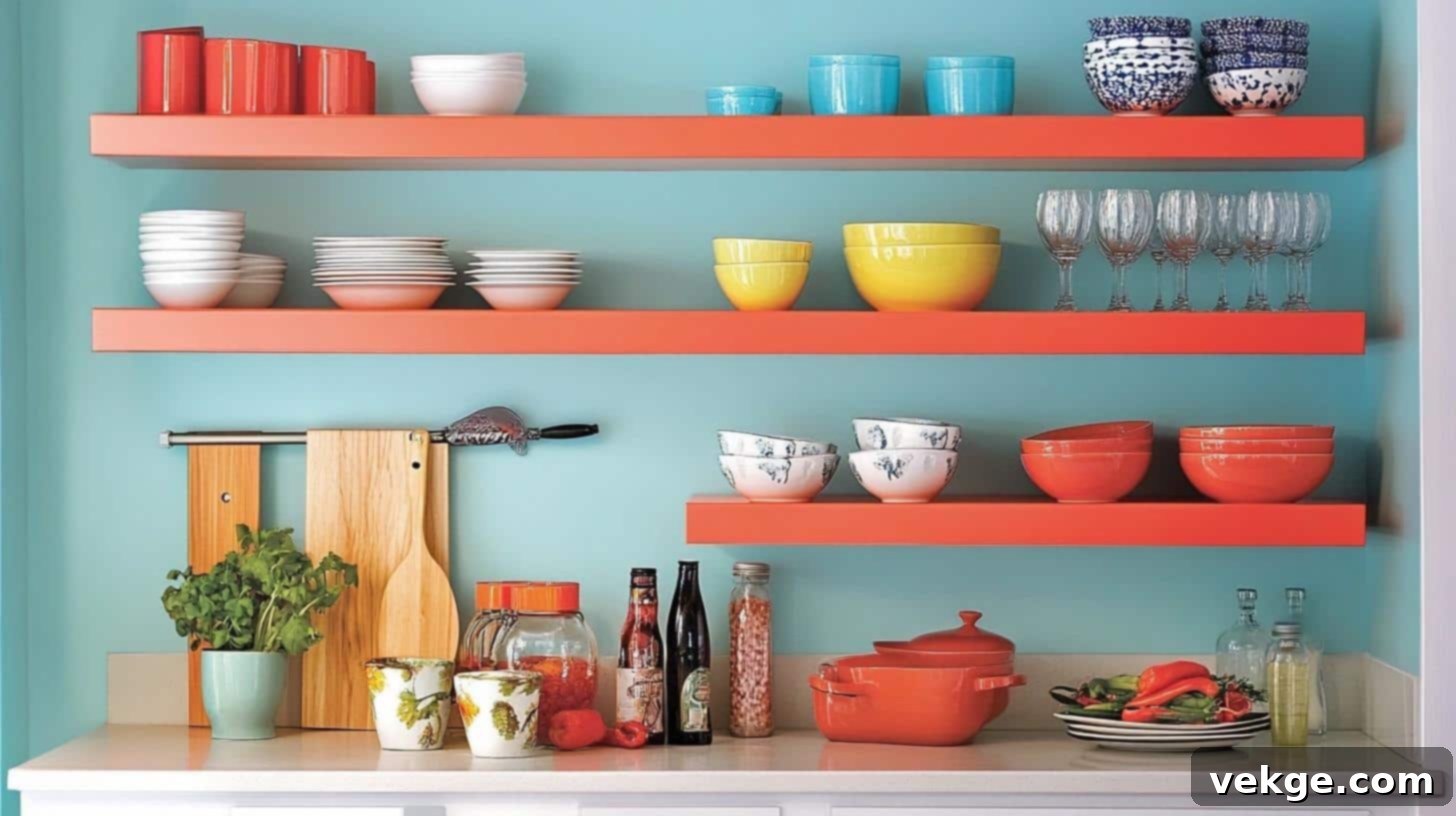
Inject vibrancy and personality into an otherwise neutral kitchen space by opting for colorful floating shelves. A bold hue can serve as an unexpected pop of color, transforming a plain wall into an artistic statement. This idea is perfect for those looking to add a playful or contemporary touch, allowing you to express your individual style through unexpected design elements.
- Why It Works: Instantly adds a vibrant, energetic pop of color, transforming a neutral kitchen space into a lively and personalized area.
- Materials Used: Easily customizable painted wood or sleek metal shelves, secured with standard wall brackets.
- Seasonal Styling Ideas: Artfully coordinate your shelf colors with the changing seasons—think bright pastels or sunny yellows in spring, and deep reds, greens, or oranges in winter.
- DIY Budget Range: $50-$150, depending on the shelf material and the quality and type of paint used.
14. Slate Mosaic Tiles and Floating Shelves
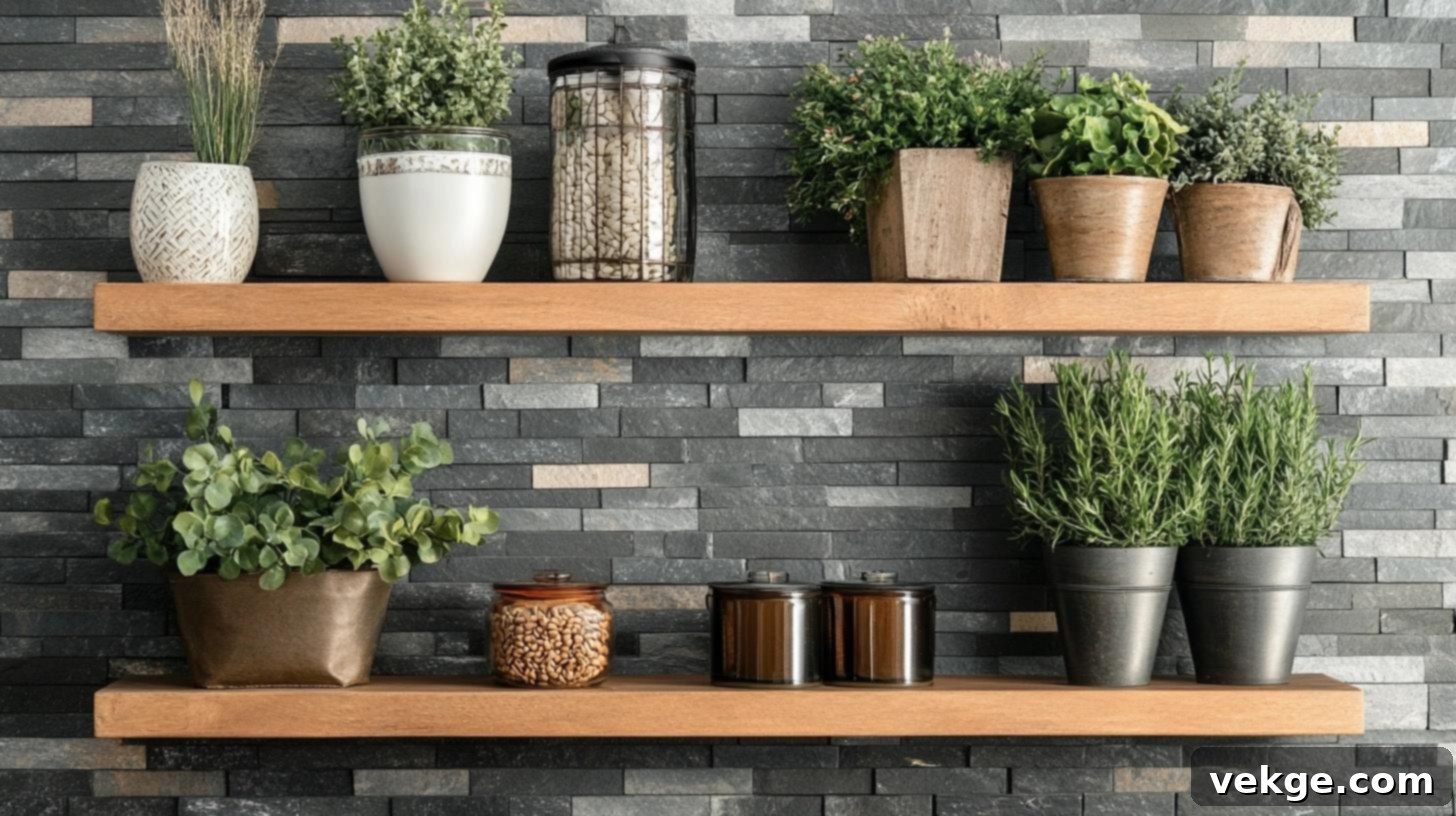
Create a stunning, earthy, and highly textured backdrop for your modern floating shelves by utilizing slate mosaic tiles. The natural variations in color and texture of slate provide a captivating contrast to the clean lines of the shelves, adding depth and organic warmth to your kitchen. This combination is ideal for a rustic-modern or natural-inspired aesthetic, making a sophisticated statement.
- Why It Works: Delivers a distinctly textured, earthy, and sophisticated backdrop that beautifully contrasts with and enhances modern floating shelves.
- Materials Used: Rich slate mosaic tiles for the wall, paired with elegant wood or sleek metal shelves.
- Seasonal Styling Ideas: Accentuate with seasonal décor, such as vibrant greenery in summer or rustic, chunky candles and warm textiles in winter.
- DIY Budget Range: $100-$300, varying with the cost of the slate tiles and the selected shelf materials.
15. Two-Tone Shelves Matching Cabinet and Wall Colors
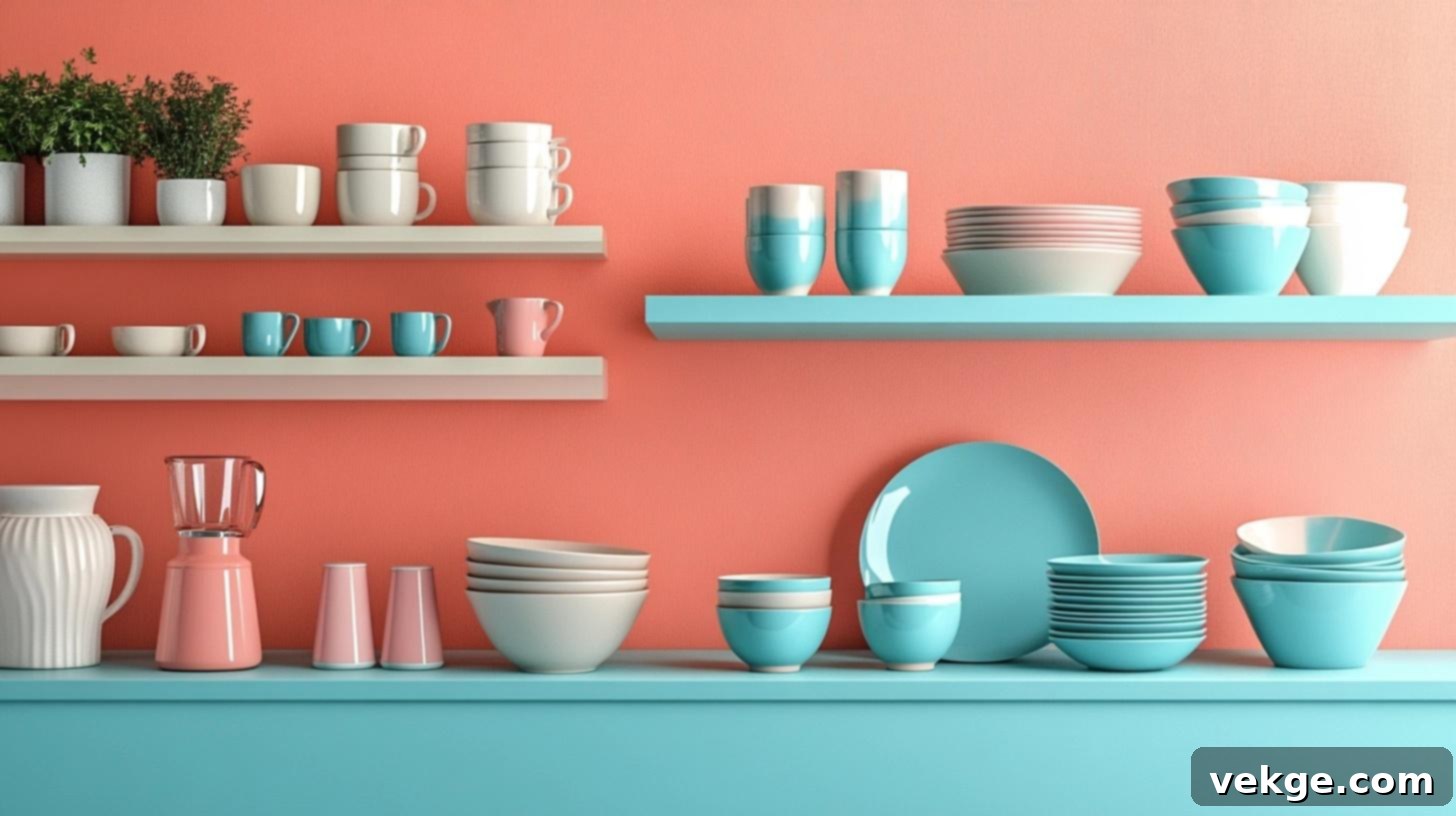
Achieve a wonderfully cohesive and polished kitchen design by using two-tone floating shelves that perfectly match both your cabinet and wall colors. This clever technique creates a seamless visual flow, making the shelves feel like an integrated part of the architecture rather than an add-on. The result is an elegant, custom-built look that is both harmonious and visually pleasing.
- Why It Works: Harmoniously blends the shelves into the kitchen’s existing color palette, resulting in a perfectly cohesive and visually integrated design.
- Materials Used: Specifically painted wood shelves, accompanied by color-matched paint for both the surrounding walls and cabinetry.
- Seasonal Styling Ideas: Introduce seasonal ceramics or delicate glassware whose colors subtly complement the changing hues and themes of the year.
- DIY Budget Range: $60-$180, depending on the quality of paint, chosen shelf material, and overall size.
16. White Kitchen Floating Shelves
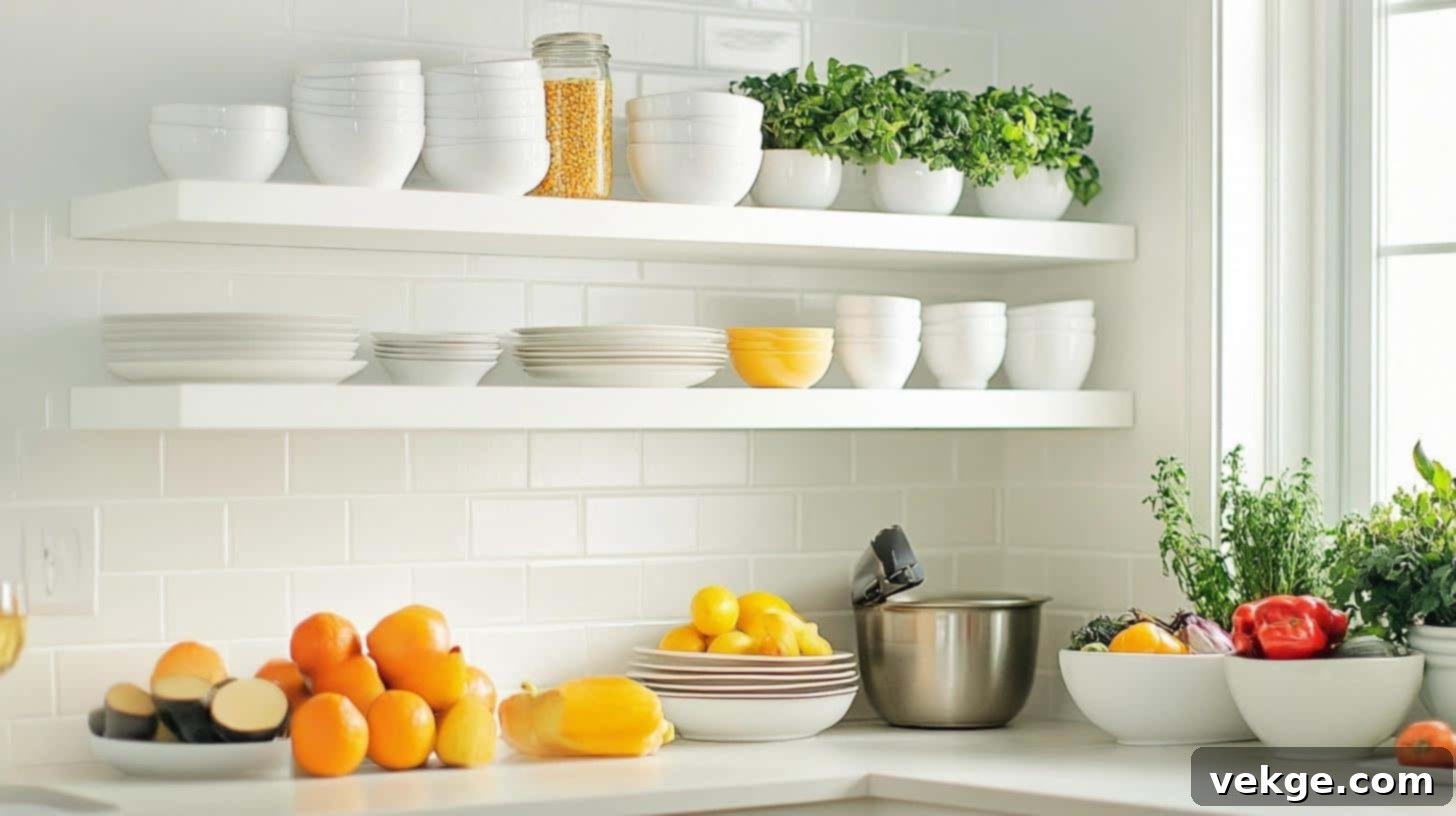
Maintain a bright, airy, and impeccably clean aesthetic in your kitchen by installing classic white floating shelves. White shelving naturally reflects light, enhancing the spaciousness of the room and creating a fresh, inviting atmosphere. They offer practical storage without visually cluttering the space, making them a staple for minimalist, Scandinavian, or contemporary kitchen designs.
- Why It Works: Keeps the kitchen feeling wonderfully light, bright, and expansive while providing highly practical and aesthetically pleasing storage solutions.
- Materials Used: Smooth white-painted wood shelves, mounted with discreet hidden brackets for a truly seamless “floating” effect.
- Seasonal Styling Ideas: Utilize the versatile white shelves as a neutral canvas, allowing vibrant, colorful holiday décor or seasonal accents to truly pop and stand out.
- DIY Budget Range: $50-$120, varying with the shelf size, material, and the quality of paint used.
17. Floating Shelves with Marble Backsplash
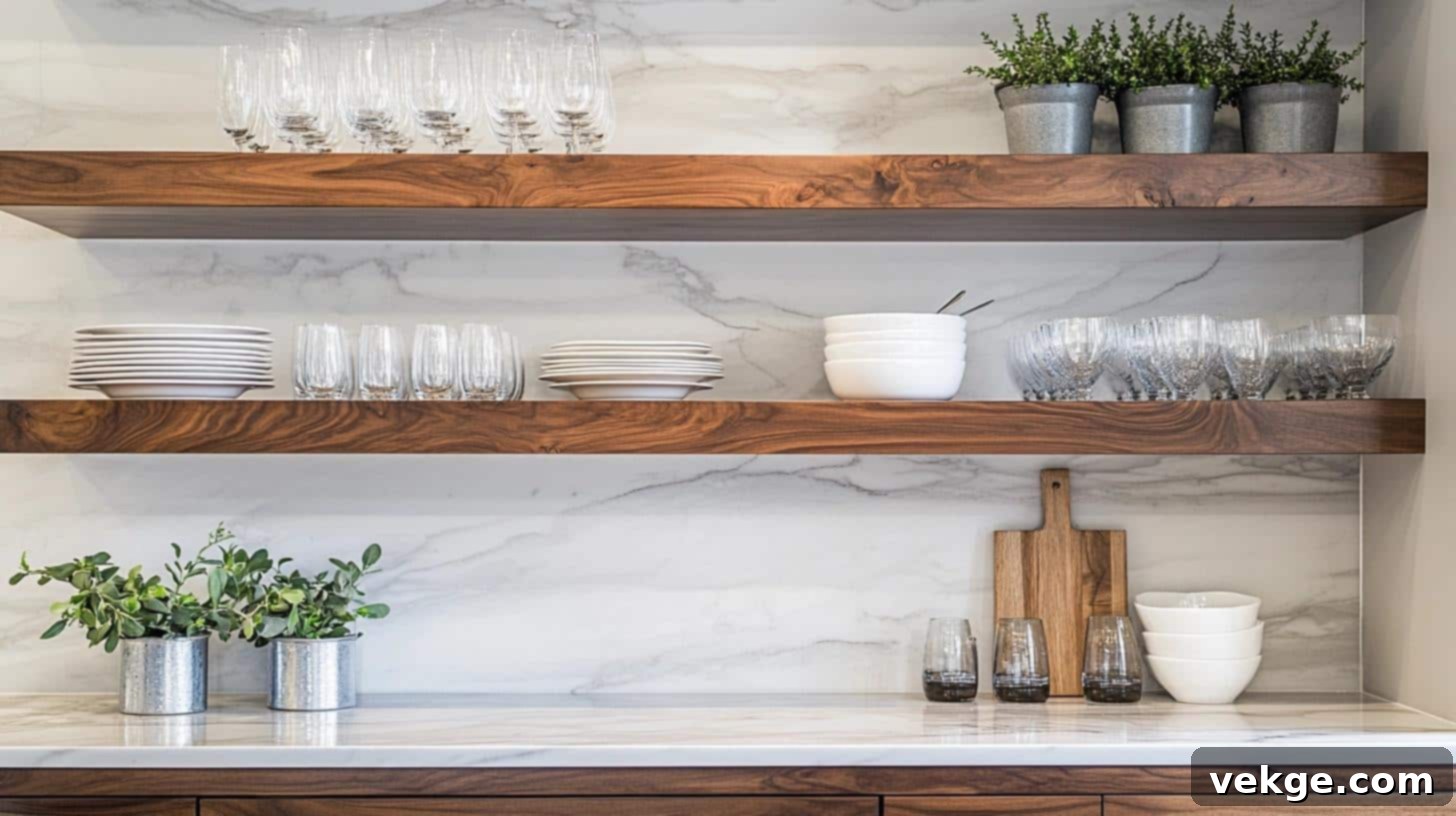
Elevate your kitchen to a new level of luxury and sophistication by pairing floating shelves with a stunning marble backsplash. The elegant veining and polished surface of marble provide a lavish backdrop that instantly adds a high-end, modern touch. This combination creates a focal point of timeless beauty, offering both aesthetic appeal and practical storage in one luxurious package.
- Why It Works: Exudes luxury and modern elegance, adding a touch of sophisticated grandeur to the kitchen while providing functional storage.
- Materials Used: Premium marble tiles for a lavish backsplash, complemented by sleek wood or modern metal shelves.
- Seasonal Styling Ideas: Adorn with simple, high-end decorative items such as sparkling crystal glassware, minimalist greenery, or elegant metallic accents that enhance the marble’s beauty.
- DIY Budget Range: $150-$400, significantly influenced by the type and quality of marble, as well as the chosen shelf material.
18. Standalone Open Shelf
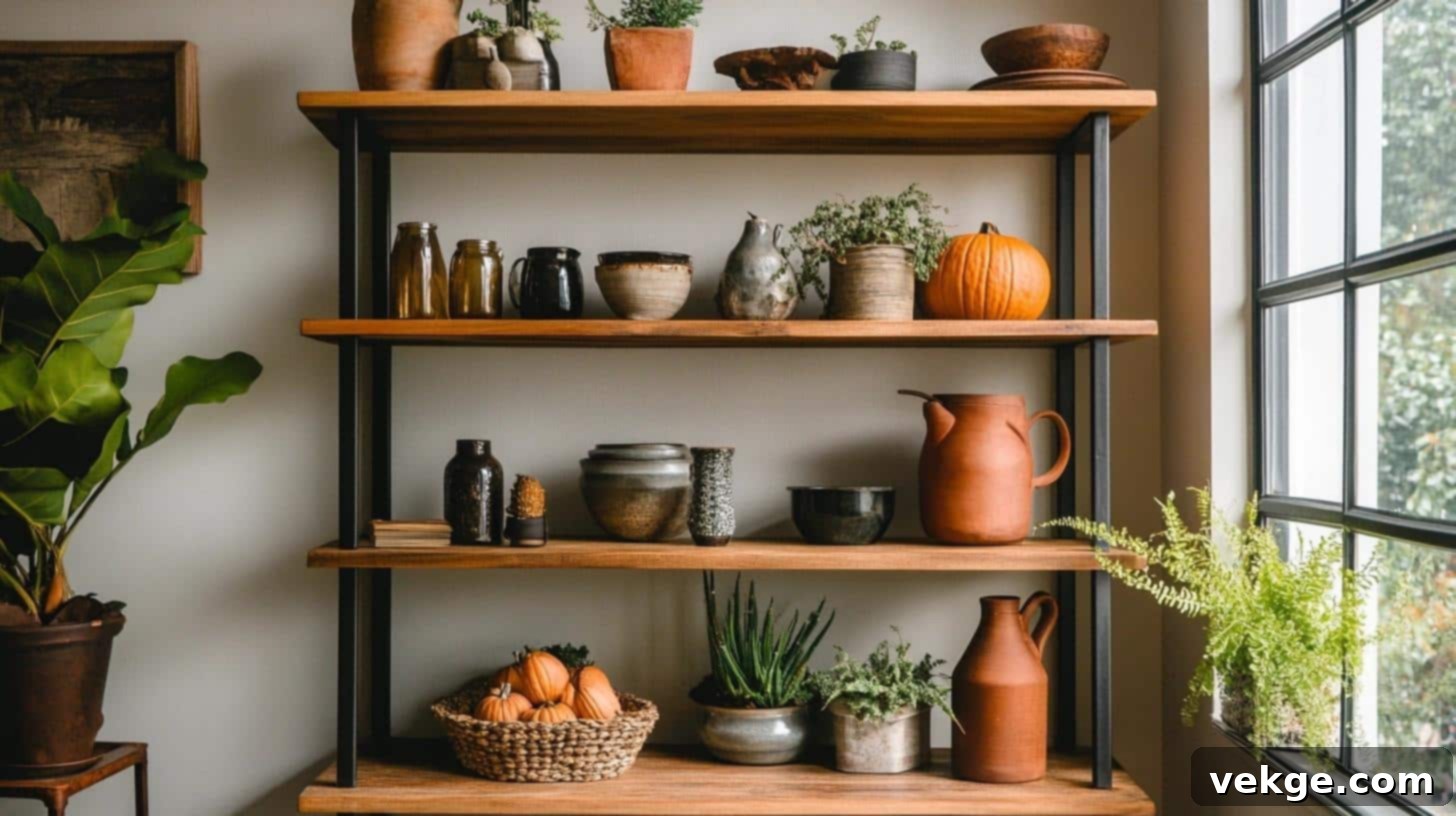
A standalone open shelf unit offers immense versatility as both a practical storage solution and a prominent display feature, without requiring permanent wall installation. Perfect for renters or those who prefer flexible layouts, these units can hold anything from cookbooks and pantry staples to decorative objects, adding character and utility to any corner of the kitchen or dining area.
- Why It Works: Serves dual purposes as functional storage and an appealing display feature, offering flexibility without the commitment of wall mounting.
- Materials Used: A robust freestanding unit crafted from durable wood or sleek metal, designed for stability and aesthetic appeal.
- Seasonal Styling Ideas: Effortlessly switch out seasonal accessories, such as vibrant pumpkins or warm-toned foliage in fall, and elegant vases with fresh blooms in spring.
- DIY Budget Range: $80-$250, dependent on the material quality, overall size, and design complexity of the freestanding shelf unit.
19. Fill Gaps with Open Shelves
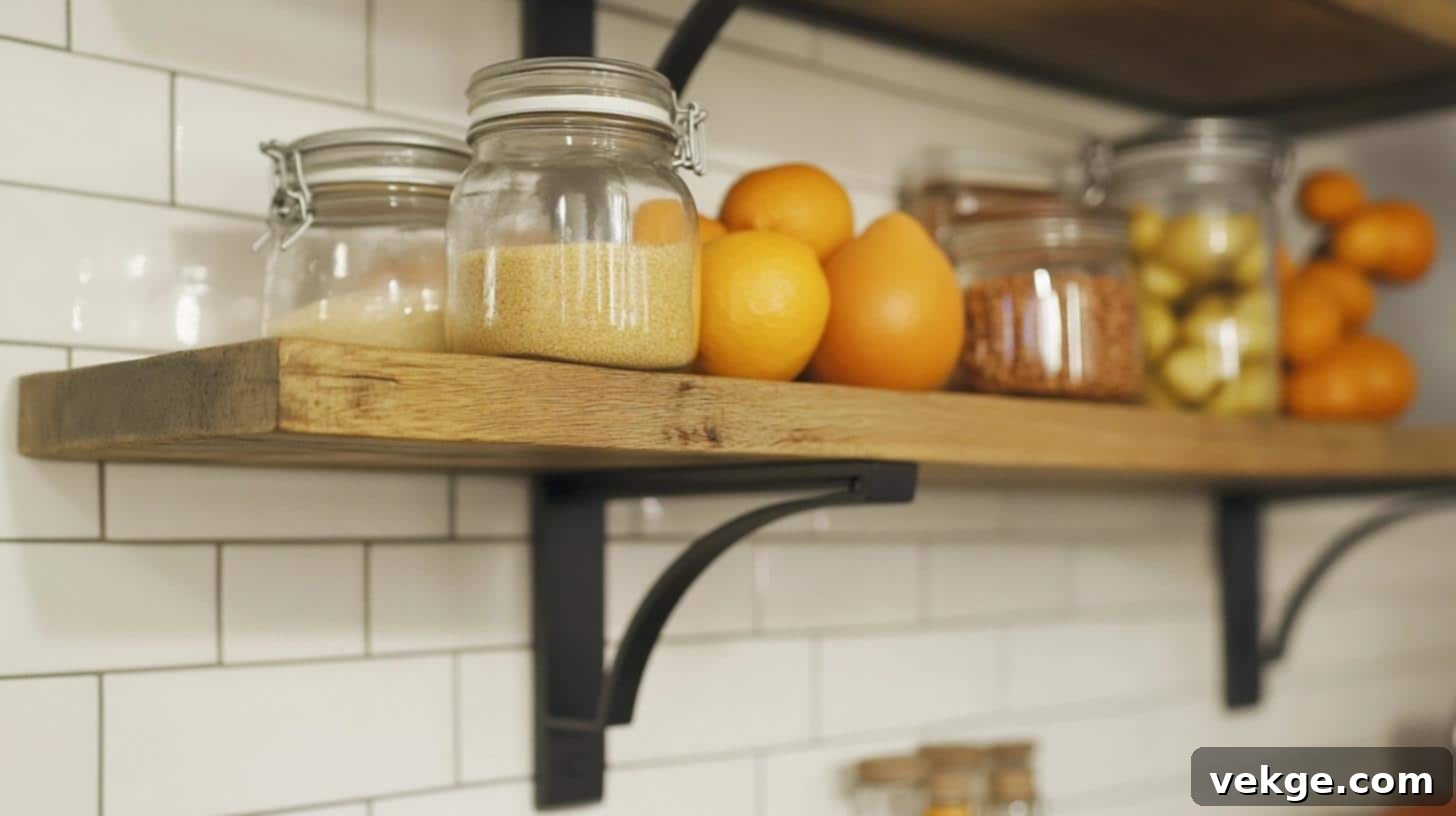
Cleverly utilize often-overlooked and unused spaces in your kitchen by custom-fitting open shelves into awkward gaps. Whether it’s a narrow space between cabinets or an empty corner, tailored shelving can transform these nooks into valuable storage or display areas. This solution is fantastic for maximizing every inch of your kitchen, providing a home for spices, small appliances, or decorative accents.
- Why It Works: Ingeniously repurposes otherwise wasted kitchen spaces, converting them into valuable additional storage or charming display nooks.
- Materials Used: Custom-cut wood or metal shelves, precisely measured and fitted with appropriate brackets to suit the unique dimensions of the gaps.
- Seasonal Styling Ideas: Display seasonal fruits in elegant bowls, or arrange decorative jars filled with ingredients that change with the time of year, like festive spices or colorful candies.
- DIY Budget Range: $60-$200, influenced by the specific size of the shelves and the materials chosen for their construction.
20. Floating Shelves with Brass Finish
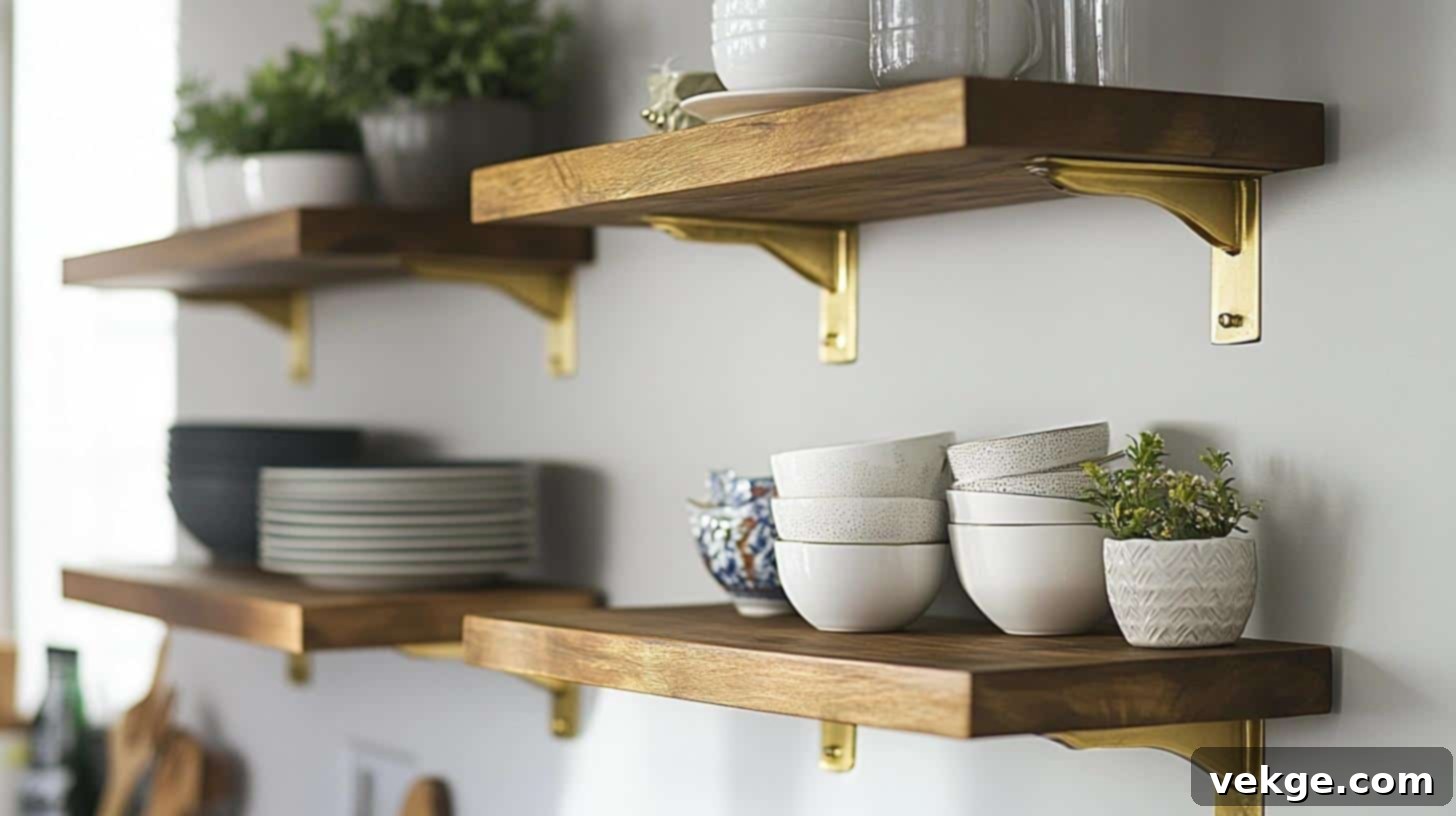
Introduce a touch of timeless glamour and inviting warmth to your kitchen with floating shelves adorned with a luxurious brass finish. Whether it’s solid brass shelves or wood shelves supported by brass brackets, this metallic accent instantly elevates the space. Brass adds a sophisticated gleam and complements a wide range of color palettes, making it perfect for both classic and contemporary interiors.
- Why It Works: Infuses any kitchen with an immediate sense of glamour, warmth, and classic sophistication, thanks to its elegant metallic sheen.
- Materials Used: Features either solid brass-finished metal shelves or sturdy brass brackets beautifully paired with complementary wood shelves.
- Seasonal Styling Ideas: During the winter holidays, enhance the festive atmosphere by adding holiday-themed gold or other metallic accents that sparkle against the brass.
- DIY Budget Range: $100-$300, varying with the quality of the brass finish, the extent of brass used, and the type of shelf materials.
21. Perfect Cookbook Shelves
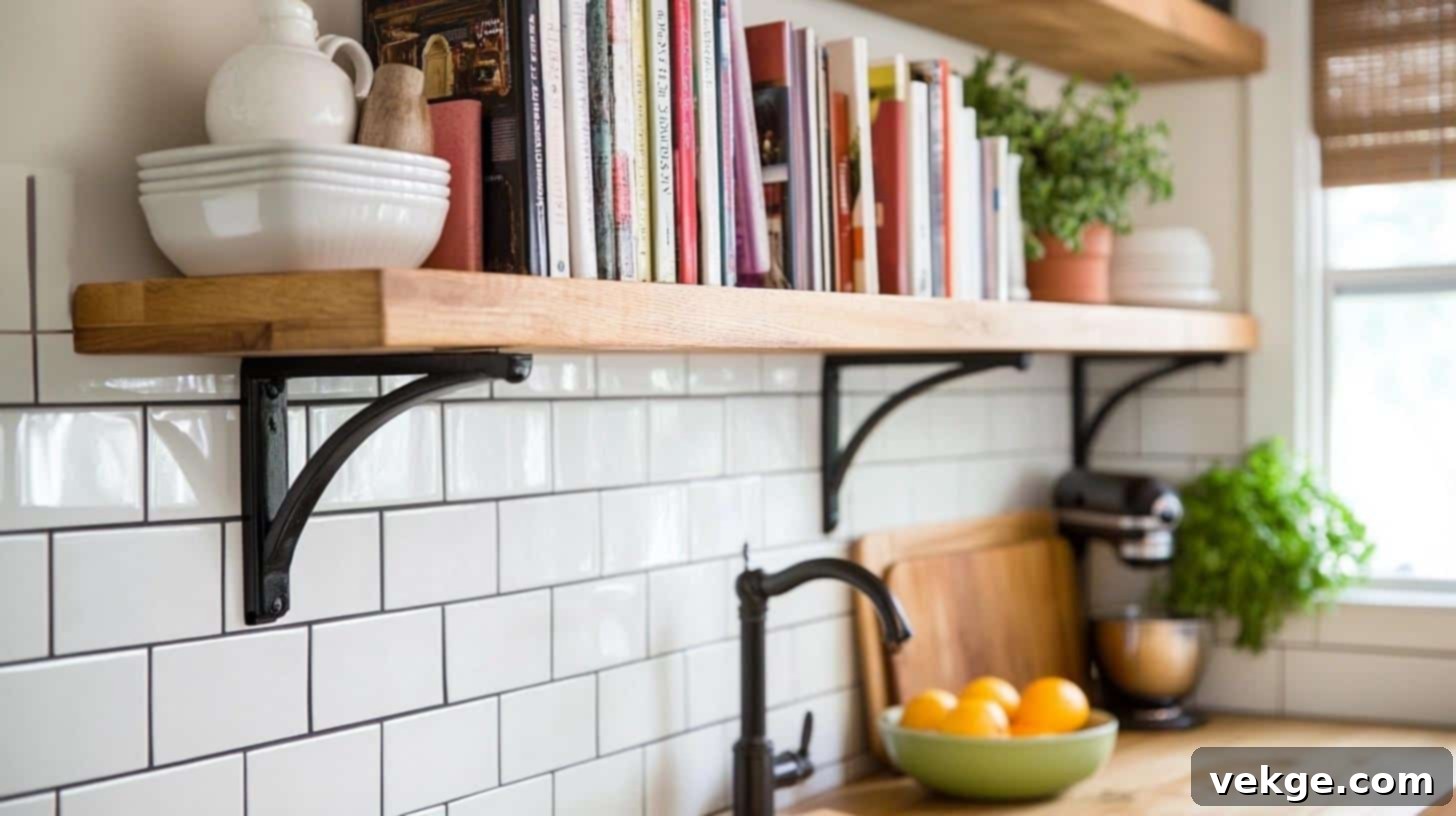
Designate specific floating shelves to house your beloved cookbook collection, keeping them perfectly organized and within effortless reach. This not only makes meal preparation easier but also adds a delightful touch of personality and color to your kitchen. A well-curated display of cookbooks transforms a functional item into a decorative feature, showcasing your culinary passions.
- Why It Works: Keeps your cherished cookbooks meticulously organized and easily accessible, simultaneously adding a unique, personal touch and visual charm to the kitchen.
- Materials Used: Durable wood or sleek metal shelves, securely mounted with sturdy brackets designed to hold the weight of multiple books.
- Seasonal Styling Ideas: Display seasonal cookbooks that align with holiday baking or summer grilling, and enhance the arrangement with small decorative items like plants or quaint bookends.
- DIY Budget Range: $50-$150, depending on the chosen shelf material, length, and the quality of the brackets.
22. Dividing Space with Floating Shelves
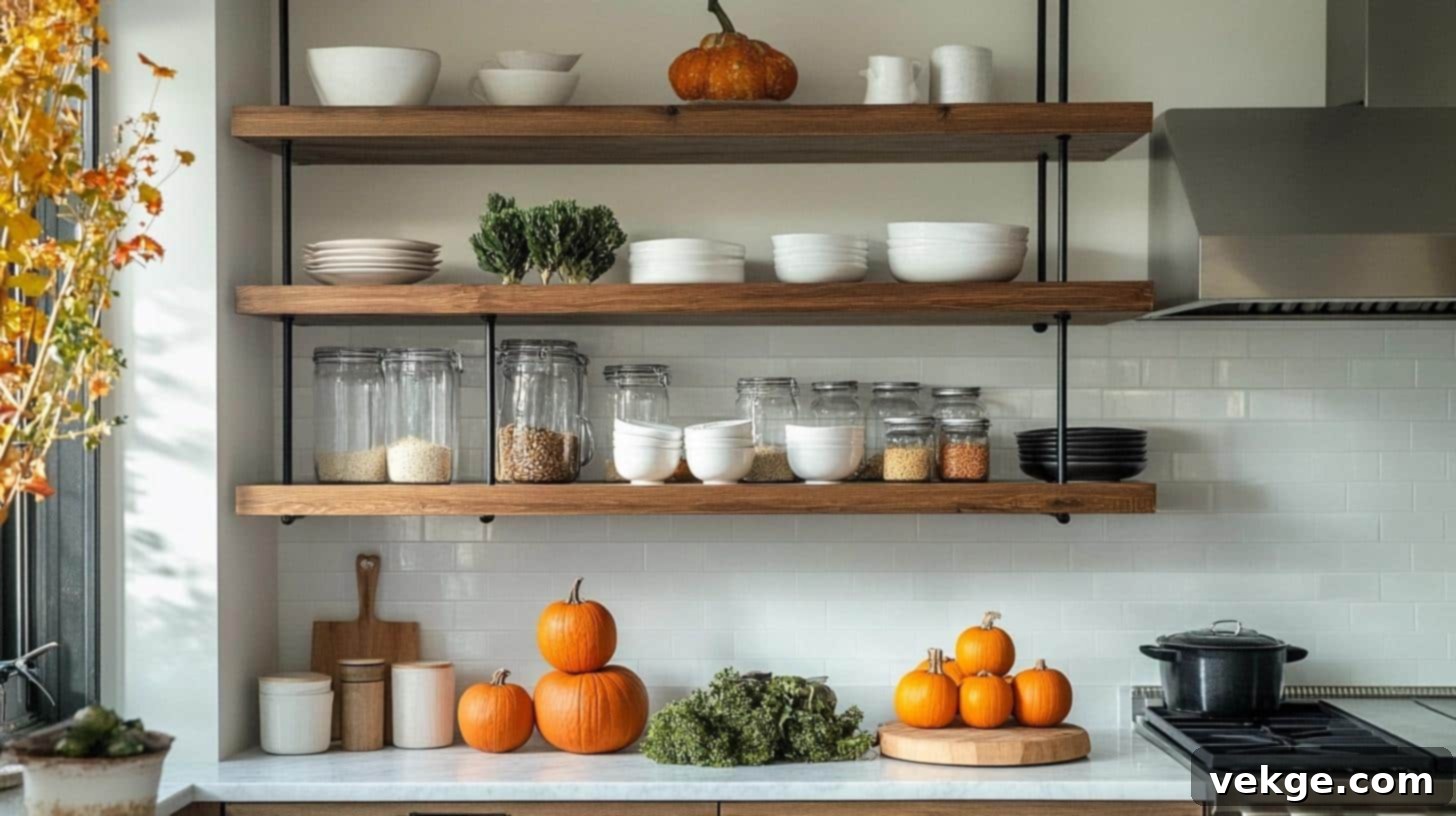
In open-plan kitchens, floating shelves can ingeniously serve a dual purpose: providing essential storage while also subtly defining distinct zones within the larger space. By strategically placing shelves that extend from a partial wall or column, you can create a soft division between the kitchen and dining or living areas without blocking light or flow. This maintains an open feel while adding structure and functionality.
- Why It Works: Ingeniously functions as both stylish storage and an effective room divider, perfect for creating subtle separation in open-plan kitchen layouts without sacrificing light or flow.
- Materials Used: Robust wood or strong metal shelves, supported by exceptionally strong, concealed supports to ensure stability and a true “floating” appearance.
- Seasonal Styling Ideas: Utilize these dividing shelves to display seasonal decorations, such as warm-toned pumpkins and fall leaves in autumn, or bright, fresh flowers in spring, changing the ambiance with the seasons.
- DIY Budget Range: $150-$400, varying significantly with the overall size of the shelf units and the quality of the chosen materials and structural supports.
23. Glass Kitchen Floating Shelves
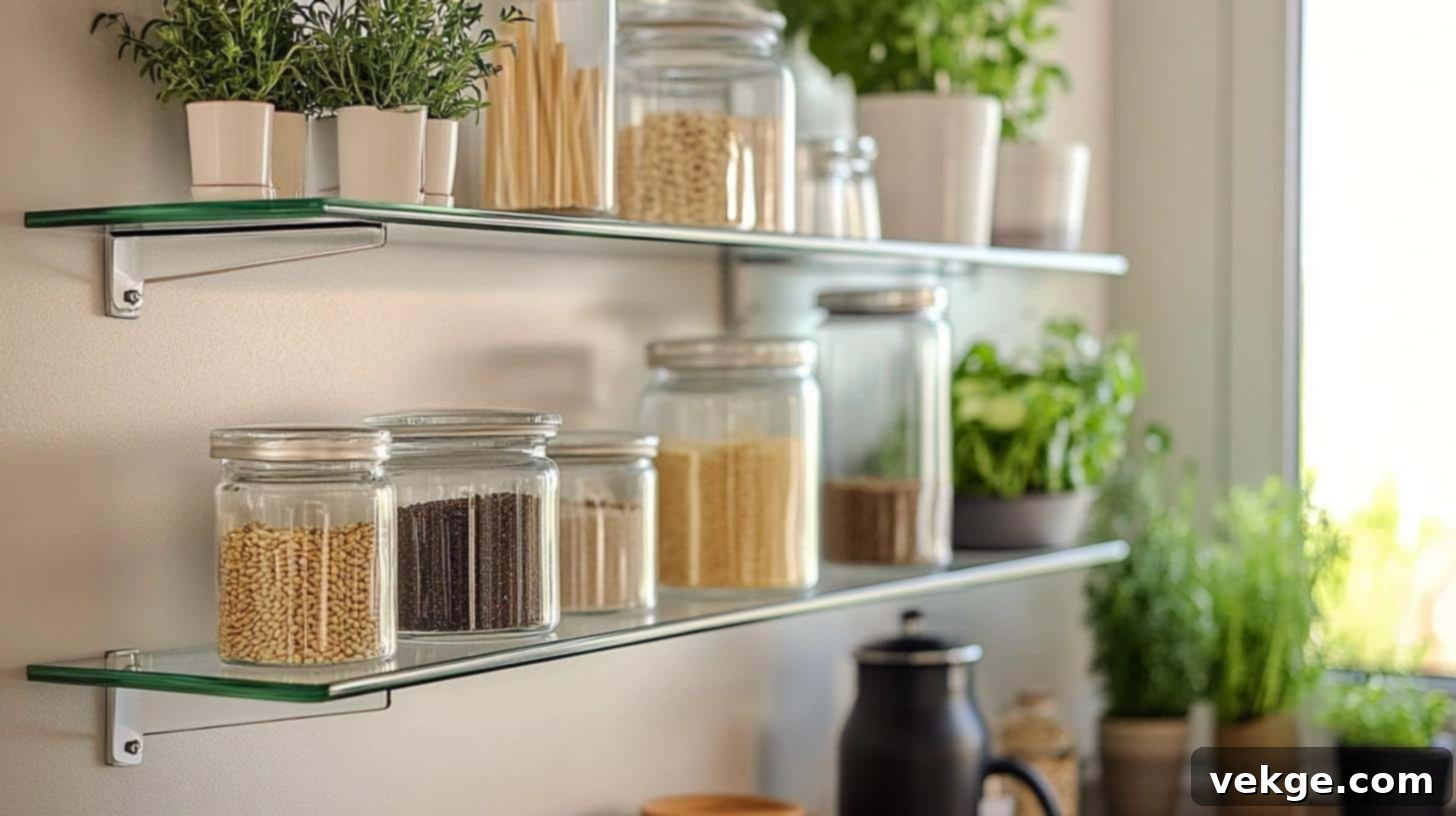
Create an incredibly light, transparent, and ethereal feel in your kitchen with elegant glass floating shelves. Glass allows light to pass through, maintaining an open and expansive atmosphere while offering practical storage and display space. This option is particularly effective in smaller kitchens or those aiming for a minimalist, ultra-modern aesthetic, as it provides utility without adding visual weight.
- Why It Works: Cultivates an exceptionally open, airy, and sophisticated ambiance, offering practical storage solutions without visually cluttering the space.
- Materials Used: High-quality tempered glass shelves, ensuring safety and durability, mounted with discreet hidden brackets for a seamless look.
- Seasonal Styling Ideas: Display simple, elegant seasonal décor such as delicate candles in winter or vibrant fresh herbs in stylish glass containers in summer.
- DIY Budget Range: $100-$250, influenced by the quality and thickness of the glass, and the type of concealed brackets used.
24. Create a Coffee Bar
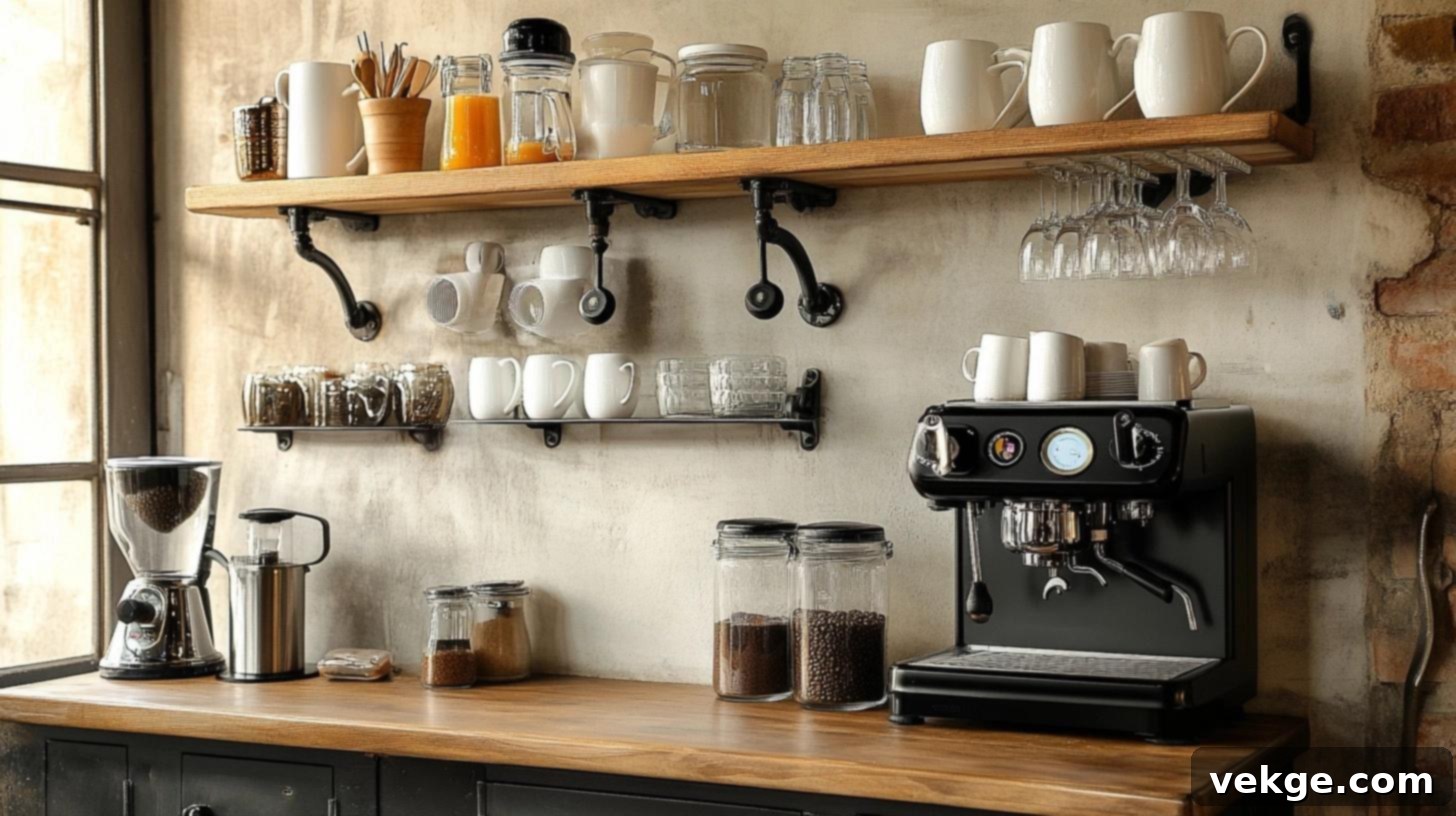
Transform an unused section of your kitchen wall into a delightful and highly practical coffee bar using floating shelves. This dedicated station can house your coffee machine, mugs, various coffee supplies, and charming decorative accents, making your morning routine a pleasure. It’s an efficient way to organize all your coffee essentials in one stylish, accessible spot, reducing clutter on your main countertops.
- Why It Works: Skillfully converts previously unused wall space into a highly practical, aesthetically pleasing, and dedicated coffee station.
- Materials Used: Versatile wood or sleek metal shelves, complemented by convenient hooks for hanging mugs, and space for your essential coffee machine.
- Seasonal Styling Ideas: Personalize with seasonal coffee mugs (e.g., festive designs in winter) or incorporate flavored syrups like peppermint or pumpkin spice during their respective seasons.
- DIY Budget Range: $75-$200, dependent on the chosen shelf material and the variety and quality of coffee accessories.
25. Open Shelving Unit Replacing a Pantry Door
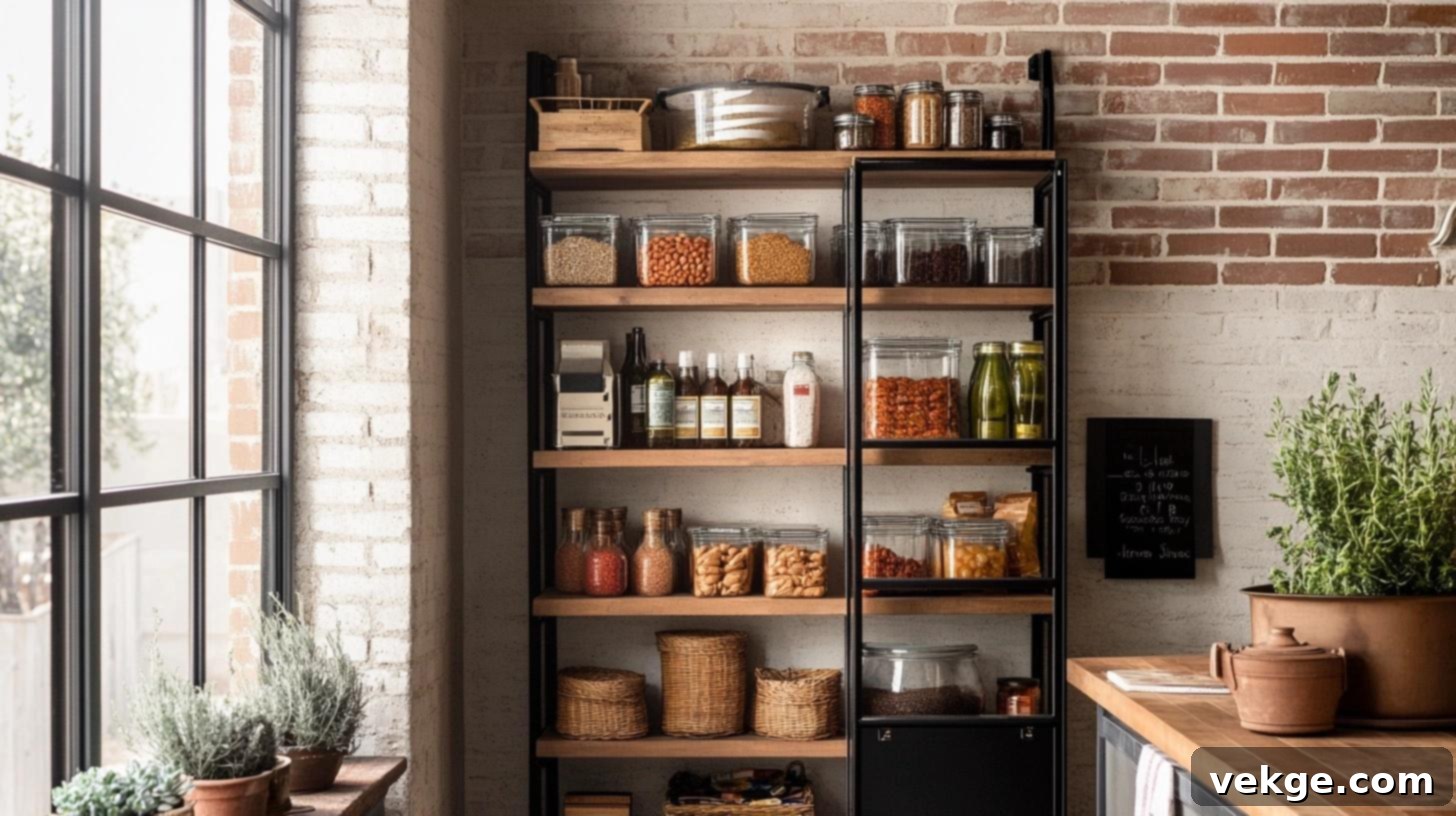
Reinvent your pantry entrance by replacing a traditional door with an open shelving unit. This bold design choice offers immediate and easy access to all your pantry items, turning what was once a hidden storage area into an organized and attractive display. It encourages tidiness and allows you to quickly survey your ingredients, making meal planning and cooking more efficient. Perfect for a modern, functional aesthetic.
- Why It Works: Offers seamless and immediate access to pantry items, beautifully displaying them in an organized and visually appealing manner, streamlining your kitchen workflow.
- Materials Used: A robust wooden or durable metal shelving unit, specifically designed with an open structure to replace a traditional pantry door.
- Seasonal Styling Ideas: Store seasonal items like holiday baking supplies or festive treats in winter, and arrange fresh produce or colorful canning jars in summer.
- DIY Budget Range: $100-$300, varying with the material quality, size, and custom fittings of the open shelving unit.
26. Narrow Shelves Fitting Between Upper Cabinets
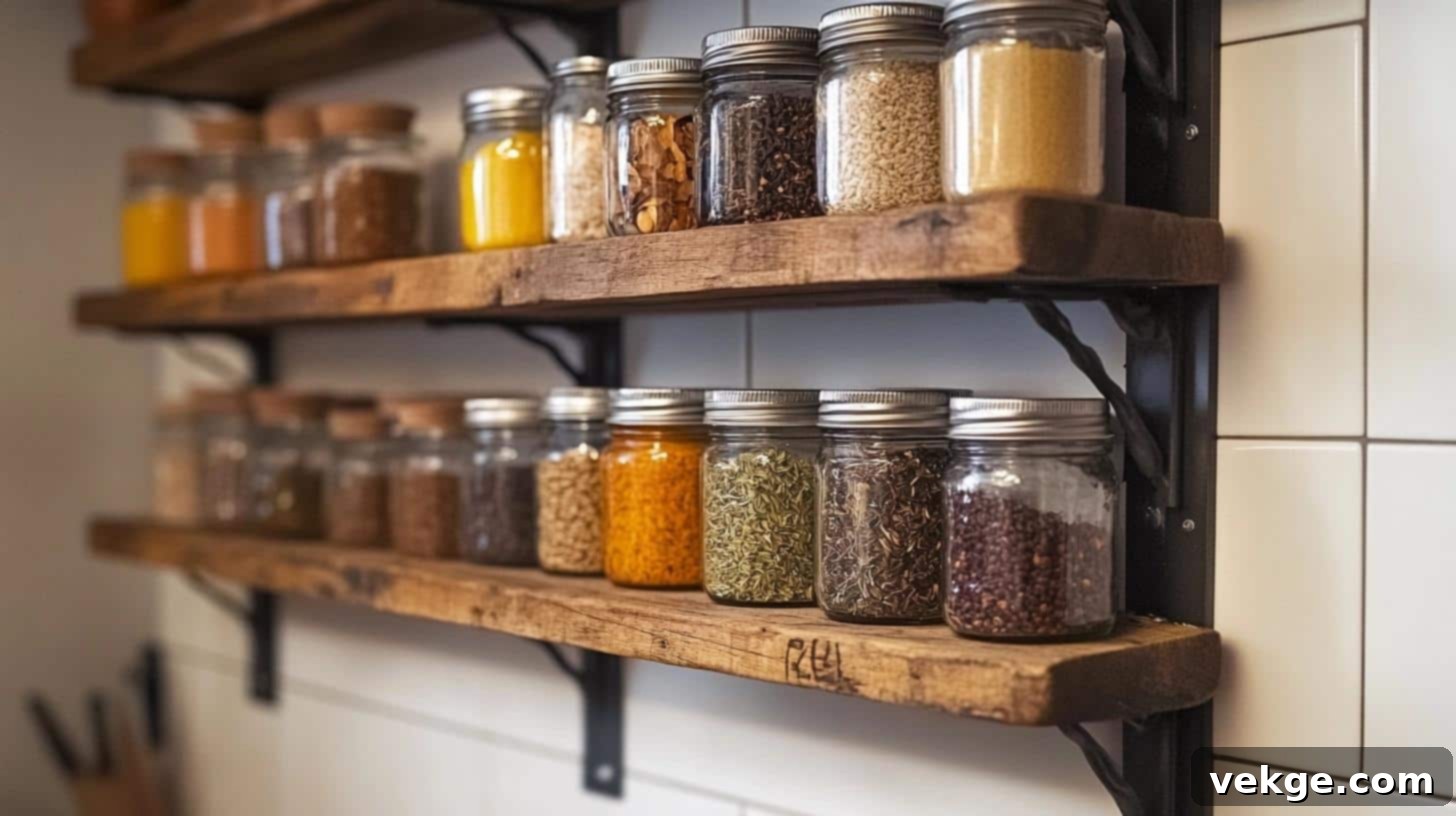
Make the most of every inch in your kitchen by installing narrow floating shelves in the often-wasted spaces between upper cabinets. These discreet shelves are perfect for holding spices, small jars, decorative bottles, or cherished keepsakes. This smart solution maximizes vertical storage, provides easy access to frequently used items, and adds a thoughtful, custom touch to your kitchen design, however small the space.
- Why It Works: Ingeniously utilizes small, often overlooked spaces, transforming them into valuable additional storage for a more organized kitchen.
- Materials Used: Custom-cut narrow wood or slender metal shelves, securely installed with sturdy brackets designed for tight spaces.
- Seasonal Styling Ideas: Store and display spices, specialty oils, or seasonal ingredients in small, uniform jars, updating the selection with the changing seasons.
- DIY Budget Range: $50-$150, depending on the chosen shelf material, precise measurements, and overall length.
27. Open Pantry on the Side of Kitchen Island
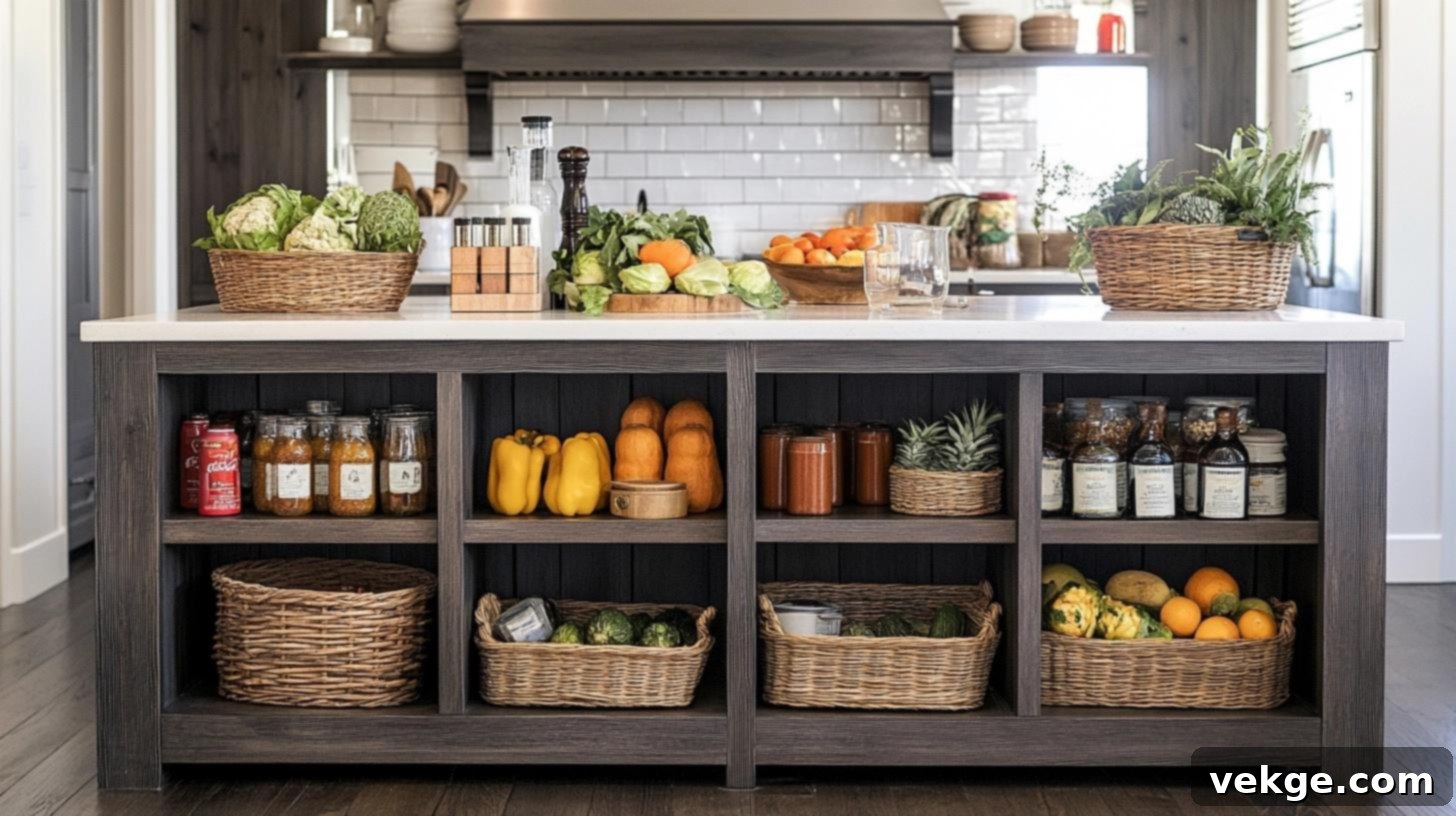
Integrate an open pantry directly into the side of your kitchen island to maximize storage and enhance accessibility. This innovative design allows for a visually appealing display of pantry staples, cookbooks, or decorative baskets, all within easy reach while cooking or entertaining. It’s a clever way to add functionality to your island, turning unused space into a practical and stylish feature, perfect for open-concept living.
- Why It Works: Smartly maximizes kitchen space by integrating additional storage into an easily accessible and highly visible location, enhancing both functionality and aesthetics.
- Materials Used: Custom wood or metal shelves, thoughtfully integrated into the existing structure of the kitchen island’s side panel.
- Seasonal Styling Ideas: Display seasonal pantry items such as holiday-themed containers of dry goods in winter, or charming baskets filled with fresh, colorful produce in summer.
- DIY Budget Range: $100-$250, dependent on the complexity of the island’s structure and the chosen shelf material.
28. Open Shelves on an Accent Wall
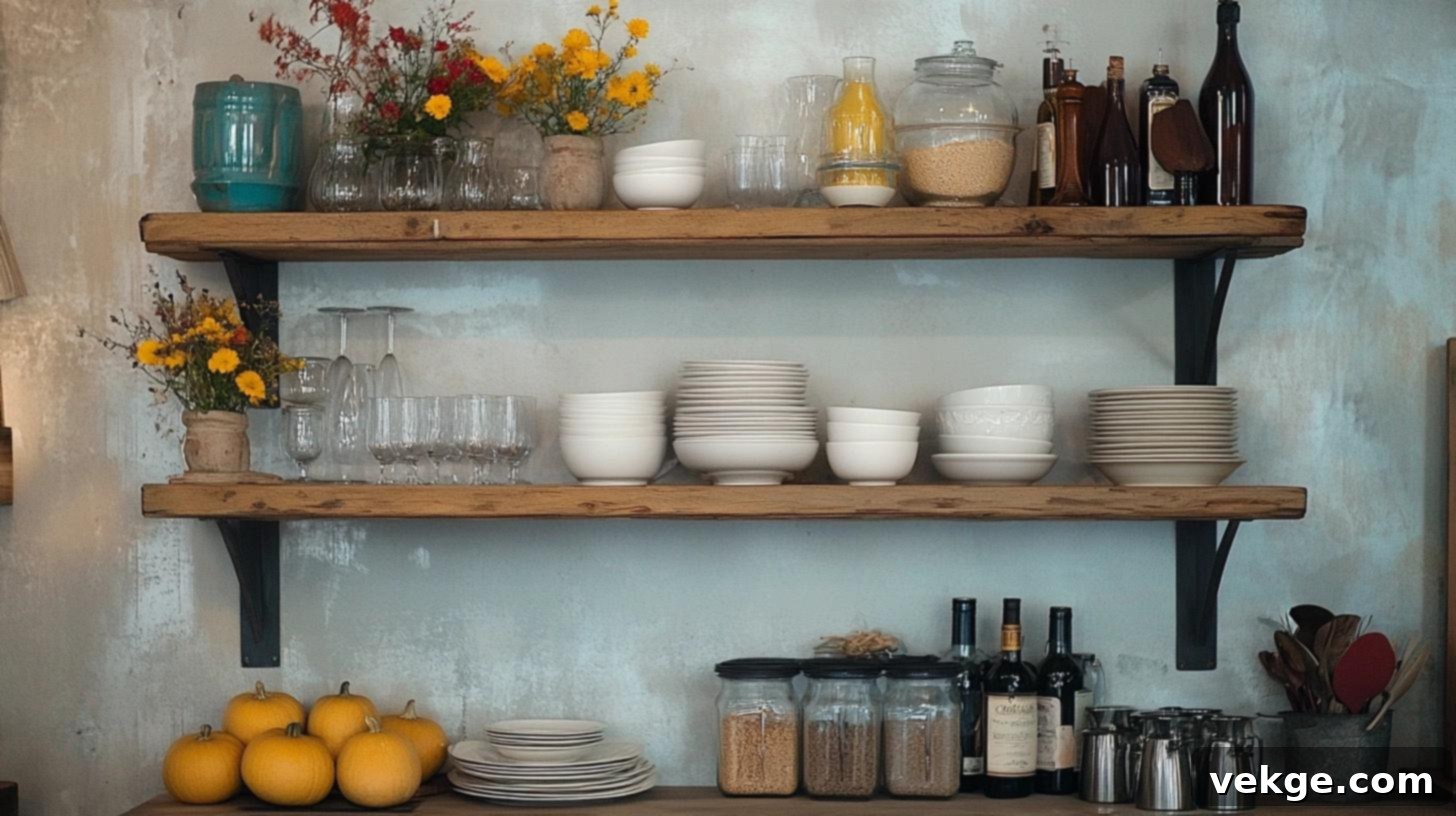
Create a striking visual impact in your kitchen by installing open shelves on a designated accent wall. Whether painted in a bold color or covered with an eye-catching wallpaper, the accent wall provides a vibrant backdrop that makes the shelves and their contents truly pop. This design strategy offers both functional storage and an artistic display opportunity, allowing you to showcase cherished items and add a unique personality to your kitchen’s overall design.
- Why It Works: Adds significant visual interest and depth to the kitchen while providing highly functional storage, creating a perfect stage for showcasing both decorative and essential kitchen items.
- Materials Used: Versatile shelves made from wood, metal, or glass, securely mounted onto a distinctly painted or beautifully wallpapered accent wall.
- Seasonal Styling Ideas: Easily refresh the display to match the seasons—consider warm-toned pumpkins and autumnal foliage in fall, or bright, cheerful florals and pastel-colored ceramics in spring.
- DIY Budget Range: $80-$200, varying with the chosen shelf materials, the extent of the wall treatment, and any additional decorative elements.
Step-by-Step Tutorial on Building DIY Kitchen Floating Shelves
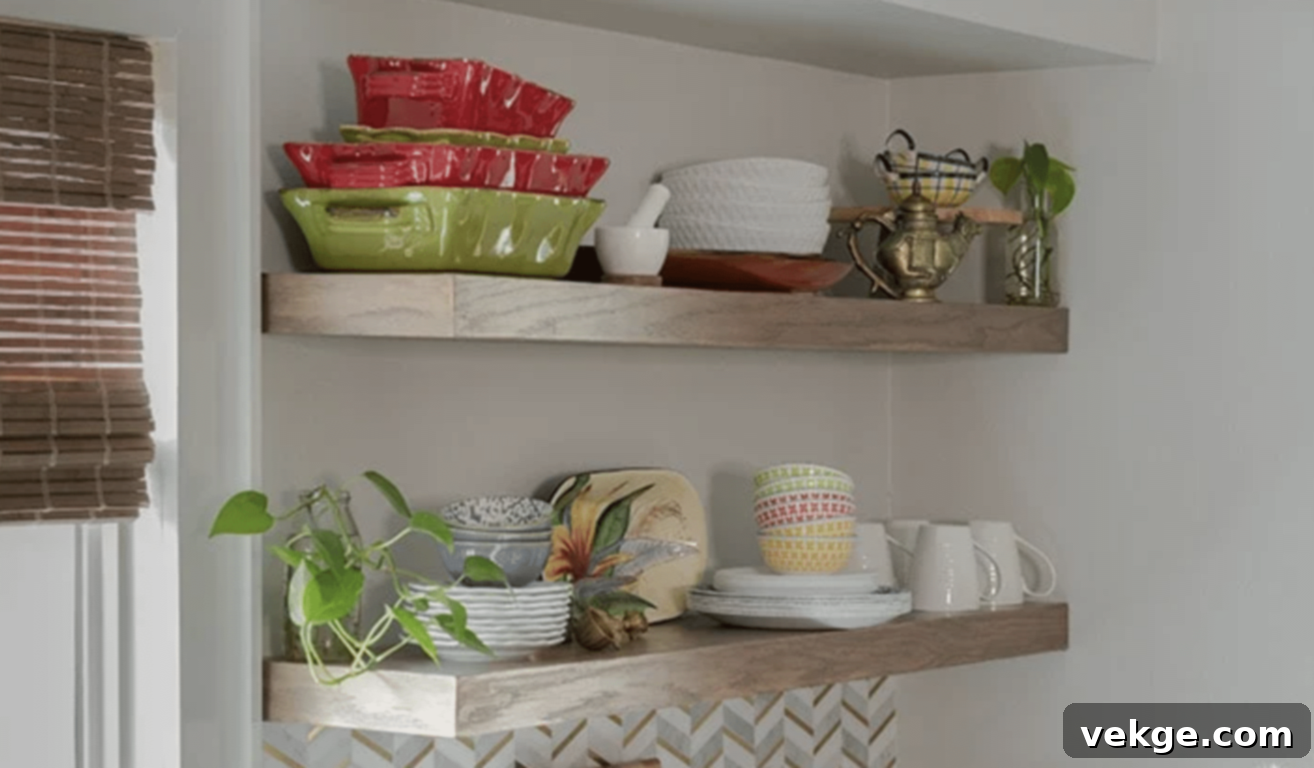
Creating your own floating shelves can be a rewarding DIY project that adds both beauty and utility to your kitchen. Follow these detailed steps to build sturdy and stylish floating shelves that will seamlessly integrate into your space.
1. Materials and Tools Required
| Materials | Tools |
|---|---|
| 1×2 and 1×3 boards (for support and brace) | Kreg Jig (for pocket holes) |
| ¾” plywood (for the shelf’s outer wrap) | Miter saw (for precise angle cuts) |
| 4″ GRK structural screws (for securing to studs) | Circular saw or table saw (for cutting plywood strips) |
| 4″ toggle bolts (for securing to drywall where studs aren’t present) | Drill-driver or impact driver (for screws) |
| 1¼” pocket hole screws (for brace assembly) | Clamps (face clamps and trigger clamps for holding pieces) |
| Finish nails (1¼”) (for securing plywood wrap) | Sanding sponge or sandpaper (for smooth finish) |
| Wood glue (for strong joinery) | Screwdriver (specifically for seam finishing) |
| Wood putty (for filling holes and imperfections) | Finish nailer (for quick and clean nail application) |
| Stain, paint, or top coat (optional, for desired finish) | Angle gauge (for checking cut accuracy) |
2. Step by Step Instructions
Step 1: Attach the Support Board to the Wall
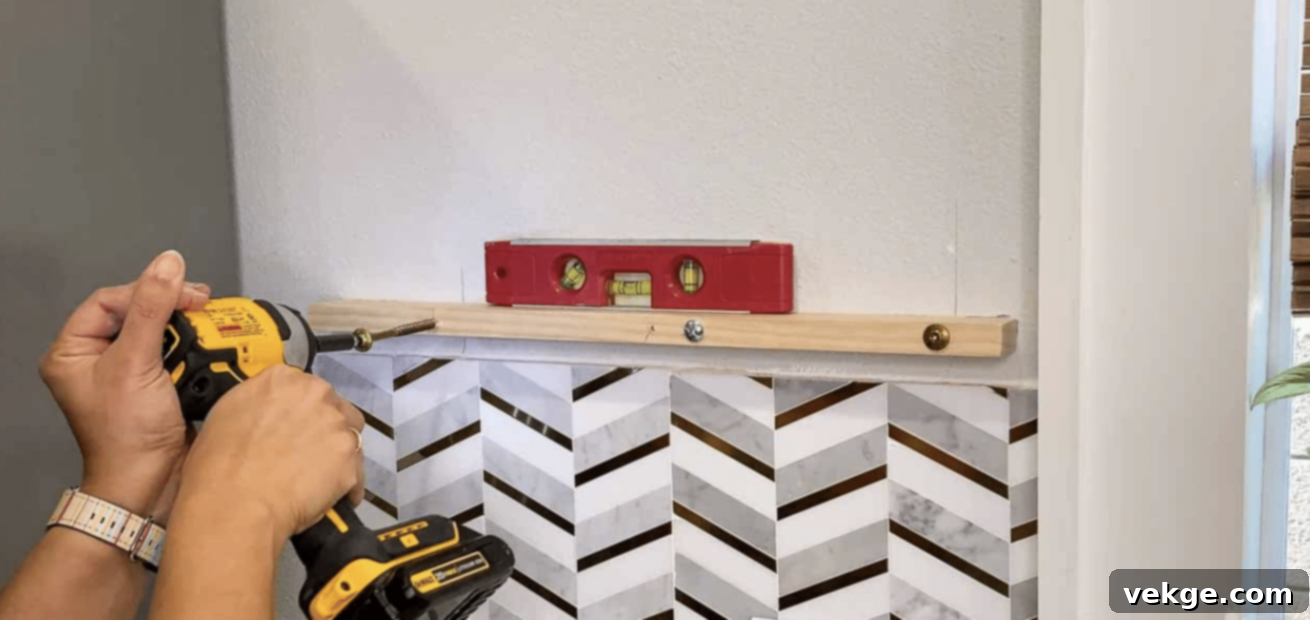
- Explanation: This is the foundational step for a secure floating shelf. Begin by precisely marking the intended location of your shelf on the wall, carefully accounting for the final depth that the plywood wrap-around will add. Use a stud finder to locate and mark the wall studs, as these provide the most robust anchoring points. Transfer these stud marks accurately onto your 1×2 support board.
- Action: Pre-drill pilot holes through the 1×2 board at each stud location to prevent wood splitting. For sections between studs, drill holes for toggle bolts, which provide strong support in drywall. Fasten the 1×2 support board firmly to the wall using the long 4-inch GRK structural screws into the studs and the 4-inch toggle bolts in other marked positions, ensuring it is perfectly level.
Step 2: Build the Brace
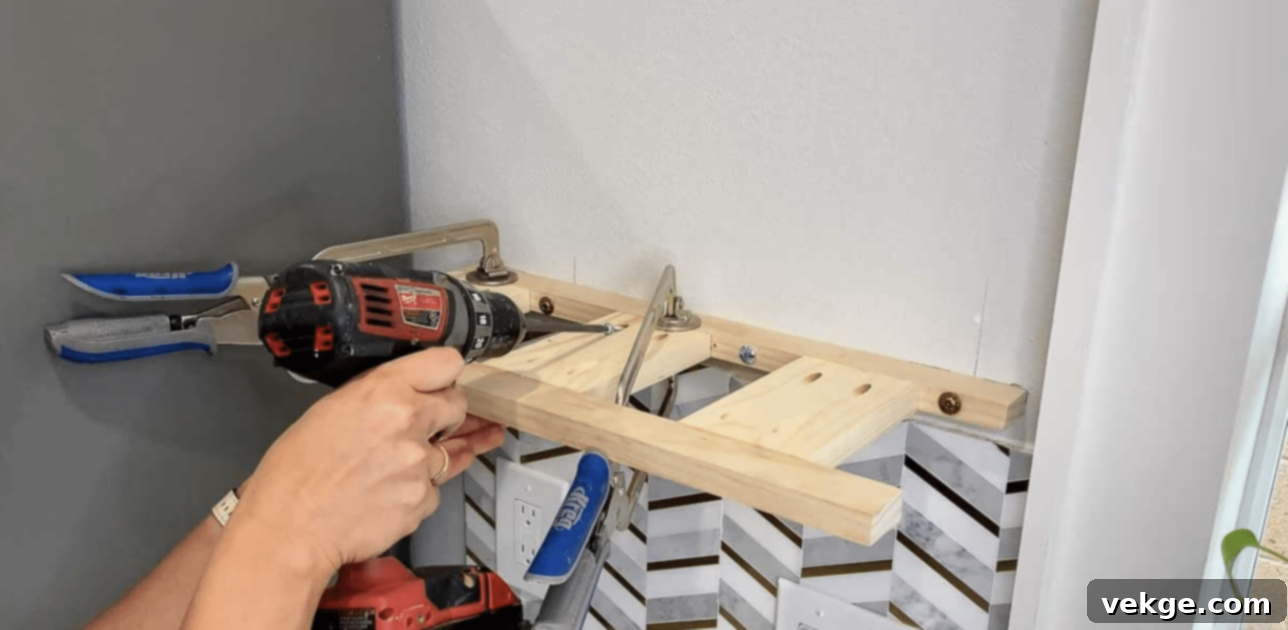
- Explanation: The brace forms the internal structure that gives the floating shelf its strength and shape, holding the outer plywood shell securely in place. It’s crucial for the shelf’s stability and its ability to bear weight.
- Action: Cut your 1×3 boards to the exact desired depth of your finished shelf, less the thickness of your 1×2 support board. Using a Kreg Jig, drill pocket holes on both ends of these 1×3 brace pieces. Attach these 1×3 boards perpendicularly to the previously mounted 1×2 support board, ensuring they are evenly spaced and do not interfere with the structural screws already in the wall studs. Apply a bead of wood glue before securing each 1×3 brace with 1¼-inch pocket hole screws for a strong, invisible joint.
Step 3: Cut the Plywood for the Shelf
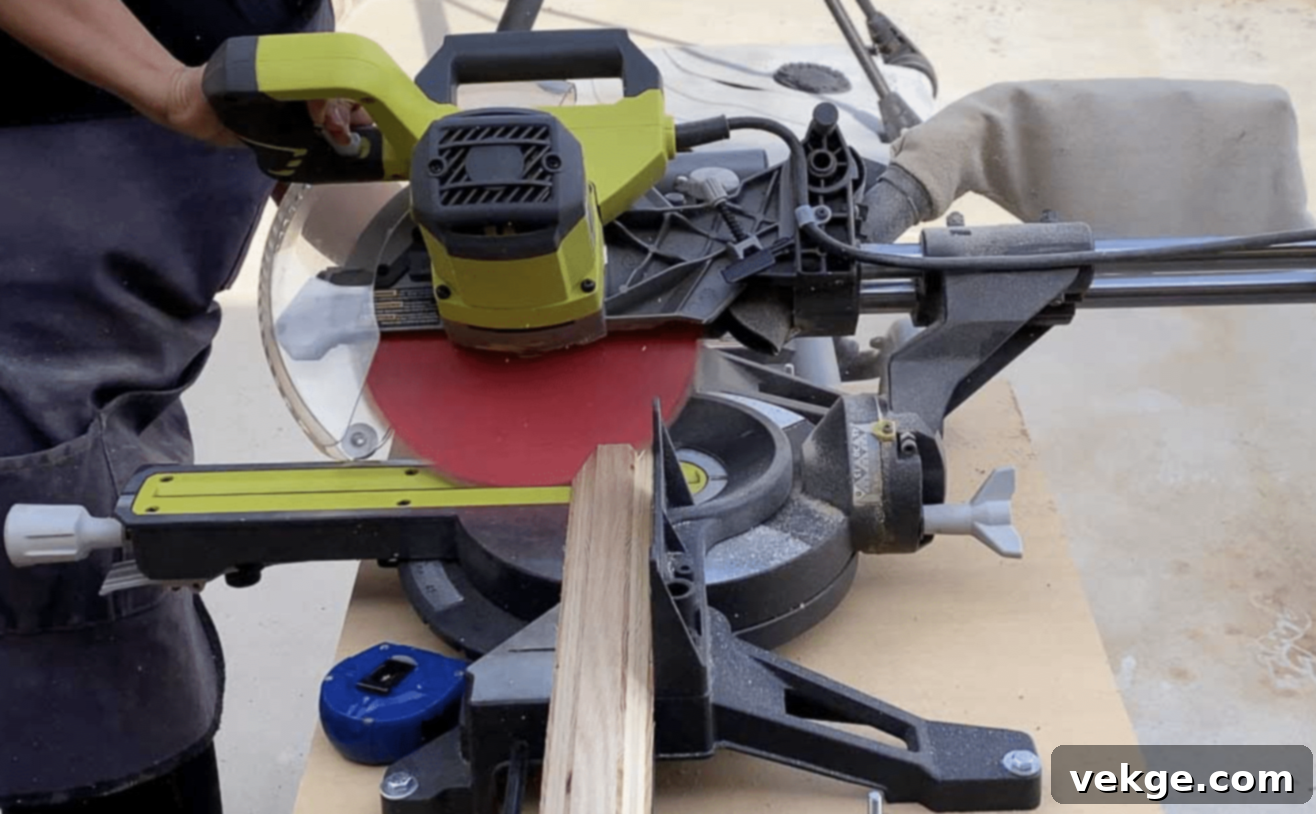
- Explanation: This step prepares the ¾-inch plywood pieces that will form the visible “box” of your floating shelf, wrapping elegantly around the internal brace structure. Precision in cutting is paramount for a seamless, professional finish with tight joints.
- Action: For a clean, mitered corner look, set your table saw or circular saw blade to a 45-degree bevel. Carefully cut the ¾-inch plywood into three main strips: one for the top, one for the bottom, and one for the front face of the shelf. Ensure the width of these strips is precise, especially the front piece, to achieve your desired shelf thickness (typically around 2 inches for a robust floating look). The side pieces will be cut to fit later.
Step 4: Assemble the Shelf Box
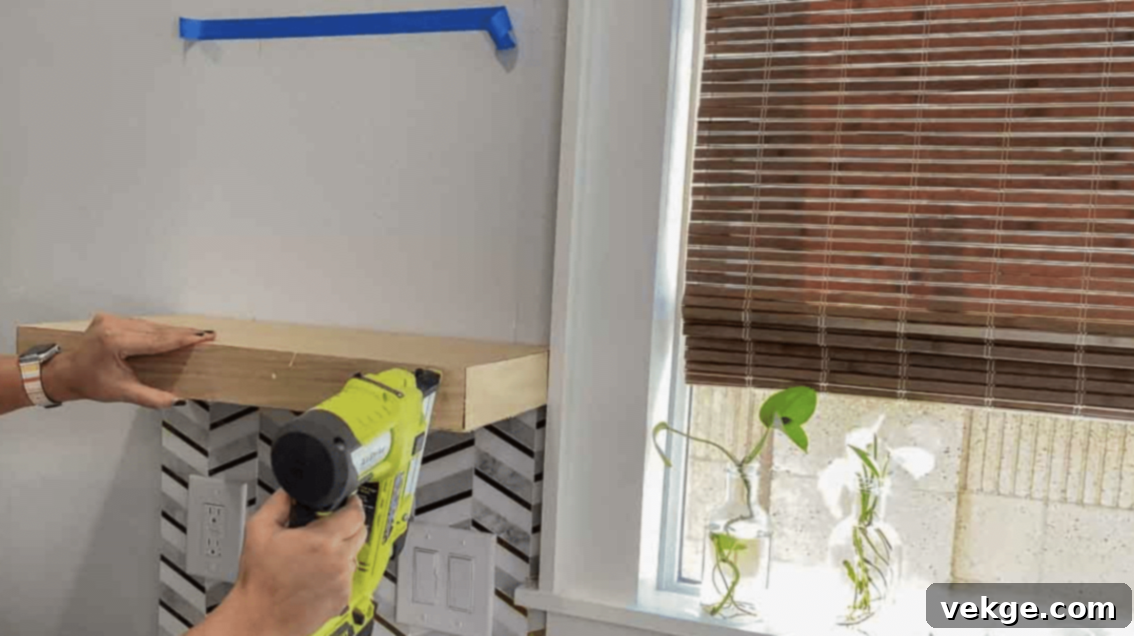
- Explanation: With the plywood pieces cut, it’s time to assemble the outer shell of your shelf. This step involves carefully joining the top, bottom, and front pieces around the brace, creating a strong, hollow box that defines the shelf’s visible form. Proper clamping is essential to ensure tight, gap-free seams.
- Action: Apply a thin, even layer of wood glue along the edges of your plywood pieces where they will meet. Begin by attaching the front piece to the top and bottom pieces using a finish nailer and 1¼-inch finish nails. Use clamps (face clamps are excellent for this) to hold the pieces tightly together while the glue sets and you drive the nails. Carefully slide this assembled plywood box over the mounted brace. Finally, secure the plywood box to the brace by nailing it in place along the top, bottom, and sides, ensuring it doesn’t accidentally slide off and holds firmly to the internal structure.
Step 5: Finish the Shelf
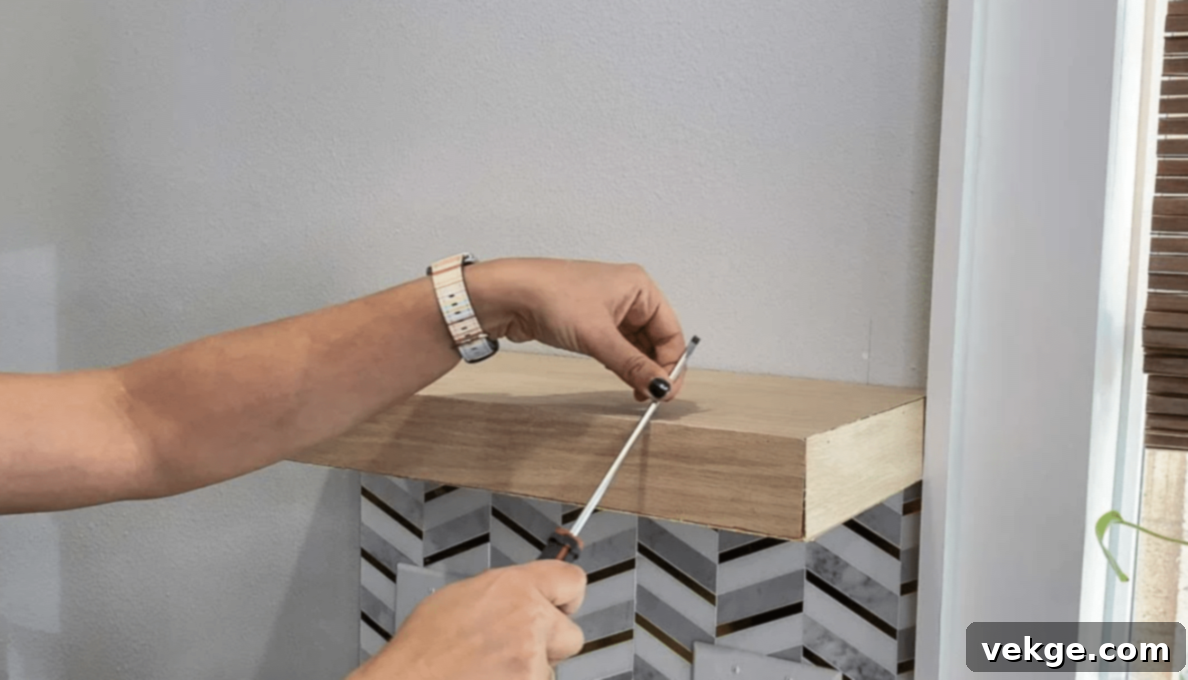
- Explanation: The final stage is all about achieving a smooth, professional, and durable appearance. This involves tidying up any visible imperfections and applying a protective and aesthetically pleasing finish that matches your kitchen’s decor.
- Action: Once the glue has dried, gently rub a screwdriver shaft or a smooth, hard edge along the seams of the plywood box. This technique helps to “burnish” the wood, tightening the seams and minimizing any slight gaps. Fill any nail holes or minor imperfections with wood putty and allow it to dry completely. Lightly sand the entire shelf surface with a sanding sponge or fine-grit sandpaper until it’s perfectly smooth. Finally, apply your chosen stain, paint, or a clear protective top coat according to the manufacturer’s instructions. A top coat is highly recommended for kitchen shelves to protect against moisture and wear.
Tips for Styling and Organizing Kitchen Floating Shelves
Floating shelves are not just for storage; they are a blank canvas for expressing your kitchen’s personality. Thoughtful styling can elevate your kitchen’s aesthetic, making it feel more curated and inviting. Here are some expert tips to help you style and organize your floating shelves like a pro:
- Keep it Tidy: Display only items that are frequently used, beautiful, or truly beloved to prevent visual clutter and maintain a clean, open feel. Less is often more.
- Group Similar Items: Arrange dishes, glasses, bowls, or cookbooks in cohesive sets. This creates a sense of order and makes the shelves look more organized and aesthetically pleasing.
- Use Color Coordination: Select a consistent color palette for your displayed items that either matches or harmoniously contrasts with your kitchen’s existing decor. This creates a polished and cohesive look.
- Mix Heights for Visual Interest: Vary the height of objects on each shelf. Combine tall vases with shorter stacks of plates or small plants to create dynamic visual appeal and prevent a flat, uninspired look.
- Add Greenery: Incorporate small potted plants, succulents, or fresh herbs. Greenery brings life, freshness, and a touch of nature to your shelves, softening the hard lines.
- Incorporate Texture: Mix different materials and textures. Pair smooth ceramics with rough woven baskets, metallic accents, or wooden elements to add depth and tactile interest.
- Integrate Lighting: Consider adding under-shelf lighting or small decorative lamps. This not only enhances ambiance but also highlights your displayed items, making the shelves a focal point.
- Leave Some Space: Resist the urge to fill every inch. Empty space, or “negative space,” is crucial for visual balance and allows the eye to rest, making the display feel more intentional and less crowded.
- Use Attractive Containers: Store loose pantry items like pasta, grains, or spices in beautiful glass jars, ceramic canisters, or stylish wooden boxes. This keeps things neat and adds to the decor.
- Display Collections: Showcase your favorite collection of mugs, vintage kitchenware, unique serving bowls, or a set of colorful tea kettles. Personal collections add character.
- Add Labels: For pantry items stored in containers, attractive labels not only add a layer of organization but can also contribute to the overall style and charm.
- Create Zones: Dedicate specific shelves or sections of shelves for particular purposes, such as a coffee station, baking supplies, or a mini bar, to enhance functionality and organization.
- Use Odd Numbers: When grouping decorative objects, arrange them in odd numbers (threes or fives). This design principle is generally more pleasing and balanced to the eye.
- Stick to a Theme: Choose a consistent style or theme for your shelves (e.g., rustic, modern, minimalist, farmhouse) and select items that consistently reflect that aesthetic.
Maintenance and Care of Kitchen Floating Shelves
Proper maintenance and care are essential to ensure your kitchen floating shelves remain beautiful, functional, and safe for years to come. Different materials require specific cleaning methods, and regular checks can prevent damage and ensure longevity.
Cleaning Different Materials
Keeping your floating shelves spotless is crucial for preserving their aesthetic appeal. For wooden shelves, use a soft, slightly damp cloth with a mild, non-abrasive soap solution. Avoid excessive moisture, which can damage wood. Glass shelves are best cleaned with a specialized glass cleaner and a lint-free microfiber cloth to prevent streaks. Metal shelves typically only require a quick wipe down with a damp cloth; however, for an extra shine or to remove any tarnish, a suitable metal polish can be used. Always ensure your shelves are thoroughly dried immediately after cleaning to prevent water spots, discoloration, or potential water damage, especially for wood.
Protecting Shelves from Damage
To keep your floating shelves in pristine condition, a few preventative measures can make a big difference. Always place coasters under glasses, mugs, or vases to protect against unsightly water rings and condensation marks. Consider applying felt pads to the bottoms of decorative items or heavy serving dishes to prevent scratches on the shelf surface. It’s vital to be mindful of the weight limits specified for your shelves and to distribute heavy items evenly to avoid stress points or sagging. In the kitchen environment, try to position shelves away from direct sources of extreme heat or steam, which can cause warping or material degradation over time. Regular light dusting will also prevent the buildup of grime and dust, which could lead to staining or abrasive scratches if left unattended.
Periodic Safety Checks
Ensuring the structural integrity and safety of your floating shelves should always be a top priority. Every few months, take the time to conduct a thorough safety check. Carefully inspect all mounting screws and brackets to ensure they remain tight and secure within the wall. Look for any subtle signs of sagging, shifting, or separation of the shelf from the wall, which could indicate a loosening bracket or an overloaded shelf. If you notice any issues, immediately remove all items from the affected shelf. Tighten any loose fasteners or reinforce the mounting points as needed, possibly by adding new anchors or replacing damaged hardware. For shelves that regularly hold a significant amount of weight, consider increasing the frequency of these safety checks to ensure they continue to provide stable and safe storage.
Accessories to Decorate Your Kitchen Floating Shelves
Floating shelves are perfect for showcasing more than just functional items. The right accessories can truly elevate your kitchen’s style. Here are some hand-picked decorative items that can add character and charm to your open shelving:
Disclaimer: These recommendations are based on personal preference and experience. None of the products mentioned are affiliated or sponsored.
1. Concrete Fruit Bowl
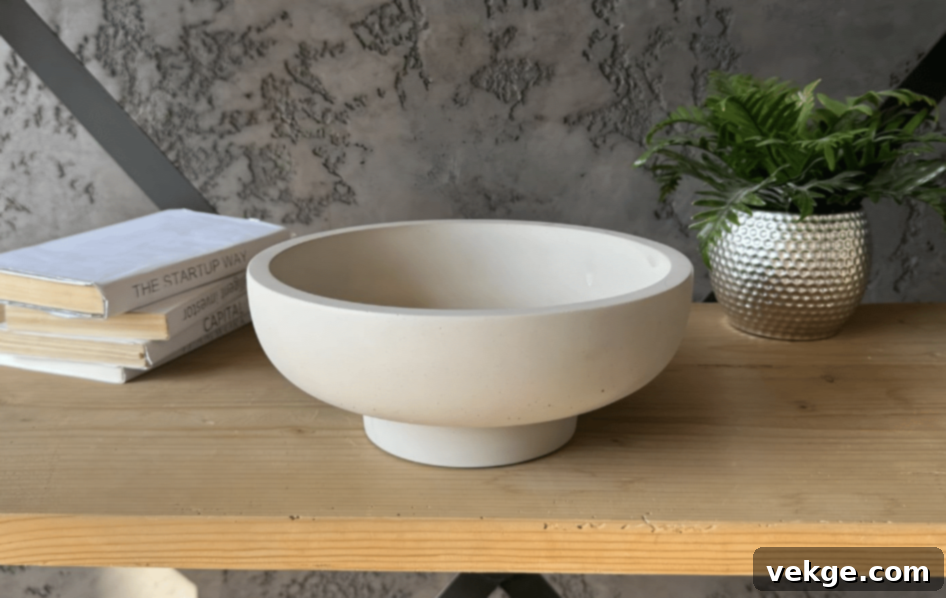
- Material: Concrete
- Colors Available: White/Cream
- Price: $49.50
2. Paper Towel Holder
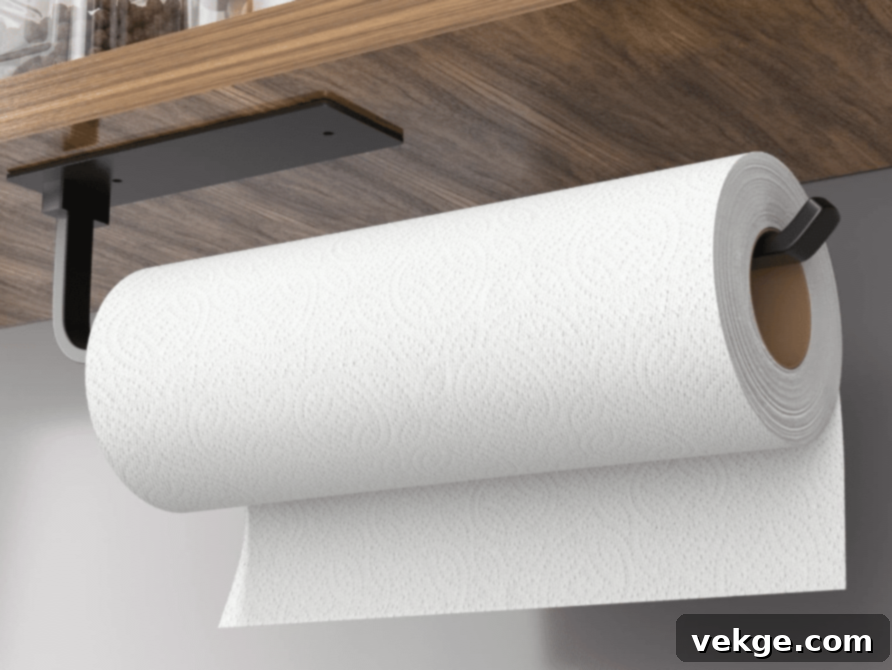
- Material: Aluminum
- Colors Available: Black, Gold, White
- Price: $7.99
3. Food & Beverage Figurines
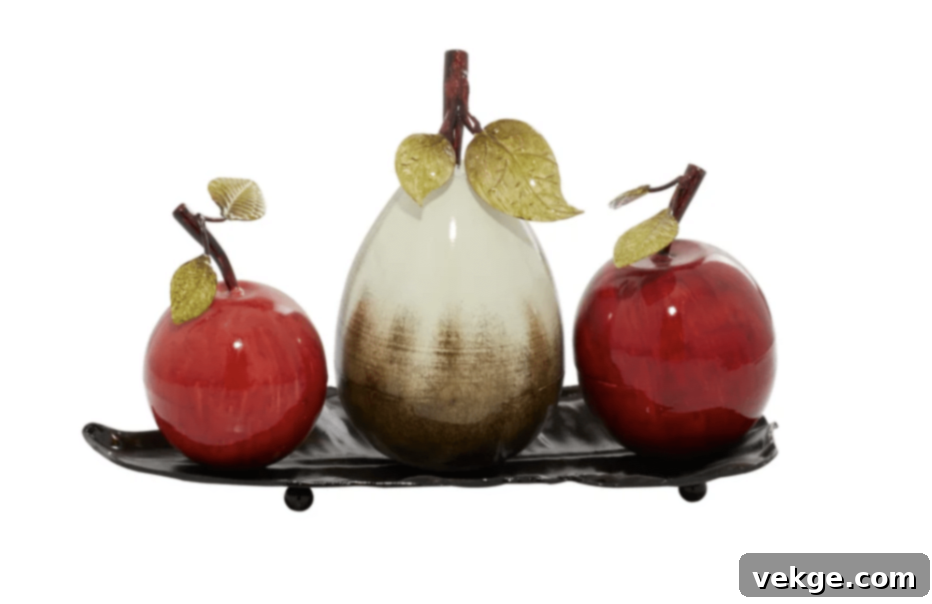
- Material: Metal
- Colors Available: White/Red
- Price: $44.99
4. Ceramic / Porcelain Canister – Set of 3
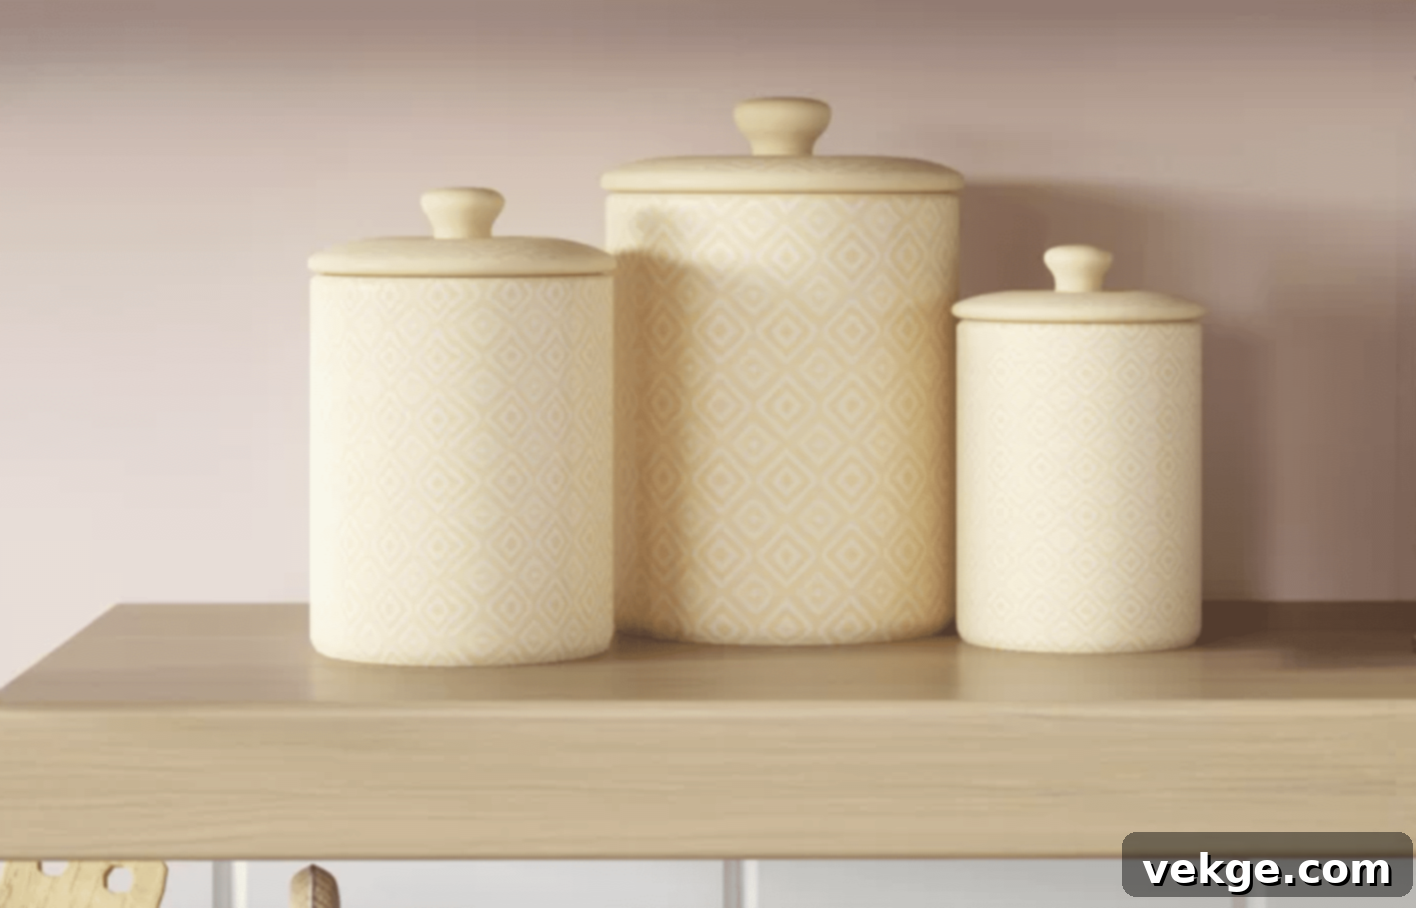
- Material: Ceramic / Porcelain
- Colors Available: Yellow, Blue, Grey, Red
- Price: $45.99
5. Utensil Holder with 4 Compartments
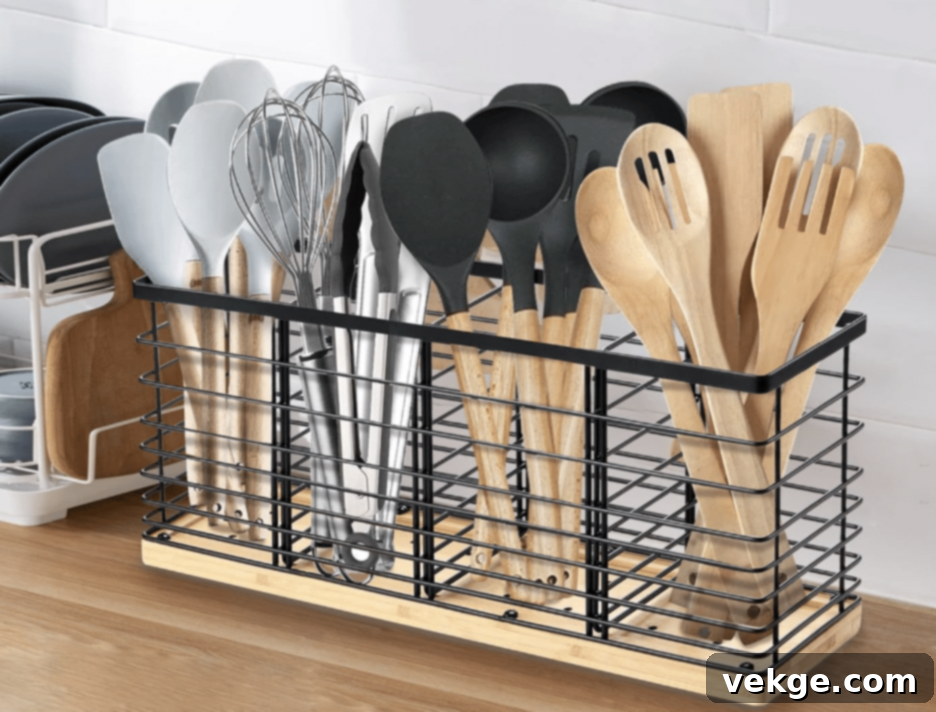
- Material: Wood, Metal
- Colors Available: Black
- Price: $28.99
6. Havana Hourglass
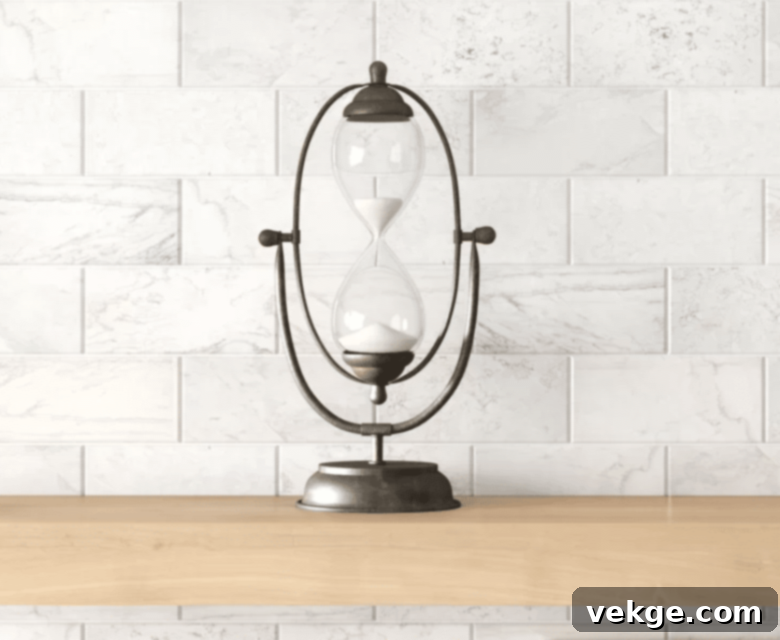
- Material: Metal
- Colors Available: Black
- Price: $48.99
7. Mug Holder Tree
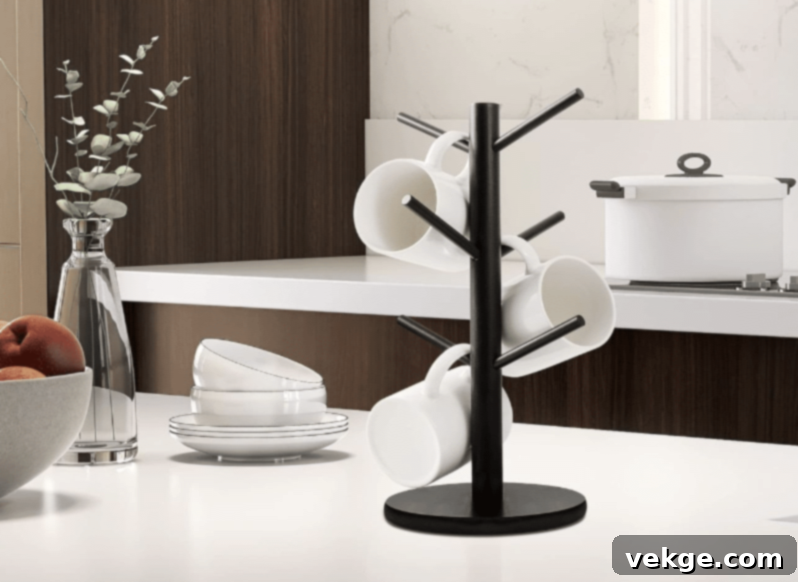
- Material: Wood
- Colors Available: Black
- Price: $16.99
8. Handmade Letter Block
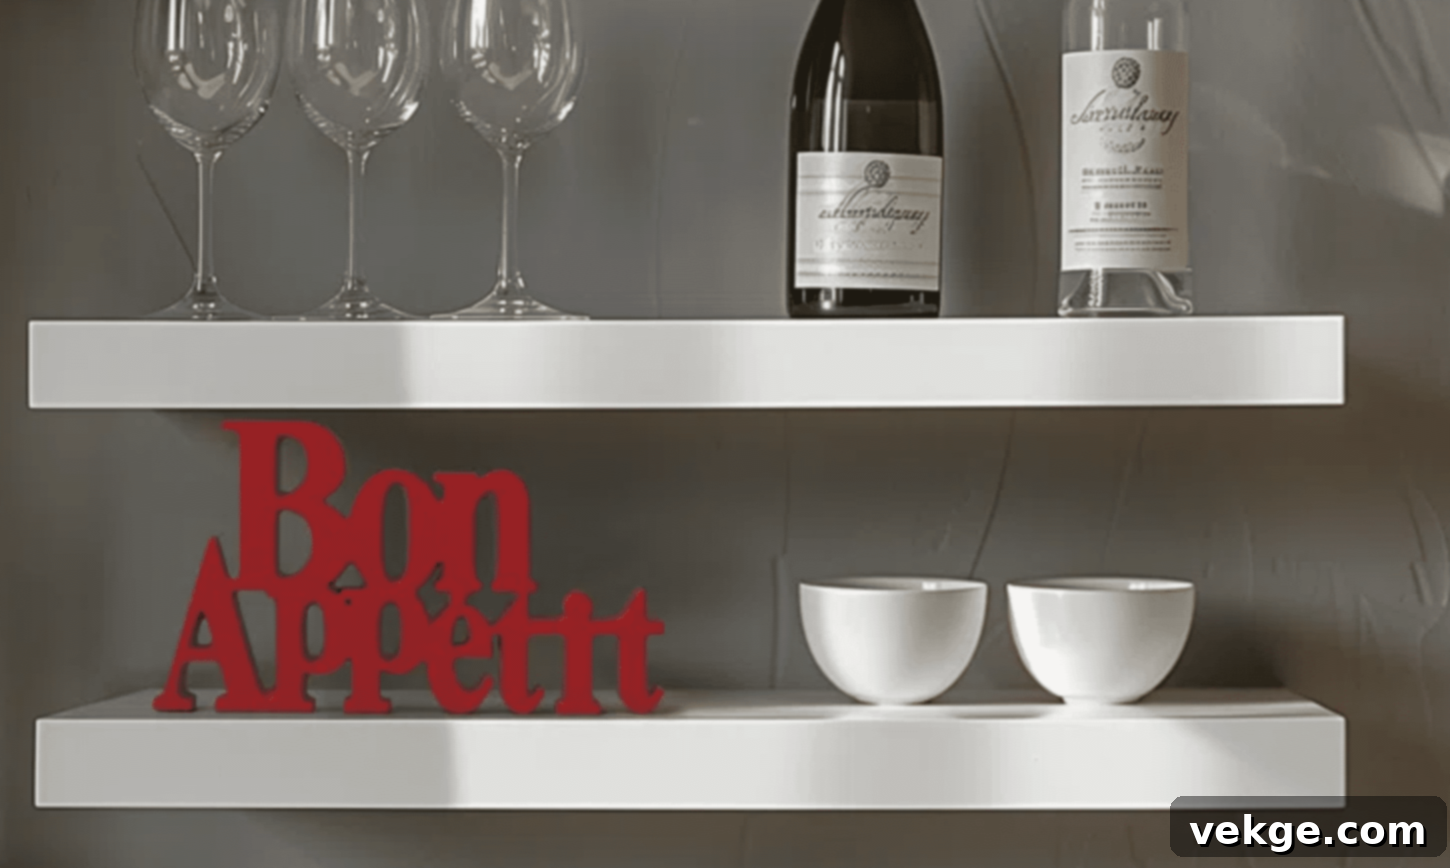
- Material: Resin
- Colors Available: Red
- Price: $44.99
9. Figurine Chef Decorative Sculpture
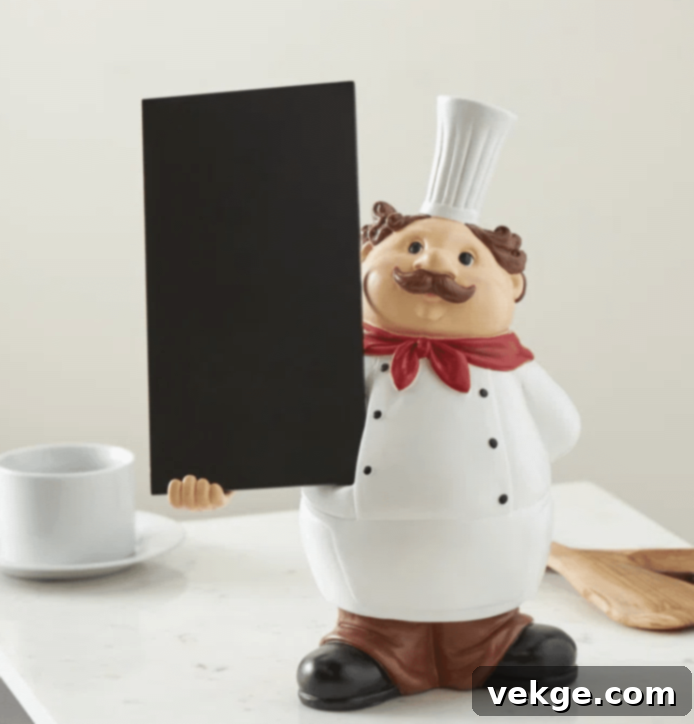
- Material: Resin
- Colors Available: White
- Price: $33.99
10. Coffee Pod/ Capsules Holder
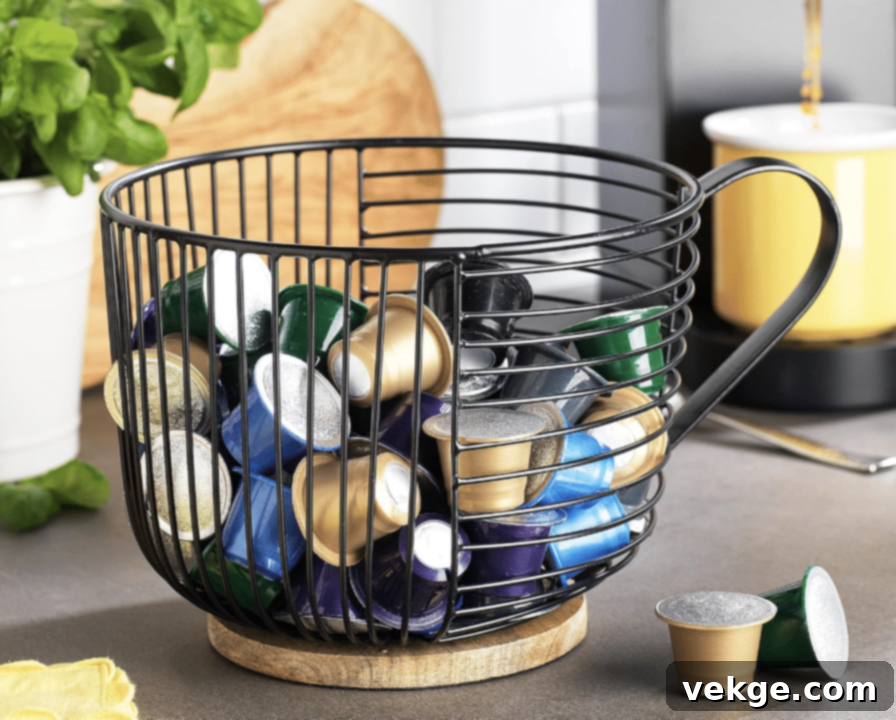
- Material: Wood, Metal
- Colors Available: Black
- Price: $21.99
Wrapping It Up
We’ve now completed our inspiring journey through the versatile world of kitchen floating shelves. We’ve uncovered their numerous advantages, from creating an expansive, open feel in your kitchen to adding significant style and practical functionality. We’ve seen how these shelves continue to be a top design trend in 2024, adapting with fresh twists like mixed materials and smart lighting. Plus, we’ve armed you with a wealth of innovative ideas and essential tips for styling them to perfection.
Remember, floating shelves are much more than just a storage solution; they possess the power to truly transform your kitchen, making it feel more spacious, organized, and inviting. Their utility extends beyond aesthetics, offering easy and immediate access to your everyday essentials, simplifying your culinary tasks.
Whether your personal taste leans towards a sleek modern, cozy rustic, or minimalist aesthetic, a floating shelf design will seamlessly integrate and enhance your kitchen’s overall character. And with a commitment to proper installation, regular maintenance, and thoughtful care, these stylish additions will maintain their appeal and functionality for many years to come.
Feeling ready to infuse your kitchen with a fresh, contemporary, and highly organized look? Why not begin by exploring some of these innovative floating shelf ideas, perhaps starting with a charming Tile-Backed Floating Shelf? Your dream kitchen, both beautiful and efficient, might just be a few well-placed shelves away!
