Transform Your Space: 40 Brilliant DIY Garage Storage Ideas for Ultimate Organization
After years of hands-on experience helping homeowners conquer the perennial challenge of garage clutter, I’ve come to a profound realization: the right organization system isn’t just about tidiness; it’s about transforming a chaotic space into a highly functional and enjoyable area. Through countless projects, I’ve witnessed firsthand how a well-organized garage can evolve from a dumping ground into a dedicated workshop, a streamlined storage hub, or even a versatile recreational zone.
Initially, the sheer volume of accumulated items in most family garages felt overwhelming. Tools, sports equipment, seasonal decorations, cleaning supplies, and forgotten relics often create an impenetrable mess. However, through persistent trial and error, developing and refining a myriad of solutions, I’ve created practical and effective strategies that can work for virtually any garage space and budget. My goal is to empower you to tackle your own garage organization project with confidence, equipped with proven methods and creative ideas.
Let me guide you through these 40 tested and inspiring DIY garage storage ideas, meticulously designed to help you reclaim valuable space, enhance functionality, and bring lasting order to your garage. Whether you’re a seasoned DIY enthusiast or just starting, these solutions offer practical steps toward a perfectly organized garage.
Why Organize Your Garage? The Untapped Potential
Organizing your garage offers far more benefits than just a tidier appearance. It fundamentally changes how you interact with your space and your belongings. Here’s why dedicating time to garage organization is a worthwhile investment:
- Reclaim Valuable Space: A cluttered garage often means your vehicles are left outside, exposed to the elements. Organization frees up floor space, allowing you to actually park your car inside, or even create new functional areas for hobbies, exercise, or a home workshop.
- Find Items Quickly: No more endless searching for that specific wrench or the kids’ soccer ball. When everything has a designated place, you save precious time and reduce frustration, making tasks more efficient and enjoyable.
- Protect Tools and Equipment: Proper storage protects your investments. Tools left on the floor can get damaged by moisture, rust, or being run over. Organized storage, especially with wall mounts or cabinets, keeps them safe from harm, extending their lifespan.
- Create Functional Work Areas: For many, the garage doubles as a workshop. Organization allows you to designate specific zones for different activities – woodworking, gardening, auto repair – complete with easy access to the tools and supplies needed for each task.
- Maintain Safe Storage Practices: Clutter can be a serious safety hazard. Tripping over items, reaching for unstable stacks, or encountering sharp objects haphazardly placed are risks eliminated by a well-thought-out system. Chemicals and hazardous materials can also be stored securely, away from children and pets.
- Boost Property Value: A clean, organized garage can be a significant selling point for your home, signaling to potential buyers that the property is well-maintained and cared for.
- Reduce Stress and Improve Well-being: A clear, organized environment contributes to a clearer mind. The sense of accomplishment and the ease of use derived from an organized garage can significantly reduce daily stress.
40 Creative DIY Garage Storage Ideas to Master Your Mess
1. Wall-Mounted Pegboard System: The Ultimate in Versatility
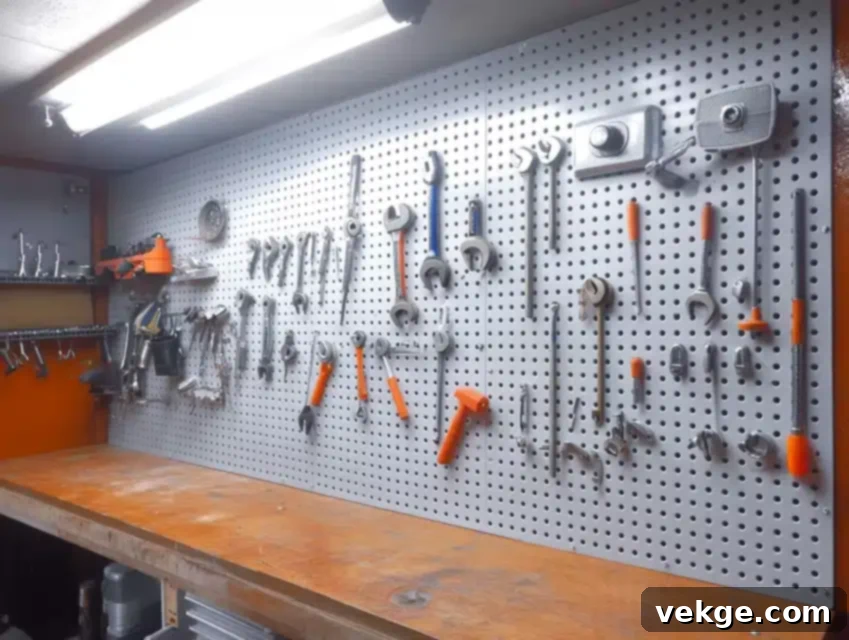
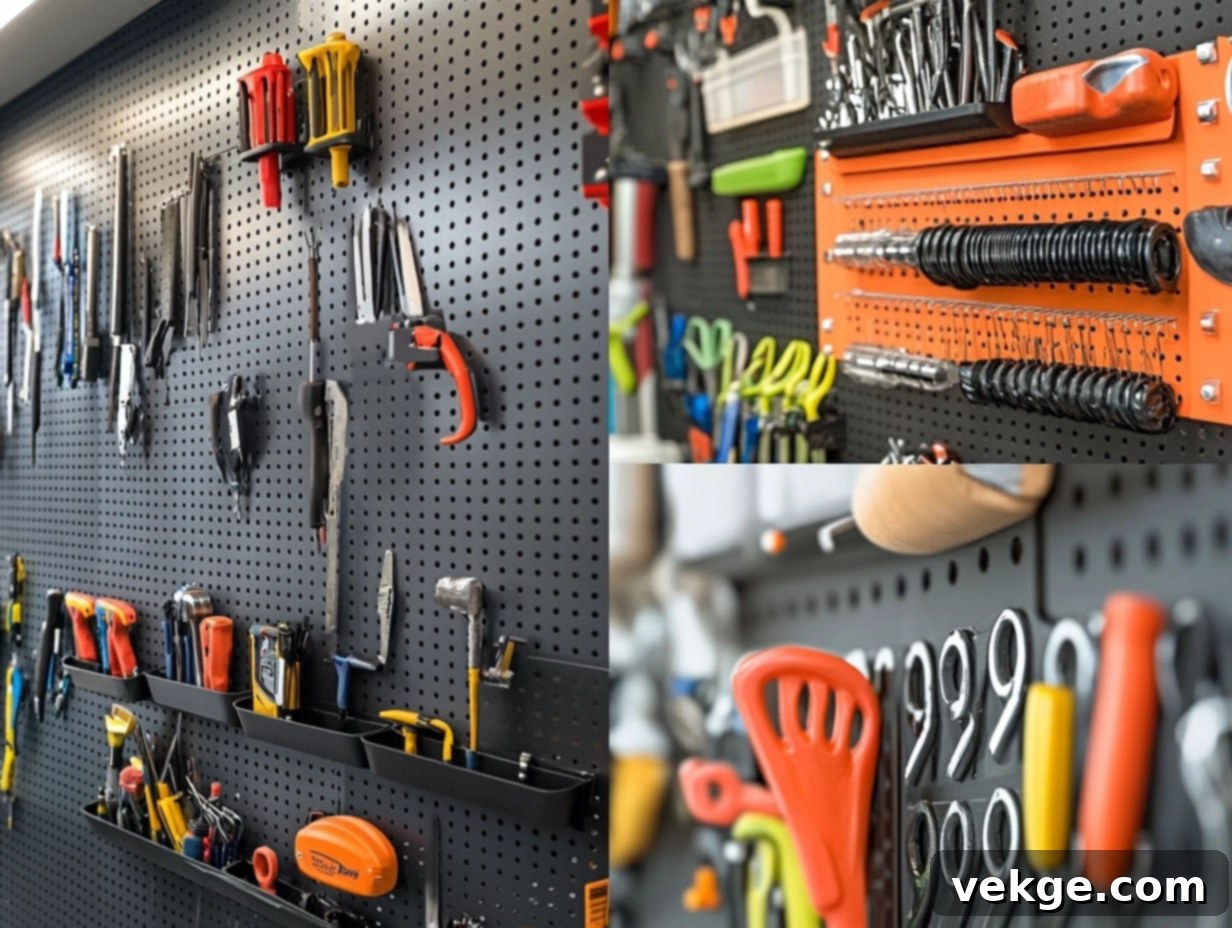
My initial pegboard installation was a revelation, completely transforming my approach to garage organization. This timeless solution offers unparalleled versatility, adapting to an ever-changing array of tools and accessories. With endless configuration possibilities, you can arrange and rearrange hooks, shelves, and bins to suit your current needs, making it perfect for both small hand tools and larger power tools. The inherent visual organization allows for instant identification of where each tool belongs, saving countless hours typically spent searching. Drawing an outline of each tool directly on the board ensures items are always returned to their proper place, maintaining long-term order and efficiency. Properly installed, a pegboard system provides years of reliable, adaptable tool storage, turning a blank wall into a dynamic storage hub.
Installation Steps for a Robust Pegboard System:
- Install Proper Wall Backing for Support: Pegboards require sturdy backing, such as furring strips, to create a gap from the wall, allowing hooks to be inserted properly and ensuring the board can bear significant weight.
- Create Airspace Behind the Board for Hook Clearance: This critical step involves using spacers or furring strips to elevate the pegboard off the wall, providing the necessary depth for various hooks to function effectively.
- Add a Frame Around the Edges for Stability: A simple wooden frame not only provides additional rigidity and stability to the pegboard but also gives it a more finished and professional appearance.
- Use Correct Length Mounting Screws: Ensure screws are long enough to penetrate through the pegboard, furring strips, and firmly into wall studs for maximum security and weight support.
- Install Adequate Lighting Above the Board: Good illumination is essential. Task lighting directly above your pegboard enhances visibility, making it easier to find and return tools, especially in dimly lit garage corners.
- Create Tool Shadow Outlines: Trace the outline of each tool onto the pegboard using a marker. This simple visual cue makes it incredibly easy to see if a tool is missing and ensures everything is returned to its designated spot.
- Test Weight Capacity Thoroughly: Before loading with all your tools, incrementally test the board’s capacity. Hang heavier items first to ensure the mounting system is secure and can safely support the intended load.
2. Overhead Storage Innovation: Harnessing Vertical Space
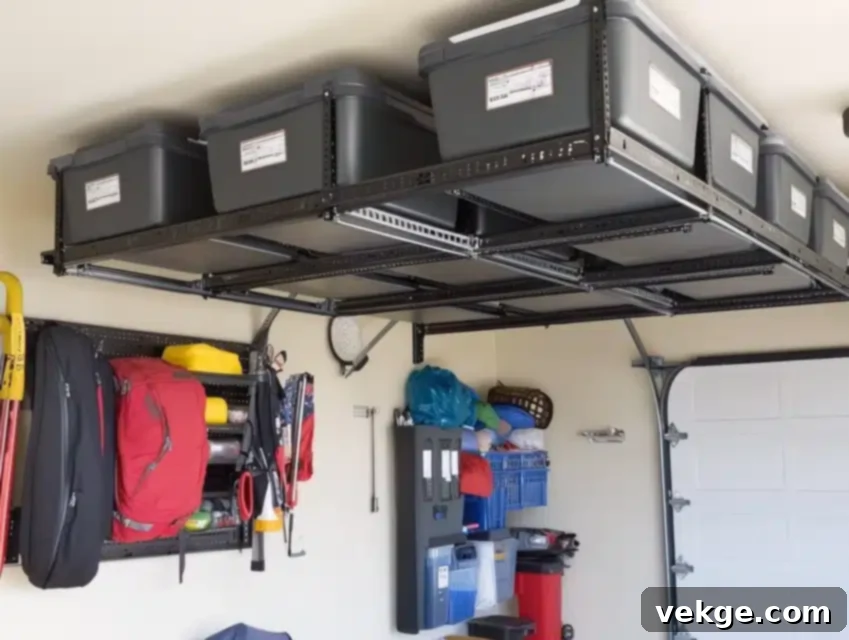
One of my most impactful space-saving discoveries came from simply looking up at the often-overlooked ceiling space. Overhead storage racks are an ingenious way to transform this dead air into immensely valuable storage real estate, perfect for items used infrequently or seasonally. These sturdy racks are ideal for storing holiday decorations, camping gear, seasonal tires, or bulky sports equipment, keeping them safe from moisture and cluttering your main floor. Each installation requires careful planning to ensure proper clearance, especially to avoid interference with garage doors or lighting fixtures. When installed correctly, an overhead storage system provides years of reliable, out-of-the-way storage, drastically improving floor space and overall garage aesthetics.
Installation Steps for Secure Overhead Storage:
- Locate Ceiling Joists Precisely: Use a reliable stud finder to pinpoint ceiling joists. Mounting directly into joists is crucial for supporting heavy loads safely.
- Install Heavy-Duty Mounting Brackets: Always use brackets designed for overhead use and rated for the weight you intend to store. Secure them firmly into the identified ceiling joists.
- Create Proper Clearance Measurements: Carefully measure to ensure the racks don’t interfere with your garage door’s operation, vehicle clearance, or any existing light fixtures.
- Add Safety Rails for Security: Many overhead rack systems include safety rails or netting to prevent items from falling off, adding an extra layer of security.
- Test Weight Capacity Thoroughly: Gradually load the rack with items, checking for any signs of strain or instability. Distribute weight evenly to maximize safety and longevity.
3. Magnetic Tool Organization: Instant Access, Visual Clarity
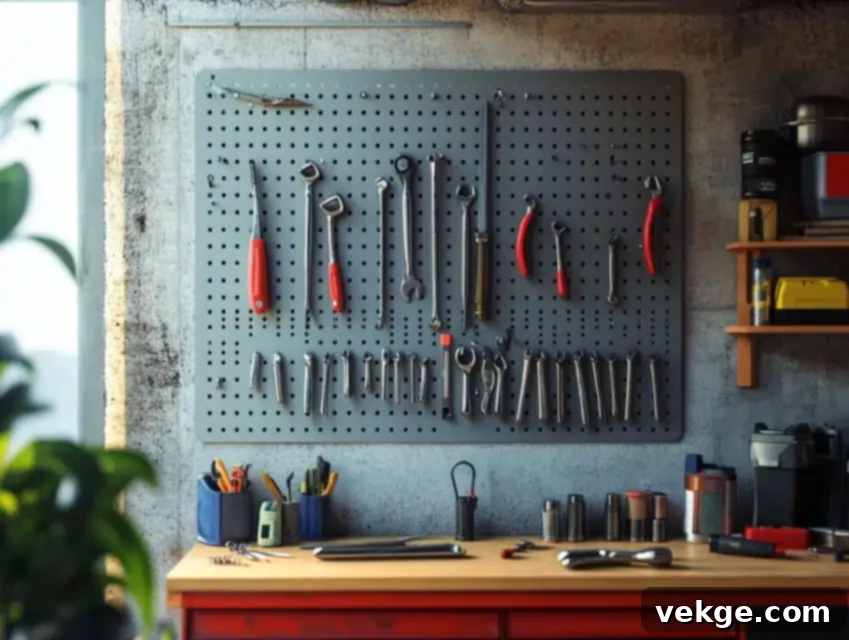
I stumbled upon this incredibly efficient solution while seeking quick and easy access to frequently used metal tools. Magnetic tool bars offer a brilliant way to keep screwdrivers, wrenches, pliers, and other metal implements securely held and instantly visible. Strategic placement near workbenches or common work zones ensures that your most-used tools are always within arm’s reach, dramatically improving workflow. Installing multiple magnetic strips allows you to create organized zones for different tool types, further enhancing efficiency. This simple yet highly effective system has become an indispensable component in all my garage setups, proving its worth for both convenience and space-saving.
Installation Steps for Magnetic Tool Strips:
- Select Proper Strength Magnets: Choose magnetic strips with sufficient holding power for your heaviest tools. Don’t underestimate the weight of multiple wrenches.
- Mount at an Accessible Height: Install the strips at a height that allows comfortable, instant access to your tools while you’re working at your bench or standing.
- Create Tool Grouping Zones: Dedicate separate magnetic strips or sections for different tool categories (e.g., screwdrivers, hex keys, small pliers) for better organization.
- Install Adequate Wall Anchors: Ensure the strips are securely fastened to wall studs or use appropriate heavy-duty wall anchors to prevent them from pulling away under the weight of tools.
- Test Holding Strength Carefully: After installation, test the strips with a few of your heavier tools to confirm they hold securely and won’t slip or fall.
4. PVC Storage Solution: Ingenious Long-Tool Management
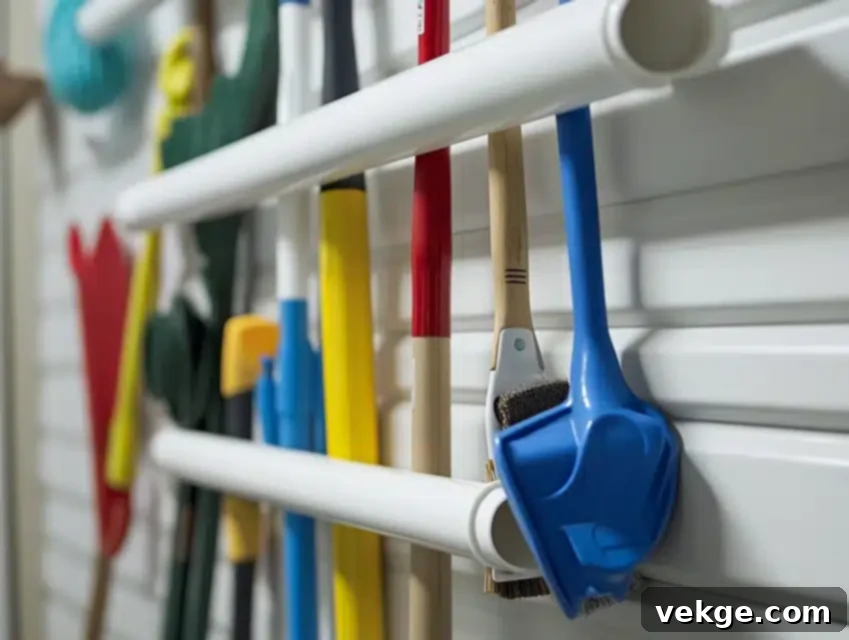
This remarkably affordable and customizable system revolutionized the way I store long-handled tools and items like lumber cut-offs, dowels, or even sporting equipment. Using readily available PVC pipes, you can create a highly effective vertical storage solution. By cutting PVC pipes at perfect angles and mounting them securely, you can maintain tool stability and prevent them from toppling over. The modular design means you can easily expand the system as your collection grows, simply by adding more sections. Labeling each tube ensures quick identification of contents, making it a breeze to find exactly what you need. This organization method not only keeps tools upright and easily accessible but also protects their blades and handles from damage.
Installation Steps for a PVC Storage System:
- Cut Pipes at Proper Angles: Determine the ideal angle (e.g., 30-45 degrees) for your tools to rest securely. A miter saw or PVC cutter can achieve clean, precise cuts.
- Create a Secure Mounting System: Design a frame or use heavy-duty pipe clamps to attach the PVC sections firmly to a wall or freestanding unit, ensuring they won’t shift.
- Install Adequate Support Backing: For wall-mounted systems, ensure the mounting points are anchored into wall studs or solid blocking to support the weight of the tools.
- Add a Clear Labeling System: Use permanent markers or adhesive labels on each tube to quickly identify the type of tool or material stored within.
- Test Stability Thoroughly: Once installed, place your tools into the system and gently test its stability to ensure no pipes wobble or detach, especially with heavier items.
5. Sliding Bin Innovation: Maximizing Under-Shelf Space
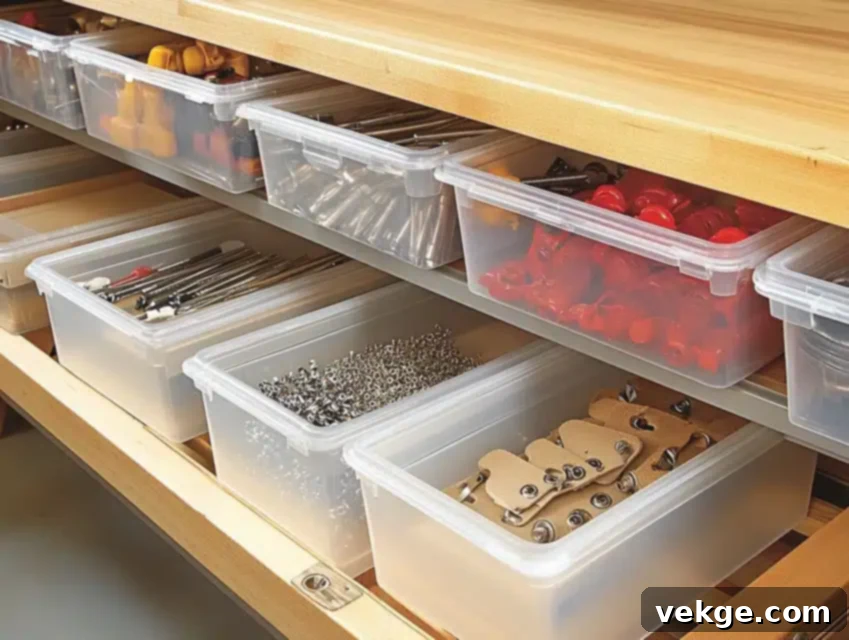
This ingenious project completely transformed previously wasted under-shelf space into incredibly accessible and organized storage. The concept utilizes smooth-gliding tracks, allowing bins to slide out effortlessly, granting full access to stored items without needing to reach into dark, cramped spaces. Each bin can be dedicated to specific categories, from cleaning supplies to car care products or hardware, ensuring everything has its place. Opting for clear bins makes contents instantly visible, eliminating the need to rummage. This system not only maximizes vertical storage space beneath existing shelving but also maintains easy reach for all your essentials, making it a highly ergonomic and efficient solution for any garage.
Installation Steps for a Sliding Bin System:
- Install Heavy-Duty Sliding Tracks Securely: Choose high-quality drawer slides or dedicated bin tracks and mount them firmly to the underside of your shelves, ensuring they are level and parallel.
- Mount Proper Support Brackets: If your shelves aren’t sturdy enough, add support brackets to the underside to handle the added weight of the bins and their contents.
- Create a Bin Labeling System: Label the front of each bin clearly with its contents (e.g., “Screws,” “Cleaning Rags,” “Electrical Supplies”) for quick identification.
- Add Safety Stops on Tracks: Ensure your chosen tracks have built-in stops or add external ones to prevent bins from accidentally sliding completely off the rails.
- Test Weight Capacity Thoroughly: Load a bin with typical contents and test the sliding mechanism. Ensure it operates smoothly and that the tracks and mounting points can support the weight without sagging.
6. Folding Workbench Creation: Space-Saving Functionality
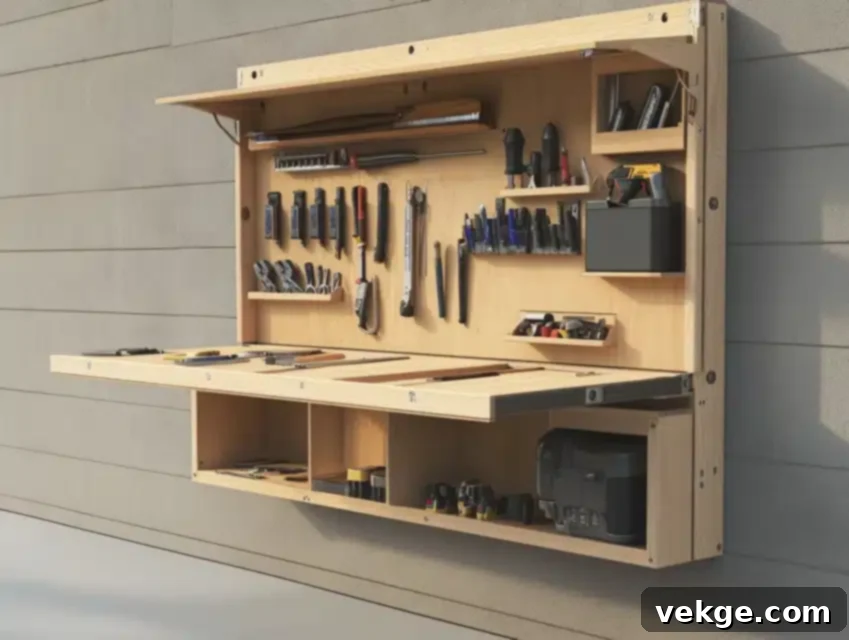
My custom-designed, space-saving folding workbench completely changed my perspective on garage workshops, especially in multi-purpose or smaller spaces. This ingenious solution allows you to have a full-sized, sturdy workbench for projects when you need it, and then effortlessly fold it flat against the wall when not in use. This frees up significant floor space, allowing for vehicle parking or other activities. Sturdy hinges and robust locking mechanisms are crucial to safely support heavy project work. Built-in storage or a pegboard section above the bench can keep frequently used tools handy without taking up additional space. This versatile solution is an absolute game-changer, especially for anyone with a compact garage seeking maximum flexibility.
Installation Steps for a Folding Workbench:
- Install Proper Wall Support System: Ensure the workbench’s back frame is securely anchored into multiple wall studs, as it will bear the primary load.
- Create a Sturdy Folding Mechanism: Use heavy-duty, robust hinges (piano hinges are often recommended) that can withstand repetitive folding and significant weight.
- Add a Reliable Locking System: Implement strong, easy-to-operate latches or support legs that securely lock the workbench in its open, working position to prevent accidental collapse.
- Mount Storage Solutions Underneath: Consider adding a small shelf or a few hooks underneath the main work surface for immediate access to essentials when the bench is in use.
- Test Weight Capacity Extensively: Before using for projects, gradually apply weight to the open workbench, ensuring all hinges, supports, and locking mechanisms hold firm and stable.
7. Overhead Bike Storage: Elevate Your Wheels

This innovative pulley system elegantly addresses the common problem of bulky bike storage, freeing up valuable floor and wall space. When not in use, each bicycle lifts smoothly and safely to ceiling height, completely out of the way. This is particularly useful for storing seasonal bikes or those used less frequently. Specialized, coated hooks prevent any damage to bike frames or wheels during storage and lifting. The system typically includes safety locks to ensure the bike remains securely hoisted, preventing accidental drops. Installation requires careful planning to ensure proper clearance from garage doors and other overhead obstructions, making it a highly efficient solution for avid cyclists or families with multiple bikes.
Installation Steps for Overhead Bike Storage:
- Install Ceiling Mounting Brackets Securely: Mount the pulley system’s main brackets directly into robust ceiling joists, as they will bear the full weight of the bike.
- Create Proper Pulley System Alignment: Ensure all pulleys are correctly aligned and the rope runs freely, allowing for smooth, effortless lifting and lowering of the bicycle.
- Add Safety Locking Mechanisms: Most good systems include a rope cleat or a locking mechanism to secure the rope, preventing the bike from inadvertently descending.
- Test the Lifting Mechanism Thoroughly: Before trusting it with your bike, test the system with a comparable weight (e.g., a bag of sand) to ensure it operates smoothly and securely.
- Install Bike Protection Padding: Apply protective padding or rubber coatings to any hooks or contact points where the bike frame or wheels will rest, preventing scratches or damage.
8. Rolling Cabinet System: Mobile Workspace Flexibility
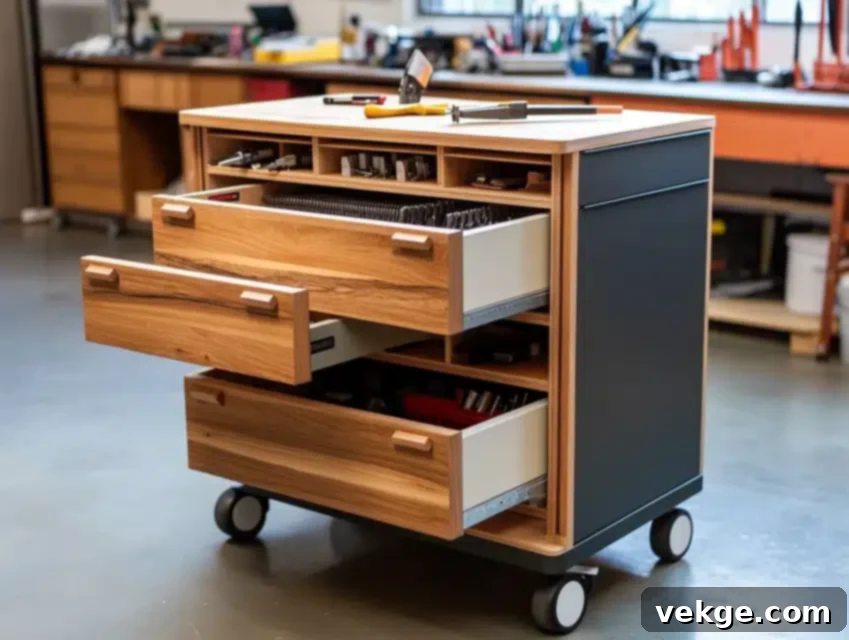
My journey into mobile storage solutions truly revolutionized how we utilize dynamic garage space. Rolling cabinet systems offer unparalleled flexibility, allowing you to bring your tools and supplies exactly where they’re needed most, whether you’re working on a car, a woodworking project, or just cleaning a specific area. Equipped with heavy-duty casters, these cabinets support substantial weight while maintaining effortless mobility. Custom dividers and organizers inside keep tools and supplies meticulously arranged, preventing clutter within the drawers. These versatile units transform any garage into a flexible, adaptable workspace, ready to reconfigure on demand, making them ideal for multi-purpose garages or those with limited static space.
Installation Steps for a Rolling Cabinet System:
- Select Proper Weight-Rated Casters: Choose casters (wheels) that are rated to support the total anticipated weight of the cabinet plus its contents, ensuring smooth, safe movement.
- Install Sturdy Cabinet Base Support: Ensure the base of the cabinet is robust enough to securely attach the casters and distribute the load evenly.
- Create an Interior Organization System: Install drawer dividers, tool trays, or foam inserts within the drawers to keep items neatly organized and prevent them from shifting during movement.
- Add Locking Wheel Mechanisms: Crucially, install casters with locking mechanisms to prevent the cabinet from rolling accidentally while you’re working, ensuring stability and safety.
- Test Mobility Under Full Load: Once fully loaded with tools, test the cabinet’s mobility. Ensure it rolls smoothly and that the locking casters hold it firmly in place when engaged.
9. Pallet Storage Innovation: Eco-Friendly & Economical
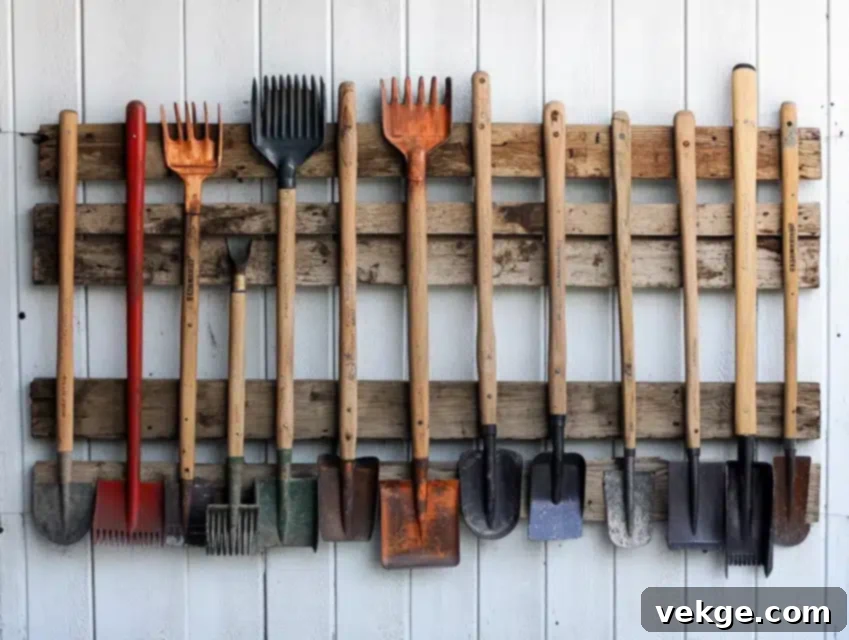
This ingenious recycled solution provides incredible storage capacity at an almost minimal cost, demonstrating the power of repurposing. Old wooden pallets, often discarded, can be transformed into robust and highly functional garage storage units. The natural spacing between pallet boards is perfectly suited for holding long-handled tools, lumber scraps, or even organizing sports equipment. Strategic mounting techniques can create multiple storage levels, maximizing vertical space. Each pallet section can be adapted to serve specific storage needs, from garden tools to paint cans. Ensuring the wood is properly cleaned and weather-treated guarantees long-term durability and prevents splintering, making this a sustainable and highly effective DIY option.
Installation Steps for Pallet Storage:
- Clean and Treat Pallets Properly: Before use, thoroughly clean the pallets to remove dirt, debris, and potential pests. Apply a wood sealer or paint for weather resistance and to prevent splinters.
- Create a Secure Wall Mounting System: Depending on the pallet’s configuration, either mount directly into wall studs or build a strong cleat system to support its weight securely.
- Install Proper Support Brackets: For heavier loads or if spanning across multiple studs isn’t possible, additional L-brackets or ledger boards can provide crucial support.
- Add Tool-Holding Sections: Utilize the existing gaps in the pallet design for tools or add simple wooden blocks or PVC pipe sections to create custom slots and compartments.
- Test Weight Distribution Carefully: Load the pallet system incrementally, observing how it handles the weight. Ensure heavy items are placed near the mounting points and that weight is distributed evenly.
10. Mason Jar Organization: Small Parts, Big Impact

This incredibly clever under-shelf system is my go-to for keeping small items like screws, nails, bolts, washers, and other tiny hardware perfectly organized and instantly accessible. Utilizing standard mason jars, you simply screw their lids to the underside of shelves. Each jar then twists securely into its mounted lid, keeping its contents visible and neatly tucked away without occupying valuable shelf space. The clear glass allows for immediate identification of contents, eliminating guesswork. The screw-top lids ensure secure storage, protecting small parts from dust and spills. Adding labels to the jar bottoms or lids further helps maintain proper organization long-term, making this an economical and highly effective solution for tiny components that often get lost.
Installation Steps for Mason Jar Organization:
- Install Jar Lids Under Shelving Securely: Screw the metal lids (or just the rings) of mason jars directly to the underside of a shelf, ensuring they are firmly attached into the wood or with appropriate anchors.
- Create Proper Spacing Between Jars: Allow enough space between mounted lids for jars to be twisted on and off easily, and to accommodate the width of your hand.
- Add a Clear Labeling System: Label the bottom of each jar or the face of the lid with its contents (e.g., “1-inch Screws,” “Small Washers”) for quick identification.
- Test Jar Attachment Strength: Before filling, twist a jar onto its lid and gently pull down to ensure the lid is securely mounted and can withstand the weight of its contents.
- Install Adequate Lighting Above: Good lighting near your jar system makes it even easier to see the contents of each clear jar.
11. Customizable Shelving Design: Adaptable Storage for All Seasons
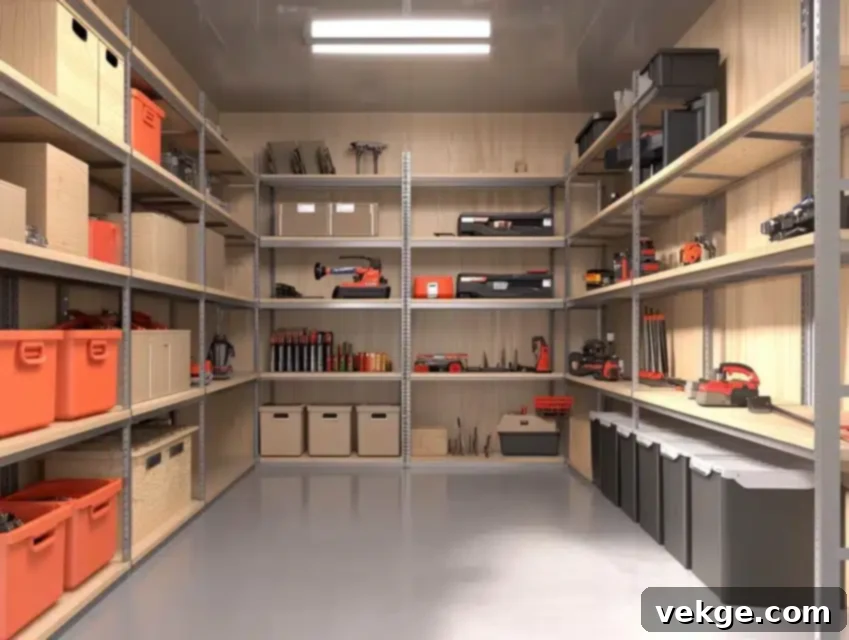
This highly adaptable shelving system emerged from my need to accommodate items of varying sizes that frequently change with the seasons, from snow shovels to gardening tools. The beauty of customizable shelving lies in its adjustable shelf heights, allowing for perfect customization as your storage needs evolve throughout the year. Each shelf bracket typically includes multiple mounting points, facilitating easy height adjustments, often without the need for additional tools. The modular design further enhances flexibility, meaning sections can be added or removed as your storage requirements grow or shrink. Special reinforcement techniques are crucial to ensure stability, even when fully loaded with heavy items like paint cans or power tools. Proper spacing between uprights provides optimal support while maximizing the overall storage capacity, making this a truly versatile foundation for any organized garage.
Installation Steps for Customizable Shelving:
- Install Vertical Support Tracks with Proper Wall Anchoring: Mount the main vertical tracks (standards) securely into wall studs using heavy-duty screws or appropriate anchors, ensuring they are perfectly plumb.
- Create Multiple Height Adjustment Points Carefully: Ensure the tracks are installed at consistent heights if multiple sections are planned, allowing shelves to be level across spans.
- Add Proper Bracket Support Systems Thoroughly: Insert the shelf brackets into the vertical tracks, ensuring they click securely into place at your desired height.
- Install Shelf Surfaces with Reinforcement: Place your chosen shelf material (plywood, MDF, wire) onto the brackets. For heavy loads, consider adding reinforcing strips underneath shelves.
- Test Weight Capacity at Various Heights: Before full use, test the shelves with a representative load, especially at their highest and lowest adjustments, to ensure stability and safety.
12. Lumber Storage System: Organized Timber Management
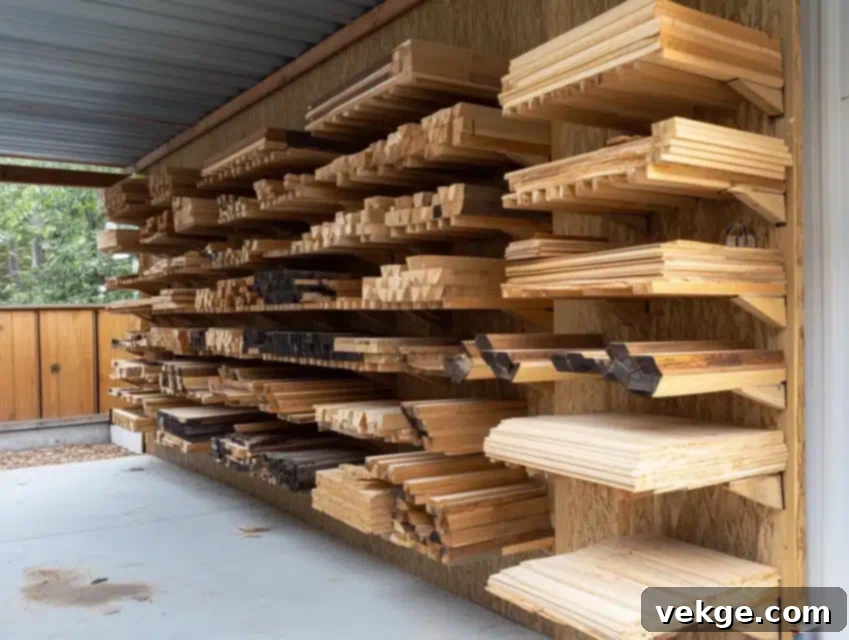
One of my most challenging, yet rewarding, projects involved creating an organized storage system specifically for varying lengths and types of wood and lumber. The solution: a robust, wall-mounted rack that keeps different sizes of lumber easily accessible, properly supported, and off the floor. Multiple horizontal levels efficiently accommodate everything from small scraps to full-length boards, maximizing vertical space. Special angled supports are essential to prevent warping, especially for longer pieces, while keeping materials neatly separated. The design should ideally include space for both sheet goods (plywood, MDF) and dimensional lumber storage. Each level can feature adjustable dividers to keep different wood types, species, or dimensions perfectly separated, ensuring your workshop remains tidy and your materials protected.
Installation Steps for a Lumber Storage System:
- Install Main Support Brackets into Wall Studs Securely: Use heavy-duty brackets designed for significant weight and ensure they are anchored directly into wall studs at consistent heights.
- Create Proper Angle Supports for Material Stability: Design the supports with a slight upward angle to prevent lumber from rolling or sliding off, ensuring stability.
- Add Divider System for Organization Purposes: Incorporate vertical dividers on each level to separate different types, lengths, or sizes of wood, making selection easier.
- Install Safety Rails to Prevent Sliding: For systems holding longer boards, consider a front lip or safety rail on each level to prevent materials from sliding forward, especially in high-traffic areas.
- Test Full Weight Capacity Thoroughly: Gradually load the system with your heaviest lumber, checking the stability of all brackets and mounting points. Reinforce if any signs of strain are observed.
13. Stackable Storage Tower: Vertical Efficiency
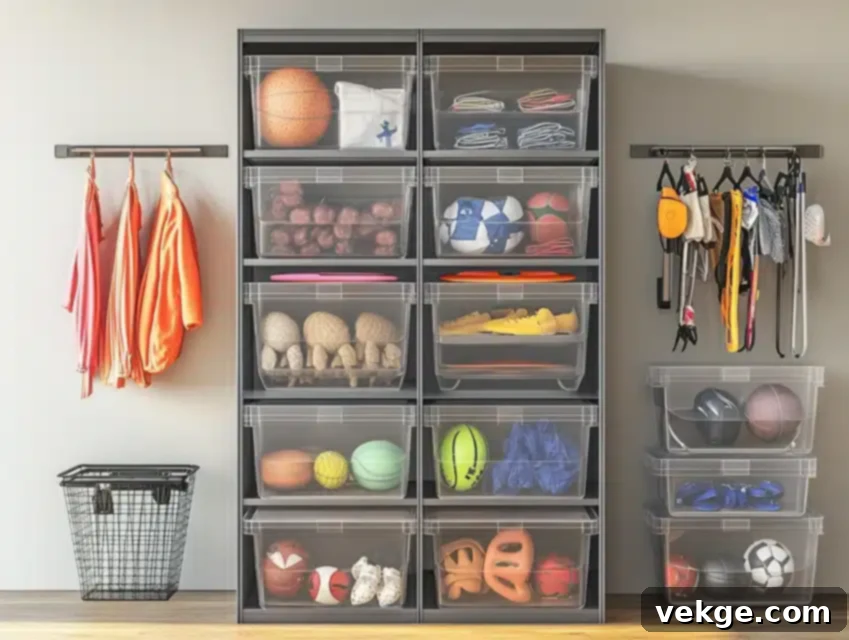
This vertical storage solution is a masterclass in maximizing floor space while maintaining surprisingly easy access to contents. Stackable storage towers, often made up of modular bins or drawers, allow you to build upwards, making the most of your garage’s height. Each bin level typically features clear labeling and smooth sliding action for effortless content retrieval, eliminating the need to unstack. The modular design offers immense flexibility, meaning sections can be added or removed as your storage needs change, particularly useful for seasonal items. Special interlocking features are vital to ensure stability when bins are fully stacked and loaded. Many designs also include proper ventilation to prevent moisture buildup in stored items, protecting tools or seasonal clothing. Built-in handles make moving filled bins safe and convenient when rearranging your space.
Installation Steps for a Stackable Storage Tower:
- Create a Stable Base Platform for Stacking: Ensure the bottom unit or a dedicated platform is perfectly level and solid, providing a stable foundation for the entire tower.
- Install Proper Bin Sliding Mechanisms: If using drawers or sliding bins, ensure their tracks are correctly installed and operate smoothly for easy access.
- Add a Ventilation System Throughout the Structure: For enclosed bins, consider drilling small holes or ensuring the design allows for air circulation to prevent mustiness or rust.
- Create a Clear Labeling System Carefully: Label each bin prominently with its contents (e.g., “Camping Gear,” “Gardening Supplies,” “Winter Hats”) for quick identification.
- Test Stability Under Various Load Conditions: Stack and load the tower, checking for any wobble or instability. For very tall units, consider anchoring them to a wall for added safety.
14. Cord and Hose Management: Untangle Your Life
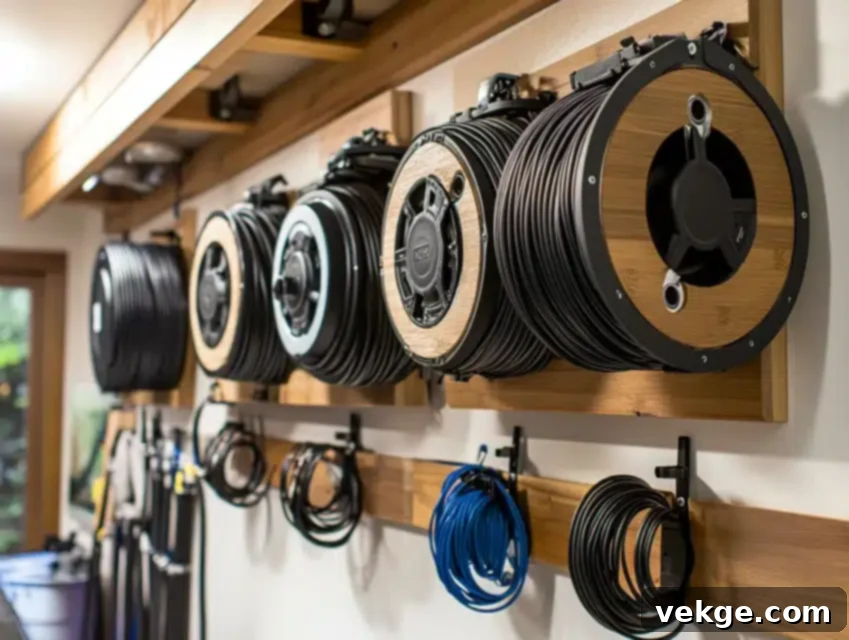
This organizational system finally solved the perennial problem of tangled cords and hoses in my garage, a source of constant frustration and potential hazards. Wall-mounted reels and specialized hooks provide perfect storage, preventing kinks, twists, and damage to expensive electrical cords, garden hoses, and air compressor lines. Each mounting bracket should ideally include a locking mechanism to prevent unwanted unwinding of stored items, keeping them neat and tidy. Special guides ensure proper winding and prevent twisted cords during both storage and retrieval. The most effective systems include separate sections or color-coding for different types of cords and hoses, making identification effortless. Built-in tension control further prevents excessive stress on stored materials, prolonging their lifespan and maintaining their functionality.
Installation Steps for Cord and Hose Management:
- Mount Reel Brackets into Solid Wall Supports: Ensure all reel brackets and hooks are anchored directly into wall studs or heavy-duty blocking to support the weight of coiled hoses and cords.
- Install Proper Guide Mechanisms for Winding: If using reels, ensure the guide arm or mechanism functions smoothly to evenly distribute the cord/hose during winding.
- Create a Tension Control System Carefully: For retracting reels, ensure the tension is appropriate – strong enough to retract, but not so strong that it causes excessive strain on the cord or hose.
- Add Safety Locks for Secure Storage: Many reels feature a locking pin or latch to prevent accidental unwinding; ensure these are functional and used.
- Test the Winding Mechanism Thoroughly: Test each reel with its intended cord/hose to ensure smooth operation, proper coiling, and secure storage without kinks.
15. Mobile Pegboard Cart: Tools on the Go
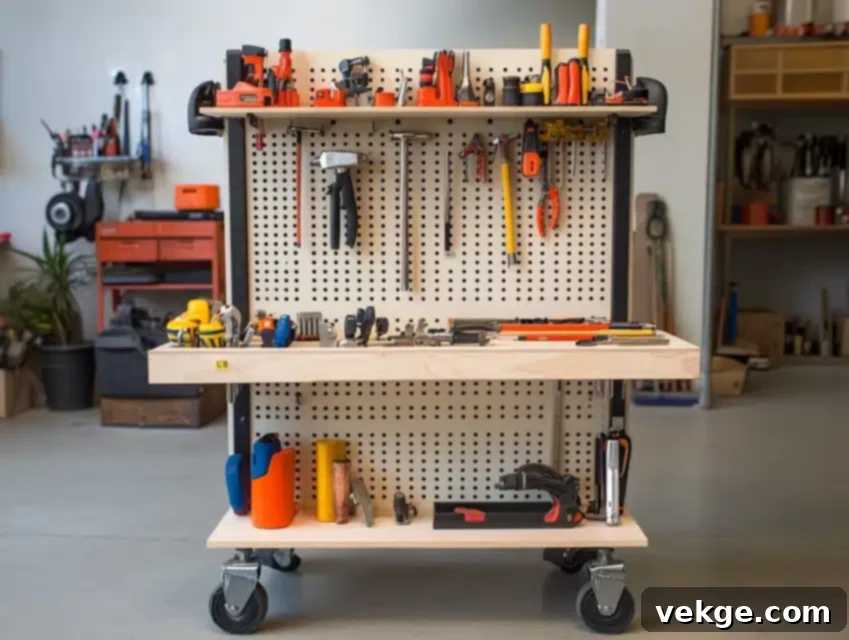
The flexibility of my workshop increased dramatically with the introduction of this highly portable storage solution. A mobile pegboard cart brings your most-used tools exactly where they’re needed in your workspace, eliminating countless trips back and forth to a stationary wall. Each side of the cart can feature customizable tool arrangements, allowing you to tailor setups for different projects – woodworking tools on one side, automotive on the other. Built-in shelves below the pegboards provide convenient storage for larger items, power tools, or supply bins, further enhancing its utility. The sturdy wheel system includes locking casters, ensuring the cart remains stable and secure during use, transforming any area of your garage into an instant, temporary workbench or tool station.
Installation Steps for a Mobile Pegboard Cart:
- Build a Sturdy Frame with Proper Support: Construct a robust wooden or metal frame for the cart, designed to support the weight of the pegboards, tools, and any lower shelves.
- Install High-Quality Caster Wheels Securely: Attach heavy-duty, locking casters to the base, ensuring they are rated for the total weight and can withstand frequent movement.
- Mount Pegboard Panels with Reinforcement: Secure the pegboard panels to the cart’s frame, potentially adding a thin plywood backing for extra strength and hook stability.
- Create a Tool Organization System Carefully: Arrange hooks, bins, and small shelves on the pegboards, optimizing for frequently used tools and easy access.
- Test Mobility Under Full Load Capacity: Load the cart with your tools and supplies, then test its ability to roll smoothly and lock securely. Ensure it feels stable and balanced.
16. Under-Shelf Hook System: Doubling Shelf Capacity
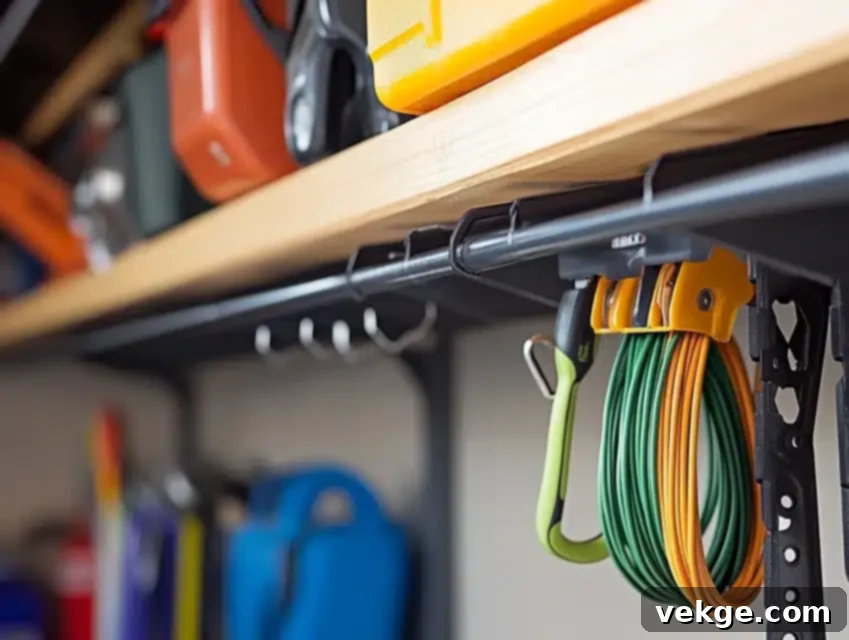
This deceptively simple solution dramatically doubled the storage capacity of my existing garage shelves, proving that sometimes the best innovations are the simplest. By utilizing the often-overlooked space directly underneath shelves, every inch becomes useful for hanging lightweight items. Hooks can be easily screwed into the underside of wooden shelves, providing secure and readily accessible storage for various tools, extension cords, paintbrushes, or cleaning supplies. A special coating on the hooks can prevent damage or scratches to stored items. Strategic placement allows for easy access to frequently used items while maximizing every available cubic inch of space. This cost-effective method is perfect for decluttering shelves and keeping smaller items visible and within reach.
Installation Steps for an Under-Shelf Hook System:
- Install Hooks with Proper Spacing Measurements: Measure and mark points on the underside of your shelf, ensuring adequate space between hooks for the items you plan to hang, preventing overcrowding.
- Create a Weight Distribution Plan Carefully: Avoid overloading any single section of the shelf. Distribute heavier items evenly or place them closer to the shelf’s support brackets.
- Add Protective Coating to Hook Surfaces: If your hooks are bare metal, consider adding a rubberized coating or plastic caps to prevent tools from being scratched or damaged.
- Test Weight Capacity for Each Hook: Gently test each installed hook with the intended item to ensure it’s securely fastened and can bear the weight without bending or pulling out.
- Install Safety Catches Where Needed: For items that might swing or fall, consider adding small safety catches or choosing hooks with a more enclosed design.
17. Repurposed Bookshelf Innovation: New Life for Old Furniture
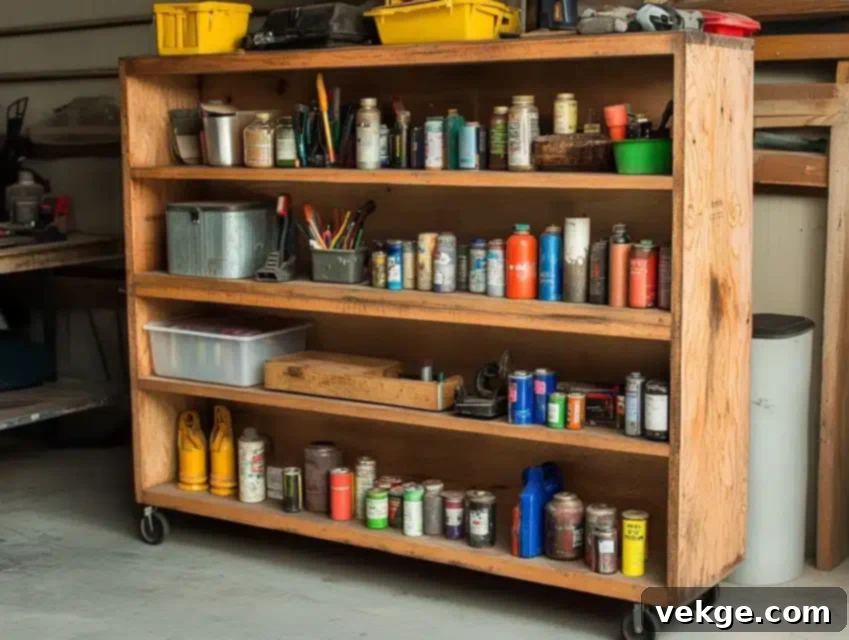
One of my favorite and most satisfying garage storage solutions involved transforming old, unwanted bookcases into highly organized and robust garage storage units. The sturdy shelves of these repurposed pieces proved perfect for holding everything from paint cans and cleaning supplies to power tools and hardware bins. With a little customization, each shelf can receive custom dividers, creating specific zones for different item categories, optimizing organization. Strategic placement of small bins or baskets on shelves maximizes storage in previously wasted vertical spaces. The addition of heavy-duty wheels makes these units completely mobile, offering flexible storage that can be moved for cleaning or project work. Applying a special shelf liner prevents damage from accidental oil or chemical spills, ensuring durability and easy cleanup. This is a truly sustainable and budget-friendly approach to serious garage organization.
Installation Steps for Repurposed Bookshelf Storage:
- Reinforce Shelf Structure for Heavy Items: If the bookcase is flimsy, add L-brackets or reinforce shelf bottoms with additional wood strips to handle the weight of garage items.
- Install the Proper Wheel System Carefully: Attach heavy-duty, locking casters to the base of the bookcase, ensuring they are securely fastened and rated for the expected load.
- Create Custom Divider Placement: Measure and cut thin plywood or plastic sheeting to create custom dividers for specific items or bins on each shelf.
- Add Protective Surface Coating: Consider painting the bookcase with a durable, washable paint, or adding shelf liners to protect against moisture, chemicals, and general wear and tear.
- Test Stability Under Full Load: Load the repurposed unit with your items and gently push/pull it to test mobility and stability. Ensure the wheels lock effectively.
18. Tool Drawer Organization: Precision for Your Tools
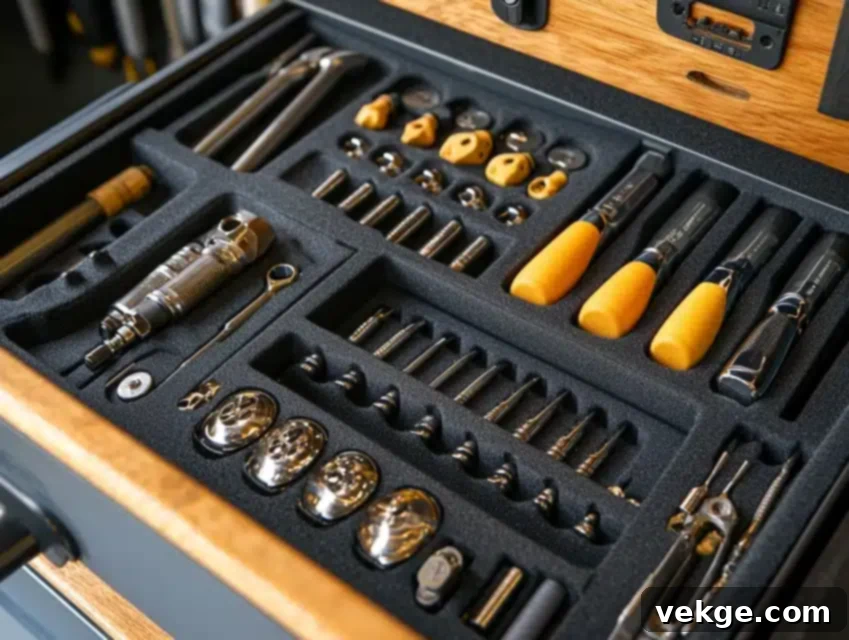
This system completely transformed chaotic tool drawers into perfectly organized and highly efficient storage spaces, ending the frustration of rummaging for the right size. The secret lies in custom-cut foam inserts (often Kaizen foam or similar closed-cell foam), which create specific, snug spots for each individual tool in your collection. This level of organization makes missing tools immediately noticeable, saving precious time on project days. Each drawer can feature a photographed layout guide or engraved outlines for proper tool replacement, ensuring everyone knows where things belong. Applying a special coating or using moisture-resistant foam prevents moisture buildup and tool corrosion, protecting your valuable investments. This meticulous system elevates a basic toolbox into a highly functional and professional-grade storage solution, ensuring every tool has its home.
Installation Steps for Tool Drawer Organization:
- Measure Drawer Dimensions Precisely: Accurately measure the length, width, and depth of each drawer to ensure your foam inserts fit snugly.
- Create Custom Foam Inserts Carefully: Using a sharp utility knife or hot knife, meticulously cut out individual recesses for each tool, making sure they fit without being too tight or too loose.
- Add Tool Identification System: Consider labeling or etching the name/size of each tool into the foam or the drawer itself, especially for tools that look similar.
- Install a Moisture Protection Layer: Place a thin rubber or moisture-absorbing mat at the bottom of the drawer before the foam insert to protect against condensation.
- Test Drawer Operation When Full: Load all tools into their foam inserts and test the drawer’s opening and closing mechanism. Ensure it slides smoothly and doesn’t get jammed.
19. Filing Cabinet Transformation: Vertical Power Tool Storage
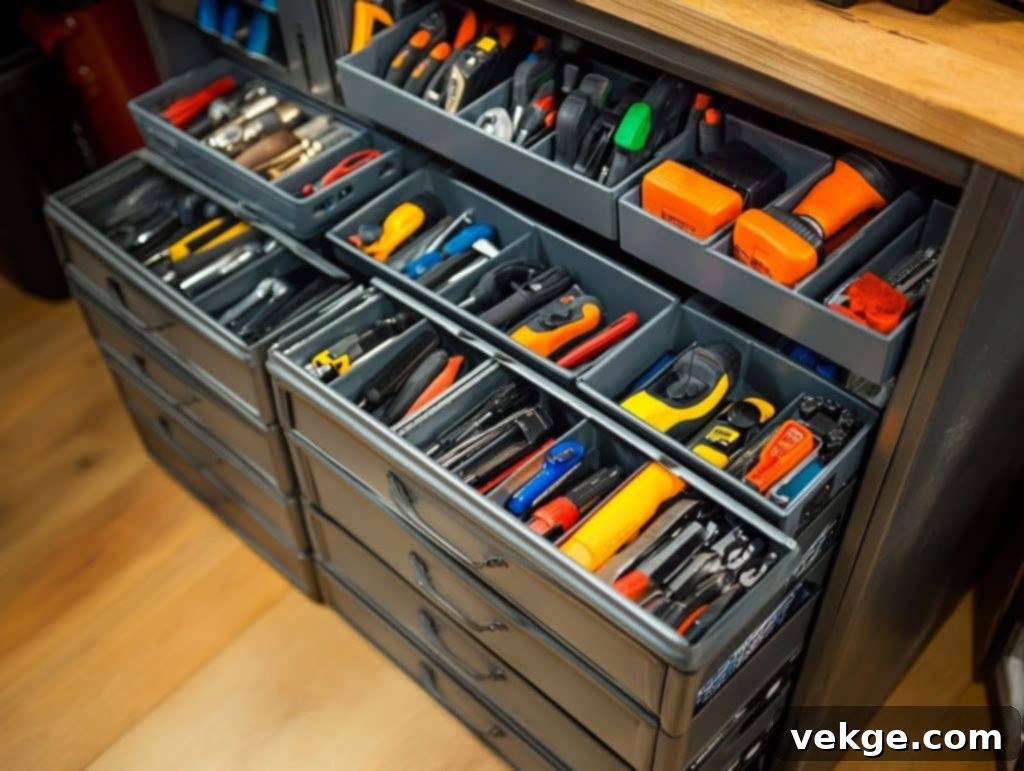
This remarkably innovative repurposing idea transformed old, often overlooked, filing cabinets into robust and highly effective vertical storage for larger tools and equipment. The deep drawers of a standard filing cabinet are perfectly suited to accommodate bulky power tools like drills, sanders, and even small saws, keeping them protected from dust and damage. Each drawer can be outfitted with custom dividers, creating organized storage sections for specific tools and their accessories (e.g., drill bits with the drill). The sturdy metal construction of filing cabinets provides excellent protection for expensive tools, offering a secure and durable storage solution. Special drawer liners, such as rubber mats or non-slip material, are crucial to prevent tools from sliding around during drawer operation, reducing wear and tear. This is a fantastic budget-friendly way to get heavy items off the workbench and into organized storage.
Installation Steps for a Filing Cabinet Transformation:
- Clean and Prep the Cabinet Thoroughly: Remove all old files, clean the interior and exterior, and if desired, paint the cabinet for a fresh look and added protection.
- Install Proper Drawer Dividers: Use plywood, plastic, or even old cardboard to create custom compartments within each drawer to separate tools and accessories.
- Create Non-Slip Surface Lining: Cut and place rubber drawer liners or non-slip shelf liner at the bottom of each drawer to prevent tools from shifting and clanking.
- Add a Clear Labeling System: Label the outside of each drawer with its contents (e.g., “Drills & Bits,” “Sanders & Paper,” “Small Power Tools”) for easy identification.
- Test Drawer Operation Carefully: Load the drawers and test their smooth operation. Ensure they open and close fully without sticking or binding, especially when loaded with heavier tools.
20. Bucket Wall Storage: Versatile and Removable Bins
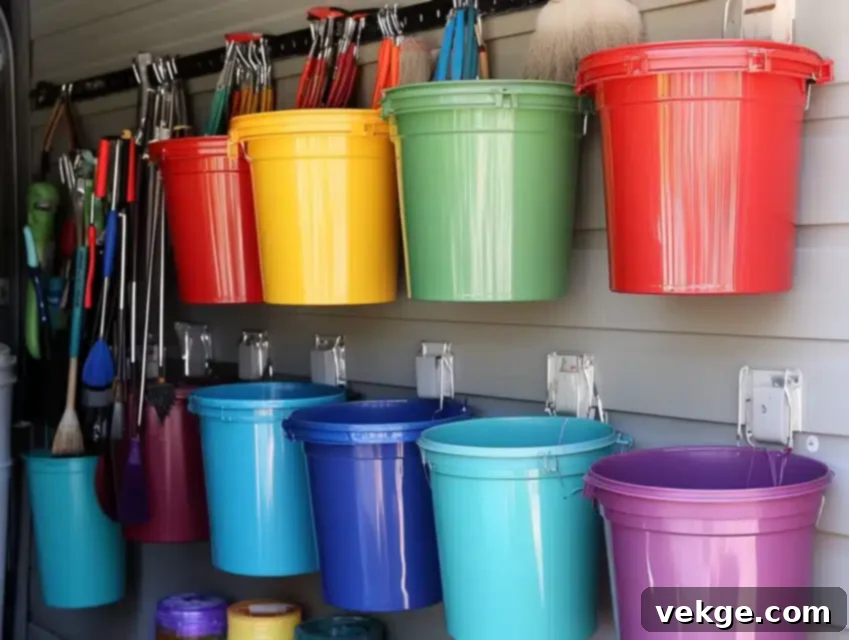
This truly innovative system transformed ordinary five-gallon paint buckets into incredibly versatile and easily removable wall storage bins. By securely mounting brackets to your garage wall, each bucket can hang firmly while remaining effortless to detach for transport to a work area or garden. Arranging buckets at graduated heights creates perfect access to stored items at various levels, optimizing visibility and reach. For outdoor or damp garage installations, special drainage holes drilled into the bottom of each bucket prevent water collection, protecting contents from moisture. Color-coded buckets can further help organize different categories of tools and supplies, making it simple to grab what you need. This system proves particularly useful for storing frequently used items like gardening tools, car wash supplies, or pet food, keeping them organized yet portable.
Installation Steps for Bucket Wall Storage:
- Install Mounting Brackets into Wall Studs: Use heavy-duty, appropriate mounting brackets (e.g., French cleats, bucket hooks) and secure them firmly into wall studs or robust blocking.
- Create a Proper Bucket Spacing Layout: Measure and mark the spacing for each bucket to ensure adequate clearance when hanging and removing, and to optimize the use of your wall space.
- Add Drainage System Carefully: Drill a few small holes in the bottom of each bucket to prevent water accumulation, especially if storing items that might get wet or if used in a humid environment.
- Install Bucket Removal Mechanism: Ensure your chosen mounting system allows for easy and safe removal of buckets without compromising stability when they are hanging.
- Test Weight Capacity Thoroughly: Before filling with all your supplies, test each mounted bucket with a typical load to ensure the brackets and wall anchors can support the weight.
21. Driver and Wrench Organization: Custom Tool Holders
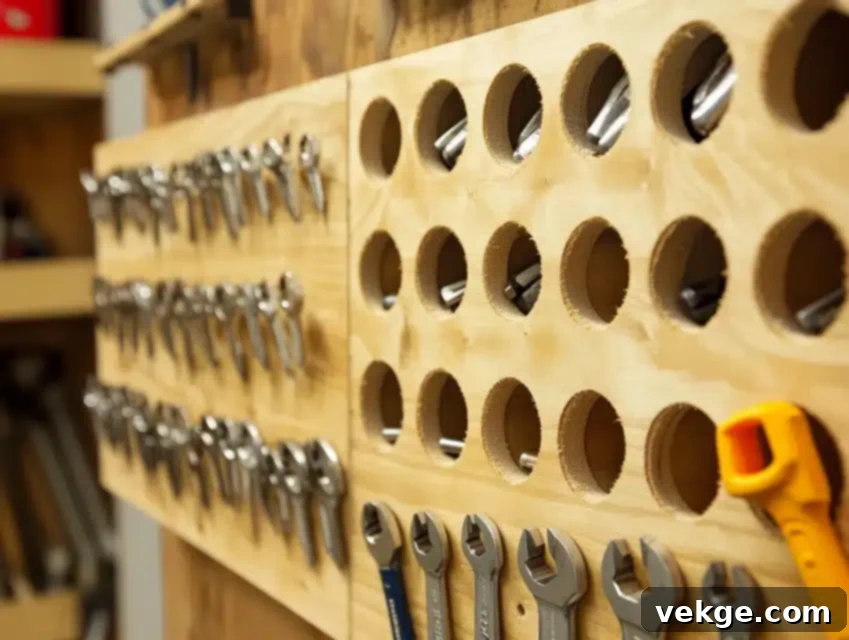
My custom solution for storing screwdrivers and wrenches completely revolutionized quick tool access in my workshop. This clever DIY project involves creating custom-drilled holes in wooden blocks, meticulously angled to create perfect holders for various screwdriver and wrench sizes. This not only keeps them organized but also presents them in an easy-to-grab fashion. Each tool slot receives clear size labeling, making identification instantaneous – no more guessing the right wrench! The angled design makes tool selection and, crucially, replacement effortless, promoting a tidy workspace. Multiple blocks mounted at different heights or in a tiered fashion can accommodate various tool sizes and types, from precision screwdrivers to large adjustable wrenches, ensuring every single tool has its dedicated, easily accessible spot.
Installation Steps for Driver and Wrench Organization:
- Create Precise Hole Measurements: Measure the shaft diameter of each screwdriver and the handle width of each wrench. Mark precise drilling locations on your wooden blocks.
- Drill Proper Angle for Tool Placement: Use a drill press or a drill guide to create holes at a consistent, ergonomic angle (e.g., 15-20 degrees from vertical) to allow tools to rest securely and be easily picked up.
- Install Size Identification System: Clearly label each hole or slot with the corresponding tool size (e.g., “Phillips #2,” “1/2 inch Wrench”) using stencils, permanent marker, or engraved tags.
- Mount Blocks Securely to the Wall: Attach the prepared wooden blocks firmly to your garage wall, ideally into wall studs, using screws that are long enough to provide secure support.
- Test Stability Under Full Load: Place all your screwdrivers and wrenches into their designated slots and gently tug on the blocks to ensure they are securely mounted and can bear the full weight.
22. Ladder Storage Innovation: Safely Off the Floor
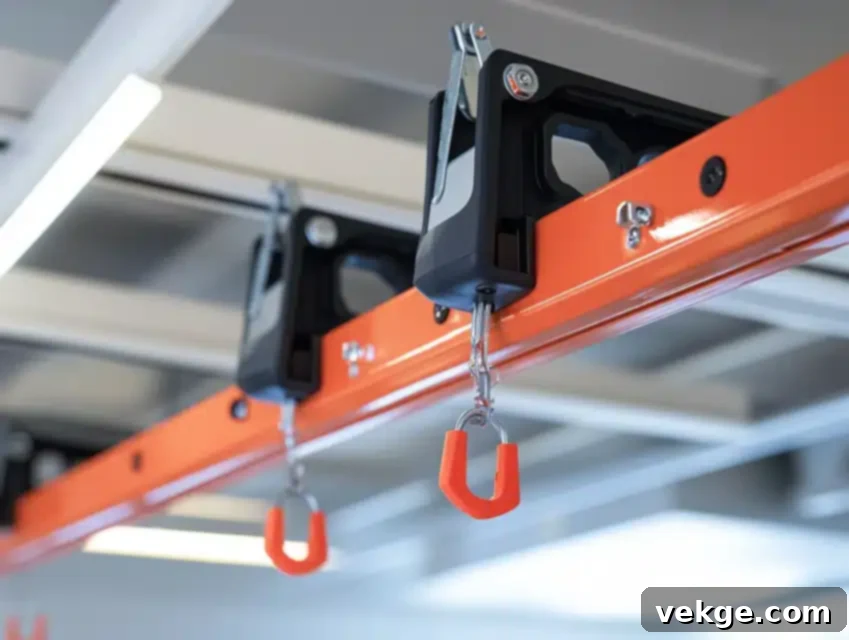
This ingenious ceiling-mounted system provides the perfect solution for storing bulky ladders, keeping them secure, out of the way, yet easily accessible when needed. Rather than leaning precariously against a wall or taking up valuable floor space, a pulley mechanism makes raising and lowering ladders almost effortless, even for larger extension ladders. Special padding on the hooks or contact points protects ladder surfaces from scratches or damage during storage. Integrated safety locks are crucial to ensure the ladder remains securely overhead, preventing accidental falls. The system is designed to work perfectly for various ladder sizes and styles, from stepladders to multi-position ladders, making it an essential addition for any homeowner looking to optimize garage space and enhance safety.
Installation Steps for Ladder Storage:
- Install Ceiling Mounting Brackets Securely: Anchor the main mounting brackets of the pulley system directly into robust ceiling joists, as ladders can be surprisingly heavy.
- Create Proper Pulley Alignment: Ensure all pulleys are correctly aligned and the rope runs freely, allowing for smooth, balanced lifting and lowering of the ladder.
- Add a Safety Locking Mechanism: Implement a reliable cleat or locking mechanism for the rope to secure the ladder firmly in the raised position, preventing accidental descent.
- Install Protective Padding: Apply soft padding or rubber coatings to any hooks or contact points where the ladder will rest, protecting its finish from scratches.
- Test Operation with Different Ladders: Before full use, test the system with ladders of varying sizes and weights to ensure smooth operation and secure holding capacity across your needs.
23. Spray Paint Storage Design: Organized Color Palette

This specialized rack completely transformed how I organize and access my collection of spray paint cans, turning a chaotic pile into a neatly arranged color palette. The tiered design is the key, allowing clear visibility of every can’s color and type at a glance, eliminating the need to search through rows of identical tops. Each row typically tilts slightly backward, a clever feature that prevents cans from accidentally falling forward. The spacing is carefully designed to accommodate various can sizes while maximizing storage capacity in a compact footprint. Custom labels applied to the front of each slot or shelf can help track paint types, finishes, and even remaining quantities easily. The entire unit mounts securely to the wall, preventing any accidental spills or toppling, making it a dream for DIYers and crafters alike.
Installation Steps for a Spray Paint Storage Rack:
- Build a Tiered Frame with Proper Angles: Construct a sturdy frame with shelves designed at a slight backward tilt (e.g., 5-10 degrees) to hold cans securely.
- Install Secure Mounting Brackets: Attach the entire unit firmly to wall studs using robust screws and brackets, ensuring it can support the concentrated weight of many cans.
- Create a Label Identification System: Label each slot or shelf with the specific color, finish, or type of spray paint, possibly using color swatches or product names.
- Add Safety Rails for Security: Consider a small lip or rail on the front edge of each tier to provide an extra safeguard against cans rolling off.
- Test Stability with a Full Load: Fill the rack with spray cans and gently nudge it to ensure it is perfectly stable and securely mounted to the wall.
24. Hanging Jar System: Ceiling-Mounted Small Parts

My most versatile small-item storage solution utilizes the often-underestimated ceiling space above a workbench or shelf, creatively turning it into a highly efficient organization zone. This ingenious system involves screwing jar lids directly to the underside of a shelf or ceiling joist. Each jar then twists securely into its mounted lid, keeping its contents visible and neatly out of the way. Clear glass jars are paramount, as they make finding tiny items like nails, screws, washers, or electrical connectors quick and incredibly simple. This method effectively keeps the floor and valuable shelf space free for larger items, decluttering your primary work surfaces. Regular-mouth mason jars typically work perfectly for most small storage needs, offering an affordable and highly effective way to manage tiny components that often get lost.
Installation Steps for a Hanging Jar System:
- Mount Jar Lids Securely to the Surface: Use short screws to attach the metal rings or full lids of mason jars to the underside of a shelf or a sturdy wooden beam on the ceiling.
- Create Proper Spacing Between Jars: Ensure there’s enough room between mounted lids for jars to be twisted on and off comfortably without hitting adjacent jars.
- Install a Clear Labeling System: For added efficiency, label the bottom of each jar or the face of the mounted lid with the contents (e.g., “Small Nails,” “Wood Screws”).
- Add Content Identification Method: Consider adding a small sample of the contents to the top of the lid (if flat) or using color-coded dots for quick visual recognition.
- Test Weight Capacity Carefully: Before filling all jars, twist on a loaded jar and gently pull to ensure the lid’s mounting screws are secure and can support the weight.
25. Overhead Track System: Sliding Bins for Seasonal Storage
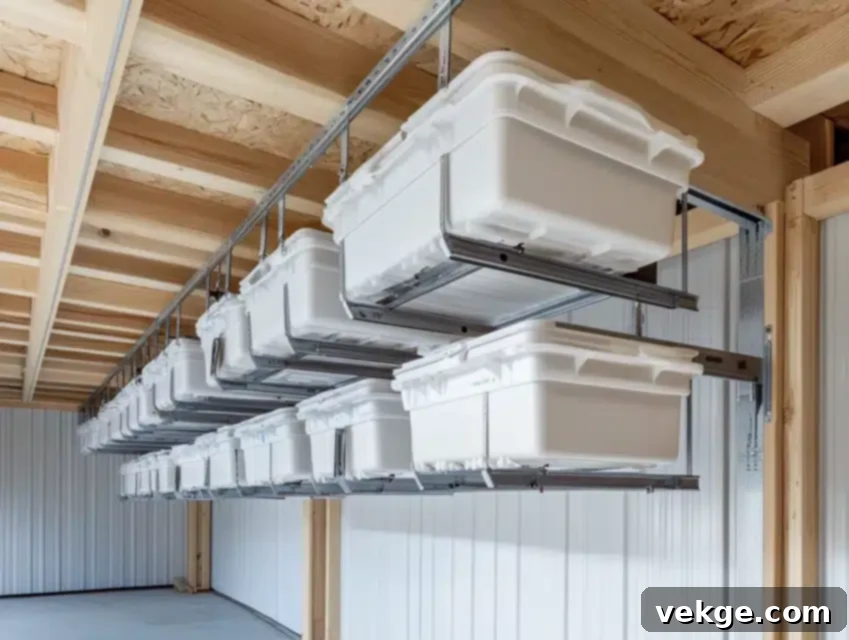
This sliding bin system is an incredibly efficient way to maximize often-wasted ceiling space, especially for items that are used seasonally or less frequently. By installing tracks directly to your garage ceiling, you can hang plastic storage bins that slide smoothly along the rails, providing easy access to contents when needed, and effortlessly tucking them away when not. Each bin should include proper labeling for quick content identification, making it simple to locate holiday decorations, camping gear, or winter clothing. Crucially, safety catches are incorporated to prevent bins from accidentally sliding off tracks, ensuring secure storage. This system works particularly well for long-term or seasonal storage items, keeping them off the floor and out of sight, yet always accessible without needing a ladder every time.
Installation Steps for an Overhead Track System:
- Install Ceiling Tracks into Sturdy Supports: Mount the main track rails directly into ceiling joists using heavy-duty screws, ensuring they are perfectly parallel and level.
- Mount the Sliding Mechanism Properly: Attach the corresponding sliding brackets or wheels to the storage bins, ensuring they are compatible with your track system and roll smoothly.
- Create a Bin Organization System: Group similar items into individual bins and plan a logical arrangement along the tracks for easy access.
- Add Safety Stop Mechanisms: Install end stops or locking pins at the ends of the tracks to prevent bins from sliding off unintentionally, especially during heavy use.
- Test Sliding Operation Thoroughly: Load a few bins with representative items and test the sliding action. Ensure they move freely and securely, and that the stops engage correctly.
26. PVC Screwdriver Organization: Upright and Visible
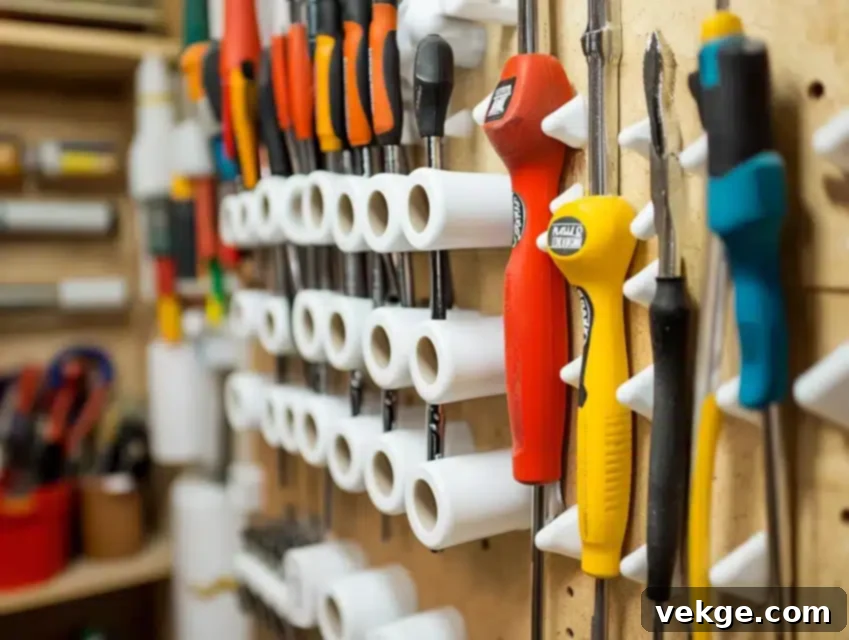
This vertical storage solution completely changed how I organize and access my ever-growing collection of screwdrivers. Using simple PVC pipes, you can craft a custom holder that keeps every screwdriver upright, visible, and within easy reach. The key is to make angled cuts in varying sizes of PVC pipes, creating perfect, snug holders for different screwdriver sizes and handle types. Each tube receives clear labeling for quick tool identification, eliminating any guesswork. The often-white color of PVC pipes provides a clean backdrop, keeping tools visible while offering excellent protection against damage. Special mounting brackets ensure the entire unit remains stable and secure under a full load of tools, making this a durable, economical, and highly effective way to manage one of the most used tool categories in any garage or workshop.
Installation Steps for PVC Screwdriver Organization:
- Cut PVC Pipes at Precise Angles: Determine the ideal angle (e.g., 20-30 degrees) for screwdrivers to rest securely and be easily gripped. Use a miter saw for clean cuts.
- Create a Secure Mounting System: Design a back panel or frame to attach the individual PVC pipe sections, ensuring they are firmly connected and won’t shift.
- Install Proper Backing Support: For wall-mounted units, anchor the back panel directly into wall studs or use robust wall anchors to support the concentrated weight of many screwdrivers.
- Add Clear Identification Labels: Use permanent markers or adhesive labels on each PVC tube to clearly indicate the type and size of the screwdriver (e.g., “Phillips #2,” “Flat 1/4”).
- Test Stability with Full Tool Load: Once installed, fill the PVC holders with your screwdrivers and gently test the unit’s stability, ensuring it is firmly attached and all pipes hold tools securely.
27. Shoe Organizer Tool Storage: Pocket Power
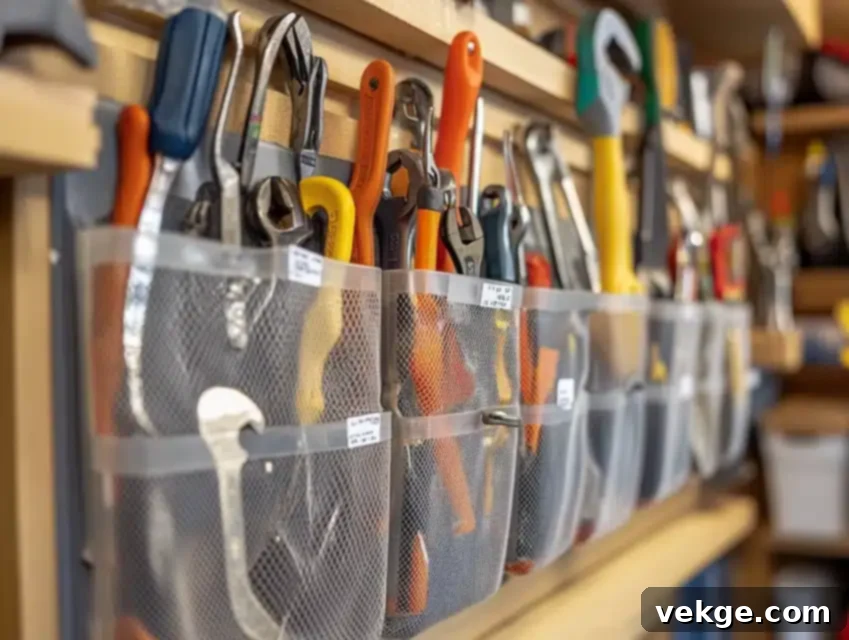
This brilliantly repurposed solution transformed an ordinary over-the-door shoe organizer into an incredibly efficient and budget-friendly tool storage system for my garage. Each individual pocket becomes a perfect holder for specific tools or supplies, keeping them neatly separated and within easy reach. Opting for clear pockets is a game-changer, making it quick and simple to find items like spray cans, paintbrushes, small hand tools, or even bottles of glues and lubricants. The flexible material of the organizer prevents tool damage while maintaining excellent organization. Multiple organizers can be hung side-by-side or stacked to create an extensive storage system, utilizing vertical door or wall space that often goes overlooked. This is a perfect example of a cheap, quick, and highly effective garage storage hack.
Installation Steps for Shoe Organizer Tool Storage:
- Install Sturdy Mounting Hardware: Hang the shoe organizer from heavy-duty over-the-door hooks, or for wall mounting, use strong adhesive hooks or small screws into a wall stud/blocking.
- Create a Tool Placement Strategy: Group similar tools or supplies together in adjacent pockets (e.g., “Screwdrivers,” “Pliers,” “Adhesives”) for logical organization.
- Add Proper Identification Labels: Use small labels or even a permanent marker directly on the organizer pockets to identify the contents, especially if the pockets aren’t clear.
- Reinforce Pocket Seams Carefully: If storing heavier items, consider reinforcing the bottom seams of the pockets with a few stitches or fabric glue for added durability.
- Test Weight Capacity Thoroughly: Gradually fill the pockets and observe how the organizer hangs. Ensure the mounting hardware and the organizer itself can support the full weight without tearing or sagging.
28. Garden Tool Organization: Pallet Perfection
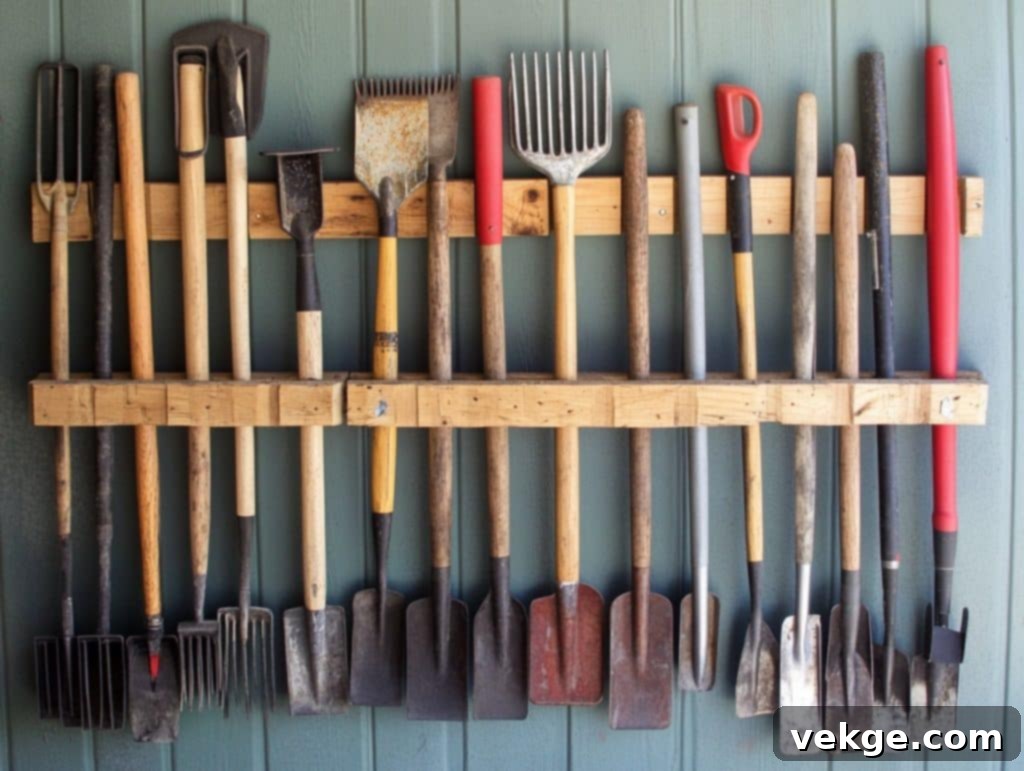
My simple, yet highly effective, pallet-based solution keeps long-handled garden tools perfectly organized, preventing them from toppling over or cluttering the corner of the garage. This vertical storage system ingeniously uses the natural gaps in a wooden pallet to hold rakes, shovels, hoes, and brooms securely. This not only saves valuable floor space but also keeps tools easily accessible and visible. Each slot holds tools firmly while allowing for effortless removal when needed. Crucially, applying a weather-resistant finish (like outdoor paint or sealant) protects the wood from moisture damage and rot, ensuring the system lasts for years. Regular maintenance, such as occasional re-treatment, keeps the system working smoothly year-round, making it a sustainable and attractive way to manage your gardening arsenal.
Installation Steps for Garden Tool Organization (Pallet-Based):
- Prepare Pallets with Weather Protection: Clean and sand the pallet, then apply an exterior-grade paint or wood sealant to protect it from moisture and prolong its life.
- Create a Proper Tool Spacing Layout: Position the pallet vertically against a wall. The gaps between the top and bottom slats will naturally form slots for tools. You can add extra slats or blocks if needed.
- Install Secure Mounting Brackets: Mount the pallet securely to your garage wall, anchoring it into wall studs at several points using heavy-duty screws or L-brackets, as long tools can be heavy.
- Add Tool Identification System: Consider painting silhouettes of tools or adding small labels near each slot to ensure tools are returned to their proper place.
- Test Stability Under Full Load: Once installed, place all your garden tools into the system and gently test its stability, ensuring it can support the weight without wobbling or detaching.
29. Floating Shelf Installation: Modern & Minimalist Storage
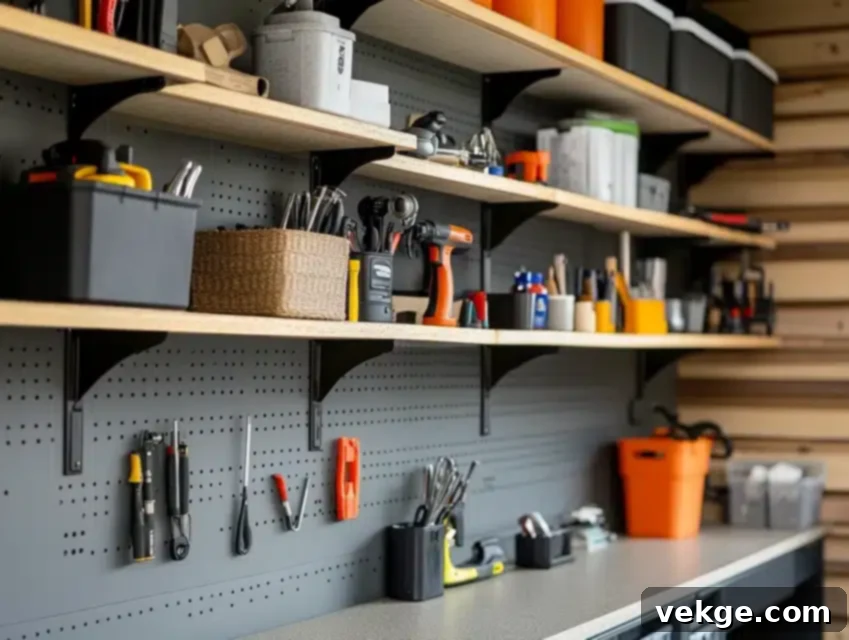
This minimalist storage solution beautifully maximizes wall space without the need for bulky, visible supports, offering a clean and modern aesthetic even in a garage. The hidden bracket system creates the illusion of a shelf floating directly from the wall, yet provides incredibly sturdy storage for a variety of items. Each shelf can be designed to include subtle built-in ledges or a slight lip to prevent items from accidentally sliding off, adding a layer of practicality to its sleek design. Strategic placement allows for perfect access to frequently used items, from small containers of hardware to decorative elements that personalize your workspace. The design can accommodate various weight requirements through proper internal bracing and robust wall anchoring, proving that garage storage can be both highly functional and visually appealing.
Installation Steps for Floating Shelf Installation:
- Install Hidden Wall Brackets Securely: Choose heavy-duty floating shelf brackets (e.g., metal rods that extend into the shelf) and anchor them firmly into wall studs, ensuring they are perfectly level.
- Create a Proper Shelf Support System: If building your own floating shelves, ensure the internal construction of the shelf itself is robust enough to slide onto and firmly attach to the hidden brackets.
- Add Safety Ledge Installation: Consider routing a small groove or attaching a thin lip along the front edge of the shelf to prevent items from easily sliding off.
- Mount Shelves with Precise Leveling: Slide the pre-drilled shelves onto the brackets, ensuring a snug fit and verifying that the shelf remains perfectly level from all angles.
- Test Weight Distribution Carefully: Load the shelf gradually with items, paying attention to weight distribution. Ensure the hidden brackets and wall anchors maintain stability and show no signs of strain.
30. Under-Bench Storage Design: Hidden Capacity

My workbench transformation project literally doubled its storage capacity through the clever integration of hidden, pull-out drawers. This design ingeniously utilizes the previously wasted space directly beneath the workbench surface, transforming it into highly organized storage. Smooth-sliding drawers, mounted on full-extension slides, allow complete access to stored items, from power tools to project components. Each drawer can feature custom dividers, creating meticulous organization for different categories of tools or supplies, preventing clutter. Full-extension slides are key, ensuring you can reach every item, even those at the very back. Crucially, the system is designed to maintain workbench stability while significantly adding functionality, proving that every inch of space in a garage can be optimized for efficiency and organization.
Installation Steps for Under-Bench Storage Design:
- Install Drawer Slides Properly: Mount heavy-duty, full-extension drawer slides to the underside of your workbench frame, ensuring they are perfectly level and parallel for smooth operation.
- Create Custom Drawer Dimensions: Build drawers that fit precisely into the available space, maximizing capacity while allowing for smooth movement.
- Add Interior Organization System: Incorporate dividers, custom-fit trays, or foam inserts within the drawers to keep tools and supplies neatly separated and prevent shifting.
- Mount Drawer Fronts Securely: Attach aesthetic drawer fronts that complement your workbench design, ensuring they are level and open/close without obstruction.
- Test the Sliding Mechanism Thoroughly: Load the drawers with items and test their full extension and retraction. Ensure they operate smoothly and quietly, even when heavily loaded.
31. Cable Organization System: Taming the Tangle
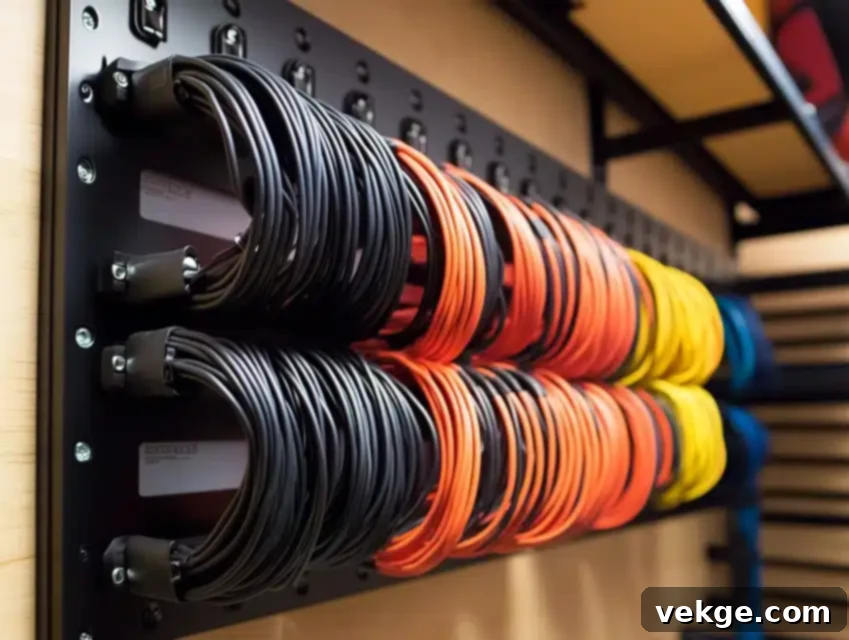
This dedicated solution finally conquered the eternal problem of tangled cables and cords that often plague workshops and garages. A well-designed, wall-mounted system keeps cables neatly coiled, easily accessible, and perfectly untangled. Each section includes proper labeling for quick identification, preventing the frustrating search for the correct cord. Special hooks, often rubber-coated or made from smooth plastic, prevent cable damage during storage, preserving their integrity and extending their lifespan. The modular design allows for the easy addition of new cables as your collection grows, ensuring the system remains adaptable. From extension cords to charging cables, this organization method transforms a messy heap into a highly functional and visually pleasing array, making your workspace safer and more efficient.
Installation Steps for a Cable Organization System:
- Mount Storage Hooks Securely: Choose appropriate cable hooks (J-hooks, U-hooks, or specialized cable hangers) and mount them firmly into wall studs or using heavy-duty anchors.
- Create Proper Spacing Between Sections: Allow enough space between hooks or sections to easily hang and remove coiled cables without entanglement.
- Install Cable Identification System: Use color-coded ties, labels, or even write directly on the hooks to identify the type, length, or purpose of each cable.
- Add Protective Coating on Hooks: For metal hooks, consider adding a rubberized coating or plastic sleeves to prevent abrasion and damage to cable insulation.
- Test Weight Capacity Thoroughly: Load a section with a few heavy-gauge extension cords and gently tug to ensure the hooks and mounting hardware are secure.
32. Mobile Tool Chest Creation: Rolling Workshop
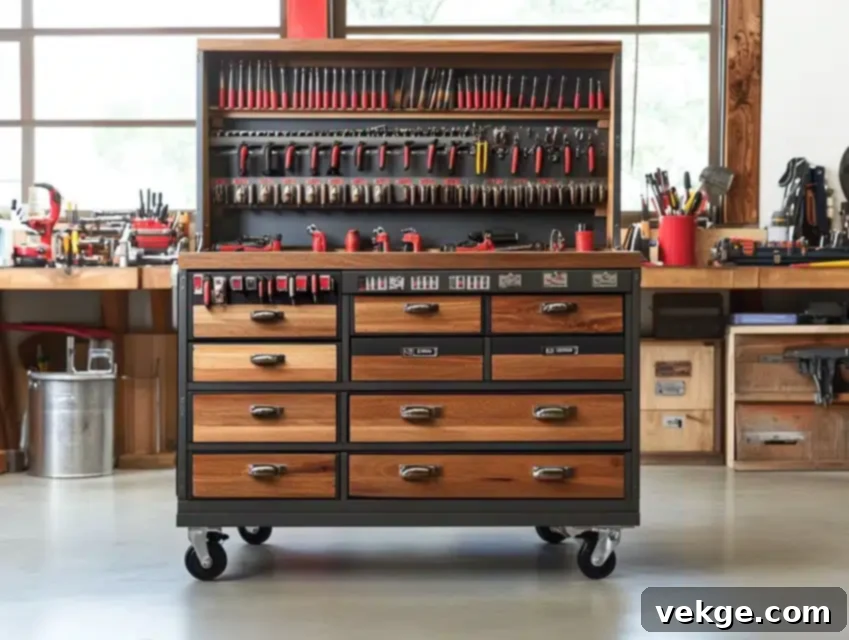
This rolling storage solution truly combines the best of accessibility with substantial storage capacity, creating a highly functional mobile workshop. A multi-drawer design keeps an extensive array of tools perfectly organized at different working heights, from small precision tools in shallow drawers to larger power tools in deep compartments. Equipped with heavy-duty, industrial-grade wheels, the entire unit allows for effortless movement throughout the garage space, bringing your entire tool collection directly to your project. Each drawer can feature custom foam inserts, meticulously cut for specific tool storage, preventing clanking and damage. Integrated locking mechanisms ensure tools remain secure when not in use or during movement, providing both protection and peace of mind. This robust mobile tool chest is an investment in efficiency and ultimate garage flexibility.
Installation Steps for a Mobile Tool Chest Creation:
- Install Heavy-Duty Caster Wheels Securely: Choose industrial-grade, locking casters that are rated for the full weight of the chest and its contents, and securely bolt them to the bottom frame.
- Create a Drawer Organization System: Plan the layout of your drawers, dedicating specific drawers for hand tools, power tools, fasteners, etc.
- Add Proper Locking Mechanisms: Ensure the chest has a robust central locking system for all drawers, as well as individual drawer latches or soft-close features.
- Install Drawer Slides Carefully: Use heavy-duty, full-extension ball-bearing drawer slides for smooth operation and durability, mounting them precisely for proper alignment.
- Test Mobility Under Full Load: Once fully loaded with tools, test the chest’s ability to roll smoothly across the garage floor and ensure the locking casters hold it firmly in place.
33. Vertical Bike Storage: Space-Saving for Cyclists

This incredibly space-saving solution keeps bicycles secure, off the floor, and against the wall, maximizing valuable garage real estate. Vertical bike storage systems utilize robust wall-mounted hooks or clamps that hold bikes firmly in an upright position, typically by the front or rear wheel, without damaging their frames. Each mounting point should include protective padding or a rubberized coating for bike contact points, preventing scratches and scuffs. The system can easily accommodate various bike sizes and styles, from road bikes to mountain bikes, even those with wide tires. Special angle adjustments or multiple hook options allow for different frame designs, ensuring a snug and stable fit. This is an indispensable solution for any cycling enthusiast or family looking to store multiple bikes efficiently in a confined garage space.
Installation Steps for Vertical Bike Storage:
- Install Wall Mounting Brackets Securely: Anchor the bike hooks or mounting rail directly into wall studs using long, heavy-duty screws, as bikes can be surprisingly heavy.
- Add Protective Padding to Contact Points: Apply rubber or foam padding to any part of the hook or rack that will come into contact with the bike frame or wheel rim to prevent damage.
- Create Proper Spacing Between Bikes: If storing multiple bikes, measure carefully to ensure adequate horizontal spacing for easy hanging and removal without bikes bumping into each other.
- Install Safety Catch Mechanisms: Some systems include a strap or catch to secure the bike wheel to the hook, preventing it from swinging or accidentally dislodging.
- Test Weight Capacity Thoroughly: Hang one of your heavier bikes and gently pull down on it to ensure the mounting hardware and wall anchors are firmly secure.
34. Garage Door Storage: Unlocking Hidden Potential
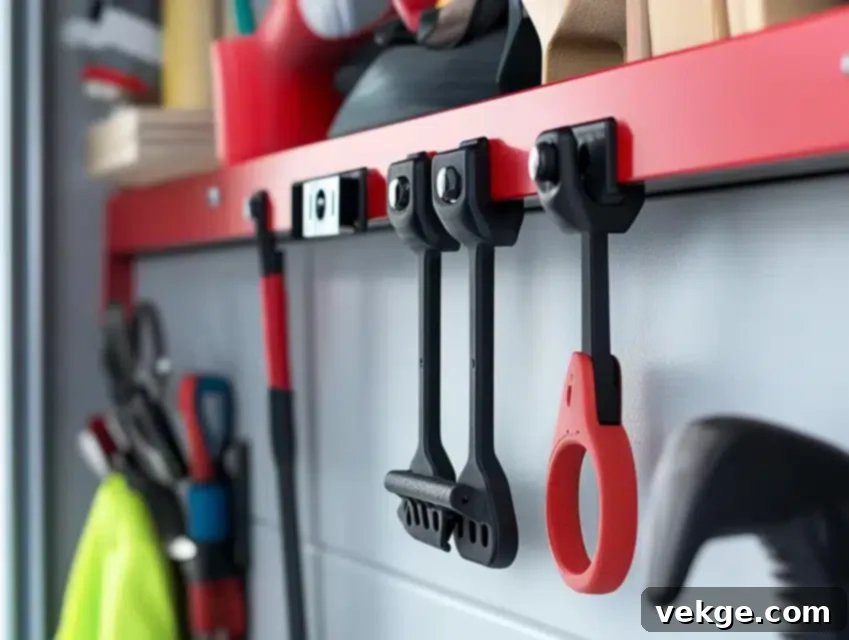
This truly innovative system taps into the often-overlooked and underutilized space on your garage door itself. By attaching lightweight storage hooks, netting, or shallow pockets directly to the inside of the garage door, you can create accessible storage for frequently accessed, lightweight items without affecting door operation. Each hook or section can hold specific items like small sporting equipment (balls, frisbees), cleaning rags, bungee cords, or even lightweight garden tools. Special mounting techniques ensure items stay securely attached and don’t interfere with the door’s tracks or closing mechanism during movement. This system works perfectly for items you need to grab quickly on your way out the door, transforming a blank canvas into a functional and convenient storage zone, especially beneficial in garages with limited wall space.
Installation Steps for Garage Door Storage:
- Install Door-Safe Mounting Brackets: Use lightweight, low-profile mounting hardware that won’t interfere with the garage door’s movement or tracking system. Adhesive-backed hooks or small, short screws may work.
- Create a Proper Item Spacing Layout: Carefully plan where each hook or pocket will go, ensuring items won’t collide with the door frame, tracks, or ceiling when the door is open or closed.
- Add Secure Attachment Points: Ensure whatever items you’re hanging are firmly attached to the hooks/pockets so they don’t fall off during the door’s operation.
- Test Door Operation Carefully: After installing, open and close the garage door slowly and repeatedly, observing for any interference, rubbing, or signs of items coming loose.
- Install Safety Catches Properly: For any items with potential to fall, consider additional safety straps or netting to secure them, especially during the door’s movement.
35. Fold-Out Panel System: Dynamic Wall Organization
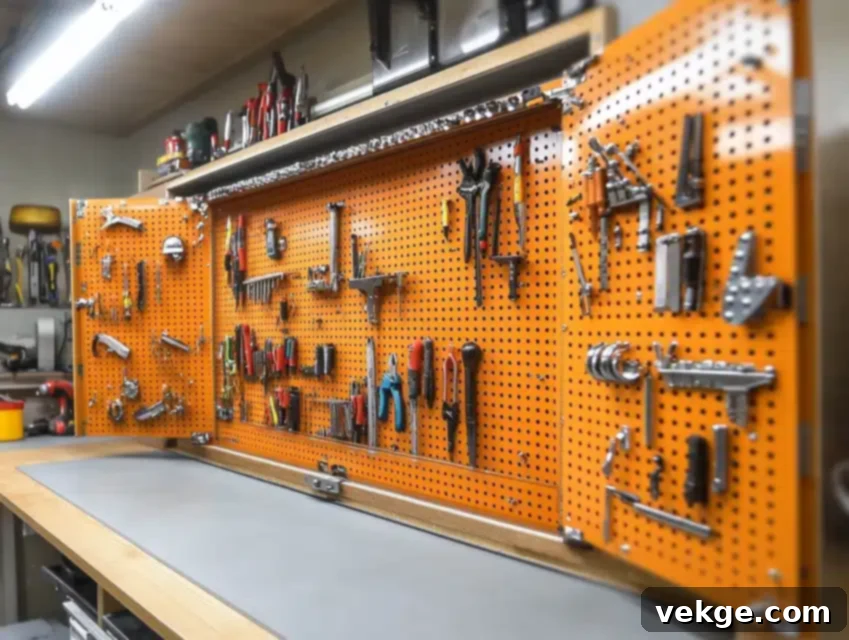
This highly innovative design is a masterclass in maximizing limited wall space through clever engineering. The fold-out panel system consists of hinged panels that swing out from a main wall unit, revealing multiple layers of hidden storage surfaces. Each panel can be customized with various tool holders, pegboard sections, or organization systems on both sides, effectively quadrupling your wall storage capacity. The folding mechanism allows easy access to all layers of tools and supplies, making efficient use of what would otherwise be a single-plane wall. When closed, the system presents a clean, organized, and often minimalist appearance, concealing all the tools behind the panels. This dynamic solution is perfect for smaller workshops or garages where every square inch of wall space counts and a tidy look is desired.
Installation Steps for a Fold-Out Panel System:
- Install Heavy-Duty Hinges Securely: Use robust, full-length piano hinges or multiple heavy-duty butt hinges to attach the panels to the main wall frame, ensuring they can support the weight and movement.
- Create Proper Panel Spacing Design: Plan the dimensions of each panel carefully, ensuring they clear each other when opening and closing, and that there’s enough space to access tools.
- Add Tool-Holding Mechanisms: Outfit each panel surface with pegboard, magnetic strips, hooks, or custom-built holders for specific tools, optimizing for accessibility.
- Install Panel Locking System: Implement latches, magnets, or simple hooks to securely hold the panels closed when not in use, preventing them from swinging open accidentally.
- Test Operation Under Full Load: After outfitting with tools, repeatedly open and close the panels to ensure smooth operation, stability, and that all hinges and locking mechanisms hold firm.
36. Overhead Lumber Organization: Long Material, Out of the Way
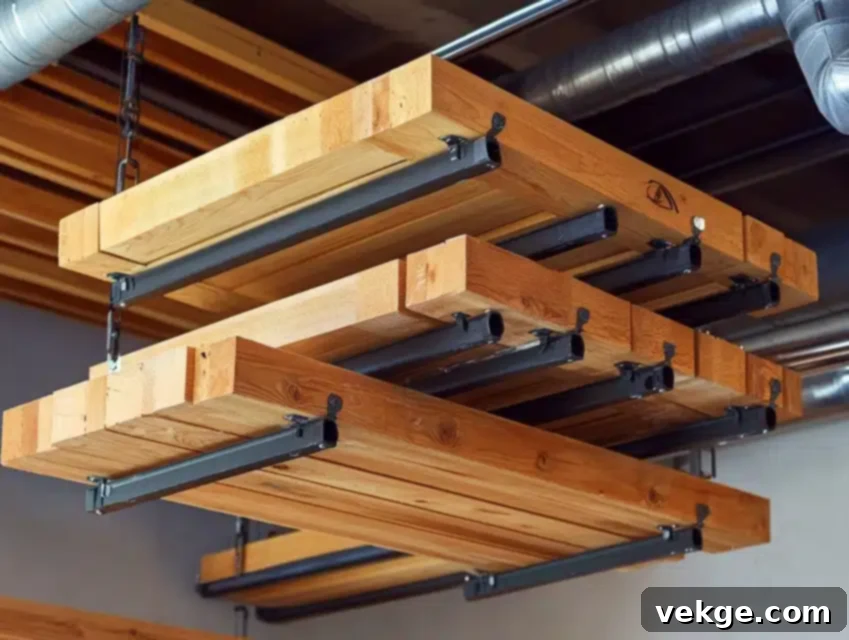
My definitive solution for long material storage effectively utilizes the often-unused ceiling space in the garage. This robust overhead bracket system is specifically designed to keep lumber, PVC pipes, metal rods, and other long, unwieldy materials organized, easily accessible, and safely out of the way. Each support point should include rubber padding or a protective coating to prevent material damage and reduce noise when loading. Special spacing between the support arms allows for ample air circulation, preventing moisture issues or warping, especially for wood. The design is highly adaptable, accommodating materials of various lengths and sizes, from short off-cuts to full 16-foot boards. This system is crucial for any serious DIYer or woodworker looking to reclaim floor space and maintain a professional-level workshop.
Installation Steps for Overhead Lumber Organization:
- Mount Ceiling Brackets into Solid Supports: Install heavy-duty, long-reach brackets directly into multiple ceiling joists, as lumber can be extremely heavy. Ensure they are perfectly level and aligned.
- Install Protective Padding Carefully: Apply rubber or foam padding to the top and inner surfaces of the brackets where the lumber will rest, preventing scratches and slippage.
- Create Proper Spacing Between Levels: Determine the number of levels needed and space them appropriately to accommodate different thicknesses of lumber, allowing for easy loading and retrieval.
- Add Safety Rails for Security: Consider adding a small lip or cross-bar at the end of each bracket arm to prevent materials from accidentally sliding off.
- Test Weight Distribution Thoroughly: Gradually load the system with your heaviest and longest lumber, observing for any signs of strain or instability in the brackets or ceiling.
37. Tire Storage System: Seasonal Tire Management
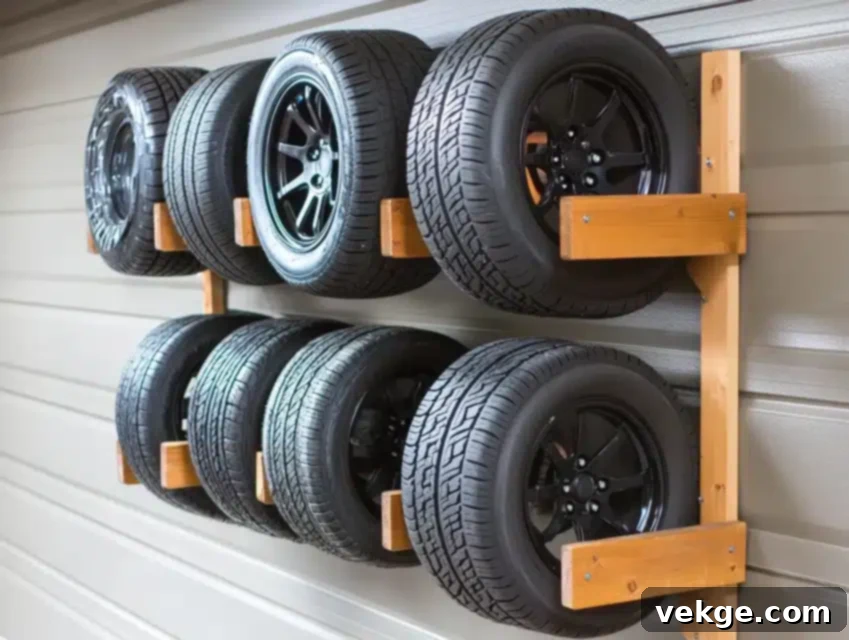
This dedicated wall-mounted solution keeps seasonal tires organized and protected. The angled supports prevent tire deformation during long-term storage. Each mounting point includes proper weight distribution consideration. Special coating on supports prevents tire damage. The system allows easy access to seasonal tire rotation. This is a must-have for families with multiple vehicles or anyone serious about tire longevity and garage tidiness.
Installation Steps for a Tire Storage System:
- Install Wall Mounting Brackets Securely: Choose robust, heavy-duty tire rack brackets and anchor them firmly into at least two wall studs using long, appropriate fasteners.
- Create a Proper Tire Spacing Layout: Plan the spacing between mounting points to comfortably fit your tires, ensuring they don’t rub against each other or the wall.
- Add Protective Coating to Supports: Apply a rubberized coating, plastic sleeves, or electrical tape to the metal supports to protect tire sidewalls from scuffs and abrasions.
- Install Safety Straps Carefully: For added security, especially if the rack is high, consider adding adjustable straps or chains to secure the tires to the rack, preventing them from rolling off.
- Test Weight Capacity Thoroughly: Once installed, load the rack with your tires and gently test its stability. Ensure all mounting points are secure and show no signs of strain under full load.
38. Sliding Pegboard Innovation: Maximizing Wall Space with Motion
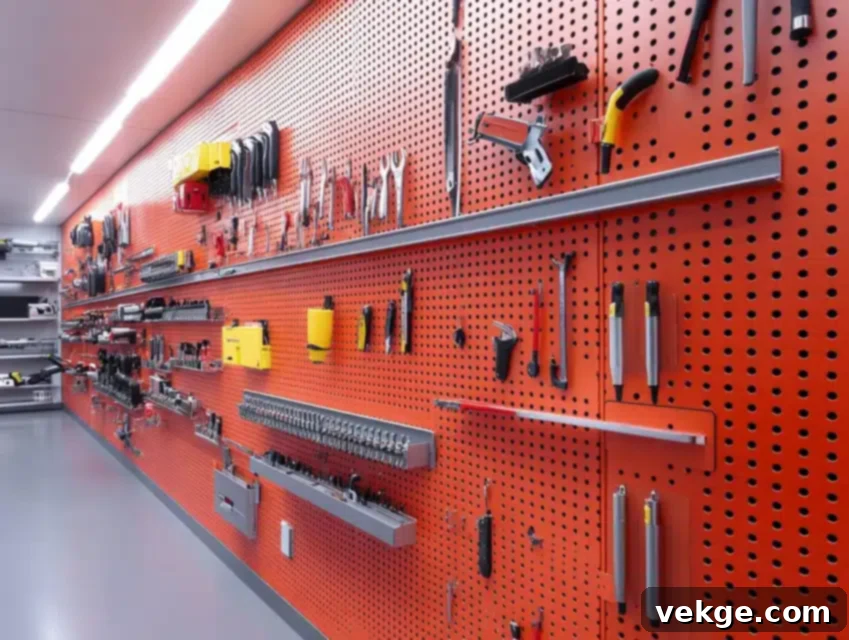
This truly movable wall system revolutionized how I access and store tools in a compact workshop. The sliding pegboard innovation utilizes overhead tracks and floor guides, allowing large pegboard panels to glide smoothly past each other. This creates multiple storage surfaces within a single wall footprint, effectively doubling or even tripling your accessible wall space without permanently blocking anything. Each panel moves effortlessly on overhead tracks, providing easy access to tools stored behind the front layer. The system can include built-in locks or catches to secure panels in place when needed, ensuring safety and stability during tool selection. Custom tool arrangements on each side of the panels maximize storage capacity, making this a dynamic and highly efficient solution for tight spaces or areas requiring adaptable organization.
Installation Steps for a Sliding Pegboard System:
- Mount Overhead Tracking System Securely: Install heavy-duty tracks directly into ceiling joists or a robust header, ensuring they are perfectly level and aligned for smooth panel movement.
- Install Smooth Rolling Mechanisms: Attach compatible rollers or trolleys to the top edge of each pegboard panel, ensuring they fit securely within the overhead tracks.
- Create a Panel Guide System Carefully: Install floor guides (channels or small blocks) beneath each panel to keep them aligned and prevent swinging during movement.
- Add Proper Locking Features: Incorporate simple locking pins, latches, or friction brakes to hold panels firmly in their open or closed positions when desired.
- Test Sliding Operation Thoroughly: Load the panels with tools and repeatedly slide them back and forth. Ensure they move smoothly, quietly, and don’t bind or derail.
39. Recycling Station Design: Order for Eco-Friendly Habits

My organized approach to recycling transformed a previously cluttered and often unsightly corner of the garage into an efficient, eco-friendly station. This specialized design typically involves a wall-mounted rack or a sturdy frame that keeps recycling bins elevated and easily accessible, preventing them from taking up valuable floor space. Each section includes clear labeling for proper sorting of different materials – plastics, paper, glass, cans – making the recycling process effortless and mistake-free. The design should facilitate easy bin removal for emptying, simplifying the chore. For liquid containers, special drainage features or a removable drip tray can handle residue, maintaining cleanliness. Color-coded bins further enhance the system’s clarity, encouraging consistent recycling habits and contributing to a cleaner, more organized garage environment.
Installation Steps for a Recycling Station Design:
- Install Wall Mounting Brackets Properly: Mount robust brackets or a sturdy frame for your recycling bins directly into wall studs, as bins can become quite heavy when full.
- Create a Bin Support System Carefully: Ensure the chosen system securely holds the bins in place, preventing them from tipping over but allowing for easy removal.
- Add Identification Labels: Clearly label each bin with the type of recyclable material it holds (e.g., “Plastics,” “Paper,” “Glass,” “Aluminum”) using large, visible labels.
- Install Drainage System Properly: For bins that might hold items with liquid residue, consider a drip tray beneath or drill small drainage holes in the bottom of the bins.
- Test Weight Capacity Thoroughly: Fill the bins with typical recycling materials and test the stability of the mounting system, ensuring it can safely support the full, accumulated weight.
40. Wall Rail Organization: Flexible & Adaptable Utility
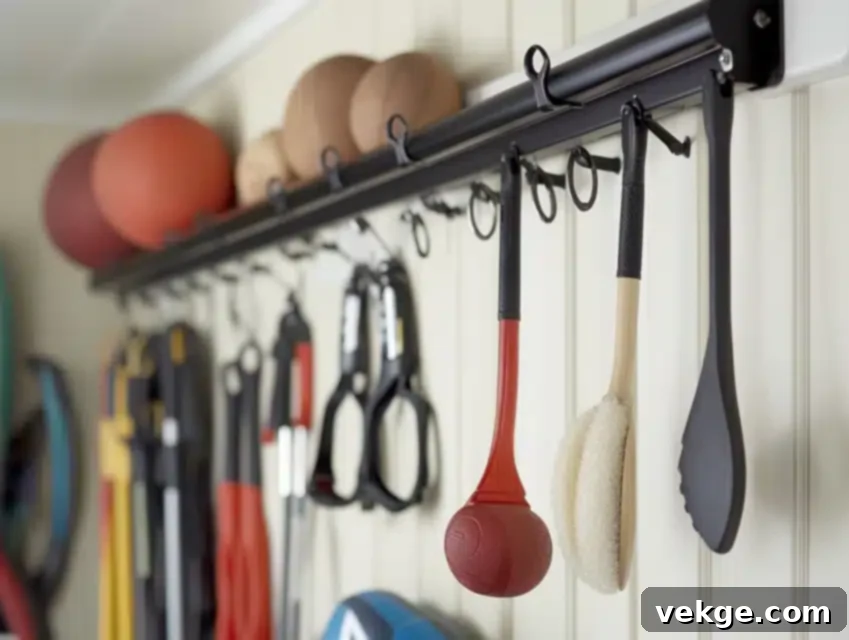
This remarkably flexible wall rail system allows for infinite adjustment possibilities, making it one of the most adaptable storage solutions for any garage. The core principle involves mounting horizontal rails to the wall, onto which various hooks, brackets, and shelves can be easily attached and moved. This means that rail-mounted hooks and brackets can slide effortlessly along the tracks, accommodating changing storage needs for tools, sports equipment, gardening supplies, or general household items. Each attachment point locks securely into place while remaining adjustable, providing both stability and versatility. The system works perfectly for a diverse range of items, from heavy garden tools to lightweight helmets. Installing multiple rail heights further helps create organized storage zones, allowing you to tailor your wall space to perfectly suit your evolving requirements, ensuring a tidy and highly functional garage.
Installation Steps for Wall Rail Organization:
- Mount Wall Rails into Solid Supports: Install the main horizontal rails directly into wall studs using heavy-duty screws, ensuring they are perfectly level and spaced appropriately.
- Install Proper Spacing Between Rails: If using multiple rails, ensure adequate vertical spacing to accommodate the height of items you plan to hang, allowing for easy access.
- Add Various Attachment Options: Acquire a range of compatible hooks, brackets, and shelves designed for your specific rail system to handle different types of items.
- Create Organization Zones Carefully: Group similar items together on specific rail sections or at certain heights (e.g., “Garden Tools,” “Sports Equipment,” “Cleaning Supplies”).
- Test the Security of All Components: Once hooks and items are in place, gently tug on them to ensure all attachments are securely locked into the rail system and won’t slip or fall.
Conclusion: Your Path to a Perfectly Organized Garage
After years of implementing hundreds of garage storage solutions and witnessing the transformative power of organization, I’ve come to understand that a truly successful system is one that harmonizes practicality with your unique personal needs. Every garage presents its own distinct challenges – from awkward layouts to an overwhelming collection of accumulated items. However, with thoughtful planning, strategic execution, and the right DIY approach, any cluttered space can be revitalized and transformed into an efficient, functional, and aesthetically pleasing storage area.
Remember, the journey to a perfectly organized garage is an ongoing process, not a one-time event. It evolves as your needs change, your hobbies shift, and new items enter your home. Start with foundational solutions, like reclaiming vertical space and decluttering, then gradually expand and refine your system as you identify specific requirements. The satisfaction of a well-ordered garage extends beyond mere tidiness; it enhances safety, boosts productivity, and brings a sense of calm and control to your home environment. Embrace these DIY ideas, adapt them to your space, and enjoy the incredible benefits of ultimate garage organization!
Key Principles for Lasting Organization Success:
- Start with a Thorough Cleanup: Before organizing, declutter! Remove everything you don’t use, need, or love. Sell, donate, or discard.
- Plan Zones for Different Activities: Designate specific areas for different functions: workshop, gardening, sports, household storage, etc.
- Consider Vertical Space Utilization: Look up! Walls and ceilings are prime real estate for shelving, pegboards, and overhead racks.
- Implement Proper Lighting: A well-lit garage makes it easier to work, find items, and maintain organization.
- Create Maintenance Schedules: Regularly (e.g., quarterly or seasonally) re-evaluate and tidy up your garage to prevent clutter from accumulating again.
- Document Storage Systems: Consider simple labels or even photos of organized drawers/shelves to help everyone in the household understand the system.
- Build in Flexibility for Future Needs: Choose modular, adjustable, and adaptable storage solutions that can grow and change with your evolving lifestyle.
Frequently Asked Questions About Garage Organization
How Can I Organize My Garage Efficiently on a Budget?
From my extensive experience, the most effective way to organize your garage on a budget is to start with cost-effective, DIY-friendly solutions. Begin by installing basic pegboard systems and simple DIY shelving using readily available lumber. Repurpose materials like pallets, PVC pipes, old bookshelves, or even shoe organizers for highly functional and nearly free storage options. The key is to focus on maximizing vertical storage first, getting items off the floor. Then, expand gradually as your budget allows and specific needs arise. I’ve personally helped countless homeowners create highly effective and durable organization systems for under $200 by creatively using salvaged materials and basic hand tools. Don’t underestimate the power of a good declutter and a fresh coat of paint!
What Are Some Easy DIY Storage Solutions for Small Garage Spaces?
To truly maximize floor space in a small garage, you must think vertically and creatively. I highly recommend starting with wall-mounted storage solutions. Pegboards are fantastic for tools, while vertical bike storage or pulley systems can hoist bikes out of the way. Overhead shelving is a game-changer for seasonal or infrequently used items, freeing up valuable ground space. For smaller tools and hardware, simple organization using PVC pipes (for screwdrivers, etc.) and magnetic strips for metal tools offers quick wins with minimal effort. The focus should always be on multi-purpose solutions that combine storage with functionality, like a folding workbench. Every inch counts in a small garage, so prioritize solutions that keep items off the floor and utilize the full height of your walls.
What Materials and Tools Do I Need for Building Garage Storage Units?
For most DIY garage storage projects, you’ll need a core set of essential tools: a reliable drill/driver, a tape measure, a level, a stud finder (absolutely crucial for safety!), and basic hand tools like a hammer, saw (manual or power), and a utility knife. When it comes to materials, start with versatile and sturdy options such as plywood (for shelves and backings), 2x4s or 2x6s (for frames and supports), and high-quality mounting hardware (screws, bolts, L-brackets). For safety, I always emphasize investing in quality fasteners and appropriate wall anchors, ensuring your storage units are secure and can handle the intended load. Keep basic organizational supplies like pegboard hooks, various storage bins, and clear labels on hand to complete your projects effectively and neatly.
Are There Step-By-Step Plans or Tutorials Available for DIY Garage Shelves?
Absolutely! I’ve developed and refined several basic, easy-to-follow shelf plans using standard lumber sizes, making them perfect for DIY enthusiasts. You can start with simple floating shelves (using hidden brackets for a clean look) or sturdy bracket-supported units (which are often easier for beginners). The most critical aspects for any DIY shelf project are proper mounting into wall studs and careful consideration of weight distribution to prevent sagging or collapse. Always focus on building strong, stable structures. Furthermore, I often recommend considering modular designs. These allow you to build smaller sections that can be easily expanded or reconfigured later as your needs change, offering flexibility and scalability for your garage organization journey.
How Can I Maximize Storage Space in My Garage?
To truly maximize storage space in your garage, you need to employ a multi-faceted approach. First, look up – ceiling space is often an untapped goldmine for overhead racks and bike hoists. Second, utilize every inch of wall space efficiently with adjustable systems like wall rails, pegboards, and vertical tool organizers. Third, implement proper zoning for different activities, creating dedicated areas that prevent items from migrating and cluttering other spaces. Fourth, consider seasonal rotation systems; store infrequently used items (like holiday decor or summer gear in winter) in less accessible overhead areas. Finally, don’t forget the space under workbenches or in corners – custom drawers, rolling cabinets, or vertical storage towers can squeeze out extra capacity. The goal is to move as many items as possible off the floor, making your garage feel larger, safer, and more functional.
