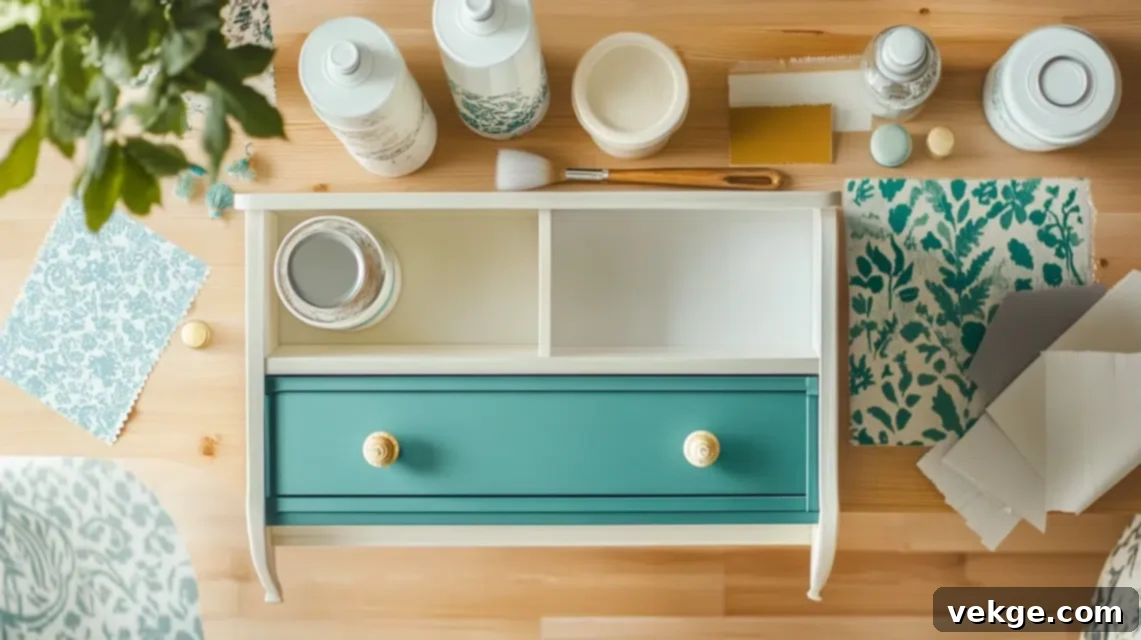
Transform Your Old Dresser: 40+ DIY Restoration & Upcycling Ideas for Every Style
Do you have an old dresser that’s seen better days, perhaps covered in scratches, chipped corners, or simply doesn’t match your evolving decor? Before you think about sending it to the curb, consider giving it a new lease on life. I’ve personally experienced the satisfaction of transforming a forgotten piece into a cherished item, and with the right approach, it’s far easier and more rewarding than you might imagine.
This comprehensive guide will walk you through everything you need to know, from identifying your dresser’s material—whether it’s solid wood, laminate, or veneer—to selecting the appropriate tools and diving into over 40 creative dresser restoration ideas that truly deliver impressive results. You’ll gain practical knowledge on how to properly prep surfaces, address common damage, and apply various finishes that will make your furniture feel brand new. Whether your vision is a clean, minimalist modern look, a cozy farmhouse aesthetic, or a vibrant, eclectic statement piece, you’ll find inspiration and actionable steps here.
Let’s embark on this creative journey together and turn that neglected piece of furniture into a functional, stylish, and fresh addition to your home. You’ll be amazed at what you can achieve, creating something unique and beautiful that you’ll be proud to showcase.
Getting Started: Essential Steps for a Successful Dresser Makeover
Embarking on a dresser restoration project is an exciting and budget-friendly way to personalize your living space. Before you jump into painting or decorating, a few crucial steps will ensure your project runs smoothly and yields professional-looking results. Understanding your dresser’s construction and having the right supplies on hand are key.
Identify Your Dresser’s Material: Solid Wood vs. Laminate vs. Veneer
Knowing what your dresser is made of dictates the best restoration approach. This initial check is vital for choosing the right tools and products:
- Solid Wood Dressers: These are typically heavier and often reveal a natural, continuous wood grain. You can usually sand them down aggressively to remove old finishes and expose raw wood, making them highly versatile for staining, painting, or distressing.
- Laminate Dressers: Identified by their lighter weight and a slick, often shiny, artificial surface, laminate is a thin layer of plastic or paper applied over particleboard. They cannot be sanded deeply as this can damage the surface. Special bonding primers are essential for paint adhesion.
- Veneer Dressers: Veneer consists of a thin layer of real wood glued over a cheaper core material. While it’s real wood, it’s delicate. You can lightly sand veneer, but be cautious not to sand through to the substrate, which can be difficult to repair.
Always test any paint or stain on a small, inconspicuous area (like the back of a drawer) to ensure compatibility and achieve the desired effect before committing to the entire piece. For laminate or glossy surfaces, “paint-and-stick” products or specific bonding primers are your best friends.
Basic Tools and Supplies You’ll Need
Having the right tools ready will make your restoration process much more efficient. Here’s a list of common items:
- Screwdriver: For removing hardware, drawers, and sometimes legs.
- Sandpaper: Various grits (e.g., 80-grit for heavy removal, 120-grit for smoothing, 220-grit for fine finishing).
- Paintbrushes and Rollers: High-quality brushes for details, foam rollers for smooth finishes.
- Drop Cloth or Plastic Sheeting: To protect your workspace from dust and spills.
- Cleaning Supplies: Degreaser, all-purpose cleaner, rags, and a bucket.
- Paint: Furniture paint, chalk paint, spray paint, or latex paint, depending on your chosen finish.
- Stain: Wood stain if you plan to expose and enhance the natural wood grain.
- Primer: Essential for good paint adhesion, especially on tricky surfaces like laminate or previously stained wood.
- Sealant/Topcoat: Polyurethane, wax, or clear coat to protect your finish and enhance durability.
- Painter’s Tape: For creating clean lines and protecting areas you don’t want to paint.
- Putty Knife & Wood Filler: For repairing minor damage, scratches, or holes.
Crucial First Step: Clean and Prep! Always begin by thoroughly cleaning the entire dresser. Remove all drawers and hardware. Use a good degreaser or mild soap and water to wipe down every surface. This critical step removes dirt, grease, and grime, ensuring your primer and paint adhere properly and prevent peeling or uneven finishes. A little extra time spent on prep will significantly impact the success and longevity of your restoration.
Easy DIY Makeovers for Beginners: Simple Dresser Ideas
If you’re new to furniture restoration, starting with simple projects is a great way to build confidence and transform a dresser quickly. These ideas require minimal tools, basic skills, and are perfect for adding fresh style with little effort.
1. Simple White Paint Makeover
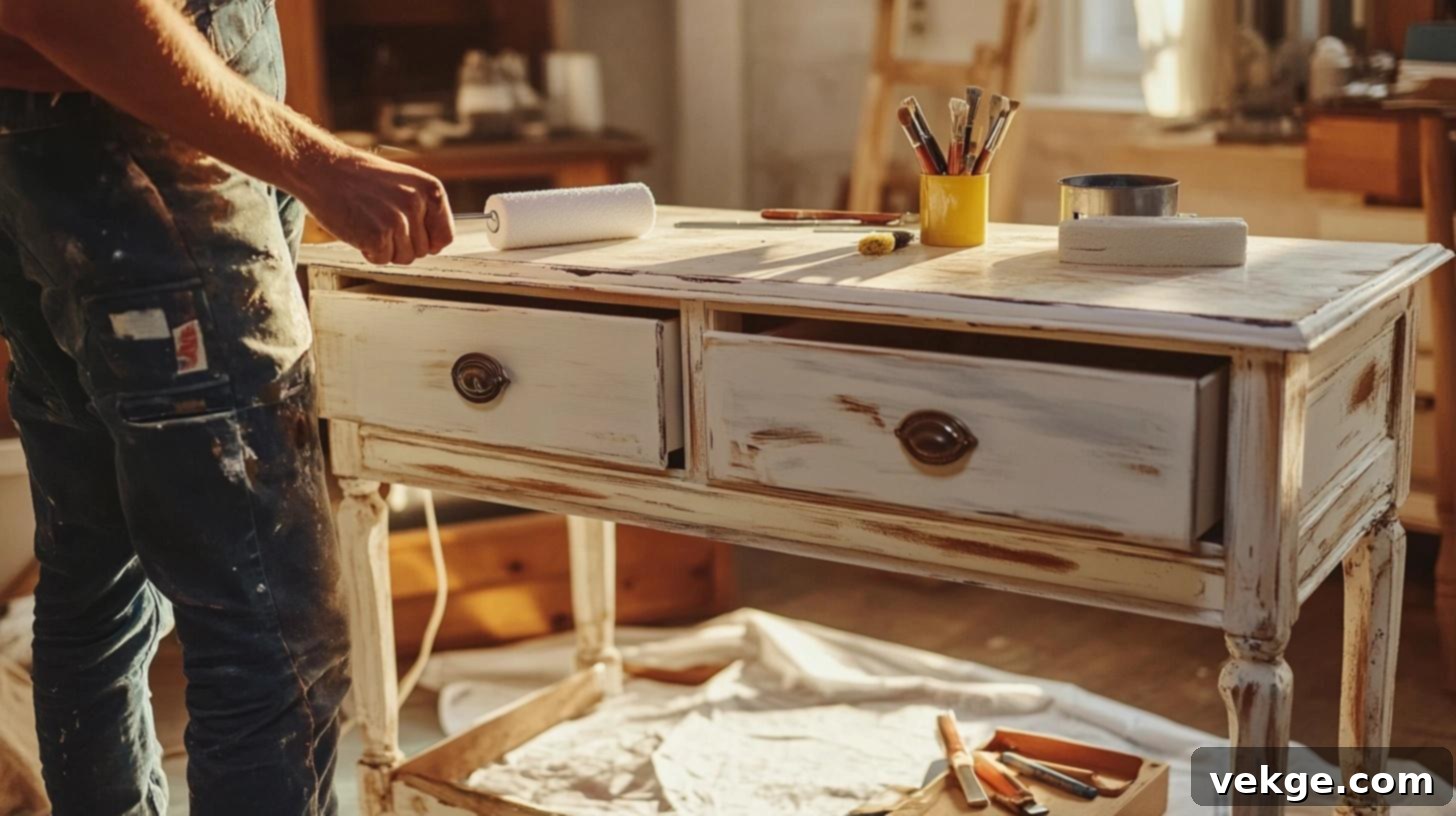
A fresh coat of plain white furniture paint can instantly revitalize any dresser. Begin by carefully removing all existing hardware. Thoroughly clean and lightly sand the surface to ensure proper adhesion. Apply two to three thin coats of white paint using a small foam roller for a smooth, streak-free finish. This classic choice makes any old dresser look cleaner, brighter, and more contemporary. For an extra touch, replace the old knobs or handles with new, sleek hardware to complete a truly fresh and inviting look with minimal effort.
2. Peel-and-Stick Wallpaper Fronts
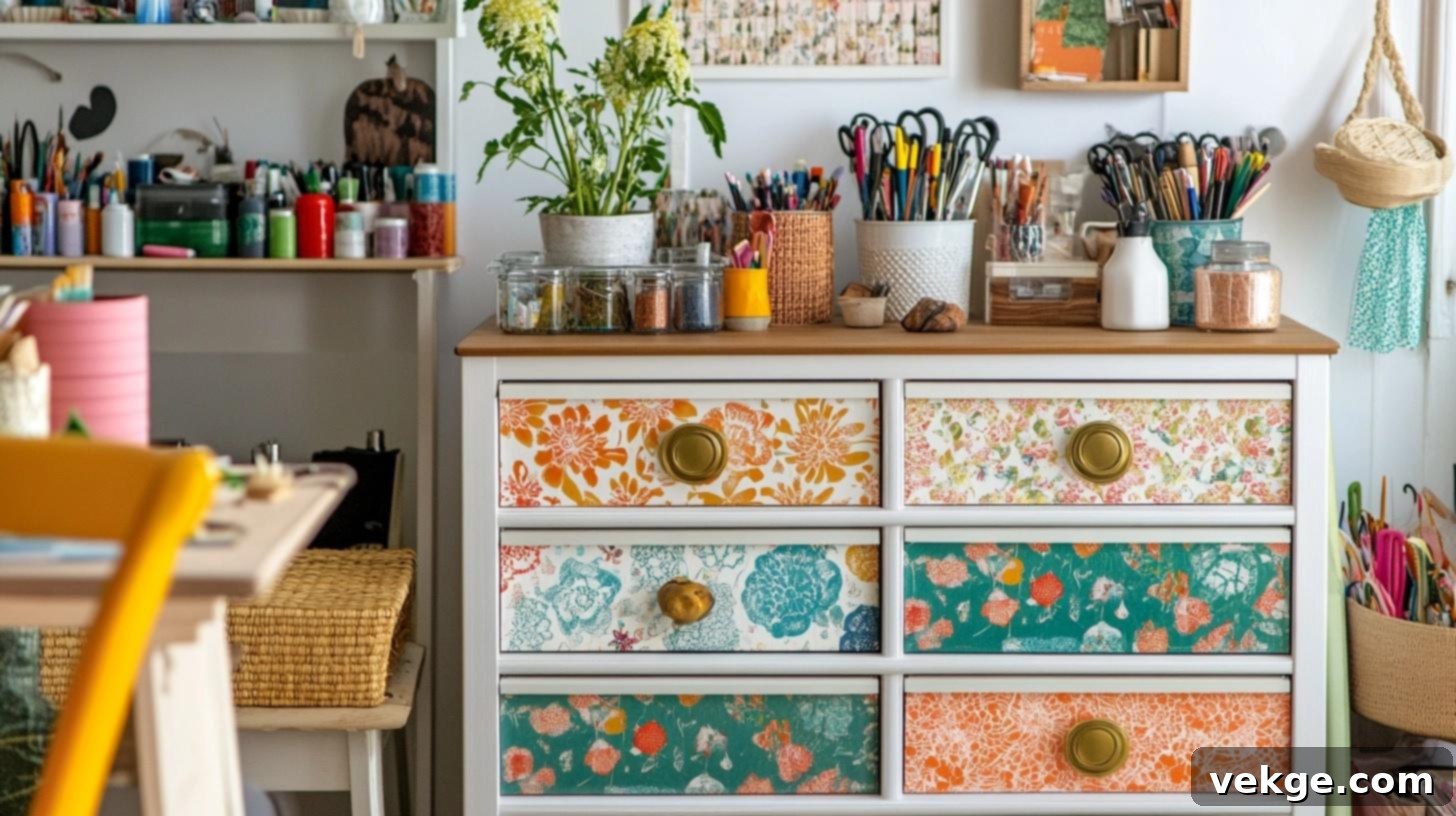
Add a pop of pattern or texture to your dresser by covering the drawer fronts with peel-and-stick wallpaper. First, remove the drawers and clean their surfaces thoroughly. Measure and cut the wallpaper precisely to size, then carefully apply it, smoothing out any air bubbles with a squeegee or credit card. This method is incredibly versatile, allowing you to introduce vibrant colors, intricate patterns, or subtle textures without the commitment of paint. It’s also a fantastic option for renters or those who like to frequently change their decor, as it’s easily removable.
3. No-Sanding Paint Job
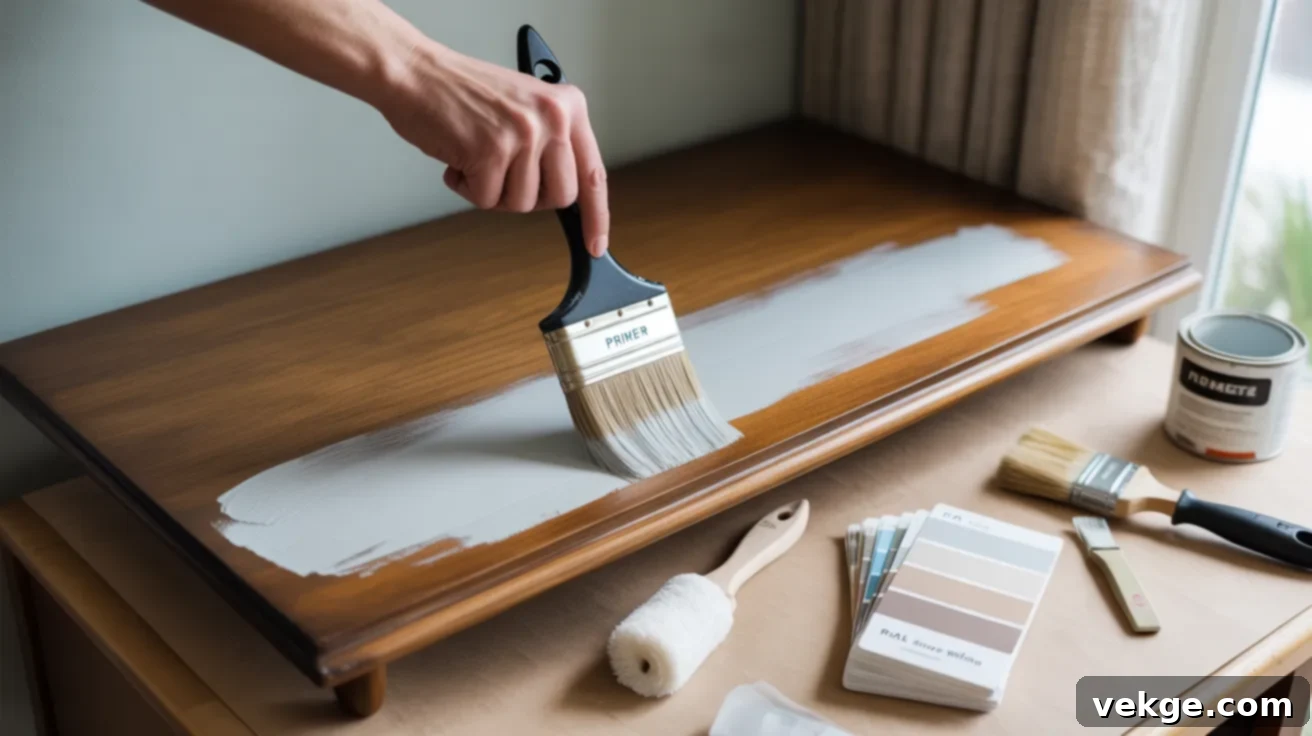
For a quick and mess-free update, opt for a “no-sanding” paint job. This technique relies on specialized bonding primers that create an adhesive surface for paint without the need for extensive sanding. After thoroughly cleaning the dresser, apply a high-quality bonding primer. Once dry, follow with your chosen furniture paint. This method is particularly effective for laminate or glossy surfaces where sanding can be challenging or damaging. Choose soft, muted colors for a calm, sophisticated look or bolder hues for a playful statement, saving significant time and effort on preparation.
4. Stencil Drawer Designs
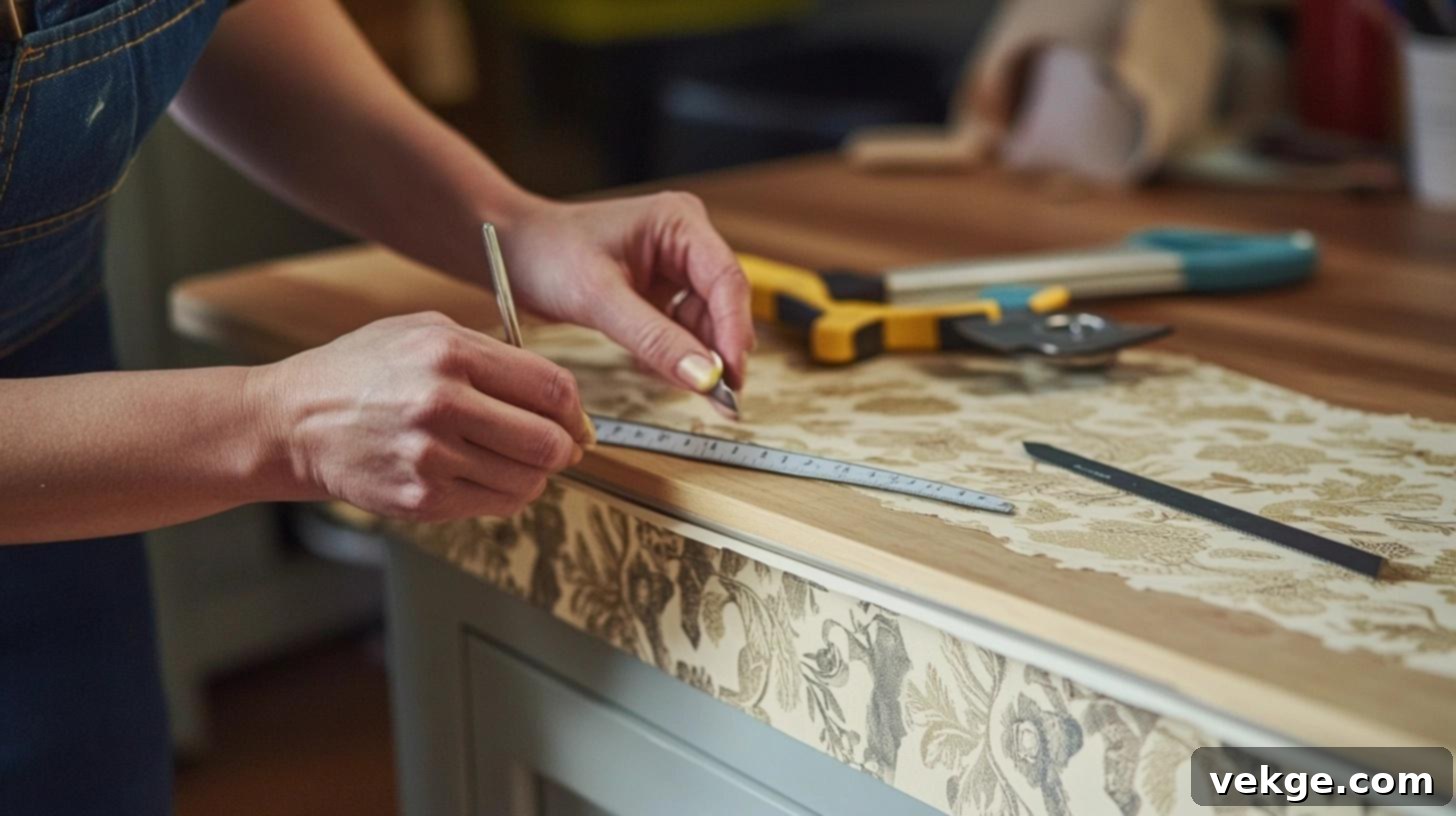
Personalize your dresser with unique stencil patterns on each drawer front. You can find a vast array of stencils online or even create your own simple designs. After painting the dresser a base color, tape the stencil securely in place on each drawer. Using a contrasting or complementary color, dab paint gently with a sponge or stencil brush. Be careful not to use too much paint to avoid bleeding under the stencil. This quick technique adds an artistic flair and makes the dresser feel much more personal and custom-made.
5. New Hardware Only
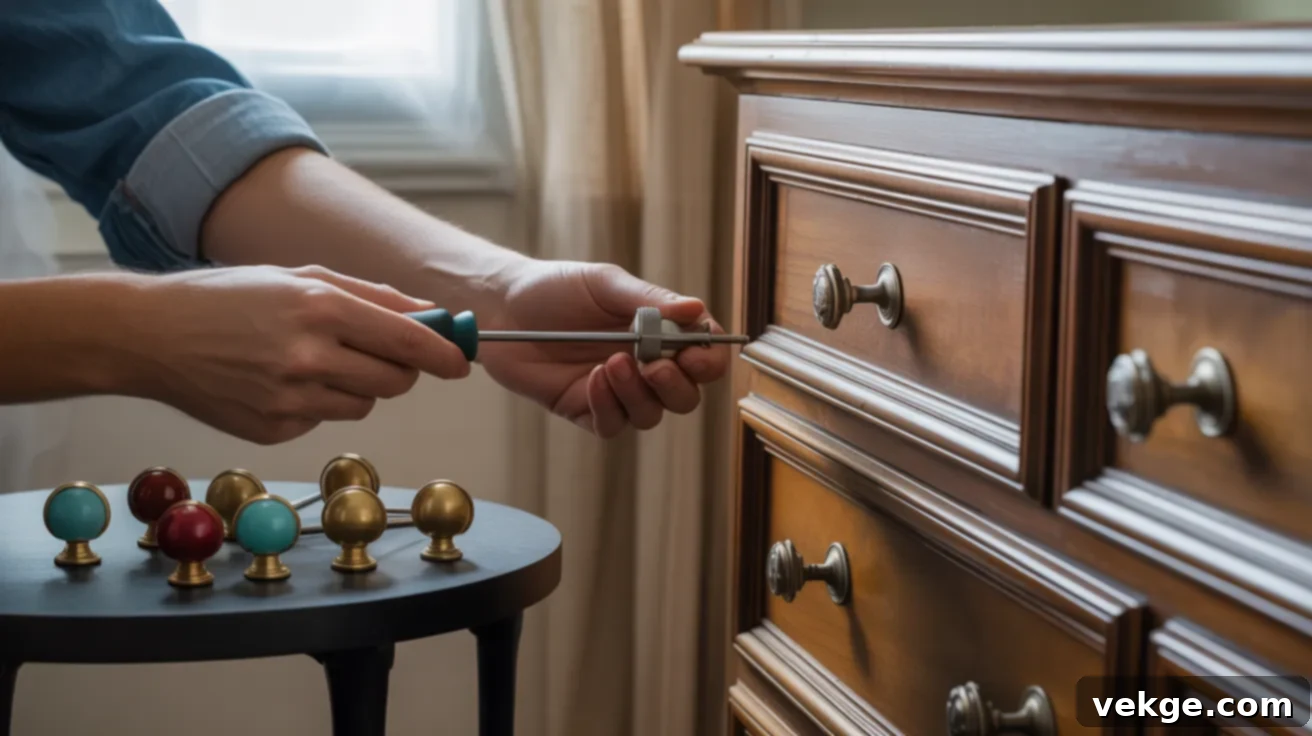
Sometimes, the smallest change can make the biggest impact. Simply replacing old, dated hardware with new handles or knobs can completely refresh a dresser’s appearance. Explore options like sleek brass pulls, modern matte black knobs, or vibrant colorful plastic handles. Before purchasing, carefully measure the existing hole spacing to ensure the new hardware fits without needing to drill new holes. This instant update takes mere minutes but drastically alters the overall feel and style of the dresser, giving it a polished and contemporary finish.
6. Fabric-Covered Drawers
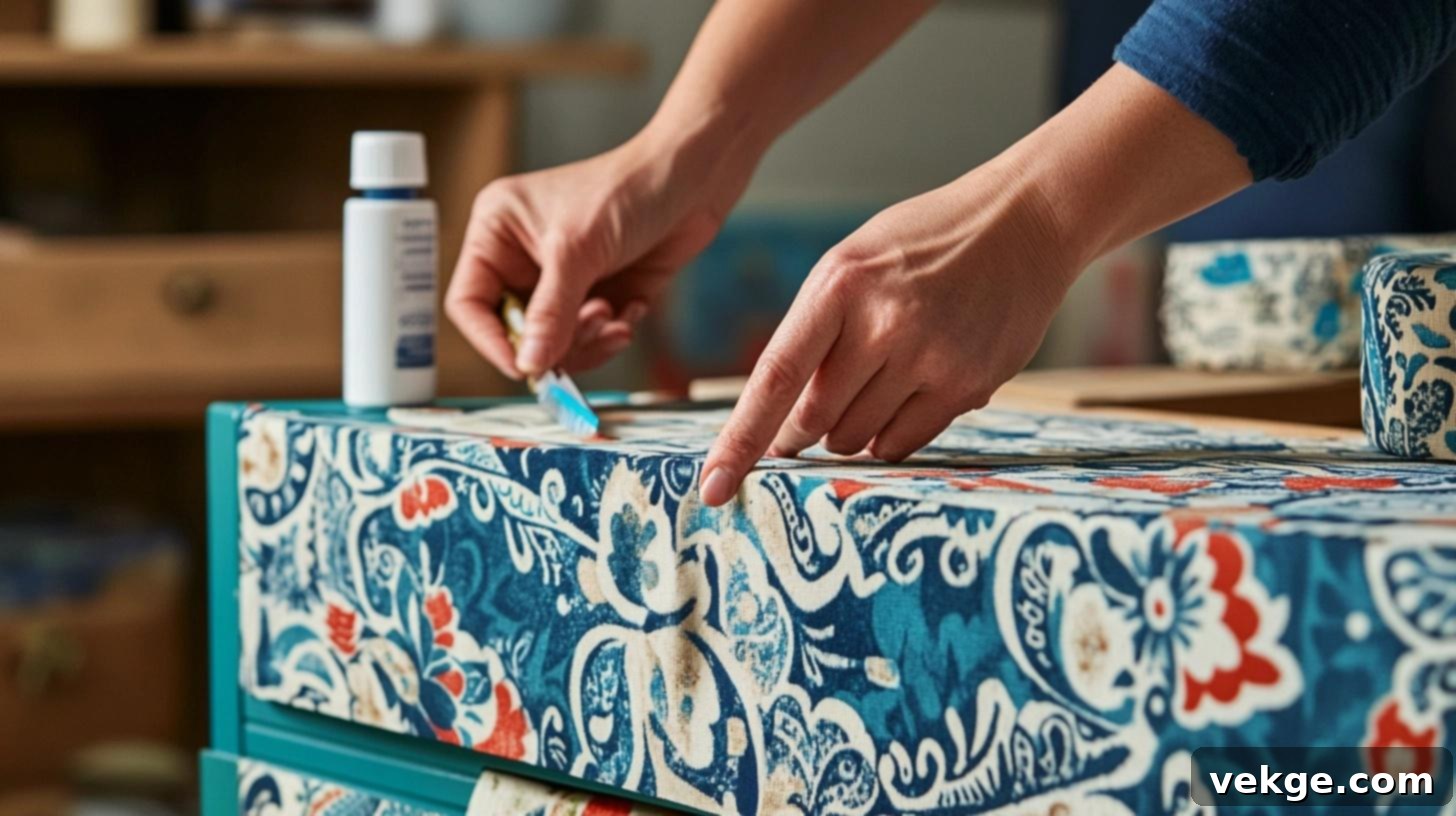
For a softer, more tactile look, consider covering your drawer fronts with fabric. Select a thin cotton fabric with a pattern that complements your room’s decor. Measure and cut the fabric to fit each drawer front, allowing for a slight overlap to wrap around the edges. Apply a thin layer of decoupage glue (like Mod Podge) to the drawer front, smooth the fabric over it, and seal it with another coat of clear glue. This method adds a unique texture and visual interest, and mixing different prints can create a wonderfully playful and eclectic feel.
7. Colored Drawer Edges

Add an unexpected pop of color by painting only the edges of the drawers that become visible when slightly pulled out. Choose a bright, contrasting color like sunny yellow, vibrant red, or electric blue against a neutral dresser frame. Use painter’s tape to create crisp, clean lines and apply the paint carefully. This subtle detail offers a delightful surprise and a modern touch, making the dresser feel more dynamic. Ensure each coat is fully dry before reinserting the drawers to prevent smudging.
8. Contact Paper Top
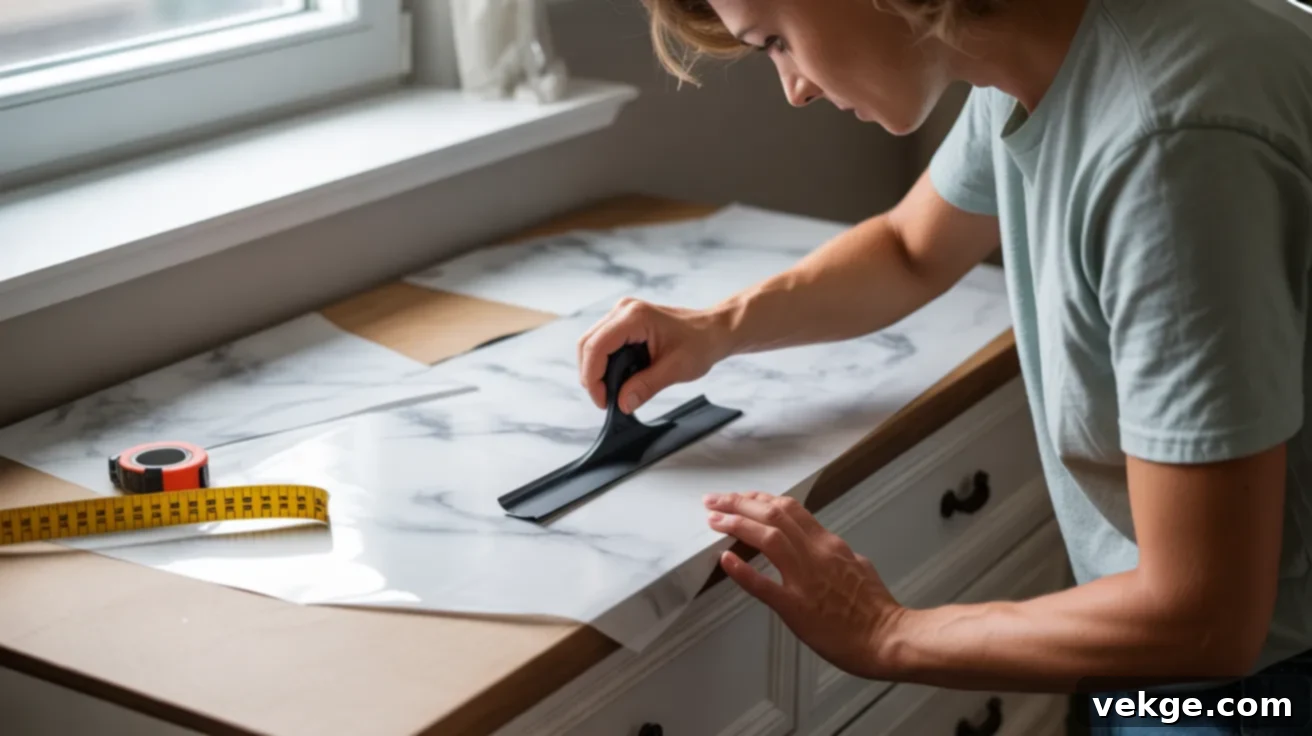
If your dresser top is scratched, stained, or simply unappealing, contact paper offers a quick and affordable fix. Choose a pattern that mimics wood grain, marble, or a geometric design. Clean the dresser surface thoroughly, measure carefully, and slowly apply the contact paper, using a squeegee to smooth out air bubbles as you go. This method not only covers imperfections but also instantly updates the look. Since contact paper is removable, you can easily change the style later without damaging the original surface, making it ideal for experimental designs.
9. Spray Paint the Hardware
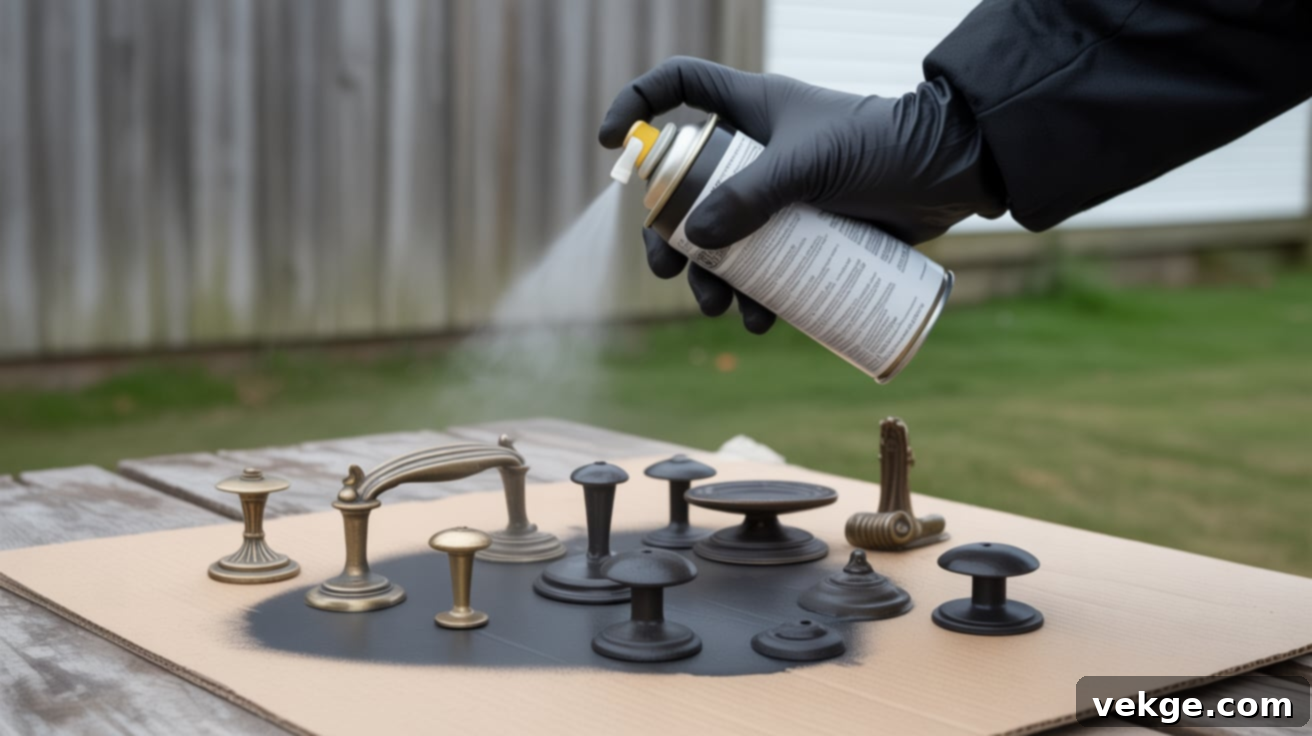
Instead of buying new hardware, you can easily revitalize your existing knobs and pulls with spray paint. Remove all hardware, clean it thoroughly to remove grime, and then apply a few thin, even coats of spray paint in a well-ventilated area. Popular choices include matte black, antique gold, or even a bold, bright color for a fun twist. Allow them to dry completely before reattaching them. This small, cost-effective step can dramatically elevate the dresser’s style and create a cohesive look with your chosen paint color.
10. Drawer Liner Pop
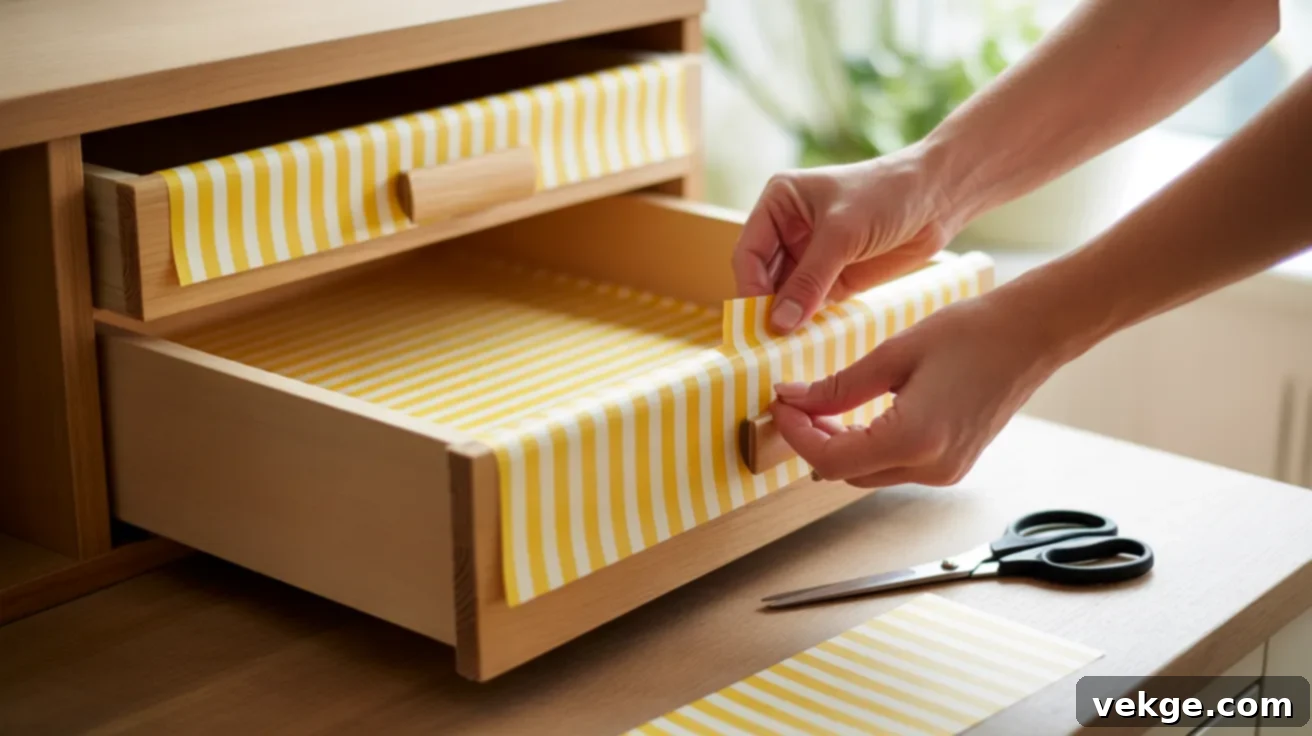
Give the inside of your dresser as much personality as the outside by lining each drawer with colorful paper, sticky liner, or even fabric. Choose a bold graphic print for a vibrant surprise, or a calm pastel for a soothing touch. Measure and cut the liner to fit the bottom of each drawer, then press it in smoothly. This simple addition adds a delightful element of surprise every time a drawer is opened, making the dresser feel more thoughtful and personalized. It’s a fast, easy, and impactful way to add charm.
Finishing Touches: Style Your Newly Transformed Dresser: Once all your updates are complete—paint dry, hardware in place, and liners smoothed out—take a moment to admire your handiwork. Wipe away any dust or fingerprints. Then, personalize the top surface with decorative elements such as a small lamp, a framed photograph, a favorite plant, or a curated collection of books. These styling choices will pull the entire look together, giving your newly updated dresser a polished, inviting, and truly finished appearance.
Colorful and Eye-Catching Paint Ideas: Make a Bold Statement
For those who love to express their personality through vibrant colors and unique designs, these paint ideas are perfect. They help your furniture become a standout piece, adding character and fun to bedrooms, home offices, playrooms, or any space needing a burst of energy.
11. Bold Color Blocking
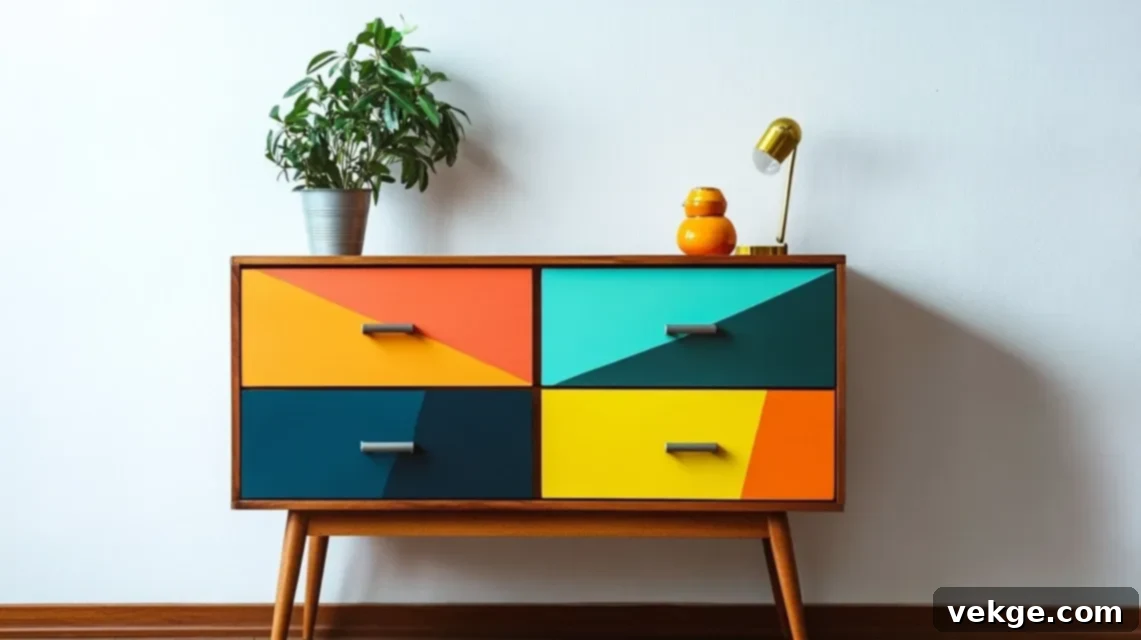
Transform your dresser into a modern art piece by painting each drawer a different, striking color or by dividing drawer fronts into geometric sections with strong, contrasting lines. Use high-quality painter’s tape to meticulously mark off your areas and ensure crisp, sharp edges. Select a palette of colors that stand out individually but still harmonize as a group. This dynamic design approach makes the dresser appear playful, exciting, and highly contemporary, fitting perfectly into kids’ rooms, creative studios, or spaces with a bold aesthetic.
12. Ombre Fade
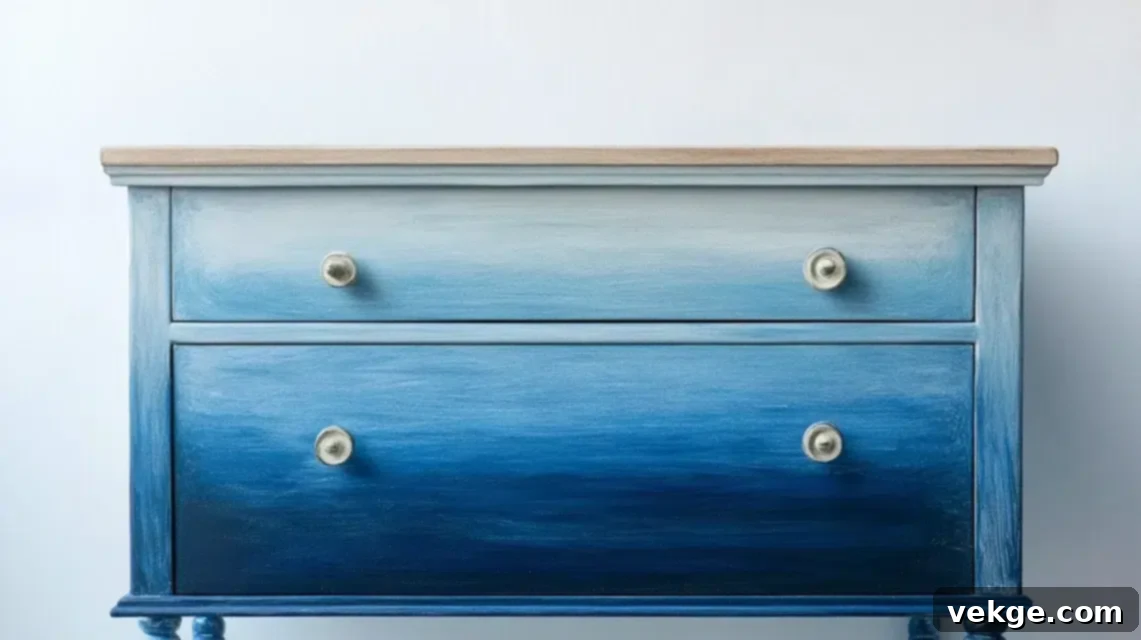
Create a sophisticated and smooth transition of color with an ombre effect. Choose a single base color and gradually lighten it by mixing in increasing amounts of white paint for each subsequent drawer, from darkest at the bottom to lightest at the top (or vice versa). This soft, gradient fade offers a cool, contemporary, and incredibly chic look. It’s relatively easy to achieve and adds a gentle yet striking touch. Ombre works beautifully with pastels, blues, greens, or even grays for a serene and modern feel in any room.
13. Sunset Shades
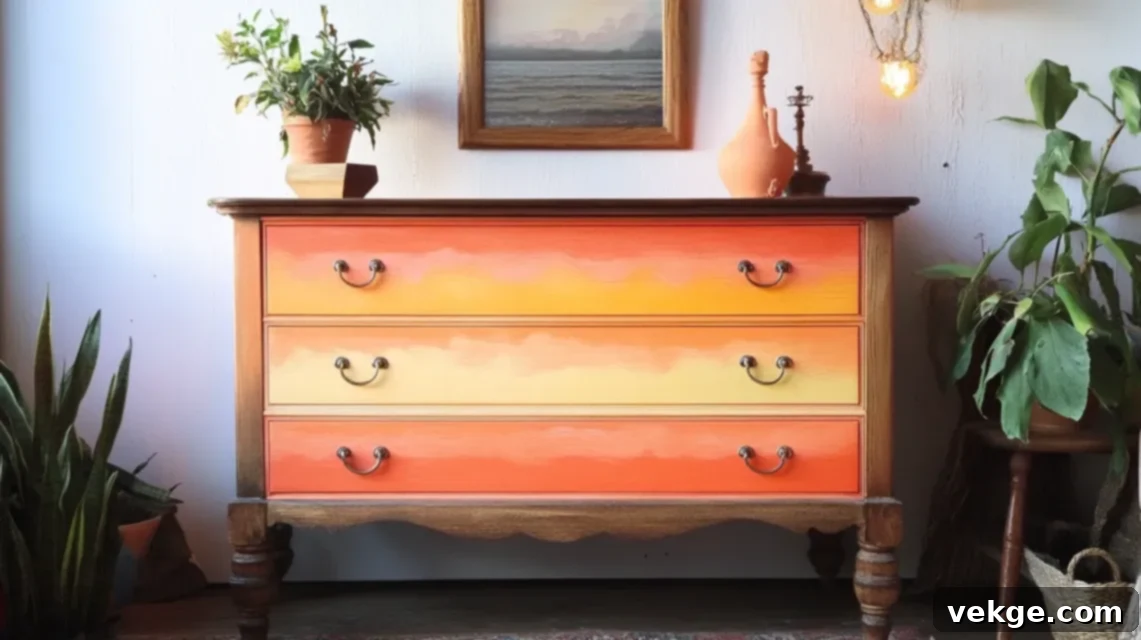
Infuse warmth and happiness into your room by painting your dresser in a spectrum of sunset colors: fiery oranges, deep reds, soft pinks, and cheerful yellows. You can paint each drawer a distinct shade or try blending them together seamlessly on a single surface using a sponge or brush for a more artistic, diffused effect. This vibrant palette creates a cozy and uplifting atmosphere, instantly brightening any space. Pair these strong, fun colors with simple wooden knobs or pulls to maintain balance and prevent overwhelming the design.
14. Two-Tone Finish
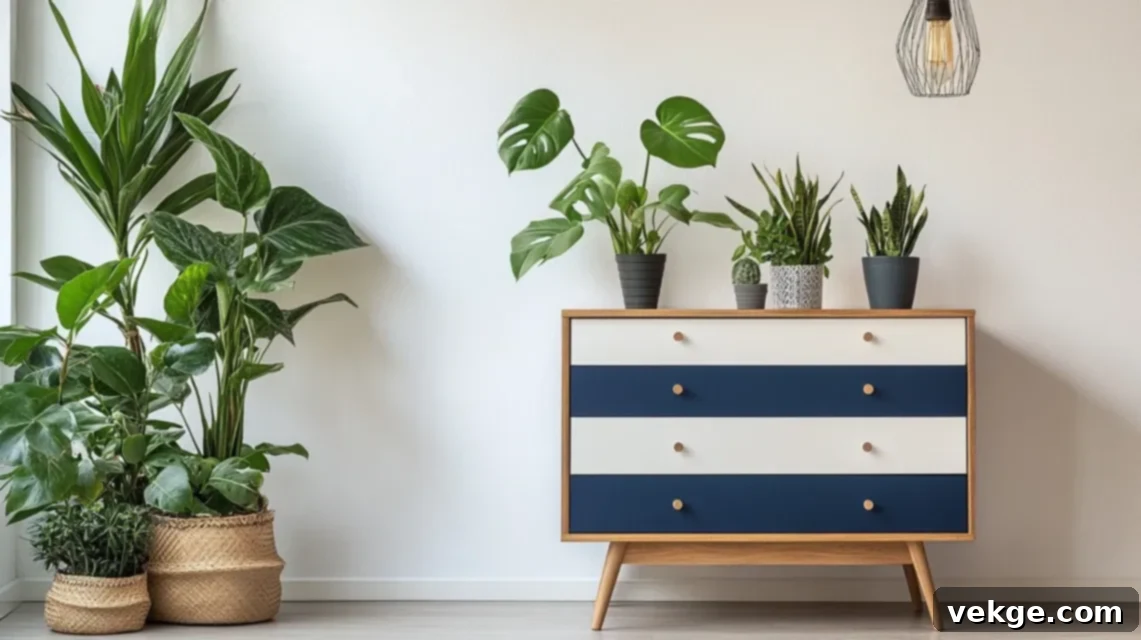
A classic and elegant way to add contrast is with a two-tone finish. Paint the main body and sides of the dresser one color, and the drawer fronts another. Popular combinations include timeless navy and crisp white, sophisticated deep green with natural wood, or a chic gray paired with soft tan. This approach adds depth and visual interest without being overly complex. Ensure ample drying time between painting each section to prevent smudging and achieve clean lines. The result is a custom, mature, and stylish dresser.
15. Rainbow Drawers
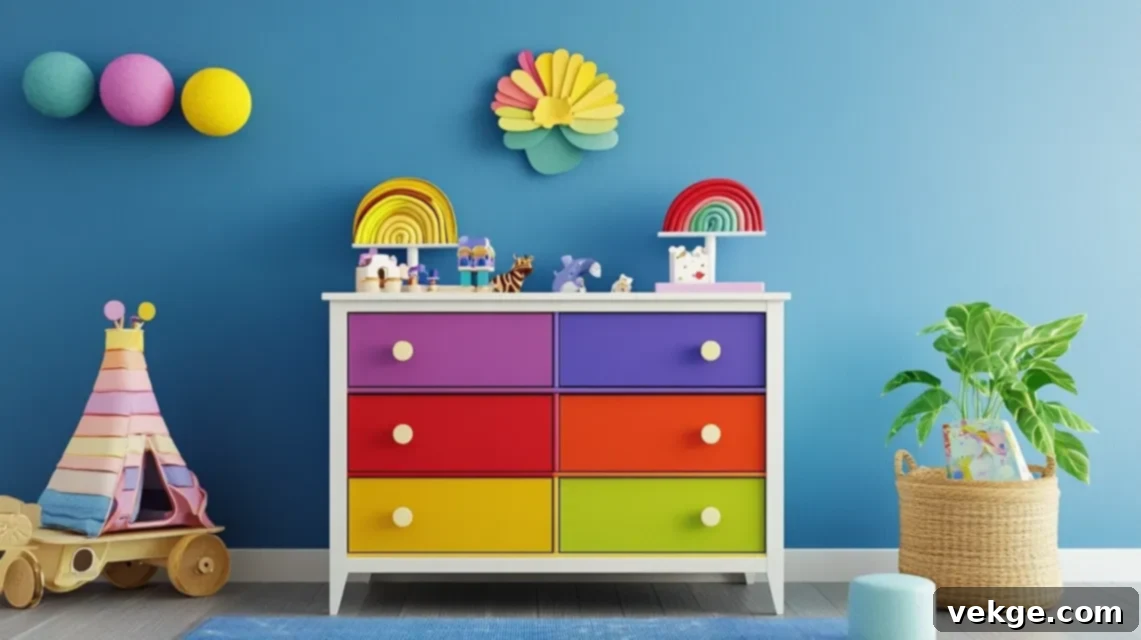
For a burst of undeniable joy and playfulness, paint each drawer a different vibrant color of the rainbow. Start with red at the top and transition through orange, yellow, green, blue, and purple down to the bottom. To make the colors truly pop, keep the dresser’s frame a neutral white or sleek black. This cheerful and energetic design is absolutely perfect for kids’ rooms, creative spaces, or any area that could benefit from a dose of bright, uninhibited fun. It’s a simple yet incredibly impactful way to create a focal point.
16. Painted Geometric Shapes
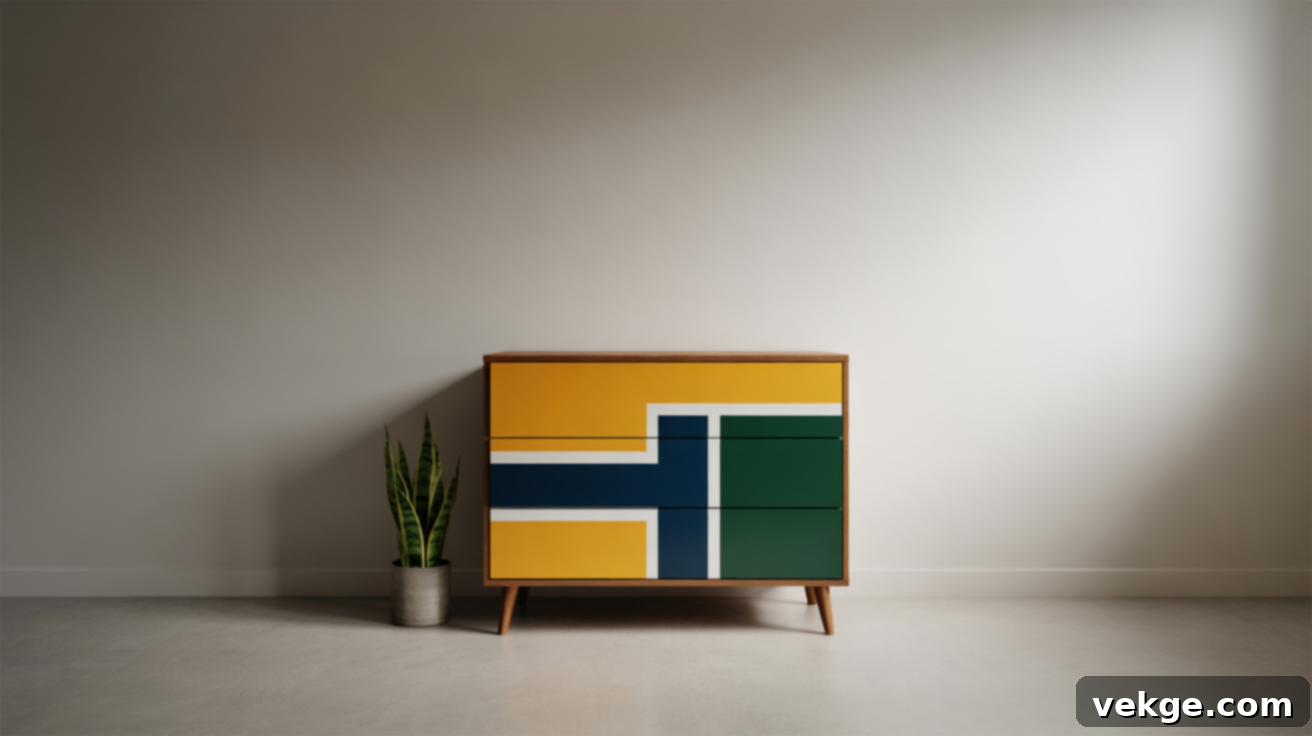
Unleash your inner artist by using painter’s tape to meticulously create a pattern of triangles, squares, diamonds, or other geometric forms on the dresser’s surface or drawer fronts. Fill these shapes with bold, complementary colors to create an abstract and contemporary design. This technique gives the dresser an artsy, fresh, and highly customized style. For the best results, ensure your base coat is completely dry before applying tape, and carefully peel off the tape when the painted shapes are still slightly wet (or just dry enough not to smudge) to achieve razor-sharp edges.
17. High-Gloss Color Pop
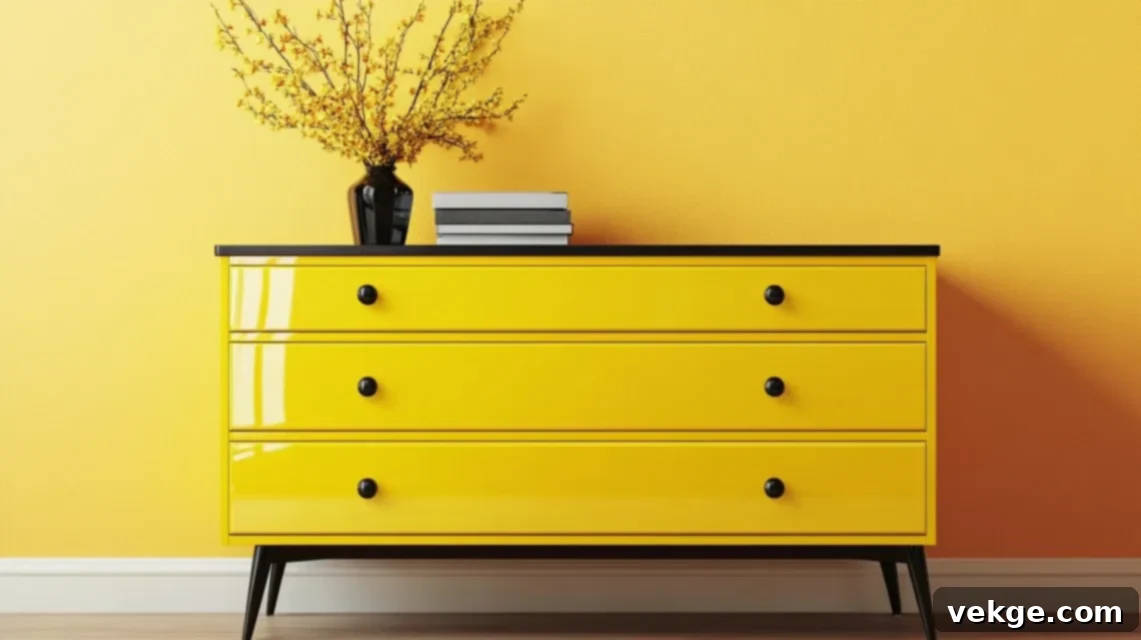
For a dresser that truly commands attention, choose one striking, bright color—like electric teal, fiery red, or sunny yellow—and apply it with a high-gloss finish. The reflective quality of gloss paint creates a vibrant, eye-catching effect that makes even the oldest furniture look incredibly bold, modern, and fresh. This style works particularly well on simple dressers with clean lines, as the shine itself becomes the primary decorative element. Pair it with minimalist black or polished metal knobs to enhance its sleek, contemporary appeal.
18. Soft Pastel Mix
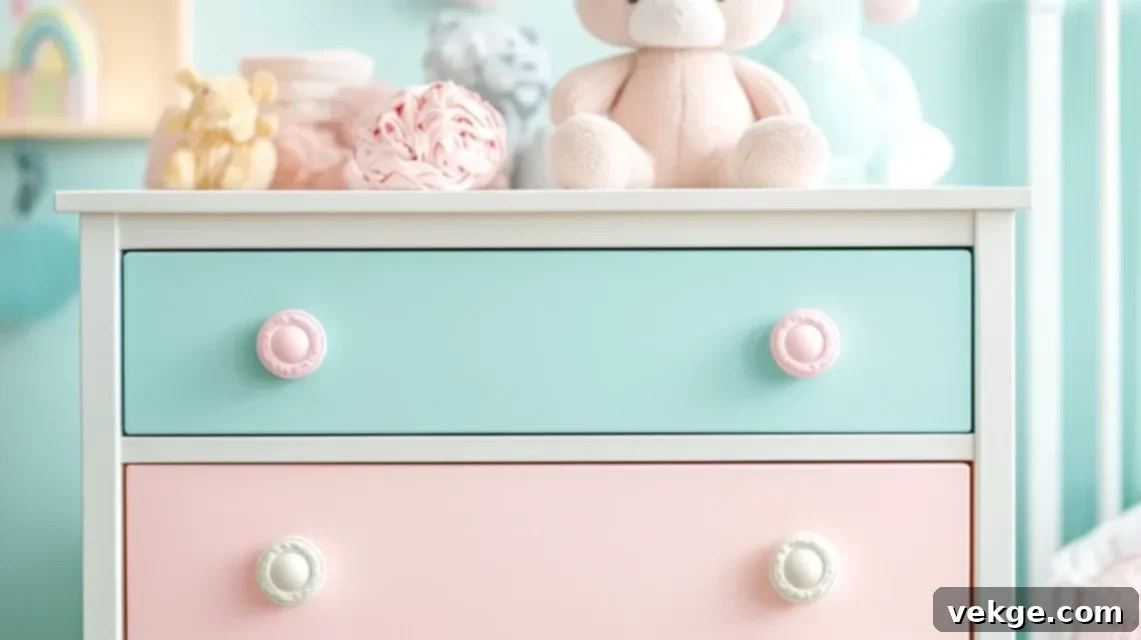
Cultivate a gentle and serene atmosphere with a soft pastel mix. Paint each drawer in delicate hues like pale pink, mint green, sky blue, and buttery yellow. To maintain the light and airy feel, keep the main dresser frame either crisp white or a subtle light gray. This palette imparts a gentle, calm, and charming look, making it ideal for nurseries, tranquil bedrooms, or any space seeking a soft touch. Experiment with the order of the drawers to create different color flows, from uniform gradients to playful, mixed arrangements.
19. Painted Drawer Frames Only
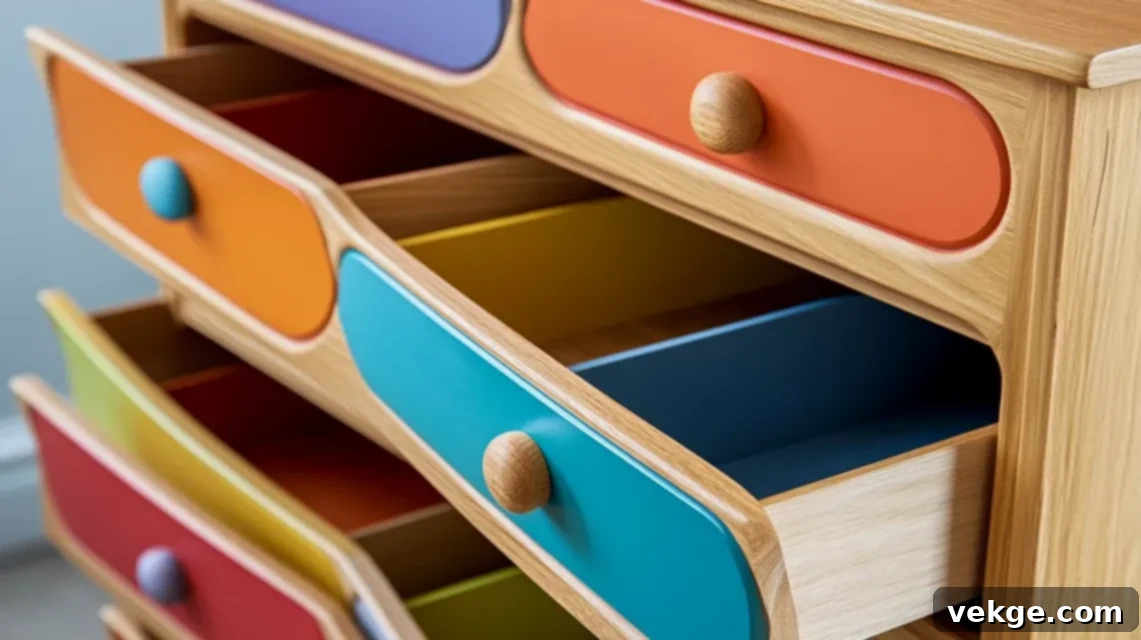
Instead of painting the entire dresser or its drawers, try a subtle yet effective approach by only painting the frames or edges around each drawer opening. Leave the drawer fronts either their natural wood finish or painted a soft, neutral color. This technique adds a sophisticated hint of color without overwhelming the piece. It’s a simple twist that delivers a fresh, modern look and is an excellent option if you have limited time or paint, offering a unique architectural detail with minimal effort.
20. Chalkboard Paint Drawers
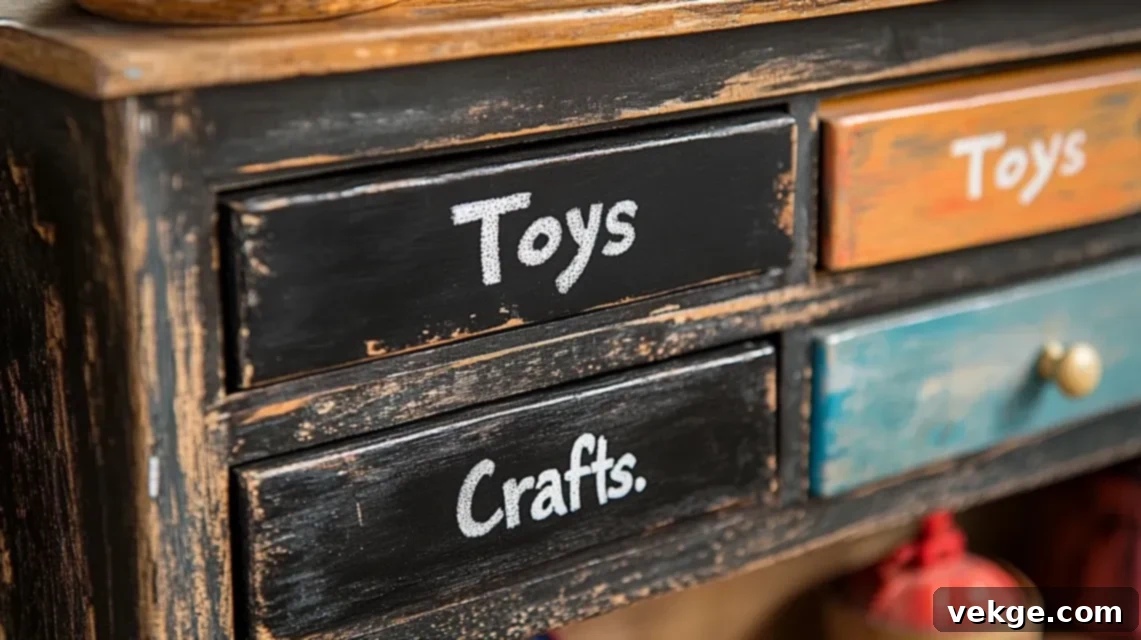
Transform your dresser into an interactive and functional piece by painting the drawer fronts with chalkboard paint. This allows you to write labels, draw doodles, or change messages on a whim, making it incredibly versatile. It’s particularly fantastic for kids’ rooms, craft areas for organizing supplies, or even a mudroom for daily reminders. Remember to apply a good primer first to ensure the chalkboard paint adheres properly. Keep a supply of chalk nearby and enjoy continually refreshing the dresser’s look and function whenever inspiration strikes.
Farmhouse and Rustic Style Restorations: Timeless Charm
Embrace the warmth, character, and inviting feel of farmhouse and rustic design. These restoration ideas focus on soft, muted paints, exposed natural wood, and simple, authentic hardware to give your dresser an aged, beloved look. Perfect for creating a cozy atmosphere in country-inspired homes, cottages, or any space desiring a laid-back, charming aesthetic.
21. Whitewashed Finish
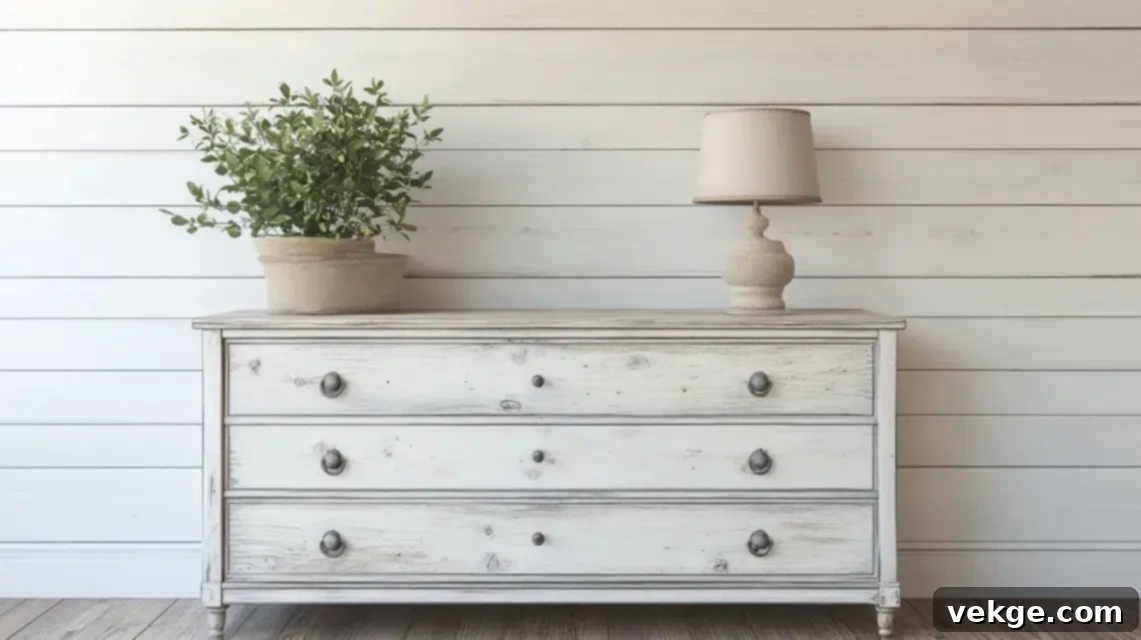
Achieve a light, airy, and subtly aged look with a whitewashed finish. Thin down white paint with water (typically a 1:1 or 2:1 paint-to-water ratio) and brush it lightly over the prepared wood surface. Immediately wipe off excess paint with a clean rag before it dries. This technique allows the natural wood grain to show through, creating a soft, translucent white haze that mimics years of natural aging. It’s a perfect choice for giving your dresser a charming, old-time country feel without requiring extensive tools, and it works wonderfully on rougher wood surfaces, enhancing their texture.
22. Soft Chalk Paint Look
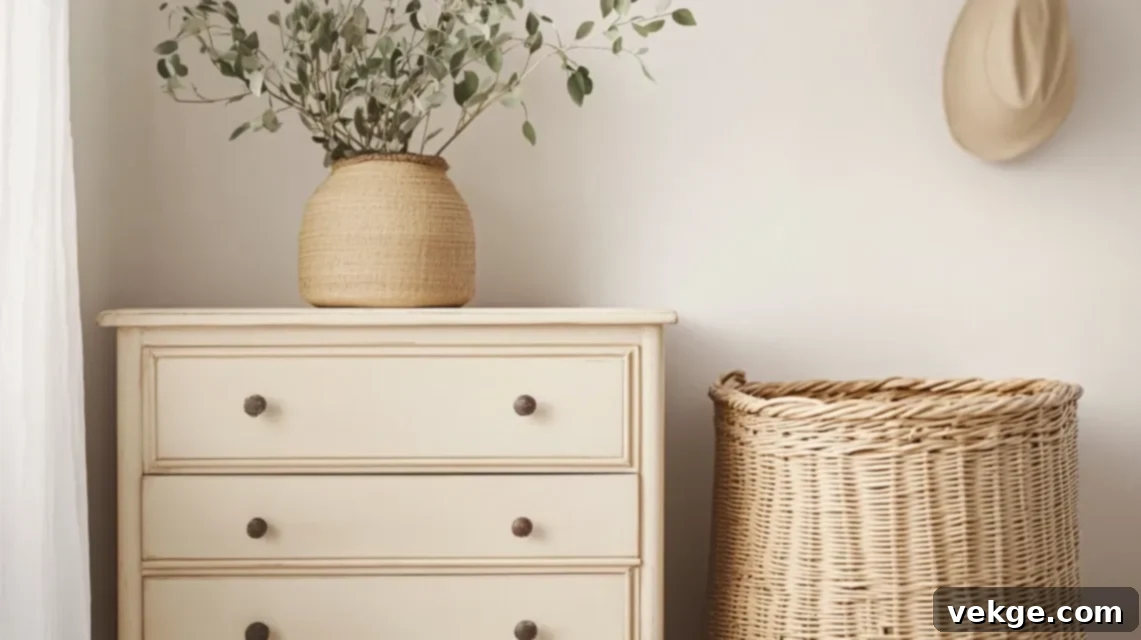
Chalk paint is a dream for rustic and farmhouse styles due to its quick drying time, excellent adhesion, and signature matte, powdery finish. It often requires minimal to no sanding or priming, making it a beginner-friendly option. Choose muted, earthy colors like creamy beige, soft gray, faded blue, or sage green. Once painted, seal it with a clear wax for protection and a subtle sheen. This finish gives your dresser an inviting, ‘used and loved’ feel that perfectly complements farmhouse or shabby chic cottage-style rooms, adding instant character.
23. Distressed Edges
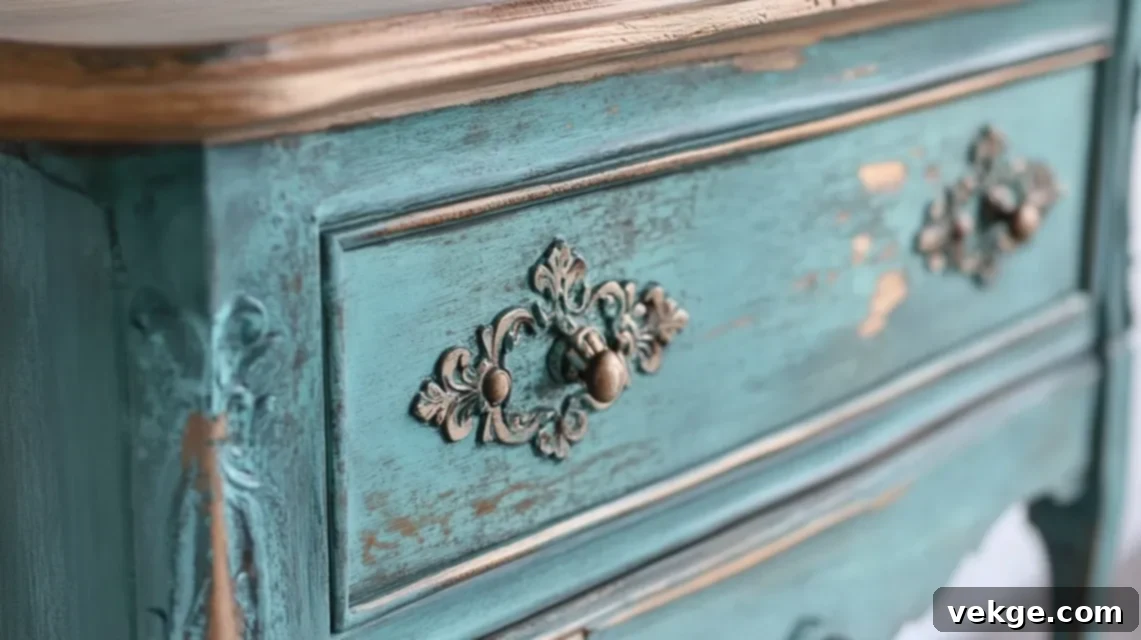
To evoke the charm of a well-loved antique, apply a distressed finish. Paint your dresser in your chosen color (chalk paint works exceptionally well for this), allow it to dry completely, then use sandpaper (medium grit like 120-grit) to gently rub away paint from corners, edges, and raised details. This reveals the wood (or a previously applied base coat) underneath, creating the illusion of natural wear and tear over time. It adds instant character and a touch of rustic charm without needing extra tools. Soft colors like cream, light gray, or pale blue are ideal for a classic country distressed finish.
24. Wood and Paint Mix
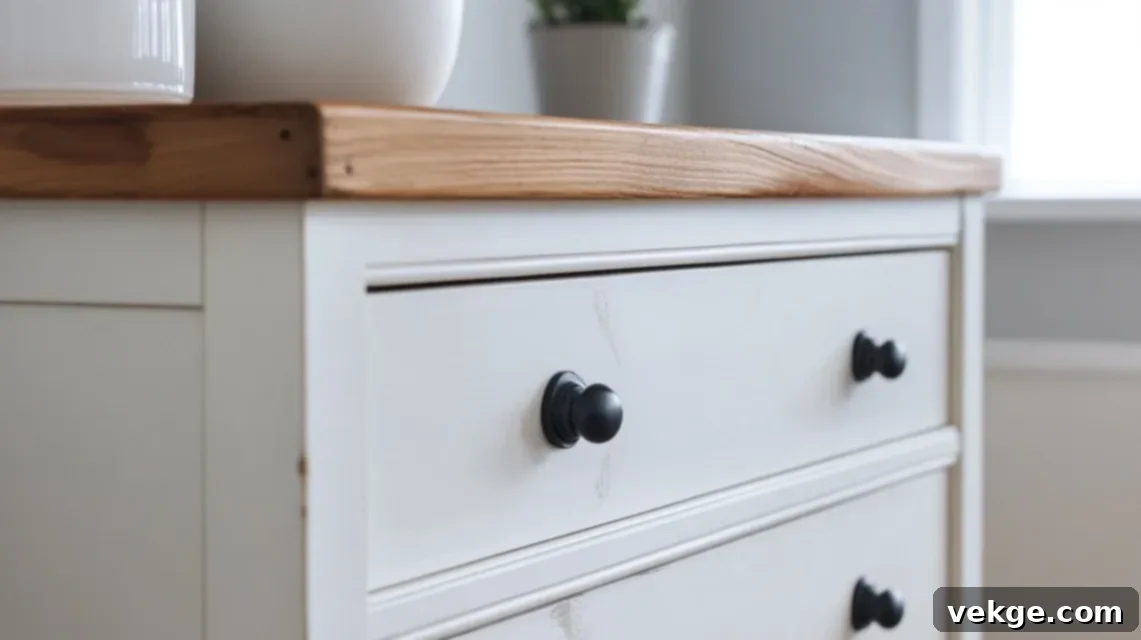
Combine the warmth of natural wood with the freshness of paint for a popular farmhouse look. This often involves leaving the dresser top as exposed, stained wood while painting the rest of the body and drawers. Carefully sand the top to remove any old finish, then apply a wood stain (such as a rich dark walnut or a light oak) for a deeper, more refined color. This contrast maintains an old-fashioned, rustic feel but keeps the piece looking clean and updated. Pair with black or classic wooden knobs to complete the cohesive farmhouse aesthetic.
25. Antique-Style Stain Finish
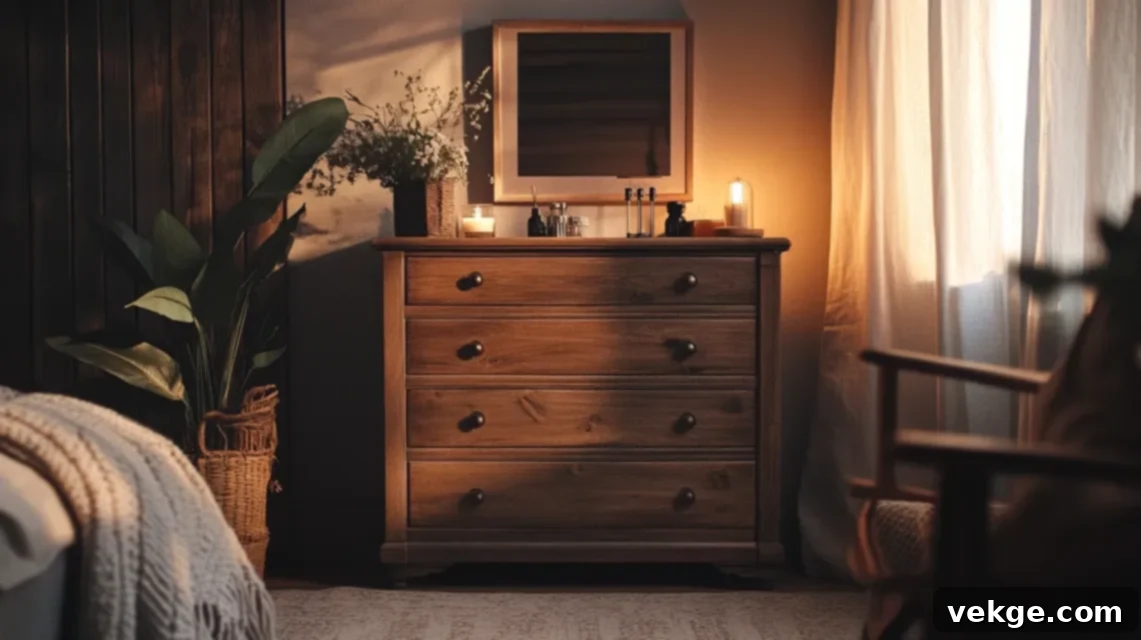
If your dresser is solid wood and you prefer a deeply traditional, aged look without paint, an antique-style wood stain is ideal. After thorough sanding to expose raw wood, apply a dark wood stain (like espresso, dark walnut, or cherry) using a cloth or brush. Allow it to penetrate for a few minutes, then wipe off any excess. The rich, deep color will beautifully highlight the natural wood grain, giving the dresser a warm, well-preserved, and truly vintage appearance. This method is best suited for solid wood pieces, as it relies on the wood’s inherent beauty.
26. Worn Paint Layers
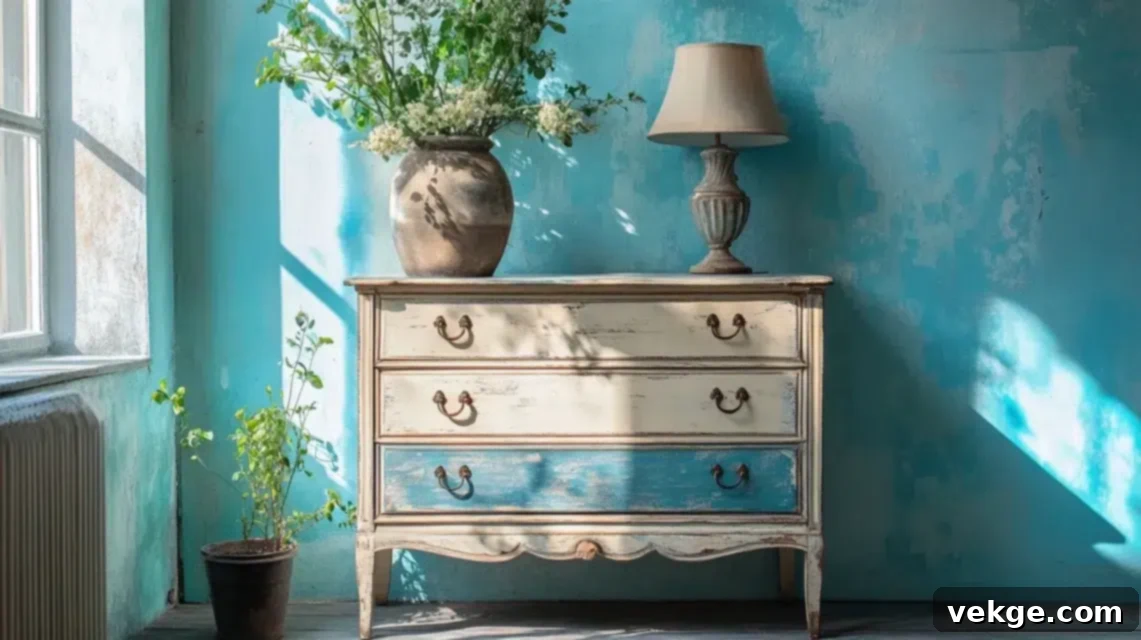
Create a charming, layered look that suggests years of history. Start by painting the dresser in one color, allowing it to dry completely. Then, apply a second, contrasting color over the first. Once the top layer is dry, strategically sand through parts of it, especially on edges and areas that would naturally see wear, to reveal glimpses of the base color underneath. This technique mimics paint layers that have built up and chipped away over time. It works wonderfully with combinations like creamy white over a soft blue, or light gray over a deeper charcoal, for an authentic vintage touch.
27. Rustic Barnwood Trim
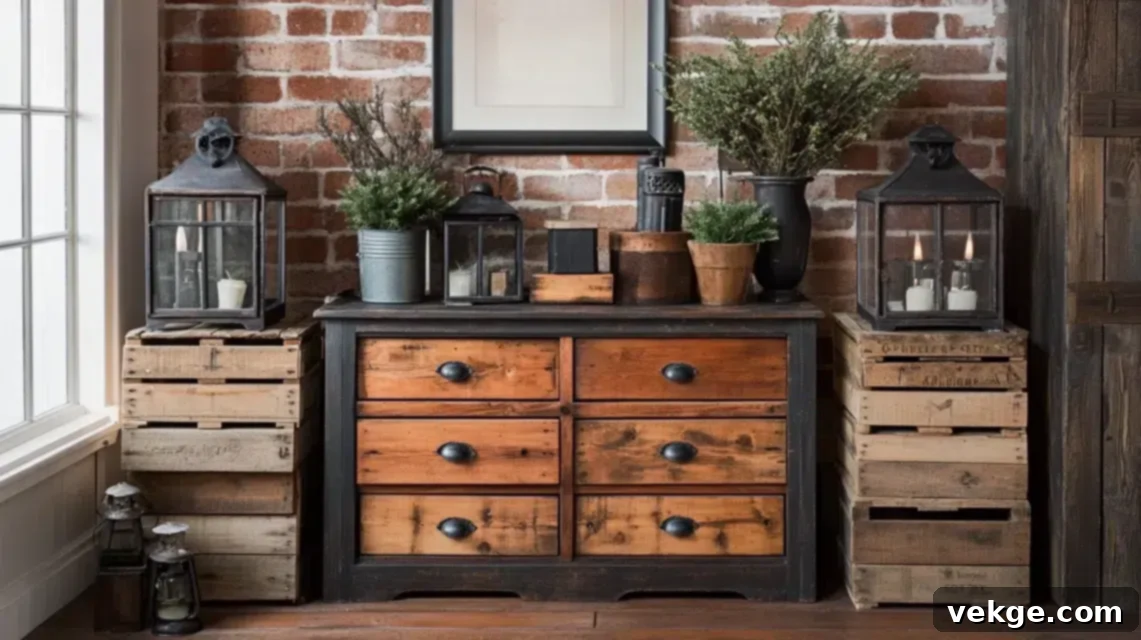
Incorporate authentic rustic elements by adding thin pieces of weathered wood as trim. Cut narrow strips of reclaimed barnwood (or new wood stained to look old in gray or dark brown tones) and securely attach them along the drawer edges, the dresser top, or even as decorative panels on the sides. You can use wood glue and small nails or brads. This addition instantly gives the dresser a raw, handmade, and rugged feel, mimicking the look of traditional country furniture. Pair it with simple, dark metal hardware for a cohesive natural aesthetic.
28. Old-World Hardware Add-On
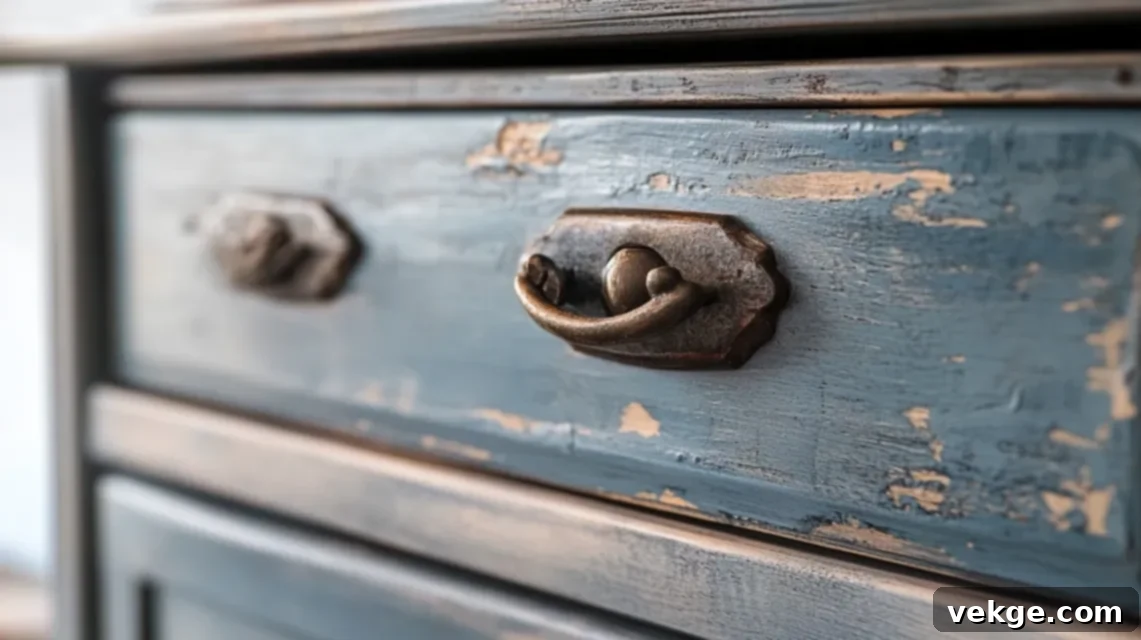
Beyond paint, hardware plays a crucial role in defining a dresser’s style. For an instant farmhouse or rustic update, swap out generic knobs for old-world style metal pulls, classic black cup-style hardware, or antique-finished drop pulls. Look for hardware with a worn, distressed, or matte finish rather than shiny modern ones. Even if you don’t change the paint or wood finish, this single change can make a significant difference, imbuing your dresser with immediate character and an authentic, vintage appeal.
29. Crackled Paint Effect
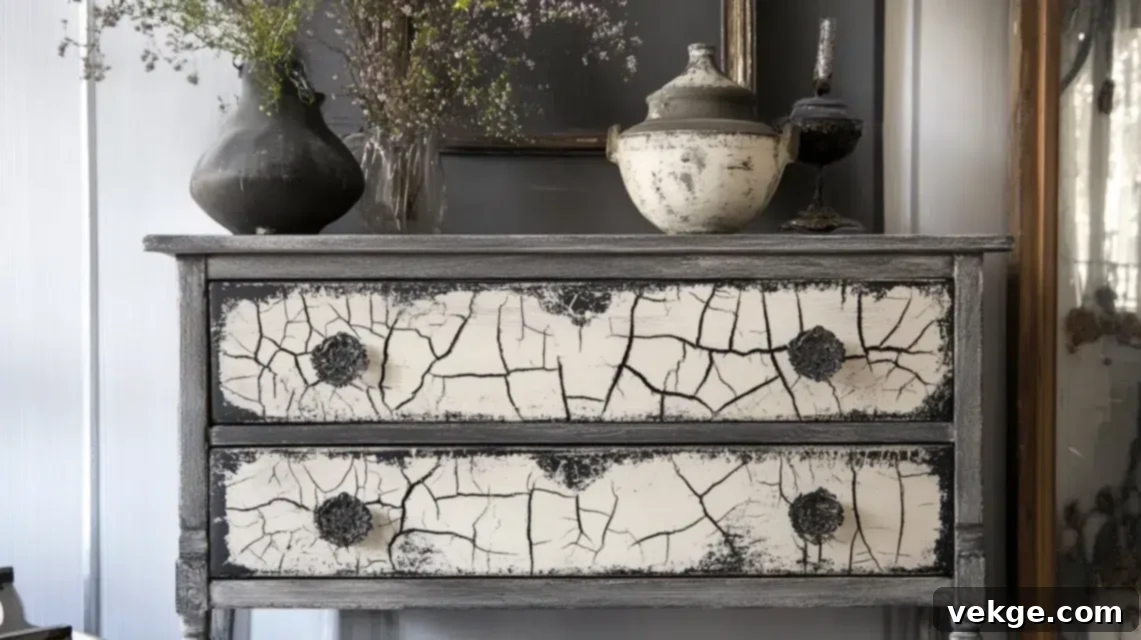
Create the beautiful illusion of naturally aged paint with a crackle glaze. This technique involves applying a crackle medium between two layers of paint. First, paint your dresser with a base color and let it dry. Then, apply the crackle glaze, followed by a contrasting top coat of paint before the glaze fully dries. As the top layer dries, it will crack and shrink, revealing the base color underneath through a network of fine lines. This effect delivers genuine farmhouse charm and works best with soft, faded colors on smaller dressers or specific drawer fronts.
30. Beadboard Drawer Fronts
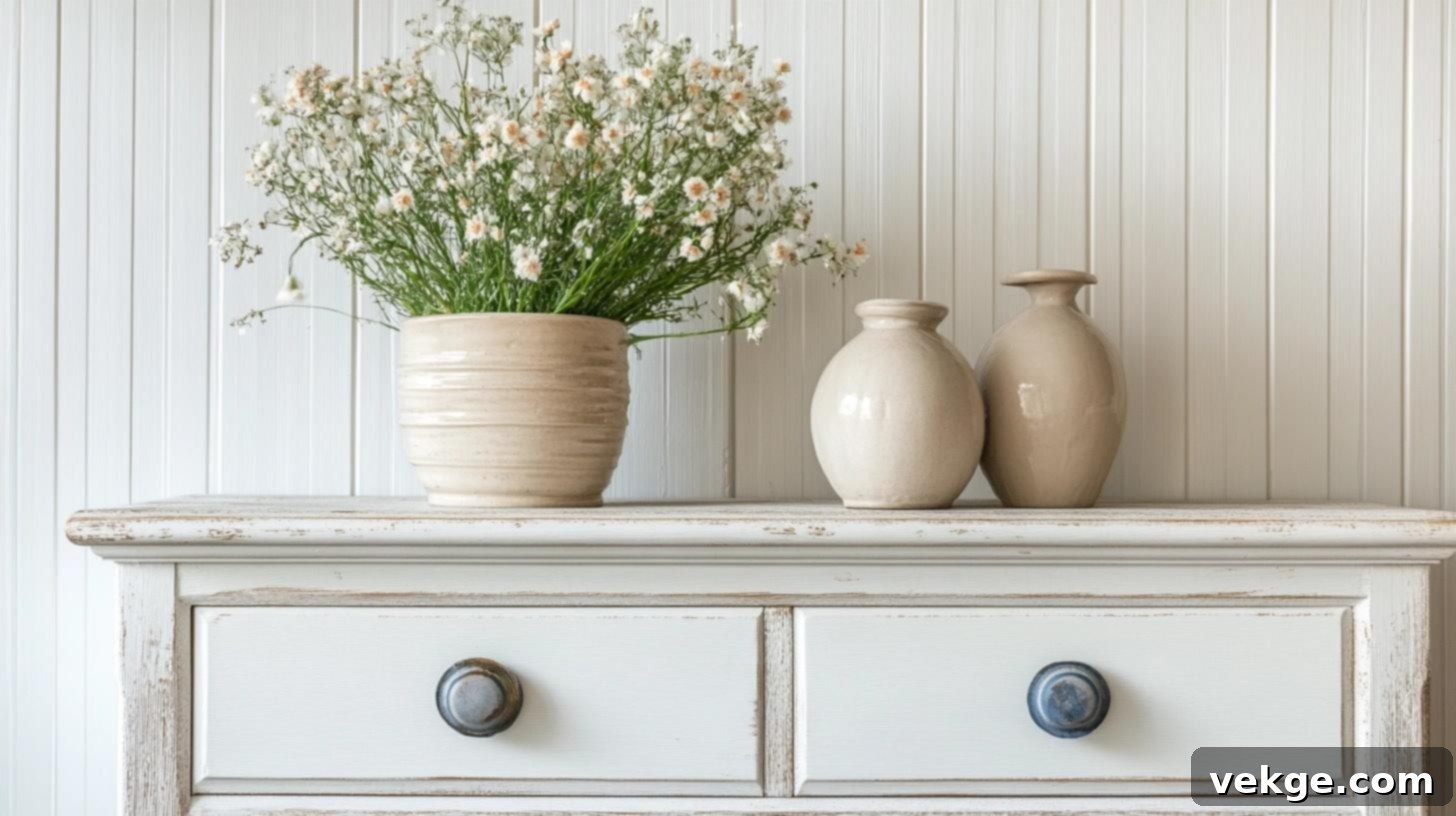
Add quintessential country texture by attaching thin beadboard panels to your drawer fronts. Measure and cut the beadboard to fit precisely, then secure it firmly with wood glue and small brad nails (if desired for extra hold). Once attached, paint the beadboard and dresser frame in a cohesive color, such as classic white or a soft sage green. This addition immediately enhances the dresser’s texture and makes it look like it belongs in a charming farmhouse kitchen or a cozy cottage bedroom. It’s a bit more involved, but the strong country feel is well worth the effort.
Sleek Mid-Century and Modern Looks: Clean Lines & Minimalist Style
For those who appreciate uncluttered aesthetics and functional design, these restoration ideas focus on straight lines, simple colors, and smooth finishes. Inspired by mid-century modern design principles, these approaches incorporate subtle details like angled legs or flat pulls to help your dresser seamlessly fit into contemporary or retro-inspired spaces.
31. Matte Black Finish
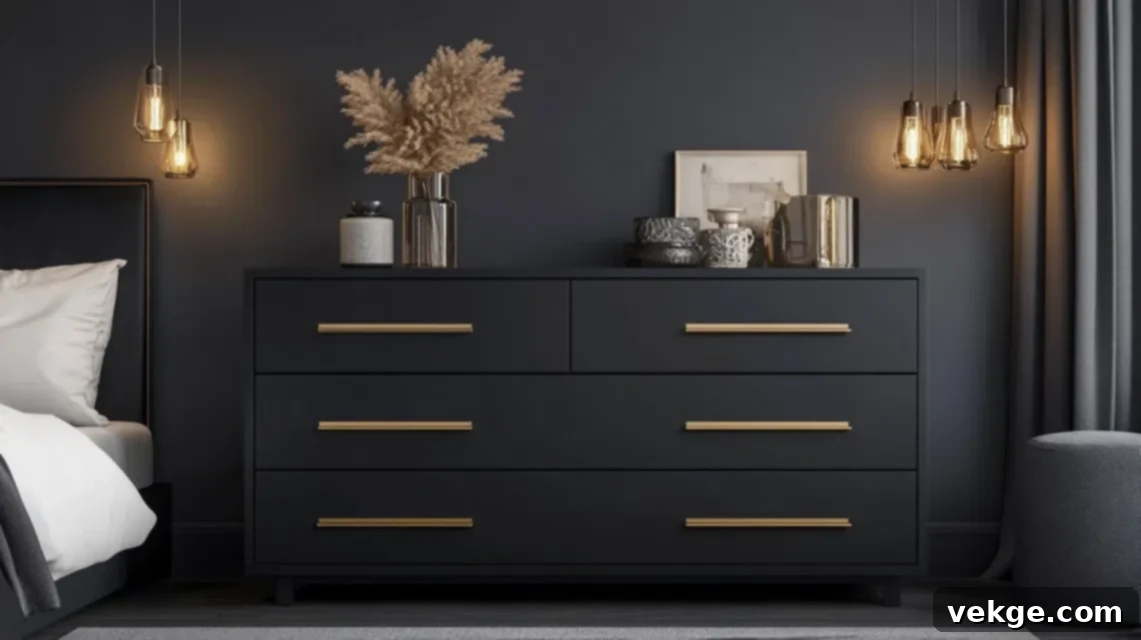
Embrace modern sophistication with a striking matte black finish. Paint the entire dresser in a flat black for a bold, clean, and understated look. This style truly shines on dressers with inherently straight lines and flat drawer fronts. The matte texture absorbs light, giving the piece a refined, almost sculptural presence. To add a touch of contrast and elegance, consider pairing it with sleek brass or warm wooden handles. The result is simple, sharp, and perfectly at home in contemporary interiors. Apply two to three thin coats for full, even coverage.
32. Walnut-Stained Wood
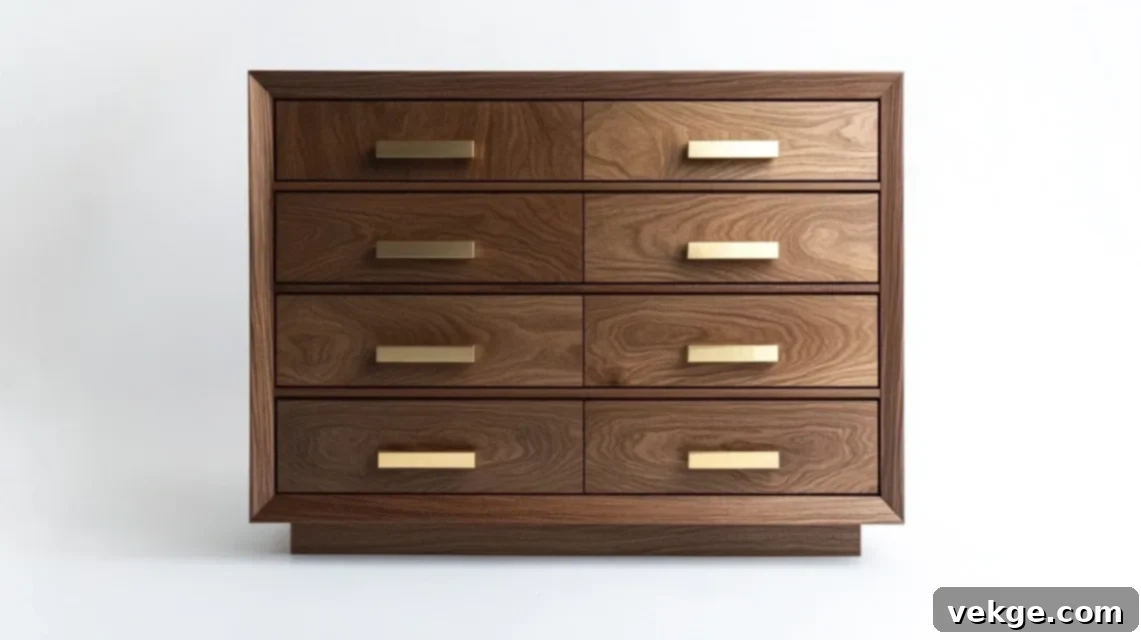
To capture the essence of mid-century design, restore your dresser to a rich walnut-stained wood finish. This often involves thoroughly sanding down the existing finish to expose the bare wood. Apply a high-quality walnut-colored wood stain in thin, even coats, wiping off any excess with a clean cloth to achieve a deep, warm brown tone that is characteristic of this era. Pair the stained wood with minimalist gold or black hardware. If possible, leave the legs and frame bare, stained wood to maintain an authentic mid-century aesthetic, emphasizing natural materials and craftsmanship.
33. Tapered Legs Add-On
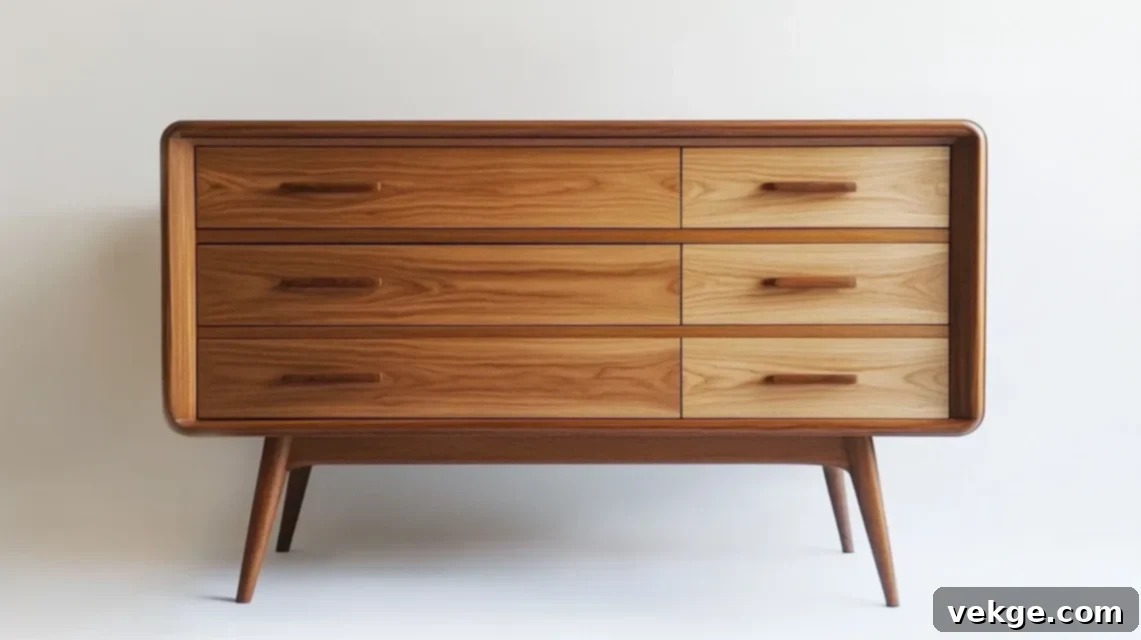
One of the most defining features of mid-century furniture is its iconic tapered legs. Swap out bulky or traditional legs for sleek, often slightly angled, tapered ones. These legs elevate the dresser, making it appear lighter and more graceful. You can find pre-made tapered legs with a natural wood finish (to stain walnut) or painted black. They usually attach easily using universal mounting plates or brackets. Even without extensive painting, simply changing the legs can dramatically transform a conventional dresser into a stylish mid-century piece, perfect for small rooms where a sense of lightness is desired.
34. Two-Drawer Color Split
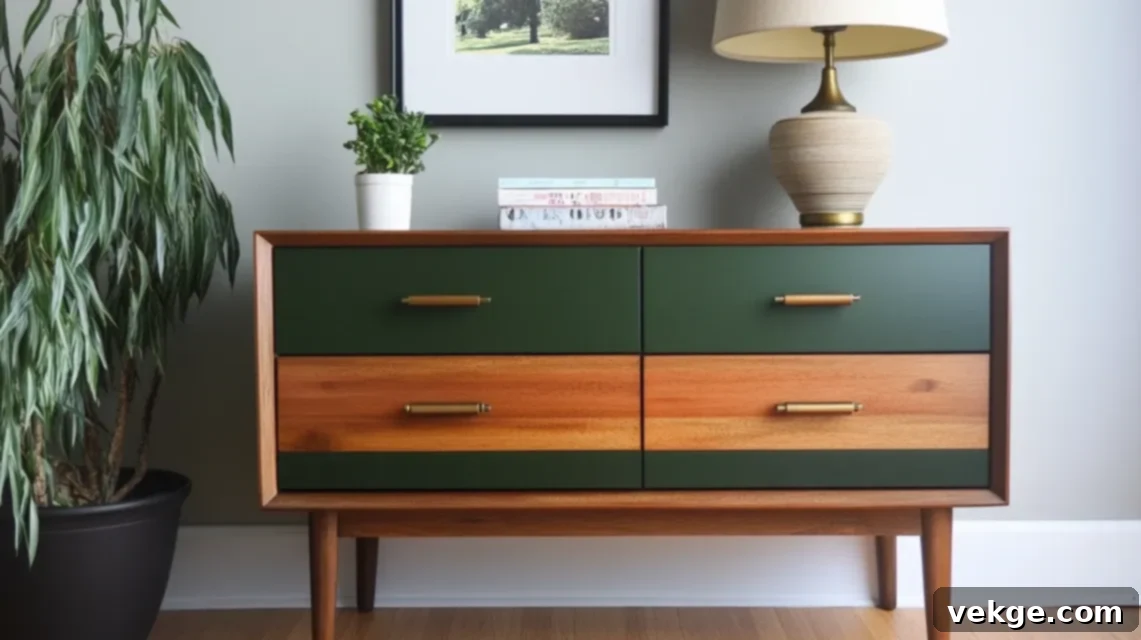
For a clean, understated modern look, consider a two-drawer color split. Paint the top one or two drawers in a contrasting or complementary color, while leaving the remaining drawers either their natural wood finish or painted in a softer, coordinating shade. This design is effortlessly stylish, creating visual interest without being overly busy. Try sophisticated combinations like a deep forest green with a warm wood base, or a minimalist gray over crisp white. Match the hardware to both colors or choose a neutral metallic finish to elegantly tie the distinct sections together.
35. Flat Drawer Pulls
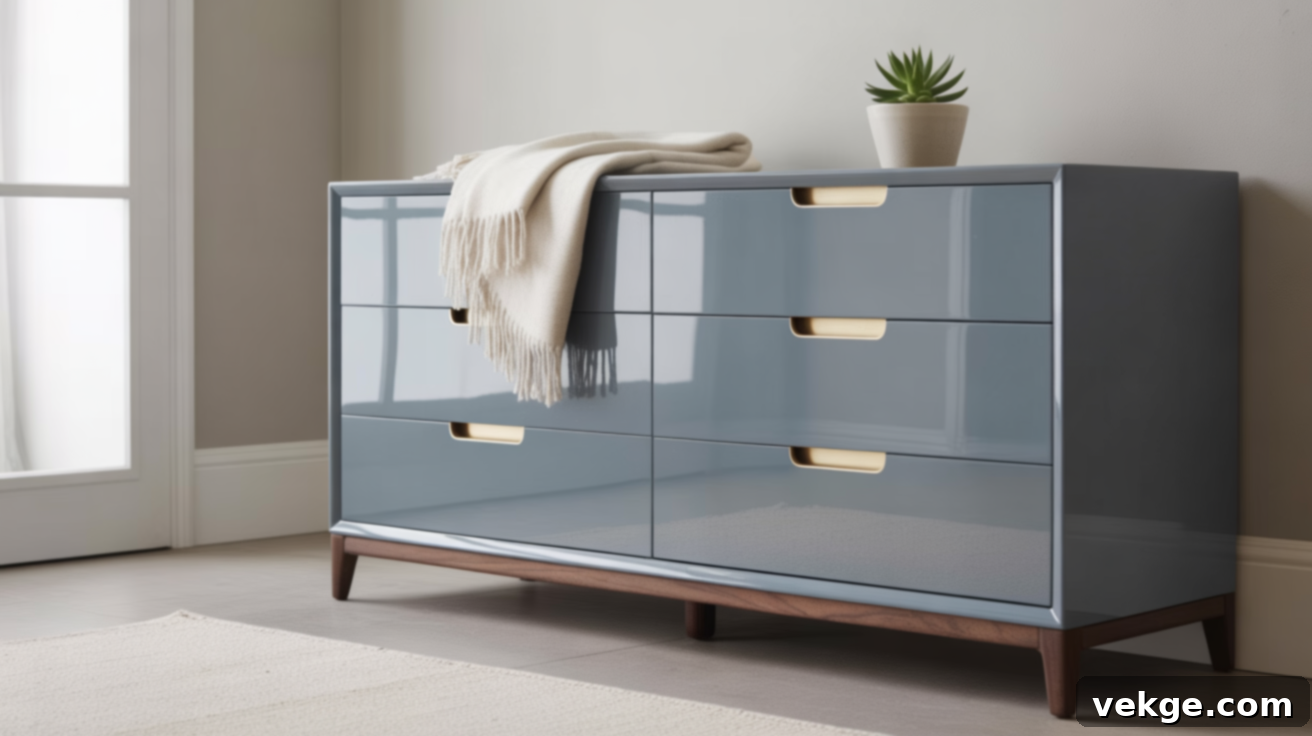
Emphasize clean lines and a minimalist aesthetic by replacing bulky knobs with flat, low-profile drawer pulls or even designing integrated cut-out handles. Sleek metal pulls in brushed silver, matte black, or even natural wood flush pulls will keep the dresser’s surface smooth and uncluttered. If you’re painting the dresser, stick to solid, sophisticated tones like charcoal gray, deep navy, or pure white, allowing the simplicity of the hardware to complement the overall design. This choice instantly makes the dresser feel more grown-up, contemporary, and incredibly sleek, aligning perfectly with modern and minimalist interiors.
Creative Repurposing Projects: New Life for Old Dressers
Sometimes, a dresser’s highest potential isn’t as a dresser at all. These innovative projects demonstrate how to completely transform and repurpose an old dresser into something entirely new and incredibly functional. These ideas are fantastic for saving space, adding unique pieces to your home, and getting maximum utility out of forgotten furniture.
36. Dresser Turned Bench
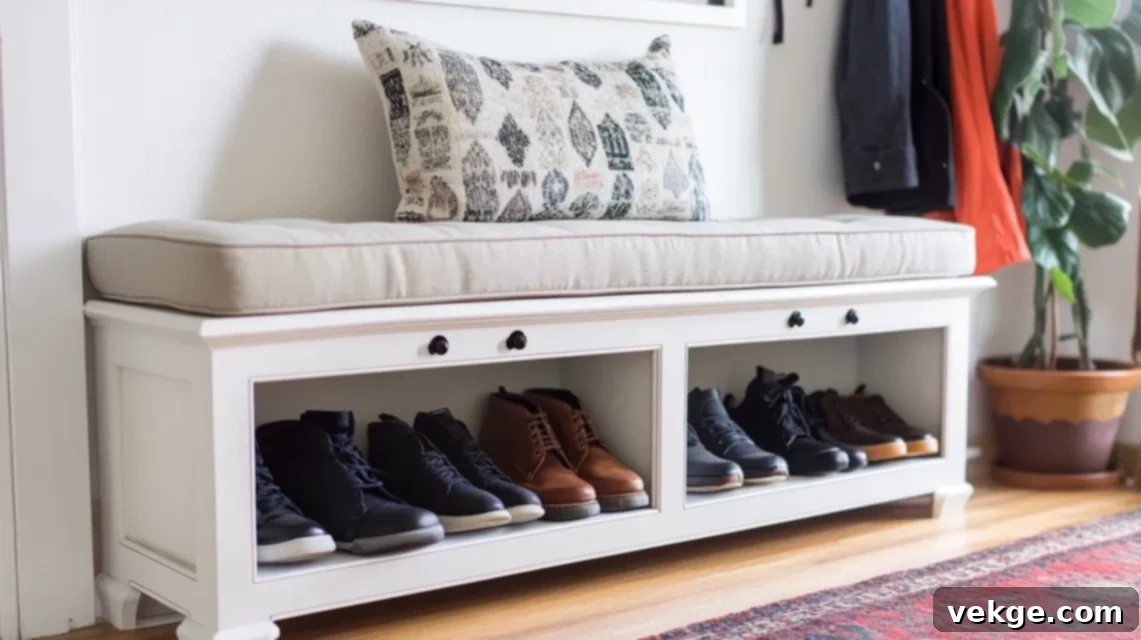
Give your entryway or bedroom a unique seating and storage solution by converting an old dresser into a charming bench. The key is to remove the top two or three drawers, leaving the bottom drawers intact for storage. Reinforce the open section with horizontal supports and add a sturdy wooden seat directly over the opening. Paint or stain the entire piece to match your decor. For added comfort, top it with a plush cushion and decorative pillows. This smart repurposing project creates a practical and stylish bench with built-in storage, perfect for stashing shoes, blankets, or books.
37. Make a Bathroom Vanity
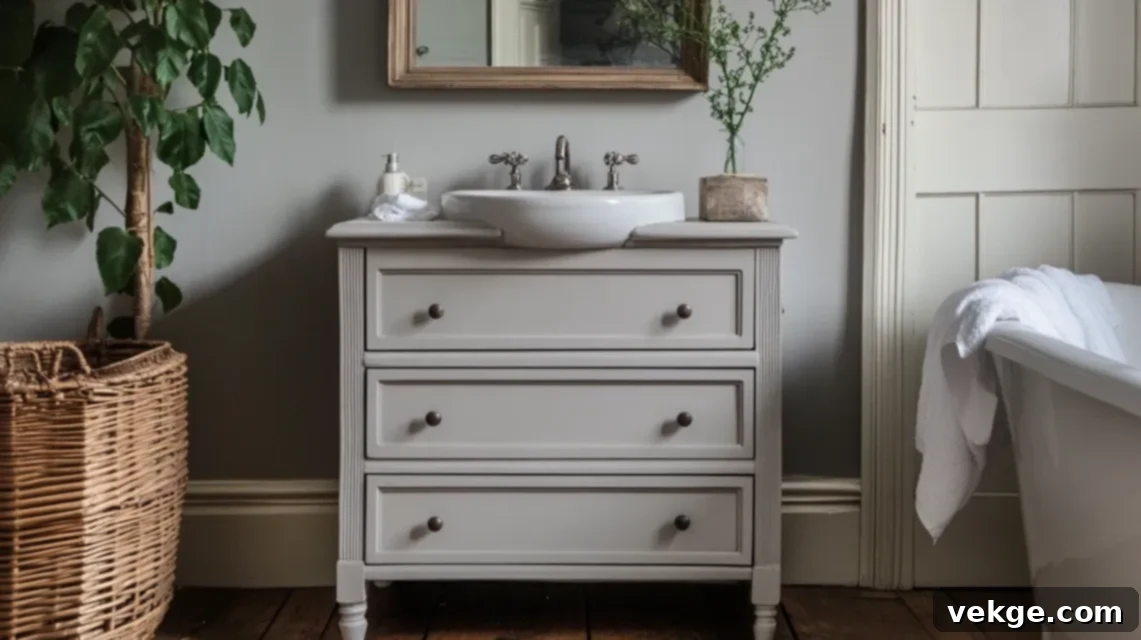
Transform a sturdy old dresser into a beautiful and unique bathroom vanity. This project requires more advanced DIY skills. Start by removing the top drawers and carefully cutting out space in the top surface for a drop-in or vessel sink. You’ll also need to cut openings in the back and inside the cabinet for plumbing. Paint or stain the dresser, then apply a waterproof sealant to protect it from moisture. This conversion offers abundant storage with its existing drawers, adding a custom, high-end look to your bathroom while keeping it organized. Always check plumbing requirements and clearances before you begin cutting.
38. Kitchen Island Conversion
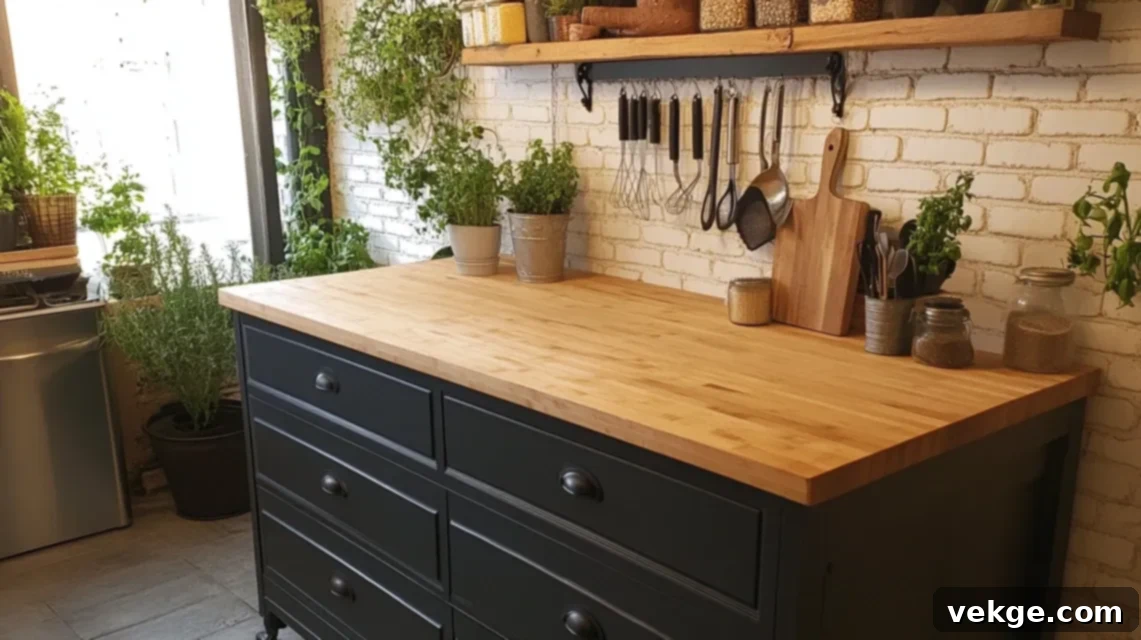
A wide, robust dresser can serve as an excellent base for a custom kitchen island, providing much-needed counter space and storage. Paint it a vibrant color or a classic neutral, then add sturdy locking wheels for mobility or new legs for a stationary island. Replace the original top with a durable butcher block, a stone slab, or a piece of sealed wood. You can even remove some drawers to create open shelving for cookbooks or decorative items. This transformation is ideal for open kitchens or for passionate cooks who need extra workspace and storage, making it a functional focal point.
39. Turn Into a Bookshelf

Give an old dresser a new purpose as a charming bookshelf or display unit. Simply remove all the drawers to create open compartments. Measure and cut new wooden boards to fit horizontally across these empty spaces, creating sturdy shelves. Secure the shelves firmly with screws or L-brackets. Once the shelves are in place, paint or stain the entire unit to match your desired aesthetic. This repurposed piece is perfect for organizing books, showcasing plants, holding decorative bins, or displaying collectibles in kids’ rooms, classrooms, or cozy reading corners. You can even keep one or two bottom drawers for concealed storage.
40. TV Stand Upgrade
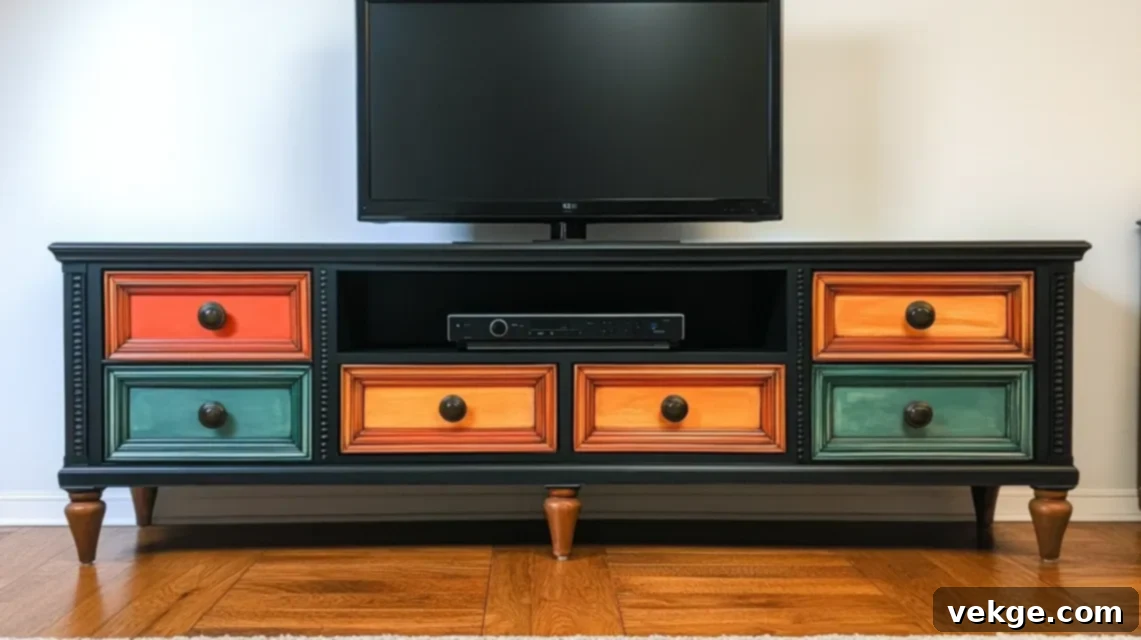
An old dresser, particularly a longer, lower one, can be perfectly repurposed into a stylish and functional TV stand or media console. The drawers offer excellent hidden storage for remotes, cables, and media accessories. For a sleeker look, you can remove a central drawer (or two) and create an open shelf for media boxes, game systems, or soundbars. Drill neat holes in the back panel for cable management to keep wires organized and out of sight. Paint or stain the dresser to complement your living room’s decor. This is a practical and attractive way to reuse an old piece, making it a central part of your entertainment area.
What Not to Do When Restoring a Dresser: Common Mistakes to Avoid
While DIY dresser restoration is incredibly rewarding, knowing what pitfalls to avoid can save you time, effort, and frustration. Here’s a quick list of common mistakes that can lead to subpar results or even damage your dresser:
- Don’t Skip Cleaning: Neglecting to thoroughly clean the surface before priming or painting is a recipe for disaster. Dirt, grease, and grime prevent paint from adhering properly, leading to peeling, bubbling, and an uneven finish.
- Don’t Paint Over Loose or Chipped Surfaces: Always address any loose veneer, chipped paint, or damaged areas first. Painting over imperfections will only highlight them and result in a less durable, unprofessional finish. Repair and sand these areas smooth.
- Don’t Forget to Test Paint or Stain: Before applying any product to the entire dresser, always test it on a small, hidden area (like the back of a drawer or an inside panel). This ensures the color and finish are what you expect and that there are no adverse reactions with the existing material.
- Don’t Use Wall Paint for Furniture: While tempting, standard wall paint isn’t formulated for the wear and tear furniture experiences. Furniture needs more durable, harder-wearing finishes. Invest in paints specifically designed for cabinets or furniture.
- Don’t Sand Laminate Too Hard: Laminate is a very thin top layer. Excessive or aggressive sanding can easily tear through it, exposing the particleboard underneath, which is difficult to repair seamlessly. Use a fine-grit sandpaper for a light scuff, or opt for bonding primer instead.
- Don’t Rush Drying Time Between Coats: Patience is crucial. Applying subsequent coats of paint or primer before the previous one is fully dry can lead to an uneven finish, bubbling, peeling, and a less durable surface. Always follow manufacturer’s recommendations for drying times.
- Don’t Use Cheap Brushes or Rollers: Low-quality tools leave behind bristles, streaks, and inconsistent finishes. Investing in good quality brushes and foam rollers will yield smoother results and a much more professional look.
- Don’t Mix Oil-Based and Water-Based Products Incompatibly: Be aware of the base of your products. Oil-based and water-based paints, primers, and topcoats don’t always mix or adhere well to each other. Read labels carefully to ensure compatibility.
- Don’t Ignore Wobbly Legs or Drawers: Before applying any cosmetic updates, always fix structural issues. Tighten loose screws, reinforce wobbly legs, and repair sticky or broken drawers. A beautiful finish on an unstable piece of furniture is still unstable furniture.
- Don’t Forget Safety: Always prioritize your safety. Work in a well-ventilated area, wear gloves to protect your hands from chemicals, and use a mask (especially when sanding or using spray paint) to avoid inhaling dust and fumes.
Wrapping Up Your Dresser Transformation
This extensive collection of 40+ DIY dresser restoration and upcycling ideas has aimed to provide you with practical, creative, and inspiring ways to breathe new life into any old dresser. From fundamental preparation techniques and material considerations to a diverse range of stylistic approaches—including simple paint makeovers, vibrant color pops, charming farmhouse looks, sleek modern designs, and even ingenious repurposing projects—we’ve covered a comprehensive spectrum of ideas to ignite your imagination.
You now possess a wealth of starting points and detailed guidance, regardless of your personal taste, skill level, or the specific condition of your furniture. Every scratch, chip, or outdated finish on your old dresser represents an opportunity for a beautiful transformation.
If you’ve been holding onto a worn piece of furniture, perhaps unsure of its potential, consider this your definitive sign to take action. Gather your tools, select a favorite style from this guide, and confidently embark on your next DIY adventure. The satisfaction of creating something beautiful and functional with your own hands is truly unparalleled.
And remember, if you’re ever in search of more inspiration, practical tips, or fresh ideas for other home improvement and DIY projects, feel free to explore the rest of our blogs. There’s always something new and exciting waiting for you to try!
