Achieve a Modern Look: Your Guide to a DIY Concrete Fireplace Transformation
Are you tired of your outdated fireplace serving as an aesthetic anchor rather than a stunning focal point in your home? Imagine transforming it into a sleek, contemporary masterpiece that not only elevates your living space but also leaves your guests wondering if you commissioned a high-end designer. The good news is, achieving this sophisticated look is more accessible and affordable than you might think.
A DIY concrete fireplace makeover offers the perfect solution. This budget-friendly project allows you to completely revolutionize your living space, infusing it with modern elegance without draining your savings. With a modest investment of less than $100 for materials and a willingness to put in some effort, you can create a show-stopping concrete fireplace that rivals professional installations in both appearance and durability.
The clean lines, minimalist aesthetic, and versatile texture of concrete instantly upgrade any room’s style, providing a sophisticated backdrop for your decor. Beyond the visual appeal, there’s immense satisfaction in crafting such a significant home improvement yourself. This comprehensive guide will walk you through every essential step of building your custom concrete fireplace, from the initial demolition to the final, polished touches. Prepare to roll up your sleeves and embark on a dramatic fireplace transformation that will redefine your home’s ambiance.
Why Choose a Concrete Fireplace for Your Home?
Opting for a concrete fireplace presents a multitude of compelling advantages, making it an increasingly popular choice for homeowners seeking both style and practicality. Here’s why a DIY concrete fireplace is an exceptional investment:
- Unmatched Cost-Effectiveness: One of the primary draws of a concrete fireplace is its affordability. By choosing the DIY route, you bypass the hefty labor costs associated with professional services, potentially saving thousands of dollars. The materials themselves are relatively inexpensive, allowing you to achieve a high-end, custom look on a budget that’s truly remarkable.
- Contemporary Aesthetic Appeal: Concrete delivers a distinctively modern look that is highly sought after in contemporary interior design. Its clean, sharp lines and minimalist appearance create a sleek, sophisticated focal point that complements a wide range of decor styles, from industrial chic to Scandinavian minimalist. It’s a timeless material that exudes understated elegance.
- Incredible Versatility and Customization: Far from being a bland, utilitarian material, concrete is surprisingly versatile. You have the freedom to experiment with various textures—from perfectly smooth and polished to slightly rough and industrial—and even incorporate different pigments or finishes to perfectly match your personal style and existing home decor. This level of customization ensures your fireplace is truly unique.
- Exceptional Durability and Longevity: Concrete is renowned for its strength and resilience. It naturally withstands high temperatures, making it an ideal material for a fireplace surround, and it holds up remarkably well against daily wear and tear. This ensures that your concrete fireplace will maintain its beauty and structural integrity for many years to come, offering a wise, long-term investment for your home.
- Low Maintenance: Once sealed, concrete surfaces are relatively easy to clean and maintain, resisting stains and grime. This makes it a practical choice for busy households, allowing you to enjoy your beautiful fireplace without constant upkeep.
Essential Materials and Tools Needed for Your Project
To successfully build your budget-friendly concrete fireplace, gathering the right materials and tools is crucial. Here’s a detailed list of what you will need:
- Demolition Hammer: A powerful electric tool designed to efficiently break up hard surfaces like existing stone or concrete facades. Renting one from a local hardware store is often the most cost-effective option for specific projects.
- Cement Board: Rigid panels composed of cement and reinforcing fibers. This serves as a durable, heat-resistant, and stable backing board or underlayment for your concrete finish, providing an ideal surface for adhesion.
- Mesh Tape: A self-adhesive fiberglass tape essential for reinforcing the joints and seams between cement board panels, preventing cracks in your final concrete finish.
- Electric Drill: A robust, corded power tool is recommended over battery-powered options for consistent torque when drilling into masonry.
- Masonry Drill Bits and Screws: Specialized drill bits designed to penetrate tough materials like brick or concrete, paired with screws specifically rated for masonry applications to ensure secure attachment of the cement board.
- 14-inch Drywall Tray: A rectangular plastic or metal tray used for holding and efficiently mixing smaller batches of your Ardex Feather Finish or other concrete compounds.
- 12-inch Drywall Knife (or Trowel): A wide, flat-blade tool indispensable for spreading, smoothing, and achieving an even application of the concrete mix across surfaces.
- Ardex Feather Finish or Henry’s Feather Finish: These are self-drying, cement-based finishing underlayment products. They are specifically designed to create smooth, durable, and highly adhesive surface preparations, ideal for achieving that coveted concrete look.
- 5-gallon Bucket: A large, sturdy plastic container perfect for mixing larger quantities of your Ardex Feather Finish or water.
- Drill Attachment Mixer: A mixing paddle that attaches to your electric drill. This tool is invaluable for thoroughly and efficiently mixing concrete or other compounds, ensuring a consistent, lump-free mixture.
- Safety Gear: Don’t forget safety glasses, work gloves, and a dust mask. Demolition and mixing can create dust and debris, so protecting yourself is paramount.
The DIY Process: Step-by-Step Fireplace Transformation
Before diving into the hands-on work, a crucial clarification is needed. The method outlined here worked successfully for us, but every fireplace and home structure is unique. We thoroughly inspected our chimney and consulted with an expert to ensure our existing stone facade was purely decorative and could be safely removed without compromising the chimney’s structural integrity. If you have any doubts whatsoever about your fireplace’s structure or the safety of removing existing materials, please consult a professional. Our instructions also assume there is a solid brick substrate beneath any stone covering. With these important considerations understood, let’s begin your transformation!
Estimated Time Needed: Two full days (allowing for drying times)
Follow these detailed steps to craft your stunning concrete fireplace:
1. Remove the Fireplace Insert and Mantel
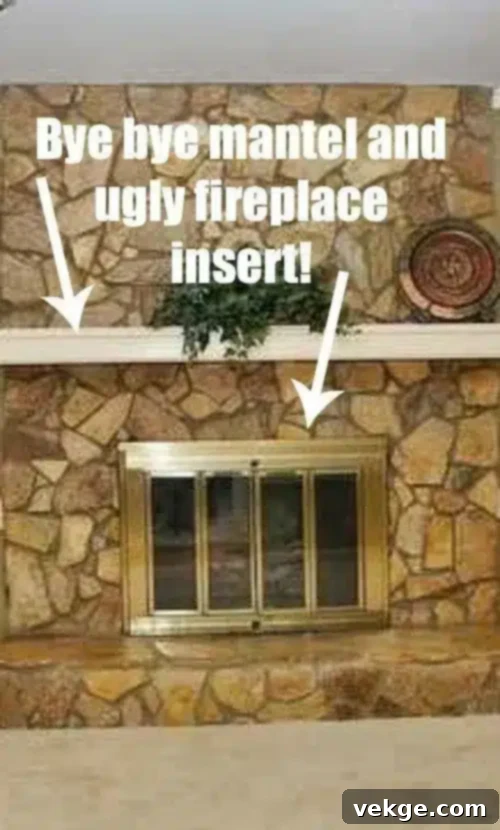
The first step is to carefully remove any existing, outdated fireplace inserts, mantels, or hearth extensions. This process essentially “clears the canvas,” providing you with a clean, flat, and safe base to begin your concrete overlay. Take your time to detach these components without causing unnecessary damage to the surrounding structure, ensuring a smooth transition to the next stage of your renovation.
2. Remove the Old Facade (if Needed)
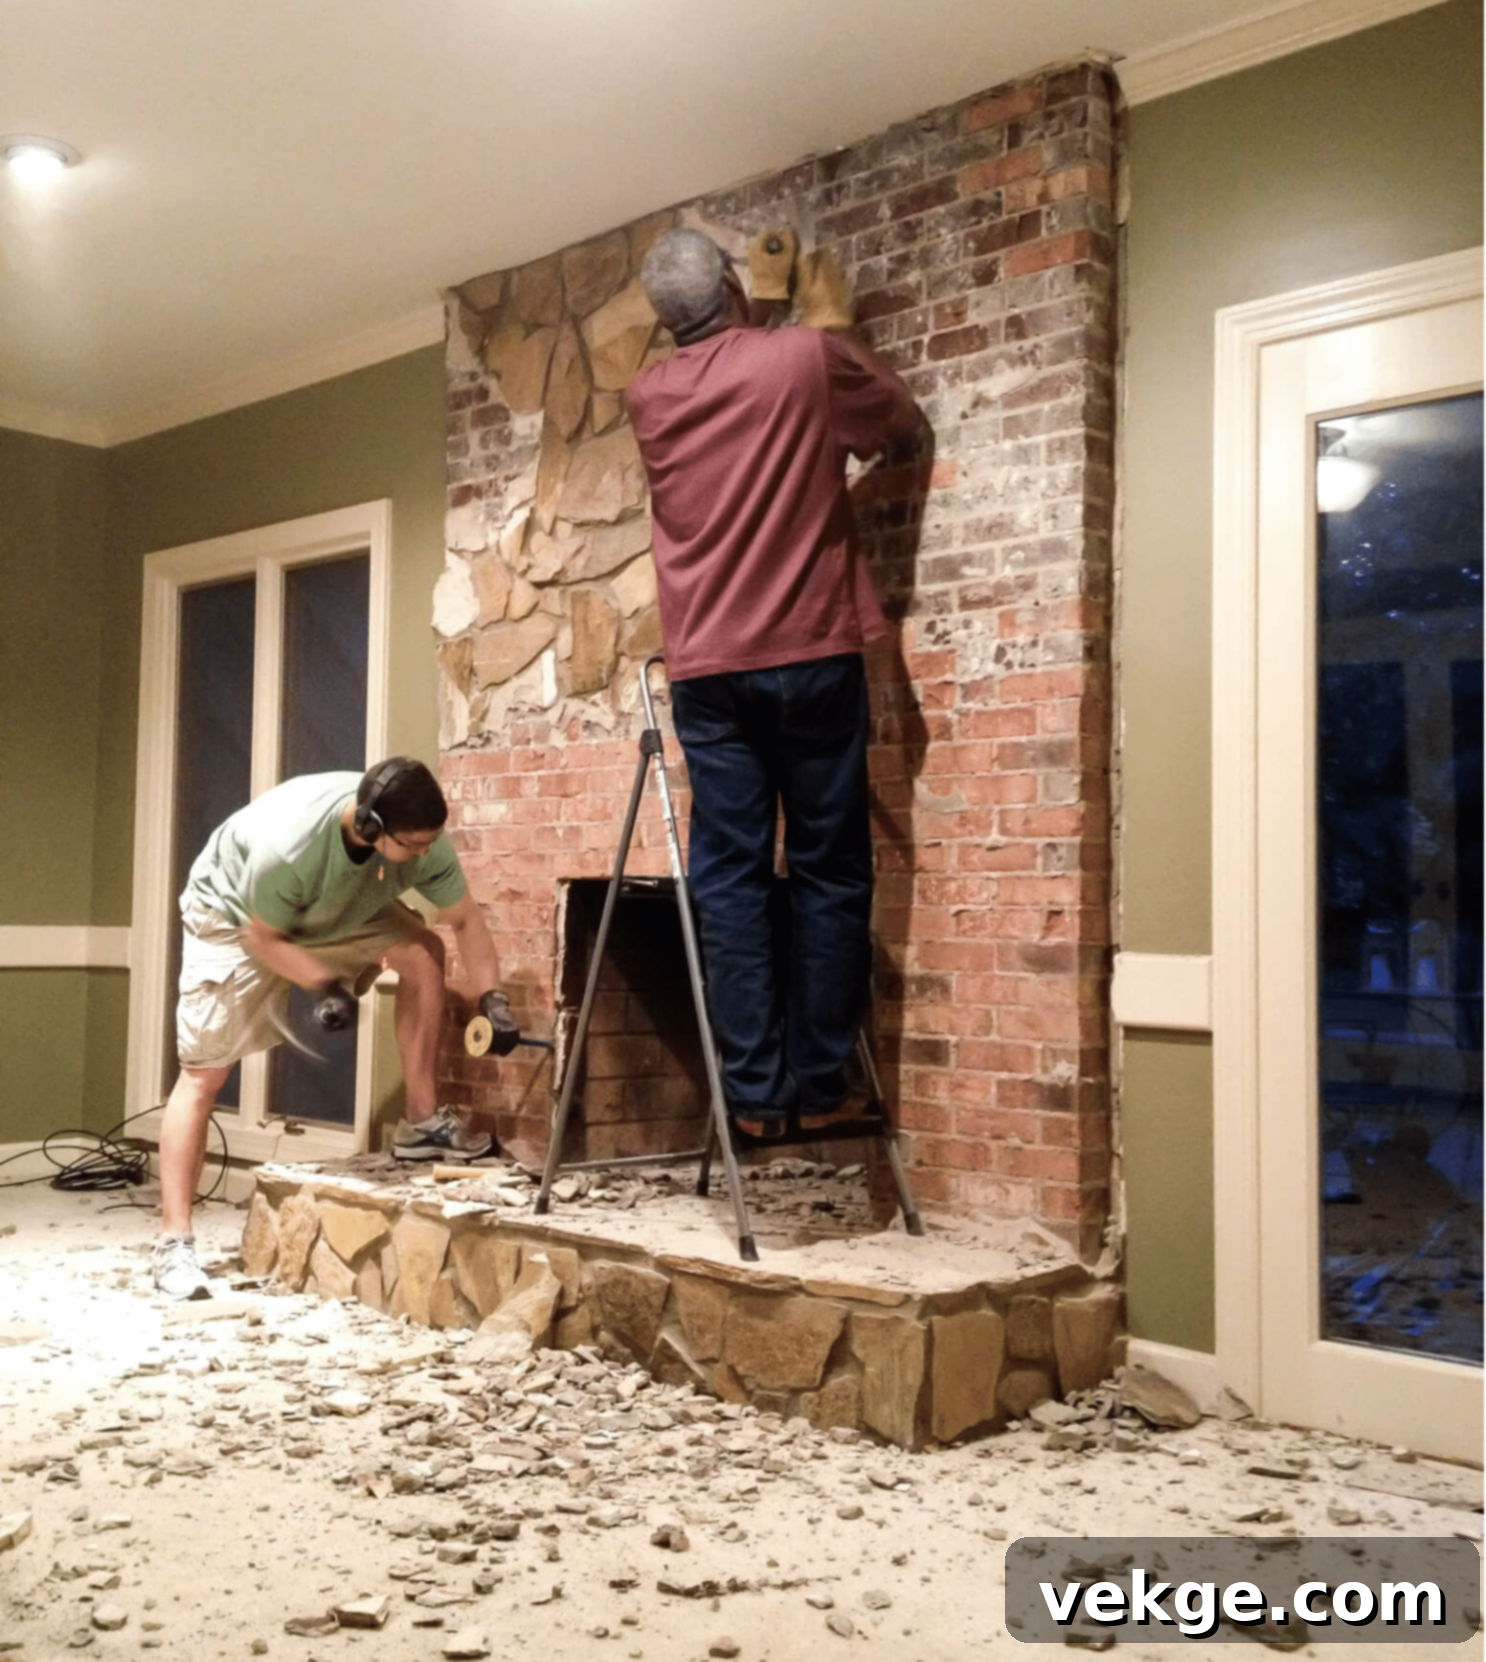
If your fireplace currently features an existing stone, tile, or other decorative covering that you wish to replace with concrete, this is the stage to remove it. A demolition hammer is highly recommended for its efficiency and power compared to a traditional chisel and hammer, particularly for breaking up stubborn stone or mortar. Work carefully and methodically, wearing appropriate safety gear (gloves, eye protection, and a dust mask), to uncover the solid brick structure underneath. This brick base will serve as the strong foundation for your new cement board and concrete finish.
Note: During our renovation, we seized the opportunity to add a hidden electrical outlet behind our television for a cleaner look. If you plan to incorporate any electrical work, always consult and hire a certified electrician to ensure safety and compliance with local codes.
3. Attach Cement Board for a Durable Base
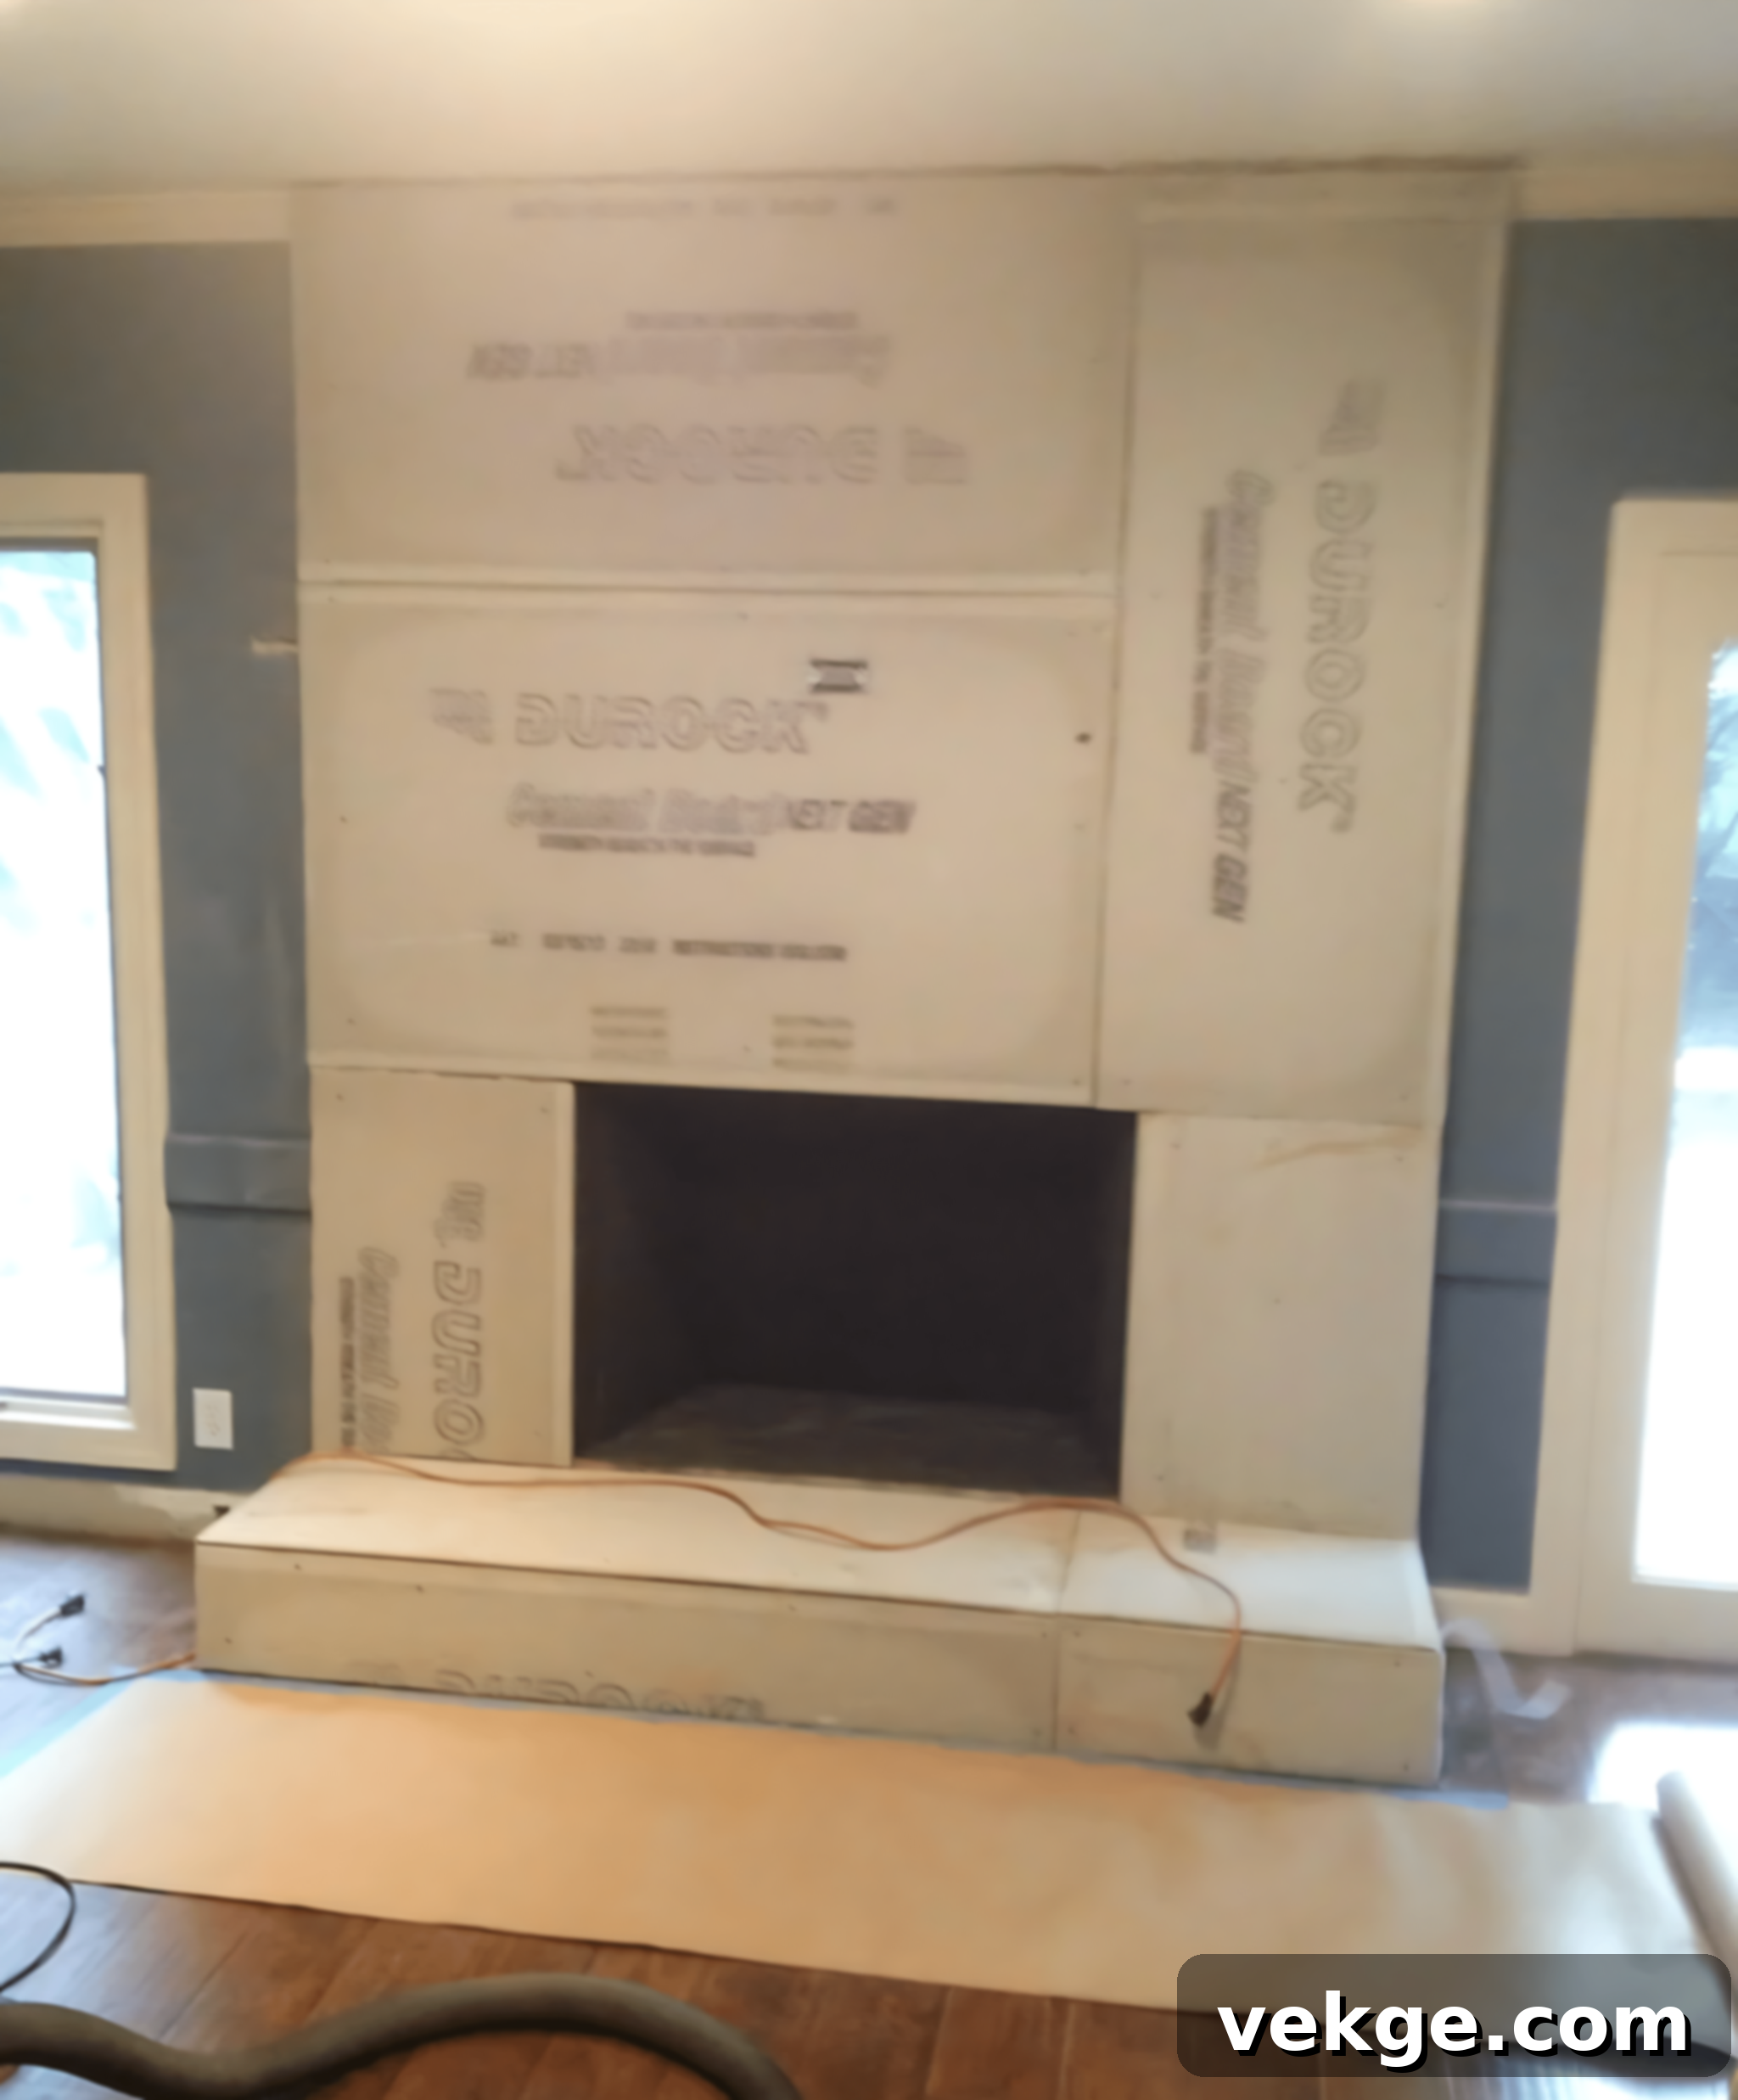
Once your brick base is exposed and cleaned, it’s time to attach the cement board. This material is crucial because it provides a stable, heat-resistant, and ideal surface for the Ardex Feather Finish to adhere to, ensuring a long-lasting and crack-free concrete facade. When attaching the cement board to the brick, it’s imperative to use a powerful electric drill (a corded model is often superior to battery-powered for consistent torque) equipped with specialized masonry drill bits and appropriate masonry screws. Ensure the boards are tightly secured and flush against the brick. After the cement board is firmly in place, apply self-adhesive mesh tape over all the seams and joints. This fiberglass tape acts as a critical reinforcement, preventing potential cracks from forming in your concrete finish over time.
4. Apply the Concrete Finish (Ardex Feather Finish)
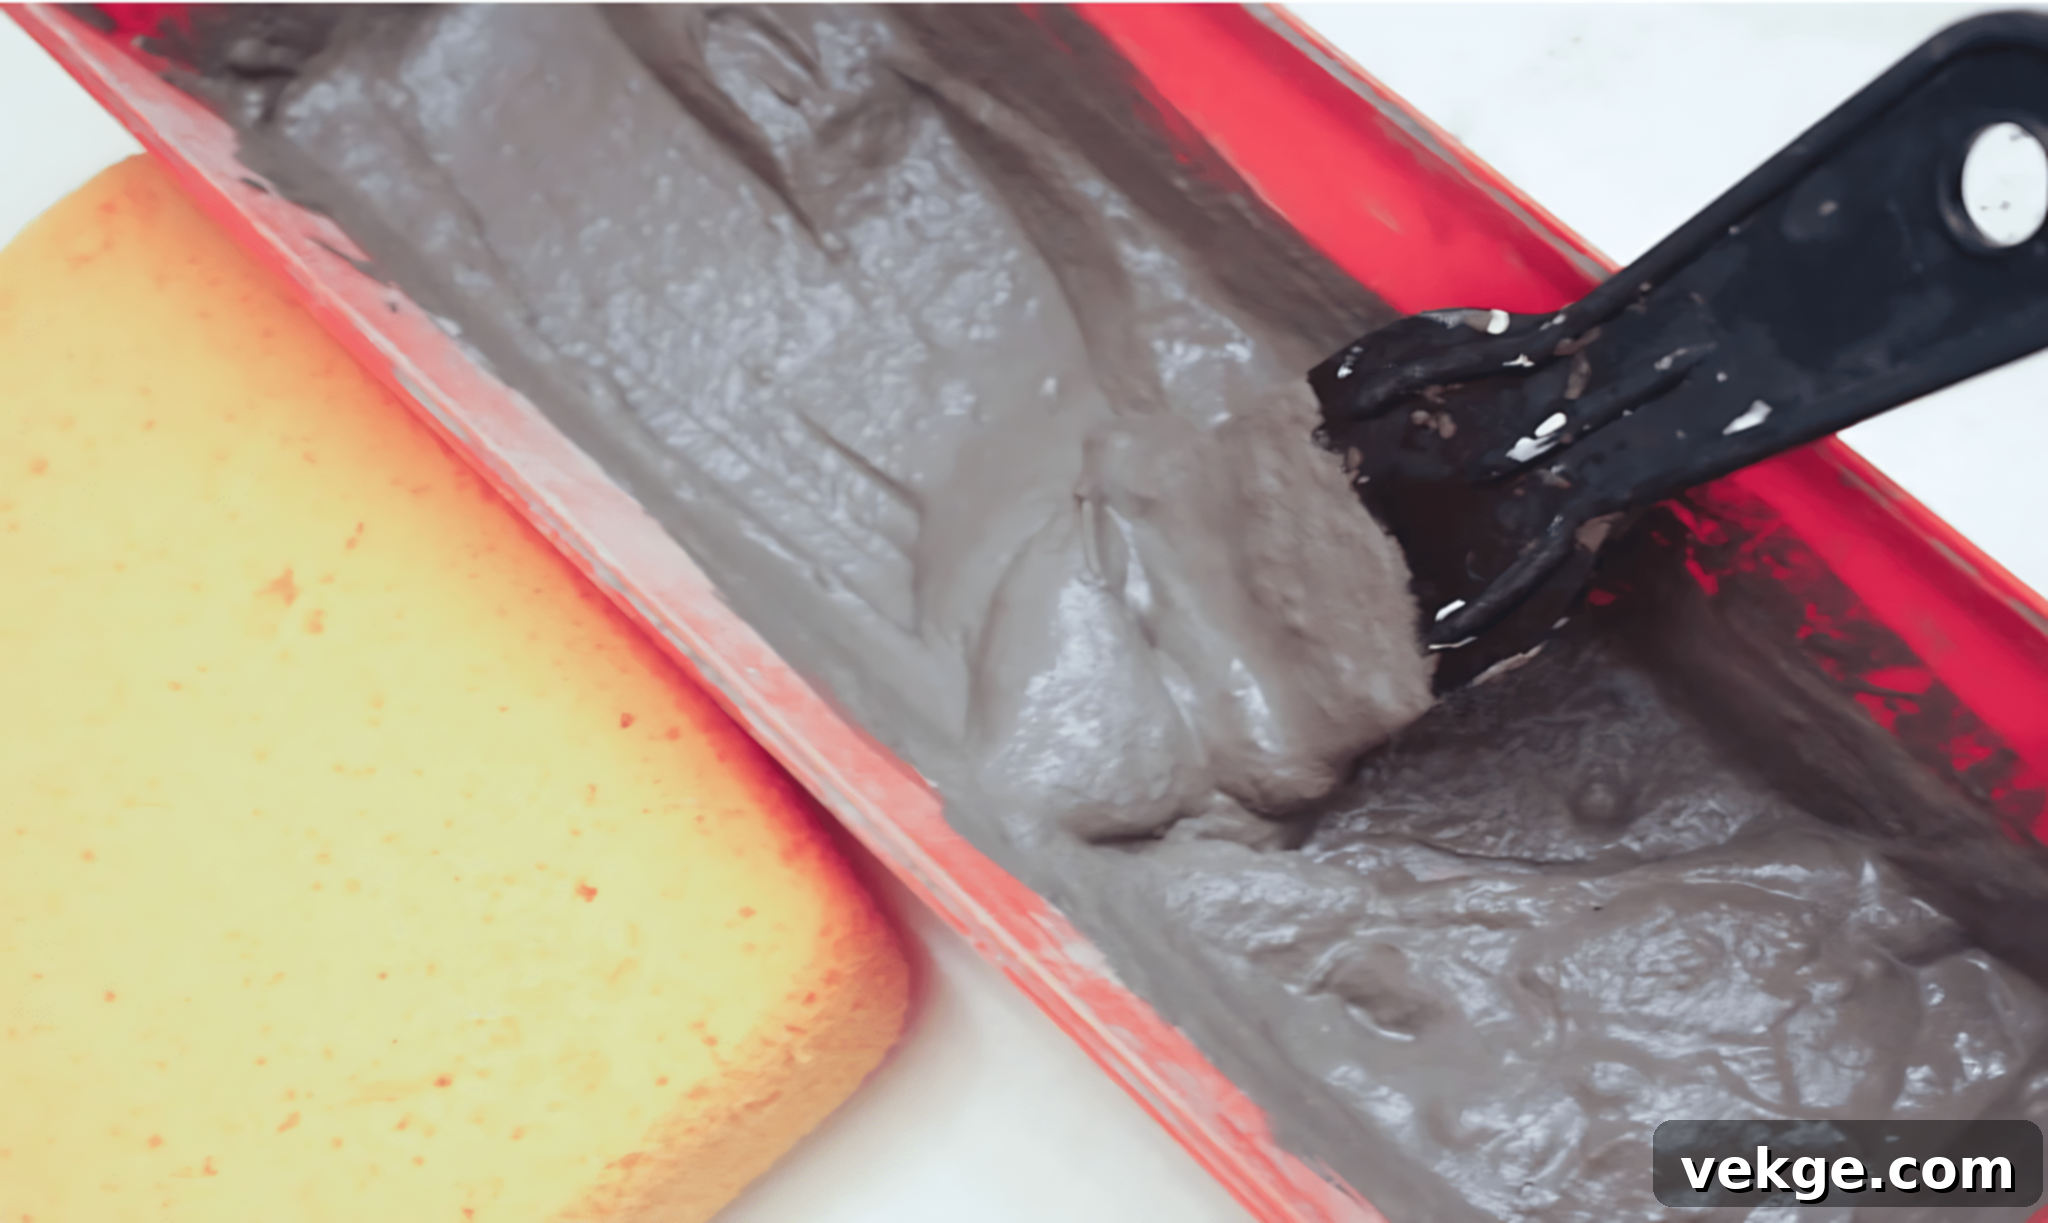
This step brings your vision to life. Begin by mixing your Ardex Feather Finish with water in a 5-gallon bucket until it reaches a consistency similar to thin pancake batter – smooth, pourable, but not watery. Use the drill attachment mixer for a thorough and lump-free blend. Let the mixture sit for approximately 5 minutes (this allows the polymers to activate), then mix it again briefly. The key to a professional finish is applying thin, even layers.
Using your 12-inch drywall knife (or trowel), start by applying a very thin layer of the mixture to all the mesh-taped seams to completely embed and cover them. Once the seams are addressed, proceed to apply thin coats across the entire cement board surface. For corners and edges, your fingers can be surprisingly effective for smooth, controlled application. The magic happens with multiple coats: aim for 4-5 very thin layers, allowing each coat to dry completely to the touch before applying the next. As you build up the layers, the seams will progressively disappear, and you’ll achieve a beautifully smooth, uniform concrete appearance. Patience during the drying process is paramount for a durable and flawless result.
5. Optional: Sanding and Sealing for Your Desired Look
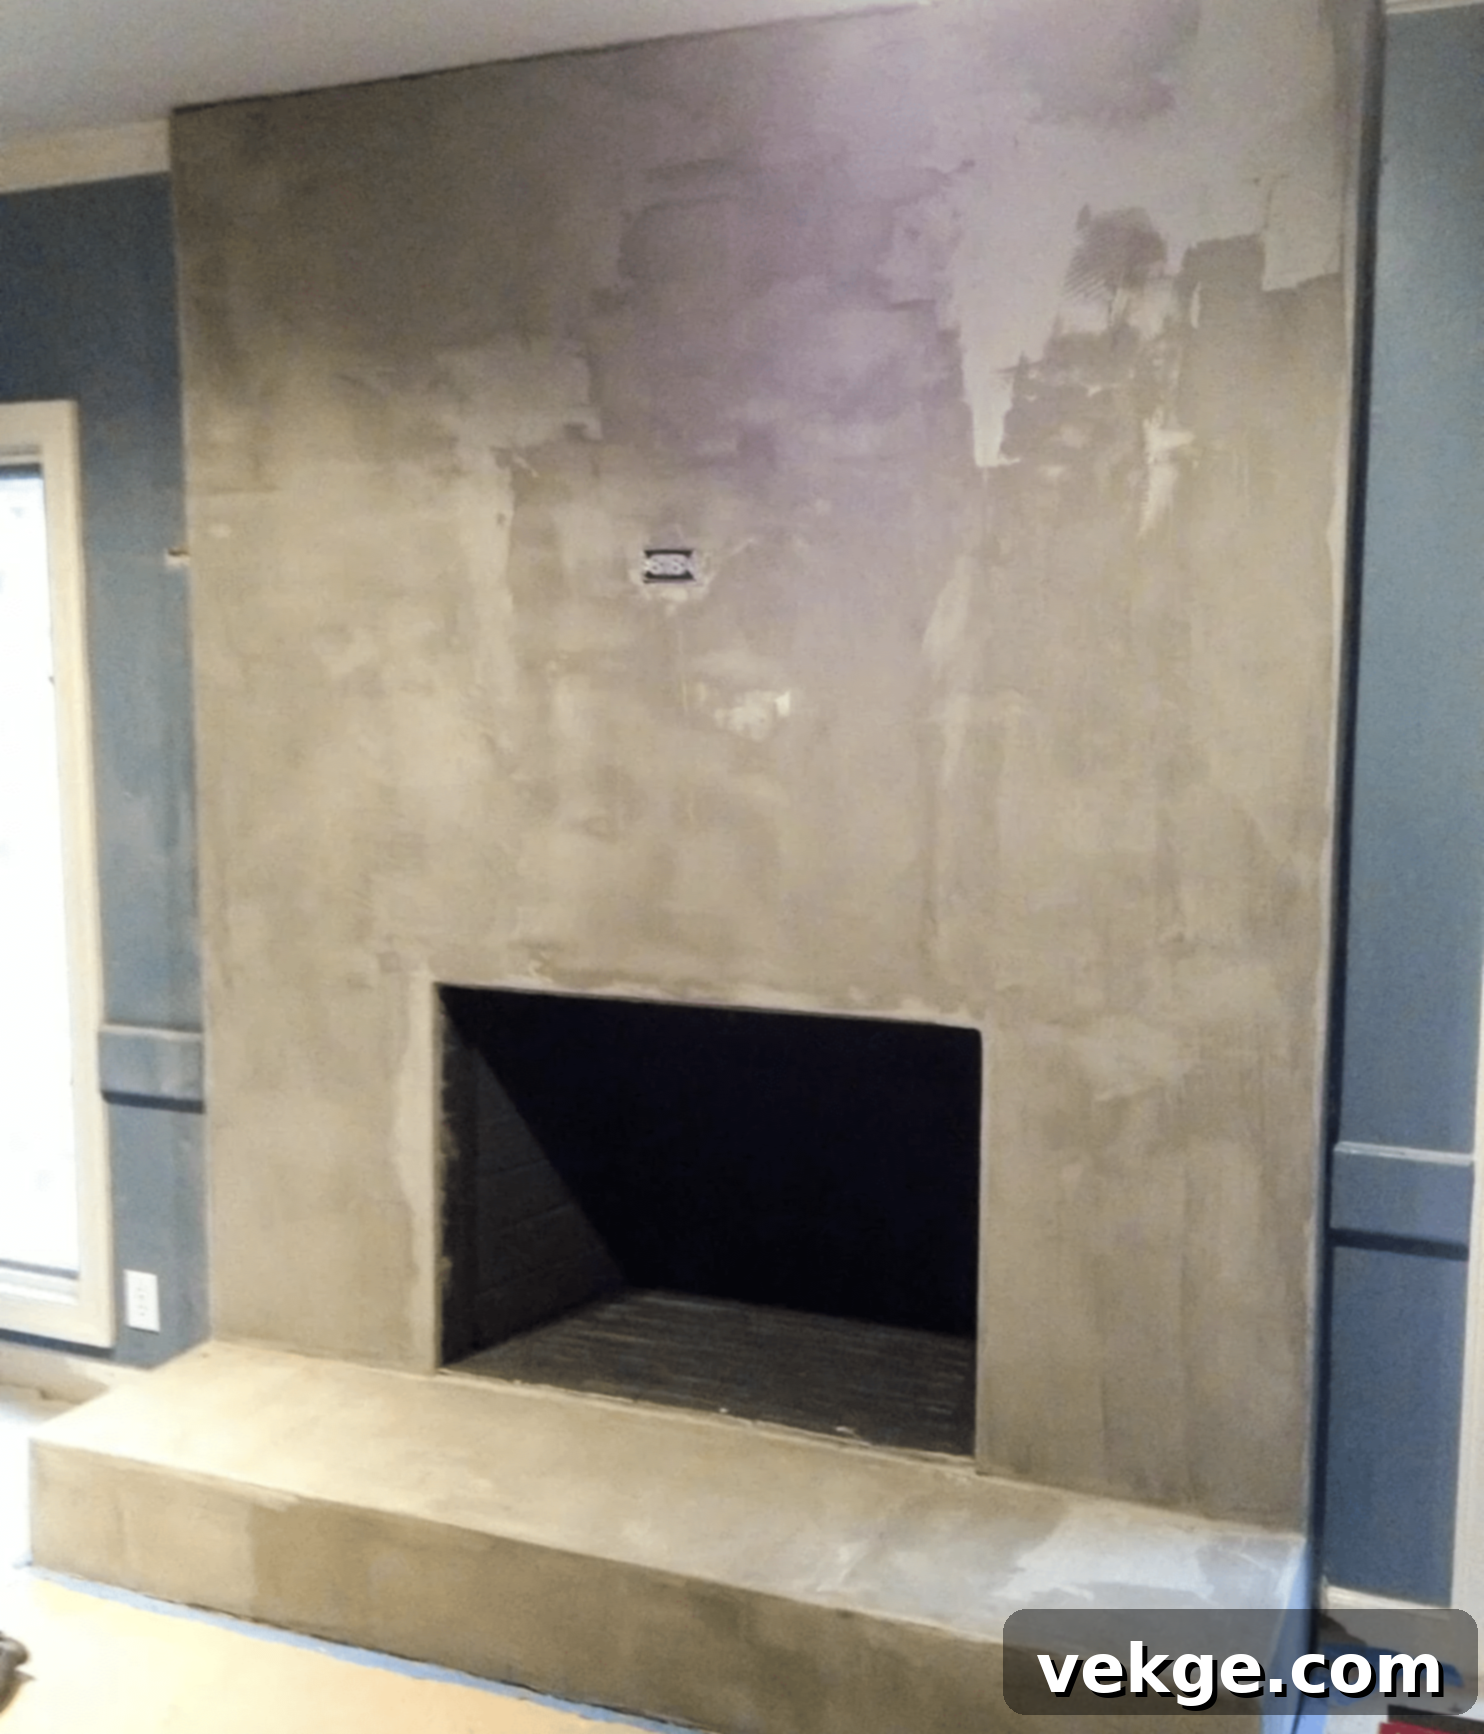
Once all your concrete layers are dry, you have a couple of optional decisions to make regarding the final finish. We personally opted to skip sanding. Sanding can be incredibly messy, generating a fine dust that permeates everything, and it’s often unnecessary if you appreciate the authentic, slightly textured “hand-troweled” look that the Ardex Feather Finish naturally provides. This organic texture adds character and depth.
Similarly, we chose not to seal our concrete. However, if you desire a subtle sheen, enhanced protection against spills, or a surface that is easier to wipe clean, applying a concrete sealer is a great option. There are various types of sealers available, from matte to high-gloss, so choose one that aligns with your preferred aesthetic. And just like that, for less than $100, you’ve transformed your dated fireplace into a stunning, modern focal point!
Crucial Tips and Important Considerations for Success
Before you embark on your exciting DIY concrete fireplace project, keep these important tips and considerations in mind to ensure safety, efficiency, and a successful outcome:
- Prioritize Chimney Inspection: Safety comes first. Before starting any demolition or construction, have a certified professional inspect your chimney. They can confirm its structural integrity, identify any potential hazards, and ensure it’s safe to work on. Never assume; always verify.
- Consistency is Absolutely Crucial: When mixing your Ardex Feather Finish, achieving the right consistency—like thin pancake batter—is vital. Too thick, and it will be difficult to spread smoothly; too thin, and it might not adhere properly or provide adequate coverage. Use your drill mixer to ensure a perfectly smooth, lump-free blend every time.
- Master Thin Layer Application: Resist the urge to apply thick coats of concrete. Thin, even layers are the secret to a professional-looking finish. This technique not only promotes a smoother appearance but also helps prevent cracking, peeling, and uneven drying. Patience in this step will pay off immensely.
- Sanding is Truly Optional: As mentioned, skipping sanding can save a lot of mess and effort. If you appreciate the unique, organic, and slightly imperfect hand-troweled texture, embrace it! This artistic look is often preferred for a truly custom, artisanal concrete finish.
- Sealing Decisions and Preferences: Carefully consider whether to seal your concrete. While not strictly necessary for structural integrity, a quality concrete sealer can offer additional protection against stains, moisture, and general wear. It can also enhance the concrete’s color and provide a desired sheen, from matte to glossy. Research sealers and choose one that matches your lifestyle and aesthetic goals.
- Patience Pays Off in Spades: This project isn’t a race. Allow each layer of concrete to dry completely before applying the next. Rushing the drying process can lead to issues like cracking, uneven finishes, or poor adhesion. Check the manufacturer’s recommendations for drying times and adjust based on humidity levels.
- Practice Makes Perfect (or at least better!): If you’re new to working with concrete or troweling techniques, consider practicing on a small, inconspicuous scrap piece of cement board first. This allows you to get a feel for the material, its consistency, and the application tools before tackling your main fireplace, building your confidence.
- Ensure Good Ventilation: Mixing and applying cement-based products can create dust and fumes. Work in a well-ventilated area, and always wear a high-quality dust mask and safety glasses to protect your respiratory system and eyes.
- Clean Tools Promptly: Concrete and cement products set quickly. Clean your tools (drywall knives, mixing paddle, buckets) immediately after use with water. This prevents dried material from hardening and making them unusable for subsequent coats or future projects.
The Stunning Final Result: A Modern Masterpiece

The transformation achieved through this do-it-yourself concrete method is nothing short of impressive. The dated facade has been replaced with a contemporary, sleek design, featuring clean lines and a beautifully smooth finish that immediately commands attention. This concrete fireplace now serves as a powerful and elegant focal point within the family room, reflecting a sophisticated and modern aesthetic.
To further complement this stunning renovation, a custom-built DIY metal sliding barn door fireplace screen has been integrated. This additional element not only provides practical safety but also significantly enhances the fireplace’s modern industrial charm, contributing to a cohesive and incredibly stylish look that homeowners will undoubtedly adore and visitors will admire.
Before and After: A Dramatic Visual Comparison
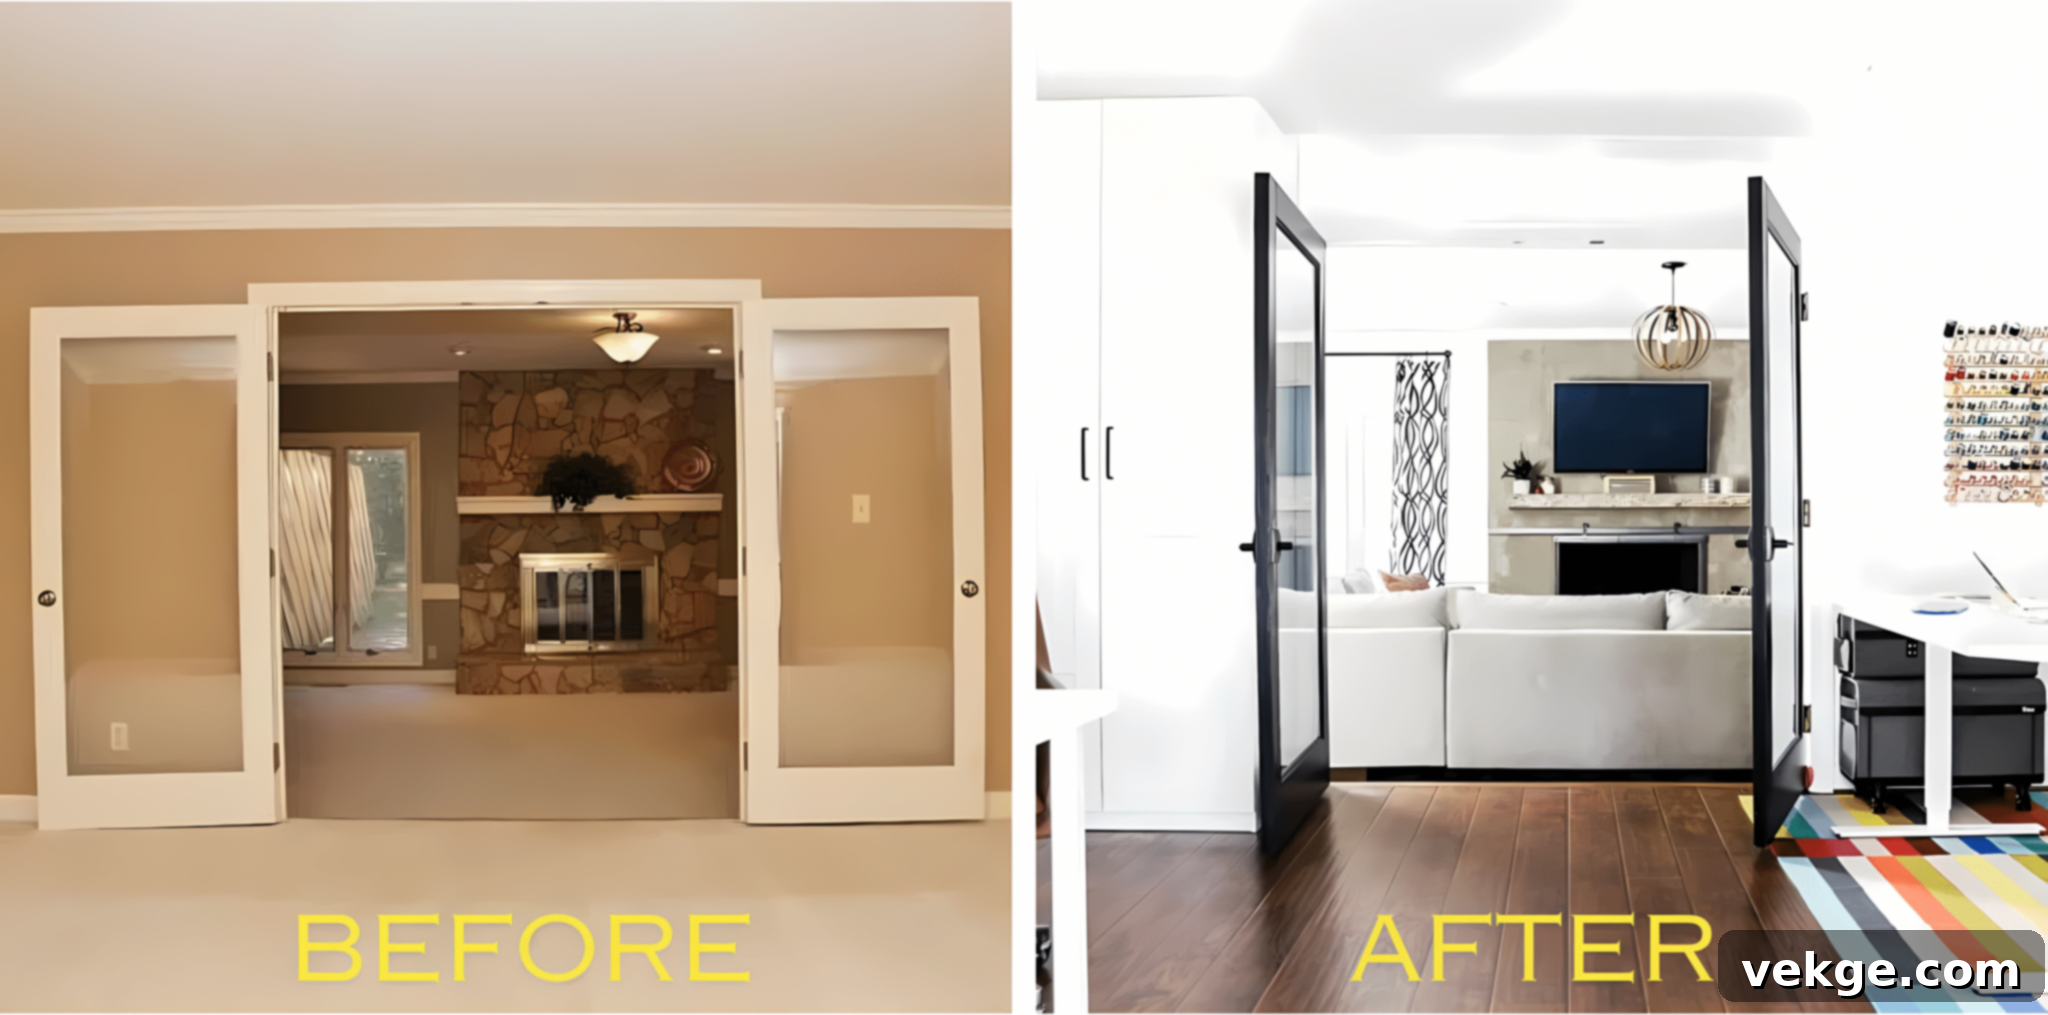
The visual impact of this transformation is truly remarkable. The previous stone veneer fireplace, which had grown outdated and heavy in appearance, has been completely revitalized and reimagined. It now stands as a testament to modern design, showcasing the incredible potential of a concrete finish. This upgrade goes beyond mere aesthetics; it has profoundly impacted the overall ambiance and refreshed the entire appearance of the living space. The “before and after” pictures vividly illustrate how a strategic DIY project can dramatically elevate a home’s style and perceived value.
Conclusion: Your Dream Concrete Fireplace Awaits
Transforming your fireplace with a concrete finish is an incredibly rewarding DIY project that delivers stunning, professional-looking results on an accessible budget. By diligently following this comprehensive guide, you are empowered to create a modern, sleek concrete fireplace that not only becomes the undeniable centerpiece of your room but also reflects your personal style and craftsmanship.
Throughout the process, remember to prioritize safety above all else; a professional chimney inspection before you begin is non-negotiable. Approach each step with patience and meticulous attention to detail, especially when mixing and applying the concrete layers. The secret to a successful and long-lasting finish truly lies in consistency, careful application, and allowing adequate drying time between coats.
While the initial prospect of a DIY renovation might seem daunting, the immense satisfaction derived from creating such a significant home improvement with your own hands is immeasurable. Your new concrete fireplace will not only update and modernize your living space but will also stand as a proud testament to your DIY skills and vision. So, gather your materials, confidently roll up your sleeves, and prepare to enjoy the enduring beauty and sophistication of a magnificently transformed concrete fireplace that you brought to life.
