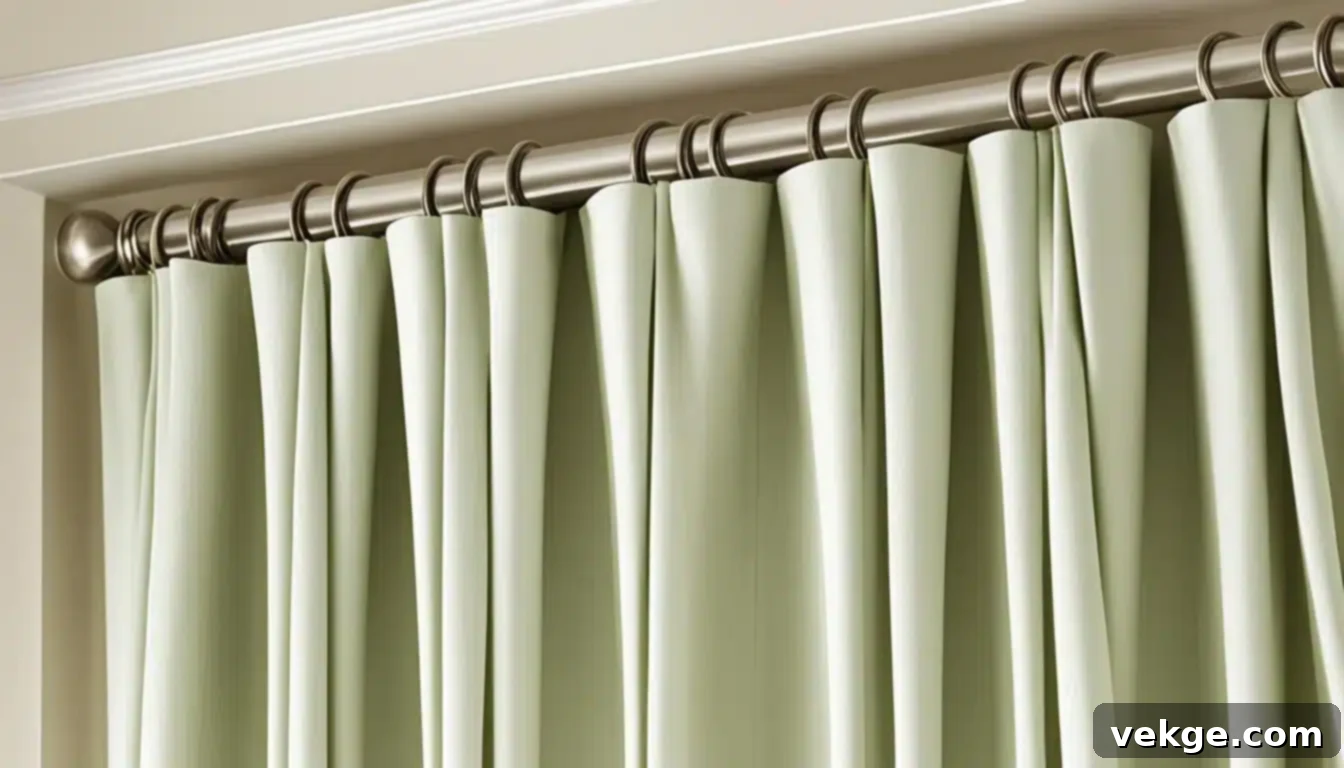
DIY Pleated Curtains: Transform Your Windows with Style & Elegance
Are you tired of bland, lifeless window treatments that fail to enhance your living spaces? Many homeowners struggle with flat, uninspired curtains that offer little in terms of aesthetic appeal or functional depth. These ordinary panels often look dull, doing little to improve a room’s atmosphere and sometimes even detracting from its overall design.
But there’s a simple, yet incredibly effective solution that can change everything: pleated curtains. Pleated curtains are renowned for their ability to add depth, texture, and a touch of luxurious sophistication to any window, instantly elevating the ambiance of your home.
This comprehensive guide will walk you through the entire process of creating beautiful, professional-looking pleated curtains, step by step. Whether you’re a seasoned crafter or a complete beginner, you’ll gain invaluable insights into how to measure, mark, and fold your fabric correctly, choose the ideal materials, and utilize basic tools to achieve stunning results. By the end of this tutorial, you will possess the skills and confidence to transform your windows, giving your home a fresh, polished, and custom-designed look that reflects your personal style.
What Exactly Are Curtain Pleats?
Curtain pleats are precisely formed folds in the fabric, meticulously sewn or otherwise attached to create a structured, neat, and highly aesthetic appearance. These elegant folds serve both crucial practical functions and significant decorative purposes in modern curtain design. From a practical standpoint, pleats are essential for distributing the curtain fabric evenly across the curtain rod or track, ensuring that your curtains open and close smoothly and gracefully without snagging or bunching unevenly. This even distribution also contributes to a more controlled drape, allowing the fabric to fall beautifully.
Decoratively, pleats are what transform a simple piece of fabric into a sophisticated window treatment. They add considerable depth, visual interest, and a sense of tailored craftsmanship to your curtains, making them look far more polished, luxurious, and well-made than flat panels. The defined structure of pleats allows curtains to maintain their shape, whether they are fully drawn closed or neatly stacked open, adding a refined architectural element to your room’s design.
Exploring the Various Types of Curtain Pleats
Understanding the different styles of pleats is key to choosing the right look for your home. Each type offers a unique aesthetic and can dramatically alter the feel of a room, from casually inviting to formally elegant. Here’s a closer look at the most popular curtain pleat styles:
Pinch Pleat Curtains
The Pinch Pleat is arguably the most classic and widely recognized curtain style, synonymous with traditional elegance. In this design, the curtain fabric is gathered and “pinched” together at the top, typically at regular intervals, and then sewn to create small, distinctive fan-like folds that flow downwards. These pleats can be single (one fold), double (two folds), or triple (three folds), with triple pinch pleats offering the fullest and most opulent look. Pinch pleats give curtains a formal, highly tailored, and sophisticated appearance, making them an excellent choice for prominent living rooms, formal dining areas, and master bedrooms where a refined and luxurious ambiance is desired. They work particularly well with heavier, more structured fabrics that can hold their shape.
Pencil Pleat Curtains
Pencil Pleats are characterized by their thin, closely spaced, and cylindrical folds that resemble a neat row of pencils standing upright. This style is incredibly versatile and straightforward to create, making it a highly popular and beginner-friendly option for DIY enthusiasts. Pencil pleats are often achieved using a special pleater tape with gathering strings that, when pulled, create the uniform folds. This style works beautifully with a wide range of fabric weights, from lighter linens and cottons to medium-weight polyesters, and can seamlessly complement both casual and semi-formal interior designs. They are a fantastic choice for bedrooms, studies, and family rooms where a soft, understated elegance is preferred.
Box Pleat Curtains
Box Pleats create a series of crisp, flat, and rectangular folds that run vertically down the curtain. This style offers a clean, architectural, and highly structured aesthetic, providing a modern and geometric look. The fabric is folded inwards on both sides of a central panel, creating a recessed pleat that adds volume without excessive gathering. Box pleats are particularly well-suited for contemporary or minimalist settings, as well as traditional environments that benefit from a disciplined and neat appearance. They are often utilized in offices, formal living areas, or any space where a sophisticated yet uncluttered design is paramount. Box pleats add significant fullness to curtains while maintaining a streamlined profile.
Goblet Pleat Curtains
Goblet Pleats are named for their distinctive shape, which elegantly resembles a wine glass or goblet. This luxurious style is achieved by pinching the fabric at the base of the pleat, while the top flares out gracefully, often stuffed lightly with wadding or interlining to help maintain its rounded shape. Goblet pleats are a hallmark of high-end, formal drapery and are frequently seen in grand homes, stately dining rooms, and opulent living areas. This elegant style works best with heavier, more substantial fabrics such as velvet, silk, or brocade, which allow the pleat to hold its voluminous form. Goblet pleats truly add an unparalleled touch of luxury and grandeur to your window treatments.
Pinch Pleat vs. Pencil Pleat Curtains: A Detailed Comparison
While both pinch and pencil pleats are popular choices for adding structure and style to curtains, they offer distinct aesthetics and are better suited for different applications. Understanding their key differences can help you make an informed decision for your home:
| Feature | Pinch Pleat | Pencil Pleat |
|---|---|---|
| Appearance | Defined, highly structured, and often wider folds, creating a fanned effect below the pinch. Offers a very tailored look. | Tighter, softer, and more numerous pleats resembling a line of pencils standing upright. Creates a gathered, uniformed look. |
| Formality | Generally considered more formal and traditional, ideal for sophisticated and elegant settings. | More casual and versatile, adaptable to a wider range of contemporary and informal spaces. |
| Installation | Typically requires specific drapery hooks inserted into the back of each pleat, which then hang onto curtain rings or a track. | Uses curtain hooks inserted into the back pockets of pleater tape, which then hang onto a track or pole. Gathering strings adjust fullness. |
| Fabric Usage | Requires significantly more fabric for fuller, more pronounced folds and a luxurious drape, typically 2.5 to 3 times the window width. | Requires less fabric compared to pinch pleats, often 1.5 to 2.5 times the window width, as the pleats are narrower and more closely spaced. |
| Style | Offers a traditional, elegant, and often opulent look, perfect for classic interiors. | Provides a versatile, adaptable, and understated look that can blend with various decor styles. |
| Ideal Setting | Best suited for formal living rooms, grand dining areas, master bedrooms, and high-ceilinged spaces. | Excellent for bedrooms, casual living areas, children’s rooms, kitchens, and studies where a softer look is desired. |
| Adjustability | Fixed pleats that are sewn in place, offering less adjustability once created. The fullness is set. | Easily adjustable. The fullness can be modified by pulling or releasing the gathering strings on the pleater tape. |
| Difficulty | More complex to make and hang due to the precise measuring and sewing required for each individual pleat. | Simpler to create and install, especially with pleater tape, making it a great option for DIY beginners. |
Why Choose Pleated Curtains for Your Home?
Curtain pleats offer a multitude of benefits that extend beyond mere aesthetics, making them a superior choice for enhancing almost any room in your home. Here’s why investing time in creating or choosing pleated curtains is a decision you won’t regret:
- Enhanced Fullness and Structure: Pleats are fundamentally designed to make curtains look significantly fuller, more voluminous, and impeccably put-together. Unlike flat panels that can hang limply, pleated curtains maintain their shape and structure, providing a rich, luxurious drape that adds instant visual weight and grandeur to your windows. This fullness also creates a sense of coziness and sophistication.
- Smooth and Even Operation: One of the most practical advantages of pleats is their role in ensuring curtains open and close smoothly and evenly. The structured folds prevent fabric from bunching awkwardly or snagging on the rod. This means your curtains will glide effortlessly along the track or pole, making daily use a pleasure and extending the lifespan of your hardware.
- Optimal Light and Privacy Control: The structured nature of pleated curtains allows for better control over light filtration and privacy. When closed, the pleats stack neatly and uniformly, minimizing gaps and maximizing coverage, which is essential for bedrooms or media rooms. When open, they gather elegantly, allowing ample natural light to flood the room without looking messy.
- Versatile Aesthetic Impact: Depending on the specific pleat style you choose, pleated curtains can dramatically alter the feel of a room. Formal pleats like pinch or goblet can make a space feel grander, more elegant, and traditional, while simpler pencil or box pleats can evoke a cozy, contemporary, or tailored atmosphere. This versatility allows you to fine-tune your room’s mood.
- Transformative Design Element: Overall, pleats elevate simple fabric into stylish, highly functional, and visually appealing window coverings. They are a statement piece that can tie a room together, adding texture, color, and architectural interest. Pleated curtains reflect attention to detail and a commitment to sophisticated interior design, making your home feel more intentional and luxurious.
Step-by-Step Tutorial: How to Pleat Your Own Curtains
Ready to transform your windows? This detailed tutorial offers two primary methods for creating pleated curtains: a simple no-sew approach perfect for beginners or those seeking a quick update, and a more traditional sewing method for a durable, custom finish. Choose the method that best suits your skills and resources.
Method 1: No-Sew Pleated Curtains (Easy & Quick!)
This method is ideal if you want beautiful pleated curtains without needing a sewing machine. It relies on clever use of pleater tape and iron-on adhesives.
Materials and Tools You’ll Need:
- Curtains or Fabric Panels: Ready-made curtains are perfect for this, or you can use fabric panels with finished edges.
- Pleater Tape (Iron-on/No-Sew variety): Look for tape designed for no-sew applications, often with heat-activated adhesive.
- Pleat Hooks: These are specifically designed to insert into pleater tape.
- Iron-on Adhesive (e.g., Hem Tape or Fabric Fuse Tape): Ensures a strong bond if your pleater tape isn’t already iron-on.
- Iron and Ironing Board: Essential for activating adhesives.
- Measuring Tape/Ruler: For accurate placement.
- Scissors: For cutting tape and fabric.
- Toothpick or Small Tool: Useful for opening the slits in pleater tape.
Step-by-Step Instructions:
-
Prepare the Curtain Panels
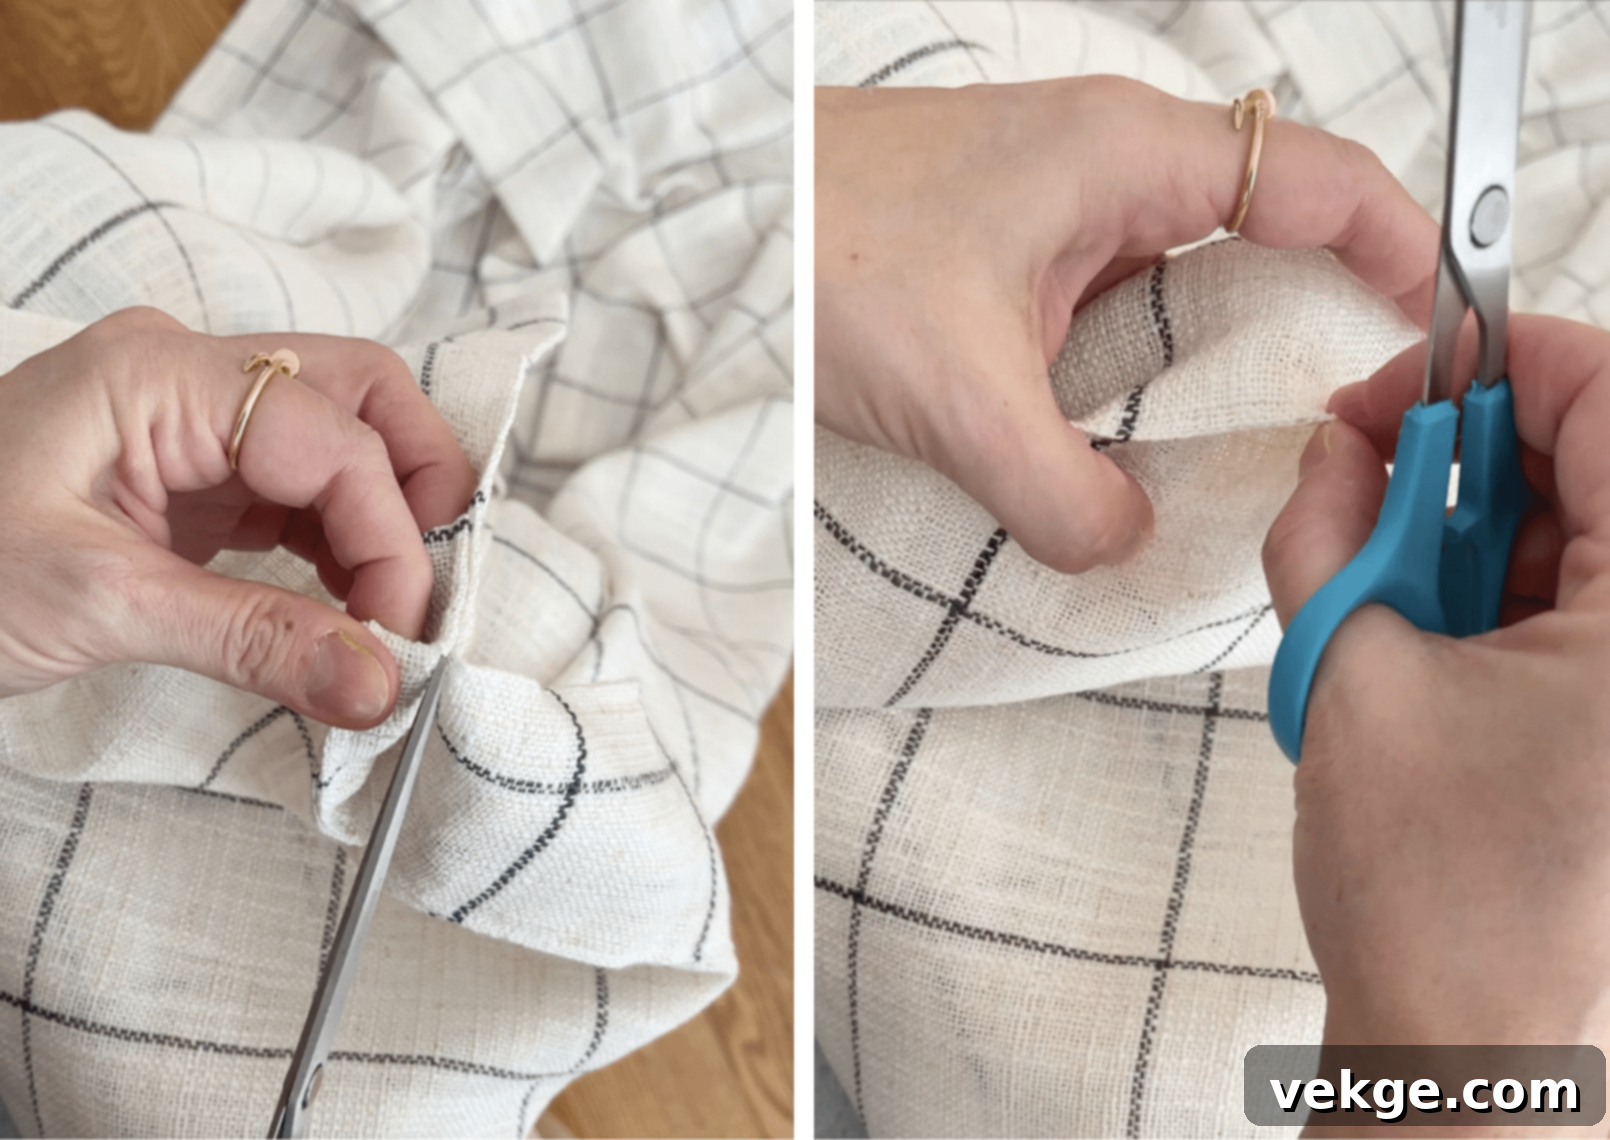
- First, if your ready-made curtains have any existing tabs, rings, or grommets that you don’t intend to use, carefully remove them. You want a clean, flat top edge.
- Lay your curtain panel flat on a clean, hard surface, such as your ironing board or a large table. Ensure it’s smooth and wrinkle-free for optimal tape application.
-
Attach Pleater Tape
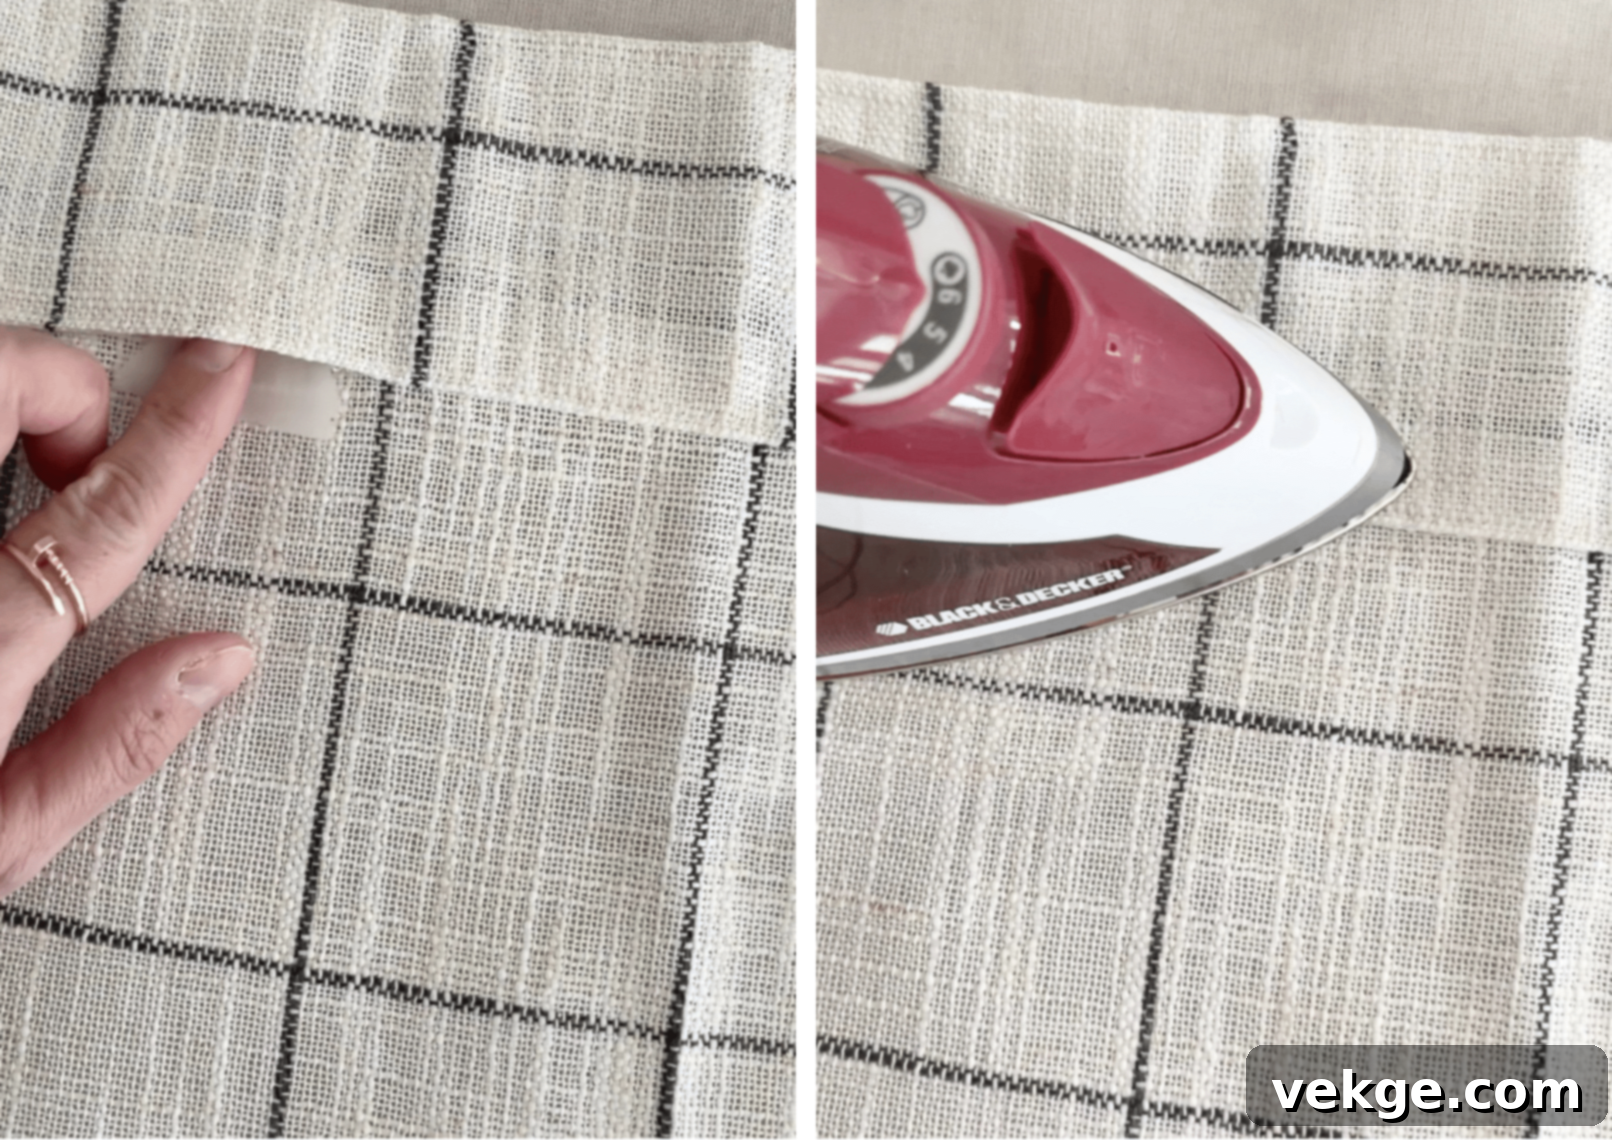
- Measure the top width of your curtain panel. Cut your iron-on adhesive tape to this exact length.
- Carefully place the adhesive tape along the very top edge on the backside of your curtain panel, ensuring it’s straight and even.
- Next, lay the pleater tape directly over the iron-on adhesive tape. The pleater tape should also align perfectly with the top edge of the curtain.
- For a clean, professional finish, you might want to fold the raw side edges of the pleater tape inward before ironing to prevent fraying.
- Following the manufacturer’s instructions for both your adhesive tape and pleater tape, press firmly with a warm iron. Move the iron slowly and steadily, applying even pressure to ensure a strong, secure bond across the entire length. Allow it to cool completely to set.
-
Insert Pleat Hooks
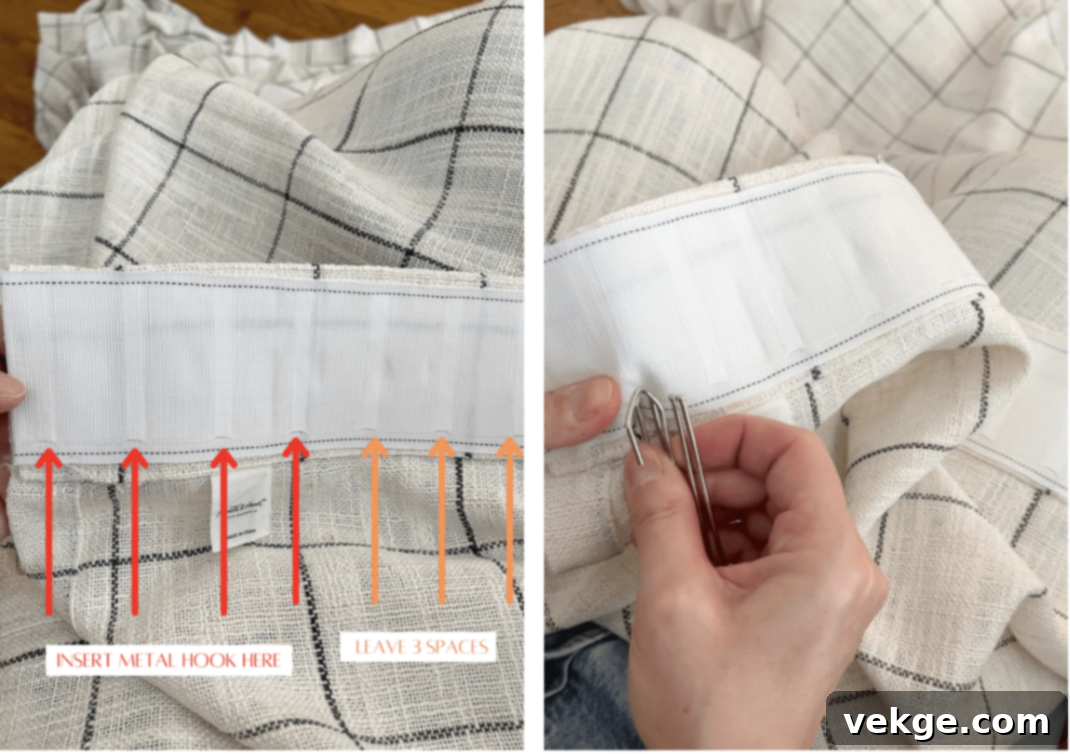
- The pleater tape will have small pockets or slits designed for hooks. Use a toothpick or another small, pointed tool to gently open these slits if they are closed.
- Begin inserting your pleat hooks into the designated pockets on the pleater tape. Start with the outermost pockets, and then work your way inward.
- The key to even pleats is consistent spacing. Experiment with placing hooks every 2-4 pockets (or as recommended by your pleater tape instructions) to achieve your desired fullness and pleat size. Adjust the spacing until the pleats look uniform and appealing.
-
Hang Curtains
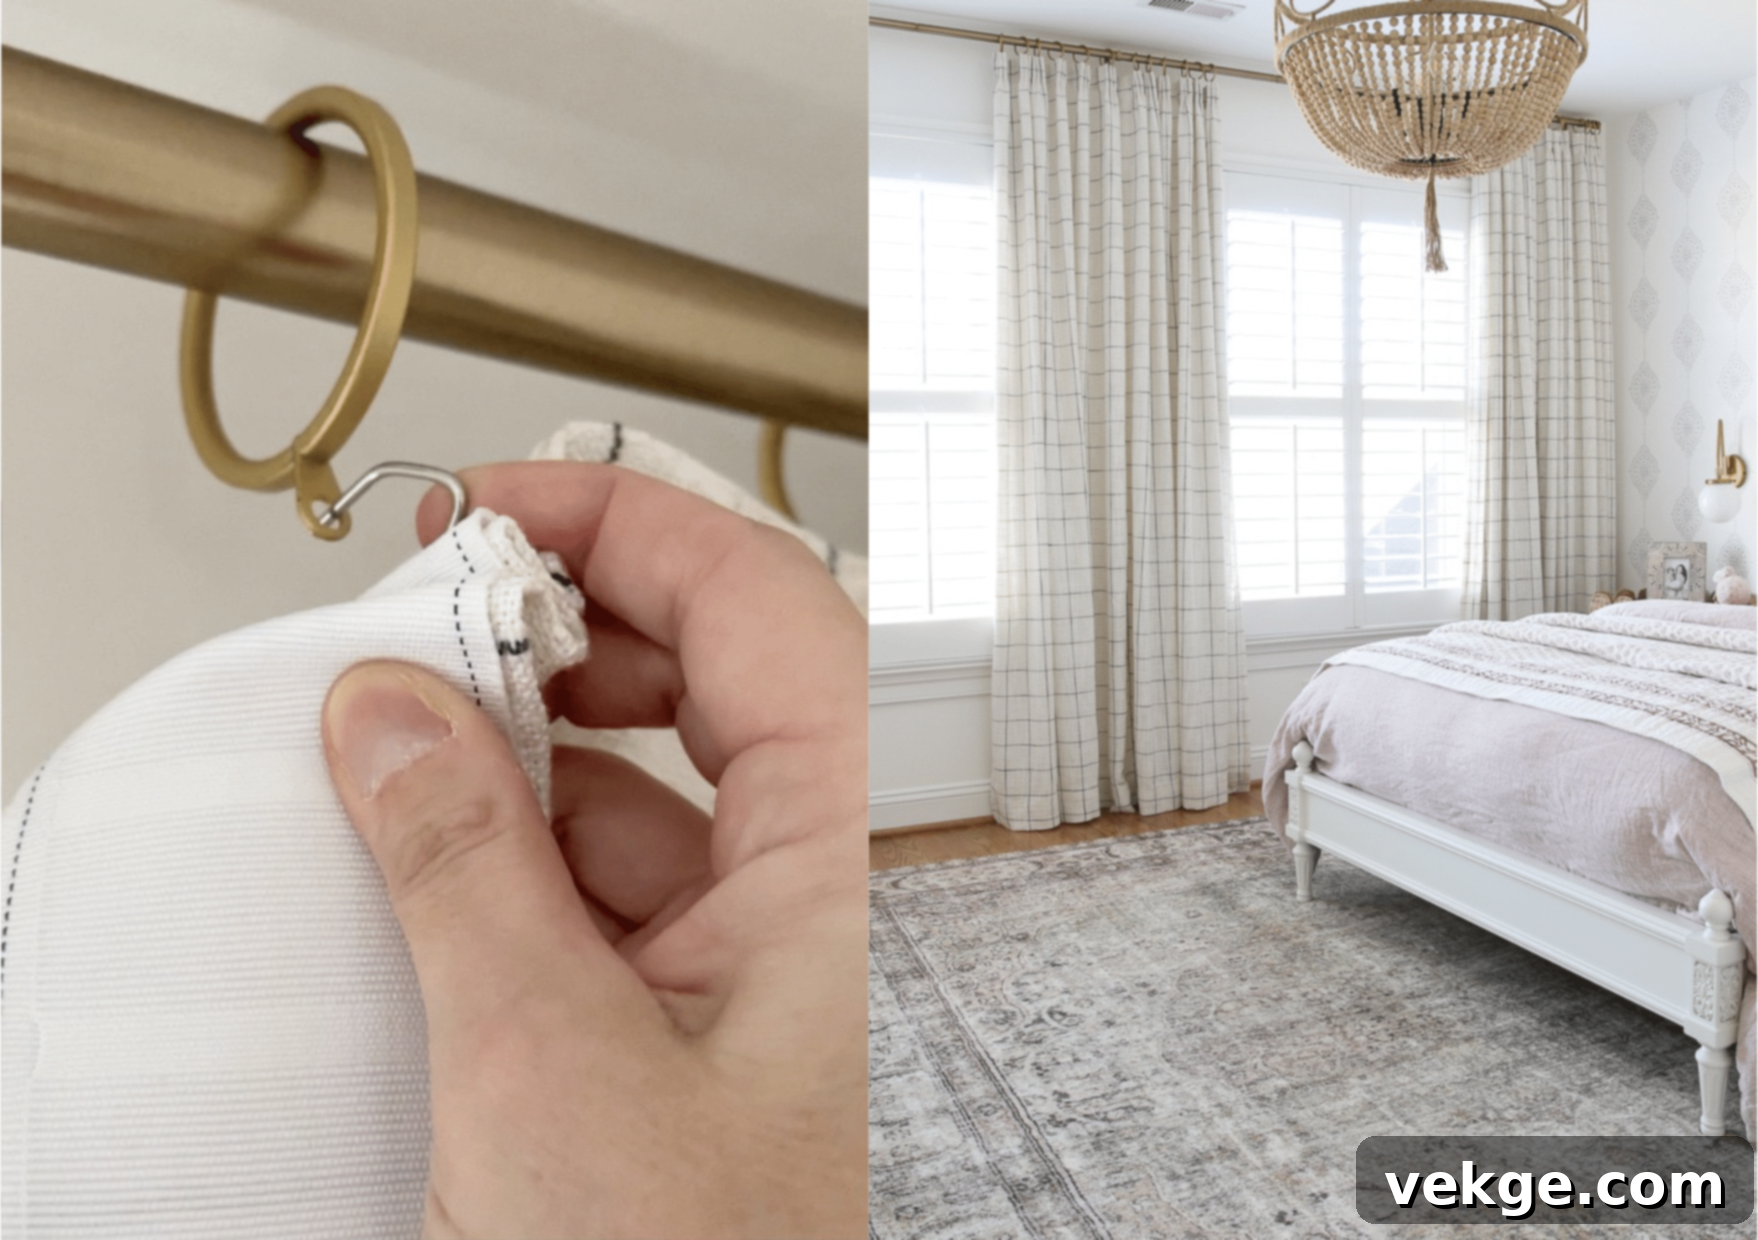
- Once all hooks are securely in place, carefully attach the pleat hooks to your curtain rod rings or directly onto your curtain track.
- After hanging, gently adjust the fabric between the hooks. “Train” your curtains by encouraging the fabric to fall into uniform pleats. You can lightly press the folds with your hands to define them. Allow the curtains to hang for a day or two to settle into their new shape.
No-Sew Tips and Tricks:
- Choosing the Right Pleater Tape: Not all pleater tapes are created equal. Select a high-quality tape that is specifically designed for no-sew applications and ensures it is compatible with the weight and type of your curtain fabric. Thicker fabrics may require stronger adhesive tape.
- Achieving Even Pleats: The secret to a professional-looking finish lies in consistent spacing of your hooks. Before permanently placing all hooks, do a test run. Hang the curtain with just a few hooks to eyeball the pleat size and spacing. Adjust as needed before inserting all hooks to ensure a balanced and harmonious look.
For more detailed visual instructions on a no-sew pinch pleat method, you can visit Stefana Silber’s DIY Pinch Pleat Drapes Guide.
Method 2: Sewing Pleated Curtains (Durable & Custom)
For a more permanent, custom, and exceptionally durable finish, sewing your pleated curtains is the way to go. This method offers greater control over the final look and is perfect for creating bespoke window treatments.
Materials You’ll Need:
- Curtain Fabric: Choose a fabric appropriate for your desired pleat style and room aesthetic.
- Drapery Lining (Optional but Recommended): Adds body, protects fabric, and enhances light control.
- Drapery Pleat Tape: This tape has pockets or loops for hooks and sometimes includes gathering strings.
- Drapery Hooks: Hooks designed to fit your pleat tape and curtain rod/track.
- Sewing Machine and Matching Thread: Essential for a strong, clean finish.
- Iron and Ironing Board: For pressing seams and hems.
- Measuring Tape, Ruler, Fabric Scissors, Pins: Standard sewing tools.
Step-by-Step Instructions:
-
Prepare Your Fabric
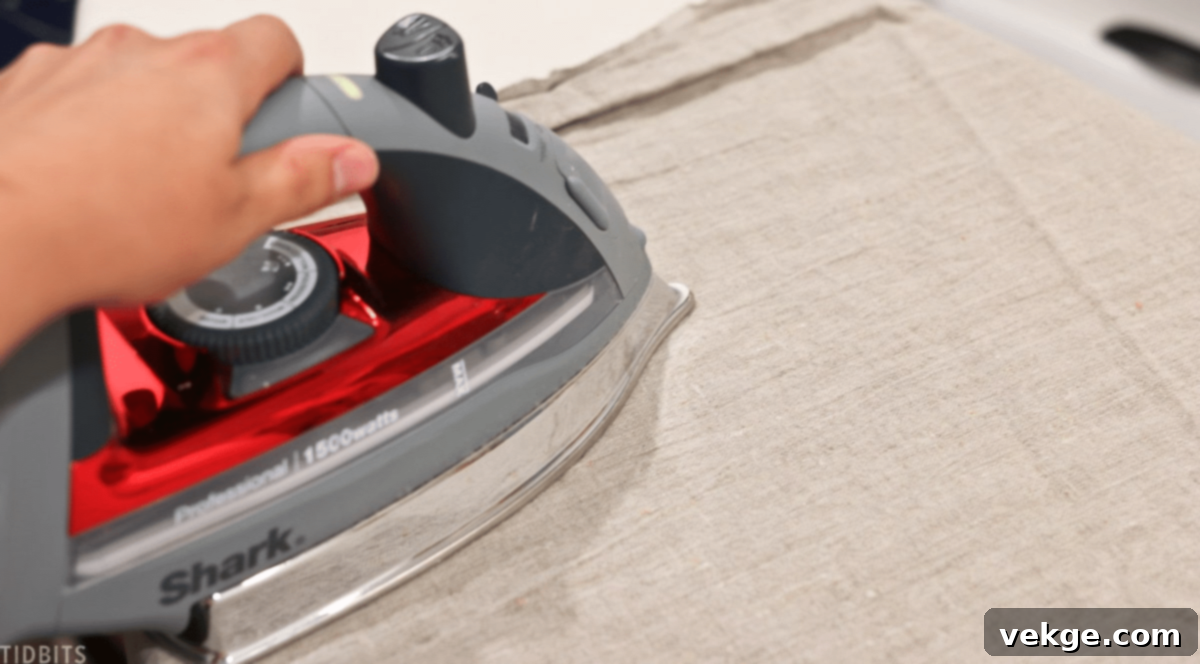
- Before cutting or sewing, it’s crucial to “pre-shrink” your fabric by washing it according to its care instructions. This prevents future shrinkage after your curtains are made.
- After washing, thoroughly press the fabric with an iron to remove all wrinkles and creases. A smooth, wrinkle-free fabric is much easier to work with and ensures precise measurements.
- Ensure the fabric is completely dry before proceeding to the next steps. Any moisture can affect measurements and sewing quality.
-
Hem the Sides and Top Edge
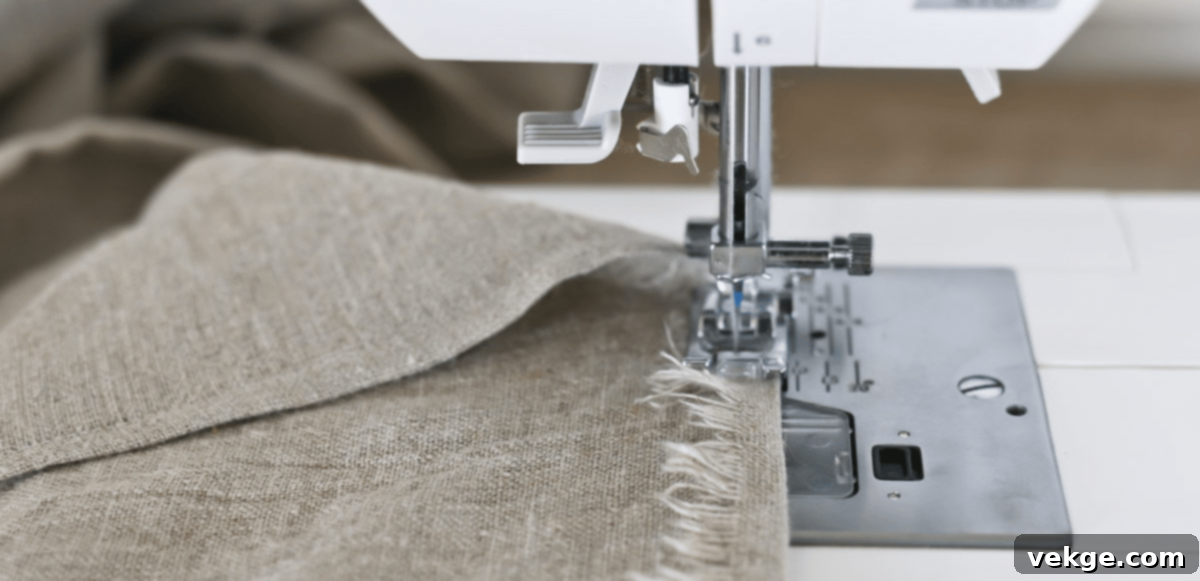
- Lay your fabric flat. First, fold the raw side edges of your curtain panel inward by about 1-1.5 inches (2.5-4 cm) twice, creating a double hem. Press these folds firmly with an iron to create crisp, clean edges.
- Using your sewing machine, sew along the inner folded edge to create neat and durable side hems.
- Next, fold the raw top edge of the fabric inward by about 2-4 inches (5-10 cm), depending on the width of your pleater tape and desired header depth. Press this fold.
- Sew along the lower edge of this fold to encase the raw edge, creating a clean and finished top for your curtain panel. This also provides a sturdy base for attaching the pleater tape.
-
Sew Pleater Tape in Place
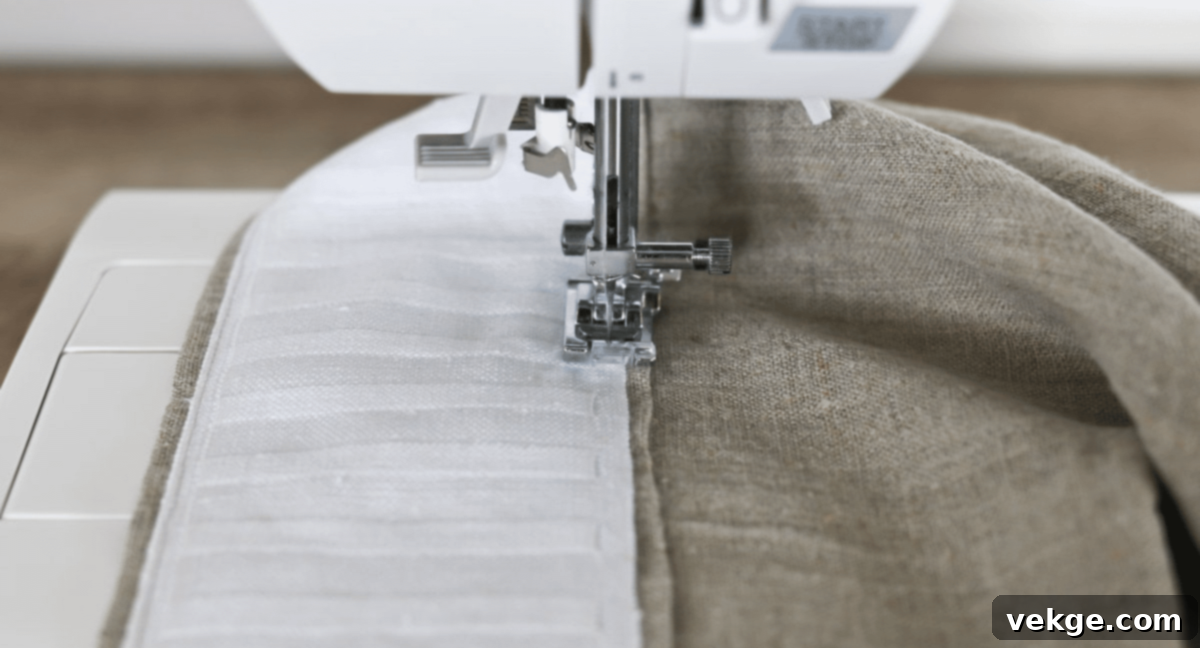
- Measure the exact width of your curtain panel. Cut your pleater tape to this length, adding an inch or two on each side if you plan to fold the ends under for a clean finish.
- Position the pleater tape along the top edge of the curtain panel, ensuring it is centered and straight. Pin the tape securely in place, making sure not to stretch the fabric.
- Using your sewing machine, sew the pleater tape to the curtain fabric. Typically, you’ll sew along the top and bottom edges of the tape, and sometimes down the middle if it has multiple channels. Ensure your stitches are straight and secure. Use a thread color that matches your fabric for a seamless look.
-
Insert Pleat Hooks
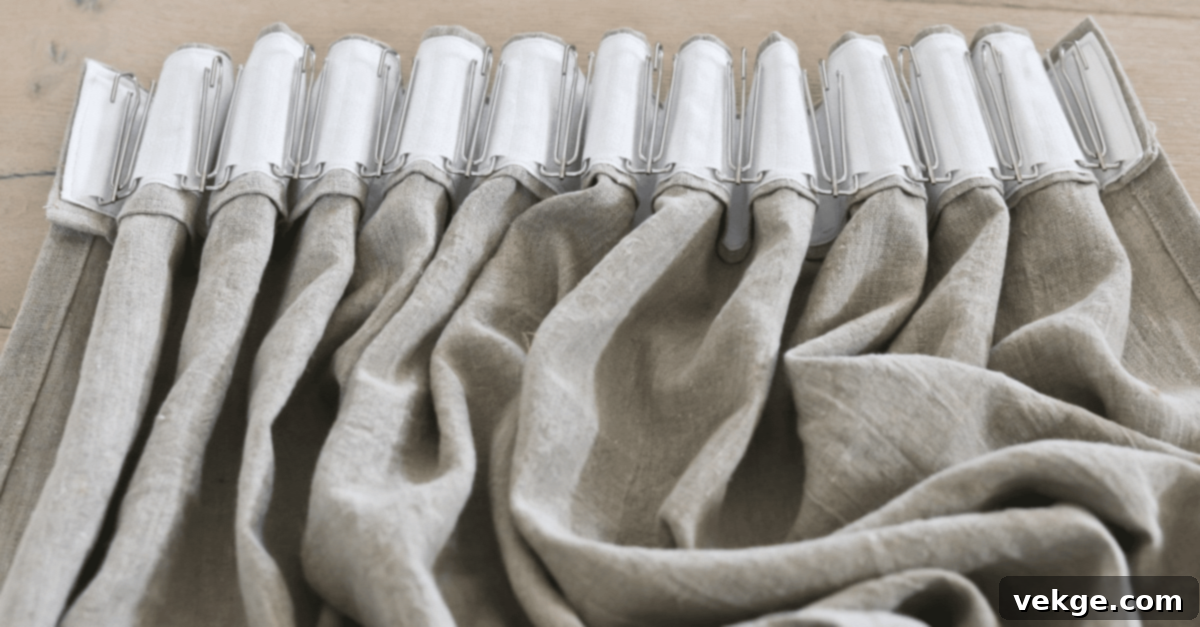
- Once the pleater tape is securely sewn, locate the designated pockets or marked areas on the tape where the pleat hooks are meant to be inserted.
- Begin inserting your drapery pleat hooks into these spots. For pencil pleats, pull the gathering strings on the tape to create the desired pleat fullness before inserting hooks into the gathered fabric. For other pleat types, simply insert the hooks according to the tape’s design.
- Crucially, ensure the hooks are evenly spaced across the entire width of your curtain. This uniformity is key to achieving consistent and attractive pleats.
-
Hang Your Beautiful Curtains
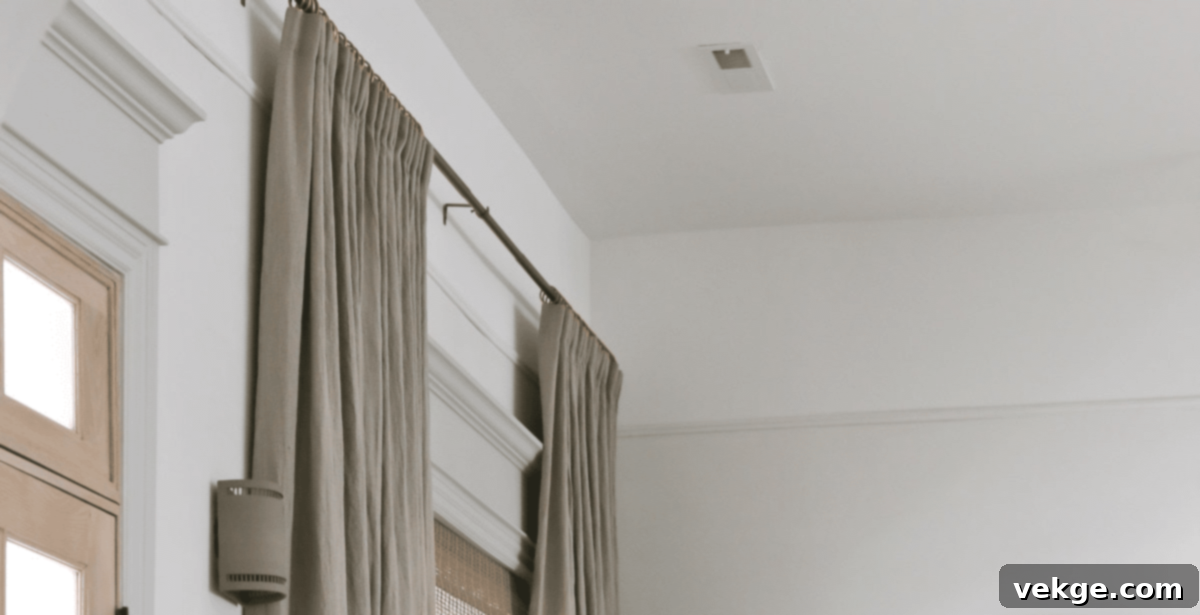
- With the hooks in place, carefully attach them to your curtain rod rings, curtain track gliders, or directly to the rod if it supports hooks.
- After hanging, take the time to “dress” your curtains. Gently adjust the fabric between each hook, guiding it into even, attractive pleats. You can use your hands to define the folds. Stand back and observe, making small adjustments until the pleats fall perfectly.
Sewing Tips for Professional Results:
- Thread Matching: Always use a high-quality thread color that perfectly matches or very closely blends with your curtain fabric. This ensures your stitches are invisible and the focus remains on the beautiful pleats.
- Patience and Precision: Take your time with each step, especially when measuring, pressing, and sewing. Rushing can lead to mistakes that are difficult to fix. Precision in these early stages guarantees a polished final product.
- Double-Check Measurements: Before making any cuts or permanent stitches, double-check all your measurements. It’s much easier to correct a measurement error before the fabric is cut or sewn.
By diligently following this guide, you can create custom pleated curtains that not only add a touch of sophisticated style to your windows but also reflect your craftsmanship. Remember, practice makes perfect, so don’t be discouraged if your first attempt isn’t absolutely flawless. Each project is a learning experience!
For more in-depth sewing instructions, particularly for pinch pleats, check out Tidbits & Cami’s tutorial.
Tips for Customizing Your Pleated Curtains
Pleated curtains offer an incredible canvas for personalization, allowing you to tailor your window treatments to perfectly match your home’s aesthetic and your practical needs. By thoughtfully selecting the right fabric, colors, patterns, and even layering techniques, you can create a truly bespoke look. Let’s explore some key considerations to help you customize your pleated curtains and make them uniquely yours.
Thoughtful Fabric Choices
The fabric you choose is arguably the most impactful decision, as it dictates the curtain’s drape, texture, light filtration, and overall mood:
- Light Fabrics for a Casual, Airy Look: If you desire a relaxed, breezy, and informal atmosphere, opt for lighter-weight fabrics. Thin cottons, delicate linens, or sheer materials like voile create an open, airy feel, allowing soft, diffused light to enter the room. These are perfect for casual spaces such as bedrooms, sunrooms, breakfast nooks, or coastal-themed interiors where natural light and an unpretentious charm are priorities. They tend to create softer, less structured pleats.
- Heavier Fabrics for a Formal, Luxurious Setting: For a more substantial, upscale, and formal appearance, gravitate towards heavier fabrics. Thick cotton sateen, plush velvet, elegant brocade, or rich faux silk will give your curtains a more opulent drape and a grander presence. These materials are excellent choices for formal living rooms, elegant dining areas, or master suites where you aim for a refined, luxurious, and stately look. Heavier fabrics hold their pleats crisply and offer better insulation and light blocking.
Considerations for Color and Pattern
The color and pattern of your curtains play a pivotal role in harmonizing with your room’s existing decor:
- Solid Colors: These are incredibly versatile and can effortlessly blend with a multitude of decor styles, from minimalist to traditional. Light, neutral colors (like cream, beige, or light grey) can make a room feel more spacious, open, and airy. Conversely, darker, richer shades (such as deep blues, emerald greens, or charcoal) can add a sense of intimacy, coziness, and dramatic depth, particularly effective in larger rooms.
- Patterns: Introducing patterns can add significant visual interest, texture, and personality to your windows. Consider classic stripes for a tailored look, delicate florals for a romantic touch, bold geometrics for a modern edge, or intricate damasks for traditional grandeur. When choosing a pattern, always consider the scale of your room: large, bold patterns tend to work best in spacious rooms to avoid overwhelming the space, while smaller, more subtle patterns are ideal for compact areas. Ensure the pattern complements rather than clashes with other patterns in the room.
- Matching vs. Contrasting: Decide whether you want your curtains to seamlessly blend into your existing color scheme or to stand out as a vibrant focal point. Matching your curtain color to your wall paint or major furniture pieces creates a unified, serene, and cohesive look. In contrast, choosing a contrasting color or a bold pattern can make a strong design statement, injecting energy and acting as a powerful accent in the room.
The Art of Layering Curtains
Layering your pleated curtains with other window treatments is a sophisticated technique to enhance both functionality and aesthetic appeal:
- Sheers with Pleated Curtains: This classic combination involves hanging sheer curtains underneath your pleated panels. Sheers provide a delicate, filtered light effect, offering daytime privacy while still allowing natural light to gently illuminate the room. The pleated curtains can then be drawn at night for full privacy and light blockage, offering a versatile and elegant solution for living rooms and bedrooms.
- Blackout with Pleated Curtains: For ultimate light control and privacy, especially in bedrooms or media rooms, layer blackout curtains behind your decorative pleated panels. This setup gives you the flexibility of having beautiful pleated curtains for style, coupled with the practical benefit of achieving total darkness when needed. It’s also excellent for insulation against heat and cold.
- Valances or Swags: Add a valance or a decorative swag above your pleated curtains for an extra layer of design sophistication. A valance can conceal hardware and add a finished, tailored look, particularly effective in formal dining rooms or living areas where you want to emphasize architectural details and a sense of completeness. This also offers an opportunity to introduce another coordinating fabric or trim.
By thoughtfully considering these aspects – fabric, color, pattern, and layering – you can meticulously craft custom pleated curtains that not only look spectacular but also perfectly fulfill your practical needs. Remember, the ultimate goal is to strike a harmonious balance between your unique personal style and the overarching design ethos of your room, creating a truly inviting and personalized living environment.
Common Mistakes to Avoid When Pleating Curtains
Embarking on a DIY curtain pleating project can be a highly rewarding experience, culminating in beautiful, bespoke window treatments. However, like any crafting endeavor, there are common pitfalls that can derail your efforts and lead to less-than-professional results. By being aware of these frequent errors, you can proactively avoid them and ensure your pleated curtains turn out looking polished, symmetrical, and perfectly tailored. Let’s delve into the key mistakes to watch out for throughout the pleating process.
Miscalculating Fabric Needs
One of the most frequent and frustrating errors is not purchasing enough fabric, which can halt your project or compromise the desired fullness. This often stems from underestimating the extra material required for pleats and finishing touches:
- Measure Accurately: Always begin by meticulously measuring your windows, including the width of your curtain rod or track, and the desired finished length of your curtains. Account for where the rod is mounted and how far down you want the curtains to hang (e.g., sill length, floor length, or puddling).
- Factor in Pleat Fullness: Crucially, remember that pleated curtains inherently use significantly more fabric than flat panels. A good rule of thumb is that pleated curtains often require 2.5 to 3 times the width of your window or curtain rod (the space your curtains will cover when closed). This extra fabric is what creates the luxurious folds and fullness.
- Add for Hems and Headers: Don’t forget to add extra length for all hems (top, bottom, and sides) and the header where the pleats will be formed. Typically, an additional 6-12 inches (15-30 cm) in length is a safe buffer for top and bottom hems, plus a few inches for side hems. Always check specific pleat tape instructions for header requirements.
- Consider Pattern Repeat: If your fabric has a pattern, ensure you buy enough extra fabric to allow for pattern matching across multiple panels, which can add substantial yardage.
Improper Pleat Placement
Poorly spaced or unevenly placed pleats are a dead giveaway of a DIY project, making your curtains look amateurish and unbalanced:
- Plan and Mark Precisely: Before you even think about sewing or attaching pleats, meticulously plan and mark your pleat positions across the entire width of your curtain panel. Use a fabric pencil or tailor’s chalk.
- Utilize Measuring Tools: A reliable ruler or measuring tape is your best friend here. Ensure that the spacing between each pleat is absolutely consistent. Even a slight variation can become very noticeable once the curtains are hung.
- Consider Fabric Pattern: If your fabric has a prominent pattern, try to align your pleats so they don’t awkwardly cut through key design elements, or use the pattern itself as a guide for spacing.
- Verify Alignment: Double-check that all pleats are not only evenly spaced but also straight and perfectly aligned with each other, from the top edge downwards.
Uneven Hems
Curtains with uneven bottom hems can instantly detract from an otherwise well-made project, creating a sloppy and unfinished appearance:
- Measure and Mark Carefully: Once your curtains are fully pleated and almost ready to hang (but before hemming the bottom), hang them for a day or two. Then, measure and mark your desired hem line accurately while the curtains are hanging, using a helper if possible, to account for any fabric stretch.
- Press Before Sewing: Always use an iron to press your hems firmly before you start sewing. This creates a crisp fold that is much easier to sew straight and evenly.
- Consider Hem Tape: For extra precision or for no-sew hems, iron-on hem tape can be invaluable for creating a crisp, even, and perfectly straight edge.
- Compare Panels: If you’re making multiple curtain panels, always double-check that they are all the exact same finished length.
Using Wrong Curtain Hook Sizes
The size and type of curtain hooks you use can significantly impact how your pleated curtains hang and drape:
- Match Hooks to Tape/Rings: Ensure your chosen hooks are the correct size and style to fit properly into your pleating tape or the rings of your curtain rod. Hooks that are too small might slip out, while those too large might damage the tape.
- Support Fabric Weight: Verify that the hooks you select are robust enough to comfortably support the entire weight of your curtain fabric. Heavier fabrics require stronger, more durable hooks.
- Maintain Uniformity: For a consistent and professional look, always use the same size and type of hooks throughout your entire curtain project. Mixing and matching can lead to an uneven hang.
- Concealed Hooks: When hung, the hooks should ideally not be visible above the curtain rod. Ensure they are inserted at the correct height within the pleater tape to remain discreetly hidden.
By diligently avoiding these common mistakes, you’ll be well on your way to creating stunning, professionally crafted pleated curtains that will beautifully enhance your windows and elevate your overall room design. Remember, patience, meticulous attention to detail, and careful planning are your best allies in achieving results that look truly bespoke and impressive.
Troubleshooting Guide for Pleated Curtains
Even with meticulous planning and careful execution, you might encounter a few hiccups when pleating your curtains. Don’t let minor imperfections discourage you – most problems have straightforward solutions. This comprehensive troubleshooting guide will help you diagnose and address common issues, ensuring you achieve the perfect, polished look for your pleated curtains.
How to Fix Uneven Pleats
Uneven pleats are one of the most common issues and can detract from the polished appearance of your curtains. Here’s how to bring them back into alignment:
- Take Them Down: Remove the curtains from the rod or track and lay them completely flat on a large, clean surface. This gives you a clear view of the problem areas.
- Inspect Hook Spacing: Carefully examine the spacing of your pleat hooks. Are they consistently distributed? Oftentimes, unevenness stems from hooks being too close in some areas and too far apart in others.
- Re-insert and Adjust: If using pleater tape, gently remove and re-insert the hooks, paying very close attention to uniform spacing. Use a ruler to measure the distance between each hook for precise, even distribution across the entire width.
- Check Pleating Tape Alignment: If you’ve sewn or ironed on pleater tape, ensure it was attached perfectly straight and hasn’t stretched or bunched in any areas. If it’s uneven, you might need to detach and re-apply it.
- “Train” the Pleats: Once the hooks are re-spaced, re-hang the curtains. Then, starting from one end, gently adjust each pleat by hand. Use your fingers to encourage the fabric into crisp, uniform folds. You may need to spend a few minutes gently shaping each pleat.
How to Correct Fabric Wrinkles and Creases
Wrinkles and unwanted creases can undermine the smooth, elegant look of your pleated curtains. Here’s how to restore their pristine appearance:
- Remove from Rod: Take the curtains down from the rod to work on them effectively. Lay them flat on an ironing board or a clean, protected surface.
- Choose the Right Method:
- Steamer: A handheld fabric steamer is often the safest and most effective method for pleated curtains, as it removes wrinkles without flattening the pleats. Hold the steamer a few inches away and move it slowly over the wrinkled areas.
- Iron: If using an iron, always check the fabric care label for the appropriate heat setting. Use a pressing cloth between the iron and the curtain fabric to prevent scorching or shine, especially on delicate materials.
- Work Methodically: Start from the top of the curtain and work your way down. When ironing, gently press between the pleats, being extremely careful not to iron directly over and flatten the defined folds. For steaming, simply allow the steam to relax the fabric.
- Dampen Stubborn Wrinkles: For very stubborn wrinkles, you can lightly mist the fabric with water before steaming or ironing. This helps the fibers relax more easily.
- Immediate Re-hanging: Hang the curtains immediately after steaming or ironing while they are still slightly warm. This helps the fabric fall into its natural drape and prevents new wrinkles from forming as it cools.
How to Adjust Pleats After Hanging
Sometimes, pleats need a final touch-up or “dressing” once the curtains are hung to achieve their best look:
- Start at One End: Begin at one end of your curtain rod or track. This allows for a consistent and systematic approach.
- Even Distribution: Gently pull or push the fabric between each pleat to ensure it’s evenly distributed. The goal is to avoid any sagging or excess fabric in one area and tightness in another.
- Shape Each Pleat: Use your hands to gently shape and define each individual pleat. Pinch the top and guide the fabric downwards, encouraging it to fall into crisp, clean folds. This “dressing” process makes a huge difference in the final look.
- Adjust Gathering Strings (Pencil Pleats): If you have pencil pleats with gathering strings, you can fine-tune the fullness. If pleats are too tight, carefully loosen the gathering strings slightly. If they are too loose, gently tighten them or move the pleat hooks closer together.
- Allow to Settle: Allow the curtains to hang for a day or two. Fabric often relaxes and settles over time. After this period, make any final, minor adjustments as needed to perfect the drape and pleat definition.
Remember, patience and a keen eye are your best assets when troubleshooting your pleated curtains. Take your time with each step, and don’t hesitate to repeat the process if needed. With a bit of effort and attention to detail, you can achieve beautifully even, wrinkle-free, and perfectly pleated curtains that truly enhance your room’s decor and reflect a professional finish.
Conclusion: Embrace the Elegance of DIY Pleated Curtains
Transforming your windows with the timeless elegance of pleated curtains is a surprisingly achievable DIY project, far easier than you might initially think. Whether you’ve chosen the simplicity and speed of the no-sew method or opted for the durable, custom finish provided by your sewing machine, you now possess the comprehensive knowledge and step-by-step guidance to create truly beautiful, bespoke window treatments that will elevate any room in your home.
Always remember that the cornerstone of success in curtain making, especially with pleats, lies in meticulous preparation, precise measurements, and a keen eye for detail. By diligently following our expert advice and detailed instructions, you can confidently achieve professional-looking results that will not only enhance your home’s aesthetic appeal but also bring you immense satisfaction from a job well done.
So, what’s next on your home decor journey? Why not take the plunge and give it a try? Start with a single window that needs a refresh, and witness firsthand how your newly pleated curtains completely transform the entire feel and ambiance of the space. You’ll be amazed at the impact a simple change in window treatment can have.
We’d absolutely love to hear about your experiences, learn from your insights, or even better, see photos of your magnificent finished projects! Share your results and any creative solutions you discovered in the comments section below. And please, don’t hesitate to reach out and ask if you encounter any questions or challenges along the way. Happy pleating!
Frequently Asked Questions About Pleated Curtains
How do I get my curtains to pleat without sewing?
To create pleats without sewing, you’ll need special pleater tape and pleat hooks. First, attach the pleater tape along the top edge of your curtain panel using a strong iron-on adhesive (like hem tape) or a pleater tape specifically designed with heat-activated backing. Once the tape is secure, insert the pleat hooks into the designated pockets or slits on the tape, spacing them evenly to form the desired pleats. Then, simply hang these hooks onto your curtain rod or rings for instant, elegant pleats.
Can I pleat curtains that are already made?
Absolutely, you can pleat most ready-made curtains! The easiest way is to use the no-sew method described above: attach pleater tape with iron-on adhesive to the top of your existing curtains and then insert pleat hooks. For a simpler, more temporary pleated look, you can also gather the fabric at the top and secure it with decorative curtain clips or sturdy fabric pins, then hang these directly onto your rod or rings.
What is the best fabric for pleated curtains?
Medium to heavy-weight fabrics generally work best for pleated curtains as they hold their folds beautifully and drape elegantly. Good choices include cotton sateen, linen blends, silk (or faux silk), velvet, brocade, and polyester blends. These fabrics have enough body to maintain the crispness of the pleats. Lighter fabrics like sheers or thin cottons can also be pleated, but they will result in softer, less defined pleats.
How do I clean and maintain pleated curtains?
Proper cleaning and maintenance will ensure your pleated curtains retain their shape and beauty for years. Regularly vacuum your pleated curtains with a soft brush attachment to remove dust and prevent build-up, taking care not to pull on the pleats. For deeper cleaning, always follow the specific care label instructions on your fabric. Many decorative pleated curtains are recommended for professional dry cleaning only. Some may be spot cleaned with a mild detergent, or if the fabric allows, machine washable on a gentle cycle with cold water. If wrinkles appear after cleaning, iron on a low heat setting, using a pressing cloth and carefully working around the pleats to avoid flattening them.
