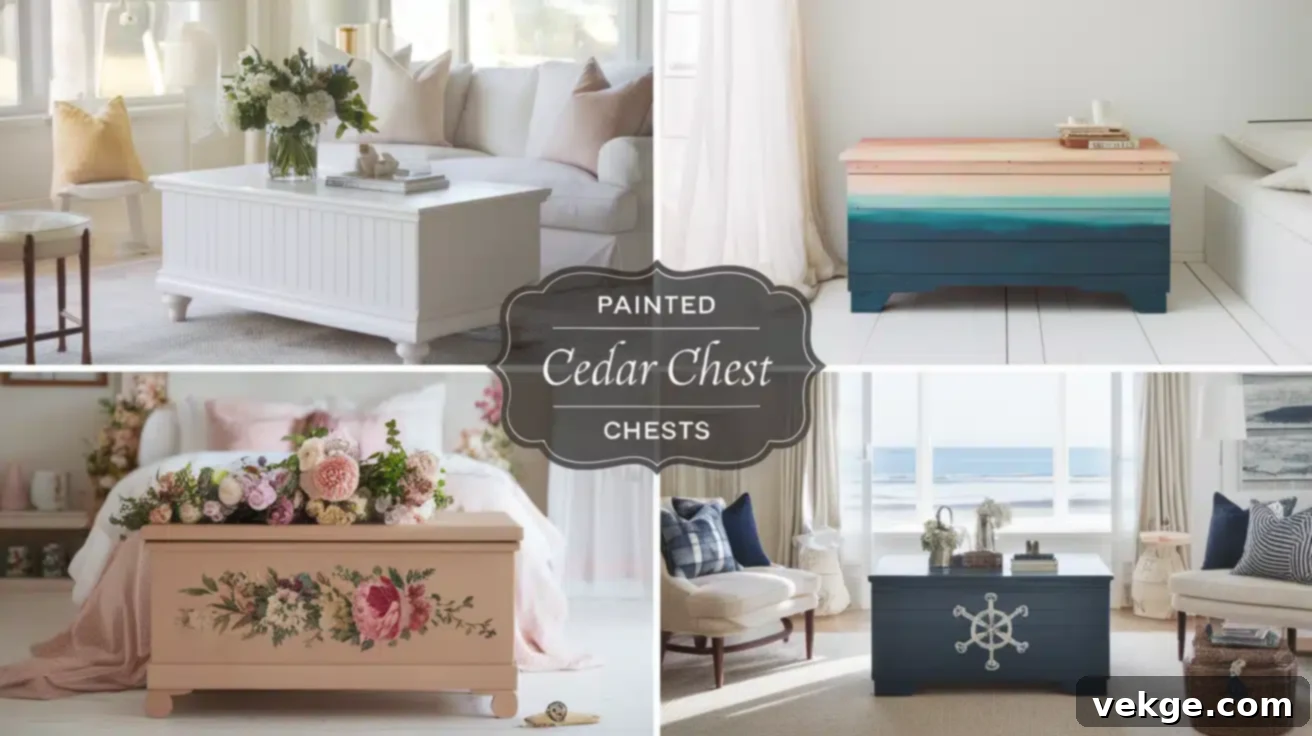
The Ultimate Guide to Painting Cedar Chests: Ideas, Techniques & Care
With years of experience transforming hundreds of cedar chests, I’ve witnessed firsthand how a fresh coat of paint can breathe new life into these cherished, often forgotten, pieces. Each chest holds a unique history, and my passion lies in preserving its inherent character while infusing it with contemporary style through thoughtful painting techniques. Join me as I share proven methods and inspiring ideas to help you transform your traditional cedar chest into a stunning focal point within your home.
From concealing minor wear to completely reimagining its aesthetic, painting offers an unparalleled opportunity to customize and modernize these durable storage units. Whether you’re a seasoned DIY enthusiast or just starting your furniture transformation journey, this comprehensive guide will equip you with the knowledge and inspiration needed to achieve beautiful, lasting results.
Why Transform Your Cedar Chest with Paint?
Beyond simply updating its look, painting a cedar chest offers a multitude of benefits, enhancing both its aesthetic appeal and practical value. Through countless restoration projects, I’ve consistently observed that a carefully painted cedar chest:
- Seamlessly Adapts to Modern Decor: A painted finish allows an antique or vintage chest to blend effortlessly into contemporary interior design schemes, bridging the gap between old and new.
- Effectively Conceals Minor Damage: Paint can cleverly hide surface imperfections, scratches, or minor dings, restoring a flawless appearance while preserving the chest’s structural integrity for years to come.
- Becomes a Unique Statement Piece: With an endless palette of colors and creative techniques, you can transform a simple storage chest into a truly unique, personalized work of art that captures attention and reflects your individual style.
- Enhances Functionality with Beauty: A well-painted chest not only provides valuable storage but also serves as a beautiful accent, complementing other furniture and elevating the overall ambiance of a room, making it both practical and visually appealing.
- Offers Limitless Personal Expression: Painting provides an incredible outlet for creativity, allowing you to infuse your personal style, tell a story, or reflect a specific theme in your home decor, making the piece truly yours.
Inspiring Painted Cedar Chest Ideas & Transformations
Having explored countless creative possibilities, I’ve curated a collection of 21 unique ideas to spark your imagination. Each technique brings a distinct charm, allowing you to tailor your cedar chest to any design preference.
1. Classic White Transformation
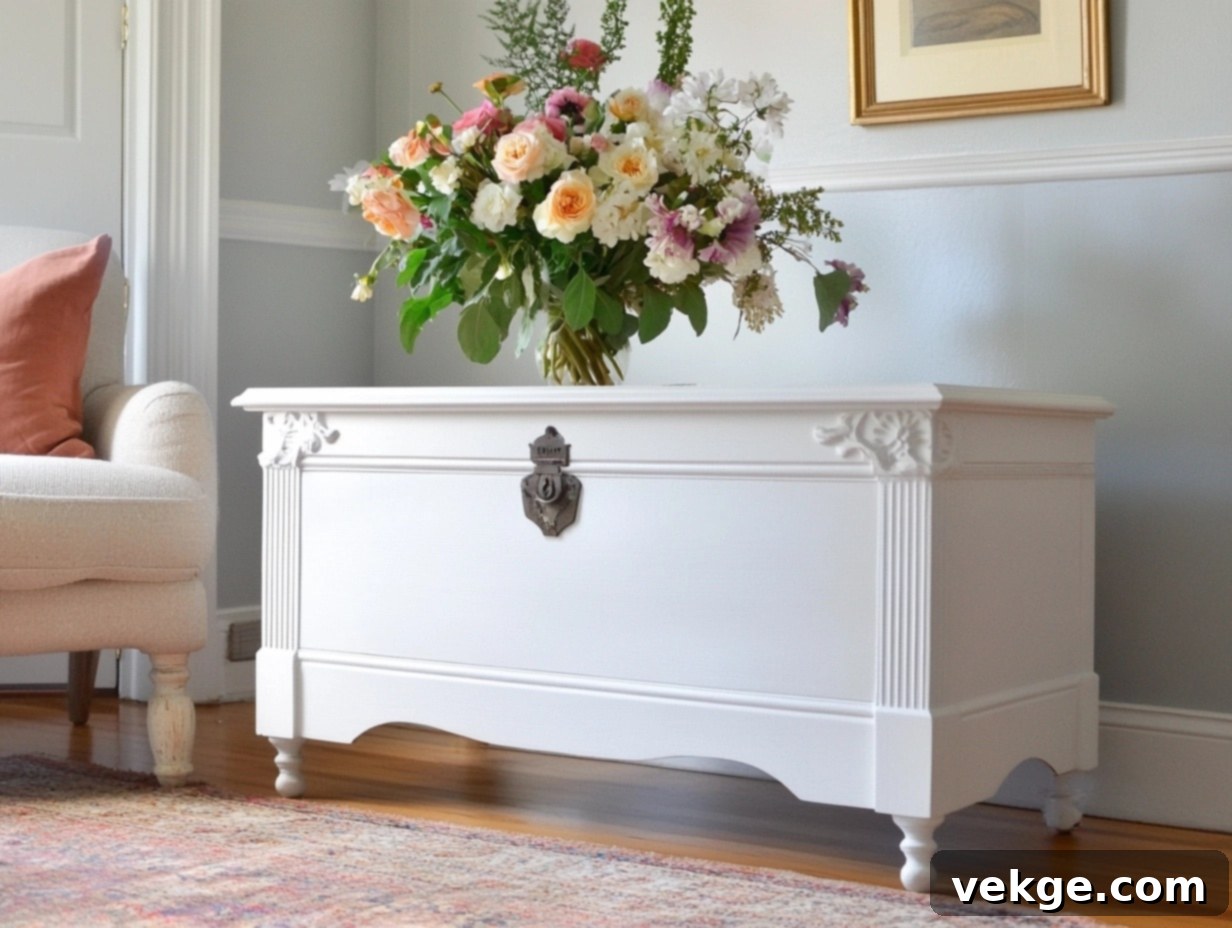
One of my most satisfying transformations involved breathing new life into a vintage cedar chest with a pristine, pure white finish. This timeless choice instantly brightens any space, offering a fresh, clean aesthetic. The chest, once bearing visible signs of age and wear, was meticulously prepared and painted in multiple thin layers, resulting in a flawless, factory-fresh appearance. The crisp white beautifully accentuates the original hardware, allowing the chest’s classic lines to truly shine. Achieving this professional, lasting result demands careful attention to corner details and edges, ensuring a smooth and durable finish that withstands the test of time.
Application Process:
- Thorough Cleaning: Start by cleaning the entire surface with a specialized wood cleaner to remove all dirt, grease, and grime.
- Careful Sanding: Lightly sand the existing finish with fine-grit sandpaper (e.g., 220-grit) to create a smooth, etched surface for optimal paint adhesion.
- Primer Application: Apply a high-quality oil-based primer. This step is crucial for blocking tannins from cedar and ensuring a uniform, lasting white finish.
- Layered White Coats: Apply multiple thin, even coats of pure white paint, allowing adequate drying time between each layer. Thin coats prevent drips and create a smoother, professional finish.
- Protective Seal: Finish with a clear, durable protective topcoat (e.g., water-based polyurethane) to guard against chips, scratches, and everyday wear, extending the life of your painted surface.
2. Ombre Effect Creation
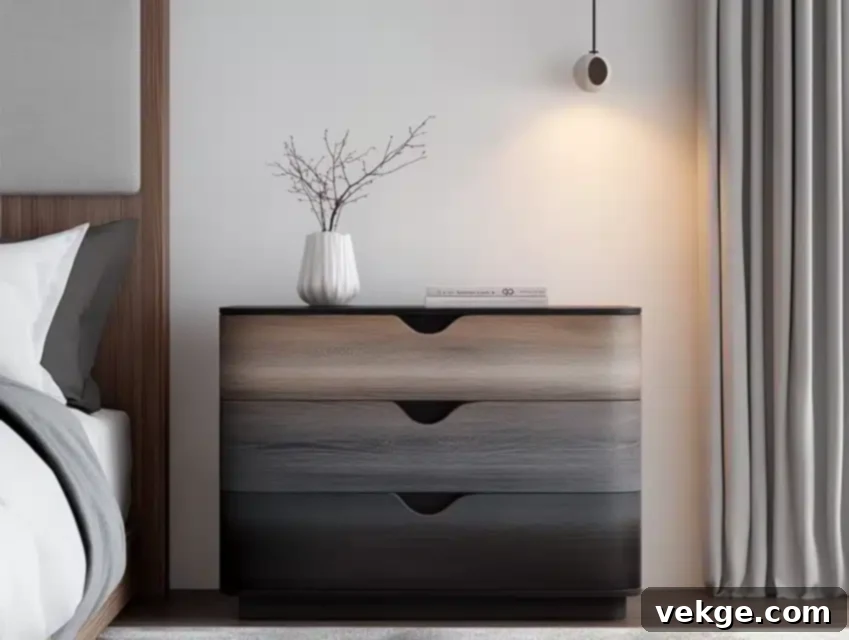
Discovering the magic of ombre effects was a revelation, particularly when a client requested a unique piece for her daughter’s bedroom. My initial attempt taught me invaluable lessons in patience and the delicate art of color transition. This chest elegantly transformed from a soft, light gray at the top to a rich, deep charcoal at the bottom, creating a stunning visual flow that serves as a captivating focal point. The secret lies in blending each shade seamlessly into the next, creating an illusion of fluid, flowing color. Visitors frequently inquire about the technique used to achieve such smooth and captivating color transitions on this particular piece.
DIY Steps:
- Surface Preparation: Thoroughly sand the entire surface, starting with medium-grit sandpaper (e.g., 120-grit) for initial smoothing, then progressing to fine-grit (e.g., 220-grit).
- Color Blending: Before beginning, mix five graduated paint shades, ensuring a smooth transition from light to dark or vice versa.
- Base Coat: Apply your lightest shade as an even base coat across the entire chest surface.
- Sectional Blending: Work in small sections, carefully blending each color into the next while the paint is still wet.
- Wet Edges: Always keep the edges of your painted sections wet to ensure seamless color transitions and avoid harsh lines.
- Misting Technique: Lightly mist water between color layers to aid in smooth blending, especially with acrylic paints.
- Protective Finish: After complete drying, apply three clear protective coats (e.g., satin or matte polyurethane) for durability.
3. Chalk Paint Revival
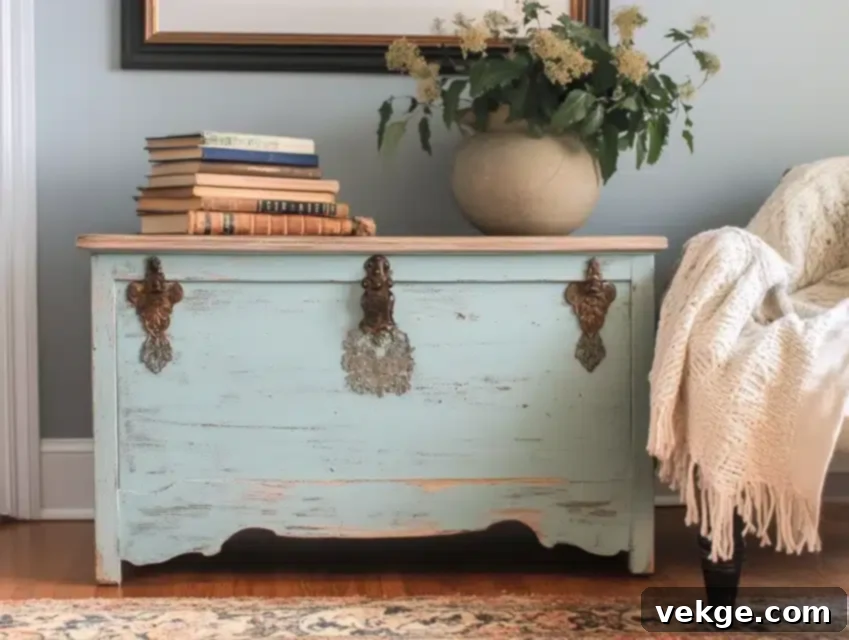
The first cedar chest I transformed with chalk paint holds a special place in my memory – it belonged to my grandmother. The soft, matte finish of the chalk paint beautifully revealed intricate details of the chest that I hadn’t fully appreciated in years. Light distressing strategically applied along the edges allowed subtle hints of the original wood to peek through, adding incredible character and historical depth. This beloved piece now serves as both practical storage and a charming conversation starter in my living room, its vintage allure perfectly preserved even after years of use.
DIY Steps:
- Initial Cleaning: Clean the surface completely with a degreaser and wood cleaner to ensure proper chalk paint adhesion.
- First Chalk Paint Coat: Apply the first chalk paint coat using long, even strokes, covering the entire surface.
- Light Sanding: Lightly sand the entire surface with fine-grit sandpaper between paint applications to achieve a silky smooth texture.
- Strategic Distressing: Distress edges, corners, and raised areas with medium-grit sandpaper (e.g., 180-grit) to reveal the underlying wood or previous paint layers.
- Aged Wax Application: Apply dark wax sparingly into corners and recessed areas for an authentic, aged effect.
- Buffing: Buff the entire surface with a soft, lint-free cloth until a smooth, subtle sheen is achieved.
- Clear Wax Seal: Seal the finish with clear wax, applying in circular motions, to protect and enhance the chalk paint.
4. Geometric Pattern Innovation
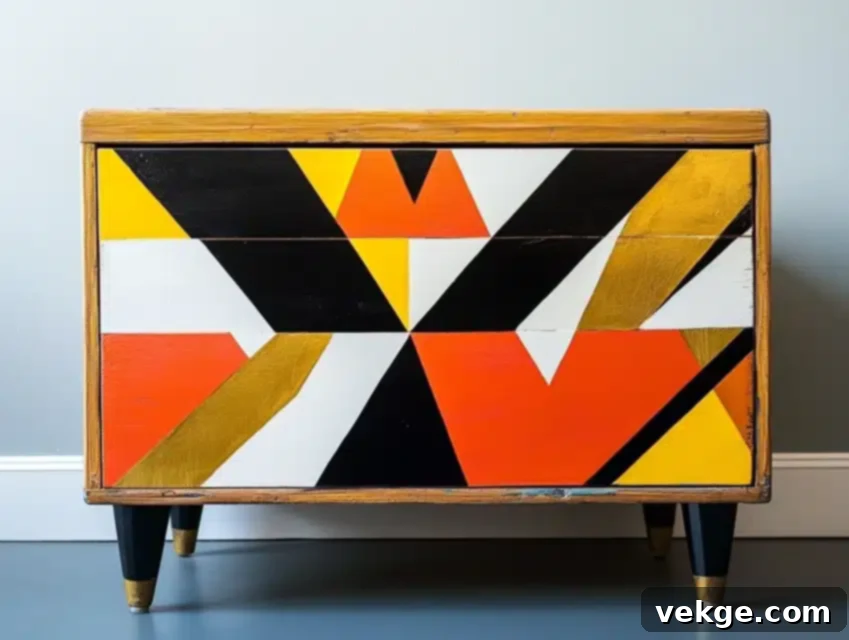
A client’s sleek, modern loft provided the perfect inspiration to experiment with bold geometric designs on a traditionally styled cedar chest. The striking combination of sharp lines and vibrant colors dramatically transformed the piece from a simple storage unit into a captivating work of modern art. Each intricate triangle demanded precise measuring and meticulous taping, a process that, while time-consuming, proved immensely rewarding. The finished chest became an undeniable focal point in their minimalist living space, with other designers frequently inquiring about my technique for achieving such impeccably clean lines and vibrant patterns.
DIY Steps:
- Template Creation: Create precise paper templates for each geometric shape to guide your design.
- Precise Taping: Apply high-quality painter’s tape, following your template measurements exactly, ensuring crisp lines.
- Careful Painting: Paint each section meticulously with an angled brush, working from the tape edge inwards to prevent bleeding.
- Tape Removal: Remove the painter’s tape while the paint remains slightly wet to achieve the cleanest lines.
- Touch-ups: Carefully touch up any minor bleeding or imperfections with a small artist’s brush and matching paint.
- Sanding Between Coats: Lightly sand between paint coats for a smooth, professional finish, always cleaning dust before the next layer.
- Protective Finish: Apply water-based polyurethane for a durable, lasting protective finish that enhances the vibrant colors.
5. Nautical Theme Creation
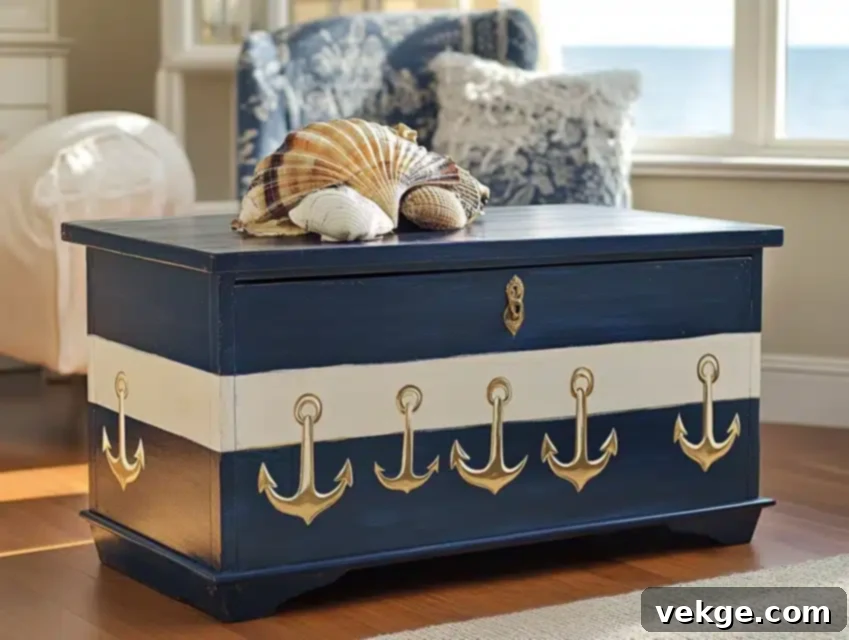
This transformation was directly inspired by a client’s beach house, aiming to capture the essence of coastal living in a weather-worn chest. The deep navy blue base coat evokes the serene depths of the ocean, providing a perfect backdrop. Crisp white stripes were meticulously applied, creating a stunning contrast against the dark background, reminiscent of classic maritime flags. Hand-painted anchors, rendered in metallic gold, added an unexpected touch of luxury and sophistication, elevating the design beyond a simple theme. The finished piece effortlessly brought a charming maritime aesthetic to their coastal living room, resonating with sea-lovers.
DIY Steps:
- Initial Cleaning: Begin by thoroughly cleaning the surface with a specialized wood cleaner to ensure perfect paint adhesion.
- Navy Base Coat: Apply two even coats of deep navy blue paint as the base, allowing full drying time between layers.
- Stripe Measurement: Carefully measure and tape straight lines for your stripes, ensuring perfect symmetry and spacing.
- White Stripe Application: Paint crisp white stripes carefully with a small foam roller or angled brush for smooth coverage.
- Stencil Creation: Create precise anchor stencils using contact paper or a stencil cutting machine.
- Metallic Details: Apply metallic gold details for the anchors using proper artist brushes for intricate work.
- Marine-Grade Seal: Seal the entire piece with a marine-grade protective coating to ensure durability in coastal environments.
6. Two-Tone Style Statement
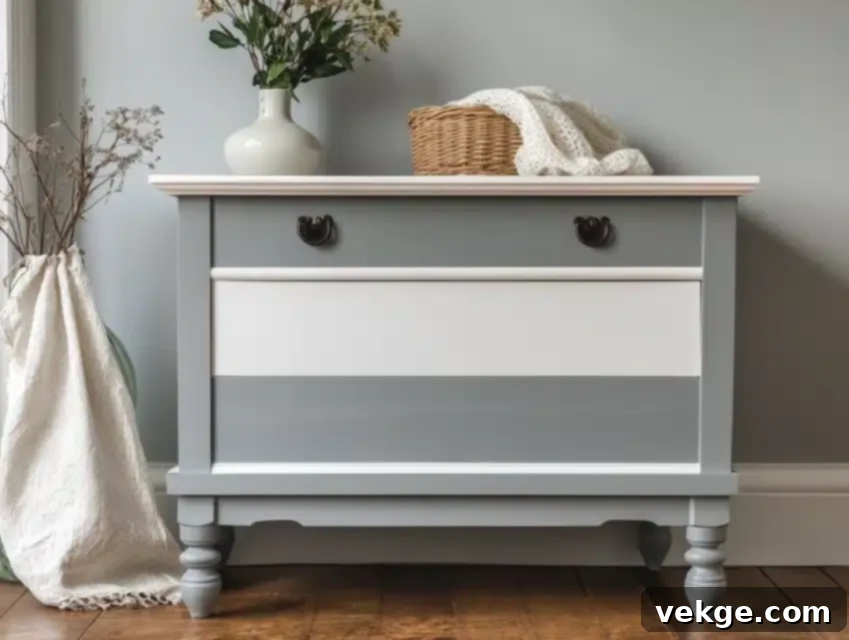
A modern farmhouse renovation project profoundly influenced my understanding of the dramatic impact a two-tone finish can achieve. The elegant combination of soft gray and crisp white created a stunning visual contrast that defined different sections of the chest with remarkable clarity. Special attention to the transition line between the two colors was paramount, elevating this piece from simple to exceptional. The sophisticated appeal of the finished chest was so well-received that it inspired three more similar commissions within that same year, solidifying its place as a client favorite.
DIY Steps:
- Surface Smoothing: Sand the entire piece thoroughly to create an impeccably smooth surface, ideal for a refined painted finish.
- Primer for Adhesion: Apply an oil-based primer for superior paint adhesion, especially important for dual-color projects.
- Precise Taping: Precisely tape transition lines between colors using high-quality painter’s tape to ensure sharp, clean divisions.
- Lighter Color First: Paint the lighter color first, ensuring even coverage using the proper brush or roller technique.
- Darker Shade Application: Apply the darker shade only after the first color has completely dried, preventing any color bleed.
- Tape Removal: Remove the tape carefully while the second color remains slightly wet to achieve the sharpest line.
- Polyurethane Protection: Protect the finish with three clear polyurethane coats, providing a durable and lasting seal.
7. Floral Stencil Enhancement
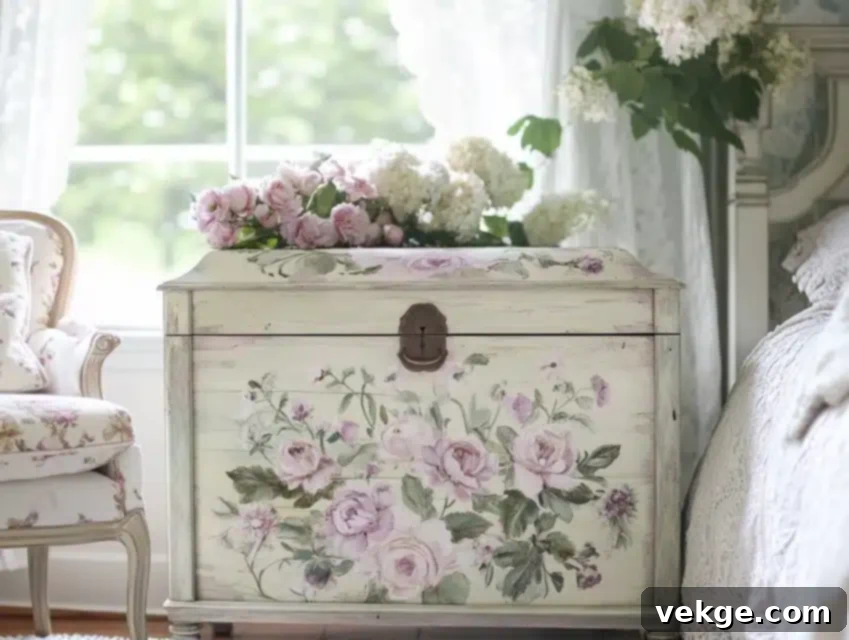
My sister’s plain vintage chest became the canvas for my very first stencil experiment, proving to be a rewarding challenge. Delicate flower patterns, carefully chosen and applied, completely transformed the previously unassuming surface. Each stenciled section required thoughtful color coordination choices, which, when layered, created unexpected depth and a sense of natural movement within the design. This unique piece now proudly serves as the most requested design in my portfolio, a testament to the timeless appeal and versatility of floral stencils in furniture transformation.
DIY Steps:
- Surface Preparation: Prepare the surface with proper sanding and cleaning techniques, ensuring it’s smooth and free of debris.
- Solid Base Color: Apply a solid base color in thin, even coats, allowing it to dry completely before stenciling.
- Stencil Positioning: Position stencils carefully using proper measuring tools (e.g., a ruler and level) for accurate placement.
- Secure Edges: Secure stencil edges completely with low-tack painter’s tape to prevent paint from seeping underneath.
- Stippling Brush Application: Apply stencil paint using a special stippling brush, dabbing gently to avoid oversaturation.
- Layered Colors: Layer multiple colors within your stencil design for a dimensional floral effect, adding depth to each element.
- Protective Topcoat: Seal the finished design with a water-based protective clear coat to ensure durability and longevity.
8. Rustic Distressed Creation
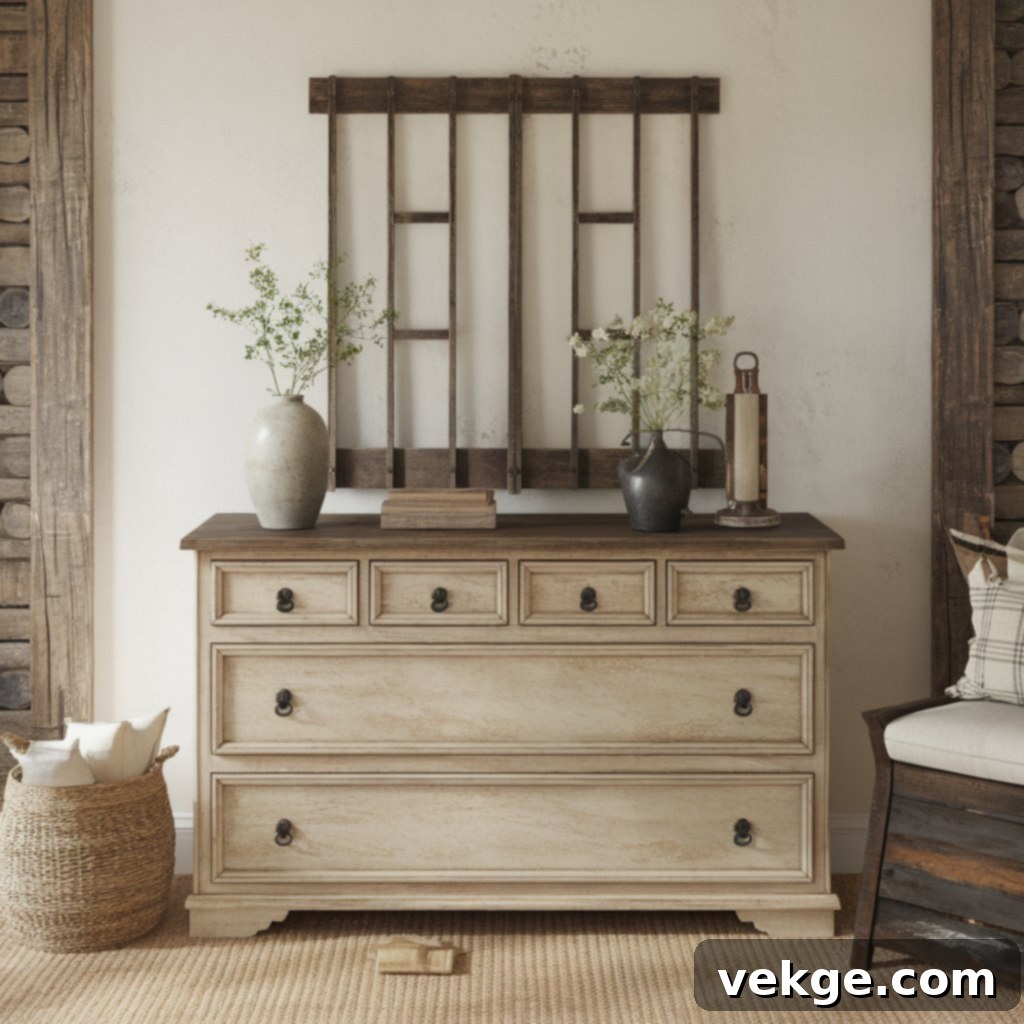
The most beloved distressed finish I ever created originated from an old family chest, steeped in history. The original dark wood beneath the cream-colored paint peeked through perfectly, creating an authentic, time-worn aesthetic. I allowed the chest’s natural wear patterns to guide my distressing technique, strategically revealing the underlying wood where it would naturally occur. Each carefully sanded edge now tells a silent story of generations past, lending unparalleled character. This truly inspiring piece not only became a treasured heirloom but also sparked the creation of an entire collection of aged furniture finishes in my workshop.
DIY Steps:
- Thorough Cleaning: Begin with a thorough cleaning of the entire wood surface, ensuring it’s free from dirt and oils.
- Dark Base Coat: Apply a dark base coat if you want a contrasting color to peek through the distressed areas.
- Light Topcoat: Layer a light-colored paint over the completely dried base coat, covering it entirely.
- Controlled Sanding: Sand edges and corners with varying pressure levels using fine-grit sandpaper (e.g., 220-grit) to reveal layers.
- Authentic Wear: Create authentic wear patterns in high-touch areas where natural distressing would occur over time.
- Dark Wax Enhancement: Add dark wax carefully to enhance distressed areas and provide a subtle aged definition.
- Matte Finish Seal: Seal with a matte finish topcoat for an authentic, aged appearance that protects the distressed look.
9. Vibrant Color Statement
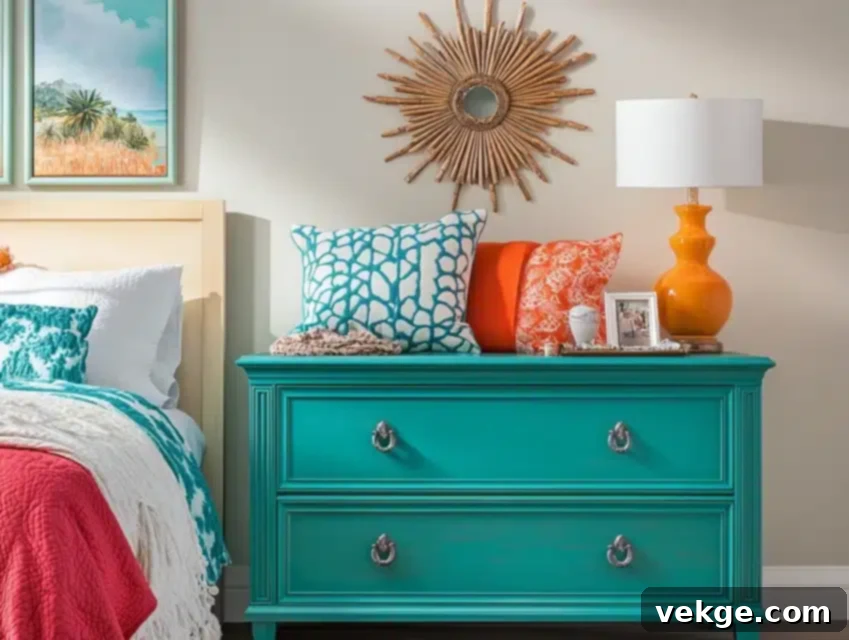
A client’s bold vision challenged my traditional painting approach, pushing me to embrace vibrant hues. The selection of a bright teal color completely transformed their otherwise neutral bedroom, infusing it with an exhilarating burst of energy and personality. Meticulous preparation was key to ensuring the vibrant shade remained true and consistent across the entire surface. Applying multiple thin coats gradually built up the perfect color depth and saturation, eliminating any streaking or unevenness. The finished chest became not just a functional piece but the room’s most striking and frequently admired conversation piece.
DIY Steps:
- Stain-Blocking Primer: Prime the surface thoroughly with a high-quality stain-blocking primer to ensure the vibrant color remains true.
- Color Saturation Test: Test color saturation on a hidden chest area or a scrap piece of wood to confirm the desired vibrancy.
- Multiple Thin Layers: Apply the bright color in multiple thin layers, allowing each coat to dry fully to prevent streaking.
- Light Sanding: Sand lightly between each coat with ultra-fine grit sandpaper (e.g., 400-grit) for a silky smooth finish.
- Progressive Application: Build color depth through progressive paint applications until the desired opacity and richness are achieved.
- Evenness Check: Check the evenness of color in different lighting conditions to ensure a flawless, uniform finish.
- UV-Resistant Top Coat: Protect the vibrancy with a UV-resistant clear top coat, preventing fading over time.
10. Personalized Monogram Addition
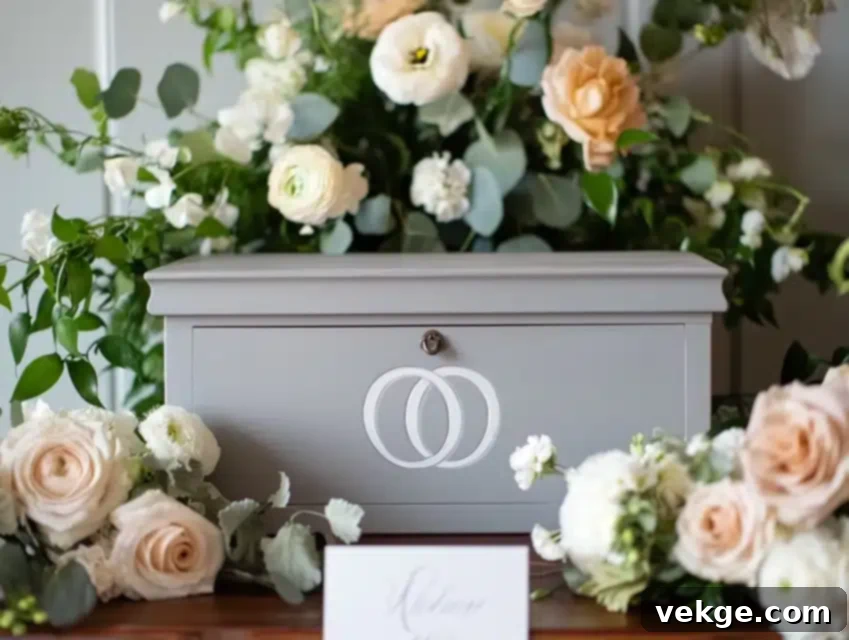
A wedding gift commission provided the perfect opportunity to explore the art of meaningful personalization. The elegant, classic gray background beautifully highlighted the crisp white monogram, creating a sophisticated and understated design. Custom stencil creation was essential to ensure perfect letter proportions and precise placement. The couple’s intertwined initials became the chest’s central focal point, transforming a functional item into a cherished keepsake. This heartfelt piece was so well-received that it inspired many similar anniversary and special occasion gift commissions in the years that followed.
DIY Steps:
- Monogram Template: Create a precise monogram template using proper spacing and font choice for aesthetic appeal.
- Solid Background Color: Apply a solid background color (e.g., classic gray) in even coats, ensuring a smooth, uniform base.
- Custom Stencil Positioning: Position custom stencils meticulously with careful measurement techniques to ensure perfect centering.
- Letter Painting: Paint letters using a small, fine-tipped brush for crisp edges, applying paint carefully to avoid bleeding.
- Stencil Removal: Remove the stencil while the paint remains slightly wet to prevent the paint from peeling with the stencil.
- Fine Touch-ups: Touch up any minor bleeding or imperfections with a fine detail brush and matching paint.
- Clear Protective Coat: Apply a clear protective coat over the entire surface to seal the monogram and protect the finish.
11. Antique Gold Statement Piece
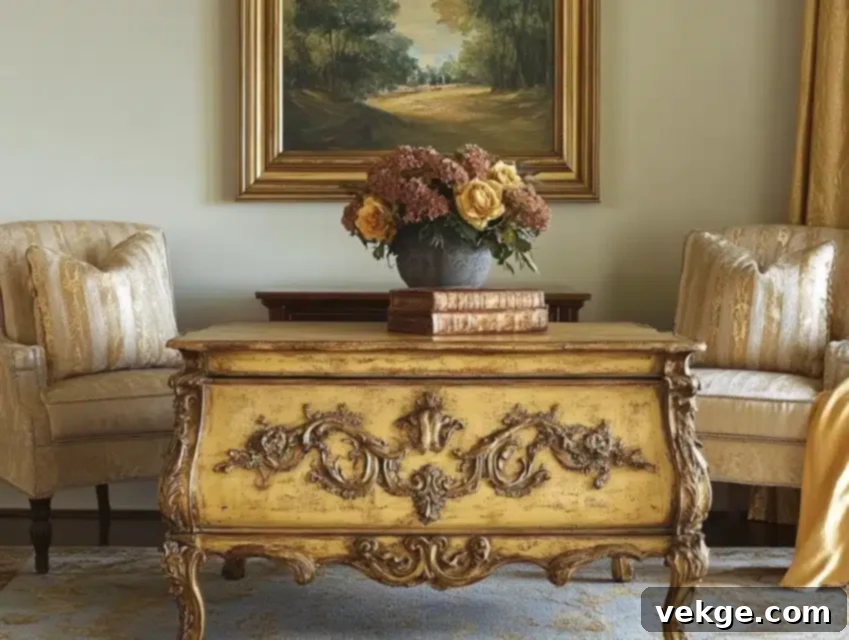
My most challenging goldwork transformation began with a heavily damaged cedar chest discovered at an estate sale. Despite its deteriorated original finish, the fundamental structure of the piece remained strong and inherently beautiful. Crafting the perfect antique gold finish demanded an intricate process involving multiple layers of metallic shades and carefully applied glazes. Each subsequent layer meticulously added depth and character, gradually building a finish that mimicked centuries-old gilding. The natural wear patterns present in the wood exquisitely enhanced the aged gold effect, proving that imperfections often contribute to the most authentic antique appearances. The finished chest now elegantly graces a client’s formal living room, frequently mistaken for a valuable European antique.
DIY Steps:
- Meticulous Surface Prep: Prepare the surface meticulously with a progression of fine-grit sanding, ensuring maximum smoothness.
- Metallic Primer: Apply a specialized metallic primer, essential for proper gold adhesion and an even shimmer.
- Layered Gold Shades: Layer different gold shades (e.g., bright, antique, bronze) for an authentic depth and varied appearance.
- Aged Patina: Carefully create an aged patina using special glazing techniques, allowing dark glaze to settle into crevices.
- Highlighting: Gently highlight raised areas with the brightest gold shade to catch the light and enhance contours.
- Recessed Age Definition: Add dark wax into recessed areas and details for further age definition and shadow.
- Metallic Finish Seal: Seal with a clear coat specifically designed for metallic finishes to protect the luster without dulling.
12. Hand-Painted Artistic Vision
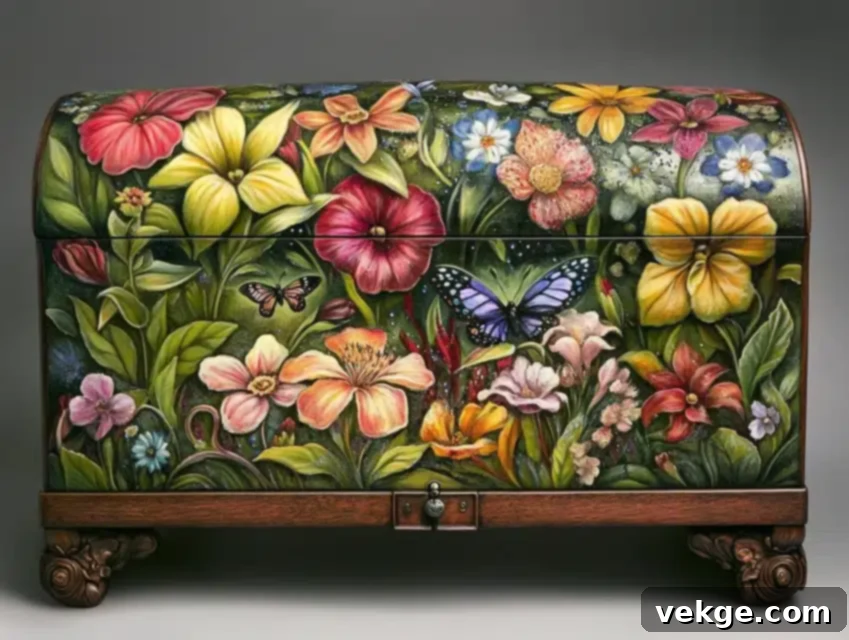
A client’s heartfelt request for a detailed garden scene pushed my artistic boundaries entirely, leading to a truly bespoke piece. Each individual flower and leaf required meticulous planning, careful color mixing, and precise brushwork to achieve a convincingly natural appearance. The landscape gracefully wrapped around all sides of the chest, creating a continuous, immersive garden scene. Small, delicate details like glistening butterflies and dew-kissed leaves brought the entire painting unexpectedly to life. The changing light throughout the day reveals new aspects of the intricate work. This project, consuming over forty hours, resulted in a true family heirloom. Years later, the client still sends photos of their grandchildren delightedly discovering new painted details on the chest.
DIY Steps:
- Design Sketching: Sketch the entire design carefully on paper first, refining all elements before painting.
- Smooth White Base: Create a flawlessly smooth white base coat, serving as the ideal canvas for detailed artwork.
- Design Transfer: Transfer the design outline carefully onto the chest surface using specialized transfer paper.
- Background Layering: Build background colors in a light-to-dark progression, adding depth to the scene.
- Detail Work: Add intricate detail work using a specialized artist brush collection, focusing on fine lines and textures.
- Intermediate Clear Coat: Layer a clear coat between significant detail work for protection, allowing you to build layers without damage.
- Final Protective Coating: Apply a final protective coating specifically designed for artwork, ensuring its longevity and vibrancy.
13. Decoupage Design Integration
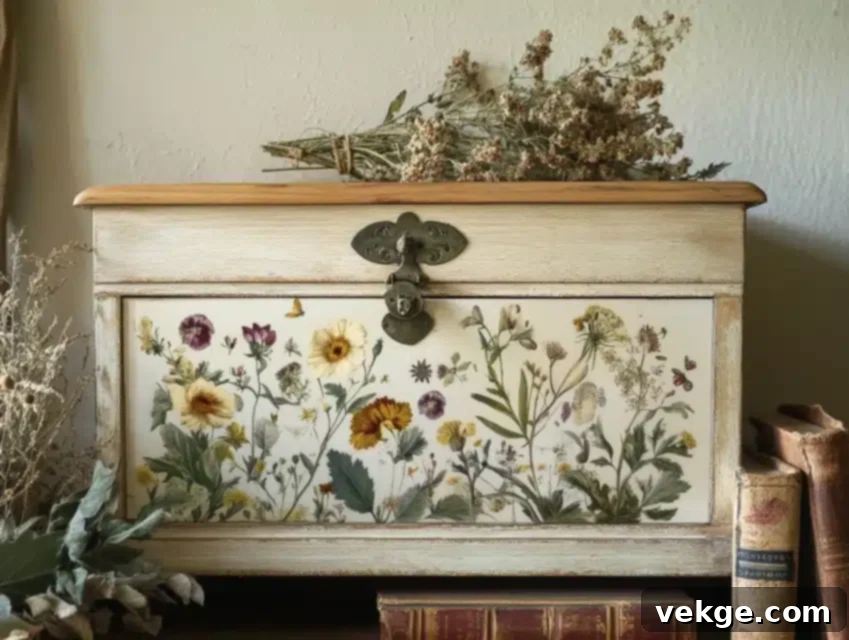
This particular technique beautifully marries my passion for painting with the intricate art of paper decoupage. The chest initially started with a simple cream base, but it swiftly evolved into a captivating artistic collaboration. Vintage botanical prints, carefully selected and layered between coats of paint, introduced unexpected depth and visual interest to the piece. Each individual paper element demanded precise cutting and meticulous positioning to ensure seamless integration with the painted areas. Special attention to edge treatment was crucial, ensuring no visible paper lines remained, creating a truly unified surface. The finished piece effortlessly commands attention from every angle in the room, with multiple clear coats not only protecting the delicate paper elements but also enhancing the overall visual depth.
DIY Steps:
- Material Selection: Choose complementary papers (e.g., vintage prints, maps) and paint colors carefully, ensuring they harmonize.
- Smooth Base Coat: Prepare the surface with a perfectly smooth base coat application, allowing for optimal decoupage adhesion.
- Precise Cutting: Cut paper elements with extreme precision using templates or a craft knife for clean edges.
- Decoupage Application: Carefully apply paper pieces using a specialized decoupage medium (e.g., Mod Podge), smoothing out all wrinkles.
- Seamless Blending: Paint connecting areas to seamlessly blend with paper elements, minimizing visible transitions.
- Air Bubble Removal: Remove all air bubbles immediately using proper smoothing tools (e.g., a brayer or plastic card).
- Protective Sealer: Build up multiple protective layers carefully with the decoupage sealer, ensuring complete coverage and durability.
14. Chalkboard Surface Creation
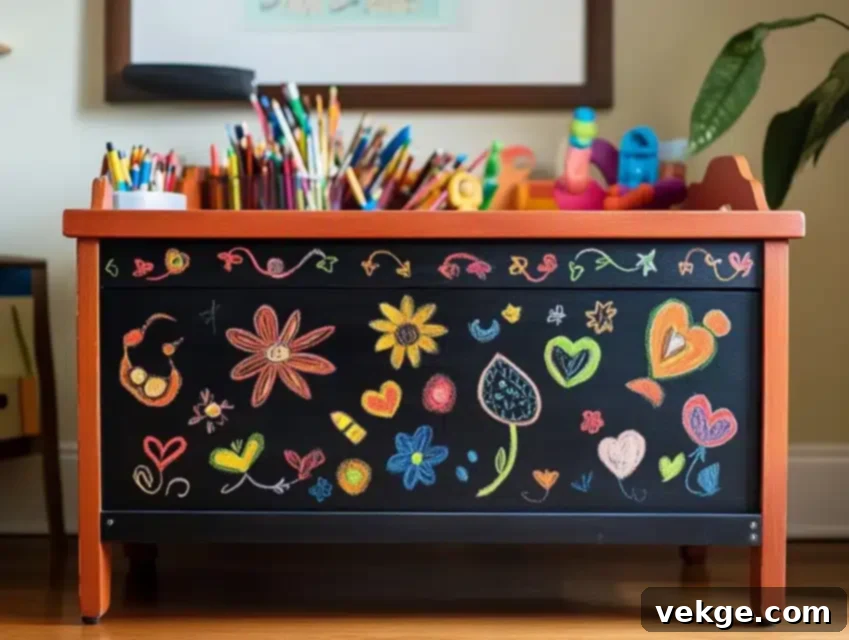
This innovative transformation began when a young mother sought interactive and creative storage for her children’s playroom. The entire chest surface was cleverly converted into a dynamic canvas, perfect for daily creativity and artistic expression. Meticulous attention to the base preparation was essential to ensure both perfect chalk adhesion and effortless erasability, guaranteeing a functional and long-lasting chalkboard surface. Crucially, hidden compartments inside still maintain the protective qualities of the cedar for stored items. The finished piece now serves as both robust functional storage and an endless artistic outlet, with children’s spontaneous artwork adorning the exterior while their treasures remain safely protected within. Even after years of active use, the chalkboard surface perfectly retains its ideal writing texture.
DIY Steps:
- Existing Finish Removal: Strip the existing finish completely using a chemical stripper or extensive sanding for a clean base.
- Ultra-Smooth Sanding: Sand the surface until completely smooth with fine grit sandpaper (e.g., 220-grit), removing all imperfections.
- Chalkboard Primer: Apply specialized chalkboard primer in thin, even layers carefully, allowing proper drying time between coats.
- Chalkboard Paint Layers: Build up the chalkboard paint surface using the proper technique (e.g., thin, even strokes) for uniform coverage.
- Surface Seasoning: Season the entire surface with chalk dust thoroughly (rub a piece of chalk on its side, then erase) before first use.
- Designated Areas: Create designated areas for permanent artwork or labels versus temporary daily drawings.
- Edge & Interior Seal: Protect exterior edges and the interior with a clear, cedar-safe sealer to preserve its natural properties.
15. Modern Minimalist Design
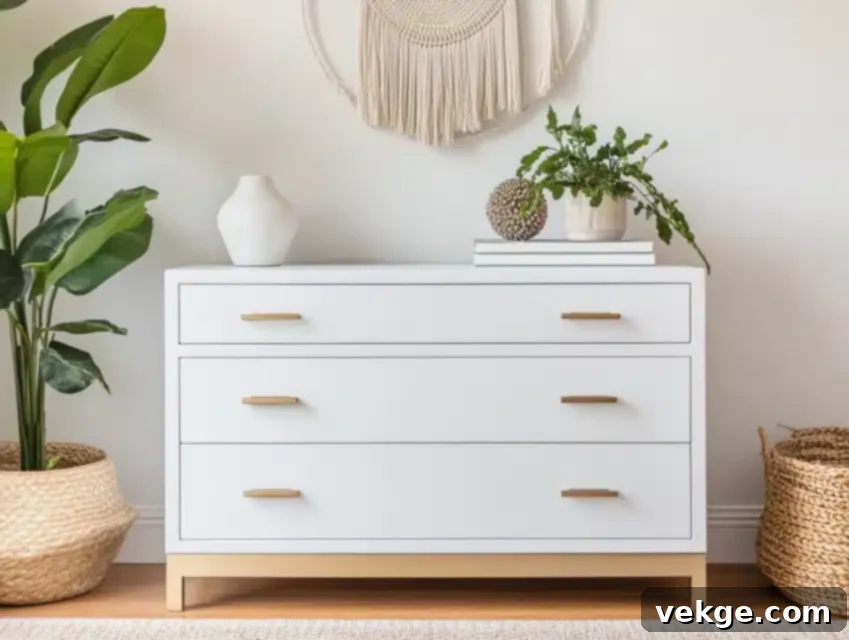
A contemporary apartment renovation provided the perfect inspiration for this streamlined, minimalist transformation. The inherently clean lines of the original cedar chest naturally guided my color and finish choices. I opted for a pure white paint with a sophisticated matte finish, effectively eliminating any surface distraction and creating a serene aesthetic. Simple, elegant brass hardware replaced the original pieces, adding a subtle touch of modern sophistication without overpowering the design. This particular piece profoundly demonstrates that sometimes, the simplest and most understated approach can indeed create the strongest and most impactful visual statement.
DIY Steps:
- Degreasing Clean: Clean the surface thoroughly with a degreasing wood cleaner first, ensuring it’s free of all residues.
- High-Adhesion Primer: Apply a high-adhesion primer specifically formulated for modern finishes to ensure longevity.
- Ultra-Fine Sanding: Sand between coats using ultra-fine grit paper (e.g., 320-400 grit) to achieve a glass-smooth finish.
- Thin White Layers: Build up a pure white color with multiple thin, even layers, allowing proper drying time for consistency.
- Modern Hardware Install: Install modern hardware with precise measurements, ensuring perfect alignment and a clean look.
- Perfect Edge Finish: Create a perfect edge finish with light, intentional distressing if desired for a subtle, aged look.
- Matte Protective Coating: Seal with a matte protective coating for exceptional durability and to maintain the understated aesthetic.
16. Striped Pattern Implementation
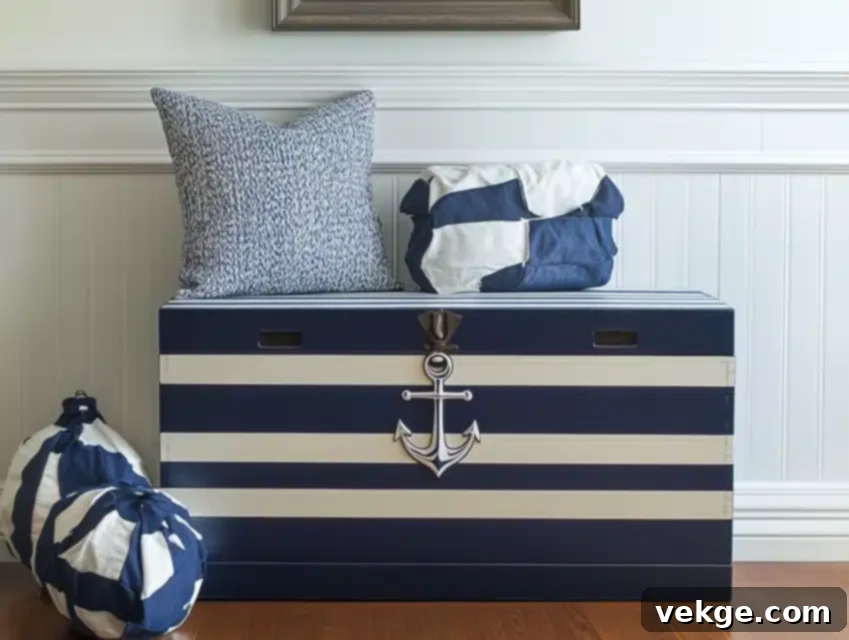
This project was an invaluable lesson in the paramount importance of precise measuring and unwavering patience. Each individual stripe demanded meticulous planning to ensure perfect width and consistent spacing across the entire surface. The bold alternating navy and crisp white stripes created an undeniably dramatic visual impact, transforming the chest into a striking design element. Special attention to wrapping the pattern seamlessly around corners was crucial to maintain an unbroken, flowing design. This beautifully executed striped chest proved so popular that it later inspired an entire collection of striped furniture pieces, becoming a signature look.
DIY Steps:
- Laser Level Marking: Measure and mark all stripe positions with a laser level for unparalleled accuracy and straight lines.
- Lightest Base Coat: Apply the base coat in the lightest stripe color first, covering the entire surface evenly.
- Precision Tape Lines: Create precise tape lines using specialized edge tape designed to prevent paint bleed-through.
- Darker Stripe Painting: Paint darker stripes with the proper brush technique, ensuring even coverage within the taped areas.
- Careful Tape Removal: Remove the tape carefully while the paint remains slightly wet to achieve clean, crisp lines.
- Detail Brush Touch-ups: Touch up any minor bleeding edges with a fine detail brush and the corresponding paint color.
- Protective Topcoat: Apply a clear protective coat over the entire surface carefully to seal and protect the striped design.
17. French Provincial Elegance
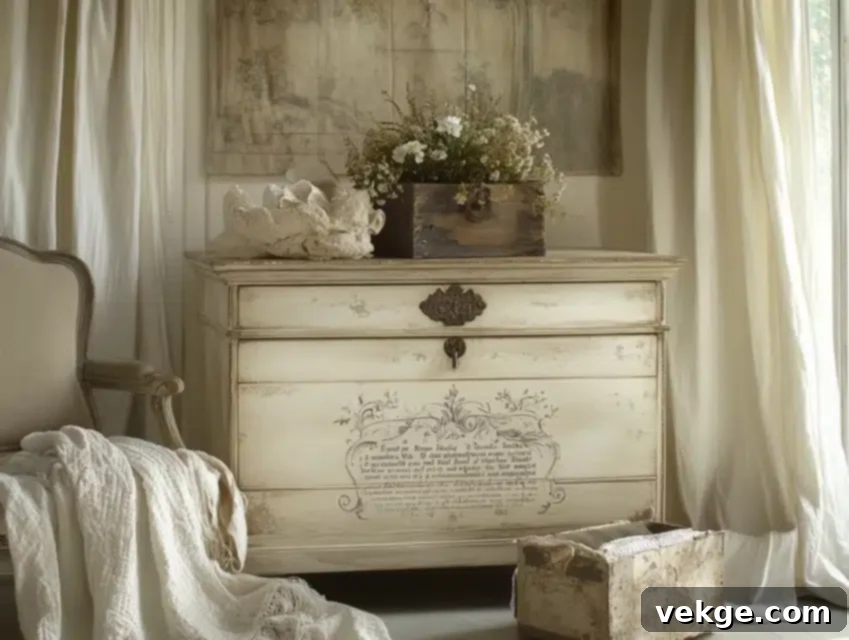
Crafting this French-inspired piece irrevocably altered my approach to vintage finishes. The soft, creamy base color provided an exquisite backdrop, perfect for the delicate French script that would adorn it. Hand-stenciled French poems and elegant phrases gracefully wrapped around the chest, evoking the charm of ancient, treasured letters. Subtle aging techniques were meticulously applied, imparting an authentic European character that speaks of centuries past. This truly transformative project sparked dozens of similar commissions over the years, with even discerning French clients praising its authentic vintage Parisian appearance. Every carefully considered detail contributes to the compelling narrative of an imagined French antique piece.
DIY Steps:
- Vintage Cream Base: Apply a vintage cream base color in multiple thin layers, ensuring full, even coverage.
- Custom Script Stencils: Create custom French script stencils with proper spacing and elegant typography.
- Text Positioning: Position text elements precisely using careful measurement techniques for balanced composition.
- Age-Appropriate Wear: Add age-appropriate wear patterns to specific areas carefully, mimicking natural aging.
- Dark Wax Detailing: Layer dark wax into corners, crevices, and carved details for a time-worn, antiqued appearance.
- Distressing Raised Areas: Apply light distressing methodically to raised areas and edges, revealing underlying wood.
- Vintage-Finish Seal: Seal with a specialized vintage-finish protective coating that preserves the delicate antique look.
18. Animal Print Adventure
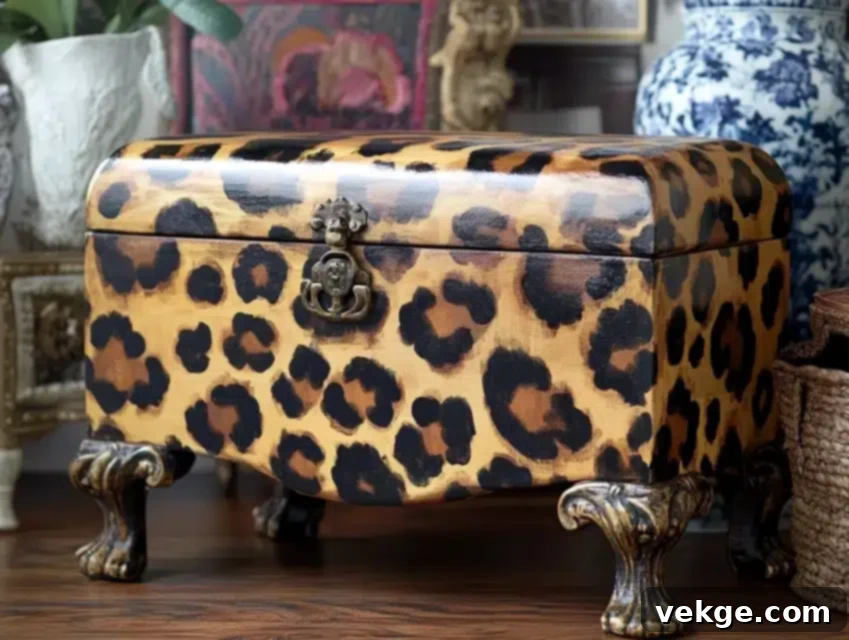
This bold and adventurous transformation originated from a request by a fashion-forward client seeking a statement piece. The intricate leopard print pattern demanded careful planning and execution to achieve a truly natural and organic appearance, avoiding any manufactured look. Each individual spot required unique characteristics and variations in shape and size, contributing to the overall authenticity. Despite its dramatic nature, the chosen neutral color palette of the leopard print kept the design surprisingly versatile, allowing it to integrate seamlessly into various interior styles. This chest stands as a testament, proving that animal prints can be both sophisticated and playfully chic in home decor.
DIY Steps:
- Textured Base Tone: Create a perfect base tone with a specialized texture primer, mimicking the subtle texture of fur.
- Layered Brown Shades: Layer different brown shades systematically for depth, creating a realistic undercoat for the print.
- Unique Spot Patterns: Paint each spot pattern with unique characteristics carefully, varying sizes and shapes for naturalism.
- Dimensional Shadows: Build shadows around spots properly to create a three-dimensional, realistic effect.
- Realistic Fur Highlights: Add highlight details within and around spots to create a realistic fur-like appearance.
- Edge Blending: Blend edges between spots using special brush techniques to soften transitions and enhance realism.
- Matte Protective Finish: Apply a matte protective finish to maintain a natural look and protect the intricate pattern.
19. Metallic Panel Enhancement
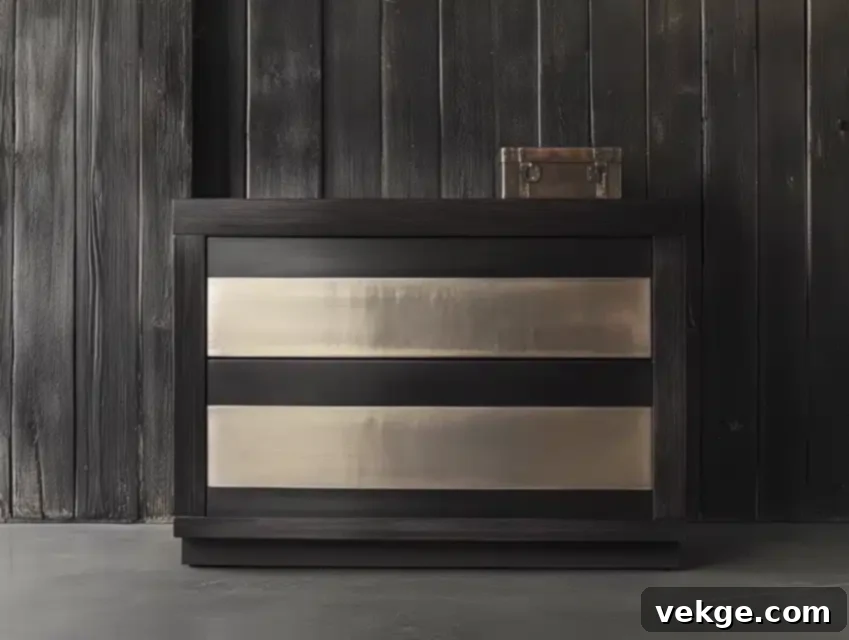
This project began as an intriguing experiment in artfully mixing different finishes and textures to create visual intrigue. The main body of the cedar chest received a deep, sophisticated charcoal paint treatment, providing a rich, matte backdrop. Against this dark canvas, shimmering metallic silver panels were meticulously applied, creating a stunning and dramatic contrast. Special attention to the panel edges was paramount, ensuring exceptionally clean lines and sharp distinctions between the matte and metallic finishes. The innovative combination of these disparate textures resulted in an unexpected and captivating visual drama, elevating the chest to a modern art piece.
DIY Steps:
- Dual Surface Preparation: Prepare surfaces differently for each finish application; for example, rougher for matte, smoother for metallic.
- Dark Base Coat: Apply a dark base coat to non-metallic areas first, ensuring it dries completely before masking.
- Precision Masking: Mask panel areas with extreme precision techniques using high-quality painter’s tape to define crisp lines.
- Metallic Paint Layering: Layer metallic paint for proper coverage carefully, building up the shimmer with thin coats.
- Clean Mask Removal: Remove masking tape while the metallic paint is slightly wet, maintaining crisp edge lines.
- Dual Finish Coating: Add protective coating suitable for both matte and metallic finishes, ensuring compatibility.
- Care Instructions: Create adequate care instructions specific to the dual finishes to maintain their distinct qualities.
20. Beach-Inspired Weathered Finish
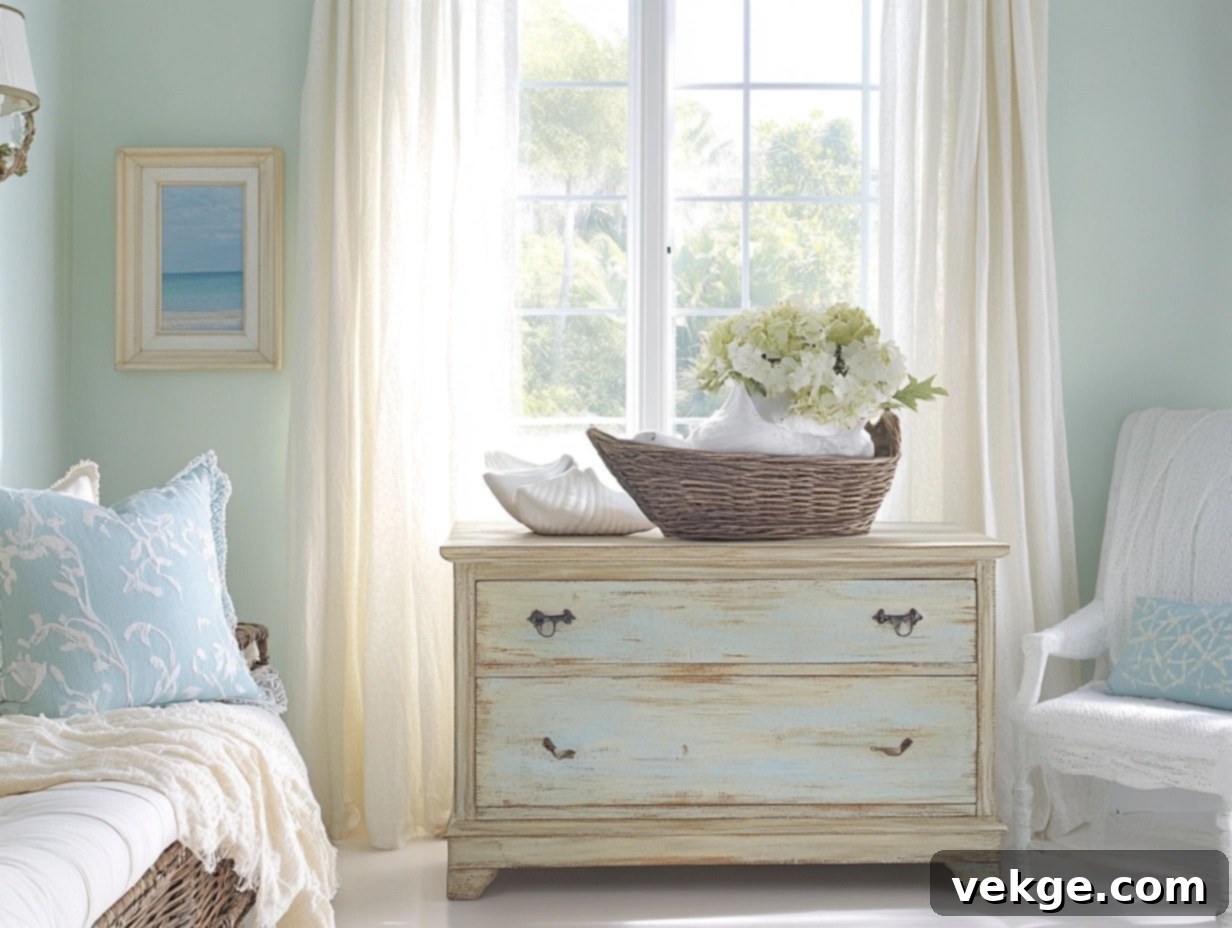
My cherished coastal living experience deeply inspired this naturally aged, beach-inspired aesthetic. The harmonious combination of sandy beige and weathered blue hues perfectly captured the serene essence of the beach and ocean. Specialized techniques were employed to meticulously mimic the effects of years of salt air exposure, sun-bleaching, and gentle erosion. Strategically white-washed areas effectively suggested the sun-bleached wood found along shorelines, adding authentic detail. This distinctive finish quickly became my signature style for numerous coastal home projects. The transformed chest effortlessly brings immediate beach memories and a calming, seaside ambiance to any space, a quality even inland clients frequently request for an authentic coastal weathering effect.
DIY Steps:
- Base Texture Creation: Create base texture using specialized wood treatment techniques (e.g., dry brushing, wire brushing) to mimic weathered wood.
- Layered Weathered Colors: Layer multiple colors (e.g., greens, blues, grays) for an authentic weather-worn appearance, allowing previous layers to show through.
- White-Washing Effect: Apply the white-washing effect in strategic areas carefully, simulating sun-bleached wood.
- Progressive Color Depth: Build depth through progressive color application methods, ensuring a natural blend.
- Subtle Sand Texture: Add subtle sand texture in specific areas methodically using fine sand mixed with paint or glaze.
- Salt-Spray Effect: Create a salt-spray effect using a specialized finishing technique, mimicking ocean mist.
- Marine-Grade Seal: Seal with marine-grade protective coating thoroughly, offering durability and moisture resistance, ideal for coastal themes.
21. Natural Top Preservation
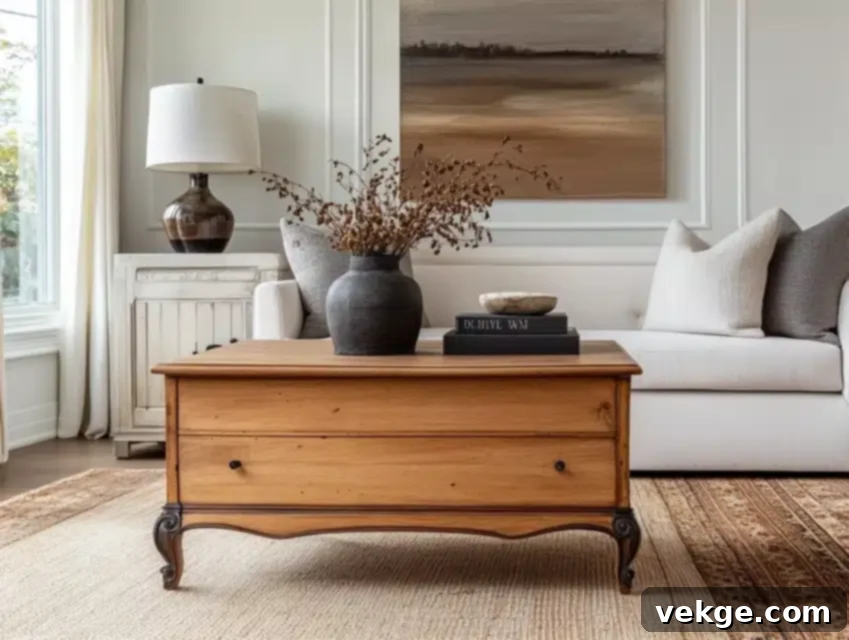
This particular design beautifully celebrates the perfect balance between preserving historical elements and introducing modern aesthetics. The natural cedar top is meticulously preserved, maintaining its exquisite grain and inherent protective properties, a true ode to its original craftsmanship. Careful sanding was performed to reveal stunning wood patterns that had been hidden under years of wear and aging. The freshly painted base provides a contemporary style that harmoniously honors the chest’s traditional elements. This striking combination of old and new proved to be incredibly inspiring, leading to many similar furniture transformations and design commissions afterward.
DIY Steps:
- Cedar Top Sanding: Sand cedar tops carefully with progressive grits of sandpaper (e.g., 120, 220, 320-grit) to reveal their natural beauty.
- Wood Grain Enhancement: Apply a specialized stain or clear coat (e.g., lacquer, polycrylic) to enhance and protect the natural wood grain pattern.
- Unpainted Area Protection: Meticulously protect unpainted areas (the cedar top) during the base color application process using painter’s tape and paper.
- Clean Transition Line: Create a clean, crisp transition line between the preserved top and the painted base precisely with careful taping.
- Systematic Base Painting: Build up paint layers on the lower portion systematically, ensuring even coverage and a smooth finish.
- Dual Surface Coating: Add protective coating suitable for both surfaces (e.g., polyurethane for painted, clear finish for wood) ensuring compatibility.
- Detailed Care Instructions: Create detailed care instructions tailored for dual finishes, advising on how to maintain both the natural wood and painted surfaces.
Essential Maintenance Guide for Your Painted Cedar Chests
After years of creating and maintaining these cherished pieces, I’ve developed specific care routines that ensure their lasting beauty and functionality. Adhering to these proven maintenance approaches will significantly extend the life and vibrancy of your painted cedar chest.
Daily Care Tips for Longevity
Regular, gentle maintenance is key to preventing most common issues and keeping your chest looking pristine:
- Dust Regularly: Dust the surface only with a soft, clean microfiber cloth to avoid scratches and buildup.
- Avoid Direct Sunlight: Position your chest away from direct sunlight exposure to prevent fading and paint discoloration over time.
- Maintain Consistent Temperature: Ensure a consistent room temperature and humidity level to prevent wood expansion, contraction, and potential cracking of the paint.
- Use Coasters: Always use proper coasters under any items placed on the chest’s surface to protect against moisture rings and heat damage.
- Immediate Moisture Check: Promptly wipe away any spills or moisture to prevent water damage or staining, especially on less durable finishes.
Seasonal Maintenance for Lasting Beauty
I recommend incorporating these quarterly care steps into your routine to ensure comprehensive protection and address minor wear:
- Deep Clean Surfaces: Deep clean painted surfaces with appropriate, mild cleaners (non-abrasive) designed for painted furniture.
- Inspect for Wear: Thoroughly inspect the chest for any new wear patterns, chips, scratches, or signs of damage.
- Touch Up Imperfections: Promptly touch up any chips or scratches using matching paint to prevent further damage and maintain aesthetics.
- Check Hardware: Periodically check the tightness of all hardware (hinges, pulls, locks) and tighten as needed to ensure functionality.
- Apply Protective Wax: If your finish (like chalk paint) benefits from wax, apply a fresh coat of protective furniture wax as needed (typically every 3-6 months).
Long-Term Protection Strategies
For truly lasting beauty and an heirloom quality, consider these long-term protection strategies:
- Annual Professional Touch-ups: For heavily used pieces, consider annual professional touch-ups to address accumulated wear.
- Periodic Refinishing: Plan for a full refinishing every 5-7 years, or as needed, depending on usage and environmental factors, to restore its original luster.
- Regular Hardware Maintenance: Clean and lubricate hardware regularly to prevent corrosion and ensure smooth operation.
- Careful Moving & Placement: Always lift and move the chest carefully, avoiding dragging, and choose stable, level placement.
- Environmental Protection: Protect from extreme environmental factors like very high humidity or prolonged dry conditions, which can harm wood and paint.
Special Finish Care Considerations
Different finishes require specific attention to maintain their unique characteristics:
- Chalk Paint: Requires regular waxing every 6 months to maintain its matte finish and protect against moisture.
- Metallic Finishes: Avoid abrasive cleaners or harsh chemicals which can dull the metallic sheen; use soft cloths and mild solutions.
- Distressed Finishes: Touch-up wear naturally by selectively distressing new paint if a more aged look is desired, rather than trying to hide it.
- Clear Coats: Periodically check for signs of clouding, peeling, or cracking, which may indicate a need for reapplication.
- Specialty Finishes: Always follow any custom care instructions provided for highly specialized or unique finishes to ensure their integrity.
Remember, proper and consistent care extends the life and beauty of your painted cedar chest, ensuring it continues to protect its cherished contents while enhancing your home’s aesthetic for generations.
Conclusion
After transforming hundreds of cedar chests over the years, my greatest lesson has been that successful painting is a harmonious blend of meticulous preparation, the selection of quality materials, and, most importantly, patience. Each cherished piece presents a unique canvas for creative expression, allowing you to infuse your personal style while preserving its inherent practical purpose as a storage solution. The journey from an old, worn chest to a stunning focal point is incredibly rewarding.
As you embark on your own cedar chest transformation, keep these key points in mind for optimal results:
- Test All Products: Always test new paints, primers, and sealers on an inconspicuous area or scrap wood before full application to ensure compatibility and desired results.
- Prioritize Preparation: Dedicate ample time to preparation steps, as thorough cleaning, sanding, and priming are the foundation of a long-lasting, professional finish.
- Document Your Process: Keep a record of the products and techniques you use for future reference, making touch-ups or replicating the finish much easier.
- Consider the Environment: Think about the chest’s intended environment (e.g., high traffic area, humid climate) when choosing durable paints and protective coatings.
- Ensure Ventilation: Maintain proper ventilation during all painting and drying stages to ensure safety and facilitate faster, more even drying.
- Follow Manufacturer Instructions: Always adhere strictly to the manufacturer’s instructions for all paint, primer, and topcoat products regarding application, drying times, and safety.
- Establish Maintenance Routines: Create and follow a proper maintenance routine to protect your beautiful new finish and ensure its longevity.
Whether you choose the timeless elegance of classic whites, the bold statement of vibrant patterns, or the rustic charm of distressed textures, your painted cedar chest is destined to become more than just a functional storage piece. It will transform into a stunning, personalized design element that truly reflects your unique taste and enhances the beauty of your home for years to come.
Frequently Asked Questions About Painting Cedar Chests
What Are Some Creative Ideas for Painting a Cedar Chest?
From my extensive experience, the possibilities are truly vast! Popular and highly effective options include the classic white transformation for timeless versatility, bold geometric patterns for modern minimalist spaces, or a charming distressed finish for a farmhouse or shabby-chic aesthetic. You could also explore ombre effects, hand-painted floral designs, or even a personalized monogram. My best advice is to consider your room’s existing decor and the chest’s future function to guide your design choice. For beginners, starting with simpler designs before attempting complex patterns or advanced techniques is often a great strategy.
What Kind of Paint Is Best for Cedar Wood?
For optimal results on cedar, I always recommend starting with a high-quality oil-based primer. This is crucial for sealing the wood and preventing the natural tannins in cedar from bleeding through your topcoat, which can cause yellowing or discoloration. For the topcoat itself, chalk paint works beautifully if you desire a vintage, matte, or distressed look, often requiring minimal surface preparation. Alternatively, high-quality latex or oil-based paints provide excellent durability and a more robust finish, ideal for pieces that will see frequent use. Always test your chosen paint and primer combination on a hidden area of the chest first to ensure proper adhesion and desired appearance.
Will Painting a Cedar Chest Affect Its Cedar Aroma or Value?
In my many restoration projects, I’ve consistently found that painting only the exterior surfaces effectively maintains the internal cedar scent. The aroma, crucial for moth repellent properties, originates from the raw, unfinished interior wood. As for value, painting an antique cedar chest might affect its value to a purist collector, as it alters the original state. However, for newer or less valuable pieces, a thoughtful, professional transformation with paint can significantly increase its aesthetic appeal and, consequently, its resale value, making it more desirable in contemporary markets. If antique value is a concern, always document the original condition with photographs before beginning any painting project.
How Do I Prepare the Chest for Painting?
Proper preparation is absolutely crucial for a durable and beautiful painted finish. First, thoroughly clean the entire surface with a specialized wood cleaner or a degreaser to remove all dirt, grease, and grime. Next, carefully sand the surface, starting with medium-grit sandpaper (e.g., 120-grit) and progressing to fine-grit (e.g., 220-grit) to create a smooth, etched profile that paint can adhere to. Address any damaged areas by applying wood filler, allowing it to dry, and then sanding it smooth. Most importantly, apply an appropriate primer, ideally one designed for cedar, to prevent tannin bleed-through and ensure excellent paint adhesion.
Can I Preserve the Inside While Painting the Outside?
Absolutely, preserving the interior of a cedar chest is a standard practice and one I always prioritize! The natural properties of cedar, including its distinct aroma and insect-repelling qualities, are best maintained when the interior wood is left unfinished. To achieve this, meticulously use high-quality painter’s tape to mask off all interior edges and thoroughly cover the entire inside of the chest with paper or plastic sheeting. This creates a protective barrier, preventing any paint from reaching the raw cedar inside, thus preserving its natural integrity and the chest’s core storage functionality while allowing for a complete exterior transformation.
