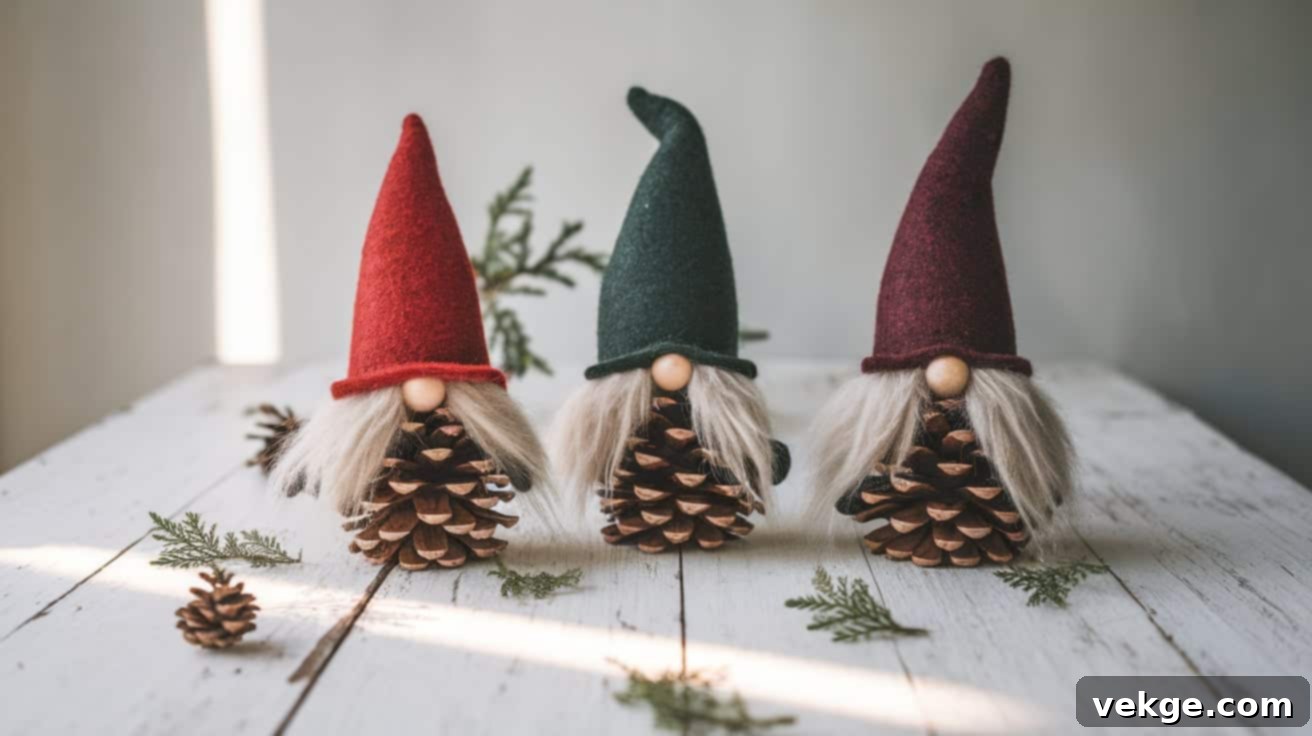
DIY Pinecone Gnomes: Your Ultimate Guide to Crafting Enchanting Holiday Decorations
Pinecone gnomes are more than just simple decorations; they are tiny embodiments of forest magic, bringing a touch of whimsical charm and rustic elegance to any seasonal setting. These delightful figures, meticulously crafted from natural pinecones and a few basic craft supplies, transform readily available elements into heartwarming characters that instantly elevate your holiday decor. Their quaint presence adds a personalized and cozy feel, reminiscent of traditional folklore and the serene beauty of winter woodlands.
The tradition of handcrafting with natural materials like pinecones spans generations, often serving as cherished family activities where loved ones gather to transform nature’s bounty into treasured holiday keepsakes. In today’s fast-paced world, these small woodland friends have found a special and enduring place in modern holiday decorating, offering a touch of handmade authenticity and a connection to nature that mass-produced ornaments often lack. They evoke a sense of nostalgia, comfort, and the joy of creating something beautiful with your own hands.
This comprehensive guide is designed to equip you with everything you need to know about making your own enchanting pinecone gnomes. We will delve into every aspect of the crafting process, from the initial selection of the best materials to detailed, step-by-step instructions that ensure a successful and enjoyable crafting experience. Along the way, you’ll discover invaluable tips and tricks that will help you overcome common challenges and unleash your creativity.
Furthermore, we’ll provide practical advice on where to source your supplies, whether from local craft stores, online marketplaces, or even your own backyard. You’ll also learn smart strategies for managing costs, allowing you to create a delightful family of gnomes without breaking the bank. Crafting these endearing holiday companions is not just about the final product; it’s about the joy of the creative process, the satisfaction of a handmade item, and the smiles they bring to everyone who beholds them.
So, gather your materials, prepare your workspace, and let’s embark on this magical journey of crafting. By the end of this guide, you’ll be an expert pinecone gnome maker, ready to infuse your home with unique, forest-inspired charm and create unforgettable festive memories.
Essential Materials and Tools for Crafting Pinecone Gnomes
Creating the perfect pinecone gnome begins with selecting the right materials and having the necessary tools at hand. A well-stocked craft station makes the entire process smoother and more enjoyable, ensuring your gnomes are both charming and durable.
1. Essential Supplies: The Building Blocks of Your Gnomes
Your basic supply list forms the foundation of these charming decorations. First and foremost, you’ll need a collection of pinecones. For the best results, look for sturdy, open pinecones that are relatively symmetrical and range from 3 to 4 inches in height. These provide an ideal base for your gnome’s body, offering natural texture and character. Next, craft felt sheets are crucial for the gnomes’ hats, offering a versatile and easy-to-work-with material that comes in a wide array of colors. You can choose traditional reds, greens, and whites for a festive look, or explore more muted, earthy tones for a natural woodland vibe.
White craft paint, preferably acrylic, combined with small foam brushes, will help you create the signature fluffy beard that brings these gnomes to life. Acrylic paint adheres well to pinecone scales and dries quickly. For the noses, wooden beads about 1 inch (or slightly smaller, depending on your pinecone size) are perfect. These round beads add a distinct, friendly face to each gnome, and their natural wood tone complements the pinecone base beautifully. Alternatively, you can use small felt balls, pebbles, or even air-dry clay to sculpt custom noses.
2. Tools Required: Making Assembly Easy and Secure
A hot glue gun is arguably the most important tool for this project, making the assembly process quick, secure, and efficient. Opt for a glue gun with both high and low-temperature settings; the low setting is safer, especially if children are assisting, while the high setting offers a stronger bond for critical attachments. Always use glue sticks specifically designed for your hot glue gun type. Regular sharp scissors are sufficient for cutting felt, but if you plan on using thicker or more delicate fabrics like wool felt, a pair of fabric scissors will provide cleaner, more precise edges and prevent fraying.
For added safety, especially when crafting with younger enthusiasts, low-temperature glue guns are an excellent choice. They reduce the risk of burns while still providing adequate adhesion for felt, wood, and pinecone surfaces. Other helpful tools might include tweezers for precise placement of small details, a craft knife for intricate felt cuts (use with caution), and a non-stick silicone mat to protect your workspace from glue drips.
3. Alternative Materials: Enhancing Quality and Customization
While standard craft store felt sheets are affordable and widely available (typically around $1 per sheet), natural wool felt offers a significantly higher quality option. Priced between $3-5 per sheet, wool felt provides superior durability, a richer color palette, and a more luxurious, finished look and feel. Its natural fibers are also easier to cut and less prone to pilling, making your gnomes feel even more special and long-lasting.
If gathering natural pinecones isn’t feasible, or if you prefer a ready-to-use option, consider using pine-scented pinecones from craft stores. These often come pre-cleaned, pre-baked, and sometimes even pre-painted, saving you preparation time. The added pleasant holiday smell can also enhance the festive ambiance of your finished gnomes. For those who enjoy foraging, look for a variety of pinecone shapes and sizes, as different species offer unique textures – from the tightly closed scales of a spruce cone to the elongated grandeur of a sugar pinecone. Experimenting with these natural variations can lead to truly unique gnome characters.
Preparing Your Pinecones: From Forest Floor to Festive Decor

Proper pinecone preparation is a crucial step to ensure your gnomes are not only beautiful but also long-lasting and free from unwanted guests. This section covers everything from selecting the best pinecones to cleaning and storing them effectively.
Selecting Quality Pinecones for Your Gnomes
The quality of your pinecones significantly impacts the final look of your gnomes. When foraging or buying, look for pinecones that stand upright and have a relatively flat base, providing a stable foundation for your gnome. The ideal size ranges between 3-4 inches tall, allowing for good visibility of the beard and hat without being too bulky or too small to work with. Pay attention to the scales: they should be well-defined, open, and free from excessive sap buildup, which makes painting difficult. The texture created by these scales is perfect for giving your gnome’s beard a natural, bushy appearance.
Freshly collected pinecones should feel solid and substantial. Gently inspect them for any signs of decay, such as crumbling scales or soft spots. Avoid pinecones with visible insect damage, spider webs, or mold, as these can harbor pests that might later infest your home or compromise the integrity of your craft. While slightly damaged pinecones can sometimes add character, extensive damage might cause them to fall apart during crafting or over time. Different pinecone varieties, like Scotch pine, Eastern White Pine, or Ponderosa pine, offer unique shapes and textures, so don’t be afraid to experiment!
Effective Cleaning Methods for Natural Pinecones
To ensure your collected pinecones are clean, sanitized, and pest-free, baking is the most effective method. Preheat your oven to 200 degrees Fahrenheit (approximately 93 degrees Celsius). Line a baking sheet with aluminum foil or parchment paper to catch any dripping sap. Arrange the pinecones in a single layer, ensuring they don’t touch, and bake them for 30 minutes to an hour. The heat will kill any hidden bugs, dry out moisture, and set any remaining sap, preventing stickiness. Keep a close eye on them to prevent burning, as cooking times can vary depending on their size and moisture content.
After baking, let the pinecones cool completely to room temperature. This cooling period is essential as it allows any sap that softened during heating to re-harden, making the pinecones much easier and cleaner to handle for painting and decorating. For very dirty pinecones, you can first wash them in a sink with warm soapy water (using a stiff brush to remove dirt) and then air-dry them for several days before baking. This two-step process ensures a thoroughly clean and sanitized base for your gnomes.
Optimal Storage Solutions for Prepared Pinecones
Once your pinecones are cleaned and cooled, proper storage is key to preserving them for future crafting projects. Store them in a cardboard box, mesh bag, or any container that allows for good air circulation. Avoid airtight plastic containers, as these can trap moisture and lead to mold growth. Keep the stored pinecones in a dry, cool place away from direct sunlight, which can cause them to warp, fade, or become brittle over time. A pantry, closet, or attic are suitable locations.
It’s a good practice to label your storage containers with the date of collection and cleaning. This helps you track how long you’ve had them and ensures you use the oldest ones first, maintaining a fresh rotation of crafting supplies. With proper care, your prepared pinecones can last for years, providing a ready supply for countless gnome-making adventures and other natural craft projects.
A DIY Step-By-Step Guide to Crafting Charming Pinecone Gnomes
These detailed steps will guide you through the process of transforming simple pinecones into a delightful family of gnome decorations, perfect for bringing holiday cheer to your home or gifting to loved ones!
Step 1: Create the Gnome Hat Pattern and Cut the Felt
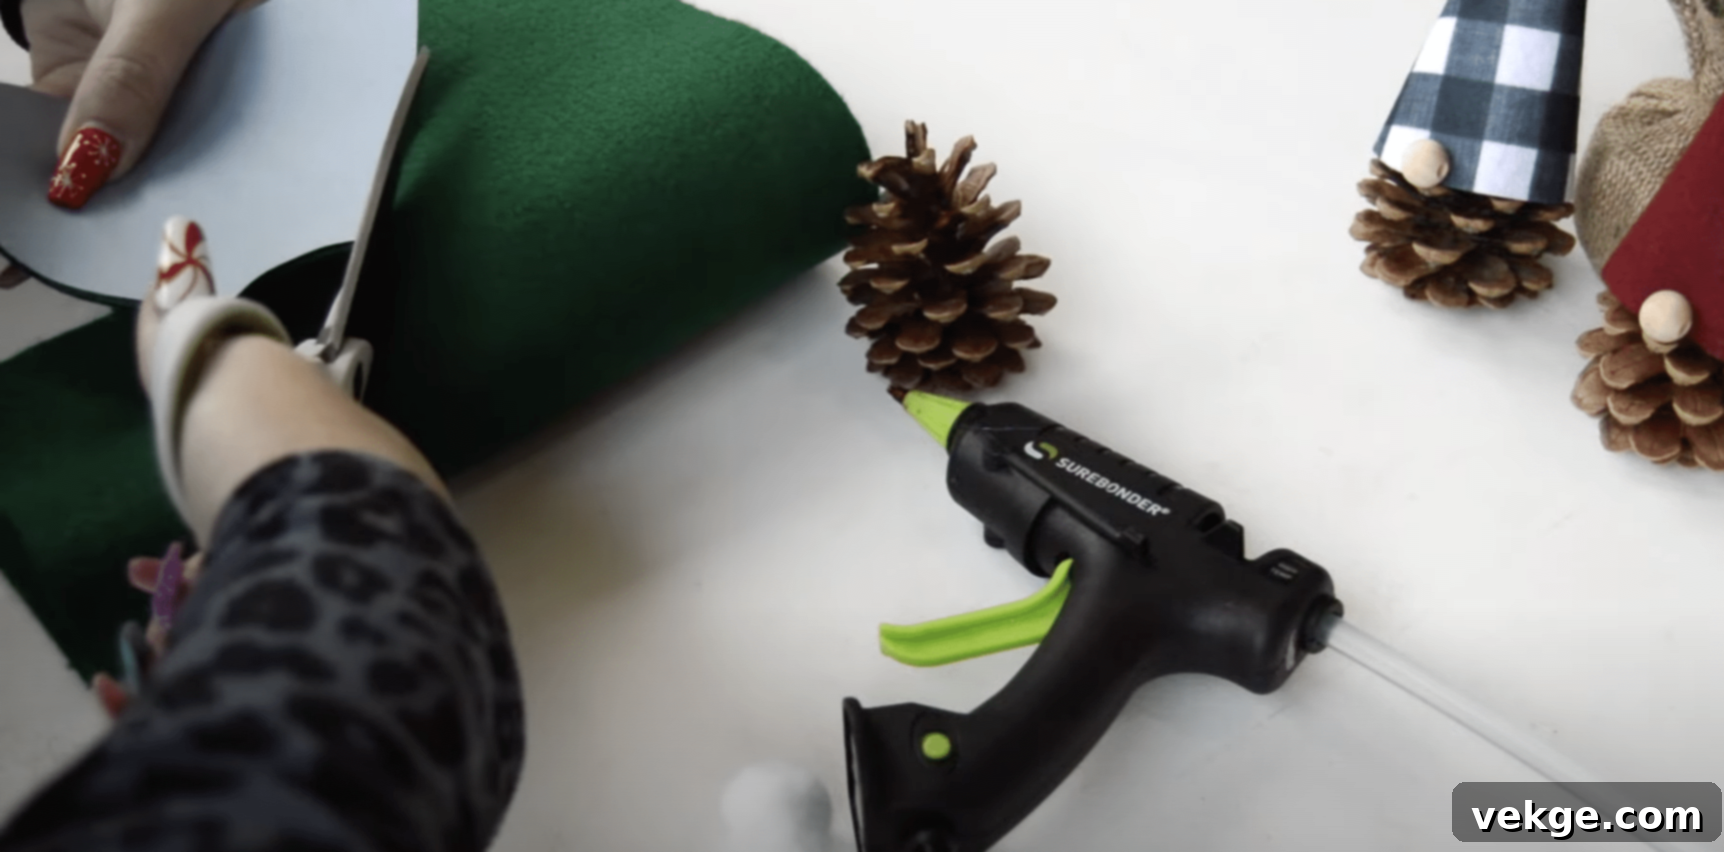
The gnome’s hat is its most distinguishing feature, and creating a well-fitted one is key. Start by downloading and printing the free hat template provided. Carefully cut out the paper template. Before cutting your felt, hold the template against your chosen pinecone to gauge the appropriate size. You can easily adjust the template size by printing it at a larger or smaller percentage for mini or extra-large pinecone gnomes. Once satisfied, place the template on your craft felt, trace around it with a fabric marker or chalk, and then cut out the felt piece with sharp scissors.
Alternatively, if you prefer a freehand approach, you can roll a piece of felt into a cone shape directly around the top of your pinecone. Ensure the felt completely covers the pinecone’s top width, with an additional half-inch overlap for gluing. Trim the felt to achieve your desired hat height and shape (pointy, slouchy, or rounded). Unroll the felt, clean up any rough edges, and prepare it for gluing. This method offers more flexibility for unique hat styles.
Step 2: Shape and Secure the Gnome Hat
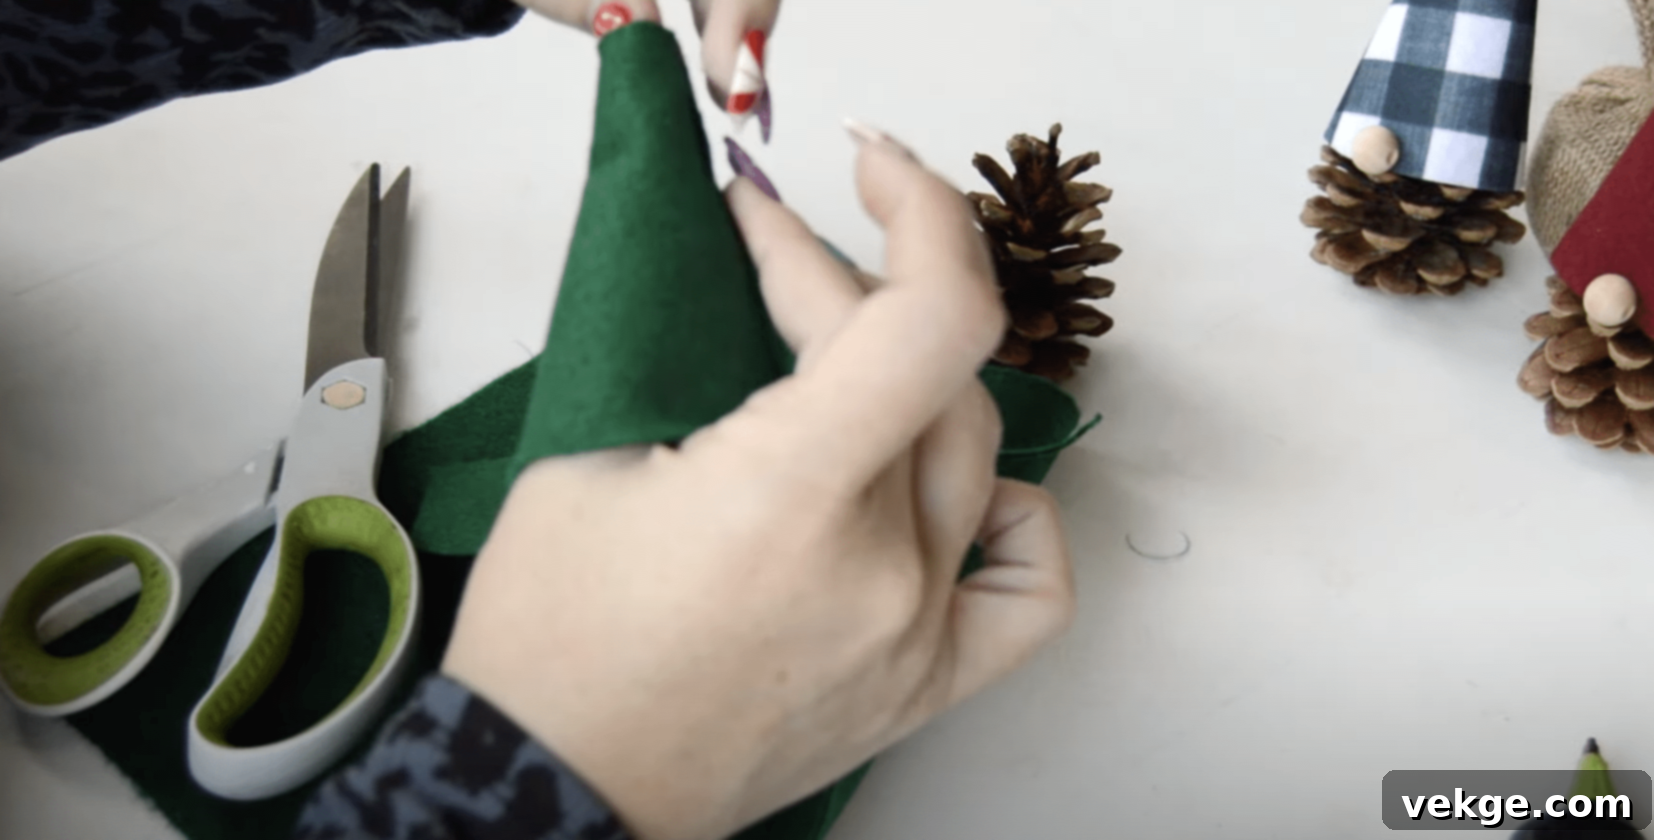
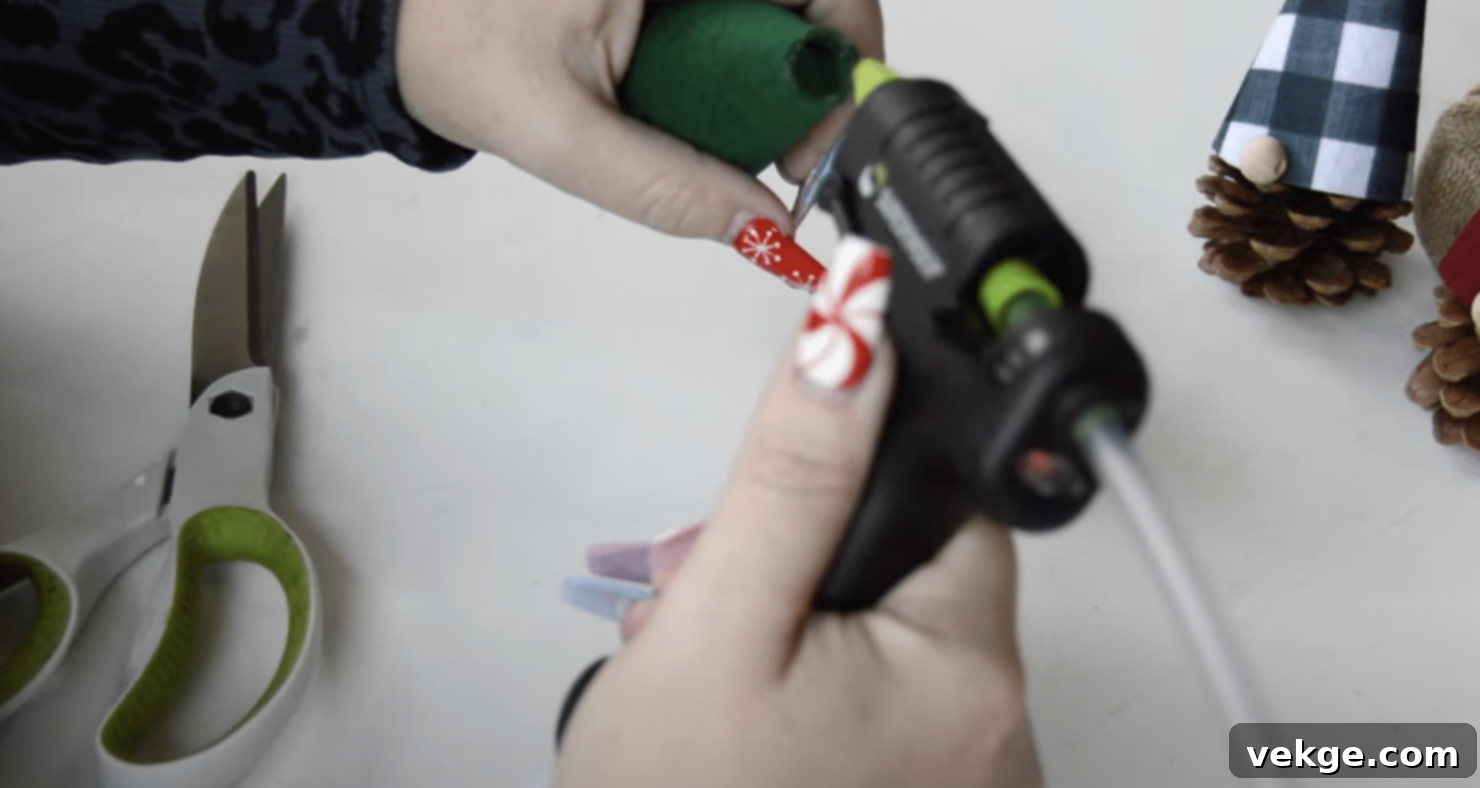
With your felt piece cut, it’s time to form the basic gnome hat. Carefully roll the felt into a cone shape, aligning the straight edges. Apply a thin, continuous line of hot glue along one of the long edges of the felt, then press the other edge firmly over it to secure the seam. Hold it in place for a few seconds until the glue cools and sets. For a hat with a closed, more rounded top, overlap the edges slightly more at the top before gluing. If you desire a slouchy hat, avoid gluing the very tip and let it bend naturally. Ensure the base of the cone is wide enough to fit comfortably over the narrow end of your pinecone.
Step 3: Decorate the Hat and Personalize Your Gnome
This is where your creativity truly shines! Add fun and festive details to your gnome’s hat to give it personality. A small pom-pom glued to the tip is a classic choice, but you can also attach a tiny jingle bell for a festive sound, a piece of faux fur for a cozy brim, or even miniature leaves and berries for a woodland touch. Consider adding glitter glue, small buttons, embroidered stitches, or a mini natural twig. The possibilities are endless, allowing each gnome to have a unique character and style. Let your imagination guide you in making each hat a miniature work of art.
Step 4: Attach the Hat to the Pinecone Body
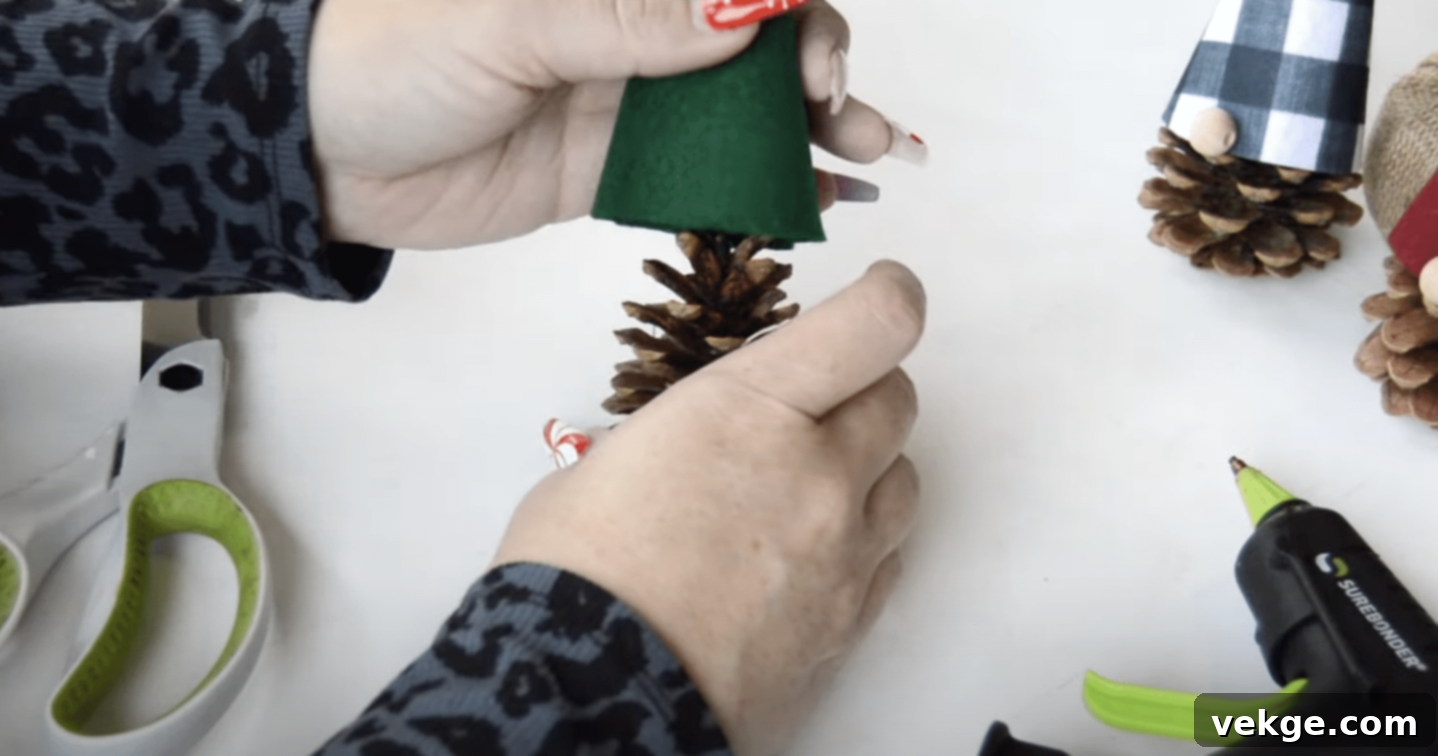
Now, it’s time to bring your gnome to life by combining the hat and body. Apply a generous amount of hot glue to the inside rim of the felt hat. Carefully position the hat onto the narrow, pointed end of the pinecone, ensuring that the wider, flat end of the pinecone faces downward to form the base of your gnome. Press firmly and hold the hat in place until the glue has cooled and created a secure bond. For extra stability, you might add a few small dabs of glue around the hat’s base directly onto the pinecone scales. This step transforms the pinecone into a recognizable gnome figure.
Step 5: Create the Gnome Beard
While not explicitly pictured in the original steps, the beard is a quintessential feature of any gnome. There are two primary methods: painting or adding fiber. For a painted beard, use white craft paint and a foam brush to dab paint onto the scales of the pinecone, starting from just below where the hat sits and extending downwards. Focus on the tips of the scales to create a textured, wispy beard effect. Build up the paint in thin layers for better coverage and a more natural look. Allow each layer to dry before adding the next. Alternatively, you can use a small piece of white faux fur, cotton balls, or wool roving. Cut a small, triangular piece of faux fur or shape the cotton/roving into a beard. Hot glue it securely under the front of the hat, letting it cascade down over the pinecone scales to create a fluffy, voluminous beard.
Step 6: Add the Gnome Nose for Character
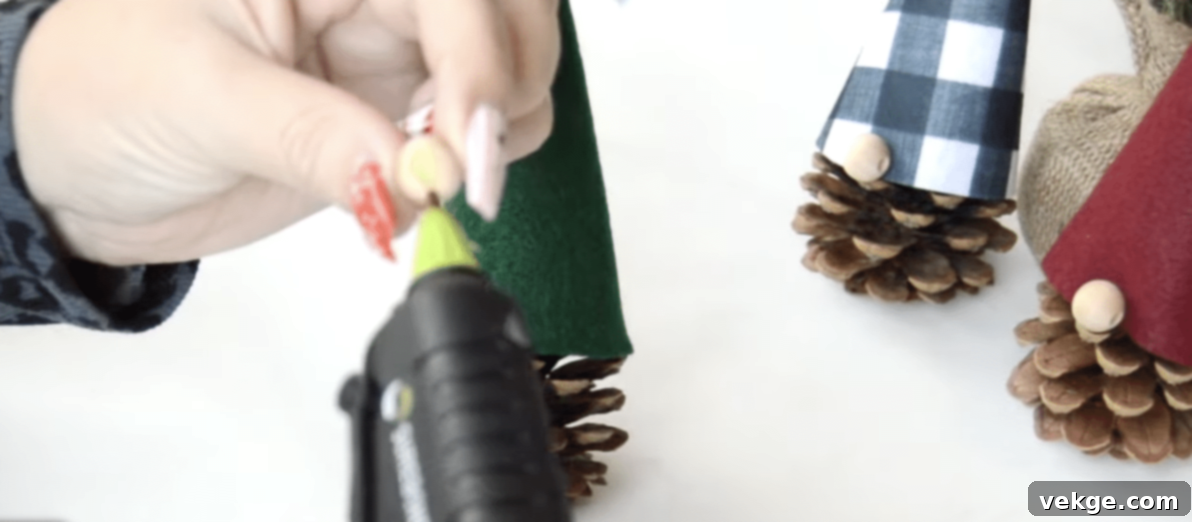
The nose is the final touch that gives your gnome its charming expression. Take your chosen wooden bead (or alternative nose material) and apply a small dot of hot glue to its flatter side. Carefully position the bead directly onto the front of the hat, just above the top edge of the beard. The felt surface of the hat provides a much better and more stable grip for the bead than trying to glue it directly onto the uneven pinecone scales. Press the bead firmly into place until the glue sets. Adjust its position slightly to ensure it looks perfectly aligned and gives your gnome the friendly face you envisioned. Your pinecone gnome is now complete and ready to bring smiles!
Video Tutorial for Visual Learners
For more detailed visual guidance on crafting your pinecone gnomes, check out this helpful video tutorial by Sarah Nenni-Daher. It provides an excellent step-by-step walkthrough of the process.
Troubleshooting Common Issues in Pinecone Gnome Crafting
Even experienced crafters encounter challenges. Here are some common issues you might face when making pinecone gnomes and how to effectively troubleshoot them, ensuring a smooth crafting experience.
Paint Application Problems: Achieving the Perfect Beard
One frequent issue is that white paint, especially acrylic, might not stick well to the naturally waxy or somewhat oily surfaces of some pinecone scales. To combat this, apply a very thin base coat of paint first, acting as a primer. Let this initial layer dry completely before adding a second coat. This technique improves adhesion and allows for better, more even coverage without clumping. If certain scales stubbornly resist paint, don’t force it. Instead, focus on painting the more visible edges of the scales to create a natural-looking, textured beard effect, rather than trying to coat every single surface perfectly. Using a dabbing motion with a foam brush often works better than brushing, as it pushes the paint into the crevices of the scales.
Assembly Challenges: Ensuring Stability and Durability
Hot glue, while fast, may sometimes struggle to form a strong, lasting bond on the smooth or uneven surfaces of pinecones. If you find elements like hats or noses not holding securely, try gently roughing up the specific areas on the pinecone where the glue will be applied. A fine-grit sandpaper or a small file can create a better surface for the glue to adhere to, significantly improving the bond. If your finished gnome tends to wobble or tip over, check the alignment of its base. An uneven pinecone bottom is a common culprit. To stabilize it, you can glue a small, circular piece of felt to the very bottom, creating a flat pad that balances the gnome. Alternatively, you can add a small, flat stone or a coin to the inside of the pinecone’s base (if hollow enough) before attaching the felt pad, giving it extra weight and stability.
Where to Buy Pinecone Gnomes and Crafting Materials
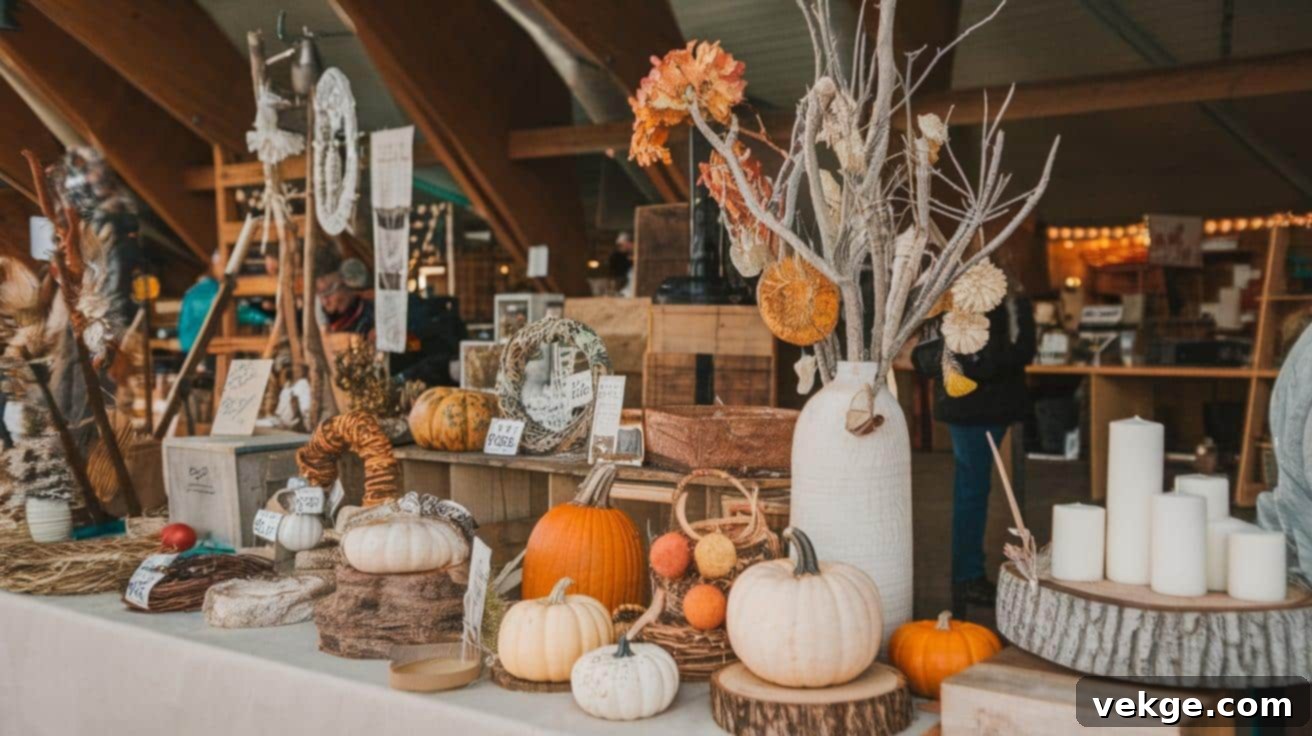
Whether you’re looking for inspiration, ready-made gifts, or the supplies to embark on your own crafting journey, there are numerous places to find pinecone gnomes and their essential components.
Online Marketplaces: Convenience and Variety at Your Fingertips
Online marketplaces offer unparalleled convenience and a vast selection. Major craft supply websites like Amazon, Etsy, and specialized craft stores (e.g., Michaels.com, HobbyLobby.com) often stock complete kits for making pinecone gnomes, which can be an excellent starting point for beginners. These kits typically include all the necessary pinecones, felt, beads, and glue. Beyond kits, you can find individual components like high-quality wool felt, specialized wooden beads, and even pre-cleaned, scented pinecones. Handmade marketplaces like Etsy are also treasure troves for unique, custom-made pinecone gnomes created by small business owners and talented artisans. Supporting these creators not only gives you a unique item but also helps sustain the vibrant crafting community.
Local Sources: Community Connection and Immediate Access
For those who prefer a more tactile shopping experience, visiting nearby craft stores such as Michaels, Hobby Lobby, or Jo-Ann Fabrics provides immediate access to supplies. Many of these stores offer seasonal discounts on holiday crafting materials, especially during the autumn and winter months, making it a great time to stock up. Local farmer’s markets, craft fairs, and holiday bazaars are fantastic venues to discover unique crafting supplies. Here, you can often find vendors selling natural materials like bundles of pinecones (sometimes pre-cleaned), handmade felt, and decorative embellishments at reasonable prices. These events also offer a chance to connect with local crafters, gain inspiration, and even purchase a beautiful, ready-made pinecone gnome from an artisan. Don’t forget the most local source of all: your own backyard or local park (check local regulations) for foraging pinecones – a free and fun way to gather your main material!
Expenses and Cost Considerations for Your Gnome Project

Crafting pinecone gnomes can be an incredibly affordable hobby, especially if you source some materials from nature. However, understanding the potential costs and how to manage them can help you budget effectively for your projects.
Material Costs: Budgeting for Your Gnome Family
For a single pinecone gnome, the basic supplies typically cost between $3 and $5. This estimate generally covers a pinecone (if purchased), a small piece of craft felt, a wooden bead for the nose, a bit of paint, and hot glue. However, purchasing materials in bulk or larger quantities for multiple gnomes can significantly reduce the per-unit cost, making it much more economical for creating a whole family of gnomes or for group crafting activities. For example, a pack of pinecones might cost less per individual cone than buying them separately, and a large sheet of felt yields many hats.
If you opt for quality upgrades, such as premium wool felt, specialty wooden beads, or unique embellishments like miniature bells or high-grade faux fur, the cost per gnome might increase to $7-10 or even more. Consider these premium materials for gnomes intended as special gifts, heirloom decorations, or items you plan to sell, as the enhanced quality justifies the higher expense and adds a touch of luxury to the finished product.
Cost-Saving Tips: Crafting Smart on a Budget
There are several clever ways to minimize the expenses of your pinecone gnome projects without sacrificing quality. Firstly, purchase basic supplies during after-season sales. Many craft stores offer significant discounts on holiday craft materials in January and February, so planning ahead can save you a substantial amount. Keep an eye out for clearance bins year-round for felt scraps or embellishments.
Secondly, consider sharing supplies with other crafters. Organizing a craft group or simply pooling resources with friends allows everyone to benefit from bulk purchasing power, reducing individual costs for items like glue sticks, paint sets, or larger rolls of felt. This also fosters a sense of community and provides a fun social activity. Lastly, embrace foraging for pinecones in local parks or your backyard (ensure it’s permissible and safe). This is a completely free way to acquire your primary material and adds an element of adventure to your crafting journey. Repurposing old fabric scraps for hats or using natural elements like twigs and small stones for decorations can further reduce costs and add unique, eco-friendly touches.
Final Words: Embrace the Joy of Pinecone Gnome Crafting
Creating pinecone gnomes is a deeply rewarding endeavor that allows you to infuse your holiday decorations with a personal touch and a dash of forest magic. These charming, small friends do more than just decorate a space; they tell a story, spark conversation, and make incredibly thoughtful, handmade gifts for family, friends, and colleagues. Each gnome, with its unique hat, beard, and expression, carries a piece of your creativity and effort, making it a truly special addition to any home.
We absolutely adore seeing your handmade gnome creations! Don’t hesitate to share photos of your festive forest dwellers on social media. Tag us or use relevant hashtags to connect with other crafters and inspire a wider community. Remember, every gnome has its own distinct personality, and yours will undoubtedly be special and cherished. Your unique designs and personal touches are what make these crafts so captivating.
Are you eager for more craft ideas and creative inspiration? Sign up for our weekly newsletter! You’ll receive a curated selection of seasonal projects, invaluable crafting tips, and a constant stream of creative ideas delivered directly to your inbox. As a subscriber, you’ll also gain exclusive access to our advanced craft tutorials and be among the first to receive early notice about upcoming holiday projects and special offers.
Always remember, the true essence of crafting lies in enjoying the process as much as anticipating the beautiful result. Start with just one gnome, take your time, and savor each step. Before you know it, you might find yourself surrounded by a delightful, ever-growing family of these festive friends, each bringing a unique charm to your home and filling your heart with the joy of creation. Happy crafting!
Frequently Asked Questions (FAQs) About Pinecone Gnomes
How to Make a Pinecone Gnome Hat?
To make a pinecone gnome hat, start by cutting a piece of felt into a cone shape using a template or by freehand. Roll the felt into a cone and secure the seam with hot glue. You can then decorate the hat with various embellishments like a pom-pom, a small bell, faux fur trim, or glitter to give your gnome a personalized touch. Ensure the hat’s base is wide enough to fit snugly over the top of your chosen pinecone.
Are There Vintage Pinecone Gnome Designs?
Yes, vintage pinecone gnome designs often emphasize natural tones, reflecting a rustic and timeless aesthetic. These gnomes typically feature simple felt hats in muted colors (like earthy greens, browns, and deep reds), natural pinecones that are sometimes left unpainted or only lightly glazed, and hand-painted wooden faces with minimal details, usually just the nose. This style evokes a nostalgic, charming, and cozy holiday spirit, reminiscent of traditional European folk crafts.
How Do I Preserve Pinecones for Crafting?
To preserve pinecones for crafting and ensure they are pest-free, bake them on a foil-lined baking sheet at 200°F (93°C) for 20-30 minutes. This process sterilizes them and removes any sap or moisture. After cooling, you can clean them further with a stiff brush to remove any lingering dirt. For added longevity and a polished look, you can seal the dried pinecones with a clear acrylic spray sealant or varnish, which also enhances their natural luster and protects them from decay.
Can Kids Participate in Making Pinecone Gnomes?
Absolutely! Making pinecone gnomes is a fantastic craft for children, especially with adult supervision. Kids can help collect pinecones, select felt colors, paint the beards (using non-toxic paints), and choose decorations for the hats. For safety, adults should handle the hot glue gun or opt for low-temperature glue guns or craft glue that is safer for younger hands. This activity helps develop fine motor skills, creativity, and a connection to nature.
How Long Do Handmade Pinecone Gnomes Last?
When properly prepared and stored, handmade pinecone gnomes can last for many years, even becoming cherished family heirlooms. Baking the pinecones prevents pest infestation and decay, while using durable materials like wool felt and strong adhesive ensures the gnome’s structural integrity. Storing them in a dry, cool place away from direct sunlight and humidity during the off-season will help maintain their beauty and prevent deterioration, allowing you to enjoy them for many holidays to come.
