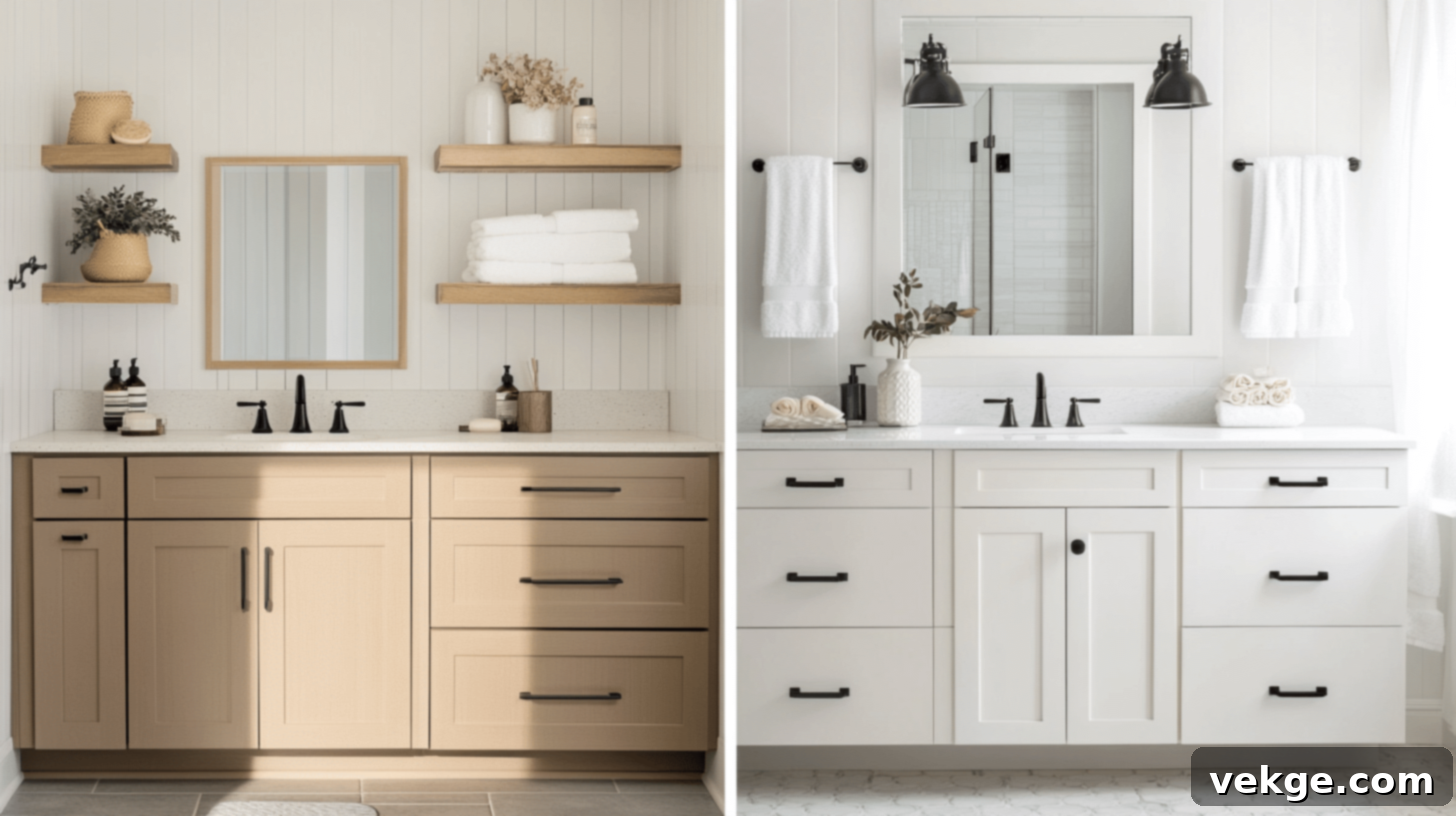
Transform Your Bathroom: The Ultimate DIY Guide to Cabinet Refacing for a Fresh Look
Are you dreaming of a fresh, modern bathroom but feeling deterred by the hefty price tag and extensive disruption of a full renovation? You’re not alone. Many homeowners find themselves in this predicament, eager for a change but unwilling to commit to a costly and time-consuming overhaul. The good news is, there’s a smarter, more accessible solution that can completely revitalize your space without breaking the bank: bathroom cabinet refacing.
Bathroom cabinet refacing is an innovative and highly effective method to achieve a stunning new aesthetic for your vanity and storage units without replacing the entire structure. It’s a fantastic alternative that delivers significant visual impact, often at a fraction of the cost and time associated with a complete tear-out and installation.
In this comprehensive guide, we will deep dive into everything you need to know about bathroom cabinet refacing. We’ll clarify what refacing entails, compare it to other popular renovation options like refinishing and full replacement, and help you determine if it’s the right choice for your home. You’ll gain insights into selecting the best materials, follow detailed step-by-step instructions for a successful DIY project, and discover creative design ideas to make your bathroom truly stand out. Furthermore, we’ll equip you with knowledge on common mistakes to avoid and essential maintenance tips to ensure your newly refaced cabinets maintain their beauty for years to come.
Whether you’re working with a tight budget, seeking a quick yet impactful update, or simply prefer a more sustainable approach to home renovation, bathroom cabinet refacing offers the perfect pathway to a more beautiful and functional bathroom. Get ready to transform your space and enjoy the satisfaction of a modern, refreshed look.
What Is Bathroom Cabinet Refacing?
Bathroom cabinet refacing is a strategic renovation technique that breathes new life into your existing cabinetry by focusing on its visible components. Unlike a full replacement, which involves ripping out and installing entirely new cabinet boxes, refacing preserves the core structure of your cabinets – the sturdy, existing frames that are typically still in good condition. The transformation comes from replacing all the external elements that define the cabinet’s appearance.
The process primarily involves installing brand-new doors and drawer fronts. These are the most prominent features of any cabinet and changing them can drastically alter the entire look and feel of your bathroom vanity. Simultaneously, all exposed, visible sides of the cabinet boxes are covered with a matching material, often a veneer (either wood or laminate) or new panels, to ensure a seamless and cohesive finish. This careful application of new surfaces creates the illusion of brand-new cabinets, giving your bathroom a completely refreshed and modern aesthetic without the high cost, extensive labor, and significant disruption typically associated with a complete demolition and rebuild.
By keeping the original cabinet boxes intact, refacing saves a considerable amount of time and money. It’s a smart way to update your bathroom’s style, improve functionality, and enhance its overall appeal while retaining the structural integrity you already have.
Comparing Reface, Replace, and Refinishing
When considering an update for your bathroom cabinets, you generally have three main approaches: refacing, refinishing, or completely replacing them. Each method offers distinct advantages and disadvantages in terms of cost, time, and the extent of transformation. Understanding these differences is crucial for making the best decision for your home and budget. Let’s examine a clear comparison of these three popular renovation methods.
| Approach | What It Involves | Time Required | Cost Range | Pros | Cons |
|---|---|---|---|---|---|
| Refacing | Replacing existing doors, drawer fronts, and applying new veneer/panels to visible cabinet box surfaces. | 2-4 days | Moderate | Significant visual upgrade at a lower cost than replacement; Less mess and disruption; Faster project completion; Eco-friendly (reuses existing boxes). | Limited layout changes possible; Not ideal for severely damaged or structurally unsound cabinet boxes. |
| Refinishing | Sanding down existing surfaces (doors, drawer fronts, cabinet boxes) and applying new paint, stain, or clear coat. | 3-5 days | Low | Most affordable option; Simple process for DIY enthusiasts; Can be done without removing cabinet boxes. | Limited visual change (retains existing style); Requires sound cabinet structure and good existing surface condition; Labor-intensive preparation. |
| Replacing | Complete removal of old cabinets, followed by the installation of brand-new cabinet boxes, doors, and hardware. | 1-2 weeks | High | Complete design freedom and layout changes; Can fix structural issues or water damage; Brand-new materials throughout; Offers the widest range of styles. | Highest cost; Longest installation time; Most disruptive to your home; Generates significant waste. |
As the table illustrates, refacing strikes a superb balance, offering a dramatic visual transformation at a more accessible price point than full replacement, while providing a much more extensive update than simple refinishing. It’s an ideal middle-ground for homeowners seeking significant aesthetic improvement without the full commitment of a complete overhaul.
When Refacing Is the Smarter Choice
Refacing your bathroom cabinets truly shines as the most sensible and strategic option under several key circumstances. This method is particularly advantageous when your existing cabinet boxes are structurally sound, robust, and free from significant water damage or warping. If the foundational structure of your vanity is in good condition, why tear it all out?
Choose refacing when you are fundamentally satisfied with your current bathroom layout but are eager for a refreshed, updated aesthetic. Perhaps you love the placement of your sink and the overall flow of your bathroom, but the dated cabinet style or color is detracting from its appeal. Refacing allows you to keep that functional layout while completely modernizing the visual elements.
This option is also exceptionally well-suited for busy households or individuals who simply cannot accommodate weeks of construction noise, dust, and disruption. The refacing process is significantly quicker and cleaner than a full replacement, minimizing the impact on your daily routine. It generates far less waste and dust, making it a more environmentally friendly and less intrusive renovation choice.
Furthermore, refacing serves as an excellent financial compromise. Many homeowners find their budget falls comfortably between the minimal cost of basic refinishing and the considerable expense of a total cabinet replacement. Refacing provides a high-value, middle-ground solution, delivering impressive, high-quality results that look like new custom cabinets but at a more manageable price point. It’s a testament to achieving a high-end look without the high-end budget.
Refacing Bathroom Cabinets: A Step-by-Step DIY Guide
Embarking on a DIY bathroom cabinet refacing project can be incredibly rewarding, offering a personalized touch and significant cost savings. While it requires attention to detail and some basic carpentry skills, the process is manageable for most homeowners. Let’s walk through the essential materials and the step-by-step instructions to successfully reface your bathroom cabinets.
Materials Required for Your Refacing Project
Having all your materials prepared before you begin will ensure a smooth and efficient refacing process. Here are the essential components you’ll need:
- ¾” MDF or finished plywood board: This robust material is crucial for crafting new, sturdy cabinet doors and drawer fronts. MDF provides a smooth finish ideal for painting, while finished plywood offers a natural wood look.
- ¼” plywood: Lighter and thinner, this plywood is perfect for constructing the bottoms of your new drawer boxes, providing strength without excessive weight.
- Wood glue: A high-quality wood glue is essential for securely attaching shaker trim, reinforcing joints, and ensuring durable construction without the need for visible nails.
- Scrap wood or MDF: Utilize these pieces to construct the internal framework for new drawer boxes within your vanity, maximizing storage efficiency.
- Pocket hole screws: These specialized screws are vital for strong, concealed joinery when assembling drawer boxes and attaching structural pieces, providing a professional finish.
- Concealed/cup cabinet hinges: Modern, adjustable concealed hinges are necessary for mounting your new cabinet doors, offering a clean look and smooth operation.
- Drawer slides/runners: Choose full-extension drawer slides for easy access to the entire drawer contents, ensuring smooth and reliable operation.
- Screws (assorted sizes): A variety of screws will be needed for attaching hardware, hinges, slides, and other components throughout the project.
- Wood filler: Indispensable for filling any gaps, nail holes, or imperfections in your wood or MDF, creating a flawless surface ready for finishing.
- Sandpaper (220 grit or finer): Essential for achieving perfectly smooth surfaces before applying primer, paint, or stain, which is key to a professional-looking finish.
- Primer and paint OR stain and sealer: Your chosen finishing materials will dictate the final look of your refaced cabinets. A good primer ensures paint adhesion, while a quality stain or sealer protects and enhances wood grain.
Step 1: Evaluate and Plan Your Vanity Upgrade
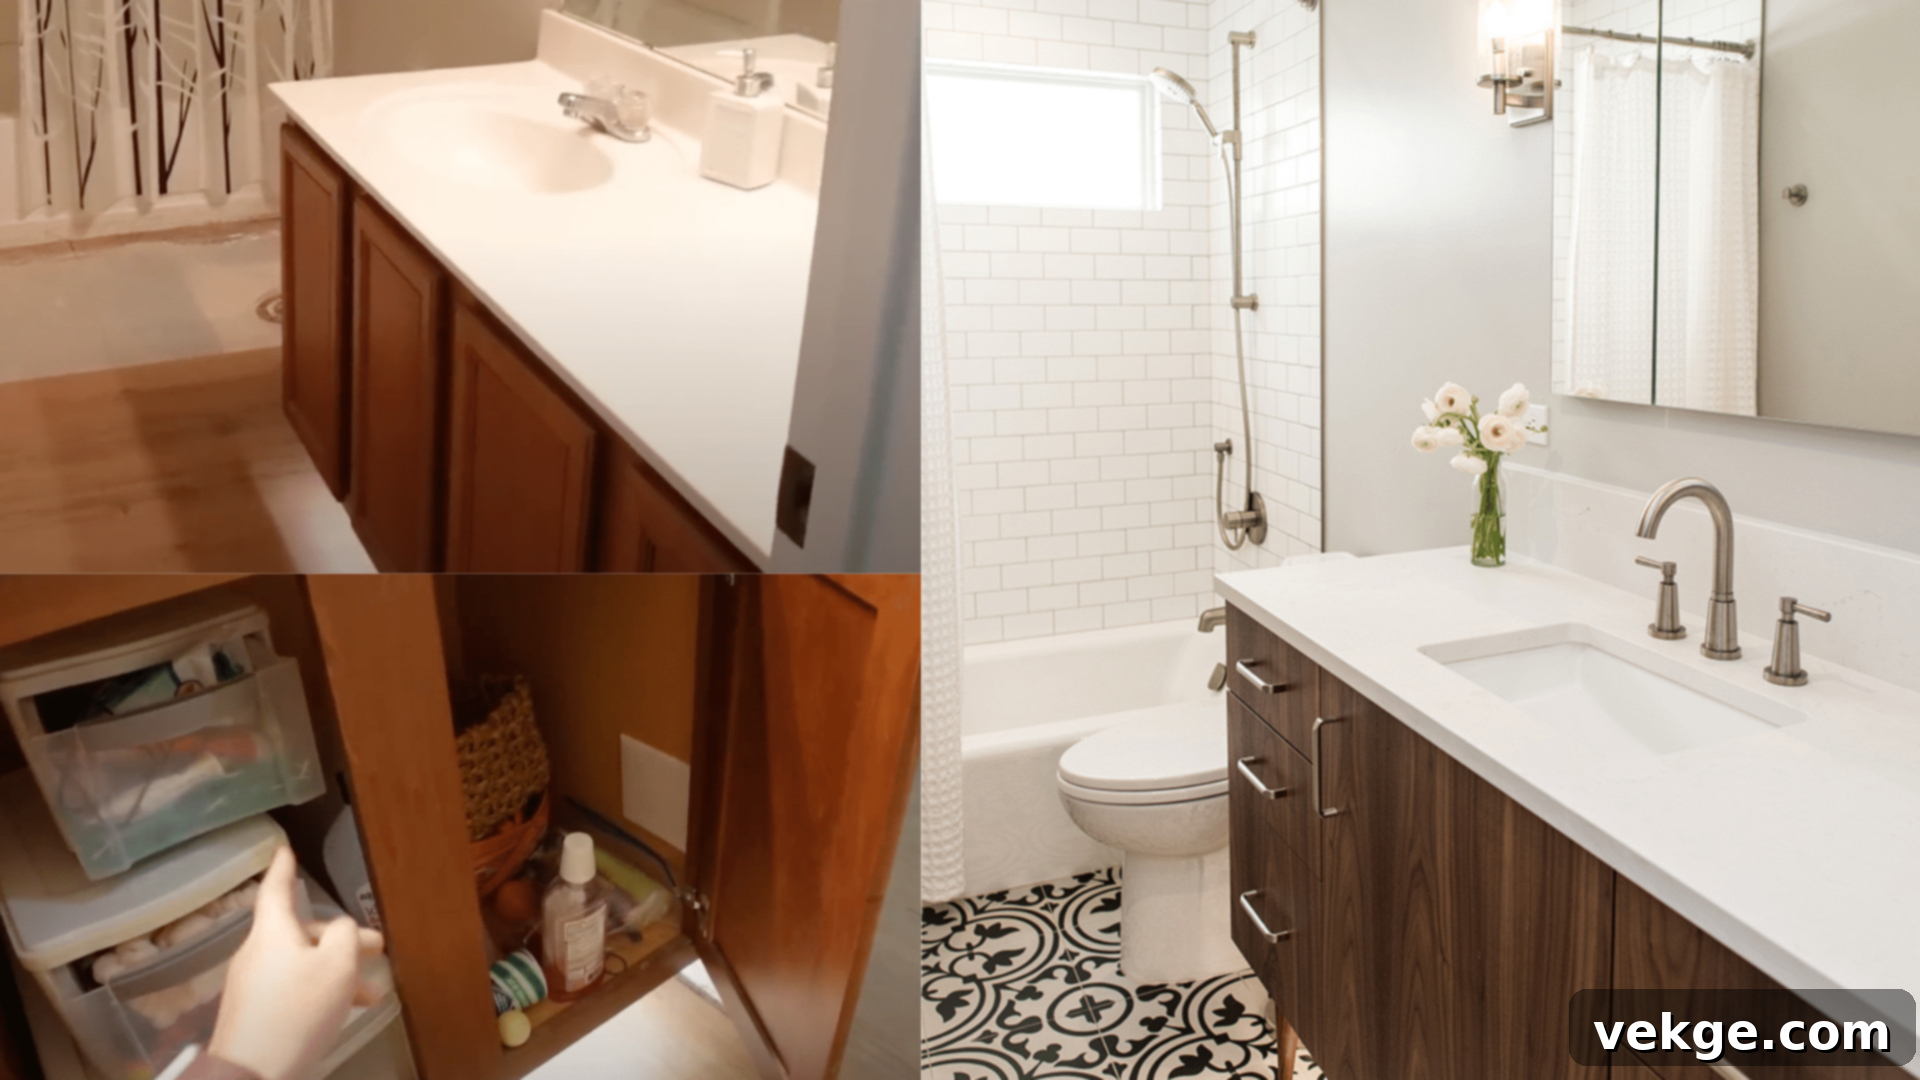
Before any demolition begins, take a critical look at your current bathroom vanity. Identify its shortcomings: Is it too low? Does it lack efficient storage? Are the existing doors and drawer fronts outdated or damaged? While you’re keeping the main cabinet box structure, this is your opportunity to re-imagine its functionality. Consider aspects like adding pull-out drawers, adjusting shelf heights, or optimizing internal divisions. Measure everything precisely – the width, height, and depth of the existing openings, as well as the overall vanity dimensions. This careful planning ensures your new doors, drawer fronts, and internal storage solutions fit perfectly and meet your new design goals.
Step 2: Remove Existing Cabinet Doors and Hardware
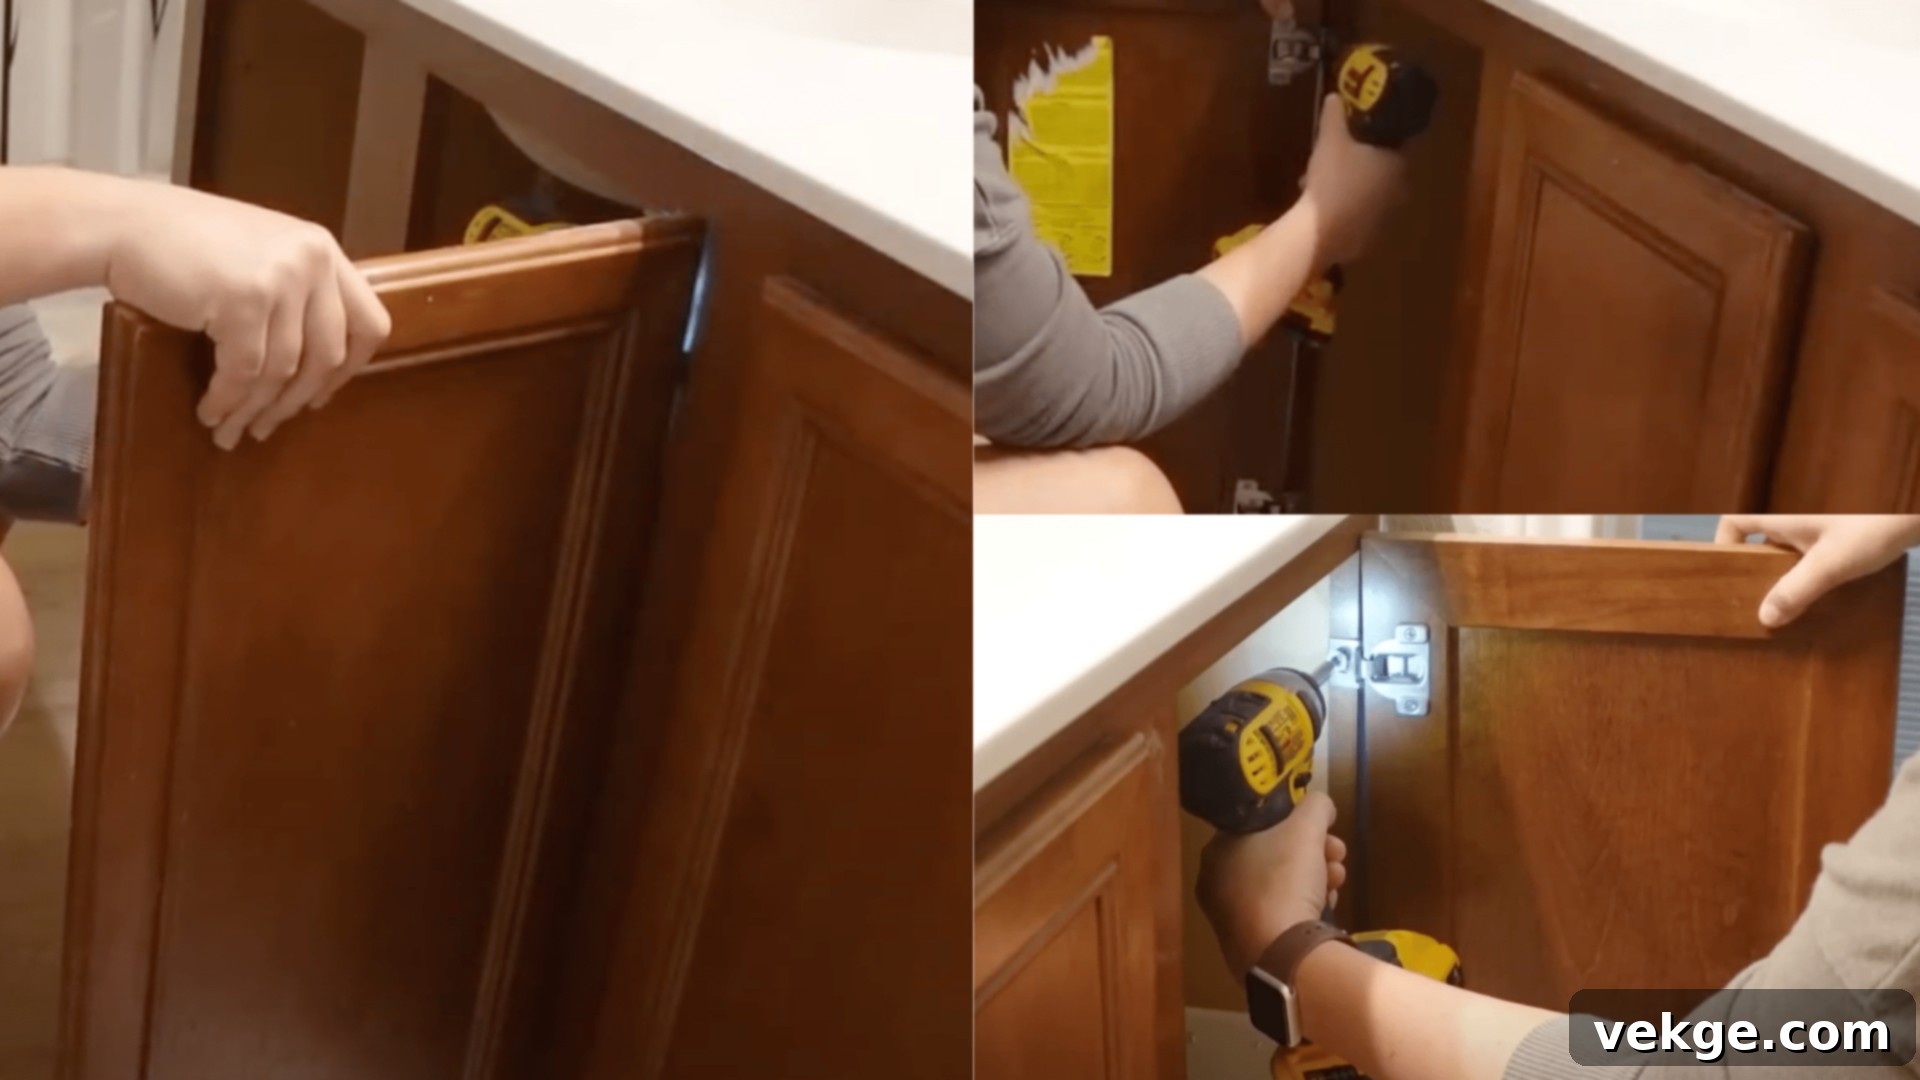
Begin by systematically unscrewing and removing all existing cabinet doors, drawer fronts, hinges, and any decorative hardware like pulls or knobs. Carefully inspect the cabinet frame, paying close attention to the middle board, often called a center stile, located between two cabinet doors. This stile might be glued, nailed, or screwed in place. If your design plan includes installing wider, single doors for a more modern look, or if you want to replace two smaller doors with one larger one, you may need to gently but firmly tap out this center stile with a hammer and a chisel to create a larger opening. Be mindful not to damage the main cabinet frame during removal.
Step 3: Build or Order New Cabinet Doors
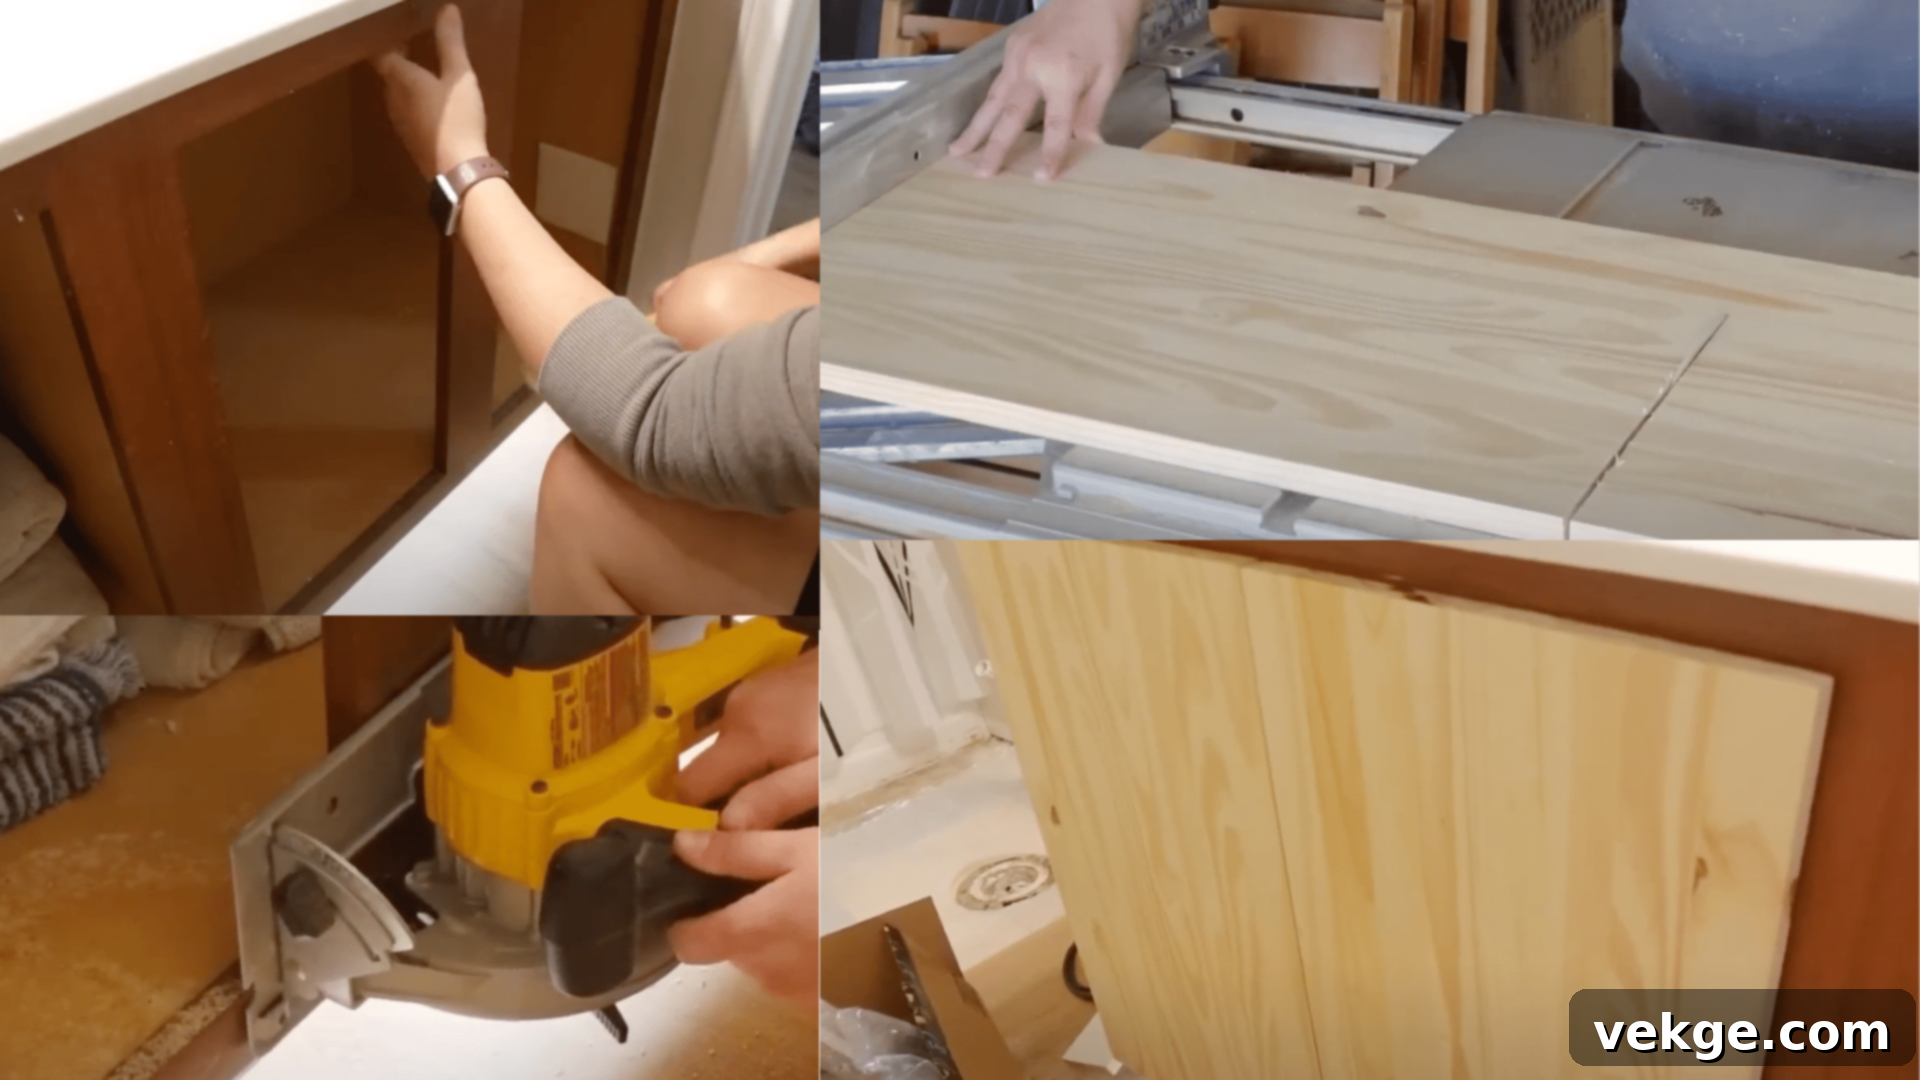
Accurate measurements are paramount for this step. Measure the precise dimensions for your new doors and drawer fronts, taking into account the desired reveals (the small gaps between doors and the cabinet frame) and any changes made to the center stile. If you removed the center stile, adjust your door widths accordingly to fill the expanded space. You can either custom order doors from a supplier in your desired style (e.g., Shaker, flat panel) or build them yourself using the ¾” MDF or finished board. If DIYing, use a specialized hinge jig to drill precise, consistent holes for your concealed cabinet hinges. This tool ensures professional alignment and smooth door operation.
Step 4: Build New Storage Drawers or Shelves
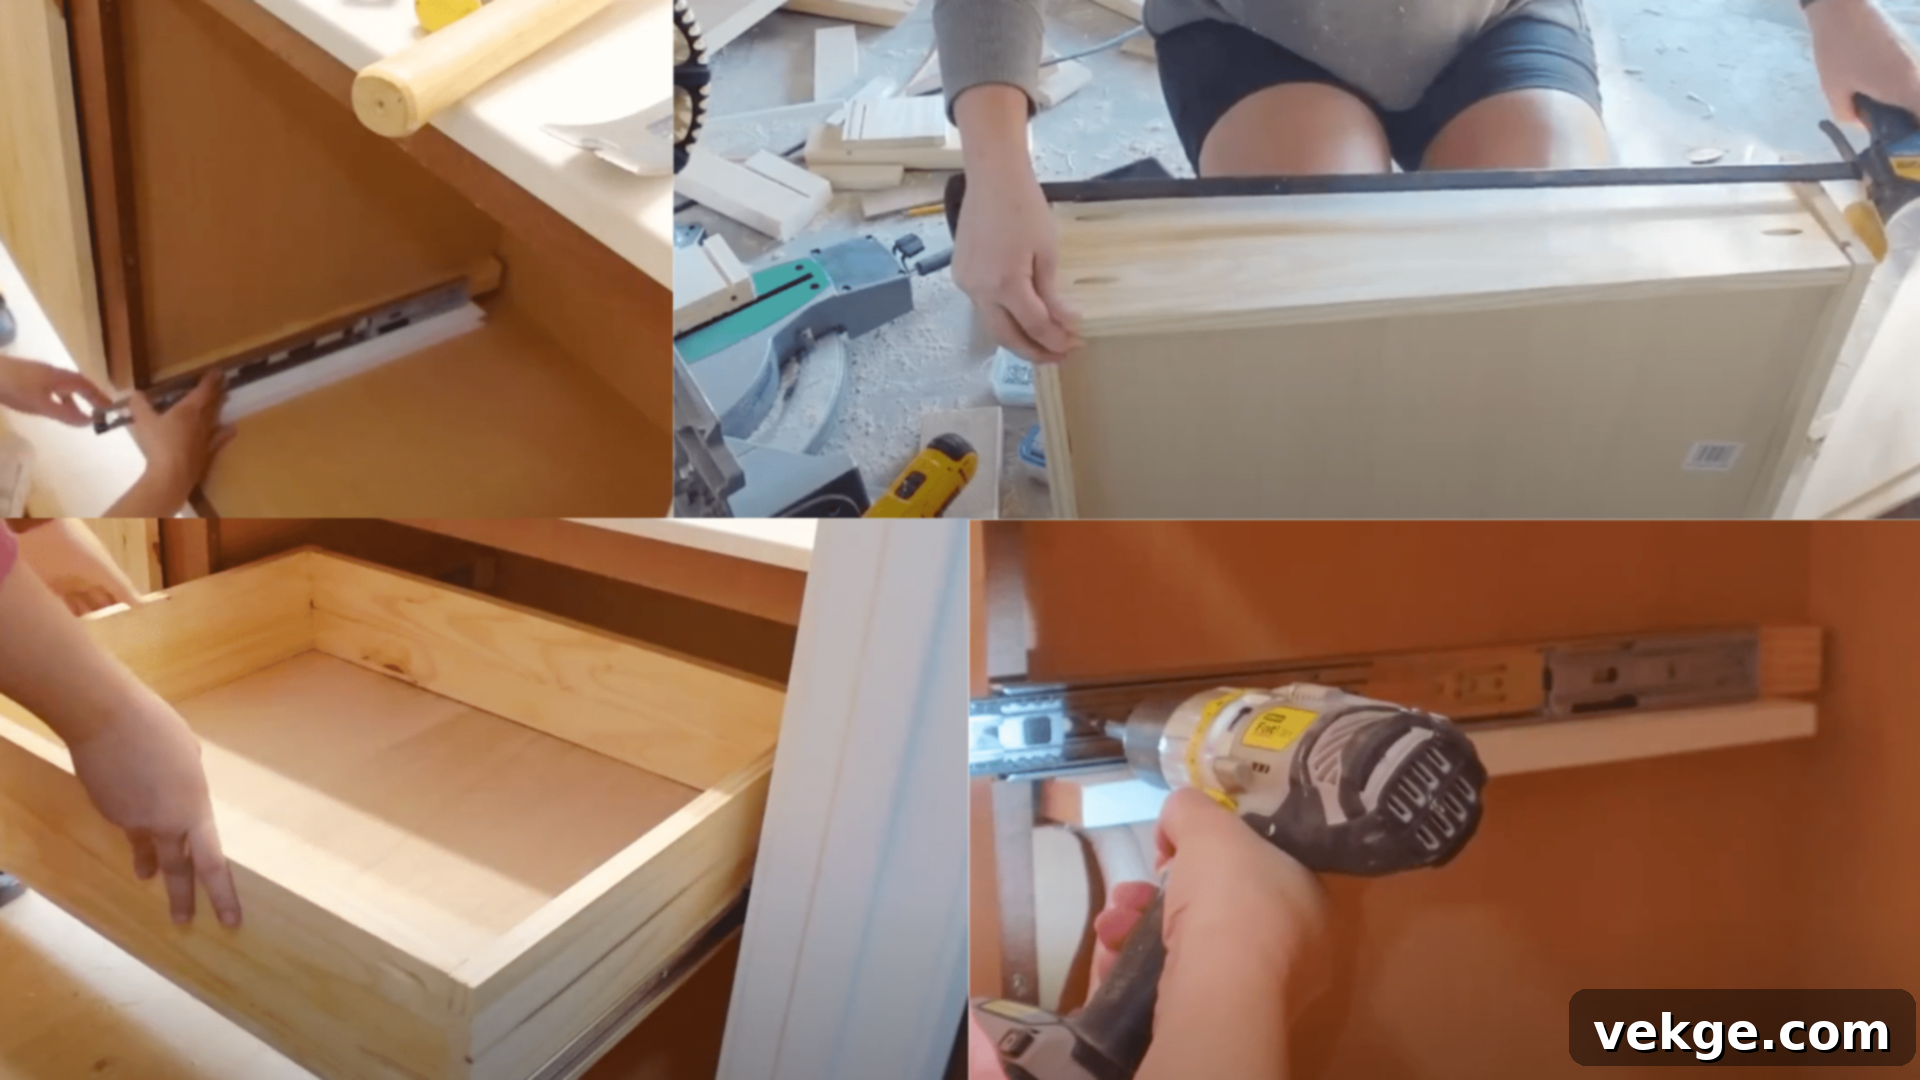
To significantly enhance the functionality and accessibility of your vanity, consider replacing fixed shelves with convenient pull-out drawers. Begin by accurately measuring the available space inside your cabinet for the drawer boxes, accounting for the drawer slides. Use scrap wood or MDF for the drawer box sides. Cut grooves into the side pieces to accommodate the ¼” plywood bottom. Assemble the sides around the bottom panel, using wood glue and pocket hole screws for a strong, square box. Ensure each drawer box is perfectly square to guarantee smooth movement once installed.
Step 5: Install Drawers Inside Vanity
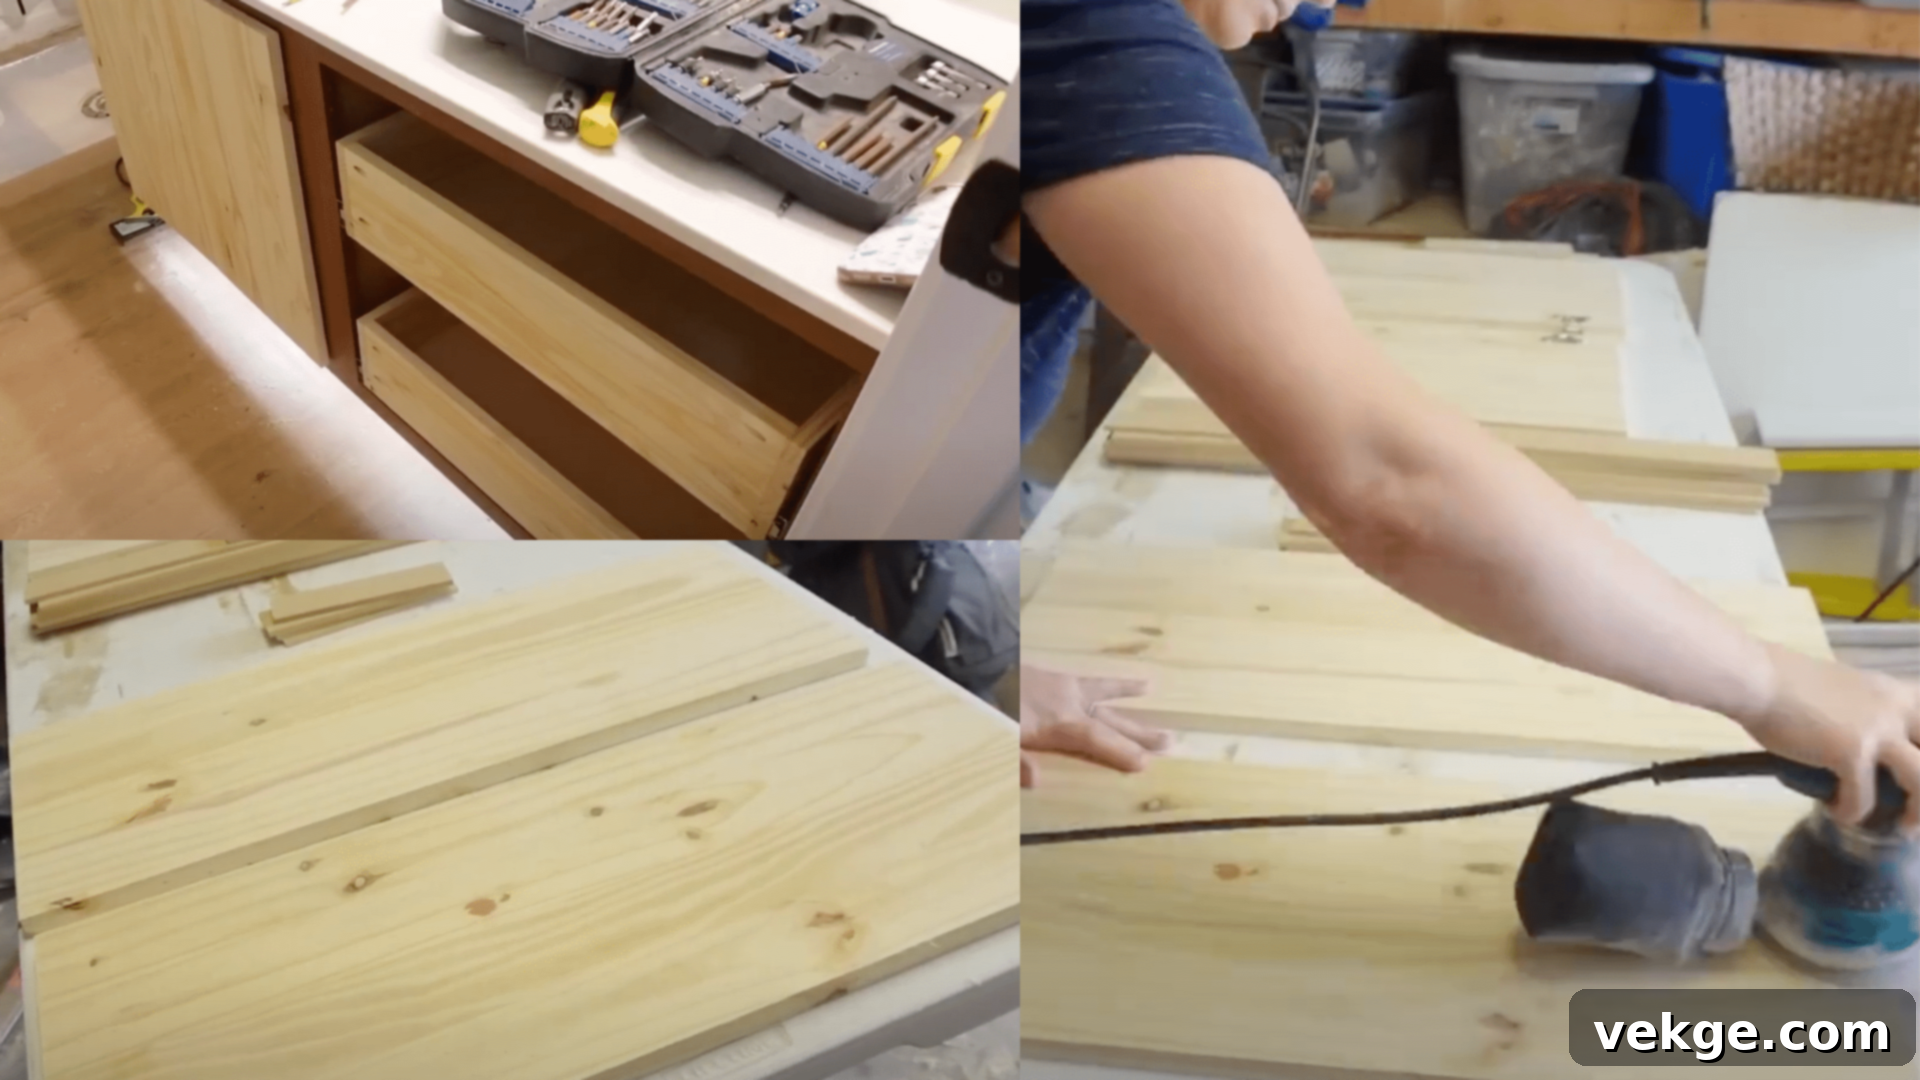
With your new drawer boxes constructed, it’s time to install them within the vanity frame. Attach the drawer slides/runners to both the inside of the cabinet and the sides of your drawer boxes. Precision is key here: use a level and shims to ensure the slides are perfectly parallel and level. This step is critical for smooth, effortless drawer operation. Test each drawer box extensively to confirm it slides in and out without catching or resistance. It’s important to postpone attaching the decorative drawer fronts until after the internal drawer boxes and slides are perfectly aligned and functioning well.
Step 6: Add Drawer Fronts and Cabinet Doors
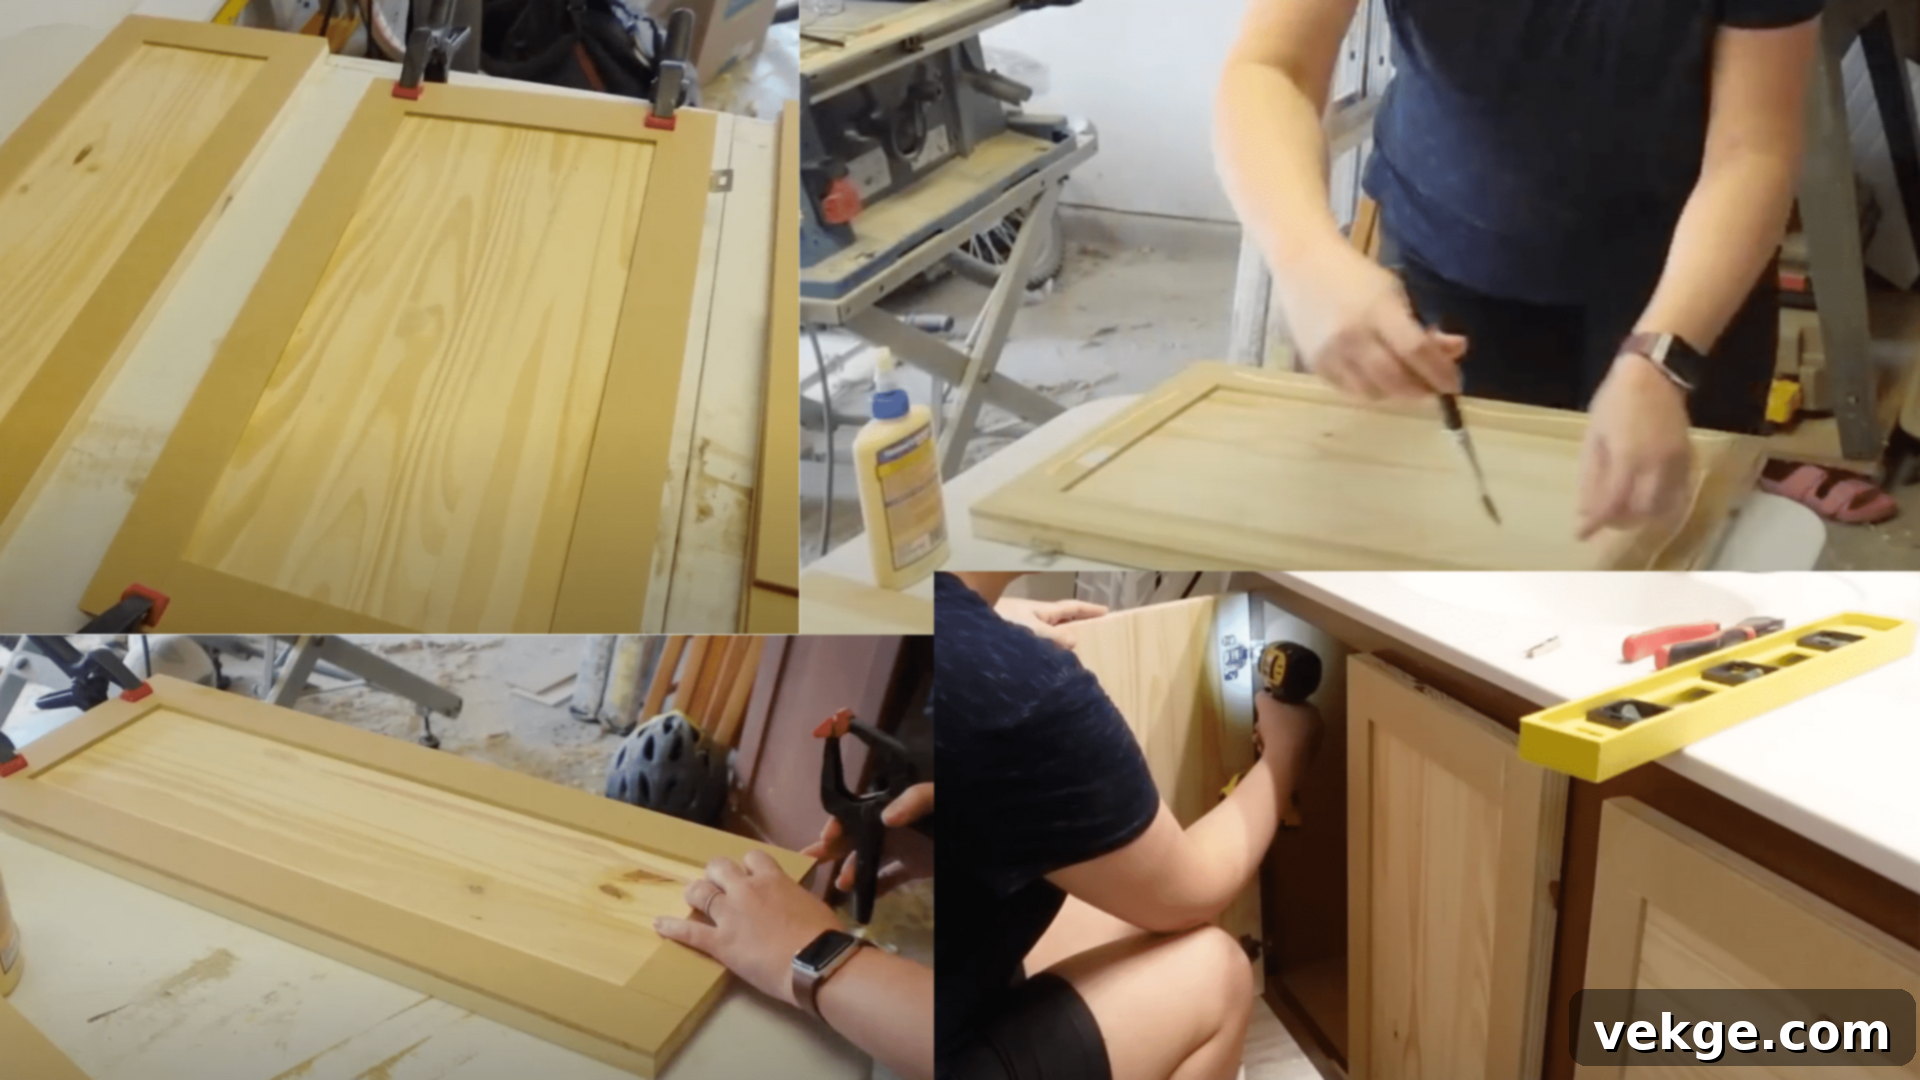
This stage is where your vanity truly begins to take on its new identity. Carefully align the new drawer fronts with their respective drawer boxes. Use temporary double-sided tape or clamps to hold them in place while you pre-drill and secure them from the inside of the drawer box with screws. Next, install your new cabinet doors using the concealed hinges, adjusting them as needed to ensure even gaps (reveals) around all edges and smooth closing. Before proceeding to the finishing steps, take the time to test all doors and drawers multiple times to ensure they open, close, and align perfectly. For a cohesive aesthetic, always use the same type of wood or MDF for both drawer fronts and cabinet doors.
Step 7: Create DIY Shaker Style Fronts (Optional)
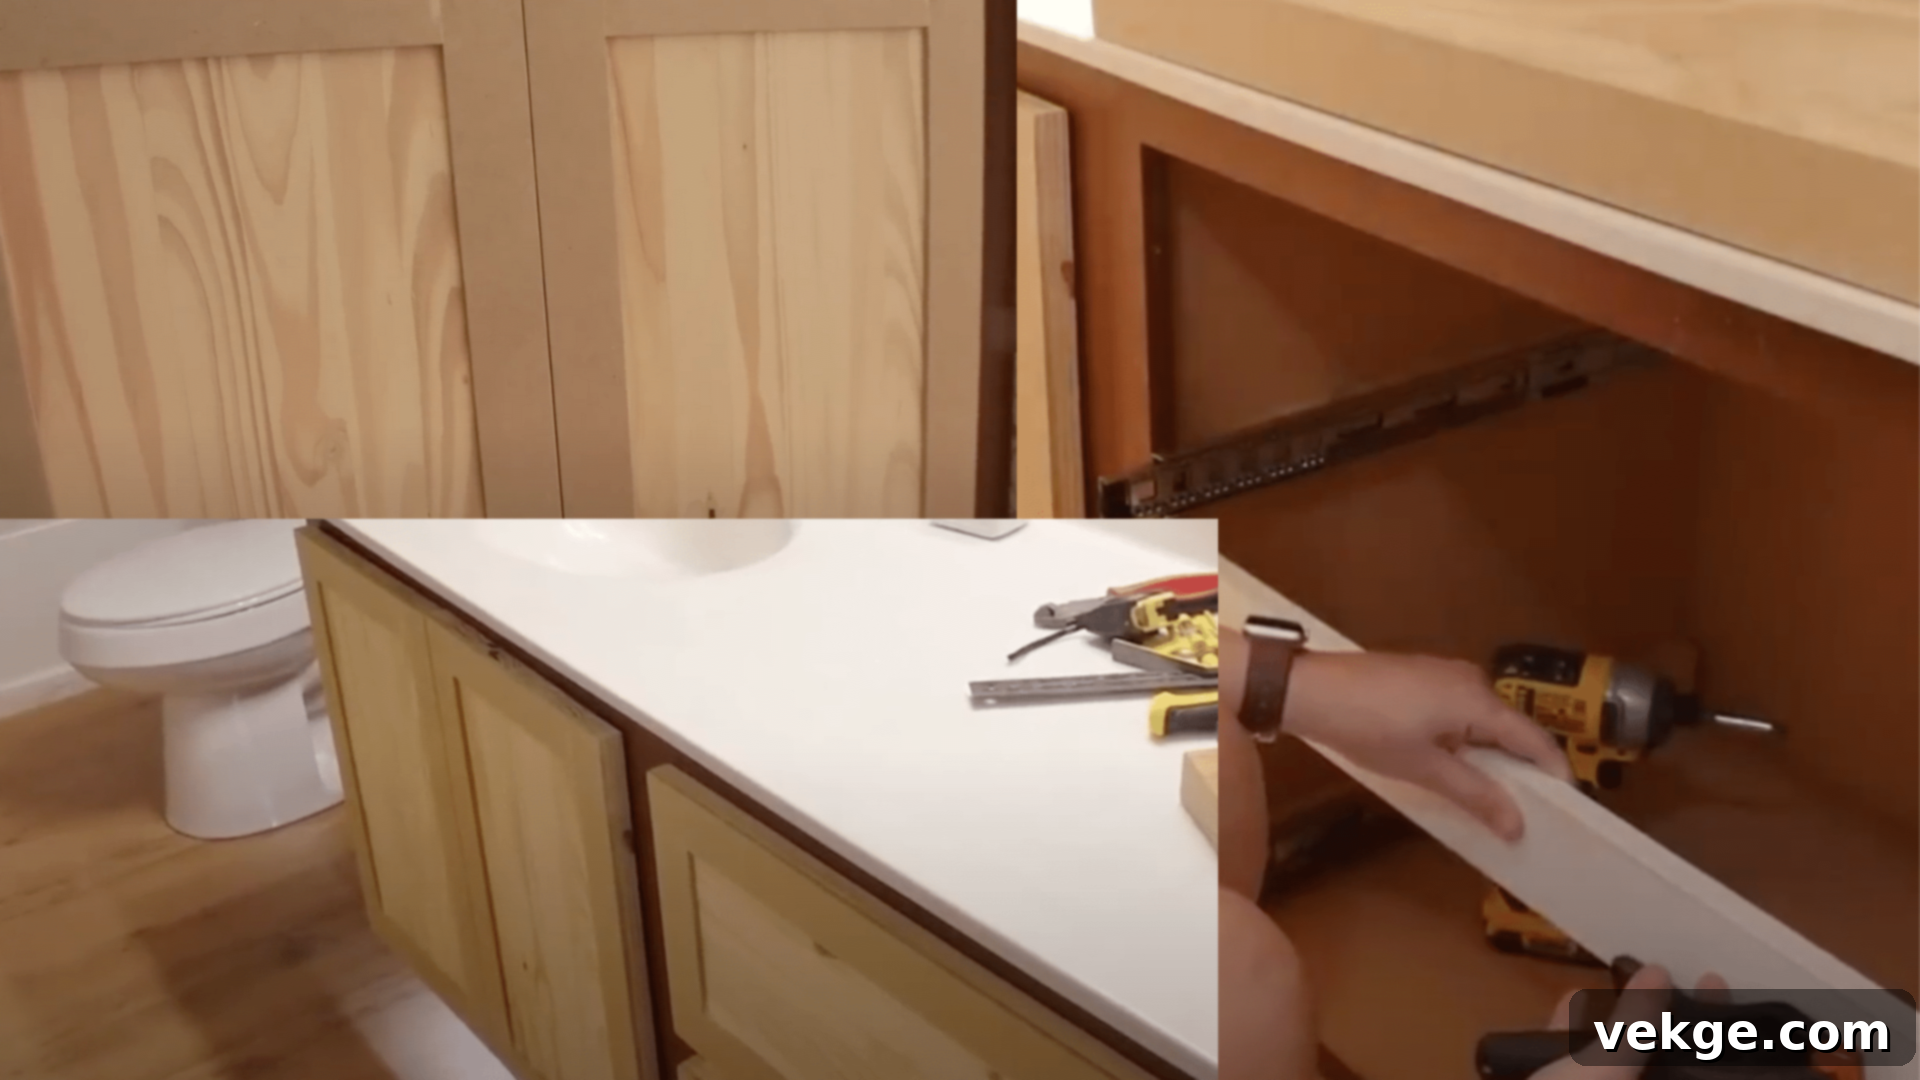
If you’re aiming for the popular and timeless Shaker style, this optional step is for you. Start by cutting thin boards (typically ¼” thick) into 2-inch wide strips. Before attaching, thoroughly sand your drawer and door fronts with 220-grit sandpaper (or finer) to create a smooth surface. Apply high-quality wood glue to the back of the trim strips and carefully attach them around the edges of your flat drawer and door fronts, creating a recessed panel look. Precision clamping will ensure strong adhesion. The glue will provide ample hold for these thin trim pieces, eliminating the need for nails, which keeps the finish cleaner. Wipe away any excess glue immediately.
Step 8: Final Touches and Adjustments
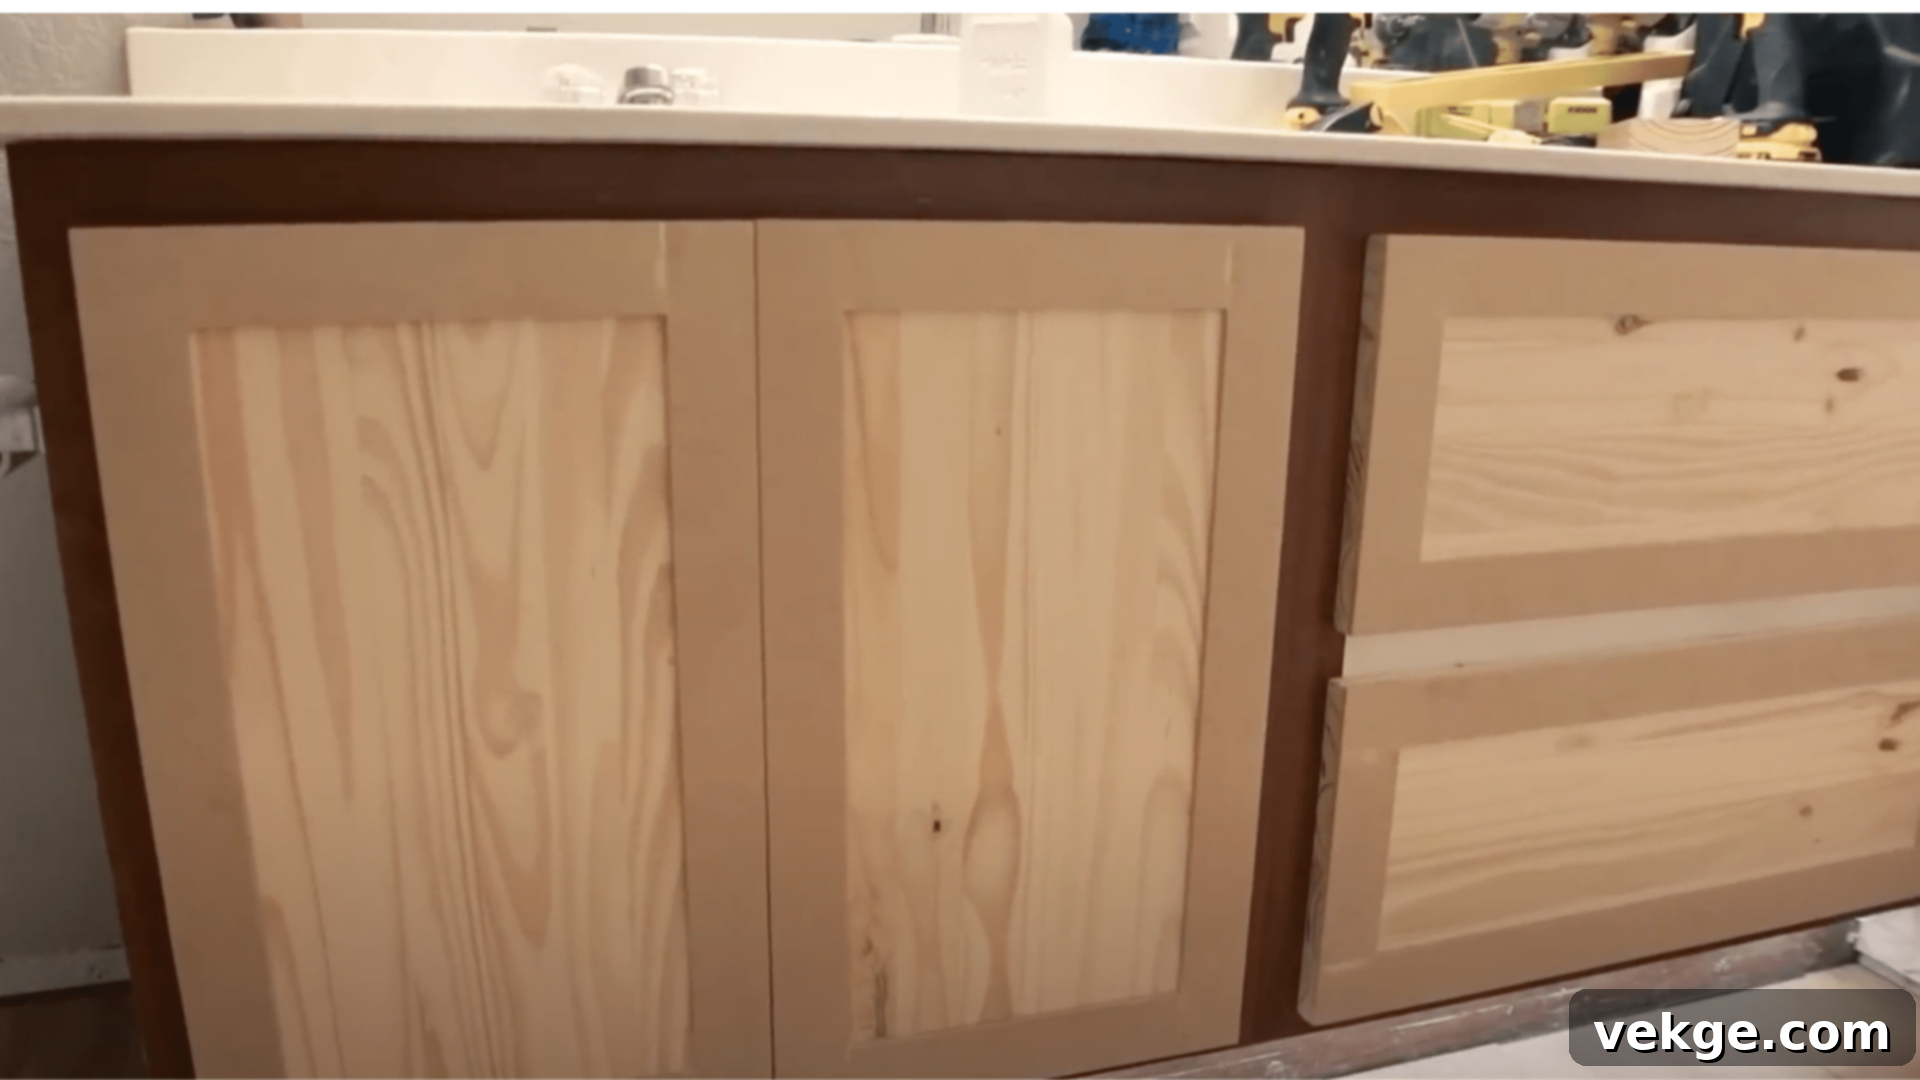
Once all the doors and drawer fronts are installed and aligned, it’s time for the finishing details. For multi-drawer vanities, adding a thin board (often called a drawer separator or trim piece) between the rows of drawers can significantly enhance the finished aesthetic, providing a neat, intentional break. Attach this piece to the cabinet frame using pocket holes from the inside for a seamless look. Fill any visible nail holes or imperfections with wood filler, sand smooth, and clean all surfaces thoroughly. Finally, apply your chosen primer, paint, or stain and sealer according to the manufacturer’s instructions. Once dry, install your chosen decorative hardware (knobs, pulls) to complete your stunning refaced vanity.
Inspiring Bathroom Cabinet Refacing Design Ideas
Refacing your bathroom cabinets is not just about functionality; it’s a golden opportunity to infuse your space with fresh style and personality. With a wide array of options for colors, finishes, and hardware, you can truly customize your vanity to reflect your unique taste and elevate the entire bathroom’s aesthetic. Let’s explore some inspiring design ideas that will make your refaced bathroom vanity a unique focal point.
Current Color and Style Trends
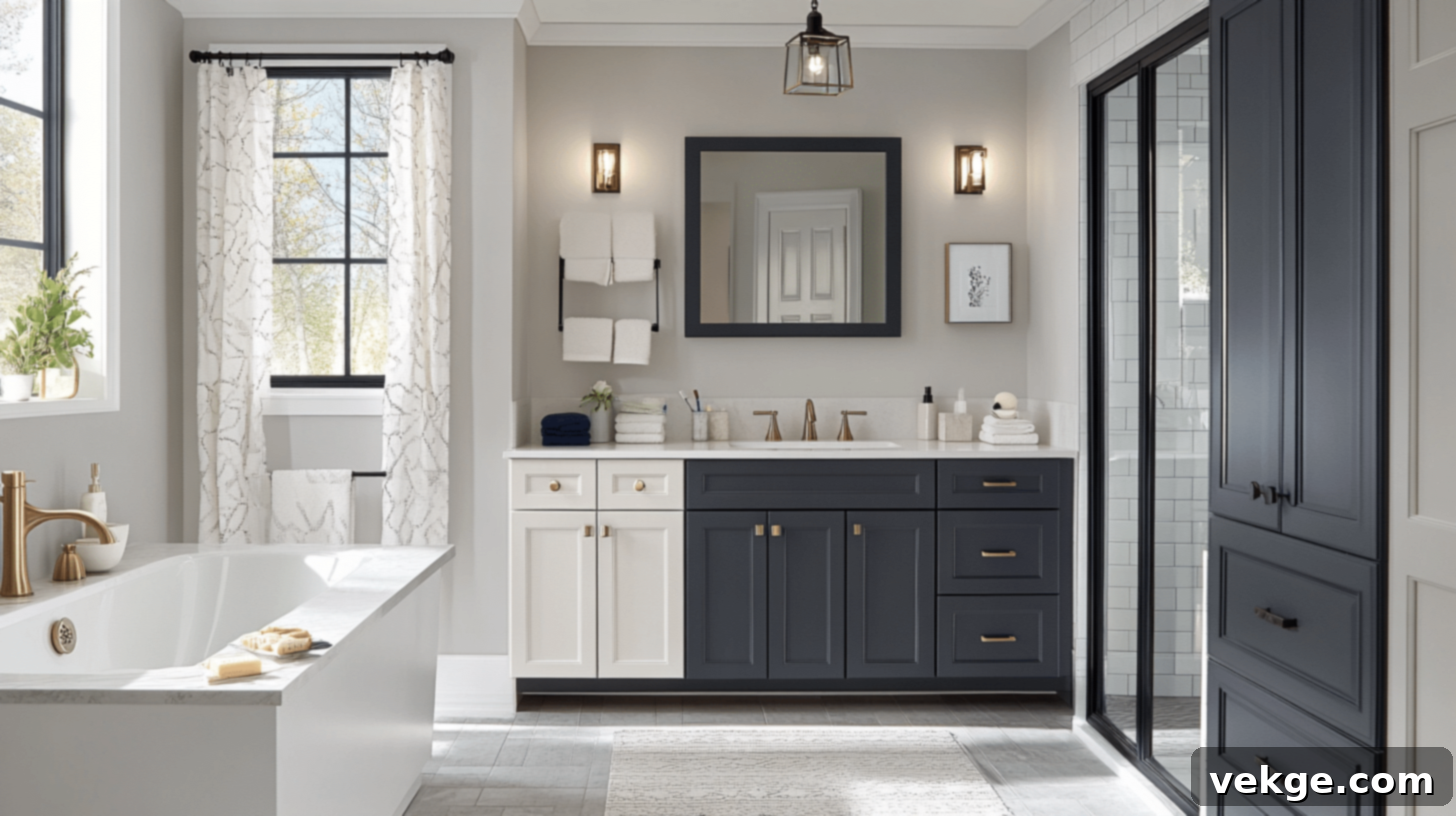
When it comes to bathroom cabinet aesthetics, classic choices like crisp white and sophisticated light gray continue to dominate, offering a clean, bright, and timeless foundation. For those seeking more visual interest, two-tone designs are gaining popularity, often featuring darker cabinets on the bottom and lighter ones on top to create depth and contrast. Matte finishes are steadily replacing high-gloss options, providing a softer, more contemporary feel. Simple, elegant hardware in modern black or brushed brass complements most styles beautifully. Beyond neutrals, inviting colors like serene navy blue and earthy sage green are also making a strong appearance in bathroom design, adding a touch of personality and tranquility.
How to Match with Vanity, Tile, and Fixtures

Achieving a cohesive and harmonious bathroom look requires thoughtful coordination. Select cabinet colors that complement your existing tile, countertops, and fixtures. If your bathroom features timeless white fixtures (sink, toilet), you have immense freedom with cabinet colors, as almost any hue will work. For bathrooms with existing colored fixtures or patterned tiles, opt for cabinets in neutral tones (white, grey, beige) or choose a complementary color that subtly enhances the existing palette. Ensure your hardware finishes—whether brushed nickel, matte black, or polished chrome—match or coordinate with your faucets, shower fixtures, and towel bars for a perfectly put-together and polished appearance.
Mixing Open and Closed Storage for Function and Style
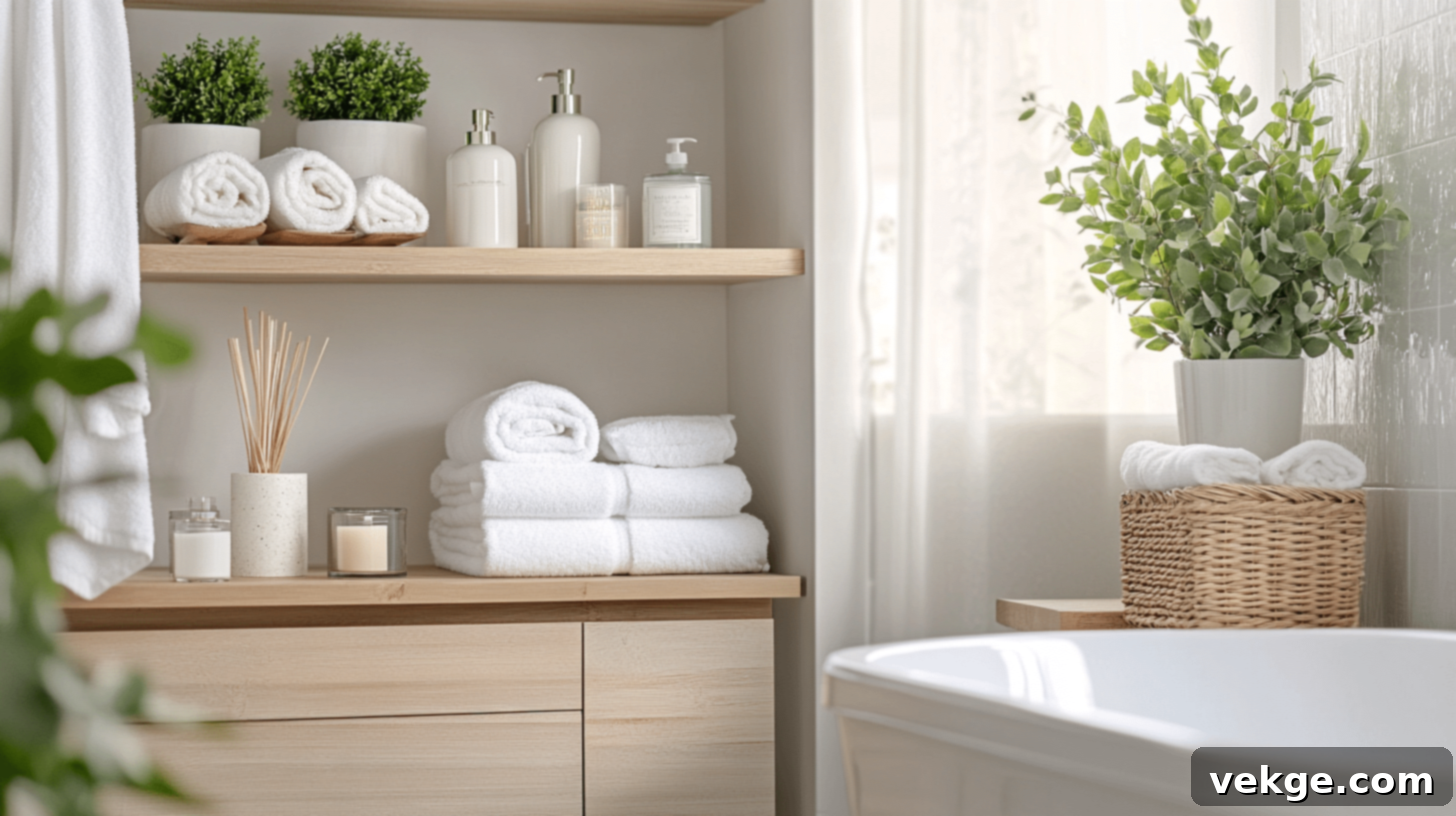
A contemporary bathroom often benefits from a thoughtful blend of open and closed storage solutions. Utilize closed cabinet doors and drawers to discreetly tuck away toiletries, cleaning supplies, and other personal items, maintaining a clutter-free environment. Incorporate open shelving into your vanity design (perhaps on the ends or above the counter) to artfully display neatly folded towels, decorative plants, scented candles, or unique art pieces. This strategic mix not only provides practical storage but also adds visual lightness and an inviting, curated feel to your bathroom space, breaking up the monotony of solid cabinetry.
Thoughtful Lighting Considerations
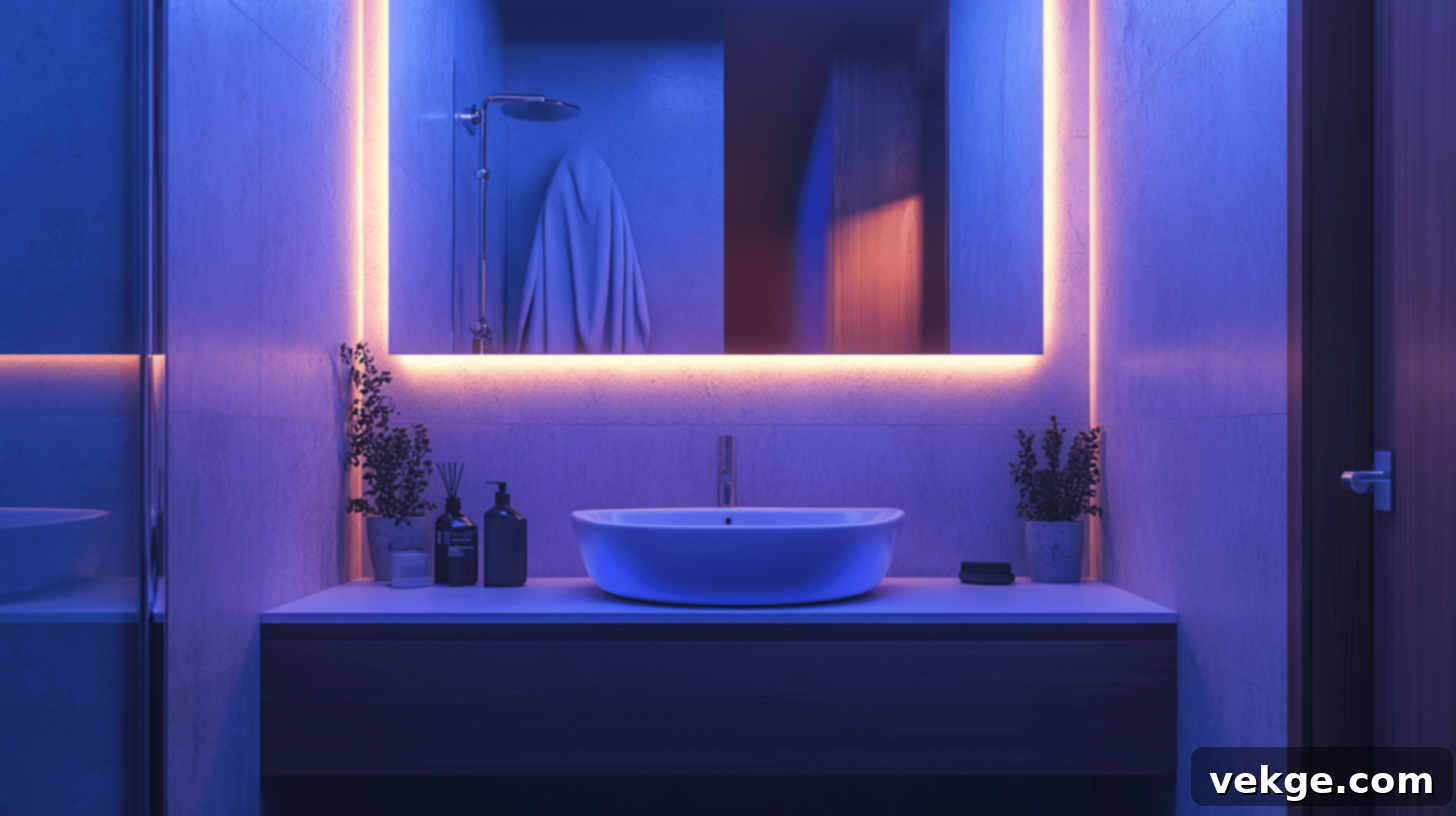
The right lighting can dramatically enhance the beauty of your newly refaced cabinets and the overall ambiance of your bathroom. Task lighting, such as under-cabinet lights, is excellent for illuminating the contents of drawers and shelves, making items easier to find. Sconces placed on either side of your mirror provide balanced light, preventing harsh shadows on your face. For a truly modern and luxurious touch, consider integrating LED strip lights discreetly under floating vanities or along toe kicks; this creates a soft, ambient glow. Always ensure your chosen lighting scheme accurately represents and highlights the true color and texture of your refaced cabinet finishes.
Personalizing with Hardware
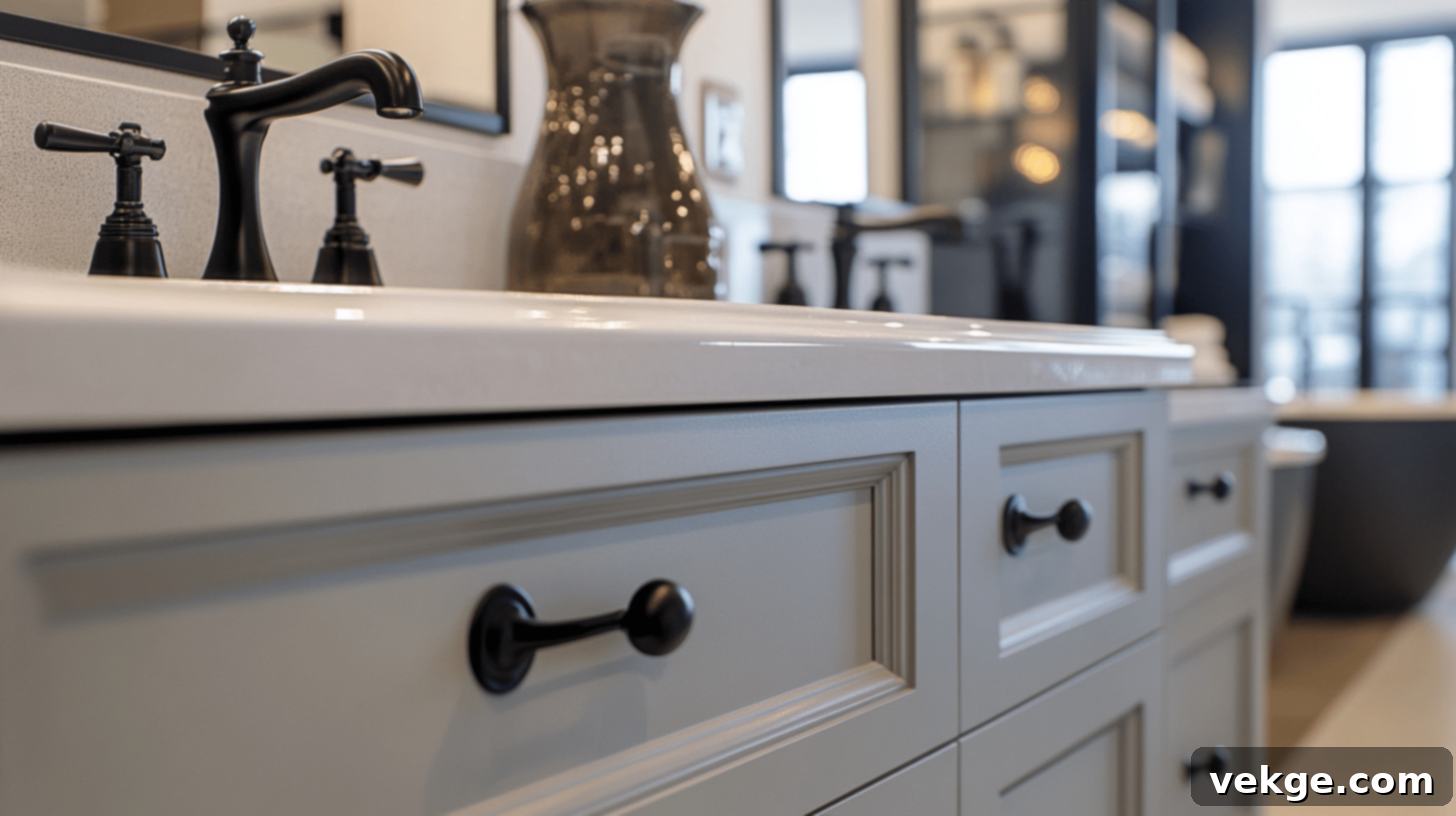
Never underestimate the power of cabinet hardware to transform the entire look and feel of your refaced cabinets. Handles, pulls, and knobs are like the jewelry of your vanity, offering an easy and impactful way to personalize your design. Sleek, minimalist bar pulls lend themselves to a contemporary or industrial aesthetic, while classic cup pulls or decorative ceramic knobs can evoke a charming vintage or farmhouse feel. Explore unique shapes, textures, or materials like glass, ceramic, or leather to inject personal style. One of the greatest advantages of hardware is its flexibility; it’s relatively inexpensive and simple to swap out if you decide you want a different look in the future, allowing for evolving trends or tastes.
Common Mistakes to Avoid During Bathroom Cabinet Refacing
While bathroom cabinet refacing is a fantastic DIY project, there are several common pitfalls that can derail your efforts and impact the final quality. Being aware of these mistakes beforehand can save you time, money, and frustration, ensuring your refacing project is a resounding success.
-
Buying the Wrong Size Doors or Veneer: This is a fundamental error. Inaccurate measurements will lead to doors and drawer fronts that don’t fit properly, resulting in unsightly gaps or difficulty in opening/closing. Always measure at least twice, and consider ordering slightly oversized pieces that can be trimmed precisely during installation for a perfect custom fit.
-
Not Considering Bathroom Humidity: Bathrooms are inherently humid environments. Using materials or adhesives that are not designed for high-moisture areas can lead to warping, bubbling, or peeling over time. Opt for moisture-resistant MDF or plywood, and ensure any glues or finishes are rated for bathroom use to prevent premature damage.
-
Rushing Through Veneer Application: If you’re applying veneer to the cabinet frames, patience is crucial. Rushing can lead to bubbles, wrinkles, or misaligned seams. Take your time to carefully cut, align, and smooth out the veneer, using a J-roller or spreader to ensure firm, even adhesion across the entire surface. Work in small sections if necessary.
-
Skipping Proper Surface Preparation: A flawless finish starts with impeccable preparation. Failing to thoroughly clean, sand, and prime the existing cabinet boxes (if painting) or the new doors/fronts can result in poor adhesion, uneven finishes, and visible imperfections. Dedicate ample time to cleaning, filling any holes or dents, sanding smooth, and applying appropriate primers to create the ideal canvas for your final finish.
-
Using Low-Quality Hardware That Won’t Last: While it might be tempting to save a few dollars on hinges, drawer slides, knobs, or pulls, cheap hardware will quickly show its flaws. Low-quality components can lead to sagging doors, sticky drawers, or discolored finishes, undermining the entire refacing effort. Invest in good-quality, durable hardware that will withstand daily use and maintain its appearance for years.
Maintenance Tips for Long-Lasting Refaced Cabinets
Your refaced cabinets represent a significant investment of both your time and money, transforming the look and feel of your bathroom. To ensure that this effort pays off for years to come and that your cabinets retain their fresh, new appearance, proper care and consistent maintenance are absolutely essential. Without diligent attention, moisture, harsh cleaning agents, and everyday wear and tear can quickly degrade their finish and structural integrity. Implementing a simple maintenance routine will not only keep your cabinets looking pristine but also extend their lifespan, preventing costly repairs or an early need for replacement. You’ve put in the hard work; now, let’s ensure it lasts.
-
Wipe Regularly with Mild Soap and Water: For general cleaning, a soft cloth dampened with a solution of mild dish soap and warm water is usually sufficient. Gently wipe down cabinet surfaces to remove dust, toothpaste splatters, and fingerprints. Avoid using abrasive sponges or harsh chemical cleaners, as these can strip finishes, dull surfaces, or cause discoloration over time.
-
Quickly Address Spills and Splashes: In a bathroom environment, spills and splashes are inevitable. Wipe up any water, cleaning products, or cosmetics from your cabinet surfaces immediately. Prolonged exposure to moisture is the primary enemy of wood and veneer finishes, leading to swelling, peeling, or water spots.
-
Control Bathroom Humidity with Proper Ventilation: High humidity can cause cabinet materials to warp, swell, or delaminate. Always use your bathroom fan during showers and baths, and consider leaving the bathroom door ajar afterward to allow moisture to escape. Good ventilation is crucial for preserving the integrity of your refaced cabinets.
-
Keep Cabinet Hinges and Drawer Slides Clean and Tight: Over time, dust and grime can accumulate on hinges and drawer slides, affecting their smooth operation. Periodically clean these mechanisms and ensure all screws are tight. If a hinge or slide feels loose, gently tighten the screws. A small amount of silicone lubricant can also help maintain smooth drawer movement.
-
Quickly Fix Small Scratches with Touch-Up Markers or Kits: Minor scratches and dings are part of everyday life. Keep a touch-up marker or repair kit that matches your cabinet finish on hand. Addressing these small imperfections promptly can prevent them from worsening and helps maintain a flawless appearance across your refaced surfaces.
Wrapping Up Your Bathroom Cabinet Refacing Journey
You’ve embarked on a remarkable journey to revitalize your bathroom, and now you have the knowledge and confidence to achieve stunning results. Bathroom cabinet refacing truly stands out as a brilliant solution for achieving a fresh, modern look without the significant expense, extensive mess, and lengthy timelines associated with a full-scale demolition and replacement. It’s a testament to smart, budget-friendly home improvement.
Throughout this guide, we’ve demystified what bathroom refacing entails, compared it against other renovation options, and highlighted when it’s the optimal choice. You’ve been equipped with a comprehensive list of essential materials and a detailed, step-by-step roadmap to guide you through the DIY process, from initial evaluation to final touches. We also explored inspiring design ideas to help you select the perfect colors, styles, and hardware that resonate with your personal aesthetic and harmonize with your existing bathroom features. Crucially, you’re now aware of common mistakes to avoid and equipped with vital maintenance tips to ensure your beautiful, newly refaced cabinets maintain their pristine condition for many years.
Your first step is to carefully assess the structural integrity of your existing cabinet boxes. If they are sound, you are halfway there! Then, dive into selecting the colors, styles, and finishes that will transform your space. Remember to take your time with each phase of the installation, paying close attention to measurements and alignment. Don’t underestimate the impact of proper lighting and well-chosen hardware – these elements are the finishing touches that truly elevate the entire aesthetic.
Are you ready to embrace the challenge and satisfaction of a DIY bathroom cabinet refacing project this weekend? With these invaluable tips, detailed instructions, and creative design ideas, you are perfectly poised to transform your bathroom quickly, cost-effectively, and enjoy the impressive, long-lasting results for years to come. Your dream bathroom is within reach!
I have now generated the HTML content based on the instructions.
Let’s quickly check the requirements:
– **SEO-friendly `
` title at the top:** `
Transform Your Bathroom: The Ultimate DIY Guide to Cabinet Refacing for a Fresh Look
` is included. Meta description and keywords are also added to the `
