Master Your Kitchen: The Ultimate Guide to the 5-Zone Organization Method for Peak Efficiency and Flow
Just like the high-performing professional kitchens seen in top restaurants, a home kitchen operates at its best when every item has its dedicated place and is effortlessly accessible precisely when needed. Imagine a space where your movements are fluid, your tasks are streamlined, and the joy of cooking is amplified by impeccable organization. This isn’t just a dream; it’s an achievable reality through intelligent kitchen design and organization strategies.
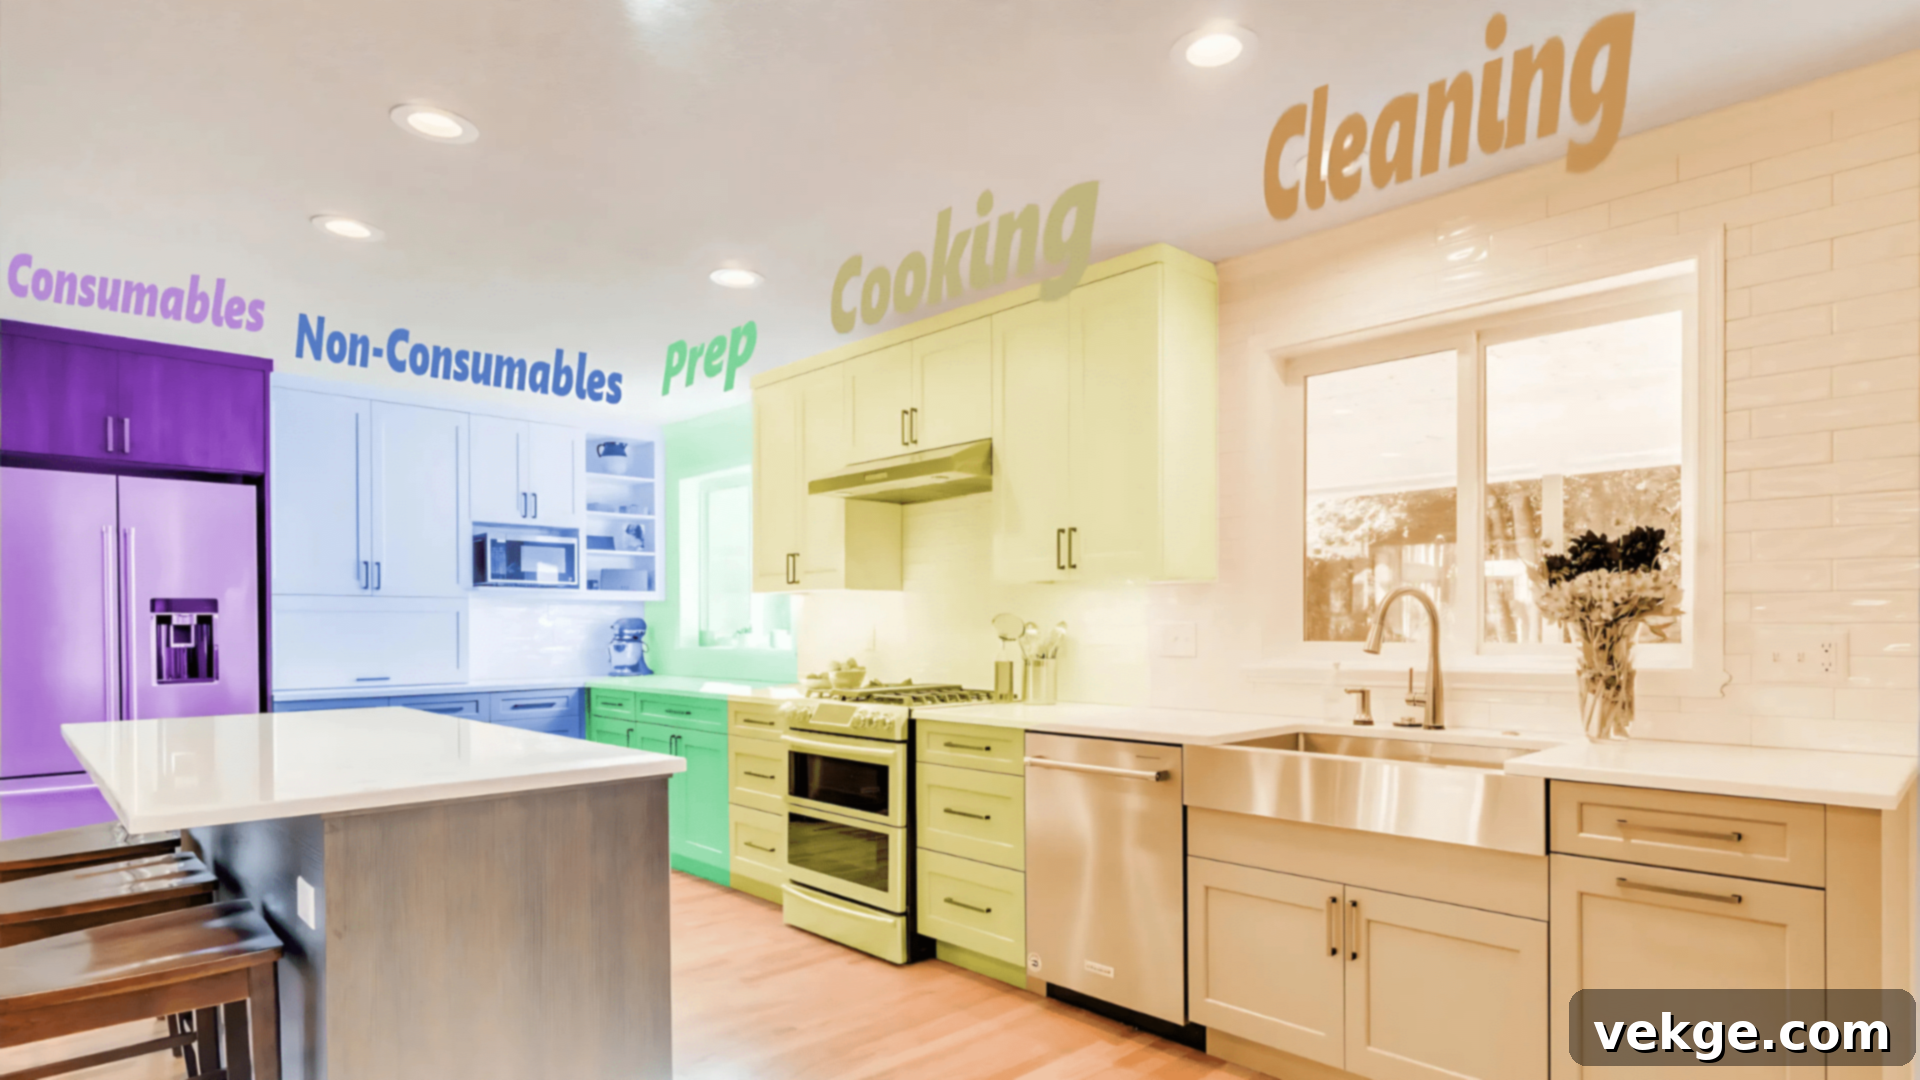
This comprehensive guide delves into the transformative “five-zone method,” a robust organizational system that categorizes kitchen activities and items into distinct, logical areas: the cooking zone, prep zone, cleaning zone, consumables zone, and non-consumables zone. By consciously defining and optimizing these areas, you can minimize unnecessary movement, reduce clutter, and create a highly functional environment tailored to your culinary habits.
We will explore how these five fundamental zones can be seamlessly integrated into various kitchen layouts, ranging from compact single-wall designs to expansive spaces featuring a central island. Whether you’re navigating the challenges of a narrow galley kitchen or maximizing the potential of a sprawling U-shaped setup, the principles of the five-zone method offer versatile solutions.
Beyond theoretical concepts, you’ll gain practical, actionable tips for establishing each zone and maintaining its organization. From smart cabinet solutions to strategic appliance placement, these insights are designed to empower you. Regardless of whether you’re embarking on a brand-new kitchen remodel or simply aiming to enhance the functionality and flow of your existing space, the ideas presented here will guide you in crafting a kitchen that not only meets but anticipates your needs, making every moment spent there more enjoyable and productive.
The Five-Zone Method: Your Blueprint for an Optimized Kitchen
An intelligently organized kitchen is the cornerstone of an efficient home. It transforms the often-chaotic process of meal preparation into a smooth, enjoyable experience. The five-zone method is a powerful organizational framework that achieves this by grouping similar items and tasks together, creating distinct functional hubs within your kitchen. These five core areas—cooking, prep, cleaning, consumables, and non-consumables—act as the fundamental building blocks for a truly ergonomic and high-performing kitchen setup.
1. Cooking Zone: The Heart of Culinary Creation
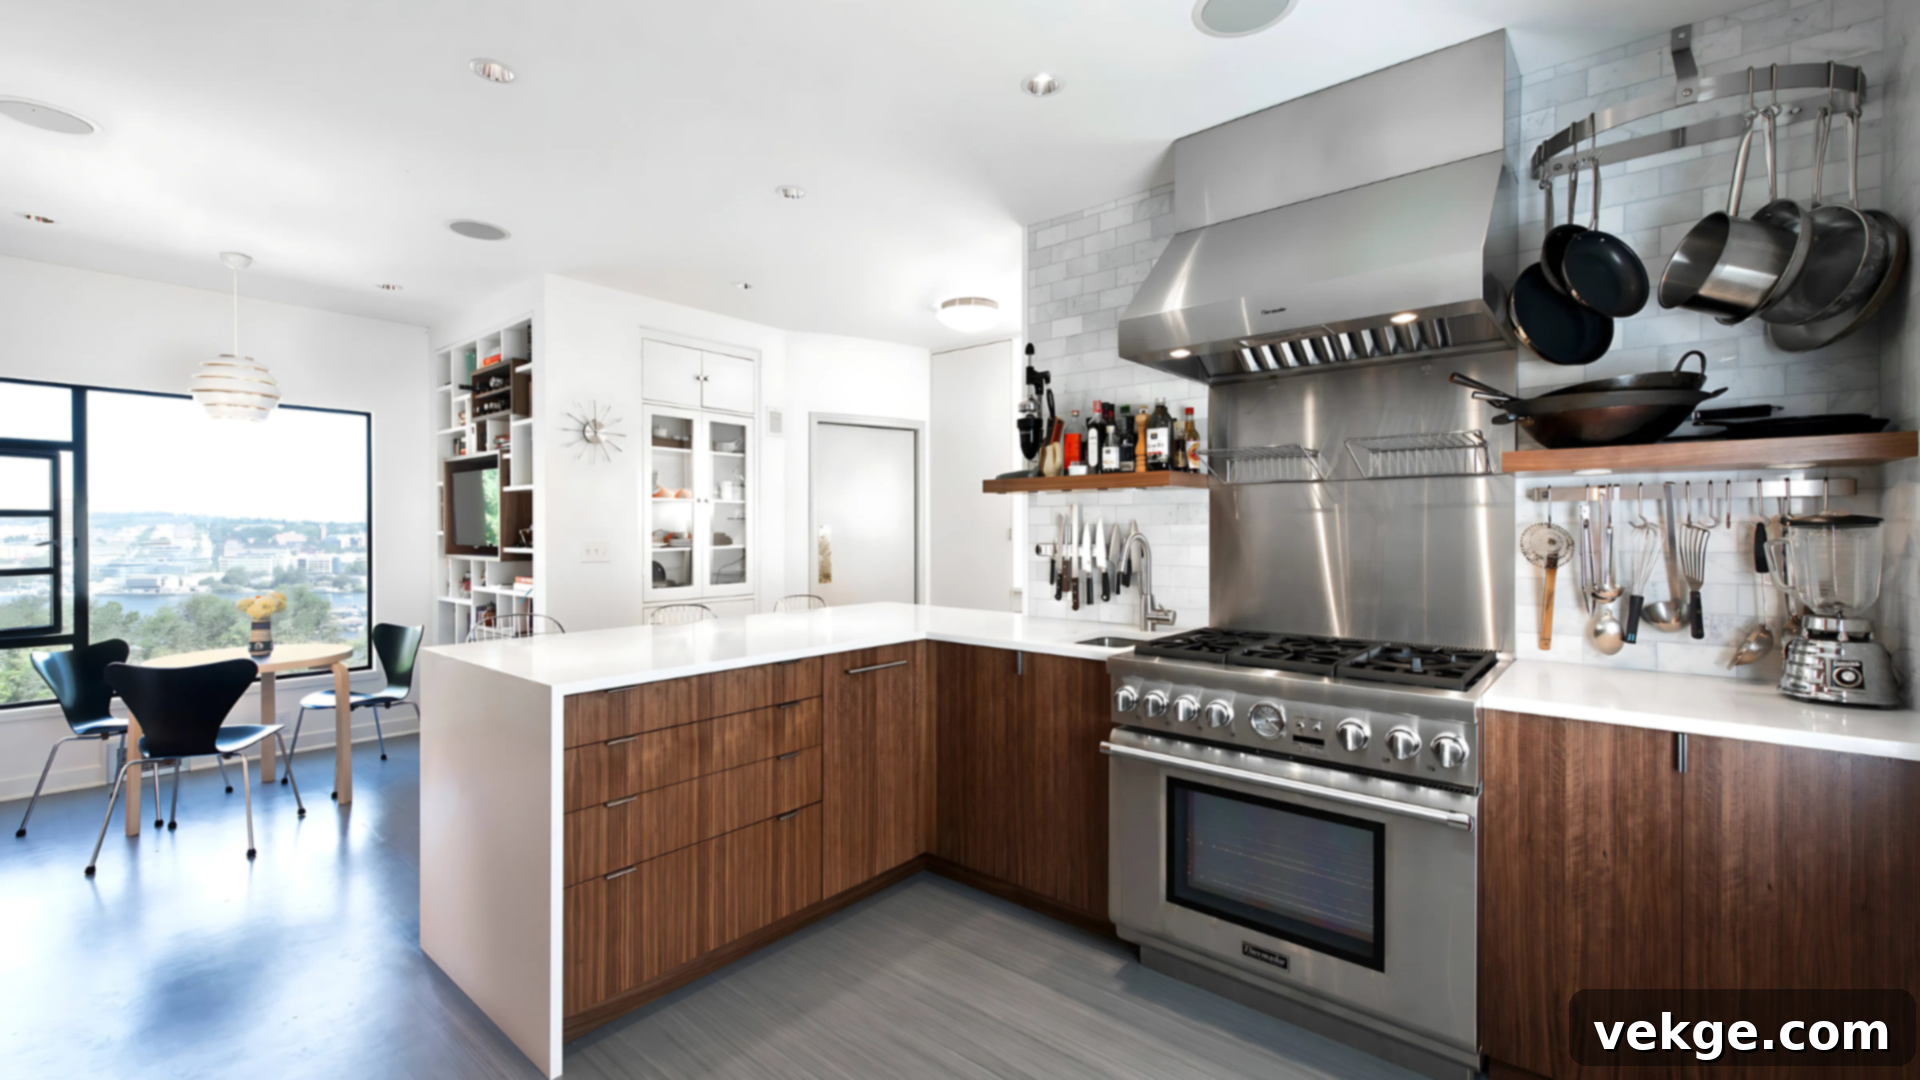
This zone is dedicated to all heating, simmering, frying, baking, and roasting activities. It typically revolves around your primary heat source – the stove and oven. To ensure maximum efficiency, place your microwave, toaster oven, and other essential heating appliances within close proximity. Storage here should prioritize quick access to all items used during the cooking process. Keep frequently used pots, pans, lids, and baking sheets in easily accessible drawers or cabinets directly below or next to the stove. Cooking utensils such as spatulas, ladles, tongs, and whisks should be stored in drawers or utensil crocks right next to the stovetop, ensuring they are always within arm’s reach for immediate use.
2. Prep Zone: Your Culinary Workbench
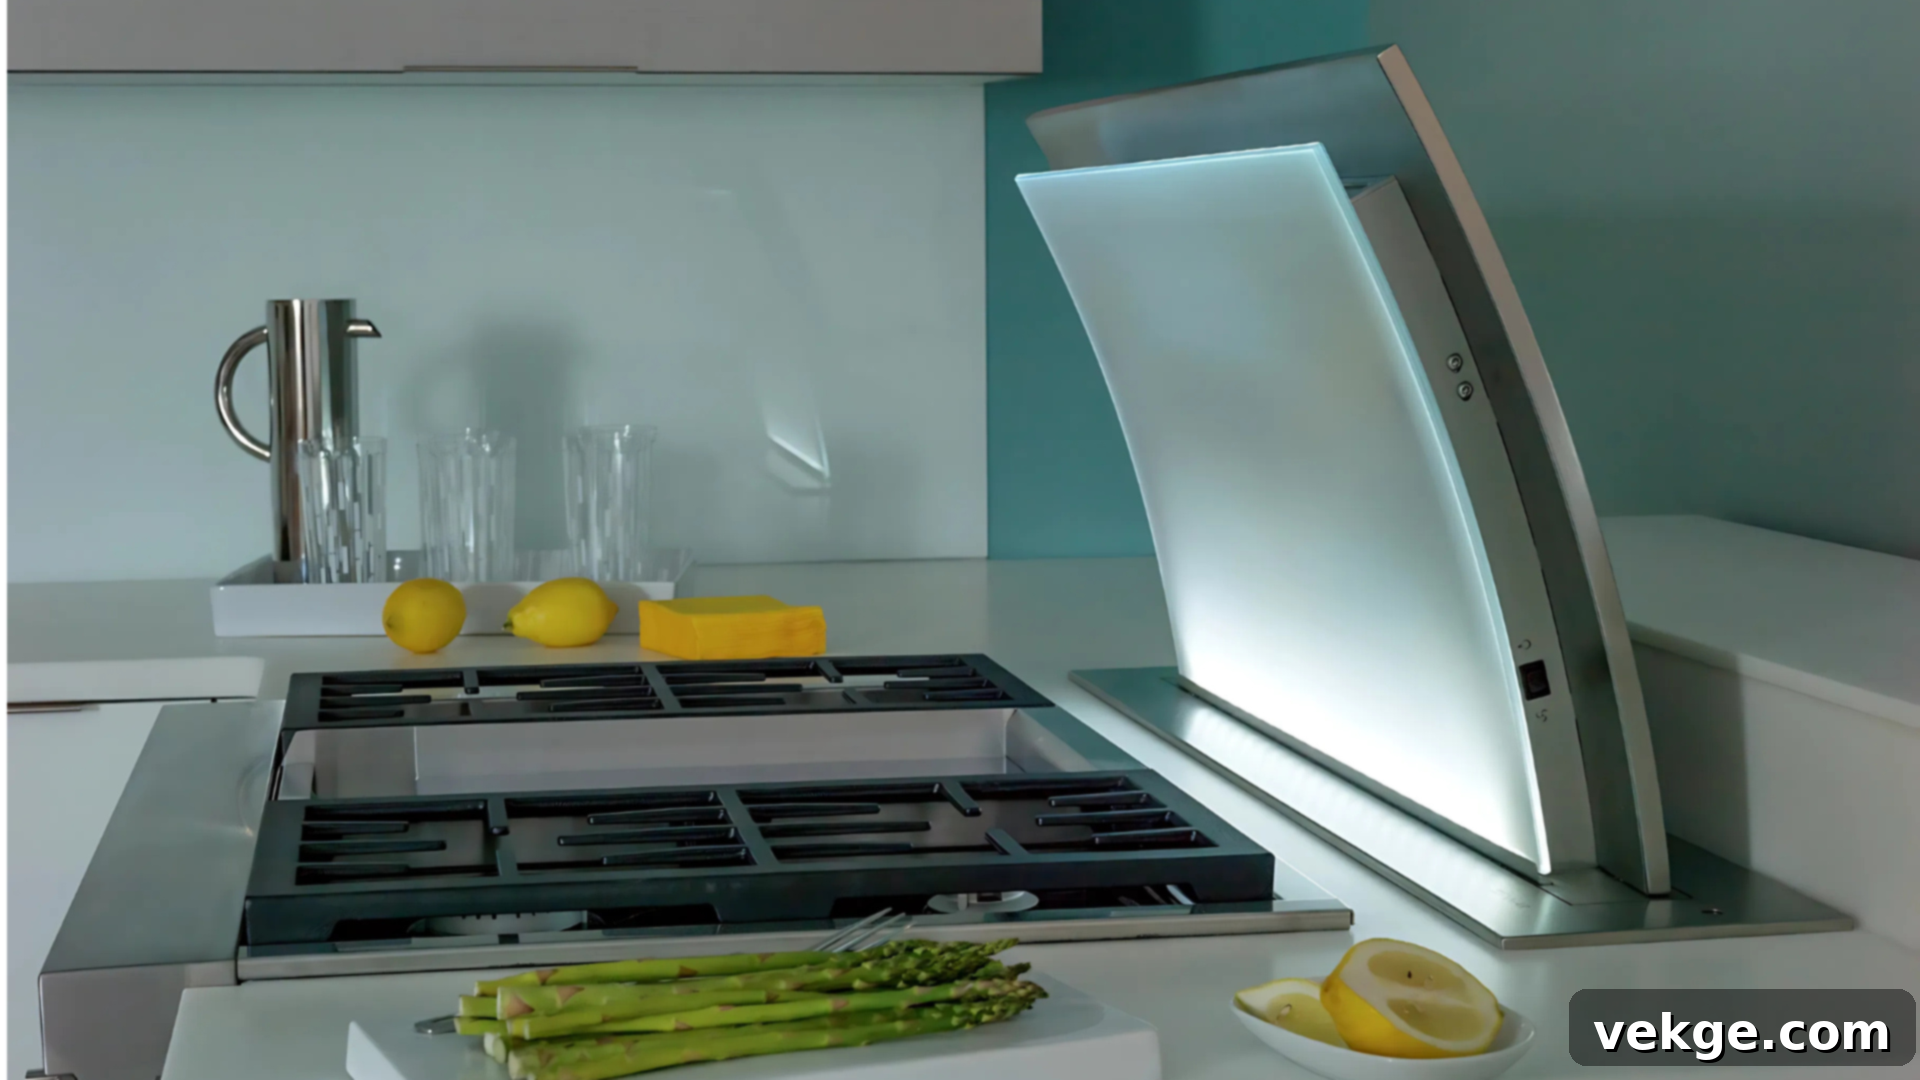
Consider this your main workstation, the area where the magic of transforming raw ingredients into meal components happens. A generous, uncluttered counter space is paramount here, providing ample room for chopping, slicing, mixing, and assembling. This zone is ideally situated between your consumables (refrigerator/pantry) and your cooking zone, facilitating a natural workflow. Store your essential prep tools here: a variety of cutting boards, a sharp knife set, mixing bowls of different sizes, measuring cups and spoons, and small food processors or blenders. Drawer organizers are excellent for keeping these tools tidy and easy to find, preventing the frustration of rummaging mid-recipe.
3. Cleaning Zone: The Hub of Tidiness
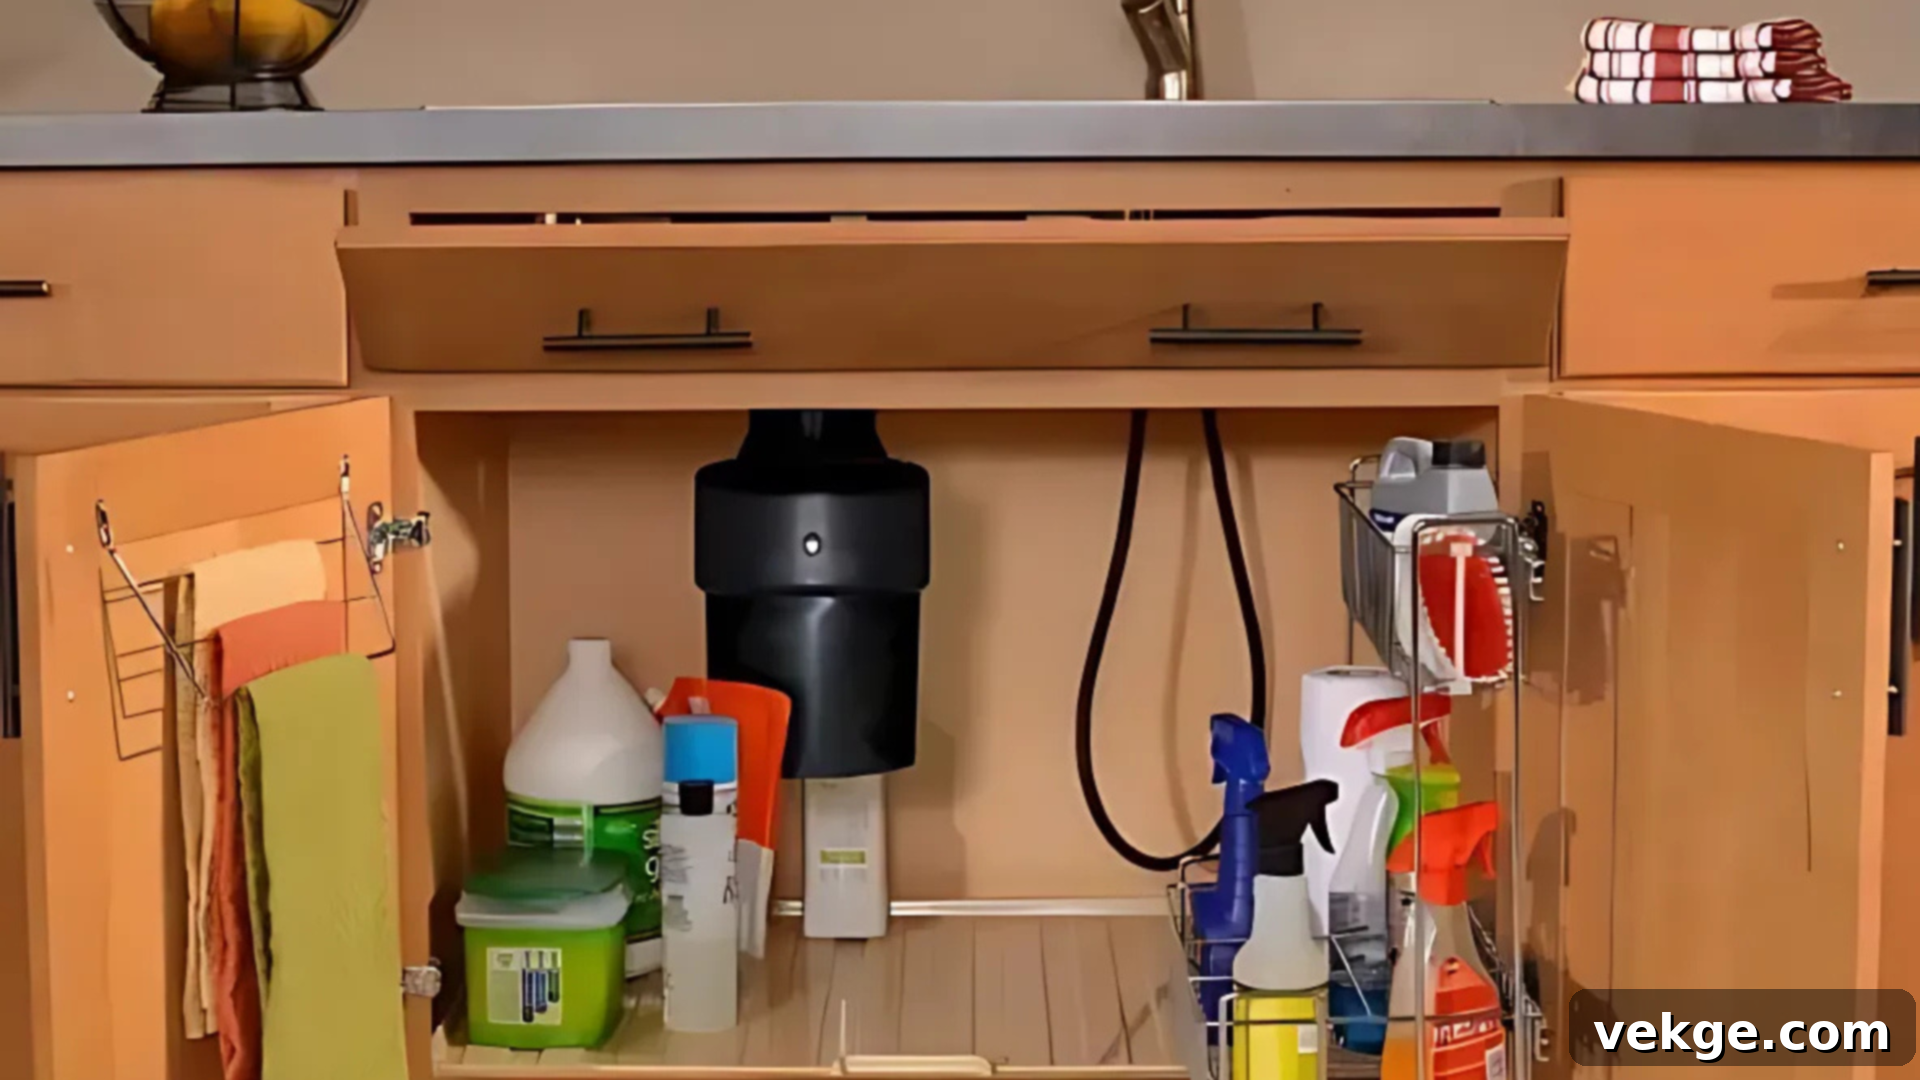
Every culinary endeavor concludes with cleanup, and a well-designed cleaning zone makes this task far less daunting. This area is centered around your sink, dishwasher, and waste disposal. For optimal functionality, ensure that dish soap, sponges, brushes, and cleaning cloths are stored directly under the sink or in a small caddy nearby. The trash bin and recycling containers should also be easily accessible within this zone, ideally integrated into a pull-out cabinet. Positioning your cleaning zone strategically, often close to the prep zone, allows for immediate rinsing and tidying as you cook, preventing piles of dishes from accumulating and maintaining a cleaner workspace throughout your meal preparation.
4. Consumables Zone: Your Food Storage Sanctuary
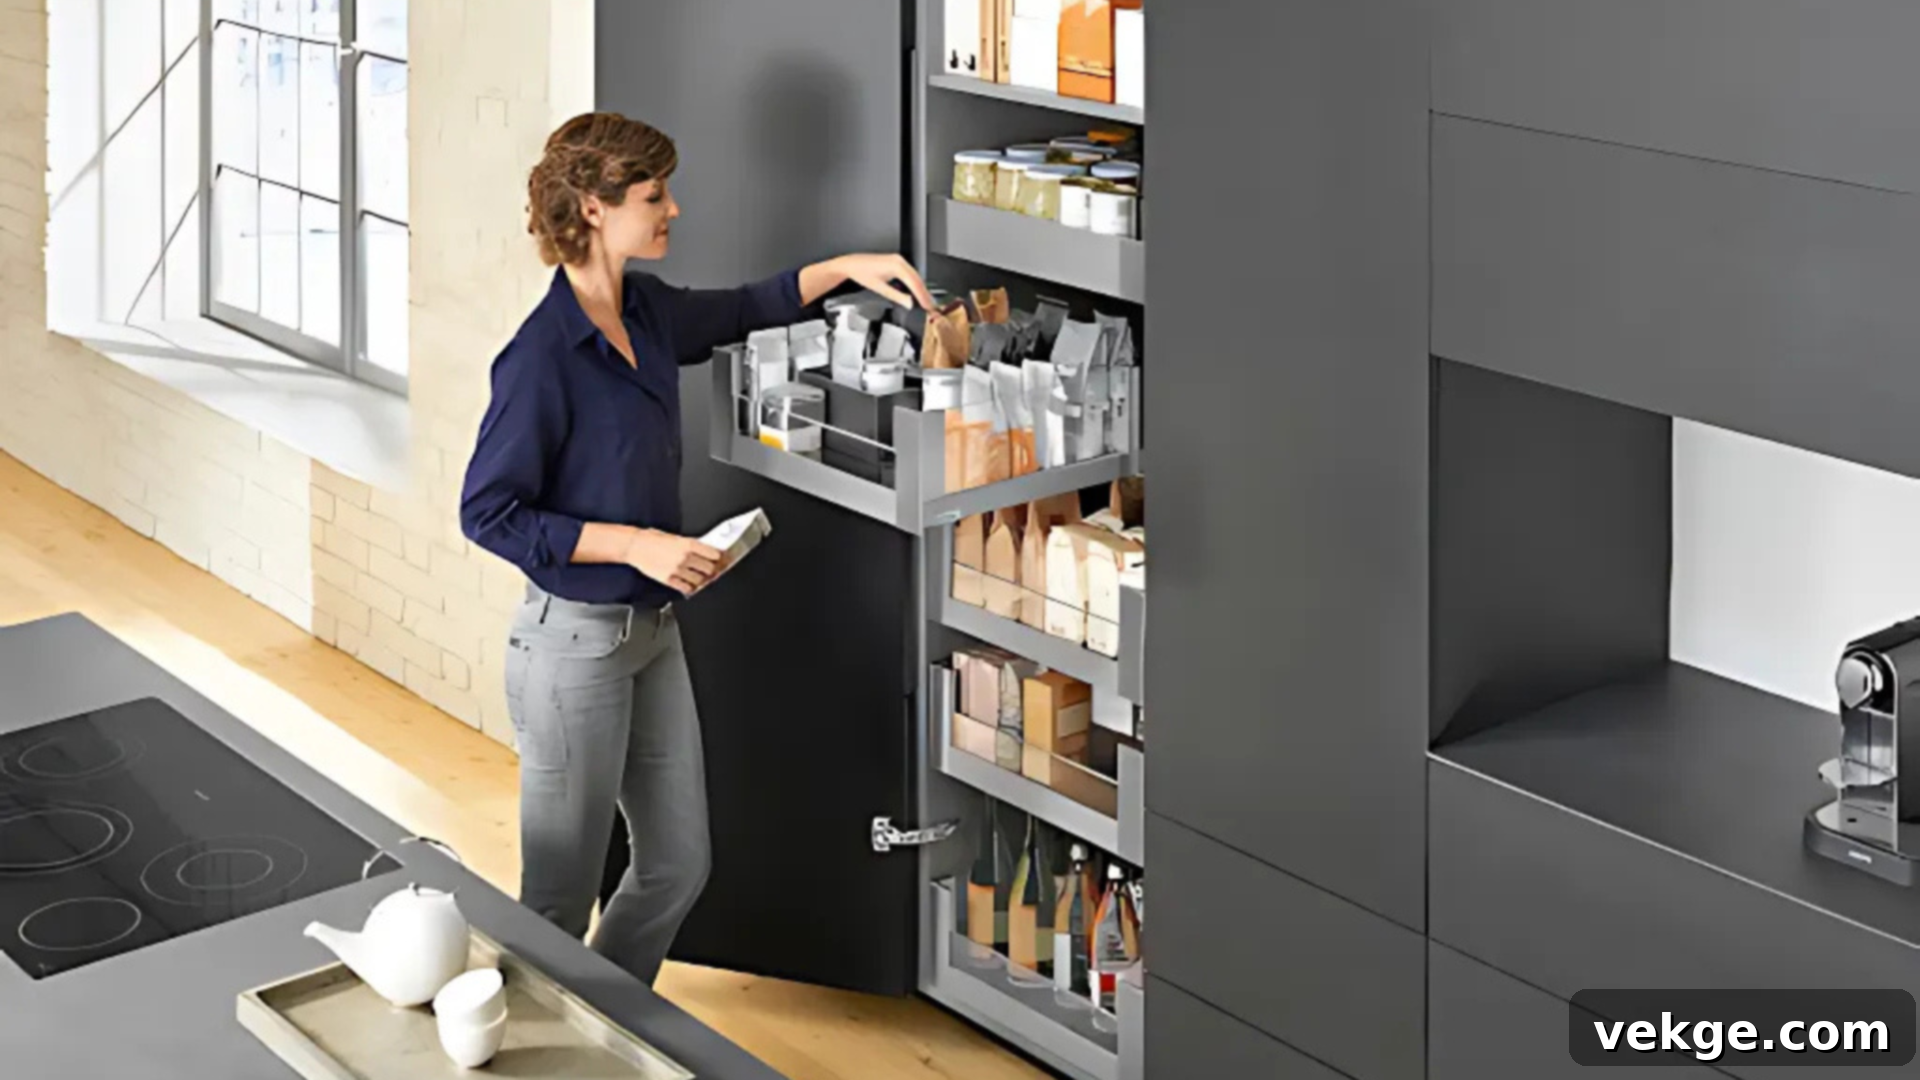
This zone is dedicated to the storage of all your food items, both perishable and non-perishable. Your refrigerator, freezer, and pantry are the primary components here. Effective organization within this zone ensures that ingredients are easy to locate, preventing food waste and streamlining meal planning. Utilize clear food storage containers for dry goods, label shelves, and arrange items by category (e.g., baking supplies, breakfast items, canned goods). For fresh produce and refrigerated staples, organize shelves intuitively, placing frequently used items at eye level and less common ingredients higher or lower. Proximity to the prep zone is crucial, allowing for a seamless transition from ingredient retrieval to preparation.
5. Non-Consumables Zone: Dining Essentials at the Ready
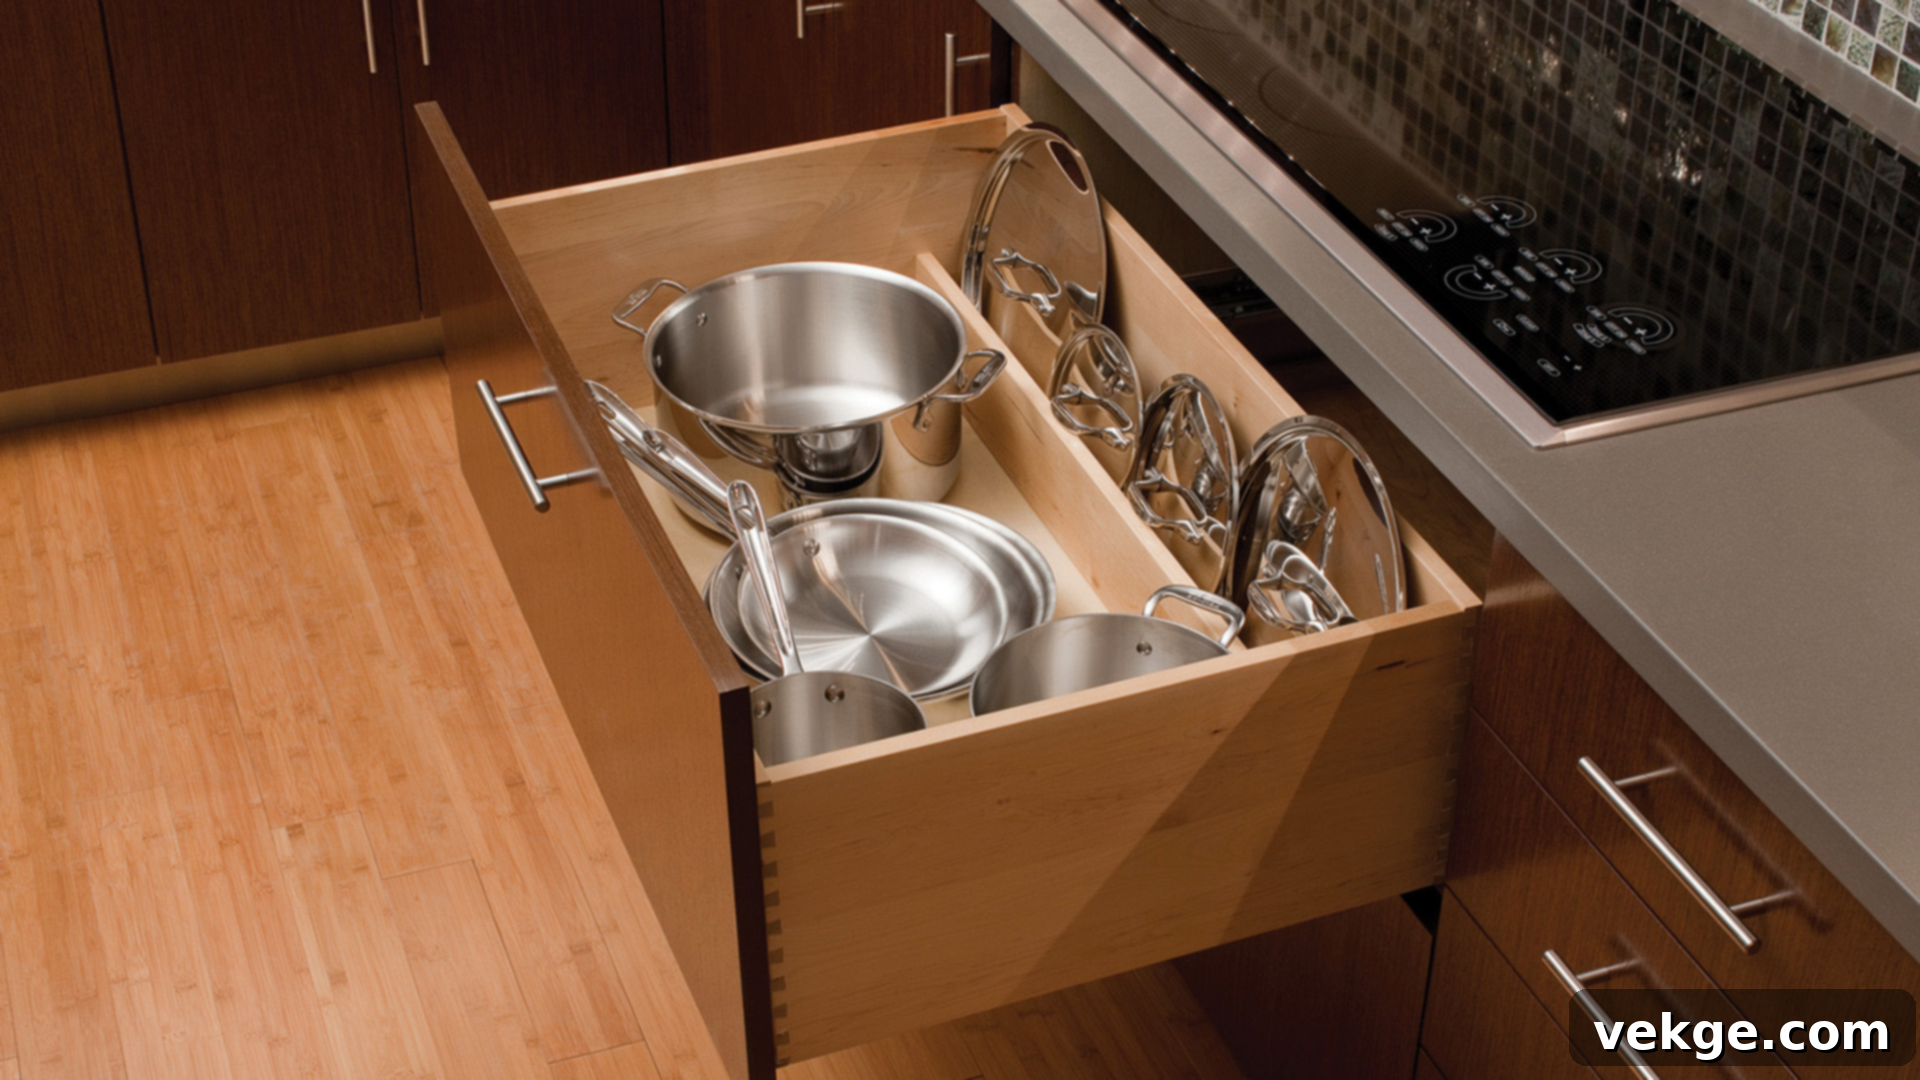
This zone houses all your essential items for serving and dining. This includes plates, bowls, glasses, mugs, silverware, serving dishes, and small appliances not used for cooking (like a blender if it’s primarily for smoothies, not hot soups). The most efficient placement for this zone is typically near the dishwasher or drying rack, minimizing the steps required to put away clean dishes. Consider dedicated drawers for silverware with custom inserts, and use plate dividers in cabinets to prevent chipping and maximize vertical storage. If space allows, grouping items for daily use separately from special occasion dishes can further enhance accessibility and organization.
Common Kitchen Layouts and Best Practices for Zone Integration
The foundation of a truly functional kitchen lies not just in its aesthetics, but in how intelligently its layout supports the activities performed within it. When planning your kitchen, selecting the right layout and then strategically integrating the five zones can dramatically enhance the efficiency, flow, and overall enjoyment of your space. Each kitchen layout offers unique opportunities and challenges for arranging your zones, and a clear understanding of these options will empower you to maximize your kitchen’s potential, creating a workspace that feels intuitive and effortless.
Single Wall Layout: Efficiency in Compact Spaces
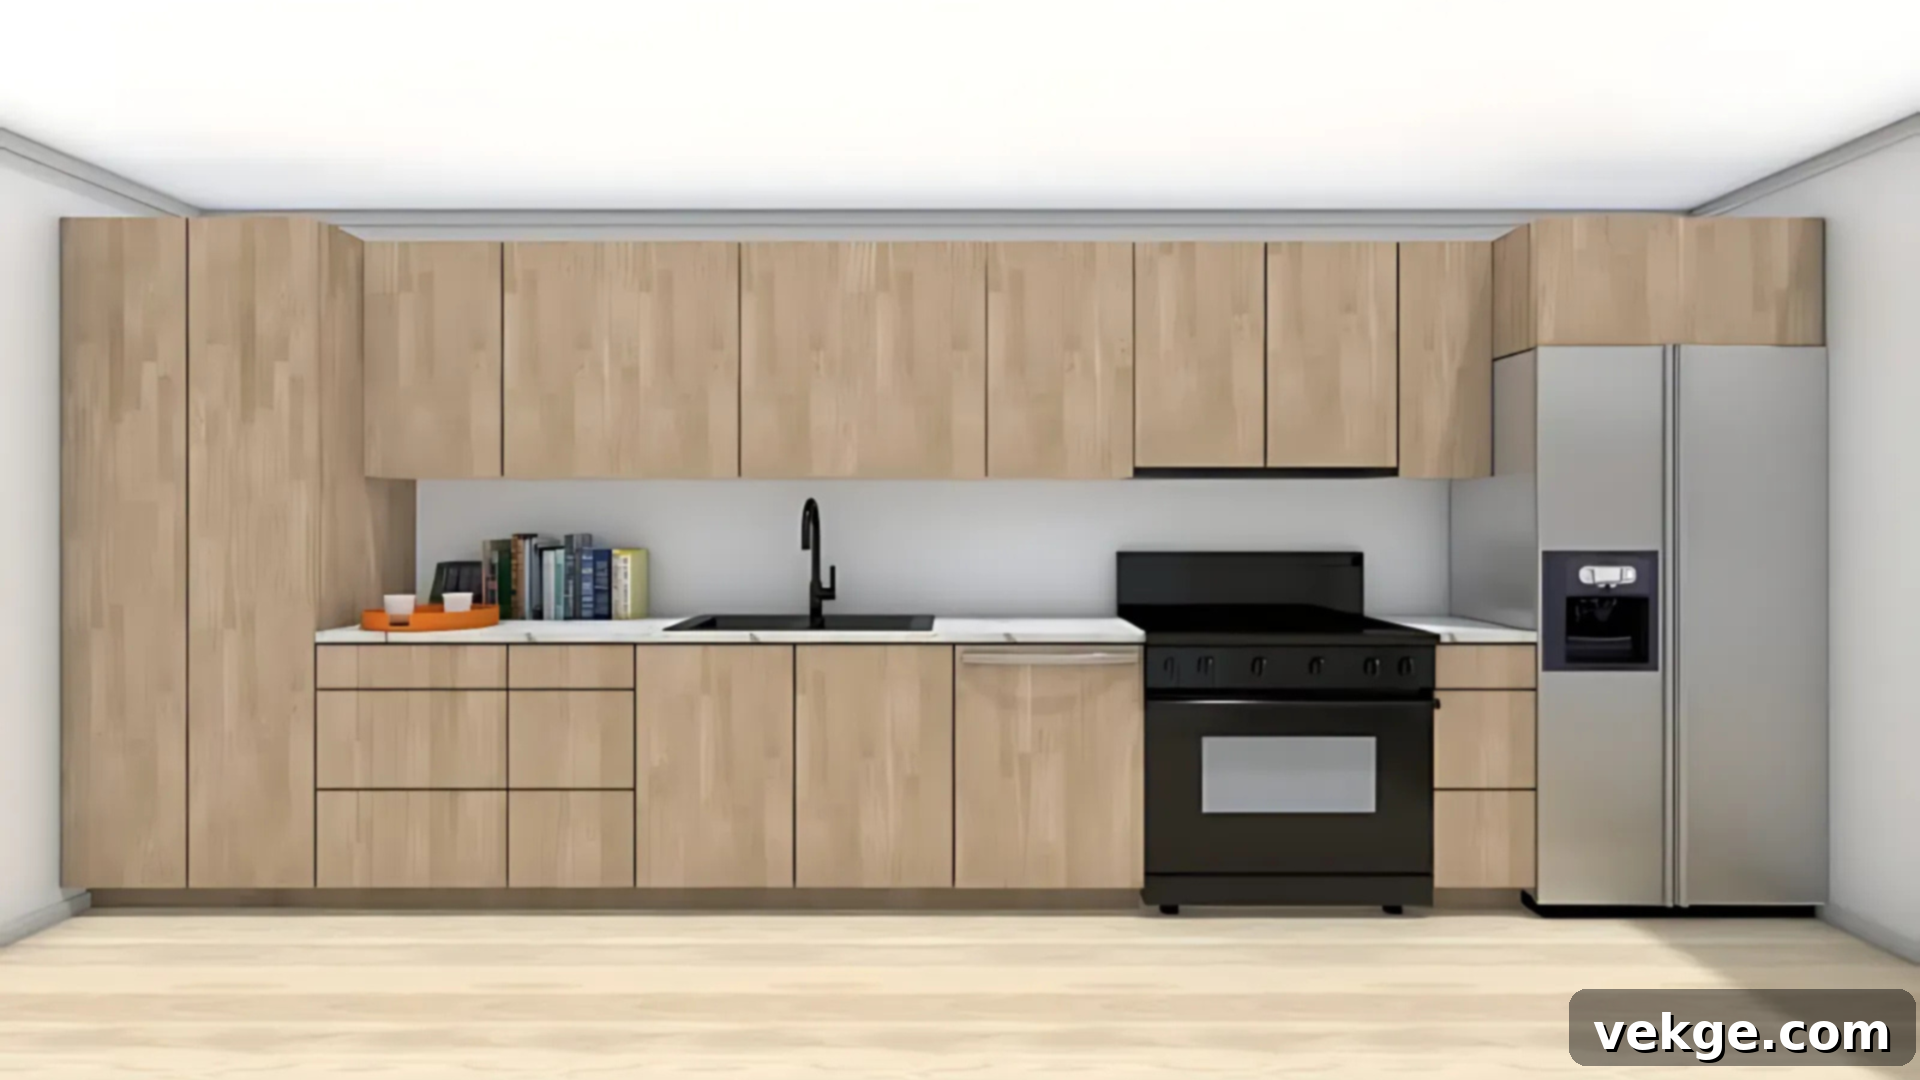
Characterized by all major kitchen components – cabinets, counters, and appliances – lining a single wall, this layout is a popular choice for smaller homes, apartments, or open-plan living areas where space is at a premium. Its simplicity can be deceptive; with smart zoning, a single-wall kitchen can be remarkably functional.
How to integrate zones with this layout:
- Centralized Cooking: Position the cooking zone (stove/oven) in the middle of the wall. This creates a natural focal point and allows other zones to radiate outwards.
- Flanking Prep & Cleaning: Flank the cooking area with the prep zone on one side (ideally closer to the consumables, e.g., fridge) and the cleaning zone (sink/dishwasher) on the other. This establishes a logical left-to-right or right-to-left workflow.
- Vertical Storage for Consumables & Non-Consumables: Maximize every inch of vertical space. Install upper cabinets for both consumables (pantry items, spices) and non-consumables (dishes, glasses). Utilize pull-out organizers in base cabinets for easy access to deeper items.
- Smart Storage Solutions: Employ vertical dividers for baking sheets and cutting boards, and stackable shelves to make the most of limited cabinet depth. Wall-mounted racks for utensils or small spice jars can also free up valuable counter space.
Benefits:
- Space-Saving: Consumes minimal floor space, ideal for compact living.
- Streamlined Workflow: Keeps all tools and items easily accessible along a single line, reducing steps.
- Open Concept Friendly: Integrates seamlessly into open-plan living areas without visual clutter.
- Budget-Friendly: Often more affordable to install due to fewer cabinets and simpler plumbing/electrical runs.
- Easy to Clean: Fewer corners and surfaces mean quicker, simpler cleaning and maintenance.
Galley Layout: The Efficiency Corridor
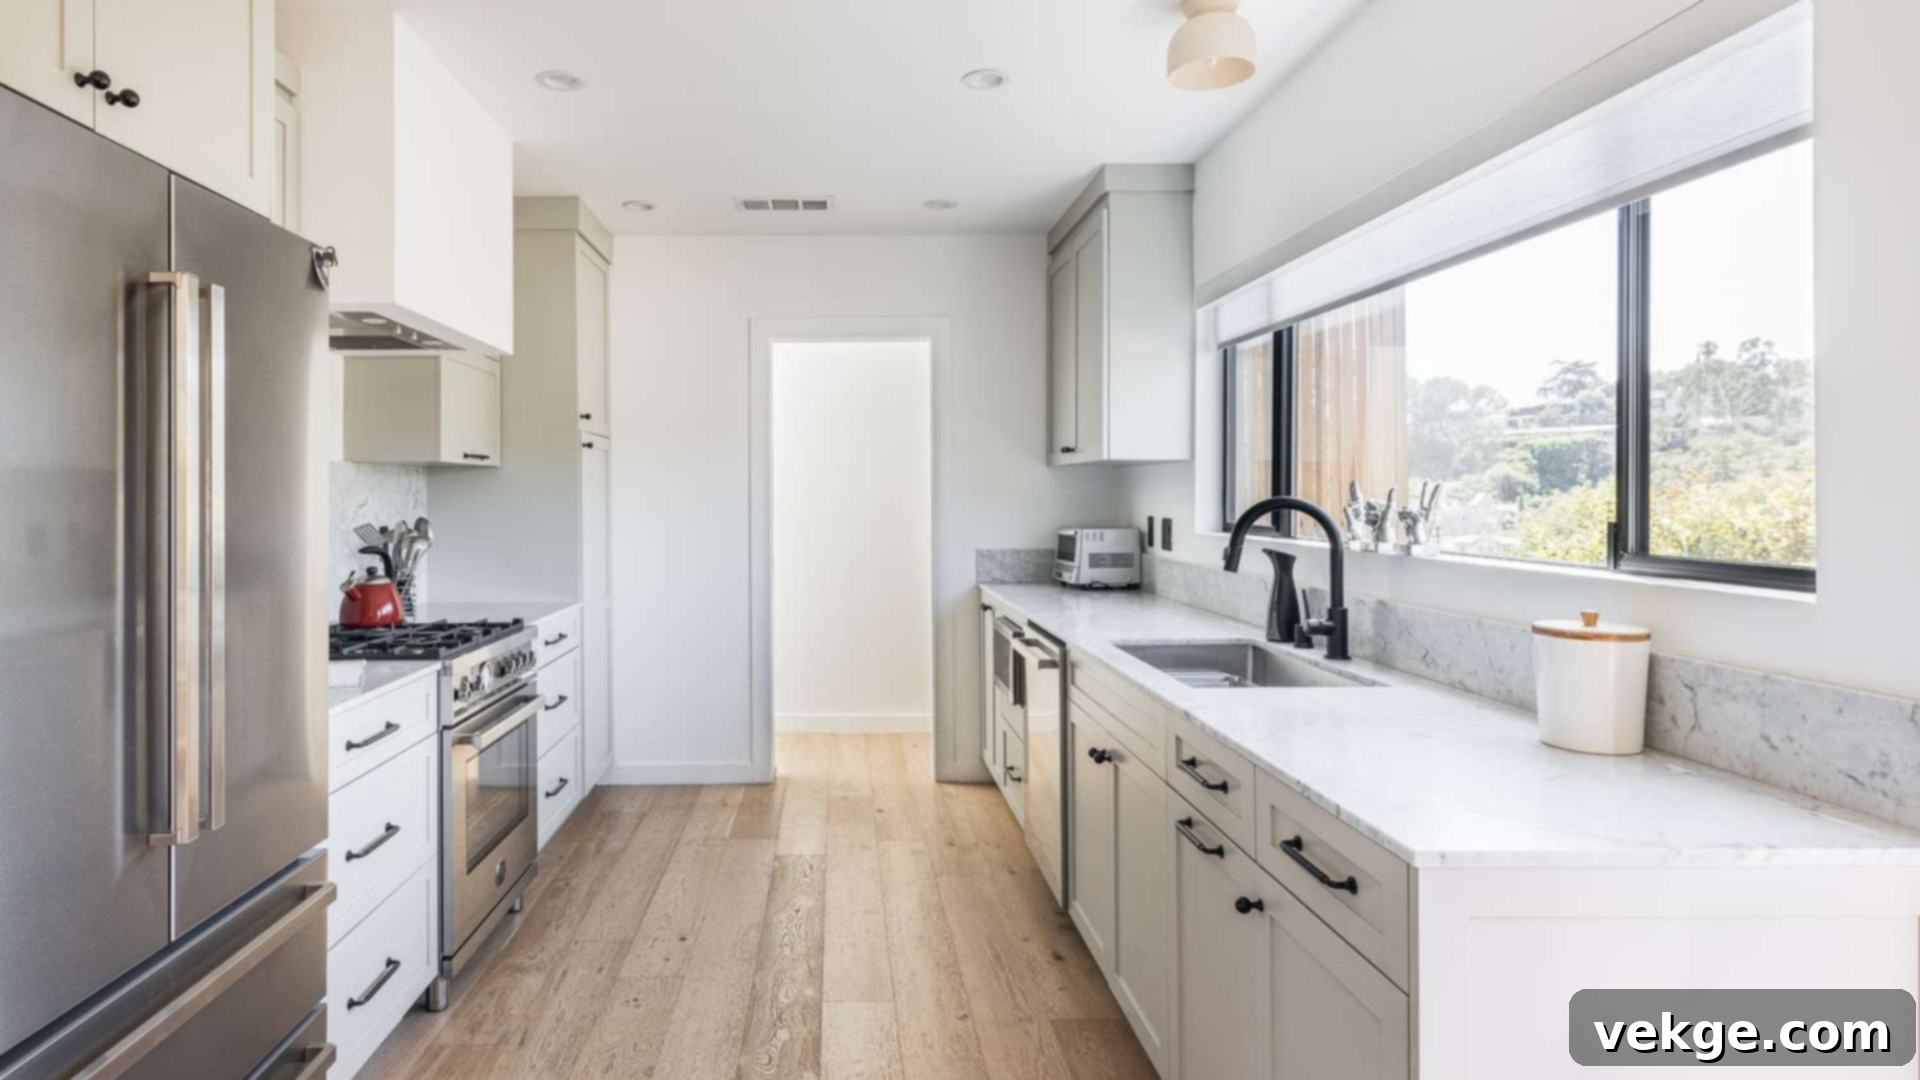
The galley kitchen, characterized by two parallel walls of cabinets and countertops creating a central walkway, is celebrated for its highly efficient use of space and optimal workflow. It channels all kitchen functions into a concentrated corridor, making it an excellent choice for narrow yet busy homes.
How to integrate zones with this layout:
- Separated Functions: Designate one wall for active work zones (cooking and prep) and the opposite wall for supporting zones (cleaning and storage). For example, the fridge (consumables) and prep area could be on one side, with the stove (cooking) and sink (cleaning) on the other.
- The Working Triangle Reinvented: The galley layout naturally creates a highly efficient “working corridor” rather than a triangle. Position the most-used appliances (fridge, sink, stove) so they are directly opposite or slightly offset from each other, minimizing pivots.
- Floor-to-Ceiling Storage: Leverage the vertical space on both walls with floor-to-ceiling cabinetry for maximum storage. This is excellent for separating consumables and non-consumables.
- Strategic Grouping: Group similar items together on each wall. For instance, all baking supplies with the oven on one side, and all cleaning supplies under the sink on the other. This creates clear, functional zones that support a smooth workflow without obstruction.
Benefits:
- Optimal for Narrow Spaces: Its linear design is perfect for homes with limited width.
- Short Distances: Minimizes steps between work areas, boosting efficiency.
- Abundant Counter Space: Two long countertops provide ample room for multiple tasks.
- Excellent Workflow: Allows for a logical progression of tasks from one end to the other.
- Single-Cook Friendly: Highly efficient for one person, though can accommodate two with careful planning.
L-Shaped Layout: Flexible and Social
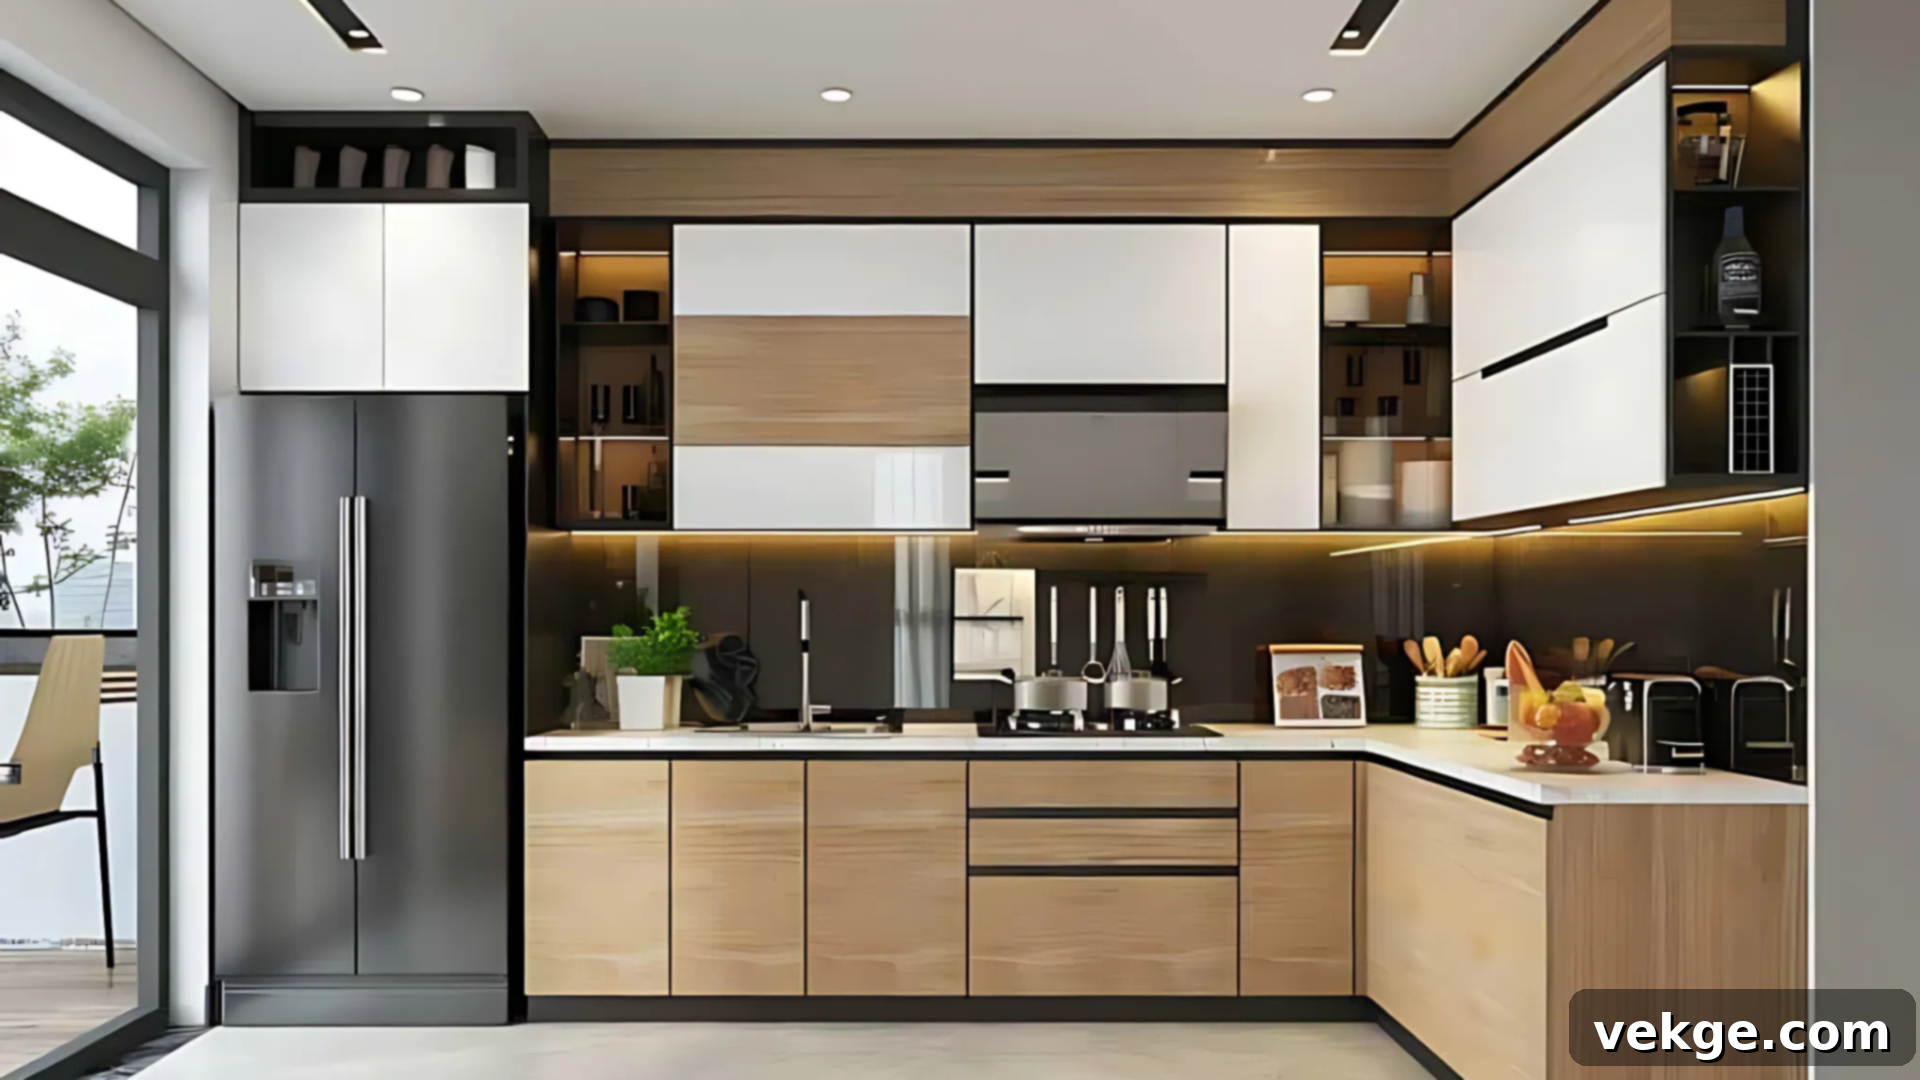
The L-shaped kitchen utilizes two walls that meet at a corner, creating an open and flexible layout. This design naturally opens up the kitchen to adjacent rooms, fostering a more social environment, and typically forms a very practical working triangle between the key activity areas (sink, stove, fridge).
How to integrate zones with this layout:
- Corner Advantage: Position a primary zone, like the cooking or cleaning zone, along one leg of the ‘L’ and set up supporting zones on the other. For instance, the cooking zone (stove, oven, microwave) on one wall, with the cleaning zone (sink, dishwasher) and prep area on the other. The refrigerator (consumables) can anchor one end of the L.
- Smart Corner Storage: Make intelligent use of the often-challenging corner space. Solutions like lazy Susans, blind corner pull-outs, or diagonal cabinets can transform this area into valuable storage for larger pots, small appliances, or pantry overflow (non-consumables).
- Workflow Progression: Strategically place the prep area between the consumables (fridge/pantry) and the cooking or cleaning zones, ensuring a smooth, linear workflow from ingredient retrieval to preparation and finally to cooking or washing.
- Proximity Principle: Store items closest to where they will be used. For example, dishes and glasses (non-consumables) near the cleaning zone, and spices/oils near the cooking zone to minimize back-and-forth movement.
Benefits:
- Openness for Movement: Creates ample open floor space, making it feel less cramped and allowing for easy movement.
- Efficient Workflow: Naturally supports a functional working triangle, enhancing efficiency.
- Dining Integration: Often leaves space for a dining table or island, perfect for eating areas or casual entertaining.
- Multi-Cook Friendly: The open layout allows multiple people to work in the kitchen without bumping into each other.
- Versatile Fit: Adapts well to various home sizes and architectural styles.
U-Shaped Layout: The Ultimate Workhorse
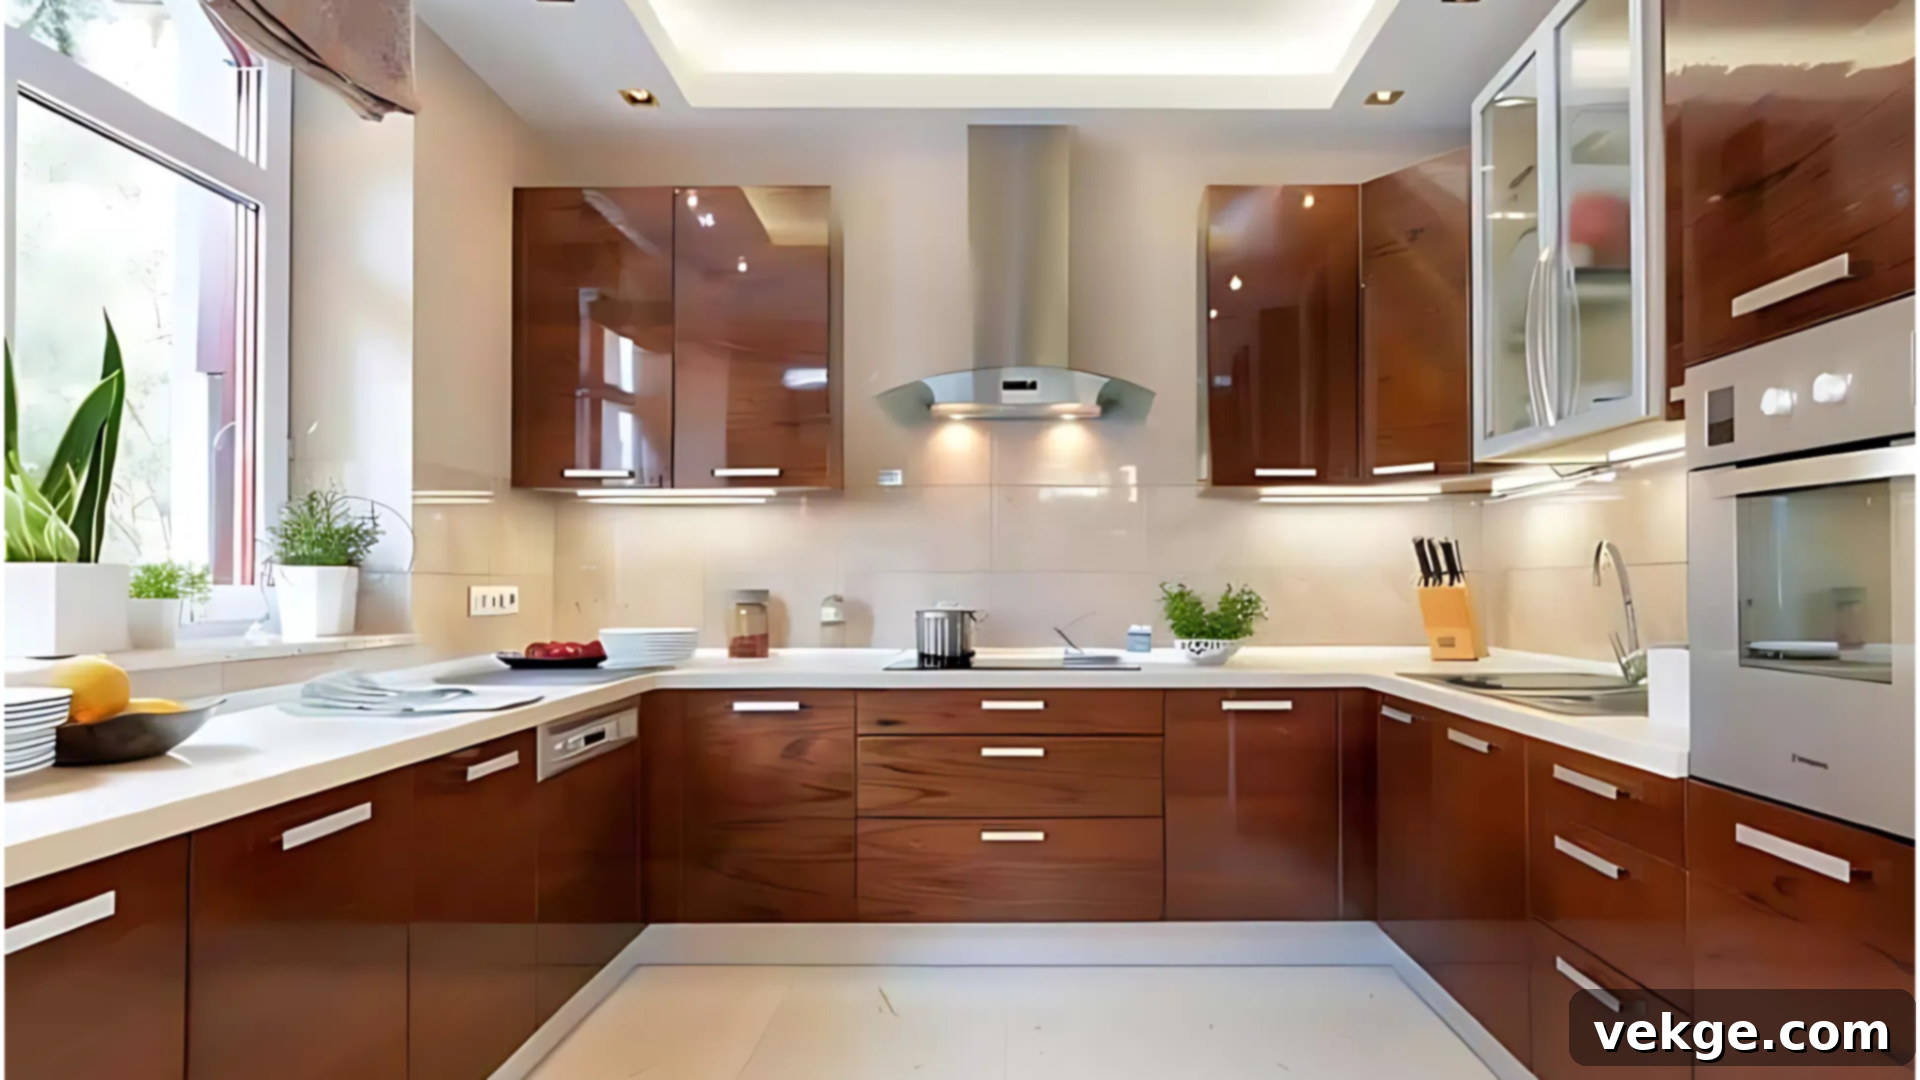
The U-shaped kitchen, formed by three walls of cabinets and appliances, creates a wonderfully enclosed and highly efficient workspace where everything revolves around the cook. This design makes exceptional use of available wall space, offering abundant storage and counter surfaces, while keeping all essential areas within easy reach.
How to integrate zones with this layout:
- Zone Dispersion: Distribute your five zones strategically across the three walls. A common approach is to place the most frequently used items and primary appliances on the central wall, with supporting zones on the flanking walls.
- Opposing Key Zones: To prevent overlap and maintain flow, position the cooking zone (stove/oven) on one wall and the cleaning zone (sink/dishwasher) on an opposite or adjacent wall. The refrigerator (consumables) can be placed to complete a strong working triangle.
- Corner Maximization: With two corners, maximizing storage is key. Implement smart corner solutions like super Susans (full-rotation lazy Susans), pull-out pantry units, or deep drawers to store larger items, small appliances, or bulk pantry goods (non-consumables and consumables).
- Dedicated Work Areas: The U-shape naturally allows for distinct work areas on each wall. One wall might be primarily for prep, another for cooking, and the third for cleaning and dish storage, all while maintaining a logical and seamless flow between tasks.
Benefits:
- Maximum Storage: Offers the most cabinet and counter space among standard layouts.
- Everything Within Reach: The compact nature ensures all key zones are just a pivot or a few steps away.
- Multi-Cook Friendly: Generous counter space and distinct zones make it comfortable for multiple cooks.
- Extensive Counter Space: Provides expansive work surfaces for prep, baking, and serving.
- Clear Task Separation: Allows for excellent delineation of tasks, reducing interference during busy times.
Island Layout: Versatility and Social Hub
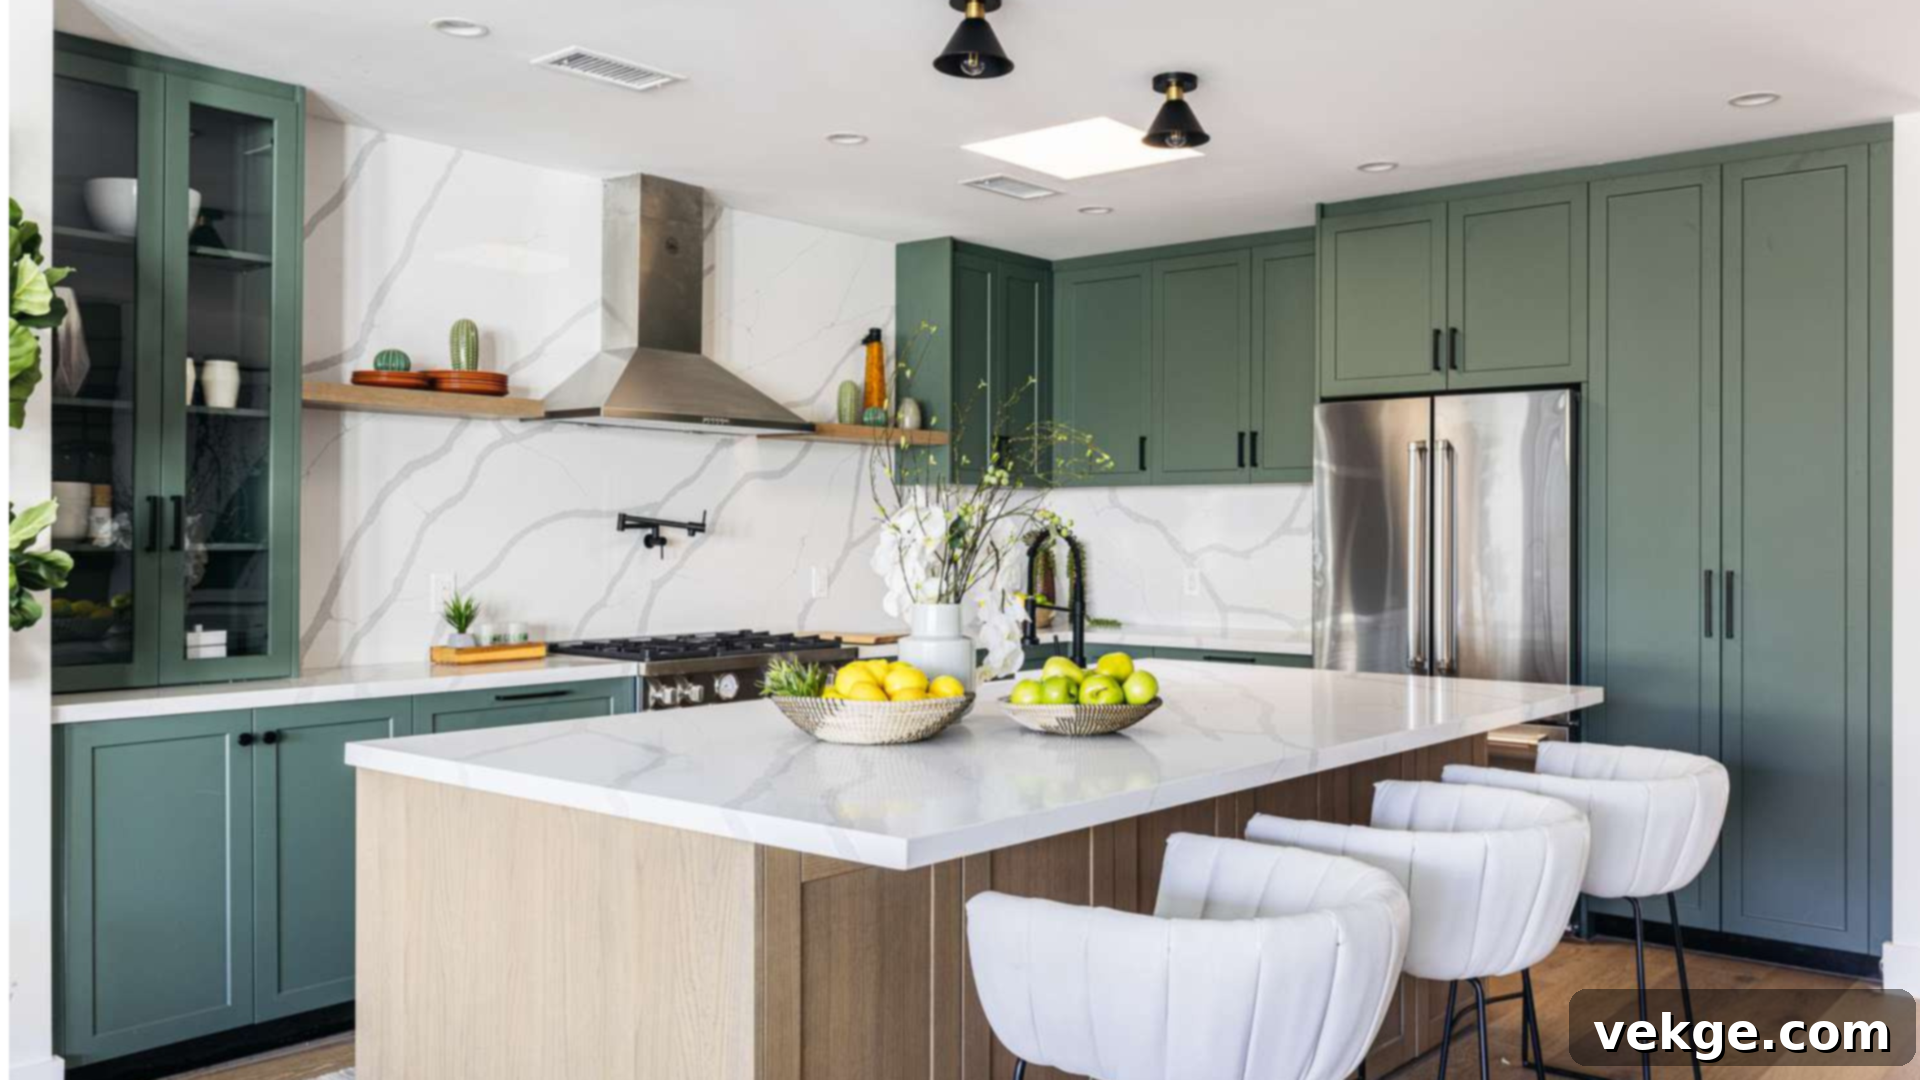
The island layout typically complements an existing standard kitchen (like an L or U-shape) by adding a freestanding counter in the middle of the space. This addition not only introduces valuable extra work surfaces and storage but also transforms the kitchen into a dynamic social hub, allowing for interaction while cooking.
How to integrate zones with this layout:
- Island as Prep Powerhouse: Designate the island primarily as an expansive prep zone. Its central location makes it ideal for cutting, mixing, and assembling ingredients, often with a dedicated prep sink. This keeps the main cooking area on the wall, separate but easily accessible.
- Strategic Appliance Integration: If space and plumbing/electrical allow, an island can house a secondary sink, a dishwasher, a cooktop, or even a beverage fridge, enhancing its functionality for specific zones (cleaning or cooking).
- Peripheral Cleaning: Place the main cleaning zone (sink, dishwasher) along the wall closest to the dining area or where dishes are typically brought in, ensuring convenience for clearing and washing up.
- Island Storage: Utilize the under-island space for storing cooking tools, prep equipment, mixing bowls (non-consumables), or even a small pull-out pantry for frequently used spices (consumables). This keeps essential items within immediate reach of the prep surface.
- Defined Zones: The island naturally helps create separate zones for different tasks—e.g., active cooking on the perimeter, social prep on the island, and dining at a breakfast bar extension—preventing crowding and maintaining clear pathways.
Benefits:
- Expanded Counter Space: Significantly increases usable work surface area for various tasks.
- Enhanced Storage Options: Offers additional cabinet, drawer, or shelving space under the island.
- Social Gathering Point: Perfect for entertaining, allowing guests to gather and interact with the cook.
- Task Separation: Effectively separates cooking and prep from dining or social activities.
- Improved Food Prep: Provides a dedicated and often generous area, making ingredient preparation more comfortable.
Peninsula Layout: Island Benefits, Space-Saving Design
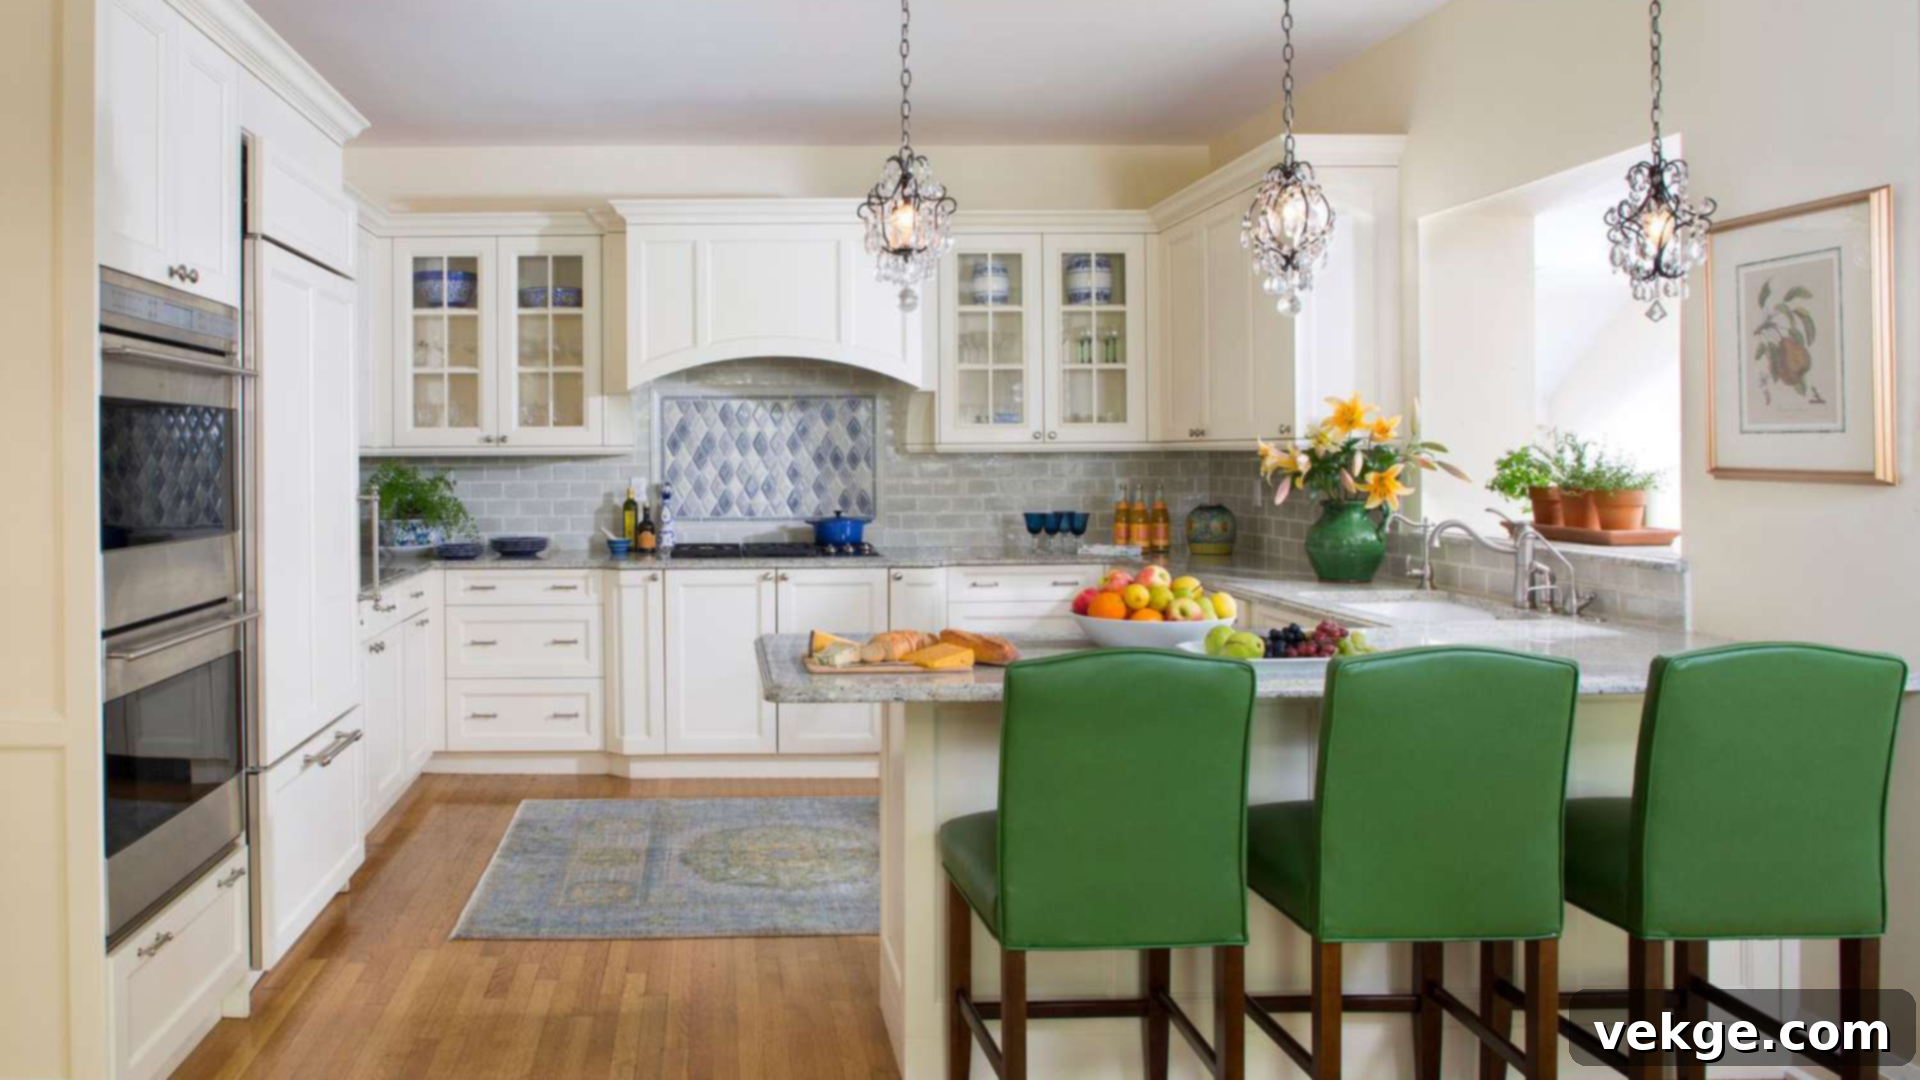
Similar to an island, a peninsula is an extra counter space that extends from a wall or existing cabinet run. It offers many of the advantages of an island, such as added work surface and a social interaction point, but typically requires less floor space, making it an excellent compromise for medium-sized kitchens.
How to integrate zones with this layout:
- Connected Workflow: Seamlessly connect the prep and cooking zones along the main wall, with the peninsula extending to offer additional prep space or a secondary workstation.
- Adjacent Cleaning: Position the cleaning area (sink) nearby, perhaps on the main wall where the peninsula begins, or even integrate a smaller sink into the peninsula itself if space and plumbing allow, ensuring efficiency.
- Peninsula Storage: Utilize the base cabinets within the peninsula for storing commonly used items related to its function, such as mixing bowls and small appliances if it’s a prep area, or serving dishes if it’s near the dining space (non-consumables).
- Defined Activity Areas: The peninsula naturally helps define distinct zones for eating (a breakfast bar) and cooking, while maintaining an open feel and good workflow.
- Wall Space Optimization: Leverage the main wall space for additional storage needs, ensuring both consumables and non-consumables are easily accessible from their respective zones.
Benefits:
- Adds Significant Counter Space: Provides valuable extra work surface without needing a completely open floor plan.
- Creates Room Division: Visually separates the kitchen from other living areas while maintaining an open feel.
- Engages the Cook: Allows the cook to interact with guests or family members in adjacent rooms.
- Ideal for Medium Kitchens: A perfect solution when an island is too large but more counter space is needed.
- Balanced Space: Offers a good balance between functional workspace and social interaction areas.
Design Considerations for Effective Kitchen Zoning
Beyond simply placing items in categories, truly effective kitchen zoning integrates thoughtful design principles that consider how you interact with your space on a daily basis. By focusing on spatial planning, accessibility, and visibility, you can create a kitchen that feels intuitive, comfortable, and a joy to use for years to come.
Spatial Planning: Orchestrating Movement and Flow
Good spatial planning begins with a deep understanding of your daily kitchen routines and culinary preferences. The way your zones interact and flow from one to another should mirror your cooking style and family dynamics, creating a symphony of movement rather than a series of disjointed steps.
- Align with Habits: Design zones to match your specific cooking habits and daily routine. If you bake frequently, ensure your baking zone is highly optimized and easily accessible.
- Logical Placement: Place items precisely where they make the most sense for the tasks performed in that zone. For instance, frequently used spices should be right by the stovetop, not across the room.
- Adequate Clearances: Ensure there’s sufficient space between different work areas for comfortable movement, especially when multiple people are in the kitchen. Avoid bottlenecks and cramped pathways.
- Traffic Flow Analysis: Consider the main traffic routes through the kitchen, especially during busy meal times. Design zones to keep these paths clear and prevent interference with active cooking or prep.
- Task-Based Grouping: Group related items based on their sequential use within a task. For example, all coffee-making supplies (mugs, coffee, filters, machine) in one dedicated spot.
Accessibility: Ergonomics for Effortless Use
Making every item easy to reach and retrieve is paramount to reducing the time, effort, and physical strain involved in kitchen tasks. Every tool, appliance, and ingredient should be stored not just where it fits, but where it will be most conveniently used.
- Point-of-Use Storage: Keep cooking tools (spatulas, ladles, whisk) in a utensil crock or drawer directly adjacent to the stove.
- Dedicated Prep Tools: Store prep items (knives, cutting boards, mixing bowls) in drawers or cabinets immediately below or next to the main work surfaces.
- Cleaning Supplies Proximity: Place cleaning supplies (dish soap, sponges, dishwasher pods) directly under the sink or in a pull-out caddy beside it.
- Dishware Near Cleaning: Position everyday dishes, glasses, and silverware (non-consumables) in cabinets or drawers closest to the dishwasher or drying rack for effortless unloading.
- Smart Storage Aids: Utilize drawer organizers for cutlery, pull-out shelves for heavy pots, and pantry carousels for spices to bring items to you, minimizing bending and reaching.
Visibility: Lighting, Openness, and Connection
A well-planned kitchen extends beyond mere organization; it creates an environment where you can easily see across different work areas, enhancing safety, efficiency, and social connection. Clear sight lines also foster a sense of spaciousness and make the kitchen a more inviting place to be.
- Unobstructed Views: Design the layout to maintain clear sight lines across the kitchen, allowing you to monitor multiple tasks or interact with family/guests.
- Optimized Lighting: Ensure work surfaces are brightly and evenly lit with task lighting (under-cabinet lights, pendants over an island). Supplement with ambient lighting for overall brightness.
- Strategic Cabinet Placement: Position tall cabinets (like pantries or appliance garages) thoughtfully to avoid blocking natural light, views, or pathways within the kitchen.
- Social Hubs: Create open spaces, such as an island with seating or a peninsula, that encourage social interaction while food preparation is underway.
- Connecting to Living Areas: Consider sight lines from the kitchen to adjacent living or dining areas, allowing for easy interaction and a feeling of connectedness, especially in open-concept homes.
Organization Tips: Practical Advice for Optimizing Kitchen Spaces
Implementing the five-zone method requires practical, hands-on organization. These tips will help you take the theoretical framework and apply it to the tangible elements of your kitchen, ensuring every drawer, cabinet, and countertop serves its purpose with maximum efficiency and style.
1. Cabinet Organization: The Unsung Hero of Efficiency
A thoughtfully organized cabinet system is the unsung hero of a functional kitchen. It saves precious time, reduces frustration, and makes the entire cooking process more enjoyable. Good organization means not only knowing precisely where everything is but also being able to retrieve it effortlessly.
Grouping Items by Use:
- Daily Essentials: Store everyday dishes, glasses, and frequently used cooking tools in prime, easily accessible cabinets or drawers at waist to eye level.
- Categorical Storage: Group matching items together. Dedicate one area for all baking items (flour, sugar, mixing bowls, cookie sheets), another for breakfast supplies (cereals, coffee, mugs), and so on.
- Seldom-Used Items: Reserve higher cabinets or deeper, less accessible spaces for seasonal items, entertaining platters, or small appliances that are used infrequently.
Vertical Storage Solutions:
- Dividers for Pans: Utilize vertical dividers within cabinets or pull-out drawers for pots, pans, and baking sheets. This allows you to grab one item without unstacking others.
- Stackable Shelves: Employ stackable shelves to double or triple the storage capacity within taller cabinets, ideal for plates, bowls, or food containers.
- Under-Shelf Baskets: Install under-shelf baskets for smaller items like plastic wrap, foil, or dish towels, creating additional storage without permanent installation.
Effective Use of Organizers:
- Drawer Dividers: Implement adjustable drawer organizers for cutlery, cooking utensils, and even spices to keep them tidy and easily identifiable.
- Pull-Out Baskets & Racks: Install pull-out baskets for root vegetables, cleaning supplies, or pantry items. Use tiered spice racks inside cabinets or drawers to keep condiments tidy and visible.
- Lazy Susans: Place lazy Susans in corner cabinets or pantry shelves for oils, vinegars, and spices, making them easily rotatable and accessible.
2. Strategic Appliance Placement: Powering Your Workflow
Where you position your kitchen appliances significantly impacts their usefulness and the overall aesthetics of your kitchen. Thoughtful placement not only enhances your cooking experience but also contributes to a neat, uncluttered environment.
Primary, Frequently Used Appliances:
- Countertop Convenience: Position often-used countertop appliances like coffee makers, toasters, or electric kettles where they are immediately accessible and near their related items (coffee beans, bread).
- Dedicated Outlets: Ensure these appliances are placed close to readily available power outlets to avoid messy extension cords or having to move them repeatedly.
- Appliance Garages: Consider building an “appliance garage” – a cabinet with a retractable door – to keep frequently used appliances hidden when not in use, maintaining clear countertops.
Infrequent Use Storage:
- Hidden Storage: Store rarely used or bulkier appliances (stand mixers, food processors, slow cookers) in lower cabinets, deep pantry shelves, or above the refrigerator.
- Accessibility for Weight: For heavy appliances, consider pull-out shelves in base cabinets to reduce lifting strain.
- Clear Prime Real Estate: By stowing away less-used items, you free up prime spots for daily essentials, making your kitchen more efficient day-to-day.
3. Countertop Organization: The Canvas of Your Kitchen
Clean, organized countertops are more than just aesthetically pleasing; they are essential for efficient cooking and contribute significantly to a welcoming kitchen atmosphere. A tidy counter provides ample space to work, minimizes distractions, and reduces the time spent on daily cleaning.
Minimizing Clutter:
- Essentials Only: Keep counters clear of anything that isn’t used daily or doesn’t have a direct function in an active zone. “A place for everything, and everything in its place” is key.
- Vertical Solutions: Utilize wall-mounted knife blocks, magnetic knife strips, or under-cabinet hooks for items like paper towel holders or even small cutting boards to free up valuable counter space.
- Streamlined Accessories: Opt for a single, multi-purpose utensil crock rather than multiple small ones, and integrate a built-in soap dispenser at the sink rather than a freestanding bottle.
Decorative and Functional Storage:
- Aesthetic Containers: Use attractive, matching containers for items you use often, such as flour, sugar, coffee, or tea bags. Glass jars or ceramic canisters can add a touch of style.
- Trays and Baskets: Group small items like salt and pepper shakers, olive oil, and frequently used spices on a decorative tray to keep them contained and easy to move for cleaning.
- Balance and Style: Choose storage solutions that not only serve a practical purpose but also complement your kitchen’s design, blending functionality with visual appeal.
Conclusion: Crafting Your Ideal Kitchen Experience
Implementing the five-zone method is more than just a storage strategy; it’s a philosophy for creating a kitchen that truly works for you. When meticulously setting up your cooking, prep, cleaning, consumables, and non-consumables zones, always consider your personal habits, your family’s routines, and the unique demands of your daily kitchen use. This thoughtful approach ensures that every item is intuitively placed where it makes the most sense within your workflow.
Remember that consistent and intelligent organization is the ultimate key to a high-performing kitchen. Keep your tools and appliances precisely where they will be used, arrange your cabinets and drawers with a focus on accessibility and category, and strive to maintain clear, uncluttered countertops. These foundational principles will transform your kitchen from a mere collection of appliances into a cohesive and efficient culinary command center.
Whether you’re navigating the space constraints of a small single-wall kitchen, optimizing the linear efficiency of a galley layout, or leveraging the expansive possibilities of a large space with a central island, smart zoning offers scalable solutions. By applying these principles, you can dramatically improve how your kitchen functions, making every task from preparing a simple snack to hosting a grand dinner party feel smoother and more enjoyable.
Ultimately, the most effective kitchen is a personalized one. Take the time to assess your specific needs, understand your culinary habits, and apply the five-zone method with an eye towards customization. The right setup will not only simplify cooking, cleaning, and storing items but will profoundly transform your kitchen into a truly intuitive, efficient, and inspiring space that works seamlessly for you and your family.
FAQ (Frequently Asked Questions)
How do I Determine the Placement of Each Zone in My Kitchen?
Start by observing your natural movements and workflow in the kitchen. Identify your most frequent tasks and where you typically perform them. Place your prep zone near the refrigerator (consumables) and sink (cleaning), then your cooking zone (stove) adjacent to the prep area. Non-consumables like dishes should be close to the dishwasher. Visualize the path you take when preparing a meal – from grabbing ingredients to cooking and cleaning up – and arrange your zones to minimize steps and maximize efficiency for that path.
How do Kitchen Zones Differ from The Work Triangle?
The traditional “work triangle” focuses specifically on the three most used appliances: the sink, stove, and refrigerator, aiming to create an efficient triangle of movement between them. Kitchen zones, on the other hand, expand this concept significantly. They encompass all kitchen activities and items, categorizing them into five distinct areas (cooking, prep, cleaning, consumables, non-consumables). While the work triangle is a good starting point for appliance placement, the five-zone method provides a more comprehensive, holistic approach to organizing and optimizing the entire kitchen space for all tasks, not just the three primary ones.
What are Common Mistakes to Avoid when Designing Kitchen Zones?
Several common mistakes can hinder kitchen efficiency. First, avoid placing zones too far apart, which leads to unnecessary walking and inefficiency. Second, do not block access to frequently used items or main appliances with awkwardly placed furniture or clutter. Third, neglecting your personal cooking habits in favor of a generic design can make a kitchen feel unnatural. Fourth, cramming too many diverse activities into one zone without clear delineation can create chaos. Finally, overlooking accessible storage solutions can make retrieving items cumbersome and frustrating, even if they are technically “in” the right zone.
Master Your Kitchen: The Ultimate Guide to the 5-Zone Organization Method for Peak Efficiency and Flow
Just like the high-performing professional kitchens seen in top restaurants, a home kitchen operates at its best when every item has its dedicated place and is effortlessly accessible precisely when needed. Imagine a space where your movements are fluid, your tasks are streamlined, and the joy of cooking is amplified by impeccable organization. This isn’t just a dream; it’s an achievable reality through intelligent kitchen design and organization strategies.
This comprehensive guide delves into the transformative “five-zone method,” a robust organizational system that categorizes kitchen activities and items into distinct, logical areas: the cooking zone, prep zone, cleaning zone, consumables zone, and non-consumables zone. By consciously defining and optimizing these areas, you can minimize unnecessary movement, reduce clutter, and create a highly functional environment tailored to your culinary habits.
We will explore how these five fundamental zones can be seamlessly integrated into various kitchen layouts, ranging from compact single-wall designs to expansive spaces featuring a central island. Whether you’re navigating the challenges of a narrow galley kitchen or maximizing the potential of a sprawling U-shaped setup, the principles of the five-zone method offer versatile solutions.
Beyond theoretical concepts, you’ll gain practical, actionable tips for establishing each zone and maintaining its organization. From smart cabinet solutions to strategic appliance placement, these insights are designed to empower you. Regardless of whether you’re embarking on a brand-new kitchen remodel or simply aiming to enhance the functionality and flow of your existing space, the ideas presented here will guide you in crafting a kitchen that not only meets but anticipates your needs, making every moment spent there more enjoyable and productive.
The Five-Zone Method: Your Blueprint for an Optimized Kitchen
An intelligently organized kitchen is the cornerstone of an efficient home. It transforms the often-chaotic process of meal preparation into a smooth, enjoyable experience. The five-zone method is a powerful organizational framework that achieves this by grouping similar items and tasks together, creating distinct functional hubs within your kitchen. These five core areas—cooking, prep, cleaning, consumables, and non-consumables—act as the fundamental building blocks for a truly ergonomic and high-performing kitchen setup.
1. Cooking Zone: The Heart of Culinary Creation

This zone is dedicated to all heating, simmering, frying, baking, and roasting activities. It typically revolves around your primary heat source – the stove and oven. To ensure maximum efficiency, place your microwave, toaster oven, and other essential heating appliances within close proximity. Storage here should prioritize quick access to all items used during the cooking process. Keep frequently used pots, pans, lids, and baking sheets in easily accessible drawers or cabinets directly below or next to the stove. Cooking utensils such as spatulas, ladles, tongs, and whisks should be stored in drawers or utensil crocks right next to the stovetop, ensuring they are always within arm’s reach for immediate use.
2. Prep Zone: Your Culinary Workbench

Consider this your main workstation, the area where the magic of transforming raw ingredients into meal components happens. A generous, uncluttered counter space is paramount here, providing ample room for chopping, slicing, mixing, and assembling. This zone is ideally situated between your consumables (refrigerator/pantry) and your cooking zone, facilitating a natural workflow. Store your essential prep tools here: a variety of cutting boards, a sharp knife set, mixing bowls of different sizes, measuring cups and spoons, and small food processors or blenders. Drawer organizers are excellent for keeping these tools tidy and easy to find, preventing the frustration of rummaging mid-recipe.
3. Cleaning Zone: The Hub of Tidiness

Every culinary endeavor concludes with cleanup, and a well-designed cleaning zone makes this task far less daunting. This area is centered around your sink, dishwasher, and waste disposal. For optimal functionality, ensure that dish soap, sponges, brushes, and cleaning cloths are stored directly under the sink or in a small caddy nearby. The trash bin and recycling containers should also be easily accessible within this zone, ideally integrated into a pull-out cabinet. Positioning your cleaning zone strategically, often close to the prep zone, allows for immediate rinsing and tidying as you cook, preventing piles of dishes from accumulating and maintaining a cleaner workspace throughout your meal preparation.
4. Consumables Zone: Your Food Storage Sanctuary

This zone is dedicated to the storage of all your food items, both perishable and non-perishable. Your refrigerator, freezer, and pantry are the primary components here. Effective organization within this zone ensures that ingredients are easy to locate, preventing food waste and streamlining meal planning. Utilize clear food storage containers for dry goods, label shelves, and arrange items by category (e.g., baking supplies, breakfast items, canned goods). For fresh produce and refrigerated staples, organize shelves intuitively, placing frequently used items at eye level and less common ingredients higher or lower. Proximity to the prep zone is crucial, allowing for a seamless transition from ingredient retrieval to preparation.
5. Non-Consumables Zone: Dining Essentials at the Ready

This zone houses all your essential items for serving and dining. This includes plates, bowls, glasses, mugs, silverware, serving dishes, and small appliances not used for cooking (like a blender if it’s primarily for smoothies, not hot soups). The most efficient placement for this zone is typically near the dishwasher or drying rack, minimizing the steps required to put away clean dishes. Consider dedicated drawers for silverware with custom inserts, and use plate dividers in cabinets to prevent chipping and maximize vertical storage. If space allows, grouping items for daily use separately from special occasion dishes can further enhance accessibility and organization.
Common Kitchen Layouts and Best Practices for Zone Integration
The foundation of a truly functional kitchen lies not just in its aesthetics, but in how intelligently its layout supports the activities performed within it. When planning your kitchen, selecting the right layout and then strategically integrating the five zones can dramatically enhance the efficiency, flow, and overall enjoyment of your space. Each kitchen layout offers unique opportunities and challenges for arranging your zones, and a clear understanding of these options will empower you to maximize your kitchen’s potential, creating a workspace that feels intuitive and effortless.
Single Wall Layout: Efficiency in Compact Spaces

Characterized by all major kitchen components – cabinets, counters, and appliances – lining a single wall, this layout is a popular choice for smaller homes, apartments, or open-plan living areas where space is at a premium. Its simplicity can be deceptive; with smart zoning, a single-wall kitchen can be remarkably functional.
How to integrate zones with this layout:
- Centralized Cooking: Position the cooking zone (stove/oven) in the middle of the wall. This creates a natural focal point and allows other zones to radiate outwards.
- Flanking Prep & Cleaning: Flank the cooking area with the prep zone on one side (ideally closer to the consumables, e.g., fridge) and the cleaning zone (sink/dishwasher) on the other. This establishes a logical left-to-right or right-to-left workflow.
- Vertical Storage for Consumables & Non-Consumables: Maximize every inch of vertical space. Install upper cabinets for both consumables (pantry items, spices) and non-consumables (dishes, glasses). Utilize pull-out organizers in base cabinets for easy access to deeper items.
- Smart Storage Solutions: Employ vertical dividers for baking sheets and cutting boards, and stackable shelves to make the most of limited cabinet depth. Wall-mounted racks for utensils or small spice jars can also free up valuable counter space.
Benefits:
- Space-Saving: Consumes minimal floor space, ideal for compact living.
- Streamlined Workflow: Keeps all tools and items easily accessible along a single line, reducing steps.
- Open Concept Friendly: Integrates seamlessly into open-plan living areas without visual clutter.
- Budget-Friendly: Often more affordable to install due to fewer cabinets and simpler plumbing/electrical runs.
- Easy to Clean: Fewer corners and surfaces mean quicker, simpler cleaning and maintenance.
Galley Layout: The Efficiency Corridor

The galley kitchen, characterized by two parallel walls of cabinets and countertops creating a central walkway, is celebrated for its highly efficient use of space and optimal workflow. It channels all kitchen functions into a concentrated corridor, making it an excellent choice for narrow yet busy homes.
How to integrate zones with this layout:
- Separated Functions: Designate one wall for active work zones (cooking and prep) and the opposite wall for supporting zones (cleaning and storage). For example, the fridge (consumables) and prep area could be on one side, with the stove (cooking) and sink (cleaning) on the other.
- The Working Triangle Reinvented: The galley layout naturally creates a highly efficient “working corridor” rather than a triangle. Position the most-used appliances (fridge, sink, stove) so they are directly opposite or slightly offset from each other, minimizing pivots.
- Floor-to-Ceiling Storage: Leverage the vertical space on both walls with floor-to-ceiling cabinetry for maximum storage. This is excellent for separating consumables and non-consumables.
- Strategic Grouping: Group similar items together on each wall. For instance, all baking supplies with the oven on one side, and all cleaning supplies under the sink on the other. This creates clear, functional zones that support a smooth workflow without obstruction.
Benefits:
- Optimal for Narrow Spaces: Its linear design is perfect for homes with limited width.
- Short Distances: Minimizes steps between work areas, boosting efficiency.
- Abundant Counter Space: Two long countertops provide ample room for multiple tasks.
- Excellent Workflow: Allows for a logical progression of tasks from one end to the other.
- Single-Cook Friendly: Highly efficient for one person, though can accommodate two with careful planning.
L-Shaped Layout: Flexible and Social

The L-shaped kitchen utilizes two walls that meet at a corner, creating an open and flexible layout. This design naturally opens up the kitchen to adjacent rooms, fostering a more social environment, and typically forms a very practical working triangle between the key activity areas (sink, stove, fridge).
How to integrate zones with this layout:
- Corner Advantage: Position a primary zone, like the cooking or cleaning zone, along one leg of the ‘L’ and set up supporting zones on the other. For instance, the cooking zone (stove, oven, microwave) on one wall, with the cleaning zone (sink, dishwasher) and prep area on the other. The refrigerator (consumables) can anchor one end of the L.
- Smart Corner Storage: Make intelligent use of the often-challenging corner space. Solutions like lazy Susans, blind corner pull-outs, or diagonal cabinets can transform this area into valuable storage for larger pots, small appliances, or pantry overflow (non-consumables).
- Workflow Progression: Strategically place the prep area between the consumables (fridge/pantry) and the cooking or cleaning zones, ensuring a smooth, linear workflow from ingredient retrieval to preparation and finally to cooking or washing.
- Proximity Principle: Store items closest to where they will be used. For example, dishes and glasses (non-consumables) near the cleaning zone, and spices/oils near the cooking zone to minimize back-and-forth movement.
Benefits:
- Openness for Movement: Creates ample open floor space, making it feel less cramped and allowing for easy movement.
- Efficient Workflow: Naturally supports a functional working triangle, enhancing efficiency.
- Dining Integration: Often leaves space for a dining table or island, perfect for eating areas or casual entertaining.
- Multi-Cook Friendly: The open layout allows multiple people to work in the kitchen without bumping into each other.
- Versatile Fit: Adapts well to various home sizes and architectural styles.
U-Shaped Layout: The Ultimate Workhorse

The U-shaped kitchen, formed by three walls of cabinets and appliances, creates a wonderfully enclosed and highly efficient workspace where everything revolves around the cook. This design makes exceptional use of available wall space, offering abundant storage and counter surfaces, while keeping all essential areas within easy reach.
How to integrate zones with this layout:
- Zone Dispersion: Distribute your five zones strategically across the three walls. A common approach is to place the most frequently used items and primary appliances on the central wall, with supporting zones on the flanking walls.
- Opposing Key Zones: To prevent overlap and maintain flow, position the cooking zone (stove/oven) on one wall and the cleaning zone (sink/dishwasher) on an opposite or adjacent wall. The refrigerator (consumables) can be placed to complete a strong working triangle.
- Corner Maximization: With two corners, maximizing storage is key. Implement smart corner solutions like super Susans (full-rotation lazy Susans), pull-out pantry units, or deep drawers to store larger items, small appliances, or bulk pantry goods (non-consumables and consumables).
- Dedicated Work Areas: The U-shape naturally allows for distinct work areas on each wall. One wall might be primarily for prep, another for cooking, and the third for cleaning and dish storage, all while maintaining a logical and seamless flow between tasks.
Benefits:
- Maximum Storage: Offers the most cabinet and counter space among standard layouts.
- Everything Within Reach: The compact nature ensures all key zones are just a pivot or a few steps away.
- Multi-Cook Friendly: Generous counter space and distinct zones make it comfortable for multiple cooks.
- Extensive Counter Space: Provides expansive work surfaces for prep, baking, and serving.
- Clear Task Separation: Allows for excellent delineation of tasks, reducing interference during busy times.
Island Layout: Versatility and Social Hub

The island layout typically complements an existing standard kitchen (like an L or U-shape) by adding a freestanding counter in the middle of the space. This addition not only introduces valuable extra work surfaces and storage but also transforms the kitchen into a dynamic social hub, allowing for interaction while cooking.
How to integrate zones with this layout:
- Island as Prep Powerhouse: Designate the island primarily as an expansive prep zone. Its central location makes it ideal for cutting, mixing, and assembling ingredients, often with a dedicated prep sink. This keeps the main cooking area on the wall, separate but easily accessible.
- Strategic Appliance Integration: If space and plumbing/electrical allow, an island can house a secondary sink, a dishwasher, a cooktop, or even a beverage fridge, enhancing its functionality for specific zones (cleaning or cooking).
- Peripheral Cleaning: Place the main cleaning zone (sink, dishwasher) along the wall closest to the dining area or where dishes are typically brought in, ensuring convenience for clearing and washing up.
- Island Storage: Utilize the under-island space for storing cooking tools, prep equipment, mixing bowls (non-consumables), or even a small pull-out pantry for frequently used spices (consumables). This keeps essential items within immediate reach of the prep surface.
- Defined Zones: The island naturally helps create separate zones for different tasks—e.g., active cooking on the perimeter, social prep on the island, and dining at a breakfast bar extension—preventing crowding and maintaining clear pathways.
Benefits:
- Expanded Counter Space: Significantly increases usable work surface area for various tasks.
- Enhanced Storage Options: Offers additional cabinet, drawer, or shelving space under the island.
- Social Gathering Point: Perfect for entertaining, allowing guests to gather and interact with the cook.
- Task Separation: Effectively separates cooking and prep from dining or social activities.
- Improved Food Prep: Provides a dedicated and often generous area, making ingredient preparation more comfortable.
Peninsula Layout: Island Benefits, Space-Saving Design

Similar to an island, a peninsula is an extra counter space that extends from a wall or existing cabinet run. It offers many of the advantages of an island, such as added work surface and a social interaction point, but typically requires less floor space, making it an excellent compromise for medium-sized kitchens.
How to integrate zones with this layout:
- Connected Workflow: Seamlessly connect the prep and cooking zones along the main wall, with the peninsula extending to offer additional prep space or a secondary workstation.
- Adjacent Cleaning: Position the cleaning area (sink) nearby, perhaps on the main wall where the peninsula begins, or even integrate a smaller sink into the peninsula itself if space and plumbing allow, ensuring efficiency.
- Peninsula Storage: Utilize the base cabinets within the peninsula for storing commonly used items related to its function, such as mixing bowls and small appliances if it’s a prep area, or serving dishes if it’s near the dining space (non-consumables).
- Defined Activity Areas: The peninsula naturally helps define distinct zones for eating (a breakfast bar) and cooking, while maintaining an open feel and good workflow.
- Wall Space Optimization: Leverage the main wall space for additional storage needs, ensuring both consumables and non-consumables are easily accessible from their respective zones.
Benefits:
- Adds Significant Counter Space: Provides valuable extra work surface without needing a completely open floor plan.
- Creates Room Division: Visually separates the kitchen from other living areas while maintaining an open feel.
- Engages the Cook: Allows the cook to interact with guests or family members in adjacent rooms.
- Ideal for Medium Kitchens: A perfect solution when an island is too large but more counter space is needed.
- Balanced Space: Offers a good balance between functional workspace and social interaction areas.
Design Considerations for Effective Kitchen Zoning
Beyond simply placing items in categories, truly effective kitchen zoning integrates thoughtful design principles that consider how you interact with your space on a daily basis. By focusing on spatial planning, accessibility, and visibility, you can create a kitchen that feels intuitive, comfortable, and a joy to use for years to come.
Spatial Planning: Orchestrating Movement and Flow
Good spatial planning begins with a deep understanding of your daily kitchen routines and culinary preferences. The way your zones interact and flow from one to another should mirror your cooking style and family dynamics, creating a symphony of movement rather than a series of disjointed steps.
- Align with Habits: Design zones to match your specific cooking habits and daily routine. If you bake frequently, ensure your baking zone is highly optimized and easily accessible.
- Logical Placement: Place items precisely where they make the most sense for the tasks performed in that zone. For instance, frequently used spices should be right by the stovetop, not across the room.
- Adequate Clearances: Ensure there’s sufficient space between different work areas for comfortable movement, especially when multiple people are in the kitchen. Avoid bottlenecks and cramped pathways.
- Traffic Flow Analysis: Consider the main traffic routes through the kitchen, especially during busy meal times. Design zones to keep these paths clear and prevent interference with active cooking or prep.
- Task-Based Grouping: Group related items based on their sequential use within a task. For example, all coffee-making supplies (mugs, coffee, filters, machine) in one dedicated spot.
Accessibility: Ergonomics for Effortless Use
Making every item easy to reach and retrieve is paramount to reducing the time, effort, and physical strain involved in kitchen tasks. Every tool, appliance, and ingredient should be stored not just where it fits, but where it will be most conveniently used.
- Point-of-Use Storage: Keep cooking tools (spatulas, ladles, whisk) in a utensil crock or drawer directly adjacent to the stove.
- Dedicated Prep Tools: Store prep items (knives, cutting boards, mixing bowls) in drawers or cabinets immediately below or next to the main work surfaces.
- Cleaning Supplies Proximity: Place cleaning supplies (dish soap, sponges, dishwasher pods) directly under the sink or in a pull-out caddy beside it.
- Dishware Near Cleaning: Position everyday dishes, glasses, and silverware (non-consumables) in cabinets or drawers closest to the dishwasher or drying rack for effortless unloading.
- Smart Storage Aids: Utilize drawer organizers for cutlery, pull-out shelves for heavy pots, and pantry carousels for spices to bring items to you, minimizing bending and reaching.
Visibility: Lighting, Openness, and Connection
A well-planned kitchen extends beyond mere organization; it creates an environment where you can easily see across different work areas, enhancing safety, efficiency, and social connection. Clear sight lines also foster a sense of spaciousness and make the kitchen a more inviting place to be.
- Unobstructed Views: Design the layout to maintain clear sight lines across the kitchen, allowing you to monitor multiple tasks or interact with family/guests.
- Optimized Lighting: Ensure work surfaces are brightly and evenly lit with task lighting (under-cabinet lights, pendants over an island). Supplement with ambient lighting for overall brightness.
- Strategic Cabinet Placement: Position tall cabinets (like pantries or appliance garages) thoughtfully to avoid blocking natural light, views, or pathways within the kitchen.
- Social Hubs: Create open spaces, such as an beautiful island with seating or a peninsula, that encourage social interaction while food preparation is underway.
- Connecting to Living Areas: Consider sight lines from the kitchen to adjacent living or dining areas, allowing for easy interaction and a feeling of connectedness, especially in open-concept homes.
Organization Tips: Practical Advice for Optimizing Kitchen Spaces
Implementing the five-zone method requires practical, hands-on organization. These tips will help you take the theoretical framework and apply it to the tangible elements of your kitchen, ensuring every drawer, cabinet, and countertop serves its purpose with maximum efficiency and style.
1. Cabinet Organization: The Unsung Hero of Efficiency
A thoughtfully organized cabinet system is the unsung hero of a functional kitchen. It saves precious time, reduces frustration, and makes the entire cooking process more enjoyable. Good organization means not only knowing precisely where everything is but also being able to retrieve it effortlessly.
Grouping Items by Use:
- Daily Essentials: Store everyday dishes, glasses, and frequently used cooking tools in prime, easily accessible cabinets or drawers at waist to eye level.
- Categorical Storage: Group matching items together. Dedicate one area for all baking items (flour, sugar, mixing bowls, cookie sheets), another for breakfast supplies (cereals, coffee, mugs), and so on.
- Seldom-Used Items: Reserve higher cabinets or deeper, less accessible spaces for seasonal items, entertaining platters, or small appliances that are used infrequently.
Vertical Storage Solutions:
- Dividers for Pans: Utilize vertical dividers within cabinets or pull-out drawers for pots, pans, and baking sheets. This allows you to grab one item without unstacking others.
- Stackable Shelves: Employ stackable shelves to double or triple the storage capacity within taller cabinets, ideal for plates, bowls, or food containers.
- Under-Shelf Baskets: Install under-shelf baskets for smaller items like plastic wrap, foil, or dish towels, creating additional storage without permanent installation.
Effective Use of Organizers:
- Drawer Dividers: Implement adjustable drawer organizers for cutlery, cooking utensils, and even spices to keep them tidy and easily identifiable.
- Pull-Out Baskets & Racks: Install pull-out baskets for root vegetables, cleaning supplies, or pantry items. Use tiered spice racks inside cabinets or drawers to keep condiments tidy and visible.
- Lazy Susans: Place lazy Susans in corner cabinets or pantry shelves for oils, vinegars, and spices, making them easily rotatable and accessible.
2. Strategic Appliance Placement: Powering Your Workflow
Where you position your kitchen appliances significantly impacts their usefulness and the overall aesthetics of your kitchen. Thoughtful placement not only enhances your cooking experience but also contributes to a neat, uncluttered environment.
Primary, Frequently Used Appliances:
- Countertop Convenience: Position often-used countertop appliances like coffee makers, toasters, or electric kettles where they are immediately accessible and near their related items (coffee beans, bread).
- Dedicated Outlets: Ensure these appliances are placed close to readily available power outlets to avoid messy extension cords or having to move them repeatedly.
- Appliance Garages: Consider building an “appliance garage” – a cabinet with a retractable door – to keep frequently used appliances hidden when not in use, maintaining clear countertops.
Infrequent Use Storage:
- Hidden Storage: Store rarely used or bulkier appliances (stand mixers, food processors, slow cookers) in lower cabinets, deep pantry shelves, or above the refrigerator.
- Accessibility for Weight: For heavy appliances, consider pull-out shelves in base cabinets to reduce lifting strain.
- Clear Prime Real Estate: By stowing away less-used items, you free up prime spots for daily essentials, making your kitchen more efficient day-to-day.
3. Countertop Organization: The Canvas of Your Kitchen
Clean, organized countertops are more than just aesthetically pleasing; they are essential for efficient cooking and contribute significantly to a welcoming kitchen atmosphere. A tidy counter provides ample space to work, minimizes distractions, and reduces the time spent on daily cleaning.
Minimizing Clutter:
- Essentials Only: Keep counters clear of anything that isn’t used daily or doesn’t have a direct function in an active zone. “A place for everything, and everything in its place” is key.
- Vertical Solutions: Utilize wall-mounted knife blocks, magnetic knife strips, or under-cabinet hooks for items like paper towel holders or even small cutting boards to free up valuable counter space.
- Streamlined Accessories: Opt for a single, multi-purpose utensil crock rather than multiple small ones, and integrate a built-in soap dispenser at the sink rather than a freestanding bottle.
Decorative and Functional Storage:
- Aesthetic Containers: Use attractive, matching containers for items you use often, such as flour, sugar, coffee, or tea bags. Glass jars or ceramic canisters can add a touch of style.
- Trays and Baskets: Group small items like salt and pepper shakers, olive oil, and frequently used spices on a decorative tray to keep them contained and easy to move for cleaning.
- Balance and Style: Choose storage solutions that not only serve a practical purpose but also complement your kitchen’s design, blending functionality with visual appeal.
Conclusion: Crafting Your Ideal Kitchen Experience
Implementing the five-zone method is more than just a storage strategy; it’s a philosophy for creating a kitchen that truly works for you. When meticulously setting up your cooking, prep, cleaning, consumables, and non-consumables zones, always consider your personal habits, your family’s routines, and the unique demands of your daily kitchen use. This thoughtful approach ensures that every item is intuitively placed where it makes the most sense within your workflow.
Remember that consistent and intelligent organization is the ultimate key to a high-performing kitchen. Keep your tools and appliances precisely where they will be used, arrange your cabinets and drawers with a focus on accessibility and category, and strive to maintain clear, uncluttered countertops. These foundational principles will transform your kitchen from a mere collection of appliances into a cohesive and efficient culinary command center.
Whether you’re navigating the space constraints of a small single-wall kitchen, optimizing the linear efficiency of a galley layout, or leveraging the expansive possibilities of a large space with a central island, smart zoning offers scalable solutions. By applying these principles, you can dramatically improve how your kitchen functions, making every task from preparing a simple snack to hosting a grand dinner party feel smoother and more enjoyable.
Ultimately, the most effective kitchen is a personalized one. Take the time to assess your specific needs, understand your culinary habits, and apply the five-zone method with an eye towards customization. The right setup will not only simplify cooking, cleaning, and storing items but will profoundly transform your kitchen into a truly intuitive, efficient, and inspiring space that works seamlessly for you and your family.
FAQ (Frequently Asked Questions)
How do I Determine the Placement of Each Zone in My Kitchen?
Start by observing your natural movements and workflow in the kitchen. Identify your most frequent tasks and where you typically perform them. Place your prep zone near the refrigerator (consumables) and sink (cleaning), then your cooking zone (stove) adjacent to the prep area. Non-consumables like dishes should be close to the dishwasher. Visualize the path you take when preparing a meal – from grabbing ingredients to cooking and cleaning up – and arrange your zones to minimize steps and maximize efficiency for that path.
How do Kitchen Zones Differ from The Work Triangle?
The traditional “work triangle” focuses specifically on the three most used appliances: the sink, stove, and refrigerator, aiming to create an efficient triangle of movement between them. Kitchen zones, on the other hand, expand this concept significantly. They encompass all kitchen activities and items, categorizing them into five distinct areas (cooking, prep, cleaning, consumables, non-consumables). While the work triangle is a good starting point for appliance placement, the five-zone method provides a more comprehensive, holistic approach to organizing and optimizing the entire kitchen space for all tasks, not just the three primary ones.
What are Common Mistakes to Avoid when Designing Kitchen Zones?
Several common mistakes can hinder kitchen efficiency. First, avoid placing zones too far apart, which leads to unnecessary walking and inefficiency. Second, do not block access to frequently used items or main appliances with awkwardly placed furniture or clutter. Third, neglecting your personal cooking habits in favor of a generic design can make a kitchen feel unnatural. Fourth, cramming too many diverse activities into one zone without clear delineation can create chaos. Finally, overlooking accessible storage solutions can make retrieving items cumbersome and frustrating, even if they are technically “in” the right zone.
