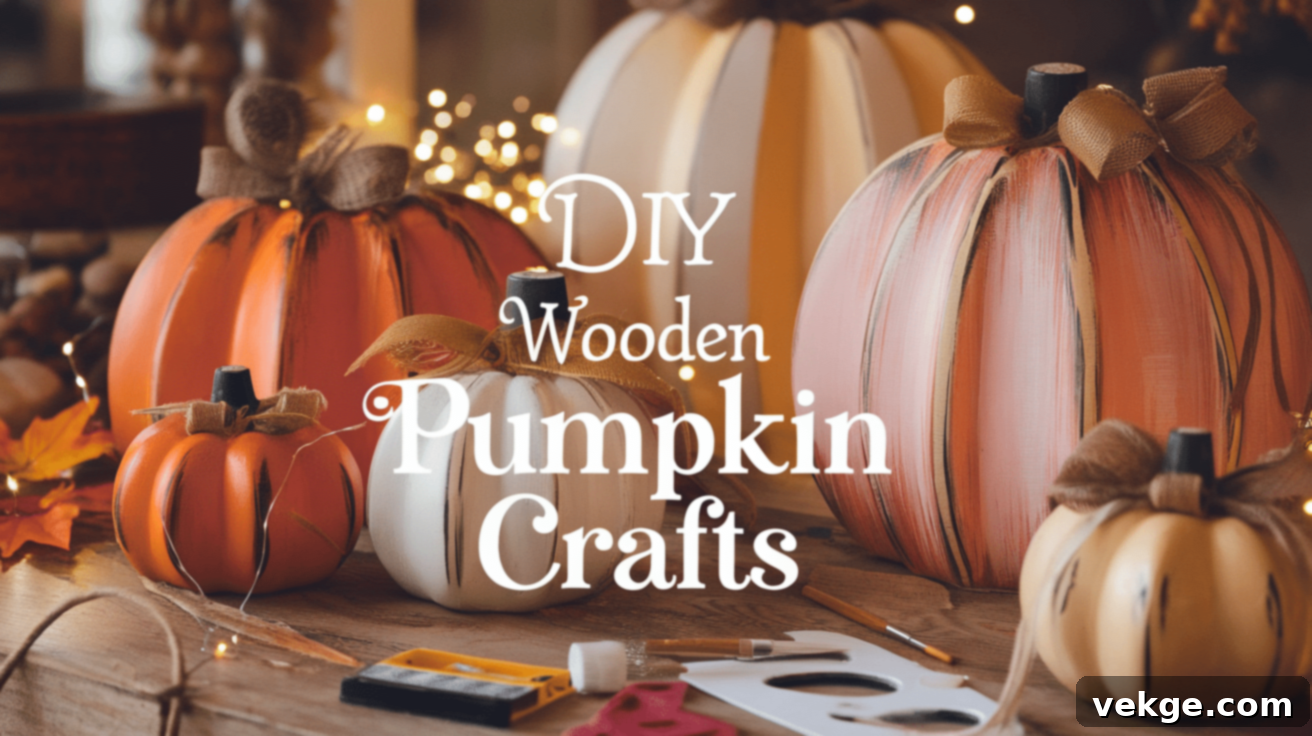
DIY Wooden Pumpkin Crafts: Rustic Fall Decor Ideas for Your Home
Fall is truly a magical time of year, with its crisp air, vibrant colors, and the comforting scent of pumpkin spice. It’s the perfect season to embrace coziness and infuse your home with warm, inviting decor. While real pumpkins are charming, they have a limited lifespan. That’s where wooden pumpkin crafts come in! These versatile and durable decorations offer a timeless rustic appeal, allowing you to celebrate the autumn season year after year.
Wooden pumpkins are more than just a seasonal trend; they’re a sustainable and customizable way to bring a touch of farmhouse charm or rustic elegance to your living space. Whether you’re a seasoned crafter or just starting with DIY projects, creating your own wooden pumpkins is a rewarding experience. They are surprisingly easy to make, look fantastic both indoors and outdoors, and, best of all, they last for countless autumns to come.
In this comprehensive guide, we’ll dive into a variety of fun and simple wooden pumpkin craft ideas suitable for every skill level. From charming painted blocks to intricate stacked designs, you’ll find plenty of inspiration to bring those beloved fall vibes directly into your home. All it takes is a little creativity, some basic supplies, and a desire to make something beautiful with your own hands. If you adore handmade decor and enjoy the satisfaction of a good DIY project, you’re going to love these wooden pumpkin ideas. Let’s gather our tools and start crafting some truly memorable fall decorations!
Why Make Wooden Pumpkins for Your Fall Decor?
Wooden pumpkins offer a fantastic and practical alternative to their organic counterparts. Beyond their charming aesthetics, there are several compelling reasons why they are an excellent choice for your autumn decor:
- Durable and Long-Lasting: Unlike real pumpkins, which inevitably rot and need to be discarded, wooden pumpkins are built to endure. Crafted from sturdy materials, they can be stored away after the season and brought out again year after year, making them a sustainable and cost-effective decorating solution. This longevity allows you to invest time and effort into creating truly unique pieces that become cherished parts of your annual fall display.
- Infinitely Customizable: The beauty of wooden pumpkins lies in their versatility. You are the artist! You can paint them in any shade (from traditional orange to modern whites, greys, or pastels), apply various stains to highlight natural wood grains, or decorate them with an endless array of styles. Add stencils, glitter, decoupage, or hand-lettered phrases to perfectly match your home’s aesthetic, whether it’s rustic farmhouse, modern minimalist, or cozy traditional.
- Budget-Friendly Crafting: Many wooden pumpkin crafts can be created using inexpensive materials. Think scrap wood from old projects, reclaimed pallet wood, or even simple wooden blocks found at craft stores or hardware outlets. By repurposing materials, you not only save money but also add a unique, storied character to your decorations. This makes DIY wooden pumpkins an accessible craft for everyone.
- Mess-Free Enjoyment: Say goodbye to the sticky, slimy mess of pumpkin carving! Wooden pumpkins offer all the fun of decorating without the hassle of seeds, pulp, or rot. This means you can enjoy the creative process and the finished product without worrying about cleanup or attracting unwanted pests. It’s simple crafting fun that anyone, including children, can participate in with ease.
- Versatile Placement: Because they are durable and mess-free, wooden pumpkins can be displayed almost anywhere. From a prominent spot on your front porch to a cozy nook on a bookshelf, a charming centerpiece on your dining table, or even as part of a garden display, their adaptability knows no bounds.
Simple Wooden Pumpkin Craft Ideas for Every Home
Ready to get creative? There are countless ways to craft beautiful wooden pumpkins, ranging from straightforward painted designs to more intricate assemblies. Here are some easy DIY ideas to inspire your fall decorating journey:
1. Wooden Block Pumpkins
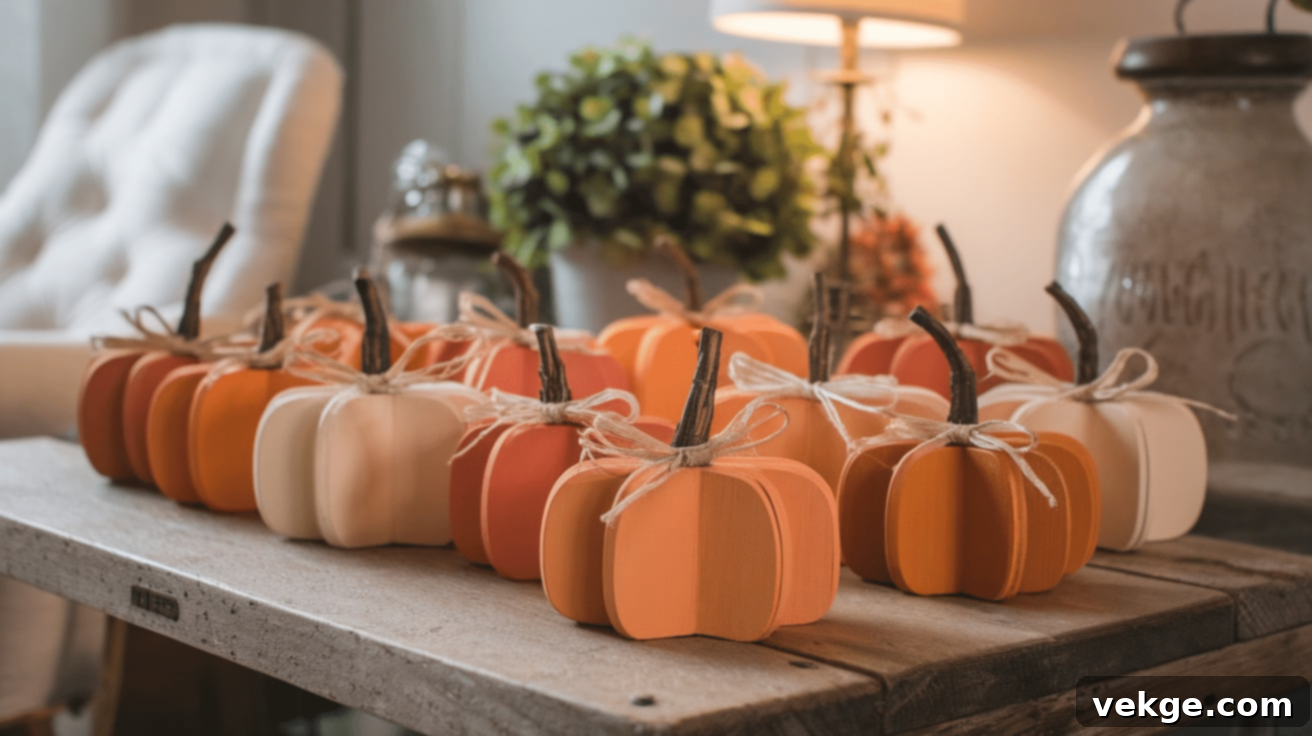
Wooden block pumpkins are perhaps one of the easiest, yet most adorable, crafts you can create. Made from readily available scrap wood, such as 2x4s or smaller offcuts, these little gems can be customized in a myriad of ways to fit any decor style. Their simplicity makes them perfect for beginner crafters or a fun project with kids.
Supplies Needed:
- Small wooden blocks (cut into pumpkin-like squares or slightly rounded shapes)
- Orange paint or wood stain (various shades for variety)
- Sandpaper (medium and fine-grit)
- Small twigs or wooden dowels for stems
- Hot glue gun and glue sticks
- Ribbon, raffia, twine, or faux leaves (optional, for embellishment)
Steps to Make:
- Start by sanding all sides and edges of your wooden blocks to ensure a smooth finish and remove any rough spots. This step helps the paint adhere better and gives a professional look.
- Paint or stain each block in different shades of orange, cream, white, or even a soft green to create a varied pumpkin patch look. Apply multiple coats if necessary for opaque coverage. Let them dry completely between coats.
- Once dry, gently sand the edges and corners again. This light sanding will create a “distressed” or rustic look, revealing some of the raw wood underneath and adding character.
- Break small twigs into appropriate lengths for stems, or use short pieces of wooden dowel. Securely attach one twig to the top center of each painted block using a hot glue gun.
- For an extra touch of charm, tie a small ribbon, a piece of raffia, or twine around the base of the stem. You can also glue on a tiny faux leaf.
These versatile small pumpkins look charming grouped together on shelves, scattered across a mantelpiece, tucked into a tiered tray, or even as part of a festive fall centerpiece on your dining table.
2. Pallet Wood Pumpkins
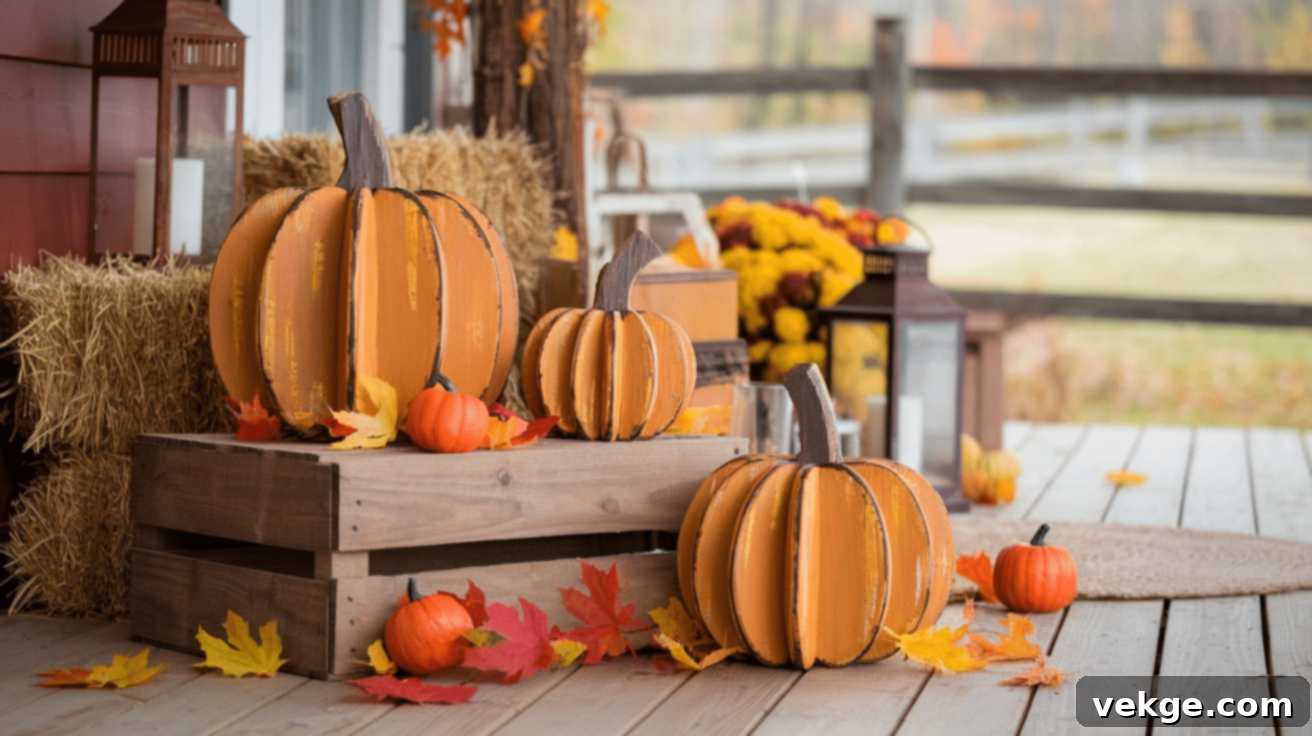
Repurposing materials is a wonderful way to craft unique decor. If you have access to an old wooden pallet, you can transform its rustic boards into beautiful, large-scale fall decorations that exude farmhouse charm.
Supplies Needed:
- Wooden pallet boards (disassembled and cleaned)
- Saw (jigsaw or hand saw to cut pumpkin shapes)
- Orange and brown paint (acrylic or exterior grade if for outdoors)
- Sandpaper
- Twine, raffia, or burlap ribbon
- Hot glue gun or wood glue
- Small twig or wooden dowel for the stem
Steps to Make:
- Carefully disassemble your pallet boards. Clean them thoroughly and draw a simple pumpkin shape directly onto the wood. You can create a classic round pumpkin or a taller, more slender design.
- Using a saw, carefully cut out the pumpkin shape. This step may require a jigsaw for curved edges. Always prioritize safety when using power tools.
- Sand all the cut edges and surfaces to achieve a smooth finish, removing any splinters. This also prepares the wood for painting.
- Paint the entire pumpkin orange. Once dry, you can add subtle brown details with a dry brush technique to create shading and texture, giving it a more dimensional and weathered look. Let it dry completely.
- Attach a sturdy twig or a short wooden dowel to the top as a stem using hot glue or wood glue.
- Wrap a piece of twine, raffia, or burlap ribbon around the stem for a decorative, rustic touch. You can also add faux leaves or berries.
Pallet pumpkins make a grand statement on front porches, leaning against a wall, or as a focal point in a large rustic fall display in your yard. They are particularly great for adding height and an authentic farmhouse feel.
3. Wooden Plank Pumpkins
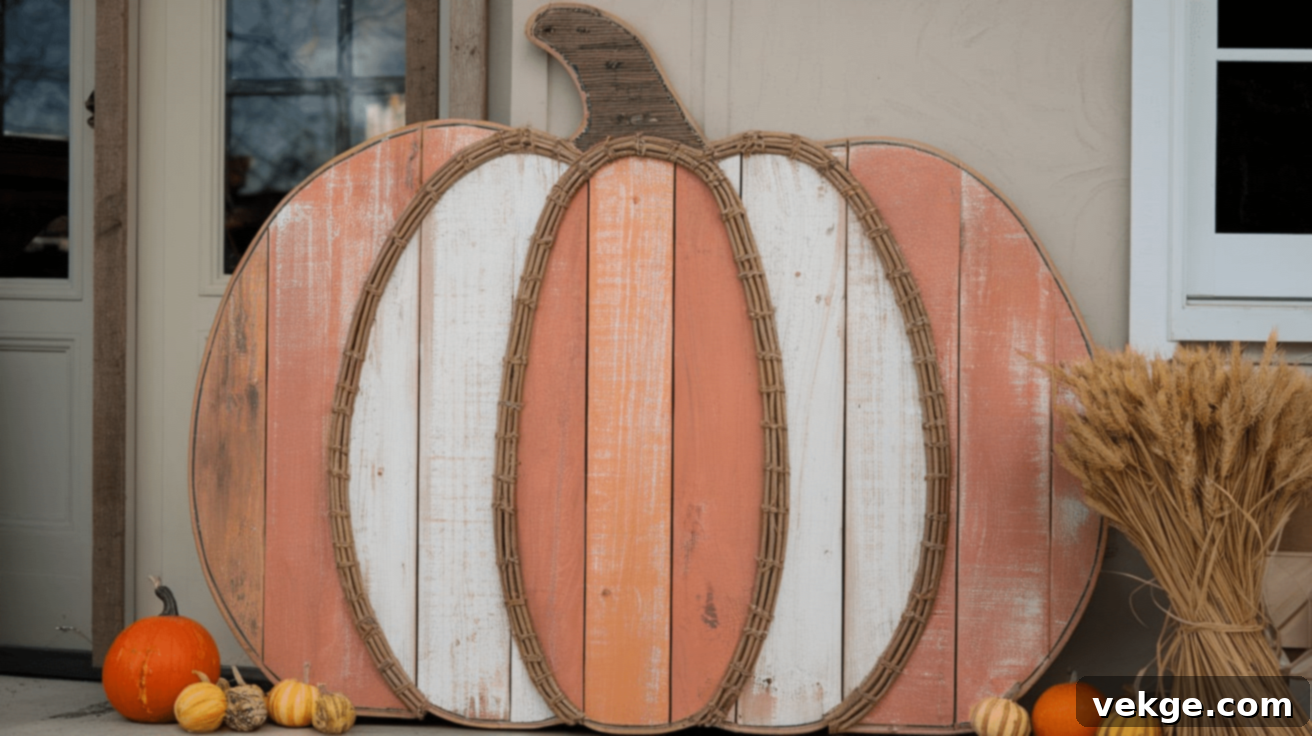
For those looking to create larger, more substantial pumpkin decorations, assembling multiple wooden planks is an excellent method. This craft is ideal for making impressive porch decorations or sturdy yard art that can withstand the elements.
Supplies Needed:
- Wooden planks (cut into varying lengths to create a curved pumpkin silhouette, or uniform lengths for a flatter look)
- Wood glue or nails/screws
- Orange, white, or various fall-colored paint
- Twigs or wooden dowels for stems
- Ribbon, burlap, or fall-themed fabric scraps
- Optional: Stencils, wood sealer for outdoor use
Steps to Make:
- Arrange your wooden planks side by side to form the desired width and shape of your pumpkin. You can cut the tops and bottoms of the planks to create a more rounded effect, or keep them straight for a modern, rustic panel look. Secure them together from the back using wood glue, nails, or screws on a bracing piece of wood.
- Once assembled and stable, paint the entire piece in your chosen pumpkin color. Classic orange is always a hit, but consider soft creams, sage green, or even a distressed white for a chic farmhouse vibe. Let it dry thoroughly.
- Attach a substantial twig or a sturdy wooden dowel to the top center of your plank assembly as the stem, using strong wood glue or screws.
- Now for the fun part: decorative touches! Add a rustic bow made from burlap, tie a length of plaid ribbon around the stem, or even paint whimsical designs or autumn phrases directly onto the planks. If placing outdoors, remember to apply a clear, weatherproof sealer.
This style of wooden pumpkin is fantastic for leaning against the wall of your house, placing prominently on your porch steps, or as a welcoming sign near your garden entrance. Its size makes it a striking feature.
4. Wooden Pumpkin Signs
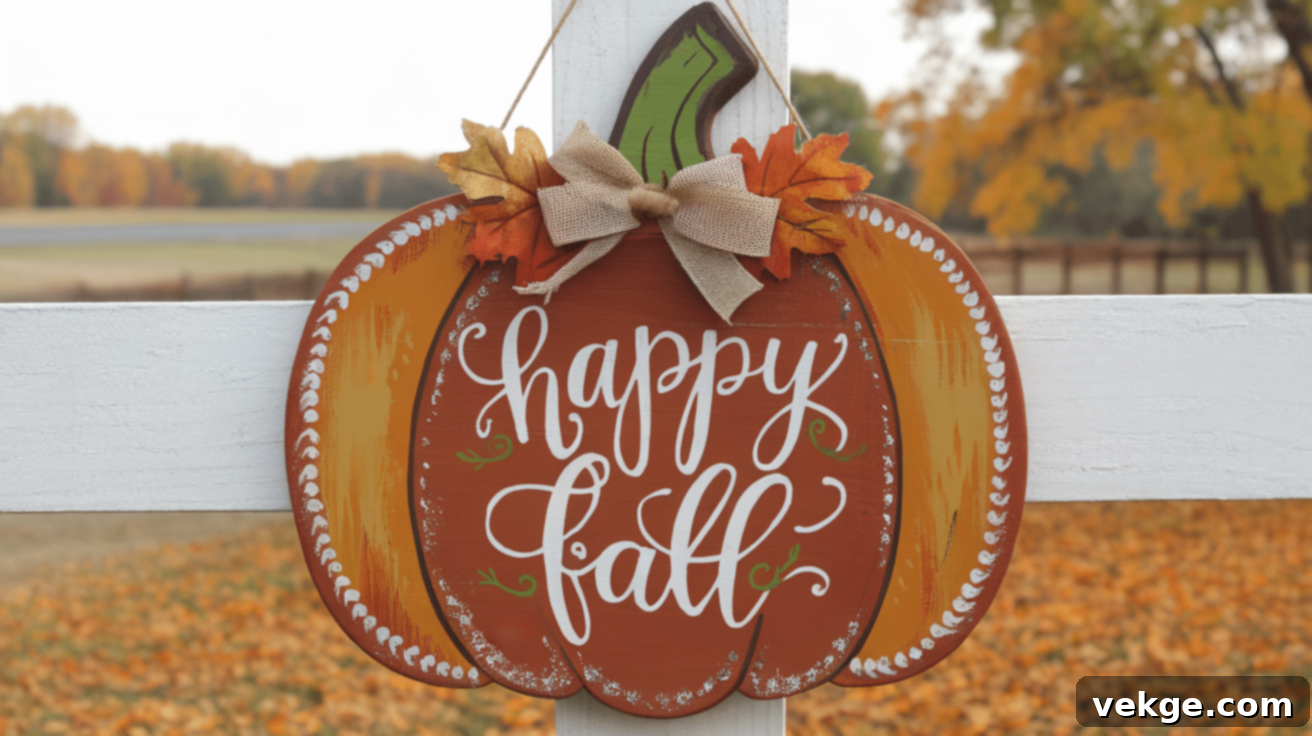
If you’re a fan of charming farmhouse-style decor, transforming a wooden board into a festive pumpkin sign is a wonderfully creative project. These signs add a personal and inviting touch to any fall display.
Supplies Needed:
- Wooden board or a single piece of pallet wood (pre-cut into a pumpkin shape or rectangular/square)
- Orange, white, black, or brown paint
- Stencils, vinyl cutouts, or hand-lettering tools (paint pens, fine brushes)
- Twine, ribbon, or small faux leaves for embellishment
- Small twig for a stem (optional)
- Wood sealer (if for outdoor use)
Steps to Make:
- If your board isn’t already pumpkin-shaped, you can cut it into one or simply use a rectangular board and paint a pumpkin design on it. Paint the wooden board in your desired pumpkin color (e.g., orange, white, or a distressed cream). Allow it to dry completely.
- Once the base color is dry, it’s time to add your message. Use stencils for crisp, clean letters, or hand-paint fall-themed words and phrases like “Happy Fall,” “Welcome Autumn,” “Pumpkin Patch,” or “Grateful, Thankful, Blessed.” White or black paint works well for contrast.
- After the lettering is dry, attach a small twig as a stem at the top if desired.
- Add decorative touches such as a loop of rustic twine, a buffalo plaid ribbon bow, or a few small faux maple leaves to complete the look.
These charming wooden pumpkin signs can be displayed indoors on a mantelpiece, entryway table, or kitchen shelf. They also make a festive outdoor welcome for guests when placed on a porch or near your front door, provided they are sealed for weather protection.
5. Stacked Wooden Pumpkins
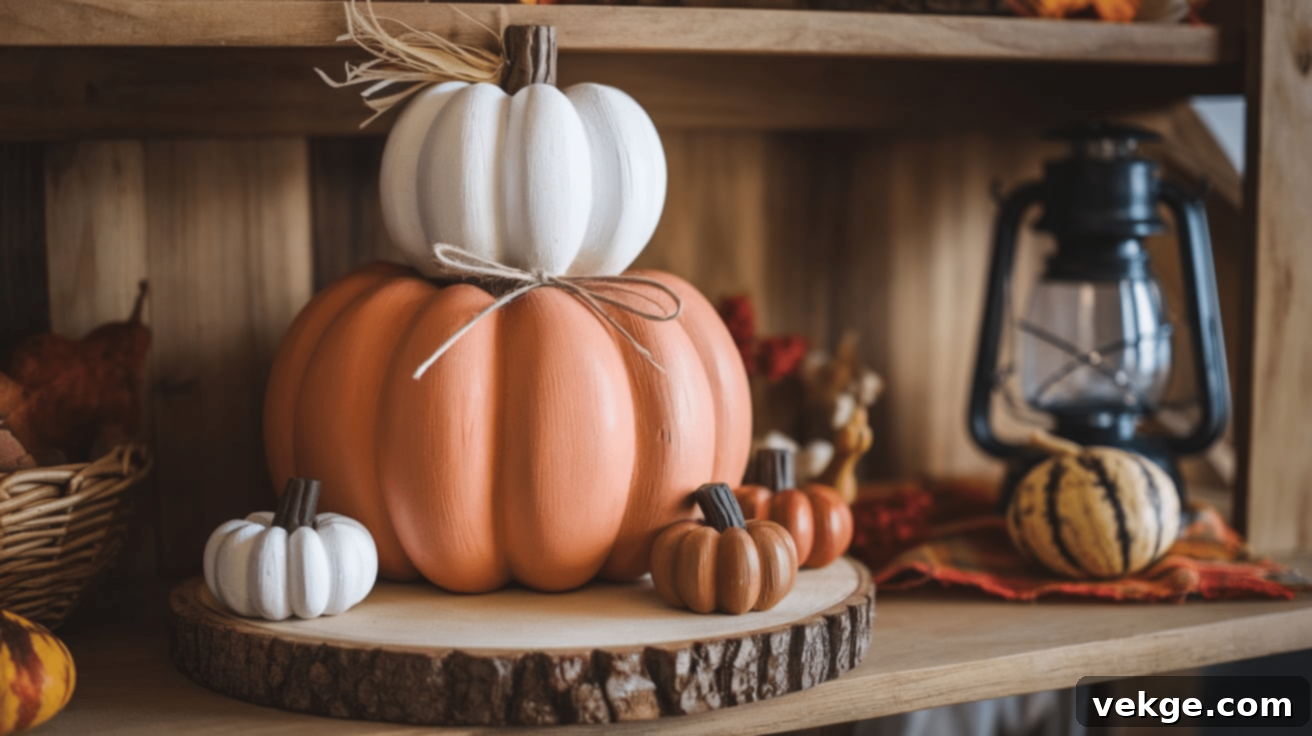
For a dynamic and visually interesting decoration, create a unique tiered display by stacking different-sized wooden pumpkins. This layered look adds depth and height, making it a striking centerpiece or accent piece.
Supplies Needed:
- Three wooden circles or oval shapes of varying sizes (small, medium, and large) – you can cut these from plywood or buy pre-cut rounds.
- Orange, white, brown, or green paint (different shades for each pumpkin)
- Sandpaper
- Strong wood glue or hot glue (for lighter pieces)
- A sturdy twig or wooden dowel for the main stem
- Ribbon, twine, faux leaves, or small faux berries for embellishment
Steps to Make:
- Paint each wooden piece in different complementary fall shades. For example, the largest could be a deep orange, the middle a cream, and the smallest a soft green. Or, try various shades of orange. Let them dry thoroughly between coats.
- Once dry, lightly sand the edges of each painted piece. This distressing technique will give them a charming, rustic, and weathered appearance, adding to their handmade appeal.
- Carefully stack the pumpkins, starting with the largest at the bottom, the medium in the middle, and the smallest on top. Securely glue them together using strong wood glue or a hot glue gun for immediate adhesion.
- Attach a small, but substantial, twig or a wooden dowel to the very top pumpkin as the main stem for the entire stack.
- Wrap decorative twine or a rustic ribbon around the stem, or glue a few faux leaves and berries around its base to enhance the autumnal theme.
This stacked arrangement makes a perfect statement piece for a front porch, a prominent mantelpiece decoration, or an eye-catching display on an entryway table. Its vertical design helps fill space and draw the eye.
6. Wooden Spool Pumpkins
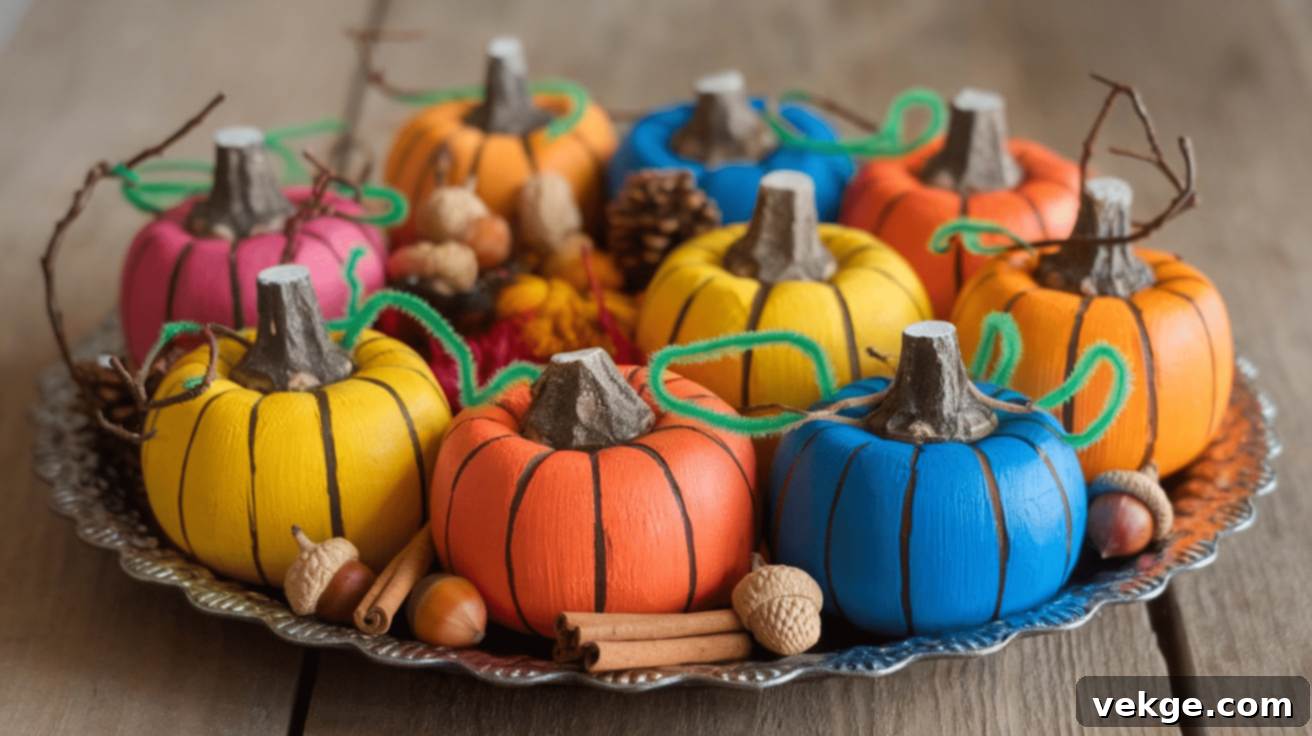
Don’t let those leftover wooden spools go to waste! Repurpose them into adorable mini pumpkins that are perfect for a farmhouse-style display, adding a quirky and unexpected touch to your fall decor.
Supplies Needed:
- Assorted wooden spools (empty thread spools, larger craft spools)
- Orange acrylic paint
- Green pipe cleaners (for curly vines)
- Small wooden beads, tiny twigs, or short dowel pieces for stems
- Hot glue gun
Steps to Make:
- Paint the wooden spools orange. You can use different shades or add subtle brown streaks for a more natural pumpkin look. Ensure the paint covers all surfaces and let them dry completely.
- Once the spools are dry, insert a small twig or a wooden bead into the center hole of each spool. Secure it with a dab of hot glue if needed, ensuring it stands upright as a stem.
- Take a green pipe cleaner and wrap it tightly around a pencil or your finger to create a spiral, curly vine. Trim it to size and hot glue one end to the base of the stem, allowing it to “grow” naturally.
- Display your finished spool pumpkins in groups. They look especially cute arranged on tiered trays, nestled among other fall items on a coffee table, or as a charming accent on a bookshelf.
These miniature wooden pumpkins are great for adding small touches of fall charm to any space, particularly effective on tiered trays or tabletops where small details truly shine.
7. Wooden Pumpkin Garland
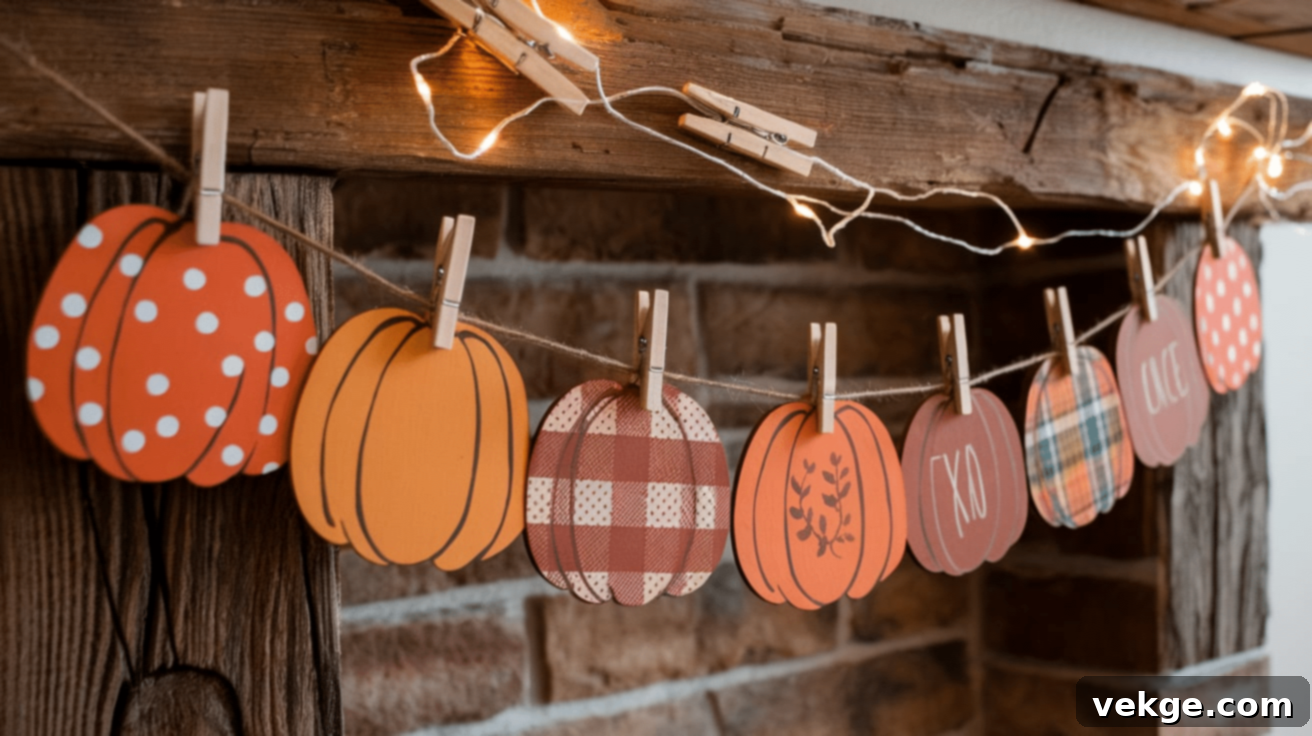
A wooden pumpkin garland is an incredibly versatile and festive way to decorate mantels, window frames, doorways, or even shelves. It offers a subtle yet charming nod to the autumn season.
Supplies Needed:
- Small wooden pumpkin cutouts (you can buy these pre-made at craft stores)
- Orange, white, green, and brown acrylic paint
- Twine or sturdy string
- Mini clothespins, or a small drill bit to make holes for stringing
- Paint pens or small stamps (optional, for details)
Steps to Make:
- Paint your wooden cutouts in a variety of fall shades. Mix and match traditional orange with creams, whites, deep reds, or olive greens to create an interesting palette. Paint both sides if the garland will be visible from multiple angles. Let them dry completely.
- Personalize your pumpkins! Use stencils or stamps to add delicate polka dots, classic plaid patterns, or simple fall-themed words like “Fall,” “Harvest,” or “Gather.” You can also draw small leaf shapes or swirls.
- There are two main ways to assemble your garland:
- Method 1 (Clothespins): Simply clip each decorated wooden pumpkin onto a long piece of twine using mini clothespins. This allows for easy repositioning.
- Method 2 (Drilling): Carefully drill small holes near the top of each pumpkin cutout. Thread your twine or string through these holes, spacing the pumpkins evenly along the length of the string.
- Once assembled, hang your beautiful wooden pumpkin garland. It looks fantastic draped across a fireplace mantel, strung along the top of a window, cascading down a staircase railing, or even adorning a plain wall.
This easy, lightweight decoration adds a delightful touch of rustic charm anywhere in your home, making it feel instantly more festive and inviting.
8. Wooden Crate Pumpkin Display
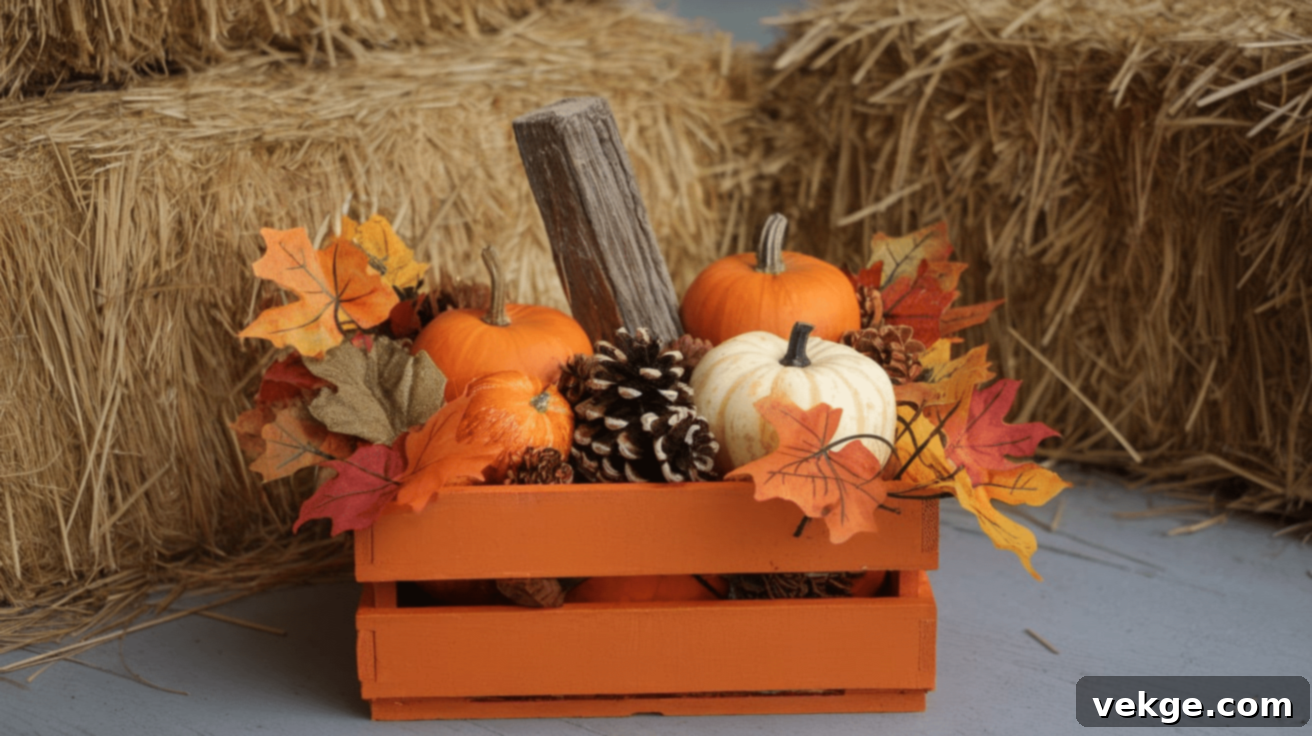
Give a small wooden crate a new life by transforming it into a charming, pumpkin-shaped decor piece. This creative idea offers both visual appeal and practical use for holding other fall items.
Supplies Needed:
- Small wooden crate (unfinished or pre-painted)
- Orange paint or wood stain
- A small wood cutout for a stem, or a thick, sturdy twig
- Raffia, twine, or faux leaves for decoration
- Hot glue gun
Steps to Make:
- If your crate is unfinished, paint or stain it a vibrant orange to mimic a pumpkin. For a more rustic look, use a dry brush technique or distress the edges after the paint dries. If the crate is already painted, you might choose to repaint or simply enhance it. Let it dry completely.
- Once the crate is dry, attach a wooden stem (either a pre-cut wood piece or a thick twig) to the top center of one of the longer sides of the crate. Use a strong adhesive like wood glue or hot glue for secure attachment.
- Tie a generous amount of raffia, rustic twine, or a piece of plaid fabric around the base of the stem for a charming, rustic touch. You can also add a small faux leaf or berry cluster.
- Finally, fill your newly created pumpkin crate! It’s perfect for holding mini pumpkins, gourds, pinecones, fall foliage, or even a small potted mum.
This versatile piece makes a cute tabletop decoration for an entryway or coffee table, or a welcoming addition to your porch or patio. It provides both a decorative element and a functional container for other fall treasures.
9. Wooden Pumpkin Wreath
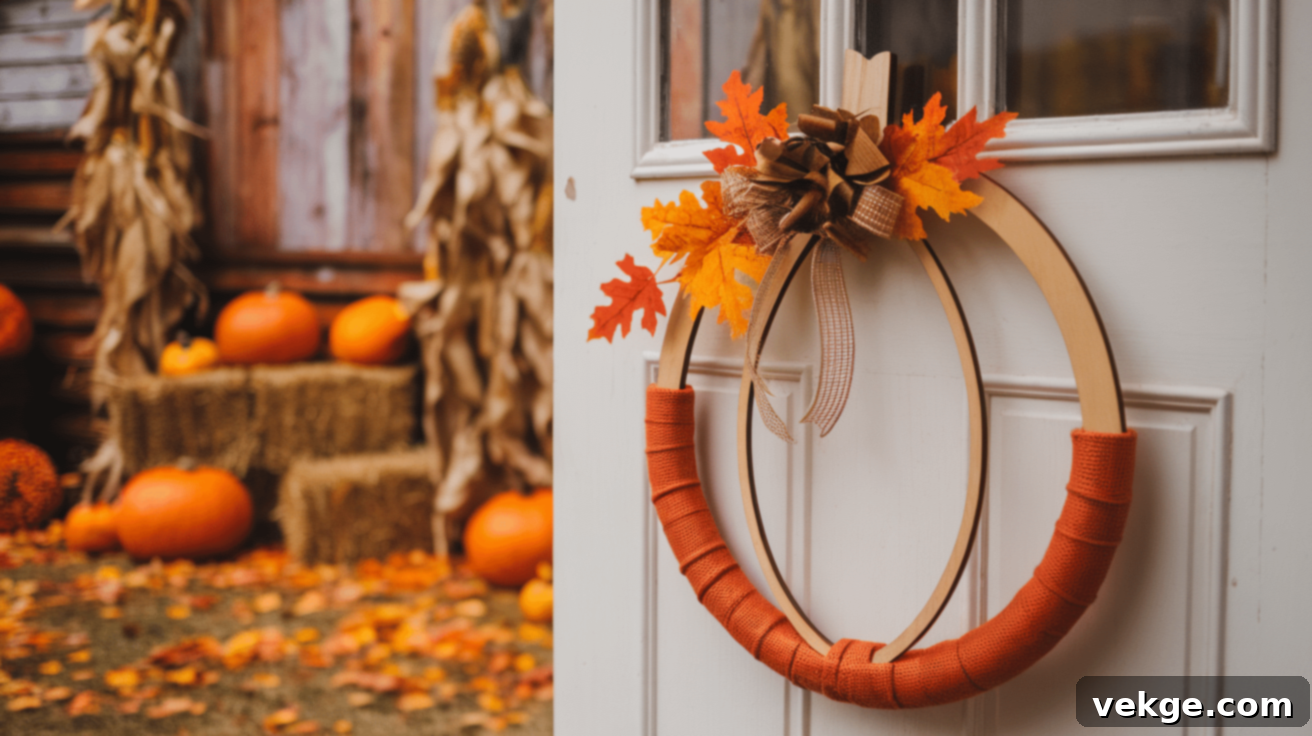
Step away from the traditional circular wreath and create a truly unique, pumpkin-shaped wooden wreath for your front door. This eye-catching piece will surely make a statement and welcome guests with autumnal charm.
Supplies Needed:
- Wooden embroidery hoop (two hoops of different sizes, if you want a more pronounced pumpkin shape) or a circular wooden frame. Alternatively, you can cut a pumpkin shape from thin plywood.
- Orange and brown paint
- Sturdy twigs or wooden dowels for the stem
- Faux leaves, burlap ribbon, twine, or small faux pumpkins/berries for embellishment
- Hot glue gun
- Wire or string for hanging
Steps to Make:
- If using embroidery hoops, you might shape them slightly by hot gluing them together to form a pumpkin outline. Paint the entire wooden hoop (or plywood cutout) orange. For a softer look, you could also wrap the hoop entirely with orange burlap or fabric strips instead of painting. Let it dry.
- Once the base is ready, attach a sturdy wooden stem (a twig or dowel) at the top of the pumpkin shape using a hot glue gun. Ensure it’s firmly secured.
- Now for the fun part: decorating! Embellish your wreath with an assortment of faux autumn leaves, tie a large, rustic burlap bow, wrap twine around sections of the hoop, or glue on small faux pumpkins, acorns, or berries for added texture and color.
- Attach a strong wire or loop of ribbon to the back for easy hanging. Display it proudly on your front door, over a window, or as a focal point above a mantel.
This pumpkin-shaped wooden wreath makes a unique and charming alternative to a regular fall wreath, offering a distinctive and handcrafted welcome to your home.
10. Wooden Pumpkin Name Place Cards
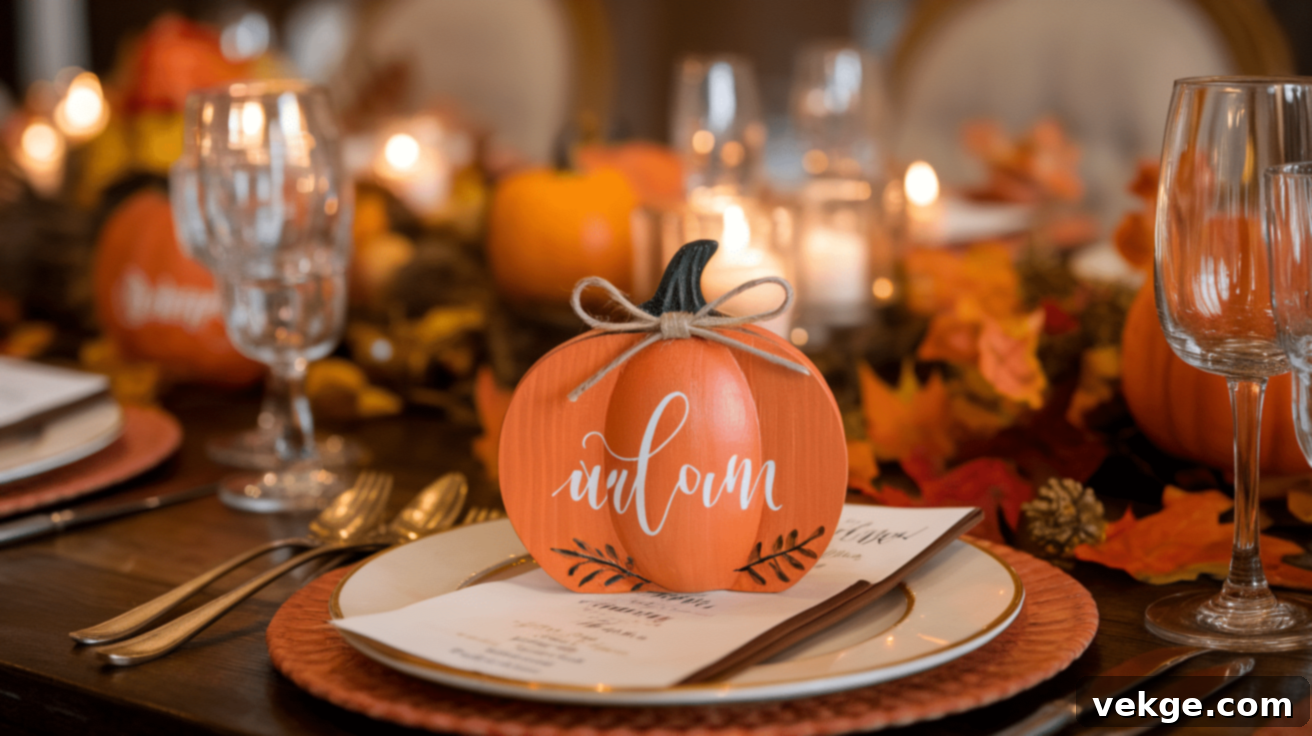
Add a thoughtful and personalized touch to your fall dinner parties or Thanksgiving feast by crafting mini wooden pumpkins as elegant name place cards. These small details make a big impression.
Supplies Needed:
- Small wooden slices, blocks, or pre-cut mini pumpkin shapes (about 2-3 inches wide)
- Orange paint or wood stain
- Black, white, or metallic paint pens (fine-tipped)
- Twine, small faux leaves, or tiny sprigs for decoration
- Hot glue gun (optional)
Steps to Make:
- Paint or stain your small wooden slices or blocks to resemble mini pumpkins. You can go for classic orange, white, or even gold for a more elegant look. Allow them to dry completely.
- Using a fine-tipped paint pen, carefully write each guest’s name on a separate wooden pumpkin. Practice your lettering beforehand if you’re not confident. Black, white, or gold pens work beautifully.
- For an extra decorative flourish, hot glue a tiny loop of twine, a small faux maple leaf, or a delicate sprig of artificial greenery near the stem area of each pumpkin.
- Place one personalized wooden pumpkin at each place setting on your dining table. Your guests will be delighted by this thoughtful and handcrafted detail.
This charming project is perfect for Thanksgiving gatherings, autumn dinner parties, or any fall celebration where you want to add a personalized and rustic touch to your table setting.
11. Glow-in-the-Dark Wooden Pumpkins
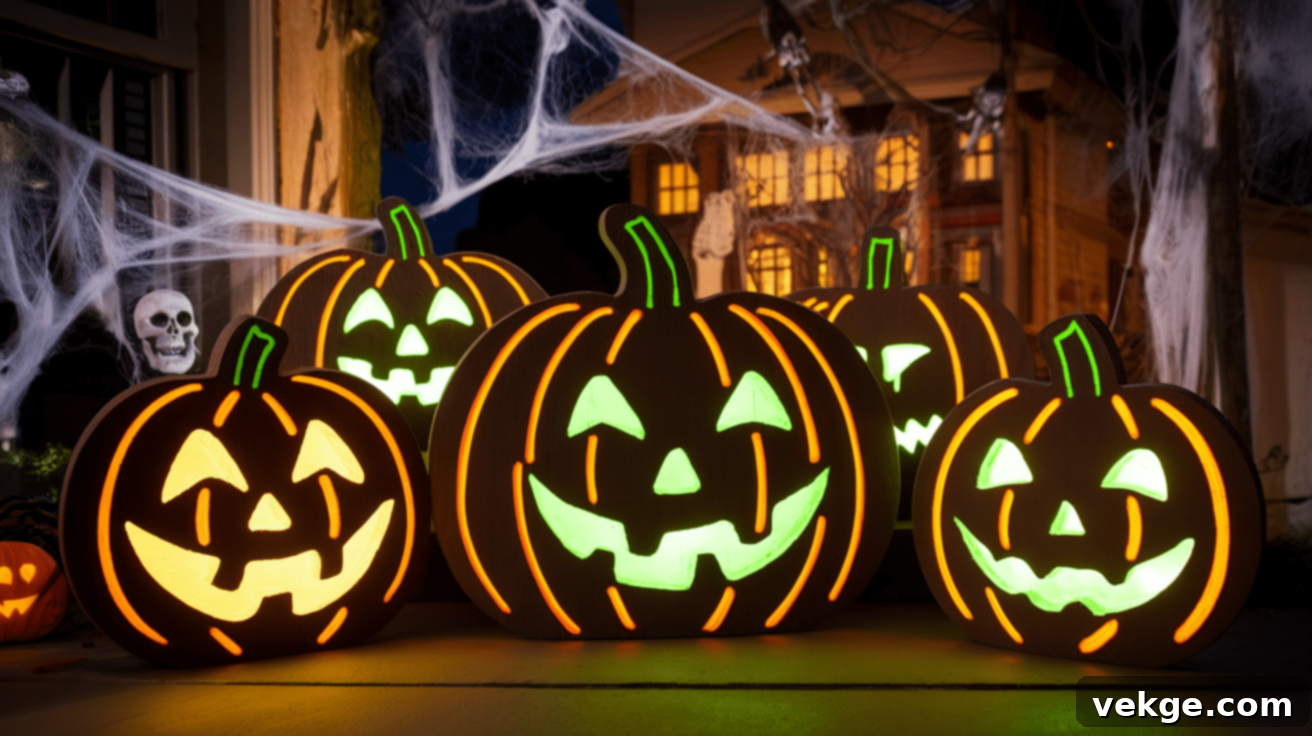
For a fun and slightly spooky twist, incorporate glow-in-the-dark paint into your wooden pumpkin crafts. These are perfect for Halloween and will add an unexpected, glowing effect to your evening decor.
Supplies Needed:
- Wooden pumpkin cutouts or blocks (any size)
- Orange acrylic paint (as a base coat)
- Glow-in-the-dark paint (available at most craft stores)
- Black acrylic paint and a fine brush for faces or designs
- Optional: Sealant for outdoor use
Steps to Make:
- First, paint your wooden pumpkins with a base coat of orange paint, just as you would for a regular pumpkin. Ensure even coverage and let them dry thoroughly.
- Once the orange base is completely dry, apply several coats of glow-in-the-dark paint over the top. The more coats you apply, the brighter and longer-lasting the glow will be. Allow each coat to dry according to the manufacturer’s instructions.
- With black paint and a fine brush (or a black paint pen), add classic jack-o’-lantern faces, spooky spiderwebs, bat silhouettes, or other Halloween-themed patterns onto your glowing pumpkins.
- Display your finished glow-in-the-dark pumpkins near a light source during the day to “charge” them. Then, as dusk falls or in a dark room, watch them emit an eerie and cool glowing effect, perfect for Halloween nights.
These unique wooden pumpkins are a fantastic addition to your Halloween decorations, creating a playful and spooky ambiance that will delight trick-or-treaters and party guests alike!
12. Wooden Pumpkin Serving Tray
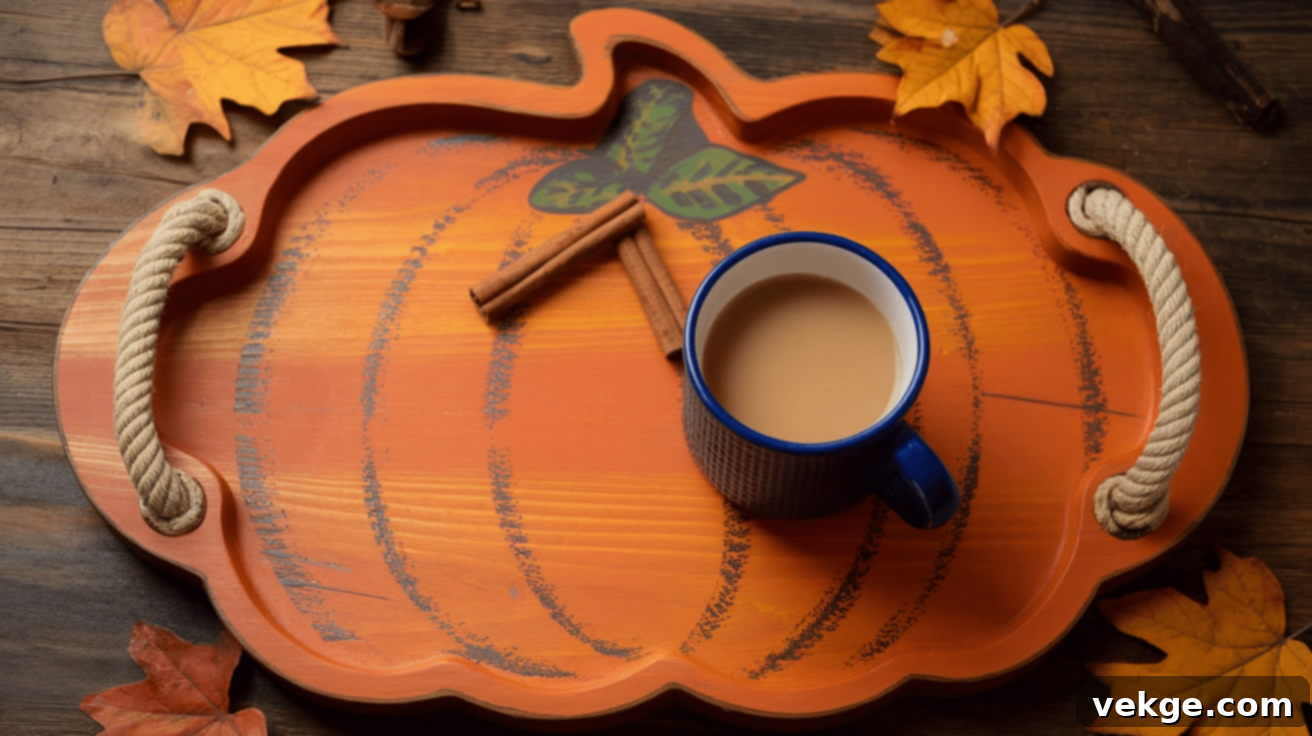
Combine functionality with festive fall decor by transforming a simple wooden board into a charming pumpkin-shaped serving tray. This piece is perfect for entertaining during autumn gatherings.
Supplies Needed:
- Sturdy wooden board (approximately 1/2 to 3/4 inch thick)
- Saw (jigsaw is ideal for curves)
- Sandpaper (various grits)
- Orange paint or food-safe wood stain/sealant
- Rope handles, metal cabinet handles, or leather straps
- Screws and a screwdriver/drill
- Optional: Small wooden dowel for a stem
Steps to Make:
- Draw a pumpkin shape onto your wooden board. Aim for a shape that is wide enough to hold drinks or snacks comfortably. Carefully cut out the pumpkin shape using a jigsaw.
- Thoroughly sand all edges and surfaces of the wooden pumpkin cutout. Start with a coarser grit to smooth rough areas, then move to a finer grit for a silky smooth finish.
- Paint the pumpkin shape orange, or apply a food-safe wood stain to highlight the natural grain. If you plan to serve food directly on it, ensure your chosen paint or stain is non-toxic and sealed with a food-safe topcoat. Allow it to dry completely.
- Attach your chosen handles (rope, metal, or leather) to the sides of the pumpkin shape using screws. Make sure they are securely fastened and can bear the weight of items on the tray.
- Optionally, attach a small wooden dowel or sturdy twig to the top as a decorative stem using wood glue.
This beautifully crafted wooden pumpkin serving tray makes a functional and visually appealing fall centerpiece, perfect for serving seasonal treats, displaying candles, or holding fall drinks at your next autumn party.
How to Customize Your Wooden Pumpkins for Unique Style
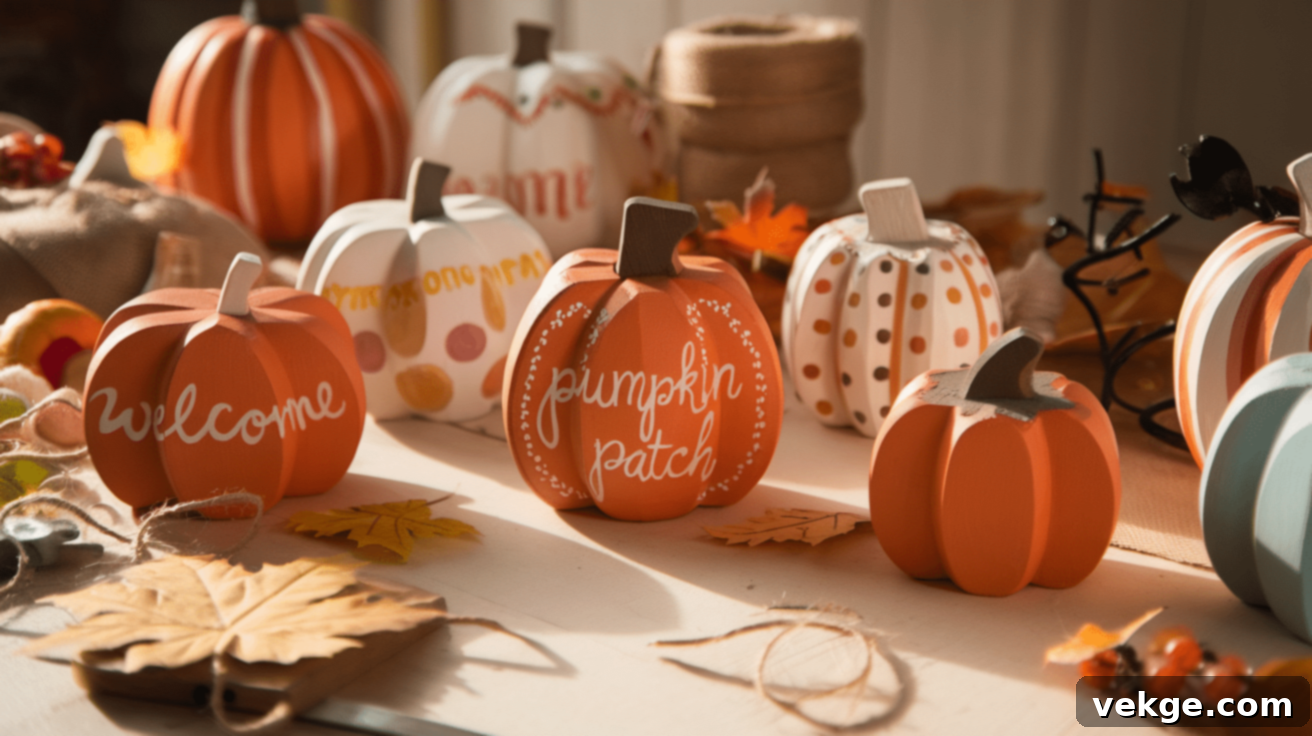
One of the greatest joys of crafting wooden pumpkins is the endless possibilities for customization. Here are some ideas to help you make each piece truly unique and reflective of your personal style:
1. Painted Pumpkins: A Spectrum of Colors and Patterns
- Color Palettes: While classic orange is always in style, experiment with different shades. Try soft pastel oranges, creams, whites, sage greens, or even sophisticated deep blues and grays for a modern farmhouse or contemporary look.
- Patterns & Designs: Go beyond solid colors. Add playful polka dots, classic stripes, delicate floral designs, or even abstract patterns for a unique touch. Use painter’s tape for clean lines.
- Textural Finishes: Use chalk paint for a beautiful matte, rustic finish that can be easily distressed. Acrylic paints offer bright, vibrant colors, while spray paints provide quick and even coverage.
2. Achieve a Weathered, Distressed Look
- Sanding Technique: After your paint has dried, lightly sand the edges, corners, and raised areas of your wooden pumpkins. This technique reveals glimpses of the raw wood underneath, instantly giving them a charming, weathered, and vintage feel, perfect for rustic decor.
- Dry Brush Method: Dip a dry paintbrush lightly into a contrasting color (like white, cream, or a soft brown), wipe off most of the paint, and then lightly brush it over the painted surface. This creates an aged, whitewashed, or “chippy paint” effect, adding depth and character.
3. Stenciled or Hand-Lettered Personalization
- Expressive Stencils: Use stencils to add welcoming words like “Hello Fall,” “Welcome,” “Gather,” “Blessed,” or “Pumpkin Patch.” Stencils ensure neat, uniform lettering even for those new to hand-painting.
- Artistic Hand-Lettering: If you enjoy hand-lettering, use paint pens or a fine brush to write seasonal messages, family names, or even intricate illustrations like leaves, vines, or acorns. This adds a truly personal and artistic touch.
- Wood Burning: For a deeper, more permanent effect, use a wood-burning tool to engrave designs, patterns, or letters directly into the wood for a unique, natural look.
4. Elevate with Decorative Embellishments
- Natural Elements: Glue on faux autumn leaves, real dried leaves, small twigs, acorn caps, or raffia bows for an organic, earthy charm. These elements beautifully complement the wood.
- Textile Wraps: Wrap twine, burlap ribbon, lace, or plaid fabric strips around the stems or the body of the pumpkin for added texture and a cozy, rustic aesthetic.
- Sparkle and Shine: For a touch of whimsy, lightly dust with glitter while the paint is still wet, or add tiny fairy lights (battery-operated) to larger pumpkins to create a magical, cozy glow during the evenings.
- Buttons and Beads: Small decorative buttons, wooden beads, or even miniature bells can be glued on as charming accents.
Where to Display Your Charming Wooden Pumpkins
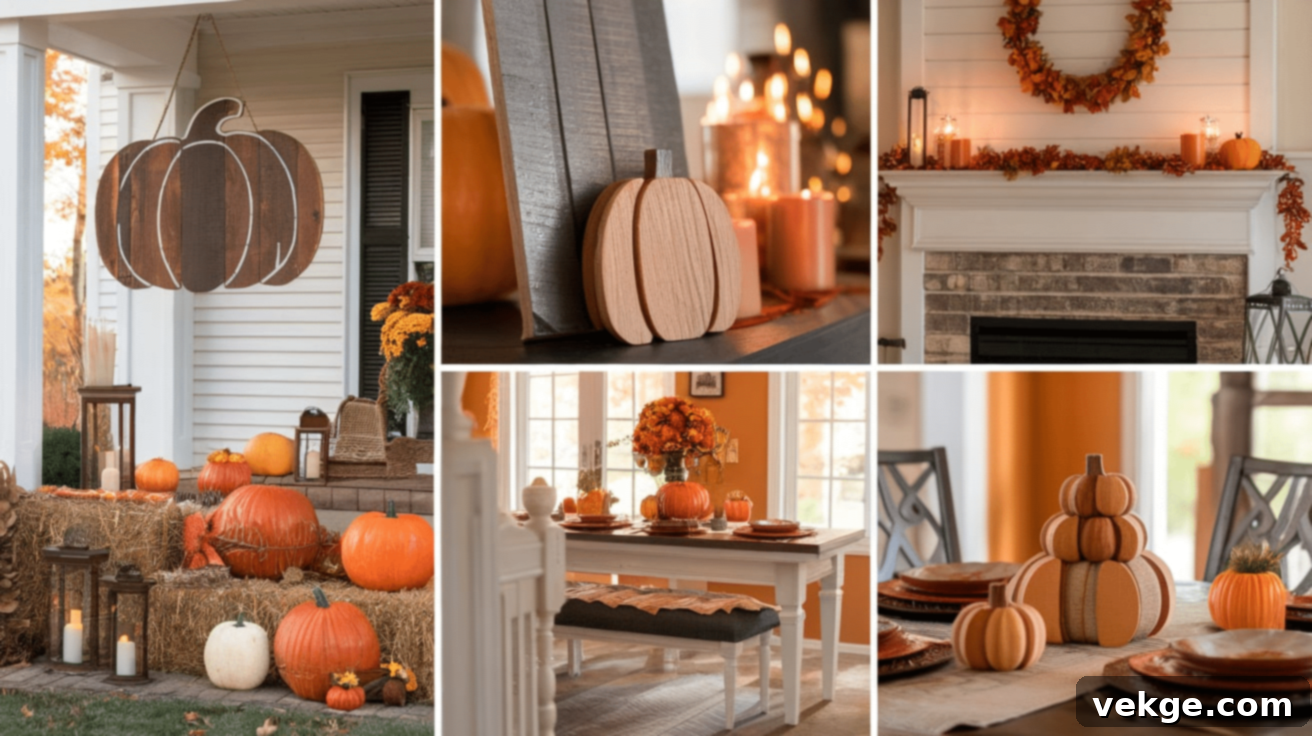
Once your beautifully crafted wooden pumpkins are ready, it’s time to find the perfect spots to showcase them! Their versatility means they can enhance almost any area of your home, both indoors and out. Here are some fantastic ideas for displaying your creations:
- Front Porch: Create an inviting autumnal welcome. Arrange larger wooden pumpkins (like pallet or plank designs) near your front door. Complement them with bales of hay, traditional lanterns, potted mums, and a few real pumpkins for a rich, layered, and truly welcoming entrance. Consider painting house numbers on a wooden pumpkin for a unique house sign.
- Fireplace Mantel: Transform your fireplace into a cozy focal point. Group various sizes of wooden pumpkins with flickering LED candles, draped fall garlands (made from faux leaves, berries, or even your wooden pumpkin garland!), and other small autumn decorations like pinecones or acorns. This creates a warm and inviting indoor display.
- Dining Table Centerpiece: Make your fall meals extra special. Use an assortment of small to medium wooden pumpkins as the core of a fall-themed table setup. Add real or faux leaves, scattered mini gourds, tea lights in glass holders, or a rustic runner to create a stunning and festive centerpiece that will impress your guests.
- Bookshelves or Entryway Tables: Infuse subtle touches of fall decor throughout your home. Place a few wooden pumpkins strategically on bookshelves, console tables in your entryway, or side tables in your living room. They can be nestled amongst books, family photos, or other decorative objects to add a cozy, seasonal accent without overpowering the space.
- Kitchen Decor: Bring fall into the heart of your home. Small wooden pumpkins can sit on open shelves, window sills, or act as accents on your kitchen island or countertop. Use the wooden pumpkin serving tray to hold fresh fruit or baked goods.
- Garden or Yard Display: Extend your fall decor beyond your walls. If you’ve sealed your wooden pumpkins with weatherproof paint and a clear outdoor sealant, they are perfect for outdoor use. Arrange them amongst your flower beds, near garden pathways, or at the base of trees for a charming, fall-themed garden setup that will last through the season’s unpredictable weather.
- Tiered Trays: Small wooden block or spool pumpkins are ideal for tiered tray displays. Combine them with tiny signs, mini candles, coffee mugs, and other miniature fall-themed items for a curated and delightful vignette.
Expert Tips for Making Your Wooden Pumpkin Crafts Shine
To ensure your wooden pumpkin projects are not only enjoyable to make but also turn out beautifully and last for many seasons, consider these helpful tips:
- Embrace Scrap Wood: Don’t feel the need to buy brand new wood. Repurpose old wood pieces, pallet planks, or even discarded furniture parts. This not only saves money but also adds incredible character, history, and a genuinely rustic feel to your finished pumpkins. Look for unique textures and imperfections!
- Always Seal for Outdoor Use: If your beautiful wooden pumpkins are destined for the front porch, garden, or any outdoor space, a clear, weatherproof sealant is non-negotiable. Apply several thin coats to protect the wood and paint from moisture, UV rays, and temperature changes, ensuring they remain vibrant and intact season after season.
- Experiment with Colors Beyond Orange: While orange is the classic fall color, don’t be afraid to venture beyond it. Try painting your pumpkins in shades of white, cream, soft gray, sage green, deep burgundy, or even black for a sophisticated, modern, or slightly spooky aesthetic. Mixing colors adds depth and interest to your display.
- Mix and Match Sizes and Styles: For a truly dynamic and eye-catching display, combine wooden pumpkins of different sizes, shapes, and crafting styles. A large pallet pumpkin next to a stack of smaller blocks, complemented by a painted sign, creates a layered and visually appealing arrangement that is far more engaging than uniform pieces.
- Involve the Whole Family: Wooden pumpkin crafting is an excellent activity for all ages. Let children get creative by painting or decorating smaller wooden blocks or cutouts. It’s a fantastic way to spend quality time together, encourage creativity, and make memories while creating fall decor.
- Sanding is Key: Don’t skip the sanding step! Smooth wood allows paint to adhere better and provides a professional finish. For a rustic look, light sanding after painting creates that desirable distressed effect.
- Patience with Drying Times: Rushing the drying process can lead to tacky paint, smudges, or uneven finishes. Always allow paint and glue to dry completely between coats and before adding embellishments.
- Consider Themes: Think about a theme for your fall decor (e.g., rustic farm, elegant autumn, spooky Halloween). This can help guide your color choices, embellishments, and overall design decisions for your wooden pumpkins.
Conclusion: Craft Your Cozy Autumn Haven with Wooden Pumpkins
Wooden pumpkin crafts are truly a delightful and accessible way to embrace the beauty of fall and infuse your home with warmth and charm. They offer a unique blend of durability, endless customization, and budget-friendliness that real pumpkins simply can’t match.
From the simplicity of painted wooden blocks and the rustic appeal of repurposed pallet wood to the festive touch of a pumpkin garland or a charming serving tray, there are countless ways to get creative. Each project allows you to put your personal stamp on your seasonal decor, creating pieces that resonate with your home’s unique character.
Beyond just decorating, these DIY projects are a wonderful opportunity to slow down, engage in a mindful activity, spend quality time with family, or simply discover the joy of making something beautiful with your own hands. The satisfaction of crafting a piece that will be enjoyed year after year is truly rewarding.
We hope these diverse ideas have inspired you to grab some wood and paint and start making your own collection of wooden pumpkins. Don’t be afraid to try different styles, mix and match colors and textures, and add those unique touches that make each creation truly yours. With these handmade wooden decorations, your home will feel wonderfully warm, festive, and inviting throughout the entire autumn season. Happy crafting!
Frequently Asked Questions About Wooden Pumpkin Crafts
What kind of wood is best for wooden pumpkin crafts?
For most wooden pumpkin crafts, common and easy-to-work-with woods like pine, plywood, or reclaimed pallet wood are excellent choices. They are generally soft enough to cut, paint, and sand with relative ease, making them ideal for achieving that desired rustic look. If you’re planning to make larger, sturdy outdoor decorations, opt for thicker, more robust pieces of wood that can withstand the elements.
Do I need power tools to make wooden pumpkins?
Not necessarily for all crafts! Many simpler projects, like the wooden block pumpkins, can be made with pre-cut wooden shapes or by simply painting existing blocks. However, for custom designs, especially those requiring curved cuts like pallet pumpkins or pumpkin-shaped signs, a saw (such as a jigsaw) will be incredibly helpful and make the process much faster and easier. Even without power tools, a hand saw can be used for straight cuts, and sandpaper is always useful for smoothing rough edges.
What kind of paint should I use for my wooden pumpkins?
Acrylic paints, chalk paint, or spray paint are all excellent choices for wooden pumpkins. Acrylic paint offers a wide range of colors, is easy to apply, and dries relatively quickly. Chalk paint is fantastic for achieving a matte, velvety finish and is perfect for a distressed, rustic aesthetic. Spray paint provides quick and even coverage, especially for larger pieces. If your wooden pumpkins will be displayed outdoors, it’s crucial to use exterior-grade paint or apply a clear, waterproof sealant over your finished design to protect them from moisture and UV damage.
How do I make my wooden pumpkins look rustic?
Achieving a rustic look is quite simple! After painting your wooden pumpkins, allow the paint to dry completely. Then, lightly sand the edges, corners, and any raised surfaces with fine-grit sandpaper. This will gently remove some of the paint, revealing the natural wood underneath and creating a beautifully distressed, weathered effect. Another popular technique is dry-brushing: dip a dry brush very lightly into a contrasting paint color (like brown, white, or cream), wipe most of the paint off, and then lightly brush it over the main painted surface. This adds subtle texture and an aged appearance.
How do I store wooden pumpkins after fall?
To ensure your wooden pumpkins last for many autumns to come, proper storage is key. Keep them in a dry place, away from extreme temperatures and humidity, such as a plastic storage bin, a closet, or an attic. To prevent scratches or chipping, wrap individual pumpkins in soft tissue paper, newspaper, or a clean cloth before placing them in a container. This careful storage will keep them looking fresh and ready for display for next year’s fall season.
