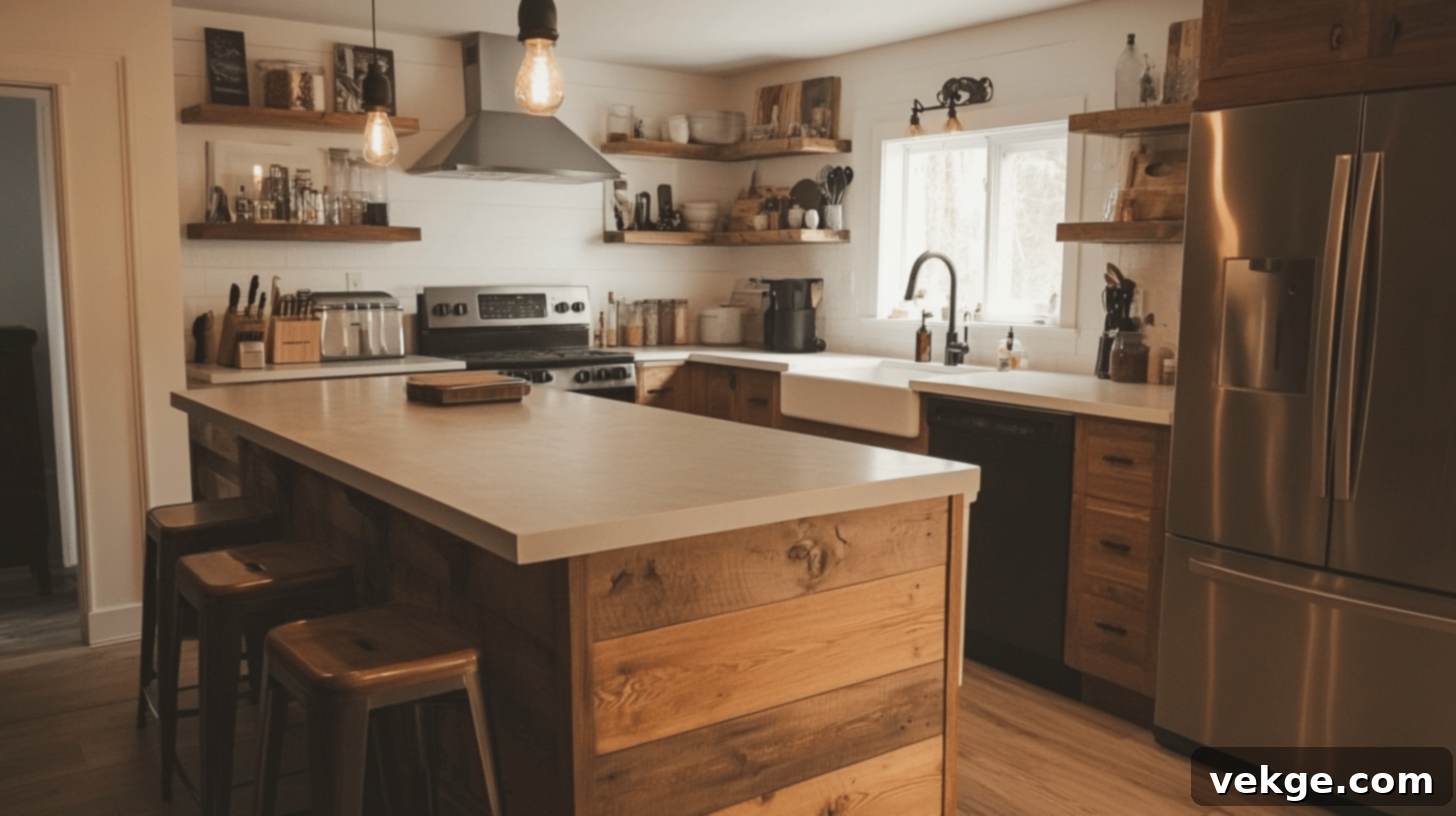
Build Your Dream Kitchen Island: A Comprehensive DIY Guide for Every Budget
Are you yearning for more counter space in your kitchen? Do you dream of a central hub for meal prep, entertaining, or simply more storage? I know the feeling perfectly. In my own small kitchen, I faced the challenge of needing extra room for cooking and organization, only to find that pre-made kitchen islands were often too expensive, lacked personalization, or simply didn’t fit my unique space.
However, I soon discovered that building a functional and beautiful kitchen island doesn’t have to be an overwhelming or costly endeavor. With a bit of planning and the right guidance, anyone can create a custom island that perfectly suits their needs and budget.
In this comprehensive guide, I’ll walk you through the entire process of constructing a sturdy, practical, and stylish kitchen island. We’ll cover everything from the initial planning stages and selecting the right materials to the step-by-step assembly and adding those all-important final touches. My goal is to empower you to tackle this rewarding DIY project with confidence, even if you’re a complete beginner.
I’ve carefully broken down each part into simple, manageable steps, ensuring that anyone, regardless of their DIY experience level, can follow along and achieve fantastic results. By the end of this guide, you’ll have a beautifully crafted kitchen island that not only adds immense functionality to your space but also becomes a proud centerpiece of your home.
Let’s embark on this exciting journey to make your kitchen more organized, efficient, and enjoyable with your very own DIY kitchen island!
How to Plan Your DIY Kitchen Island?
From my experience, meticulous planning is the secret ingredient to a successful kitchen island build. Before you even think about picking up a tool, taking the time to thoroughly plan will save you countless headaches, unexpected costs, and multiple trips to the hardware store. Let’s dive into the crucial points you need to consider before starting this transformative project.
- Measure Your Space Accurately: This is arguably the most critical first step. You need at least 36 inches (about 90 cm) of clearance around all sides of your island for comfortable movement, opening cabinet doors, and ensuring a safe and functional kitchen workflow. Measure your kitchen’s overall dimensions, noting any existing appliances or doorways, to determine the absolute maximum size your island can be without feeling cramped. Consider the “kitchen triangle” (sink, stove, refrigerator) and ensure your island doesn’t obstruct this essential pathway.
- Define Your Island’s Primary Purpose: What do you primarily need your island for? Do you require significant additional counter space for baking and cooking? Are you looking for extra storage for bulky kitchen items? Or perhaps you envision specific features like a breakfast bar for seating, an integrated sink for food prep, or even space for small appliances? Clearly defining its purpose will guide all subsequent design and material choices.
- Plan Your Storage Needs Precisely: Once you know its purpose, list out all the items you intend to store in or on your island. Think about pots, pans, mixing bowls, small appliances, utensils, cookbooks, or even children’s homework supplies. This detailed list will help you determine the ideal configuration of drawers, shelves, and cabinet sizes you’ll need, ensuring every inch of space is utilized efficiently.
- Set a Realistic Budget: A basic, quality kitchen island built with off-the-shelf cabinets can start around $1,200, but this can vary widely. Break down your budget into categories: cabinet frames, doors/drawers, hardware, countertop, and any additional features. Remember to allocate extra funds for specialized elements like electrical outlets (which often require a licensed electrician), plumbing for a sink, or integrated appliances. Unexpected costs can arise, so it’s wise to have a small contingency fund.
- Select Materials Wisely: Your material choices will significantly impact both the look and durability of your island. Consider readily available base cabinets from retailers like IKEA or Home Depot for a cost-effective and straightforward build. For the countertop, options range from affordable laminate or warm butcher block to premium stone (granite, quartz) or solid surface materials. Don’t forget to choose hardware (knobs, pulls, hinges) that complements your existing kitchen aesthetic.
- Verify Floor Support: A kitchen island, especially one with a stone countertop or filled with heavy kitchenware, can be quite heavy. It’s crucial to ensure your existing floor structure can adequately support the added weight. In older homes, or if you’re planning a particularly large or heavy island, it may be necessary to consult a structural engineer or add additional reinforcement underneath the floor.
- Plan Utilities Early: If your island will include electrical outlets, built-in lighting, plumbing for a prep sink, or even a gas line for a cooktop, these elements require professional installation and must be planned and roughed-in *before* the main construction begins. Ignoring this step can lead to costly and complicated retrofitting later on.
- Create a Detailed Shopping List: Once all your design decisions are made, compile an exhaustive shopping list. Include every single item: cabinet frames, drawer slides, doors, hinges, countertop material, lumber for the base, screws, adhesive, trim, paint/stain, and all necessary tools. A comprehensive list minimizes last-minute trips to the store, keeping your project on schedule and your momentum strong.
By investing your time in planning these details upfront, you’ll ensure your DIY kitchen island project progresses smoothly, stays within budget, and results in a beautiful, functional addition to your home.
Tools & Materials Required to Build Your Kitchen Island
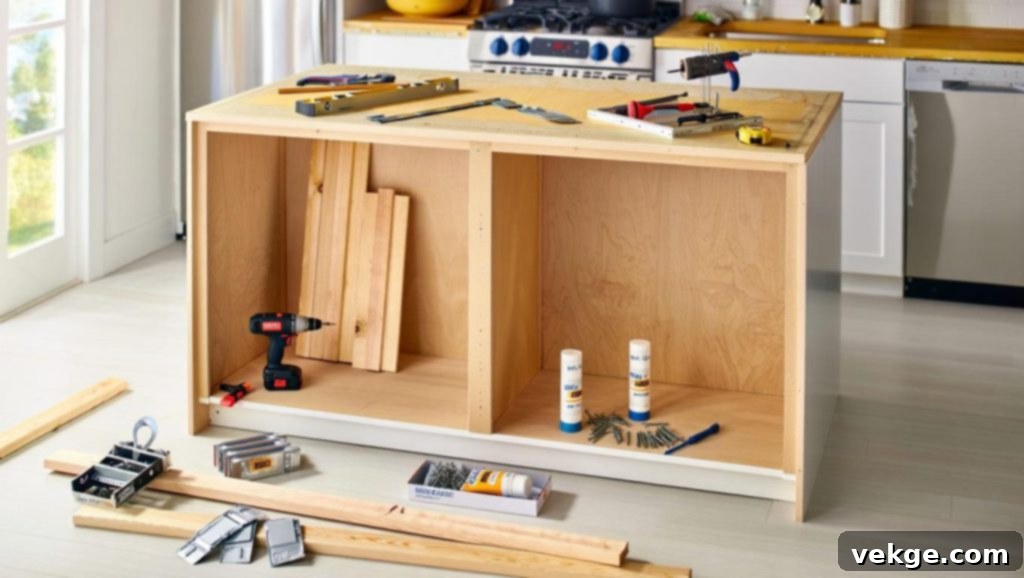
Before you embark on the exciting journey of building your custom kitchen island, it’s crucial to gather all the necessary tools and materials. Having everything ready beforehand will ensure a smooth, efficient, and frustration-free build. Here’s a comprehensive list of what you’ll need:
| Item Name | Estimated Price (USD) | Why You Need It |
|---|---|---|
| IKEA Base Cabinet Frames (e.g., 3 large, 1 small) | $600–$800 | These form the core structure and provide essential storage. IKEA cabinets are popular for their affordability and ease of assembly. |
| Cabinet Drawers with Hardware (6 sets) | $360–$450 | For accessible and organized storage of utensils, spices, and smaller kitchen items. Includes drawer slides and mechanisms. |
| Cabinet Doors with Hardware (6 sets) | $300–$450 | To enclose your cabinet spaces, keeping contents tidy and protected. Includes hinges for smooth operation. |
| Drawer Hardware Packs (2 packs) | $40–$60 | Additional or replacement hardware for drawers, ensuring they function correctly. |
| Two-by-Four Lumber (enough for your base frame) | $3.50–$5 each | Essential for constructing the sturdy, level base that your cabinets will sit on, raising them to the desired height. |
| Wood Screws and General Hardware | $10–$30 | Various sizes of screws for joining cabinet frames, attaching the base, and securing other components. |
| Clamps (several) | $10–$30 each | Indispensable for holding cabinet units tightly together while you screw them, ensuring a seamless and strong connection. |
| Liquid Nails Adhesive (or similar construction adhesive) | $7–$15 | For securely bonding the countertop to the cabinet frames, providing a strong and lasting hold. |
| Cabinet Hardware Installation Jig (e.g., Kreg KHI-PULL) | $55–$70 | A crucial tool for accurately and consistently drilling holes for cabinet handles and pulls, ensuring a professional, uniform look. |
| Power Drill/Driver | $50–$150 | Your primary tool for quickly and efficiently driving screws, assembling cabinets, and pre-drilling holes. |
| Quarter-Inch Plywood (for back facing) | $25–$40 per sheet | Used to create a clean, finished look on the back of the island, covering exposed cabinet backs. |
| Measuring Tape & Pencil | $5-$20 | For precise measurements, marking cuts, and layout. Accuracy is key in DIY projects. |
| Level (long and short) | $20-$60 | Absolutely essential for ensuring your base frame and cabinets are perfectly level, preventing a crooked island or uneven countertop. |
| Saw (Circular Saw, Miter Saw, or Hand Saw) | $30-$200+ | For cutting lumber to size for the base frame, plywood, and any decorative trim. |
| Safety Glasses & Work Gloves | $5-$15 | Non-negotiable personal protective equipment to prevent injury from sawdust, flying debris, or splinters. |
Extra Costs to Consider:
Your total material cost can fluctuate significantly based on several factors. Keep these potential additional expenses in mind:
- Countertop Material: As discussed, prices vary wildly from economical laminate to luxurious stone. Your choice here will be one of the biggest budget drivers.
- Electrical Work: If you plan to add outlets or lighting, hiring a licensed electrician is necessary, adding to your labor costs.
- Additional Storage Solutions: Specialized organizers like pull-out spice racks, drawer dividers, or waste bin pull-outs can add convenience but also cost.
- Decorative Elements: Trim, molding, decorative corbels, or specialty finishes will enhance aesthetics but come with an additional price tag.
- Tool Purchases or Rentals: If you don’t own all the necessary tools, you’ll need to budget for purchasing them or renting them for the duration of your project.
Note: Many tools, such as clamps, a cabinet hardware installation jig, and a power drill, can often be borrowed from a friend, rented from local tool libraries or hardware stores, or even rented through online services. This can significantly reduce your initial investment if you don’t plan to use them frequently in the future.
Step-by-Step Process for Building a DIY Kitchen Island
With your tools and materials ready, it’s time to bring your vision to life! Follow these detailed steps to construct your practical and stylish kitchen island.
Step 1: Remove Old Cabinets and Plan the Island Build
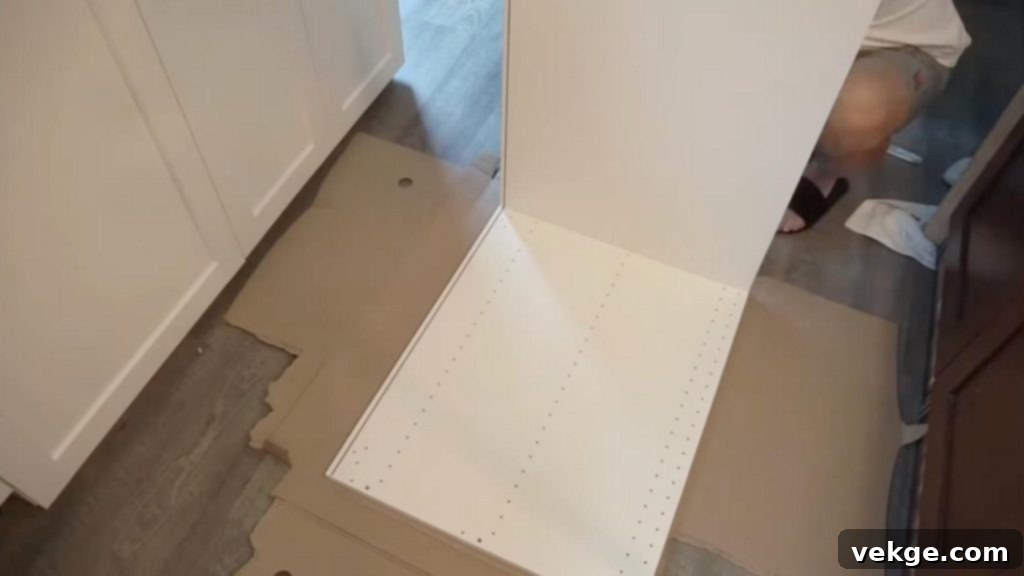
If you’re replacing an existing island, carefully remove the old cabinets and countertop. For a new build, your first task is to finalize the exact footprint of your new island on the floor. Use painter’s tape or a pencil to outline its position, double-checking your measurements against the 36-inch clearance rule. This visual guide will help you ensure proper placement and avoid potential obstructions. Opt for new cabinet units that are both affordable and straightforward to assemble, like those from IKEA, to simplify your planning and construction.
Step 2: Build a Raised Base

Using two-by-four lumber, construct a sturdy wooden frame that matches the exact dimensions of your combined cabinet units. This frame serves multiple purposes: it elevates the cabinets to a comfortable working height (standard kitchen counter height is 36 inches), provides a stable and level platform, and allows for potential floor leveling adjustments. Carefully place the assembled frame exactly where your island will sit, ensuring it’s perfectly level in all directions using a spirit level. This foundational step is critical for the overall stability and appearance of your finished island, preventing any wobbling or unevenness.
Step 3: Assemble and Align Cabinet Units on Frame

Begin by assembling your chosen cabinet units according to the manufacturer’s instructions. Once assembled, carefully place them onto the wooden base frame. Crucially, ensure each cabinet is perfectly aligned with its neighbors and sits flush. Use sturdy clamps to hold the cabinets tightly together while you secure them. Drive wood screws through the side panels of adjacent cabinets to connect them firmly, creating a single, cohesive unit. Pay close attention to keeping the front faces of the cabinets even and level. You might consider leaving a small, consistent space underneath for a “floating” or recessed toe-kick look, which can be covered later for a polished finish.
Step 4: Attach Countertop Using Adhesive
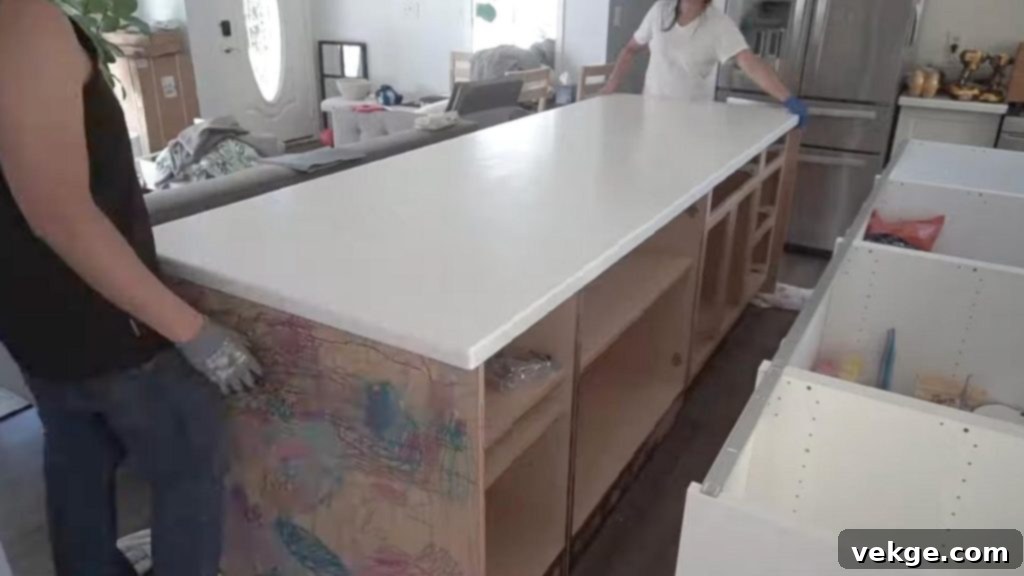
Now for the crowning glory of your island! If you have an existing countertop you plan to reuse, this is a fantastic way to save on costs. Otherwise, install your newly acquired countertop. Apply a generous, even bead of high-quality construction adhesive (like Liquid Nails) along the top edges of your cabinet frames. Carefully lower the countertop into place, ensuring it’s perfectly centered and aligned with any desired overhangs. For heavier countertops, it’s advisable to have an extra pair of hands to help with placement. While some countertops can be secured with screws from underneath, adhesive is often sufficient for a strong bond, especially with standard materials. Allow adequate drying time as per the adhesive manufacturer’s instructions.
Step 5: Install Drawer Fronts and Reuse Hardware
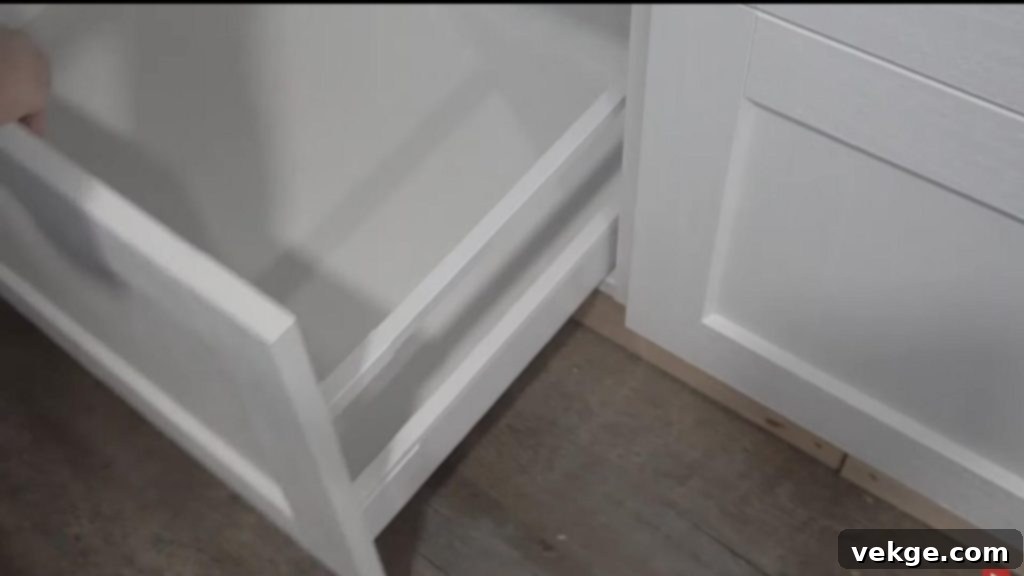
With the main structure in place, it’s time to add the finishing touches that bring your island to life. Install your cabinet doors and drawer fronts, ensuring they open and close smoothly. If your budget allows, consider using soft-close hinges and drawer slides for a premium feel. Reusing your existing handles and pulls is an excellent way to maintain a cohesive look with your main kitchen cabinets while saving money. A cabinet hardware installation jig (like a Kreg KHI-PULL) is invaluable here, ensuring all your pulls are perfectly centered and aligned, giving a truly professional and uniform appearance. This small detail makes a significant difference in the overall aesthetic.
Optional Step 6: Cover Back With Plywood and Add Decorative Slats

This optional but highly recommended step elevates the aesthetic of your DIY island, making it look custom-built rather than assembled. Cut thin quarter-inch plywood to size and nail it securely to the exposed back and sides of your cabinet units. This conceals any gaps, wires, or unfinished cabinet backs, providing a smooth, paint-ready surface. For an even more sophisticated and modern touch, you can then glue on wood veneer slats or decorative trim pieces. This step is purely for visual enhancement, but it dramatically improves the overall finished look of your DIY kitchen island, creating a truly integrated and high-end appearance.
Some Safety Guidelines to Consider

Safety should always be your top priority when undertaking any DIY project. Taking a few simple precautions can prevent accidents, protect you from injury, and ensure your project is a positive experience from start to finish. Before you begin, take a moment to review these essential safety tips:
- Always Wear Safety Glasses and Work Gloves: These are non-negotiable. Safety glasses protect your eyes from sawdust, flying debris, and chemical splashes. Work gloves can prevent splinters, cuts, and provide a better grip on tools and materials.
- Inspect Power Tools Before Each Use: Before plugging in or turning on any power tool, visually check cords for fraying, ensure all safety guards are in place, and verify that switches are functioning correctly. Never use damaged tools.
- Maintain a Clean and Organized Workspace: A cluttered area is an accident waiting to happen. Keep your workspace free of sawdust, stray tools, excess materials, and extension cords that could cause trips or falls.
- Read and Follow Instruction Manuals: This applies to both new tools and any materials (like adhesives or paints). Understanding proper operation and handling instructions is crucial for safety and achieving the best results.
- Get Help with Heavy Lifting: Never try to lift heavy items like countertops, large sheets of plywood, or assembled cabinet pieces by yourself. Enlist a helper to prevent back strain or accidental drops.
- Ensure Proper Ventilation: When using adhesives, paints, stains, or other chemical finishes, always work in a well-ventilated area. Open windows and doors, or use fans, to disperse fumes and protect your respiratory health.
- Keep a First Aid Kit Accessible: Even with all precautions, minor cuts or scrapes can happen. Having a fully stocked first aid kit readily available means you can address small injuries quickly.
- Understand Your Tools: If you’re using a tool for the first time, take a moment to understand its function, controls, and safety features. Practice on scrap material if unsure.
Following these basic safety steps will make your DIY kitchen island project not only smoother and more efficient but also significantly safer and more enjoyable.
Watch How It’s Done: DIY Kitchen Island
Sometimes, seeing is believing, and a visual guide can make all the difference. For those who prefer to watch the construction process unfold, I highly recommend checking out this helpful video.
For more detailed visual information and to see these steps in action, do check out the video by Fix This House. It provides excellent demonstrations that can complement this written guide.
DOWNLOAD THE ENTIRE DIY KITCHEN ISLAND GUIDE FROM THIS PDF
CLICK HERE
Certain Tips for Professional Results
While building your kitchen island, aiming for professional-quality results will ensure it looks fantastic and functions perfectly for years to come. Here are some expert tips you can follow to achieve that polished, custom-built look:
- Use a Level Tool Frequently: Don’t just level the base once. Continuously check for level and plumb (vertical straightness) at every stage—after placing cabinets, before attaching the countertop, and when installing doors. An island that isn’t perfectly level will look amateurish and could cause drawers to slide open or doors to hang crooked.
- Sand All Exposed Edges: Before painting, staining, or even just leaving edges natural, sand all visible wood edges of the cabinets, base, and any trim pieces. This prevents splinters, creates a smoother surface for finishes, and gives a more refined appearance.
- Pre-drill Your Holes: Especially when working with hardwoods or near edges, always pre-drill pilot holes for your screws. This prevents wood from splitting, ensures screws drive in straight, and reduces the chance of damaging your materials.
- Apply Wood Glue for Extra Strength: Whenever you’re screwing two pieces of wood together, apply a thin bead of wood glue to the joint first. The glue significantly increases the bond’s strength and durability, making your island incredibly robust.
- Maintain Even Cabinet Door Gaps: Use small spacers (e.g., pennies, shims, or plastic shims) between cabinet doors and drawer fronts during installation. This ensures consistent, even gaps all around, which is a hallmark of professional cabinetry.
- Match Screws to Your Materials: Using screws that are too long can poke through the other side, and screws that are too short won’t provide adequate holding power. Always select screws of the appropriate length and type for the materials you are joining.
- Test Drawers and Doors Repeatedly: Install drawer slides and hinges, then test the drawers and doors multiple times throughout the process. This allows you to catch and correct any alignment issues, sticking points, or functional problems early on, before they become difficult to fix.
- Measure Twice, Cut Once: This classic carpenter’s adage is absolutely crucial. Double-checking every measurement before making a cut can save you from costly mistakes, wasted materials, and frustrating delays.
- Clean as You Work: Regularly clear away sawdust, scraps, and excess adhesive. A clean workspace is safer, allows you to see your progress more clearly, and helps you spot any imperfections or mistakes quickly.
- Pay Attention to Visible Joints and Seams: These small details often distinguish between a good DIY project and a great one. Ensure all visible joints are tight, gaps are minimized, and any seams are carefully filled and sanded smooth for a flawless finish.
- Use Matching Wood Putty: For any small gaps, nail holes, or screw holes that will be visible, use wood putty that closely matches the color of your cabinet or finish. This blends imperfections seamlessly into the overall design.
- Check Drawer Smoothness Before Countertop: Before permanently attaching your countertop, fully install and test all drawers and doors. Once the countertop is on, making adjustments to drawer slides or hinges becomes significantly harder.
By diligently following these steps, you’ll be able to create a kitchen island that not only functions beautifully but also boasts a professional, high-quality finish, rivaling custom-built units.
Best Customization Options to Look After
One of the greatest advantages of building your own kitchen island is the ability to customize it exactly to your lifestyle and aesthetic preferences. Beyond the basic structure, there’s a world of options to make your island truly unique and highly functional. Let me share some detailed customization options, complete with estimated price ranges based on current market rates, to help you plan and budget effectively.
| Category | Item | Price Range (USD) | Why It’s a Great Addition |
|---|---|---|---|
| Storage Solutions | Pull-out Spice Racks | $30 – $100 | Keeps spices organized and easily accessible, freeing up cabinet or pantry space. |
| Built-in Knife Block Drawer Inserts | $40 – $120 | Safely stores knives out of sight, protecting blades and keeping counters clear. | |
| Vertical Dividers for Baking Sheets/Cutting Boards | $25 – $75 | Organizes flat items vertically, making them easy to grab without rummaging. | |
| Deep Drawer Organizers for Pots/Pans | $50 – $150 | Custom inserts that keep bulky cookware organized and prevent scratching. | |
| Hidden Trash & Recycling Pull-outs | $80 – $200 | Conceals unsightly trash and recycling bins, maintaining a clean kitchen aesthetic. | |
| Roll-out Shelves for Easy Access | $45 – $150 per shelf | Converts fixed lower cabinet shelves into easily accessible drawers, perfect for small appliances. | |
| Functional Add-ons | Built-in Electrical Outlets | $50 – $150 (excluding electrician cost) | Essential for plugging in blenders, mixers, and charging devices, making the island a true workstation. |
| Under-cabinet Lighting Strips | $30 – $100 | Adds task lighting for prep work and ambient lighting for a cozy atmosphere. | |
| Towel Bars on End Panels | $20 – $60 | Conveniently keeps kitchen towels within reach without cluttering the countertop. | |
| Built-in Paper Towel Holder | $25 – $75 | Keeps paper towels handy but out of sight or off the counter. | |
| Hooks for Hanging Utensils | $15 – $45 | Provides easy access to frequently used tools, adding a rustic or industrial touch. | |
| Pull-out Cutting Board | $60 – $150 | Offers an extra prep surface that can be tucked away when not in use, saving counter space. | |
| Countertop Choices | Butcher Block | $200 – $600 | Warm, natural, and food-safe; can be sanded and re-finished over time. |
| Laminate | $150 – $400 | Most affordable, wide range of colors/patterns, easy to clean. | |
| Solid Surface Material | $400 – $1,000 | Non-porous, seamless, and repairable; available in many colors. | |
| Granite or Marble | $500 – $1,500 | Luxurious, durable, and natural stone with unique patterns. Requires sealing. | |
| Quartz | $600 – $1,800 | Engineered stone, highly durable, non-porous, and low maintenance; consistent patterns. | |
| Stainless Steel | $400 – $1,200 | Industrial look, highly hygienic, heat-resistant, and very durable. | |
| Style Elements | Decorative End Panels | $100 – $300 | Finishes the sides of the island, matching cabinet doors or offering a contrasting design. |
| Corbels or Brackets | $40 – $120 each | Adds architectural detail and can provide support for countertop overhangs. | |
| Custom Molding | $5 – $15 per linear foot | Adds a refined, built-in look to the base, top, or sides of the island. | |
| Cabinet Paint or Stain | $30 – $100 | Allows you to match or contrast your island with existing kitchen decor. | |
| Designer Hardware | $5 – $30 per piece | Upgrades the look of your island with unique knobs and pulls. | |
| Glass Cabinet Doors | $100 – $300 per door | Showcases decorative items, adds visual depth, and can lighten the overall feel. | |
| Extra Features | Wine Rack Inserts | $50 – $200 | Perfect for wine enthusiasts, storing bottles neatly and stylishly. |
| Cookbook Shelf | $40 – $100 | Keeps your favorite recipes easily accessible and displayed. | |
| Charging Station Drawer | $100 – $300 | A dedicated, hidden spot for charging phones and tablets, reducing counter clutter. | |
| Built-in Microwave Shelf | $150 – $400 | Frees up counter space by integrating the microwave into the island structure. | |
| Pet Feeding Station | $100 – $300 | A pull-out or recessed area for pet bowls, keeping them out of the main walkway. | |
| Hidden Step Stool Storage | $75 – $200 | A clever way to store a step stool for accessing high shelves without it being visible. | |
| Seating Options | Basic Bar Stools | $50 – $150 each | Offers casual seating for quick meals or socializing. |
| Breakfast Bar Overhang | $200 – $500 (extra countertop material) | Extends the countertop to create comfortable knee space for seating. | |
| Built-in Bench Seating | $300 – $800 | Integrated seating that can also offer additional storage underneath. | |
| Foot Rail | $60 – $150 | Adds comfort and a classic pub-style look to a breakfast bar. | |
| Pull-out Seats | $200 – $500 each | Seats that can be tucked away completely when not in use, maximizing space. |
Remember, these prices are estimates and can fluctuate significantly based on:
- Your Geographical Location: Material and labor costs vary by region.
- Material Quality: Premium materials naturally command higher prices.
- Brand Choices: Designer brands often cost more than generic options.
- Installation Costs: If you hire professionals for specific elements (like electrical), this will add to your budget.
- Current Market Rates: Prices for materials can change due to supply and demand.
I always recommend prioritizing one or two main features that you truly need and will use regularly. As your budget permits, you can then add other desired customizations. This approach ensures you get the most impactful additions first, maximizing functionality and personal style while keeping your project financially manageable.
Conclusion
Building your own kitchen island might initially appear to be a daunting project, but as this comprehensive guide demonstrates, it is absolutely within reach for any enthusiastic DIYer. With careful planning, a clear understanding of your needs, and a systematic approach, you can create a truly functional and beautiful island that perfectly complements your kitchen.
Having tackled several island builds myself, I can confidently say that the key to success lies in taking your time with every measurement, ensuring precise alignment during assembly, and never rushing the process. The satisfaction of stepping back and admiring a piece you’ve built with your own hands is truly immense.
Always remember to prioritize safety above all else – wear your protective gear and follow best practices for tool use. Select high-quality materials that will stand the test of time and provide the durability your busy kitchen demands. Your DIY kitchen island is more than just an extra surface; it’s an investment in your home’s functionality, aesthetics, and your personal pride in a job well done. It will undoubtedly become a cherished heart of your cooking and gathering space, so it’s worth doing right.
Now that you have all the information and steps, I encourage you to embark on this rewarding project. Want to show off your incredible DIY kitchen island, or perhaps you’ve encountered a specific challenge during your build? Share your project photos and any questions you have in the comments section below! Let’s celebrate your creativity and help each other achieve remarkable results. I can’t wait to see what you create!
