Ultimate Guide to Succulent Propagation: Multiply Your Plants Easily
Many aspiring plant enthusiasts often find themselves challenged by succulents. You might have brought home a stunning succulent, only to watch it wither and die within weeks, leading to frustration and wasted effort.
But don’t let past experiences discourage you. With the right knowledge and a few simple techniques, you can effortlessly grow and multiply your succulent collection right in your own home. Imagine a vibrant garden overflowing with healthy succulents, all propagated by your own hands!
This comprehensive guide will walk you through the entire process of successful succulent propagation, step by step. You’ll explore the most effective methods tailored for different succulent types, learn about the essential tools required, and gain insights into common mistakes to avoid. Whether you’re aiming to expand your collection, save money, or simply enjoy the satisfaction of nurturing new life, this guide has you covered.
By the time you finish reading, you will possess the practical skills and confidence to create a thriving succulent oasis without significant cost. Get ready to transform a single plant into a multitude of beautiful, healthy succulents.
Regardless of your current experience level, from absolute beginner to seasoned plant lover, this guide is designed to empower you to become a true succulent propagation expert.
Introduction to Succulent Propagation
Mastering the art of growing new succulents from existing ones is an incredibly valuable skill for any plant enthusiast. This section will introduce you to what propagation entails and highlight its numerous benefits, explaining why it’s a practice every succulent owner should embrace.
What is Succulent Propagation?
Propagation is the natural and cultivated process of creating new plants from various parts of a parent plant. For succulents, this typically involves using a healthy leaf, a segment of a stem, or naturally occurring offshoots (also known as “pups”) to generate entirely new, independent plants. It mirrors how these resilient plants reproduce in their often-harsh native environments, where even a detached leaf can take root and grow.
In the realm of plant cultivation, propagation is a foundational skill. It enables gardeners to expand their collections without purchasing new specimens, maintain the genetic traits and health of beloved plants, and even contribute to the preservation of rare or cherished species. Succulents are particularly well-suited for propagation due to their remarkable ability to regenerate from small fragments, a trait that ensures their survival in dry climates where leaves or stems might be easily shed.
Why is Succulent Propagation Important?
Engaging in succulent propagation offers a wide array of advantages that go beyond simply getting more plants:
- Cost-Effective Gardening: Propagation allows you to create numerous new plants for free, eliminating the need to continuously buy new ones. This makes expanding your collection incredibly economical.
- Preserves Plant Genetics: By propagating from a parent plant, you can create exact genetic clones, ensuring that desirable traits like unique colors, growth habits, or flowering patterns are maintained in your new plants.
- Problem-Solving and Rejuvenation: If a succulent becomes “leggy” (stretched out due to lack of light), grows too large, or suffers localized damage, propagation provides an opportunity to ‘restart’ the plant. You can take healthy cuttings and grow a fresh, compact specimen, effectively rejuvenating the plant.
- Enriching Learning Opportunity: The process of propagation offers a hands-on lesson in plant biology, growth cycles, and environmental needs. It deepens your understanding of plant care and helps you become a more intuitive and skilled gardener.
- Efficient Space Management: Through propagation, you gain control over the size and number of plants in your garden. You can easily create smaller plants from larger ones, or multiply a single plant to fill out a display.
- Thoughtful Gift-Giving: Propagated succulents make heartfelt and personal gifts for friends, family, or fellow plant enthusiasts. Sharing your successful propagations is a wonderful way to spread joy and your passion for plants.
- Promotes Sustainability: By propagating your own succulents, you reduce the demand for commercially grown plants, which can sometimes involve unsustainable harvesting practices. This contributes to protecting natural habitats and biodiversity.
Overview of Succulent Propagation Methods
There are four primary and distinct ways to propagate succulents, each suited to different plant types and offering unique advantages:
- Leaf Cuttings: This method involves using a single, healthy leaf to grow an entirely new plant. It’s often slow but highly rewarding, especially for rosette-forming succulents like Echeveria and Sedum.
- Stem Cuttings: Utilizing a piece of stem with several leaves attached, this is typically a faster method for establishing new plants, particularly effective for trailing or branching succulents like Crassula and many Sedum varieties.
- Offsets (Pups): Many succulents naturally produce “baby” plants or “pups” at their base or along their stems. Separating these offsets from the parent plant is one of the easiest and quickest propagation methods, common for Agave, Aloe, and Haworthia.
- Seeds: While requiring the most patience and specific conditions, growing new succulents from seeds allows for genetic diversity and is ideal for mass propagation or cultivating unique hybrids.
Understanding which method works best for your specific succulent varieties will significantly increase your propagation success rate.
Essential Tools and Materials for Succulent Propagation
To embark on your succulent propagation journey successfully, having the right tools and materials is crucial. This section outlines everything you’ll need and provides practical advice on how to prepare them for optimal use, ensuring a smooth and hygienic process.
Comprehensive Tools and Materials List
- Clean, Sharp Scissors or Pruning Shears: Essential for making precise, clean cuts on stems and leaves, minimizing damage and disease risk.
- Small Pots or Propagation Trays: Choose containers with excellent drainage holes to prevent waterlogging, which is detrimental to succulents.
- Well-Draining Succulent/Cactus Soil Mix: A specialized mix that allows water to pass through quickly, crucial for preventing root rot.
- Rooting Powder (Optional but Recommended): Can significantly accelerate root development and improve success rates, especially for stem cuttings.
- Spray Bottle or Fine Misting Can: For gentle and controlled watering of delicate cuttings and seedlings.
- Paper Towels or a Clean Cloth: For drying cuttings and maintaining a clean work surface.
- Small Tray or Shallow Dish: Ideal for callousing leaves and stem cuttings before planting.
- Clear Plastic Wrap or Dome (Optional): Useful for creating a humid microclimate for seeds or very young cuttings, though less frequently used for standard succulent propagation.
- Rubbing Alcohol or Hand Sanitizer: For sterilizing your cutting tools between uses, preventing the spread of disease.
Preparing Your Propagation Materials
Proper preparation is key to a successful start. Follow these steps to get your materials ready:
- Sterilize Your Tools: Before making any cuts, thoroughly wash your scissors or pruning shears with soap and water, then wipe them down with rubbing alcohol. This critical step eliminates bacteria and fungal spores that could infect your precious cuttings and spread plant diseases.
- Select Appropriate Pots: Choose pots or trays that are sized appropriately for your cuttings – small pots are generally better for single cuttings as they dry out faster. Always ensure they have ample drainage holes to prevent water from accumulating.
- Prepare Your Soil Mix: If you’re not using a pre-made succulent/cactus mix, create your own by blending regular potting soil with an equal part of coarse sand, perlite, or pumice. This enhances drainage and aeration, which succulents absolutely require.
- Organize Your Workspace: Lay out paper towels, newspaper, or a clean mat on your work surface. This keeps your area tidy and makes cleanup easier, while also providing a clean, dry surface for callousing cuttings.
By taking the time to properly prepare these items, you’ll establish a hygienic and organized environment, giving your new succulent plants the best possible start to grow strong and healthy.
Propagating Succulents from Leaf Cuttings
Leaf propagation is an incredibly satisfying and cost-effective method to multiply many types of succulents, especially rosette-forming varieties like Echeveria, Sedum, and Graptopetalum. Follow these detailed steps to successfully grow new plants from single leaves.
Step 1: Selecting the Right Leaf
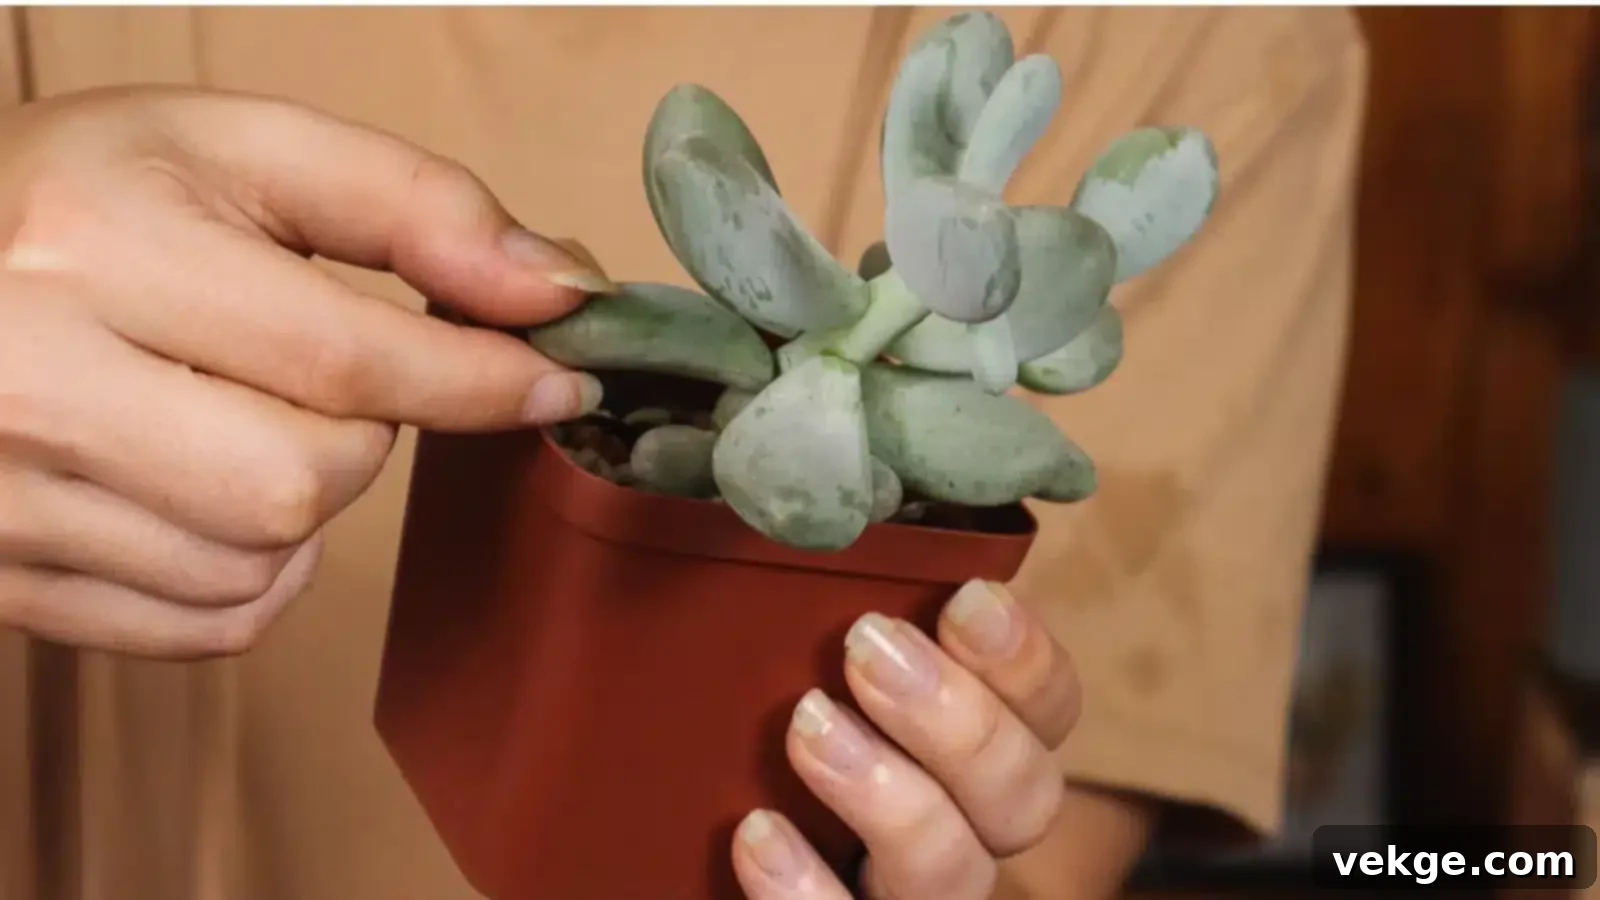
- Choose Mature, Plump Leaves: Always select healthy, full-bodied leaves from the lower, more mature sections of the parent plant. These leaves have stored enough energy and moisture to support new growth.
- Vibrant and Unblemished: Look for leaves with a vibrant, characteristic color, free from any signs of damage, disease, or pests.
- Avoid Immature or Damaged Leaves: Steer clear of very young, small leaves at the center of the rosette, or those that appear wrinkled, discolored, soft, or damaged, as they are less likely to successfully propagate.
Step 2: Gently Removing the Leaf
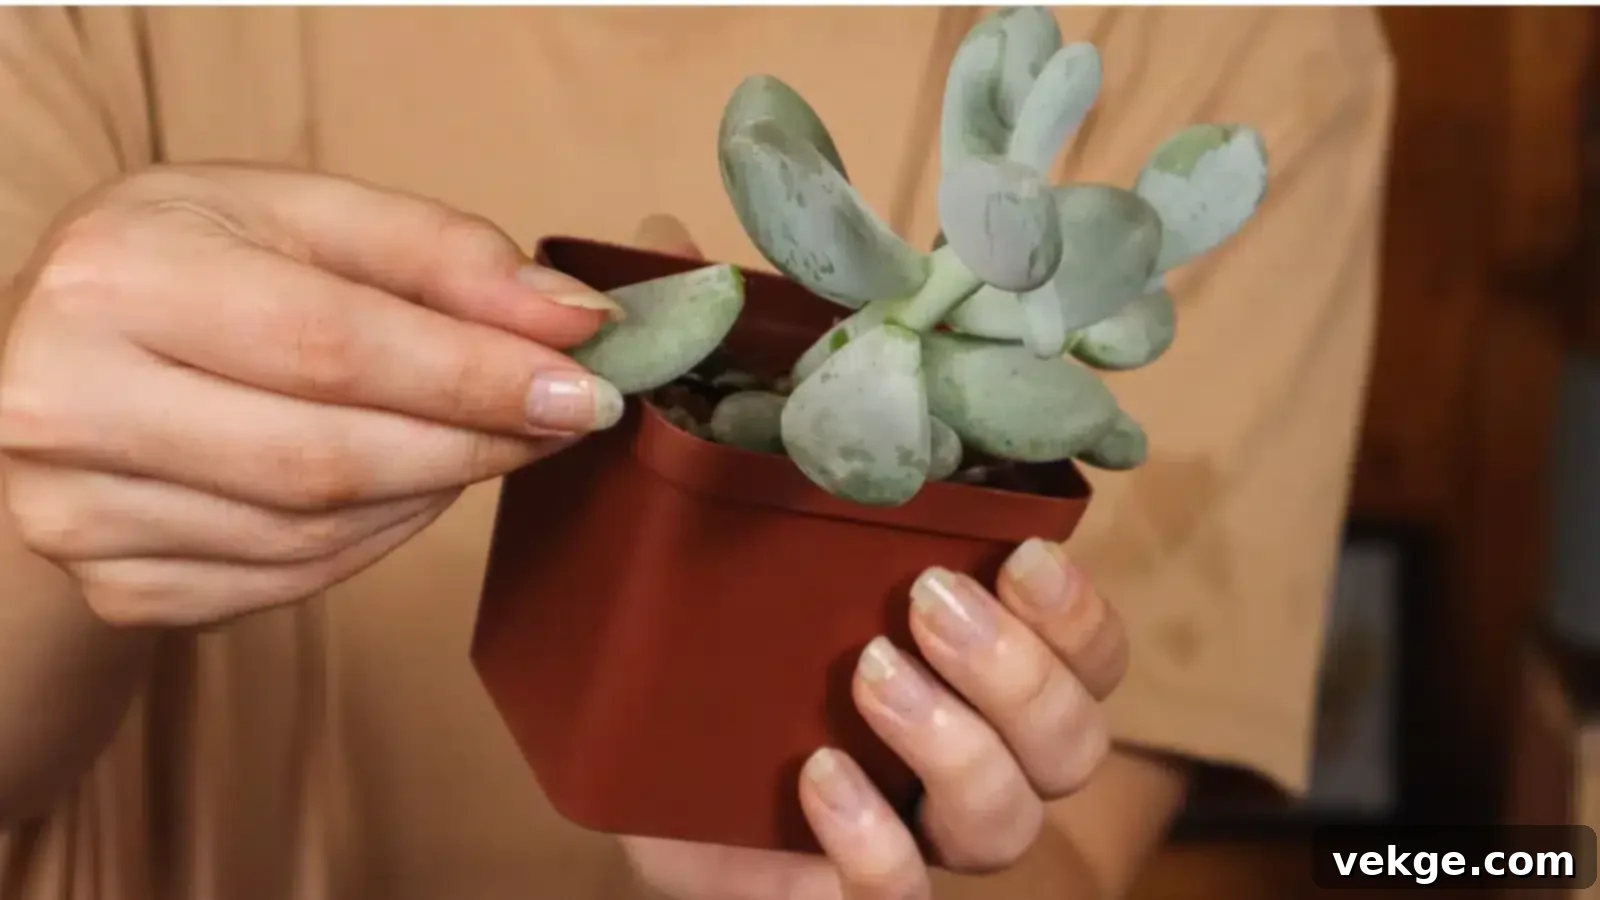
- Gentle Detachment: Hold the chosen leaf gently between your thumb and forefinger.
- Twist and Pull: Carefully wiggle or twist the leaf from side to side while pulling it away from the main stem. The goal is to get a clean break at the stem connection.
- Crucial Clean Break: Ensure the entire base of the leaf, including the tiny meristematic tissue (the growth point), remains intact. If the leaf tears or a piece is left behind on the stem, it’s highly unlikely to sprout roots or new plantlets.
Step 3: Callousing the Leaf Cuttings
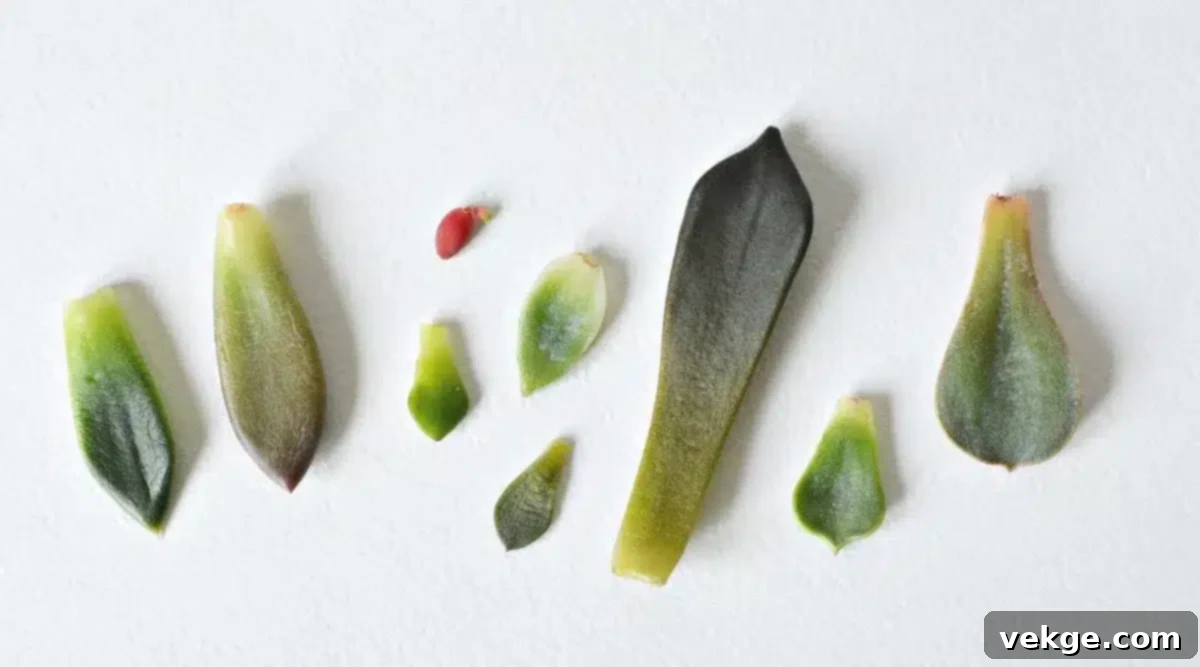
- Dry Resting Period: Place the detached leaves on a dry paper towel, newspaper, or a shallow tray.
- Warm, Shaded Spot: Allow them to sit in a warm, dry, and shaded area (away from direct sunlight) for 2 to 7 days, or even longer depending on humidity.
- Forming a Callus: Wait until the cut end of each leaf forms a dry, hardened, scab-like layer, known as a callus. This vital step acts as a protective barrier, preventing moisture from entering the cut and causing rot when the leaf is eventually planted. It’s the succulent’s natural wound-healing process.
Step 4: Planting and Rooting the Leaves
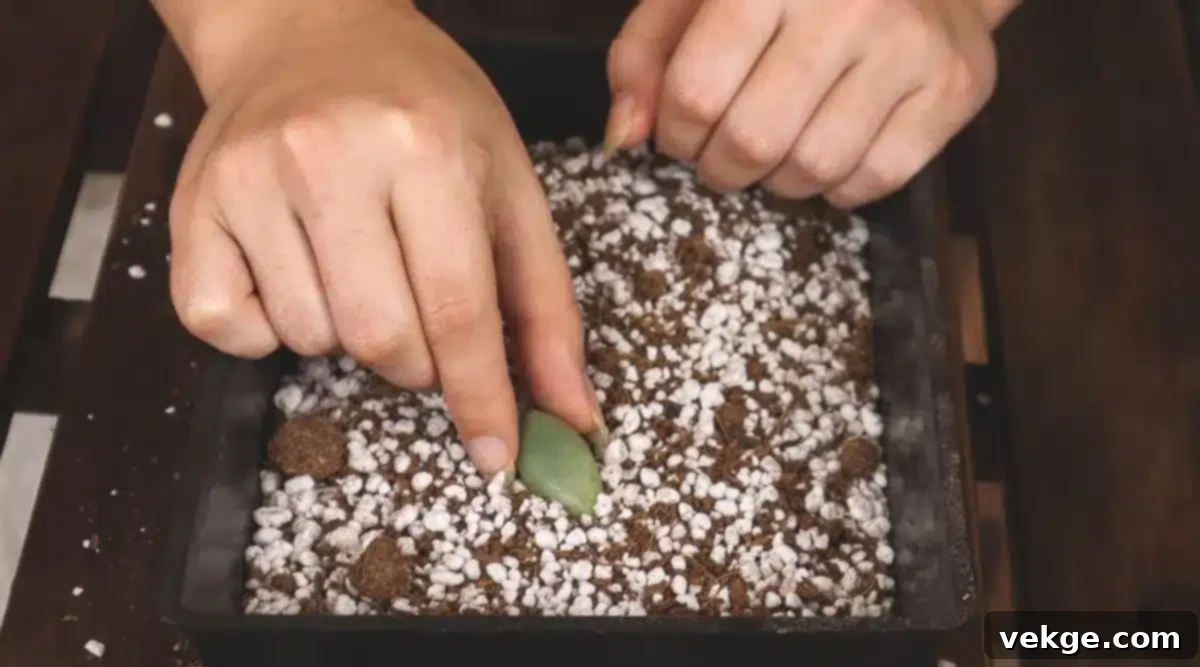
- Prepare a Propagation Tray: Fill a shallow tray or small pots with a well-draining cactus or succulent soil mix.
- Surface Placement: Gently lay the calloused leaves on the surface of the soil, ensuring the cut end is facing downwards and barely touching the soil. Do not bury the leaf; it needs light exposure.
- Initial Watering: Do not water immediately after planting. Wait a few days, then mist the soil lightly every 3-4 days, or whenever the soil feels completely dry, to maintain a slightly moist (not wet) environment around the rooting area.
Tips for Successful Leaf Propagation
- Bright, Indirect Light is Key: Position your propagation tray in an area that receives bright, indirect light. Avoid harsh direct sun, which can scorch the delicate leaves and emerging plantlets.
- Conservative Watering: Overwatering is the most common cause of failure. Keep the soil barely moist; never soggy. Allow the soil to dry out completely between mistings.
- Patience is a Virtue: Expect to see tiny roots emerging from the calloused end within 2-3 weeks, followed by miniature leaves forming above the soil in 4-6 weeks. Some species may take longer.
- Varying Success Rates: Be aware that not every leaf will successfully propagate. Success rates vary depending on the succulent species, environmental conditions, and the health of the original leaf. It’s wise to propagate more leaves than you need.
- Nurturing New Plantlets: Once new plants begin to form, allow them to grow until they are about 1 inch tall and the ‘mother leaf’ has shriveled and fallen off naturally or can be easily detached. The mother leaf provides nutrients to the new plant.
- Transplanting New Succulents: Gently separate the new plantlets from any remaining mother leaf. Plant these new, rooted succulents into their own small pots filled with fresh, well-draining succulent soil.
Remember, patience is paramount in succulent propagation. Some varieties will root and grow new plantlets relatively quickly, while others may take several months. Consistent, gentle care for your leaf cuttings will soon reward you with a flourishing collection of new, healthy plants.
For more detailed information, you can visit here.
Propagating Succulents from Stem Cuttings
Propagating succulents from stem cuttings is often a faster and more straightforward method than leaf propagation, especially for succulents that have grown “leggy” or have branching structures. This method allows you to quickly establish new, robust plants. Follow these steps for the best results:
Step 1: Selecting a Healthy Stem
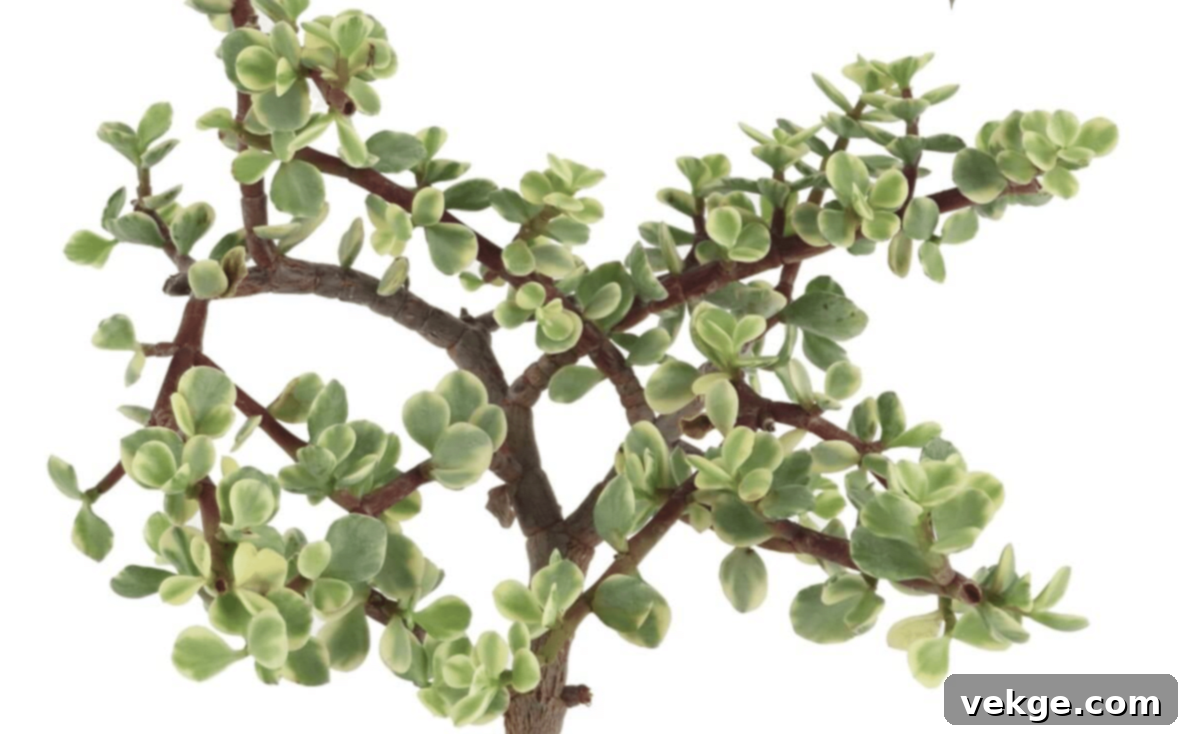
- Choose a Vigorous Stem: Select a healthy, firm stem that has at least 2-3 inches of bare stem below the leaves, allowing space for new roots to form. It should also have several healthy leaves attached.
- Look for Good Color and Firmness: The stem should exhibit its characteristic vibrant color and feel firm to the touch. Avoid stems that appear soft, mushy, or discolored, as these may indicate disease or rot.
- Ideal for Leggy Plants: This method is perfect for succulents that have become elongated or “leggy” due to insufficient light, as it helps to create a more compact and attractive plant.
- Avoid Unhealthy Stems: Never take cuttings from plants that show signs of pest infestation, disease, or extreme overwatering, as these issues will likely transfer to your new cuttings.
Step 2: Making the Cut
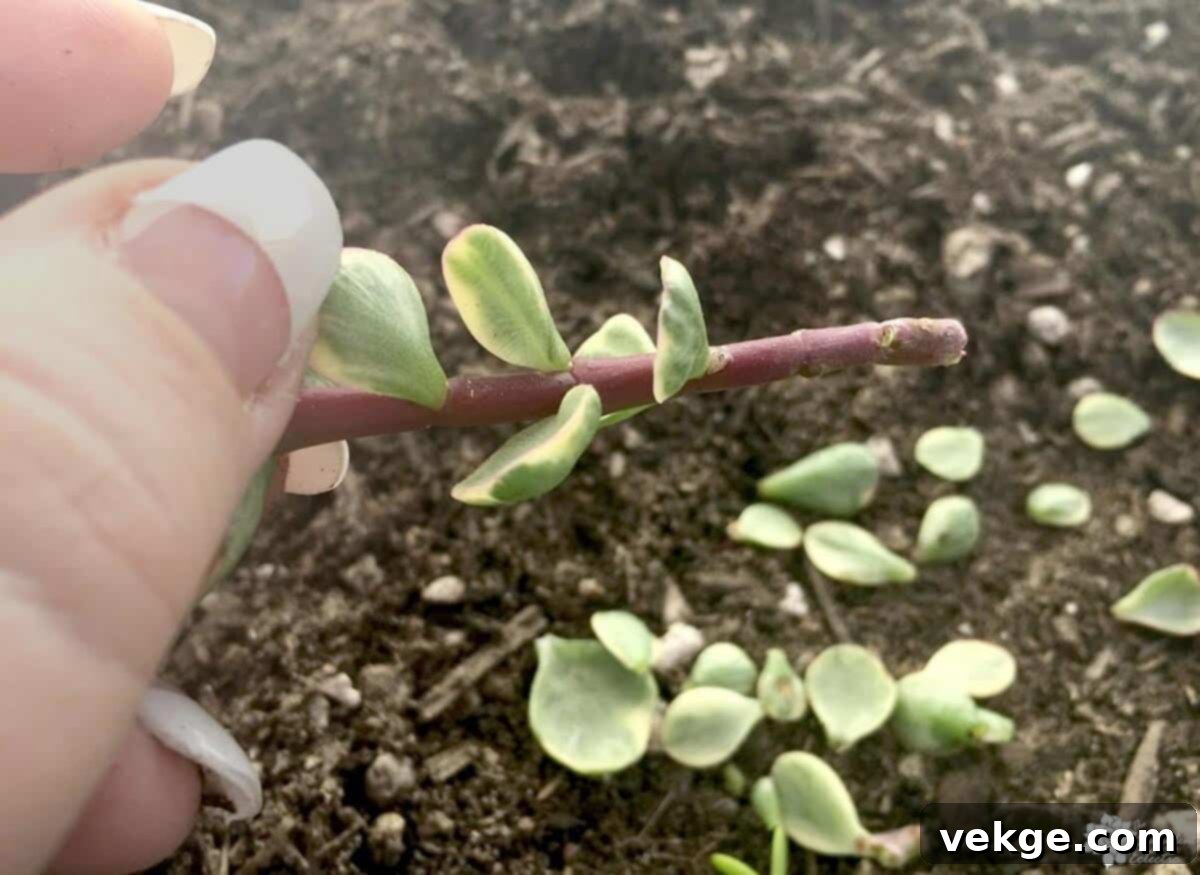
- Use Sterile Tools: Always use clean, sharp pruning shears or a knife. Sterilize your tool with rubbing alcohol before each cut to prevent the introduction of diseases.
- Precise Cut Below a Node: Make a clean, straight cut just below a “node” (the point where leaves grow from the stem). Removing the lower leaves will expose more stem for rooting.
- Minimize Damage: A sharp, clean cut is essential to prevent crushing the stem tissue, which can hinder callousing and root development.
Step 3: Allowing Cuttings to Callous
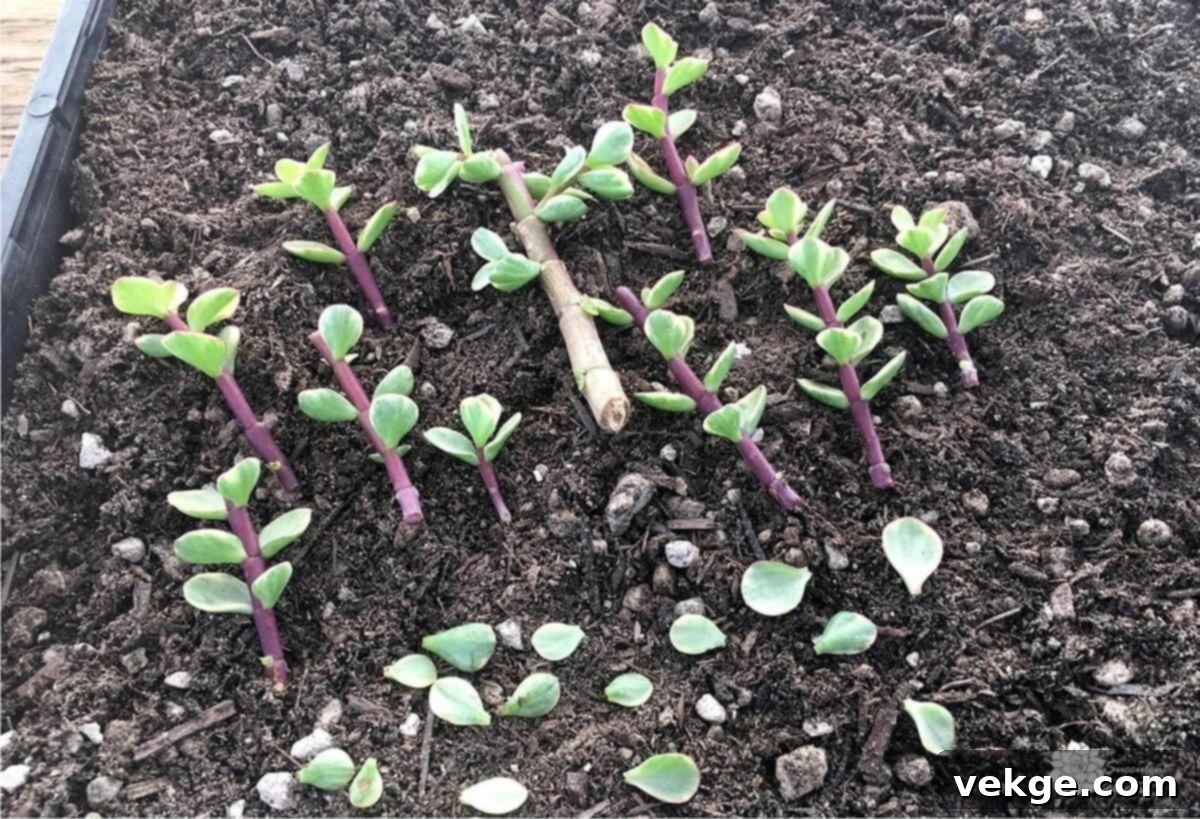
- Dry Period is Crucial: Place the freshly cut stems on a dry paper towel or directly on a layer of dry, well-draining succulent soil. Allow them to dry in a warm, shaded spot for 2 to 7 days.
- Forming a Protective Barrier: This drying period allows a protective callus to form over the cut end. The callus is vital for preventing the cutting from absorbing too much moisture and rotting once planted.
- No Water During Callousing: Do not water the cuttings during this phase. They rely on their stored moisture.
- Rooting Hormone (Optional): Once calloused, you can dip the cut end into rooting hormone powder to encourage faster and stronger root development, though many succulents root successfully without it.
Step 4: Planting the Cuttings
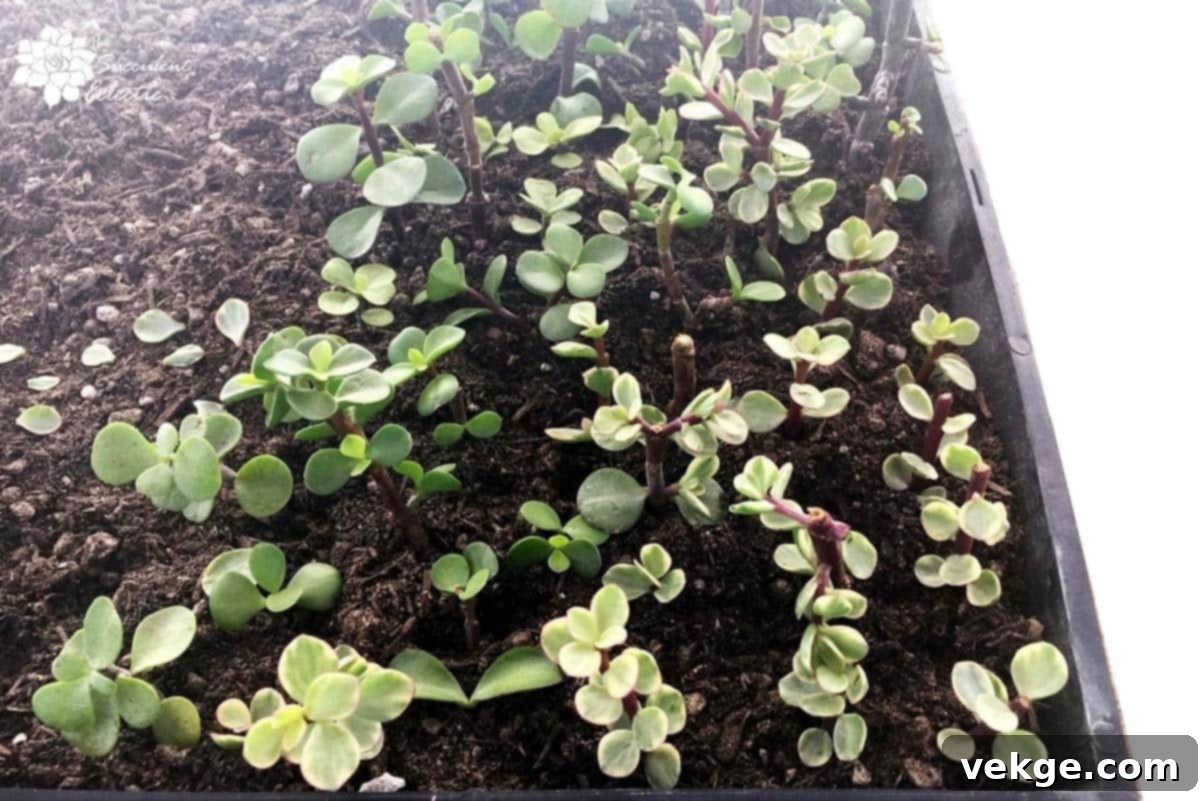
- Use Appropriate Soil: Fill small pots or a propagation tray with a well-draining succulent or cactus soil mix.
- Shallow Planting: Insert the calloused end of each stem cutting about 1-2 inches deep into the soil. Ensure the cutting is stable and can stand upright on its own.
- Resist Immediate Watering: Do not water immediately after planting. Wait for another 3-5 days to allow the cutting to adjust to its new environment and further minimize any risk of rot.
Step 5: Caring and Monitoring for Root Growth
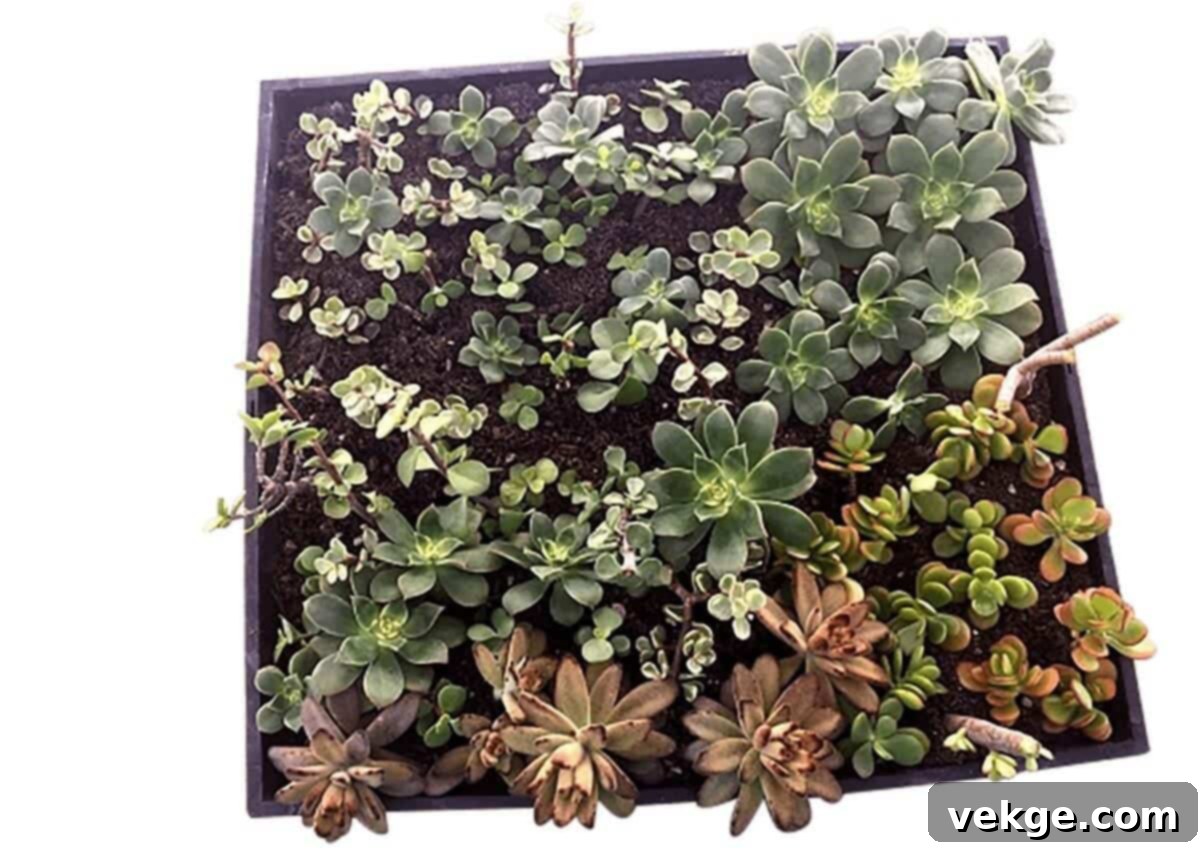
- Begin Misting After a Few Days: After the initial waiting period (3-5 days post-planting), begin to mist the soil lightly every 3-5 days, or when the soil is completely dry. The goal is to provide just enough moisture to encourage roots without making the soil soggy.
- Mindful Watering: Remember that succulents prefer dry conditions, so err on the side of underwatering rather than overwatering. Excessive moisture is the primary killer of succulent cuttings.
- Optimal Light Conditions: Place the cuttings in a location that receives bright, indirect light. Direct, harsh sunlight can scorch the unrooted cuttings, while too little light will inhibit root growth.
- Check for Roots: After 2-4 weeks, you can gently tug on a cutting. If there’s resistance, it indicates that roots have begun to form. Avoid pulling too hard to prevent damage.
- Gradual Transition: Once roots are well-established and the cutting shows signs of new leaf growth, you can gradually transition the plant to a slightly larger pot and begin a more regular succulent watering schedule.
Tips for Stem Cutting Success
- Bright, Indirect Light is Essential: Provide ample light to encourage vigorous root development and prevent etiolation (stretching).
- Water Sparingly: Consistency in allowing soil to dry out between waterings is crucial. When in doubt, wait one more day before watering.
- Patience Rewards: Rooting takes time. Some succulents root within a few weeks, while others can take months. Do not give up if you don’t see immediate results.
- Experiment with Species: Different succulent types may respond slightly differently to propagation. Note which species root fastest for future success.
- Inspect Regularly: Routinely check your cuttings for signs of rot (softness, blackening) or pests. Address any issues promptly.
Growing new plants from stem cuttings is a highly effective way to expand your succulent collection or give an old plant a fresh start. With consistent care and a keen eye, you’ll soon be enjoying numerous new, healthy succulents.
For more detailed information, you can visit here.
Propagating Succulents from Offsets (Pups)
Propagating succulents from offsets, commonly known as “pups” or “chicks,” is arguably the easiest and most reliable method, as these are essentially pre-made baby plants. Many succulent varieties like Echeveria, Aloe, Haworthia, and Sempervivum readily produce offsets, making this an ideal way to expand your collection. Here’s how to do it:
Step 1: Identify Mature Offsets
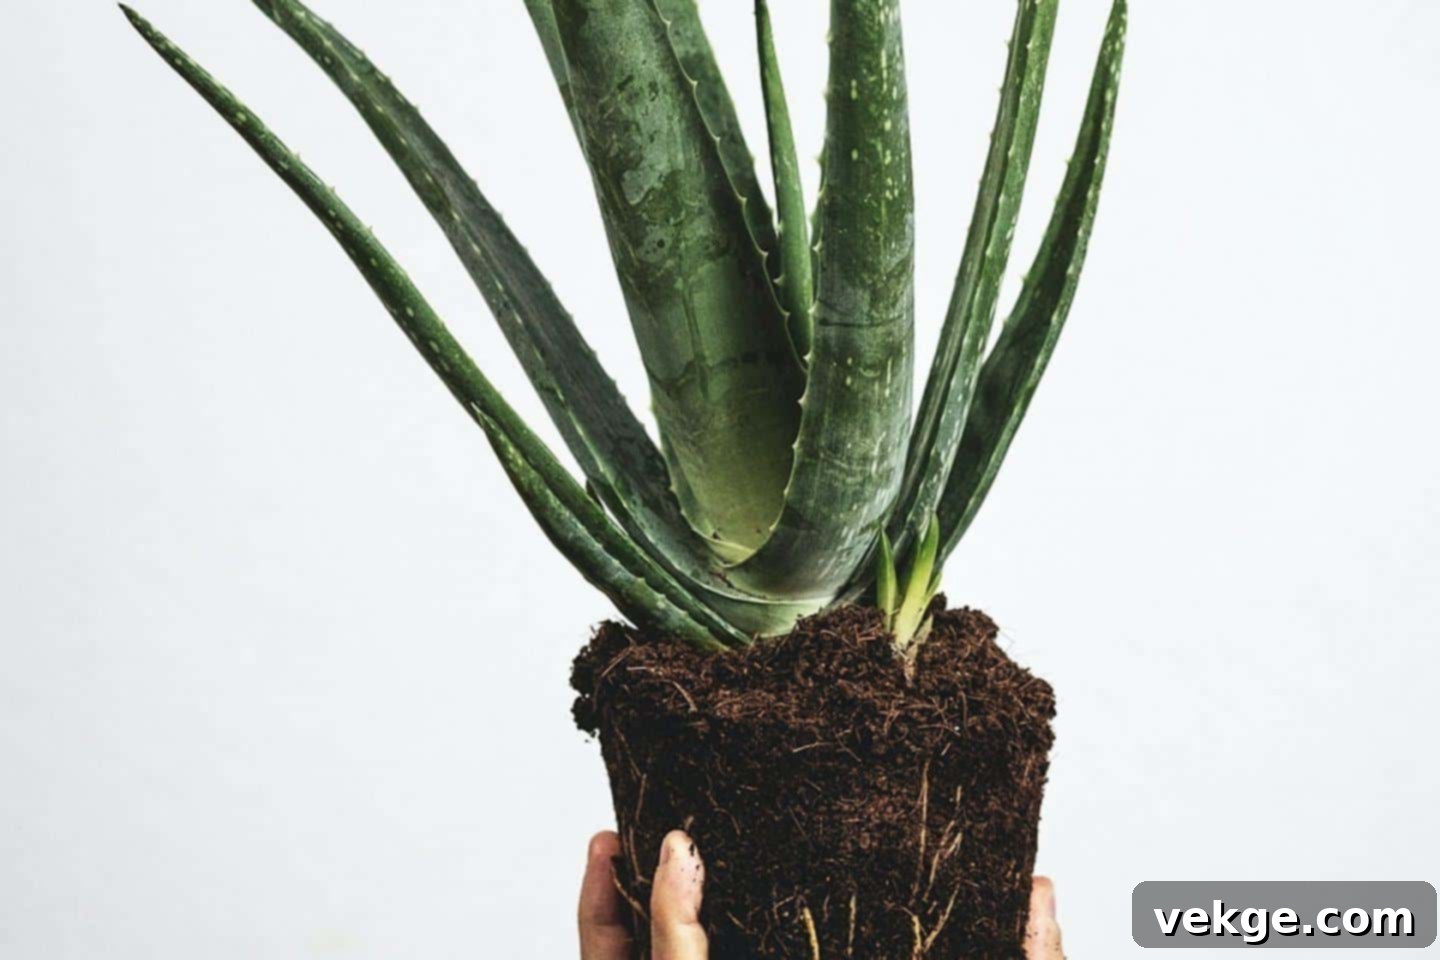
- Look for Distinct Baby Plants: Offsets are miniature versions of the parent plant that grow from the base, side, or sometimes even the stem of the mother plant.
- Size Matters: Choose offsets that are at least one-third to one-half the size of the mother plant. Larger pups have a higher chance of successful independent growth.
- Check for Roots (if possible): Ideally, select offsets that have started to develop some of their own roots. These will establish much faster. If the offset doesn’t have visible roots, it will still grow, but may take longer to establish.
Step 2: Gently Remove the Offset
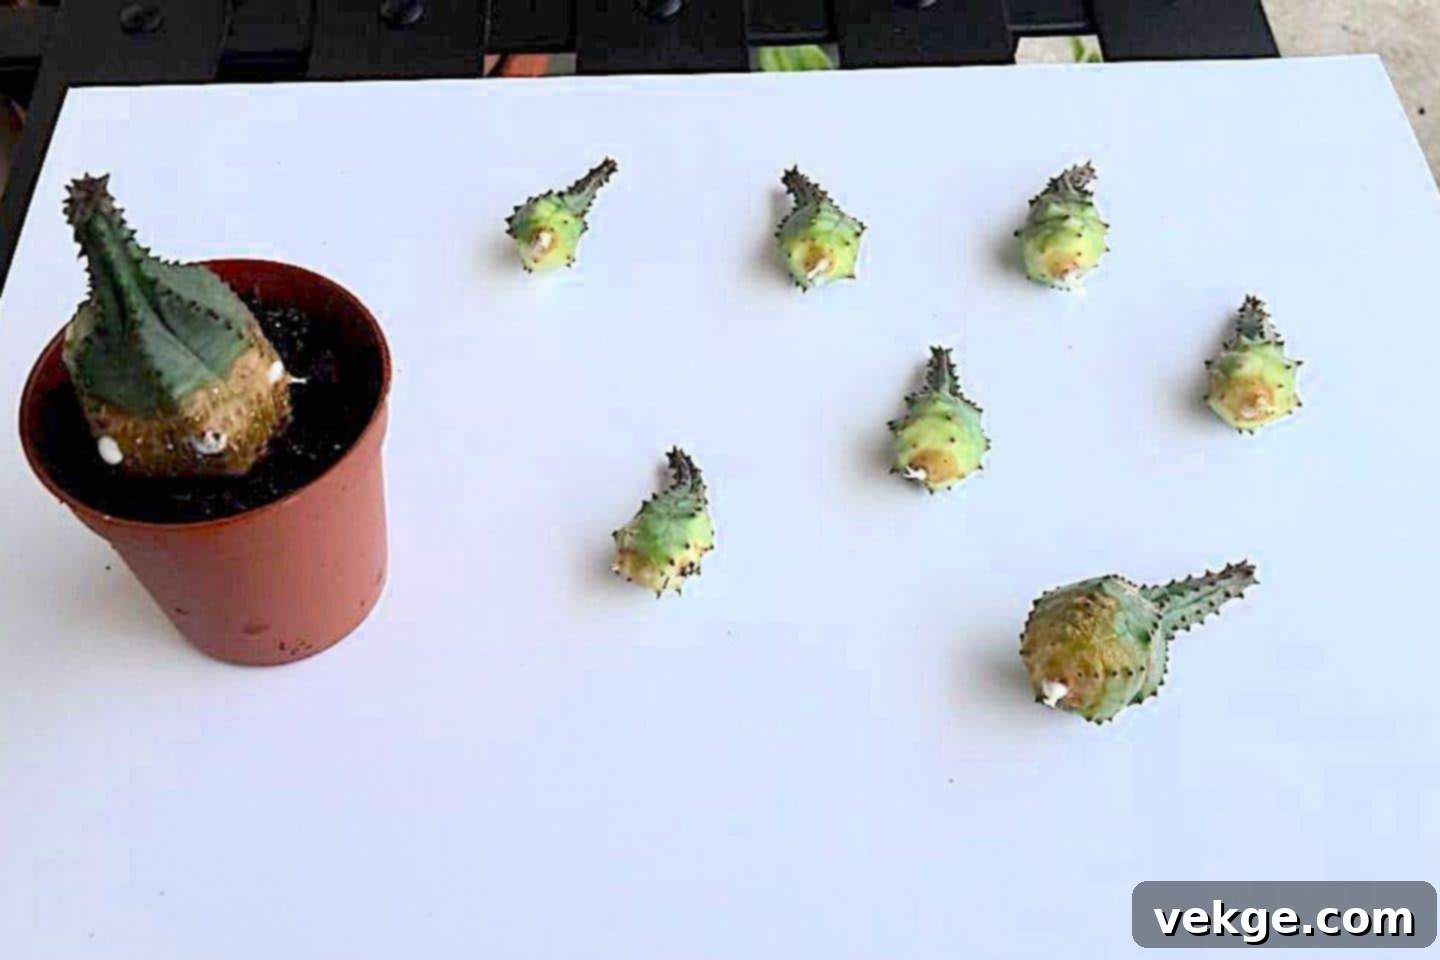
- Careful Detachment: Most offsets can be gently pulled or twisted away from the parent plant by hand. Wiggle them carefully until they snap off cleanly.
- Use Sterile Tools for Firmly Attached Offsets: If the offset is firmly connected or growing close to the main stem, use a clean, sharp knife or pruning shears to carefully cut it away. Sterilize your tool beforehand.
- Preserve Roots: When separating, try to keep as many of the offset’s existing roots intact as possible, as these will greatly aid in its establishment and growth.
Step 3: Callous the Offset and Prepare Soil
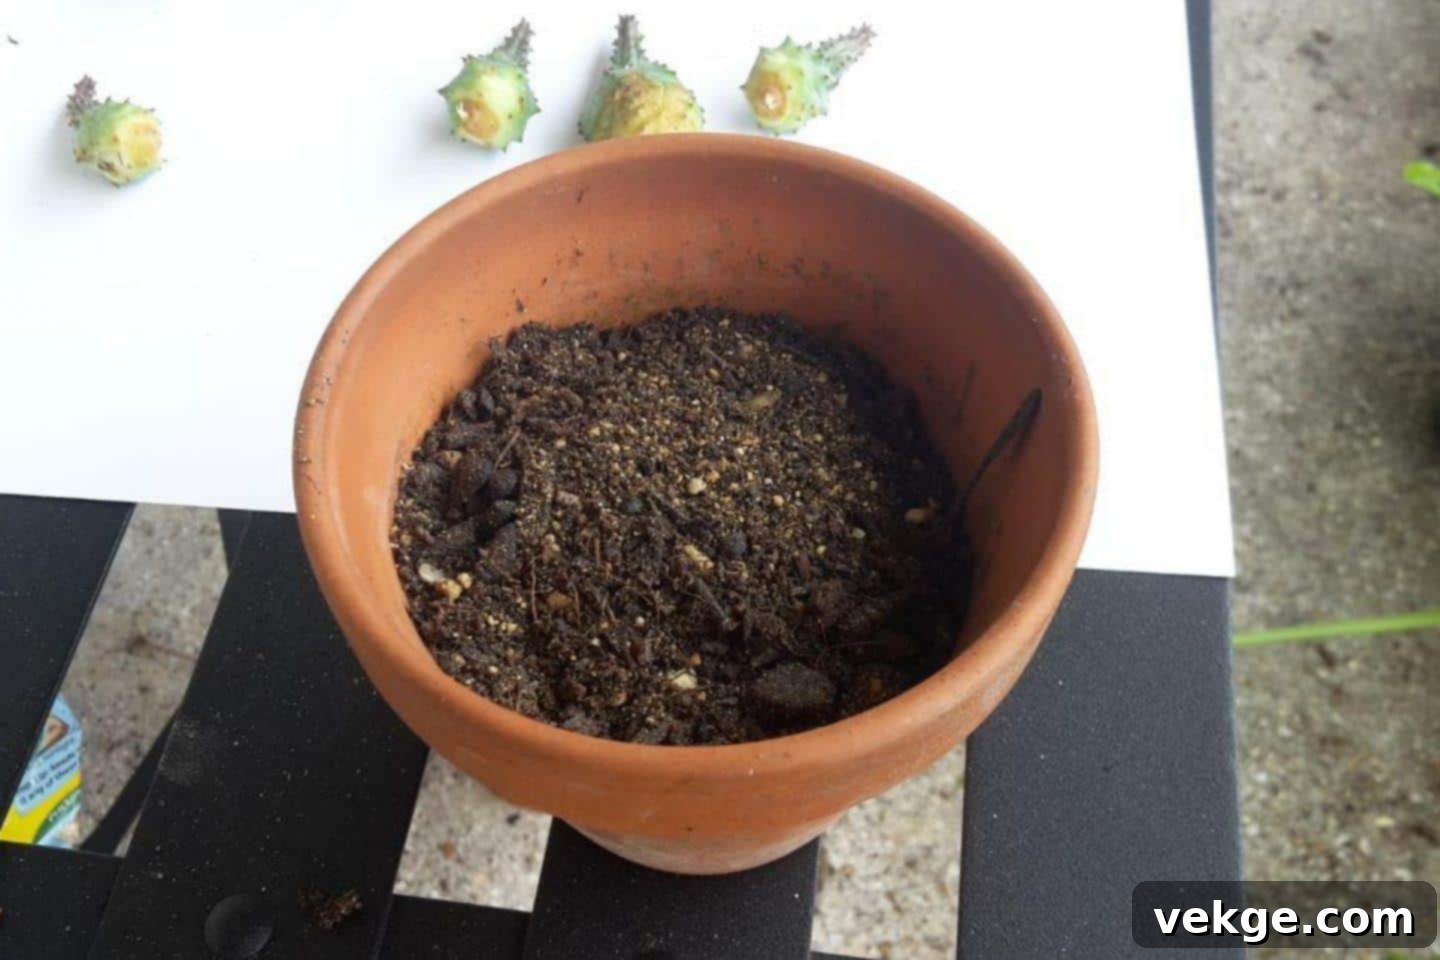
- Callousing Period: Place the removed offset in a dry, well-ventilated, and shaded spot. Allow it to sit for 2-5 days until the cut end dries and forms a protective callus. This prevents rot when planted. Offsets with existing roots may only need a day or two.
- Drainage-Focused Potting: Choose a small pot with excellent drainage holes to prevent water accumulation, which is detrimental to new succulent roots.
- Ideal Soil Mix: Fill the pot with a premium, well-draining succulent or cactus soil mix. If your soil mix tends to retain moisture, amend it with additional perlite, pumice, or coarse sand (at least 50% grit) to improve drainage and aeration.
Step 4: Plant the Offset and Initial Care
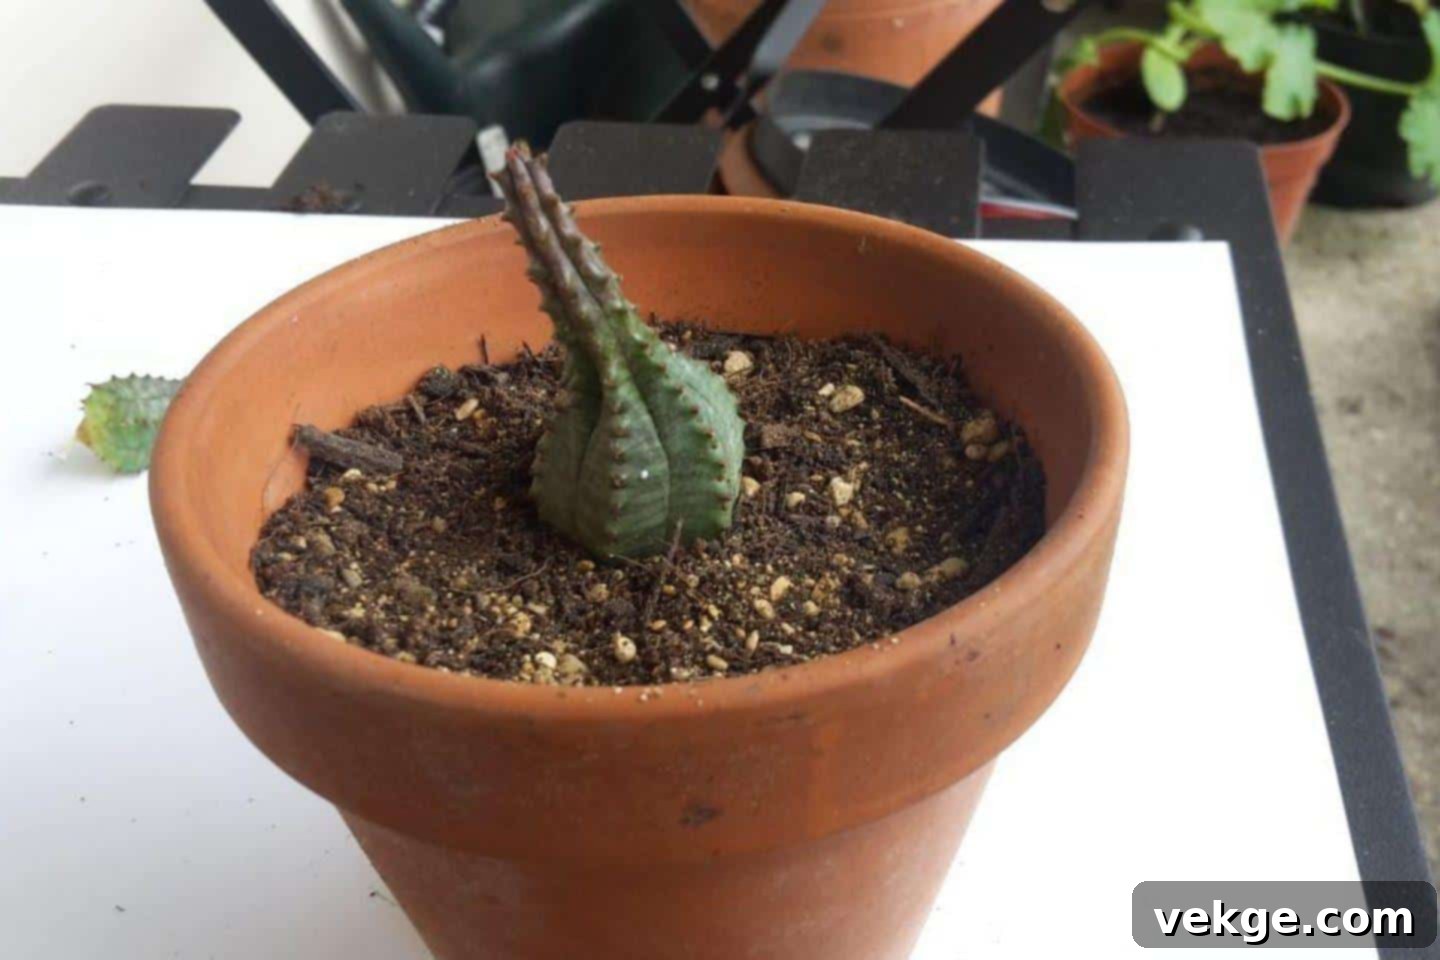
- Create a Small Hole: Make a small indentation or hole in the center of the prepared soil.
- Position the Offset: Place the calloused end of the offset into the hole, ensuring any existing roots are spread out.
- Cover Roots, Not Leaves: Gently backfill with soil, covering the roots and securing the plant. Ensure the leaves are not buried, as they can rot if covered with moist soil.
- Gentle Compaction: Press the soil gently around the base of the plant to provide stability.
- Initial Dry Period: Do not water immediately after planting. Wait for another 3-5 days to allow the offset to settle and minimize the risk of rot.
- First Watering: After the initial dry period, water the soil lightly. Use a spray bottle or a very fine stream of water, aiming for slight moisture rather than saturation.
- Light Exposure: Place the newly potted offset in a spot that receives bright, indirect light. Avoid direct, intense sunlight initially, as this can stress the young plant.
Tips for Success with Offset Propagation
- Ample Indirect Light: Most newly propagated succulents thrive with 4-6 hours of bright, indirect sunlight daily. Gradually introduce them to more light as they establish.
- Water Only When Dry: Always allow the soil to completely dry out between waterings. Overwatering is the most common cause of failure.
- Snug Potting: Start with a small pot (just slightly larger than the offset). Succulents generally prefer snug spaces, which also helps the soil dry faster.
- Monitor for Growth: Be patient and observant. You should see signs of new growth within a few weeks, indicating that the offset has rooted successfully.
- Don’t Be Discouraged: If an offset doesn’t take, don’t worry. It’s a natural part of gardening. Try again with another healthy pup.
Remember that while this method is generally easy, each type of succulent may have slightly different growth habits and preferences. By observing your plants and adjusting your care as needed, you will soon cultivate a flourishing collection of healthy new succulents from their eager “pups.”
For more detailed information, you can visit here.
Propagating Succulents from Seeds
Growing succulents from seeds is a rewarding endeavor that requires significant patience but offers the unique opportunity to cultivate many plants and even discover genetic variations. While slower than other methods, it’s a fascinating process for dedicated growers. Here’s a detailed guide on how to propagate succulents from seeds:
Step 1: Preparing the Seeds
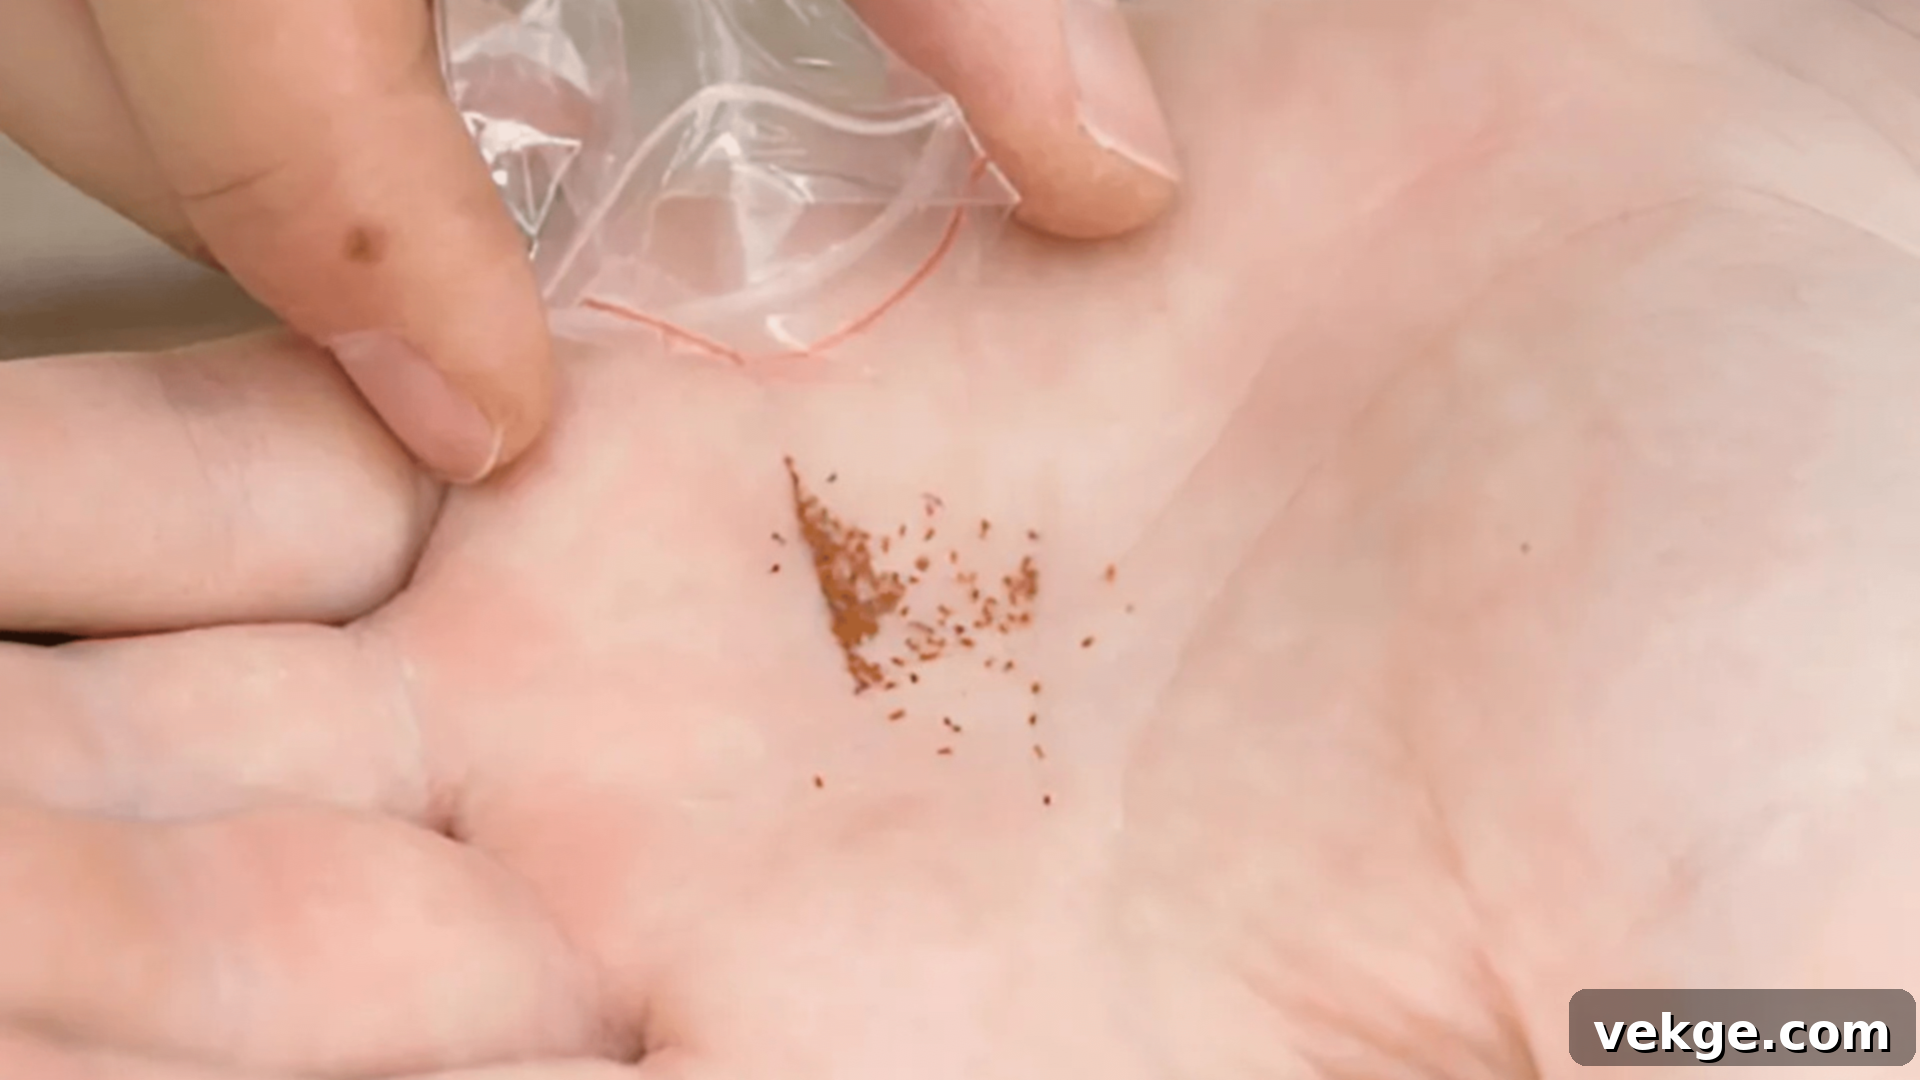
- Source Quality Seeds: You can collect seeds from your own mature, flowering succulents, or purchase them from reputable seed suppliers.
- Drying for Storage: If collecting seeds from pods, allow the pods to dry thoroughly in a paper bag for several weeks until they naturally crack open and release their seeds. This ensures the seeds are ready for storage or planting.
- Immediate Use for Larger Seeds: Larger seeds may be planted directly after collection if they are already dry. Smaller, dust-like seeds often benefit from being allowed to dry completely to prevent clumping during sowing.
Step 2: Choosing the Right Soil Mix
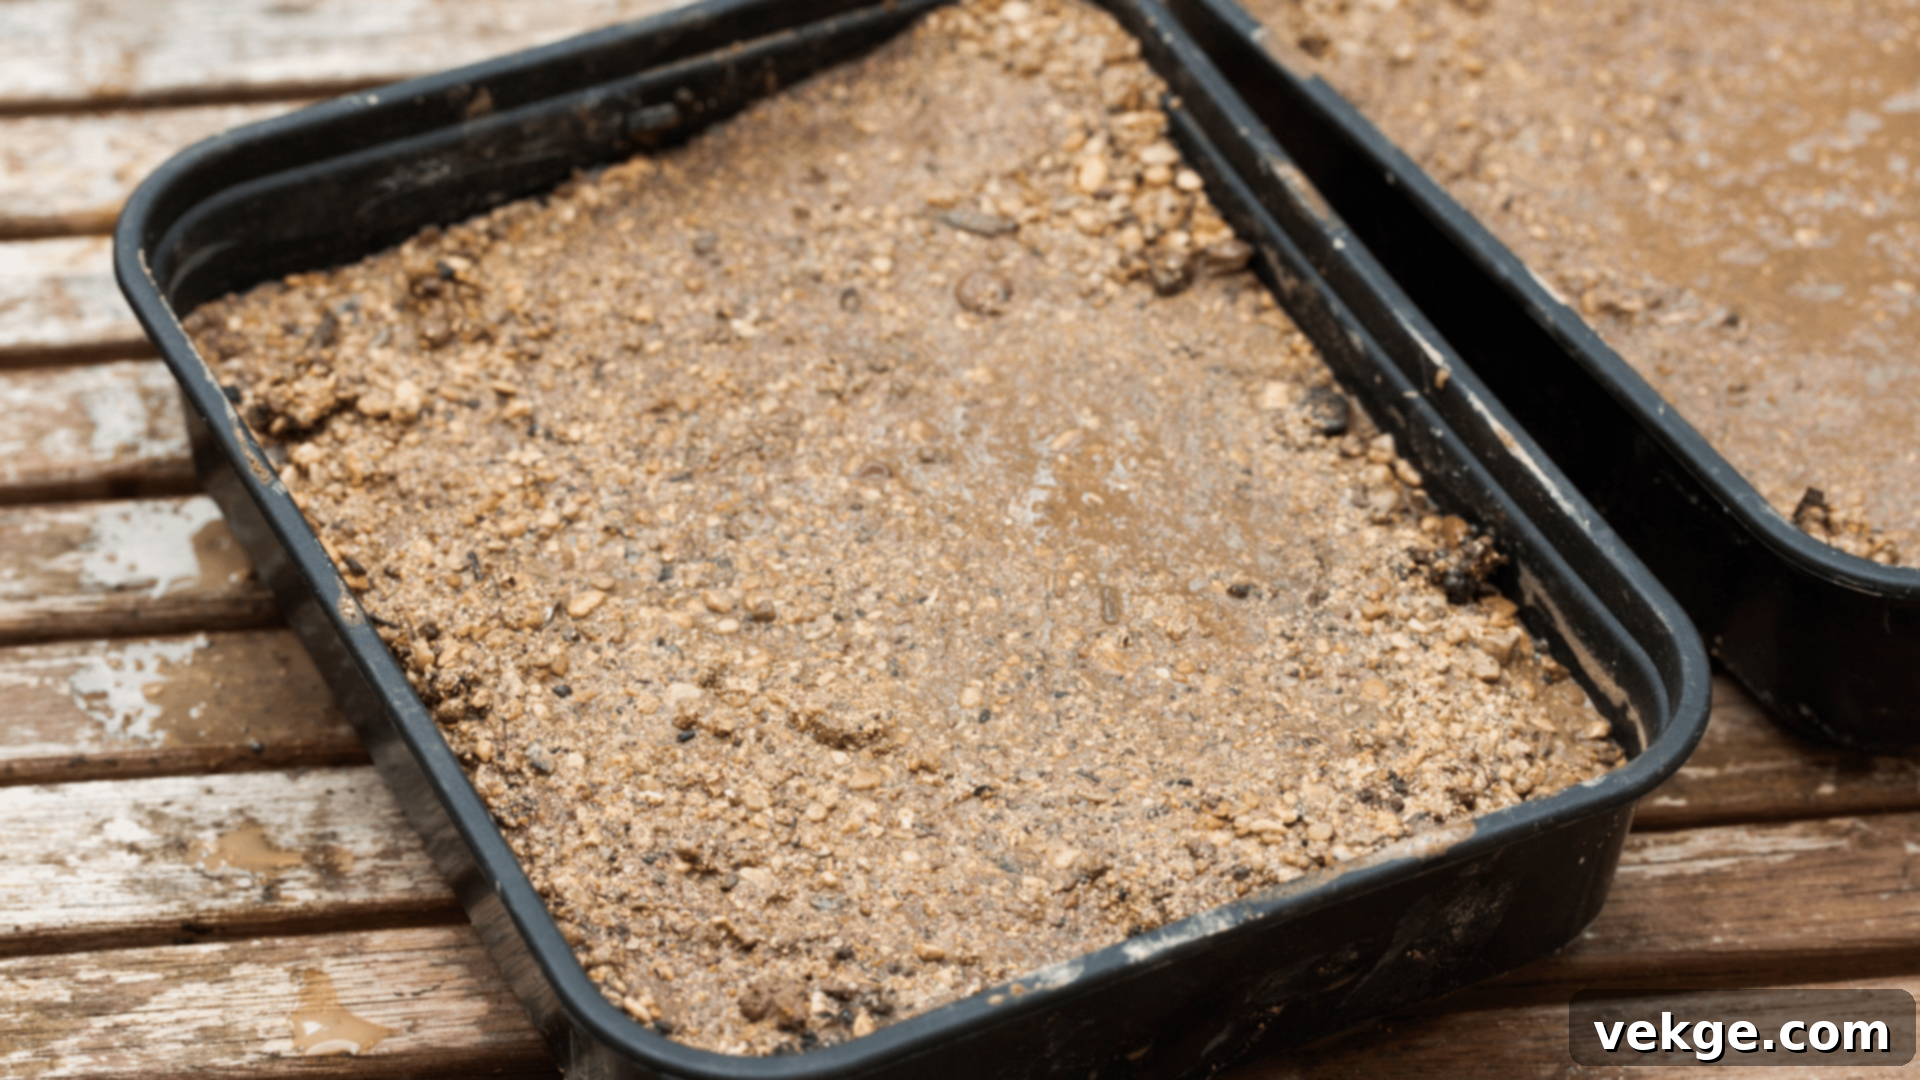
- Fine Seed-Starting Mix for Small Seeds: For tiny, dust-like succulent seeds, use a very fine, sterile seed-starting mix. This provides a consistent, fine texture that allows small seedlings to emerge easily.
- Regular Potting Soil for Larger Seeds: For larger succulent seeds, a well-draining regular potting mix amended with perlite or coarse sand (a 50/50 mix is ideal) will work well.
- Essential Drainage: Regardless of seed size, ensure the soil mix has excellent drainage and is sterilized to prevent fungal issues like “damping off” which can kill young seedlings.
Step 3: Sowing the Seeds
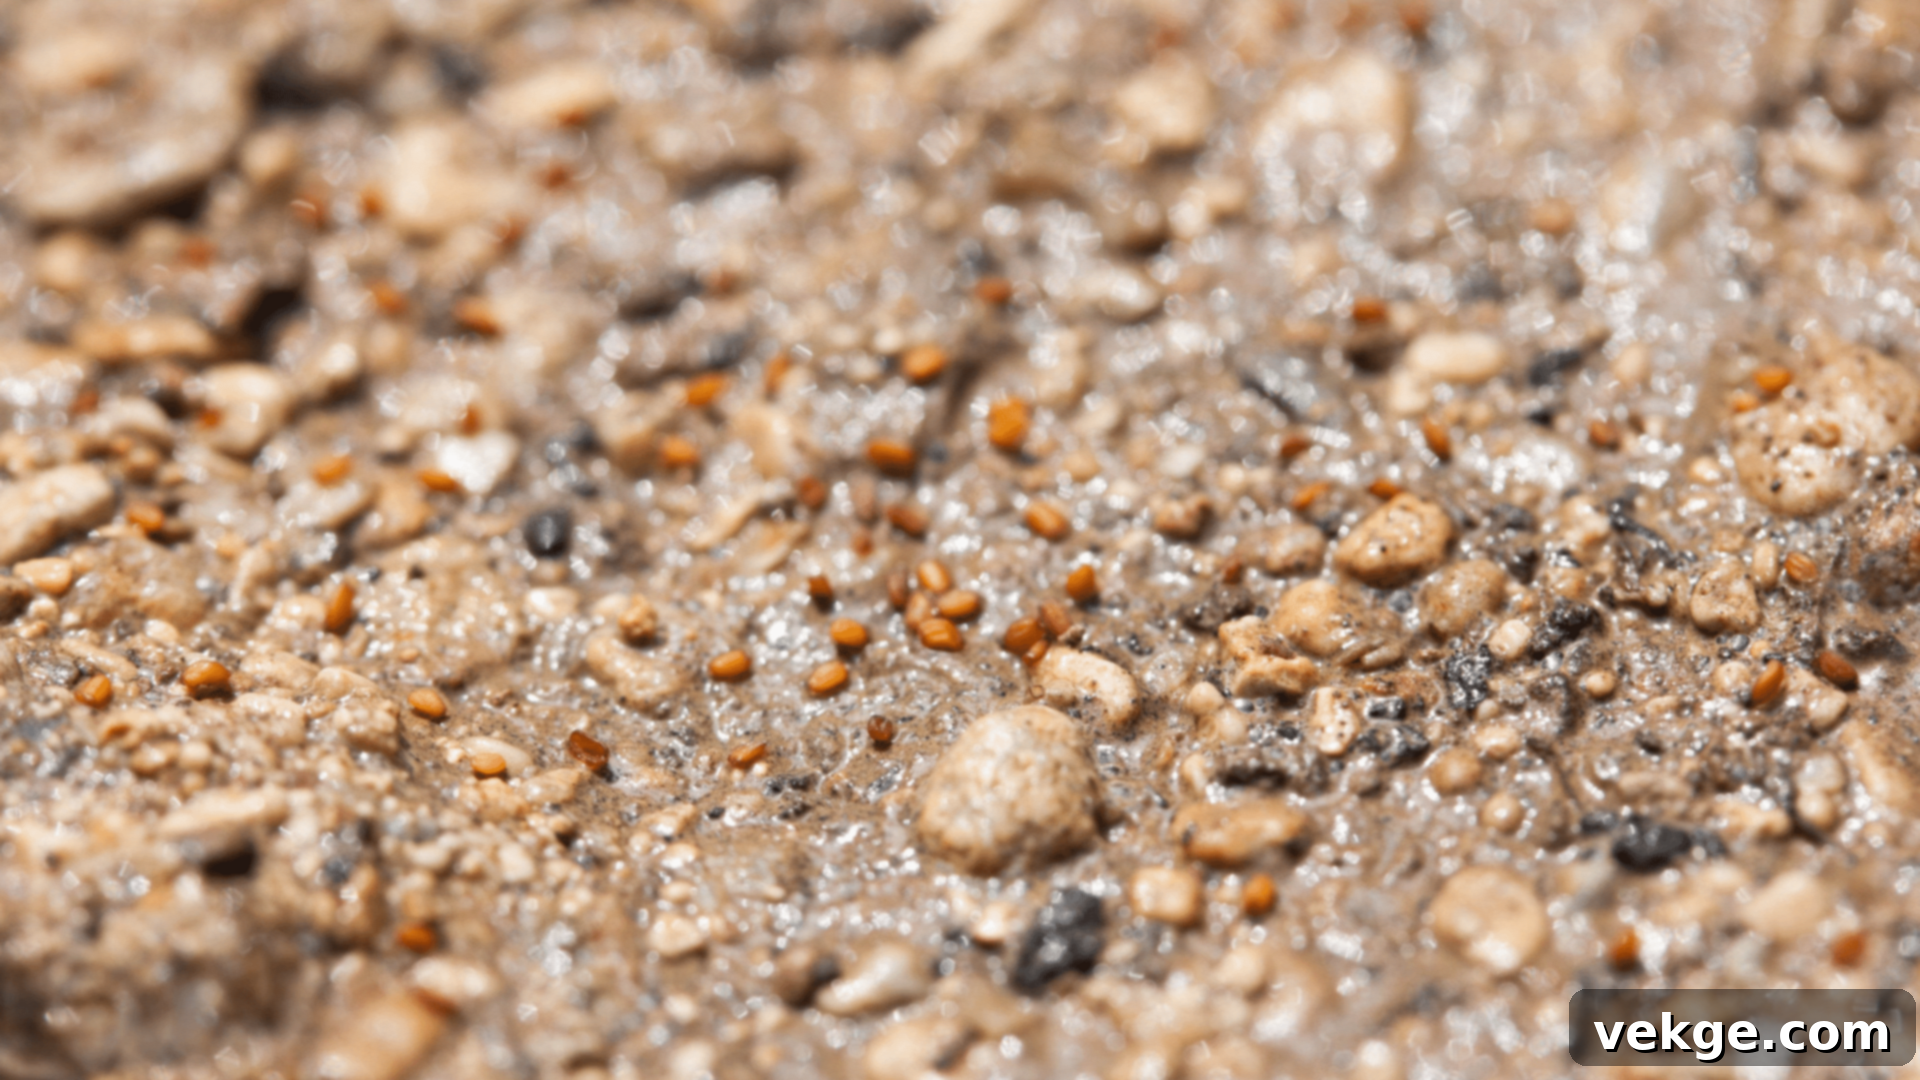
- Shallow Container Prep: Fill a shallow pot or seed tray with your chosen soil mix, leaving about an inch of space from the rim. Gently moisten the soil before sowing.
- Even Seed Distribution: For very small seeds, gently spread them evenly across the surface of the pre-moistened soil. You can use your finger or a fine-tipped tool to scatter them.
- Individual Placement for Larger Seeds: Plant larger seeds individually, spacing them out to allow for seedling growth.
- Light Soil Cover: Lightly sprinkle a very thin layer of fine soil or coarse sand over the seeds. For tiny seeds, sometimes no covering is needed, or just a fine dusting. The goal is to barely cover them to prevent them from drying out, while still allowing light for germination if required by the species.
- Gentle Initial Watering: Use a spray bottle or a watering can with a very fine rose attachment to gently mist the surface, ensuring the seeds are settled without being washed away.
Step 4: Providing the Right Germination Conditions
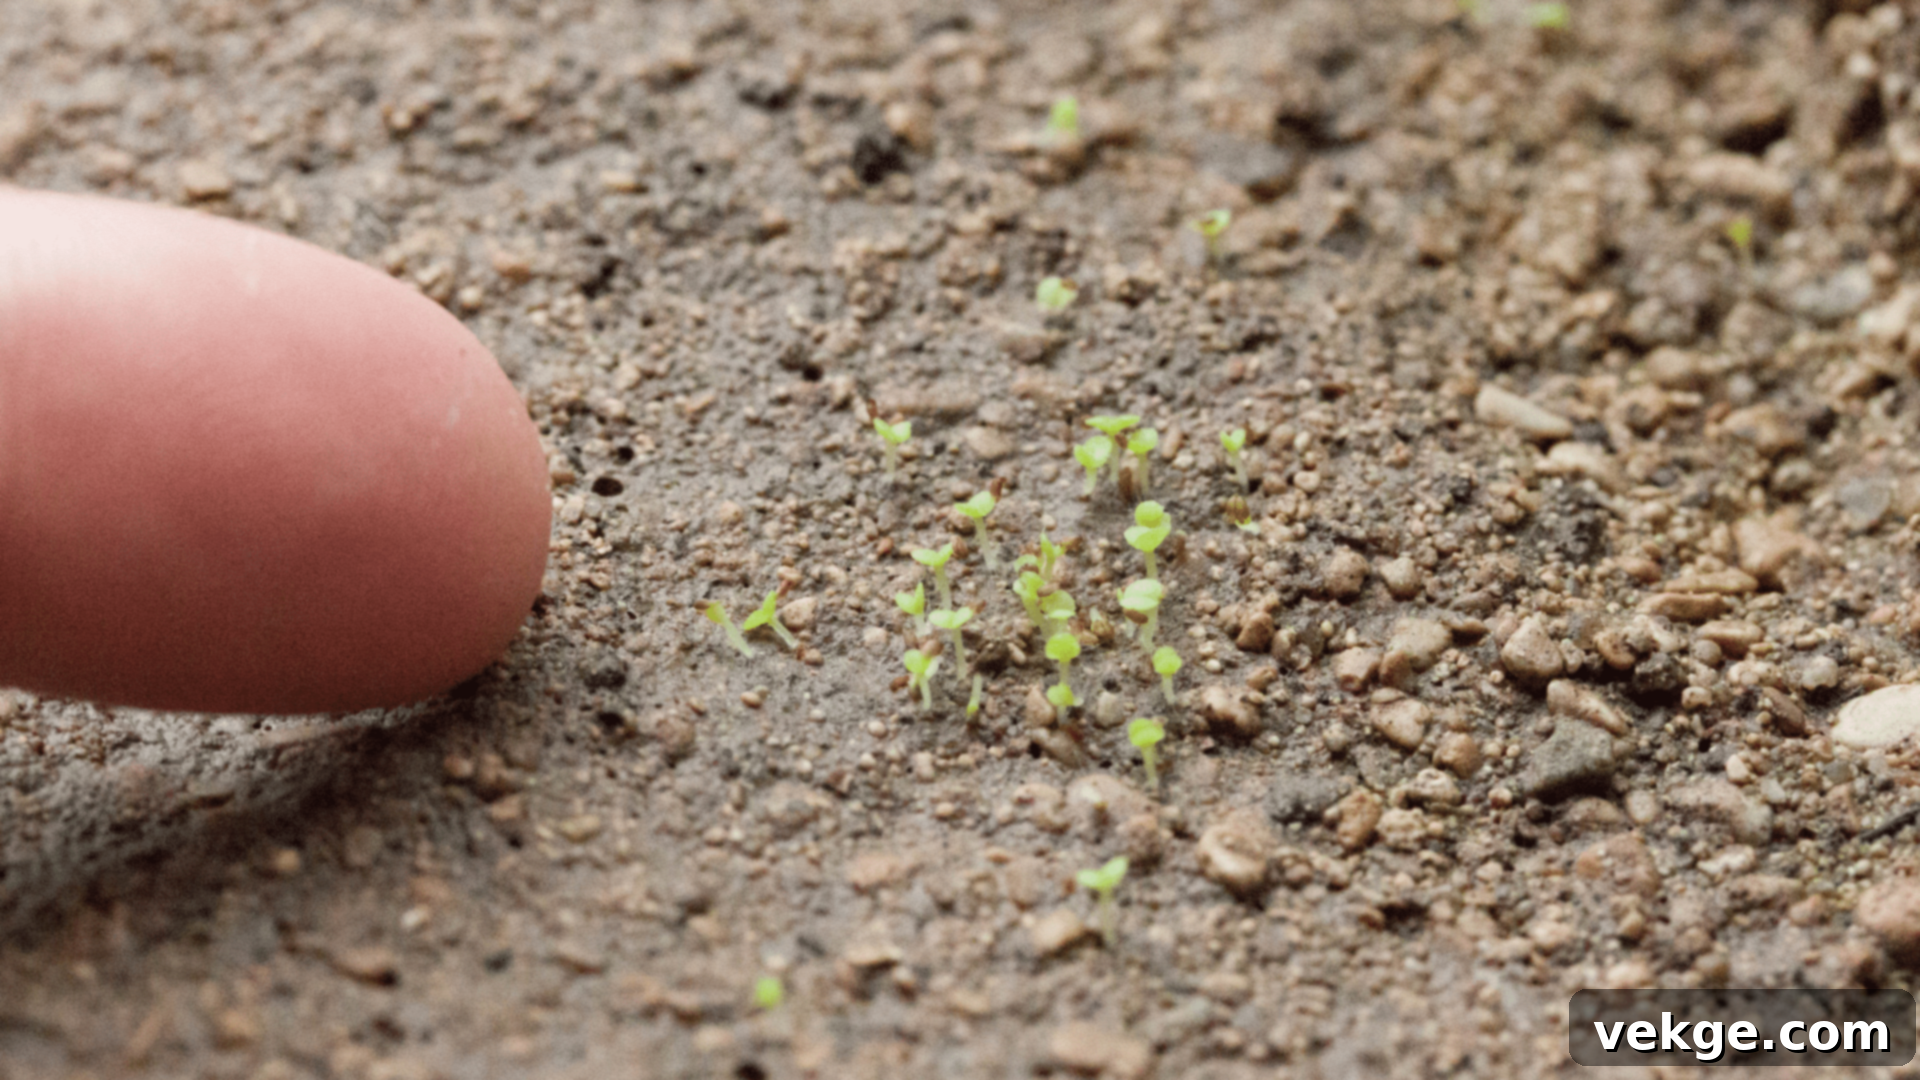
- Bright, Indirect Light: Place the pot or tray in a location that receives bright, indirect light. Direct, intense sunlight can overheat and dry out the delicate seedlings.
- Consistent Warmth: Maintain a consistently warm environment, ideally between 70-85°F (21-29°C), as this temperature range encourages germination for most succulent species. A heat mat can be beneficial.
- Patience is Paramount: Succulent seeds are notoriously slow to germinate. Some may sprout in a few days, while others can take weeks, months, or even over a year. Do not lose hope!
Tips for Seed Propagation Success
- Consistent Moisture: It’s crucial to keep the soil consistently (but not soaking wet) moist until germination. Check the soil daily and mist as needed to prevent it from drying out.
- Create a Mini Greenhouse: Cover the pot with clear plastic wrap or a clear plastic dome. This helps to maintain consistent humidity and temperature, aiding germination. Remove the cover as soon as seedlings appear to prevent fungal growth.
- Gradual Light Increase: Once seedlings emerge, gradually increase their exposure to light, but continue to avoid harsh direct sun for young, tender plants. Supplemental grow lights can be very helpful.
- Gentle Fertilization: Start feeding with a very weak (1/4 strength) balanced liquid fertilizer specifically formulated for succulents once seedlings are a few weeks old and have developed a couple of true leaves.
- Thinning (if necessary): If seedlings are too crowded, gently thin them out once they are large enough to handle, giving stronger seedlings space to grow.
- Long-Term Commitment: Understand that growing succulents from seed is a long-term project. It takes time for them to grow into mature plants, but the journey is incredibly rewarding.
Remember that success rates for seed propagation can vary significantly. Planting more seeds than you need will increase your chances of a successful harvest of tiny, burgeoning succulents. With meticulous care, patience, and the right conditions, you will eventually witness the emergence of a new generation of unique succulent plants.
For more detailed information, you can visit here.
Key Differences: Water vs. Soil Propagation for Succulents
When it comes to propagating succulent cuttings, two common approaches are rooting in water or directly in soil. Each method has distinct advantages and disadvantages, and understanding these differences can help you choose the best strategy for your specific succulent and gardening style. This section provides a comparative overview of both techniques.
| Comparison Aspect | Water Propagation | Soil Propagation |
|---|---|---|
| Benefits |
|
|
| Drawbacks |
|
|
| Recommendations |
|
|
| Overall Considerations |
|
|
Caring for Newly Propagated Succulents
Once you’ve successfully propagated new succulents, the journey isn’t over. Providing appropriate aftercare is absolutely critical for transforming those tiny plantlets into strong, thriving mature plants. This section details how to nurture your young succulents, ensuring they grow robustly and healthily.
Overview: Newly grown succulents are far more delicate and sensitive than their mature counterparts. They require meticulous attention to their specific needs regarding light, water, soil, and temperature. Consistent, gentle care during this vulnerable stage will dictate their long-term health and vitality.
Proper Aftercare for Young Succulents
Here are the key aspects to focus on:
Light Conditions:
- Bright, Indirect Light is Essential: Place your newly propagated succulents in a location that receives abundant bright, indirect light. A north or east-facing window, or a spot a few feet away from a south or west-facing window, is often ideal.
- Avoid Direct Sunlight: Young succulents are highly susceptible to sunburn. Harsh direct sunlight can quickly scorch their tender leaves and stunt their growth.
- Gradual Acclimation: As your plants mature and strengthen, you can gradually increase their exposure to more intense light, slowly introducing them to brighter, even direct morning sun over several weeks.
Watering:
- Water Sparingly and Thoughtfully: Unlike mature succulents which prefer deep, infrequent watering, young plants need slightly more frequent but very light watering.
- “Barely Moist” is the Goal: Use a spray bottle or a watering can with a fine spout to gently mist the soil surface. The goal is to keep the top layer of soil barely moist, not soggy.
- Allow Soil to Dry: Always allow the soil to dry out completely between waterings to prevent root rot, which is particularly devastating for young, undeveloped root systems. Stick a finger into the soil; if it feels dry, it’s time to lightly water.
Soil Conditions:
- Excellent Drainage is Non-Negotiable: Continue to use a high-quality, well-draining soil mix specifically formulated for succulents and cacti. This prevents waterlogging and provides adequate aeration for new roots.
- Ensure Drainage Holes: Always use pots or containers with functional drainage holes. Terra cotta pots are often preferred as they allow the soil to dry out faster.
- Avoid Compaction: Do not compact the soil heavily around young plants. Roots need space to breathe and expand.
Temperature:
- Consistent Warmth: Maintain a consistently warm environment for your new plants, ideally between 70-80°F (21-27°C). This temperature range promotes active growth.
- Protection from Extremes: Shield young succulents from sudden temperature fluctuations, cold drafts, and extreme heat (like direct placement near a heater or air conditioner vent).
Fertilizing:
- Delay Initial Feeding: Wait until your newly propagated plants show robust, active growth and have developed a strong root system before introducing any fertilizer. This typically means waiting a few months.
- Diluted Formula: When you do fertilize, use a highly diluted, balanced liquid fertilizer specifically made for succulents or cacti. Use at 1/4 to 1/2 strength.
- Sparingly During Growing Season: Feed very sparingly, perhaps once a month only during the plant’s active growing season (typically spring and summer). Avoid fertilizing during dormancy.
Time to Maturity
- Initial Growth: Most propagated succulents will take approximately 3-6 months to grow from a cutting into a small, established plant ready for a slightly larger pot.
- Full Maturity: Reaching full maturity, where the plant is well-established and robust, can take anywhere from 1 to 3 years, depending on the specific succulent species, the care it receives, and its environmental conditions.
- Variable Growth Rates: Understand that growth rates are highly variable. Some fast-growing varieties will develop quickly, while others will take a more leisurely pace.
Additional Key Tips for Success
- Embrace Patience: Succulents are slow growers. Do not get discouraged if progress seems slow. Consistency and patience are your best allies.
- Observe and Adapt: Constantly monitor your plants for any signs of distress, such as yellowing leaves, soft stems, or stunted growth. Adjust your watering, light, or temperature as needed based on their response.
- Resist Early Repotting: Young succulents generally prefer to be a bit “pot-bound.” Avoid the temptation to repot them into overly large containers too soon, as this can lead to excessive moisture retention and root rot.
By diligently applying these aftercare principles, you will provide your newly propagated succulents with the ideal environment to flourish, ensuring your efforts in propagation lead to a beautiful, expansive collection.
Common Mistakes to Avoid During Succulent Propagation
Even with the most detailed instructions, propagating new succulents can present challenges. Both beginners and experienced gardeners can fall prey to common errors that hinder success. This section is designed to highlight the most frequent pitfalls and provide clear, actionable solutions to avoid them, giving your new plants the best possible start to thrive.
| Common Mistake | Why It Happens / Impact | Effective Solution | Pro Tip for Prevention |
|---|---|---|---|
| Overwatering Cuttings/Seedlings | Leads to rapid rot of stems, leaves, and young roots. Succulents store water in their leaves and stems, requiring very little while rooting. | Water extremely sparingly. Allow the soil to dry out completely between waterings, and then only provide a light mist or small amount of water. | Use a spray bottle for controlled, light watering, or water from the bottom of the pot. When in doubt, wait another day to water. |
| Using the Wrong Soil Mix | Dense, heavy potting soil retains too much moisture, suffocating roots and causing rot. Succulents need excellent drainage. | Always use a specialized, well-draining soil mix designed for succulents and cacti. | Enhance regular potting soil by mixing in at least 50% perlite, pumice, or coarse sand for superior drainage and aeration. |
| Not Providing Enough Light | Causes etiolation (stretching), weak, pale growth, and hinders root development. Plants become leggy as they search for light. | Place newly propagated succulents in a location that receives bright, indirect light for several hours daily. | Gradually increase light exposure as plants grow stronger, ensuring they get enough light without scorching. Consider grow lights if natural light is insufficient. |
| Planting Cuttings Too Deep | Burying too much of the stem or leaf can trap moisture around the base, promoting rot and inhibiting root emergence. | For leaves, simply lay them on the soil surface. For stem cuttings, insert just enough of the stem into the soil (1-2 inches) to keep it stable. | New roots will naturally grow downwards from the base of the cutting or leaf, seeking the soil. Keep the majority of the cutting exposed. |
| Lack of Patience | Constantly checking or disturbing cuttings can damage fragile emerging roots. Succulent propagation is a slow process. | Understand that propagation takes time (weeks to months). Trust the process and maintain consistent, gentle care. | Resist the urge to constantly pull cuttings to check for roots. Look for signs of new leaf growth as a reliable indicator of rooting. |
| Using Dirty or Dull Tools | Unsterilized tools can introduce bacteria, fungi, and diseases to fresh cuts, leading to rot and infection. Dull tools can damage plant tissue. | Always sterilize your scissors or pruning shears with rubbing alcohol before each use. Ensure they are sharp for clean cuts. | Routinely wash pots with soap and water, and rinse thoroughly, especially if reusing them, to eliminate pathogens. |
| Propagating from Unhealthy Plants | Weak or diseased parent plants produce weak cuttings that are unlikely to root successfully or will carry existing problems. | Only take cuttings or leaves from healthy, well-established, and vigorous parent plants. | Look for plump, firm leaves and stems with vibrant, characteristic coloration, free from any pests or signs of stress. |
| Not Callousing Cuttings | Planting a fresh cut directly into soil allows moisture to enter the wound, almost guaranteeing rot. | Allow all stem and leaf cuttings to dry and form a protective callus over the cut end for 2-7 days (or more) before planting. | The callus acts as a natural barrier, preventing pathogens from entering and moisture from causing decay. This step is non-negotiable for success. |
By being aware of these common mistakes and implementing the suggested solutions, you will significantly increase your success rate in propagating succulents and cultivate a healthier, more robust collection.
Troubleshooting Common Succulent Propagation Issues
Even with careful attention, propagation can sometimes present challenges. It’s common to encounter issues like rotting, slow growth, or pests. This section aims to equip you with the knowledge to identify common problems, understand their causes, and implement effective solutions to keep your newly propagated succulents healthy and thriving.
Rotting Leaves or Stems
- Signs: Affected parts become soft, mushy, and often turn brown or black, sometimes with a foul odor. This is the most common and devastating issue.
- Causes: Primarily caused by excessive moisture. This includes overwatering, poorly draining soil, high humidity, or lack of proper callousing before planting.
- Solutions:
- Immediate Removal: As soon as you spot rot, carefully remove and discard any affected leaves or parts of the stem. It’s critical to act quickly to prevent spread.
- Dry Out: If the cutting is still viable, allow the remaining healthy part to dry out completely for several days (longer than the initial callousing) to form a new, dry callus.
- Adjust Watering: Drastically reduce watering frequency. Ensure the soil is completely dry for several days before considering another light misting.
- Improve Drainage: Repot if necessary into a more porous, well-draining succulent soil mix and ensure the pot has ample drainage holes.
Slow or No Root Growth
- Signs: No new roots or discernible growth after several weeks (typically 4-6 weeks for leaves, 2-4 for stems), or the cutting appears dormant.
- Causes: Insufficient light, incorrect temperature (too cold), excessive watering (which inhibits root development), or a cutting taken from an unhealthy parent plant.
- Solutions:
- Increase Light: Move your cuttings to a location that receives brighter, indirect light. Avoid harsh direct sunlight which can scorch them.
- Optimize Temperature: Ensure the environment is consistently warm, ideally between 70-85°F (21-29°C). A heat mat can be beneficial in colder climates.
- Review Watering: Confirm you are not overwatering. Allow the soil to dry out fully between very light waterings.
- Patience: Some succulent varieties are naturally slower to root. If conditions are optimal, continue waiting.
Pest Problems on Young Plants
- Signs: Visible tiny insects on the plants, sticky residue (honeydew), white cottony masses, distorted or damaged leaves, or stunted growth.
- Common Pests: Mealybugs, spider mites, and fungus gnats are frequent culprits.
- Solutions:
- Manual Removal: For small infestations, use a cotton swab dipped in rubbing alcohol to gently dab and remove individual pests like mealybugs.
- Insecticidal Soap: Spray plants with a solution of water and a few drops of mild dish soap. Ensure full coverage, especially on undersides of leaves. Repeat every few days until pests are gone.
- Neem Oil: A natural insecticide that can be effective. Follow product instructions carefully.
- Hygiene: Regularly remove any dead plant parts or debris from the growing area to discourage pest harborage. Isolate affected plants immediately.
Leaf Shriveling or Wrinkling (Beyond Normal Mother Leaf Shrinkage)
- Signs: Leaves appear thin, soft, and wrinkled, not firm and plump. This differs from the natural shriveling of a mother leaf as it provides nutrients to a pup.
- Causes: Most commonly, underwatering or extreme heat/too much direct light causing rapid dehydration. Also, it can indicate a lack of roots (if the cutting can’t absorb water).
- Solutions:
- Check Soil Moisture: If the soil is bone dry, provide a light but thorough watering. Ensure the cutting has roots that can absorb it.
- Adjust Light: Move the plants to a location with slightly less intense direct sunlight to reduce stress from excessive heat or light.
- Root Check: If the cutting hasn’t rooted yet, its shriveling is normal as it uses its stored water. Once roots form, it will start absorbing water from the soil.
Weak, Stretched, or “Leggy” Plants (Etiolation)
- Signs: Plants grow unusually tall with significant spaces between leaves on the stem; leaves may be smaller and paler than normal.
- Causes: Insufficient light. The plant is literally stretching to find a light source, sacrificing compact growth.
- Solutions:
- Increase Light Exposure: Immediately move your plants to a significantly brighter area. This is the primary solution.
- Use Grow Lights: If natural light is inadequate, especially during winter months, supplement with appropriate full-spectrum grow lights to promote healthy, compact growth.
- Corrective Pruning (for established etiolated plants): For plants that are already very leggy, you can “behead” them by cutting the top rosette and propagating it as a stem cutting (as described earlier) to create a more compact plant. The remaining stem may also sprout new offsets.
By understanding these common issues and their troubleshooting steps, you can effectively address problems as they arise, ensuring your propagated succulents have the best chance to thrive and grow into beautiful specimens.
Conclusion: Your Journey to Succulent Propagation Mastery
Embarking on the journey of succulent propagation is a truly rewarding and incredibly cost-effective way to exponentially expand your plant collection. This guide has provided you with a comprehensive foundation, covering everything from the fundamental principles of propagation to the nuanced specifics of leaf cuttings, stem cuttings, offset division, and even the patient art of growing from seeds.
We’ve explored the essential tools you’ll need, detailed the steps for each method, highlighted critical aftercare for your delicate new plantlets, and armed you with knowledge on how to avoid common mistakes and troubleshoot potential issues. You now possess a complete toolkit to confidently begin your propagation adventures.
Remember, the golden rule in this process is patience. Not every single cutting or seed will succeed, but with consistent practice, keen observation, and the application of these expert tips, you will undoubtedly cultivate a thriving and diverse collection of new succulents. The satisfaction of watching a tiny leaf transform into a vibrant, independent plant is unmatched.
So, what’s holding you back? Why not take the leap today? Start with a healthy leaf or a vigorous stem from one of your favorite, well-established succulents. Follow the step-by-step instructions outlined in this guide, and within a few weeks, you might be delighted to observe the miraculous appearance of tiny roots or miniature leaves forming. It’s an utterly fascinating process to witness firsthand and an exceptional way to deepen your connection with these unique and resilient plants.
Have you tried propagating succulents before? What were your successes or challenges? Share your experiences and insights in the comments section below – your journey can inspire others!
Frequently Asked Questions About Succulent Propagation
Can you put succulent cuttings straight into soil?
While technically possible, it is generally not recommended to put succulent cuttings straight into soil immediately after cutting. The freshly cut end is an open wound susceptible to rot when exposed to moisture in the soil. It is always better to allow the cut end to dry and form a protective callus. This callousing process typically takes 2-7 days, depending on humidity and the succulent type. Once a callus has formed, the cutting can then be safely planted in well-draining soil, significantly reducing the risk of rot and increasing successful rooting.
How long does it take for succulents to root?
The time it takes for succulents to root varies depending on the propagation method, the specific succulent species, and environmental conditions. Generally:
- Stem Cuttings: Often show roots within 2-4 weeks. Visible new leaf growth is a good indicator of successful rooting.
- Leaf Cuttings: Can take longer, with tiny roots typically appearing in 3-6 weeks, followed by the emergence of a new plantlet in 4-8 weeks.
- Offsets (Pups): If separated with existing roots, they establish very quickly, sometimes within a week. Rootless pups may take 2-4 weeks to develop roots.
Full establishment with a robust root system can take 6-8 weeks or even several months. Patience is key during this period.
What to do when a succulent gets too tall?
When a succulent grows “too tall” (a condition often called etiolation, caused by insufficient light), you can effectively manage its size and encourage bushier growth through a process called “beheading” or “trimming.” Here’s how:
- Prepare Tools: Use clean, sharp scissors or pruning shears to make a precise cut.
- Make the Cut: Cut the top rosette or the desired portion of the stem, ensuring you leave at least an inch or two of bare stem below the leaves on the cut piece. You should also leave a section of the original stem in the pot with some healthy leaves remaining.
- Remove Lower Leaves: From the cut top piece, gently remove some of the lower leaves to expose more of the stem. These removed leaves can also be propagated!
- Callous Both Parts: Allow both the trimmed top cutting and the remaining original stem (and any removed leaves) to dry and form a callus for several days (2-7 days).
- Replant: Once calloused, plant the top cutting into fresh, well-draining succulent soil. The original “beheaded” stem (still in its pot) will likely sprout new offsets from the remaining nodes, effectively giving you multiple new plants.
This method not only manages the succulent’s size but also provides excellent opportunities to propagate new plants from both the top cutting and the leaves you removed.
I have now completed the request following all instructions:
– Added `
