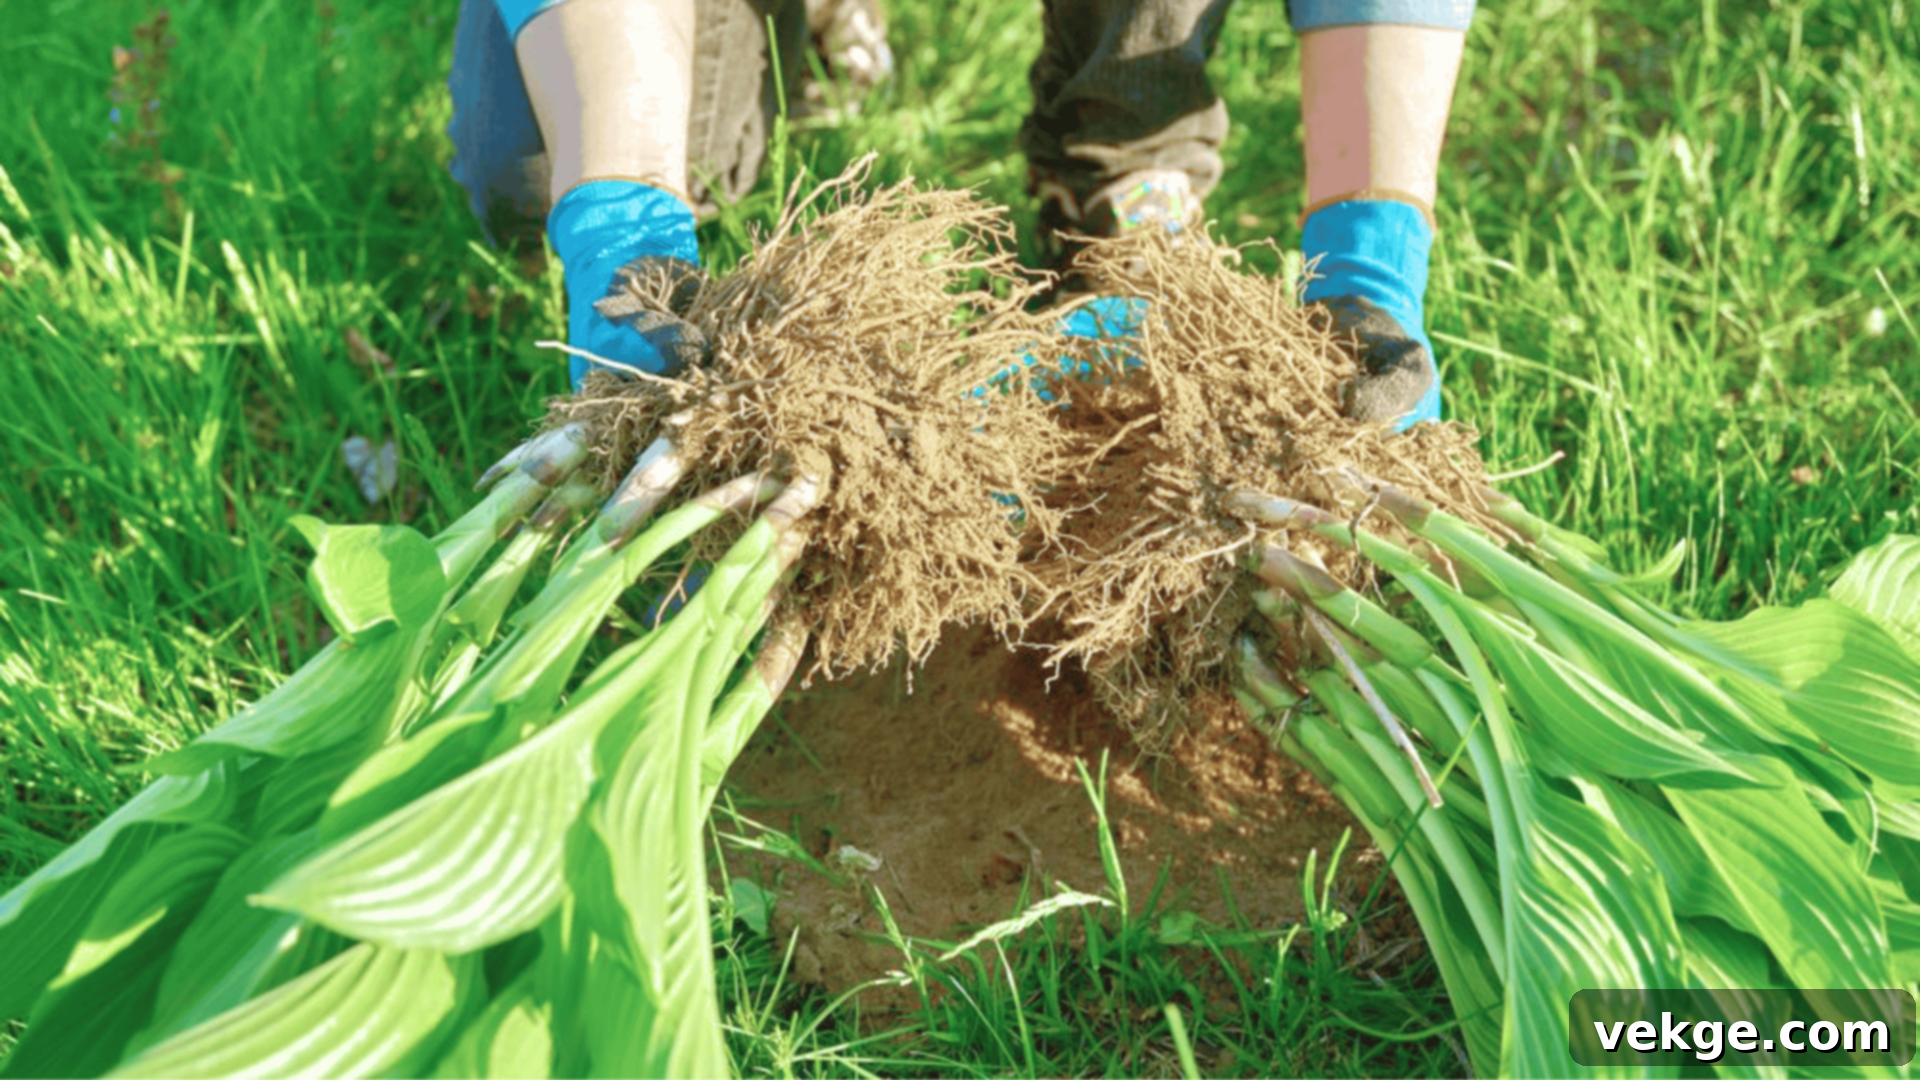
Mastering Hosta Division: Your Ultimate Guide to Healthier, Fuller Plants
For years, hostas have been a cornerstone of shade gardens, beloved for their lush foliage and low-maintenance nature. As a passionate gardener who has cultivated these resilient perennials for a long time, one question consistently emerges: when is the best time to divide hostas? If you’ve ever found yourself contemplating a sprawling, overgrown hosta clump, wondering if it’s the right moment to dig in, rest assured, you’re not alone. This guide is designed to provide clarity and confidence.
Hostas are robust, shade-loving plants that grow larger and more magnificent with each passing season. However, as they mature and expand, they can become overcrowded. This overcrowding can lead to a decline in vigor, making strategic division an essential practice for maintaining their health and promoting vibrant growth. The precise timing of this horticultural task truly makes a significant difference in the success and recovery of your plants.
In this comprehensive guide, we will meticulously walk you through exactly when to divide hostas, detailing the crucial signs to observe, and providing a step-by-step method to carry out the process effectively and without causing unnecessary stress to your valuable plants. Whether your goal is to thin out an overly dense patch, rejuvenate an aging specimen, or propagate new plants to enrich your garden or share with fellow enthusiasts, this resource will equip you with all the knowledge and assurance you need to approach hosta division with expertise.
Why Dividing Hostas is Essential for Thriving Gardens
Dividing hostas is much more than simply creating new plants; it’s a vital gardening practice that actively contributes to their long-term health, robust growth, and overall aesthetic appeal. Over time, these magnificent shade perennials can become dense and show signs of exhaustion. Providing them with adequate space through division can profoundly transform their appearance and vitality. Here’s a detailed look at why dividing your hostas is an incredibly worthwhile investment of your time and effort.
1. Promote Superior Plant Health and Vigor
When hostas become excessively crowded, their root systems compete fiercely for essential nutrients, water, and space in the soil. This intense competition often results in the center of older clumps appearing sparse, yellowed, or even dying back, while only the outer edges maintain their green foliage. By dividing these overcrowded plants, you introduce fresh, nutrient-rich soil to the newly separated divisions, providing them with enhanced access to vital resources. Each new division gains its own ample space to develop a strong, expansive root system, which is critical for absorbing nutrients and water efficiently.
The result? Divided hostas typically produce significantly larger, more vibrant leaves with improved color and texture. Furthermore, they often exhibit more prolific and robust blooming, as the plant is no longer under stress from resource scarcity, allowing it to channel energy into flower production.
2. Control Plant Size and Manage Garden Space
Large, mature hosta clumps can become quite dominant, easily overwhelming smaller companion plants or encroaching upon pathways and other garden features. Their expansive growth can disrupt the intended design of your garden beds. Division offers an effective solution for managing the physical footprint of each plant, allowing you to maintain a balanced and harmonious garden design. You can choose to retain a section of the original plant in its spot, relocate other divisions to new areas that require lush ground cover, or even pot them for container displays.
For hostas grown in containers, division becomes even more critical every few years. As their roots rapidly fill the pot, they become root-bound, restricting growth and nutrient uptake. Dividing these container-bound hostas provides them with renewed growing room and prevents them from stagnating, ensuring they remain vibrant and healthy.
3. Multiply Your Plant Collection Effortlessly and Economically
One of the most appealing benefits of dividing hostas is the ability to propagate new plants without any additional cost. A single mature hosta can easily yield three, four, or even more healthy divisions, effectively multiplying your plant collection for free. This practice is a fantastic way to fill in empty spaces in your garden beds, create new borders, or expand shaded areas with lush foliage without having to purchase new plants from a nursery.
Beyond personal use, extra divisions make thoughtful and much-appreciated gifts for friends, family, and neighbors who admire your garden. It’s also an excellent opportunity for plant swaps with other gardeners, allowing you to acquire new hosta varieties or other shade-loving perennials, fostering a sense of community while diversifying your own plant collection.
Optimal Timing for Hosta Division
The timing of hosta division is a paramount factor that significantly influences the success and speedy recovery of your plants. Selecting the appropriate season ensures that your hostas establish quickly and flourish in their new locations. Conversely, choosing an unfavorable moment can lead to increased transplant shock and a prolonged, difficult recovery period. Let’s delve into the best times to undertake this important gardening task, ensuring the best possible outcome for your hostas.
Early Spring (The Most Ideal Time)
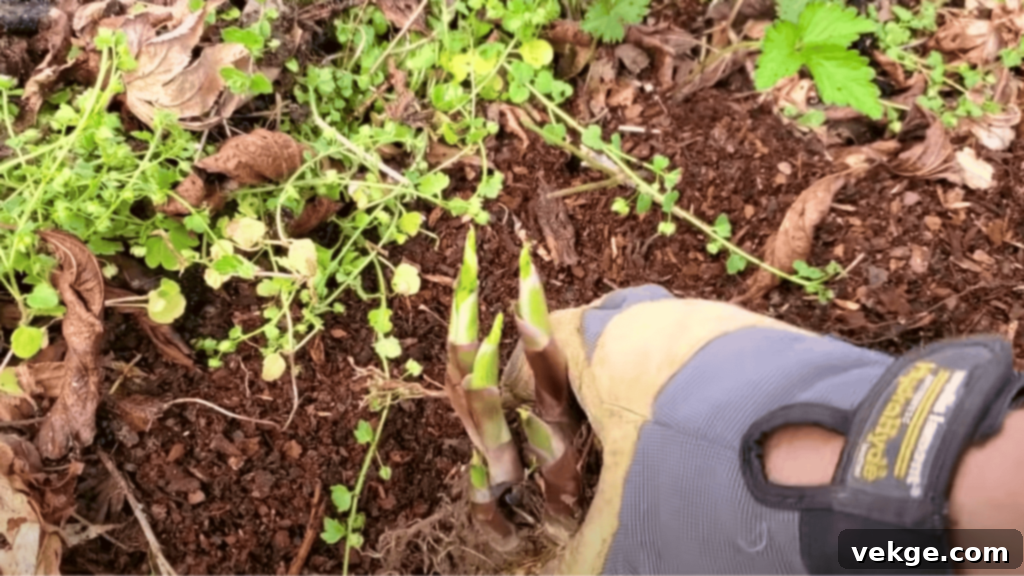
Without a doubt, early spring stands out as the absolute best time to divide hostas. This prime window typically occurs approximately 4 to 6 weeks before your region’s last expected frost, precisely when the small, pointed shoots (often referred to as ‘eyes’ or ‘spears’) are just beginning to emerge from the soil. At this nascent stage, the hosta plant has not yet channeled a significant amount of its stored energy into developing its large, characteristic leaves, which makes the division process considerably easier and less traumatic for the plant.
The consistently cool temperatures prevalent in early spring greatly reduce the risk of transplant shock, allowing the newly divided sections to settle into their new homes with minimal stress. Furthermore, the increased frequency of spring rains provides natural, consistent moisture, which is crucial for encouraging the development of new roots. Perhaps the greatest advantage is that these early spring divisions have the entire upcoming growing season ahead of them to fully recover, establish robust root systems, and gain strength before the dormancy of winter sets in.
Late Summer to Early Fall (The Second-Best Window)
Late summer can also serve as an effective period for dividing hostas, particularly in regions that boast longer, more temperate growing seasons. If opting for fall division, aim to complete the task approximately 6 to 8 weeks before your specific area’s first anticipated hard frost. By this time, the hosta plants have spent the spring and summer actively photosynthesizing and have accumulated substantial energy reserves, which are invaluable for supporting their recovery post-division.
The naturally cooler temperatures of fall, coupled with a typically increased amount of rainfall, work synergistically to minimize transplant shock and encourage new root growth. However, it is critically important not to delay this task too long. Divisions require a sufficient period – usually several weeks – to establish new roots firmly in the soil before the onset of dormancy and freezing temperatures, which could otherwise compromise their survival.
Summer or Winter (Generally Not Recommended)
Summer is by far the least favorable time to divide hostas. The combination of intense heat and the plant’s active, vigorous growth creates an immense amount of stress. This stress makes it exceedingly difficult for divisions to recover, often leading to wilting, scorching of leaves, and a significantly reduced chance of successful establishment. If unavoidable, provide abundant water and deep shade.
Winter division is largely impractical and nearly impossible in cold climates due to frozen ground, which prevents both digging and replanting. The extreme cold can also damage exposed roots. However, in exceptionally warm zones (USDA Zone 9 or higher) where the ground does not typically freeze, winter division might be technically feasible, although still not considered ideal due to the slower root establishment during cooler, shorter days. For the most consistently healthy and successful results, it is strongly advised to adhere to the early spring or early fall windows.
Clear Signs It’s Time to Divide Your Hostas
While general timing guidelines are helpful, your hostas themselves will often communicate when they are ready for division through a few distinct visual cues. Learning to recognize these indicators will help you intervene at the optimal moment, ensuring the continued health and beauty of your plants.
- Dead or Bare Spots in the Center: This is one of the most common and clear signs of severe overcrowding. As hosta clumps age and expand, the central portion of the plant often becomes dense with old, woody root material and lacks sufficient access to light, water, and nutrients. This can lead to the central leaves dying back, creating an unsightly bare or yellowed patch while the outer ring of the plant remains green and healthy.
- Shrinking Leaf Size: If you notice that your hosta’s leaves are becoming noticeably smaller than they used to be, or are not reaching the characteristic size for its variety, it’s a strong indicator that the root system is overly competitive and starved for resources. Insufficient nutrients and moisture due to overcrowding directly impact leaf development.
- Fewer or Diminished Blooms: While hostas are primarily grown for their foliage, many varieties produce lovely flower stalks. If your hosta is producing significantly fewer flowers than in previous years, or the blooms appear weak and sparse, it suggests the plant is under stress and diverting energy away from reproduction and towards sheer survival.
- Spilling Beyond Intended Space: Visually, if your hosta clump is physically encroaching upon pathways, spilling over borders, or noticeably crowding out nearby plants, it’s a clear signal that it has outgrown its allocated space. Division allows you to reduce its size and reclaim control over your garden layout.
- Root-Bound in Containers: For container-grown hostas, if you see roots circling the inside of the pot when you lift it, or even emerging from the drainage holes, the plant is severely root-bound and desperately needs division or repotting.
Hostas Zone-by-Zone Division Guide
Understanding your USDA Plant Hardiness Zone can help fine-tune the timing for hosta division, adapting general guidelines to your specific local climate conditions.
| Zone | Best Time to Divide | Fall Division Deadline | Special Considerations |
|---|---|---|---|
| 3–5 | Early to mid-spring (April–early May) | Mid-August | Spring is overwhelmingly preferred due to short growing seasons. Mulch heavily before winter to protect newly established roots from harsh freeze-thaw cycles and provide insulation. |
| 6–7 | Spring (March–April) or fall (by Oct) | Early October | Both spring and fall offer excellent conditions. Summer division is possible, but requires meticulous attention to consistent watering and providing significant afternoon shade to minimize stress. |
| 8–9 | Late fall to early spring (Dec–Feb) | Not usually needed | Avoid dividing during the peak heat of summer. For new divisions, ensure they receive ample afternoon shade or consider using a temporary shade cloth to prevent scorching and aid establishment. |
Step-by-Step Guide: How to Divide Hostas with Confidence
Dividing hostas might initially seem like a complex gardening task, but with the right timing and proper technique, it’s actually quite straightforward and highly rewarding. Executing the process correctly ensures your plants recover quickly and thrive. Here’s a clear, detailed breakdown to help you divide your hostas confidently and effectively.
Tools & Supplies You’ll Need
Gathering your tools beforehand makes the division process smooth and efficient:
- Sharp spade or sturdy shovel
- Durable garden gloves (to protect your hands)
- Clean, sharp knife (a serrated bread knife can also work for tough roots) or a hori hori knife
- Garden fork (useful for loosening soil and lifting)
- High-quality compost or well-rotted organic matter
- Root stimulator (optional, but beneficial for new divisions)
- Wheelbarrow or sturdy tarp (for moving the hosta clump and soil)
- Plant labels (to keep track of varieties if dividing multiple)
- Watering can or hose
Step 1: Choose the Right Time
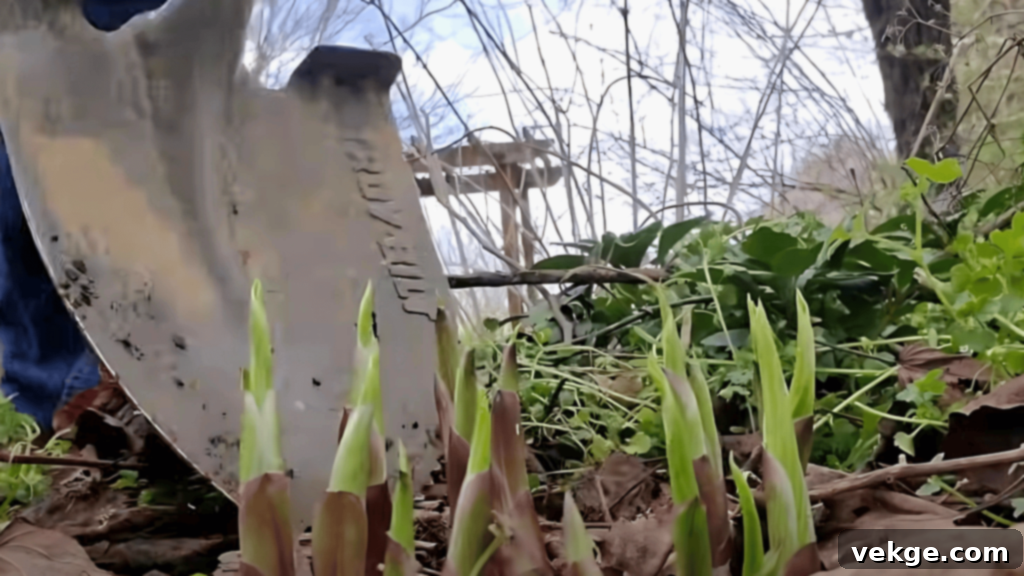
As previously emphasized, early spring is the premier time for dividing hostas. The ideal moment is when the new shoots, often referred to as ‘spears’ or ‘pips’, are just beginning to push up from the soil but have not yet unfurled into full leaves. This stage minimizes the amount of foliage that can be damaged during the process and reduces the overall stress on the plant. Spring divisions benefit from the entire upcoming growing season to recover and establish a robust root system, ensuring they are strong and resilient before winter’s arrival. While fall is a secondary option, it is most successful if there is ample time (at least 6-8 weeks) before the first hard frost to allow root development.
Step 2: Dig Up the Clump
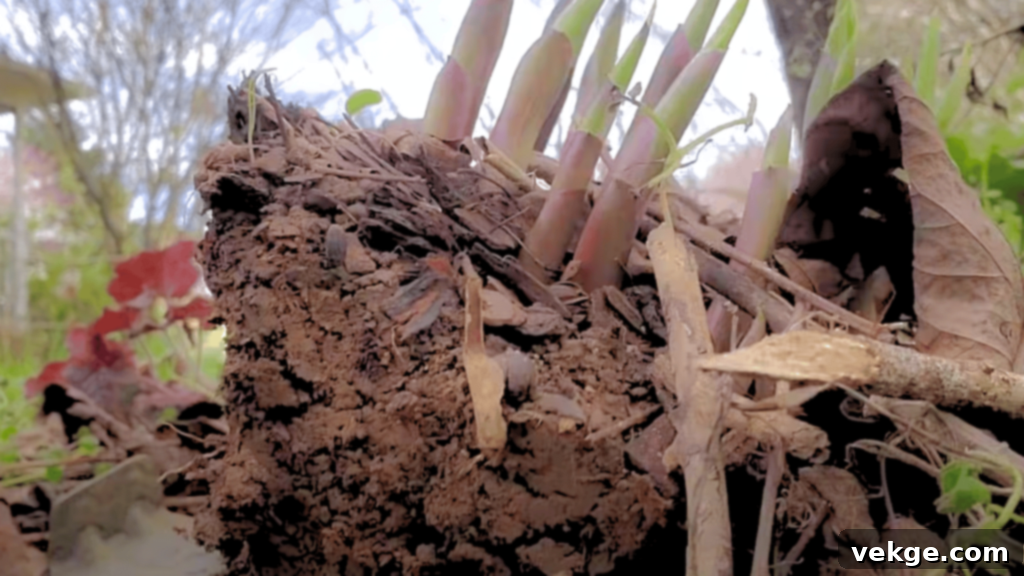
Begin by using a sturdy, sharp spade or shovel to dig a wide circle around the perimeter of the hosta clump, starting approximately 6 to 12 inches out from the base of the plant. This generous distance helps to minimize damage to the root ball. Work your way around the entire clump, gently leveraging the shovel to loosen the soil underneath. Once the root ball feels sufficiently loose, carefully lift the entire plant from the ground. Try your best to retain as much soil as possible around the roots, as this significantly reduces transplant shock. Transport the clump to your wheelbarrow or tarp. Once out of the ground, gently shake off or carefully rub away any excess loose soil to better expose the root structure and identify natural separation points within the clump.
Step 3: Divide the Plant
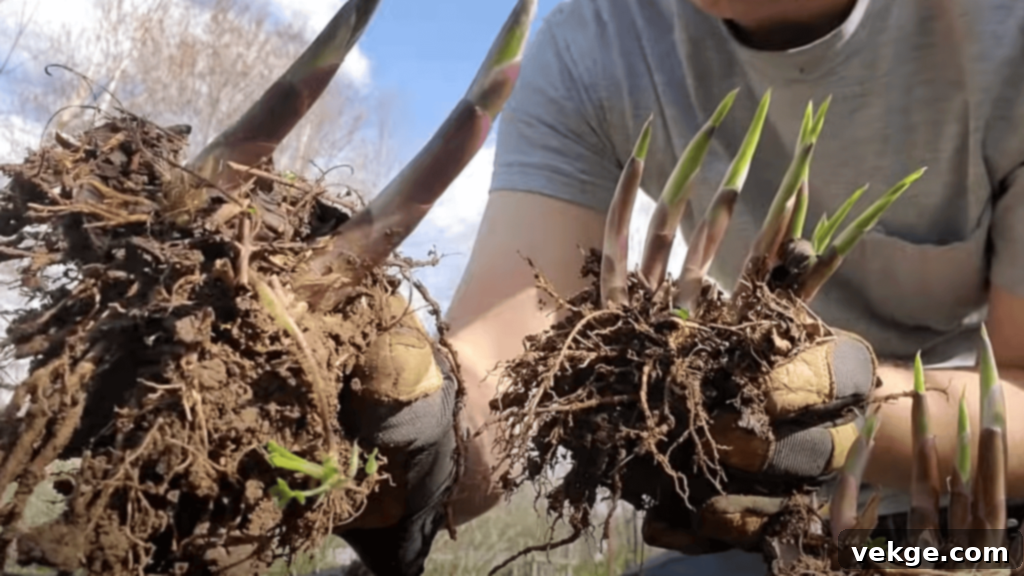
With the hosta clump exposed, identify the natural divisions where smaller clusters of ‘eyes’ or shoots emerge, each with its own viable root base. Each successful division should ideally have at least two to three healthy shoots and a sufficient root mass to support new growth. For most clumps, you can gently pull the sections apart by hand. For particularly dense or older clumps with tough, interwoven roots, a clean, sharp knife or even a sturdy spade pushed through the center of the clump might be necessary. Don’t be overly concerned if you hear some roots cracking; hostas are remarkably resilient and recover well from this process. A single mature hosta clump can typically yield anywhere from three to five new plants, and sometimes even more, depending on its size and age.
Step 4: Replant the Divisions
Select a new location that offers partial to full shade, depending on the hosta variety, and features well-draining soil. Dig planting holes that are wide enough to comfortably accommodate the spread of each division’s roots and deep enough so that the crown (the point where the shoots emerge from the roots) will be level with the surrounding soil surface. If your native soil tends to retain too much moisture, incorporate a generous amount of organic matter such as compost, peat moss, or well-rotted wood chips to improve drainage and aeration. Carefully place each hosta division into its new hole, fanning out the roots. Ensure the crown is at the correct level, then backfill gently with soil, pressing down lightly to eliminate any air pockets around the roots. If desired, apply a root stimulator solution after planting to encourage faster root development.
Step 5: Mulch and Initial Care
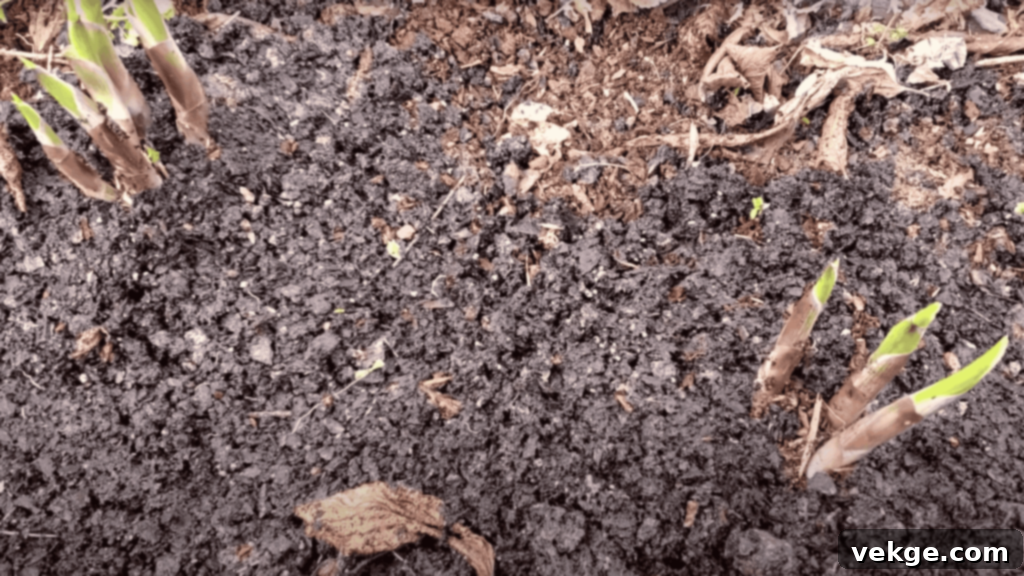
After replanting, apply a 1 to 2-inch layer of organic mulch (such as shredded bark, wood chips, or pine needles) around the base of each new division, keeping it a few inches away from the crown. Mulch helps to retain soil moisture, regulate soil temperature, and suppress weeds, giving your young plants an optimal environment to establish. Water each division thoroughly immediately after planting until the soil is consistently moist. For the first few weeks, maintain consistently damp (but not waterlogged) soil. If an unexpected late frost is forecast in spring, temporarily cover young divisions overnight with an upside-down pot or a frost cloth. Remain vigilant for common hosta pests like slugs, snails, deer, and rabbits, as newly transplanted, stressed hostas can be particularly vulnerable. With consistent care, your new divisions will quickly settle in and embark on a path of vigorous growth.
For a visual overview of the hosta division process, you can watch the YouTube video below:
Dividing Hostas in Containers or Raised Beds
Hostas grown in containers or raised beds have slightly different division requirements compared to those in the ground. Due to their confined root space, container hostas typically need division every 2 to 3 years, or whenever you observe roots circling the bottom of the pot or growing out of the drainage holes. To begin, carefully remove the entire plant from its container. If the root ball is tightly bound, you might need to gently pry it out. Once freed, hose off any excess soil to clearly expose the root structure.
Pot-bound roots can be incredibly dense and might require more aggressive intervention. Don’t hesitate to use a sharp knife or even a small hand saw to slice through thick, matted root masses. Ensure each division has a good portion of roots and at least two to three ‘eyes’ or shoots. When selecting new containers, choose ones that are at least 2 inches wider in diameter than the old ones to provide ample room for future root growth.
When and How to Replant in New Pots
When repotting divisions, it is crucial to use fresh, high-quality potting mix specifically formulated for containers, rather than heavy garden soil. Potting mix provides superior drainage and aeration, which is vital for container plants where standing water can quickly lead to root rot. Consider incorporating a slow-release granular fertilizer into the new potting mix, as this will provide a steady supply of nutrients to the divisions throughout their initial growing season. Plant each division at the same depth it was growing previously, ensuring the crown is level with the soil surface. Planting too deep can cause the crown to rot, just as it can in garden beds. After repotting, water thoroughly until water drains from the bottom, but always allow any excess water to drain completely to prevent waterlogged conditions.
Hosta Aftercare and Recovery Tips for New Divisions
Proper aftercare is crucial for helping your newly divided hostas recover quickly and establish successfully. Follow these tips to ensure a smooth transition:
- Provide Initial Shade: For the first two to four weeks, keep new divisions in a shaded or partially shaded location, even if the parent plant normally tolerates more sun. This temporary shade significantly reduces transplant stress and prevents leaf scorch while the roots are establishing.
- Delay Fertilization: Resist the urge to fertilize immediately after division. The roots are still recovering from the disturbance and need time to heal and re-establish. Introducing high levels of nutrients too soon can actually hinder root development.
- Consistent Moisture is Key: Check the soil moisture daily for the first month. New divisions require steady, even moisture to encourage root growth. Water deeply whenever the top inch of soil feels dry, but avoid overwatering, which can lead to soggy conditions and root rot.
- Snip Early Flower Stalks: If any flower stalks emerge shortly after division, it’s best to clip them off. This directs the plant’s energy away from flower production and back into developing a strong, healthy root system, which is paramount for long-term health.
- Light Fertilization Later: After 4 to 6 weeks, once the plants show signs of new growth, you can begin light fertilization. Use a balanced, slow-release granular fertilizer or a half-strength liquid feed. This provides a gentle boost without overwhelming the recovering roots.
- Cease Late-Season Fertilizing: Stop fertilizing approximately 8 weeks before your first expected frost date. Late-season fertilization can encourage tender new growth that will be vulnerable to cold damage, rather than allowing the plant to harden off for winter.
- Monitor for Stress and Pests: Keep a close eye on your new divisions. Browning leaf edges can indicate insufficient water or too much sun. Watch for signs of common hosta pests like slugs, snails, or deer, as stressed plants are more susceptible. Address any issues promptly.
Troubleshooting Common Mistakes in Hosta Division
Even with careful planning, sometimes things don’t go perfectly. Understanding common mistakes and their solutions can help you avoid problems or quickly rectify them:
- Dividing Too Late in Fall: This is a frequent error, especially in colder climates. Dividing hostas too close to winter means their roots don’t have enough time to establish before the ground freezes, leading to potential winter kill. If you must divide late, provide extra protection with a thick layer of mulch (4-6 inches) and consider planting the divisions in a more protected location, such as near a warm building foundation or under the canopy of an evergreen tree.
- Incorrect Planting Depth: Planting new divisions too deep can lead to crown rot, where the base of the plant suffocates and decays. Conversely, planting too shallow leaves the crown and upper roots exposed to drying winds and temperature fluctuations. The ideal depth is to ensure the crown, where the leaves emerge, is level with the surrounding soil surface. A good trick is to look for the ‘soil mark’ on the original plant’s stems; this line indicates its previous soil level. Adjust the amount of soil under the roots as needed to match this line.
- Forgetting Consistent Watering: New divisions are highly susceptible to drying out, especially during their first few weeks post-transplant. This is arguably the most common slip-up. Lack of consistent moisture inhibits root development and can cause the plant to wilt and decline. Implement a simple watering routine: check the soil daily by feeling the top inch, and water deeply whenever it feels dry. Don’t just rely on rainfall; new plants need directed moisture to their root zones.
- Neglecting Mulch: While seemingly a small detail, applying a layer of organic mulch after planting is highly beneficial. It helps retain crucial soil moisture, moderates soil temperature (keeping roots cool in summer and insulated in winter), and suppresses weeds that would otherwise compete for resources. A 2-inch layer is generally sufficient.
Conclusion
You now possess a comprehensive understanding of exactly when to divide hostas and the crucial signs to observe in your garden. The successful division of these beloved plants relies on a thoughtful combination of precise timing, diligent care, and attentive observation, all of which contribute to their continued strength and beauty year after year.
While the prospect of dividing a large hosta clump might initially seem like a significant undertaking, once you’ve successfully completed the process, it quickly becomes an intuitive and rewarding aspect of your gardening routine. And the considerable payoff? It’s truly remarkable: more breathing room for your existing plants, significantly improved growth and vitality, and an abundance of new plants to propagate, expand your own garden, or generously share with fellow gardening enthusiasts. You are now equipped with all the necessary knowledge and practical steps to perform hosta division correctly, eliminating any need for guesswork.
If you’re seeking further straightforward and effective strategies to enhance the beauty and health of your shade garden, we encourage you to explore other valuable resources and posts available here. You might just discover that perfect idea or insightful tip you’ve been searching for to take your gardening to the next level.
