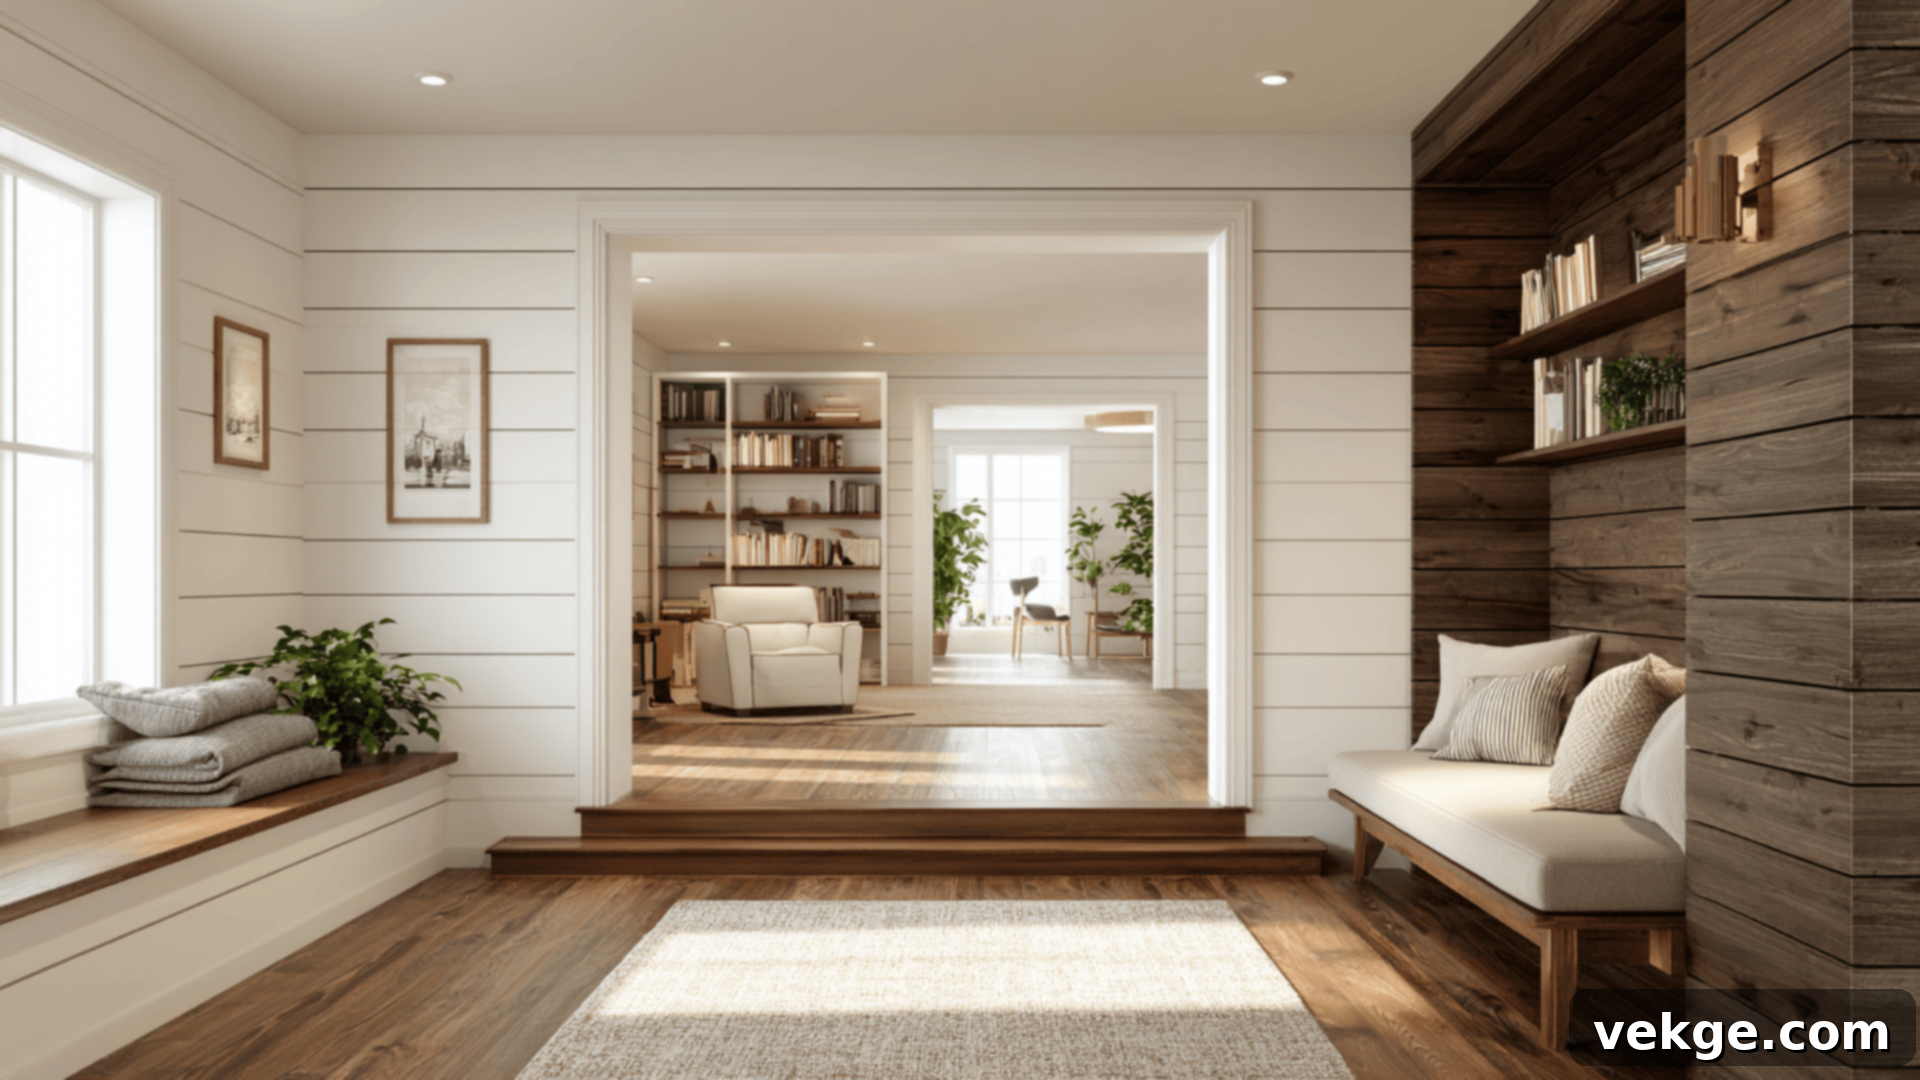
Transform Your Home: The Ultimate Guide to Wall Paneling Types and Installation
Are you gazing at dull, uninspired walls, yearning for a refresh but dreading a costly, full-scale renovation? I’ve been right there with you, dreaming of a stylish upgrade that’s both quick and impactful. That journey led me to the world of wall paneling, and it quickly proved to be an absolute game-changer for my home.
If you’re seeking a solution that artfully conceals wall imperfections, injects unique character into a room, and won’t strain your budget, then this comprehensive guide is tailored just for you. Wall paneling offers an incredible blend of aesthetic appeal and practical benefits, making it an ideal choice for any homeowner looking to revitalize their living space.
In this guide, I’ll walk you through everything you need to know: from exploring the most popular types of wall paneling and where each shines brightest, to providing clear, step-by-step installation instructions. You’ll learn valuable tips on how to shop smarter, choose materials that perfectly complement your space, and most importantly, what common pitfalls to avoid along the way. Get ready to transform those bland walls into stunning focal points you’ll be proud to show off!
Are you ready to unlock the potential of your empty walls and discover a style that truly speaks to you? Let’s dive in and find the perfect paneling solution that brings your vision to life.
What Is Wall Paneling and Why It’s a Homeowner’s Best Friend
At its core, wall paneling is a decorative covering applied over existing walls. Far more than just an aesthetic addition, it’s a versatile design element that can dramatically alter the look and feel of any room. Available in an impressive array of styles—from timeless classics to sleek modern designs—and crafted from diverse materials like natural wood, durable plastic, or advanced composite materials, paneling offers unparalleled flexibility.
Incorporating wall paneling into your home introduces immediate texture and depth, transforming flat, uninteresting surfaces into dynamic features. It can instantly infuse warmth into a stark room, provide an elegant solution for concealing minor wall imperfections or damage, and deliver a polished, high-end finish that elevates your entire decor. Beyond its visual benefits, certain types of paneling can even contribute to better home insulation, helping to regulate indoor temperatures, or offer minor soundproofing qualities, creating a more serene environment.
With such a vast selection available, each type boasting its unique appearance, price point, and functional advantages, there’s truly a paneling style to fit every goal and budget. Whether your primary aim is to protect your walls from daily wear and tear, add an architectural detail, or simply make a bold design statement, wall paneling provides a cost-effective and stylish answer.
Wall Paneling Comparison Chart: A Quick Overview of Popular Styles
Before we delve into the intricate details of each paneling type, this quick comparison chart offers a side-by-side look at the most common styles. Use it as a handy reference to understand their key characteristics, ideal applications, and installation considerations, helping you narrow down the best fit for your specific project.
| Type | Look & Feel | Best Use | Water Resistance | DIY Difficulty |
|---|---|---|---|---|
| Beadboard | Classic, narrow vertical lines | Hallways, bathrooms, kitchens | Medium | Easy |
| Shiplap | Horizontal lines, rustic farmhouse/modern coastal | Living rooms, bedrooms, accent walls | Low (unless sealed) | Moderate |
| FRP (Fiberglass Reinforced Panel) | Smooth, durable, industrial | Bathrooms, basements, utility rooms | High | Easy |
| Board & Batten | Bold vertical framing, structured | Entryways, bedrooms, nurseries | Low | Moderate |
| Tongue & Groove | Seamless fit planks, classic/rustic | Kitchens, bedrooms, ceilings | Medium | Moderate to Hard |
| Raised/Flat Panel | Traditional architectural detail or clean-framed look | Dining rooms, offices, formal living areas | Low | Moderate to Hard |
| Wainscoting | Decorative lower wall accent, protective | Bathrooms, hallways, staircases | Medium | Easy |
| Slatwall/3D Panels | Modern, textured, geometric design | Accent walls, home offices, media rooms | Low to Medium | Moderate |
This chart is a great starting point for quickly comparing major paneling styles. It’s particularly useful for quickly assessing options based on your room’s function, desired aesthetic, and your comfort level with DIY projects. Remember to consider your home’s overall architectural style and the specific needs of each room as you make your choice.
Popular Types of Wall Paneling: A Detailed Exploration
Each type of wall paneling brings its own unique character, historical context, and best applications to the table. Understanding these differences is key to selecting the perfect style that will not only look stunning but also serve your functional needs.
1. Beadboard: The Quintessential Classic
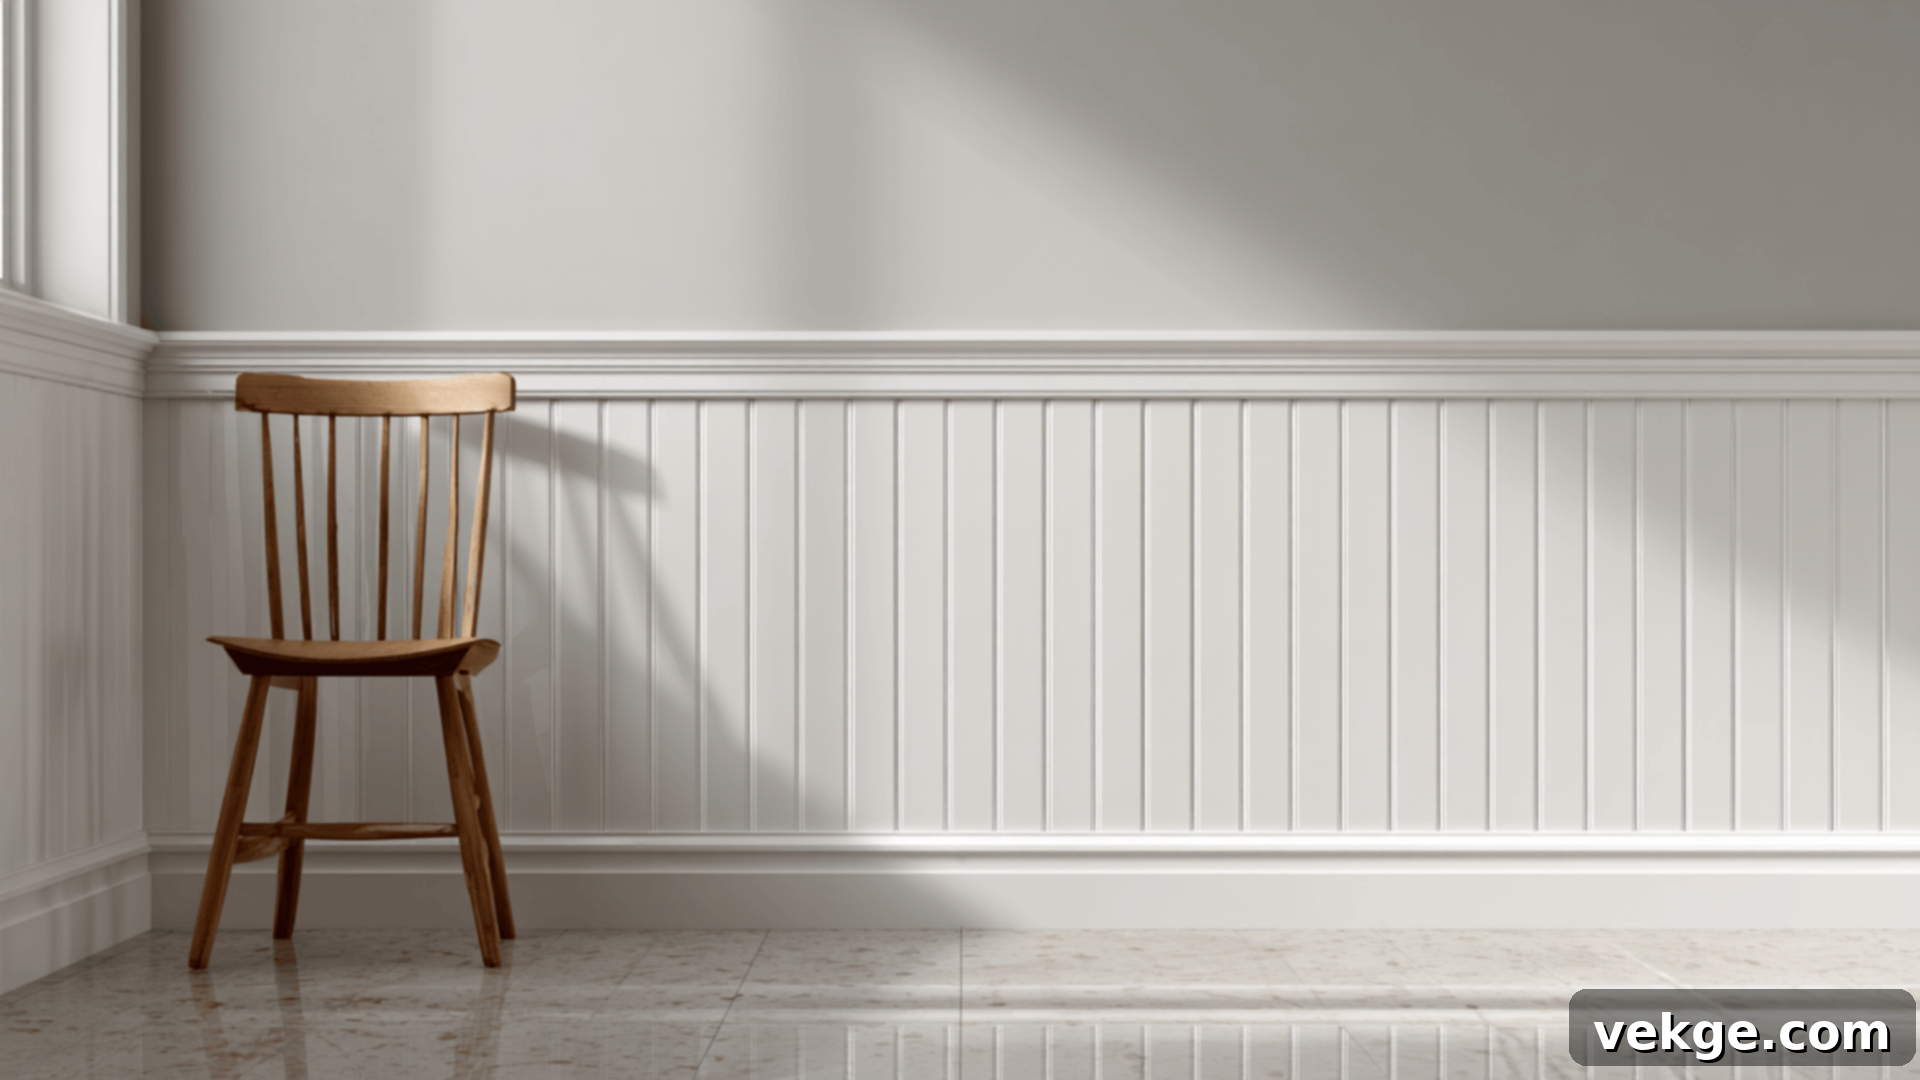
Beadboard paneling is instantly recognizable by its distinctive narrow vertical grooves, often referred to as “beads” and “planks,” which run the entire length of each panel. This design lends itself to a clean, crisp, and undeniably classic aesthetic that has graced homes for centuries. Its enduring charm makes it a fantastic choice for areas where you want to evoke a sense of tradition and comfort.
Historically, beadboard was used to protect walls and add insulation, particularly in utilitarian spaces. Today, it’s widely embraced in bathrooms, kitchens, hallways, and even laundry rooms or mudrooms. While traditionally installed on the lower third of a wall as wainscoting, full-height beadboard applications are increasingly popular, offering a more complete and immersive look. You’ll find beadboard crafted from solid wood for a premium feel, MDF (medium-density fiberboard) for an affordable and paint-ready option, or durable PVC, which is excellent for moisture-prone areas.
2. Shiplap: Farmhouse Chic and Coastal Cool
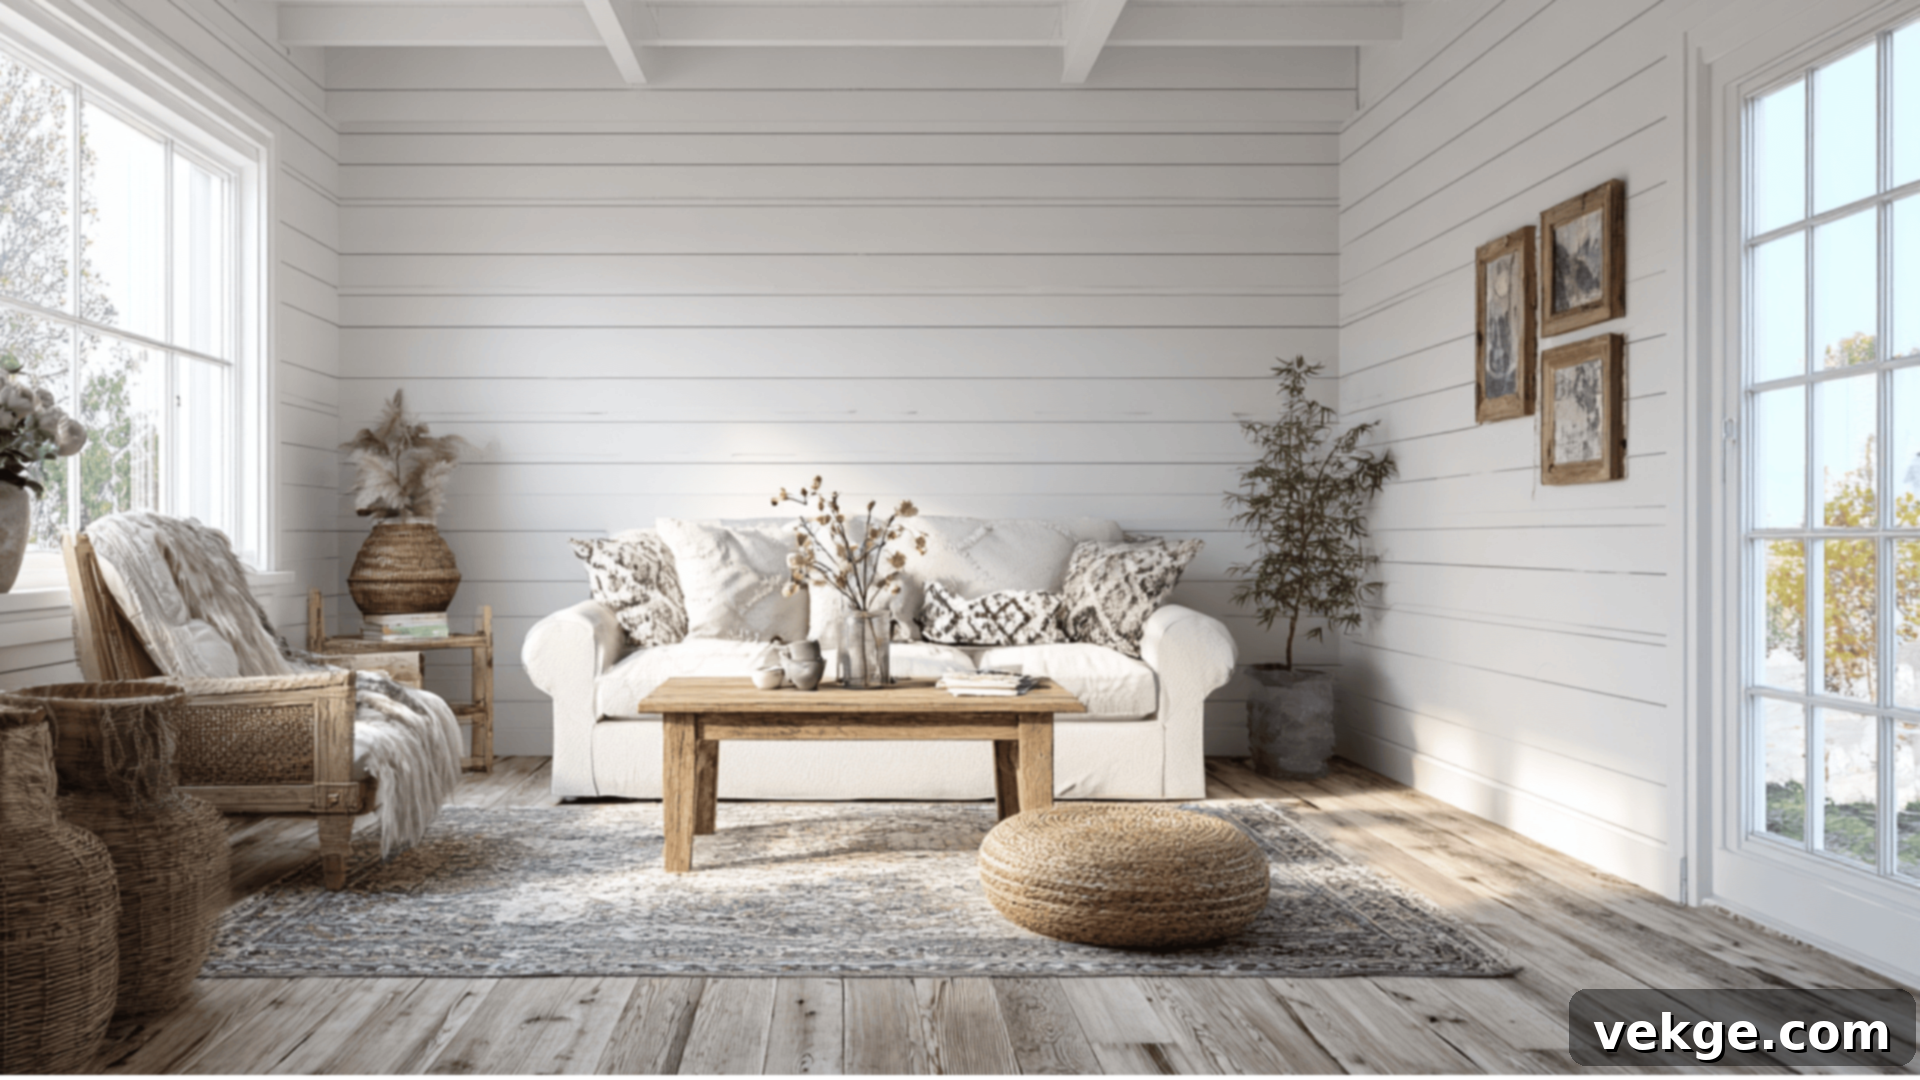
Shiplap panels are characterized by their unique overlapping edges, which create subtle horizontal lines and distinct shadow gaps between each board. This construction method, originally used for exterior siding on barns and sheds, has transcended its humble origins to become a cornerstone of modern farmhouse, rustic, and coastal-inspired designs. Its simplicity and clean lines provide a refreshing, relaxed feel that’s incredibly versatile.
This style has become a go-to for living rooms, bedrooms, and even as a striking accent wall behind a fireplace or bed. Shiplap can be painted a crisp white for a bright, airy, and modern aesthetic, or left in its natural wood state and stained to achieve a more rustic, organic look. While generally not the best choice for high-moisture areas unless properly sealed and painted, it excels at adding texture, character, and visual interest to dry interior walls.
3. Board and Batten: Bold Lines, Enduring Style
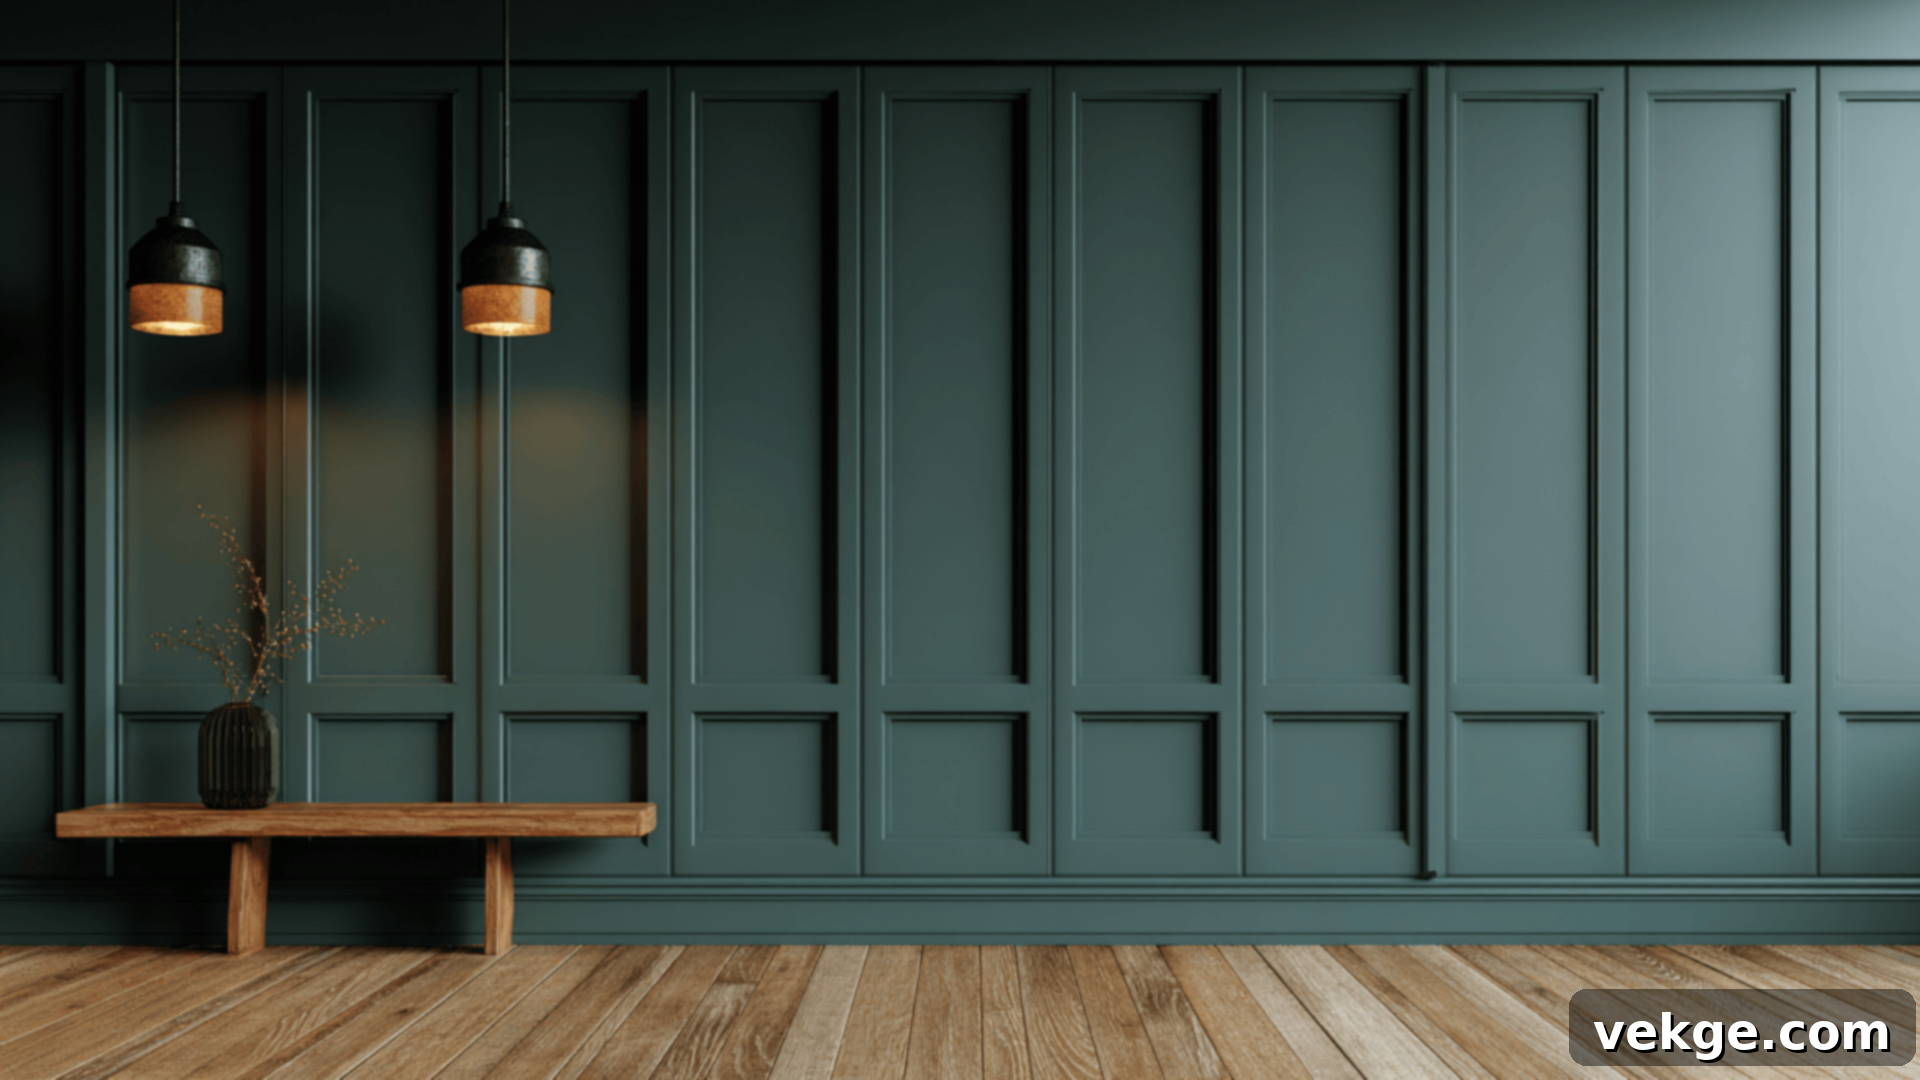
Board and batten paneling creates a striking, structured look by layering thin vertical strips (battens) over wider flat boards. This technique produces a graphic, almost architectural quality that can make walls feel taller, add significant depth, and bring a sophisticated definition to any space. It’s a style that masterfully blends both modern and traditional sensibilities, making it incredibly adaptable.
This visually powerful paneling is frequently used on feature walls, in grand entryways, or to create a cozy, defined feel in bedrooms and nurseries. It’s one of the most accessible DIY upgrades, often constructed using readily available MDF or plywood strips and a few basic tools. The simplicity of its geometric lines allows it to complement both contemporary minimalist homes and classic, more embellished interiors, offering a timeless appeal.
4. Tongue and Groove: Seamless Fit, Enduring Beauty
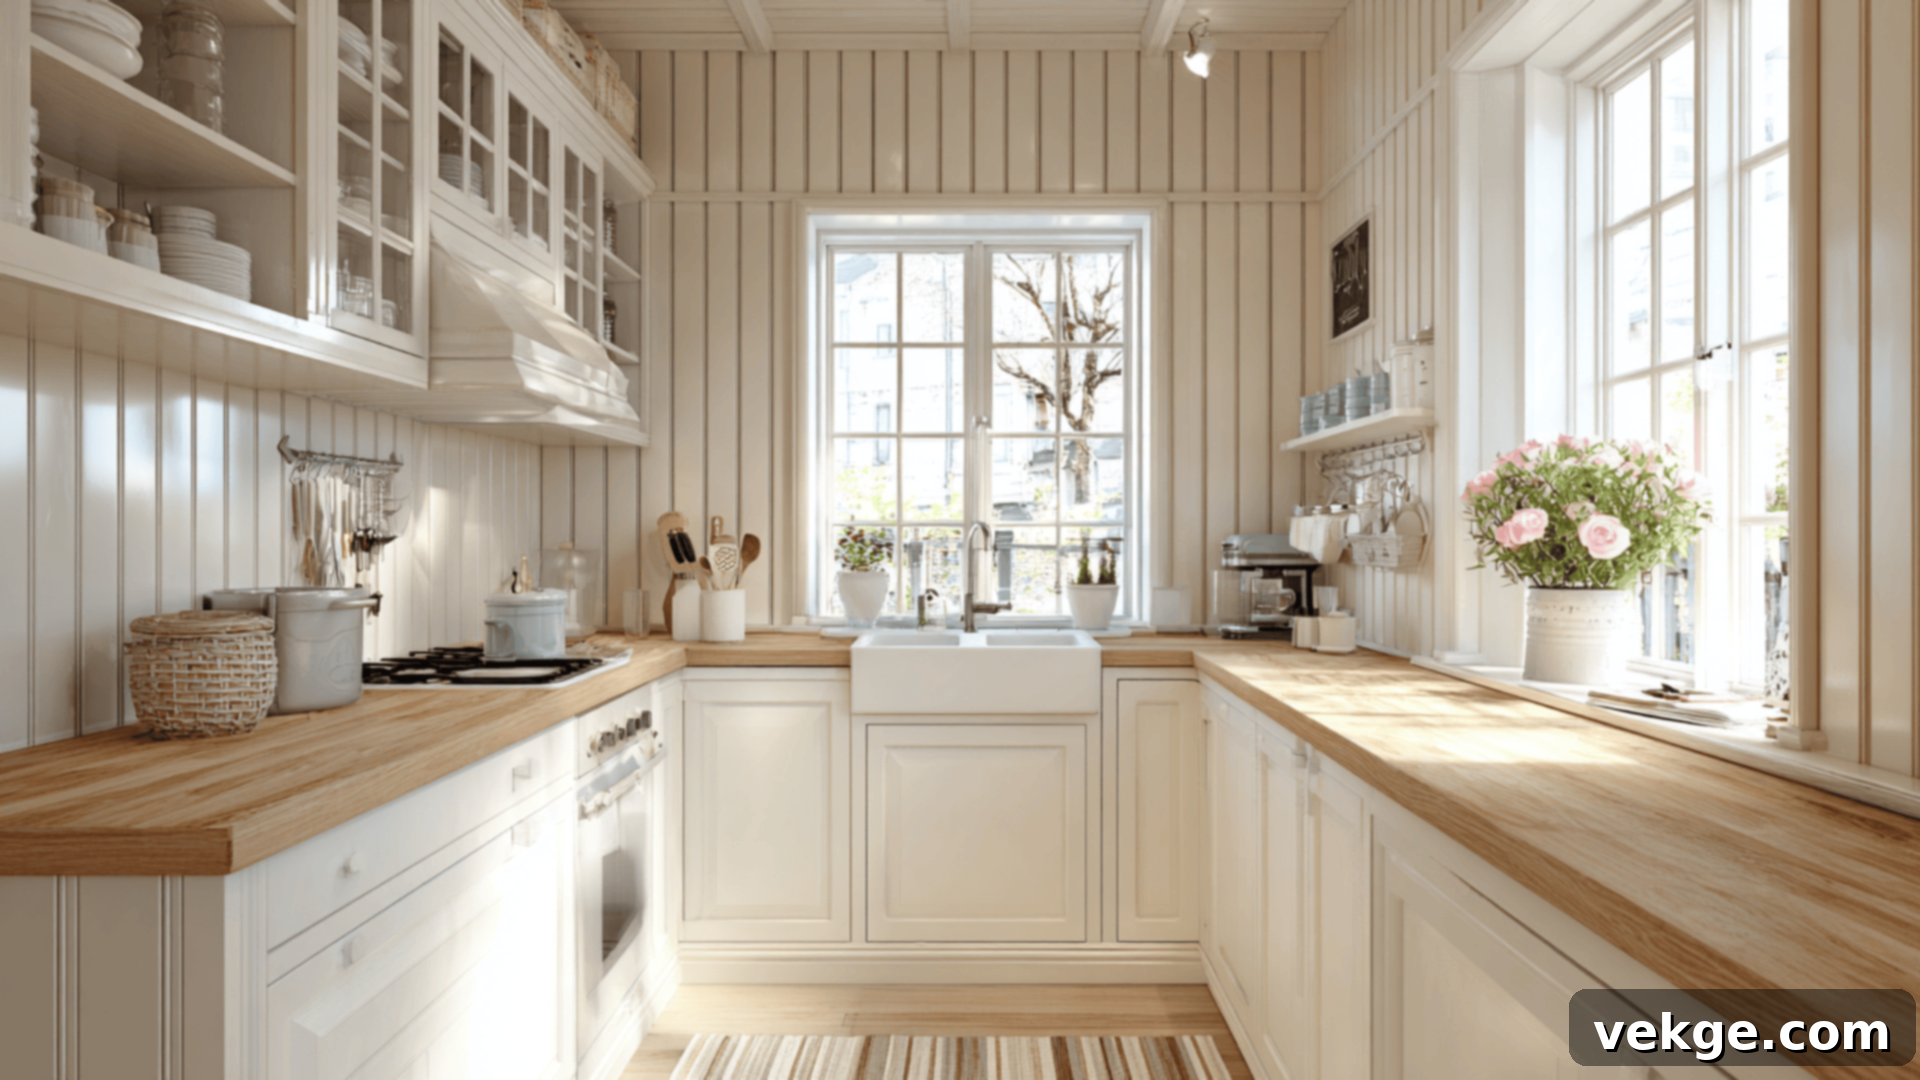
Tongue and groove planks are ingeniously designed to fit together with a protruding “tongue” on one edge and a corresponding “groove” on the other. This interlocking mechanism creates a tight, smooth, and robust finish, making the connections virtually invisible once installed. This method results in a continuous surface that is structurally sound and aesthetically pleasing, often seen in older, well-built homes or charming rustic cottages.
The subtle, refined texture of tongue and groove paneling adds a quiet elegance to bedrooms, kitchens, and even ceilings, where it can provide a beautiful, seamless overhead detail. While its installation typically requires a bit more precision and time compared to simpler shiplap or beadboard panels, the secure fit ensures exceptional durability. When properly sealed and painted or stained, tongue and groove paneling holds up remarkably well against daily wear and tear, making it a long-lasting investment.
5. Raised or Flat Panels: Architectural Elegance
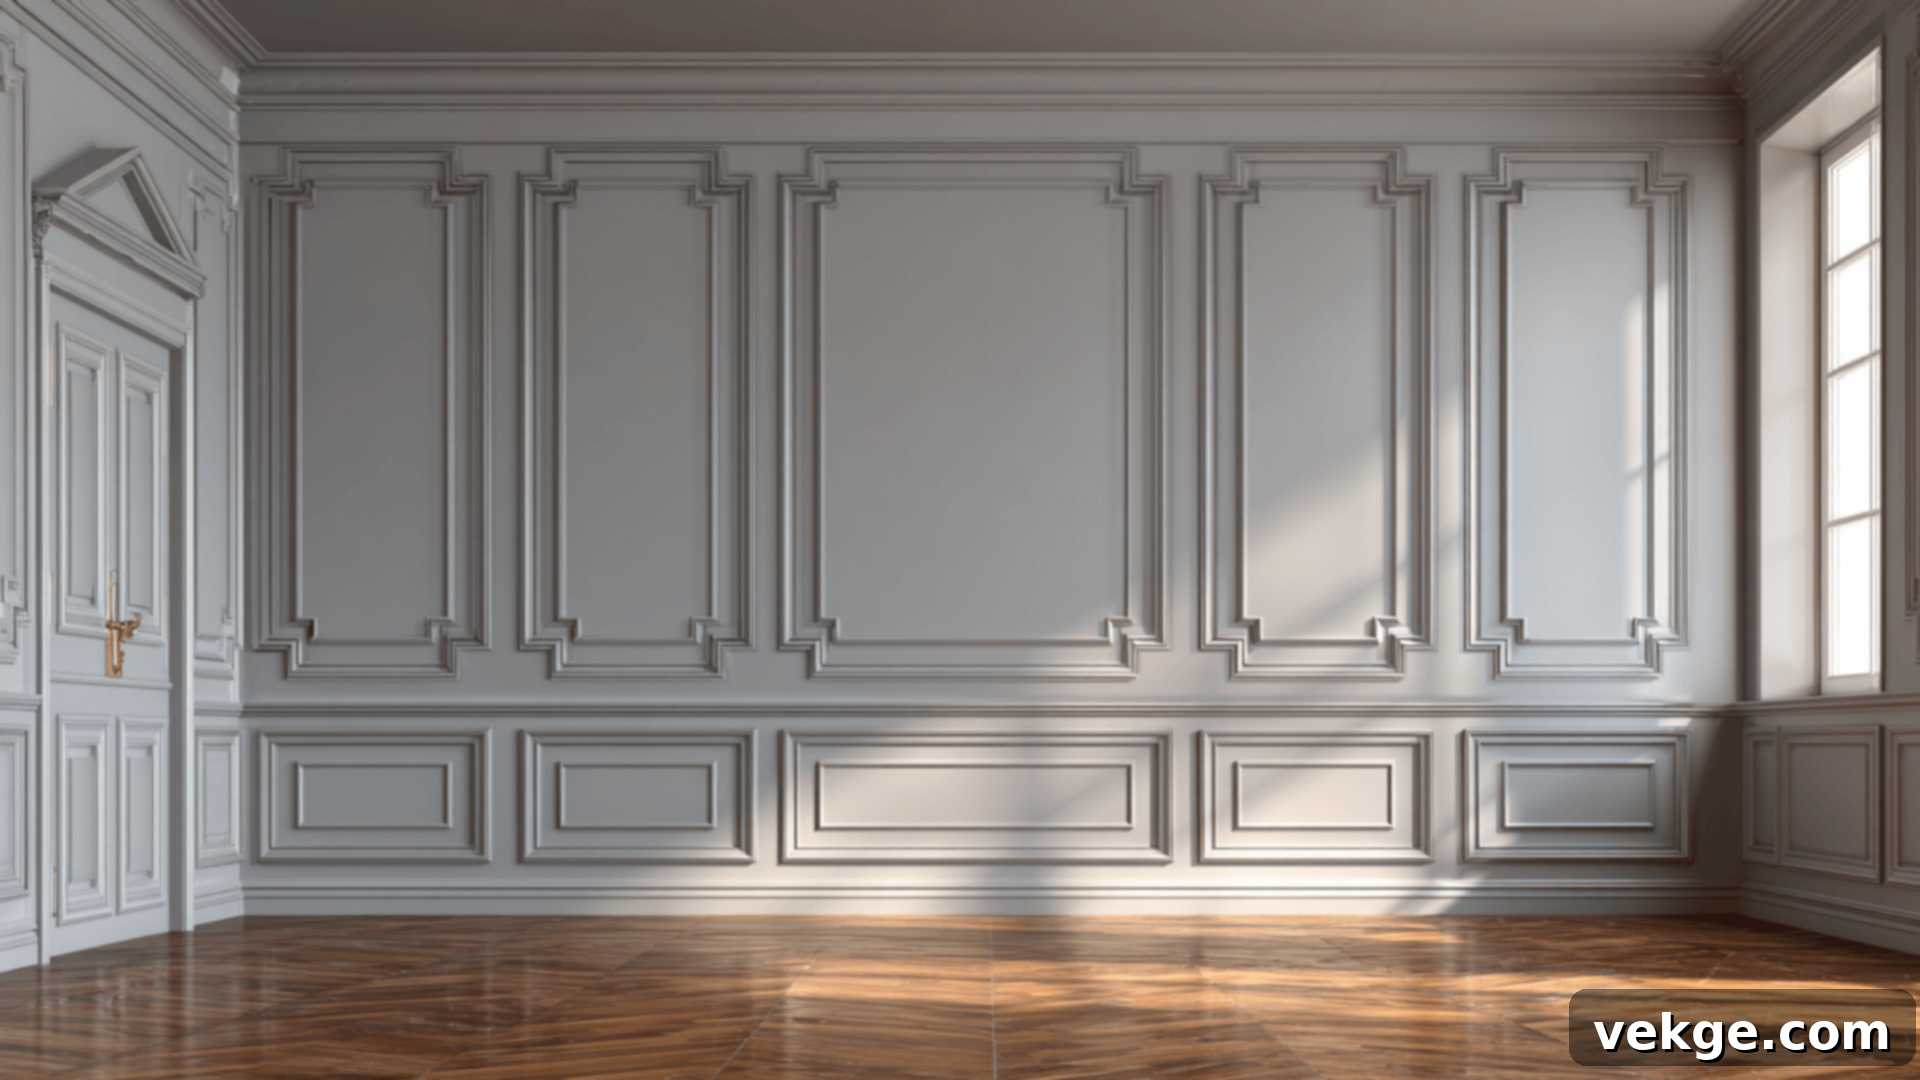
Raised paneling brings a classic, ornate, and often stately aesthetic to a room. It features framed sections where the inner panel is raised above the surrounding stiles and rails, creating distinct shadows and an impression of depth and craftsmanship. In contrast, flat panels offer a cleaner, more contemporary interpretation, with simple recessed lines that create a subtle, sophisticated frame around the inner panel, maintaining a sleek profile.
Both raised and flat panel styles are traditionally employed in more formal areas of the home, such as dining rooms, home offices, libraries, and grand entryways. They are primarily decorative, serving to enhance the architectural integrity of a space and provide a polished, custom-built appearance. Often paired with intricate trim, crown molding, or a substantial chair rail, these paneling types transform plain walls into sophisticated backdrops, elevating the perceived value and elegance of a room.
6. Wainscoting: The Protective & Decorative Lower Wall Accent
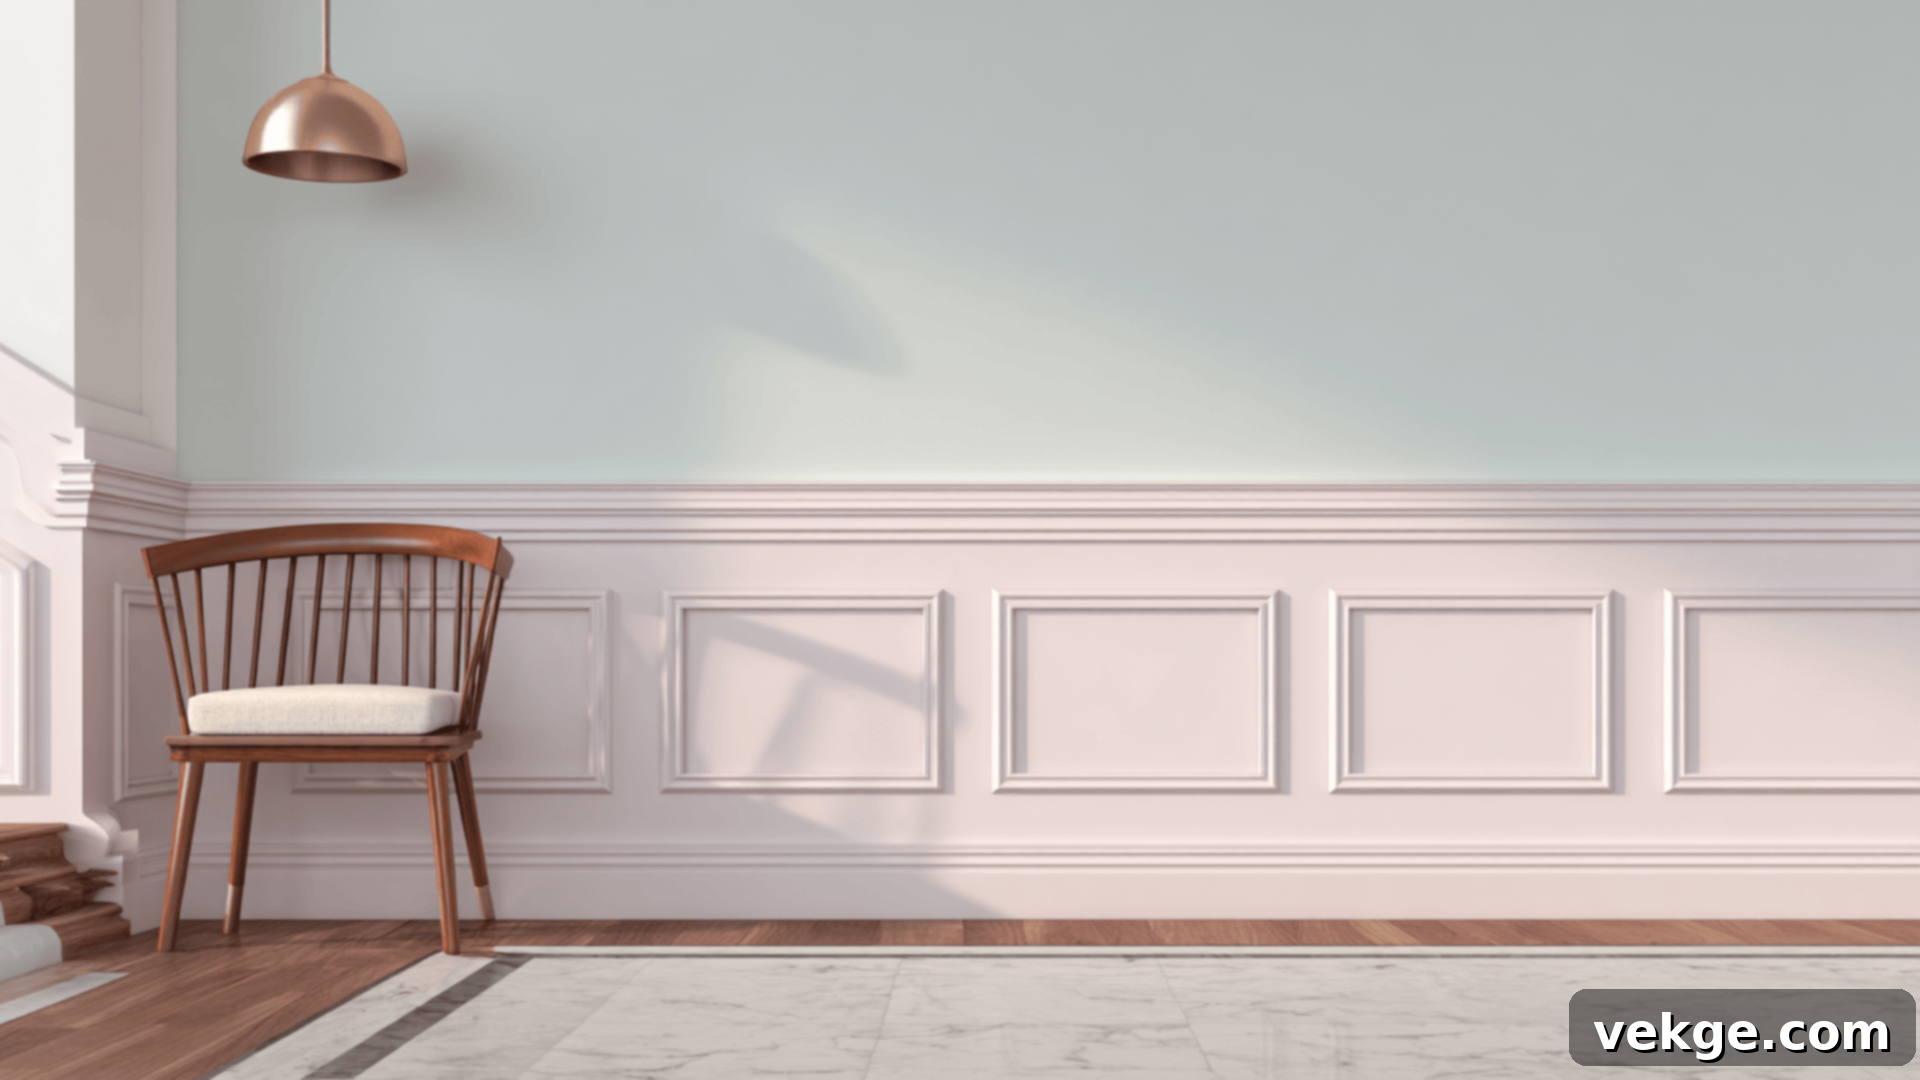
Wainscoting is a traditional decorative treatment that covers the lower portion of a wall, typically extending about one-third to one-half of its height. It is often capped with a stylish chair rail, which not only adds a finished look but also serves a practical purpose: protecting the wall from scuffs and bumps from furniture. Beyond its protective function, wainscoting adds significant visual balance, texture, and architectural interest to a room, grounding the space and making it feel more complete.
The beauty of wainscoting lies in its versatility; it’s not a single paneling type but rather a category that can incorporate various styles. You can create wainscoting using beadboard for a charming cottage feel, flat panels for a minimalist contemporary look, or even shiplap for a relaxed, farmhouse vibe. It’s an excellent way to dress up busy areas like hallways, staircases, and powder rooms without overwhelming the space, adding character and a touch of timeless elegance.
7. Slatwall and 3D Panels: Modern Depth and Texture
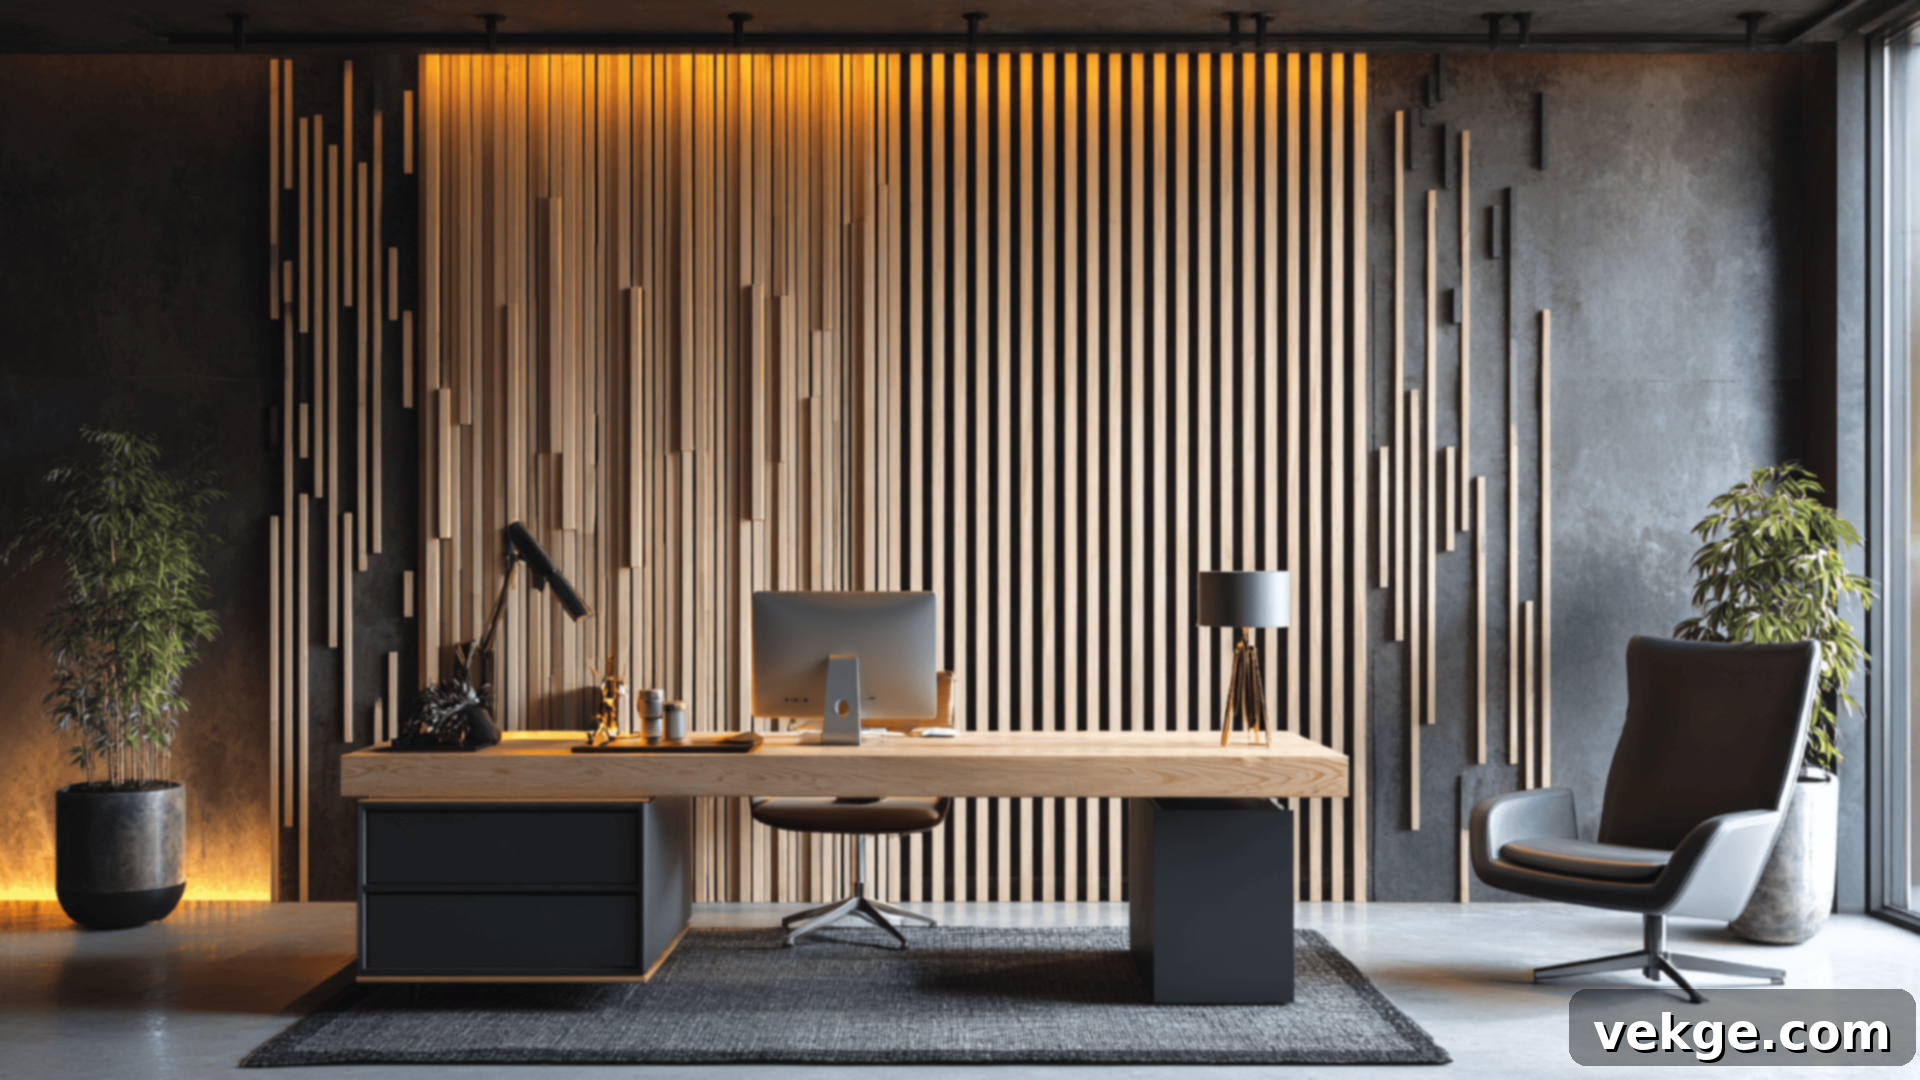
Slatwall and 3D panels represent the cutting edge of modern interior design, adding dynamic depth, intricate patterns, and captivating textures to any surface. Slatwall, typically composed of vertical wooden slats, creates a sophisticated linear rhythm that can make a room feel taller and more expansive. 3D panels, often made from PVC, composite, or even natural fibers, feature repeating geometric or organic patterns that project from the wall, creating stunning visual effects as light and shadow play across their surfaces.
These contemporary paneling styles are incredibly popular in modern office settings, minimalist homes, and as breathtaking accent walls in living rooms or media rooms. Many versions of slatwall, particularly those with a felt backing, also offer enhanced sound absorption, making them a functional choice for spaces where acoustics are important. They are designed to be statement pieces, perfect for infusing a modern, artistic, or high-tech feel into interiors.
8. FRP (Fiberglass Reinforced Panels): The Unsung Hero of Utility Spaces
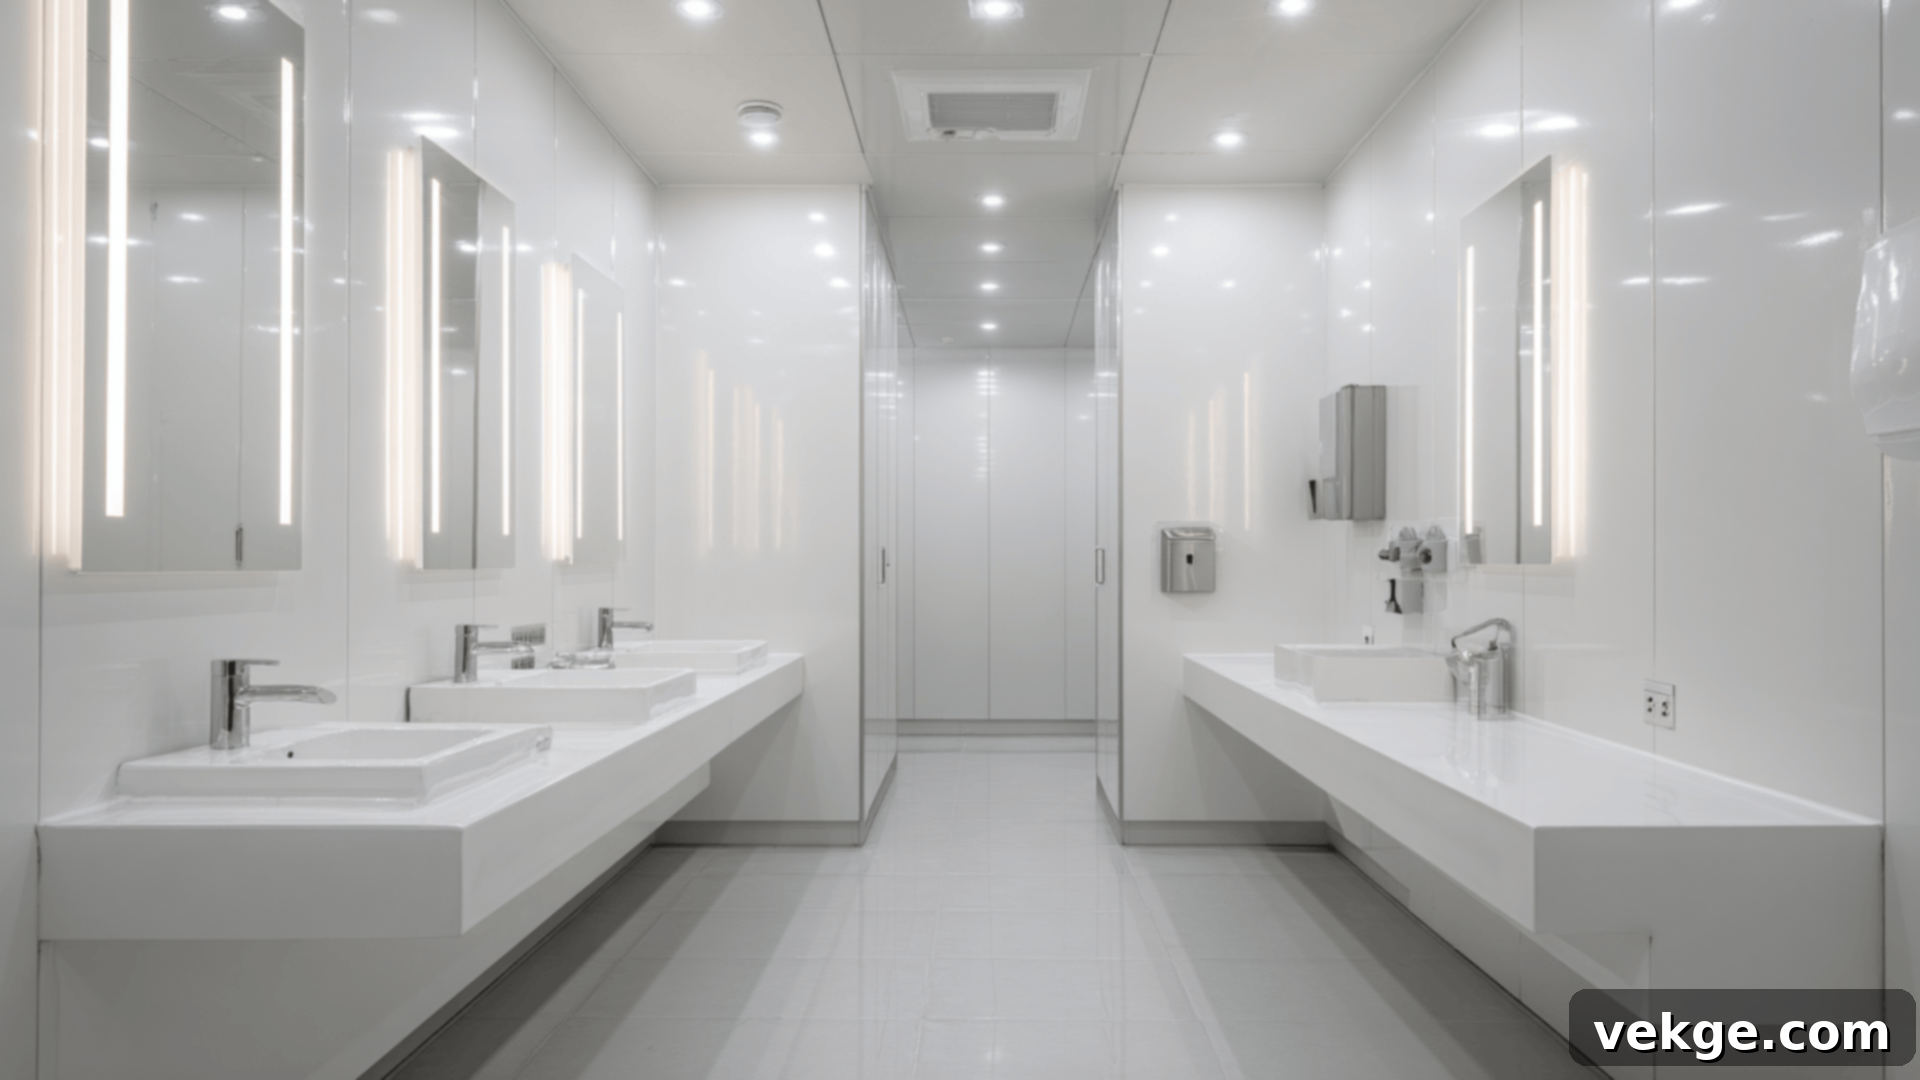
FRP panels, or Fiberglass Reinforced Panels, are the workhorses of wall coverings. While not typically chosen for their decorative flair, their exceptional durability, smooth surface, and lightweight nature make them an invaluable solution for high-traffic, high-moisture environments. They are a staple in commercial bathrooms, restaurant kitchens, laundry rooms, and basements due to their superior resistance to water, mold, mildew, and impact.
These panels are incredibly easy to clean and maintain, providing a hygienic surface that can withstand rigorous scrubbing. FRP can be installed quickly and efficiently using specialized adhesives or fasteners, making it a straightforward solution for functional needs. If you require a wall covering that can stand up to the toughest conditions, offering unmatched resilience and ease of maintenance, FRP is the ideal choice, ensuring your walls remain protected and sanitary for years to come.
Best Paneling for Each Room: Tailoring Style to Function
Selecting the right wall paneling for each room in your home involves a thoughtful balance of style, functional requirements, and the desired atmosphere. Here’s a detailed guide to help you pick the perfect paneling for every space:
Living Room: For a warm, inviting, and laid-back ambiance, consider horizontal shiplap. It works beautifully on feature walls, especially behind your sofa or fireplace, adding architectural interest without overwhelming the space. For a more sophisticated or contemporary aesthetic, opt for board and batten or sleek vertical wood slats in a soft, neutral color. These styles can define zones, add height, and create a focal point that ties the room together. Panel an entire wall for a dramatic effect or just the lower half for subtle charm.
Bathroom: When it comes to full bathrooms, durability and moisture resistance are paramount. Stick with FRP (Fiberglass Reinforced Panels) or PVC panels, which are fully waterproof, incredibly durable, and effortlessly easy to wipe down. For half baths or powder rooms with adequate ventilation, a classic sealed beadboard wainscoting can introduce a charming, timeless style, protecting the lower walls from splashes while adding character.
Bedroom: To create a serene and cozy retreat, tongue-and-groove panels bring a natural, subtle texture that enhances relaxation. Consider them for all walls or even on the ceiling for a cottage-like feel. For a more modern and stylish bedroom, a board and batten accent wall behind your bed, painted in a calm, soothing shade, can provide a luxurious backdrop and elevate the room’s design. Slatwall panels can also add a contemporary edge and, with acoustic backing, can improve sound quality for better sleep.
Basement: Basements often contend with moisture and require robust solutions. FRP or prefinished MDF panels are excellent choices, as they effectively manage moisture and can conceal wall imperfections with minimal effort. It’s best to avoid real wood paneling unless the basement is completely dry and climate-controlled. Choose lighter colors for any paneling in a basement to help darker or windowless rooms feel more open, bright, and less claustrophobic. These panels can also add a layer of insulation, improving comfort.
Kitchen: In the kitchen, durability and ease of cleaning are key. Beadboard or tongue-and-groove panels, particularly those made from PVC or properly sealed wood/MDF, can add a charming, rustic, or traditional touch to a breakfast nook or a specific wall. For backsplashes or areas prone to spills, FRP or tile-effect PVC panels offer a practical, low-maintenance solution. Ensure any wood-based paneling is well-sealed to withstand splashes and grease.
Dining Room: This is where raised or flat panel wainscoting truly shines. It adds a sophisticated, formal touch that complements traditional or transitional dining room aesthetics. Pairing it with a decorative chair rail and a complementary paint color on the upper wall creates a refined look perfect for entertaining. Board and batten can also offer a modern-traditional blend, making the room feel elegant and well-appointed.
Entryway/Hallway: These high-traffic areas benefit greatly from protective and decorative paneling. Wainscoting, whether beadboard, board and batten, or flat panel style, is ideal for shielding walls from scuffs, bags, and daily wear. It also adds significant character and a welcoming feel. Opt for durable materials and finishes that can withstand frequent contact and are easy to clean.
Quick Wall Paneling Installation Guide: Your DIY Blueprint
You don’t need to be a seasoned professional to successfully install wall paneling and achieve a stunning result. This straightforward guide walks you through the fundamental steps that apply to almost every paneling type, empowering you to tackle your next home improvement project with confidence.
Tools and Materials You’ll Need
- Tape Measure: For precise measurements of walls and panels.
- Pencil and Level: Essential for marking guidelines and ensuring panels are perfectly straight.
- Stud Finder: To locate wall studs for secure nailing, especially important for heavier panels.
- Saw: A hand saw for simple cuts or a power saw (miter saw, circular saw, or jigsaw) for faster, more accurate cuts around obstacles.
- Construction Adhesive: For a strong, secure bond, especially important in humid areas or for lighter panels.
- Nail Gun (or Hammer & Finish Nails): For attaching panels to studs, providing additional security.
- Caulk Gun: For applying adhesive and filling gaps or seams.
- Utility Knife: Handy for trimming smaller pieces or scoring lines.
- Sandpaper: Fine-grit sandpaper for smoothing cut edges or patching.
- Trim Pieces (optional): For finishing edges, corners, and creating a polished look.
- Paint, Stain, or Sealant (optional): If your panels aren’t prefinished, for protection and aesthetic enhancement.
- Safety Glasses and Gloves: Always prioritize personal safety during any DIY project.
Step-by-Step Installation Instructions
- Clean and Prep the Wall: Begin by thoroughly wiping down your existing wall to remove any dust, dirt, grease, or loose paint. Patch any significant holes or cracks with spackle and sand smooth. A clean, smooth surface ensures optimal adhesion and a flat, professional finish for your panels.
- Measure and Plan Layout: Use your tape measure to determine the dimensions of your wall. Calculate how many panels you’ll need, accounting for any waste. It’s wise to order 10-15% extra material. Mark vertical and horizontal guidelines on the wall using a pencil and a level. Dry-fit your first few panels if possible to visualize the layout and make any necessary adjustments before cutting.
- Cut Panels to Size: Carefully measure and mark each panel before cutting. Use your chosen saw to trim panels as needed to fit around electrical outlets, light switches, corners, windows, or ceiling lines. “Measure twice, cut once” is the golden rule here to avoid costly mistakes.
- Apply Adhesive or Nails:
- For Adhesive: Apply a high-quality construction adhesive to the back of the panel in long, vertical S-shaped lines or a zigzag pattern, ensuring good coverage, especially around the perimeter.
- For Nails: If using nails, locate your wall studs with a stud finder and mark them. Use a nail gun or hammer and finish nails to secure each panel, aiming for the studs or using appropriate wall anchors if studs aren’t accessible.
- Press and Hold in Place: Carefully position each panel on the wall, aligning it with your marked guidelines. Firmly press the panel into place. If using adhesive, hold it for 30–60 seconds to allow the adhesive to grip. Use your level to double-check that each panel is perfectly plumb and level before moving on to the next one.
- Fill Gaps and Seams: Once all panels are installed, use a paintable caulk to fill any visible gaps along seams, edges, or where the panel meets the ceiling, floor, or trim. For nail holes, use wood filler. Smooth out the caulk/filler with a damp finger or tool, then allow it to dry completely according to manufacturer instructions.
- Paint or Seal (if needed): If your chosen panels are not prefinished, now is the time to apply paint, stain, or a protective sealant. This step not only enhances the aesthetic appeal but also provides an extra layer of protection to the surface, especially for wood-based panels in areas prone to moisture or wear.
With careful planning and execution, you’ll be amazed at how quickly you can transform your space. You can purchase wall panels from major home improvement stores, online retailers, or specialty suppliers, each offering options to fit different needs, budgets, and design preferences.
Common Mistakes to Avoid: Learn from Others’ Errors
Even seemingly simple wall paneling projects can encounter frustrating setbacks if common mistakes are overlooked. Being aware of these pitfalls can save you time, money, and a great deal of effort, ensuring a smoother installation and a more professional, lasting result.
- Skipping Surface Prep: Neglecting to clean and properly prepare your wall is a recipe for disaster. Dirt, dust, grease, or uneven wall surfaces will prevent panels from adhering properly, leading to visible bumps, gaps, or even panels peeling off over time. Always ensure a clean, smooth, and dry substrate.
- Not Leveling the First Panel: The first panel sets the standard for the entire project. If your starting panel is even slightly crooked, every subsequent panel will be off, creating a noticeable tilt and misaligned lines. Always use a reliable level to meticulously check and recheck the first panel.
- Using the Wrong Adhesive: Not all adhesives are created equal. Using a standard adhesive in a high-humidity area (like a bathroom) where a moisture-resistant or waterproof variant is needed will inevitably lead to panels lifting or failing. Always choose the appropriate adhesive based on the panel material and the room’s environmental conditions.
- Ignoring Expansion Gaps: Wood and MDF panels naturally expand and contract with changes in humidity and temperature. Failing to leave small expansion gaps (typically 1/8 inch) around the perimeter can cause warping, buckling, or cracking as the material moves. These gaps can be easily covered by trim later.
- Overlooking Outlets and Switches: Rushing through the precise cutouts required for electrical outlets and light switches can result in unsafe fits, damaged panels, or a sloppy finish. Measure meticulously and use the correct tools (like a jigsaw) for clean, accurate cuts before installation. Always ensure power is off to these circuits for safety.
- Skipping Acclimation Time: Wood and MDF panels need time to adjust to the humidity and temperature of the room they will be installed in. Bringing them into the room and letting them sit for 1–2 days before installation, known as acclimation, prevents warping, shrinking, or gapping after they’re installed.
- Not Ordering Enough Material: Underestimating material needs is a common mistake that can halt your project mid-way. Always measure carefully and add an extra 10-15% for cuts, mistakes, and future repairs. This saves you the headache of multiple trips to the store or waiting for a new delivery.
- Poor Planning of Cuts: haphazard cutting can lead to excessive material waste. Plan your cuts strategically to maximize panel usage, starting with longer pieces and using remnants for shorter sections. This is especially important for patterned panels where alignment matters.
By diligently avoiding these common mistakes, your wall paneling project will not only run smoother but also yield a more durable, professional, and visually appealing result. A little extra care and foresight upfront truly pay off in the long run.
Where to Buy Wall Paneling: Your Shopping Guide
Finding the right wall paneling is crucial for your project’s success. Fortunately, there are many reputable retailers, both online and in-store, offering a wide array of options to suit various styles, budgets, and project needs.
- Lowe’s: A go-to for many DIY enthusiasts, Lowe’s offers a comprehensive range of foundational paneling types, including beadboard, MDF panels, and various wainscoting kits. You’ll also find all the necessary accompanying materials like trim, construction adhesive, and caulk readily in stock. They often provide bulk pricing for larger projects and may offer custom ordering services. Their in-store staff can also be a valuable resource for advice.
- Home Depot: Similar to Lowe’s, Home Depot excels in providing practical paneling solutions, particularly for high-moisture areas. Look for their selection of FRP (Fiberglass Reinforced Panels), prefinished MDF, durable vinyl boards, and classic painted shiplap. Many items are available for convenient same-day pickup, making it ideal for spontaneous projects or when you need materials quickly. They also have extensive tool rental options.
- Amazon: For modern, unique, or niche paneling styles, Amazon is an unparalleled resource. It features innovative options like peel-and-stick wood panels (great for renters or temporary updates), striking 3D PVC panels, and contemporary acoustic slats. While offering vast variety and competitive pricing, it’s crucial to thoroughly read customer reviews, compare different brands, and double-check sizing and return policies before purchasing online.
- Walmart: If you’re looking for fast, budget-friendly updates, Walmart can be a surprising option. While its selection is generally smaller and more limited, you can often find very affordable peel-and-stick paneling options, particularly for small spaces or accent walls. Many items ship free, and seasonal deals can offer significant savings for those on a tight budget.
- Specialty Lumber Yards & Building Suppliers: For higher-quality wood paneling, unique species, or custom milling, local specialty lumber yards or dedicated building supply stores are excellent choices. They often offer superior wood grades, personalized service, and expert advice that big-box stores can’t match. This is ideal for bespoke projects or when you desire a premium, natural wood finish.
- Architectural Salvage Stores: For a truly unique and eco-friendly approach, explore architectural salvage stores. You might uncover vintage wood panels, reclaimed shiplap, or antique wainscoting that can add unparalleled character and history to your home. While selection varies, the treasures you find can create a truly one-of-a-kind interior.
Conclusion: Your Walls, Reimagined
From personal experience, embracing wall paneling has been one of the simplest yet most impactful ways to update my living spaces without the upheaval and expense of a complete overhaul. It’s a smart, effective fix that continually delivers stunning results.
Now that you’re equipped with a comprehensive understanding of the various types of wall paneling, where each style truly shines, and the practical steps to install them, you are perfectly positioned to embark on your own transformation project. Whether your goal is to cleverly conceal existing wall damage, add a layer of protection, or simply infuse your home with a fresh, cleaner, or more textured look, wall paneling has the power to make an extraordinary difference.
Remember to approach your project with patience, meticulous preparation, and a keen eye on avoiding the common pitfalls we’ve discussed – lessons I, too, learned the hard way at times! Take your time to select the paneling that genuinely resonates with your space and personal style, then make it uniquely yours. The satisfaction of seeing your vision come to life on your walls is incredibly rewarding.
If this guide has sparked your inspiration, I invite you to explore more! Check out other posts on the website for a wealth of easy DIY ideas, practical home updates, and actionable tips that truly work. I’m always eager to share insights and projects that have proven successful for me, and I believe they might just be the perfect solutions for you too. Happy paneling!
