Transform Your Home: Unleash Creativity with Funky Hand-Painted Furniture Ideas
Are you tired of walking into furniture stores only to find the same mass-produced, uninspiring pieces that look just like everyone else’s? I used to feel that exact frustration, longing for furniture that truly reflected my personality and style, rather than just filling a space.
Then, I discovered the incredible world of hand-painted furniture, and it completely revolutionized how I view home decor. What if I told you that an old, forgotten dresser languishing in your garage or a thrift store find could become a stunning, one-of-a-kind focal point in your home? Hand-painted furniture empowers you to create bespoke pieces that speak volumes about who you are. It’s an opportunity to transform ordinary, pre-loved items into unique conversation starters, save a significant amount of money, and unleash your inner artist all at once.
In this comprehensive guide, I’m excited to share a collection of funky hand-painted furniture ideas designed to ignite your inspiration and encourage you to pick up a brush. Forget complicated, intimidating projects; these are fun, approachable, and truly transformative modifications that anyone, regardless of their artistic skill level, can successfully try. Get ready to embark on a creative journey and turn your furniture from forgettable into absolutely fabulous.
The Irresistible Benefits of Funky Hand-Painted Furniture
Embracing hand-painted furniture has fundamentally shifted my approach to decorating my home. Instead of succumbing to the temptation of expensive new purchases, I began to see potential in every old piece. Armed with bold colors and playful patterns, I started painting, and the transformation has been nothing short of fantastic. Each piece now tells its own unique story, infusing my home with a level of personality and warmth that simply cannot be replicated by store-bought items.
Cultivate a One-of-a-Kind Look for Your Home
I distinctly remember the first piece I ever painted – an unassuming old coffee table. I never anticipated that this single project would bring such an extraordinary amount of character and charm to my living space. What started as a simple experiment with bold stripes has evolved into a centerpiece that sparks more conversations and receives more compliments than any mass-produced item I’ve ever owned.
So, what truly makes it special? The answer is simple: no one else has anything quite like it. I’ve carefully blended colors that perfectly complement my existing curtains and throw pillows, meticulously crafting a cohesive look that feels thoughtfully curated and utterly unique. This personal touch ensures that your home reflects your individuality, making it truly yours.
Embrace a Sustainable and Eco-Friendly Approach to Decor
Last year alone, I proudly saved five large furniture pieces from the unfortunate fate of ending up in landfills. My secret? I actively seek out solid wood pieces at yard sales, flea markets, and thrift stores. Not only is this approach incredibly satisfying, but it’s also a powerful act of environmental responsibility. Many older pieces are often crafted from superior materials and boast more robust construction than much of the new, disposable furniture on the market today.
For instance, I once spent a mere $40 on a solid oak dresser that merely required a little tender loving care and a fresh coat of paint. This was a fraction of the $500+ I would have spent on a brand-new, often lesser-quality dresser. By choosing to upcycle, I not only saved money but also prevented a perfectly good, durable piece of furniture from going to waste, contributing to a more sustainable lifestyle.
Tailor Every Piece to Your Evolving Personal Style
What I cherish most about painting my own furniture is the unparalleled freedom to change and adapt it whenever my style or needs evolve. Just last month, I felt my bookshelf in the home office wasn’t quite fitting the desired aesthetic. Instead of embarking on a tiresome shopping spree for a replacement, I simply grabbed some paint and gave it a vibrant new look over a single weekend. Through experience, I’ve discovered that bold patterns can create an energetic focal point in my living room, while my bedroom pieces often benefit from more subtle, calming designs.
My journey began with smaller, less daunting projects, such as side tables, gradually building my confidence before tackling larger pieces. Each project served as a valuable learning experience, honing my skills and understanding of different techniques. Of course, I’ve made my share of mistakes – like forgetting to properly sand my first cabinet, leading to paint peeling after only a week. However, these mishaps were crucial teachers, helping me grasp what truly works and what doesn’t.
Now, I possess the confidence and knowledge to transform virtually any piece to perfectly match my vision, whether it’s injecting bright, cheerful colors into my kitchen or cultivating a serene, tranquil ambiance in my bedroom. The possibilities are truly endless, and the control over your decor is incredibly liberating.
25 Funky Hand-Painted Furniture Ideas to Ignite Your Imagination
Prepare to be inspired! These are my 25 favorite hand-painted furniture modifications, meticulously curated to help you see old pieces in a completely new and exciting light. This diverse collection of ideas spans from eye-catching geometric patterns to whimsical nature scenes, and I’ve thoughtfully organized them to guide you from beginner-friendly projects to more advanced techniques. Each suggestion offers a unique opportunity to infuse your home with personality and charm.
1. Geometric Painted Coffee Table: A Modern Focal Point
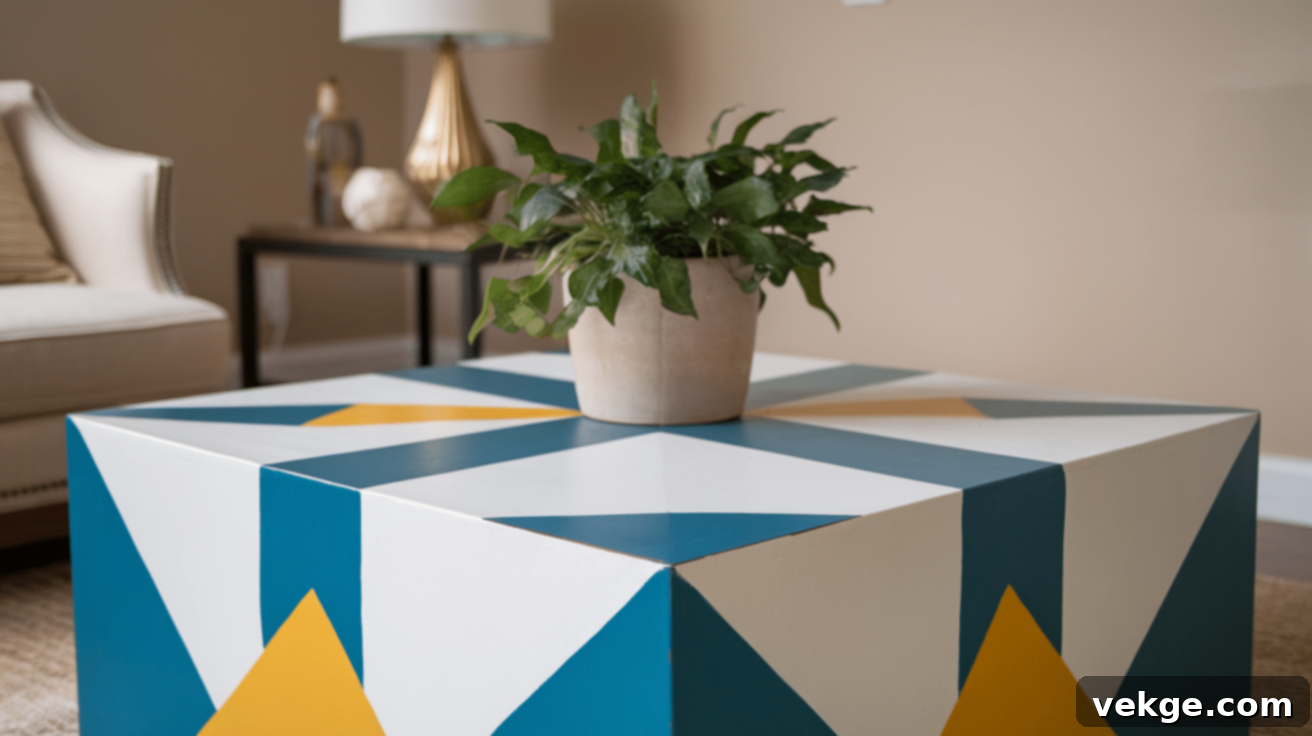
I gave an old coffee table a striking makeover by painting bold geometric patterns in an array of vibrant colors. The sharp lines and contrasting hues instantly added a dynamic, modern flair to my living room, making it an undeniable eye-catching focal point and a true statement piece. This is an excellent project for beginners looking to make a big impact.
Steps to Follow:
- Thoroughly sand the table surface to ensure optimal paint adhesion and smoothness.
- Carefully tape off your desired geometric shapes using high-quality painter’s tape for crisp lines.
- Apply paint to each distinct section with different, bold colors, allowing each coat to dry fully.
- Once all paint is completely dry, apply a durable clear varnish to protect the design and ensure longevity.
2. Abstract Painted Bookshelf: Whimsical Storage

My once-plain bookshelf truly became a conversation starter when I adorned it with abstract, flowing colors and organic shapes. The resulting design was playfully artistic yet subtly modern, seamlessly integrating with my eclectic home decor style. It transformed a functional item into a piece of art.
Steps to Follow:
- Clean and lightly sand the bookshelf, preparing the surface for paint.
- Use a pencil to lightly sketch your abstract shapes or flowing lines onto the surface.
- Paint with acrylic paints, carefully blending colors directly on the surface for a fluid, dynamic effect.
- Seal the finished artwork with a clear, protective topcoat to ensure durability.
3. Floral Painted Nightstand: A Touch of Whimsy
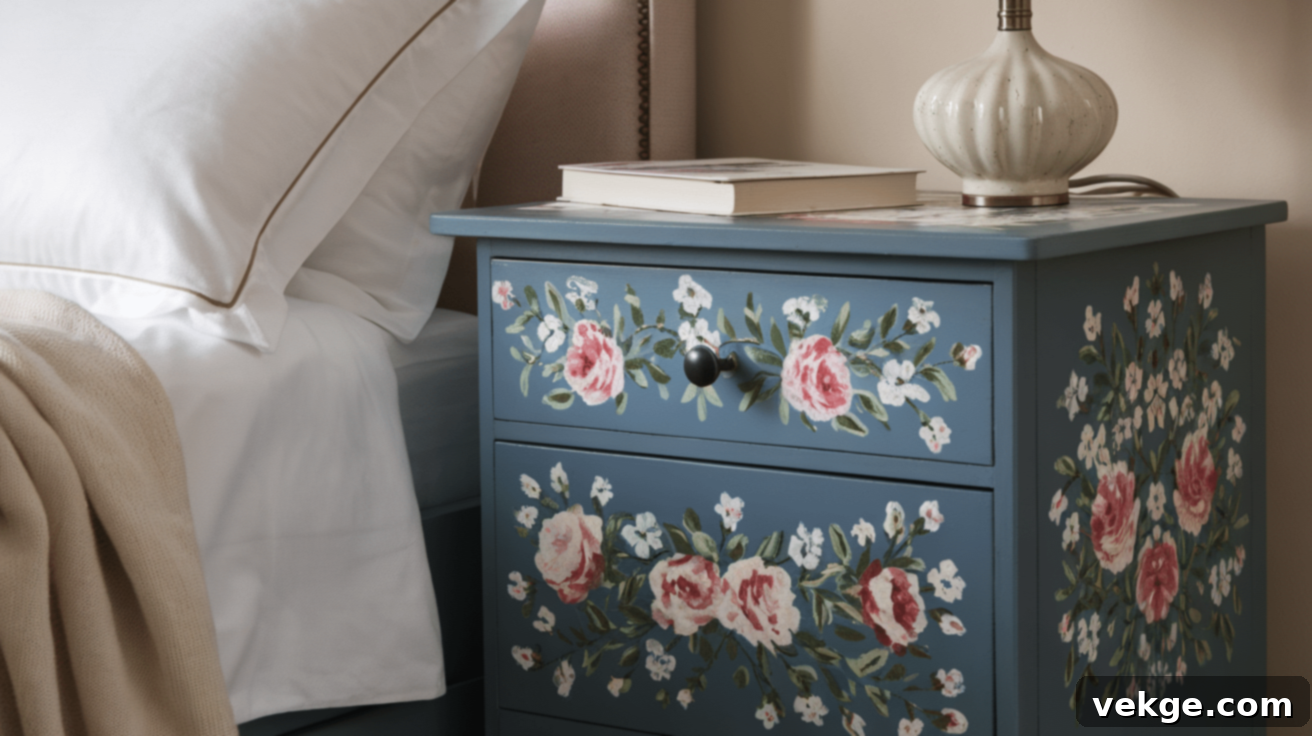
I opted for a soft, delicate floral design on my nightstand, which instantly introduced a charming touch of whimsy and natural beauty to my bedroom. The chosen soft pastels created a warm, inviting, and serene atmosphere, perfect for a restful space. This project proves that even a small piece can make a big difference.
Steps to Follow:
- Prepare the surface by sanding and thoroughly cleaning the nightstand.
- Draw your chosen floral design lightly with a pencil, allowing for adjustments.
- Paint the flowers with small, detailed brushes using a palette of soft, muted colors.
- Finish with a matte sealer to protect the intricate design and provide a subtle finish.
4. Bohemian Painted Chair: Eclectic Comfort
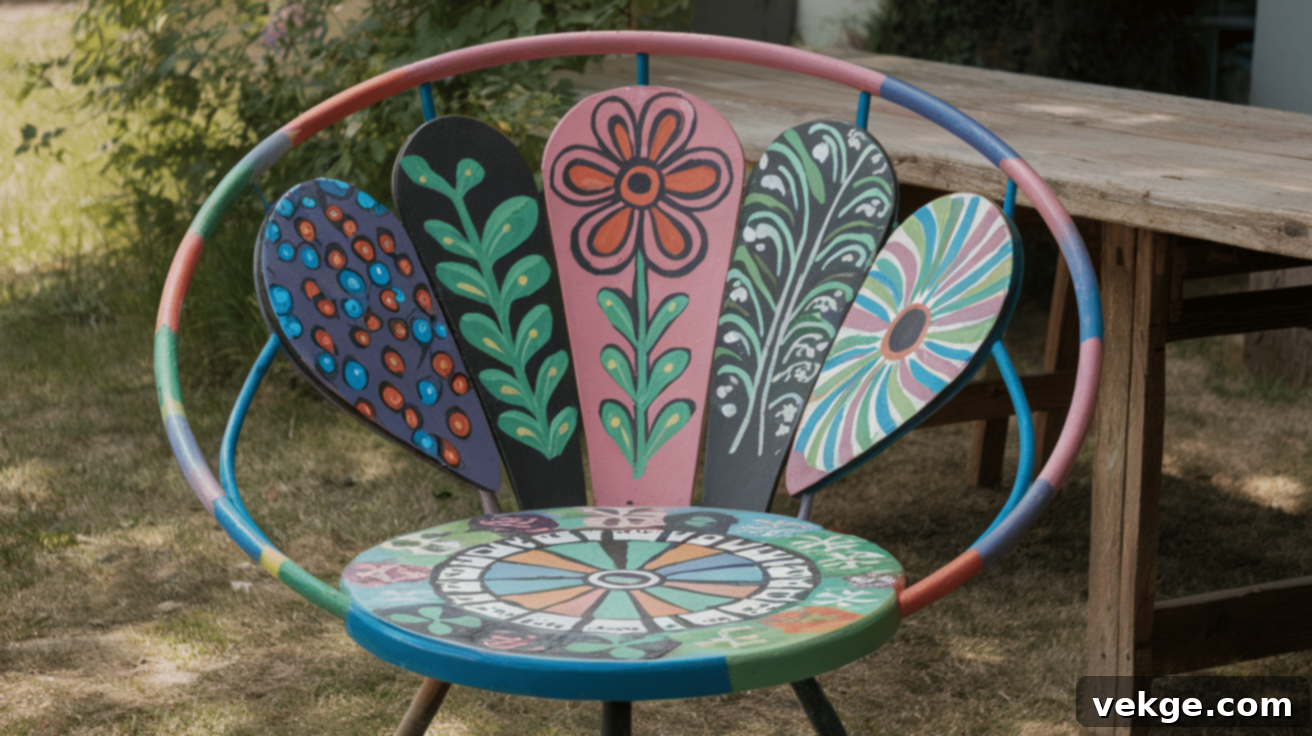
Transforming a simple, unassuming chair into a bohemian masterpiece was incredibly rewarding. By meticulously painting intricate mandala designs, I infused the chair with a unique, soulful vibe that perfectly complements my cozy, eclectic living room. It’s an artistic statement that also provides comfortable seating.
Steps to Follow:
- Lightly sand the chair to remove any existing finish and create a receptive surface.
- Carefully draw the mandala design onto the seat and backrest using a pencil.
- Paint the design with bright, contrasting colors, allowing your creativity to flow.
- Once completely dry, apply a protective layer of wax or clear coat to seal the artwork.
5. Retro Painted Dresser: Vintage Charm with a Twist
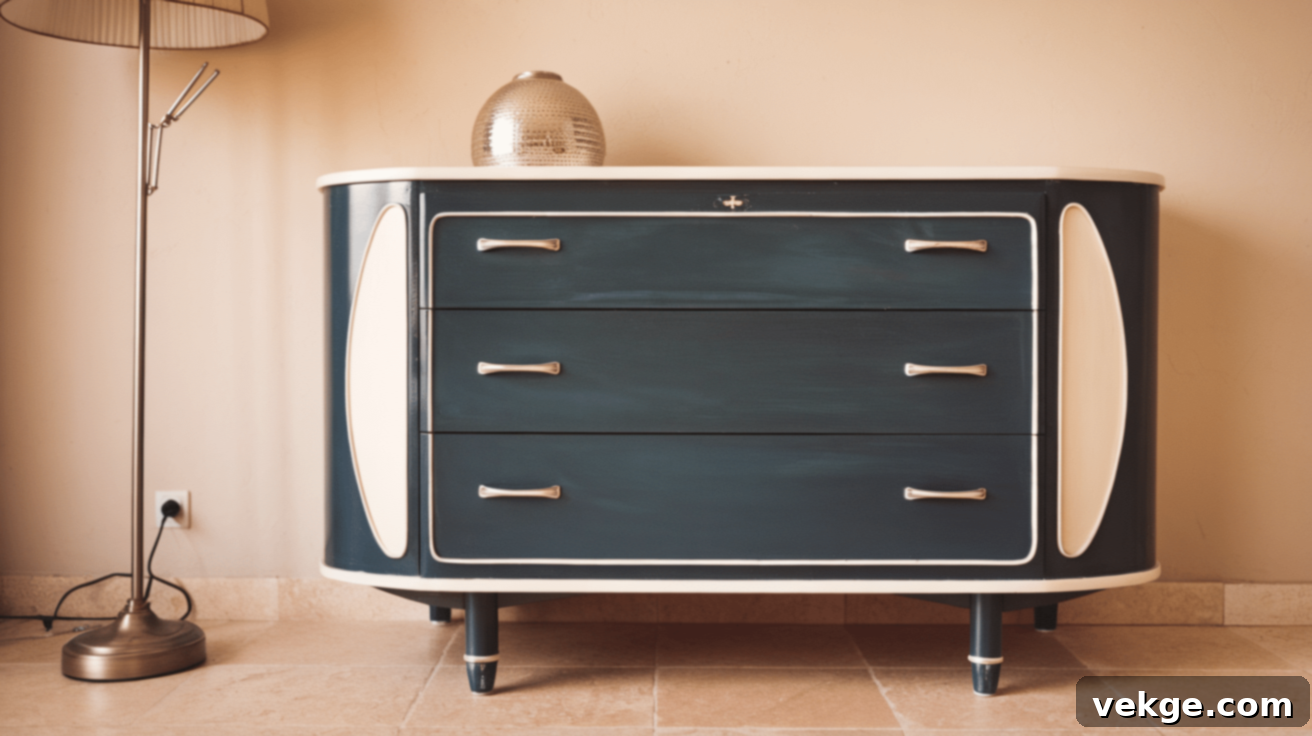
I joyfully revamped an old dresser, breathing new life into it with a playful combination of retro colors and funky patterns. The result was a delightful piece that brought a nostalgic yet fresh touch to my room, striking the perfect balance between vintage charm and modern fun. This project truly showcases the power of color.
Steps to Follow:
- Sand the dresser thoroughly to achieve a smooth, even surface for painting.
- Precisely tape off the sections for your chosen retro pattern, ensuring clean lines.
- Paint in bold, characteristic retro colors such as mustard yellow, vibrant teal, and energetic orange.
- Seal the finished design with a clear varnish, guaranteeing its durability and preserving its appeal.
6. Lively Painted Cabinet: Quirky and Playful

I transformed a simple kitchen cabinet by painting it with a whimsical animal pattern. This imaginative design instantly made the cabinet look quirky and endearing, adding a unique splash of personality and playful character to the entire room. It’s a fantastic way to infuse humor and individuality into a functional space.
Steps to Follow:
- Sand and meticulously clean the cabinet doors, ensuring they are free of debris.
- Lightly sketch your chosen animal designs or playful patterns onto the surface.
- Carefully paint each design using fine brushes and a selection of bright, cheerful colors.
- Apply a protective clear coat once the paint is completely dry to seal and protect your artwork.
7. Hand-Painted Console Table with Stripes: Bold Sophistication
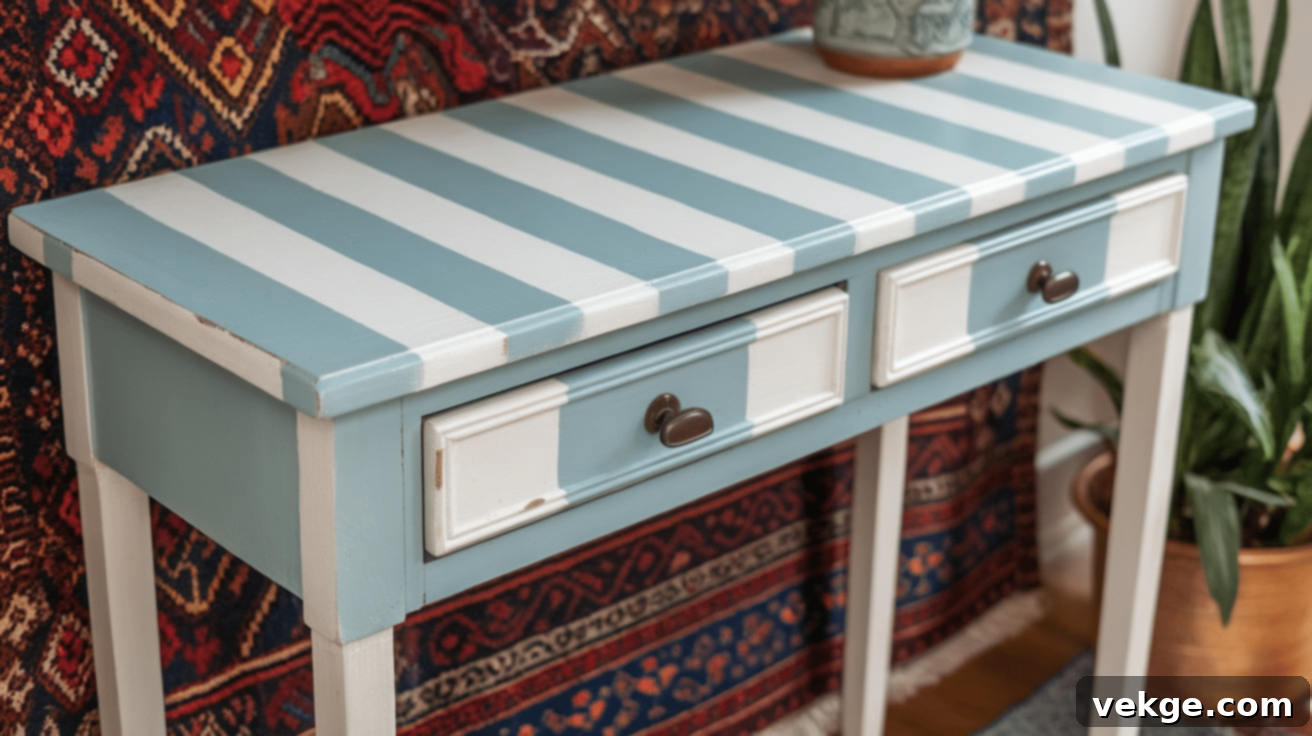
I effortlessly refreshed my console table by adding wide, horizontal stripes in alternating, complementary colors. This bold yet elegant design introduced a touch of drama and visual interest without overwhelming the space, proving that simplicity can be incredibly striking. The crisp lines create a refined modern aesthetic.
Steps to Follow:
- Thoroughly sand and prime the console table, creating a smooth and even base.
- Carefully tape off equal sections for the stripes, ensuring precision and symmetry.
- Paint each stripe with contrasting, bold colors, allowing for full drying between coats.
- Once completely dry, apply a clear sealant for a durable, long-lasting, and polished finish.
8. Ombre Painted Chest of Drawers: Serene Gradient
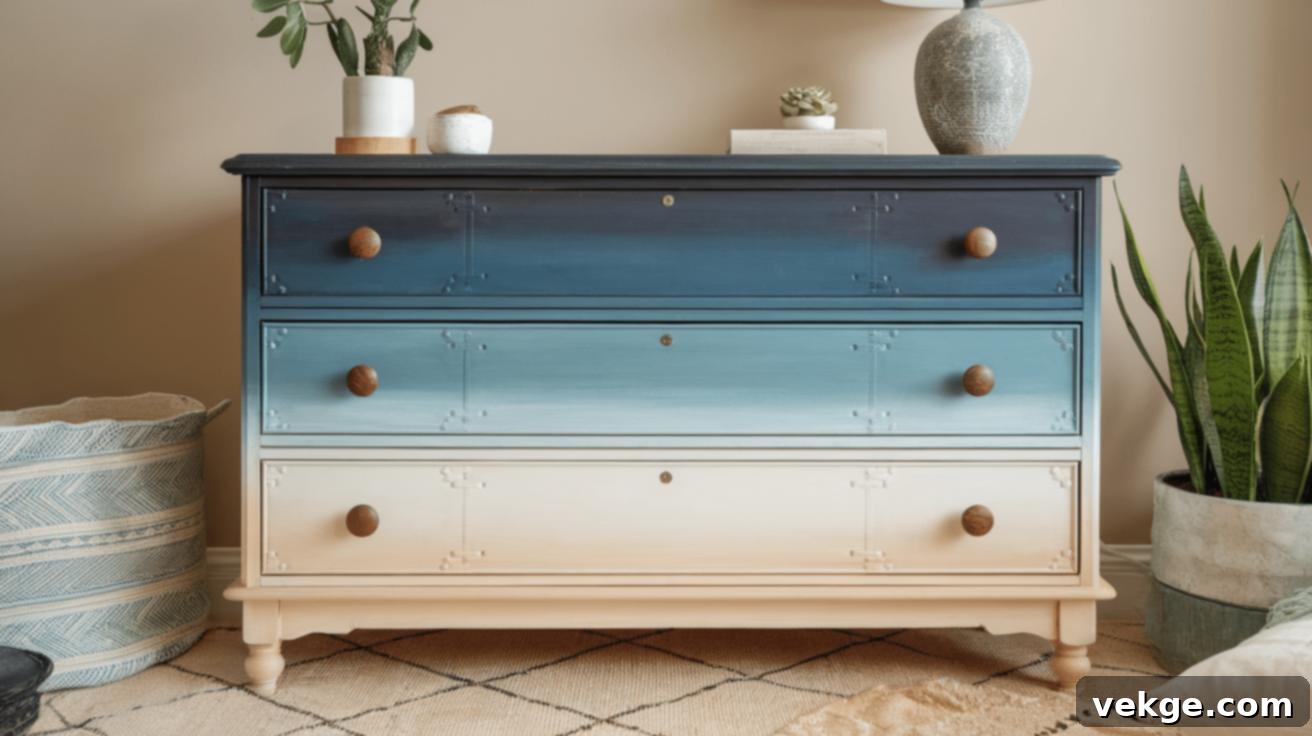
I decided to paint a chest of drawers with a beautiful ombre effect, transitioning smoothly from a deep, rich navy at the bottom to a soft, ethereal blush pink at the top. This sophisticated gradient created an incredibly serene and calming vibe, adding a touch of modern elegance to the room. The seamless blend is both soothing and stylish.
Steps to Follow:
- Sand the surface of the chest of drawers for a perfectly smooth and even finish.
- Carefully choose two or three colors that will create your desired ombre gradient effect.
- Blend the colors seamlessly from dark to light, ensuring smooth transitions between each shade.
- Finish the piece with a protective coat of clear varnish to enhance durability and sheen.
9. Funky Painted Wardrobe Doors: Playful Modernism
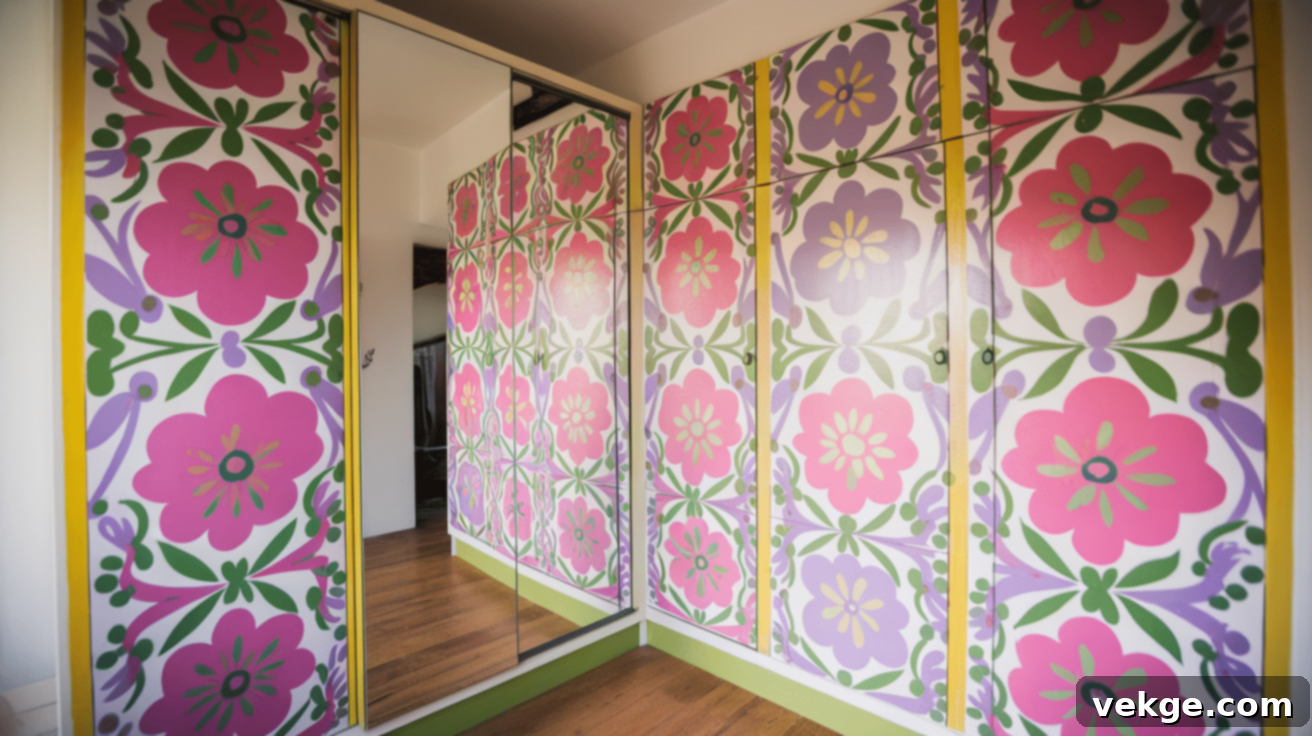
I transformed plain wardrobe doors by adding a funky, energetic zigzag pattern. The combination of bold lines and bright colors instantly gave the room a playful, contemporary look, turning a utilitarian item into a vibrant design element. It’s a fantastic way to add a dynamic touch to any space.
Steps to Follow:
- Clean and sand the wardrobe doors thoroughly, preparing them for painting.
- Use painter’s tape to meticulously create sharp, zigzag patterns across the surface.
- Paint the sections in alternating, high-contrast colors, allowing each to dry.
- Once completely dry, seal the design with a clear topcoat to protect the paint and ensure longevity.
10. Painted Storage Bench with Tribal Design: Dynamic Entryway
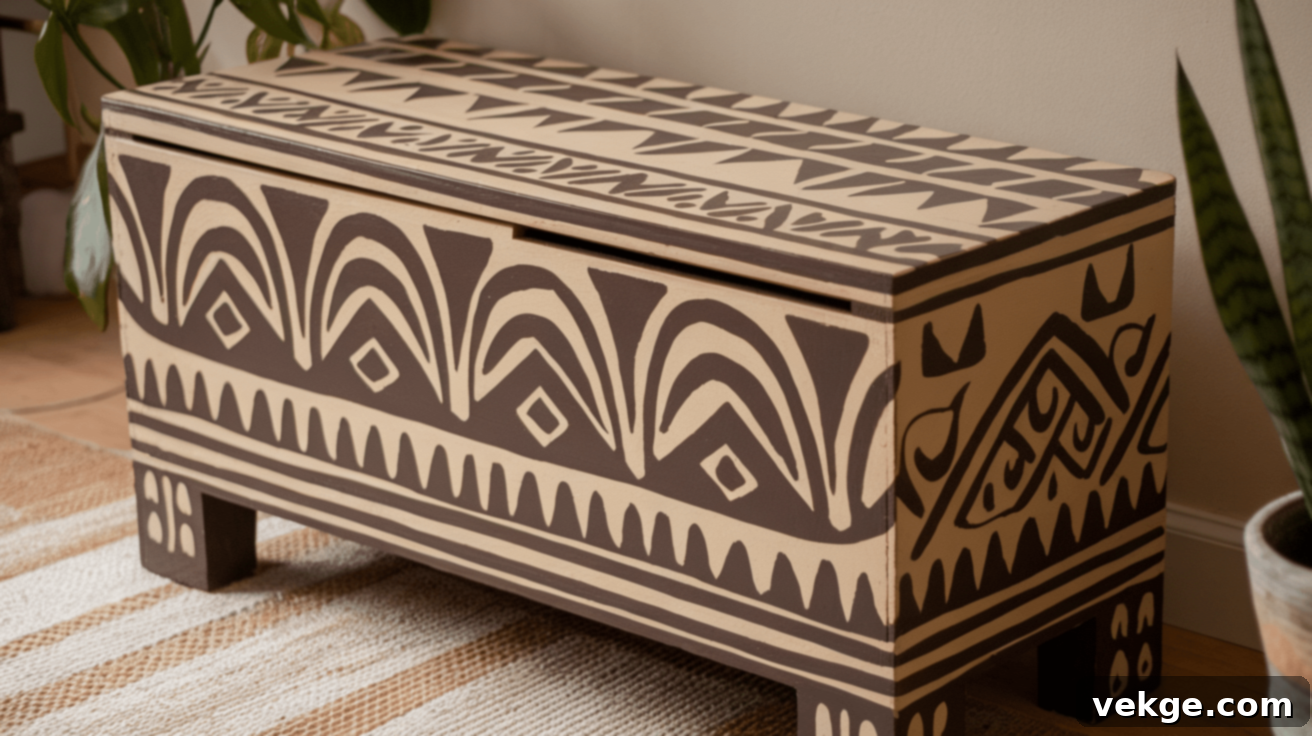
I breathed life into a plain storage bench by painting it with a bold, intricate tribal design, using deep reds and striking blacks. This powerful pattern made the entryway feel incredibly dynamic and full of cultural richness, offering both practical storage and a captivating aesthetic. It’s a wonderful way to welcome guests with a unique piece.
Steps to Follow:
- Sand the bench and meticulously prepare the surface for optimal paint adhesion.
- Lightly draw your chosen tribal pattern with a pencil onto the prepared surface.
- Carefully paint the intricate design using a palette of deep reds and contrasting blacks.
- Apply a protective sealer once the paint is completely dry to ensure the design’s durability.
11. Colorful Hand-Painted Side Table: Overlapping Vibrance
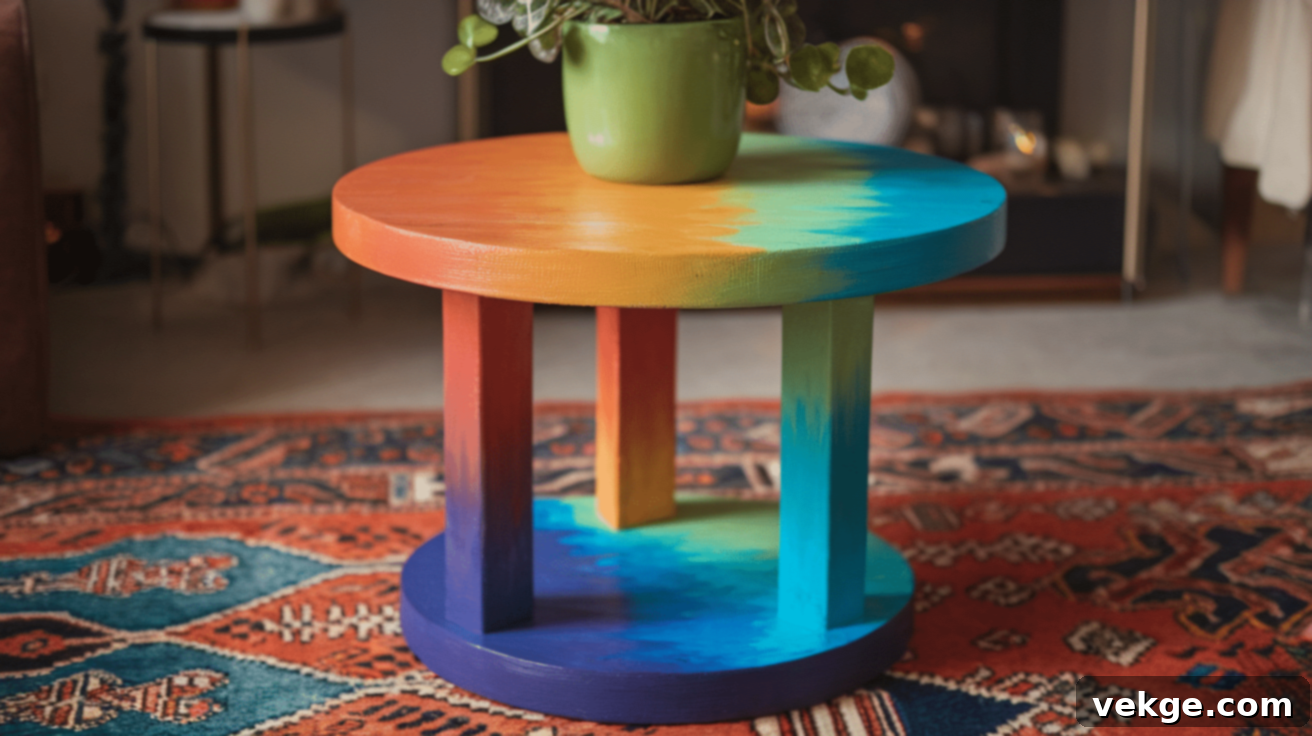
I transformed a drab side table into a lively masterpiece adorned with overlapping circular designs. The explosion of bright, cheerful hues made the entire room feel incredibly alive and energetic, proving that even small pieces can hold immense decorative power. This artistic table is sure to bring a smile to anyone’s face.
Steps to Follow:
- Sand the side table thoroughly to prepare it for painting, ensuring a smooth base.
- Draw your overlapping circles onto the surface, varying their sizes and positions for visual interest.
- Paint each circle with a different vibrant color, allowing layers to dry before overlapping.
- Let the paint dry completely and then apply a sealing coat to protect the colorful design.
12. Painted Storage Cabinet with a Chevron Pattern: Bold Statement
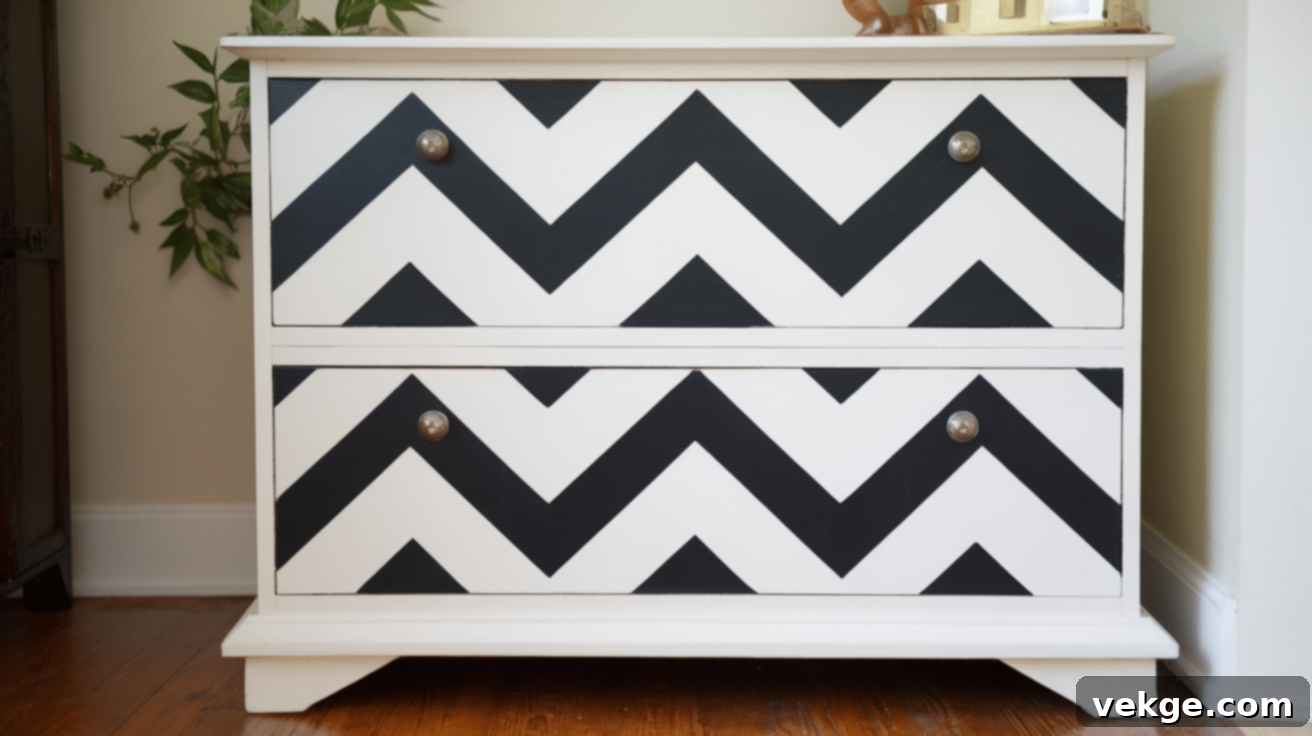
I gave my plain storage cabinet a stylish and dramatic makeover by adding a bold chevron pattern. The crisp black-and-white contrast ensured it stood out beautifully and elegantly in my room, adding a sophisticated geometric touch. This classic pattern always delivers a strong visual impact.
Steps to Follow:
- Sand and clean the cabinet surface meticulously, ensuring a pristine base.
- Use painter’s tape to precisely mark out the iconic chevron pattern.
- Paint each section with contrasting colors, such as classic black and white, for maximum effect.
- Seal the paint with a clear protective coat to ensure durability and a lasting finish.
13. Hand-Painted Mirror Frame: Quirky Reflection
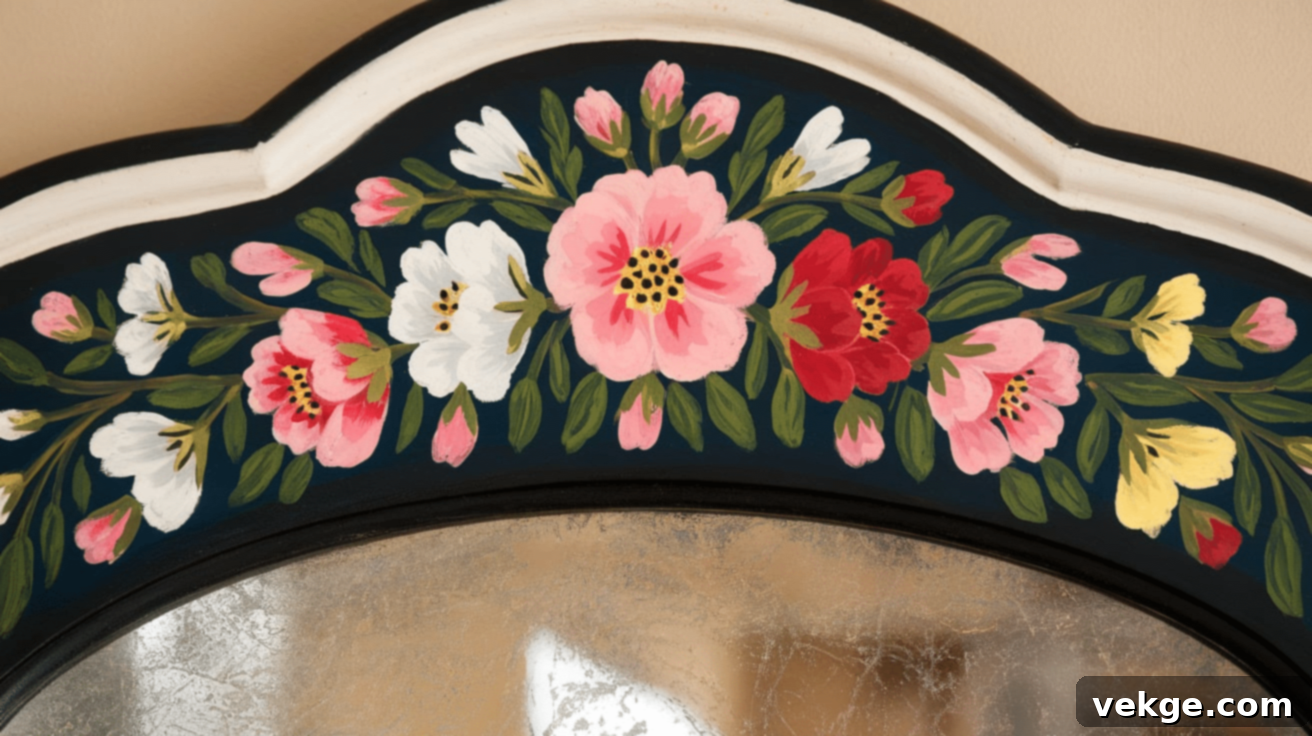
I chose to paint a plain mirror frame with a quirky color palette and a series of funky patterns. The transformation turned it into an instant standout piece in my hallway, adding a delightful and unexpected touch of fun and personality. It’s amazing how a frame can elevate the entire mirror.
Steps to Follow:
- Clean the mirror frame thoroughly and lightly sand it if necessary for adhesion.
- Use painter’s tape to help create clean geometric or freehand funky patterns.
- Paint in contrasting colors to create the desired eye-catching and playful effect.
- Once dry, carefully seal the paint with a clear varnish to protect the design.
14. Artistic Painted Nightstand: A Mini Canvas
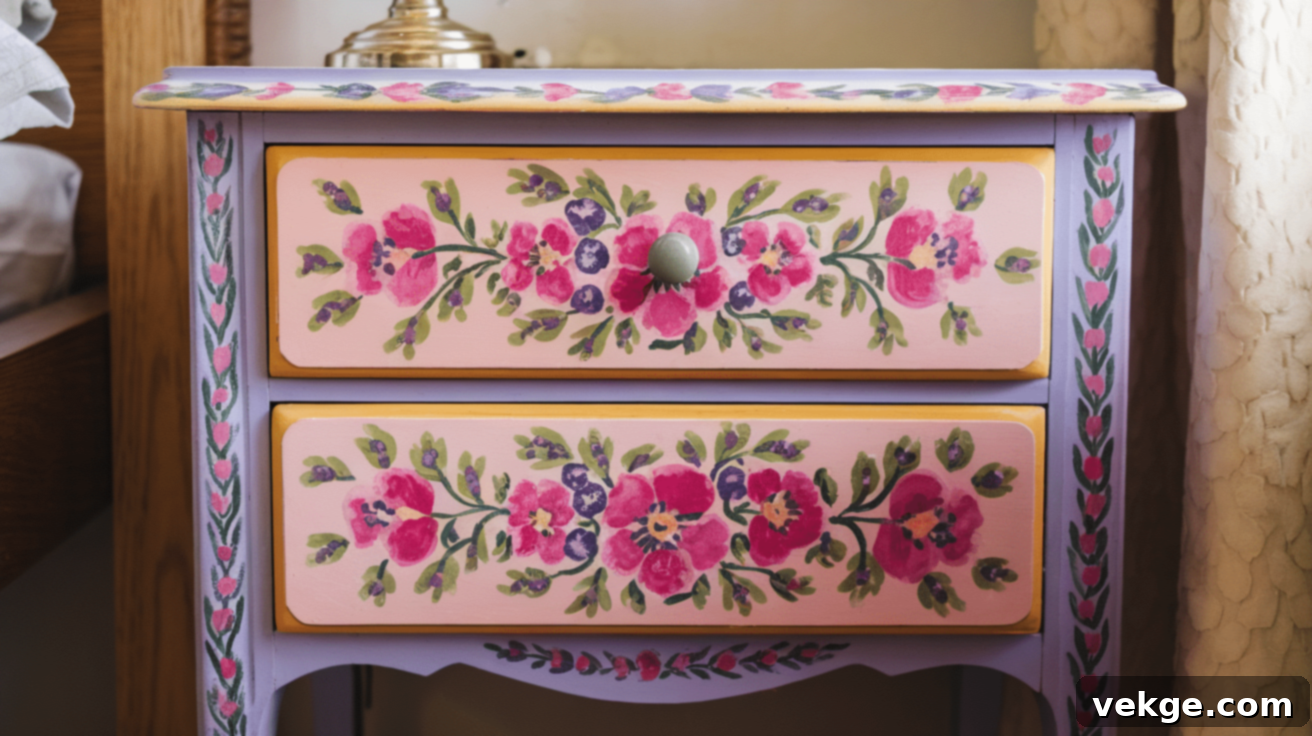
I employed abstract art techniques to paint a plain nightstand, effectively transforming it into a miniature art piece for my bedroom. The vibrant splashes and intentional strokes of color added an immediate artistic and sophisticated touch, making it much more than just a place to set a lamp. It’s a testament to how furniture can double as art.
Steps to Follow:
- Sand the nightstand to achieve a perfectly smooth and receptive surface for painting.
- Lightly draw abstract designs or guides with a pencil, or work freehand for a truly organic look.
- Use bold colors and expressive brush strokes to fill in and develop the artistic design.
- Allow it to dry completely and then finish with a protective topcoat to seal the artwork.
15. Painted Bookshelf with Horizontal Stripes: Layered Depth

I gave my bookshelf a contemporary update by painting it with horizontal stripes in varying, harmonious shades of blue. This thoughtful use of color created an illusion of depth and introduced a modern, sophisticated touch to the room, enhancing the visual interest of a typically utilitarian piece. The subtle gradient adds an elegant dimension.
Steps to Follow:
- Prepare the bookshelf surface by sanding it thoroughly to ensure smoothness.
- Carefully tape off horizontal sections for your stripes, ensuring precise measurements.
- Paint the stripes in alternating colors, allowing each section to dry before applying the next.
- Finish by sealing the entire piece with a clear varnish to protect the stripes and ensure durability.
16. Painted Chair with Polka Dots: Whimsical Playfulness
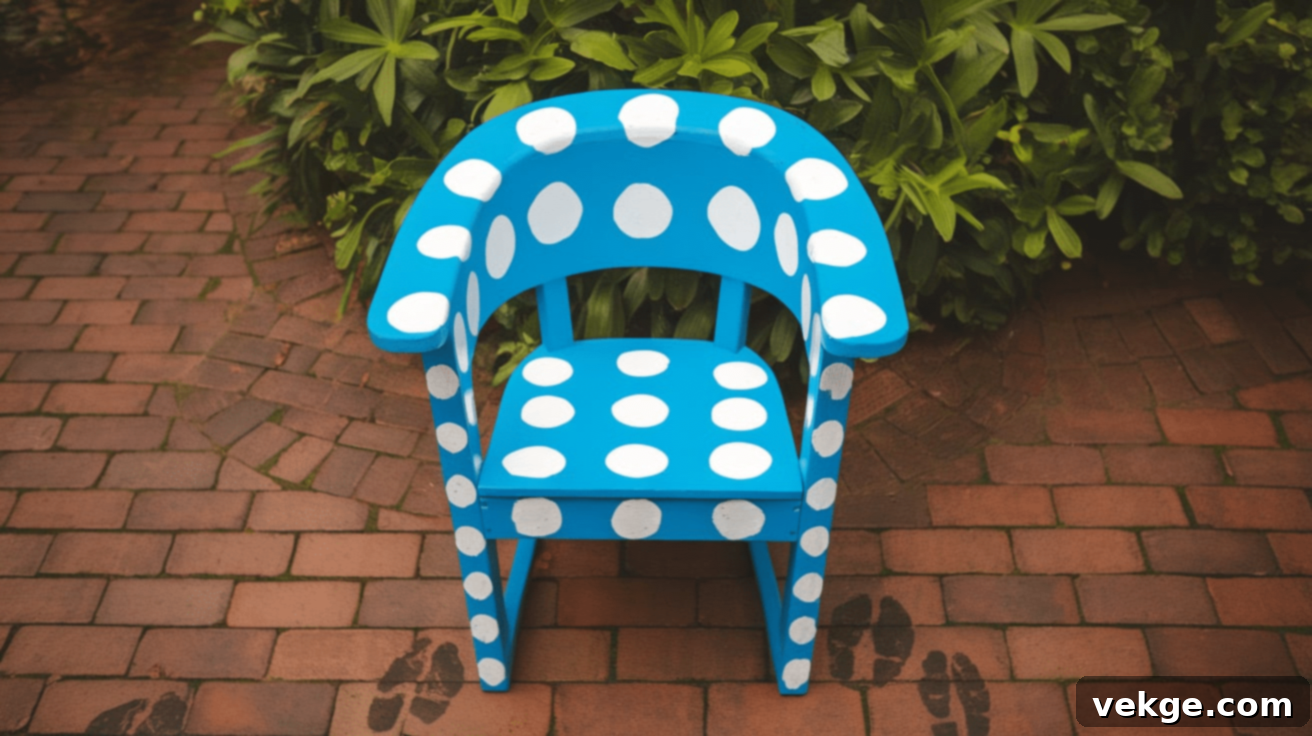
I infused a simple chair with whimsical charm by adding an array of playful polka dots using bright, contrasting colors. This delightful transformation instantly turned the chair into a fun, joyful statement piece that brings a smile to my face every time I see it. It’s a cheerful addition that brightens any corner.
Steps to Follow:
- Sand and thoroughly clean the chair, ensuring a smooth, ready-to-paint surface.
- Lightly sketch or plan where the polka dots will be placed for a balanced design.
- Use a stencil or freehand technique to paint even dots with bold, vibrant colors.
- Apply a durable topcoat once the paint is completely dry to protect the design from wear.
17. Hand-Painted End Table with Chevron and Floral Pattern: Artistic Fusion
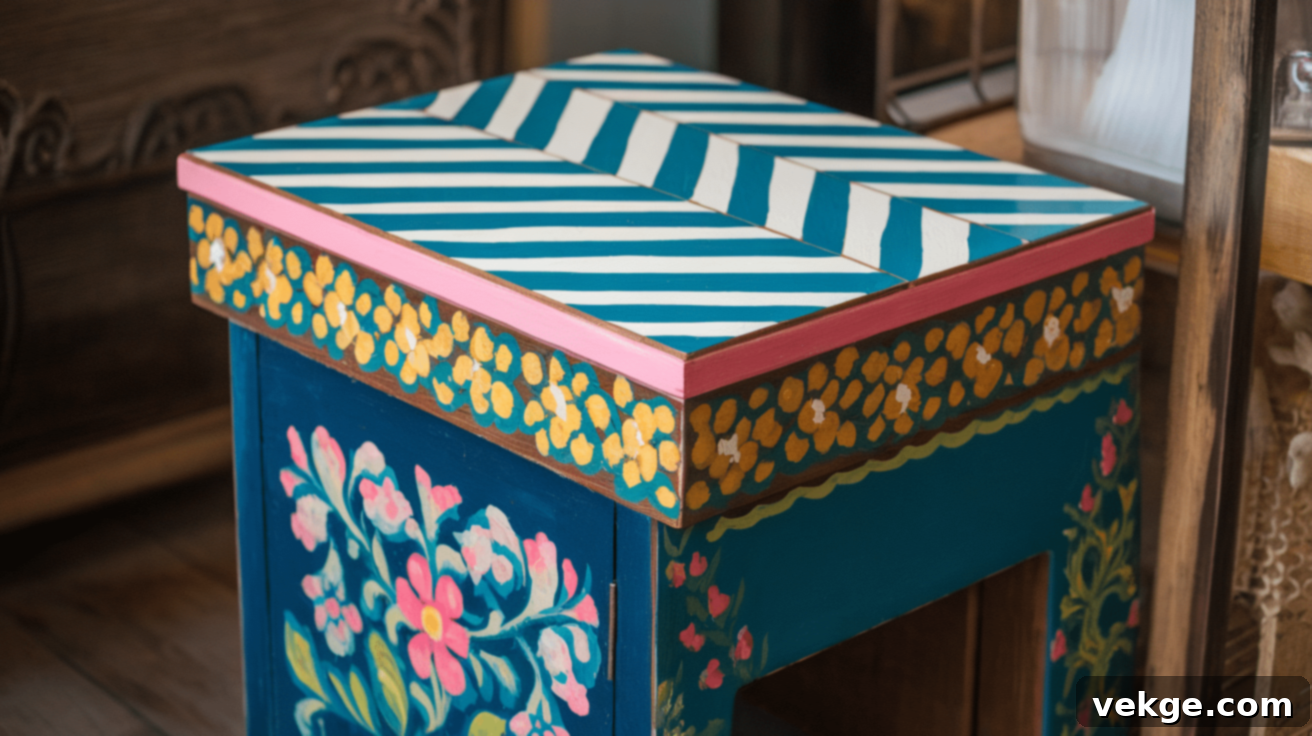
I decided to combine a structured chevron pattern with delicate floral details on my end table, creating a uniquely quirky yet incredibly stylish look. This artistic fusion instantly brightened up my living space, offering both geometric modernity and organic charm in a single piece. It’s a wonderful way to experiment with mixed patterns.
Steps to Follow:
- Sand the surface of the table, creating a smooth and prepared base for your design.
- Draw the chevron pattern and then add the floral accents with a pencil, planning your composition.
- Paint with contrasting colors, using fine brushes for the detailed floral elements.
- Seal with a clear protective coat for enhanced durability and a lasting, beautiful finish.
18. Painted Headboard with Bold Stripes: Dramatic Bedroom Statement
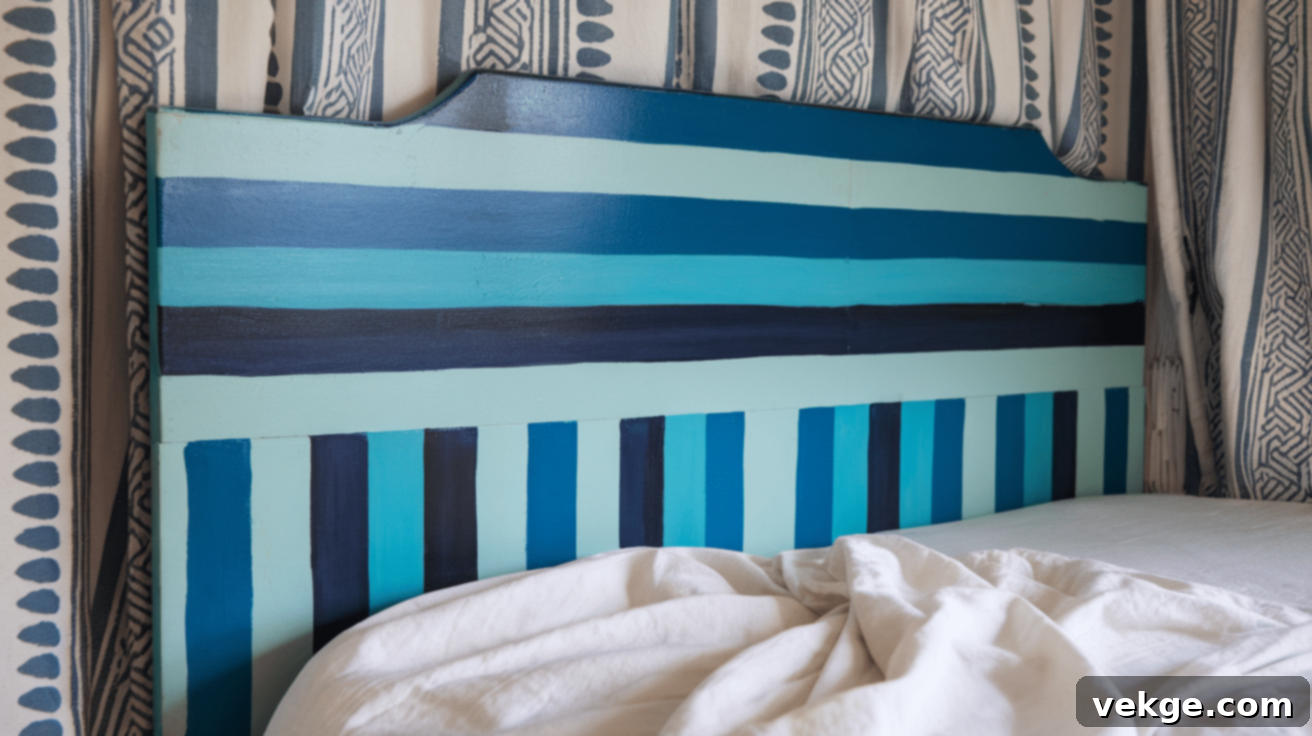
I transformed my wooden headboard by painting it with bold vertical stripes in elegant shades of green and gold. This striking design instantly elevated the headboard into a dramatic and sophisticated focal point in the bedroom, adding a luxurious and personalized touch to my sleeping sanctuary. It’s a powerful way to define your bed space.
Steps to Follow:
- Sand the headboard thoroughly to create a perfectly smooth and even surface.
- Use painter’s tape to meticulously create even vertical stripes, ensuring crisp lines.
- Paint each stripe with contrasting colors, allowing ample drying time between applications.
- Seal with a protective topcoat to preserve the vibrant stripes and extend their beauty.
19. Hand-Painted Vintage Trunk: Colorful Patchwork
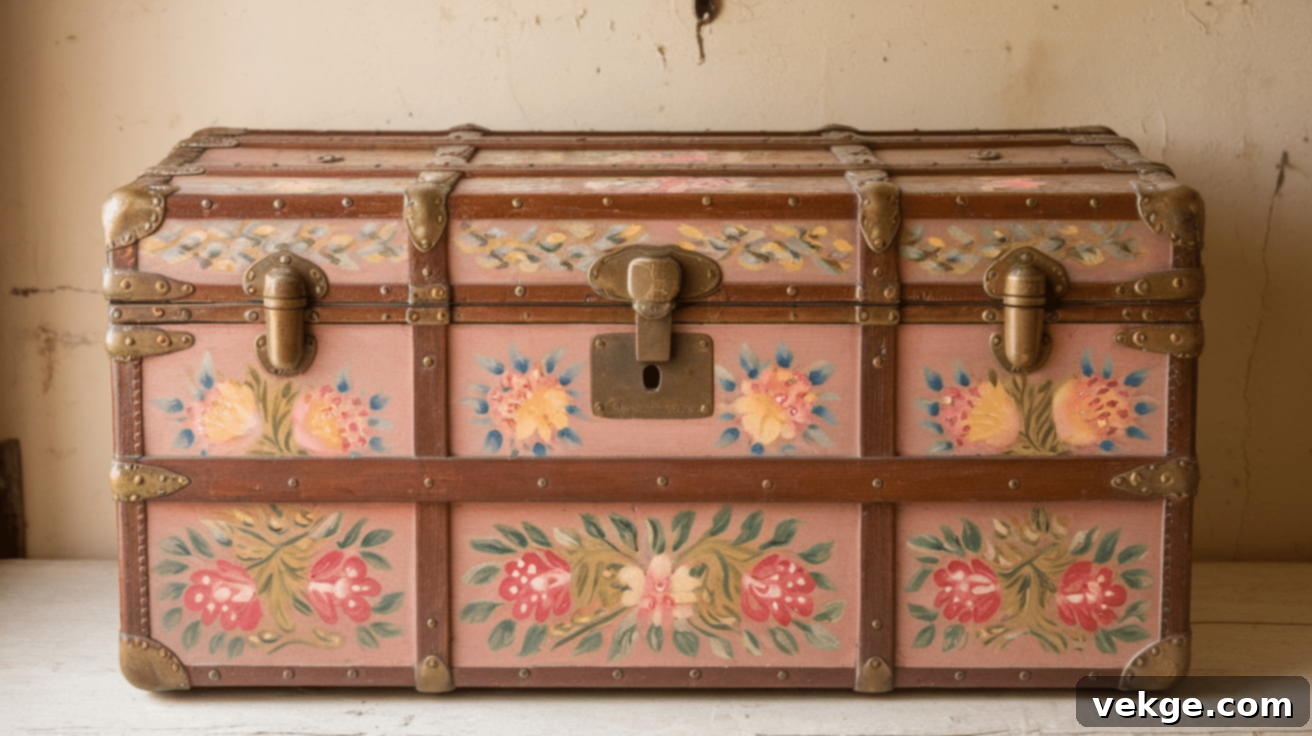
I gave my cherished vintage trunk a fresh new life by painting it with a vibrant, playful patchwork design. This creative makeover made the trunk look utterly unique and incredibly fun, instantly becoming a charming addition to my living room. It’s a functional piece that now tells a story of artistic revival.
Steps to Follow:
- Sand and thoroughly clean the trunk, ensuring a smooth and ready-to-paint surface.
- Sketch a patchwork design with a pencil, dividing the surface into various sections.
- Paint each “patch” with different colors and patterns, allowing your creativity to flourish.
- Finish by sealing the paint with a clear varnish, protecting your intricate design.
20. Painted Accent Chair with Floral Design: Fresh and Feminine
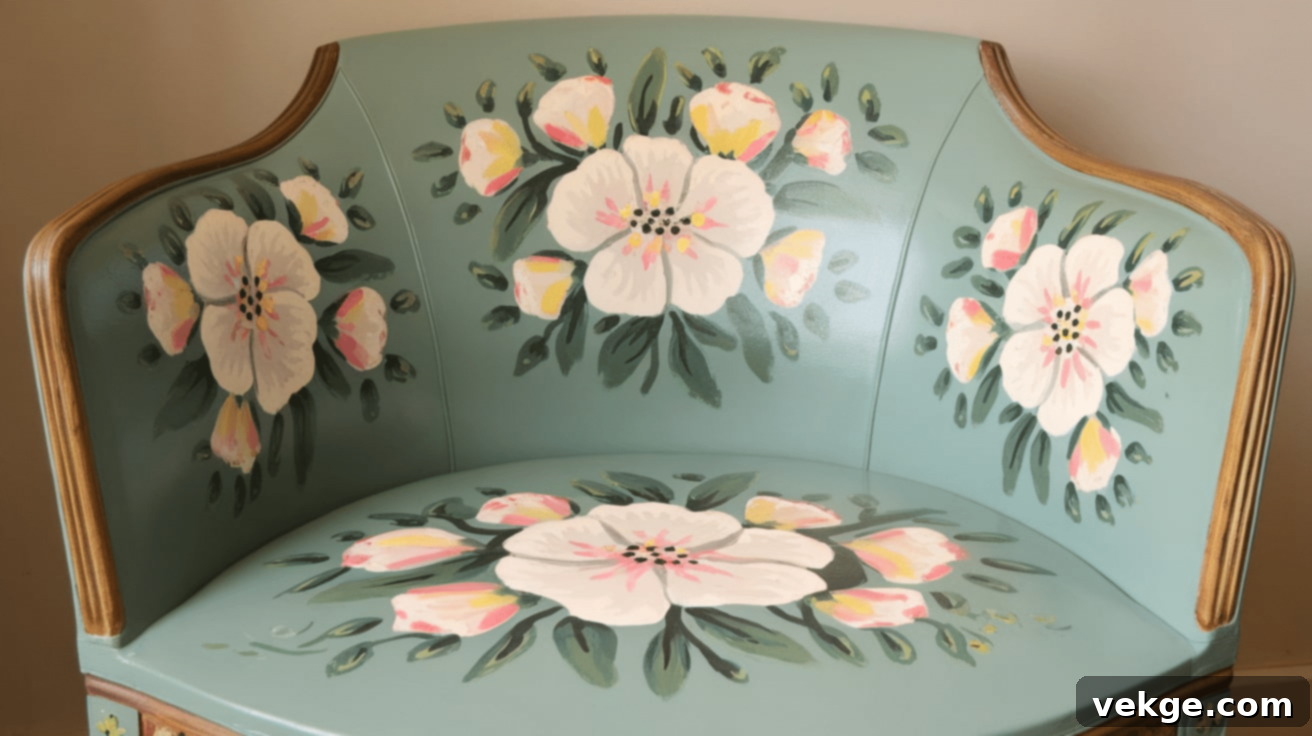
I decided to revamp an old accent chair with a delicate floral design, and the result was an instant infusion of fresh, feminine elegance. This gentle artistic touch transformed the chair into a soft, inviting piece that adds charm and beauty to any corner of the room. It’s a wonderful way to bring a touch of nature indoors.
Steps to Follow:
- Sand the chair thoroughly and meticulously clean its surface.
- Draw your chosen floral patterns with a pencil, envisioning the final composition.
- Paint the design with soft, delicate pastel colors, layering for depth.
- Apply a protective topcoat to ensure the longevity and beauty of your floral artwork.
21. Hand-Painted Filing Cabinet: Vibrant Office Space
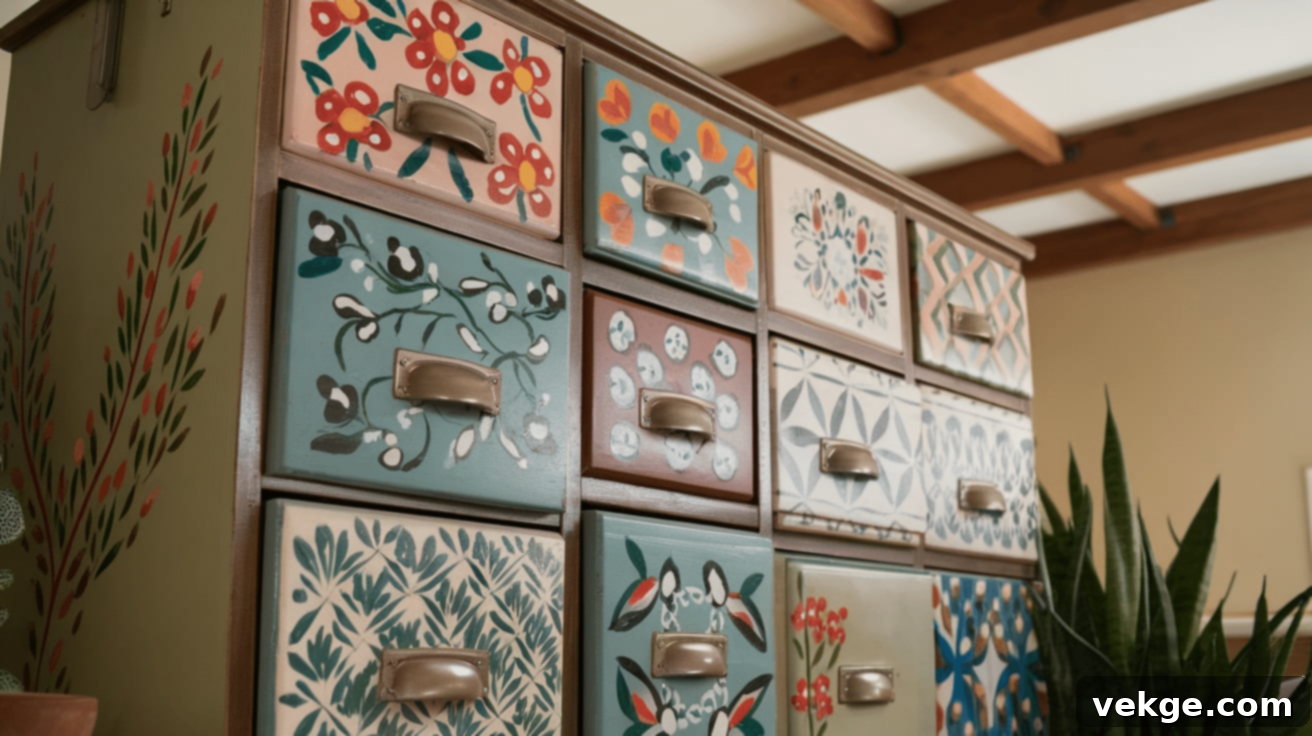
I rescued my dull, utilitarian filing cabinet from obscurity by giving it a quirky twist. Painting it in a delightful mix of pastel shades adorned with funky geometric patterns instantly made my office space feel more vibrant, creative, and inspiring. It proves that even the most mundane items can be given a personality boost.
Steps to Follow:
- Clean the filing cabinet thoroughly, ensuring no dust or grime remains.
- Carefully tape off sections to create geometric or freehand funky patterns.
- Paint with a selection of pastel colors within your chosen geometric shapes.
- Seal the finished design to protect the paint and ensure its lasting vibrancy.
22. Painted Accent Table with Ombre Effect: Soft and Trendy
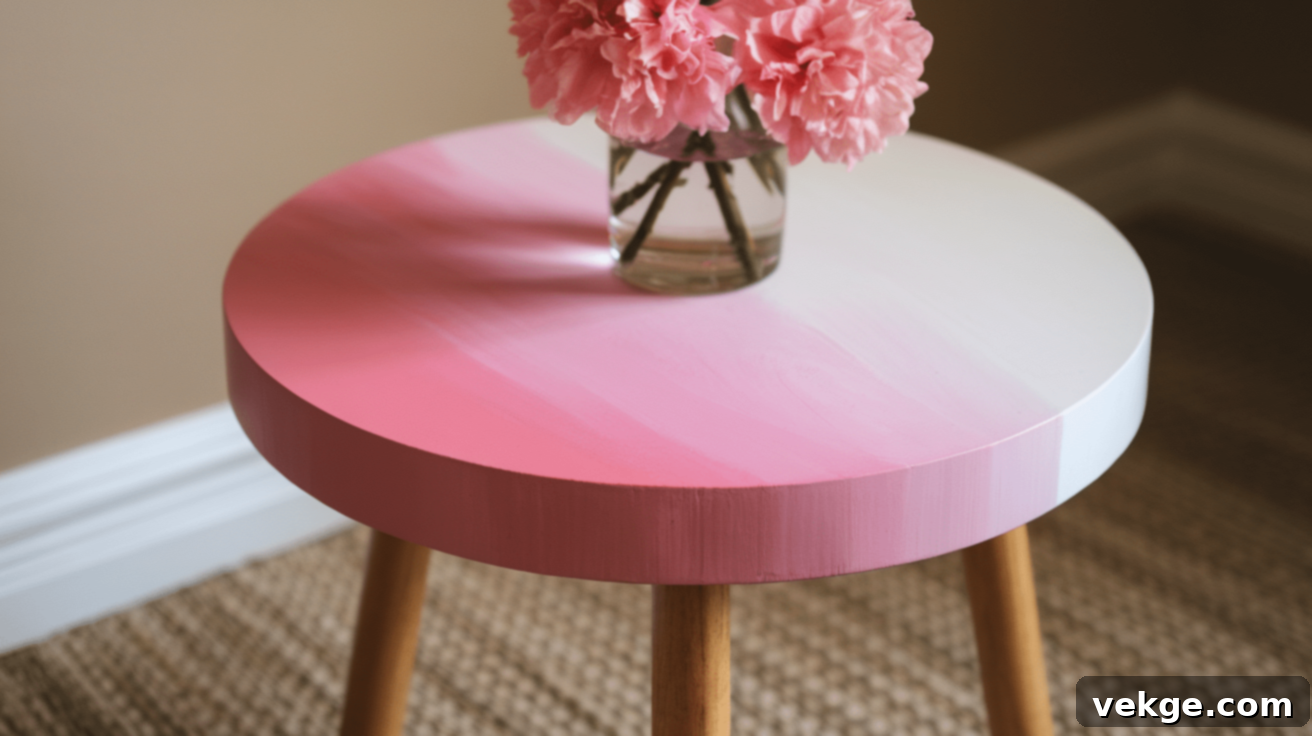
I painted a small accent table with a beautifully smooth ombre effect, transitioning seamlessly from a warm coral to a delicate pink. This subtle yet trendy addition instantly became a soft, inviting focal point in my living room, adding a touch of contemporary elegance. The gentle gradient offers a sophisticated visual appeal.
Steps to Follow:
- Sand the table meticulously to achieve a perfectly smooth and even finish.
- Carefully choose two complementary colors for your desired ombre effect.
- Blend the colors from dark to light using a paintbrush, ensuring smooth, seamless transitions.
- Let it dry completely, then apply a clear protective coat to seal the finish.
23. Painted Armchair with Retro Patterns: Mid-Century Modern Vibe
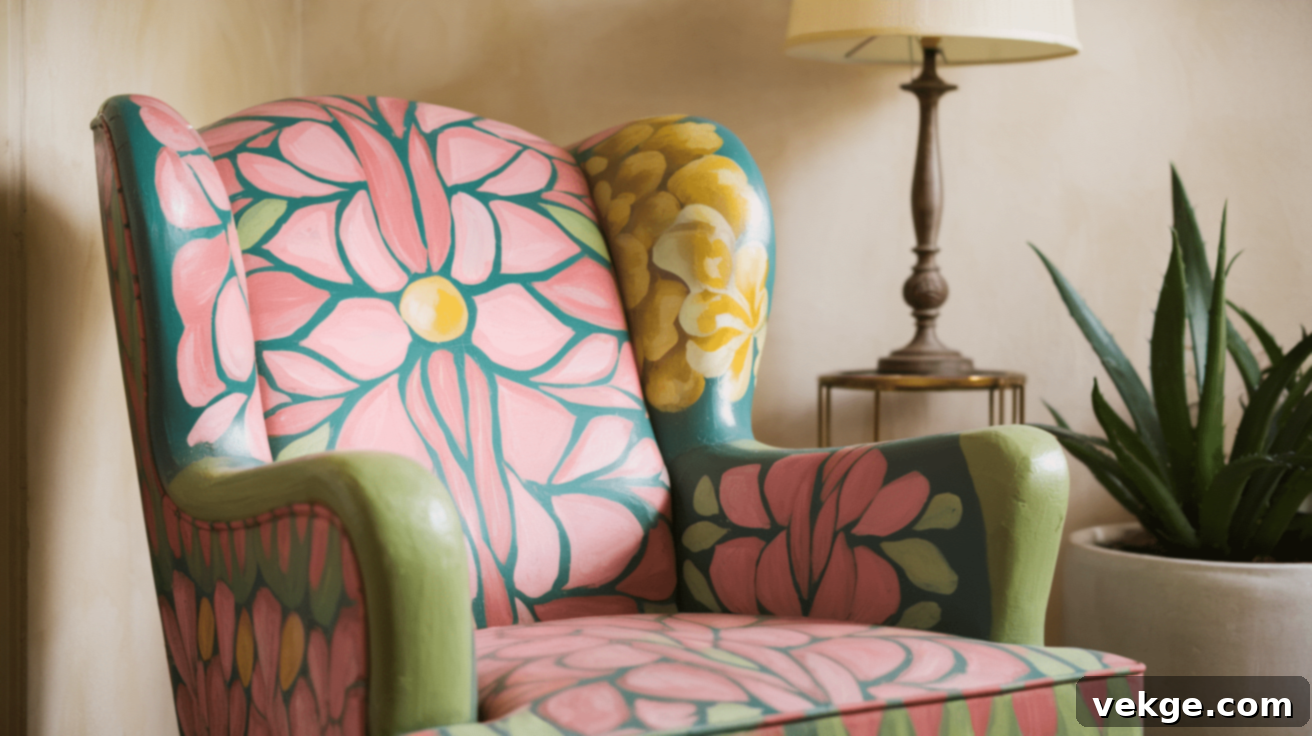
I triumphantly transformed an old armchair with a medley of vibrant retro patterns. The bold colors and characteristic designs gave the chair an authentic mid-century modern look, perfectly integrating with my existing decor and becoming a cozy, stylish seating option. It’s a fantastic way to pay homage to classic design eras.
Steps to Follow:
- Sand and thoroughly clean the armchair frame, preparing it for painting.
- Draw your chosen retro patterns onto the surface using a pencil, planning your composition.
- Paint each section with contrasting colors and fine brushes for intricate details.
- Once dry, apply a topcoat to preserve the design and ensure its longevity.
24. Painted Dining Table with Fruit Motifs: Whimsical Kitchen Accent
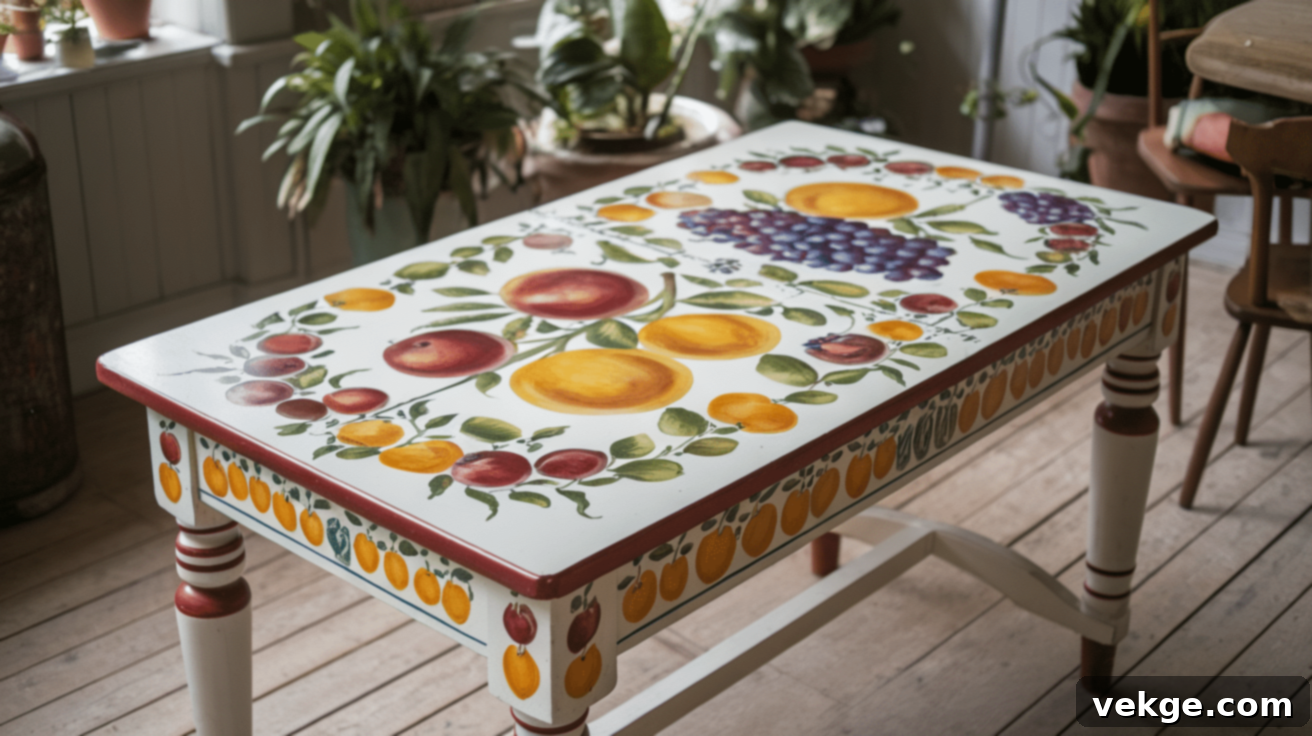
I decided to paint a delightful fruit motif onto my dining table, which instantly added a whimsical, cheerful touch. This playful design perfectly complemented the rest of my kitchen decor, creating an inviting and happy atmosphere for meals and gatherings. It brings a touch of summer fun indoors, all year round.
Steps to Follow:
- Sand the table thoroughly to create a smooth, prepared base for your artwork.
- Sketch your chosen fruit motifs around the tabletop, arranging them aesthetically.
- Paint each fruit with bright, contrasting colors, making them pop with vibrancy.
- Apply a durable topcoat for protection once dry, making it suitable for everyday use.
25. Hand-Painted Bench with Aztec Patterns: Ethnic Charm
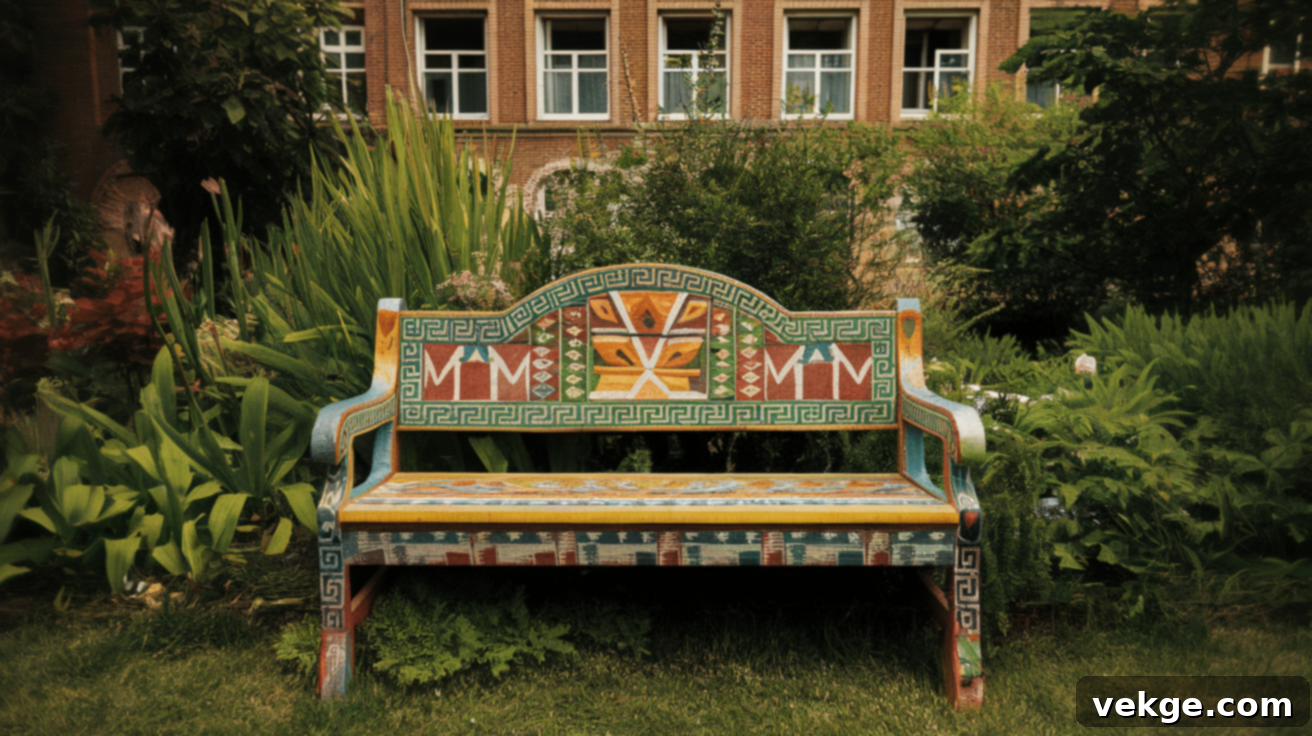
I transformed my plain wooden bench by painting it with bold and intricate Aztec patterns. This project introduced a unique and distinctly ethnic vibe to my hallway, and much to my delight, it was surprisingly easy and enjoyable to execute. The geometric beauty of Aztec designs always makes a powerful statement.
Steps to Follow:
- Sand the bench thoroughly and meticulously clean the surface for optimal paint adhesion.
- Draw the Aztec pattern with a pencil, paying attention to its geometric precision.
- Paint the various sections with earthy tones complemented by bright, contrasting accents.
- Finish by sealing the paint for a durable, long-lasting finish that protects your unique artwork.
Simple Care Tips for Funky Hand-Painted Furniture
Once you’ve invested time and creativity into your hand-painted furniture, ensuring its longevity is key. Proper care will preserve the beauty and vibrancy of your unique pieces for years to come. Here’s how I maintain my cherished creations:
- For regular dusting, use a soft, slightly damp cloth; this method is incredibly effective and won’t harm the paint or protective finish.
- Make it a habit to wipe down each piece weekly with a soft microfiber cloth, paying extra attention to high-touch areas like handles and edges.
- For more stubborn spots, such as accidental coffee spills, mix a small amount of mild dish soap with water to create a gentle cleaning solution.
- Never use strong chemical cleaners or abrasive scrubbing pads, as these can easily strip away the protective finish and damage your artwork.
- To prevent uneven fading and discoloration, keep your cherished painted pieces away from direct, harsh sunlight.
- If direct sunlight is unavoidable, rotate decorative items placed on top of furniture periodically to prevent concentrated sun damage in one spot.
- Always place felt pads or soft protectors under any items that rest directly on painted surfaces to prevent scratches and indentations.
- Utilize coasters and protective mats diligently to prevent rings, heat marks, and other damage from heavy items like vases, drinks, or hot dishes.
- During gatherings or parties, make an effort to put out coasters and gently explain to guests that your unique pieces require a little extra care and consideration.
- Consider applying a fresh protective topcoat every 2-3 years. This simple step can significantly maintain durability, enhance color vibrancy, and extend the life of your painted furniture.
Common Mistakes to Avoid During Your Painting Journey
It’s important to remember that mistakes are a natural part of any creative process, and they happen to everyone, even seasoned DIYers. However, learning from these common pitfalls can save you significant time, effort, and frustration in the long run. One of the biggest errors I’ve encountered is rushing into painting without adequate preparation. Forgetting to properly sand old furniture, for instance, often leads to frustrating issues like paint bubbling or peeling off within just a couple of weeks.
Always prioritize thorough surface cleaning, especially targeting any greasy spots or residues, as paint struggles to adhere and dry properly on contaminated surfaces. A clean, smooth base is the foundation for a flawless finish.
Another costly lesson can come from choosing the wrong type of paint. Using standard wall paint on furniture, for example, often results in a finish that scratches and chips off easily within days of use. For durable, long-lasting results, it’s crucial to select furniture-specific paints – like chalk paint or acrylic furniture paint – along with the appropriate primer and sealer. These are designed to withstand the wear and tear that furniture endures.
I always recommend testing your chosen paint on an inconspicuous area, such as the bottom or back of the piece, before committing to the entire project. What looks perfect on a small paint chip can appear completely different on the larger surface of actual furniture. This step can prevent major rework.
Finally, temperature and humidity matter far more than most people realize. Painting in cold spaces, especially during winter months, can prevent the paint from curing and drying properly, leading to a weak finish. Aim to paint in a well-ventilated area where the temperature consistently stays between 65-75°F (18-24°C). Patience truly is paramount with these projects; allowing ample drying time between coats and before sealing prevents countless hours of frustrating repainting work later on. Embrace the process, and your efforts will be rewarded.
Conclusion: Embrace Your Creative Power
Hand-painted furniture isn’t just a craft; it’s an invitation to a world of endless creative possibilities. It offers a unique opportunity to profoundly modify both your living space and your personal relationship with home decor. As these 25 diverse ideas demonstrate, you absolutely do not need expensive new pieces to create a home that authentically reflects your personality, tells your story, and feels uniquely yours.
The true beauty of hand-painted furniture lies precisely in its imperfections and its undeniable uniqueness. Each deliberate brush stroke, every thoughtfully chosen color, and every whimsical pattern becomes an integral part of your home’s evolving character. It’s a tangible expression of your creativity and individuality.
With diligent preparation, the selection of the right materials, and the consistent application of basic care techniques, your beautifully painted pieces will not only stand the test of time but will also continue to bring immense joy and inspiration for many years to come.
Are you ready to embark on your first, or next, furniture painting project? Choose a straightforward piece to begin, gather your essential supplies, and confidently allow your creativity to flow freely. Remember, there is truly no “wrong” way to express yourself through paint. Your furniture is patiently waiting to be transformed into something extraordinary; all it needs is your personal, artistic touch to bring it to life.
Frequently Asked Questions About Hand-Painted Furniture
How Long Does Hand-Painted Furniture Typically Last?
When properly prepared and sealed with a high-quality topcoat, hand-painted furniture can impressively last anywhere from 5 to 10 years, and often even longer, with consistent good care. The longevity primarily hinges on thorough surface preparation (cleaning, sanding, priming), using appropriate paint and sealer, and adhering to simple maintenance routines like gentle dusting and avoiding harsh cleaners. A durable protective layer is your best friend in ensuring its lasting beauty.
What Kind of Paint Should I Use on Furniture?
For most furniture projects, chalk paint and acrylic furniture paint are your best bets. Chalk paint is incredibly versatile and user-friendly; it adheres exceptionally well to most surfaces with minimal preparation (though some light sanding and cleaning are always recommended for best results) and provides a beautiful, smooth, often matte finish. For high-traffic items, such as dining tables or coffee tables that endure more wear and tear, I often prefer a high-quality acrylic furniture paint combined with a robust, durable sealer. This combination offers superior scratch resistance and overall longevity, ensuring your piece withstands daily use without chipping or fading prematurely.
How Do I Fix Mistakes in Hand-Painted Furniture?
Don’t panic – mistakes are usually fixable! For small drips or minor imperfections, simply wait for the paint to be completely dry, then lightly sand the area smooth with fine-grit sandpaper. You can then touch up the spot. For bigger issues, such as an undesirable color choice or a pattern that didn’t quite work out, the process is similar but requires a bit more effort. Allow the paint to dry completely, then lightly sand the entire problematic area (or the entire surface if it’s a large area) to create a smooth, receptive base. You can then re-prime and repaint. I once completely redid an entire cabinet front after realizing I hated my initial design, and you honestly can’t tell it was painted twice. Patience and proper re-preparation are key to successful corrections.
