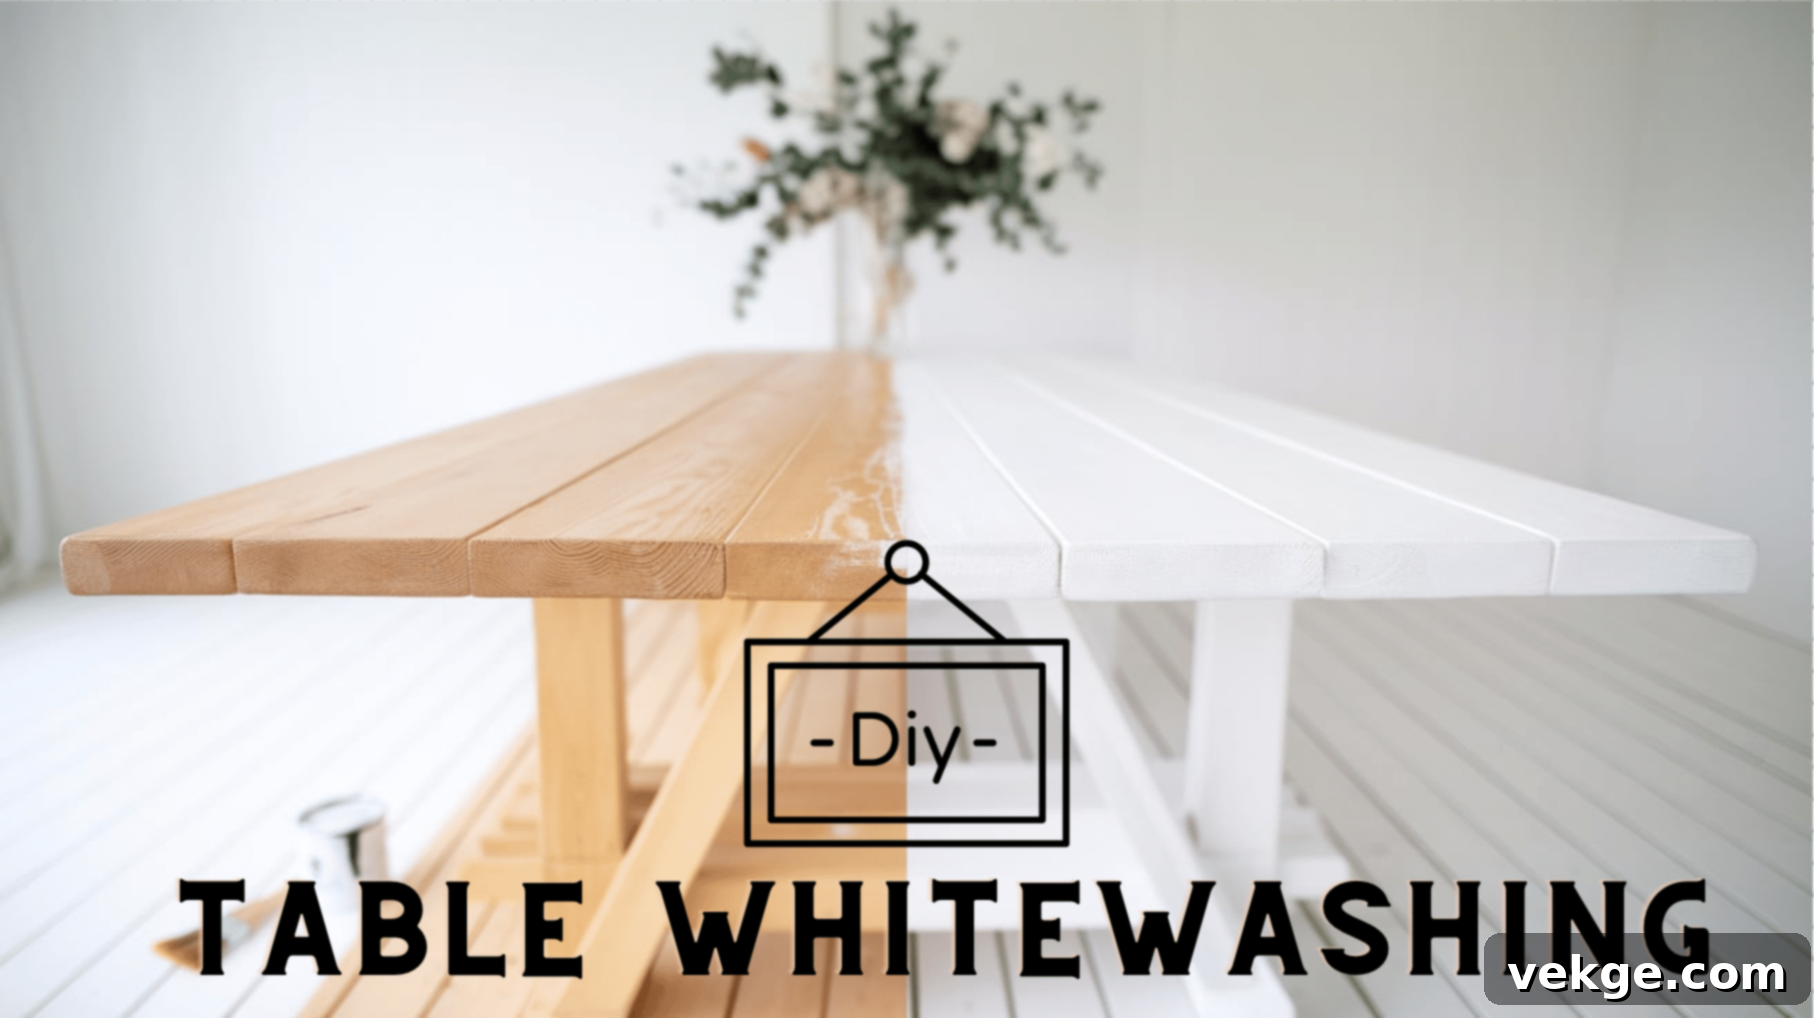
Transform Your Home: The Ultimate Guide to Whitewash Tables – DIY & Buying Tips
Whitewash tables offer a remarkably light, airy, and refreshing touch to any room, all while gracefully preserving the wood’s inherent beauty. This unique finish strikes a perfect balance between a fully painted surface and the raw appeal of natural wood, making it an increasingly popular choice in contemporary homes, coastal retreats, and rustic farmhouse settings alike.
Whether you’re looking to revitalize an old piece of furniture or searching for the ideal new addition to your decor, this comprehensive guide covers everything you need to know about whitewashing tables. From understanding the fundamental technique to making informed buying choices, we’re here to equip you with the knowledge.
We’ll walk you through simple, yet effective DIY methods that can transform ordinary, overlooked tables into stunning focal points. For those who prefer the convenience of ready-made options, we’ll provide expert advice to help you select the perfect whitewash table that harmonizes with your existing space and aesthetic.
Regardless of whether you are a dedicated DIY enthusiast eager to roll up your sleeves or a savvy shopper on the hunt for the right piece, this guide is your go-to resource. We’ll delve into various styles, share practical tips for both creation and acquisition, and help you skillfully navigate around common pitfalls.
Join us as we explore the captivating world of whitewash finishes, empowering you to either create a bespoke piece or find the perfect whitewash table to elevate your home’s charm and character.
Understanding the Art of Whitewashing
What Exactly is Whitewashing?
Whitewashing is a time-honored finishing method that involves applying a thin, translucent coating to wood, allowing its natural grain and texture to subtly show through. This technique dates back centuries, originally employed to protect barn wood and fences using a simple mixture of lime and water, which provided both preservation and a distinct lightened appearance.
In modern applications, whitewashing utilizes paint (typically diluted with water) to achieve a similar soft, weathered aesthetic. This method is particularly effective on raw or unsealed wood, as it allows the wood fibers to absorb the wash and creates a beautiful, diffused effect. The beauty of modern whitewashing lies in its versatility: you can precisely control the opacity, deciding how much of the underlying wood grain remains visible, from a faint whisper to a more pronounced presence.
The result is a soft, often matte, and beautifully weathered finish that imparts a sense of history and lightness to furniture. Whitewashing is an ideal technique for updating both new and old pieces, offering a fresh look without completely obscuring the inherent wooden charm that gives a table its unique character.
The Distinct Benefits of Whitewashing Wood Furniture
Whitewashed tables offer a host of advantages that go beyond mere aesthetics, making them a popular choice for discerning homeowners:
- Enhanced Visual Appeal: Unlike solid paint which can create a flat, one-dimensional surface, whitewash creates a subtle, layered look. The translucent finish adds depth and texture, allowing the natural wood grain to become an integral part of the design. This visual interest helps to brighten spaces, making rooms feel larger and more open.
- Durable Protection: When properly applied and sealed, whitewashed surfaces offer a protective barrier for the wood underneath. This finish helps shield the wood from daily wear and tear, making it more resistant to scratches, minor impacts, and even moisture. This means your beautifully updated table will not only look good but also stand the test of time, outperforming bare wood in terms of longevity and ease of maintenance.
- Unmatched Versatility in Design: One of the most compelling benefits of whitewash is its incredible adaptability to various home design styles.
- In farmhouse settings, it introduces a rustic charm and authentic, timeworn feel, perfectly complementing other natural materials.
- For beach-themed or coastal rooms, it evokes a light, airy, and sun-kissed ambiance, reminiscent of driftwood and seaside living.
- Even in modern and minimalist spaces, whitewashed pieces blend seamlessly. They add a much-needed layer of texture and softness without overwhelming other design elements, serving as a neutral yet engaging base that pairs beautifully with bold accent colors, metallics, or other natural materials like stone and linen.
- It also fits wonderfully into shabby chic, bohemian, and Scandinavian interiors, offering a gentle, understated elegance.
Preparing for Your Whitewashing Project
Selecting the Ideal Table for Whitewashing
The success of your whitewashing project largely depends on the initial choice of wood. Some woods naturally lend themselves better to this finish:
- Pine tables are often considered the best choice due to their light natural color and prominent, clear grain patterns. The wash adheres beautifully, allowing the distinct grain to shine through.
- Oak and maple are also excellent candidates. Oak’s open grain creates a beautiful texture under the whitewash, while maple offers a smoother, more refined look. Both accept the finish well, yielding beautiful and lasting results.
- Other porous woods with visible grain can also work effectively, as they absorb the wash to varying degrees, creating unique effects.
Always consider your table’s current condition:
- Raw wood (unfinished) is the easiest to whitewash, as it readily absorbs the mixture without extensive preparation.
- Previously painted surfaces will require thorough cleaning, stripping if necessary, and meticulous sanding to create a smooth, adherent base.
- Stained tables will demand extra preparation to completely remove the old finish, ensuring the whitewash can penetrate and not be discolored by residual stain.
Some woods may not be suitable for whitewashing. Darker woods, such as mahogany, can be challenging as their natural color might bleed through or significantly alter the final whitewash tone, often resulting in a muddy or unexpectedly muted appearance. Similarly, pressed wood or laminate surfaces are generally not recommended because they lack the natural pores to properly absorb the wash, leading to poor adhesion and an uneven finish.
Essential Materials and Tools Needed
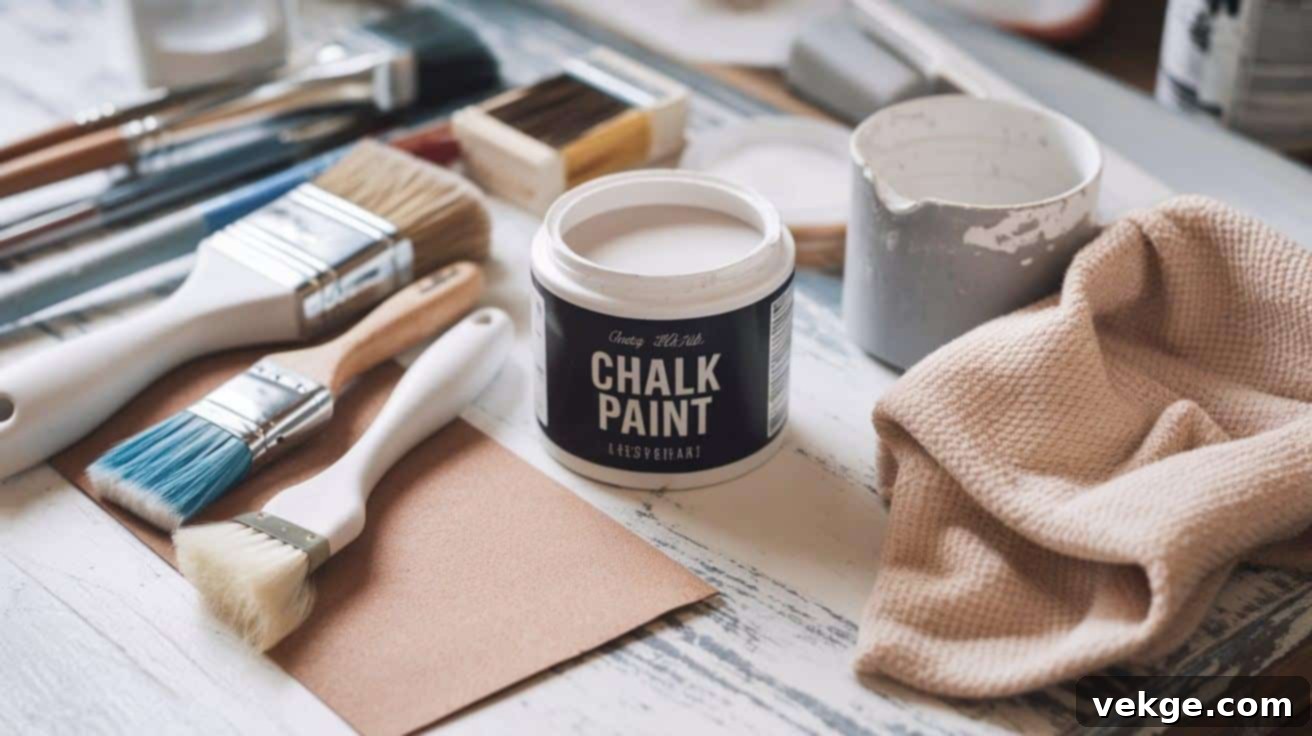
Before you begin, gather all your supplies to ensure a smooth and uninterrupted workflow. Here’s a detailed list:
- White Paint: Choose a good quality water-based paint for ease of mixing, application, and cleanup. Latex paint or chalk paint are popular choices. For a classic look, a pure white or off-white is ideal.
- Clean Water: For diluting the paint.
- Mixing Containers: Several containers for mixing paint and water in various ratios, if experimenting. Old plastic containers or buckets work well.
- Stirring Sticks: To ensure the paint and water are thoroughly combined.
- Paint Brushes:
- Wide Brush: For covering larger surfaces quickly and evenly. A good quality synthetic brush is recommended for water-based paints to minimize brush strokes.
- Narrow Brush: For detailed areas, edges, and legs.
- Clean Rags or Cloths: Several lint-free rags for wiping off excess wash. Damp cloths and dry cloths will both be useful. Old cotton t-shirts work perfectly.
- Sandpaper:
- Various Grits: Coarser grits (e.g., 80-120) for initial sanding or removing old finishes; finer grits (e.g., 220-320) for smoothing and distressing.
- Sanding Block: For even pressure and better results.
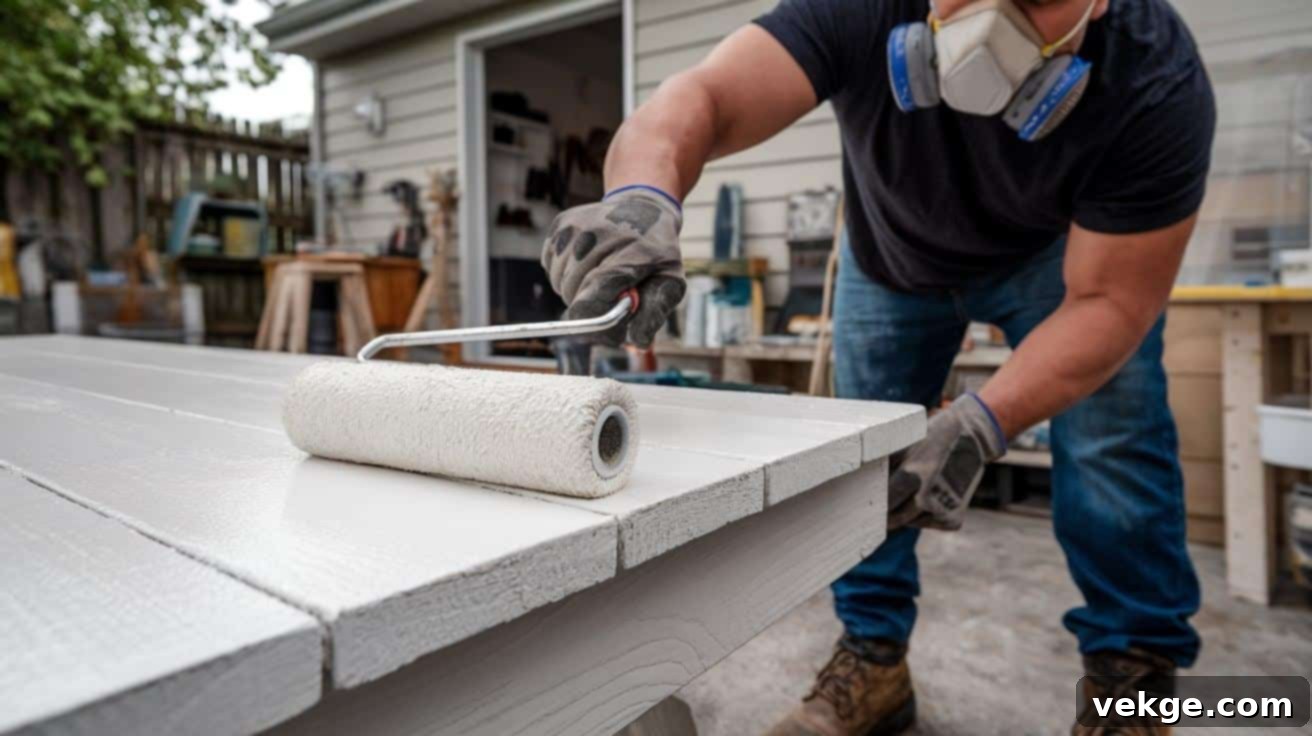
- Protective Gear:
- Gloves: To protect your hands.
- Safety Goggles: Especially during sanding.
- Mask: To protect against dust during sanding.
- Wood Filler: (Optional but recommended) For filling any scratches, dents, or imperfections in the wood before applying the wash.
- Clear Topcoat/Sealant: (Essential for durability) A water-based polyurethane, wax, or lacquer to protect your finished whitewash table from spills and wear.
- Drop Cloths or Tarps: To protect your work area from paint drips.
- Painter’s Tape: If you need to protect specific areas or create crisp lines.
- Sponge or Foam Brush: (Optional) For achieving different application textures.
A DIY Step-By-Step Guide to Whitewash a Table
STEP 1: Thoroughly Prepare the Table Surface
Before any paint touches the wood, proper surface preparation is paramount. Begin by thoroughly cleaning your table. Use a mild soap and water solution to remove any dirt, grease, or grime. For stubborn residue, a degreaser might be necessary. Allow the table to dry completely.
Next, sand the entire surface. If working with raw wood, a light sanding with 150-220 grit sandpaper will open the wood pores, allowing for better absorption of the whitewash. For previously finished, stained, or painted tables, you’ll need to sand more aggressively to remove the old finish. Start with a coarser grit (e.g., 80-120) and progressively move to finer grits (150-220) for a smooth, even surface. Ensure any loose paint or stain is completely removed. Wipe away all sanding dust with a tack cloth or a damp rag, then let it dry.
If there are any minor scratches, dents, or nail holes, now is the time to fill them with wood filler. Allow the filler to dry completely according to the manufacturer’s instructions, then sand it smooth until it’s flush with the surrounding wood surface. Wipe away any dust again.
STEP 2: Prepare the Whitewash Paint Mixture
The ratio of paint to water will determine the translucency of your whitewash. A common starting point is to combine equal parts of white paint (such as linen white-chalked ultra-matte paint) and clean water in a mixing container. This 1:1 ratio creates a relatively light and translucent wash that is easy to apply and wipe off, perfect for a subtle effect.
Stir the mixture thoroughly for at least a minute, ensuring there are no lumps and the paint is fully dispersed, resulting in a thin, watery consistency. For a more opaque finish that shows less grain, use less water (e.g., 2 parts paint to 1 part water). For a more transparent, barely-there look, use more water (e.g., 1 part paint to 2 parts water). It’s always a good idea to test your mixture on an inconspicuous area of the table or a scrap piece of similar wood to ensure it yields your desired effect before applying it to the main surface.
STEP 3: Apply the Whitewash Evenly
Working in small, manageable sections (especially on larger tabletops), apply the whitewash mixture evenly across the surface using a synthetic paintbrush. It’s crucial to brush along the direction of the wood grain. This technique ensures that the wash seeps naturally into the wood’s pores and lines, creating a cohesive and authentic whitewashed appearance. Applying with the grain also helps to avoid noticeable brush strokes and provides a more professional finish.
Avoid over-applying or letting the wash sit too long without wiping, as this can lead to a more opaque, painted look rather than a true whitewash. Work swiftly but carefully to maintain consistency across the entire section.
STEP 4: Wipe Off Excess Wash Immediately
Immediately after applying the wash to a section (before it has a chance to fully dry), use a clean, damp cloth to gently wipe off the excess paint. Follow this with a dry cloth to further buff and blend the finish. The amount of pressure and wiping will dictate how much paint remains on the surface and, consequently, the subtlety of your whitewashed appearance.
Wipe gently and consistently, always following the wood grain. If you want more wood grain to show through, wipe more firmly. If you prefer a slightly more opaque finish, wipe more lightly. Work diligently section by section, completing the application and wiping for each area before moving to the next. This ensures uniform drying and appearance across the entire table.
STEP 5: Adjust the Look with Additional Layers (If Needed)
After the initial coat has dried (typically 30 minutes to 1 hour, depending on humidity and paint thickness), assess the finish. If the first layer doesn’t achieve the desired level of opacity or lightness, you can repeat the process. Apply another thin layer of whitewash, working in sections and wiping off the excess as before.
Allow each layer to dry completely before applying the next. Building up thin layers gives you much greater control over the final look compared to applying one thick coat. You can vary the paint-to-water ratio for subsequent coats if you wish to adjust the transparency further. Patience is key here to achieve a perfectly nuanced finish.
STEP 6: Sand for a Distressed or Smoother Look
Once the final coat of whitewash is completely dry and cured (allow at least 24 hours), you can choose to sand the tabletop for two primary reasons:
- For a Distressed Look: Lightly sand specific areas where natural wear would occur – edges, corners, and raised details – using a fine-grit sandpaper (e.g., 220-320 grit). This will gently remove some of the whitewash, allowing the natural wood to peek through and create an aged, weathered, and charmingly distressed appearance. Focus on blending the distressed areas seamlessly with the rest of the finish.
- For a Smoother Finish: Even if you don’t want a distressed look, a very light overall sanding with extra-fine grit sandpaper (320-400 grit) can create an incredibly smooth, buttery finish by knocking down any raised wood fibers or tiny imperfections.
After sanding, thoroughly wipe away all dust with a tack cloth or a slightly damp microfiber cloth before proceeding to the crucial sealing step.
STEP 7: Apply a Protective Topcoat/Sealant
This is a critical, often overlooked step that ensures the durability and longevity of your whitewashed table. A clear topcoat protects the delicate whitewash finish from moisture, stains, and daily wear.
Choose a clear, non-yellowing, water-based polyurethane, clear wax, or lacquer. Water-based options are generally preferred as oil-based sealants can sometimes impart a yellowish tint over time, altering the crisp white look. Apply 2-3 thin coats, following the manufacturer’s instructions for application and drying times between coats. Always sand lightly with very fine grit sandpaper (400 grit) between polyurethane coats for the smoothest finish, wiping away dust thoroughly.
If using wax, apply it with a soft cloth in circular motions, then buff to a gentle sheen. Allow the topcoat to cure completely before heavy use (this can take several days to a week depending on the product).
Video Tutorial
For more visual guidance and detailed tips, check out this excellent video by Furniture Flippa.
Troubleshooting Common Whitewashing Issues
Even with careful preparation, minor issues can sometimes arise. Here’s how to address them:
- Uneven Spots or Streaks: This often occurs when the paint mixture isn’t consistent, the application is uneven, or wiping pressure varies. To fix, allow the area to dry. Lightly sand any noticeably darker or thicker spots. Then, apply another very thin coat of whitewash to the lighter areas using the exact same paint-to-water ratio. Ensure your brush strokes are consistent and always follow the wood grain. Prevent this by stirring your mixture frequently and working in smaller sections.
- Peeling or Flaking: Peeling is almost always a sign of inadequate surface preparation. The whitewash didn’t properly adhere to the wood. First, gently sand the peeling areas smooth until all loose paint is removed. Clean the surface thoroughly again, ensuring there’s no sticky residue, wax, or oils that might inhibit good adhesion. Reapply the wash using thin coats. To prevent this, always clean and sand your table meticulously before beginning.
- Color Intensity Issues (Too Light/Too Dark):
- Too Light? If the finished look is too transparent after drying, apply an additional thin coat of whitewash, perhaps with a slightly lower water-to-paint ratio in your mixture to increase opacity.
- Too Dark? If the whitewash appears too opaque or dark for your liking, you can lighten it. Lightly sand the entire surface with fine-grit sandpaper (e.g., 220-320 grit) to remove some of the top layer of paint. Then, wipe with a slightly damp cloth to blend and soften the effect. This will often reveal more of the underlying wood.
- Blotchy Appearance: Blotching can happen if the wood isn’t uniformly porous or if the wash is applied unevenly. Ensure your wood is properly prepped and sanded consistently. For existing blotches, you can try light, targeted sanding on darker areas and reapply a very diluted wash to lighter spots for better blending.
- Visible Brush Strokes: This usually means your paint mixture is too thick, or you’re using the wrong type of brush (e.g., natural bristles with water-based paint). Ensure your wash is thin enough, and use a good quality synthetic brush. When applying, use long, even strokes in the direction of the wood grain.
Purchasing a Whitewash Table for Your Home
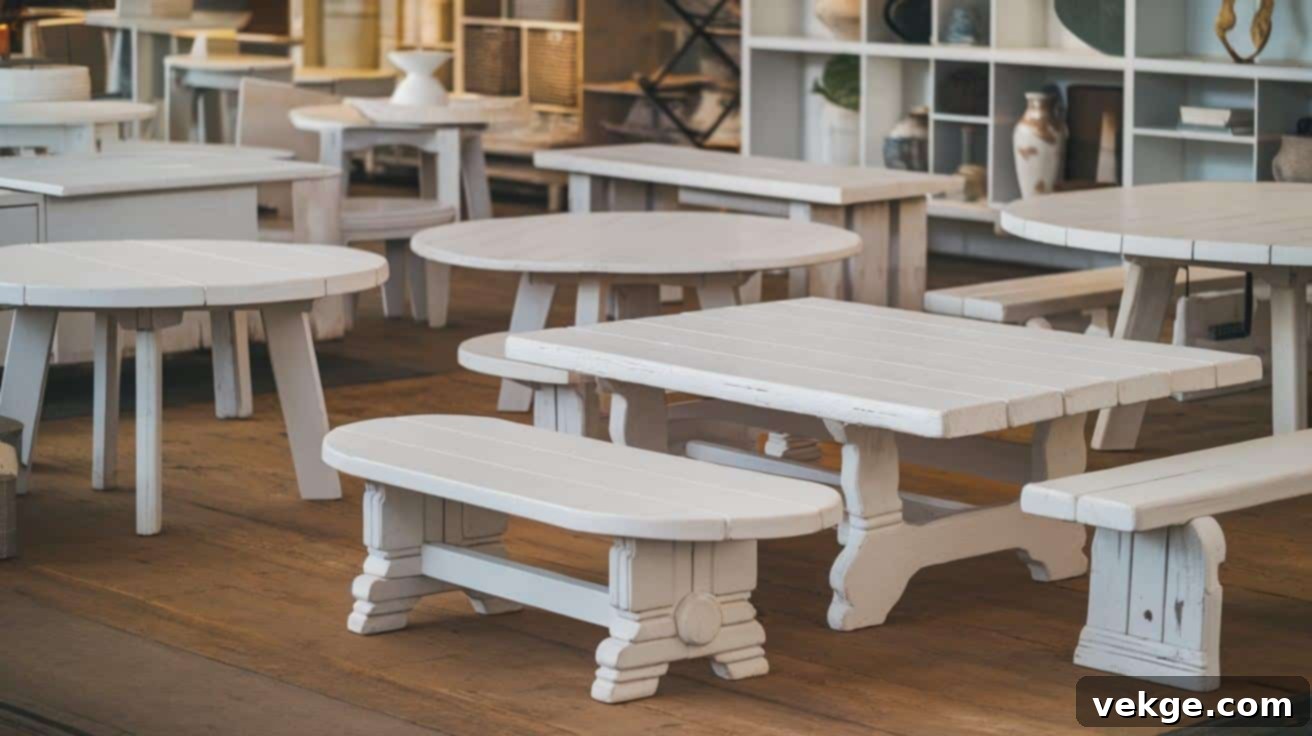
If DIY isn’t your preference, or you’re looking for a specific design, buying a ready-made whitewash table is a fantastic option. Here’s what to consider:
Popular Styles and Types Available
Whitewash finishes are applied to a wide array of furniture pieces, offering diverse functionality and aesthetic appeal:
1. Whitewash Dining Tables
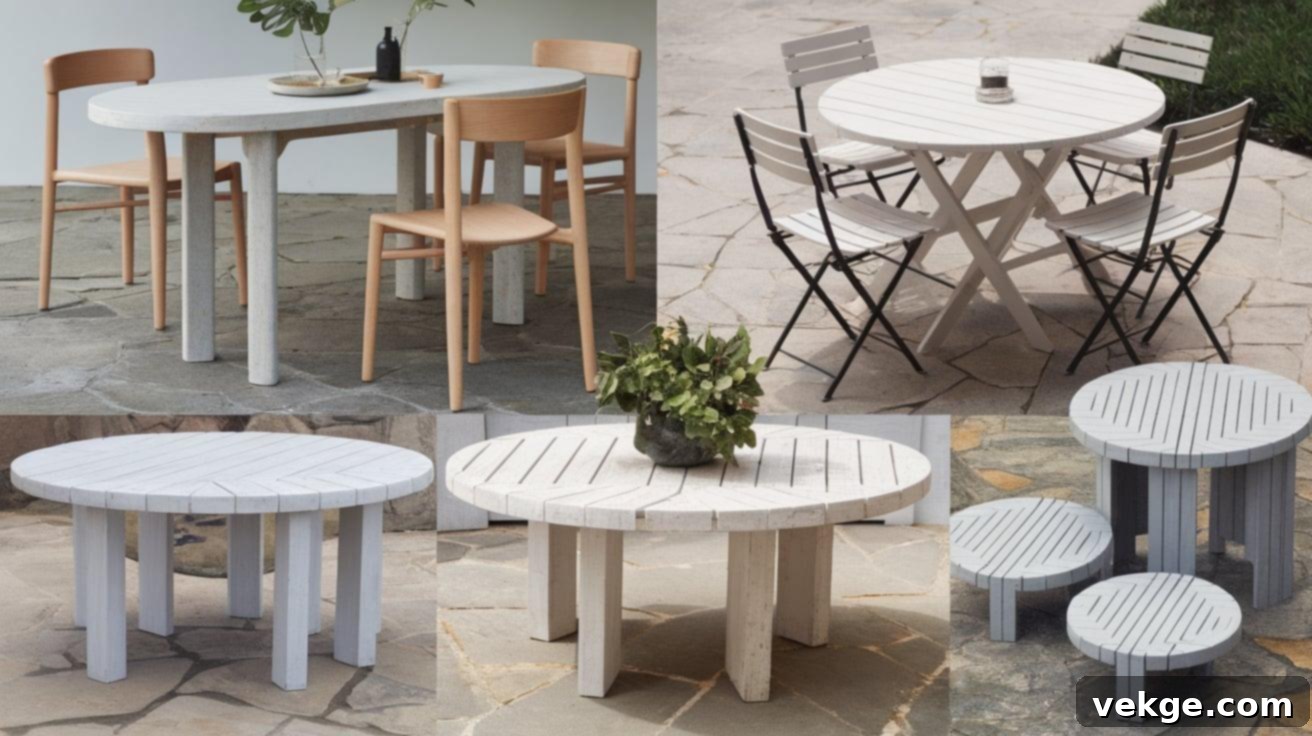
Whitewash dining tables are incredibly versatile, available in various sizes and shapes to suit any dining area. Round tables are excellent for creating an intimate atmosphere in breakfast nooks or smaller dining rooms, promoting easy conversation. Long rectangular tables are perfect for more formal dining rooms or for hosting larger gatherings. Pedestal bases offer enhanced legroom and simplify cleaning around the table. Many dining tables also come with extension leaves, providing crucial extra space when you need to accommodate guests, making them perfect for homes that entertain frequently.
2. Whitewash Coffee Tables
Coffee tables in a whitewash finish range from elegantly simple to intricately detailed designs. Smaller round tables are ideal for compact living rooms, adding a touch of softness without overwhelming the space. Larger rectangular or square coffee tables provide ample surface area for decor, books, and beverages. Look for options with built-in storage, such as drawers or lower shelves, which are practical additions that help keep living spaces tidy and organized while maintaining a cohesive and stylish look.
3. Whitewash Side and Console Tables
Side tables (or end tables) fit perfectly next to sofas, armchairs, or beds, serving as convenient spots for lamps, drinks, and personal items. Their generally smaller size makes them perfect accent pieces that add visual interest and functionality without occupying too much floor space. Console tables, on the other hand, work wonderfully in entryways, hallways, or behind sofas. They provide a graceful display surface for decorative items, art, or mirrors, adding significant visual interest to otherwise empty walls and contributing to the overall flow of your home.
4. Whitewash Outdoor Tables
When selecting outdoor whitewash tables, it’s crucial to ensure they are specifically designed to withstand the elements. These pieces typically feature treated wood and high-performance, water-resistant sealants to protect against moisture, UV rays, and temperature fluctuations. Outdoor patio dining sets, coffee tables, and side tables can bring the comfort and style of indoor living to your exterior spaces. Always look for finishes that are UV-protected to prevent fading and cracking under direct sunlight, ensuring your outdoor furniture remains beautiful for seasons to come.
Key Factors to Consider When Buying a Whitewash Table
1. Material Quality and Durability
The foundation of any good table is its material. Solid wood tables, while often commanding a higher price point, offer superior durability and longevity, capable of being refinished multiple times. Always inspect the wood’s thickness and pay close attention to the quality of the joinery (dovetails, mortise and tenon joints are signs of good craftsmanship). Veneers, which are thin layers of real wood glued over a composite core, offer a more budget-friendly choice but require gentler care. Look for thick veneers that can handle light sanding if necessary for minor repairs, and ensure the edges are well-sealed to prevent peeling.
2. Size and Dimensions
Accurate measurement of your space is paramount before you begin shopping. For dining tables, allow at least 36 inches of clearance around the table for comfortable seating and easy movement. Consider the overall flow of the room and how the table will integrate into your daily life. Also, pay attention to table height in relation to your existing chairs or sofa. Standard dining table height is typically 30 inches, while coffee tables usually measure between 16-18 inches high, designed to align with the seat height of most sofas for ergonomic comfort.
3. Design, Style, and Aesthetic Fit
Choose a whitewash table style that harmonizes seamlessly with your existing furniture lines and overall home aesthetic. Simple, clean designs with straight lines or minimalist profiles often fit well into modern, Scandinavian, or contemporary rooms. Conversely, tables with detailed legs, carved accents, or turned features might be better suited for traditional, farmhouse, or shabby chic spaces. Carefully examine the whitewash color tone. Some finishes lean towards a cooler gray-white, offering a more rustic or industrial edge, while others possess a warmer, creamier hue, ideal for softer, more inviting spaces. Select a tone that complements your current color scheme and desired ambiance.
4. Finish Durability and Maintenance Requirements
Beyond the initial look, consider the long-term durability of the whitewash finish. Ask about the type of sealant used, especially for high-traffic areas like dining or coffee tables. A well-sealed surface will be more resistant to spills and scratches, simplifying maintenance. Understand the specific care instructions provided by the retailer or manufacturer, as these can vary. A quality finish will ensure your table maintains its beauty with minimal effort for years to come.
Top Retailers and Brands
For quality and design variety, major furniture stores like Pottery Barn, Restoration Hardware, and Crate & Barrel often feature beautifully crafted whitewash tables, albeit at higher price points. Their pieces frequently boast solid wood construction, expert craftsmanship, and durable finishes. Local furniture shops can sometimes provide better deals, personalized service, and even custom finishes tailored precisely to your needs and preferences, offering a unique touch that mass-produced items might lack.
Budget-Friendly Options
If you’re working with a tighter budget, there are plenty of avenues to explore for acquiring a charming whitewash table. Second-hand stores, consignment shops, and online marketplaces (like Facebook Marketplace or Craigslist) are treasure troves where whitewash tables, or tables ripe for a DIY whitewash project, are frequently listed at significantly lower prices. Check these sources regularly, as good deals tend to sell very quickly. Additionally, yard sales, estate sales, and flea markets can hide remarkable finds. Don’t be deterred by minor scratches or imperfections; these often drastically reduce the price and can usually be easily fixed or embraced as part of the table’s distressed character at home.
Essential Care and Maintenance for Whitewashed Tables
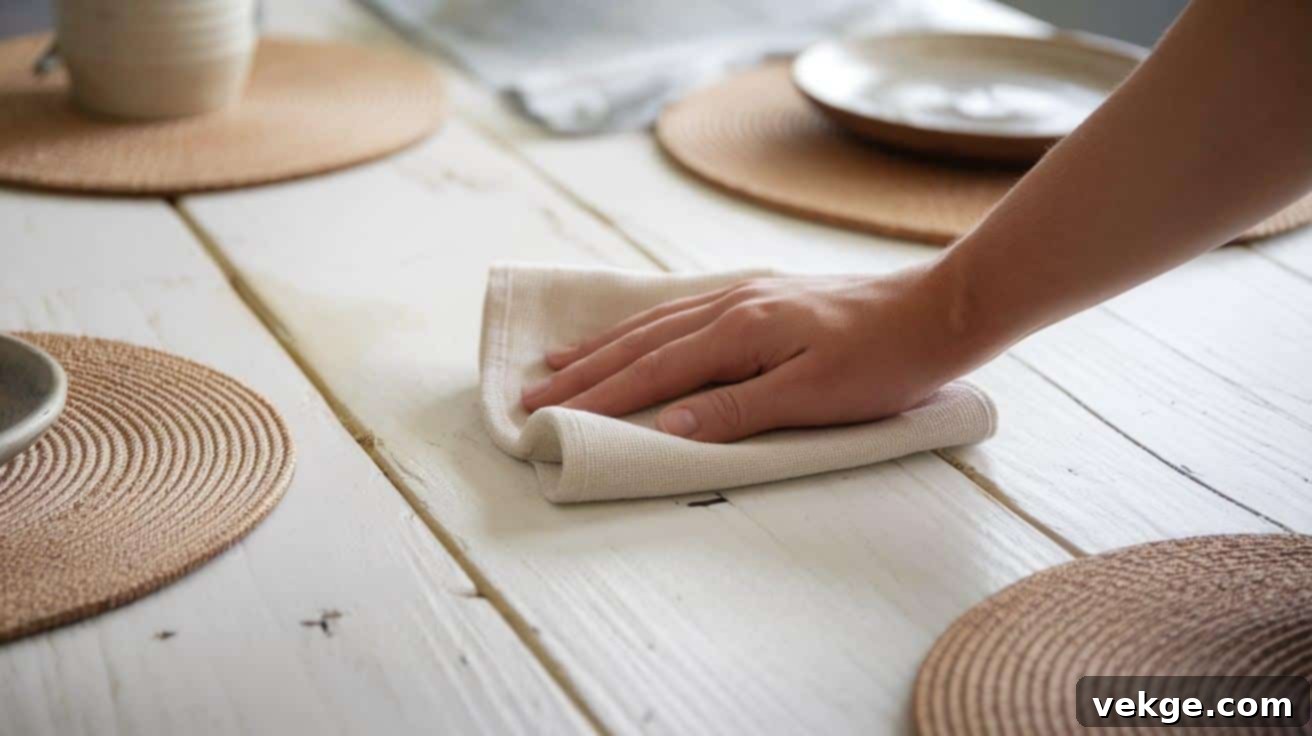
To ensure your whitewashed table retains its beauty and charm for years to come, consistent and gentle care is key:
- Regular Cleaning: Clean your whitewashed tables with a soft, slightly damp cloth. For tougher spots, a very mild soap solution (like diluted dish soap) can be used, but always ensure to wipe it off with a clean damp cloth immediately and then dry the surface thoroughly. Avoid harsh chemical cleaners, abrasive scrubbers, or polishes that contain silicone, as these can strip or damage the delicate finish and potentially cause discoloration.
- Preventative Measures: Always use coasters under drinks and placemats or trivets under hot dishes and serving bowls. This simple habit is highly effective in preventing unsightly water rings, heat damage, and scratches that can compromise the finish. Promptly wipe up any spills; quick cleanup helps prevent staining, especially on lighter finishes.
- Seasonal Protection: Depending on the type of topcoat, apply a furniture wax or a suitable wood conditioner once or twice yearly. This simple step helps to maintain the protective barrier, nourish the wood, and keep the surface looking fresh, revitalized, and better protected against daily wear. Follow the product manufacturer’s instructions for application.
- Dusting: Regular dusting is essential to prevent dirt and grime buildup, especially in the subtle texture of the wood grain. Use a soft, dry microfiber cloth or a feather duster. Gentle cleaning methods are always more effective and less damaging than aggressive scrubbing.
The Bottom Line
Whitewashed tables truly offer a perfect, harmonious blend of style, versatility, and practicality for nearly any home aesthetic. Throughout this guide, we’ve thoroughly covered the basics of whitewashing, from mastering the rewarding DIY techniques to making astute decisions when purchasing ready-made pieces.
Whether you embark on the creative journey of crafting your own bespoke whitewash finish or opt for the convenience of acquiring a beautifully finished table, you are now equipped with comprehensive knowledge to make truly informed decisions. The process, while seemingly straightforward, ultimately thrives on attention to detail, which makes all the difference in achieving a professional and lasting result.
We’d be absolutely thrilled to see your whitewash table projects come to life! We encourage you to share your inspiring before-and-after photos with us and the community. Did you encounter any interesting challenges during your DIY project, and how did you overcome them? Or perhaps you discovered a truly perfect whitewash table at an incredible price? Your experiences are valuable!
Please share your insights and stories in the comments section below. Your unique perspectives and helpful tips might just illuminate the path for others on their own whitewash table expedition. Let’s collectively build a vibrant and helpful community of home decor enthusiasts, sharing our passion for beautiful, functional, and thoughtfully designed living spaces.
Frequently Asked Questions (FAQs) About Whitewash Tables
What Does Whitewash Do to Wood?
Whitewash adds a light, often semi-transparent, rustic, or coastal finish to wood. It enhances and highlights the natural grain and texture of the wood while softening its overall appearance. The result is a beautiful, weathered, and vintage-inspired look that brightens the space without completely obscuring the wood surface or its inherent character.
How Long Does Whitewash Take to Dry?
Typically, a single coat of whitewash will take anywhere from 30 minutes to an hour to dry to the touch. However, this can vary significantly based on several factors, including the thickness of the application, the specific type of paint used, the wood’s porosity, and environmental conditions such such as humidity and ambient temperature. Always allow ample drying time between coats and before applying a protective topcoat.
Can I Reverse a Whitewash If I Don’t Like It?
Yes, while it requires effort, whitewash can generally be reversed or altered. The most common method is to sand the surface thoroughly to remove the paint completely, revealing the original wood beneath. Alternatively, you can apply a darker stain or a more opaque paint finish directly over the whitewashed effect to mask it, allowing you to achieve a completely different look if your initial attempt isn’t quite what you envisioned.
Is Whitewashing Wood Furniture Difficult for Beginners?
Whitewashing is generally considered a beginner-friendly DIY project. The technique is forgiving, and its imperfect, weathered aesthetic means that minor inconsistencies often add to its charm rather than detract from it. The key is proper preparation, using thin coats, and testing your mixture on a scrap piece of wood first. With a little patience, even a novice can achieve beautiful results.
Can I Whitewash Over Stained or Sealed Wood?
While raw wood is ideal, you can whitewash over stained or previously sealed wood, but it requires more extensive preparation. You’ll need to thoroughly clean, degrease, and sand the surface to create a dull, even surface for the whitewash to adhere to. For heavily stained or sealed pieces, stripping the old finish entirely might be necessary to ensure the whitewash takes evenly and achieves the desired translucent effect without color interference from the previous finish.
