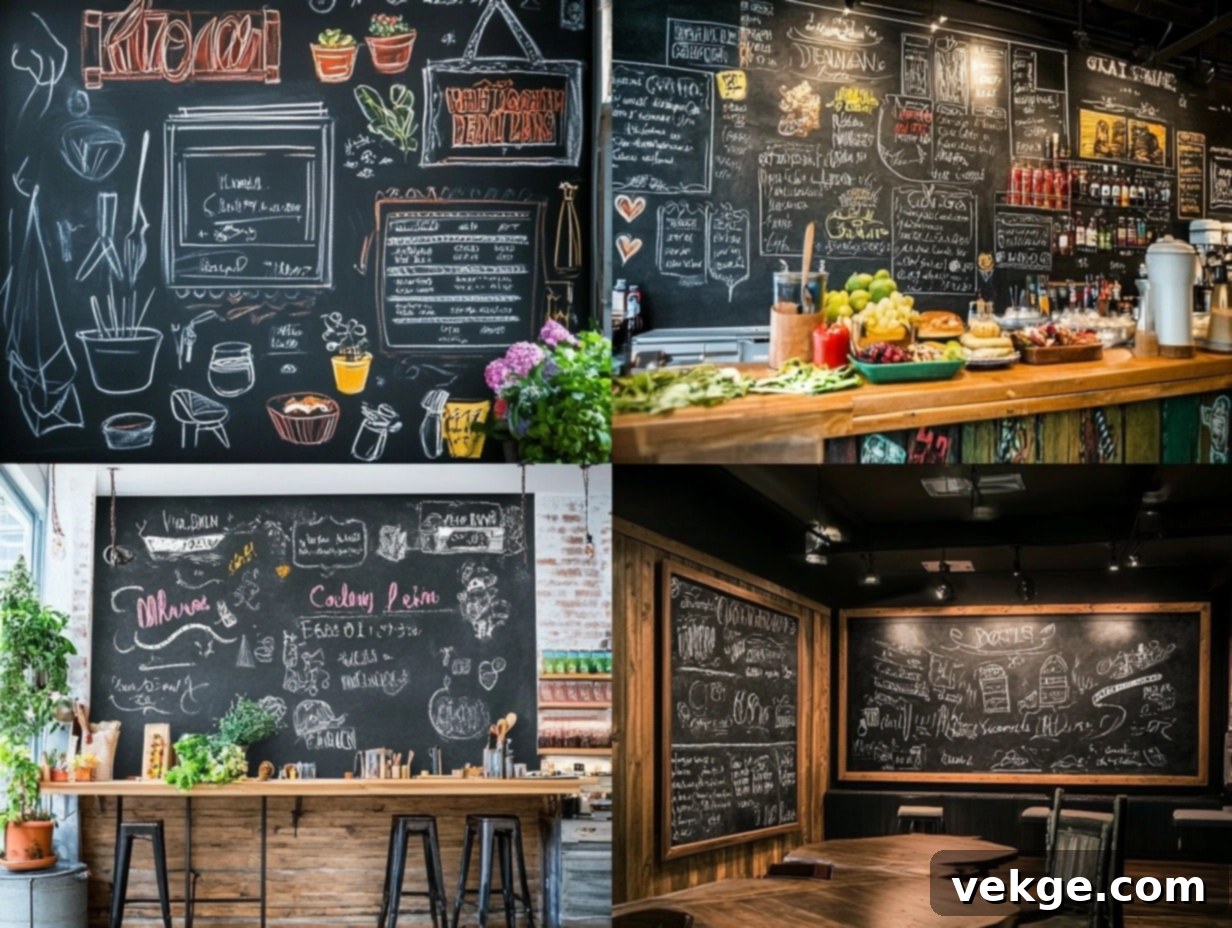
Unlock Creativity: 18 Inspiring Chalkboard Paint Ideas for Every Room
Having transformed countless walls with the magic of chalkboard paint, I’ve uncovered an incredible spectrum of possibilities for creative expression and practical functionality within the home. Each project, whether a small accent or a full-blown feature wall, presents unique challenges and rewards, ultimately turning mundane surfaces into vibrant, interactive spaces.
The secret to a successful chalkboard wall lies in meticulous preparation and a thorough understanding of how chalkboard paint interacts with different surfaces. Over the years, I’ve refined my techniques, and I’m excited to share my expertise and detailed, step-by-step guides for various creative applications that you can replicate in your own home.
What is Chalkboard Paint?

My first encounter with chalkboard paint profoundly altered my perception of functional wall finishes. This specialized coating is designed to transform almost any surface into a writable, erasable canvas, much like a traditional classroom chalkboard. Unlike standard wall paint, it creates a subtly textured, ultra-matte finish that effectively “grips” chalk marks, yet allows for effortless cleaning without ghosting or permanent stains.
I’ve explored nearly every variety available on the market. Classic latex-based versions are my go-to for larger wall applications due to their superior durability and smooth application. For smaller items or irregularly shaped surfaces, spray-on chalkboard paint offers convenience and a consistent finish. Magnetic chalkboard paints, which incorporate fine metal particles, add an extra layer of functionality, allowing you to attach notes or photos with magnets. The most recent innovation, tintable chalkboard options, enables me to perfectly match any existing color scheme while retaining that essential chalk-friendly surface. This versatility means your chalkboard wall doesn’t have to be just black or dark green anymore!
It’s important to clarify a common misconception: chalkboard paint is distinct from chalk paint. While chalk paint provides a soft, vintage, distressed look for furniture and decorative items, chalkboard paint’s sole purpose is to create a durable, writable surface for chalk. Through countless DIY projects, I’ve learned that understanding these differences is key to choosing the right product for your desired outcome.
Chalkboard Paint Wall Ideas
1. Kitchen Accent Wall
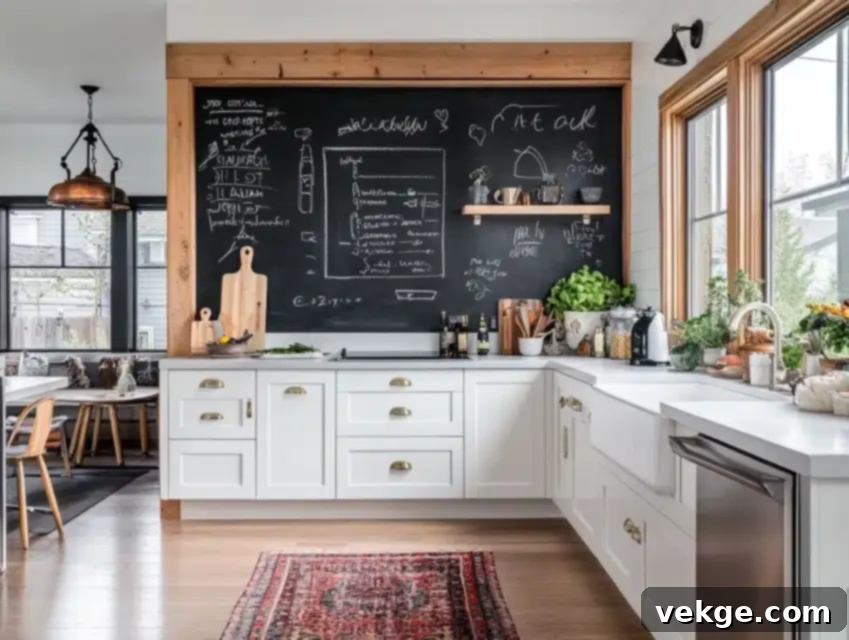
I transformed an empty wall in my kitchen into a dynamic, daily message center that the entire family now actively uses. The deep, dark surface creates a sophisticated contrast against our bright white cabinets, instantly elevating the room’s aesthetic. More than just stylish, it’s incredibly practical: grocery lists, meal plans, and family reminders are all neatly organized and easily accessible. Guests frequently compliment this interactive feature, noting how it makes our kitchen feel both welcoming and efficiently managed. Despite constant use and cleaning, the surface has maintained its pristine appearance for over three years, proving its durability.
DIY Steps:
- Prepare the Wall: Thoroughly clean the wall with a TSP (trisodium phosphate) solution to remove grease and grime, ensuring a clean base for paint adhesion.
- Smooth the Surface: Lightly sand the entire area to remove any texture or imperfections, as chalkboard paint works best on a perfectly smooth surface.
- Apply Primer: Use a high-quality primer specifically designed for chalkboard paint. This step is crucial for optimal adhesion and a flawless finish.
- Paint Coats: Apply two to three thin, even coats of chalkboard paint, allowing at least 24 hours of drying time between each coat for proper curing and durability.
- Season the Surface: Once fully dry, “season” the chalkboard by rubbing the side of a piece of white chalk over the entire surface, then erase it. This prevents ghosting from the first few writings.
- Organize with Sections: Use painter’s tape to create permanent sections or borders for specific categories like “Groceries,” “Dinner,” or “Notes” for enhanced organization.
- Add a Frame: For a polished, finished look, consider adding a decorative wooden frame around the chalkboard area, matching your kitchen’s style.
2. Kids’ Room Creative Wall
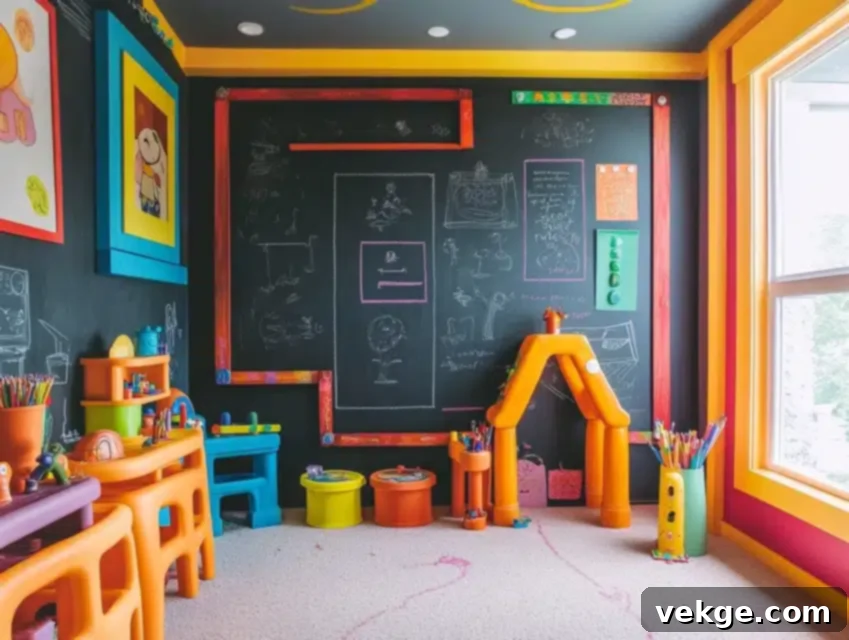
I transformed my daughter’s ordinary white wall into an expansive canvas, fostering endless imagination and artistic exploration. A full-wall application provides ample space for drawing and writing at various heights, accommodating her as she grows. We added playful frames, painted in bright, cheerful colors, to create designated zones for different activities or artistic themes. This wall now serves as a dynamic backdrop for spontaneous storytelling, creative games, and daily art practice. Regular cleaning ensures the surface remains fresh and inviting for new masterpieces, truly unleashing her creative potential.
DIY Steps:
- Preparation: Carefully remove all switch plates and outlet covers from the wall.
- Patch and Smooth: Fill any holes or imperfections with spackling compound, then sand smooth for a flawless base.
- Prime Thoroughly: Apply two coats of a durable, low-VOC primer specifically formulated for kids’ rooms, ensuring a safe and long-lasting finish.
- Paint with Care: Roll chalkboard paint in thin, even layers, taking care to avoid drips or uneven patches. Two to three coats are usually sufficient.
- Colorful Borders: Once the chalkboard paint is cured, use acrylic paint to create vibrant, colorful borders around sections, adding a playful touch.
- Height Tracker: Incorporate fun measuring marks on the side of the wall to track your child’s growth over the years, turning it into a cherished keepsake.
- Chalk Holders: Install accessible chalk and eraser holders at kid-friendly heights, encouraging independent use and easy cleanup.
3. Calendar Wall Organization
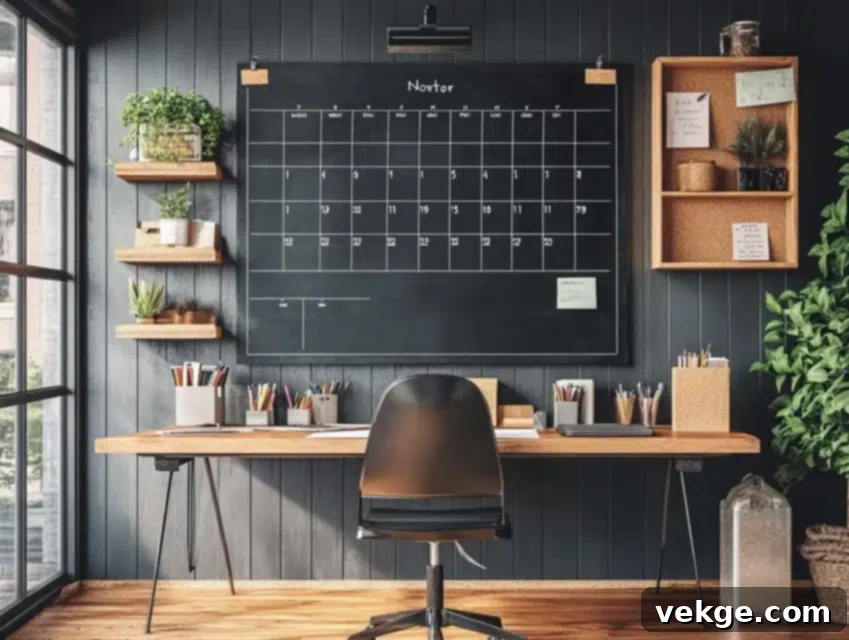
My home office desperately needed a more efficient planning system, inspiring me to create this impressive, oversized chalkboard calendar. The generously sized squares make writing appointments and erasing completed tasks incredibly easy, keeping all my commitments clearly visible. I integrated a dedicated notes section on the side for additional reminders, project lists, or impromptu ideas. The permanent grid lines, applied with paint markers, ensure neat and consistent organization month after month. This dynamic setup not only saves paper but also maintains a crystal-clear schedule, significantly boosting my productivity.
DIY Steps:
- Measure and Mark: Precisely measure and mark out perfect squares for each day of your calendar. Use a ruler and pencil for accuracy.
- Ensure Straight Lines: Use a laser level or a long spirit level and painter’s tape to ensure all lines for your grid are perfectly straight and even.
- Apply Base Coat: Paint the entire wall with chalkboard paint, following the standard priming and coating instructions before drawing the grid.
- Create Grid: Once the chalkboard paint is fully cured, use a permanent white or colored paint marker to draw the permanent grid lines for your calendar.
- Header Space: Designate and mark a clear space at the top for the month header, which can be updated monthly.
- Cork Strip: Install a cork strip or small magnetic board alongside the calendar for pinning important documents, photos, or extra reminders.
- Monthly Template: Create a reusable stencil or template for quick and consistent monthly setup, making changes effortless.
4. Living Room Art Gallery
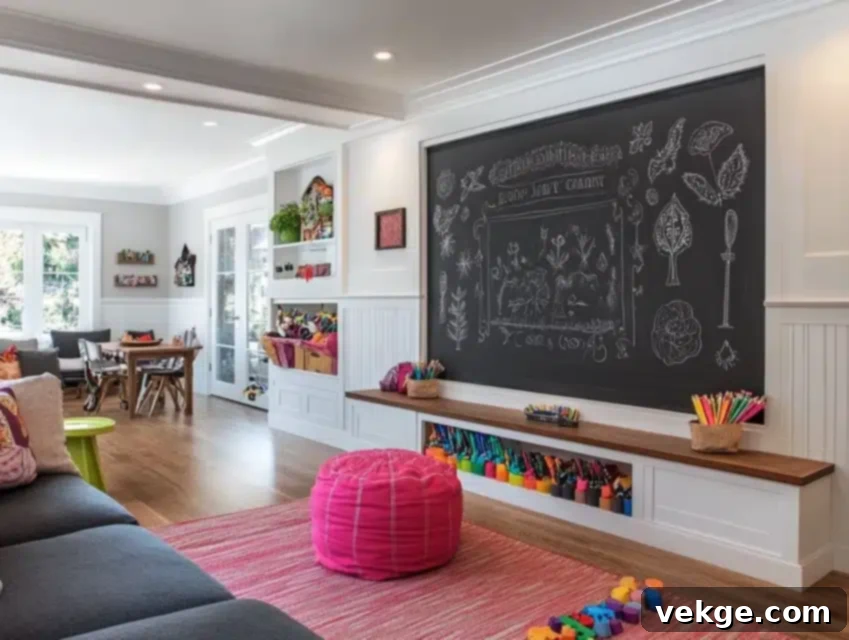
I designed this living room wall to be a dynamic conversation piece, constantly changing with our moods, the seasons, and special occasions. It serves as a captivating backdrop for parties and family gatherings, where guests are often encouraged to add their own artistic touches, making it a truly collaborative art display. The ability to use different colored chalks allows for stunning visual effects and intricate designs. The space truly feels alive and ever-evolving, reflecting our current inspirations and celebrations. This living art gallery ensures our home always feels fresh and personally curated.
DIY Steps:
- Texture Assessment: Thoroughly inspect the wall’s texture and sand it meticulously to achieve the smoothest possible finish, essential for fine chalk art.
- Layered Application: Apply multiple thin coats of chalkboard paint, rather than a few thick ones, to ensure the best coverage, durability, and a uniform finish.
- Decorative Molding: Elevate the wall’s appearance by creating a raised border with elegant decorative molding, giving it a framed gallery look.
- Hidden Lighting: Install subtle, recessed or track lighting above the wall to beautifully highlight the chalk artwork, making it truly stand out.
- Chalk Storage: Mount a small, discreet shelf beneath the chalkboard area to neatly store various colors of chalk and art tools.
- Cleaning Supplies: Keep cleaning supplies (e.g., a damp cloth, eraser) readily accessible but hidden, ensuring the wall can be refreshed easily.
- Design Templates: Create reusable stencils or templates for frequently used designs, quotes, or seasonal motifs to speed up future transformations.
5. Office Productivity Wall
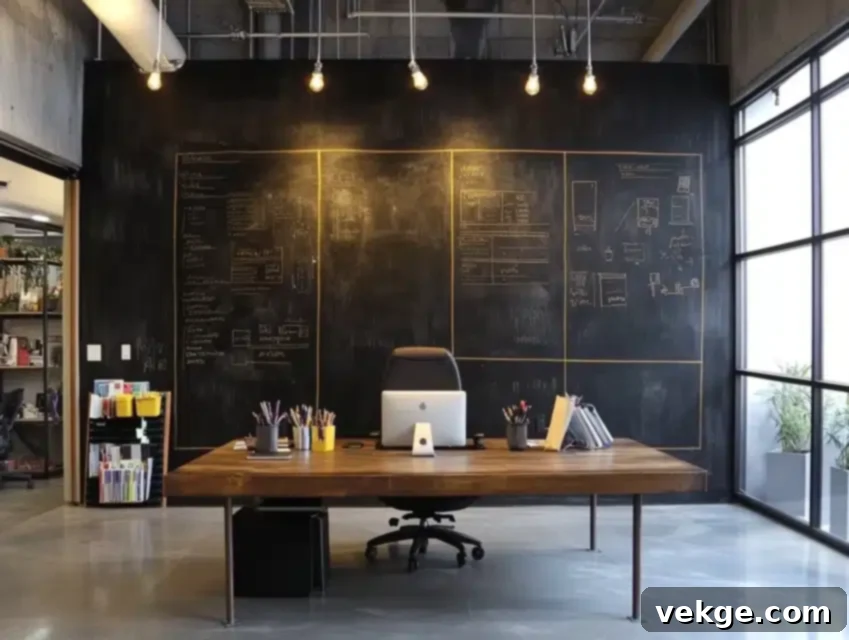
I designed my home office wall to be a catalyst for creativity and efficiency during brainstorming sessions and daily tasks. The dark, matte surface is not only aesthetically pleasing but also helps reduce eye strain during long hours of work, providing a calm backdrop for intense focus. Different sections, clearly delineated, help organize various project stages, to-do lists, and strategic planning. This wall has become an indispensable central hub for my daily workflow, allowing me to visually map out ideas and track progress. Client meetings are now far more interactive and engaging with this dynamic visual aid.
DIY Steps:
- Wall Inspection: Carefully inspect the wall surface for any cracks, dents, or holes, and make necessary repairs to ensure a perfectly smooth finish.
- Magnetic Primer: For enhanced functionality, apply a magnetic primer before the chalkboard paint. This allows you to use magnets for attaching notes and documents.
- Smooth Coats: Paint smooth, even coats of chalkboard paint, ensuring full coverage and a consistent texture, which is vital for clear writing and easy erasing.
- Section Dividers: Use painter’s tape and fine gold or silver paint pens to create elegant, permanent lines that divide the wall into distinct productivity sections.
- Hidden Storage: Install discreet, hidden storage solutions nearby for chalk, markers, erasers, and other office supplies, keeping the workspace clutter-free.
- Task Lighting: Mount adjustable task lighting or picture lights above the writing areas to ensure optimal visibility and reduce shadows while working.
- Planning Template: Design and implement a reusable template (either drawn or using removable vinyl) for weekly planning or project outlines, streamlining your workflow.
6. Interactive Entryway
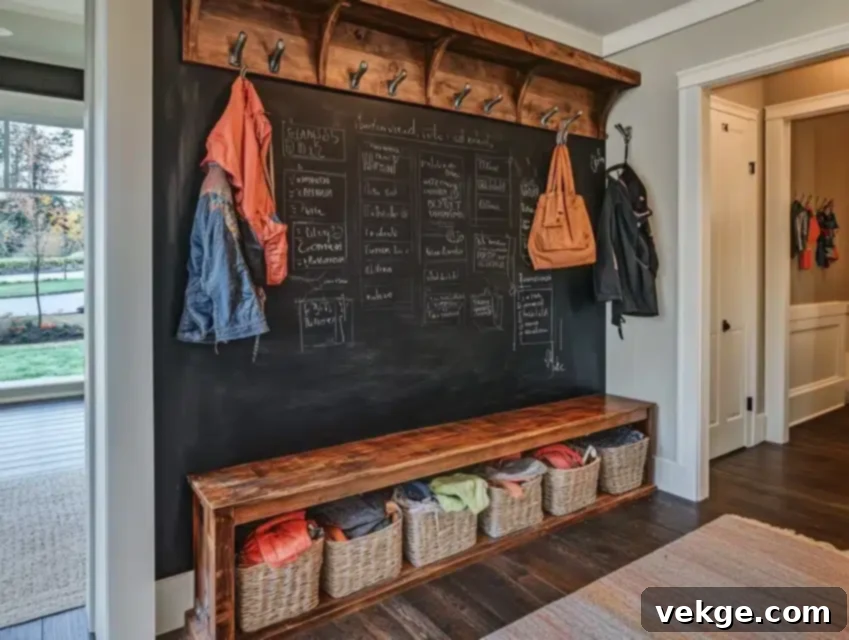
My entryway wall has transformed into the central communication hub for our family, greeting everyone with a personal touch. Important messages, daily reminders, and fun drawings remain clearly visible as family members come and go, ensuring no one misses crucial information. The space feels considerably more welcoming with personalized greetings and ever-changing chalk art. By adding sturdy hooks below, I created a highly functional message center where keys, bags, and coats can be organized. A simple weekly cleaning routine keeps the surface fresh and ready for new notes and creative expressions, maintaining its welcoming appeal.
DIY Steps:
- Wall Preparation: Start by thoroughly preparing the wall, filling any existing nail holes, small cracks, or imperfections with spackle.
- Smooth Sanding: Sand the entire surface until it is completely smooth to the touch. This step is crucial for a clean chalkboard finish and easy erasing.
- High-Traffic Primer: Apply a high-quality primer specifically designed for high-traffic areas. This ensures excellent adhesion and durability, especially in an entryway.
- Paint Application: Paint two to three thin, even coats of chalkboard paint using a foam roller for the smoothest possible finish. Allow adequate drying time between coats.
- Decorative Frame: Install a decorative wooden frame around the edges of the chalkboard area for a more polished and finished aesthetic.
- Coat Hooks: Add sturdy coat hooks or cubbies just below the chalkboard section, transforming it into a complete functional message and organization center.
- Family Sections: Create designated sections using tape or permanent markers for each family member, making it easy to leave personalized messages or reminders.
7. Rustic Dining Room Display
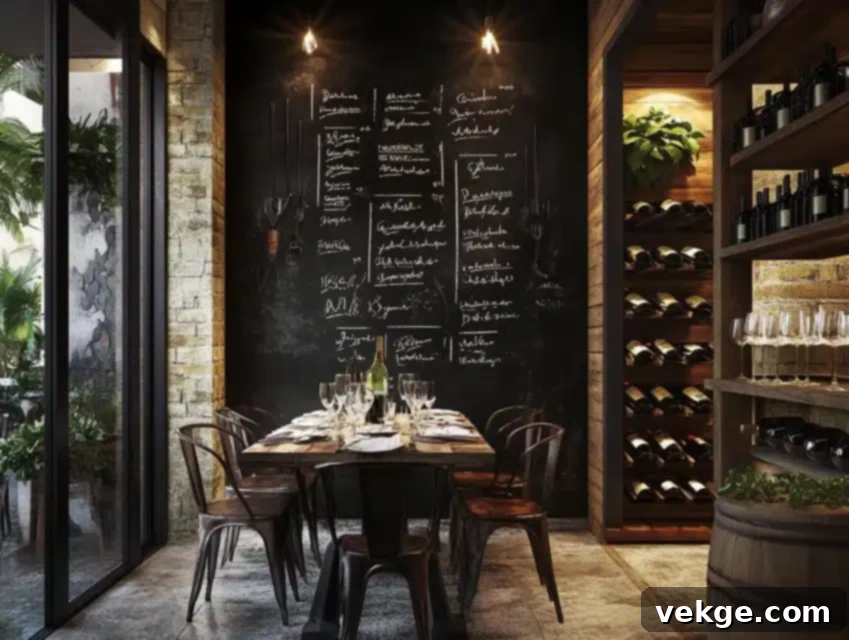
I crafted this feature wall in our dining room to serve as a charming display for our weekly menus and suggested wine pairings, adding a sophisticated, rustic touch to our meals. The deep, dark surface provides a stunning contrast to our warm wooden furniture, creating a cozy and inviting atmosphere. Dinner parties become truly special events with elegantly handwritten menus, making guests feel like they’re in a boutique restaurant. The addition of a rustic, reclaimed wooden frame perfectly complements our farmhouse-style decor. Guests consistently commend the unique dining ambiance this chalkboard wall creates, making every meal a memorable experience.
DIY Steps:
- Clean and Repair: Thoroughly clean the wall to remove any dust or grime, and repair any existing damage for a smooth base.
- Textured Primer: Apply a textured primer if you desire a more rustic, slightly aged effect for your chalkboard surface.
- Multiple Coats: Paint multiple thin, even coats of chalkboard paint, ensuring deep, rich color saturation and a durable finish.
- Reclaimed Frame: Construct a unique wooden frame using reclaimed lumber to enhance the rustic charm and define the chalkboard area.
- Accent Lighting: Install subtle accent lighting, such as small sconces or picture lights, to highlight the menu and create a warm glow.
- Wine Glass Rack: Mount a stylish wine glass rack just below the chalkboard, perfect for showcasing your wine selections or keeping them handy.
- Menu Template: Design a reusable template for your menu layouts, which can be easily traced or freehanded for consistent, beautiful presentations.
8. Home Bar Menu Wall

I brought a professional flair to our entertaining space by transforming the wall behind our home bar into an ever-changing, vibrant cocktail menu. The rich, dark surface creates the perfect dramatic backdrop for colorful chalk art, elegantly showcasing our signature drinks and seasonal specials. I meticulously divided the wall into distinct sections: one for classic cocktails, another for creative seasonal concoctions, and a dedicated space for our wine and beer offerings. Our guests absolutely adore perusing the creatively written drink descriptions, often sparking conversations about mixology and favorite recipes. This dynamic wall has undeniably become a central focal point during parties, adding an engaging and interactive element to our gatherings.
DIY Steps:
- Deep Clean: Thoroughly clean the wall surface with a degreasing solution to remove any residue, ensuring optimal paint adhesion.
- High-Moisture Primer: Apply a heavy-duty primer specifically designed for high-moisture areas to protect against humidity common in bar environments.
- Durable Coats: Paint three thin, even coats of chalkboard paint, allowing ample drying time between each, to ensure maximum durability for a frequently used bar area.
- LED Lighting: Install sleek LED strip lighting along the top or sides of the menu wall to enhance visibility and create a sophisticated, inviting glow.
- Permanent Sections: Use paint markers to create permanent, stylish sections and headings for different drink categories, ensuring a neat and organized display.
- Protective Coating: Consider applying a clear, protective coating over the permanent sections for added longevity and easier cleaning of spills.
- Chalk Storage Shelf: Mount a small, chic shelf nearby to store specialty chalk, erasers, and other bar-related writing tools, keeping them handy and organized.
9. Bedroom Headboard Feature
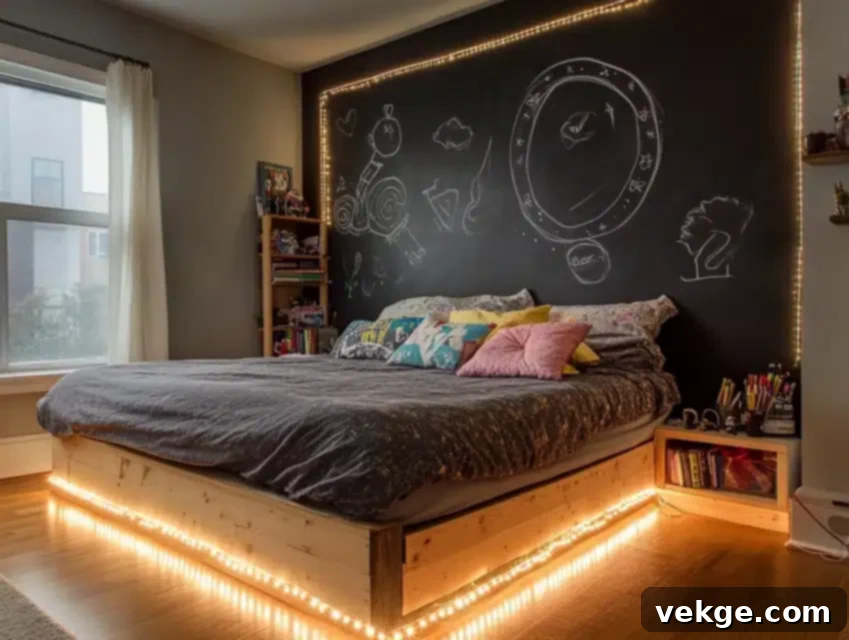
Seeking a unique focal point for my bedroom, I created this stunning chalkboard headboard wall, extending majestically from floor to ceiling behind our bed. This expansive surface offers endless opportunities to effortlessly change the room’s mood with different artwork, inspirational quotes, or serene landscapes. I frequently draw seasonal designs that beautifully complement our bedding choices, making bedroom decoration incredibly versatile and fun. The wall also discreetly doubles as a dream journal, allowing me to quickly jot down fleeting ideas or thoughts that surface during the night. Soft, dimmable lighting installed along the edges casts a magical glow against the dark surface, particularly enchanting in the evening hours, transforming the space into a peaceful sanctuary.
DIY Steps:
- Wall Prep & Sanding: Assess the wall texture, then sand it completely smooth to ensure a luxurious, even finish for your chalk art.
- Sound-Dampening Primer: Apply a sound-dampening primer for a quieter, more restful sleep environment.
- Extended Painting: Paint multiple thin coats of chalkboard paint, extending the width well beyond the bed frame for an impactful, grand statement.
- Dimmable LEDs: Install dimmable LED strips around the perimeter of the chalkboard area to create soft, customizable ambient lighting.
- Height Markers: Incorporate subtle height markers or grid lines to help maintain consistent proportions for recurring designs or patterns.
- Floating Shelves: Add sleek, floating shelves nearby for convenient storage of chalk, erasers, and decorative items.
- Optional Headboard Frame: If desired, install a minimalist headboard frame (wood, metal, etc.) over the painted wall to add architectural interest.
10. Pantry Door Organization
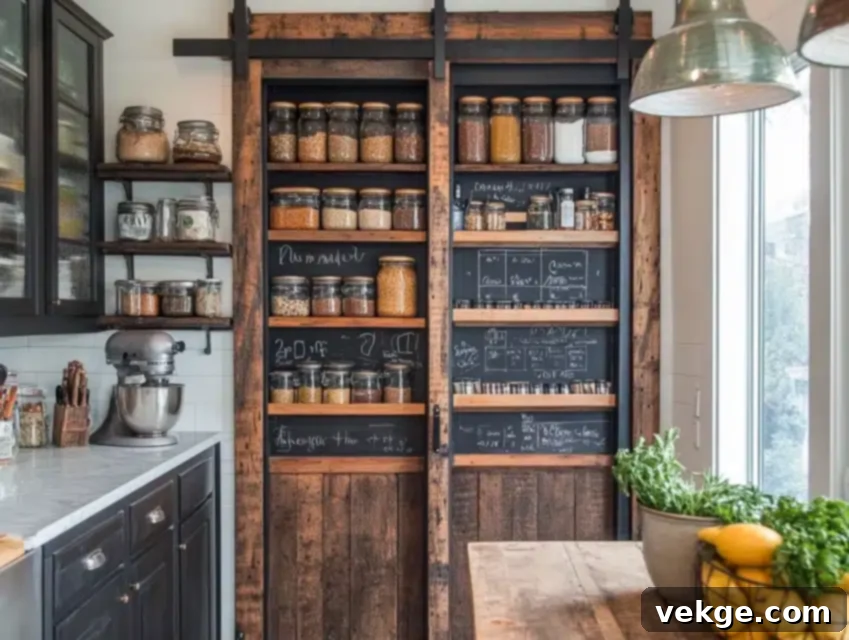
I transformed our plain pantry door into an incredibly efficient organization system that has completely revolutionized our kitchen storage habits. The entire door surface now functions as a dynamic inventory list, effortlessly changing as we use and replace items. By creating designated zones for different food categories (e.g., “Grains,” “Canned Goods,” “Baking Supplies”), grocery shopping and meal planning have become remarkably simpler and more streamlined. The bottom section of the door features a rotating meal plan, helping us utilize pantry items effectively and reduce food waste. Even the narrow door edges have received strips of chalkboard paint for quick notes, last-minute reminders, or playful doodles, maximizing every inch of space.
DIY Steps:
- Remove and Prep Door: Carefully remove the pantry door from its hinges and lay it flat on sawhorses or a protected surface for easier painting.
- Sand Thoroughly: Sand the entire door surface, including all edges, to ensure a smooth, uniform base for the primer and chalkboard paint.
- Surface Primer: Apply a high-quality primer specifically formulated for previously painted surfaces or wood, ensuring optimal adhesion and durability.
- Paint Both Sides (Optional): For maximum functionality, consider painting both sides of the door with chalkboard paint, expanding your writable area.
- Permanent Grid Lines: Use a ruler and paint marker to create permanent grid lines or section dividers for different categories like “Pantry List,” “Meal Plan,” or “Shopping List.”
- Door Bumpers: Install small clear door bumpers on the door frame or the door itself to protect the newly painted surface from chips and scuffs when opening and closing.
- Chalk Holder: Mount a small, discreet chalk and eraser holder directly onto the door frame or the side of the door for convenient access.
11. Garage Organization Wall
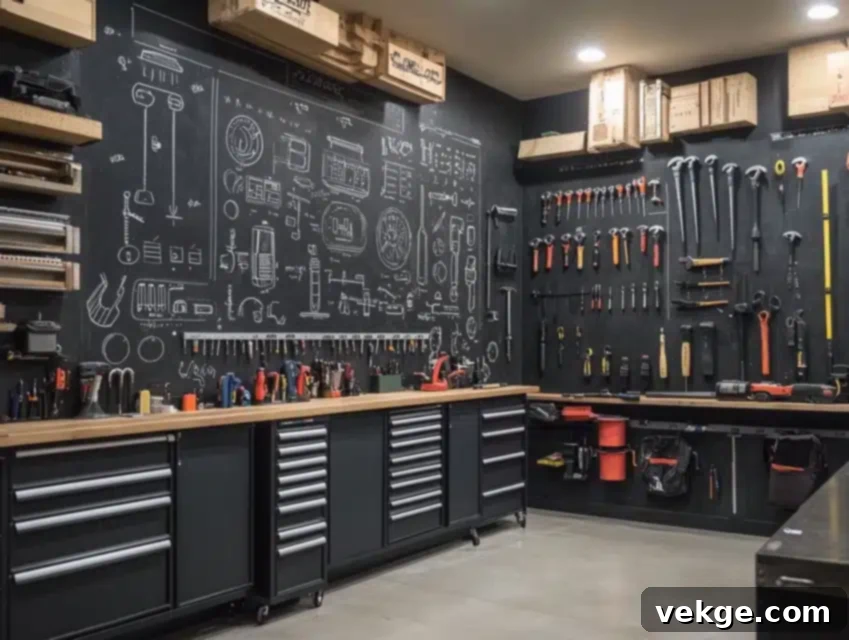
I completely revolutionized my workshop space by transforming the main wall of my garage into a comprehensive tool organization system. The expansive dark surface, extending from floor to ceiling, provides the perfect high-contrast backdrop for detailed diagrams, project measurements, and intricate notes for ongoing projects. Each section is meticulously divided into logical zones: one for tracking tool inventory and their locations, another for detailed project plans and blueprints, and a special area dedicated to vehicle or equipment maintenance schedules. This wall has become an indispensable tool for keeping track of borrowed tools and their return dates, ensuring everything stays accounted for. Regular monthly cleaning and updates are essential to maintain clear visibility of all critical information, especially in the typically dusty garage environment, making this an incredibly practical and effective solution.
DIY Steps:
- Intensive Cleaning: Thoroughly clean the garage wall with a heavy-duty degreasing agent and scrub brush to remove all grease, grime, and cobwebs.
- Heavy-Duty Primer: Apply a robust primer suitable for garage conditions, which may include uneven textures or concrete, ensuring maximum paint adhesion.
- Extra Coats for Durability: Paint extra coats (3-4 thin coats) of chalkboard paint to ensure superior durability and resistance to wear and tear in a demanding workshop setting.
- Permanent Grid System: Create a permanent grid system using paint markers or thin strips of tape, clearly defining areas for tools, projects, and schedules.
- Task Lighting: Install proper, bright task lighting directly above the work areas on the chalkboard wall to ensure excellent visibility for detailed writing and reading.
- Tool Silhouette Outlines: Draw permanent outlines or silhouettes of tools directly onto the wall in their designated spots for easy storage and quick identification.
- Dedicated Project Areas: Design specific, clearly marked sections for individual project planning, including materials lists, cut sheets, and step-by-step instructions.
12. Seasonal Celebration Wall
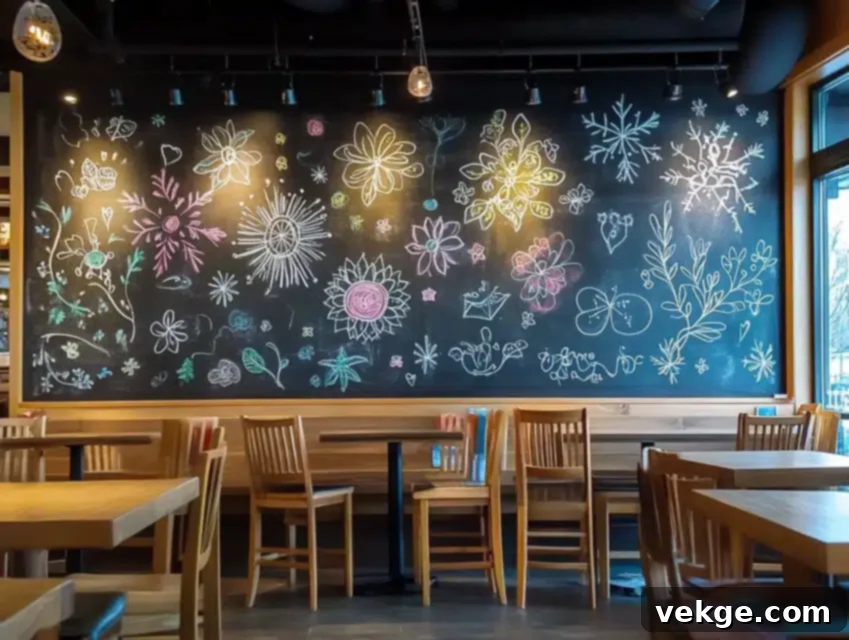
I envisioned this wall as our family’s year-round celebration canvas, a dynamic centerpiece that completely transforms its appearance with each passing season. This expansive surface serves as an enchanting backdrop for all our holiday gatherings and family milestones, featuring intricate chalk art that perfectly captures the spirit of spring, summer, autumn, and winter. Spring brings delicate flowering branches and whimsical bird designs, while winter showcases enchanting snowflakes and festive holiday themes. Fall displays a riot of colorful leaf patterns and harvest motifs, and summer bursts with vibrant beach and garden imagery. This ever-evolving wall has truly become our family’s visual calendar, marking the passage of time through creative and heartwarming seasonal transitions, fostering a strong sense of tradition and artistic expression.
DIY Steps:
- Smooth Surface Prep: Prepare the wall meticulously with a high-quality, smooth surface primer to ensure an ideal base for intricate chalk artwork.
- Multiple Thin Coats: Apply multiple thin coats of chalkboard paint, allowing each to fully dry, to achieve a perfectly smooth and durable writing texture.
- Subtle Layout Markers: Use very faint, erasable pencil lines or subtle permanent markers to establish a basic grid or guides for consistent design layouts across seasons.
- Adjustable Accent Lighting: Install adjustable accent lighting, such as track lights or wall washers, to beautifully illuminate your seasonal chalk masterpieces.
- Seasonal Frame Elements: Consider adding a simple frame that can be easily adorned with seasonal decorative elements like garlands, ribbons, or small ornaments.
- Quick Change Templates: Create reusable stencils or templates for common seasonal elements (e.g., snowflakes, leaves, flowers) to facilitate quick and easy design changes.
- Hidden Art Supply Storage: Set up a discreet, hidden storage solution nearby for all your chalk art supplies, including various colors, erasers, and stencils.
13. Café Corner Creation
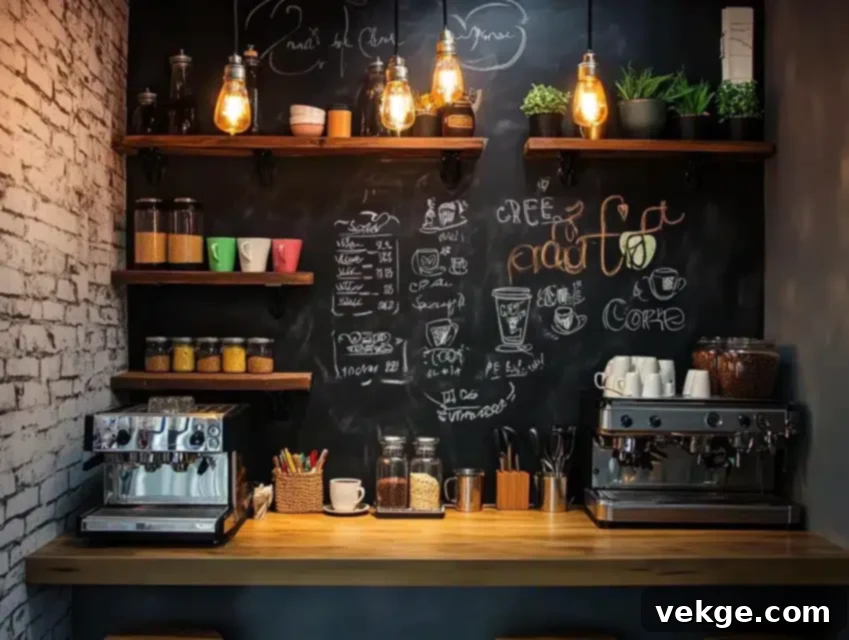
I transformed an overlooked kitchen nook into a charming café corner, effortlessly bringing the warm, inviting ambiance of a coffee shop right into our home. The chalkboard wall proudly displays our daily coffee specials, favorite breakfast items, and inspiring quotes about morning rituals. Small, rustic shelves showcase our curated coffee mug collection, creating a professional café feel against the dark background. This cozy space has quickly become our favorite morning gathering spot, complete with coffee-themed artwork and elegantly written pricing lists, just like a real café. Weekly updates to the menu keep the space feeling wonderfully fresh and exciting, delighting both family members and visiting guests alike with its personalized charm.
DIY Steps:
- Moisture Resistance Test: Before starting, assess the wall area for any signs of moisture, and address issues to prevent future peeling or damage.
- Kitchen-Specific Primer: Apply a high-quality primer specifically suited for kitchen environments, offering good adhesion and mild moisture resistance.
- Durable Thin Coats: Paint several thin, even coats of chalkboard paint to ensure maximum durability against splashes and frequent cleaning.
- Floating Shelves: Install stylish floating shelves to display coffee supplies, mugs, or small decorative items, enhancing the café aesthetic.
- Permanent Menu Sections: Use paint markers to create permanent sections for “Daily Specials,” “Drinks,” and “Pastries,” just like a real café menu board.
- Vintage Lighting: Add vintage-style lighting fixtures, such as industrial sconces or a small pendant light, to complete the authentic café ambiance.
- Coffee Cup Hooks: Install a rail with coffee cup hooks and create dedicated display areas for different coffee blends or accessories.
14. Nursery Growth Wall
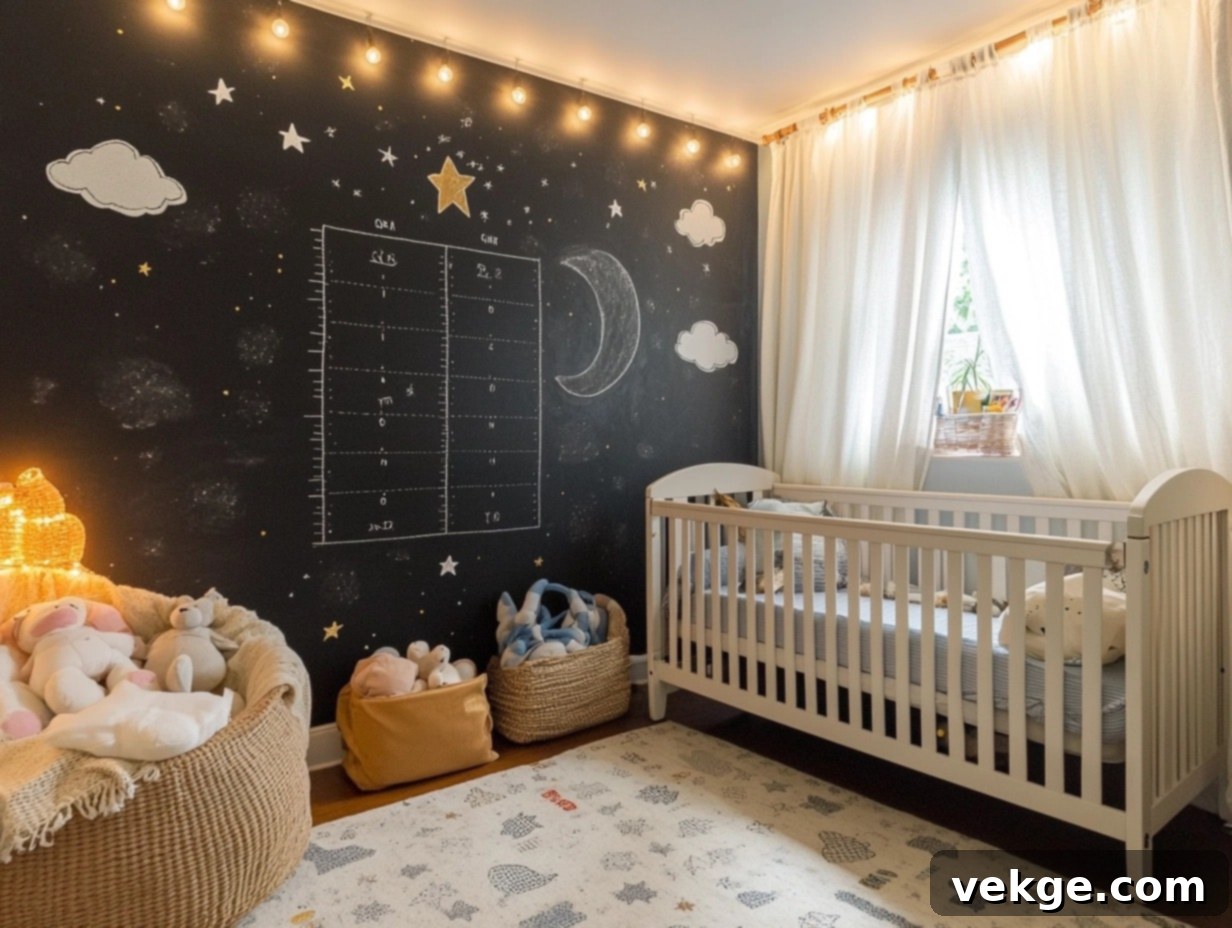
I dedicated a special wall in my baby’s nursery to meticulously document every precious milestone and growth measurement. The chalkboard paint’s gentle, matte finish beautifully softens the room’s atmosphere, providing the perfect, non-glare backdrop for monthly photoshoots. Each height marking on the wall becomes a permanent, cherished record of our little one’s growth journey, lovingly accompanied by special notes about their latest achievements, first words, and funny moments. Small, whimsical clouds and stars, painted in permanent white, create a dreamy and enduring frame around the measuring area. As our baby grows, this wall seamlessly transforms from a simple height chart into a detailed, heartwarming memory keeper, brimming with personal history.
DIY Steps:
- VOC-Free Paint Samples: Always test paint samples to ensure they are zero-VOC (Volatile Organic Compounds) for a safe nursery environment.
- Baby-Safe Primer: Apply a certified baby-safe primer and allow it to cure completely, ensuring no residual fumes.
- Ventilated Painting: Paint multiple thin coats with proper room ventilation to minimize any lingering odors and ensure a healthy space.
- Permanent Measuring Lines: Use durable, non-toxic paint pens to create permanent, clear measuring lines for height tracking.
- Monthly Photo Markers: Install subtle, permanent markers or small hooks to indicate ideal spots for monthly milestone photos.
- Wash-Away Safe Elements: Add decorative elements, such as permanently painted clouds or stars, that will not wash away with cleaning.
- Milestone Template: Create a reusable template or stencil for consistently documenting important milestones (e.g., “First Tooth,” “First Steps”).
15. Bathroom Beauty Wall
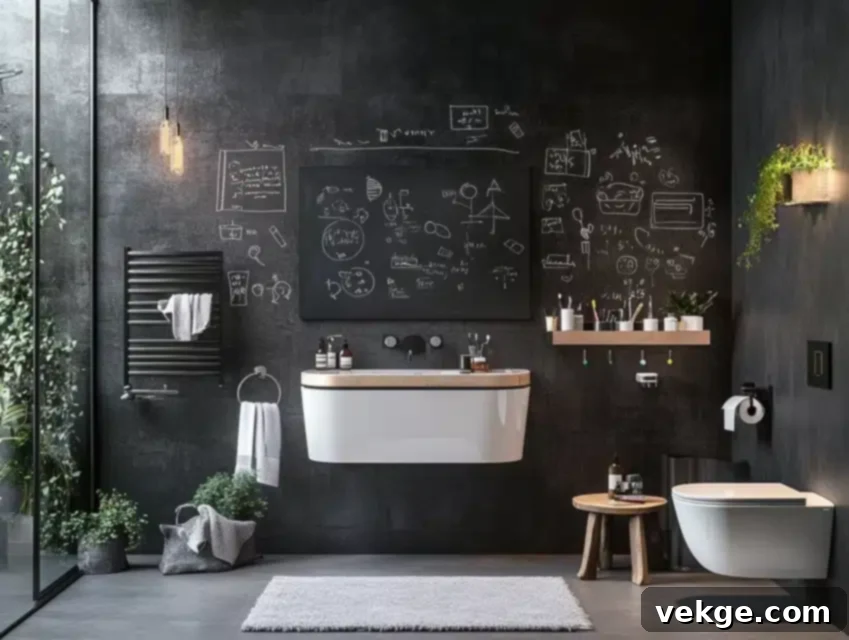
I transformed our bathroom wall into an inspiring and highly functional space, designed to brighten every morning routine. The chalkboard surface, specially treated to withstand high-moisture environments, proudly displays uplifting daily affirmations, personalized beauty tips, and even quick reminders for self-care routines. A dedicated section holds our family’s morning schedule, effectively eliminating bathroom timing conflicts and ensuring a smooth start to the day for everyone. Small, illustrative drawings of product organization help each family member keep their items neatly in their proper places, fostering tidiness. Moreover, the wall includes a special area where guests can leave fun messages, doodles, or quick notes, adding an interactive and welcoming touch to our bathroom.
DIY Steps:
- Mold-Resistant Primer: Prepare the wall with a high-quality, mold-resistant primer, essential for humid bathroom conditions.
- Moisture-Barrier Underlayment: Consider applying a liquid moisture-barrier underlayment before priming for added protection against humidity.
- Extra Coats for Humidity: Paint extra coats (at least three) of chalkboard paint to ensure maximum durability and resistance to moisture.
- Ventilation System: Ensure your bathroom has a proper, functioning ventilation system to quickly remove moisture and protect the paint.
- Water-Resistant Border: Create a decorative, water-resistant border design around the chalkboard area using waterproof paint or tile trim.
- Humidity Protection Coating: Apply a clear, specialized coating designed for humidity protection over the chalkboard paint for enhanced longevity.
- Specialized Chalk Holders: Install specialized, moisture-resistant chalk holders and erasers designed for humid environments.
16. Laundry Room Lists
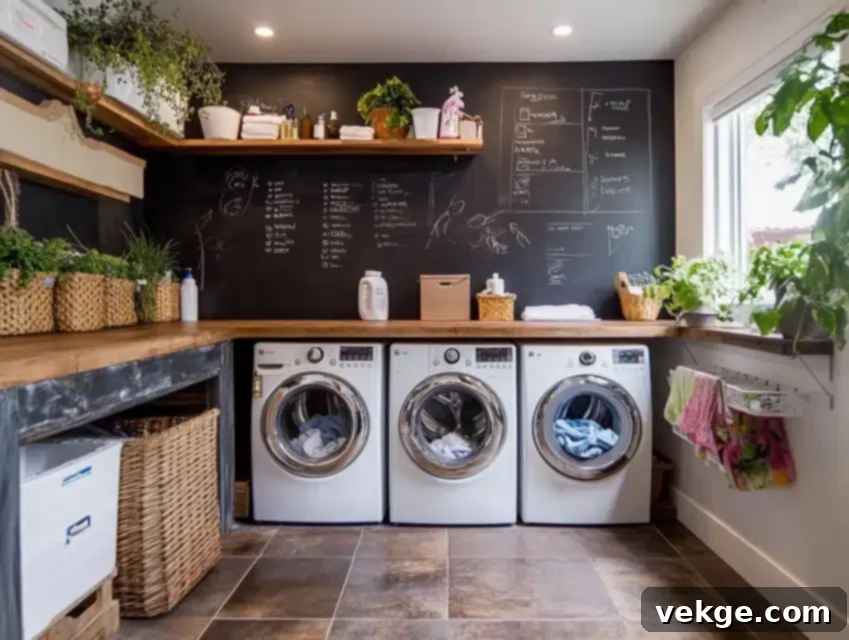
I completely redesigned our laundry room with a highly functional chalkboard wall, making the chore of washing clothes feel significantly less daunting. The durable surface features permanent sections dedicated to essential sorting instructions, handy stain removal guides, and a clear weekly laundry schedule for the entire family. Clever symbols remind family members about crucial steps like checking pockets and separating colors, minimizing laundry mishaps. A dedicated space even tracks those elusive missing socks with humorous “wanted” posters, adding a lighthearted touch to a common household mystery. Furthermore, the wall includes a simple chart showing which family members’ loads are currently progressing, ensuring efficient workflow and accountability for everyone.
DIY Steps:
- Degreasing Clean: Thoroughly clean the wall with a strong degreasing agent to remove any detergent residue, lint, or grime.
- Humidity Primer: Apply a primer specifically suited for high-humidity areas, offering superior protection against moisture and steam.
- Heavy-Use Coats: Paint multiple coats (3-4 thin coats) of chalkboard paint to ensure robust durability against frequent contact and cleaning in a busy laundry room.
- Permanent Sections: Create permanent sections for “Sorting,” “Stain Guide,” and “Schedule” using paint markers or stencils.
- Fold-Down Drying Rack: Install a convenient fold-down drying rack nearby, maximizing space efficiency in the laundry room.
- Clothing Care Guide: Add a permanent chart or visual guide of common clothing care symbols to help everyone understand washing instructions.
- Lost-and-Found Tracker: Designate a fun, permanent area for a “Lost & Found Socks” tracking system, complete with funny descriptions.
17. Study Space Success Wall
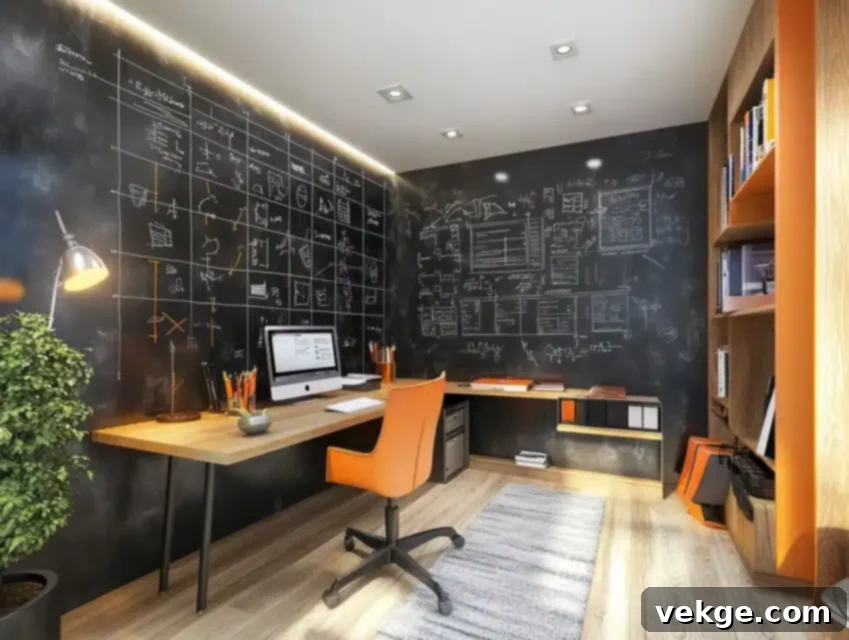
I designed this vibrant learning wall to make homework and studying far more engaging and interactive for students of all ages. Spanning from floor to ceiling, the surface is ingeniously divided into distinct zones for different subjects: math problems on the top section for easy vertical work, vocabulary and language exercises in the middle, and project planning or brainstorming at the bottom. Permanent grid lines, meticulously applied, are invaluable for geometry, graph work, or even drawing, while the perfectly smooth surface ensures erasing and redrawing is effortless. Special boxes, drawn in permanent marker, create dedicated spaces for daily assignments, upcoming test dates, and important deadlines. To foster motivation, the wall proudly features a “celebration corner” where academic achievements and personal bests receive special recognition, making learning a continuous journey of success.
DIY Steps:
- Flatness Check & Repair: Test the wall for perfect flatness; repair any bumps, dents, or uneven patches to ensure an optimal writing surface.
- Education-Grade Primer: Apply an education-grade primer designed for frequent use, providing a durable and receptive base for chalkboard paint.
- Optimal Writing Surface: Paint multiple thin coats of chalkboard paint, focusing on achieving a perfectly smooth and consistent finish for effortless writing and erasing.
- Permanent Subject Divisions: Create clear, permanent subject division lines using paint markers or stencils, neatly sectioning off areas for different academic tasks.
- Adjustable Task Lighting: Install adjustable task lighting above the study areas to ensure sufficient illumination and reduce eye strain during long study sessions.
- Magnetic Strip: Add a magnetic strip or board for easily hanging reference papers, diagrams, or inspiring quotes.
- Weekly Planning Template: Develop a reusable template for weekly study planning, allowing students to structure their time effectively and stay on track.
18. Photo Backdrop Design
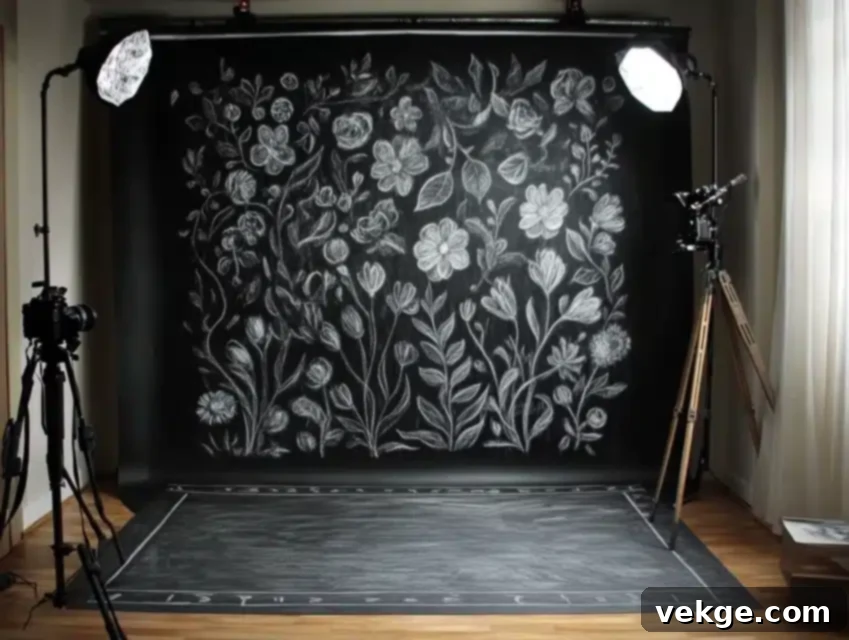
I transformed an entire wall into a dynamic photo studio backdrop, designed to change seamlessly with every special occasion and creative vision. The expansive surface extends wider than standard camera frames, providing ample space for diverse pose positions, creative staging, and large group shots. Carefully placed, subtle permanent markers serve as invaluable guides, helping me quickly center and balance designs for each new backdrop theme, ensuring professional-looking results every time. The wall thoughtfully incorporates hidden storage solutions for photography props, extra chalk supplies, and styling accessories, keeping the studio area tidy and organized. Specialized lighting, strategically installed at various angles, effectively eliminates glare while beautifully highlighting the intricate details of the chalk art designs, making every photo pop.
DIY Steps:
- Ultra-Smooth Surface: Prepare the wall with an ultra-smooth surface primer, ensuring a flawless, professional finish crucial for high-quality photography.
- Perfect Finish Coats: Apply multiple thin coats of chalkboard paint, allowing ample drying time between each, to achieve a perfectly smooth and uniform surface without brush strokes or imperfections.
- Subtle Marking Grid: Create a subtle, permanent marking grid (e.g., faint dots or lines with a paint pen) to aid in centering and aligning your backdrop designs.
- Professional Lighting: Install a professional photo lighting system, including softboxes or diffusers, to control light and eliminate shadows for optimal photo quality.
- Hidden Storage: Design and implement hidden storage solutions (e.g., recessed shelves, discreet cabinets) for all photography props, chalk, and cleaning supplies.
- Height Markers: Incorporate subtle height markers on the wall to assist with proper posing and framing subjects of different sizes.
- Backdrop Support Hooks: Install sturdy hooks or a rail along the top edge of the wall to allow for hanging additional fabric backdrops or props when needed.
Final Tips for Success:
- Always Test: Before committing to a large area, always test the chalkboard paint in a small, inconspicuous spot to assess color, texture, and adhesion.
- Chalk Variety: Keep a diverse supply of chalk, including pastels, colored chalk, and dustless options, for different artistic effects and a cleaner experience.
- Document Designs: Take photos of your successful designs. This serves as inspiration for future projects and helps recreate favorite looks.
- Regular Cleaning: Maintain a regular cleaning schedule using a damp cloth or a specialized chalkboard cleaner to prevent ghosting and keep the surface fresh.
- Create Templates: For frequently used designs or layouts (like calendars or menus), create reusable stencils or templates to save time and ensure consistency.
- Quality Erasers: Invest in high-quality chalkboard erasers. Felt erasers work best for general cleaning, while microfibre cloths are great for a pristine finish.
- Ventilation is Key: Ensure good ventilation during painting and when using chalk extensively to minimize dust and fumes.
Benefits of Using Chalkboard Paint
1. Versatility in Home Decor
After installing hundreds of chalkboard walls, I’ve witnessed firsthand their incredible adaptability across every conceivable room and decor style. Traditional homes often embrace them as elegant message centers, framed with classic moldings that blend seamlessly with existing aesthetics. Modern spaces, on the other hand, incorporate bold geometric chalkboard shapes or entire minimalist walls for a dramatic, contemporary effect. Even highly minimalist designs benefit from the clean lines and simple beauty a well-executed chalk surface provides. For my rustic-style projects, I frequently pair a perfectly smooth chalkboard center with rough, reclaimed wooden frames, creating a charming farmhouse appeal that delights clients and visitors alike. This versatility makes chalkboard paint a truly universal design solution.
2. Encouraging Creativity and Interaction
Perhaps the most rewarding aspect of chalkboard walls is watching quiet, underutilized family spaces instantly transform into vibrant hubs of activity and engagement. Children are naturally drawn to these interactive surfaces, where they can unleash their imaginations, creating endless artwork and stories without boundaries. Adults too rediscover their playful side, leaving thoughtful messages, silly drawings, or collaborative games for others to enjoy. Family game nights take on an entirely new dimension with wall-sized scoreboards or Pictionary games. This tangible, tactile surface actively encourages spontaneous creativity and genuine human interaction in a way that digital screens simply cannot replicate, fostering deeper connections within the home.
3. Practical Organization Solutions
My kitchen chalkboard installations quickly become the indispensable command centers for busy families, proving their unparalleled practical value. Weekly meal plans, urgent shopping lists, and detailed family schedules remain highly visible and effortlessly updated, ensuring everyone stays organized. Home offices gain immensely from large-scale project planning spaces, allowing for visual organization of complex tasks and deadlines. Students find their walls invaluable for creating dynamic study guides, brainstorming essays, and meticulously planning homework assignments. Even the smallest spaces can be optimized with vertical organization options provided by chalkboard paint, making every inch of your home work harder for you.
4. Personal Expression Opportunities
Each chalkboard wall I create becomes a unique reflection of its users’ personalities, evolving and adapting over time. Seasonal decorations can be effortlessly updated with a few strokes of chalk, keeping your home feeling fresh and festive year-round. For special occasions, you can design elaborate, custom backdrops for parties or celebrations without any permanent commitment. Family milestones, cherished memories, and inside jokes find creative, ever-changing ways to be documented and celebrated on these surfaces. The beauty of chalkboard paint is its ability to adapt seamlessly to changing needs, moods, and styles, allowing your home to truly grow with you.
5. Cost-Effective Design Impact
Compared to many other wall treatments or custom decor options, chalkboard paint offers truly remarkable value for its transformative impact. A single chalkboard wall can serve multiple purposes throughout its lifetime, from a toddler’s art space to a teen’s study board, and eventually, a family message center. Updates and design changes require only chalk, not expensive new materials, making it incredibly budget-friendly. Maintenance costs remain exceptionally low, typically involving just a damp cloth or a good eraser. The initial investment continues to pay dividends through years of functional beauty and boundless creative opportunities, making it a smart and sustainable choice for any home.
Conclusion
After creating dozens of chalkboard walls, I can confidently say they infuse a unique personality and dynamic energy into any space. The incredible versatility of chalkboard paint allows for endless creative possibilities while simultaneously adding practical functionality that simplifies daily life. The cornerstone of success for any chalkboard project lies in proper preparation of the surface and a patient, methodical approach during application. Every single project I’ve undertaken has taught me new techniques and refinements, leading to even better results. Always remember that your chalkboard wall is never truly “finished”; it can always be updated, refreshed, or completely changed as your needs and aesthetic preferences evolve.
The enduring joy of chalkboard walls is precisely their ever-changing nature—they grow and adapt harmoniously with your space and lifestyle. If you’re hesitant or unsure where to begin, I highly recommend starting with a small accent area or a single door. Let your innate creativity be your guide, allowing the project to evolve organically. With proper care and a little imagination, your chalkboard wall will undoubtedly provide years of functional beauty, artistic expression, and countless memorable moments for everyone to enjoy.
Frequently Asked Questions
Is Chalkboard Paint Good for Walls?
Absolutely, chalkboard paint is exceptionally well-suited for most wall surfaces. From my extensive experience, it yields the most successful and durable results when applied to smooth, meticulously prepared, and properly primed walls. With the right preparation and ongoing maintenance, a chalkboard wall can easily last for many years, providing continuous functionality and aesthetic appeal. For optimal results, always ensure the room has good ventilation during and after application, and ideally maintain a low humidity level to aid in curing and long-term durability.
How to Put Chalkboard Paint on Walls?
The process begins with thorough cleaning and light sanding of your wall surface to ensure it’s perfectly smooth and free of imperfections. Next, apply a high-quality primer specifically formulated to work with chalkboard paint – this step is crucial for adhesion and an even finish. When painting, use a foam roller for the smoothest, most uniform coverage, applying two to three thin coats rather than one thick one. This prevents drips and ensures a robust surface. Allow a full 24 hours of drying time between each coat for proper curing. Finally, “season” the surface by gently rubbing the side of a piece of white chalk over the entire wall and then erasing it. This primes the surface, preventing “ghosting” from your first written messages.
What Is the Best Thing to Paint a Chalkboard On?
For the best results, smooth, non-porous surfaces are ideal for chalkboard paint. In my numerous projects, standard drywall, wood, metal, and even glass have proven to be excellent bases, provided they are properly prepared. It’s generally best to avoid highly textured walls or surfaces that experience a lot of movement or flex, as these can lead to cracking or uneven finishes. Regardless of your chosen material, always test a small, inconspicuous area first to check for adhesion and appearance. Always use the appropriate primer tailored to the specific material you are painting to ensure the best possible bond and a long-lasting finish.
Is It Difficult to Paint Over Chalkboard Paint?
Painting over a chalkboard surface is not difficult, but it does require proper preparation to ensure a smooth, uniform new coat of paint. Begin by lightly sanding the chalkboard paint to create a slight “tooth” for the new primer to adhere to. Then, apply a quality primer – usually two coats are recommended – to thoroughly seal the dark chalkboard surface. I’ve personally found that oil-based primers tend to work best for completely covering dark chalkboard paint pigments and preventing bleed-through. After the primer is fully dry, you can proceed to paint with your chosen color. Remember, multiple thin coats of your new paint will always provide better coverage and a more professional finish than trying to achieve coverage with a single thick coat.
Can You Make Any Color of Chalkboard Paint?
While traditional black or dark green remain classic choices and offer the best contrast for white chalk, you absolutely can find or create chalkboard paint in almost any color! Many brands now offer tintable chalkboard paint bases that can be mixed to match a wide array of color schemes. I’ve had great success with rich navy blues, deep charcoal grays, and even vibrant deep purples. It’s important to remember that lighter colors, while offering a unique aesthetic, may show chalk residue more prominently and require more frequent cleaning to maintain a pristine look. Before committing to a large area, I always recommend testing the chalk visibility on your chosen color in a small patch to ensure it meets your expectations for readability and appearance.

