Transform Your Bathroom: The Ultimate DIY Vanity Makeover Guide
Is your bathroom looking tired and dated because of an old, worn-out vanity? You’re not alone. Many homeowners face the daily frustration of an uninspiring bathroom centerpiece. For years, I started my mornings staring at an ugly vanity, convinced that a proper fix would cost thousands of dollars and require professional expertise.
However, I discovered a refreshing truth: you can absolutely make your bathroom vanity look brand new without breaking the bank. Through simple yet effective techniques, even the most basic vanity can be transformed into a beautiful, functional focal point. This guide is designed to share my favorite tips and methods, empowering you to give your bathroom vanity a fresh, modern look and create a space you’ll genuinely love.
Get ready to roll up your sleeves and embark on a rewarding home improvement project that will not only enhance your bathroom’s aesthetic but also boost your DIY confidence. A stunning vanity transformation is more accessible than you think!
Planning Your Bathroom Vanity Makeover
Before diving into any renovation work, meticulous planning is paramount. My experience taught me that good preparation makes all the difference, ensuring a smoother process and a professional-looking finish for your DIY bathroom vanity makeover.
Start by thoroughly examining your vanity’s current state. Inspect the cabinet doors, drawer fronts, and counter surface for any signs of wear, damage, or areas needing special attention. Document these observations—it will guide your material selection and repair efforts.
Here’s what I consider absolutely essential before starting your vanity transformation project:
- Set a Realistic Budget: Determine how much you’re willing to spend on materials. This will influence your choices for paint, hardware, and any additional decorative elements. Remember, a DIY makeover is inherently budget-friendly, but costs can add up if not managed.
- Measure Your Vanity Accurately: Record the width, height, and depth of your vanity. These measurements are crucial for purchasing new hardware, pull wraps, or any other structural additions. Don’t forget to measure door and drawer panel dimensions if you plan to replace or modify them.
- Inventory Your Tools: List the tools you already own and identify what you’ll need to purchase or rent. Having the right tools on hand prevents frustrating delays during the renovation process.
- Choose Your Aesthetic: Select your desired paint colors, finishes, and hardware styles. Consider how these choices will integrate with your existing bathroom decor or a new theme you wish to establish. Collecting samples can be very helpful here.
- Plan for Downtime: Estimate how long your bathroom will be out of service. This is particularly important for your primary bathroom. Ensure you have alternative arrangements if the project extends over several days.
I always take “before” photos of my vanity from various angles. These visual records are invaluable for tracking progress, identifying areas that require extra care, and most importantly, appreciating the dramatic transformation once the project is complete.
Lastly, don’t overlook checking under the sink for any hidden water damage, mold, or signs of leaks. Addressing these issues beforehand will prevent future complications and ensure the longevity of your newly refurbished vanity.
My Vanity Before the Transformation

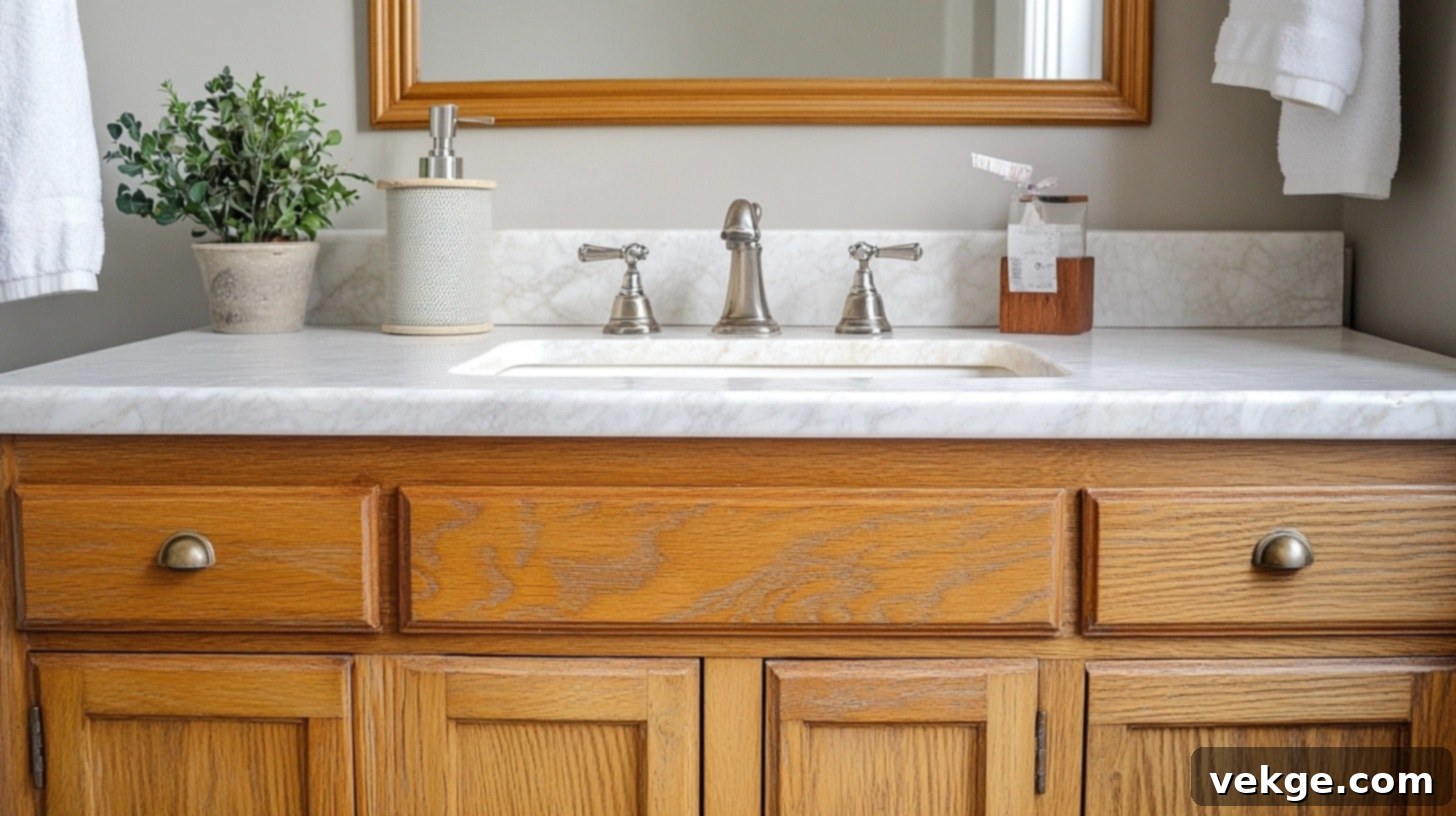
To truly appreciate the “after,” it’s important to be honest about the “before.” My old vanity, a relic from the 1990s, had definitely seen better days. The once-bright oak cabinet doors had yellowed significantly over time, and the protective finish was visibly peeling off in multiple spots. The countertop, plagued with unsightly water stains, often looked perpetually dirty, no matter how much I cleaned it.
The original drawer handles were not just outdated; they were loose, creating an annoying rattle every single time a drawer was opened. Furthermore, the white caulk surrounding the sink had yellowed and cracked, particularly where the backsplash met the wall, creating an unhygienic and unappealing border.
Beyond aesthetics, functionality was a major issue. The cabinet space felt inefficient and disorganized. Cleaning supplies would vanish into the deep recesses, and I’d often discover expired toiletries from years past lurking in forgotten corners. These daily frustrations made my morning routine less pleasant and contributed to a general feeling of disorder in the bathroom.
But instead of letting this outdated vanity define my bathroom, I chose to view it as an exciting opportunity. It was a chance to unleash creativity, learn new skills, and craft a personalized space that reflected my style and met my practical needs. This perspective shifted my entire approach to the DIY vanity renovation.
Tools and Materials Needed for Your Vanity Makeover
Having the right tools and materials is crucial for a smooth and successful bathroom vanity makeover. Here’s a comprehensive list to ensure you’re well-equipped:
| Essential Tools | Required Materials |
|---|---|
| Orbital sander (for large, flat surfaces) | TSP cleaner (trisodium phosphate, for degreasing) |
| Detail sander (for corners and intricate areas) | Bondo wood filler (for repairs and filling holes) |
| Paint sprayer or high-quality microfiber roller (for a smooth finish) | Urethane enamel paint (durable and moisture-resistant) |
| Utility knife (for precise cutting, especially pull wrap) | Primer (bonding primer for optimal paint adhesion) |
| Paint brush (for detailed work and corners) | Pull wrap (for a modern textured look on panels) |
| Multi-tool (useful for removing old caulk or stubborn elements) | Loctite glue (strong adhesive for pull wrap) |
| Pin nailer (for securing pull wrap on vertical surfaces) | Cup hooks (for hanging doors/drawers during painting) |
| Speed square (for accurate measurements and straight lines) | Drawer slides (soft-close or standard, for smooth operation) |
| Drill (for pre-drilling holes for hardware) | Cabinet hardware (new pulls, knobs, and handles) |
| Rubber mallet (for gentle adjustments) | Rubber bumpers (to protect cabinet doors and minimize noise) |
| Counter bit (for creating flush screw holes) | Soft-close hinges (for a luxurious feel and quiet closing) |
| Tape measure (for all measuring needs) | Sandpaper (220 & 400-600 grit for various sanding stages) |
Step-by-Step Bathroom Vanity Makeover Process

1. Initial Preparation
Proper preparation is the bedrock of any successful DIY project. Before any paint or filler is applied, dedicate ample time to this stage to ensure a clean, stable foundation.
Begin by completely clearing out all items from your vanity and creating a spacious, well-lit workspace. As mentioned, take those “before” photos from multiple angles; they serve as a powerful testament to your hard work. Labeling removed parts is crucial if you intend to reuse them.
Key steps for initial preparation:
- Systematic Hardware Removal: Carefully remove all existing hardware components. This includes:
- Door hinges and handles (keep screws with corresponding hinges if possible).
- Drawer pulls and slides (mark which slide belongs to which drawer and side).
- Any old rubber bumpers or felt pads.
- Store all hardware in labeled bags or containers to prevent loss and confusion, especially if you plan to re-install.
- Thorough TSP Cleaning: This step is non-negotiable for proper paint adhesion.
- Mix 2 cups of TSP (trisodium phosphate) cleaner per gallon of warm water. Always follow manufacturer instructions.
- Wear rubber gloves and protective eyewear to safeguard yourself from chemical exposure.
- Wipe down all vanity surfaces thoroughly, including the inside of the cabinet, drawer boxes, and especially the outside panels, doors, and drawer fronts.
- Pay special attention to areas prone to grease or grime buildup, such as around the sink or near handles.
- Rinse surfaces with clean water and a separate cloth, then allow them to dry completely, typically 2-3 hours. Residual moisture can compromise paint adhesion.
2. Surface Preparation
This stage is where you create the perfectly smooth canvas for your new finish. The final look and durability of your vanity’s paint or pull wrap depend heavily on proper surface preparation.
- Identify and Repair Imperfections: Carefully examine the entire vanity for any existing damages, cracks, dents, or old hardware holes that need filling.
- Bondo Wood Filler Application: For robust repairs, especially old hardware holes, Bondo wood filler is excellent.
- Mix the hardener with the filler according to product instructions until it reaches a consistent, light blue color. Work quickly as it dries fast.
- Apply the filler to all identified imperfections, slightly overfilling for sanding.
- Allow it to cure completely, usually within 20-30 minutes.
- Sanding for Smoothness:
- Use an orbital sander with 220-grit sandpaper for main, flat surfaces to remove old finishes and smooth filled areas.
- For grooves, detailed edges, and tighter areas, switch to a detail sander or contour sander blocks. Hand-sanding with a sanding sponge is also effective.
- Sand until the entire surface feels uniformly smooth and even to the touch. The goal is to create a consistent profile for optimal primer and paint adhesion.
- Crucial Cleaning: After sanding, thoroughly clean off all dust. Use a shop vac, tack cloth, or a damp cloth followed by a dry one. Any residual dust will create an uneven, bumpy paint finish.
3. Pull Wrap Installation
Pull wrap (also known as reeded paneling or fluted trim) can add a sophisticated, modern, and custom-built aesthetic to your vanity. This process requires patience and precision to achieve professional results.
Measurement and cutting for accuracy:
- Measure Twice, Cut Once: Precisely measure each surface where the pull wrap will be applied. This includes door panels, drawer fronts, and side panels.
- Allow for Trimming: Always add approximately 1/8 to 1/4 inch extra to your measurements. This allows for slight adjustments and ensures you can trim to a perfect fit after application.
- Clean Cuts: Use a sharp utility knife to cut the pull wrap. A dull blade can fray the material. For perfectly straight cuts, use a speed square or straight edge as a guide.
- Practice Makes Perfect: For complex or angled areas, create test pieces first. This helps you get a feel for the material and perfect your cutting technique before working on the actual panels.
Application process for lasting adhesion:
- Even Glue Spreading: Apply a high-quality construction adhesive, such as Loctite glue, evenly across the back of the pull wrap piece and the vanity surface. Avoid applying too much, which can cause squeezing out, or too little, leading to poor adhesion.
- Ensure Contact: Once placed, press firmly. For wider panels, use wood blocks or clamps to apply even pressure across the surface while the glue sets. This ensures full contact and prevents warping.
- Curing Time: Allow at least 24 hours for the glue to cure completely before moving or painting the pieces. Rushing this step can lead to the pull wrap detaching.
- Securing Vertical Surfaces: For vertical surfaces or larger panels, additional security is recommended.
- Use a pin nailer to secure the pull wrap. These small nails are barely visible.
- Space nails every 8-10 inches along the edges and any areas that might lift.
- Ensure you counter-sink all nail heads slightly below the surface. These small indentations will be filled and painted over later, making them invisible.
4. Hardware Preparation
Thoughtful hardware preparation ensures not only smooth operation but also a professional and clean appearance for your finished vanity. Take the time to plan and mark all locations accurately.
Pre-painting preparation for ease:
- Hanging System: Before painting, screw cup hooks into the bottom edges or back of your cabinet doors and drawer fronts.
- Strategic Placement: Space hooks about 2-3 inches from the corners. This allows you to hang the doors and drawers for painting, ensuring all sides are evenly coated without smudges.
- Test Stability: Briefly test the weight capacity of your hanging system to ensure it can safely hold the pieces during the entire painting and drying process.
Hardware layout for precision:
- Mark New Locations: Decide on the exact placement of all new hardware (knobs, pulls, hinges). Use a pencil to lightly mark the drilling points.
- Consistency is Key: For consistent spacing and alignment, use a hardware template. Many come with adjustable guides for different styles and sizes.
- Pre-Drill Pilot Holes: Always pre-drill pilot holes. This prevents wood splitting and ensures your screws go in straight. Use a drill bit slightly smaller than your screw diameter.
- Test-Fit: Before final installation, temporarily test-fit the hardware to confirm alignment and function. Adjust positions as needed for perfect symmetry and ease of use.
5. Painting Process
The painting stage is where your vanity truly begins its transformation. Proper technique here is absolutely crucial for a durable, smooth, and lasting finish that resists the moisture of a bathroom environment.
Primer application for superior adhesion:
- Quality Bonding Primer: Invest in a high-quality bonding primer. This type of primer is designed to adhere exceptionally well to various surfaces, ensuring your topcoat sticks properly and prevents bleed-through from old stains.
- Thin, Even Coats: Apply the primer in thin, even coats. Avoid thick applications, which can lead to drips, uneven textures, and longer drying times. Two thin coats are always better than one thick one.
- Proper Drying: Allow the primer to dry completely between coats as per the manufacturer’s instructions.
- Light Sanding: After the primer is fully dry, very lightly sand the entire surface with 400-grit sandpaper or a fine sanding sponge. This creates a super smooth base for your paint and improves adhesion of subsequent coats. Clean off all dust with a tack cloth.
Paint application for a flawless finish:
- Urethane Enamel Paint: Opt for a high-quality urethane enamel paint. This type of paint offers exceptional durability, resistance to moisture, and a hard, smooth finish ideal for bathroom vanities.
- Application Method: For the smoothest, most professional finish, a paint sprayer is highly recommended. If a sprayer isn’t feasible, use a high-density microfiber roller for large, flat surfaces and a good quality angled paintbrush for corners and details. Avoid regular foam rollers, which can leave bubbles.
- Multiple Thin Coats: Apply 2-3 thin coats of paint, allowing ample drying time between each coat. Patience here is key; rushing can lead to peeling or an uneven finish.
- Wet-Sanding (Optional but Recommended): For an ultra-smooth, factory-like finish, wet-sand lightly with 600-grit sandpaper between the last two coats. This removes any minor imperfections or dust nibs. Always clean thoroughly after wet-sanding before applying the next coat.
6. Hardware Installation
Installing the new hardware brings your vanity to life, but it requires attention to detail and precise measurements for proper function and aesthetics.
- Soft-Close Hinges: Install your new soft-close hinges onto the cabinet doors and then onto the cabinet frame. Carefully check overlap measurements and adjust the hinges as needed to ensure the doors close smoothly, evenly, and without rubbing. Proper hinge adjustment prevents uneven gaps and damage.
- Drawer Slides: Mount the drawer slides to both the drawer boxes and the cabinet frame. Use a level and a speed square to ensure they are perfectly parallel and evenly spaced. Incorrect alignment will lead to sticking or crooked drawers. Test each drawer’s operation after installation to confirm it glides smoothly.
- Rubber Bumpers: Affix new rubber bumpers to the inside corners of all cabinet doors. These small but important additions protect the paint finish from impacts and significantly reduce the noise of closing doors, adding to that luxurious feel.
- Handles and Pulls: Attach the new handles and pulls, using the pre-drilled pilot holes. Tighten them securely but avoid over-tightening, which can strip screws or damage the paint.
- Final Operational Test: Test all moving parts—doors, drawers, and hinges—for smooth operation. Open and close them several times, checking for any sticking, scraping, or misalignment. Make any necessary adjustments now.
7. Final Touches
The final stage is about bringing everything together, ensuring a polished look, and guaranteeing the lasting quality of your DIY vanity transformation.
Finishing steps for a flawless look:
- Install Toe Kick: If your vanity has a removable toe kick, install it securely. This provides a clean, finished base.
- Final Paint Touch-Ups: Carefully inspect all painted surfaces for any missed spots, minor nicks, or areas that require a bit more coverage. Apply small touch-ups with a fine brush if needed.
- Thorough Cleaning: Clean all surfaces thoroughly, removing any fingerprints, dust, or residue from the installation process.
- Alignment Checks: Double-check all alignments – door gaps, drawer fronts, and overall symmetry.
- Operational Verification: Perform one last test of all moving parts to confirm everything functions perfectly.
Quality checks for lasting satisfaction:
- Inspect all painted surfaces under good light for smoothness and evenness.
- Test drawer operation: Do they glide smoothly and close fully?
- Check door alignment: Are they level and do they close without issues?
- Verify hardware tightness: Are all knobs, pulls, and hinges securely fastened?
- Clean off any final fingerprints or dust particles.
For a more detailed tutorial on bathroom vanity makeover, check out the below video:
My Bathroom Vanity After the Makeover

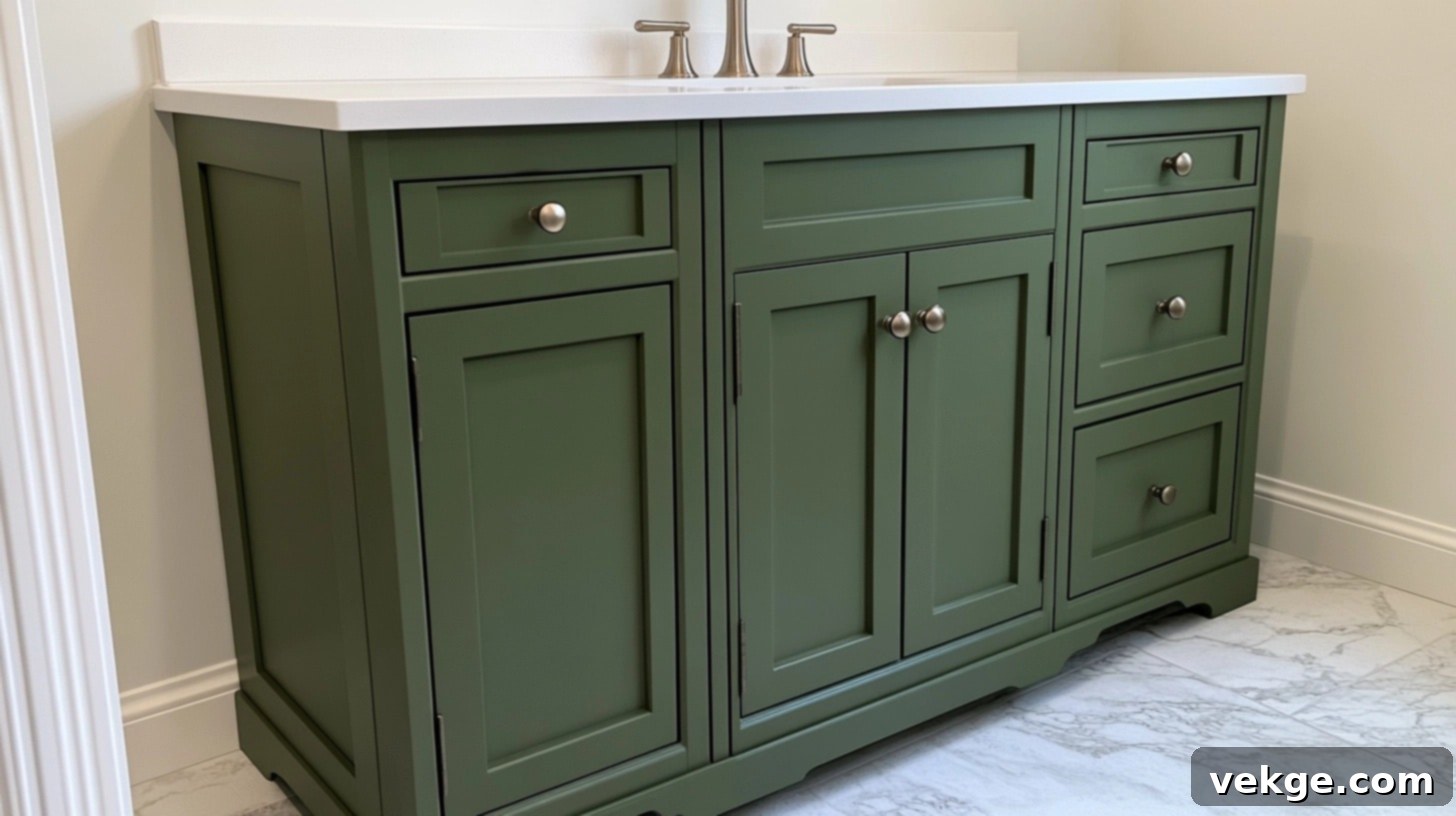
It’s genuinely hard to believe that this is the same vanity I struggled with for so many years. The transformation is absolutely stunning! The new pewter green paint has imbued it with a fresh, contemporary personality, instantly making it the elegant centerpiece of my bathroom. The door panels, enhanced with the meticulously installed pull wrap, now add a beautiful layer of texture and depth that catches the light in a captivating way, elevating the entire aesthetic.
Here’s what truly made the biggest difference in this DIY bathroom vanity renovation:
- The addition of soft-close hinges has given the cabinet doors a wonderfully luxurious feel. The days of jarring slamming sounds are long gone, replaced by quiet, gentle closures.
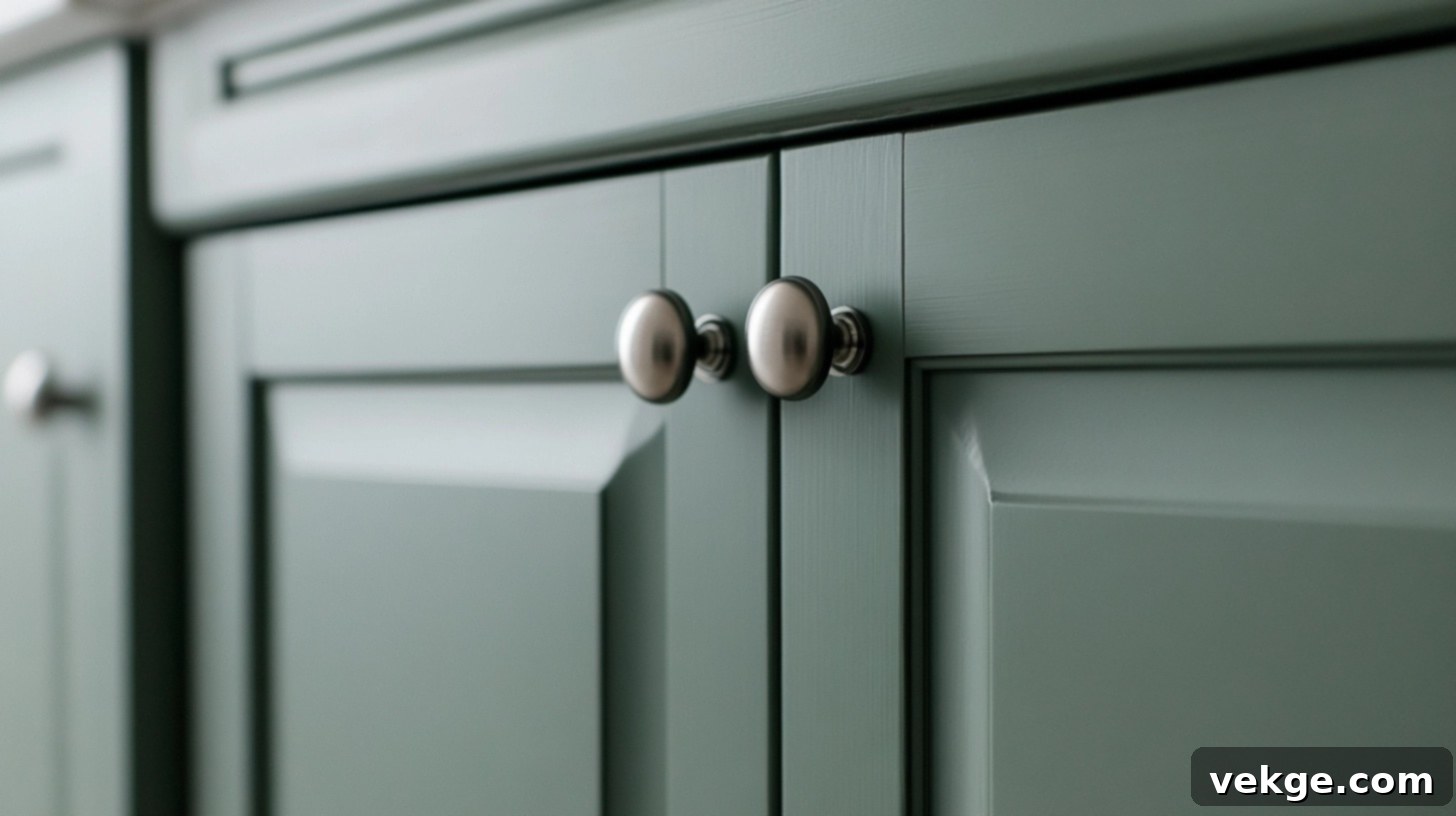
- The new Paris ball knobs and matching bar pulls from Battle Creek Hardware perfectly blend modern style with a touch of classic charm, providing both functionality and visual appeal.
- Fresh rubber bumpers ensure the doors close smoothly and silently while also protecting the pristine paint finish from any potential impacts.
- The thoughtful side panel treatment, achieved with the pull wrap, makes the vanity appear as a high-end, custom-built piece rather than a standard off-the-shelf unit.
What brings a smile to my face every single morning is how flawlessly the drawer slides now operate. They glide open and close with effortless smoothness, and everything aligns perfectly—a testament to careful planning and installation. The microfiber roller I used for painting delivered such an incredibly smooth, brushstroke-free finish; you would genuinely never guess this was a DIY project executed right at home.
The most satisfying aspect? This complete vanity transformation saved me thousands of dollars compared to purchasing a brand-new custom vanity. Moreover, it allowed me to achieve exactly what I envisioned in terms of style, color, and improved functionality. Every time I step into the bathroom, I feel a profound sense of pride in what I accomplished with some basic tools, a good amount of patience, and a keen eye for detail. This project truly embodies the power of a budget-friendly DIY upgrade.
Maintenance and Care Tips Post-Makeover
After investing time and effort into your beautiful bathroom vanity makeover, maintaining its fresh look is key. As someone who once struggled with cabinet upkeep, I want to share these simple yet highly effective care tips that have significantly helped me preserve my vanity’s new aesthetic and functionality for years to come.
- Regular Cleaning: Clean the cabinet surfaces monthly with a soft, damp cloth and a mild, non-abrasive soap. This prevents the buildup of soap scum, toothpaste, and general grime that can dull the finish over time.
- Avoid Harsh Chemicals: Steer clear of abrasive cleaners, harsh chemicals, or scouring pads. These can strip the paint finish, cause discoloration, or scratch the surface. Always opt for gentle cleaning solutions.
- Immediate Spill Cleanup: Wipe up any water spills, cosmetic products, or cleaning solutions immediately. Prolonged exposure to moisture can lead to water damage, staining, or even paint bubbling, especially around the sink area.
- Hardware Tightening: Periodically check and tighten all hardware (knobs, pulls, hinges) every three months. Daily use can gradually loosen screws, leading to wobbly handles or misaligned doors.
- Drawer Track Maintenance: Keep drawer tracks clean and free of dust, hair, and debris. A quick wipe-down with a dry cloth will ensure smooth operation and prevent sticking.
- Prompt Touch-Ups: Address any minor chips or scratches promptly with a small amount of touch-up paint. This prevents moisture from penetrating the wood and causing further damage.
- Drawer Organizers: Utilize drawer organizers to keep items tidy and prevent them from shifting around and scratching the interior surfaces of your drawers.
- Under-Sink Inspection: Regularly inspect the under-sink area for any signs of water leaks or moisture issues. Early detection can prevent significant damage to your vanity and floor.
- Hinge and Slide Cleaning: Clean hinges and drawer slides twice a year with a dry cloth to prevent dust and grime accumulation that can hinder smooth movement. A tiny amount of silicone spray (designed for hardware) can also help maintain smooth action.
- Keep Doors Closed: When not in use, keep cabinet doors and drawers closed. This protects the finish from excessive bathroom moisture and steam, which can affect paint durability.
- Annual Furniture Wax: Consider applying a thin coat of furniture wax once a year. This can help maintain the paint’s sheen, add an extra layer of protection, and make cleaning easier.
- Caulking Check: Annually inspect the caulking around the vanity top, sink, and backsplash. If you notice any cracks or gaps, re-seal them to prevent water infiltration.
- Alignment Verification: Every few months, quickly test all drawer slides and door hinges for proper alignment. Minor adjustments can prevent bigger problems down the line.
- Store Spare Paint: Keep a small, labeled container of your exact paint color for future touch-ups. This ensures a perfect match for any unexpected repairs.
Summing It Up: Your DIY Vanity Makeover Awaits!
A bathroom vanity makeover might initially seem like an overwhelming and daunting task, but I sincerely hope this comprehensive guide has demonstrated that it is entirely achievable, even for novice DIYers. From the initial meticulous preparation work to the exciting final hardware installation, each step is a building block toward creating a truly custom piece that perfectly aligns with your personal style and budget.
If you’re currently gazing at your tired, outdated vanity, contemplating whether you possess the skills and capability to undertake such a project – let me assure you, the answer is a resounding yes, you absolutely can! The key to success lies in starting small, diligently following each step outlined, and allowing yourself ample time to complete the process without rushing.
The immense satisfaction that comes from opening those new, smooth-gliding drawers, or admiring the flawlessly painted finish you achieved yourself, makes every moment of effort worthwhile. Embracing this DIY bathroom vanity renovation project is more than just updating a piece of furniture; it’s about empowering yourself, enhancing your living space, and enjoying the fruits of your own labor. Go ahead, give your bathroom the fresh look it deserves!
