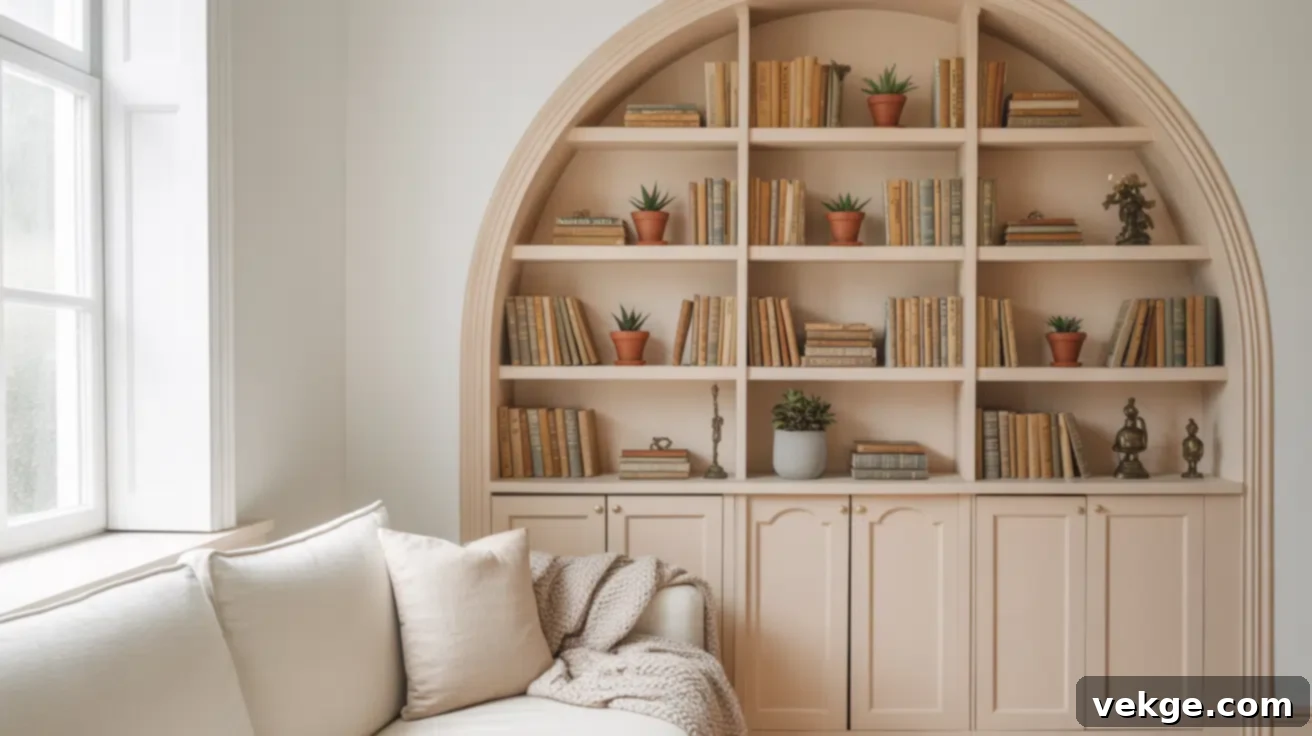
Transform Your Home with Arched Built-In Bookcases: The Ultimate DIY & Design Guide
Have you ever looked at a plain wall and imagined it as something more – a space brimming with character, unique style, and seamless storage? If you’re seeking sophisticated storage solutions that truly feel like an integrated part of your home, rather than just another piece of furniture, then the charm of an arched built-in bookcase is likely calling to you. As someone who appreciates both beauty and functionality, I’ve always been captivated by these elegant additions. They offer not just practical storage but also infuse a sense of timeless design and architectural interest into any room.
This comprehensive guide will walk you through everything you need to know about arched built-in bookcases. We’ll explore their ideal placements, provide a detailed step-by-step DIY construction plan, and offer creative ways to style them beautifully throughout the year. Whether you’re an ambitious DIY enthusiast ready to tackle a project this weekend or simply gathering inspiration for future home enhancements, you’re sure to find valuable insights and actionable ideas within these pages.
Arched Built-In Bookcases: An Overview of Timeless Elegance and Functionality
Arched built-in bookcases are more than just shelves; they are architectural features. These custom-fitted units are recessed directly into the wall, featuring a gracefully rounded top rather than sharp, angular corners. This gentle curve introduces a soft, organic aesthetic, creating a warm and inviting atmosphere. Unlike standard rectangular shelving, the arch detail helps the bookcase flow seamlessly into the surrounding wall, making it feel intrinsically part of the room’s original design, rather than an afterthought.
Their versatility means they can enhance almost any area of your home, adding both structure and a touch of refined class. Consider integrating them in:
- Living Rooms: Perfectly framing a cozy fireplace, an entertainment center, or simply serving as a stunning focal point.
- Bedrooms: Crafting a serene and personalized reading nook, or providing sophisticated bedside storage.
- Home Offices: Offering stylish, organized storage for books, files, and decorative items, elevating your workspace’s professional look.
- Hallways: Utilizing often-overlooked narrow wall spaces to display books, art, or cherished mementos, turning a utilitarian space into a gallery.
- Dining Areas: Showcasing elegant dishware, glassware, or a curated collection of cookbooks.
- Kids’ Rooms: Creating an accessible and enchanting library for children’s books and toys.
No matter where they are placed, arched built-ins elevate the aesthetic, provide essential storage, and contribute to a polished, custom-designed interior.
Understanding the Distinction: Built-In vs. Freestanding Arches
When considering an arched bookcase, it’s important to understand the fundamental difference between built-in and freestanding options, as each offers distinct advantages:
- Built-In Arched Bookcases: These are permanent fixtures, meticulously constructed to become an integral part of your home’s architecture. They are typically designed to match existing wall finishes, trim work, or cabinetry, offering a truly bespoke and high-end appearance. The installation process involves cutting into the wall, framing, and finishing, resulting in a seamless, custom look that significantly adds to your home’s value and character.
- Freestanding Arched Bookcases: While sharing the elegant arched silhouette, these units function like traditional furniture. They are self-contained pieces that sit against a wall, offering flexibility in placement and mobility. Freestanding options are generally easier to acquire (often pre-assembled or with minimal assembly required) and can be moved if you redecorate or relocate. They provide the aesthetic appeal of an arch without the permanent commitment of a built-in.
Choose built-in if you desire a polished, custom, and high-value architectural feature that feels original to your home. Opt for freestanding if flexibility, ease of installation, or living in a rental property are your primary concerns.
DIY Options: Craft Your Own Arched Bookcase
The idea of building your own arched bookcase might seem daunting, but it’s an achievable project even for novice DIYers. You don’t need a professional workshop full of specialized tools; basic equipment and a methodical approach will yield impressive results. Here’s a detailed guide to help you create a stunning built-in feature in your home.
Step 1: Planning the Wall Cutout and Framing – The Foundation of Your Arch
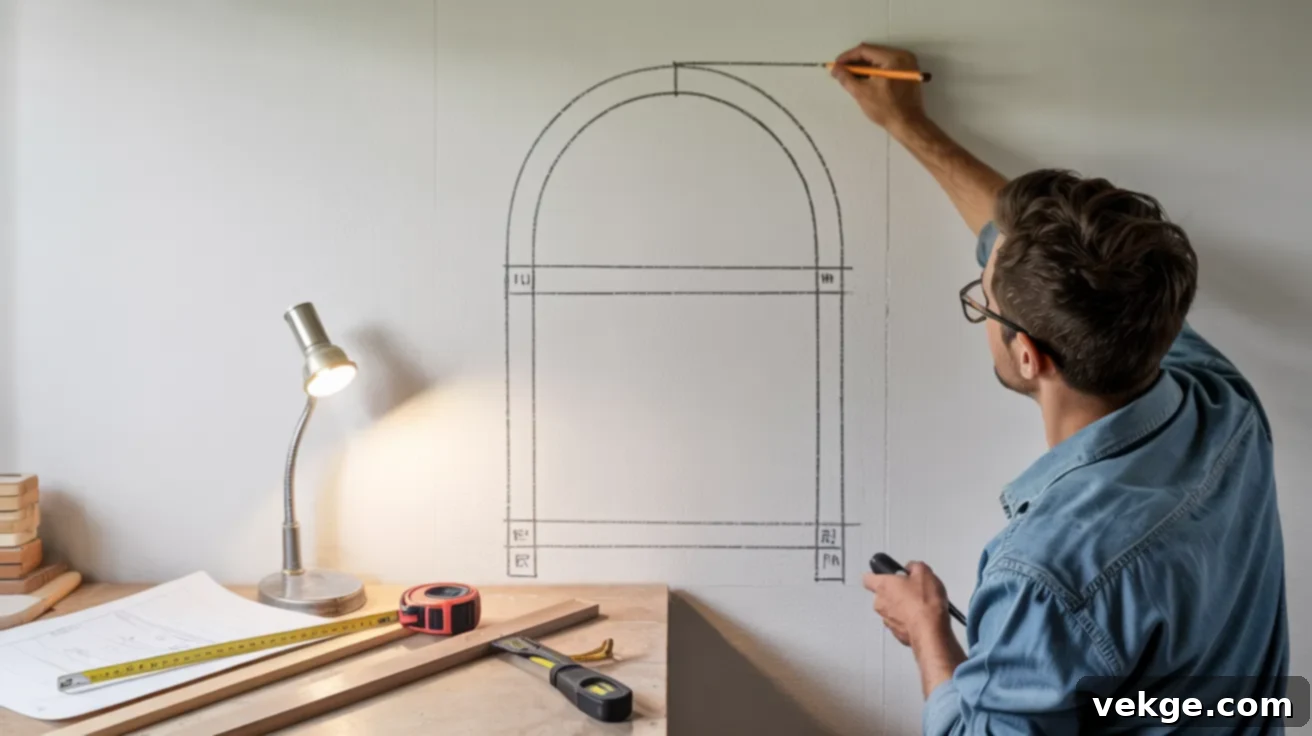
The success of your built-in begins with meticulous planning. First, select the perfect location for your bookcase. Consider factors like wall space, room flow, and proximity to electrical outlets or light switches. Once the spot is chosen, use a pencil and a level to mark the exact dimensions of your desired bookcase directly onto the wall. Define the width, overall height, and the apex of your arch.
Safety First: Before any cutting, use a reliable stud finder to locate and mark all wall studs. Crucially, scan for any hidden electrical wiring, plumbing pipes, or HVAC ducts within the intended cutout area. Avoiding these is paramount for safety and to prevent costly repairs. Once confident, carefully cut into the drywall using a drywall saw or a utility knife, following your marked lines.
Next, construct the inner frame using 2×4 lumber. This frame will provide the structural support for your bookcase. Build a robust rectangular box that fits snugly inside the newly created wall cutout. Securely fasten the 2x4s together with wood screws, ensuring the frame is plumb and level. If your chosen wall is an exterior wall, consider adding insulation behind the frame for improved energy efficiency.
Step 2: Cutting and Attaching the Arched Top – Defining Your Bookcase’s Character
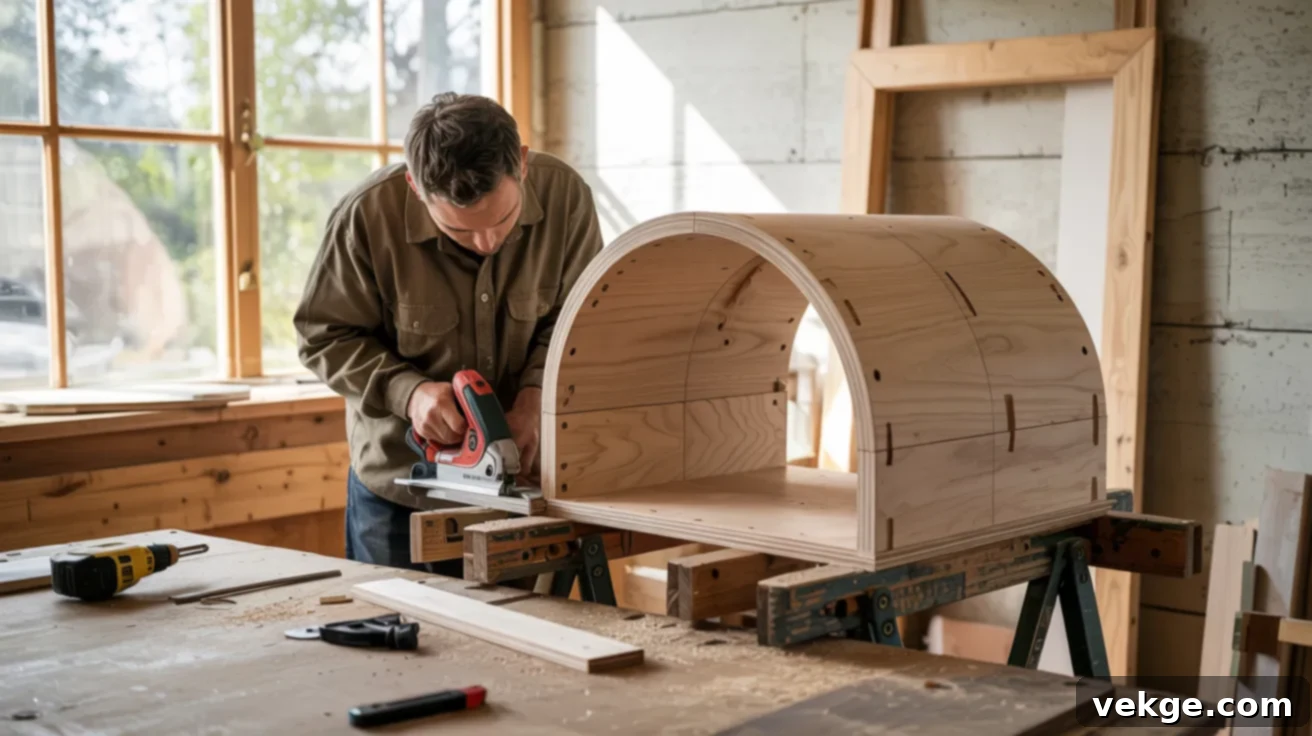
The arch is the signature element of this project. For this, you’ll need a sturdy material like high-quality plywood or MDF (medium-density fiberboard) at least 1/2 inch thick. To create a perfect arch, use a homemade string compass (a string tied to a pencil and pivoted from a central point) or a pre-made template to trace your desired curve onto the material.
Using a jigsaw, carefully cut along your traced arch line. Take your time to ensure a smooth, clean cut. Once cut, sand the curve thoroughly to achieve a perfectly smooth finish. You’ll need to create two identical arch pieces. These will form the top and bottom of your arched structure. To create depth and support, space these two arch pieces apart using small wood blocks or strips, forming what essentially becomes an “arch box.”
Attach this completed arched top structure to the very top of your framed wall opening. Use a combination of strong wood glue and screws, ensuring it is flush with the front edge of your existing wall. This step is critical for a seamless, built-in appearance.
Step 3: Installing the Shelves – Building Functional Storage
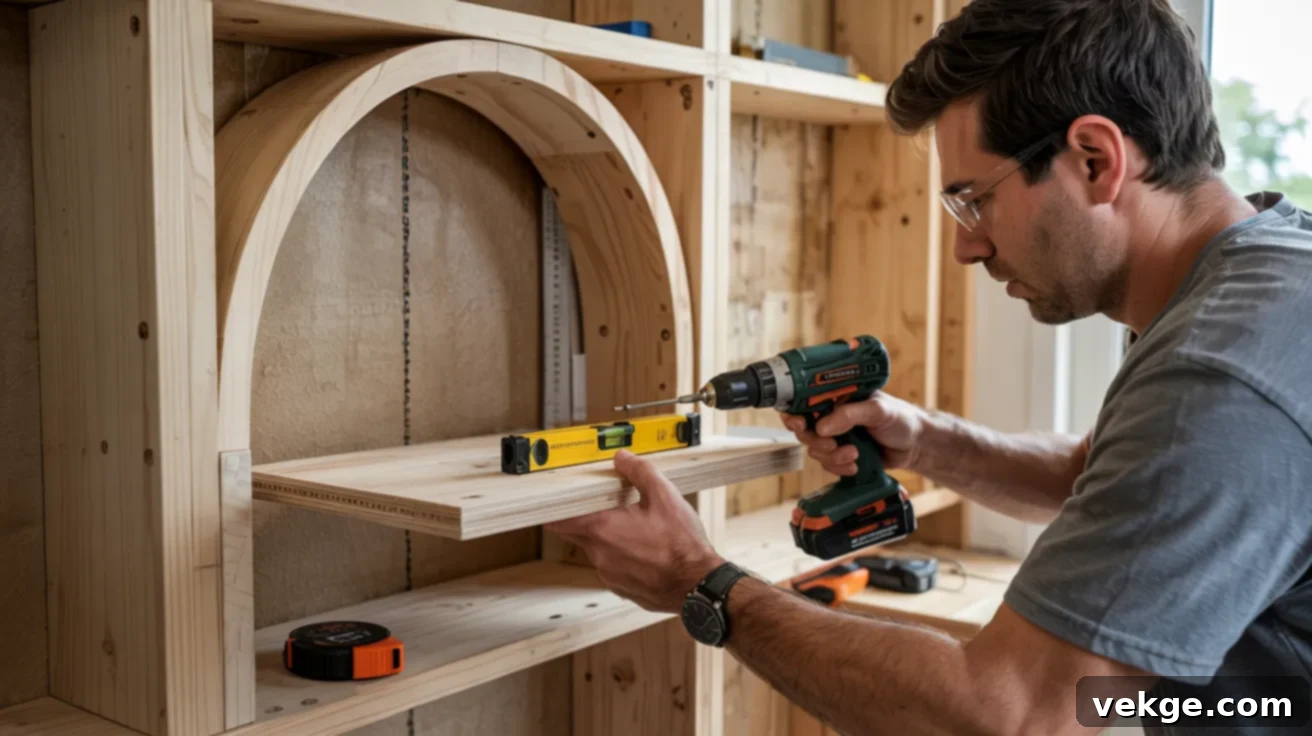
Now it’s time to create the shelving. Cut your shelf boards to the precise width of your opening. Plywood or MDF (at least 3/4 inch thick) are excellent choices for their strength and stability. Carefully mark the desired placement of each shelf, starting from the bottom and working your way up. Consider the height of your books and decorative items to ensure optimal spacing.
There are a few methods for supporting your shelves: you can install small wooden cleats (thin strips of wood) along the sides of your internal frame where each shelf will rest, or you can notch the framing itself if you prefer a cleaner look. Once the supports are in place, slide each shelf in and securely fasten it with screws. Use a level for every shelf to guarantee a perfectly horizontal surface. Double-check all fastenings to ensure your shelves are robust and can handle the weight of your stored items.
Step 4: Trimming and Finishing Flush with the Wall – The Seamless Integration
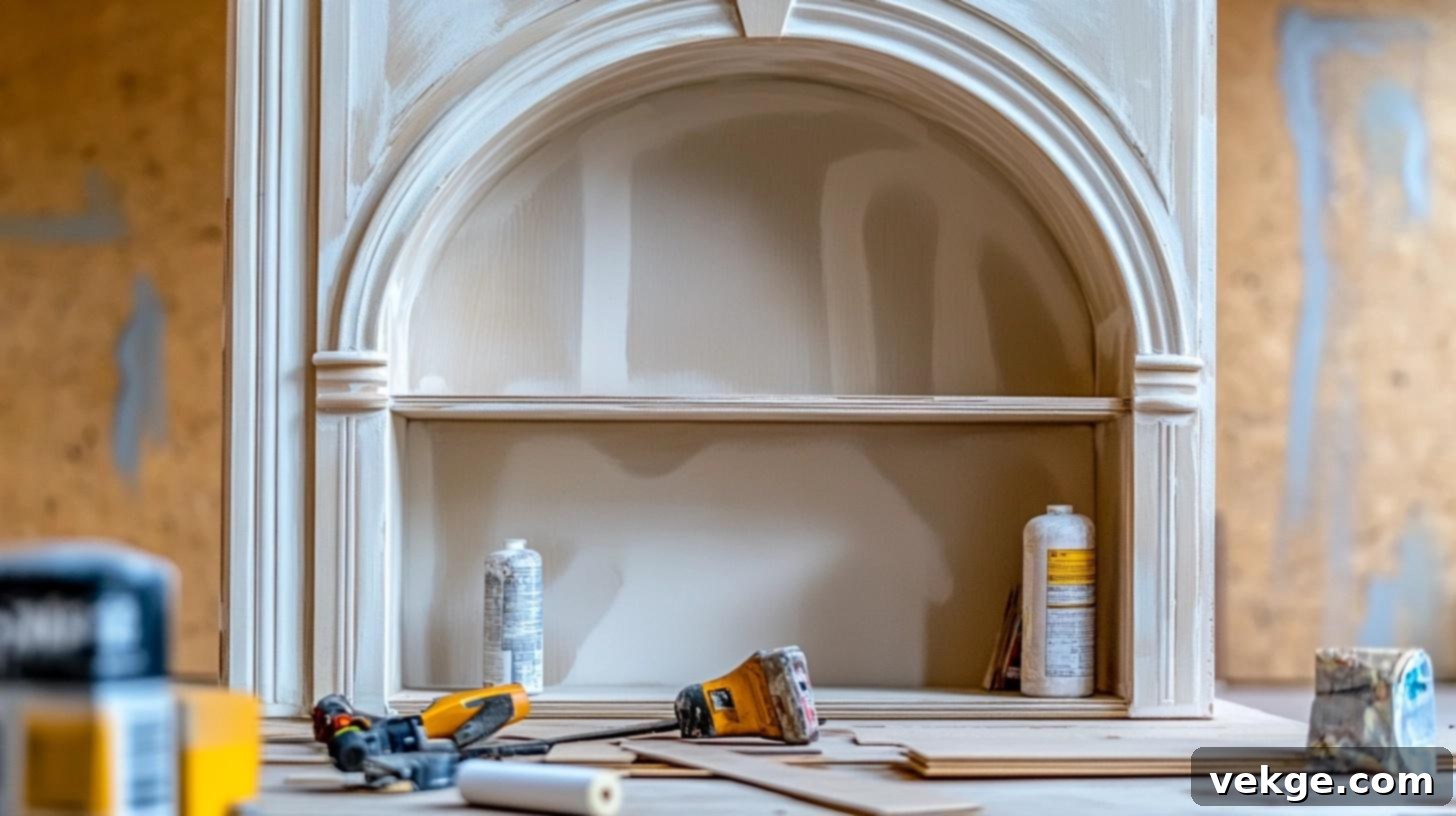
With the framework, arch, and shelves securely in place, the final step involves finishing details that will make your bookcase look truly built-in. Use appropriate trim or decorative moulding around the perimeter of the bookcase, where it meets the existing wall. This not only hides any small gaps between your new structure and the drywall but also adds a professional, finished look. Select trim that complements your home’s existing style.
Once the trim is installed, use caulk to fill all seams, ensuring a smooth transition between the bookcase and the wall. Fill any nail holes with wood filler, allow it to dry completely, then sand everything smooth until it’s perfectly flush and ready for paint. Apply a high-quality primer to all new surfaces, then paint your new bookcase. You can choose to match the wall color for a subtle, integrated feel, or select a contrasting bold color to make the arch a dramatic focal point. This meticulous finishing process is what truly transforms your DIY project into a custom architectural element.
The Faux Built-In Alternative: Achieving the Look with Less Commitment
If the thought of cutting into your walls seems too daunting, or if you live in a rental property where permanent alterations aren’t an option, a “faux built-in” offers a fantastic compromise. This method allows you to achieve the sophisticated arched look without the extensive commitment or structural work of a true built-in. It’s an excellent way to add character, especially in smaller spaces or when working with a tighter budget.
Creating a Faux Arched Built-In with an IKEA Billy Bookcase
One of the most popular and budget-friendly ways to create a faux arched built-in is by modifying an IKEA Billy bookcase. This widely available and versatile shelving unit provides a perfect base for this transformation. Here’s how you can do it:
Materials You’ll Need: An assembled IKEA Billy bookcase, plywood (1/4″ or 1/2″ thick) for the arch, wood filler, wood glue, nails or screws, sandpaper (various grits), a jigsaw, a measuring tape, a pencil, and paint (primer and topcoat).
Step-by-Step Arch Creation for Your Billy Bookcase:
- Assemble the Billy Bookcase: First, assemble your IKEA Billy bookcase according to the manufacturer’s instructions. Ensure it is stable and securely put together. Place it in its desired location against the wall.
- Measure and Design Your Arch: Carefully measure the width of your Billy bookcase and the height from the top shelf to the ceiling (or your desired arch height). Decide on the curve you want for your arch. You can use a string compass, a flexible piece of wood, or even a large pre-cut template to draw the arch shape onto your plywood sheet. Remember, you’ll need one main arch piece for the front.
- Cut the Arch: Using a jigsaw, carefully cut along your drawn arch line. Take your time to ensure a smooth, clean cut. Lightly sand the edges of the cut arch to remove any splinters or rough spots.
- Attach the Arch to the Bookcase: Place your cut plywood arch piece on top of the assembled Billy bookcase. If you want a bit more depth, you can cut thin strips of plywood to create a “box” behind the arch, making it thicker, or simply attach it directly to the front edge of the top of the Billy. Secure the arch to the top of the bookcase using wood glue and small finish nails or screws, ensuring the fasteners are countersunk below the surface.
- Fill, Sand, and Prime: Once the arch is securely attached, use wood filler to meticulously fill any gaps, nail holes, or seams where the plywood meets the bookcase. Allow the filler to dry completely, then sand the entire arch and any newly filled areas smooth. Use progressively finer grit sandpaper for a flawless finish. Apply a coat of primer to the entire newly added arch and any exposed raw wood surfaces.
- Paint for a Seamless Look: Finally, paint the entire Billy bookcase and the newly added arch. For the most convincing faux built-in look, paint it the same color as your surrounding walls. This visual trick blends the bookcase into the wall, giving the illusion that it’s a permanent, integrated fixture.
This simple trick provides the elegant, custom arched look without the need for extensive carpentry, wall demolition, or a significant budget. It’s perfect for creating a personalized and chic space with minimal effort.
For a visual presentation of similar steps and creative hacks, you can explore various YouTube tutorials. While the following iframe doesn’t show the exact Billy Arch hack, it represents how visual guides can inspire:
Visual Inspiration: Arched Bookcase Ideas for Every Room
Arched built-in bookcases are incredibly adaptable, fitting seamlessly into various interior styles and functional needs. Here are numerous creative ideas to inspire you, demonstrating how these elegant structures can enhance both the aesthetics and utility of nearly any room in your home.
Kids’ Room Library: Encouraging a Love for Reading
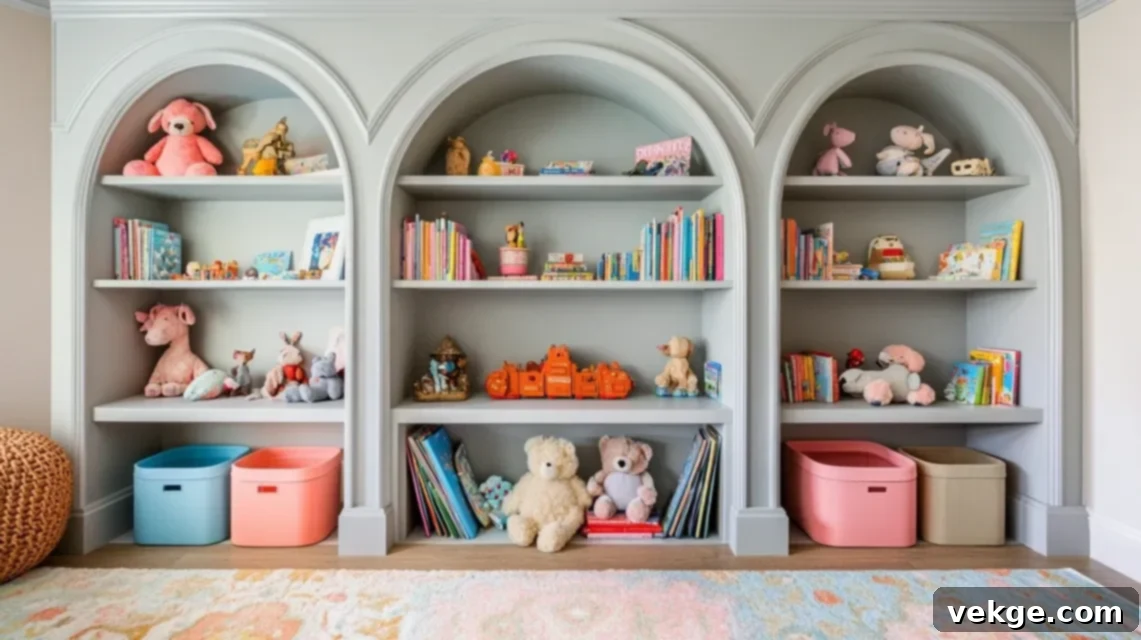
Transform a child’s room into a whimsical wonderland with an arched built-in book nook. Position the bottom shelves at a height accessible to little ones, making it easy for them to select and put away their favorite books and toys. Integrate colorful storage bins or soft fabric baskets on lower shelves for tidily storing puzzles, stuffed animals, or art supplies. Painting the arch in vibrant, playful colors or matching it to the room’s existing theme can make it a captivating focal point, fostering a love for reading and imagination while keeping clutter off the floor.
Entryway Organizer Bookcase: A Stylish Welcome
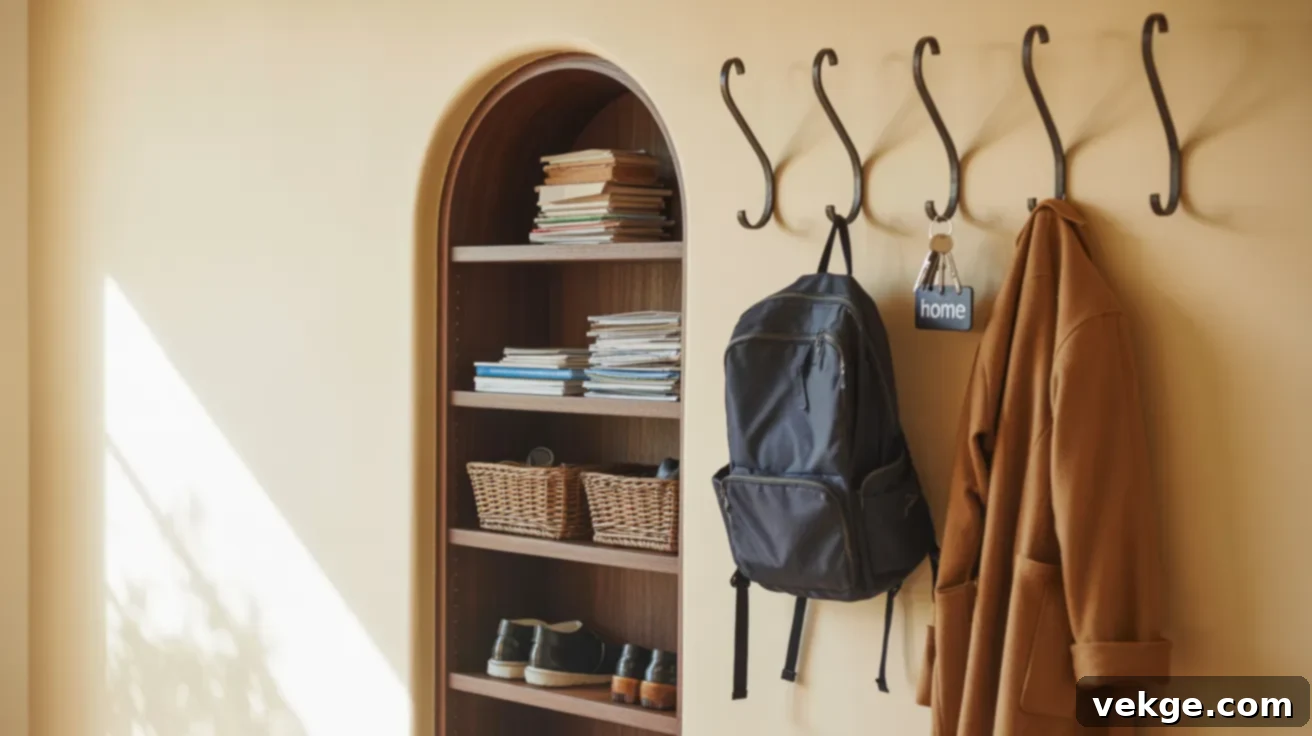
A narrow, arched bookcase built into your entryway wall is a game-changer for organization. Utilize the upper shelves for decorative elements like small plants, framed photos, or a designated spot for incoming mail. The lower shelves are perfect for practical items such as shoes, small storage baskets for keys and wallets, or even a charging station. Consider adding integrated hooks alongside or within the arch for jackets, backpacks, or dog leashes. Matching the trim color to the wall creates a seamless, sophisticated look, while a contrasting bold tone can make it a striking and welcoming feature upon entry.
Dining Room Bookcase: Elevated Display and Storage
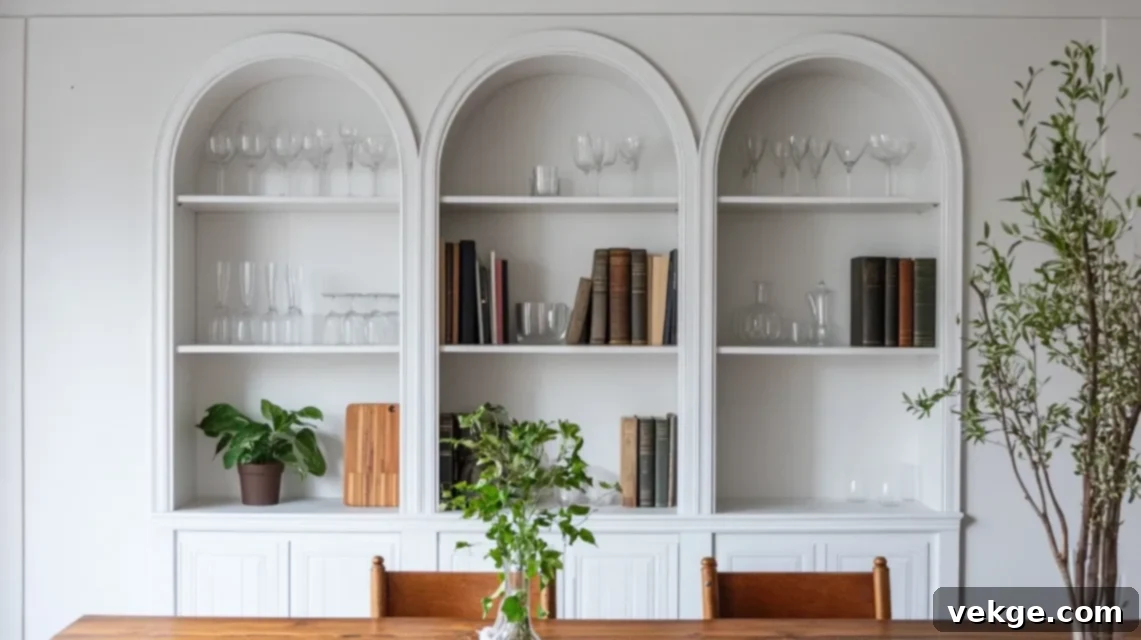
Move beyond the traditional buffet and install an elegant arched built-in bookcase in your dining area. This provides a refined space to showcase your finest dishes, cherished serving trays, or sparkling glassware. Interspersed with a few beloved cookbooks or lush potted plants, it creates a casual yet immensely stylish atmosphere. Painting the inside of the arch a darker, complementary color than the surrounding walls can add striking depth and visual interest, or stick with an all-white finish for a clean, timeless, and bright aesthetic.
Bathroom Niche Bookcase: Spa-Like Functionality
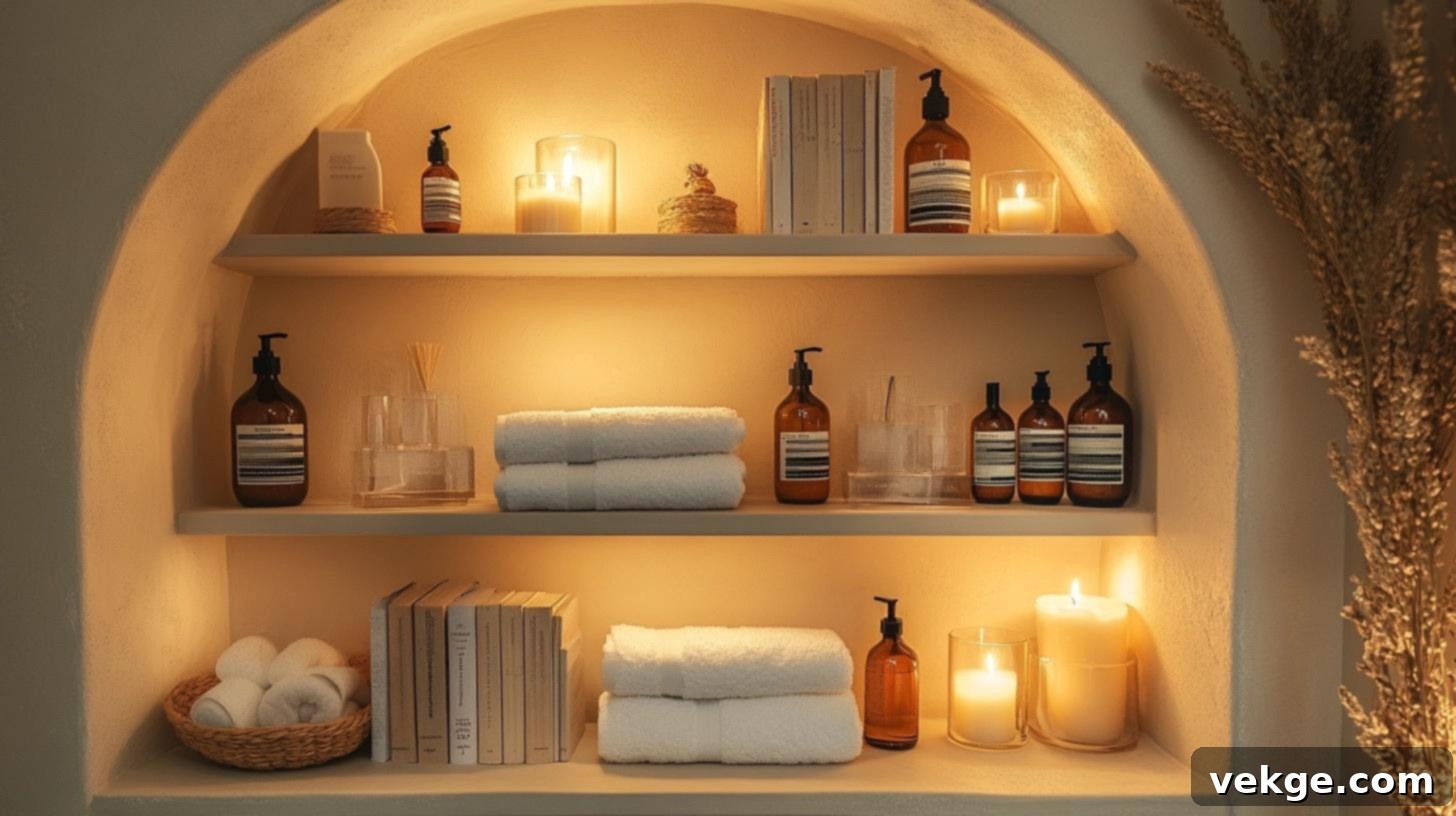
Utilize the often-underused space between wall studs in your bathroom by building in slender arched shelves. These are perfect for storing neatly folded towels, aromatherapy candles, or an organized collection of skincare and beauty products. This intelligent use of vertical space saves valuable floor area and offers a far more polished and custom look than freestanding carts. For durability against moisture, ensure all surfaces are sealed with waterproof paint, or consider tiling the back of the arch for a truly luxurious, spa-like touch that withstands steam and splashes.
Bedroom Headboard Wall: Serene and Functional
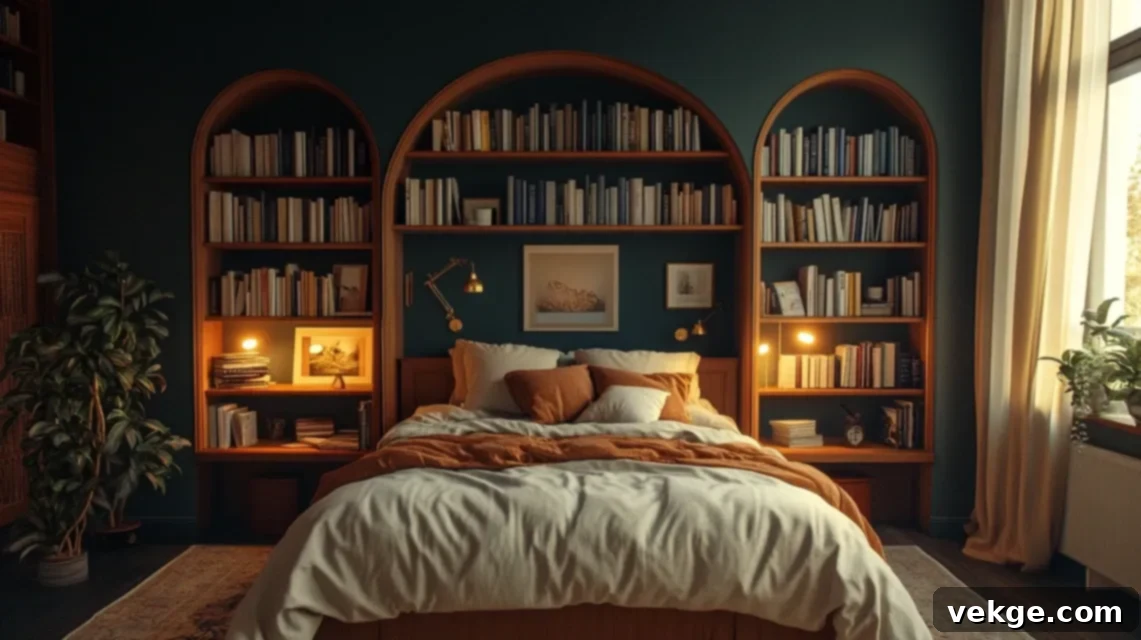
Enhance your bedroom’s functionality and aesthetic by installing arched bookcases on the wall behind or on either side of your bed. This smart design can effectively replace bulky nightstands, providing elegant storage for books, a convenient spot for reading lamps, or a display area for framed photos and personal treasures. Painting them the same color as the wall creates a soft, cohesive backdrop, promoting a sense of calm. Alternatively, choosing a rich, contrasting color can transform the arches into a bold and sophisticated focal point in your sleeping sanctuary.
Closet Organizer: Custom Luxury for Your Wardrobe
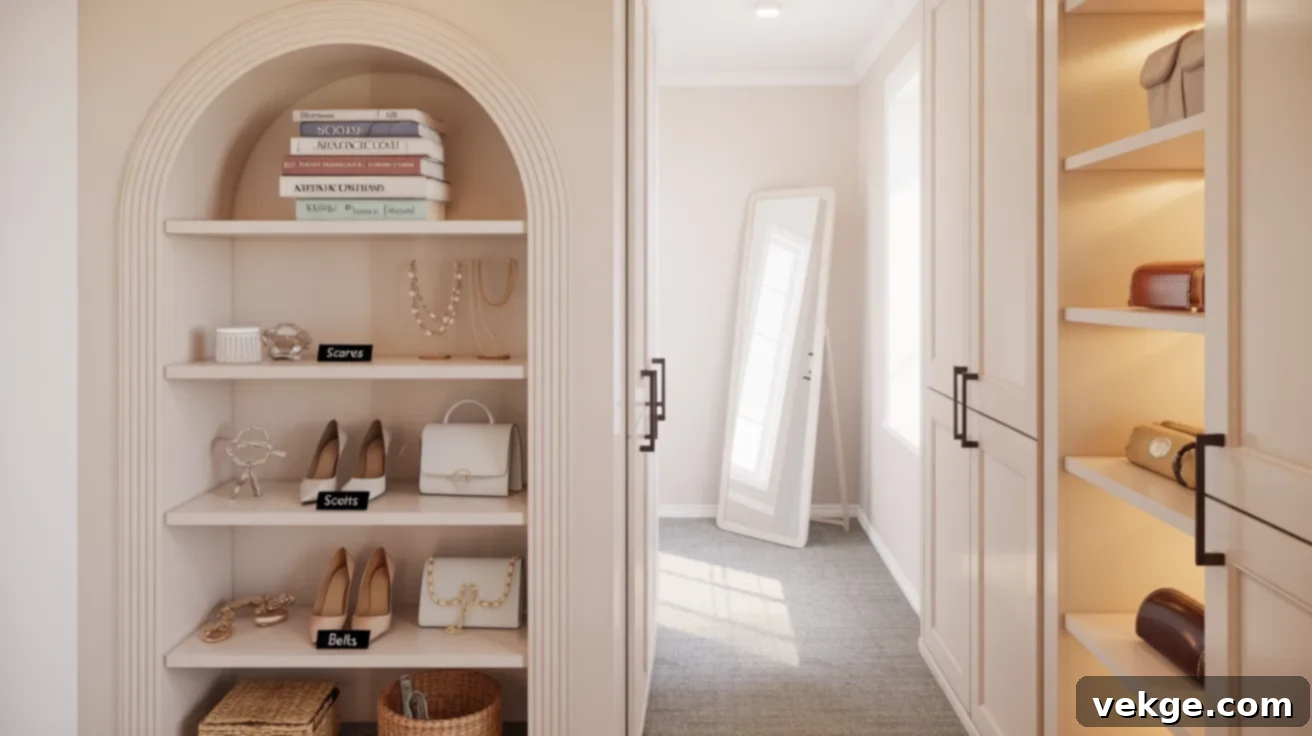
Elevate your walk-in closet from purely functional to a realm of custom luxury with an arched built-in. This tailored addition is perfect for elegantly displaying and organizing shoes, handbags, scarves, or other accessories. Strategically placed shelves keep items visible, accessible, and impeccably tidy. Paint the built-in in a tone that complements your existing closet shelving or trim for a harmonious look. Incorporating small labels or dividers can further enhance its practicality, ensuring everything has its designated place.
Hallway Feature Wall: Artful Passage
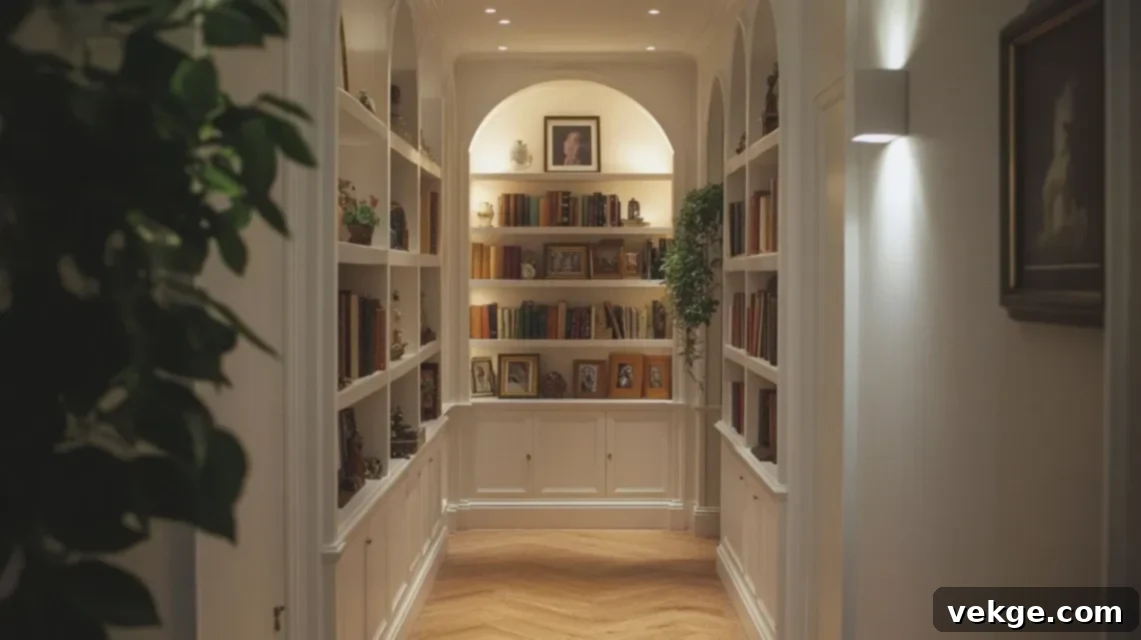
Transform a plain, often-overlooked hallway into an artful passage with a tall, narrow, arched bookcase built directly into the wall. This elegant feature can house a curated collection of small plants, cherished photo frames, or unique keepsakes, turning an otherwise utilitarian space into a captivating gallery. It introduces significant style and personality without protruding into the walkway, making ingenious use of space that might otherwise remain bare and ignored. It encourages pauses and appreciation in transitional zones of your home.
Kitchen Coffee or Spice Nook: Culinary Charm
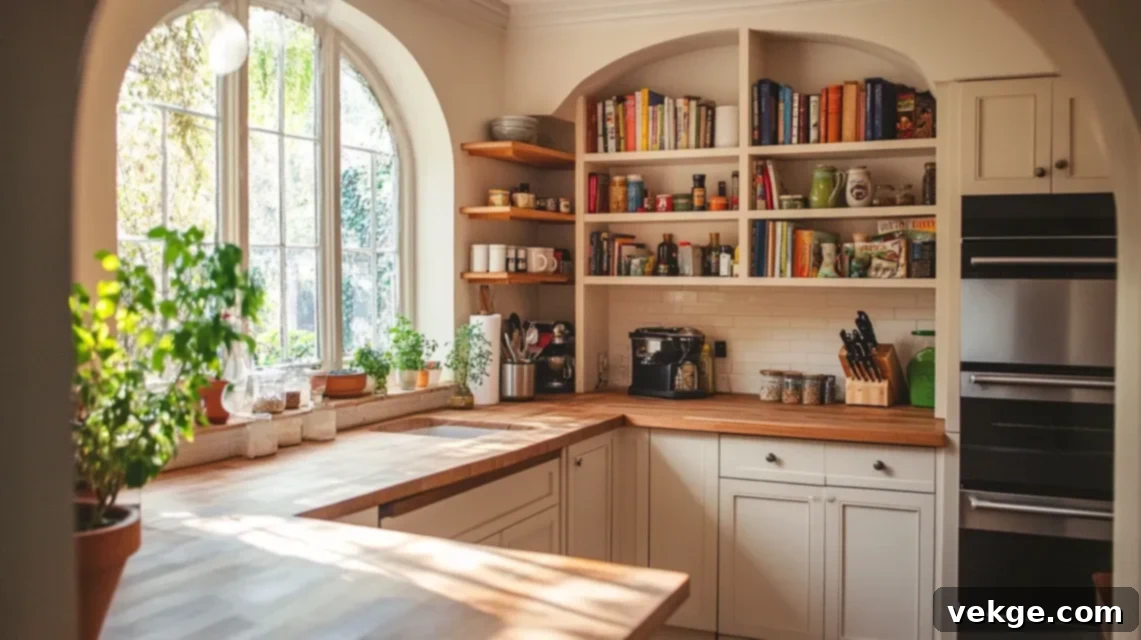
Infuse your kitchen with culinary charm by creating an arched built-in nook for your coffee station or spice collection. This functional yet aesthetically pleasing feature can be built between existing cabinets or on an unused wall near your breakfast area. It’s the perfect spot for neatly organizing spices, displaying favorite mugs, housing coffee tools, or keeping essential recipe books close at hand. Opt for open wood shelves for a warm, rustic feel, or paint them crisp white for a clean, modern, café-style setup. Add small hooks underneath the bottom shelf for hanging mugs or frequently used utensils.
Game Room Display Bookcase Wall: Organized Entertainment
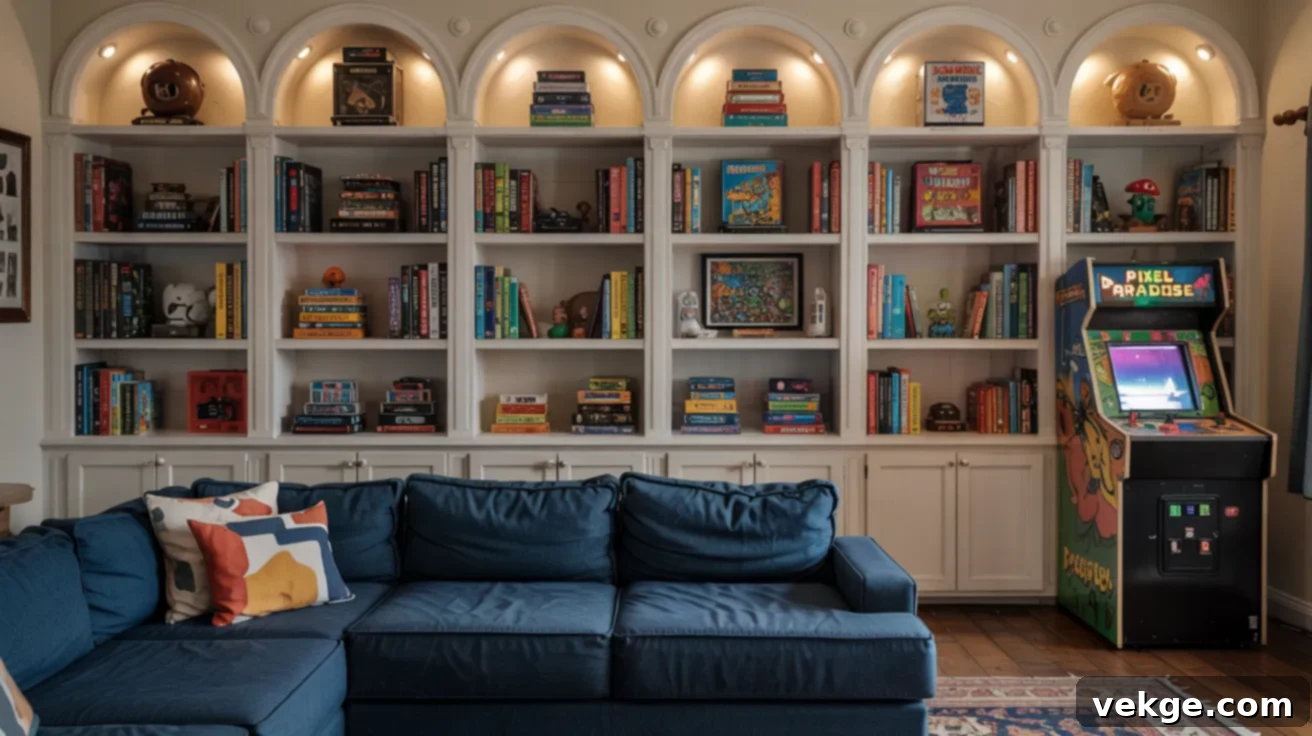
Elevate your game or recreation room by lining one wall with multiple arched bookcases. This provides a stylish and organized solution for storing board games, displaying prized collectibles, or neatly arranging video games and consoles. For a truly immersive experience, consider installing subtle LED strip lights inside each arch; this not only illuminates your displays but also creates a captivating, entertainment-focused ambiance. It effectively keeps clutter off the floor while giving the room a fun, dynamic, and professionally organized setup.
Above-Door Bookcase Shelf: Unlocking Vertical Space
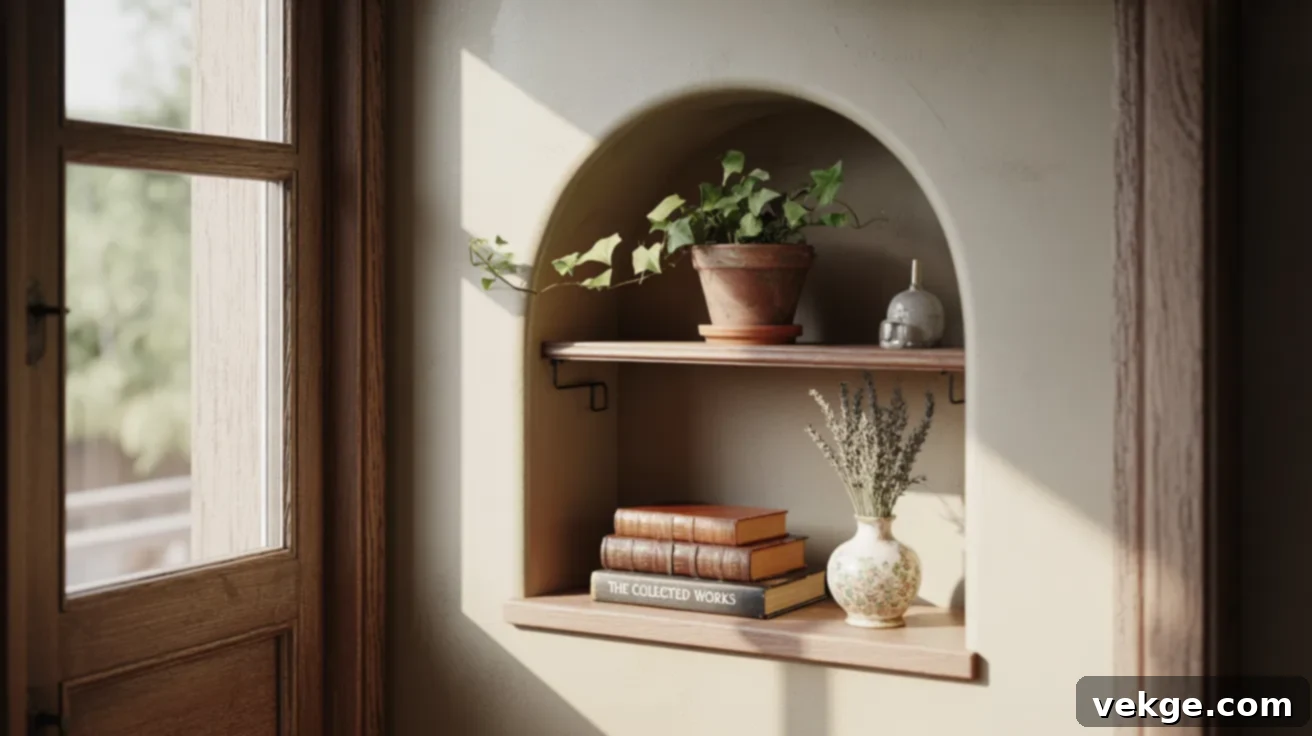
Capitalize on often-forgotten vertical space by adding a small arched bookcase above a doorway, especially effective in rooms with high ceilings. This unique placement draws the eye upward, creating a sense of grandeur and utilizing dead space in a highly creative way. It’s ideal for showcasing lightweight plants, delicate vases, or a selection of books that are cherished but not frequently accessed. This design works exceptionally well in hallways, kitchens, or reading rooms with soaring walls, adding an unexpected architectural detail.
Guest Room Desk Pairing: A Thoughtful Workspace
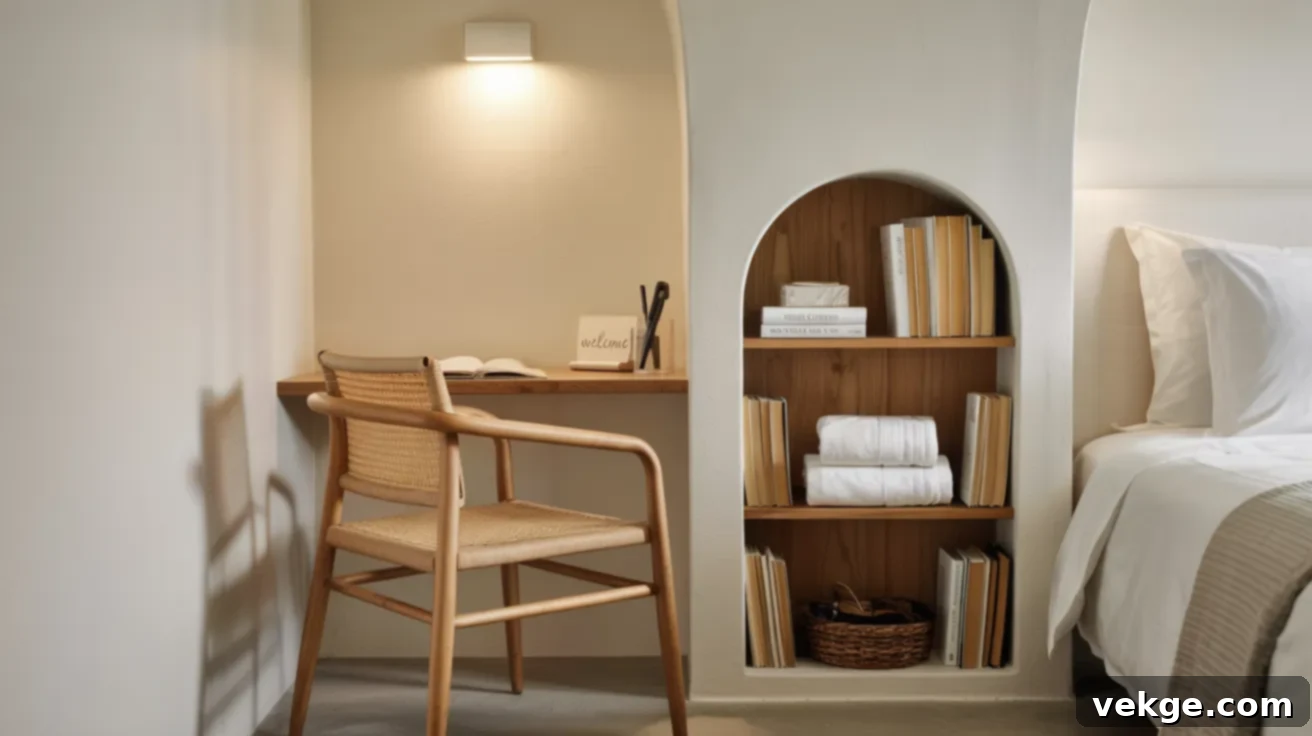
Create a welcoming and functional workspace in your guest room by pairing a short, arched built-in bookcase with a compact wall-mounted desk. The shelves offer practical storage for guest essentials like extra towels, toiletries, or a selection of reading material, alongside decorative accents. This thoughtful setup provides visitors with their own dedicated, uncluttered space for work or relaxation. Enhance the comfort with soft task lighting and a comfortable chair to complete the inviting and organized guest room environment.
Reading Nook with Seating: Your Personal Retreat
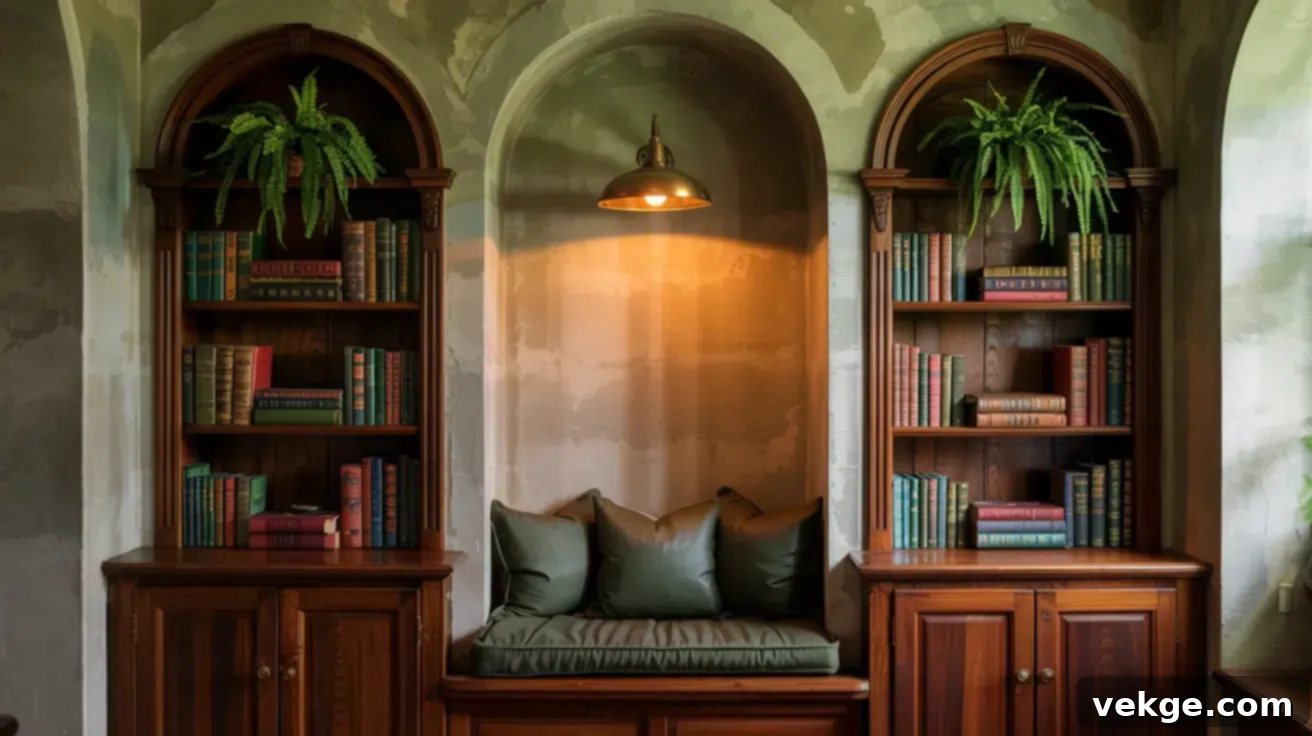
Design your ultimate cozy sanctuary by building two arched bookcases on either side of a recessed window bench or a custom built-in seating area. Dedicate the shelves to your extensive book collection, decorative pillows, or lush potted plants, making the bench inviting with plush cushions. Painting the inside of the arches a shade darker than the surrounding walls can add a wonderful sense of depth and enclosure, enhancing the “nook” feeling. Install a dedicated reading lamp above the bench, and you’ve crafted your own personal, peaceful retreat for uninterrupted leisure.
Living Room Looks: Harmonious Focal Points
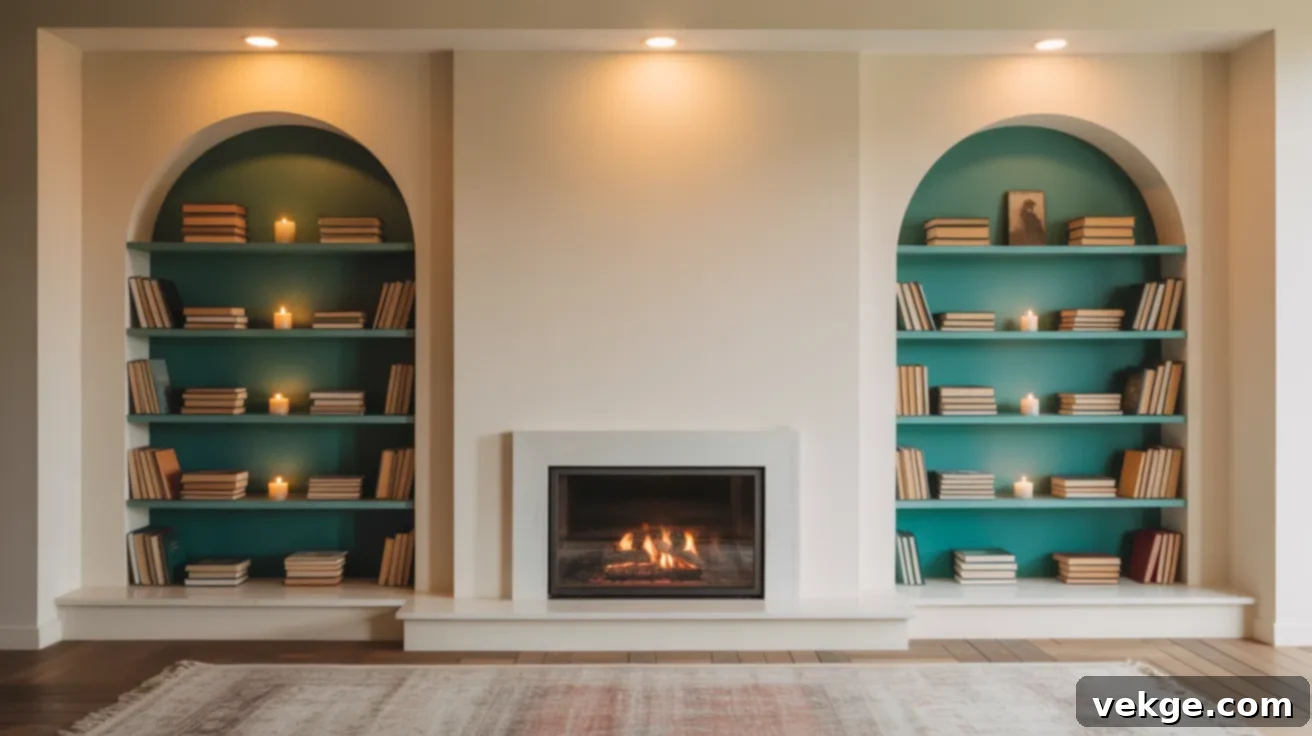
Arched built-in bookshelves are particularly impactful when framing central features in your living room, such as a fireplace or a television. They gracefully pull the entire room together, creating a sophisticated and cohesive aesthetic. These elegant structures provide an ideal spot for displaying books, cherished mementos, flickering candles, and other decorative accents. For a serene and cohesive look, consider matching the color of the shelves to your existing wall paint. Alternatively, introduce a bold, contrasting paint color to transform the arches into a striking and memorable focal point. Beyond aesthetics, these custom shelves are excellent for discreetly hiding unsightly wires, ensuring the area remains tidy, organized, and beautifully finished.
Home Office: Inspired Productivity
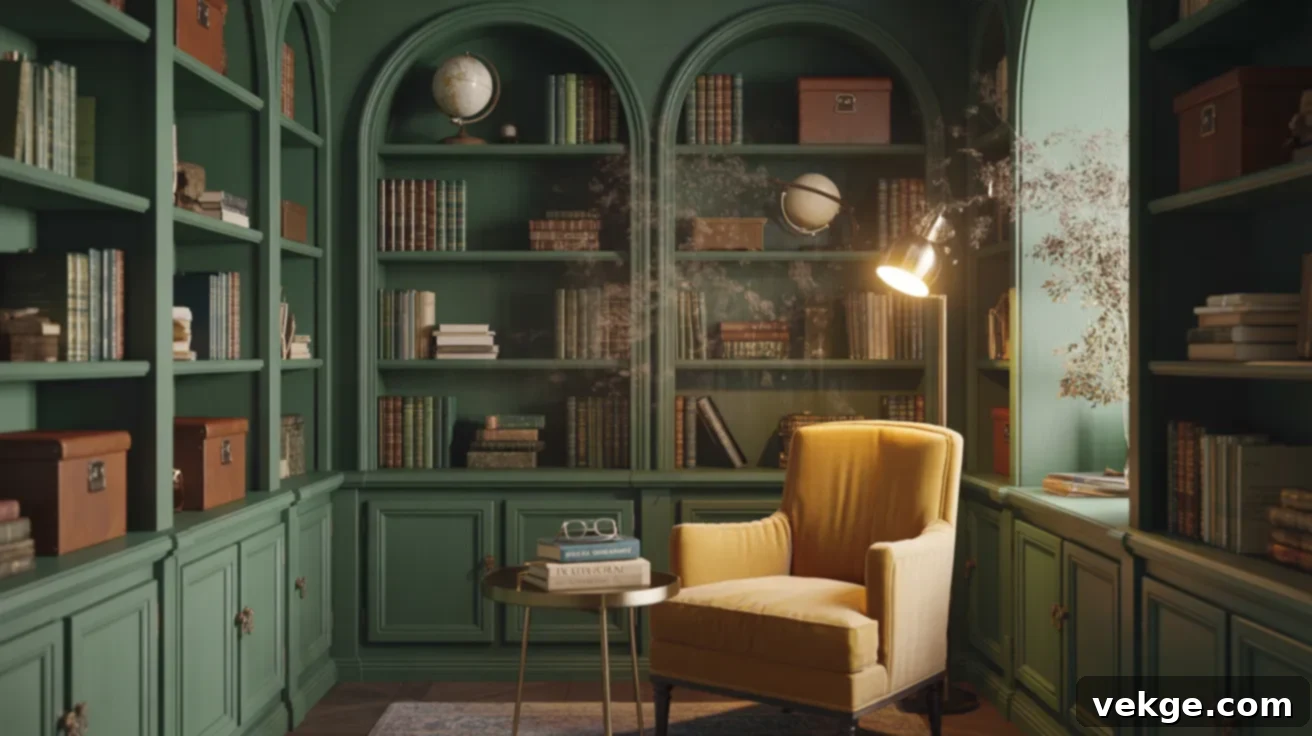
In a home office, wall-to-wall arched bookcases create an immediate sense of gravitas and professionalism. Dedicate an entire wall to these stunning units for extensive storage of books, important files, or a curated display of professional accolades and personal items. Opt for deeper, more sophisticated paint colors like rich navy, forest green, or charcoal gray to evoke a serious, focused, and inspiring atmosphere. Extending these shelves from floor to ceiling maximizes every inch of vertical space, providing unparalleled organization. Pair this with a comfortable ergonomic chair and excellent task lighting, and you’ll have a workspace that is both highly functional and profoundly inspiring.
Decorating Your Arched Bookshelves: A Guide to Year-Round Style
Styling your arched bookshelves is an art that allows your personality to shine through. Here’s a simple yet effective approach to decorating them, ensuring a clean, balanced, and aesthetically pleasing look that can be easily refreshed with the changing seasons:
- Color Palette (Shade): Choose 2-3 dominant colors and repeat them throughout your displayed items. This creates a cohesive and pulled-together look, preventing the shelves from appearing cluttered or chaotic. Think about complementary colors or varying shades within the same family for subtle elegance.
- Texture and Form (Containers): Incorporate small bowls, decorative boxes, or unique sculptures. These pieces help break up the straight lines of books and shelves, adding visual interest and texture. They also provide practical hidden storage for small, loose items that you want to keep easily accessible but out of sight.
- Balance and Flow (View): Step back frequently (every few items you place) to assess the balance and spacing of your arrangements. Look for visual symmetry or pleasing asymmetry. Ensure there’s enough negative space to let each item breathe, avoiding an overly packed appearance. Adjust items until the overall composition feels harmonious.
- Seasonal Styling:
- Fall: Embrace the warmth of autumn by adding mini pumpkins, beautifully dried leaves, acorns, or warm-toned ceramic decor. Think about rich reds, oranges, and deep greens.
- Winter: Evoke a cozy, festive spirit with fresh pine clippings, elegant candles (real or LED), and small decorative pieces in classic red, silver, or gold tones. Faux snow or miniature winter scenes can also add charm.
- Spring: Welcome renewal with fresh flowers (real or high-quality faux), soft green accents, pastel-colored books or vases, and light, airy textures. Think about blooms like tulips or hyacinths.
- Summer: Keep the look light and breezy. Incorporate elements like seashells, pieces of driftwood, glass vases filled with sand, or crisp white and blue decor to evoke coastal vibes.
Remember, even small, thoughtful changes can completely refresh the entire look and feel of your arched bookshelves. Embrace the process, enjoy switching things up, and let your decor reflect the current season or your evolving personal style.
Wrapping Up: Your Journey to Custom Elegance
The journey from staring at a blank wall to admiring a beautifully integrated arched built-in bookcase is incredibly rewarding. When I introduced this feature into my own home, it was more than just adding a shelf; it was about intelligently utilizing space, enhancing aesthetics, and creating a truly custom feel. If you’ve been contemplating this design element, you’ve now explored its potential to transform any room, from crafting a serene reading nook to organizing a child’s vibrant play area, or bringing sophistication to your home office.
You’ve gained invaluable insights: from the foundational steps of construction and the art of finishing, to the creative nuances of year-round styling. The knowledge and inspiration are now at your fingertips, empowering you to bring this elegant vision to life.
If your goal is to infuse your home with more personality, bespoke charm, and superior organization, then an arched built-in bookcase is an exceptional starting point. Take that first step: identify the perfect spot, meticulously plan your design, confidently build your structure, and then adorn it to truly make it your own unique statement piece.
For more simple, actionable, and inspiring home ideas that help you create spaces you love, explore the latest posts on our website. Your dream home is closer than you think!
