The Ultimate Guide to Bathroom Layouts: Design Tips, Dimensions, and Functional Ideas
Are you envisioning a fresh, new look for your bathroom? Is the current design feeling outdated, inefficient, or simply uninspiring? If so, you’ve landed in the perfect spot. Redesigning a bathroom offers a fantastic opportunity to create a space that’s not only beautiful but also highly functional and tailored to your lifestyle. We’re here to guide you through the intricate process of planning your ideal bathroom layout, complete with expert insights and product recommendations.
The bathroom layout is arguably the most critical and challenging aspect of any renovation. It dictates the flow, usability, and overall comfort of your space. A well-thought-out layout can transform a mundane bathroom into a personal sanctuary, while a poor one can lead to daily frustrations and inefficiencies.
Before diving into creative ideas, the foundational step is meticulous planning. Begin by drawing a precise, to-scale layout of your existing bathroom. Accurately measure every dimension, paying close attention to fixed elements like windows, existing plumbing connections, vent openings, and door swings. These details are crucial for a successful renovation.
Confirming the accuracy of your measurements is paramount. This initial diligence will save you time, money, and headaches down the line. By following our straightforward instructions, you’ll be well on your way to a successful bathroom transformation. For a broader perspective on the entire renovation journey, be sure to explore our dedicated article on planning a comprehensive bathroom project.
Essential Considerations for Optimal Bathroom Design
Crafting a bathroom that is both beautiful and functional requires careful consideration of several key elements. An ideal design accommodates the needs of all users, including those with mobility challenges, ensuring safety, superior usability, appealing aesthetics, and practical accessibility.
- Ensure Superior Ventilation: A robust ventilation system is non-negotiable. It effectively combats odors, significantly reduces moisture buildup, and actively prevents the growth of mold and mildew, safeguarding both your health and your bathroom’s longevity.
- Prioritize Space and Accessibility: Develop a comprehensive bathroom plan that maximizes both available space and accessibility. Thoughtfully consider the size, type, and placement of all fixtures and fittings to ensure comfortable movement and ease of use for everyone.
- Facilitate Easy Cleaning: Design your bathroom with maintenance in mind. Opt for wipe-clean surfaces, seamless finishes, and minimize clutter on countertops. Easy-to-clean materials simplify upkeep and contribute to a consistently hygienic environment.
- Optimize Lighting Strategy: While natural light is always a valuable asset, strategic artificial lighting is essential for creating a warm, inviting, and highly functional atmosphere. Combine task lighting (e.g., around mirrors) with ambient and accent lighting to achieve the desired mood and utility.
- Integrate Safety Features: Proactively incorporate safety elements such as discreetly placed grab bars, anti-slip flooring, and appropriate shower enclosures. These features are vital for preventing accidents and enhancing the overall safety and comfort of the bathroom, especially for children and the elderly.
- Select Durable and Aesthetic Materials: Choose materials and a color palette that are not only visually attractive but also inherently durable and easy to maintain. Specifically, opt for moisture-resistant paints and tiles to inhibit mold and mildew growth, ensuring your bathroom remains pristine for years to come.
Strategic Planning for an Optimal Bathroom Layout

Designing an optimal bathroom layout involves a careful balance of aesthetics, functionality, and space utilization. As you begin planning, keep these crucial pointers in mind to create a space that truly works for you:
1. Determine Your Core Fixtures and Needs
One of the first decisions involves your primary bathing fixture: do you envision a luxurious bathtub or a space-saving shower? Showers typically occupy about 40% less floor space, making them a popular and practical choice, especially for smaller bathrooms. Beyond that, consider if you require a single or double vanity, and whether a portable or fitted bidet aligns with your preferences. The size and shape of your available space will largely dictate these fundamental choices.
2. Optimize Fixture Sizing for Efficiency
Incorporate compact and appropriately sized fixtures and fittings whenever possible. For instance, a standard vanity unit typically has a depth of 1 foot 8 inches (approximately 50 cm). However, for compact bathrooms or to maximize floor space, a slimmer 1-foot (30 cm) deep vanity can make a significant difference without compromising functionality.
3. Implement Effective Zoning
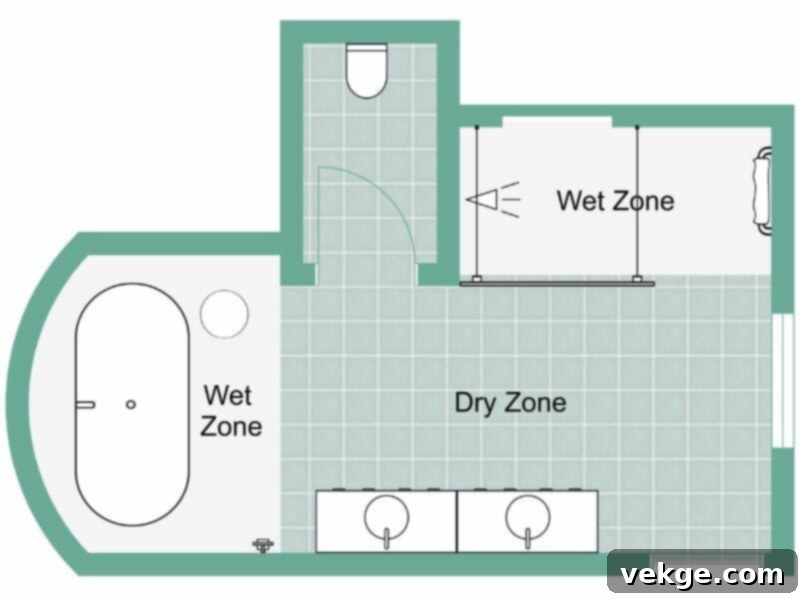
Thoughtfully divide your bathroom into distinct ‘wet’ and ‘dry’ zones. The wet zone encompasses areas prone to splashes, such as inside the shower or around the bathtub. This area requires robust waterproofing. Conversely, your dry zone – where you might dress, store towels, or apply makeup – should offer ample, comfortable space. Separating these zones enhances safety, prolongs the life of your non-waterproof items, and improves overall comfort.
4. Ensure Seamless Movement and Flow
A well-designed bathroom allows for effortless movement and transitions between different areas. Eliminate potential obstacles, such as doors that swing clumsily into fixtures or pathways. Consider innovative solutions like installing sliding or pocket doors, which recede into walls, to free up valuable floor space and improve circulation within the bathroom.
5. Strategic Fixture Positioning
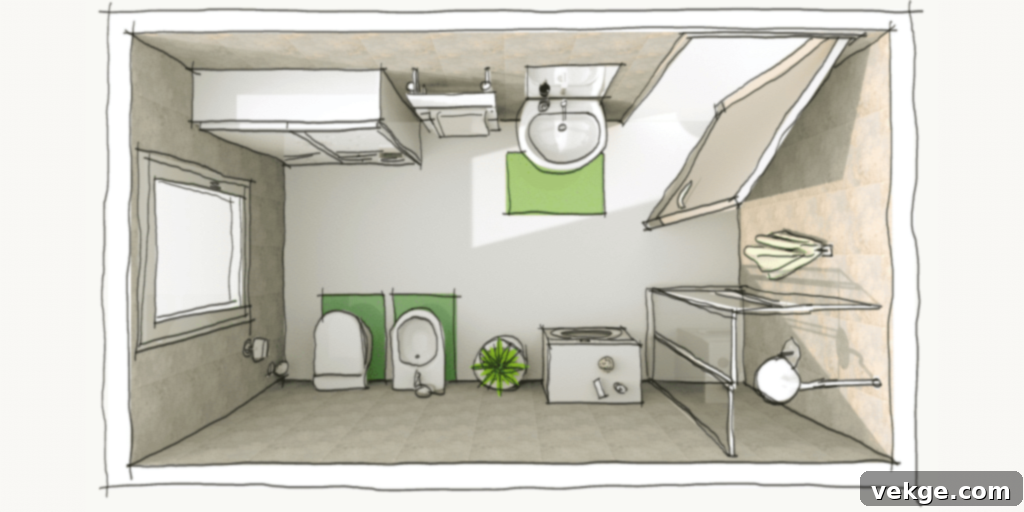
The placement of fixtures relative to each other is key to a cohesive and convenient layout. Practical arrangements include placing a mirror directly above your vanity, a towel rack within easy reach of your shower, and a bidet conveniently located next to your toilet. These thoughtful placements enhance daily usability and comfort.
6. Modern Toilet Layout Solutions
For a sleek aesthetic and easier floor cleaning, a wall-mounted toilet is an excellent choice. This design also allows for a hidden in-wall cistern, which significantly minimizes the footprint of the toilet, contributing to a more spacious and uncluttered look.
7. Prioritize Privacy
Privacy is paramount in any bathroom. Carefully consider the line of sight from the bathroom door into the room, especially regarding the toilet. Utilize frosted, etched, or patterned glass for windows and doors to ensure seclusion without sacrificing natural light. To enhance acoustic privacy, consider installing door sweeps or in-wall insulation to minimize sound transmission.
8. Design for Universal Accessibility
For households with elderly members or individuals with reduced mobility, incorporating accessibility features is vital. Install sturdy grab bars in the shower and adjacent to the toilet. Ensure the flooring is non-slip, and consider widening entryways or installing a raised toilet seat stand for enhanced comfort and safety.
9. Integrate Smart Storage Solutions
Ample and intelligent storage is crucial for maintaining a tidy bathroom. Explore various options such as wall-mounted hooks, towel rails, open shelving, and versatile cabinets. To further reduce clutter, consider practical additions like a wall-mounted soap dispenser inside your shower enclosure.
Key Design Guidelines for a Cohesive Bathroom

Beyond the fundamental layout, several specific design guidelines can elevate your bathroom from ordinary to extraordinary, ensuring both functionality and aesthetic appeal:
- Strategically Separate Wet and Dry Zones: Reinforce the concept of zoning. Wet zones, such as the area directly inside and immediately outside the shower or bath, should be clearly defined and thoroughly waterproofed. Dry zones are for dressing, accessing towels, and general movement. Keeping these areas distinct prevents the entire bathroom floor from getting wet, enhancing comfort and safety. Imagine stepping out of a refreshing shower only to find the entire floor soaked – carefully planned zoning mitigates this common frustration.
- Evaluate Bath vs. Shower Needs: While showering has become the everyday norm for most, a bathtub often signifies relaxation and luxury. Consider your lifestyle: is the tub a necessity for young children, or is it primarily for occasional indulgent soaks? If space allows, a separate shower and bathtub can offer the best of both worlds. For smaller spaces, a shower-bath combination or a dedicated walk-in shower might be more practical.
- Enhance Visual Interest with Level Changes: To add architectural interest and further define spaces, consider subtly raising the bath area or even sinking it slightly into the floor. This can create a distinct zone for bathing and help contain water, preventing the entire bathroom from becoming wet. It’s a design choice that adds sophistication and practicality.
- Conceal the Toilet from View: Privacy is crucial. When positioning your toilet, always consider the line of sight from the bathroom door. It’s generally recommended to keep the toilet out of direct view when the door is open. This can be achieved through clever placement, a partial wall, or even the strategic use of other fixtures.
- Integrate Functional Niches: Niches are invaluable for both storage and aesthetic enhancement. Beyond holding shower essentials like shampoo bottles, they can be designed to showcase waterproof plants, decorative artwork, or simply provide discreet storage. Integrated niches contribute to a clean, uncluttered look and offer a practical solution for items that would otherwise sit on ledges or floors.
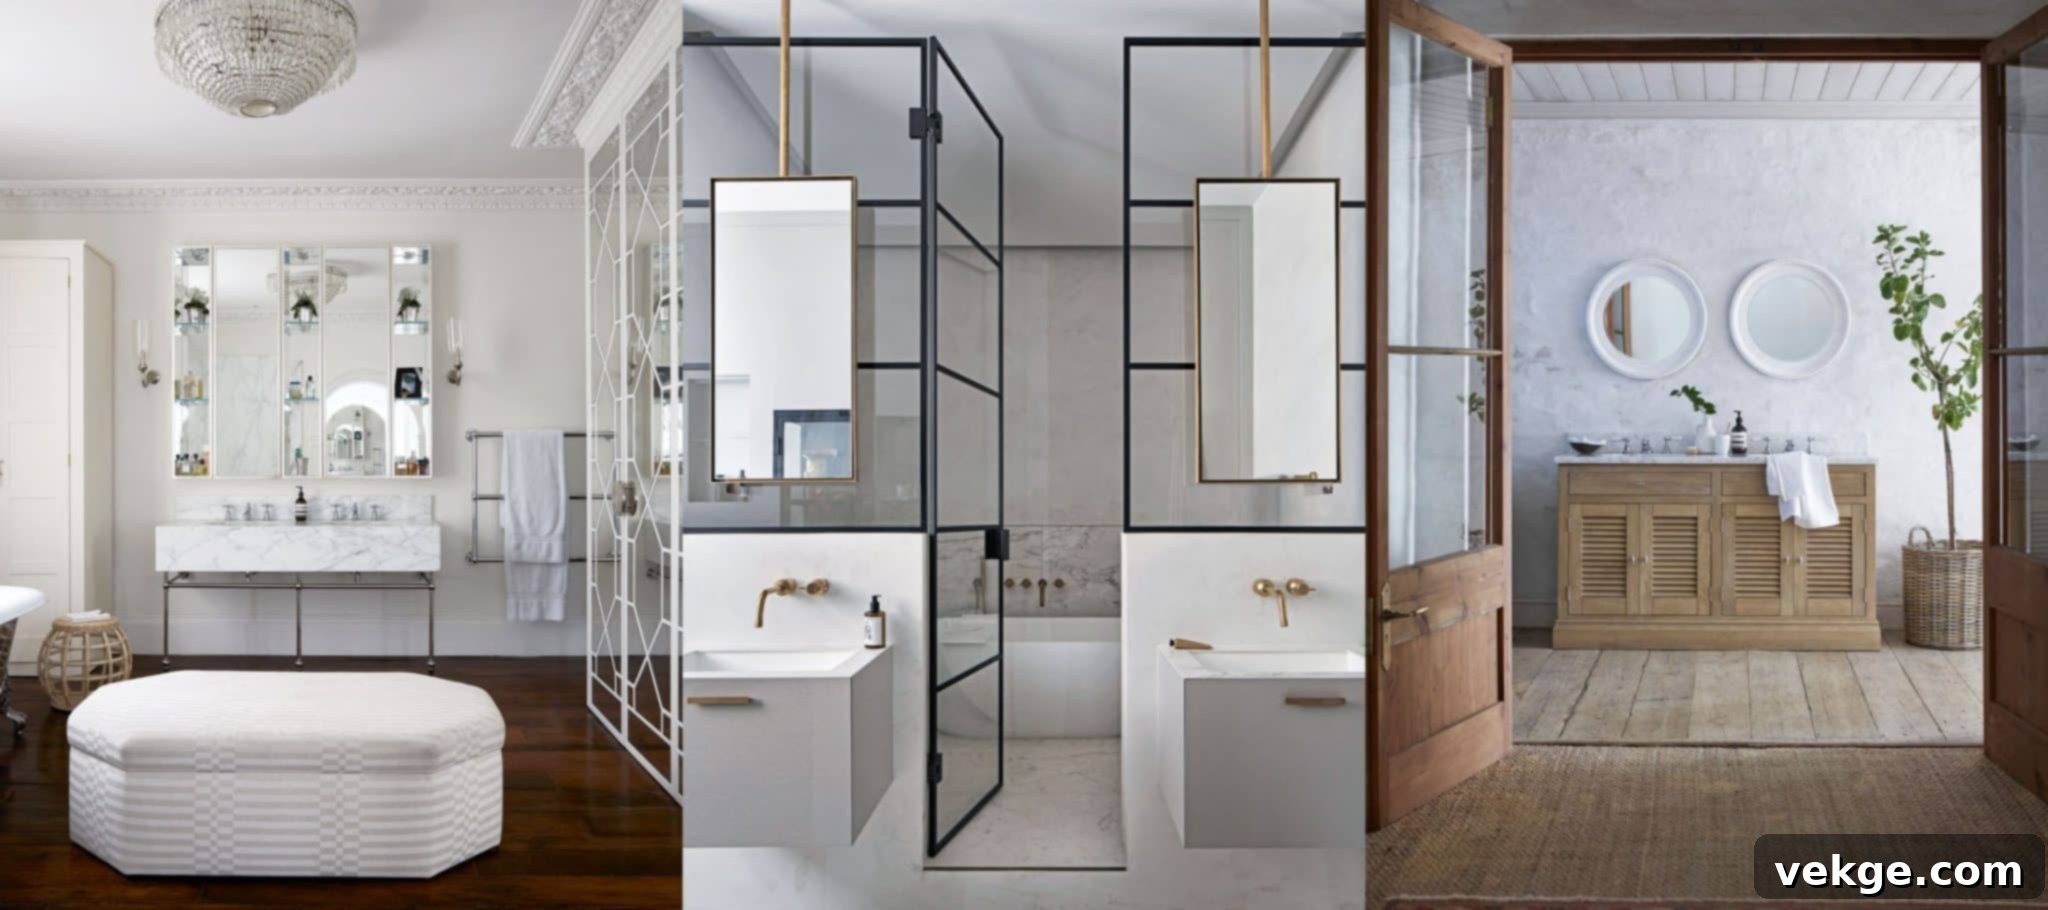
- Utilize Dividing Walls for Definition: For open-plan bathrooms or larger spaces, a cleverly designed dividing wall for the shower can create the illusion of a separate washbasin or vanity area. This adds a sense of privacy and structure, breaking up a large space into more intimate and functional zones without fully enclosing them.
- Mind Door Swings and Fixture Clearance: When installing glass shower cubicles or other fixtures, meticulously plan the door swing of both the bathroom door and any internal shower doors. Ensure there is ample clearance to prevent handles from banging into glass, walls, or other fixtures, which can lead to damage and inconvenience.
- Optimize Natural and Artificial Light: For bathrooms with windows, patterned, frosted, or etched glass is highly recommended to maintain privacy while still allowing natural light to filter in. If a wall area lacks window access, explore options like skylights or light pipes to introduce natural light, making the space feel more open and airy. Complement this with a layered artificial lighting scheme for all times of day.
- Thoughtful Organization of Minor Fixtures: Don’t overlook the details. Plan the placement of essential minor fixtures such as towel rails, hooks, shower caddies, soap holders, and toilet paper dispensers. Strategic placement ensures these items are within easy reach, contributing significantly to the bathroom’s overall functionality and user experience.
Essential Bathroom Fixture Dimensions for Practical Layouts

Understanding standard and minimum dimensions for key bathroom fixtures is fundamental to creating a functional and comfortable layout. These guidelines help ensure adequate space for use and movement:
1. Shower Area Dimensions
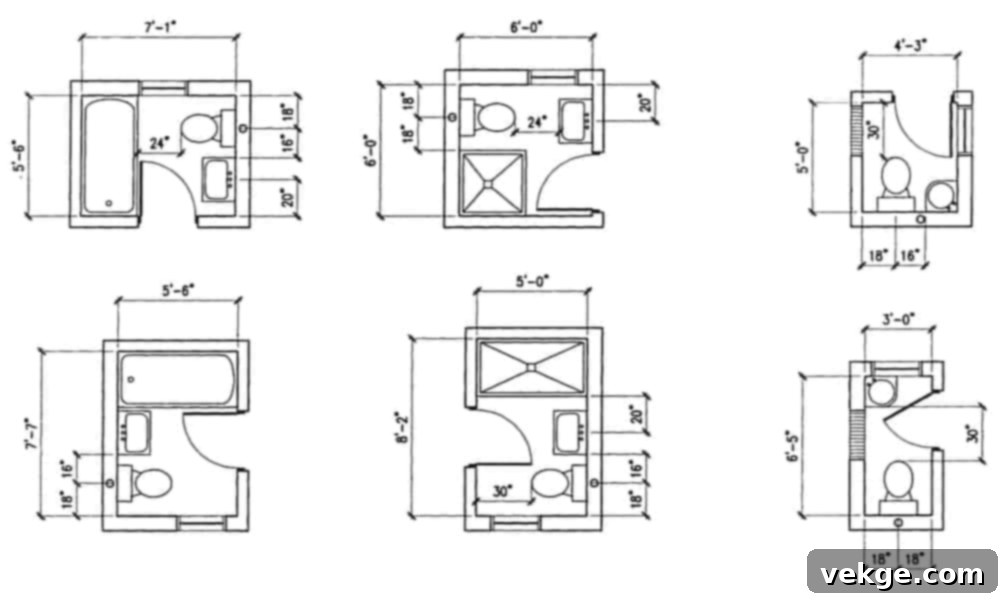
While a shower area can be as expansive as a full wet room, allowing the surrounding space to remain dry, practical minimums exist for enclosed showers. We recommend a minimum footprint of 2 feet 6 inches by 2 feet 6 inches (approximately 77 cm square) for a comfortable enclosed shower. For enhanced comfort, especially for taller individuals or those who prefer more elbow room, expanding to a 3-foot 6-inch (106 cm) square shower dramatically improves the showering experience.
2. Toilet and Surrounding Space Dimensions
A standard-sized toilet and a basic sink can typically fit comfortably within a bathroom width of 2 feet 6 inches (76 cm). However, for improved accessibility, particularly for individuals with mobility aids, widening this space to at least 3 feet (92 cm) is highly recommended. Opting for a wall-mounted toilet with a concealed cistern can be a clever space-saving solution, potentially reclaiming up to 1 foot (30 cm) of floor space by embedding the tank within the wall.
3. Vanity Unit Dimensions
For a single vanity unit, the minimum practical dimensions are generally 2 feet wide by 1 foot 8 inches deep (approximately 61 cm x 51 cm). This provides sufficient counter space and accommodates a standard basin. If your bathroom design allows, we strongly suggest incorporating a larger surface area or even a double vanity. This not only offers significantly more counter space for daily routines but also provides ample storage for all your bathroom essentials, reducing clutter and enhancing functionality.
Bathroom Layout: Essential Dos and Don’ts
Embarking on a bathroom design project, especially as a novice, can feel overwhelming. Knowing where to start, what’s essential, and what pitfalls to avoid is key. This “Dos and Don’ts” guide is crafted to help you navigate the process confidently and steer clear of common mistakes.
The Dos: Smart Design Choices
- Integrate a Hand Shower and Smart Tiling: For walk-in showers, a hand-held showerhead is incredibly practical for cleaning the enclosure and for more flexible showering. When selecting tiles for the shower floor, opt for smaller tiles. The increased number of grout lines provides superior slip resistance, significantly enhancing safety in this wet area.
- Prioritize and Maintain Ventilation: Adequate bathroom ventilation is paramount and often underestimated. Regular checks and maintenance of your ventilation system are crucial. Ensure there’s always sufficient airflow to protect bathroom furniture, decor, and structural elements from steam and moisture damage, preventing mold and mildew growth.
- Plan Meticulously with Visual Aids and Experts: Before making any final decisions, create a detailed mood board to define your aesthetic vision. Visit local showrooms to see fixtures and materials in person. Develop a precise, to-scale sketch of your bathroom, including windows and planned sanitary ware. For complex designs, consulting a bathroom expert for professional advice and 3D renderings can be invaluable.
The Don’ts: Mistakes to Avoid
- Don’t Choose the Wrong Tiles for the Location: The functionality and safety of your bathroom depend heavily on your tile selection. Avoid using tiles that are not suitable for specific areas. Always verify if a tile is slip-resistant for wet zones (like shower floors), if it’s genuinely moisture-resistant for wall applications, and if it’s compatible with underfloor heating systems if you plan to install one.
- Don’t Neglect Thoughtful Storage Solutions: Clutter can quickly detract from even the most beautiful bathroom. Avoid overlooking the necessity of dedicated storage for all your bathroom and shower supplies. Integrate solutions like built-in niches, elegant metal baskets, or cleverly designed cabinets. Don’t forget simple additions like hooks for washcloths or robes; these small details significantly enhance the showering experience and maintain tidiness.
- Don’t Underestimate the Comfort of Underfloor Heating: While often considered a luxury, underfloor heating dramatically elevates the comfort of a bathroom. Avoid dismissing its benefits. There are few feelings more opulent than stepping out of a warm shower onto a toasty tiled floor. Pair this with a heated towel rail, and you’ll transform your post-hygiene routine into a truly luxurious experience, far superior to a chilly, damp towel.
Conclusion: Crafting Your Ideal Bathroom
Redesigning your bathroom is an exciting venture that, when approached thoughtfully, can significantly enhance your home’s comfort and value. By carefully evaluating various factors – from foundational layouts and essential dimensions to aesthetic choices and practical considerations – you can achieve a space that perfectly balances functionality, ease of use, and visual appeal. The comprehensive suggestions and instructions provided in this guide aim to empower you to create a truly well-designed bathroom that meets your unique needs and preferences.
Remember that the ultimate selection of furnishings, fixtures, and fittings should always reflect your personal tastes and lifestyle. Prioritize privacy with features like frosted glass on doors and windows. Integrate intelligent storage solutions such as hooks, rails, shelving, and cabinets to keep towels, toiletries, and other essentials neatly organized. Finally, don’t overlook crucial elements like efficient ventilation, strategic tile choices, and the luxurious comfort of underfloor heating to optimize both convenience and utility.
We hope this guide has inspired and equipped you with the knowledge to embark on your bathroom transformation journey. We’d love to hear about your projects and how these insights have helped you!
Frequently Asked Questions About Bathroom Layouts
How Can I Maximize Storage Space in a Small Bathroom Layout?
To maximize storage in a small bathroom, focus on utilizing vertical space effectively. Install wall-mounted cabinets, open shelving above the toilet or sink, and recessed medicine cabinets. Consider a vanity with integrated drawers or shelves. Over-the-door organizers, shower caddies, and compact containers for toiletries can also help keep essentials tidy and accessible without taking up precious floor space.
What Are Some Key Tips for Creating a Functional and Attractive Bathroom Layout?
Creating a functional and attractive bathroom layout involves several strategies: maximize space by strategically grouping fixtures and ensuring clear pathways; choose durable, moisture-resistant materials that complement your aesthetic; integrate layered lighting for both task illumination and ambiance; and personalize the area with elegant decor and accessories that reflect your style. Prioritize safety with non-slip surfaces and proper ventilation.
What Is the Recommended Clearance Around a Toilet in a Bathroom Layout?
For comfortable and accessible use, it is generally recommended to have at least 15 inches (38 cm) of clear space from the center of the toilet to any wall or fixture on either side. Additionally, a minimum of 24 inches (61 cm) of clear space should be maintained in front of the toilet, from the rim to the nearest obstruction, to allow for comfortable movement.
How Can I Ensure Proper Ventilation When Designing My Bathroom Layout?
Proper bathroom ventilation is essential for eliminating humidity, odors, and preventing mold. Integrate a powerful exhaust fan, ideally with an appropriate CFM (Cubic Feet per Minute) rating for your bathroom size, and ensure it vents directly outside, not into the attic. If possible, incorporating a window or a vent opening allows for natural air circulation and introduces fresh light, contributing to a healthier and more pleasant bathroom atmosphere.
