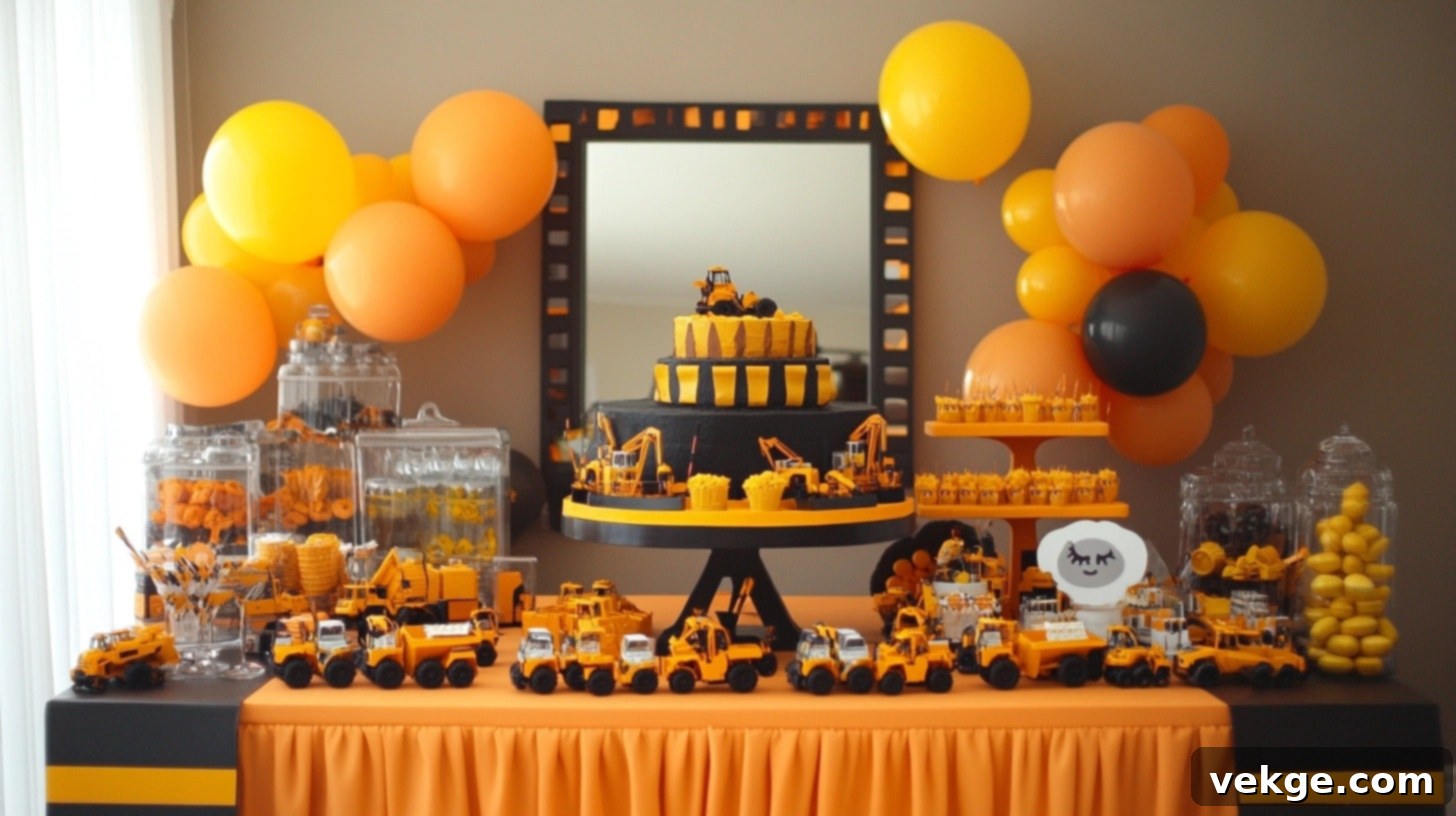
Build the Perfect Bash: Your Ultimate Guide to a Construction-Themed Kids Party
Planning a memorable celebration for your little builder? A construction-themed party is an incredibly exciting and engaging choice that guarantees fun for everyone. This comprehensive guide will equip you with everything you need to set up spectacular decorations and thrilling activities for their special day, transforming your home or party venue into a vibrant construction zone.
We’ll walk you through creating impressive DIY elements like custom safety vest party favors, delightful construction cone treats, and vibrant wall decorations using basic, affordable supplies you might already have at home. Imagine the delight on their faces as they discover bulldozer cupcakes, explore a dynamic “Build Zone” play area, and refuel at a meticulously designed tool-shaped snack station.
This guide provides clear, step-by-step instructions, detailing which materials work best and how to assemble everything quickly and efficiently. It’s designed specifically for parents who want to craft an unforgettable celebration without overspending time or money. Every idea shared here is not only parent-tested for ease but also kid-approved for maximum enjoyment, simplifying your party planning journey from start to finish.
Are you ready to grab your metaphorical hard hat and start building the perfect construction-themed party? Let’s lay the foundation with the essential basics and then systematically work our way through each exciting decoration and activity idea, ensuring your event is a smashing success!
Why Choose a Construction-Themed Party for Your Child?
Children are naturally fascinated by the world around them, especially the mighty trucks, powerful tools, and the magic of building things from scratch. A construction-themed party harnesses these innate interests, transforming them into an immersive and highly interactive celebration that captivates every guest.
It’s a versatile theme that resonates deeply with children typically aged 2 to 8 years old, offering a broad spectrum of activities that can be easily tailored to suit different developmental stages and attention spans.
The Unwavering Popularity of Construction Among Kids
There’s an undeniable allure of giant diggers, towering cranes, and bustling construction sites for young minds. Children are inherently drawn to the sheer power and intricate workings of construction equipment and the hands-on process of building. This fascination isn’t just about the loud noises or big machines; it’s about the tangible act of creation and the imaginative role-play it inspires.
This theme allows them to step into the shoes of a real builder, donning hard hats, maneuvering toy trucks, and engaging in collaborative projects with their friends. It fosters a sense of purpose and accomplishment, making playtime feel like a grand adventure where they are the masters of their own construction empire.
Age Appropriateness: Tailoring the Fun
One of the greatest strengths of a construction theme is its adaptability across various age groups, ensuring that every child finds something exciting and appropriate for their skill level.
- 2-3 Year Olds: For toddlers, activities should focus on sensory play and basic motor skills. Think large, easy-to-handle building blocks for simple stacking and knocking down, or engaging “truck-spotting” games where they identify different construction vehicles. Soft, oversized tools and a sandbox digging area are perfect for safe, supervised exploration and discovery.
- 4-5 Year Olds: Pre-schoolers are ready for slightly more structured play. Introduce basic tool use with child-safe plastic tools, such as hammering soft pegs or “screwing” large plastic nuts and bolts. Guided building activities with LEGO Duplo or larger interlocking bricks encourage problem-solving and creativity, while simple obstacle courses can simulate a construction site challenge.
- 6-8 Year Olds: Older children thrive on more complex challenges and teamwork. Offer more intricate building projects using smaller LEGO bricks, K’nex, or even simple woodworking kits (with supervision). Team-based activities like “bridge building competitions” or “site cleanup races” can enhance collaboration and strategic thinking. Scavenger hunts for hidden “tools” or “blueprints” add an exciting layer of adventure.
Benefits of Embracing a Construction Theme for Your Party
Beyond being simply fun, a construction-themed party offers a wealth of developmental advantages for children:
- Enhances Motor Skills: Activities like stacking blocks, digging in sand, or handling child-safe tools significantly contribute to the development of both fine and gross motor skills. This hands-on engagement strengthens coordination and dexterity.
- Fosters Teamwork and Collaboration: Many construction-themed games naturally encourage children to work together, whether it’s building a shared structure, carrying “supplies” as a team, or solving a collective building challenge. This teaches invaluable lessons about cooperation and communication.
- Promotes Hands-On Learning: By imitating real-world construction, children learn through direct experience. They experiment with cause and effect, understand basic engineering principles (like stability and balance), and engage in imaginative problem-solving.
- Versatile for Any Setting: This theme works beautifully in both indoor and outdoor environments. Indoors, you can set up building stations and craft corners. Outdoors, a sandbox becomes a digging site, and the yard transforms into a sprawling construction zone, allowing for more dynamic, larger-scale activities.
- Abundant DIY Decoration Options: The construction theme is incredibly forgiving and inspiring for DIY projects. Everyday household items like cardboard boxes, paper, and plastic bottles can be easily repurposed into creative and authentic-looking decor, saving money and adding a personal touch.
- Keeps Kids Engaged with Purposeful Play: Unlike themes with purely decorative elements, a construction party is inherently activity-driven. Children are kept busy and entertained with tasks that feel meaningful, fostering deep engagement and minimizing boredom.
- Flexible for Any Budget: From elaborate setups to minimalist charm, a construction party can be adapted to fit any financial plan. You can achieve a fantastic effect with simple, homemade decorations or invest in more elaborate rented equipment, depending on your preferences.
- Easy Access to Supplies: Most essential supplies like cardboard, craft paper, toy trucks, and basic tools are readily available at local craft stores, dollar stores, or even in your recycling bin, making preparation hassle-free.
Key Elements for Authentic Construction-Themed Party Decor
To truly bring your construction party vision to life, it’s crucial to establish a cohesive visual language. Focus on incorporating specific colors, iconic symbols, and versatile materials that instantly convey the theme without requiring overly complex efforts. The goal is to create an immersive environment that excites and delights your young guests.
The Essential Color Scheme
The palette for a construction party is distinct and immediately recognizable, drawing inspiration from real-world work sites:
- Vibrant Yellow: This is the cornerstone color, reflecting the bright hue of heavy machinery like excavators, bulldozers, and cranes, as well as crucial safety vests and warning signs. It brings energy and visibility to your decor.
- Bold Black: Used to represent asphalt roads, tire marks, and the sturdy parts of tools, black provides a strong contrast and grounding element to the brighter colors, adding depth and authenticity.
- Bright Orange: Synonymous with safety cones, barrier netting, and caution signs, orange signals a work zone and adds a pop of dynamic color that instantly tells guests they are entering a special area.
- Industrial Gray: Mimicking concrete, metal tools, and structural elements, gray adds a realistic, industrial touch to the theme. It acts as a neutral base that ties the other vibrant colors together.
Iconic Symbols: Must-Have Items
These recognizable items are non-negotiable for an authentic construction site vibe:
- Orange Safety Cones: Whether real traffic cones (if space allows) or miniature paper/plastic versions, these are the quintessential markers of any construction zone. Use them to define pathways, designate activity areas, or simply as table decor.
- Plastic Toy Tools: Hammers, wrenches, screwdrivers, and saws—child-friendly plastic versions are perfect for decorating and for interactive play. Scatter them on tables, hang them on walls, or include them in play zones.
- Yellow Hard Hats: Essential for safety and role-playing, yellow hard hats can serve as party favors, photo booth props, or even decorative elements when hung or stacked.
- Toy Dump Trucks and Excavators: These miniature versions of heavy machinery are central to the theme. Use them to hold snacks, display small party favors, or simply as decorative centerpieces on tables.
- Yellow and Black Striped Tape: Often seen as caution tape on real construction sites, this tape can be used creatively to line tables, frame doorways, or create “hazard” warnings around play areas, instantly establishing the theme.
- Road Signs: Mini stop signs, yield signs, and “DANGER” or “WORK IN PROGRESS” signs (DIY or printed) are excellent for directing guests, labeling food, or adding authenticity to your photo booth background.
- Building Blocks: Fundamental to the idea of construction, various types of building blocks (wooden, foam, LEGO) are perfect for decoration and essential for interactive play zones, encouraging imaginative building.
Creative Material Inspiration for Decorations
Look around your home or visit a craft store for these versatile materials:
- Cardboard Boxes: The ultimate DIY material! Large boxes can be painted yellow and black to resemble bulldozers or dump trucks. Smaller boxes can be transformed into building blocks, barriers, or even miniature buildings for a construction site diorama.
- Paper and Cardstock: Ideal for crafting signs, banners, tool cutouts, and labels. Yellow, black, and orange cardstock can be easily cut, folded, and glued to create a wide array of theme-specific decor.
- Balloons: Black, yellow, and orange balloons, inflated and arranged in clusters or garlands, instantly add a festive and colorful touch. Grey or silver balloons can also represent metal elements.
- Wood: Simple wooden planks or small wooden blocks can be used to create sturdy building stations, rustic signposts, or even small, unfinished “lumber” piles for decoration, adding a natural, tactile element to the setup.
- Foam Boards: Lightweight yet rigid, foam boards are excellent for creating larger, freestanding signs, backdrops for photo areas, or detailed cutouts of construction vehicles that can be easily displayed.
Key Areas to Focus Your Decoration Efforts
Strategic placement of your decor will maximize impact and immerse your guests:
- The Front Door and Entrance: This is your guests’ first impression. Adorn it with “Construction Zone Ahead” signs, miniature safety cones, and yellow and black caution tape to immediately set the theme and build anticipation.
- The Food Table: Make this area both functional and thematic. Use tool-shaped snack displays, serve treats in toy dump trucks, and label food items with road sign graphics. A yellow tablecloth can act as your base, resembling a work site.
- Play Zones and Activity Areas: Clearly define building zones with blocks, digging areas with sand, and craft stations with themed supplies. Use cones or caution tape to delineate these interactive spaces, making them inviting and easy to navigate for the children.
- The Photo Spot: Create an eye-catching backdrop where guests can take memorable pictures. A wall adorned with paper tools, construction signs, painted cardboard “bricks,” and perhaps even a giant cut-out of a construction vehicle makes for a perfect themed photo booth.
DIY Decoration Ideas and Step-by-Step Tutorials for Your Construction Party
Transforming your party space into a bustling construction site doesn’t require a professional decorator. With a few basic supplies and these easy-to-follow DIY tutorials, you can create impressive, personalized decorations that will wow your little builders and their friends. Let’s get started on some hands-on projects!
1. DIY Construction Theme Birthday Banner Guide
A personalized birthday banner sets the tone for the entire party, making the guest of honor feel extra special. This guide will help you craft a sturdy, eye-catching banner with an authentic construction look.
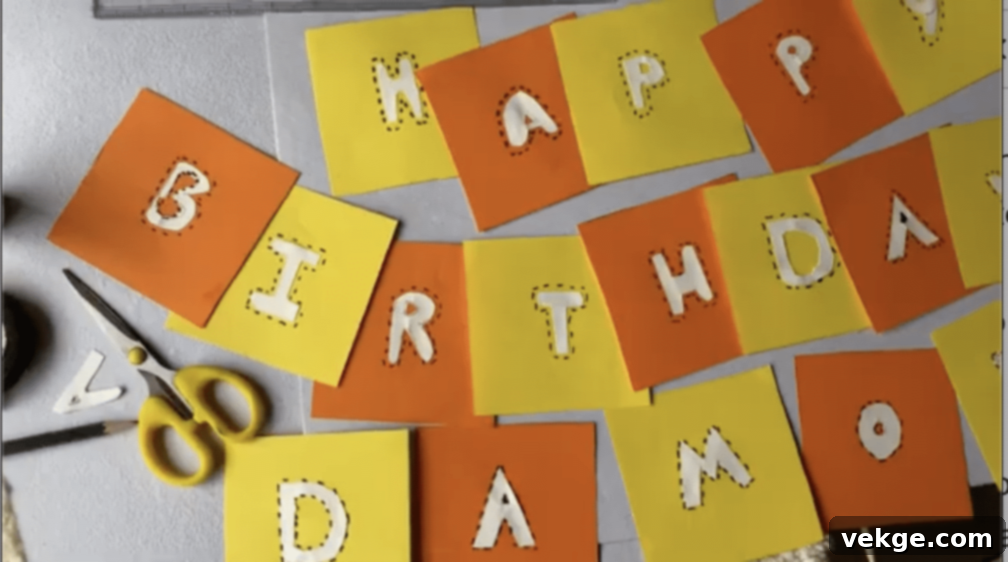
What You’ll Need:
- Multiple sheets of yellow and black cardstock paper (ensure you have enough for all letters and background triangles)
- A good pair of sharp scissors or a precise paper cutter for clean edges
- Strong craft glue or reliable double-sided tape for secure adhesion
- Sturdy string, twine, or ribbon for hanging (consider yellow or black for theme consistency)
- A standard hole punch for creating uniform holes
- A thick black marker for drawing or outlining (if not using printed templates)
- A straight ruler for accurate measurements and straight cuts
- (Optional) Letter stencils or printable letter templates for consistent lettering
Step-by-Step Guide:
1. Prepare Your Base Pieces: Crafting the Yellow Triangles
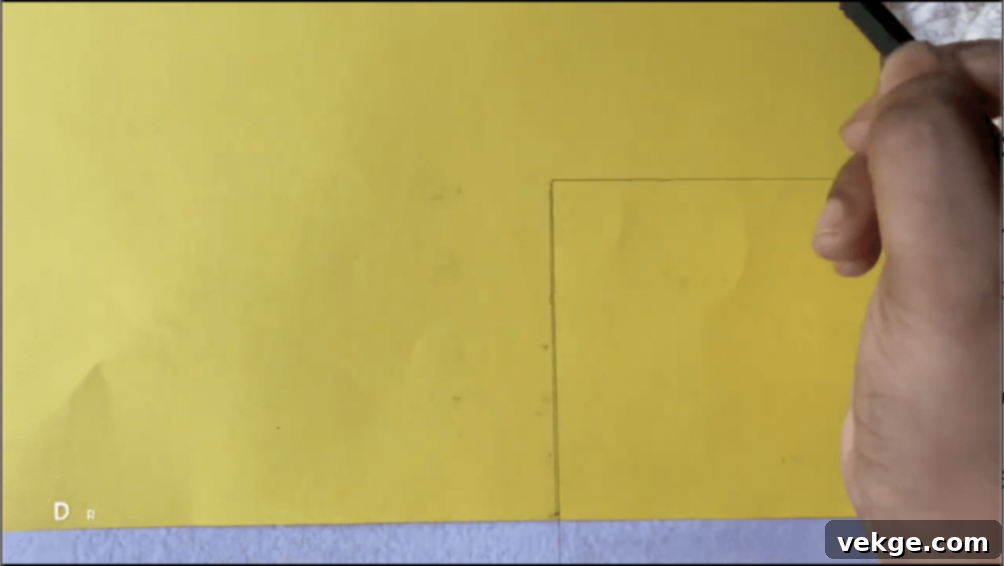
- Begin by meticulously measuring and cutting equilateral triangles from your yellow cardstock paper. These will serve as the bright, visible background for your letters.
- For optimal readability and visual impact, each triangle should ideally measure 6 inches on all sides. This size ensures your banner is easily legible from a distance.
- Utilize your ruler to draw precise, straight lines on the cardstock before making each cut. This attention to detail will result in a professional-looking finish for every piece.
- Calculate how many triangles you’ll need. You’ll require one triangle for each letter of your birthday message (e.g., “HAPPY BIRTHDAY JOHN” would need 17 triangles), plus any additional pieces for decorative spacing or themed accents like tools.
2. Create Your Letters: Bold Black Text
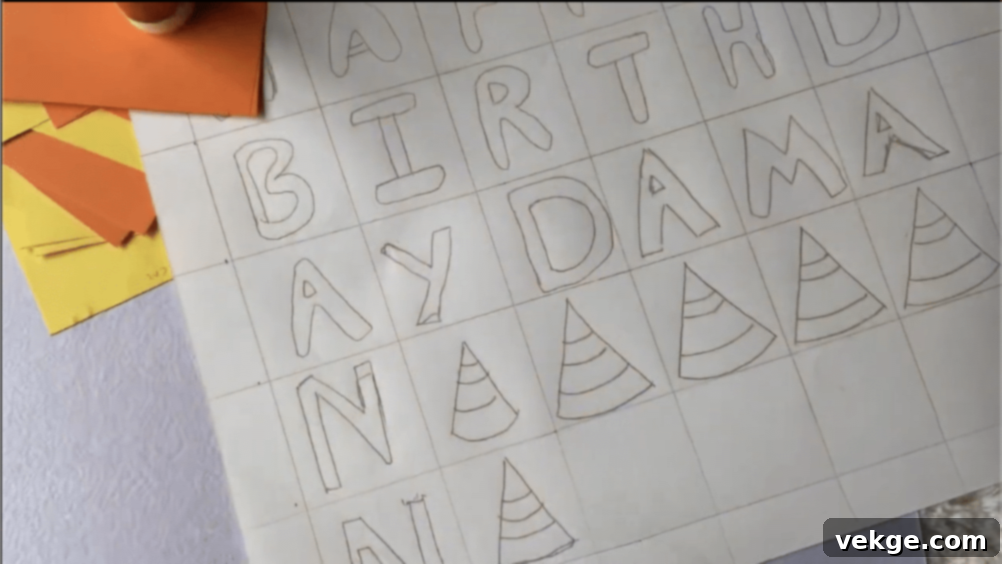
- To achieve crisp, uniform lettering, print out letter templates of your chosen font and size. Carefully trace these templates onto the black cardstock. Alternatively, if you have excellent handwriting, use your thick black marker to freehand draw block letters directly onto the black cardstock.
- Exercise patience and precision when cutting out each letter. Clean, smooth edges are key to a polished appearance. Ensure all internal cuts (like the inside of an “O” or “P”) are also neat.
- Before gluing, lay out all your yellow triangles and cut black letters on a large, flat surface (like the floor). This allows you to visualize the entire message, check the spacing between words and letters, and ensure a balanced composition.
- Verify that each letter is consistently sized. Discrepancies in letter size can make the banner appear less professional. Adjust sizes as needed before final assembly.
3. Attaching Letters and Preparing for Hanging
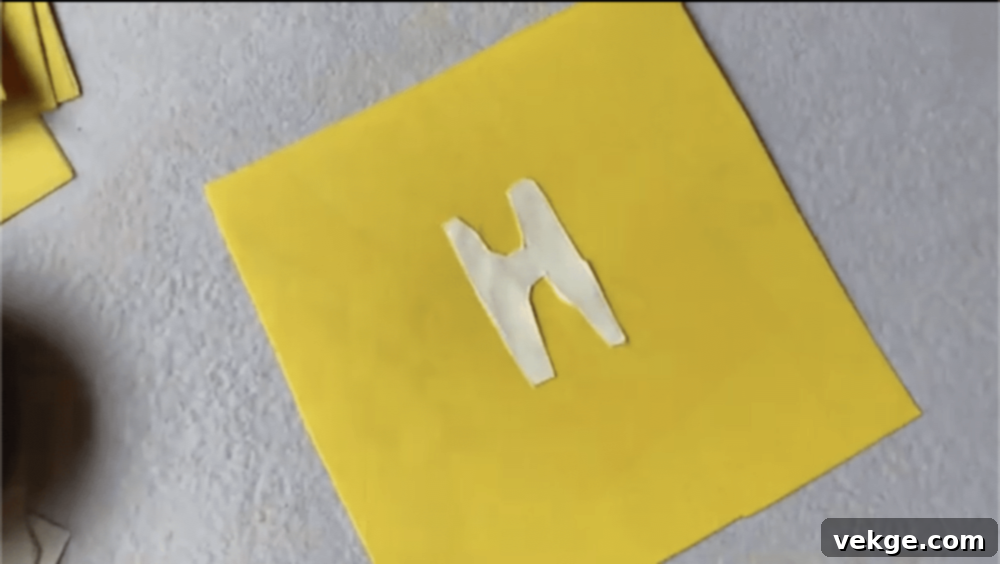
- Carefully apply craft glue or double-sided tape to the back of each black letter. Center each letter precisely onto its corresponding yellow triangle. Press firmly to ensure strong adhesion, especially at the edges.
- When positioning the letters, remember to leave a clear one-inch margin at the very top of each yellow triangle. This space is crucial for punching holes without interfering with the letter itself and ensures the banner hangs correctly.
- Using your standard hole punch, create two holes at the top corners of each triangle. Aim for consistency in placement across all pieces so the banner hangs evenly.
- Once all holes are punched, carefully slide your chosen string, twine, or ribbon through the holes, threading each triangle in the correct order of your message. You can thread from the front to the back or vice versa, depending on how you want the string to appear.
4. Final Touches: Ensuring a Perfect Display
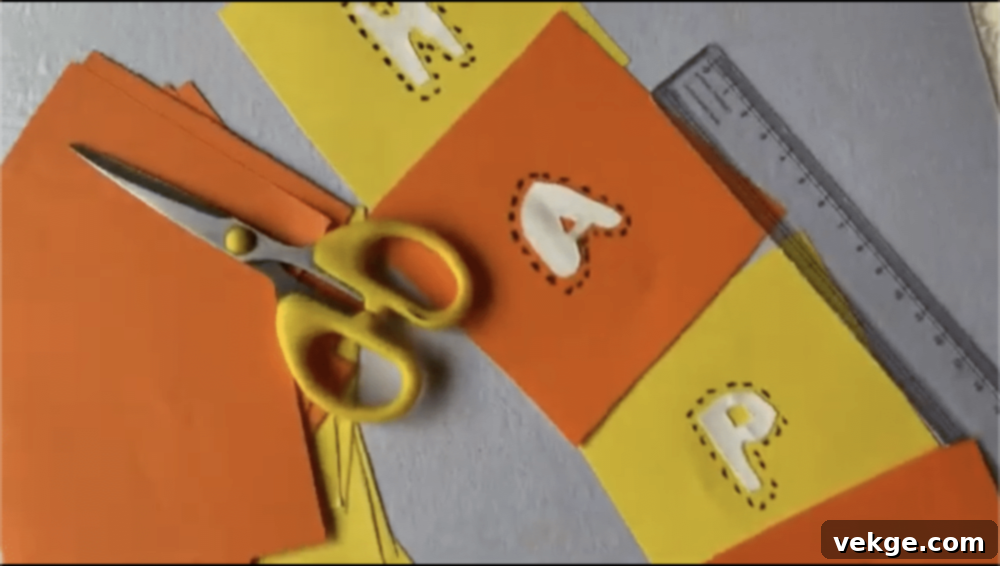
- As you thread the triangles, measure and maintain equal spaces between each piece. This creates a visually appealing rhythm and prevents the banner from looking cramped or too stretched out.
- Consider adding small paper decorations between words, such as miniature hard hats, wrenches, or caution signs cut from black or orange cardstock. These accents enhance the theme and fill any awkward gaps.
- Before hanging, meticulously check that all letters and any decorative elements are firmly glued down. Apply extra adhesive where needed to prevent pieces from detaching during the party.
- Finally, hold the banner up or have someone help you display it temporarily to ensure it hangs perfectly level. Make any necessary adjustments to the string tension or spacing for a flawless presentation.
Tips for Success:
- Precision is Key: Take your time to measure each piece accurately before making any cuts. Even slight variations can affect the overall symmetry and professional look of your banner.
- Consistency Matters: Strive to keep all letters consistent in size, font, and placement on the triangles. This attention to detail makes the banner much easier and more pleasant to read.
- Pre-Assemble and Visualize: Always place all pieces on the floor or a large table to check the full design and spacing before you start gluing or threading. This allows for adjustments without committing to mistakes.
- Generous String Length: Cut extra string length than you think you’ll need. This provides flexibility for easier hanging adjustments and tying off the banner securely in various locations.
- Creative Accents: Don’t hesitate to add small construction-themed embellishments like tiny drawn tool shapes or glitter glue for extra sparkle on letters.
For a more detailed visual guide on the method, you can refer to video tutorials. Click here for an example.
2. DIY Construction Theme Balloon Garland: A Burst of Color and Fun
A balloon garland is a fantastic way to add a celebratory and voluminous touch to your party space. This construction-themed version uses a specific color palette to create an impactful visual backdrop, perfect for a photo zone or main entrance.
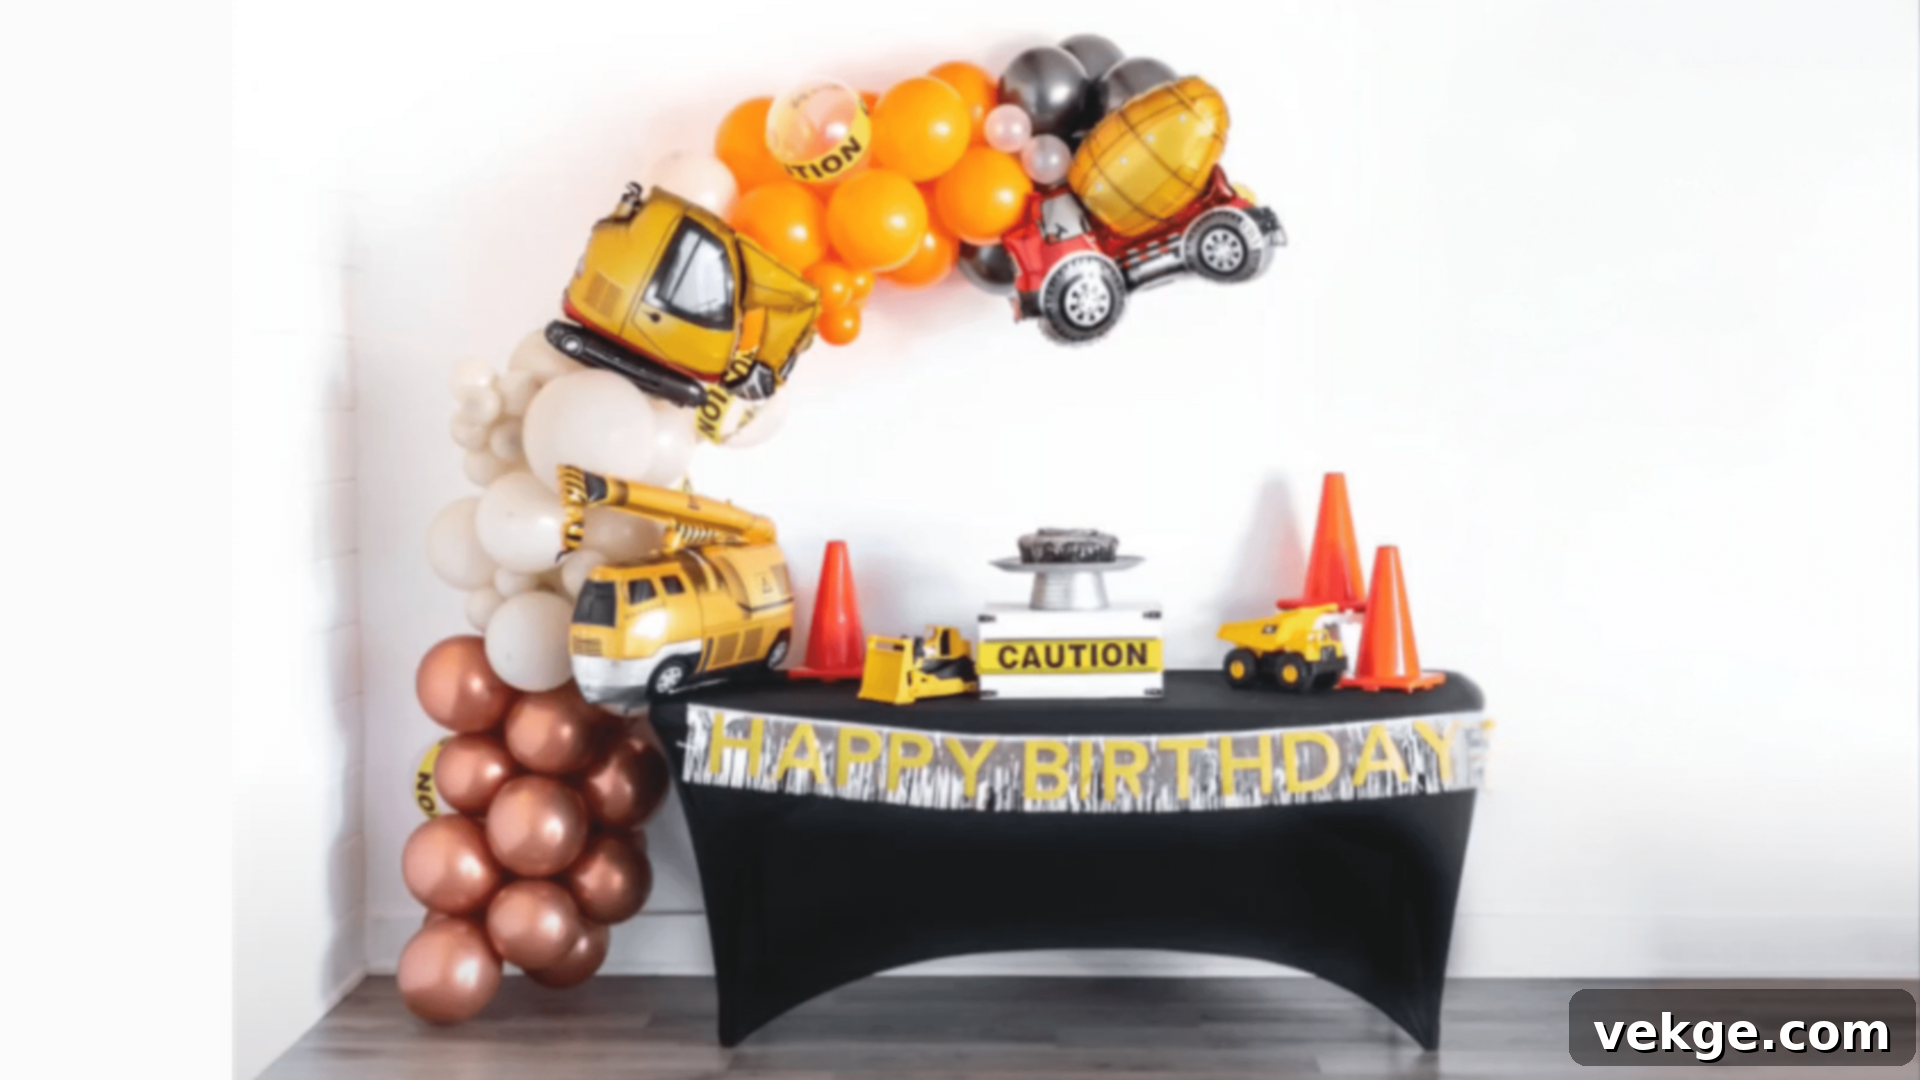
What You’ll Need:
- Yellow 12-inch balloons: These will form the main bulk and dominant color of your garland, representing machinery and safety gear.
- Yellow 5-inch balloons: Essential for filling gaps, creating dimension, and forming smaller clusters, adding texture to the garland.
- Orange balloons: To represent safety cones and caution signs, providing a vibrant contrast.
- Black balloons: For depth and to mimic road asphalt or tire marks, grounding the brighter colors.
- Silver balloons (or grey): To symbolize metal tools or concrete elements, adding a subtle metallic sheen.
- Electric balloon pump: A non-negotiable tool for inflating numerous balloons quickly and saving your lungs!
- 160-size balloon (long, thin balloon): This is crucial for creating your garland’s flexible base or ‘spine’.
- Glue dots: For securely attaching smaller balloons and accent pieces, ensuring they stay in place.
- (Optional) Balloon tying tool: Helps save your fingers when tying many balloons.
- (Optional) Fishing line or floral wire: For additional securing or hanging.
Step-by-Step Guide:
1: Prepare Your Materials and Workspace
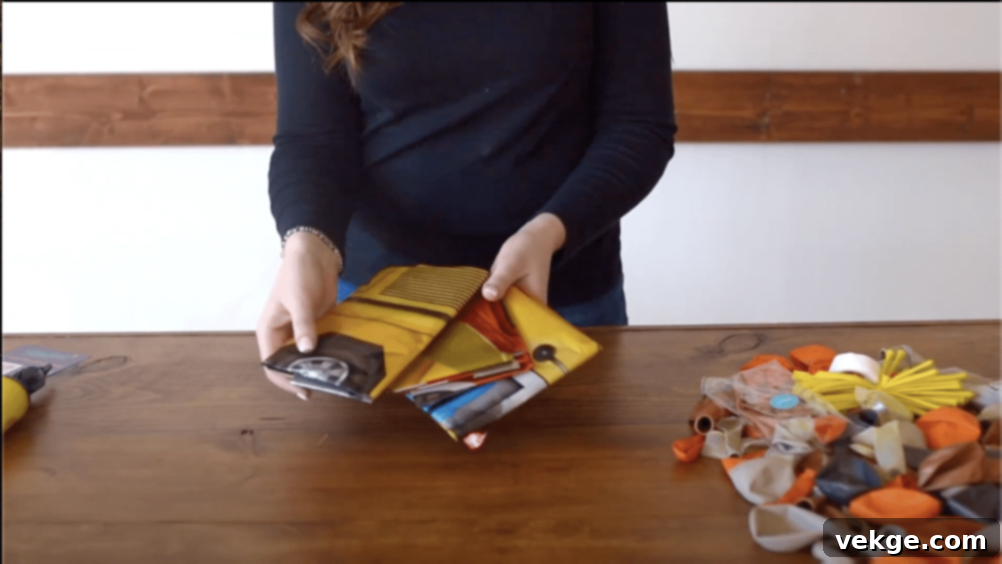
- Carefully remove all balloons from their packages and sort them by color and size. This organization saves time during the inflation and assembly process.
- Position your electric balloon pump in an easily accessible location with a power outlet, ensuring you have enough room to move around and inflate balloons comfortably.
- Clear a large, open space on the floor or a long table where you can spread out your balloons and assemble the garland without feeling cramped. Good lighting is also helpful.
- Double-check that you have all necessary accessories like glue dots and the 160-size balloon ready to hand.
2: Start the Base: The Foundation of Your Garland
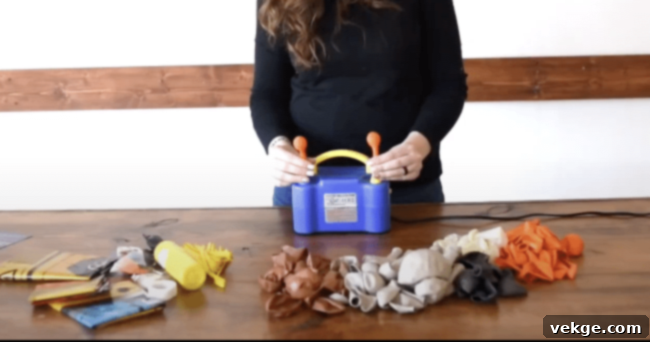
- Take your 160-size balloon and inflate it to a desired length. This long, thin balloon acts as the flexible ‘spine’ or foundation upon which all other balloon clusters will be tied. Do not overinflate; it needs to remain flexible.
- Ensure this base balloon is strong enough to bear the weight of numerous attached balloons. It should be firm but still pliable.
- Identify where you plan to hang the garland and find good anchor points to secure both ends of the 160-size balloon once you start attaching the clusters. This preliminary step helps determine the final shape and length.
- Tie off both ends of the 160-size balloon securely once inflated to prevent air loss.
3: Create Basic Clusters: Building Blocks of the Garland
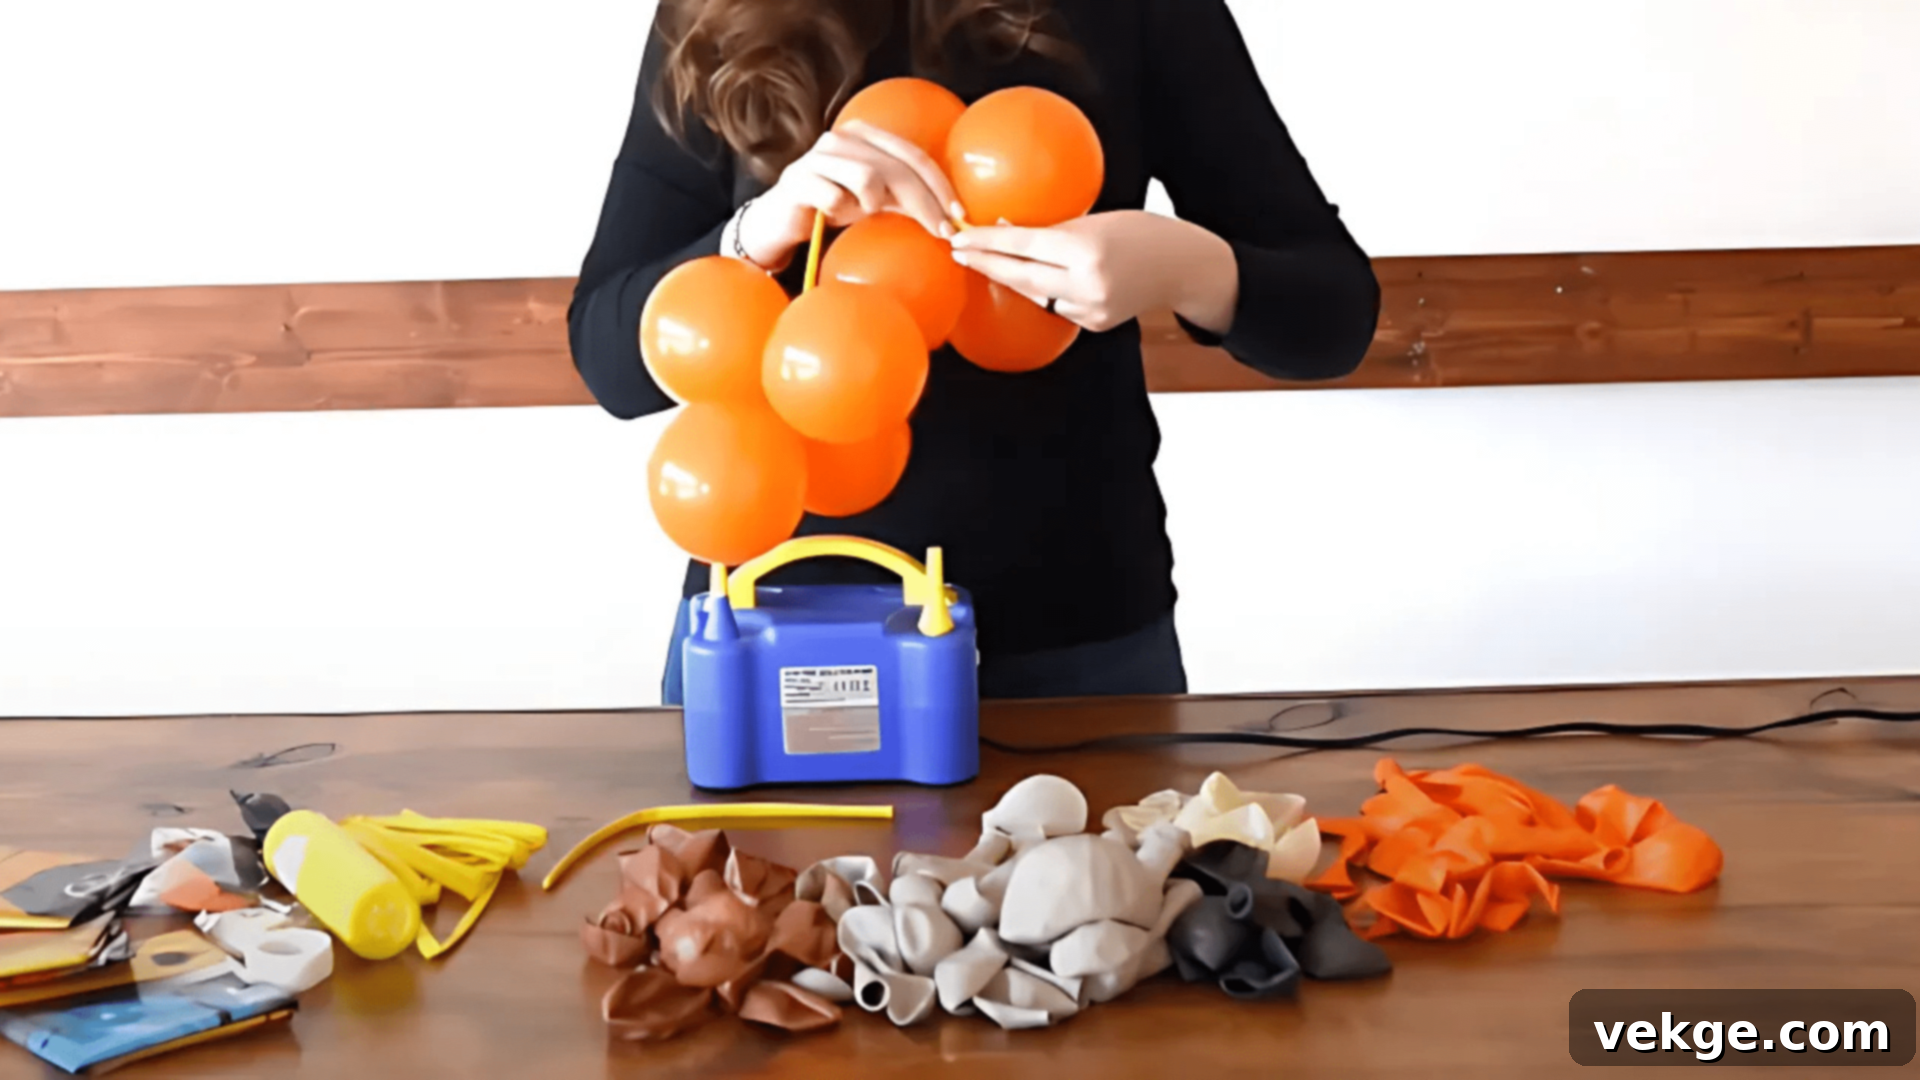
- Begin by inflating several of your yellow 12-inch balloons using the electric pump. Inflate them to varying sizes to create a more organic, dynamic look.
- To form a cluster, take two inflated balloons and tie their necks together. Then, twist two such pairs together to create a ‘quad’ (a cluster of four balloons). This method provides a stable base for attaching to the garland.
- Make numerous quads in yellow. These will be the primary building blocks of your garland. The more you make in advance, the smoother the assembly will be.
- Use your smaller 5-inch yellow balloons to create smaller quads or duos (pairs). These smaller groups will be used to fill in gaps and connect larger balloon groups, adding fullness and detail.
4: Add Color Layers: Incorporating Theme Colors
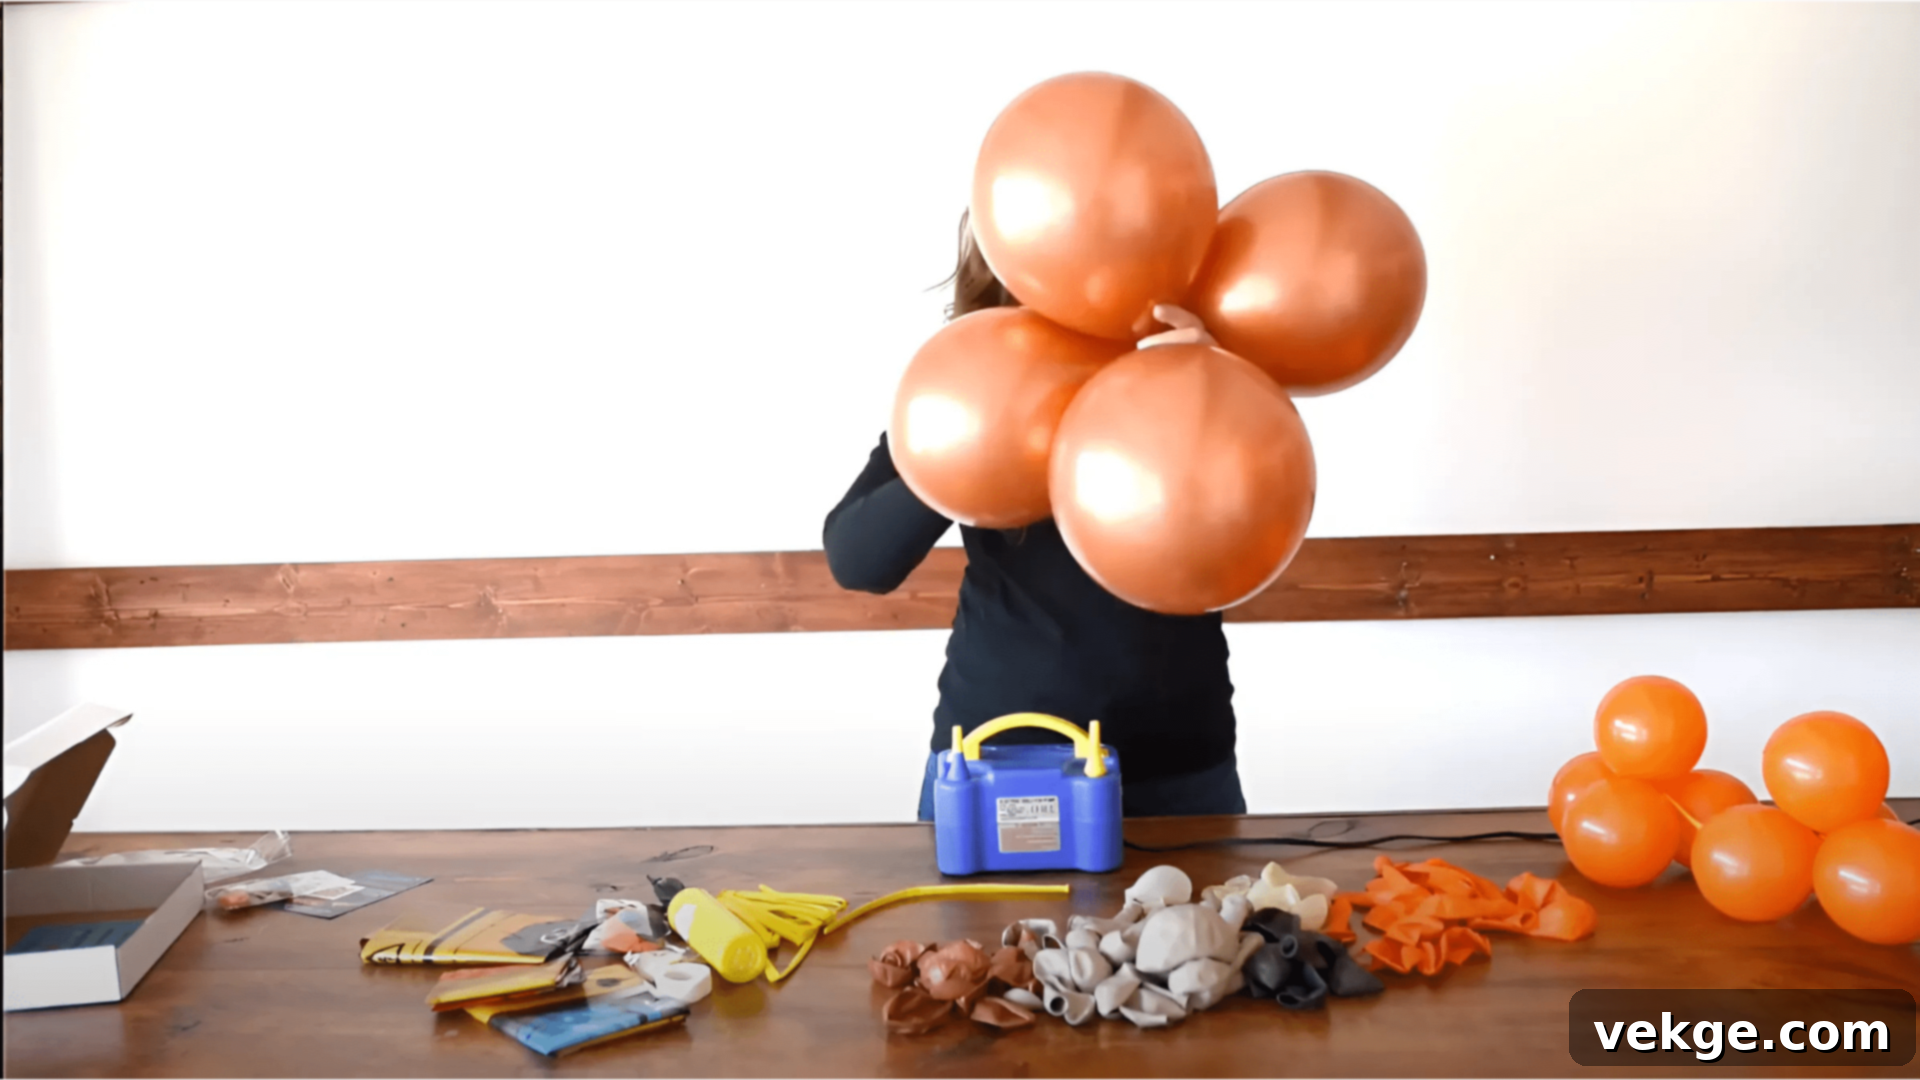
- Once you have a good foundation of yellow clusters, begin to introduce your orange balloons. Place orange clusters strategically next to the yellow ones to create a vibrant contrast and mimic safety elements.
- Integrate black balloons into your design. These will add depth, definition, and a more realistic construction site feel. They can be interspersed or used to create darker sections of the garland.
- Remember to keep the majority of your clusters predominantly yellow. This maintains the core construction theme, reflecting the dominant color of heavy machinery.
- Continuously step back and observe your garland as you add colors. Ensure that your orange and black accents are spread evenly across the entire length, creating a balanced and visually appealing design.
5: Build Your Pattern: Assembling the Garland
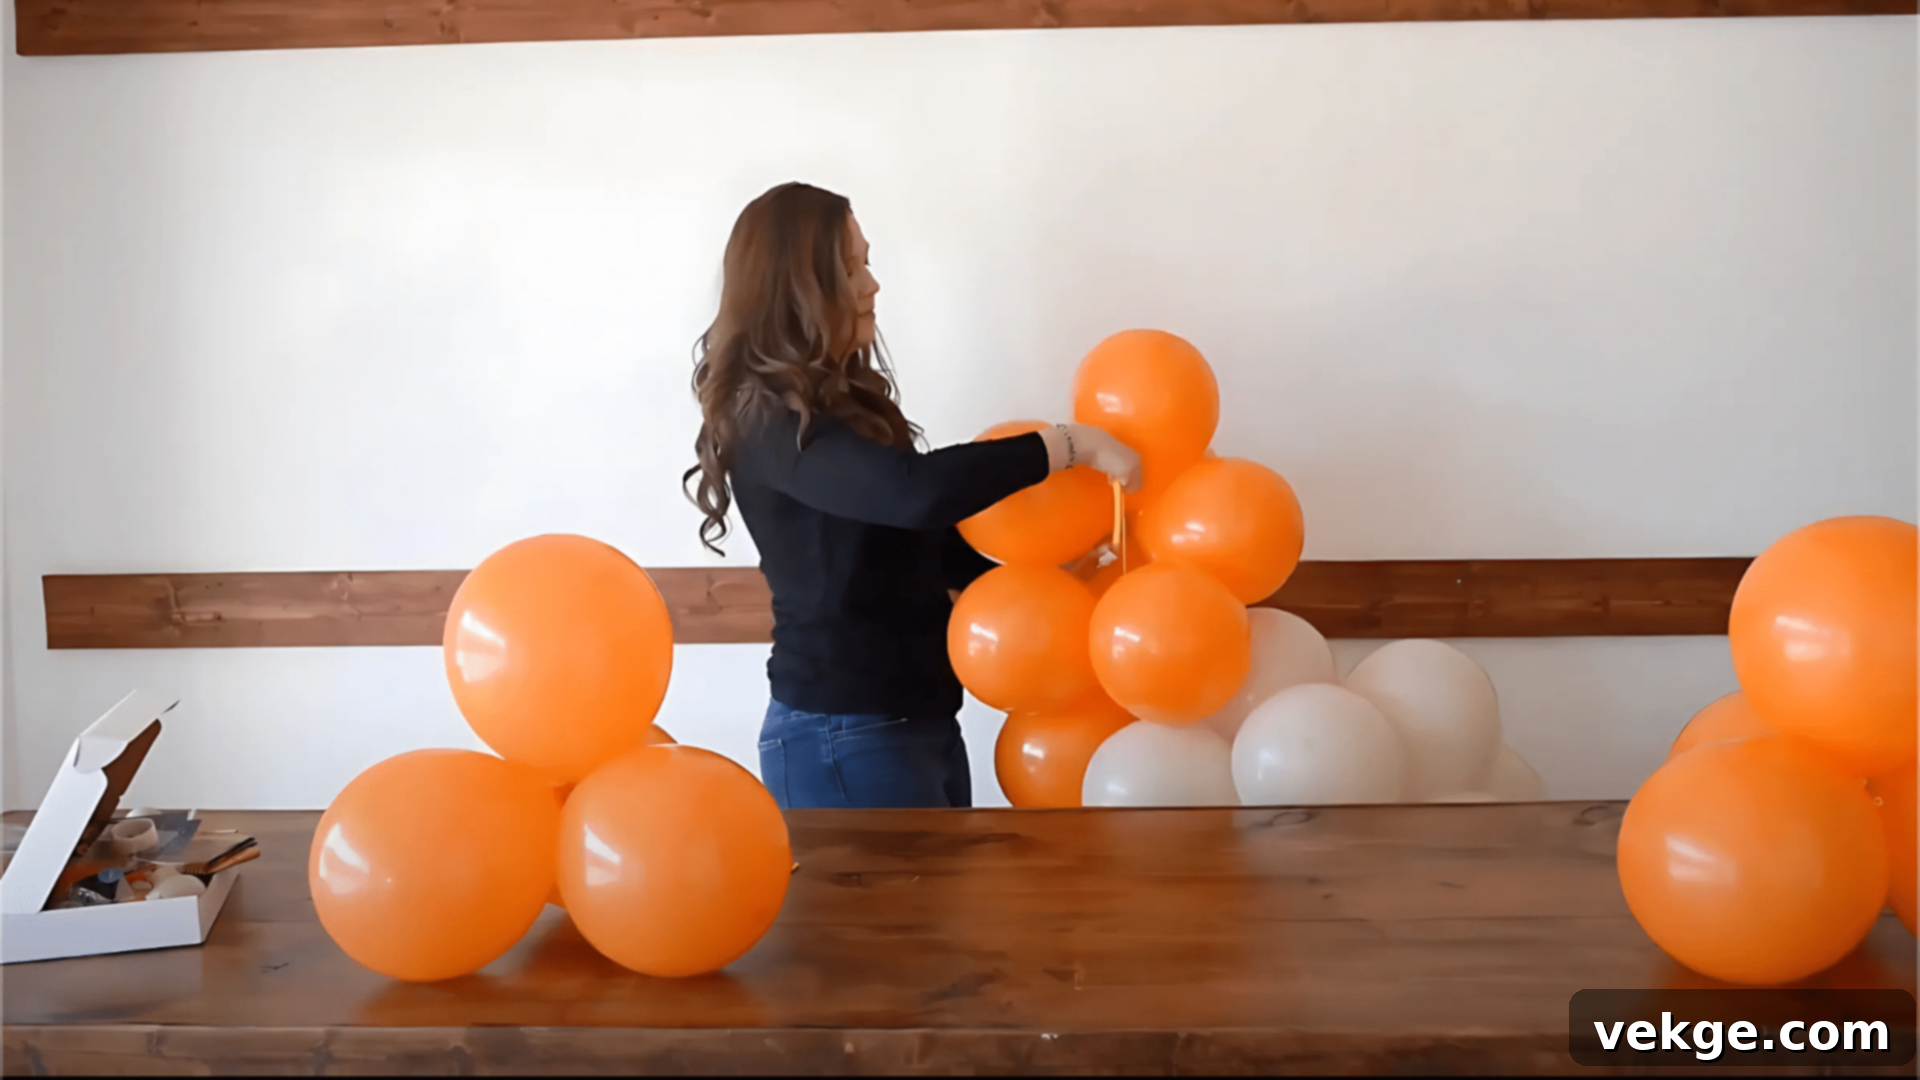
- Start attaching your balloon clusters to the 160-size base balloon. A common technique is to find the center point of your base and work outwards in both directions, or simply start from one end.
- To attach a cluster, twist its neck around the 160-size balloon. Push the cluster firmly against the previous ones to minimize gaps. Continue twisting and pushing until it feels secure.
- Aim to create a balanced look by building matching sections on both sides of the center point (if starting from the middle) or ensuring a consistent density throughout the garland.
- As you progress, look for any noticeable spaces or ‘holes’ that might need filling. This is where your smaller 5-inch balloon clusters or individual balloons come in handy. Use them to add volume and complete the organic shape of the garland.
6: Final Touches: Polishing Your Masterpiece
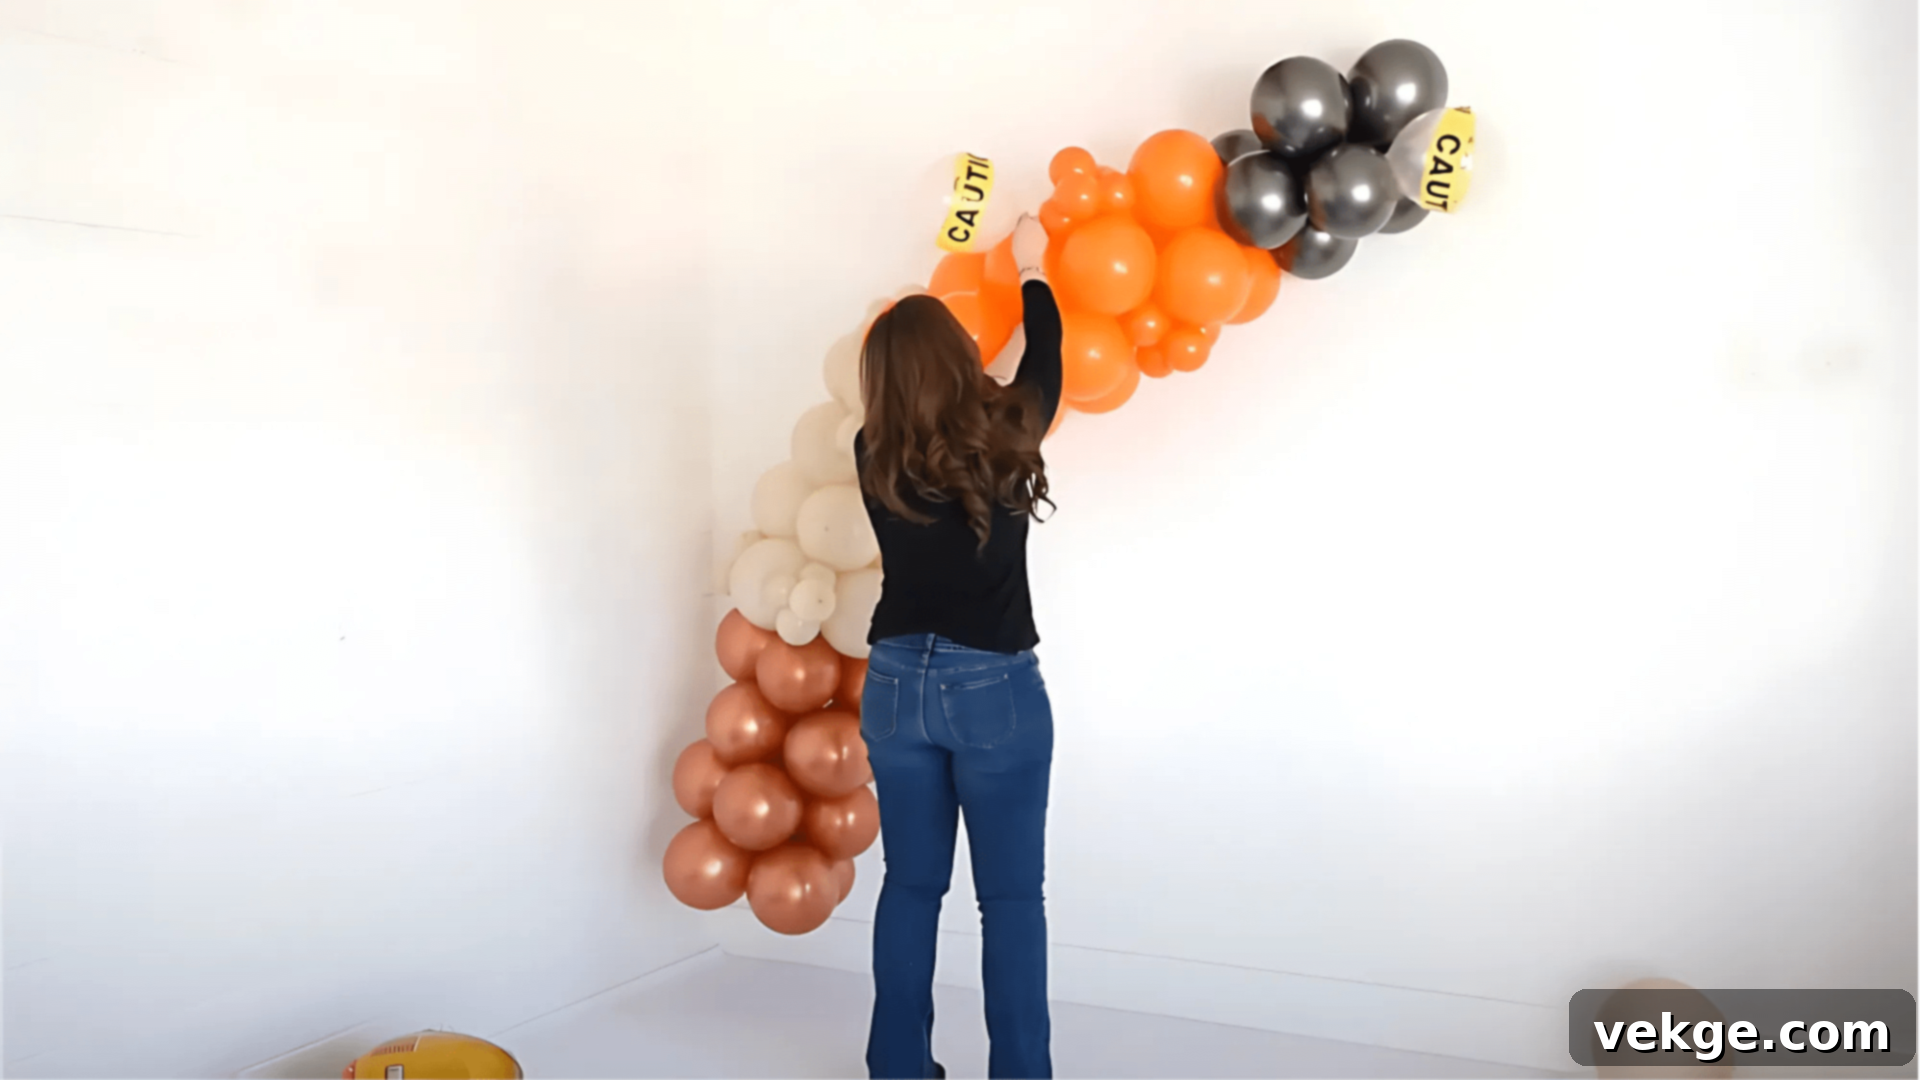
- Take your silver (or grey) balloons. These are your metallic accents, representing tools or metal structures. To attach them securely, place four glue dots around the base of each silver balloon.
- Carefully press these silver balloons into various spots throughout your garland. They should look like they are emerging from the larger clusters, adding a subtle shimmer and textural variation.
- Once all balloons are attached, give the entire garland a final, thorough check. Gently tug at random balloons to ensure they are all properly secured to the base and that no clusters are loose.
- Make any last-minute adjustments to spacing or balloon positioning to achieve the desired fullness and shape. Your construction balloon garland is now ready to impress!
Key Tips to Remember for an Amazing Garland:
- Step Back and Observe: Frequently take several steps back from your garland to assess its overall appearance. This helps you identify uneven color distribution, gaps, or areas that need more volume.
- Fill the Gaps: Keep an eye out for any noticeable empty spaces or ‘holes’ in your design. These are perfect opportunities to tuck in smaller balloons, making your garland look fuller and more professional.
- Secure Attachments: Always ensure each balloon cluster is firmly twisted and connected to your 160-size base balloon. Loose clusters can detach, compromising the garland’s integrity.
- Vary Balloon Sizes: Inflate balloons to slightly different sizes within each color group. This variation creates a more organic, professional-looking garland rather than a uniform, rigid one.
- Prepare in Advance: Inflate and tie as many clusters as you can before starting the assembly process on the base balloon. This streamlines the building phase.
For a visual walkthrough of a similar balloon garland technique, click here.
Other Creative DIY Decoration Ideas for Your Construction Zone Party
Beyond banners and garlands, a multitude of easy DIY projects can elevate your construction party theme. These ideas focus on transforming everyday items into thematic decor, adding unique touches to every corner of your event.
1. Traffic Cone Balloons: An Eye-Catching Entrance
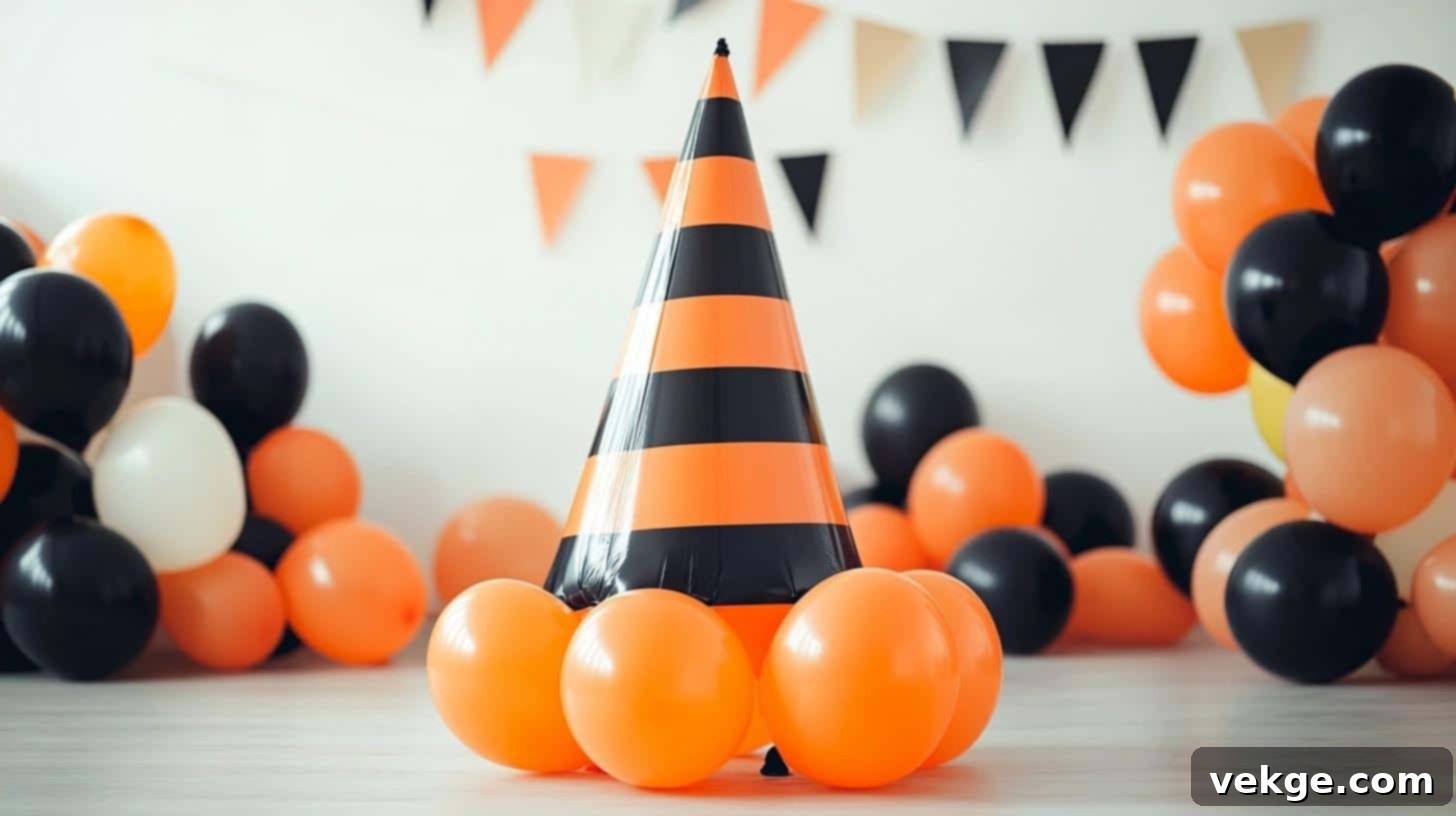
Create striking, oversized traffic cones using orange balloons. Start by inflating three large orange balloons for the sturdy base, placing them side-by-side. On top of these, secure two slightly smaller orange balloons, and finally, crown the structure with one small orange balloon to form the peak. For an authentic touch, add a paper cone cap painted bright orange with a distinctive white reflective stripe at the top, just like a real construction cone. These towering balloons make an impressive statement at entry points or as corner accents.
Setup Tips:
- Anchor with Weights: Use balloon weights at the base of each cone structure to prevent them from floating away or tipping over, especially if placed outdoors or in high-traffic areas.
- Secure Layers: Utilize double-sided tape or balloon glue dots discreetly between each balloon layer to ensure the cone shape holds firmly and doesn’t shift.
- Strategic Placement: Position these large balloon cones at the party entrance, along pathways, or in the corners of your main party area to define the space and reinforce the theme.
- Vary Sizes: Make a few cones in different heights and widths to create a dynamic landscape, mimicking a real construction site with various warning signals.
- Protect from Hazards: Keep balloon cones away from direct sunlight, sharp objects, and strong winds to maintain their integrity throughout the party.
2. Construction Site Cake Design: The Edible Work Zone
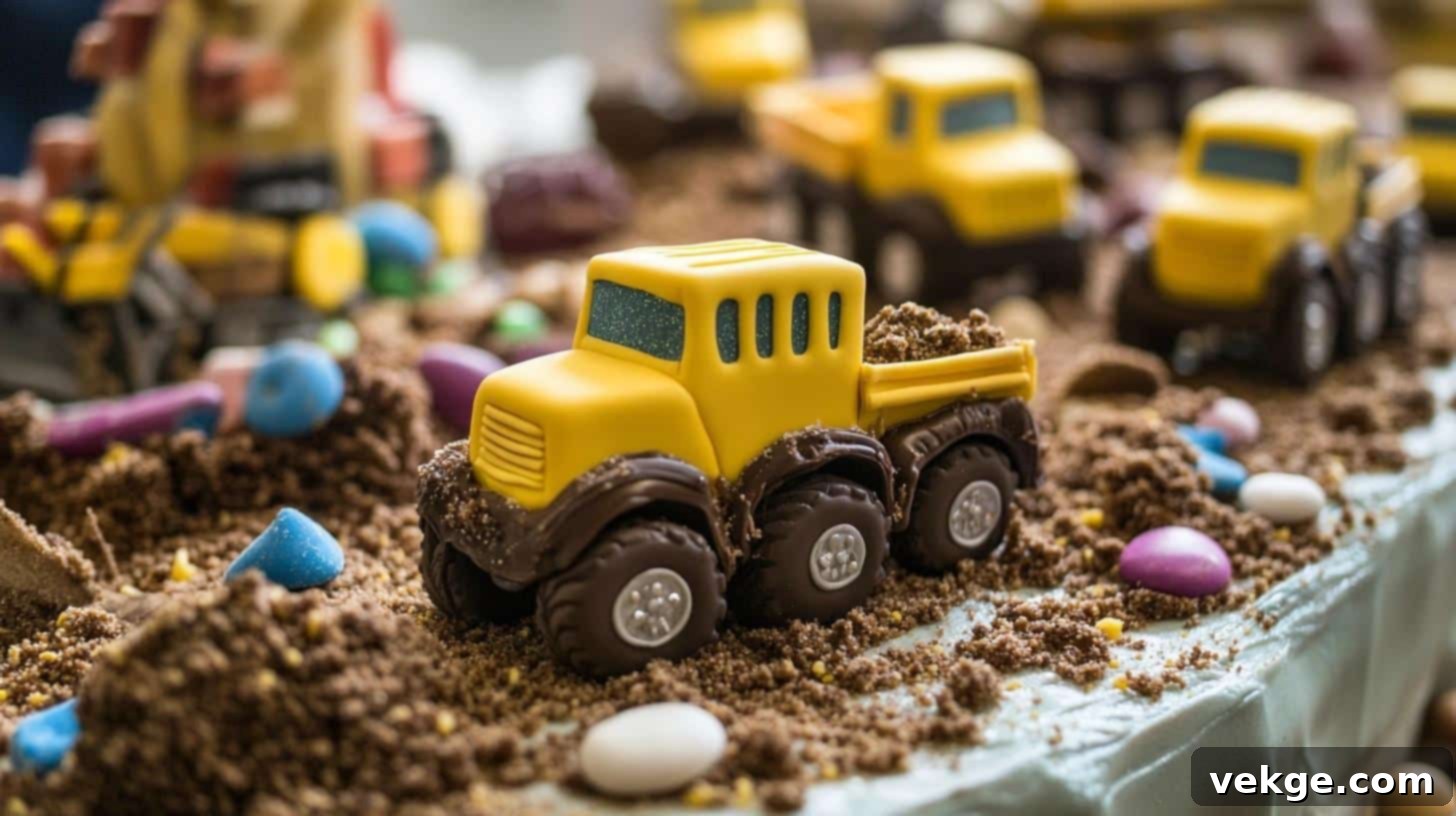
Turn your birthday cake into a miniature construction site that’s as delicious as it is thematic. Position a small, clean toy dump truck or excavator on top of the cake, as if it’s mid-task. Surround the truck with generous amounts of crushed chocolate cookies (like Oreos or digestives) to perfectly mimic fresh soil or dirt mounds. Around the edges of the cake, scatter small candy pieces, such as chocolate rocks or jelly beans, to represent loose debris or gravel. For an extra touch of realism, place some of the crushed cookie “soil” inside the truck’s bed, suggesting it’s actively carrying a load. This edible landscape will be a showstopper!
Setup Tips:
- Hygiene First: Thoroughly clean any toy trucks or vehicles with food-safe wipes or soap and water before placing them directly on the cake.
- Textural Crumbs: Keep the crushed cookies somewhat chunky rather than finely powdered to give the “soil” a more realistic and varied texture, enhancing the visual appeal.
- Balanced Placement: If using multiple toy vehicles or elements, space them evenly on top of the cake to create a balanced and aesthetically pleasing construction scene.
- Freshness Counts: Use freshly crushed cookies for the best look and texture. Stale crumbs can appear dull and less appealing.
- Backup Decorations: Have extra candy rocks, crushed cookies, and small toy elements ready in case you need to touch up the design or replenish areas during the party.
3. Truck Candy Stations: Sweet Hauls for Little Hands
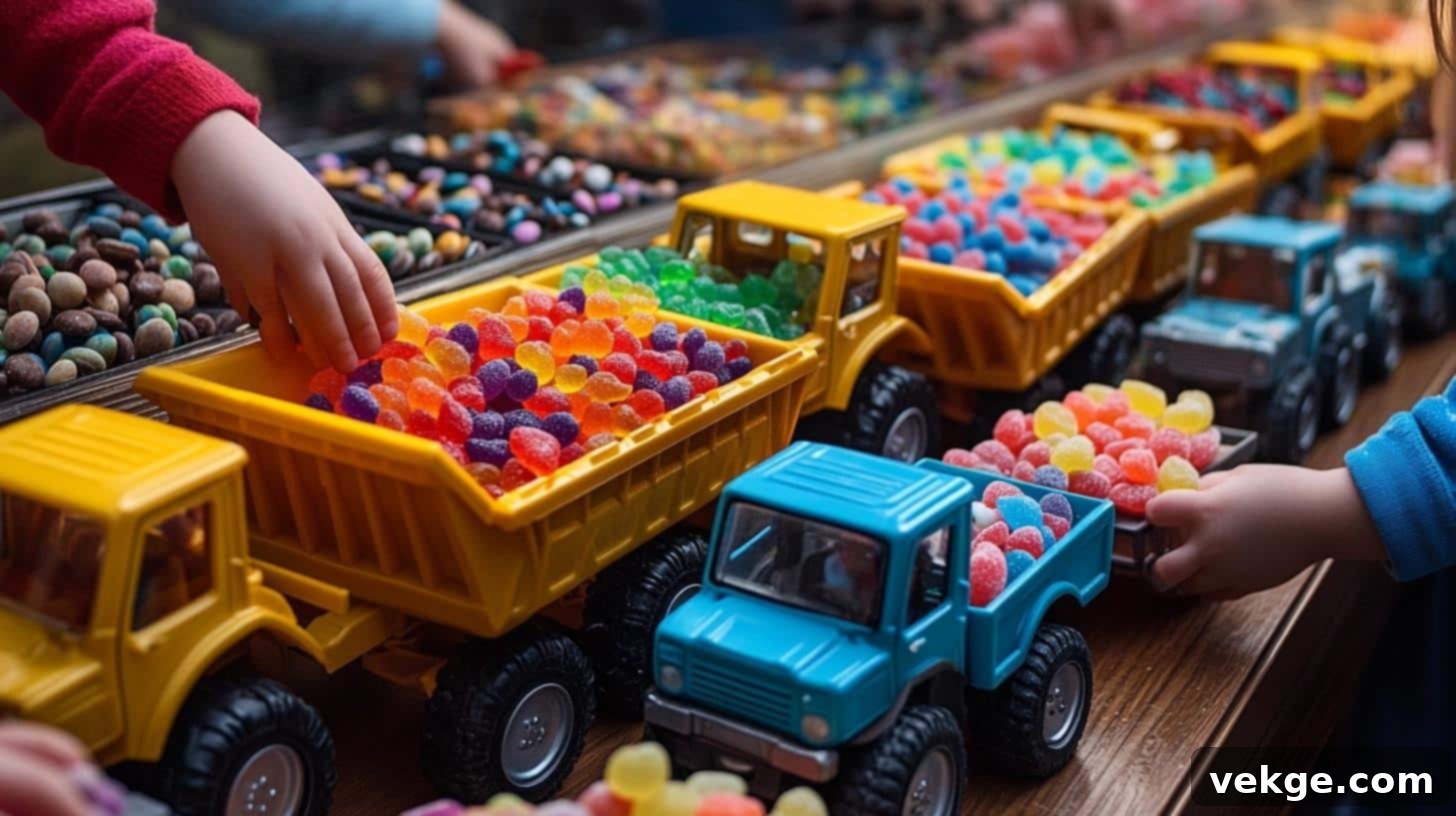
Delight your young guests with creative candy stations utilizing small yellow toy dump trucks. Fill the beds of several trucks with different types of candies: round candies like gumballs or M&Ms in one, stick candies such as Pixy Stix or licorice in another, and individually wrapped treats (like mini chocolate bars or fruit chews) in a third. Arrange these candy-filled trucks in a neat line on a dedicated table, ensuring they are at a height where children can easily reach and select their favorite “haul.” This interactive display turns snack time into a fun exploration.
Setup Tips:
- Prevent Tipping: Secure the toy trucks to the table surface with a small amount of double-sided tape underneath their wheels to prevent them from accidental tipping as children reach for candy.
- Clearly Label: Create small, themed labels (e.g., “Gravel Bites,” “Lumber Sticks,” “Demolition Doughnuts”) for each truck’s contents, making it easier for kids to choose and adding to the thematic fun.
- Child-Friendly Height: Position the candy station at a comfortable height for the youngest guests, ensuring everyone can access the treats safely and independently.
- Regular Refills: Keep a hidden stash of backup candy nearby and monitor the stations, refilling them as needed to ensure a continuous supply of treats.
- Safe Candy Choices: Select candies that are age-appropriate and minimize choking hazards, especially for younger party-goers.
4. Hard Hat Name Cards: Personalized Welcome
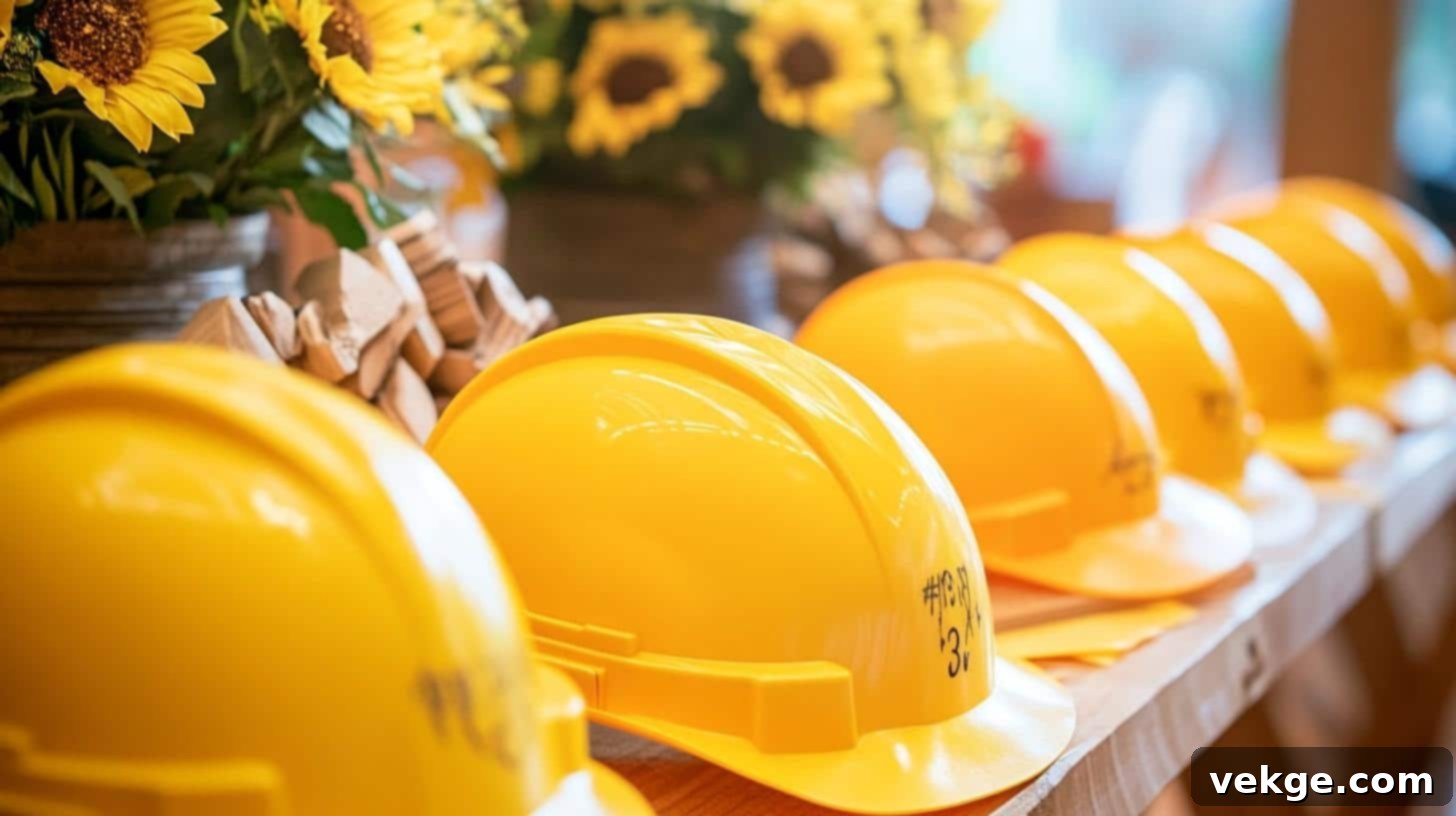
Welcome each guest with a personalized “hard hat” name card. Begin by cutting yellow cardstock into the iconic dome shape of a construction hard hat. Using a thick black marker, write each child’s name in bold, clear letters. For added realism, cut thin white strips of paper and glue them across the top of the hard hat shape, mimicking the safety bands found on real hard hats. These not only serve as delightful place settings but also make charming party favors that children can wear and take home.
Setup Tips:
- Extra for Surprises: Make a few blank extra name cards and keep a marker handy for any last-minute guests or name misspellings.
- Prominent Display: Place one hard hat name card at each child’s place setting at the party table, or create a welcoming display board at the entrance.
- Sturdy Material: Use thick cardstock (65-80 lb) to ensure the paper hard hats are durable enough to stand upright and withstand handling throughout the party.
- Flat Storage: If preparing in advance, store the name cards flat in a box or folder to prevent them from bending or getting damaged before the party.
- Multipurpose: Encourage kids to wear them upon arrival or integrate them into games for an interactive element.
5. Tool Belt Wall Display: A Handy Backdrop
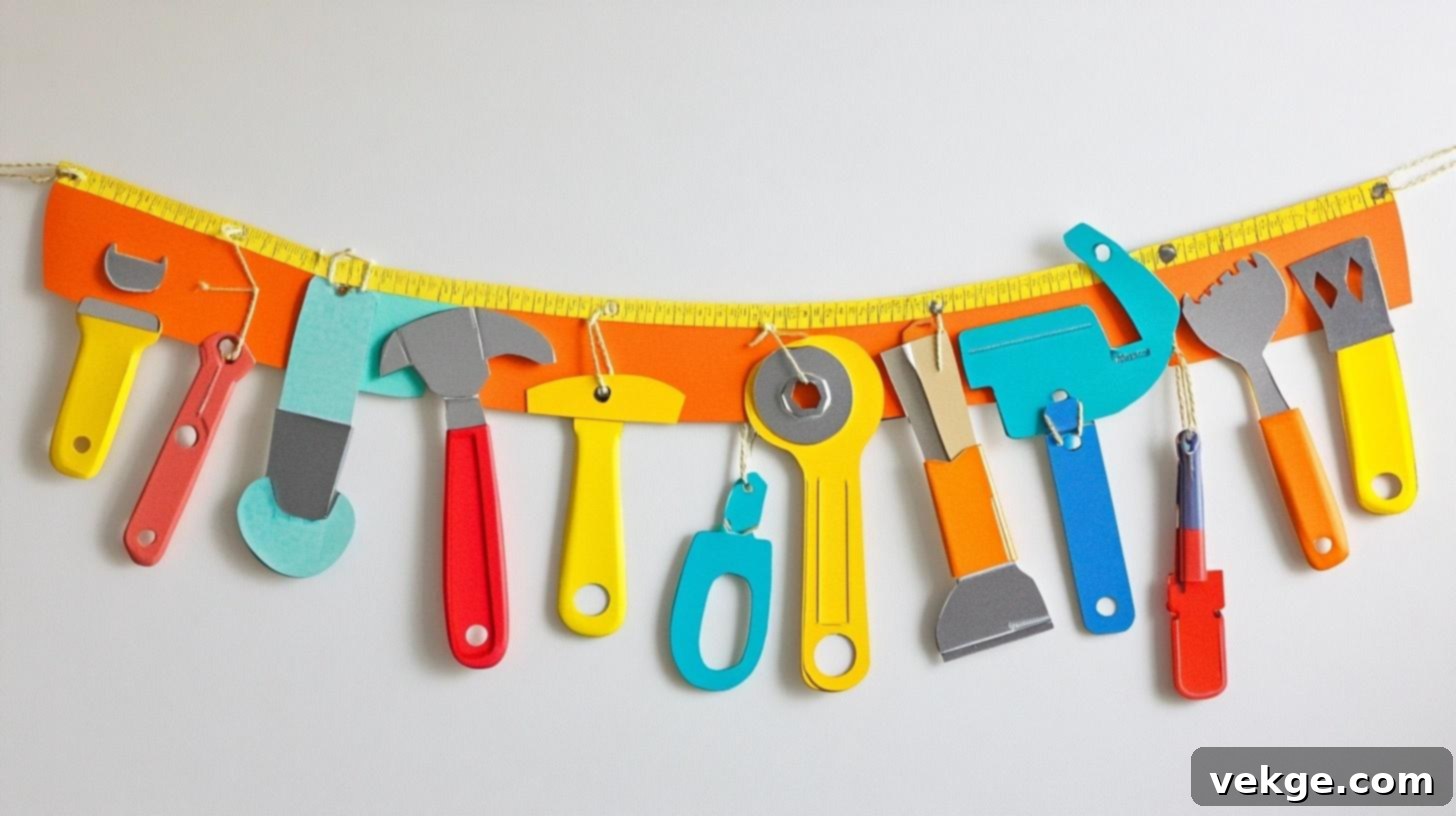
Create an impressive focal point with a DIY tool belt wall display. Cut out realistic shapes of various construction tools from sturdy paper or thin cardboard, such as hammers, screwdrivers, wrenches, saws, and measuring tapes. Use different shades of grey, black, and brown paper to add detail. String these paper tools together using brown paper or twine to mimic a functional tool belt. This engaging display can be hung above the food tables, activity areas, or as a backdrop for a photo booth, immediately reinforcing the construction theme.
Setup Tips:
- Even Spacing: Space the paper tools evenly apart along the string to ensure each tool is clearly visible and the overall display looks balanced.
- Robust String: Use strong string, twine, or even brown craft paper cut into a thick strip for the “belt” part to support the weight of the paper tools without sagging.
- Secure Attachment: Ensure the ends of the tool belt are well-secured to the wall using strong adhesive hooks, painter’s tape (if on painted walls), or small nails, depending on your surface.
- Backup Tools: Keep a few extra cut-out tools ready in case any get damaged or fall off during the party.
- Strategic Placement: While decorative, consider placing it slightly out of direct reach of small children to prevent accidental pulling or damage.
6. Floor Path Markers: Guiding the Way
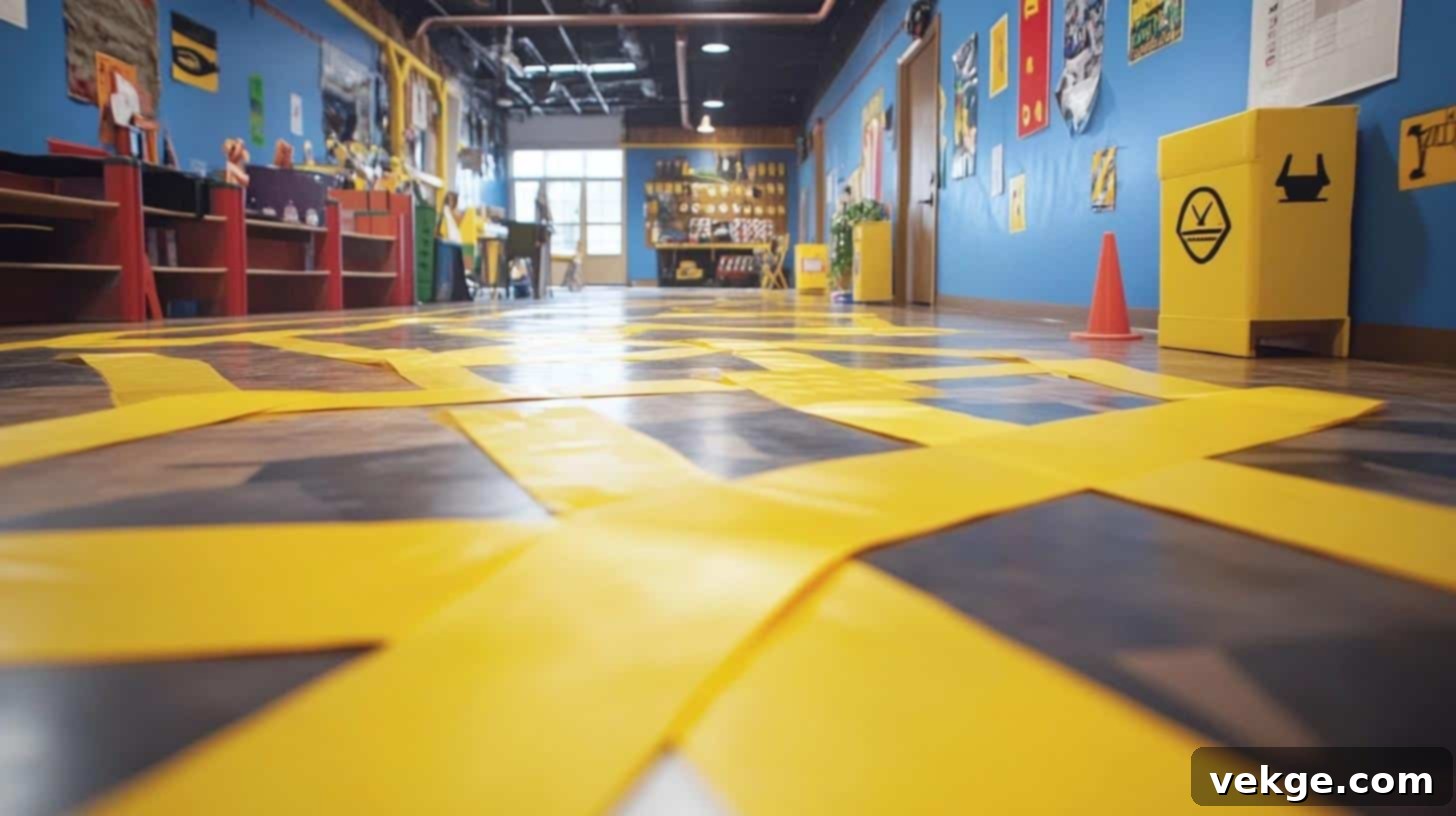
Lead your little guests through the party with thematic “road” path markers on the floor. Cut long strips of yellow paper or yellow construction paper to create roads or pathways. These can guide kids from one party area to another, for instance, from the snack station to the game zone, or to the “Build Zone.” For a realistic touch, add black dashed lines down the middle of the yellow strips using a thick black marker, just like authentic road markings. This not only enhances the theme but also helps organize the flow of traffic at your party.
Setup Tips:
- Secure Edges: Use low-tack painter’s tape or masking tape to firmly secure the edges of the paper strips to the floor. Ensure the tape is strong enough to prevent tripping hazards but won’t damage your flooring.
- Ample Width: Make the paths wide enough for two children to comfortably walk side-by-side, preventing bottlenecks and allowing for easy movement.
- Clear Activity Signage: At the end of each path, place a clear sign indicating the activity (e.g., “Snack Zone,” “Digging Site,” “Build Challenge”) to guide children effectively.
- Quick Replacement: Have extra yellow paper strips and tape on hand in case any sections tear or come loose during enthusiastic play.
- Eliminate Trip Hazards: Before securing, check for any uneven overlaps or curled edges that could cause someone to trip. Ensure all edges are flat against the floor.
7. Photo Wall Blocks: A Brick-by-Brick Backdrop
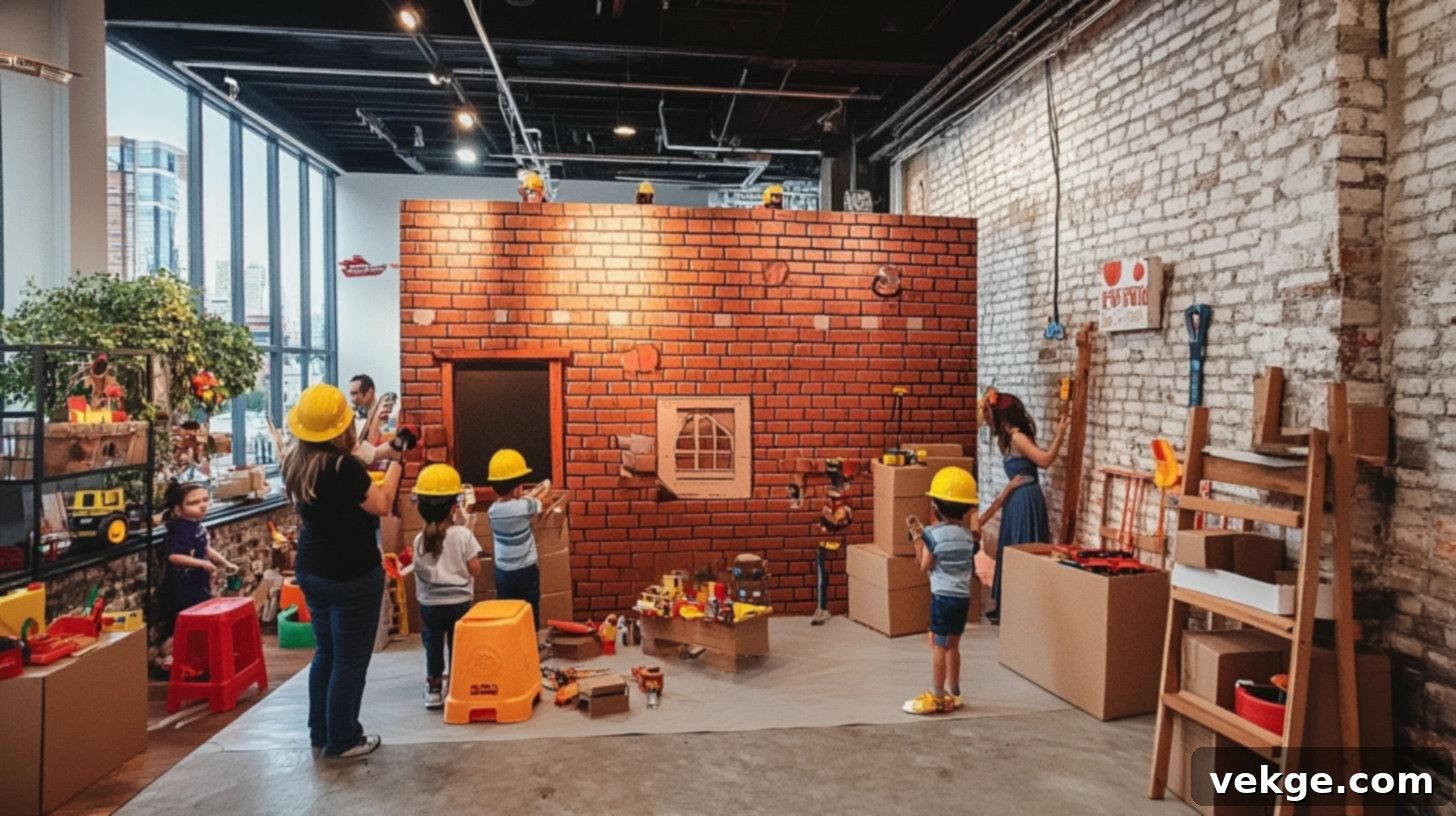
Create a fantastic photo booth backdrop by stacking and arranging painted cardboard boxes to resemble a brick wall. Paint the boxes a uniform red or terracotta color, then use white or light grey paint to add horizontal and vertical lines, mimicking the mortar between bricks. Build the wall tall enough to serve as an impressive background for group photos but ensure it is stable and secure to prevent any accidents during the party. This provides a wonderfully immersive setting for capturing fun memories.
Setup Tips:
- Reinforce Stability: Secure the boxes together with strong packing tape or hot glue on the inside to prevent them from shifting or collapsing. For extra stability, consider adding weights to the bottom layer of boxes.
- Safety First: Before the party begins, rigorously test the stability of the entire photo wall. Gently push and prod it to ensure it can withstand accidental bumps from excited children.
- Clear Photo Zone: Keep the space directly in front of the photo wall clear of clutter, allowing ample room for children and adults to pose freely without obstruction.
- Props Nearby: Have a box of construction-themed props (hard hats, plastic tools, safety vests) readily available next to the photo wall to encourage creative and engaging poses.
- Regular Checks: Periodically check the boxes throughout the party to ensure they remain in place and the structure is still stable, especially after many photos.
8. Table Blueprint Design: An Architectural Feast
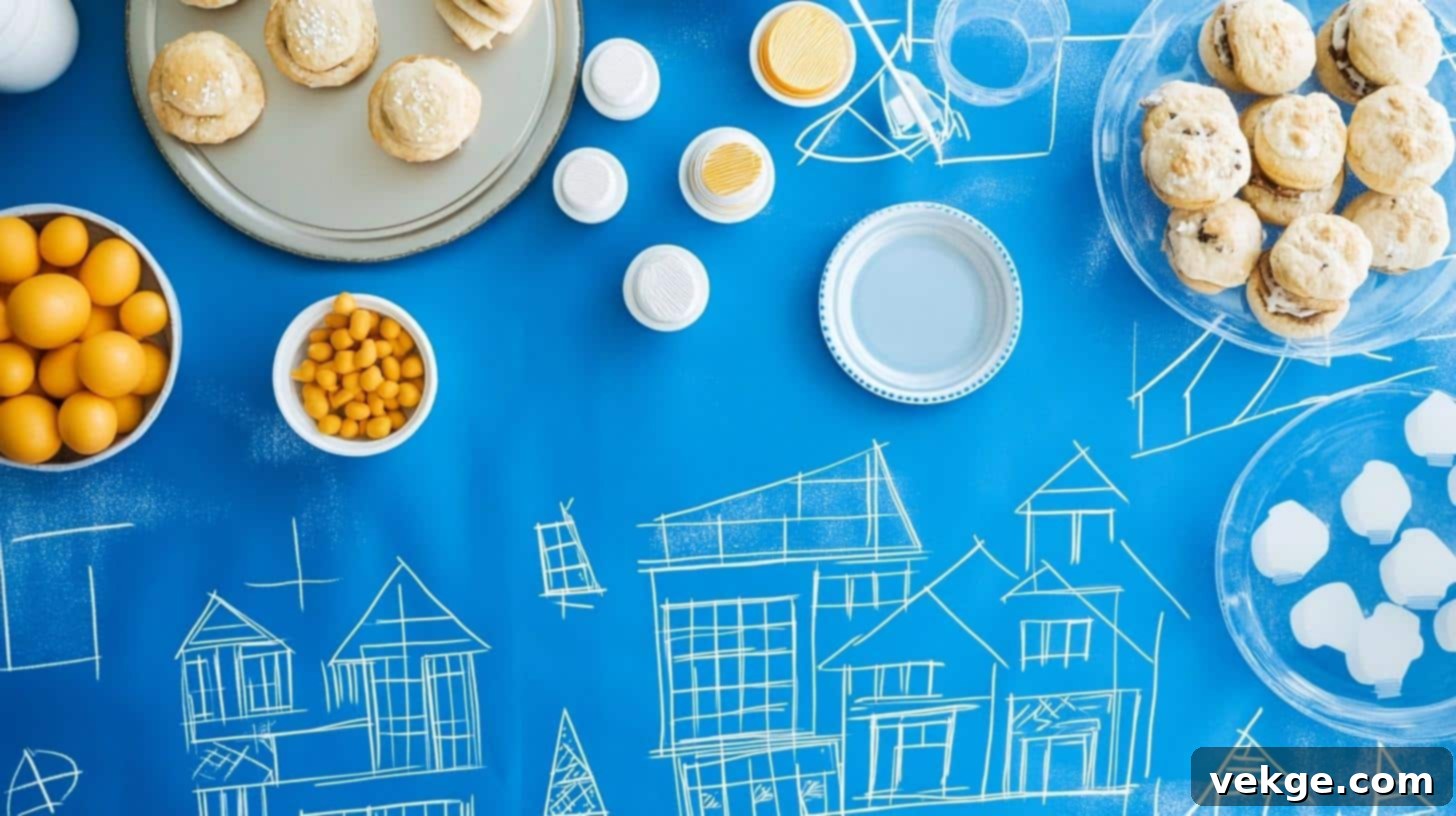
Elevate your party tables by transforming them into giant blueprints. Cover your tables with large sheets of blue craft paper or butcher paper. Using a white marker or paint pen, draw simple house plans, building layouts, or architectural sketches with straight lines and basic measurements. Add circles for windows, squares for doors, and outlines for rooms to create a convincing blueprint effect. To protect this creative tabletop from spills and sticky fingers, cover the entire surface with a layer of clear plastic tablecloth or contact paper. This design not only looks fantastic but also offers a subtle educational element.
Setup Tips:
- Precision Drawing: Use rulers, straight edges, and even a protractor to ensure your blueprint lines are crisp, straight, and accurate, enhancing the authentic look.
- Spill Protection: The clear plastic cover is crucial. Ensure it completely covers the blueprint paper and extends slightly over the table edges to provide maximum protection from food and drinks.
- Secure Underneath: Secure the edges of the blueprint paper and the clear plastic cover tightly underneath the table with tape to prevent them from shifting or being pulled off.
- Extra Covers: Prepare an extra blueprint cover or two in advance in case of major spills or tears that might require a quick replacement during the party.
- Keep Designs Simple: Focus on clear, simple architectural shapes and lines that are easily recognizable, rather than overly complex or cluttered designs, to maintain readability.
9. Snack Display Stands: Pallet-Inspired Presentation
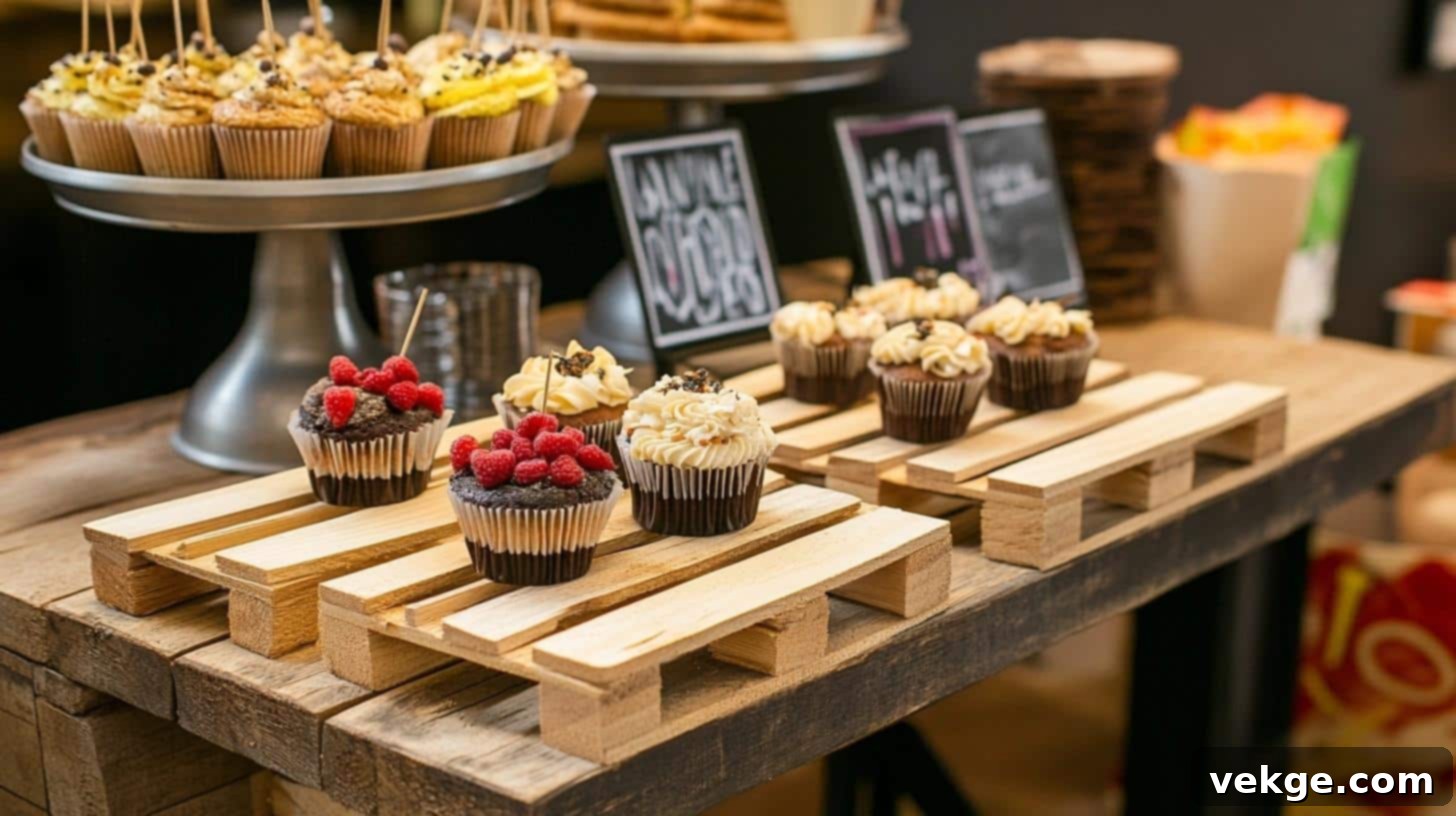
Give your snack presentation an industrial chic look by creating mini display stands resembling wooden pallets. Join craft popsicle sticks together in criss-cross patterns, mimicking the structure of real pallets. Secure them firmly with strong craft glue or a hot glue gun. Paint these mini platforms brown or leave them natural for a rustic wood effect. Place snack bowls, small plates, or cups filled with treats on top of these stands to lift them off the table surface, adding visual interest and creating different levels on your food table.
Setup Tips:
- Test Weight Limits: Before the party, test each stand with a full snack bowl to ensure it can safely support the weight without collapsing. Reinforce with more glue or sticks if necessary.
- Consistent Sizes: Aim to make all your snack display stands roughly the same size and height for a cohesive and organized look on your food table.
- Sturdy Bases: Ensure the bottom layer of popsicle sticks is robust and evenly constructed to provide a stable foundation for the items placed on top.
- Have Backups: Prepare a few extra stands, especially if you anticipate a lot of heavy items or if some might get damaged during handling.
- Food-Safe Preparation: If food will directly touch the stands (though ideally, it should be in bowls), ensure they are clean, dry, and sealed with a food-safe sealant if painted.
10. Tool-Shaped Treats: Edible Hardware
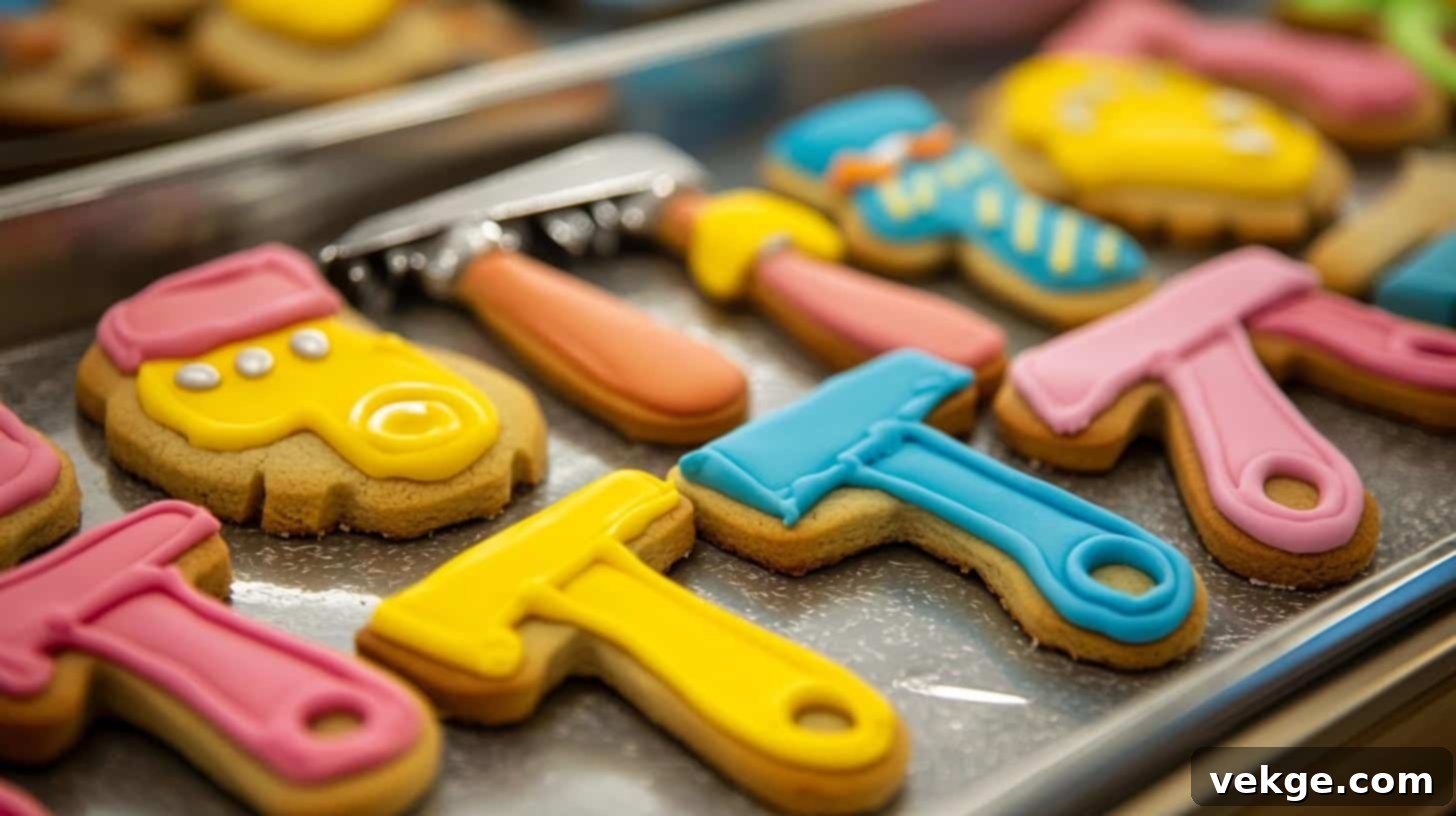
Delight your guests with delicious, custom-shaped cookies. Use cookie cutters in the shapes of wrenches, hammers, screwdrivers, and other common tools. Once baked and cooled, meticulously ice them with grey, yellow, and black frosting to match your construction theme. Take it a step further by adding small, intricate details with thin icing lines, such as grip patterns on hammer handles, metal textures on wrench heads, or screw lines on screwdriver tips. These edible tools are a fantastic way to reinforce the theme and offer a tasty treat.
Setup Tips:
- Complete Cooling: Ensure cookies are completely cooled before icing. Warm cookies will melt the frosting and ruin your detailed designs.
- Simplify Shapes: If you don’t have specific tool cookie cutters, you can cut dough into simple rectangles and squares and decorate them to resemble tools.
- Careful Stacking: If stacking cookies, place parchment paper or wax paper between layers to prevent the frosting from sticking and smudging.
- Cool Storage: Store iced cookies in an airtight container in a cool, dry place to maintain freshness and prevent frosting from melting or becoming sticky.
- Flat Transport: When transporting, ensure cookies are laid flat in a single layer or in shallow boxes to prevent damage to the delicate icing.
11. Drink Station Design: The Hydration Pipeline

Create a unique and fun drink station by designing a “pipeline” or “spout” for beverages. Construct a long, sturdy spout from cardboard tubes (like those from wrapping paper or paper towels). Paint it bright yellow to coordinate with the party colors. Position a large, clear beverage dispenser filled with juice or water at one end, allowing the cardboard tube to act as an extended pouring spout. This imaginative setup transforms a simple drink station into an interactive and thematic element that kids will love.
Setup Tips:
- Check Seals: Ensure the connection between the beverage dispenser and the cardboard tube is completely sealed (e.g., with plastic wrap and tape) to prevent any leaks. The tube itself should not be in direct contact with the liquid.
- Maintain Cleanliness: Keep the exterior of the cardboard spout clean and dry. If using it for serving, ensure cups are placed at the very end of the spout.
- Stable Foundation: Place the entire drink station on a very stable table or counter to prevent accidental tipping, especially with excited children around.
- Cups Readily Available: Have a plentiful supply of themed cups (e.g., orange or yellow plastic cups) conveniently located right next to the pouring spout.
- Monitor for Spills: Assign an adult to periodically monitor the drink station to manage refills, assist children, and promptly clean up any spills.
12. Sand Treasure Box: A Digging Adventure
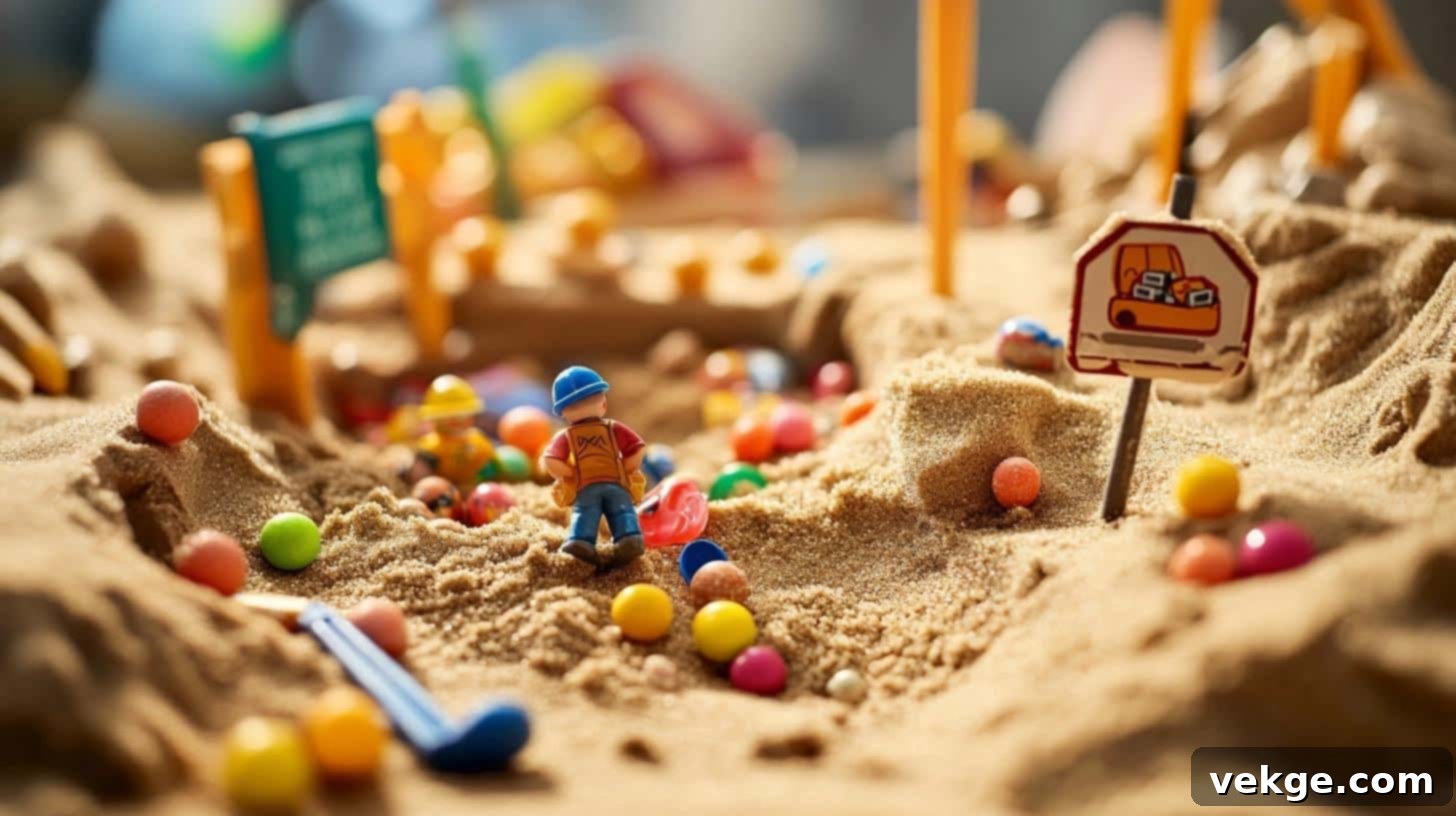
Ignite the spirit of discovery with a thrilling sand treasure box. Fill a low, wide plastic bin or a sturdy wooden box with clean play sand. Before the party, hide a variety of small, individually wrapped toys, wrapped candies, and small party favors beneath the sand’s surface. Provide each child with a small plastic shovel or scoop, inviting them to embark on their own archaeological adventure to unearth hidden surprises. Add a fun label like “Digging Site” or “Buried Treasure” to clearly mark this special activity area.
Setup Tips:
- Use Fresh Sand: Always use new, clean play sand (available at hardware or toy stores) to ensure hygiene and safety for children’s hands.
- Containment is Key: Place the sand treasure box on a large tarp or old sheet to contain any spilled sand and make cleanup much easier.
- Ensuring Burial: Hide items completely under the sand, but not too deep, so children can still easily find them with a bit of digging.
- Cleanup Tools Ready: Have a small broom and dustpan or a handheld vacuum nearby for quick cleanup of any sand that escapes the play area.
- Supervision Zone: Position the sand treasure box in an area where it can be easily supervised by an adult to ensure fair play and prevent any sand throwing.
13. Road Sign Food Labels: Navigate the Snack Bar
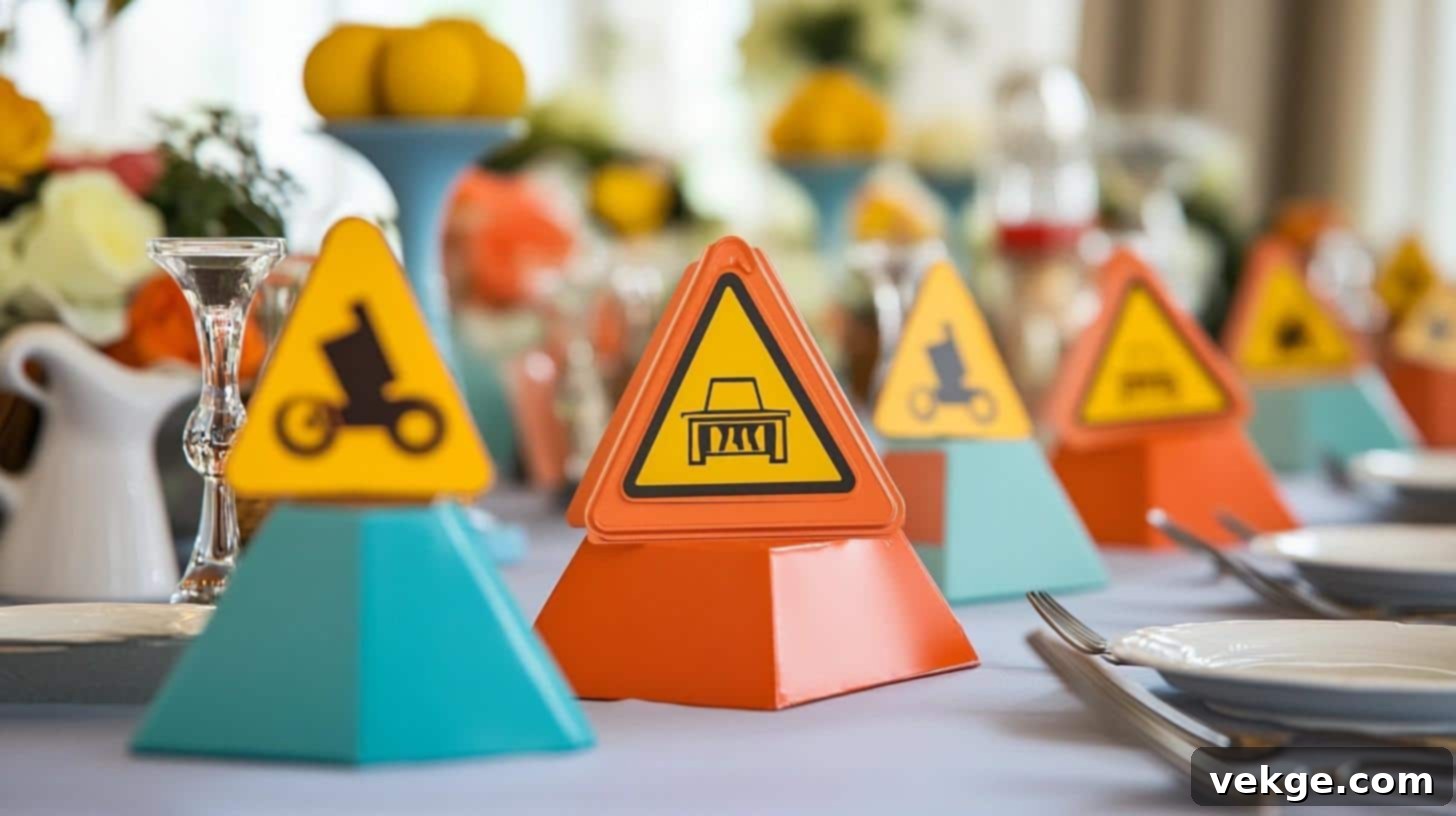
Make your food table both thematic and organized with clever road sign food labels. Cut yellow, red, and orange cardstock into various road sign shapes: octagons for “STOP” signs, triangles for “YIELD” signs, and rectangles for directional arrows. Write the names of your food items in bold black letters on these signs. For instance, “STOP” signs can mark sweet treats, “YIELD” signs can indicate drinks, and arrow signs can point to different food sections like “Tool Treats” or “Building Block Bites.” These labels are functional and add a playful touch.
Setup Tips:
- Clear, Large Font: Use a thick black marker and write food names in clear, large letters that are easily readable by both children and adults.
- Double-Sided Signs: Consider making the signs double-sided, especially if your food table is accessible from multiple directions, ensuring the labels are always visible.
- Sturdy Cardstock: Use heavy-duty cardstock (at least 80 lb) to ensure the signs stand upright without wilting and can withstand the party environment.
- Spare Signs: Prepare a few blank road signs and keep a marker on hand in case you decide to add more food items or need to adjust labels during the party.
- Update as Needed: If you run out of a particular food item or introduce a new one, quickly update or replace the corresponding road sign label to keep guests informed.
Overall Party Setup Tips for a Smooth Event:
- Early Decoration: Start putting up non-perishable decorations at least a day or two before the party. This reduces stress on the day of the event and allows for adjustments.
- Safety Check: Before guests arrive, thoroughly check all decorations, play areas, and activity stations for any potential safety hazards. Secure anything that could fall or cause tripping.
- Backup Supplies: Always keep a small box of backup supplies like tape, extra balloons, glue dots, and a few blank signs handy for unexpected needs or quick fixes.
- Plan Cleanup: Designate specific areas for trash and recycling. Have bins clearly marked and easily accessible. Consider having a dustbuster or broom for quick cleanups.
- Stability is Key: For any stacked items, hanging decorations, or display stands, ensure they are exceptionally stable. Wobbly decor can lead to accidents and disrupts the party atmosphere.
- Consider Flow: Think about how guests will move through the space. Arrange decorations and activity zones to facilitate a natural flow and prevent crowding.
Budget-Friendly Tips: Building a Great Party Without Breaking the Bank
Creating an impressive and exciting construction-themed party doesn’t have to strain your wallet. With a little creativity and resourcefulness, you can achieve a fantastic look and feel using items you already own or can acquire for very little cost. Here’s how to build a memorable celebration on a budget.
Repurpose Household Items: Your Home is a Goldmine!
Look around your house for everyday objects that can be given a new life as party decor. This is one of the most effective ways to save money and add a personal, DIY touch:
- Large Cardboard Boxes: The ultimate free building material! Paint them bright yellow and black to transform them into miniature construction machines like bulldozers, dump trucks, or excavators. Stack them to create “building blocks” or cut them to form barriers for a play zone.
- Paper Towel or Toilet Paper Rolls: These versatile tubes can be painted orange and topped with black paper to create mini traffic batons for games or even binoculars for a “site inspection” activity.
- Old Sheets or Fabric Scraps: A plain old sheet can become an instant backdrop. Paint it with construction site scenes—a blue sky with clouds, a dirt mound, or a road with vehicles—to create a large, impressive mural.
- Empty Cans (Soup, Coffee): Cleaned and painted gray or yellow, these cans make perfect sturdy holders for plastic utensils, craft supplies (like crayons or markers), or even small plant pots, resembling industrial supply containers.
- Brown Paper Bags: Simple brown paper bags can be cut and decorated with a yellow stripe and a “Property of [Child’s Name] Construction Co.” logo to make adorable, rustic work vests or party favor bags.
- Newspaper or Magazines: Roll up sheets of newspaper and secure them with tape to create lightweight “construction beams” or “pipes” for building activities or ceiling decor.
Dollar Store Finds: Affordable Essentials
The dollar store is your best friend for party supplies that won’t empty your pockets. You can find many items that fit the construction theme perfectly:
- Plastic Buckets and Pails: Inexpensive buckets (especially yellow or orange ones) are perfect for holding snacks, treats, party favors, or even small building blocks for activities.
- Yellow Paper Plates and Cups: Stock up on these for serving food. They naturally blend into the construction color scheme and are easy to clean up.
- Black and Yellow Streamers: Crisscross these over doorways or hang them from the ceiling to mimic caution tape or construction zone boundaries.
- Basic Toy Tools: Look for sets of small plastic hammers, wrenches, and screwdrivers. These are great for decorating the food table or including in play areas for safe, themed fun.
- Orange Plastic Cups: Stack these upside down to create miniature safety cones for table decor or use them for serving drinks.
- Yellow Tablecloths: A simple yellow plastic tablecloth can serve as the base for your food table, instantly creating a “construction site” feel.
- Black Duct Tape or Electrical Tape: Use this to create roads on the floor (on a paper base if you’re worried about residue) or to add stripes to yellow surfaces.
DIY with Simple Materials: Crafting on a Shoestring
Sometimes the most creative solutions come from the simplest materials:
- Paper Plates: Paint them black with yellow circles in the middle to resemble steering wheels for a “vehicle” craft station, or cut them into gears for wall decor.
- Old Shoeboxes or Small Cardboard Boxes: Cover them with brown paper and label them “Tool Box” or “First Aid Kit” for thematic storage, or paint them to look like small concrete blocks.
- Construction Paper: This is an incredibly versatile and cheap material. Cut out simple road signs, tool shapes, hard hats, or letters for banners.
- Used Wrapping Paper Rolls: Besides batons, these can be painted gray and cut into various lengths to represent pipes or conduits on your “construction site” walls.
- Newspaper: Roll and tape sheets of newspaper into thick “beams” or “logs.” Paint them brown or gray for realistic construction materials.
- Brown Grocery Bags: Cut these open and use them as rustic tablecloths, or cut out shapes to look like lumber piles.
Borrow or Swap Decorations: Community Saving
Leverage your network to reduce costs. Many parents throw themed parties, and they might have exactly what you need:
- Ask Friends and Family: Reach out to friends or family members who have recently hosted similar themed parties. They might have decorations, props, or even costumes you can borrow.
- Check Local Parent Groups: Join online community groups or local parenting forums. Often, members are happy to lend or even give away party supplies they no longer need.
- Look for Toy Lending Libraries: Some communities have toy libraries where you can borrow large-scale toys like ride-on trucks or building sets that fit your theme.
- Share Costs: If you know another parent planning a similar party, consider sharing the cost of certain items that can be reused, like a large backdrop or a special prop.
- Trade Party Supplies: Offer to trade decorations from a previous party you hosted for construction-themed items someone else might have.
Party Planning Tips: Building Your Event Step-by-Step
Organizing a construction-themed party, even with many DIY elements, requires a clear plan. Breaking down the preparation into manageable phases ensures that everything runs smoothly, reducing stress and allowing you to enjoy the process and the celebration itself.
Timeline for DIY Preparation: A Strategic Blueprint
A phased approach will help you tackle tasks systematically:
One Month Before the Party: Laying the Foundation
- Detailed Supply List: Create an exhaustive list of all necessary supplies for every decoration, activity, and food item. Break it down by category (e.g., paper, paint, craft tools, food ingredients).
- Purchase Basic Supplies: Acquire foundational items that won’t spoil or get damaged, such as various colors of cardstock and craft paper, paints, glue, scissors, and a reliable balloon pump.
- Start Collecting Cardboard Boxes: Begin collecting and thoroughly cleaning cardboard boxes of all sizes. Store them neatly so they’re ready for transformation into trucks, blocks, or other structures.
- Test Decoration Ideas: Experiment with one or two of your DIY decoration concepts (e.g., making a prototype hard hat or painting a small box). This helps you refine your methods, estimate time, and identify what works best before committing to the full batch.
- Book Key Rentals (if any): If you plan to rent large items like a bouncy house, tables, or professional-grade equipment, book them now to ensure availability.
One Week Before the Party: Construction in Progress
- Assemble Paper Decorations: Dedicate time to cutting and assembling all your paper-based decorations, such as the birthday banner, road signs, food labels, and smaller wall hangings.
- Create Clear Signage: Design and create clear, thematic signs to mark different party areas (e.g., “Build Zone,” “Fueling Station,” “Digging Site,” “Rest Area”). This helps guests navigate the party space.
- Craft Cutouts: Produce all your cutouts shaped like construction tools, vehicles, and building blocks. These can be used for garlands, table scatter, or individual embellishments.
- Paint Larger Pieces: Begin painting larger decoration pieces like your cardboard trucks, barriers, or foam board signs. Allow ample time for drying, especially if applying multiple coats.
- Confirm RSVPs: Send out final reminders for RSVPs to get an accurate headcount for food, favors, and activity planning.
One Day Before the Party: Final Touches and Setup
- Table Setup: Place and secure all tables (for food, gifts, activities) in their final positions according to your party layout plan. Drape tablecloths and secure them.
- Install Wall & Hanging Decor: Put up all wall decorations, balloon garlands, banners, and any hanging items. Use strong, appropriate adhesives or fasteners for security.
- Print & Set Out Food Cards: Print and prepare all food description cards or road sign labels. Place them on the food table next to where each item will be served.
- Fill Party Favor Bags: Assemble and fill all party bags or “toolboxes” with small toys, candies, and thank-you notes. Store them in a designated spot for easy distribution.
- Prep Perishable Food: Chop vegetables, prepare fruit salads, and do any baking that can be done in advance without compromising freshness.
- Clean and Organize: Do a final thorough cleaning of the party area and ensure all necessary supplies for games and activities are organized and ready to go.
Organizing Games and Activities: Keeping Little Builders Engaged
A mix of active and creative games will ensure continuous engagement and cater to different energy levels. Plan for more activities than you think you’ll need.
Engaging & Energetic Games:
- Tallest Tower Challenge: Divide children into teams and provide them with an assortment of building blocks (foam, wooden, cardboard). Challenge them to build the tallest freestanding structure within a 3-5 minute timer. Award prizes for height, stability, and creativity.
- Tool Scavenger Hunt: Hide plastic tools (hammers, wrenches, screwdrivers) around the party space, both indoors and out. Provide a list (picture-based for younger kids) of tools to find, and offer a small prize for the team or individual who finds the most.
- Tool Matching Game: Create large cards with pictures of various tools and their corresponding names or uses. Kids need to correctly pair them up. This can be a race for older kids or a discovery game for younger ones.
- Block Carrying Race: Set up two points a short distance apart. Split kids into teams and have them carry foam or cardboard blocks (one at a time) from a “supply depot” to a “construction site” using small toy dump trucks or wheelbarrows. The first team to move all their blocks wins.
- “Fix the Truck” Station: Create a designated area where toy trucks or construction vehicles are “broken” (e.g., a wheel is loose, a part is detached). Provide child-safe plastic tools and challenge kids to “fix” them. This fosters problem-solving and imaginative play.
- Construction Site Obstacle Course: Use tunnels (cardboard boxes), balance beams (planks of wood on the ground), and cones to create a mini obstacle course for kids to navigate, mimicking a worker on a job site.
Creative & Calm Activities:
- Construction Vehicle Coloring Station: Set up a table with construction vehicle coloring sheets (easily found online or printable) and plenty of crayons, markers, and colored pencils. This offers a calming activity for kids who need a break from active play.
- Free Build Zone: Designate a large area filled with a diverse array of building materials—LEGO, Duplo, wooden blocks, foam blocks, even cardboard boxes. Allow children unstructured time for free building and imaginative construction.
- Miniature House Painting: Provide small, unpainted wooden craft pieces (like birdhouses or small block shapes) and child-safe paints. Let kids paint their own “mini houses” or “bricks” to take home as a personalized party favor.
- Tool Sorting Station: Present bins filled with various small plastic tools, nuts, bolts, and screws (ensure all items are large enough to not be choking hazards). Task children with sorting these items by type, size, or color, promoting fine motor skills and classification.
- Pattern Copying Challenge: Create simple building patterns or structures using blocks. Challenge kids to replicate these patterns using their own set of blocks, enhancing visual discrimination and spatial reasoning.
Themed Food and Snack Ideas: Fueling the Little Builders
Carry the construction theme into your culinary creations. Simple adjustments can transform ordinary snacks into exciting, themed treats.
Delicious Sweet Treats:
- “Dirt Cups”: Layer clear plastic cups with chocolate pudding and generously top with crushed chocolate cookies (e.g., Oreos) to perfectly mimic dirt. Add a gummy worm or a tiny plastic shovel for extra charm.
- “Hard Hat” Cupcakes: Decorate plain cupcakes with vibrant yellow frosting, then use a small, upside-down mini chocolate cookie or a yellow candy melt to create the brim of a hard hat. A black frosting dot can represent the hard hat’s logo.
- Tool-Shaped Cookies: Bake and ice cookies using cookie cutters in the shapes of hammers, wrenches, and screwdrivers. Use grey, black, and yellow icing to detail them.
- “Building Block” Crispy Treats: Shape crispy rice treats into perfect squares or rectangles before they set. You can color them with food coloring (yellow, orange) to resemble different types of building blocks.
- “Gravel” or “Sand” Candies: Serve yellow candies (like lemon drops or yellow jelly beans) or chocolate rocks in small plastic dump trucks or construction pails for a thematic presentation.
Savory & Fun Snacks:
- “Building Block” Cheese Squares: Cut various types of cheese (cheddar, provolone) into small, uniform squares to resemble building blocks. Arrange them artfully on a platter.
- Tool-Shaped Sandwiches: Use small cookie cutters (or carefully cut with a knife) to create sandwiches in the shapes of different tools or construction vehicles.
- “Lumber” Pretzel Sticks: Arrange pretzel sticks neatly in a small crate or on a platter to look like piles of lumber waiting to be used.
- “Construction Barrier” Pepper Strips: Slice yellow bell peppers into long, thin strips to resemble safety barriers or caution tape. Serve with a dip like hummus or ranch.
- “Safety Cone” Carrots: Peel and cut carrots into small cone shapes. These are a healthy and thematic snack, perfect for dipping.
- “Drill Bit” Veggie Sticks: Offer a selection of long, thin vegetable sticks (like cucumber, celery, or more carrots) that resemble drill bits, served in a tall container.
Age-Appropriate Decoration and Activity Ideas: Tailored Fun for Every Little Builder
Ensuring that decorations and activities are suitable for the age group of your party guests is crucial for both enjoyment and safety. This section outlines specific ideas, carefully matched to different developmental stages, with important safety considerations in mind.
| Age Group | Recommended Decorations | Engaging Activities | Essential Safety Notes |
|---|---|---|---|
| Toddlers (Ages 2-3) |
|
|
|
| Young Kids (Ages 4-6) |
|
|
|
| Older Kids (Ages 7-8) |
|
|
|
Conclusion: Your Blueprint for an Epic Construction Party
Creating a captivating construction-themed party for your child truly doesn’t demand an enormous budget or a specialized skill set. As this guide has shown, with a dash of creativity and a bit of hands-on effort, you can easily transform your celebration space into an exciting and immersive work zone that will leave a lasting impression on all your little builders.
From crafting vibrant balloon cones and assembling custom birthday banners to arranging delightful candy trucks and personalizing hard hat name cards, each idea is designed to be achievable and impactful. Even turning a simple cake into a toy-topped construction site adds a touch of magic that kids adore. By leveraging everyday items like balloons, paper, cardboard boxes, and toy vehicles, you have all the necessary “materials” to build a kid-friendly, purposeful, and thoroughly enjoyable party environment.
Remember the key takeaways: always select decorations and activities that are perfectly suited to your child’s age group and consistently keep safety at the forefront of your planning. Begin with the foundational, easy-to-implement ideas, and then feel free to elaborate and add more intricate details as your time, budget, and creative energy allow. The beauty of this theme lies in its adaptability and the joy of seeing your vision come to life.
Your little engineers, architects, and foremen will absolutely cherish seeing their party space bustling with iconic trucks, essential tools, and authentic construction site touches. Get ready for a day filled with digging, building, and endless smiles!
We’d love to hear about your party planning adventures! Do you have a favorite DIY decoration idea from this list, or perhaps a clever tip of your own? Leave a comment below and share which construction decoration or activity you plan to try first!
Frequently Asked Questions About Construction-Themed Parties
What are some easy DIY construction party decorations for beginners?
For beginners, some of the easiest DIY construction party decorations include making personalized paper hard hats for each guest, setting up vibrant balloon cones using orange and yellow balloons, cutting out simple paper tool shapes (like hammers and wrenches) to scatter or string together, and repurposing clean cardboard boxes by painting them bright yellow to resemble large building blocks or miniature trucks. These require minimal crafting experience and deliver a big thematic punch.
How can I create budget-friendly construction party decorations and supplies?
Creating budget-friendly decorations is simple by utilizing household items like cardboard boxes for vehicles or building blocks, and old sheets for painted backdrops. Dollar stores are excellent for finding inexpensive essentials like plastic buckets, yellow paper plates, black and yellow streamers, and basic toy tools. Instead of buying pre-made items, craft your own paper signs, banners, and food labels. Also, consider borrowing decorations or toy trucks from friends or local parent groups to further reduce costs.
What food should I serve at a construction-themed party to match the theme?
Themed food adds a fun element! Serve square-cut sandwiches (e.g., peanut butter and jelly, cheese) arranged as “building blocks.” Bake and ice cookies shaped like various tools (hammers, wrenches). Decorate cupcakes with yellow frosting and a mini chocolate cookie “hard hat.” Create “dirt cups” with chocolate pudding topped with crushed cookies. For healthier options, slice yellow bell peppers into “construction barriers” and carrots into “safety cones,” or offer fruit in mini dump trucks. pretzel sticks can be “lumber piles.”
How can I keep the kids entertained and engaged during a construction-themed party?
To keep the little builders busy, set up interactive “Build Zones” with a variety of blocks (LEGO, wooden, foam) for free play or timed challenges. Organize a “tool hunt” scavenger game where kids search for hidden plastic tools. A sand-digging area (in a large bin or kiddie pool) filled with small toys and shovels is always a hit. Team-based block-carrying races or “fix the truck” stations with toy vehicles and plastic tools also provide purposeful and engaging activities. Don’t forget a coloring station with construction vehicle sheets for quieter moments.
Where can I find printable templates for construction party decorations like signs and banners?
Many online resources offer free or low-cost printable templates. Check popular craft store websites (like Michaels or Hobby Lobby), expansive visual platforms like Pinterest boards, and dedicated party planning sites. A quick search for “free construction party printables” will yield numerous options for signs, banners, food labels, and tool shapes. Additionally, some local library websites or community parenting blogs often share free downloads. You can also design simple ones yourself using basic word processing or graphic design software.
